Leaderboard
-
HusseinHolland
Free Member9Points1,031Posts -
grannyknot
Free Member5Points5,158Posts -
ckurtz2
Free Member3Points340Posts -

siteunseen
Free Member3Points15,115Posts


Popular Content
Showing content with the highest reputation on 07/14/2023 in all areas
-
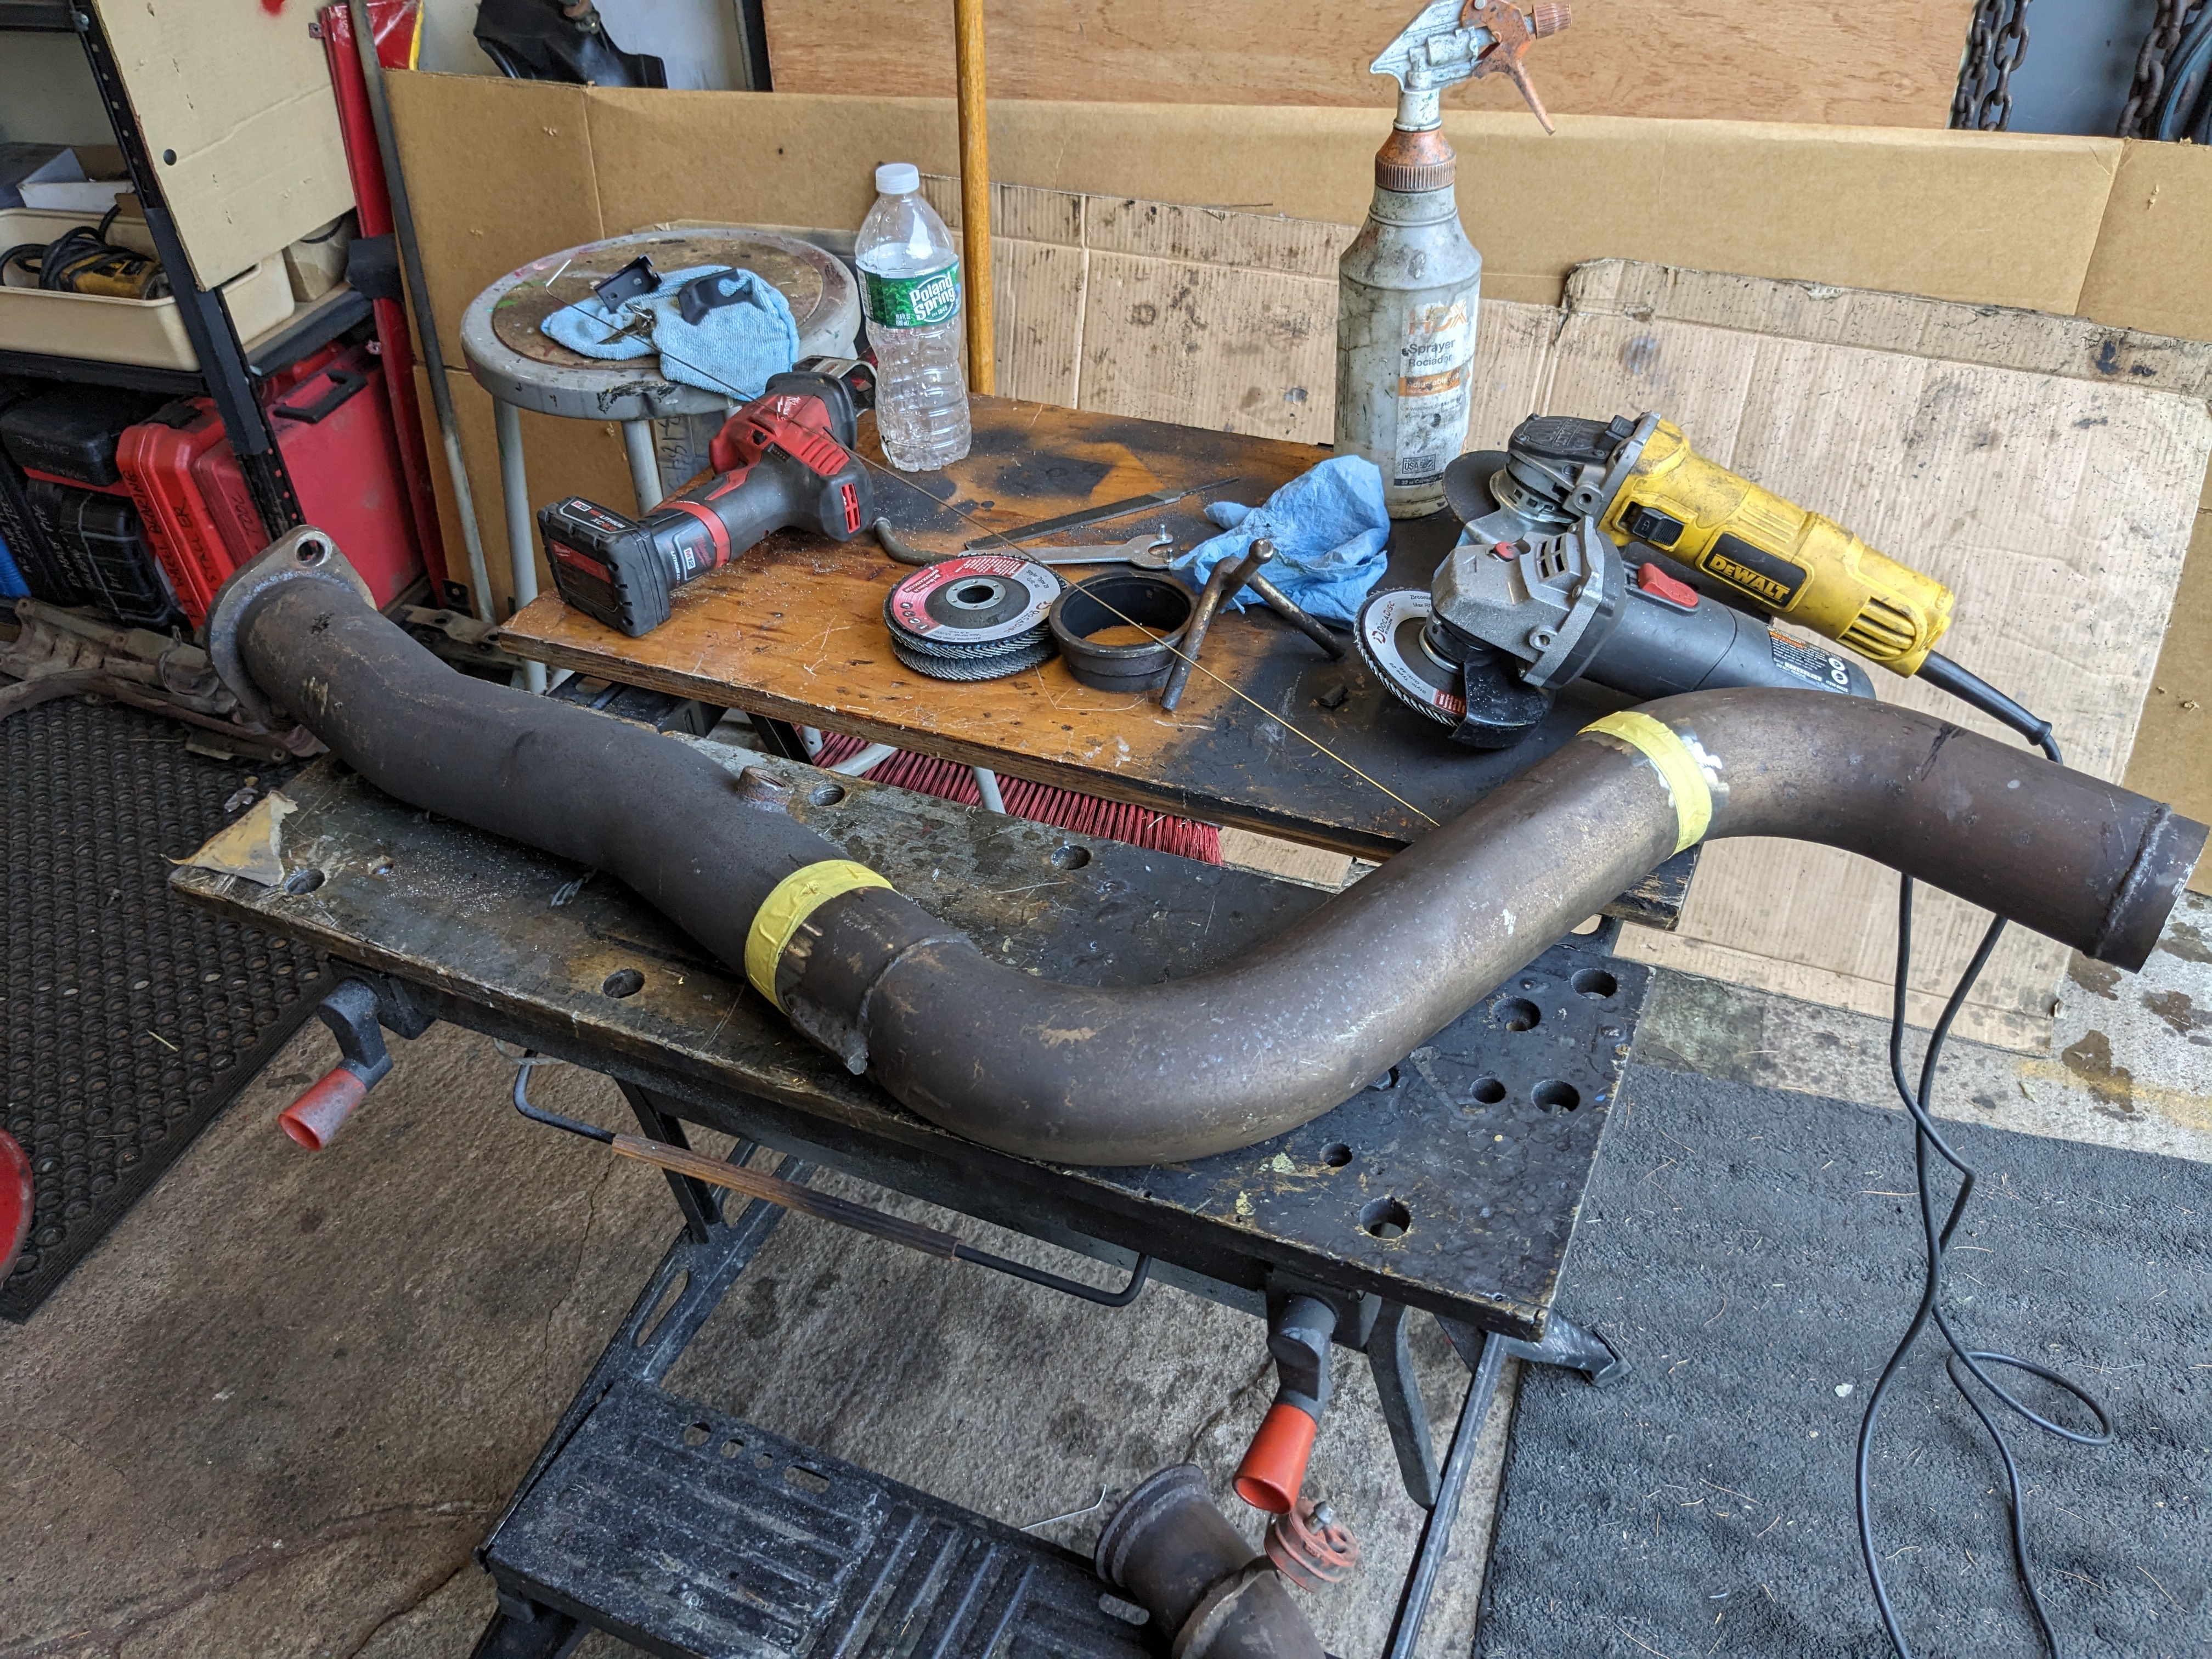
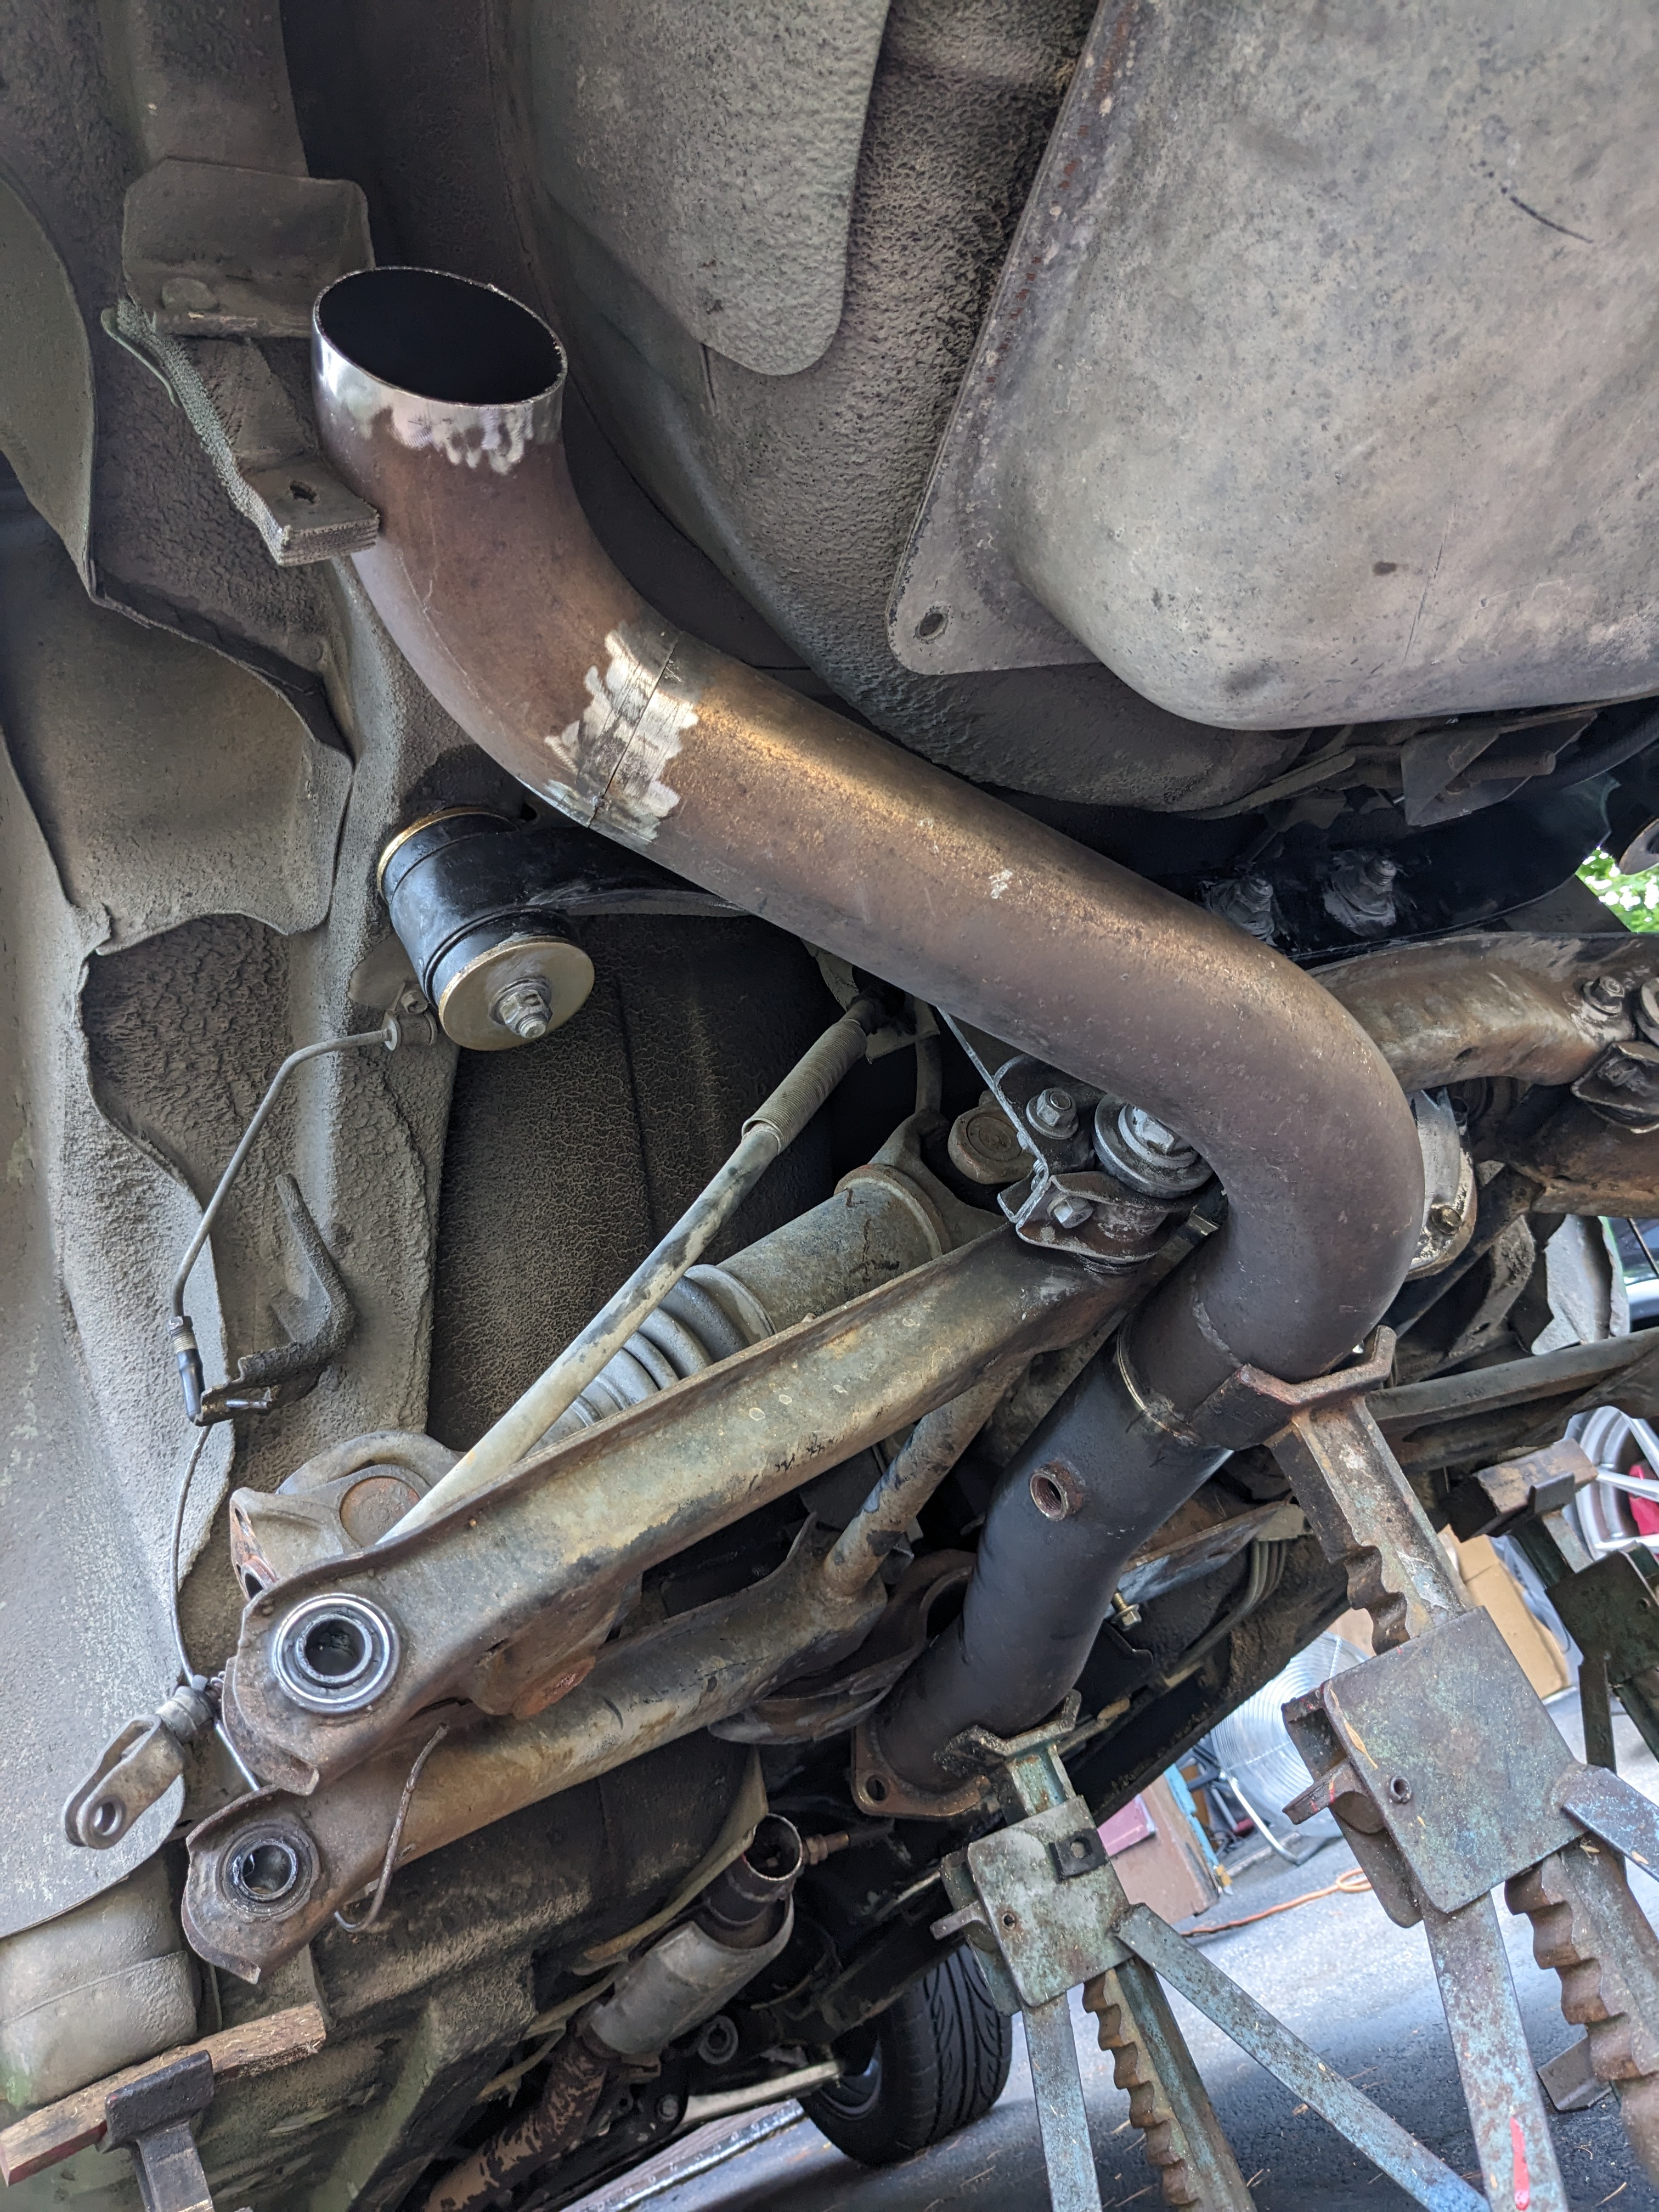
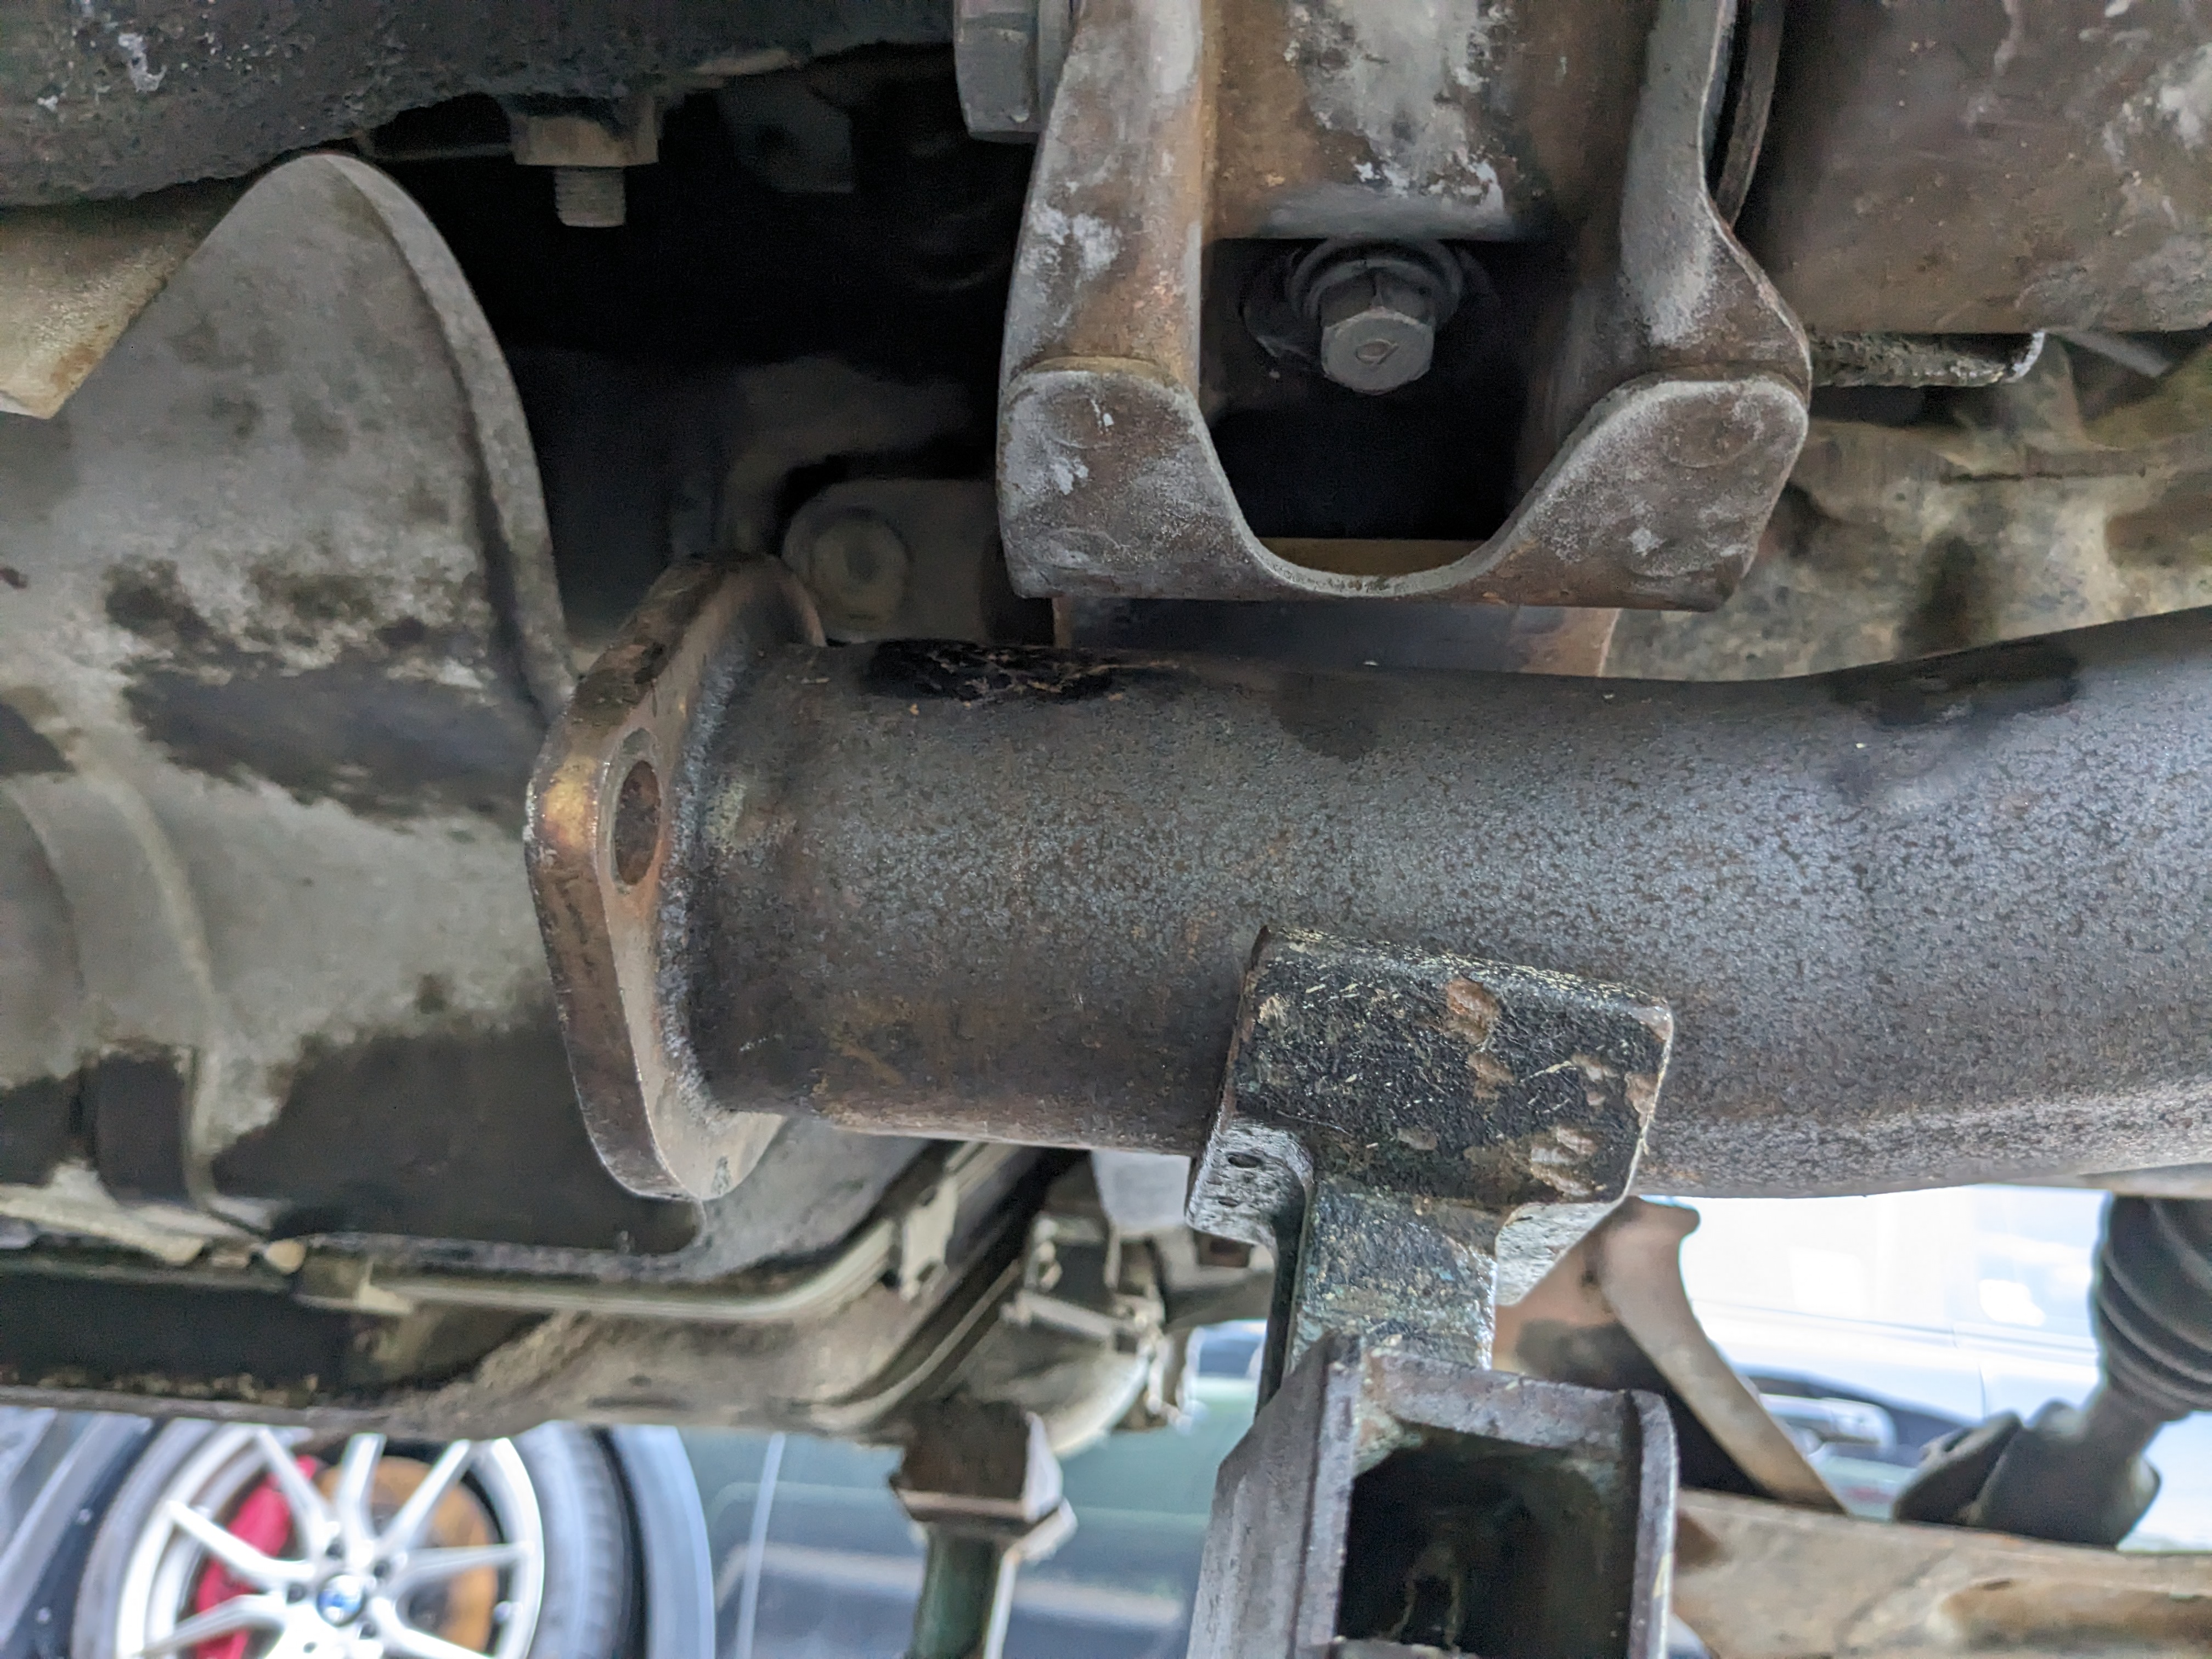
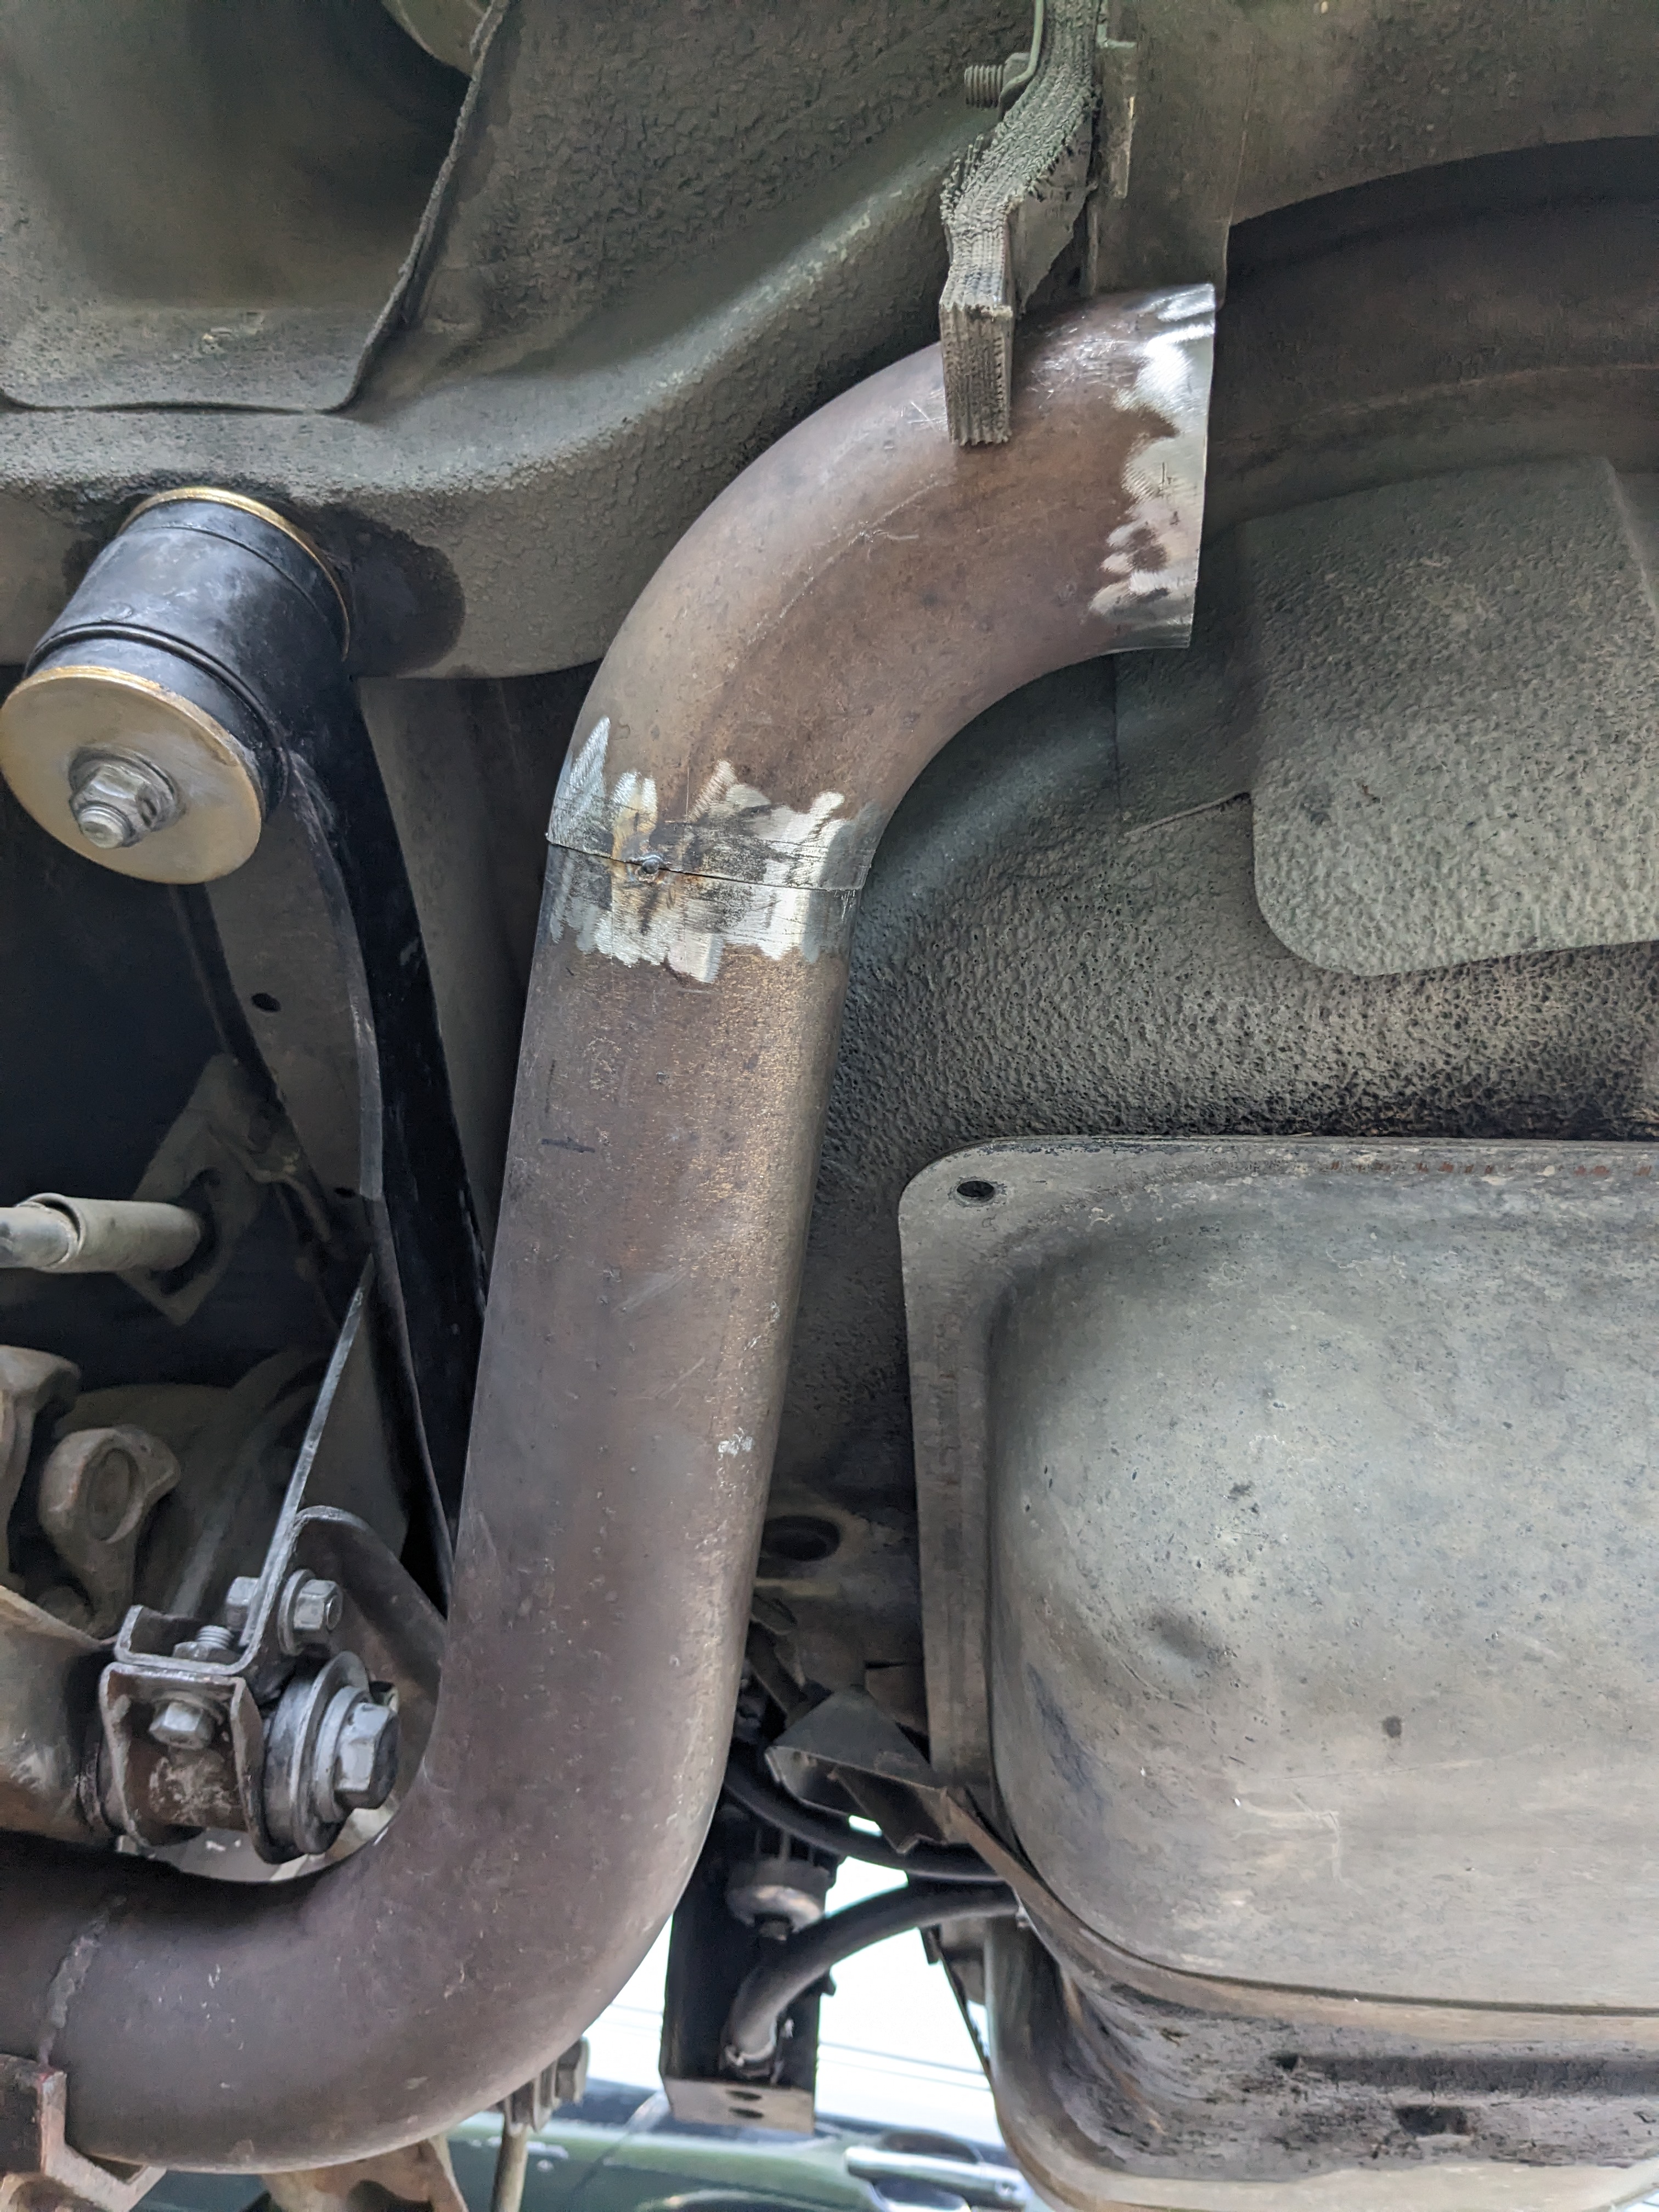
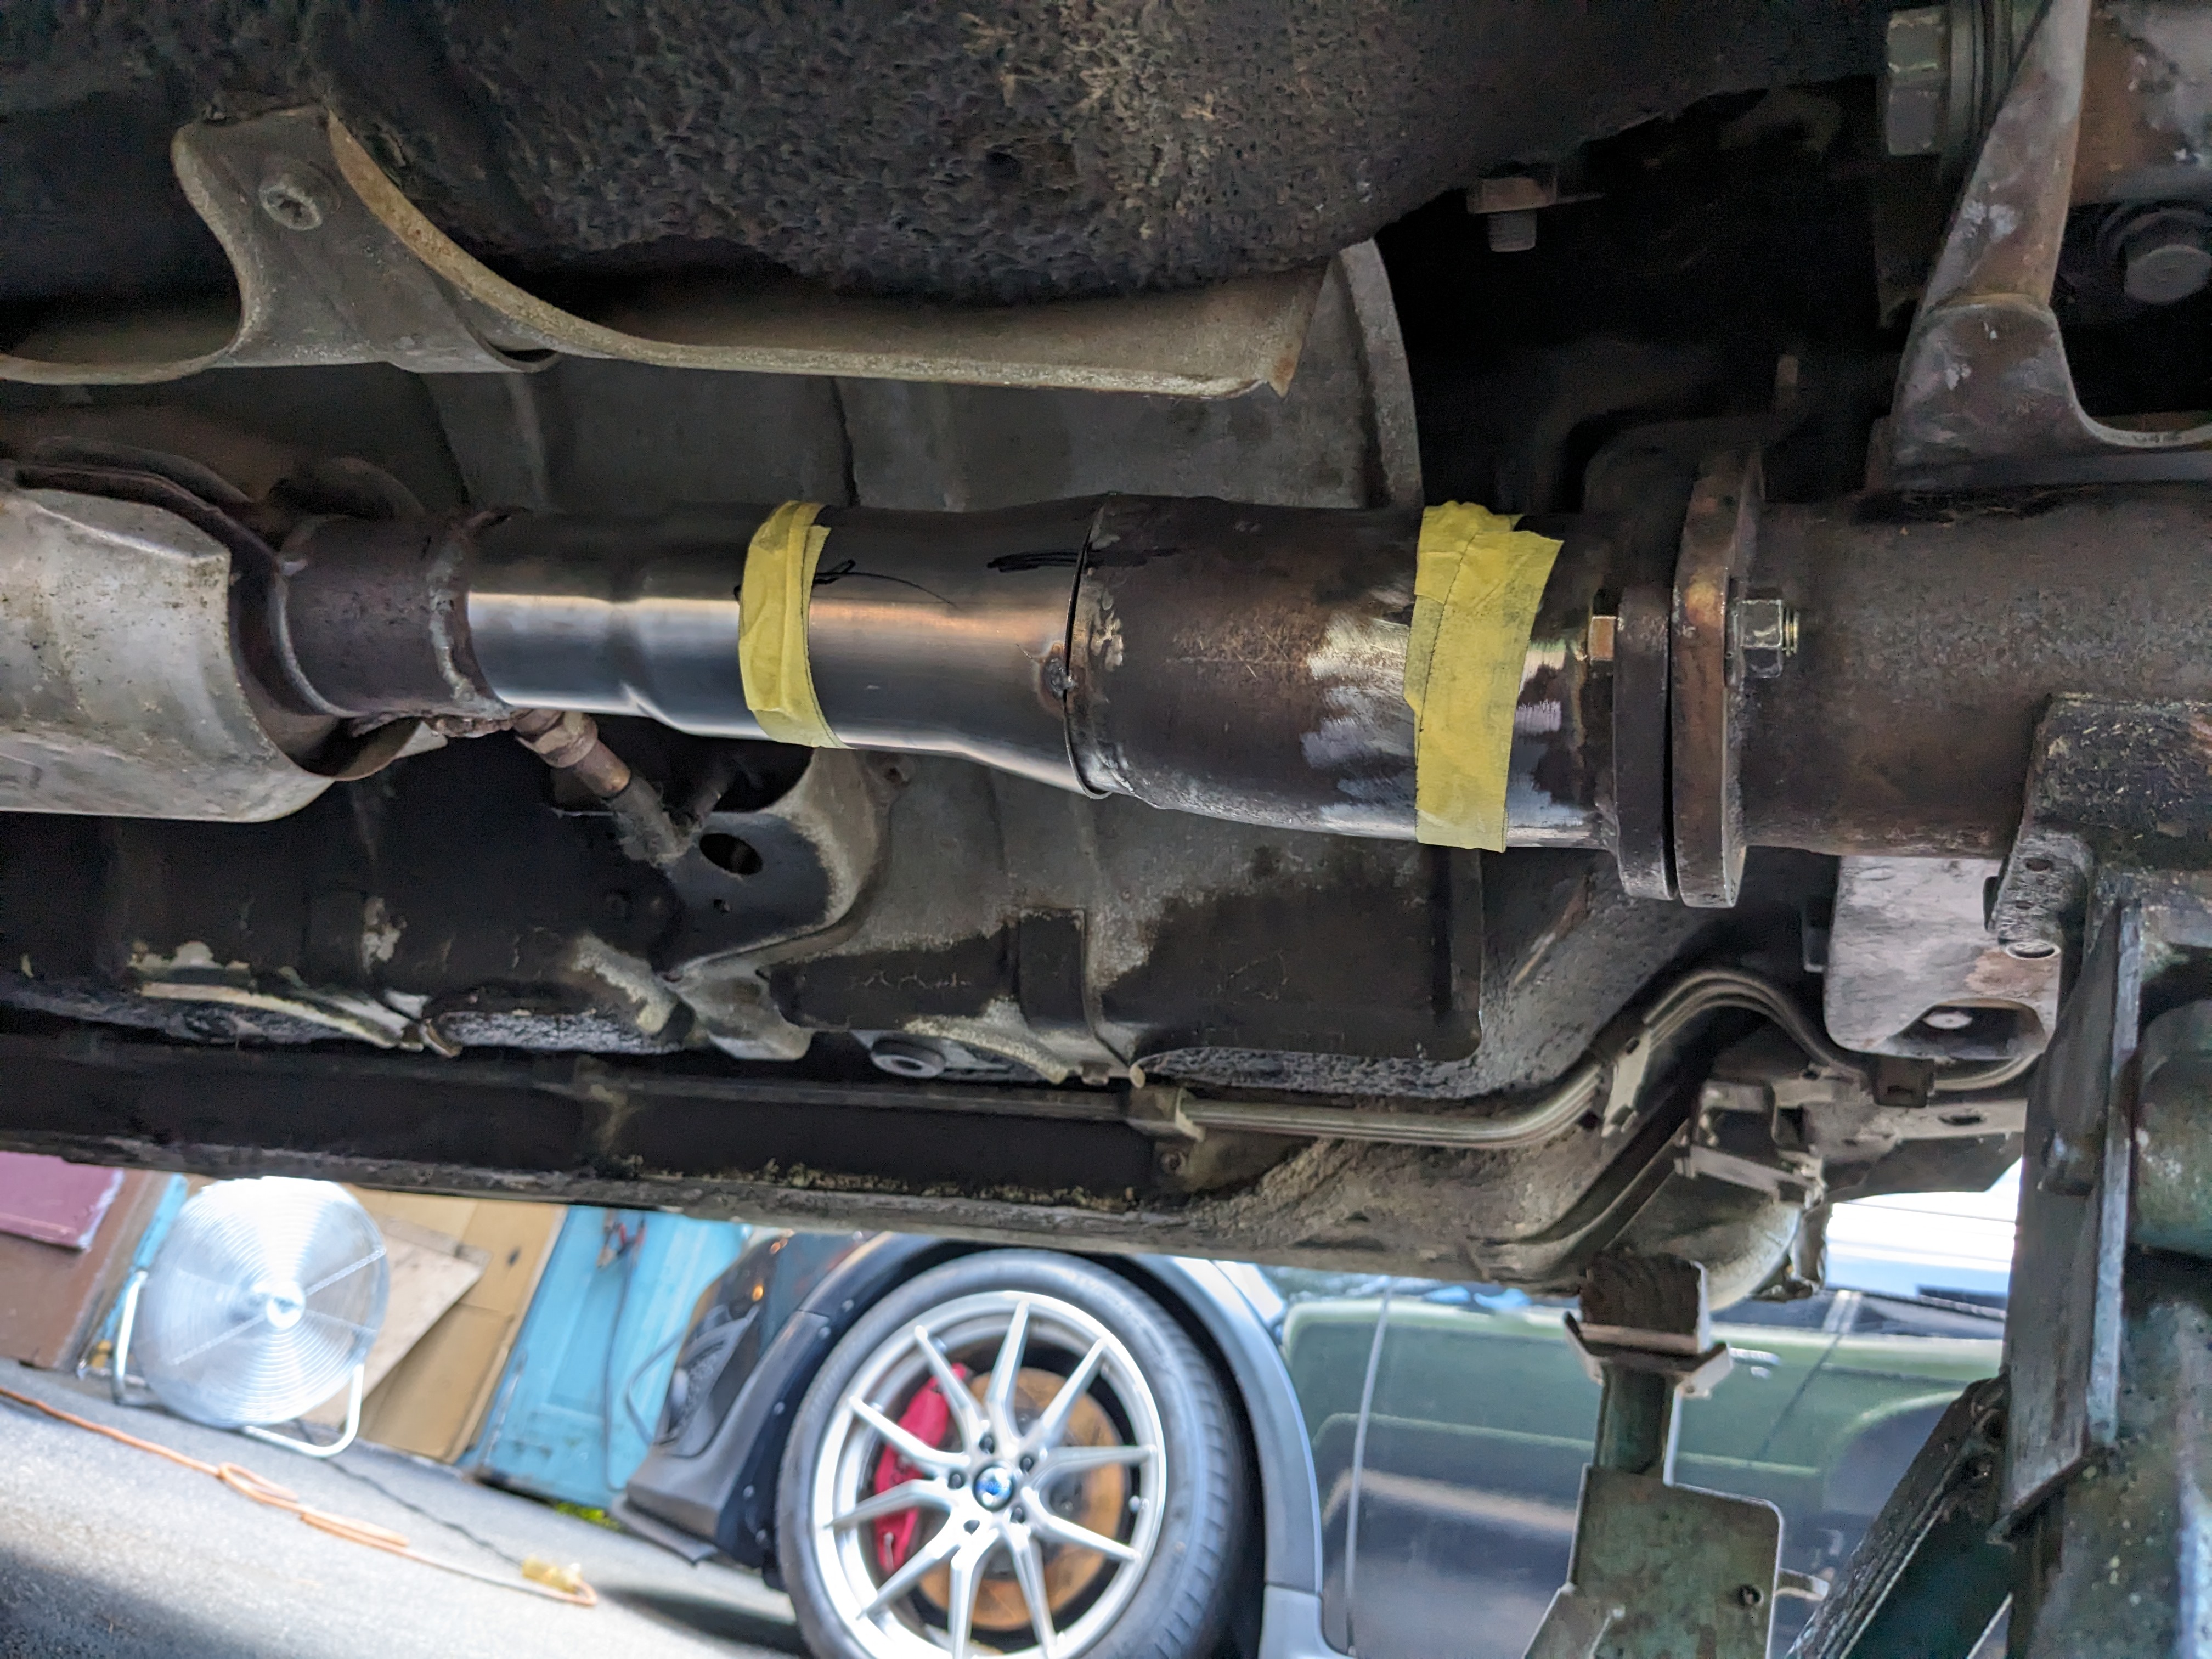
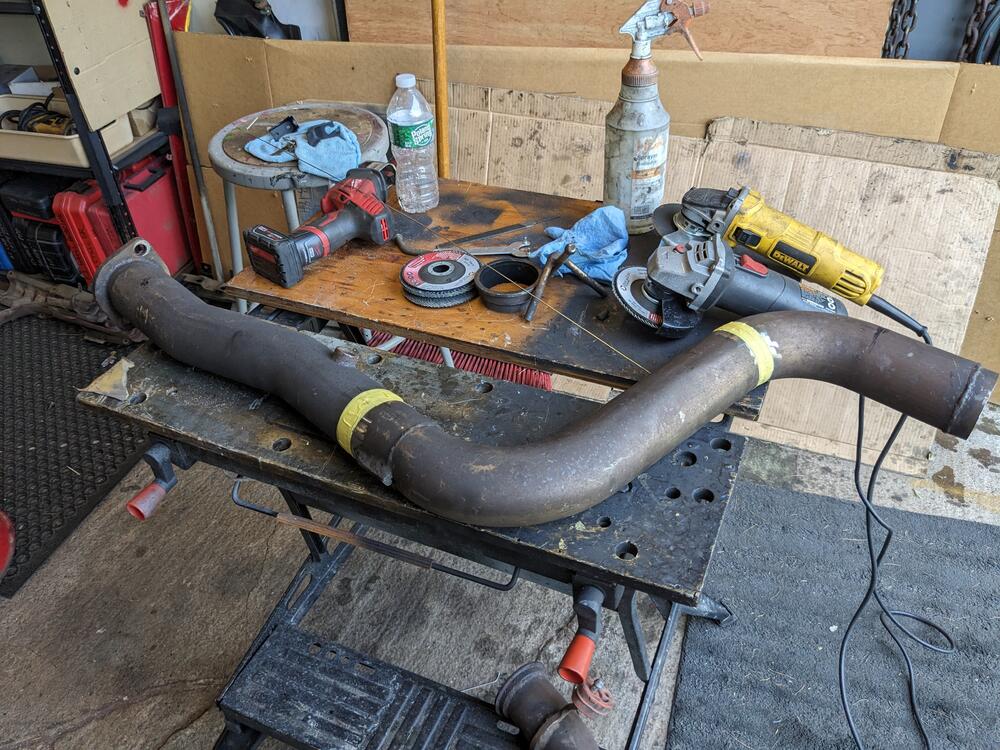
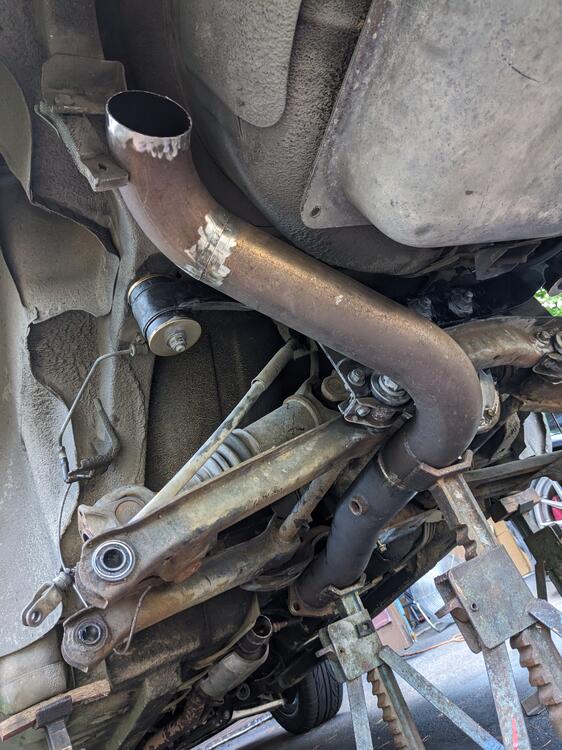
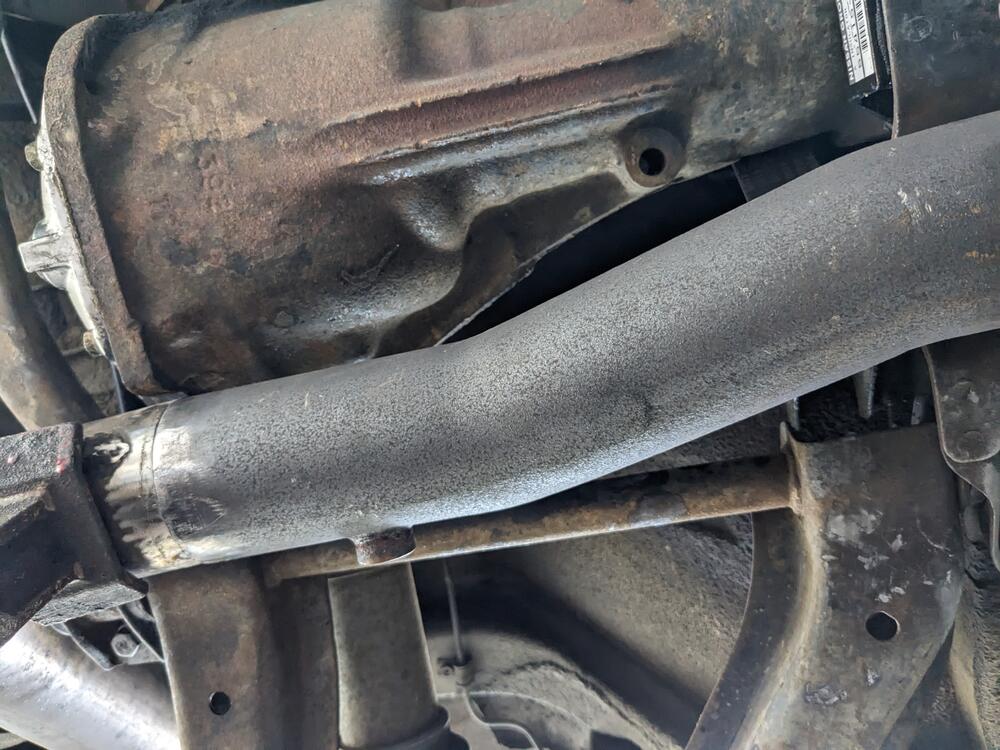
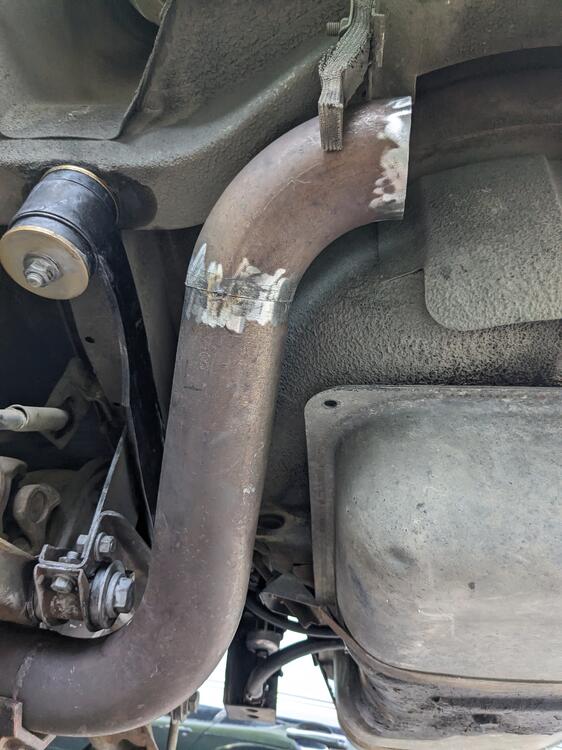
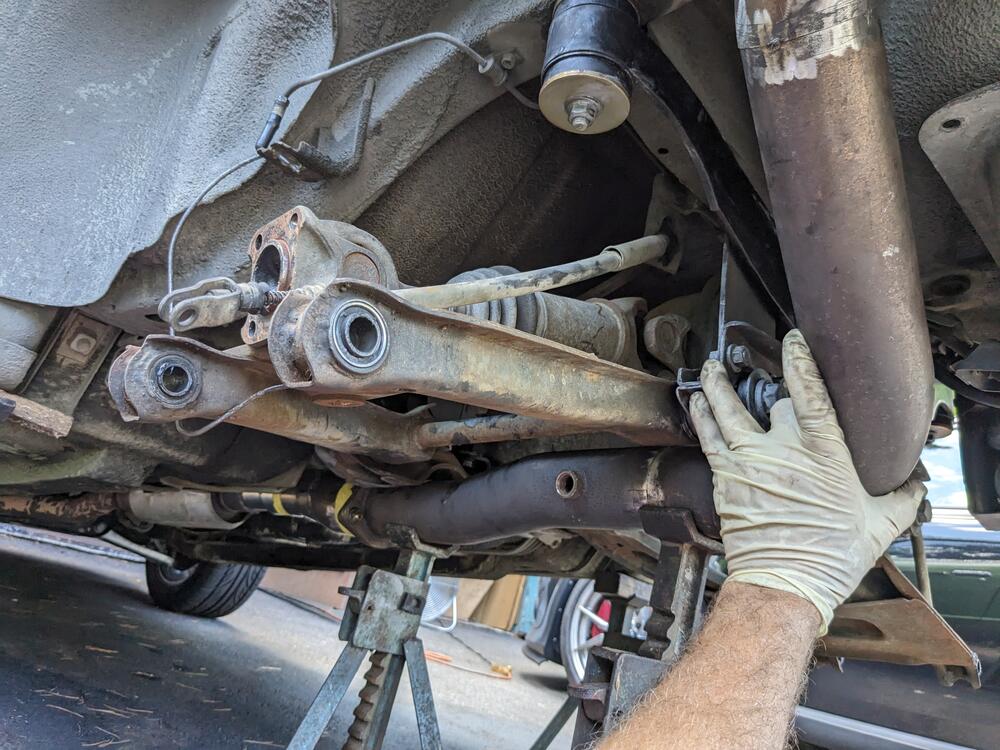
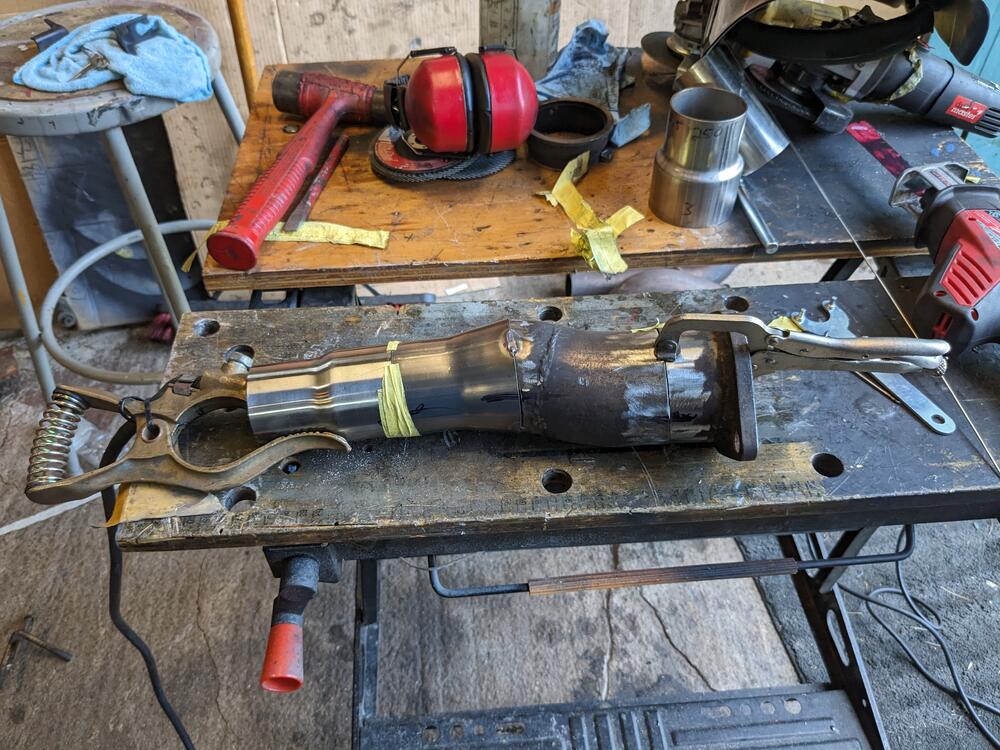
Since I had to cut off the exhaust to deal with all the rear suspension work, I decided to put together a 3" SS rear section, starting after the existing cat, then going to a 2.5" Stainless Works rear muffler (ran it on my X1/9 K24 swap for a few months). The 3" SS exhaust I put together from a exhaust I had made years ago for my Volvo C30, before I converted it to AWD & had to make it all over again. Forgot to take pic before I cut it up - this is what it was Eyeball the general placement, then cut, & tape together to check clearance off the forward crossmember and lower control pivot & diff casing tack welded, then recheck fit I'll be adding a 3" - 2.5" step from this into the muffler looks pretty good step down & dogleg to attach to existing exhaust/cat. I'll rework the entire exhaust forward of the 2 bolt 3" flange when I do the VQ35DE 2"-2.5" - 2.5"- 3" steps


 4 points
 -
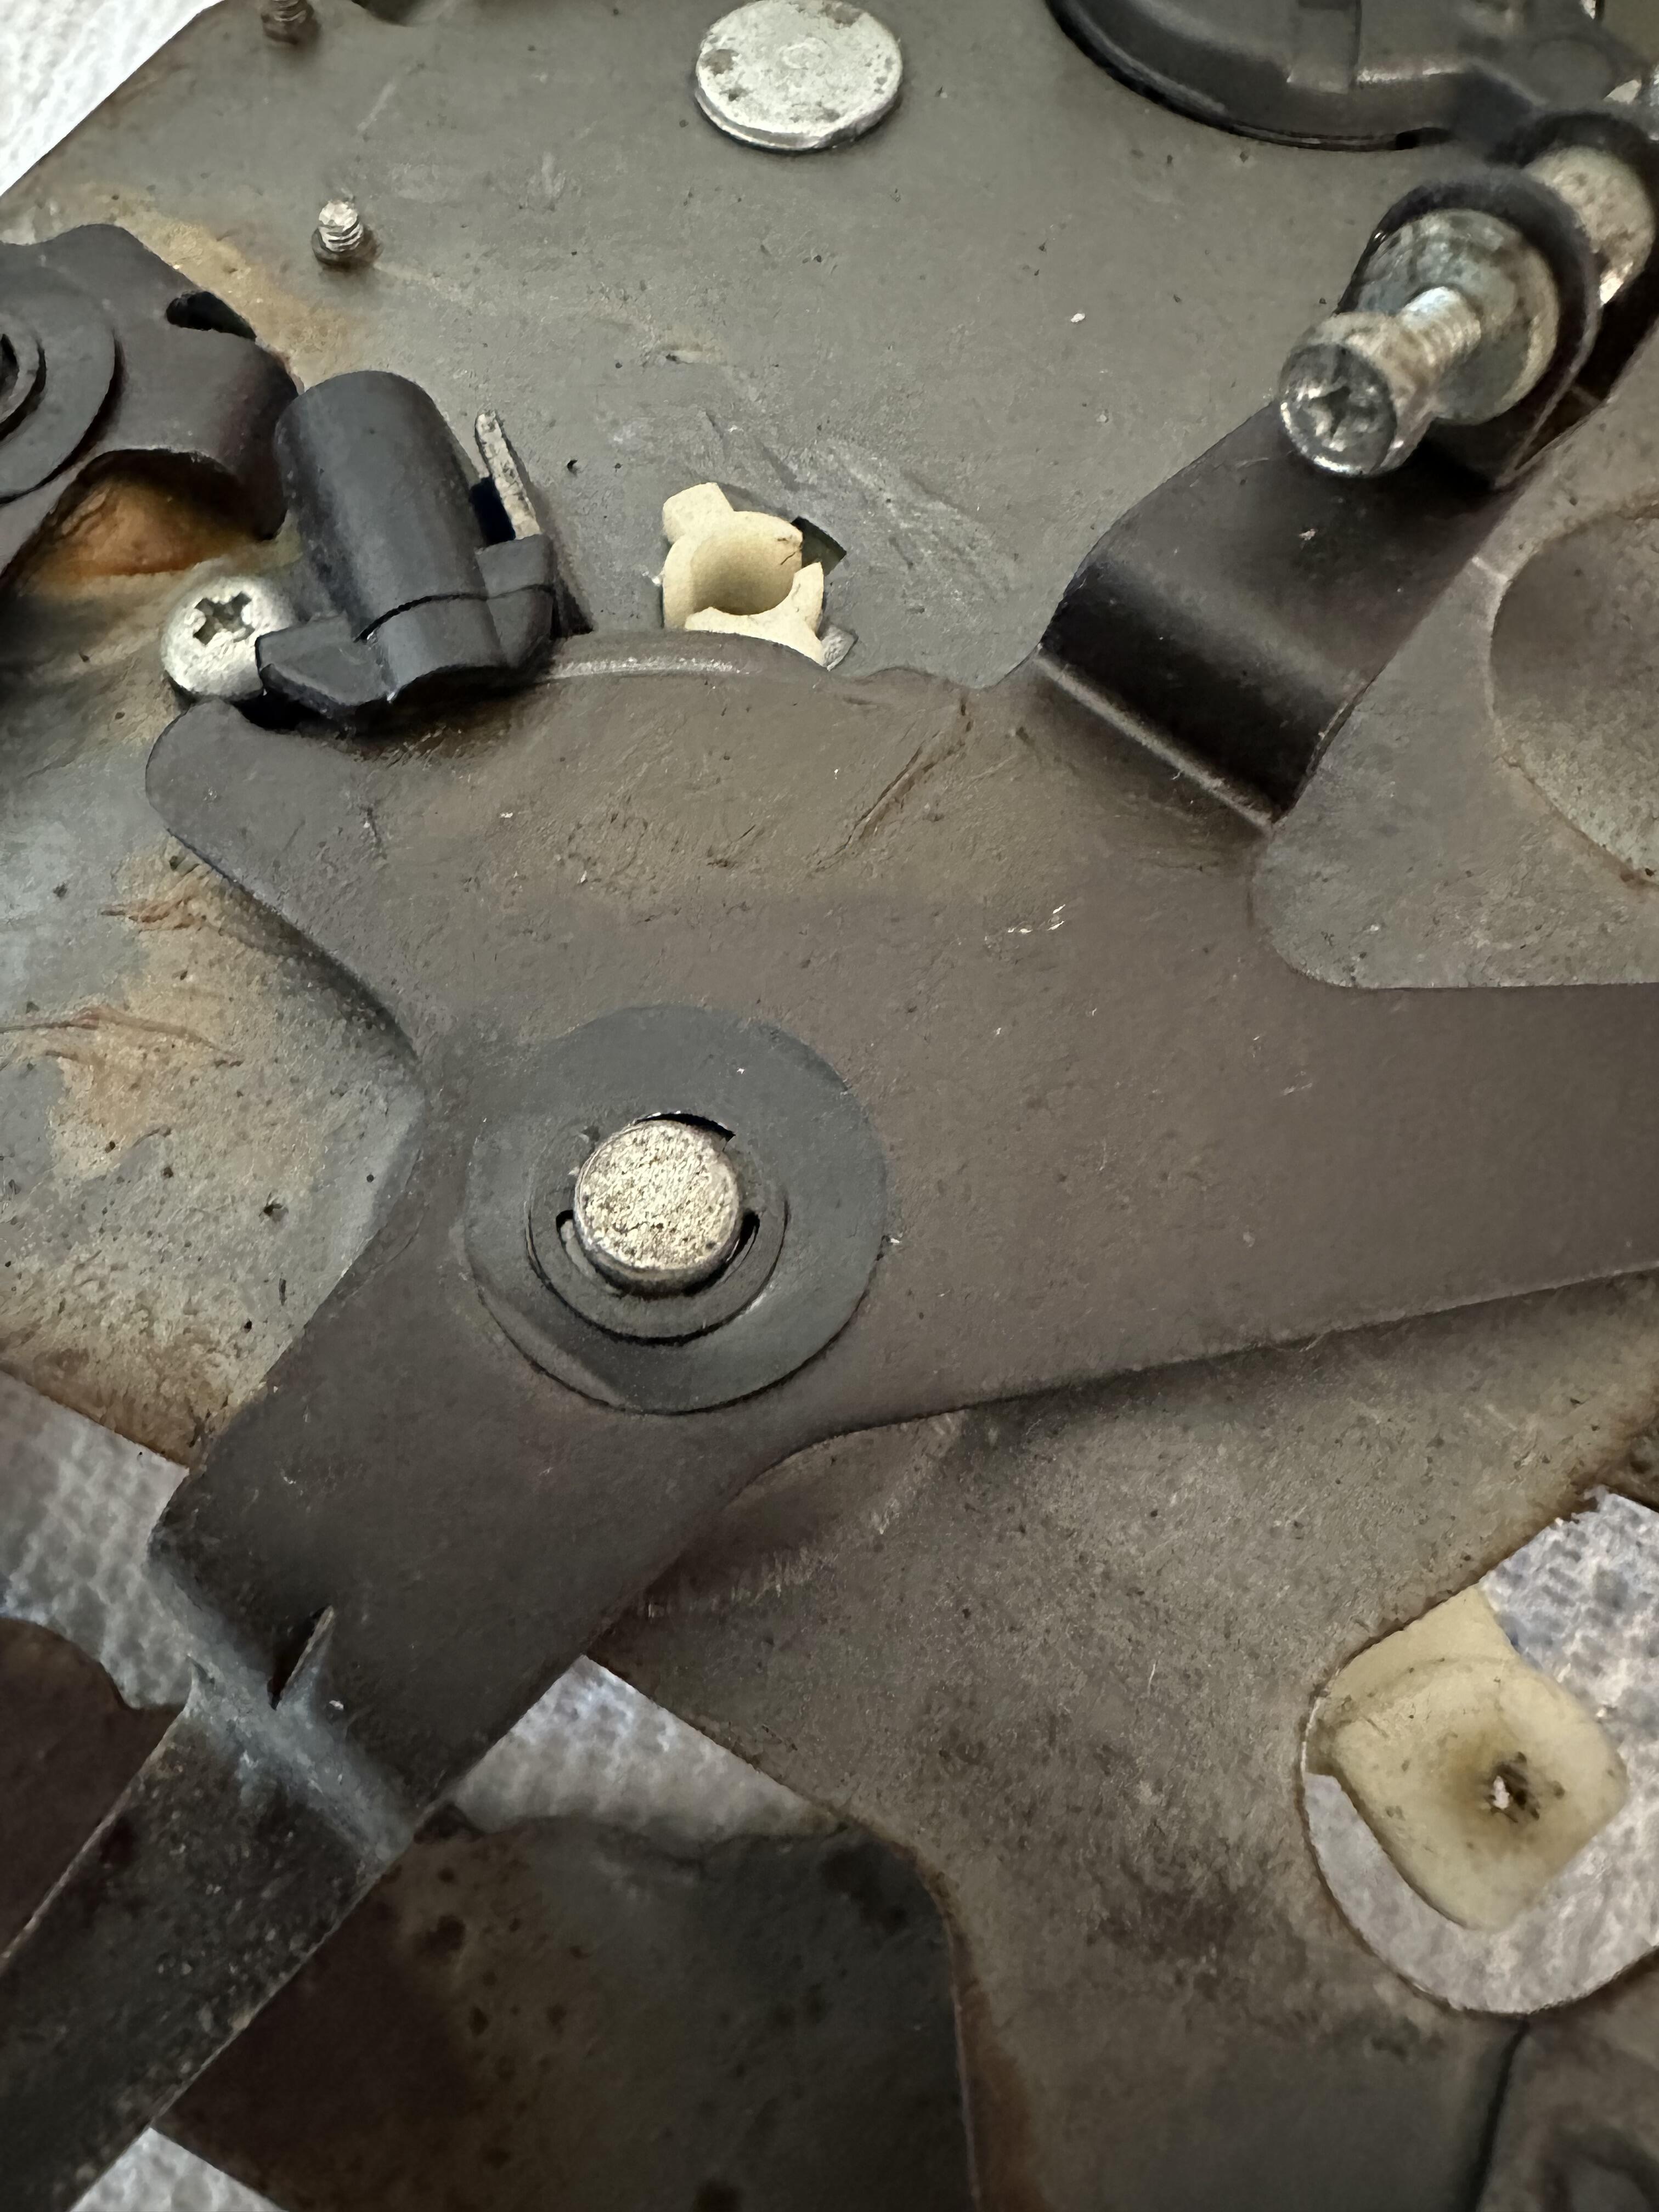
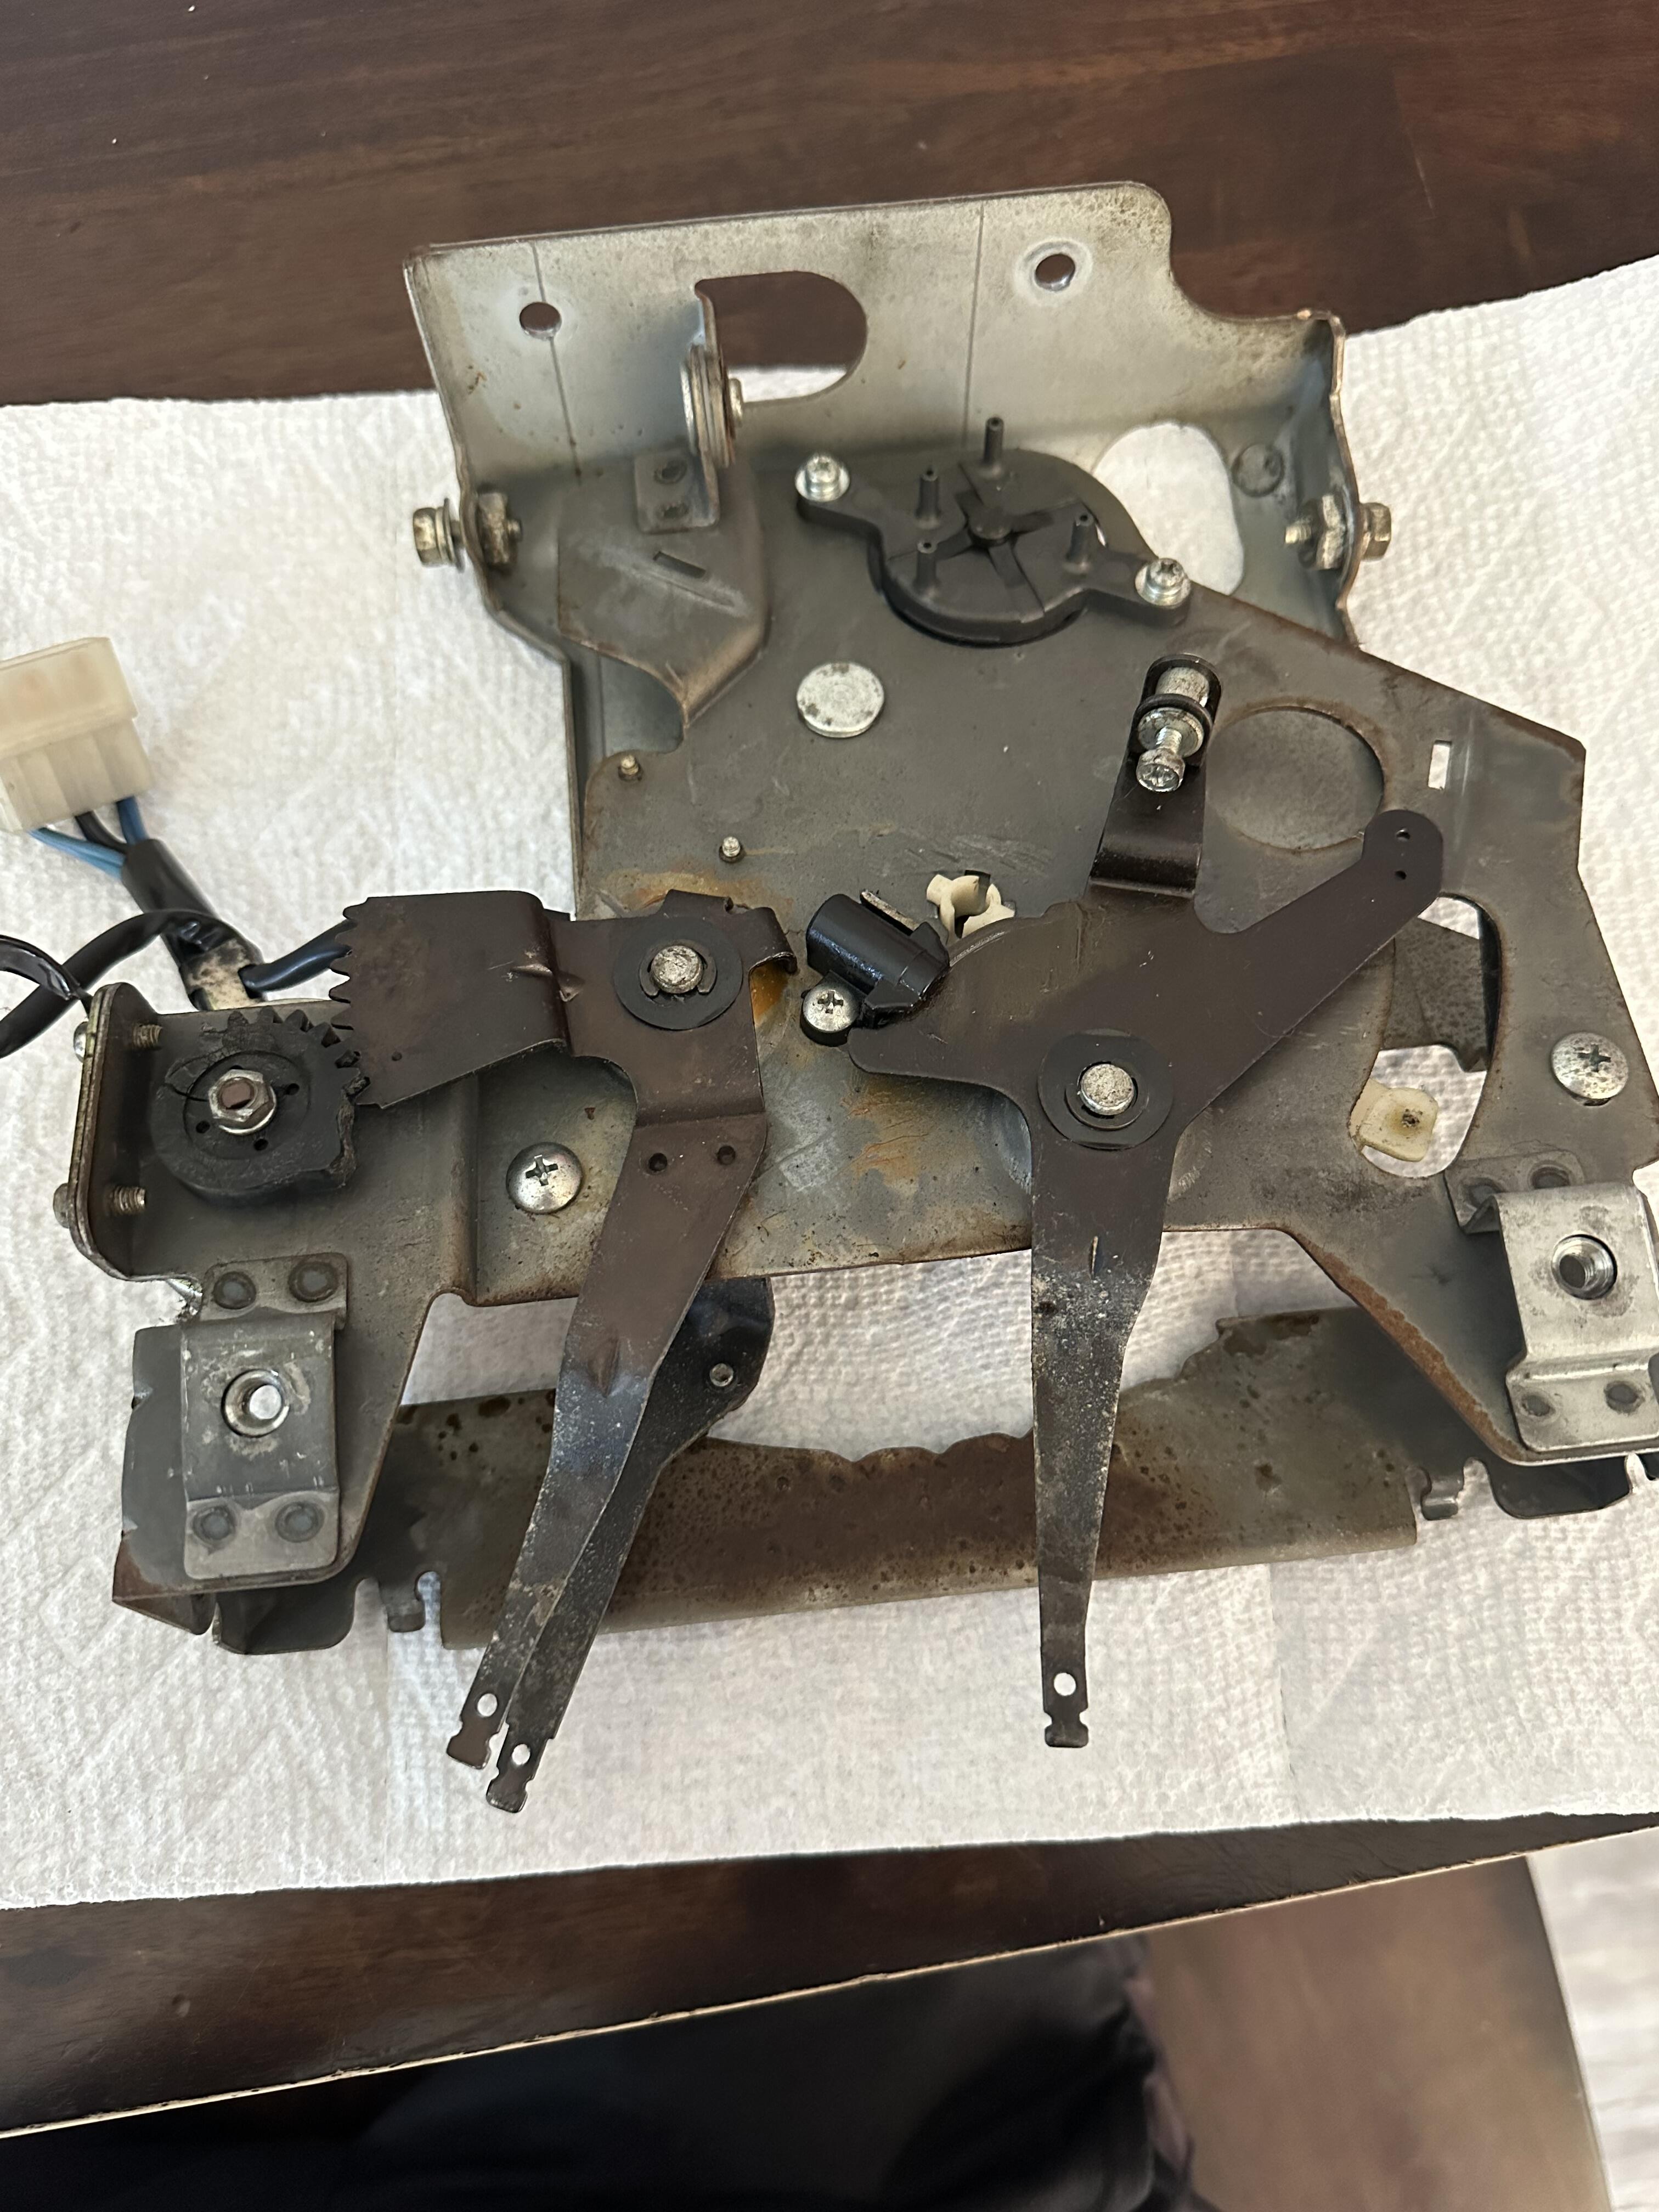
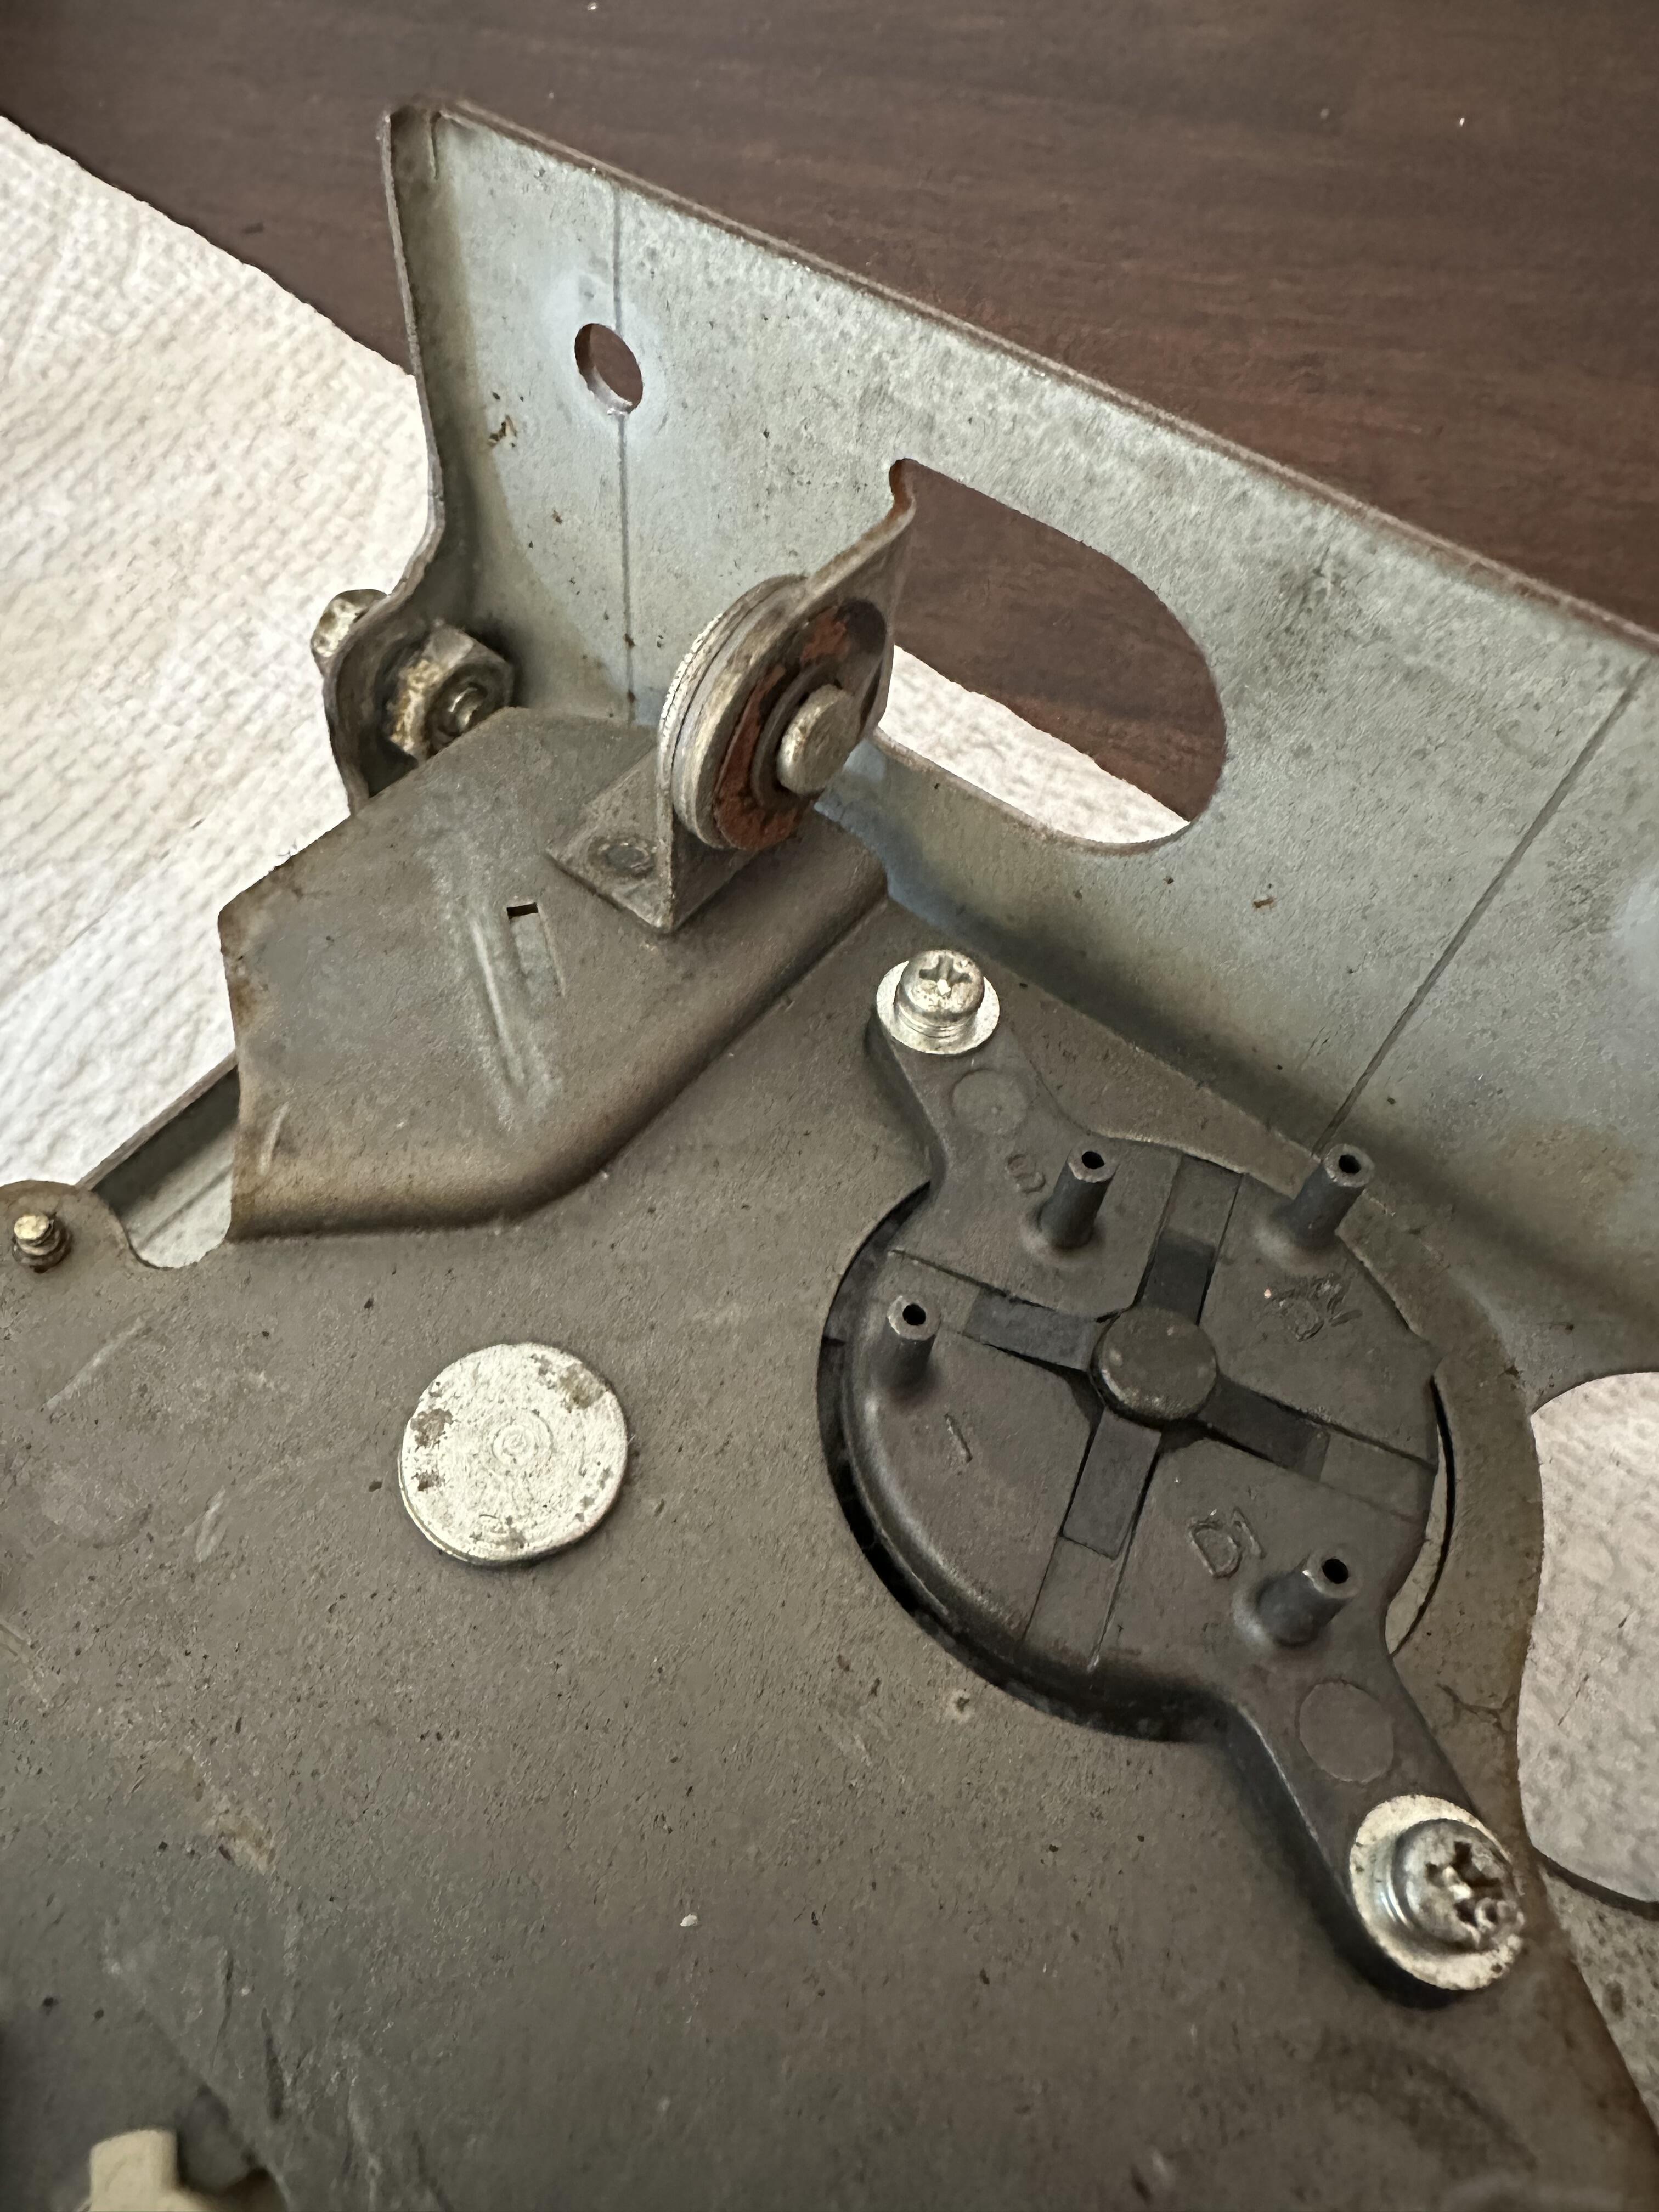
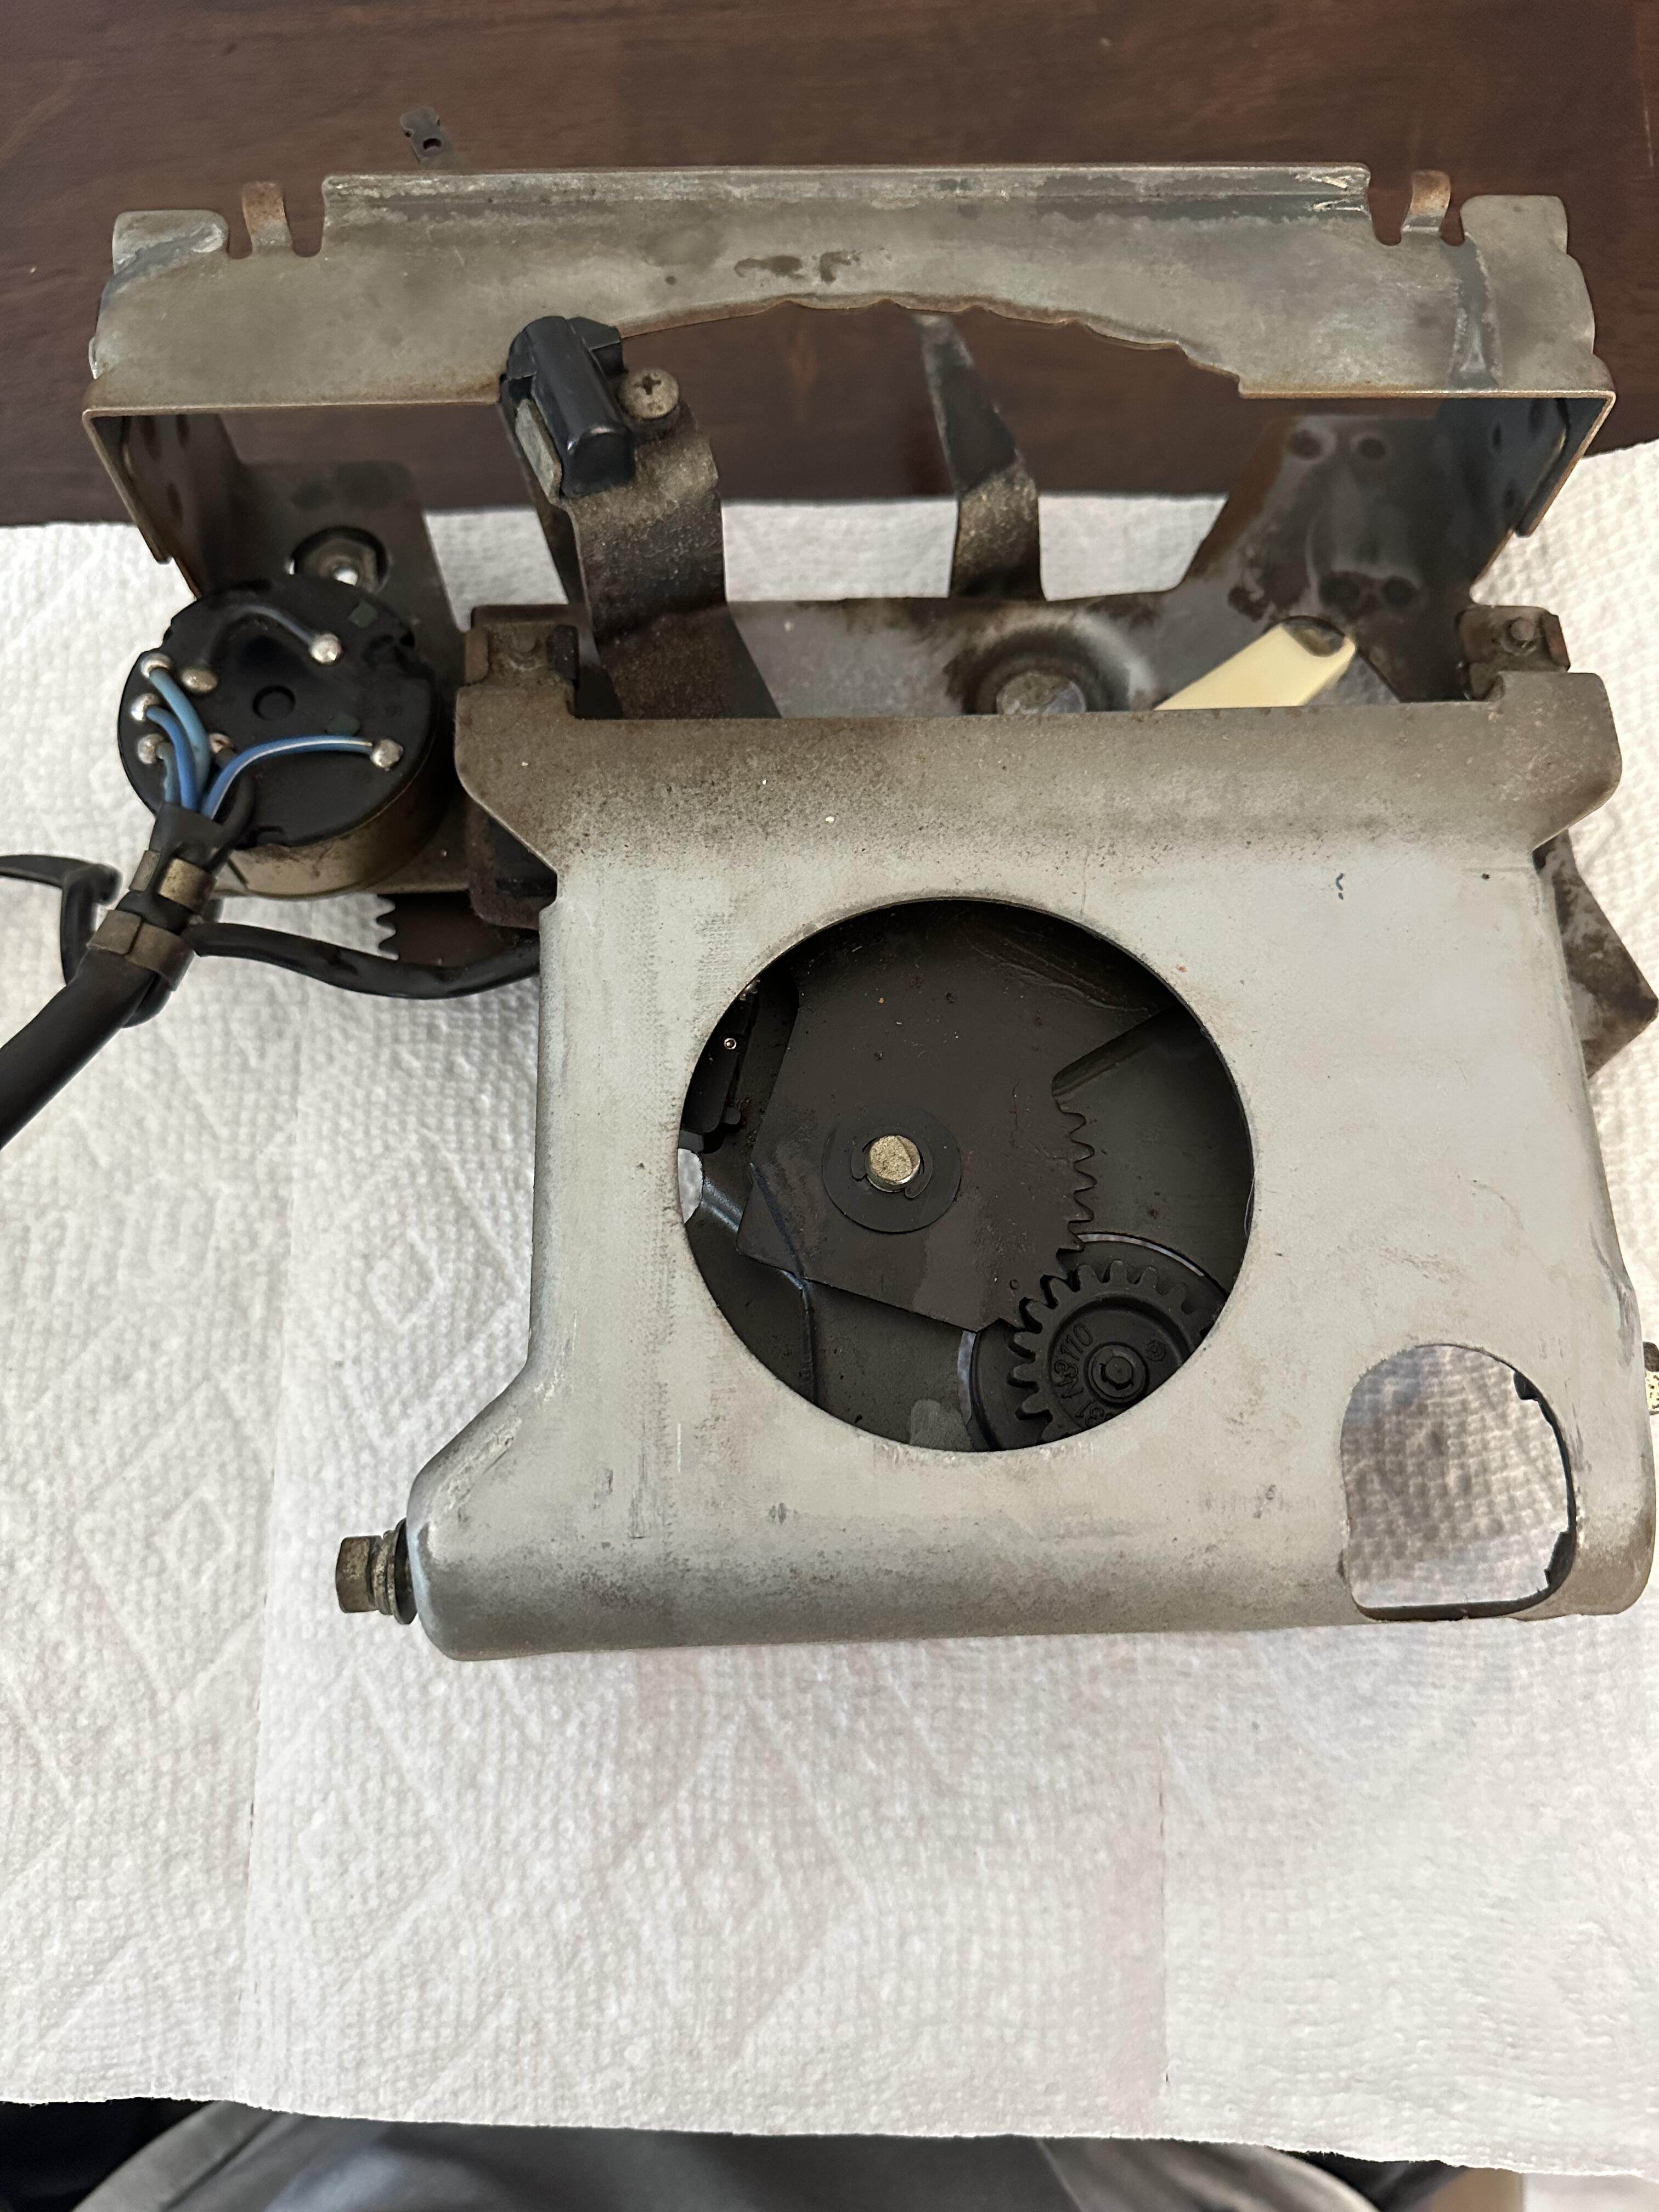
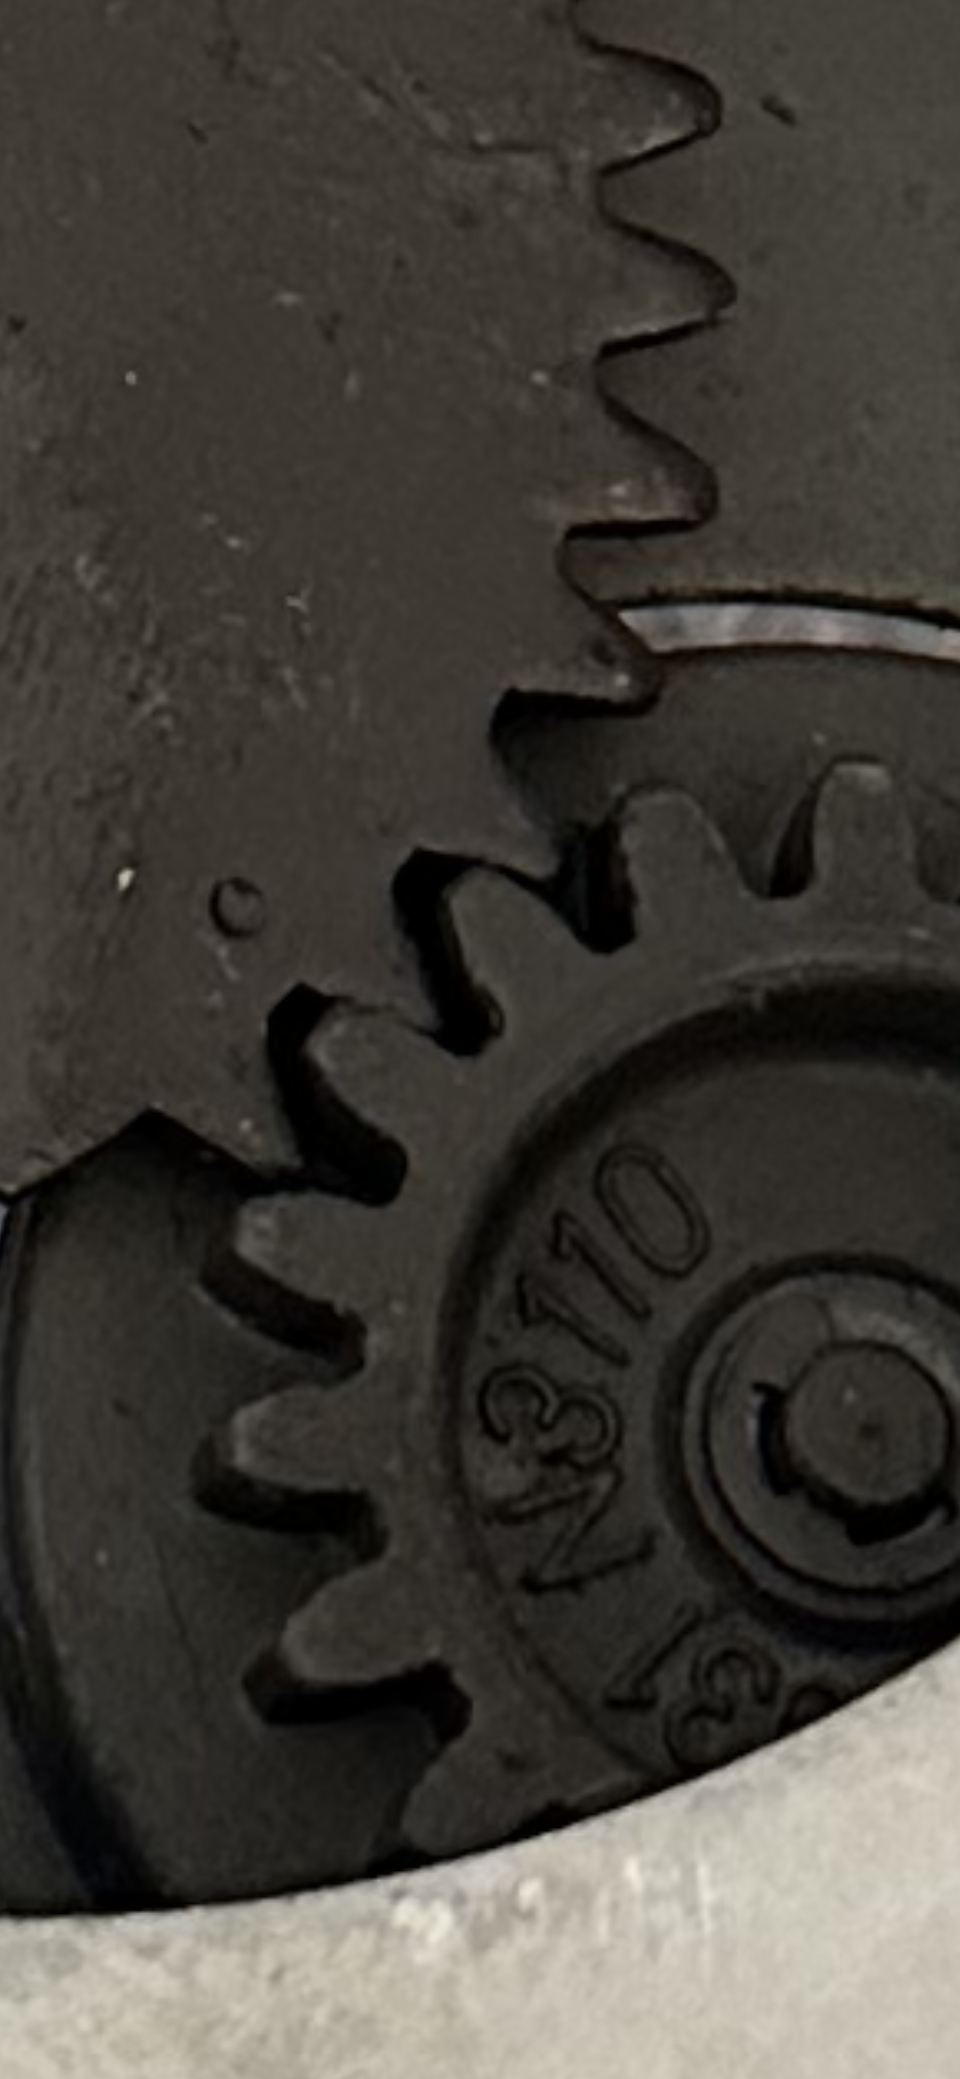
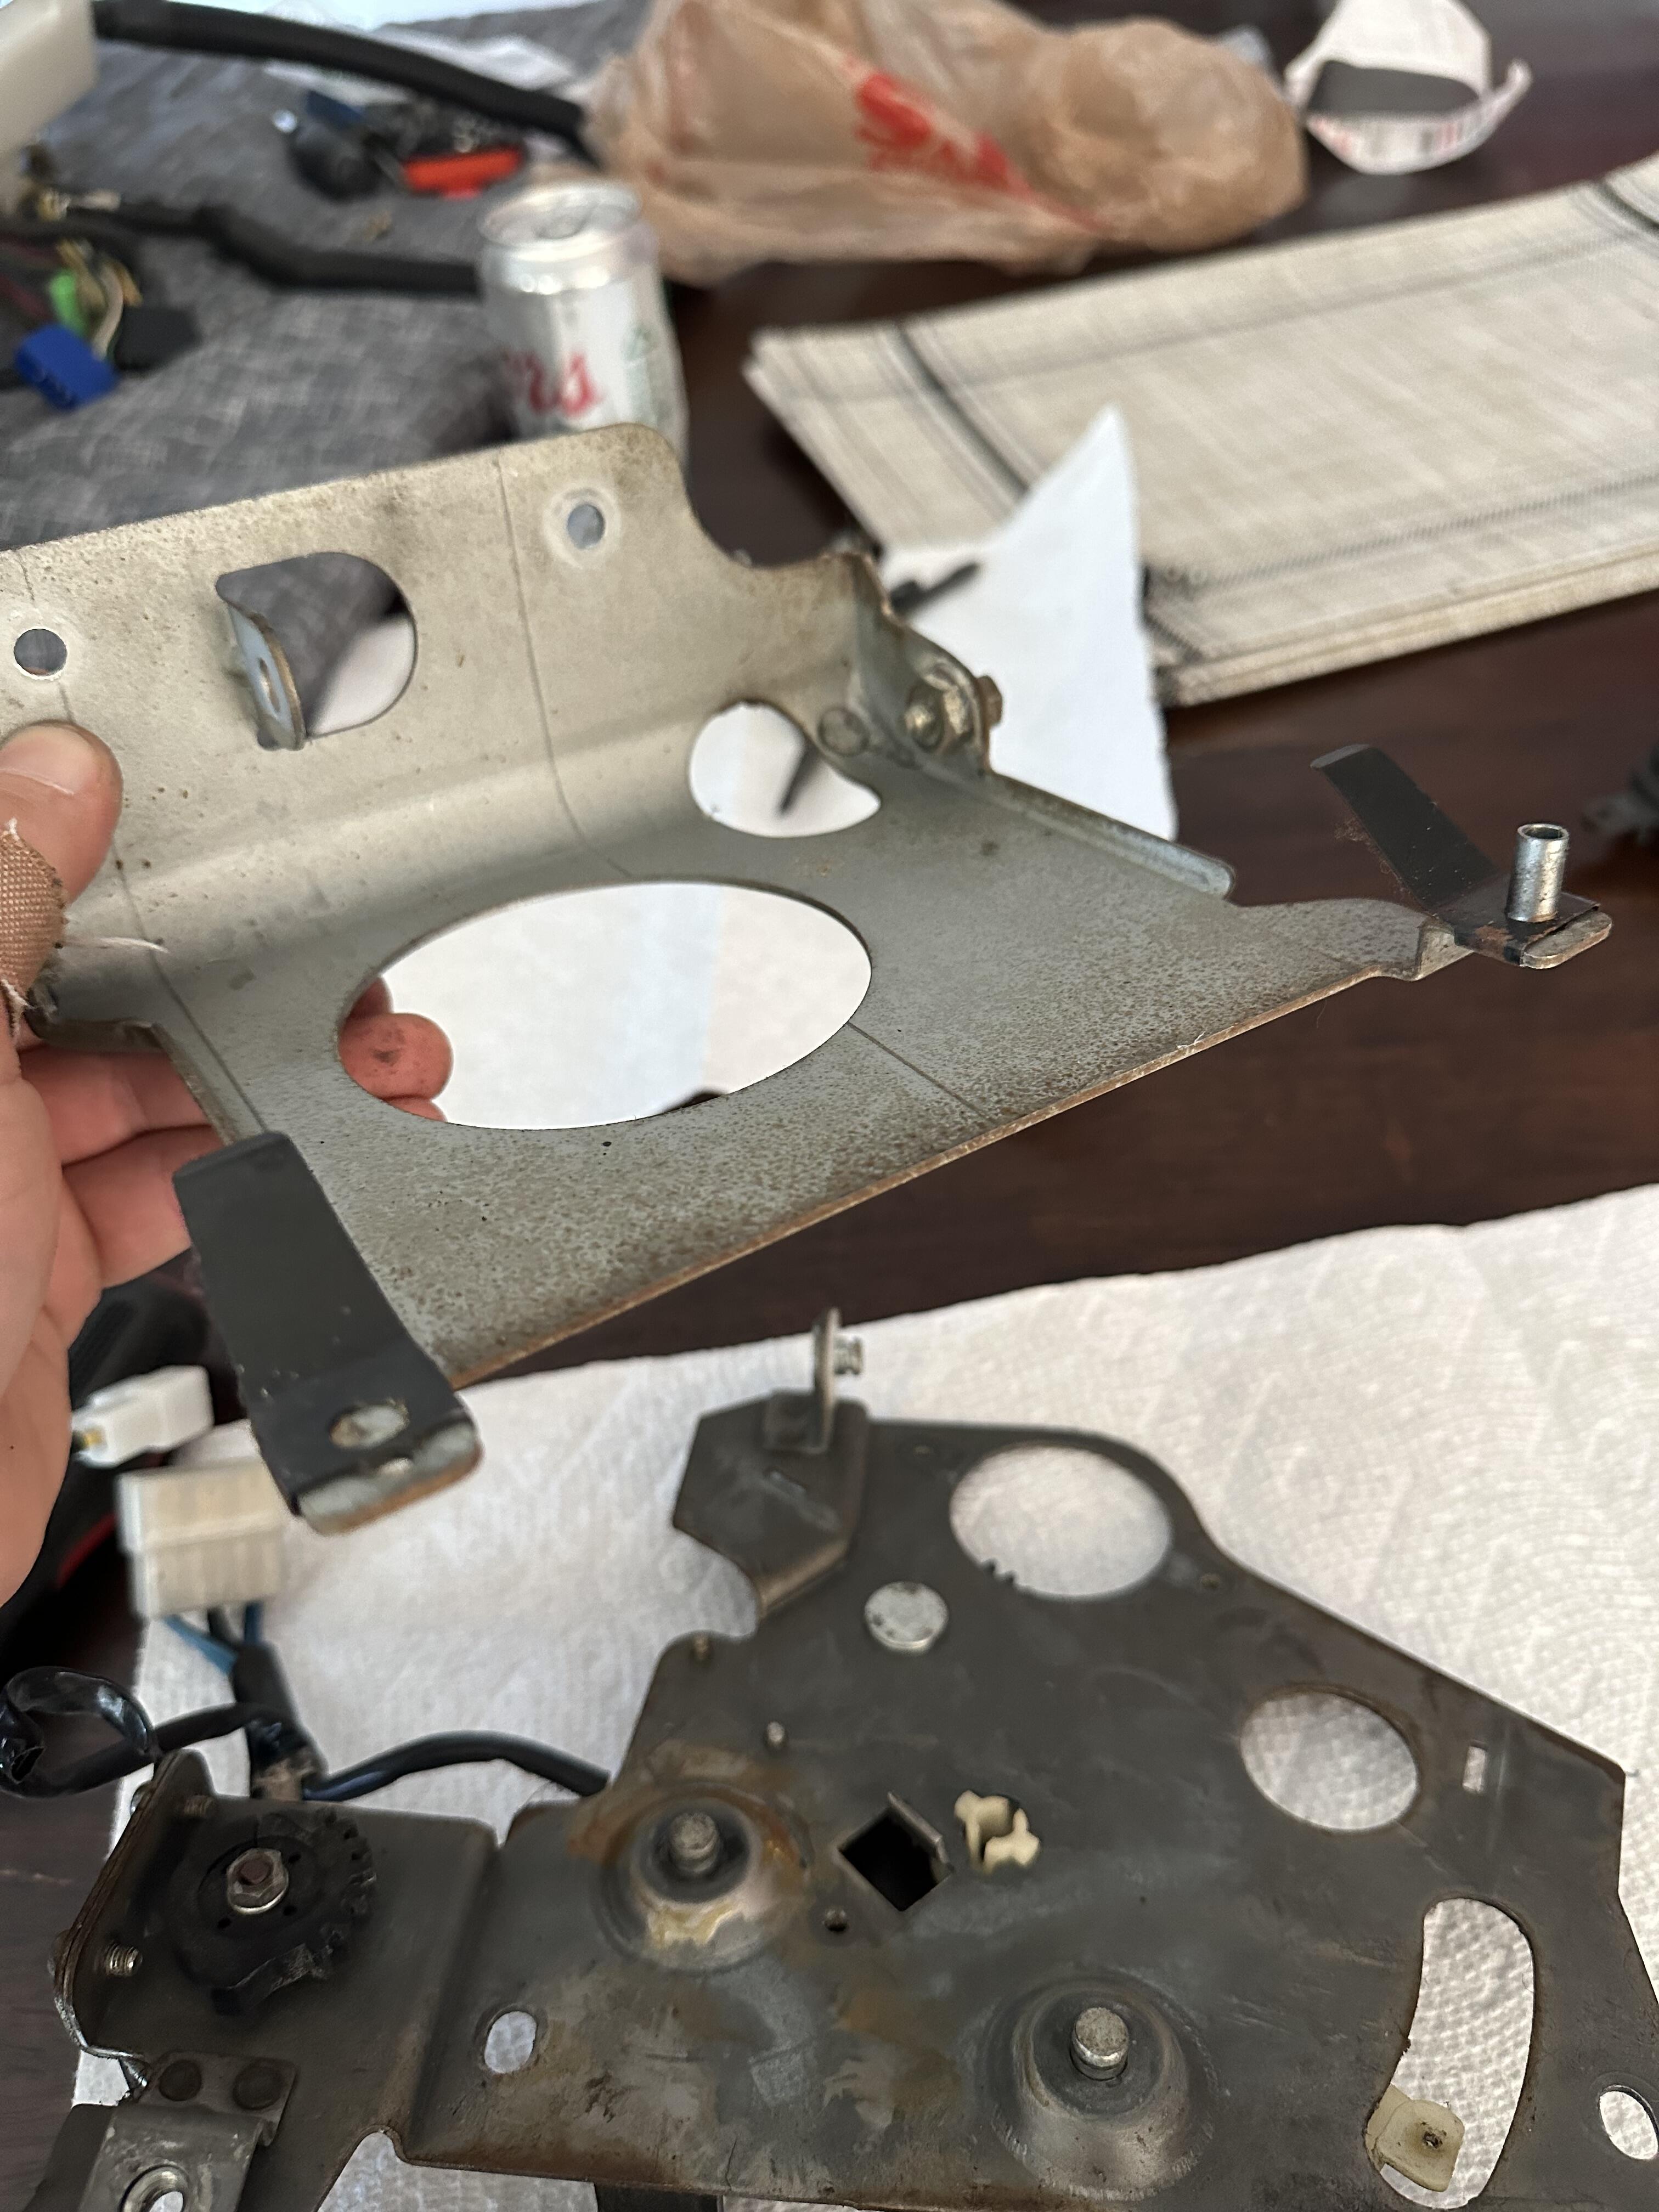
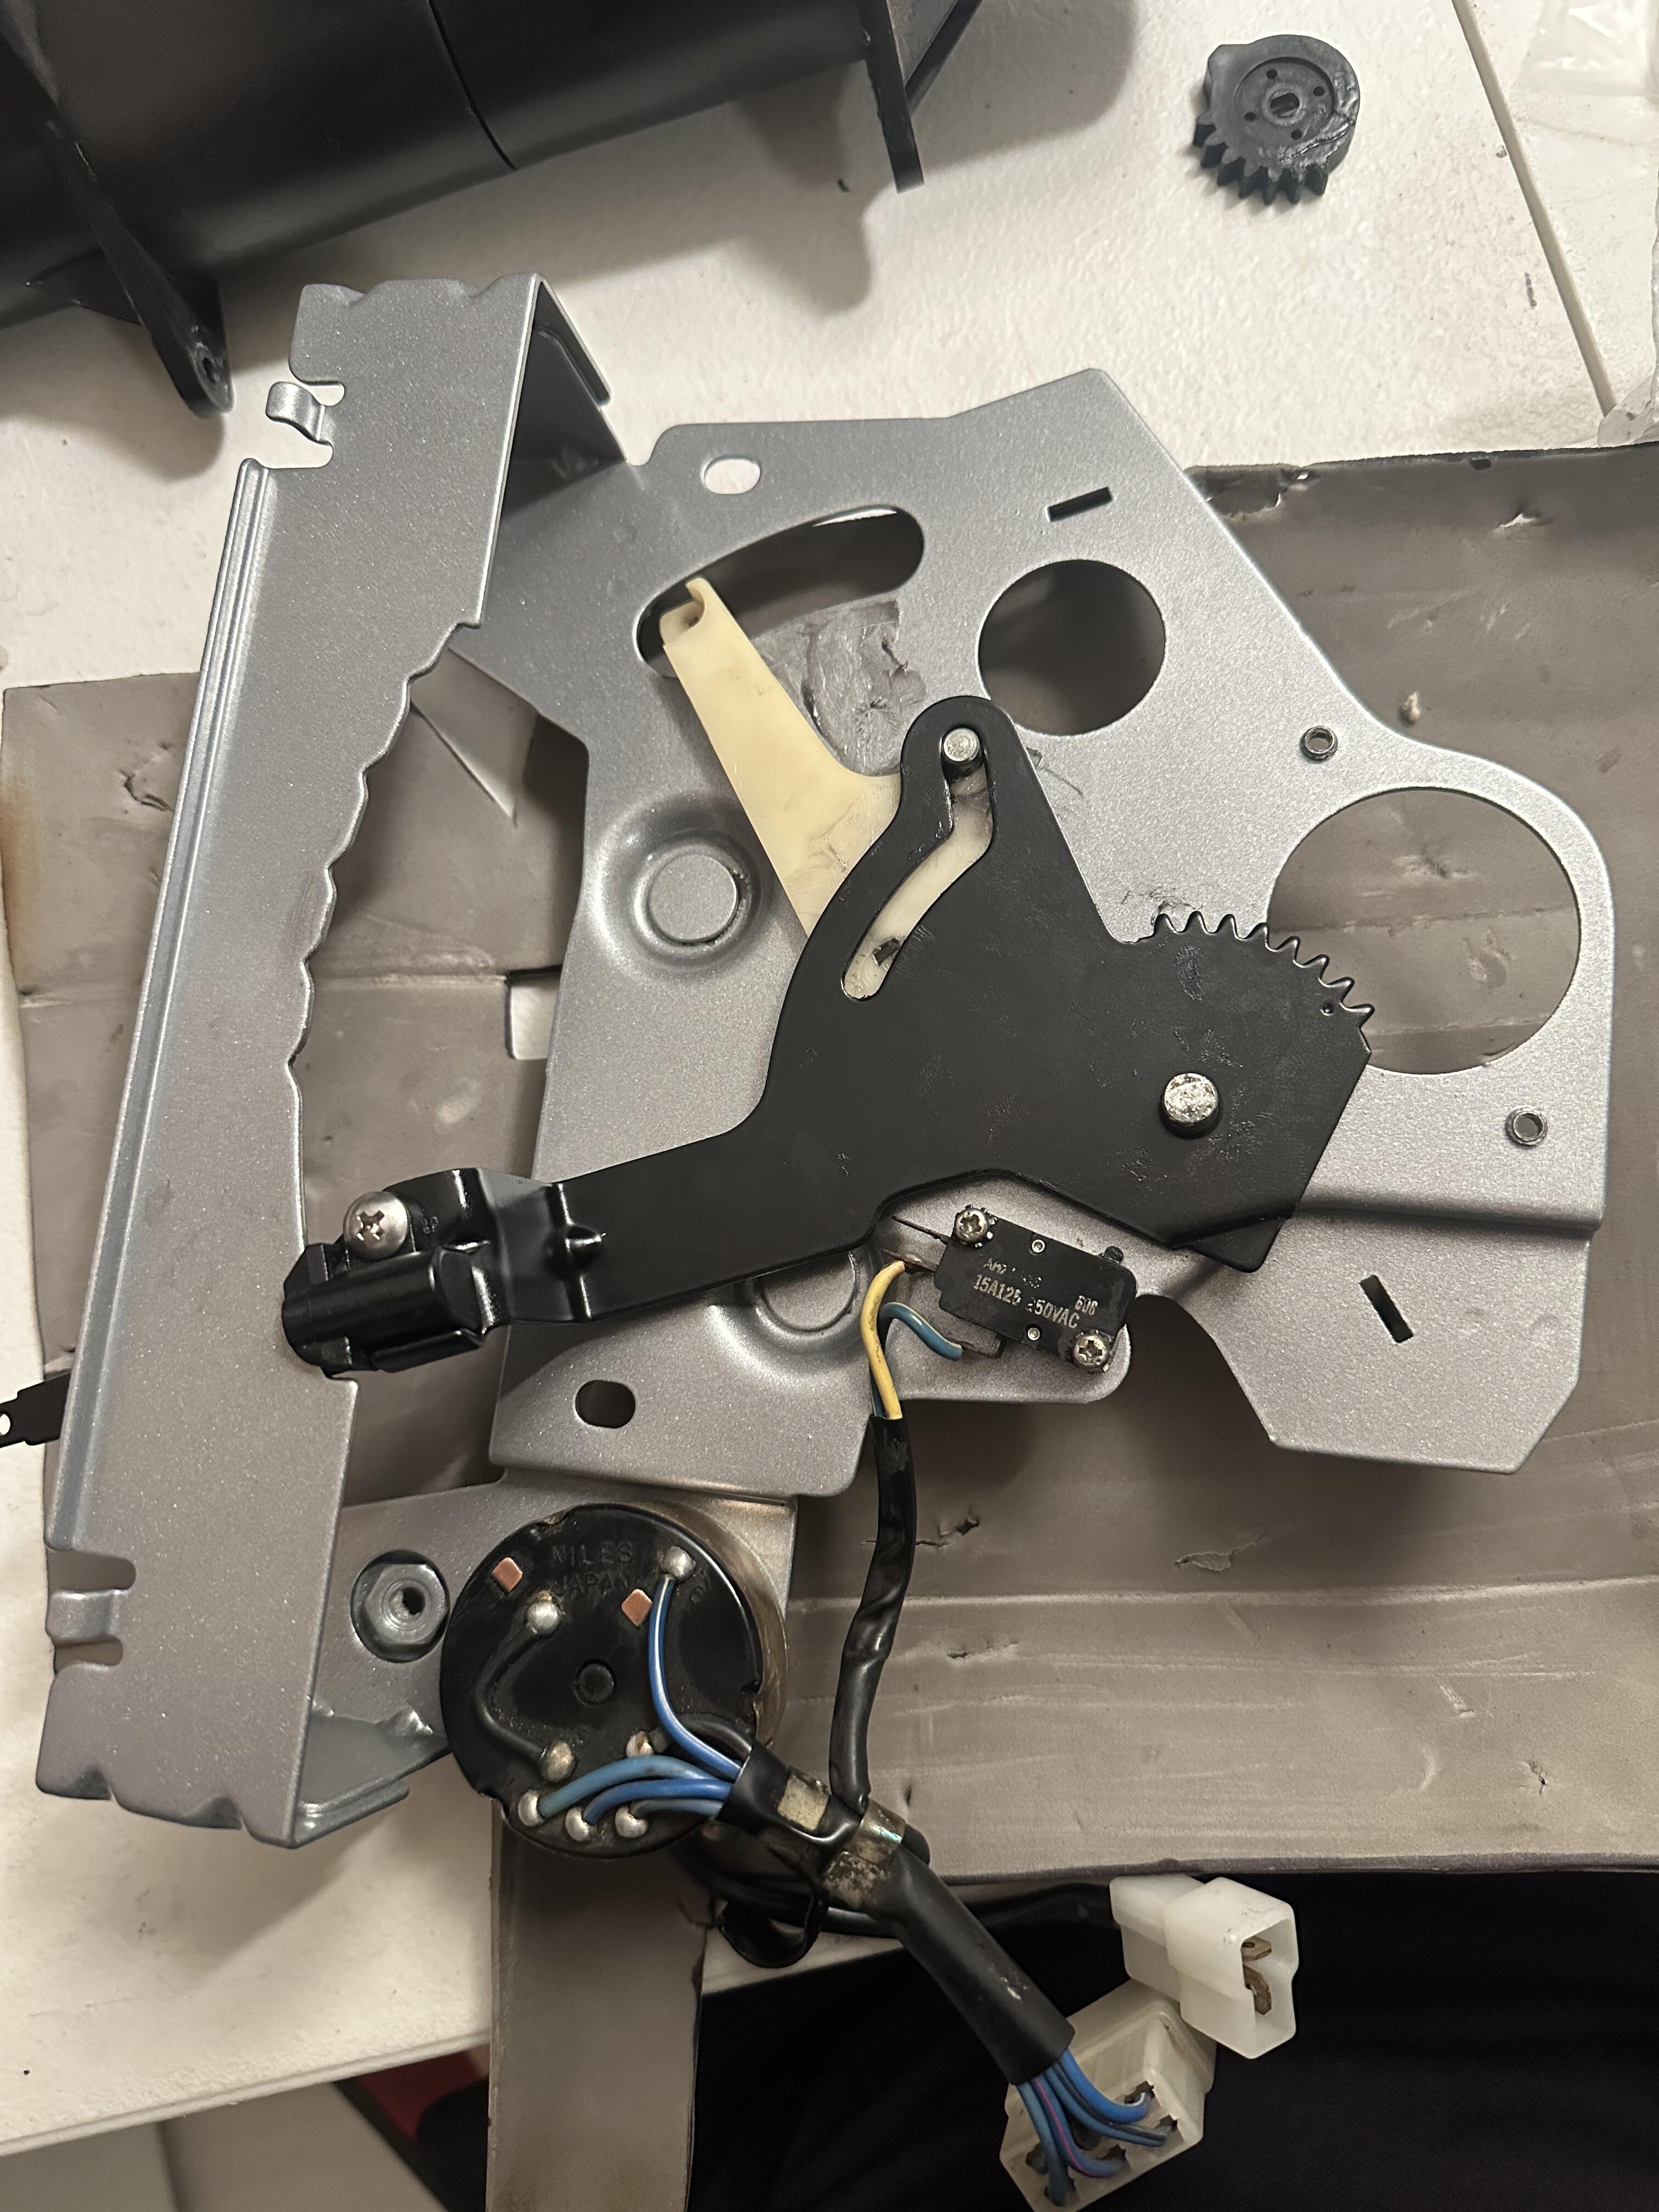
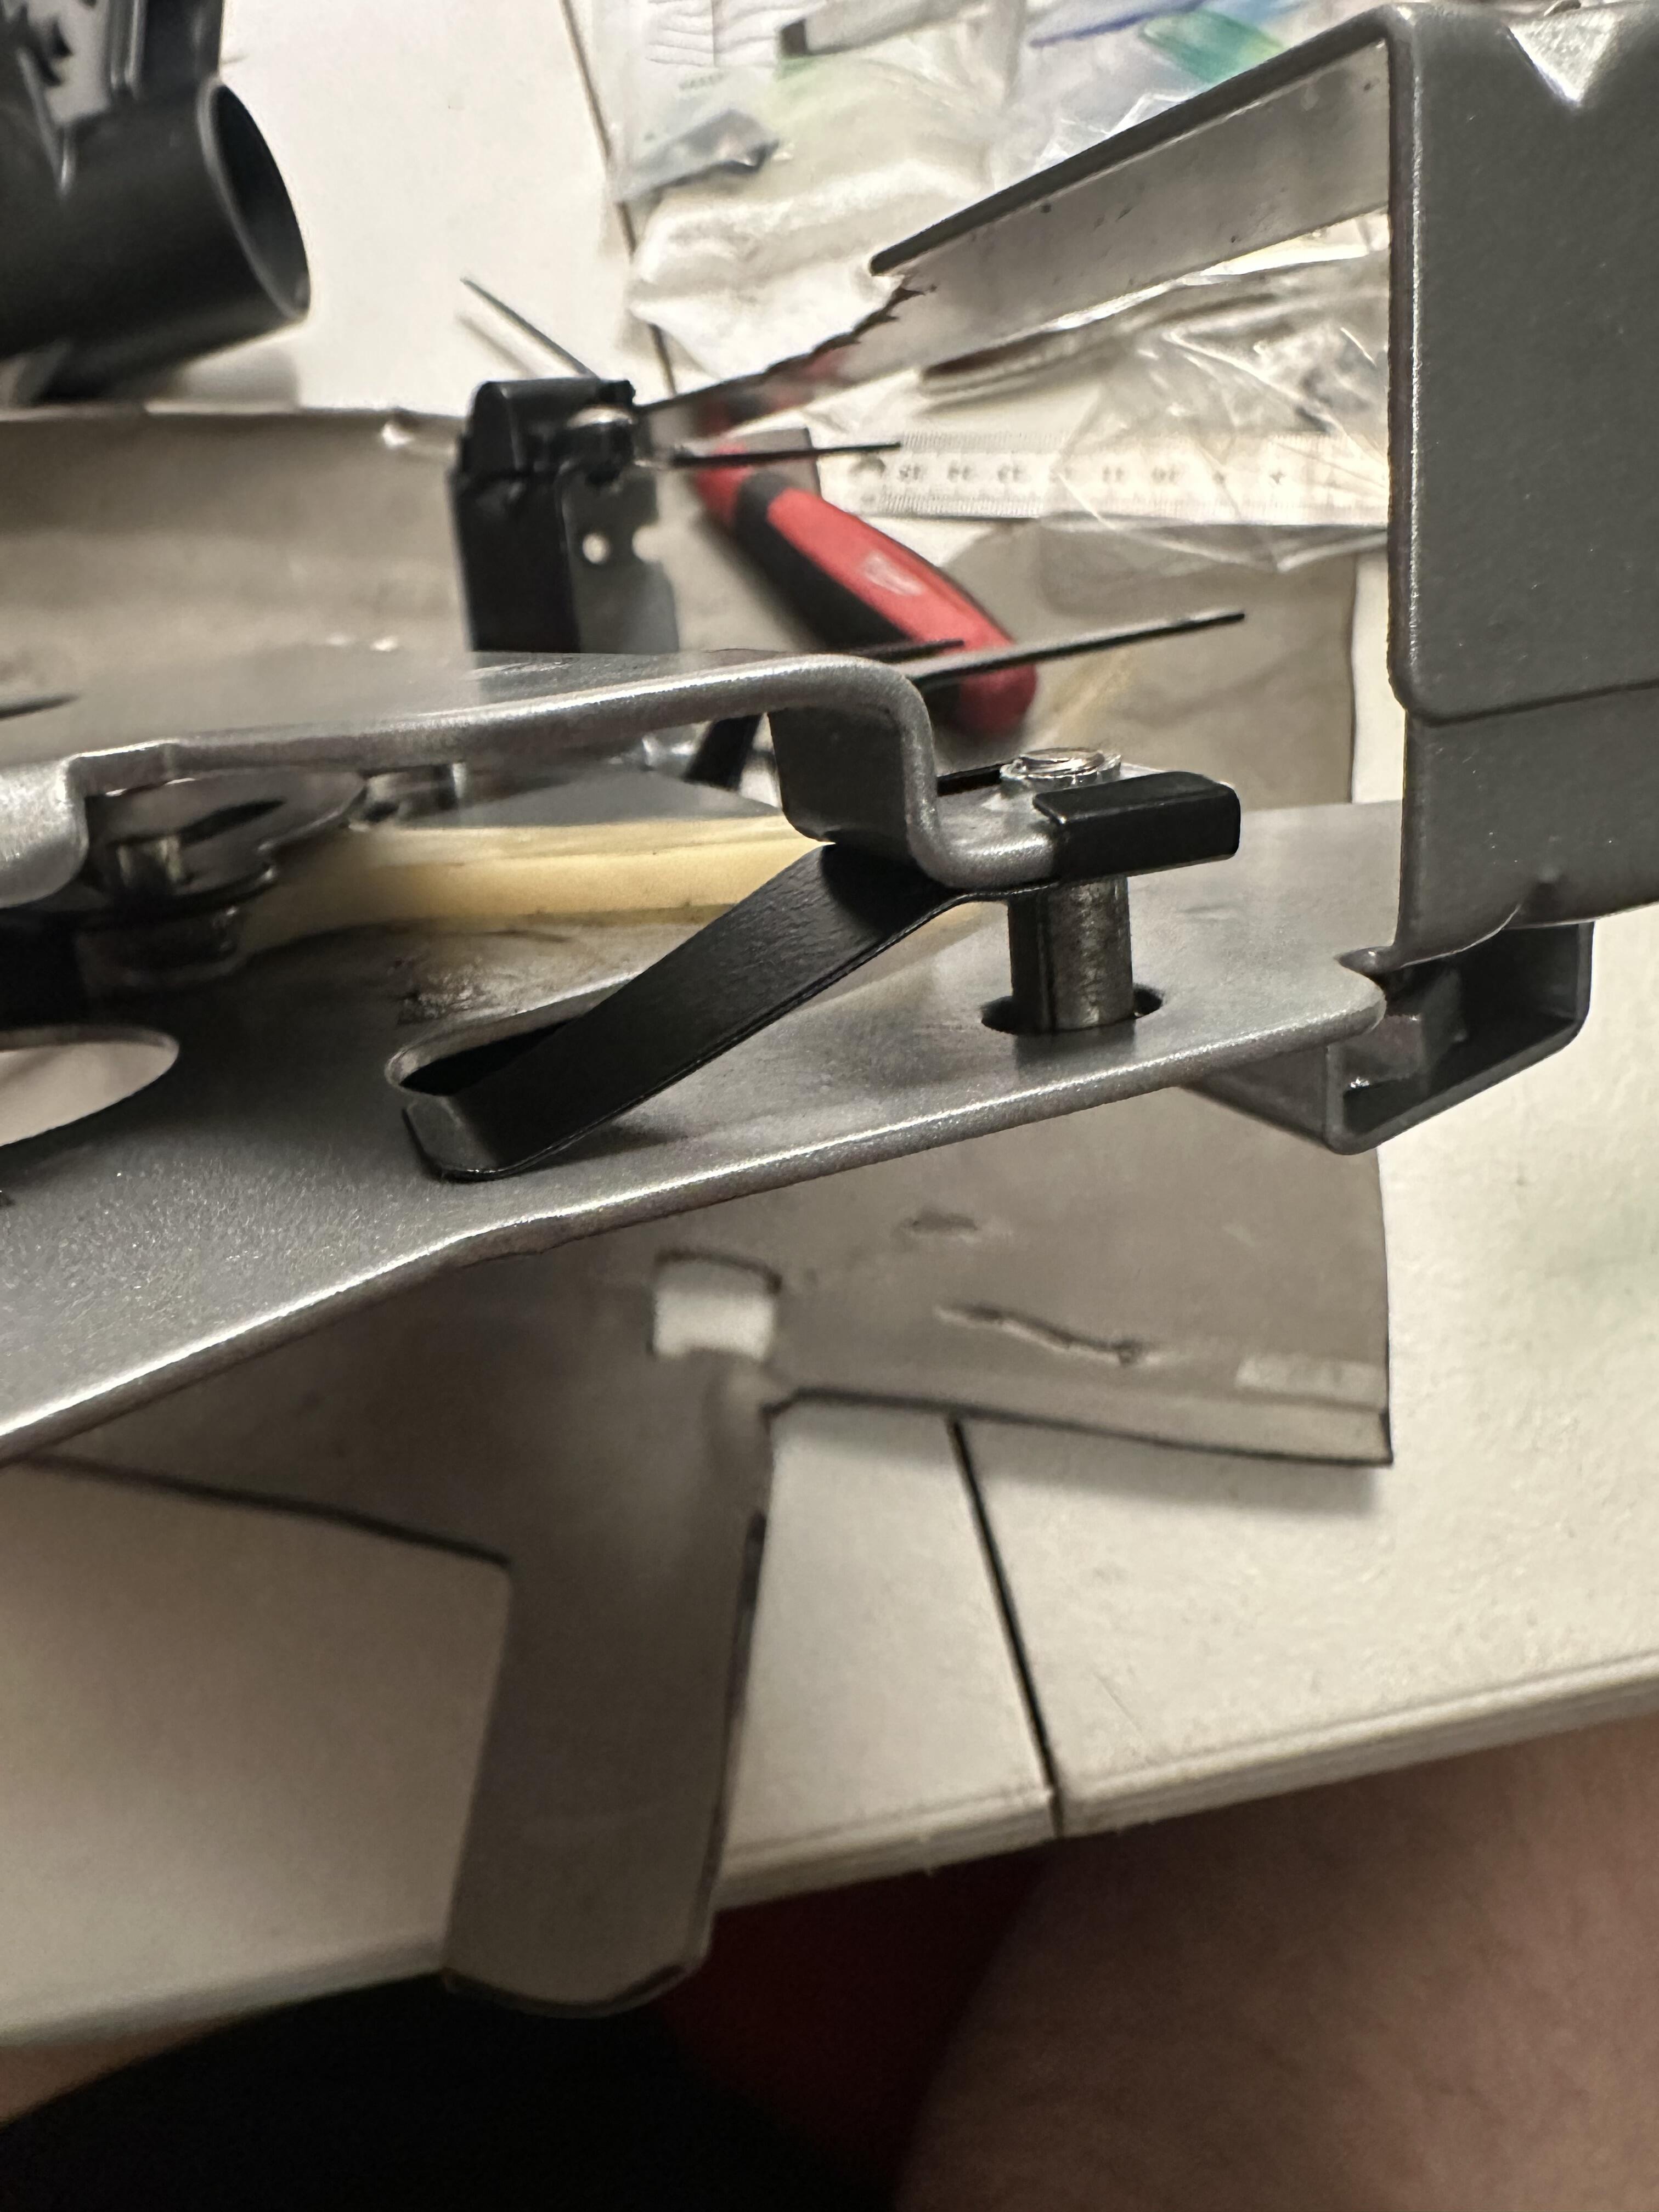
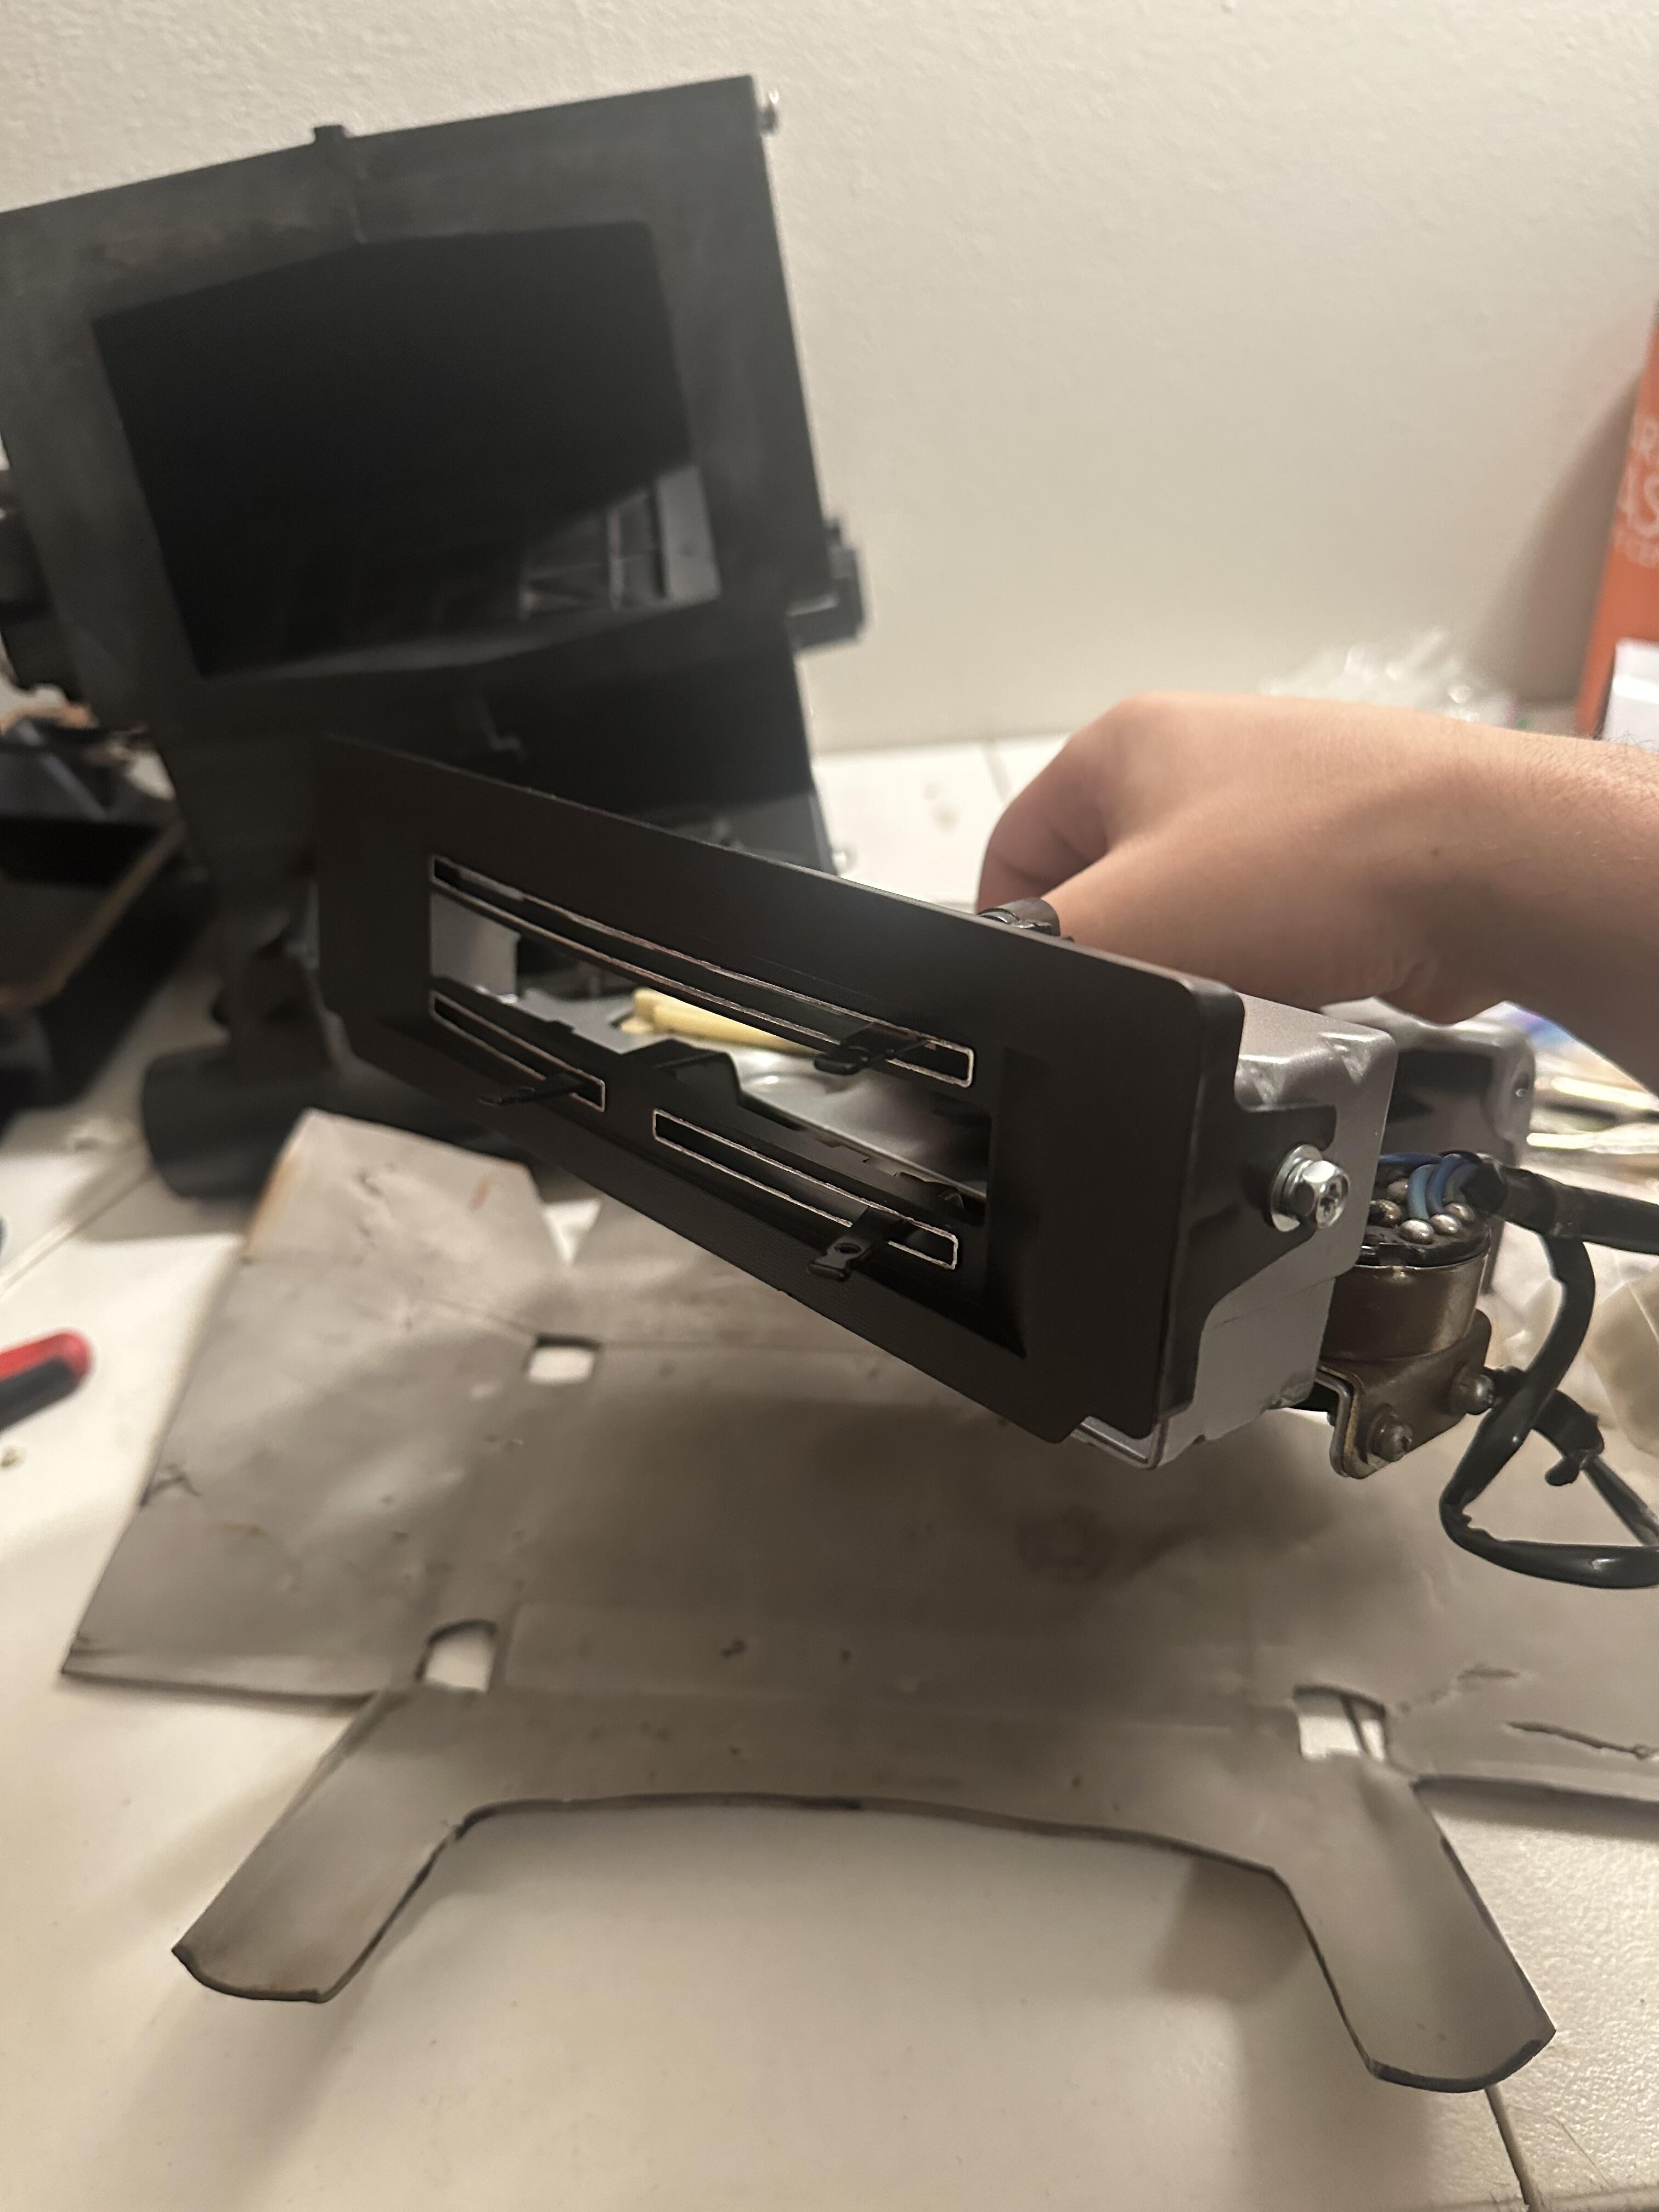
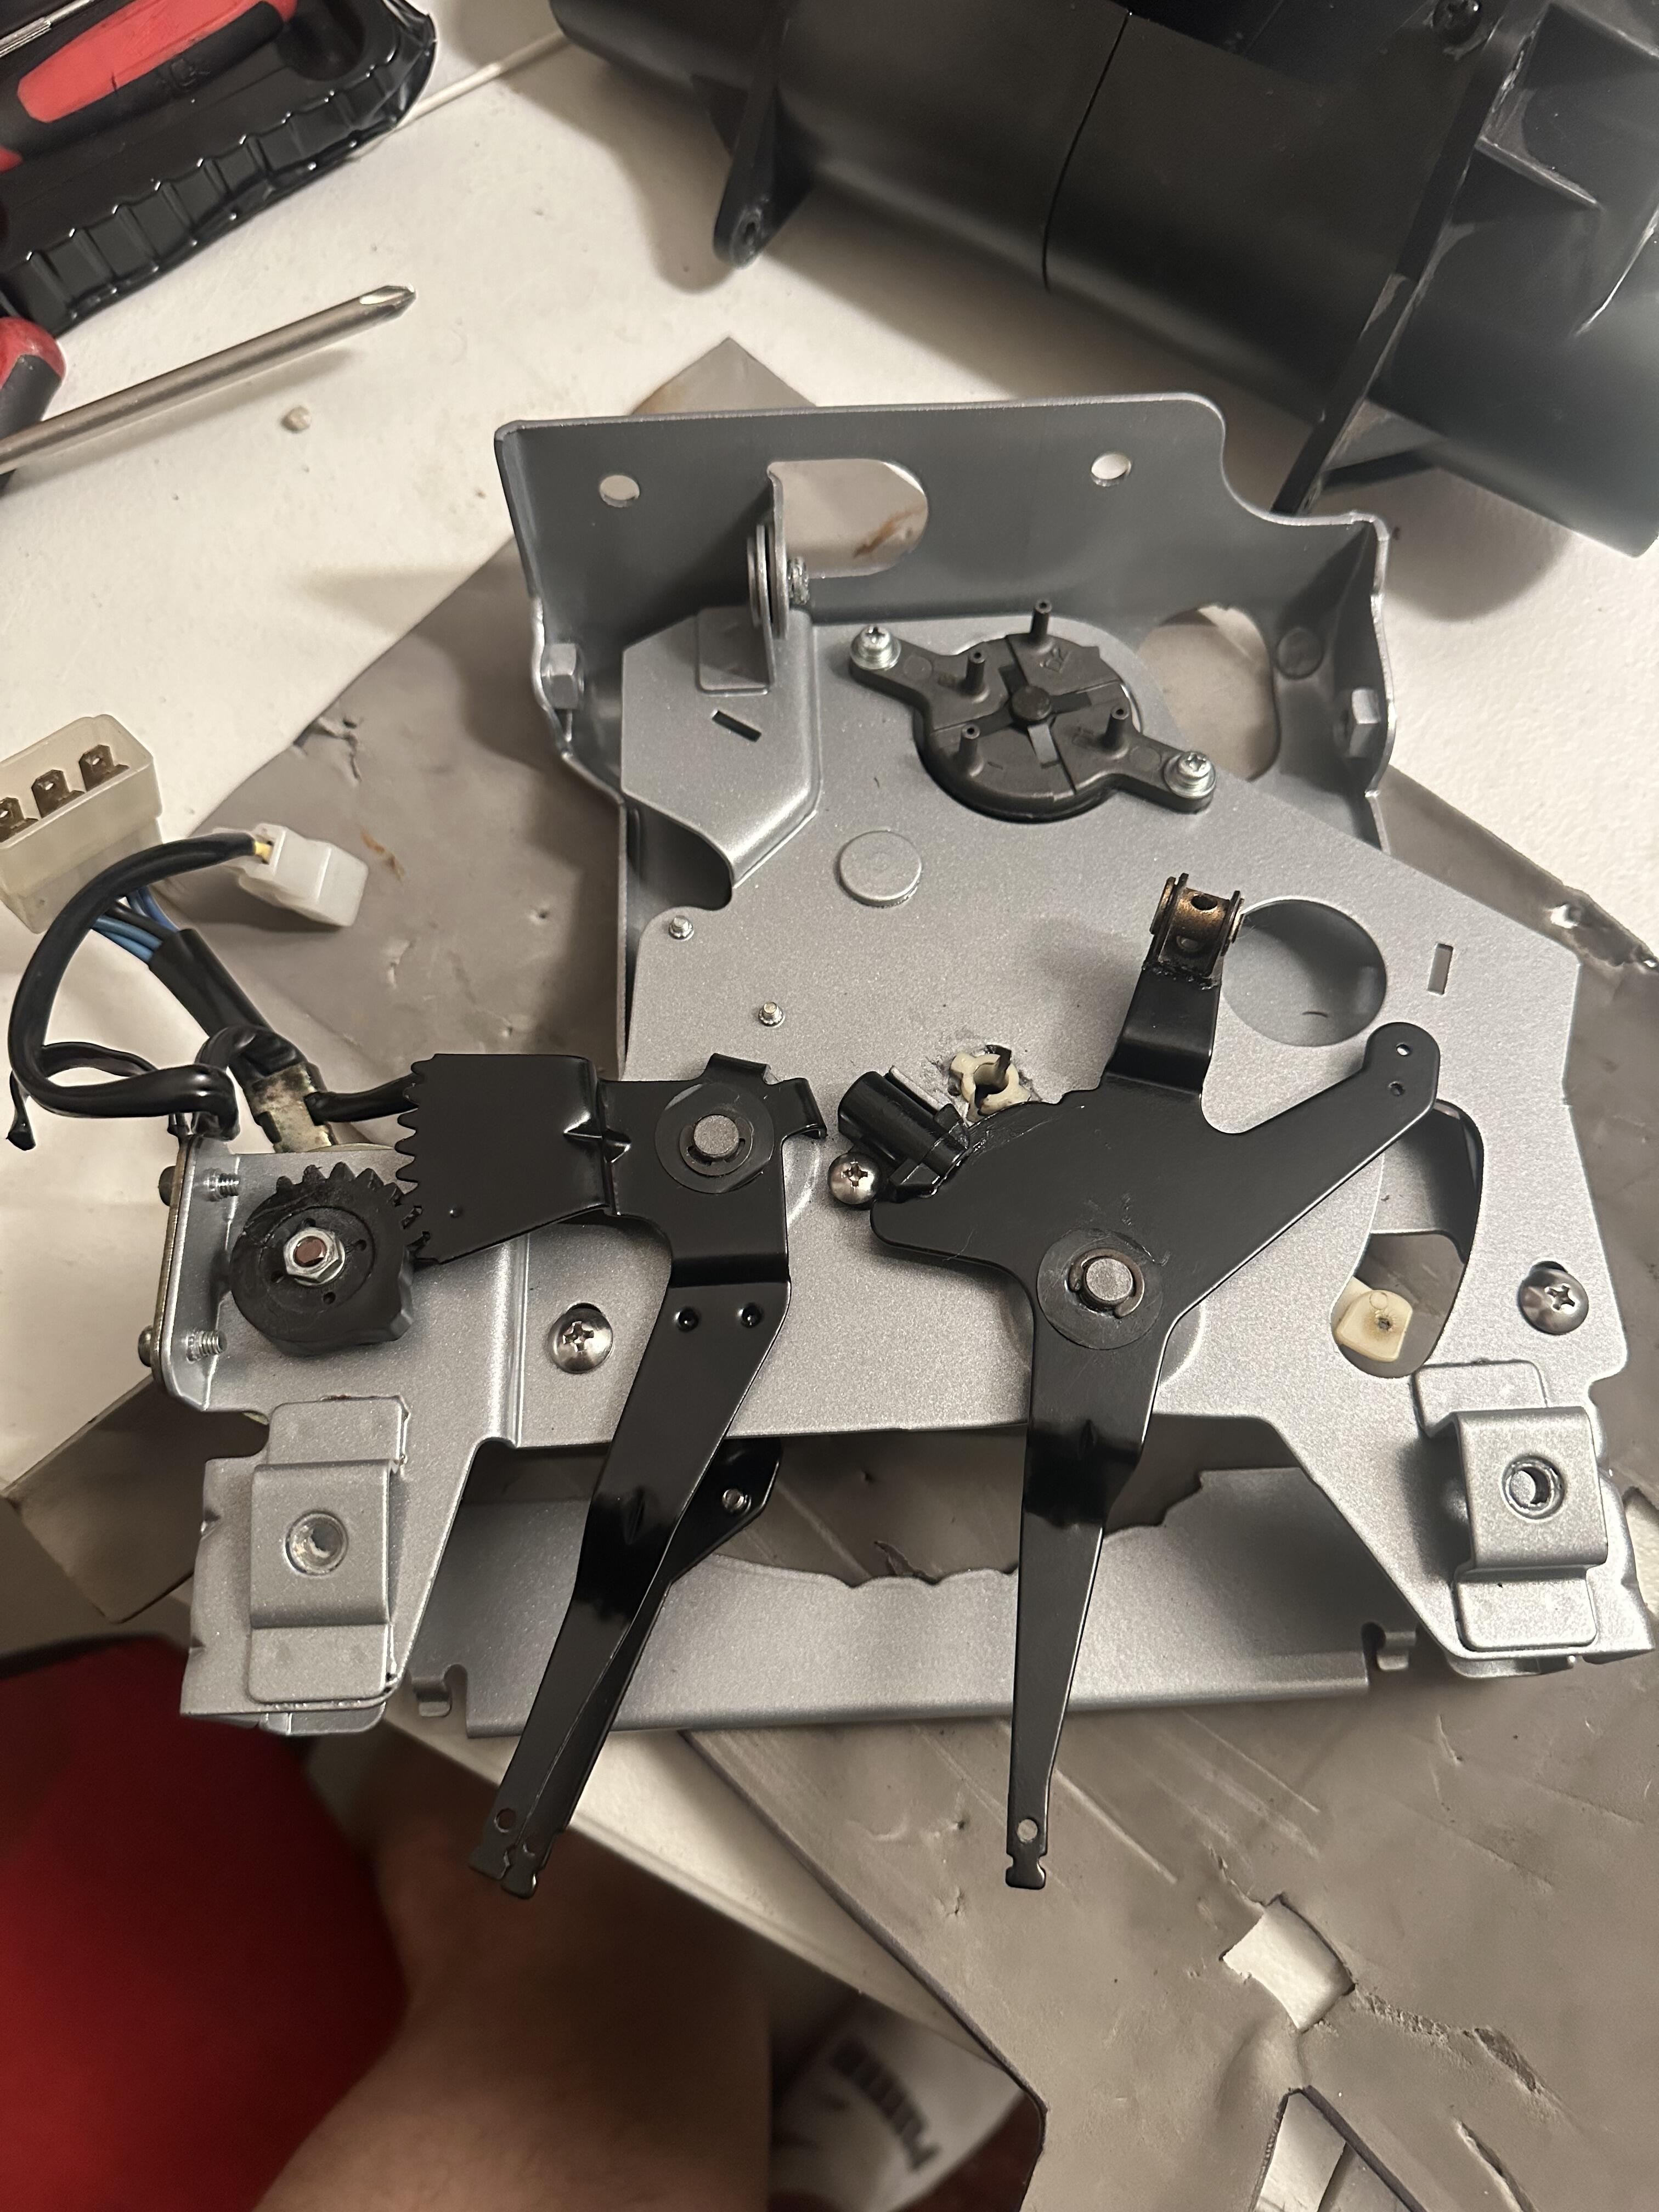
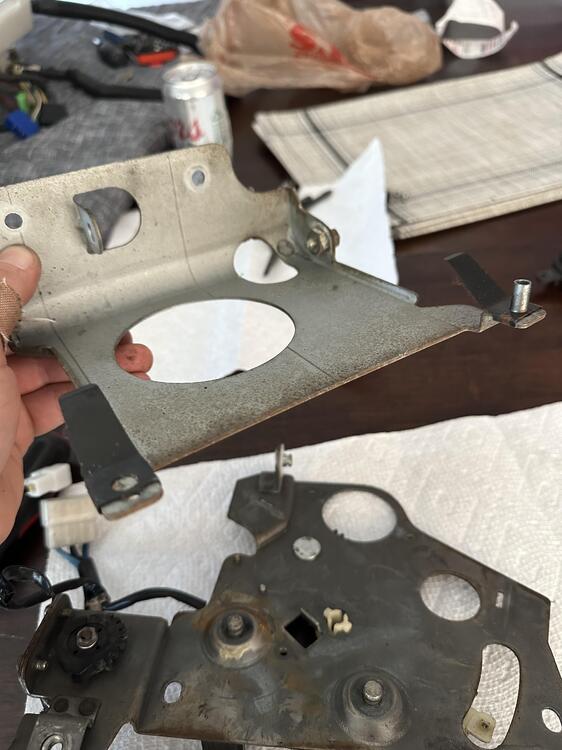
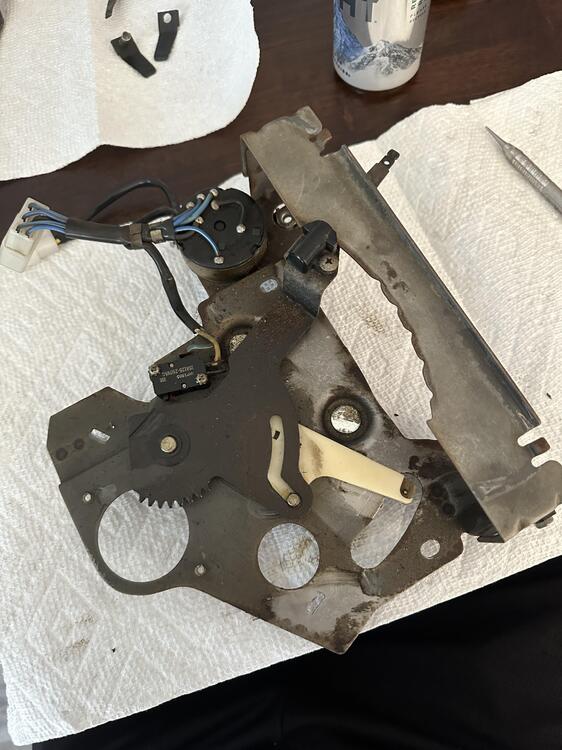
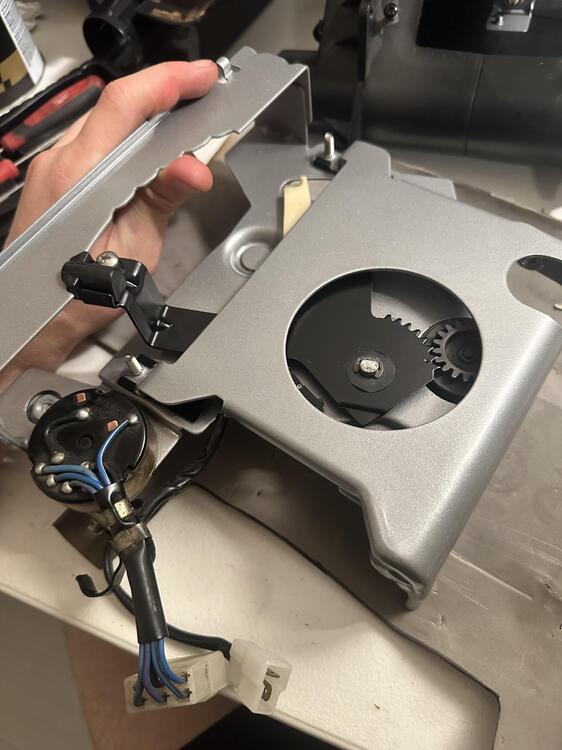
Hey guys, this was my take at restoring my old climate control box. Hopefully it helps someone in the future in case they didn't take good photos:) This is on a 77 280z. I am not sure if all years are the same. My module was really sticky, which was presumably caused by rust and lack of lubrication, so I went the extra mile and redid everything so as to never have to touch this box again. Here is the start take note that I swept every lever to the left so that everything is in sync. The module is upside down. Next is a close up photo of the Hot/Cold switch. It is held on by a pressure washer and snap ring. There is a black mechanism with a spring and ball bearing inside pressed against it. MAKE SURE NOT TO LOOSE THESE! The spring can cause the ball bearing to fly out and dissapear when removing, be careful. Although not in this photo, the Hot/Cold switch is connected to a mechanical wire that travels to the heater valve. The fan switch is removed by removing the nut that holds the black gear on, and two screws on the side of the module. You can then remove the arm by removing the pressure washer and ring. Torwards the rear on this side another pressure washer and snap ring are clipped (holds two halves of the module in place) you can also see the two screws to remove the vacuum selector valve. I will not cover how to rebuild this valve, however to do it you just need to pop it apart and put vacuum grease on the inside so it seals. Very simple mechanism. Here is the top side of the module. Take note of the relationship between the throm arm gear and the vacuum selection switch. This is its relationship with the throw arm pushed all the way left. Unscrew the two screws that hold the control module halves together. You can see them in my first photo. It pops off and you can see the two black spring tabs that hold it together with the metal spacers (0ne is missing from this photo). Take note of the coors in the background and follow suite. Here is a good view of the throw arm mechanism for the selector switch once the half is removed. The arm is attached by a snap ring and pressure washer. Although not in this photo, below the arm is also a plastic circular spacer. It is easy to forget during reassembly, but don't. The black arm also has a tab that controls the plastic throw arm. This plastic arm can crack, so if it is just fill it with epoxy or other strong glue. remove this arm, the plastic peice, and then unscrew the spring loaded pressurre tab from the arm making sure not to loose the spring and ball bearing. Next, Just remove the fan switch and its correlating electrical thing if you haven't already (sorry mine worked perfect before removal so I did not research its proper name. Simple as that. I then proceeded to powder coat all my parts and get new matching hardware. I found Misumi to be a good source for hard to find hardware that matches the original. Ace hardware didn't make the cut, haha. If you wan't you can also go more OEM and plate the parts, but I wanted a more permanent solution.... hopefully. Reassembly is just the reverse of this! Here are some helpful photos. Make sure to grease any areas the control arms pivot on. If you want a guide on how to restore the HVAC plastic faceplate a guide to do that is here (done on the radio bezel). Same principles apply. At some point in the future I will post heater and AC box restorations, and I will cover how this module connects to everything else then:)


 3 points
 -
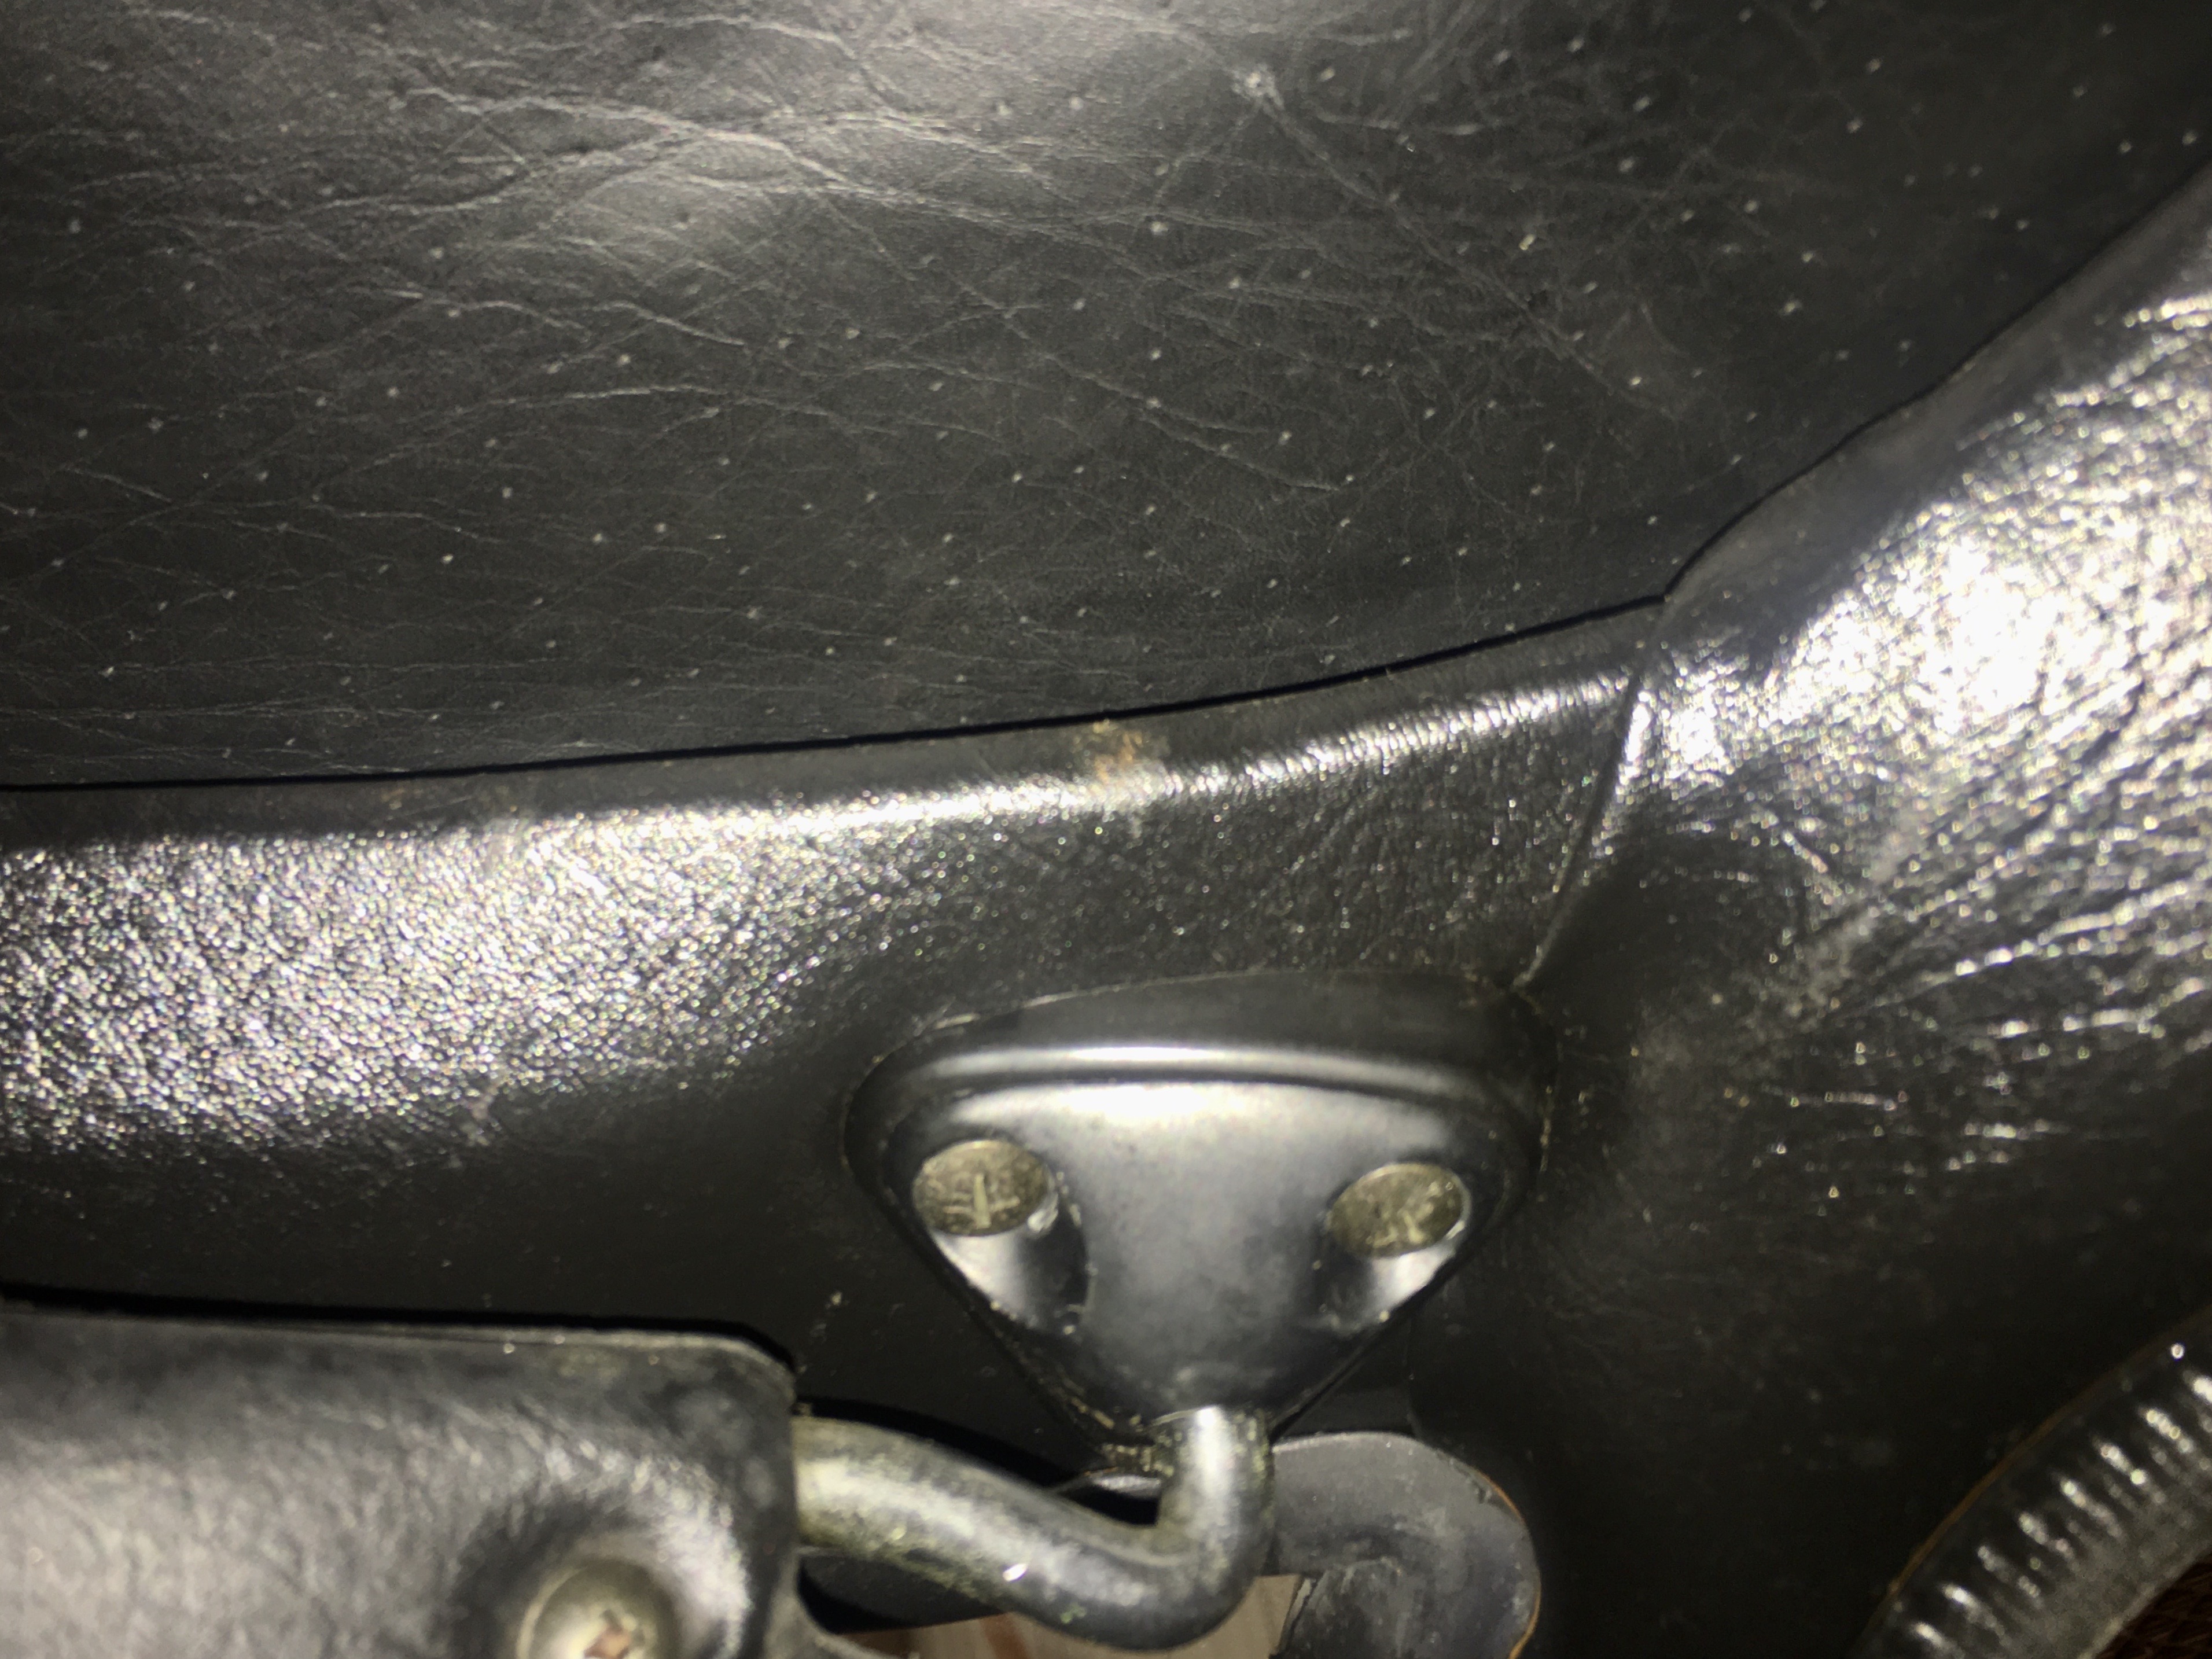
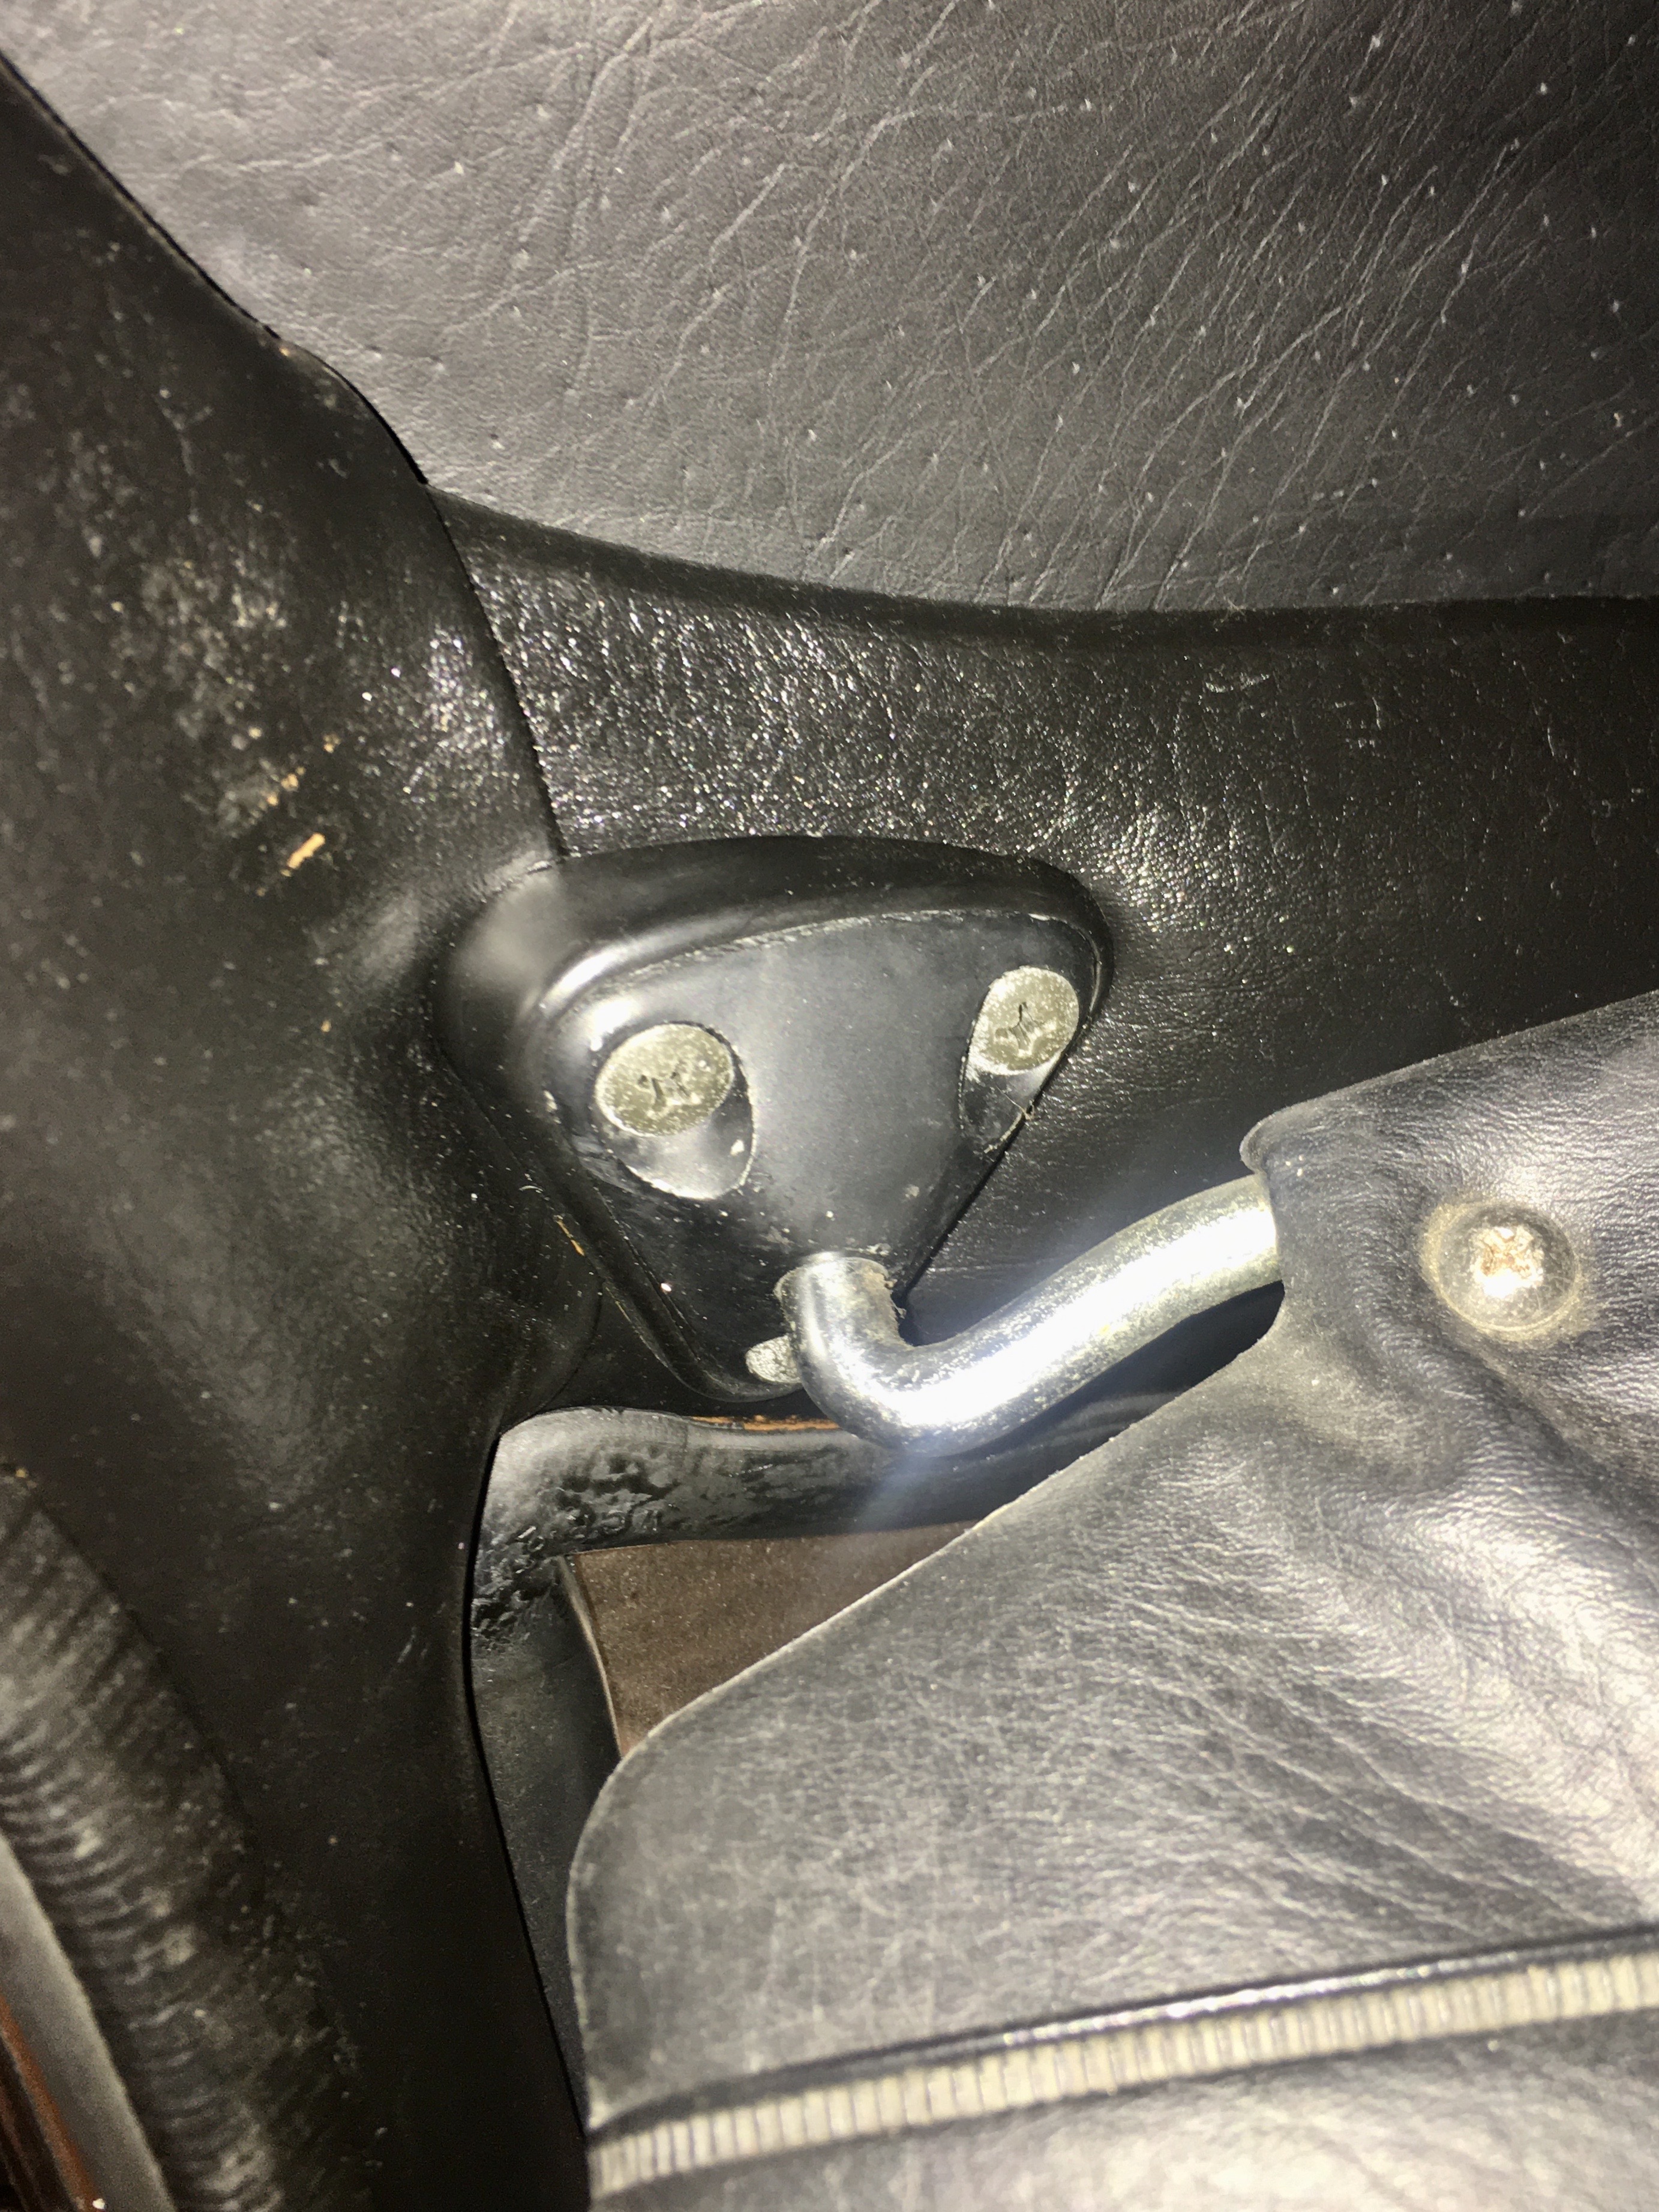
Finished the steering wheel. sanded the epoxy, primed & painted reinstalled the horn contacts & pad retaining ring Back in the car3 points
-
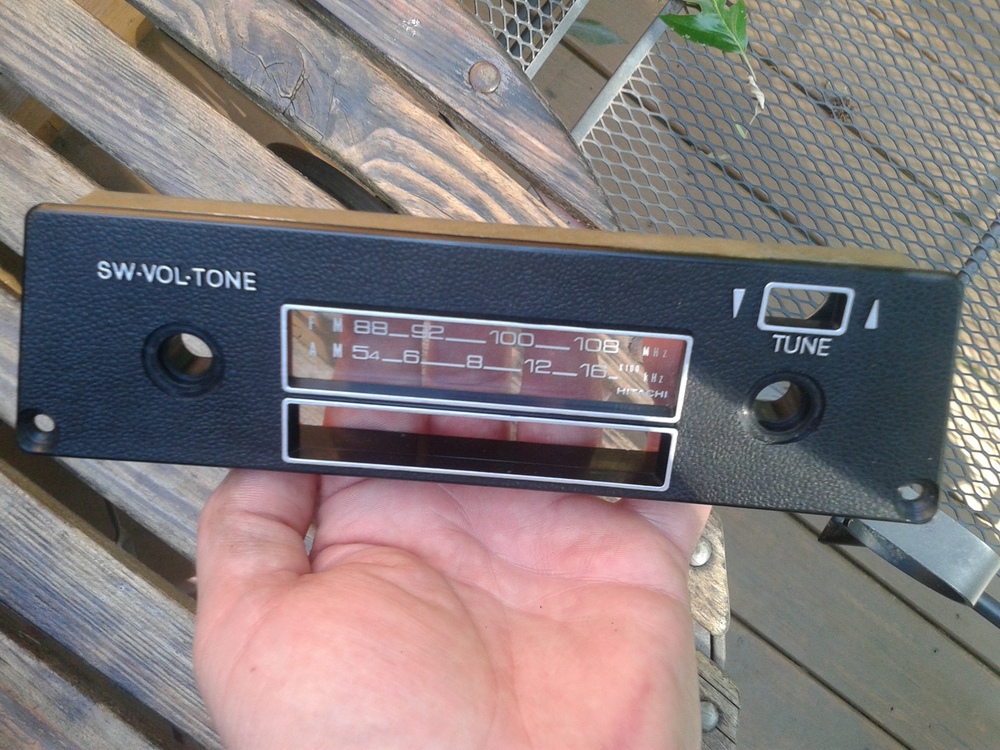
3 pointsThat hole above the word tune is the antenna up and down toggle on my early '72. From what I've seen the really early radios had the antenna up and down vertical. What threw me was where was the pre-set buttons slot.
 3 points
 -
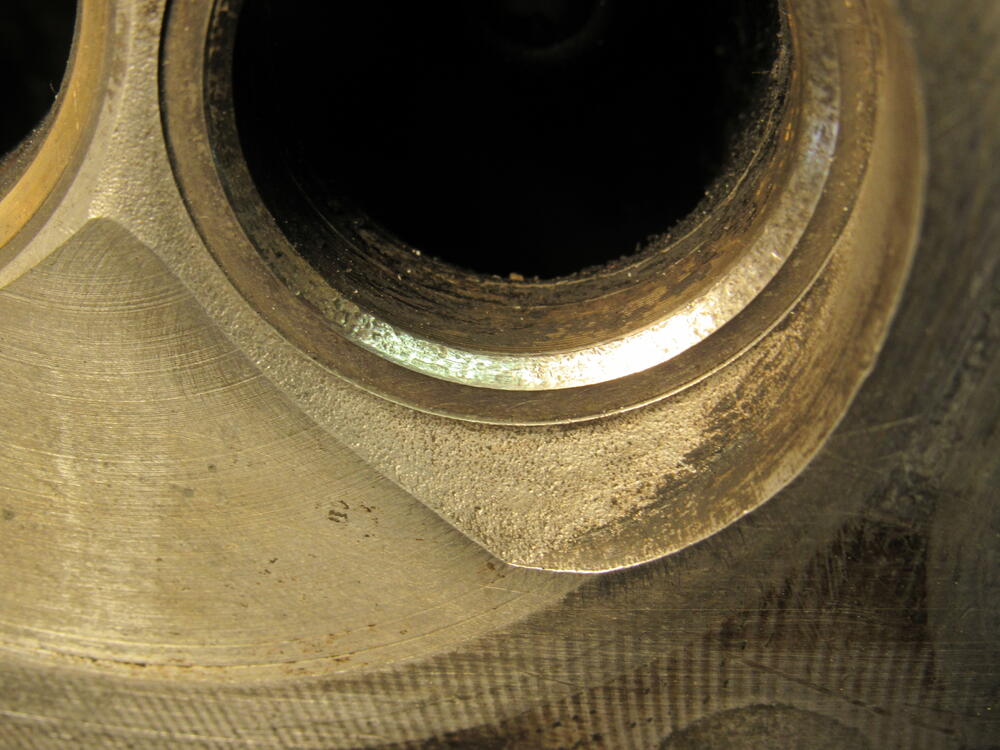
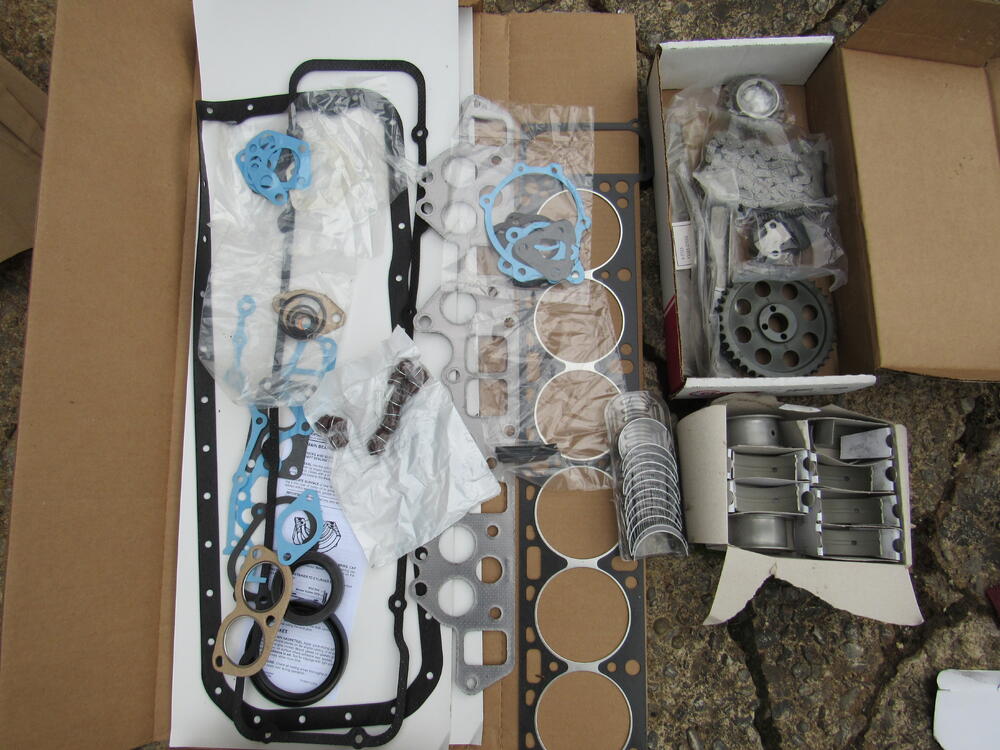
3 pointsAll the valves are out and clean, they are in very good shape, this the worst exhaust valve seat and I think I can lap that little bit of roughness out. I will take the head to my local machinist and have his skim the surface and remove a couple of broken studs for the exhaust manifold, I'm sure you all know which ones I'm taking about, either end of the manifold. Once I get it back I'll drill and tap those holes to M10. I big box of goodies from Rockauto showed up today.
 3 points
 -
2 pointsWhen we pull that vinyl the thin foam always stays glued to the metal... I think that's the easier route. I've done a few and I glue the foam to the metal and trim if I need to - then do the vinyl. The vinyl needs to start inside and be stretched out to the flanges. Glue it to the flanges. Inside up top it's held with the clips. Remember that the windshield weatherstrip is going to go over the vinyl and when it does it'll pull it tighter - so don't worry if it seems a bit "puffy" (can't think of a proper way to describe a new vinyl install without the gasket in yet...). And the door weatherstrip will cover and pull the A pillar vinyl smooth and tight on the outboard side. The top of the A pillar can be a bit troublesome - getting the joint with the front to look correct and smooth. Remember also the visors will pull the vinyl a bit too when mounted so they may help smooth things out...2 points
-
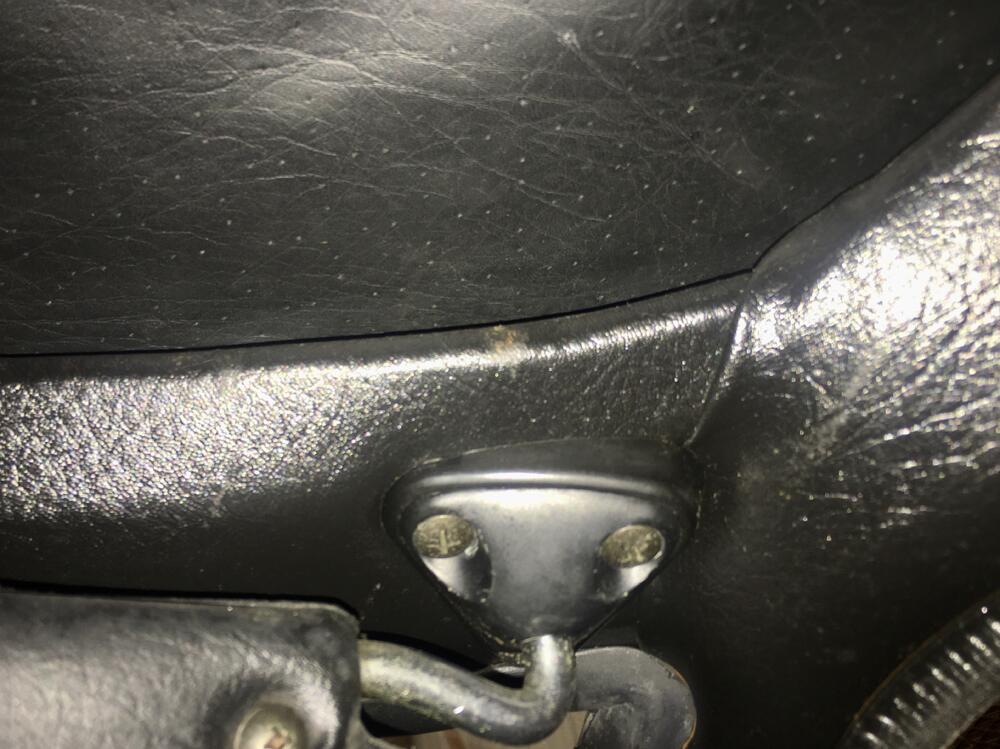
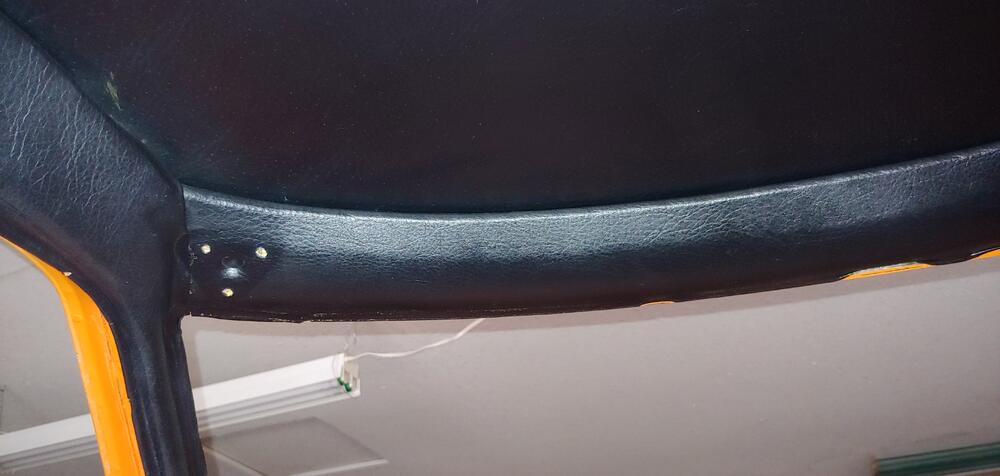
2 pointsAs promised, although a bit late, here are the corners on my 72. The center portion above the windshield was placed first, the right and left sides next. The windshield goes in last, the rubber gasket going over the vinyl, holding the edge down.
 2 points
 -
Degreased, then soaked the rear tube/hubs in acid, then cleaned up & treated them with rust convertor. I'll paint them tomorrow.2 points
-
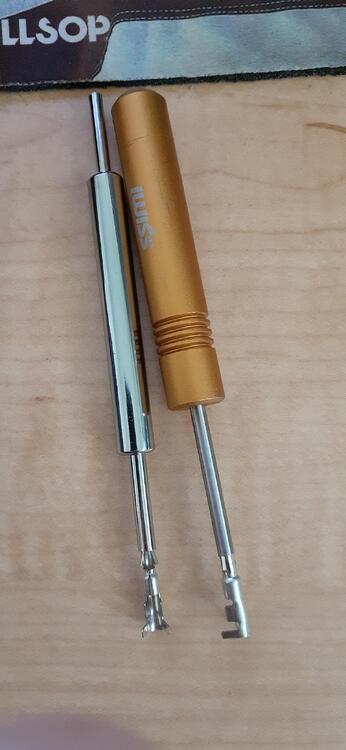
Okay, I made sure I found the right part numbers. For the male pins, this extractor works: https://www.amazon.com/gp/product/B01G46DJVU The larger side is the one that fits over the male pins. For the female pins, the Iwiss (also known as Icrimp) WR01 works. I bought it with a weather pack crimping tool: https://www.amazon.com/gp/product/B07GB698KV/, but you can also get it with a couple of other pin extractors: https://www.amazon.com/IWISS-Extractor-Removal-Metri-Pack-Connectors-3/dp/B08PKLZXCX Here's a photo of the extractors:
 2 points
 -
2 pointsDoh! Sorry, I'm looking at that faceplate and it clearly says tune but I'm thinking it is the antenna toggle switch from the earliest faceplates for the series 1.2 points
-
I also found this site recently that has the 2, 3, 4, and 6 pin Yazaki shells and pins: https://www.hi-1000ec.com/product/1133 They also have the waterproof Yazaki YPC: https://www.hi-1000ec.com/product-list/501 point
-
I decided to try and make a pair of them. I just received the mill bits yesterday from China and will try to mill the extensions next week. I figured if I tried to turn down the 11.18mm to 10.7mm, the splines would not be deep enough. CrankExtension.pdf1 point
-
1 pointHaving lunch at the moment, when I’m done I’ll go out to the shop and check a couple of my Zs. I can think of several that have original, unmolested interiors . BRB1 point
-
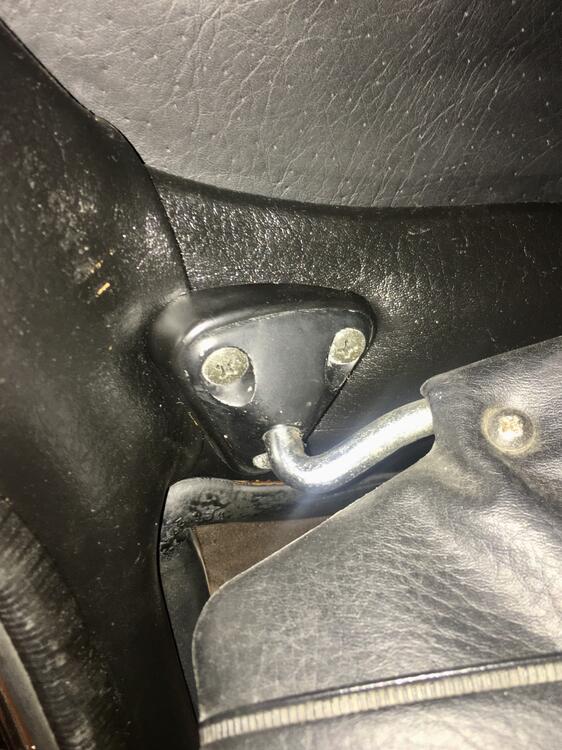
1 pointHere is a link to a post from my resto thread showing removal of the interior vinyl. On mine these items came out with the vinyl still attached to the foam, I think the foam should be attached to the vinyl first but I could be wrong. The vinyl over the windshield definitely goes in before the A-pillar/over the door vinyl. Basically the reverse of what I describe in the link. And here is a pic that might help with the corner joint. Also if you have Wick Humble's book, check that as well. A lot of good info starting on page 127.
 1 point
 -
1 point