Leaderboard
-
zKars
 Subscriber
 5Points3,770Posts
 -

Dave WM
Free Member5Points3,591Posts -
Terrapin Z
Subscriber3Points1,336Posts -
EuroDat
Free Member3Points3,309Posts


Popular Content
Showing content with the highest reputation on 05/18/2023 in Posts
-
4 pointsThe original poster requested the thread size and pitch, which I provided with additional details about the fastener. I apologize for the my use of the apparently forbidden “Phillips” term when describing machine screws on a Datsun. I shall from now on use the non-gendered term “X” or “cross” as a generic pronoun to describe screws of this style. Then the readers of the thread can choose to find and use hardware with the drive type of their choice, be it “phillips” or “JIC” or “posi-drive” or whatever the drive of the day is. Sometimes you just need to put the bumpers on with the hardware that locally available and not the exactly correct fastener. Oh, and let me also apologize for an early morning snarky response…..4 points
-
3 pointsI am pretty sure you would have to drill out new mount holes for the bigger Boosters. I have heard of people using all of those sizes with the Clutch M/C. Are you sure the reaction disc is in place? is can cause some strange pedal / brake function if it has fallen off the plunger.
 3 points
 -
3 pointsI've been using copper-antisieze on most of my suspension components, relying on the snap washer to hold it all in place. I'll replace the snap washers if i notice they have less spring to them. Nothing has loosened up yet, drive the car pretty hard...3 points
-
2 pointslong test ride (70 miles high way speeds) all good, very hot day, no sign of overheating, and very good oil pressure, so going to call it a win (no loss of oil but that is way to little mileage to know if its better now). Time to clean up and get back to working on the turbo wire harness. I have the run stand open, hopefully can get JSM turbo long block on it soon, test run it (will leave the exhaust manifold/turbo on, just run the NA intake and EFI since its all connected up, same with dizzy ang ign module. Only thing that needs to be on the long block for his will be the exhaust. BTW Jeff, heat up those manfold nuts with some mapp gas before trying to remove, may help keep then from breaking. Also Yarb if you want to bring that spare long block over, I can hook it up in prob less than an hour for a test run.2 points
-
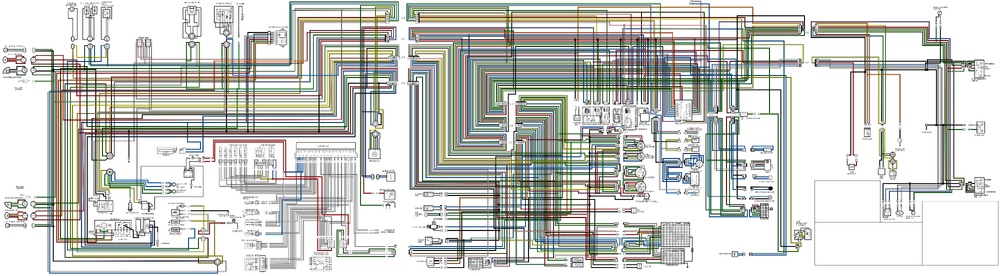
In case anyone's interested, I made this using Adobe Illustrator and converted it to a PNG. It's a big file, but feel free to use it as you like.
 2 points
 -
Hi LorenB667, Nice work and great that others can enjoy alll the effort you put in to it. You can upload wiring diagrams in the download section of this site. That would get for future use. https://www.classiczcars.com/files/category/1-wiring-diagrams/2 points
-
2 pointsDrove it to work yesterday, I don’t plan on doing it daily. Left early to minimize traffic (5am) and to get a feel of driving at night. Driving home at 330pm was a different story. Thumbs up, folks saying they’ve always “wanted a 240” at red lights. My route led me near a high school, where teenagers wanted to race. Given the Rebello’s lope, I’m guessing I’m going to need to get used to that. It’s amazing to see how small an S30 is compared to Teslas.
 2 points
 -
2 pointsall done, hood back on, test drive complete, no leaks, runs very smooth, not sure if I can notice any performance pickup other than the smoothness, will have to get it out on a high way and really open up. Will take the cool running (90's today, and used the AC), and solid oil pressure. Now I will start the oil consumption testing. That was really the main reason, as I just was getting tired of the oil loss (qt per 800-900 miles). Should be interesting to see if any better. I also will hold off on tearing down the original engine until I get some time on this one, JIC something goes bad wrong, i can quickly replace it with the oil burner and not loose any drive time. So long term plan will be to continue the wire harness mods for Plug N Play turbo, and a complete tear down of the original engine to see if there is obvious reason for the oil burning. I have hoping for stuck oil rings or clogged piston drain back holes. I will do an inspection for cylinder wear using the rings to check for any out of roundness. I did pick up some rings (std) just in case its not worn or damaged to the point of needing a rebore. All this is a ways off as I need to get some drive time in. Been too long since I had a nice road trip. Maybe up the east coast this time....2 points
-
2 pointsThe Nissan parts book shows it as a M10x1.25 x 28mm long, metric fine pitch. To see if it is a shoulder bolt measure the ID of hole in the yoke, if it is10mm then it's not a shoulder bolt.
 2 points
 -
1 pointall the same but for the long block. going to take it out for a bit of a run today to further test. I talked to to Jeff (jsm) about the install, seems like i should have revmoved the single large bolt that attaches the lower mount to the crossmember, would make it easier to line up during the install, something to keep in mind when doing yours.1 point
-
1 point
-
1 pointIt looks great. I didn't expect it to turn out so good when I saw the photos in the April post. Hope it performs as good as it looks.1 point
-
1 point
-
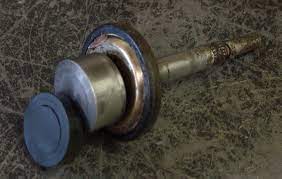
The front spindles were drilled for the Halda drive cable to pass through, with a specially-adapted hub bearing cap holding the (square) end of the cable so that it was forced to rotate with the wheels. The Haldas were geared to translate that wheel rotation into an accurate measurement of distance travelled per revolution. The Navigators were equipped with pre-set computations for different tyre selections. Note the special bearing cap and its tabs which were clamped firmly between the wheel and hub:
 1 point
 -
Assuming you mean these, the screw is M5x0.8 thread, round pan head, phillips, star washer, 10 or 12mm long.
 1 point
 -
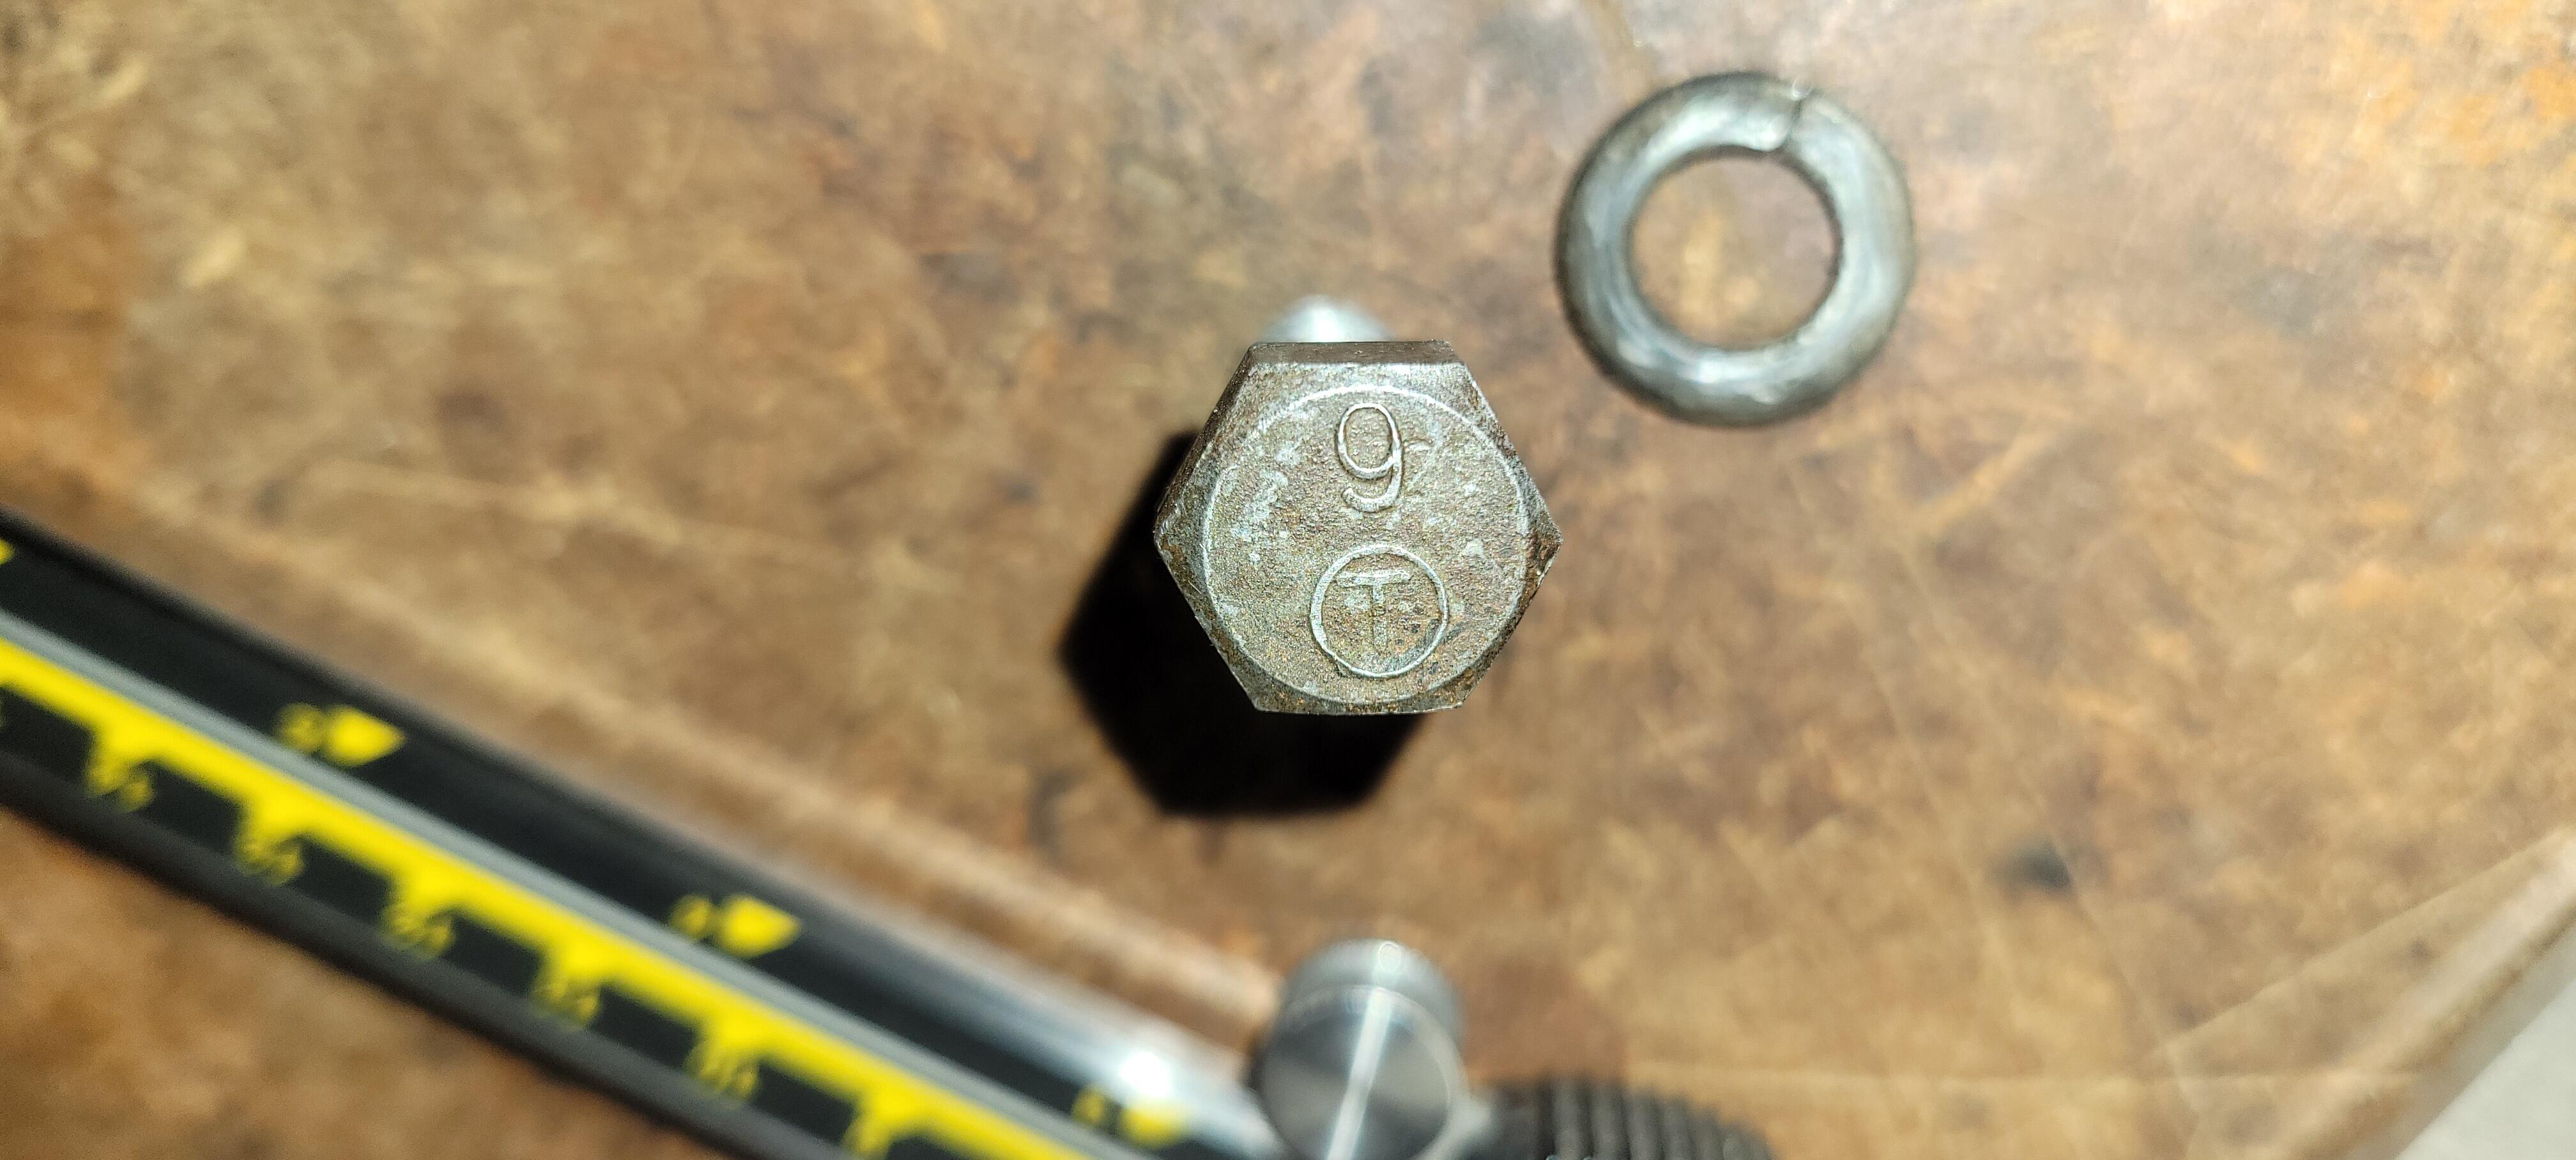
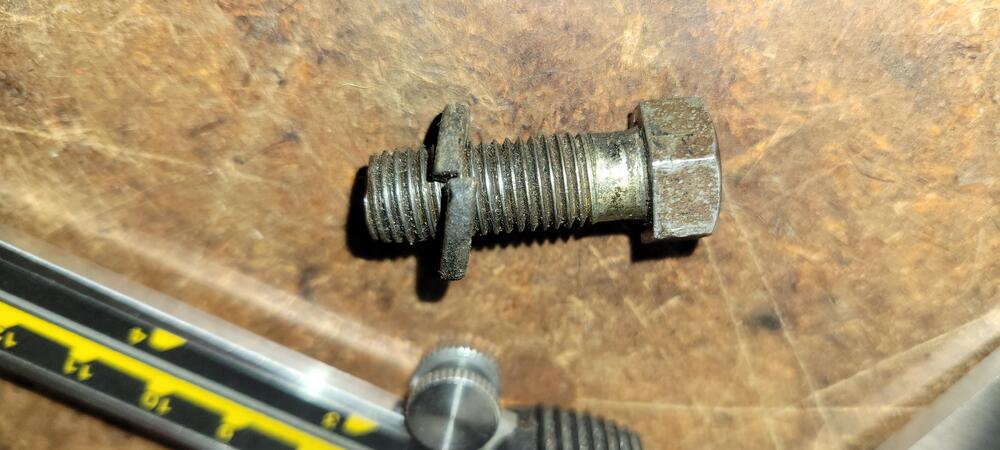
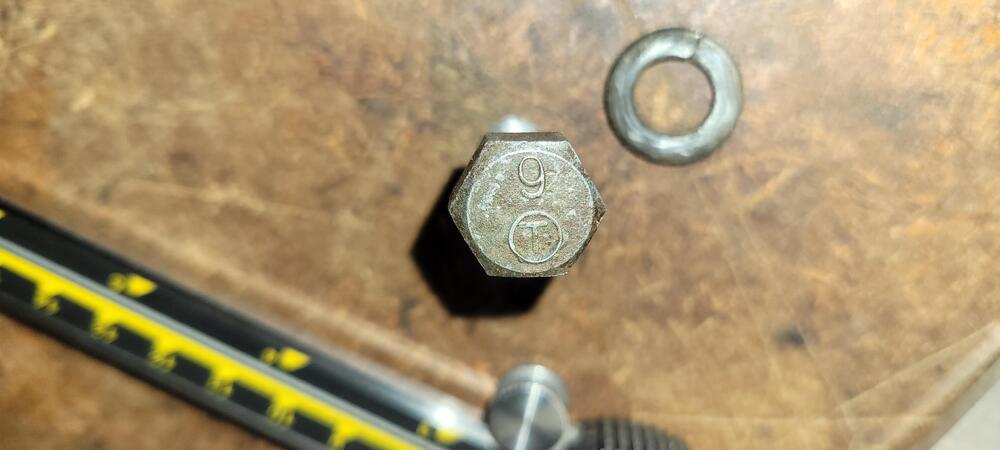
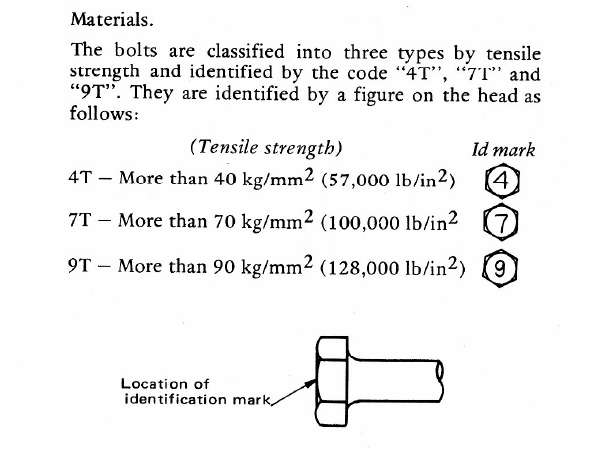
1 pointI thought my steering shaft was stored away but it was still under my car, here are a couple of pics. It is a M10x1.25 partially threaded, under head length is 28mm with 22mm thread length and has a number 9 marking on the JIS head, I believe that would cross over to metric DIN class 10. Here is some info about the grade markings on the head of the JIS bolts of that era from the Datsun/Nissan torque spec booklet. General-Datsun Torque Specifications.pdf
 1 point
 -
I can't find the more recent threads on adjusting the fuel gauge. I haven't done it myself. If I can find the time, I'll track down my spare gauge and see what I can set up to demonstrate.1 point
-
1 pointAnother idea would be: put both inner parts of both valves in the one solution, you got 2 fly's in one hit! (Dutch saying..) 🤠1 point
-
1 pointhttp://www.atlanticz.ca/zclub/techtips/efisystem/280zfuelinjectionbook.pdf1 point
-
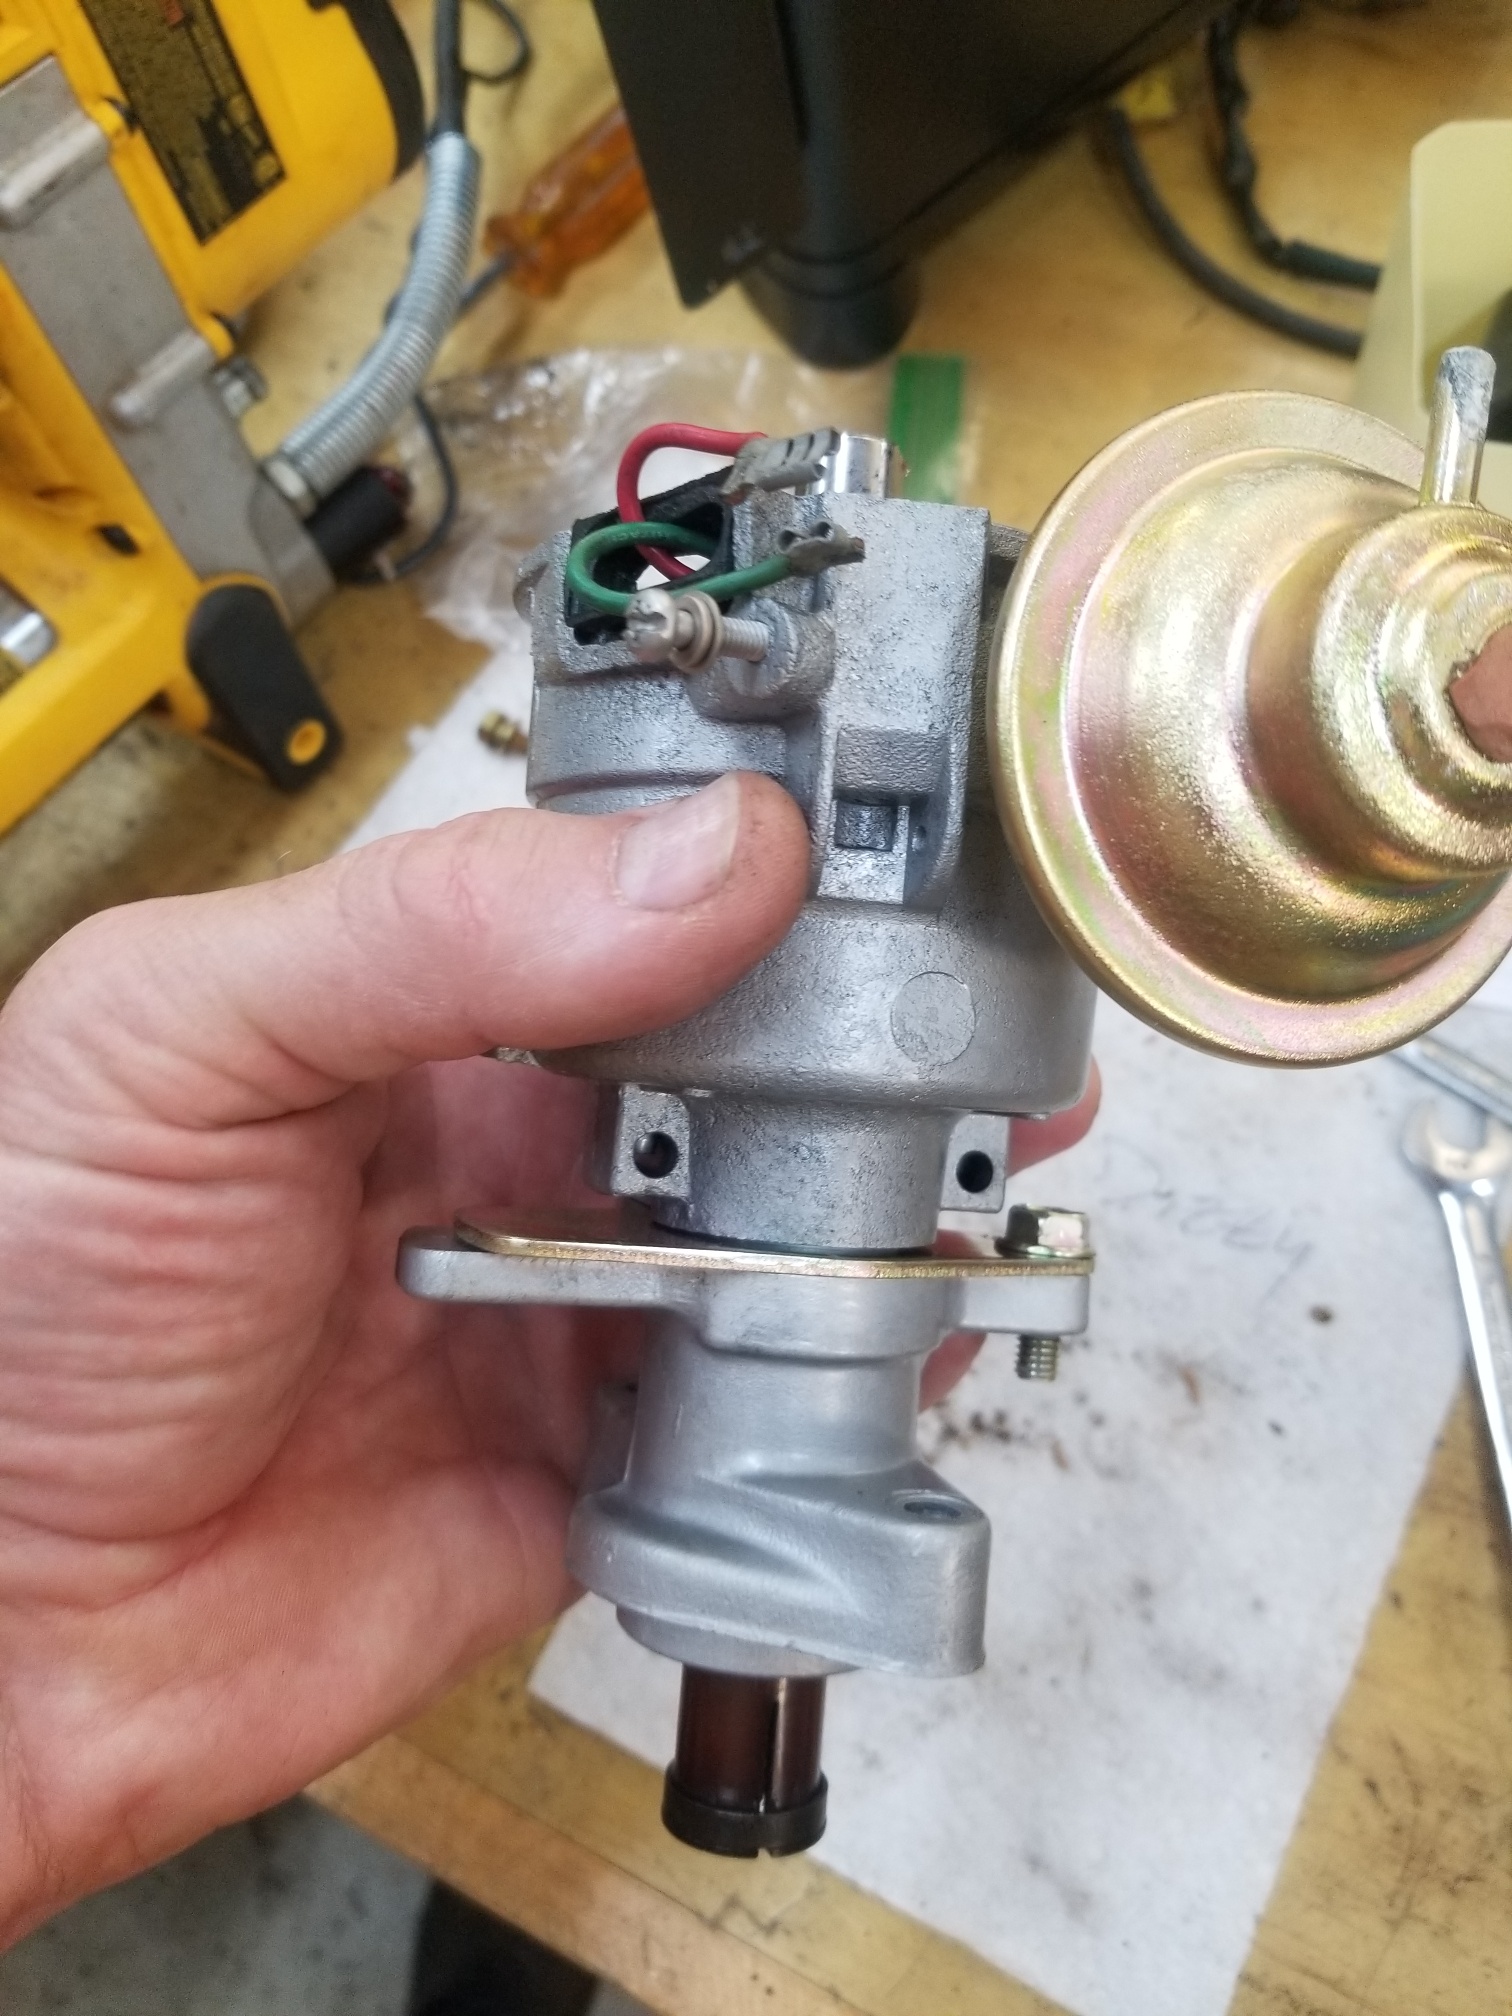
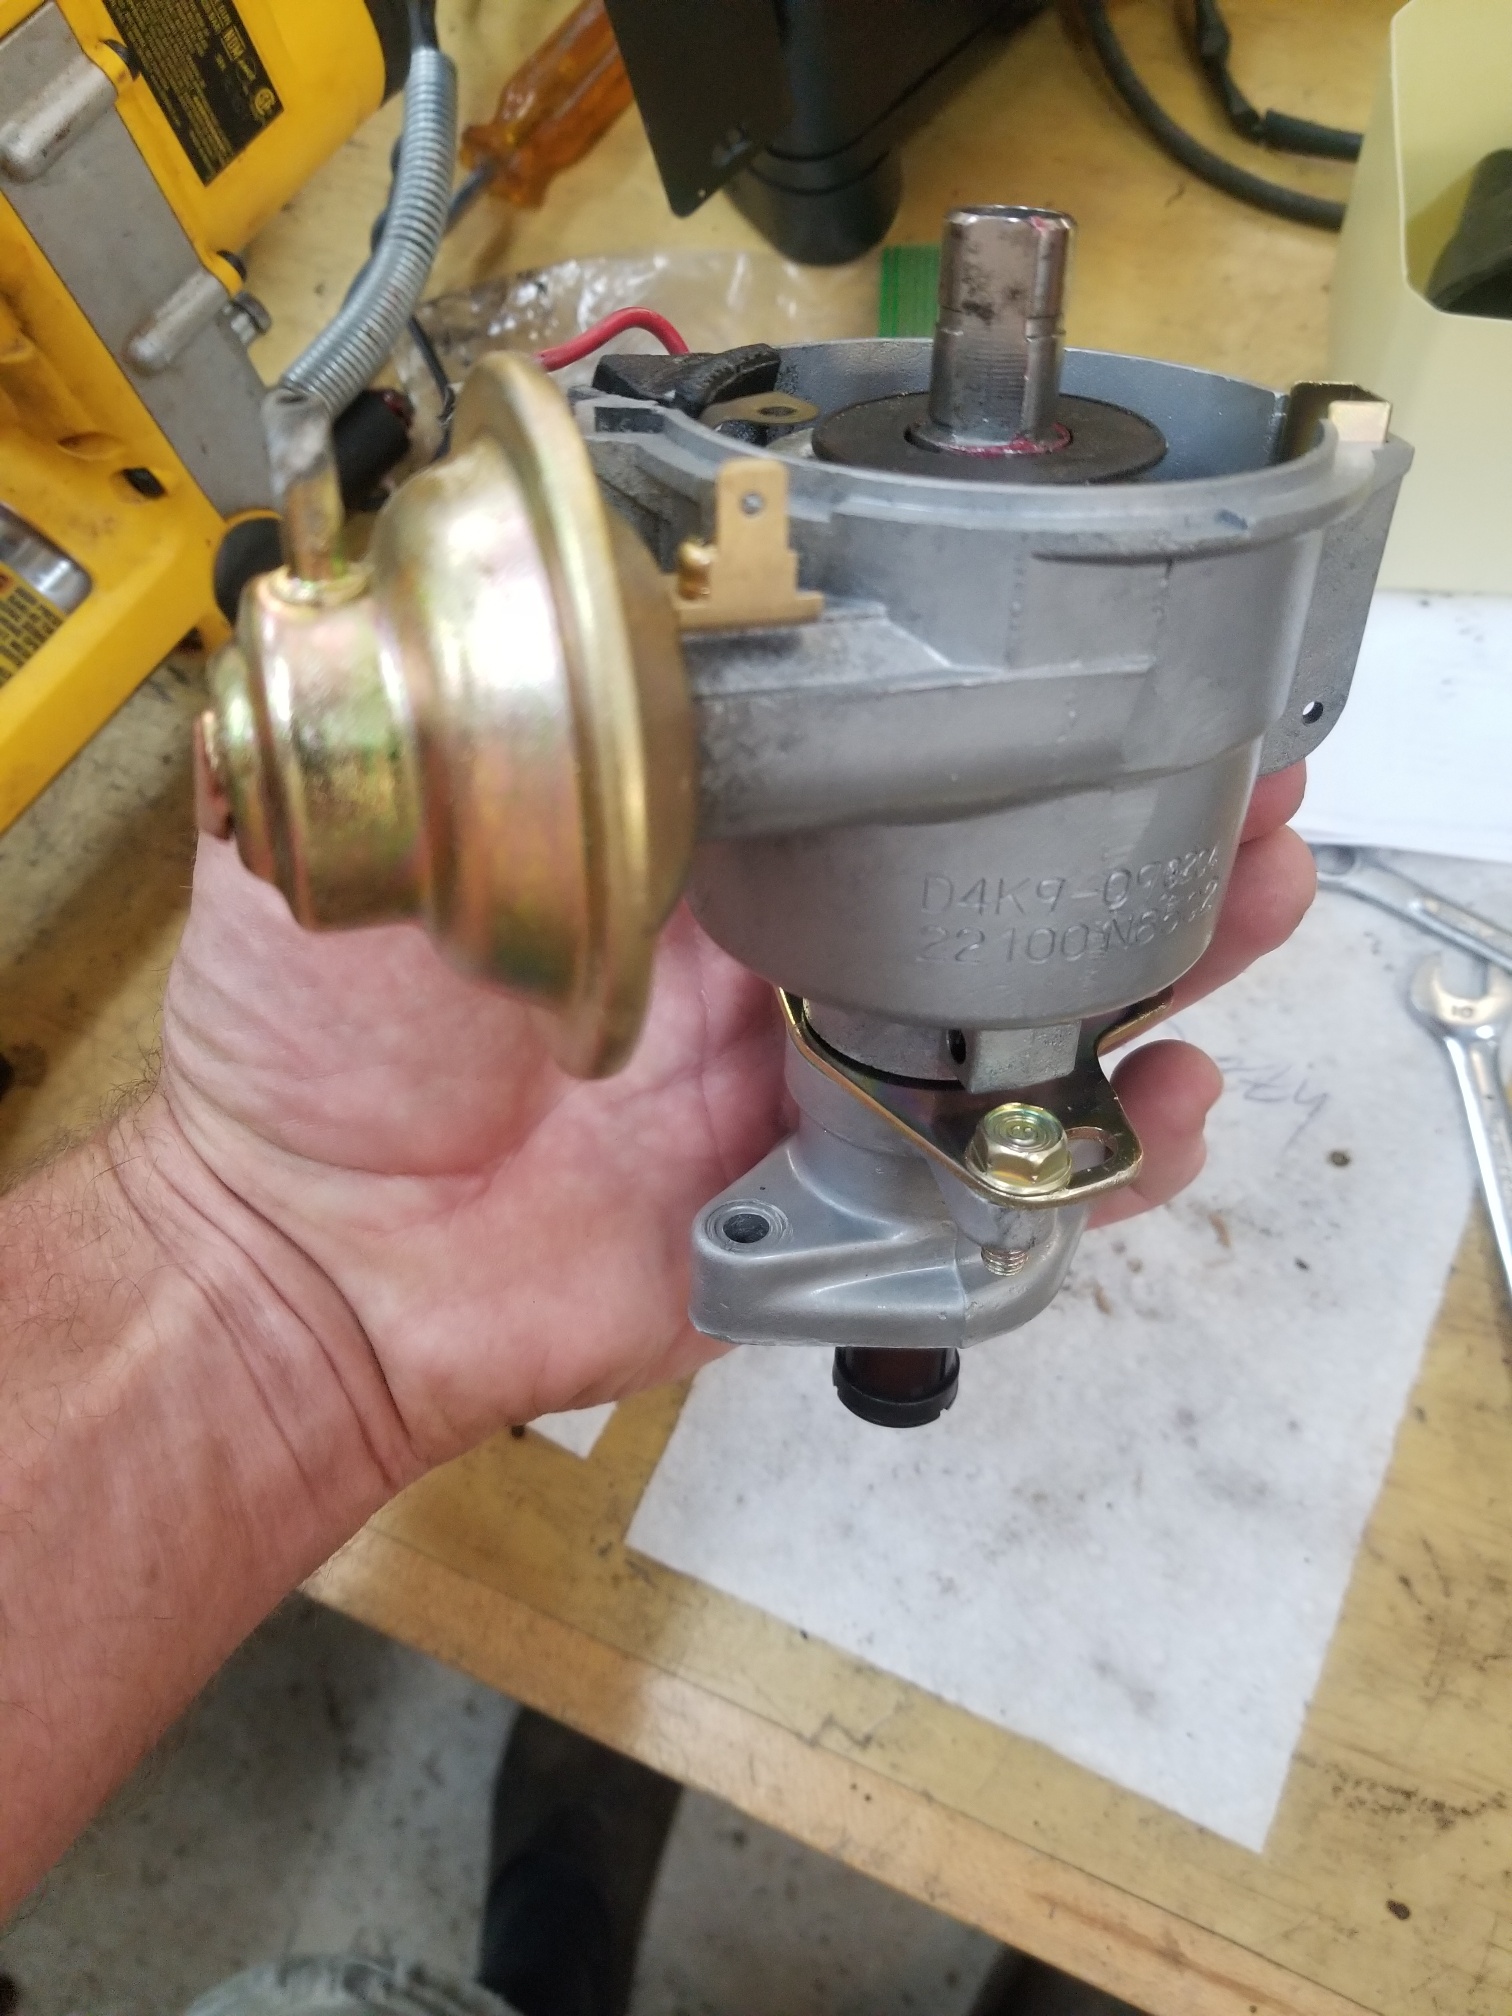
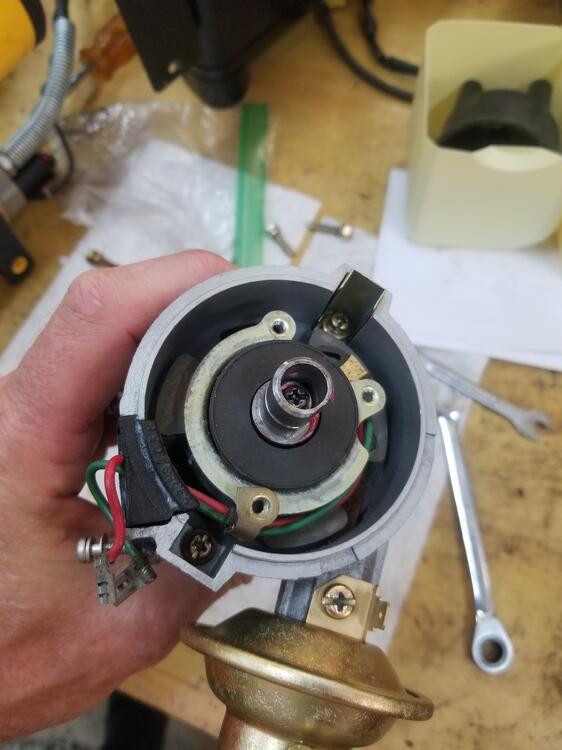
1 pointWorked on the dizzy some more I used some Ospho on the spring steel plates in the advance mechanism. It took the "blueing" off them. I might get the rest done tomorrow. We'll see. Hopefully it still works!


 1 point