


Leaderboard


 Subscriber


Popular Content
Showing content with the highest reputation on 02/02/2023 in all areas
-
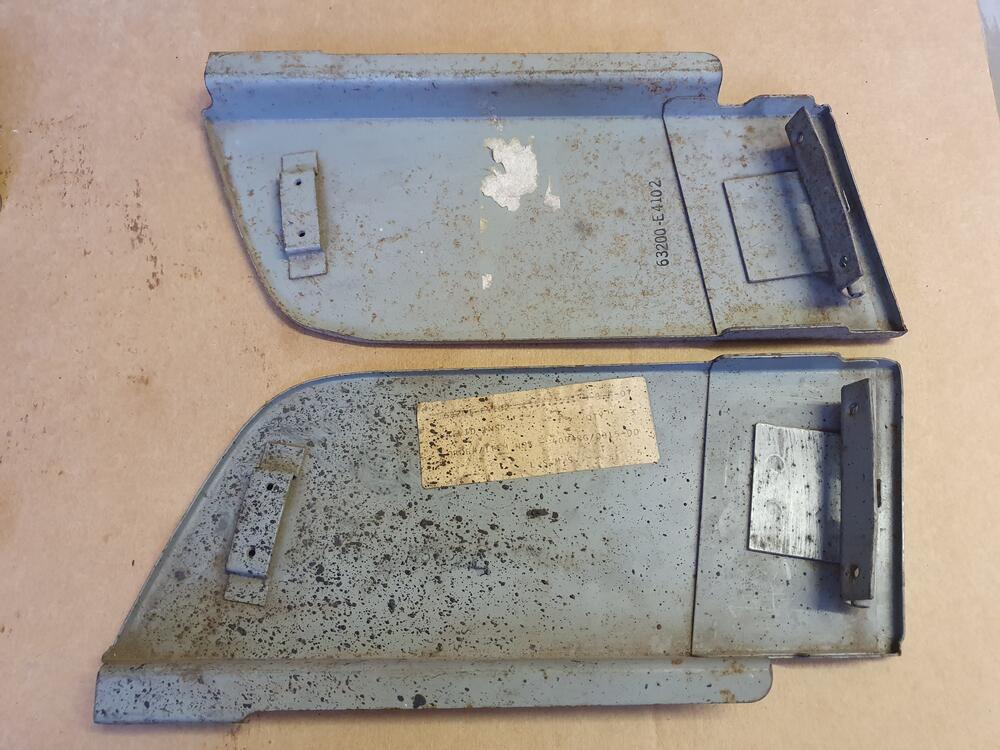
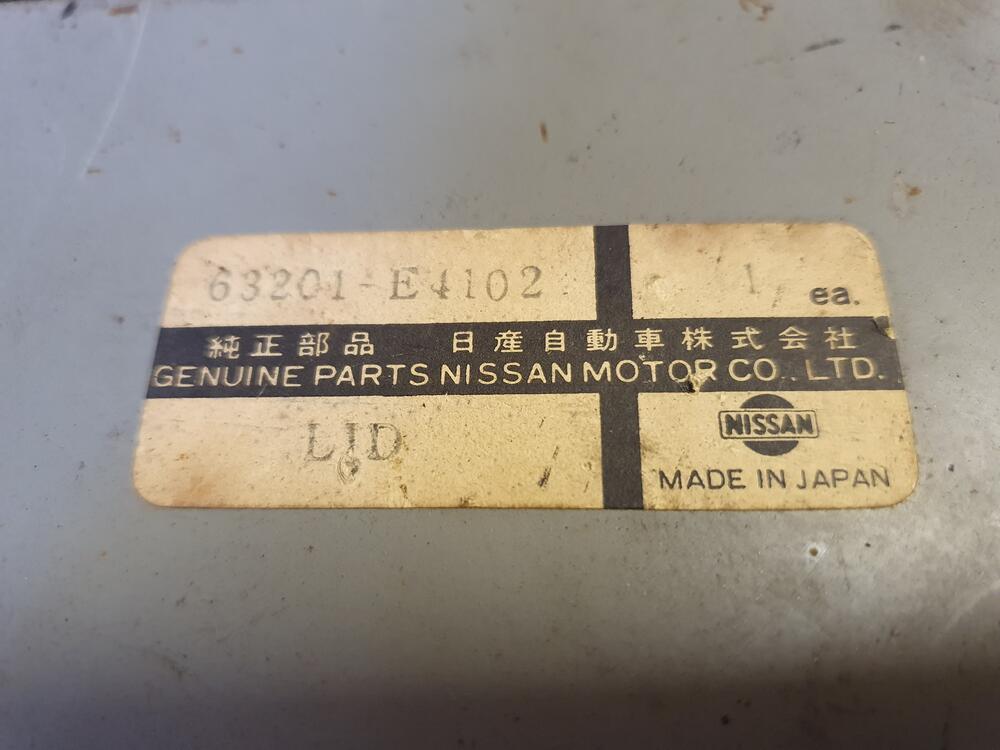
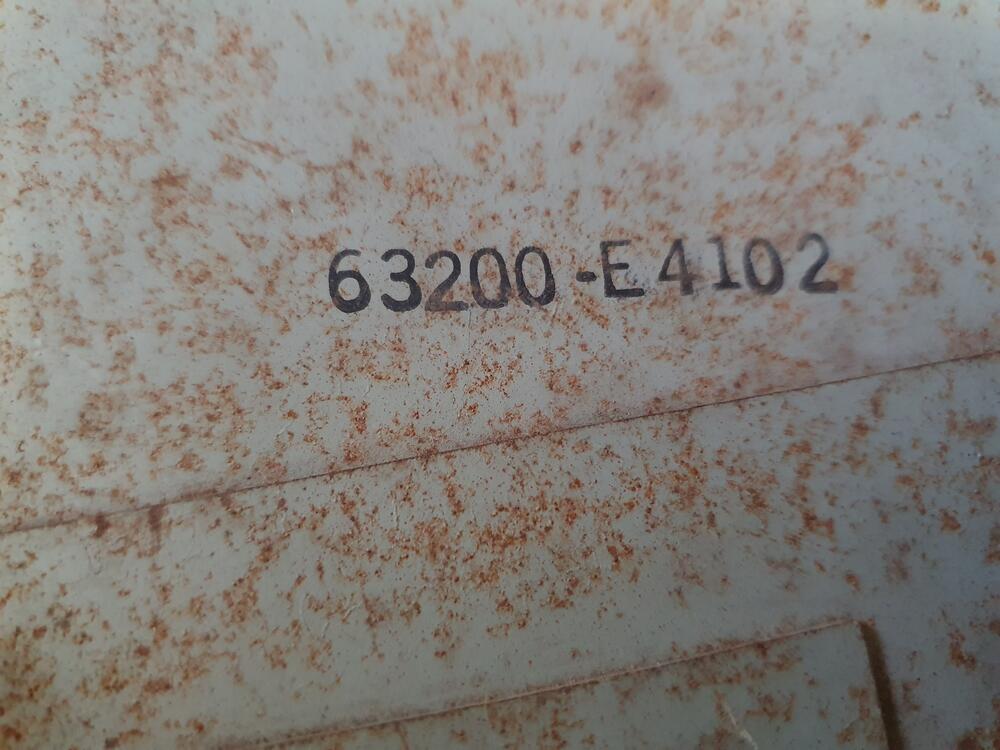
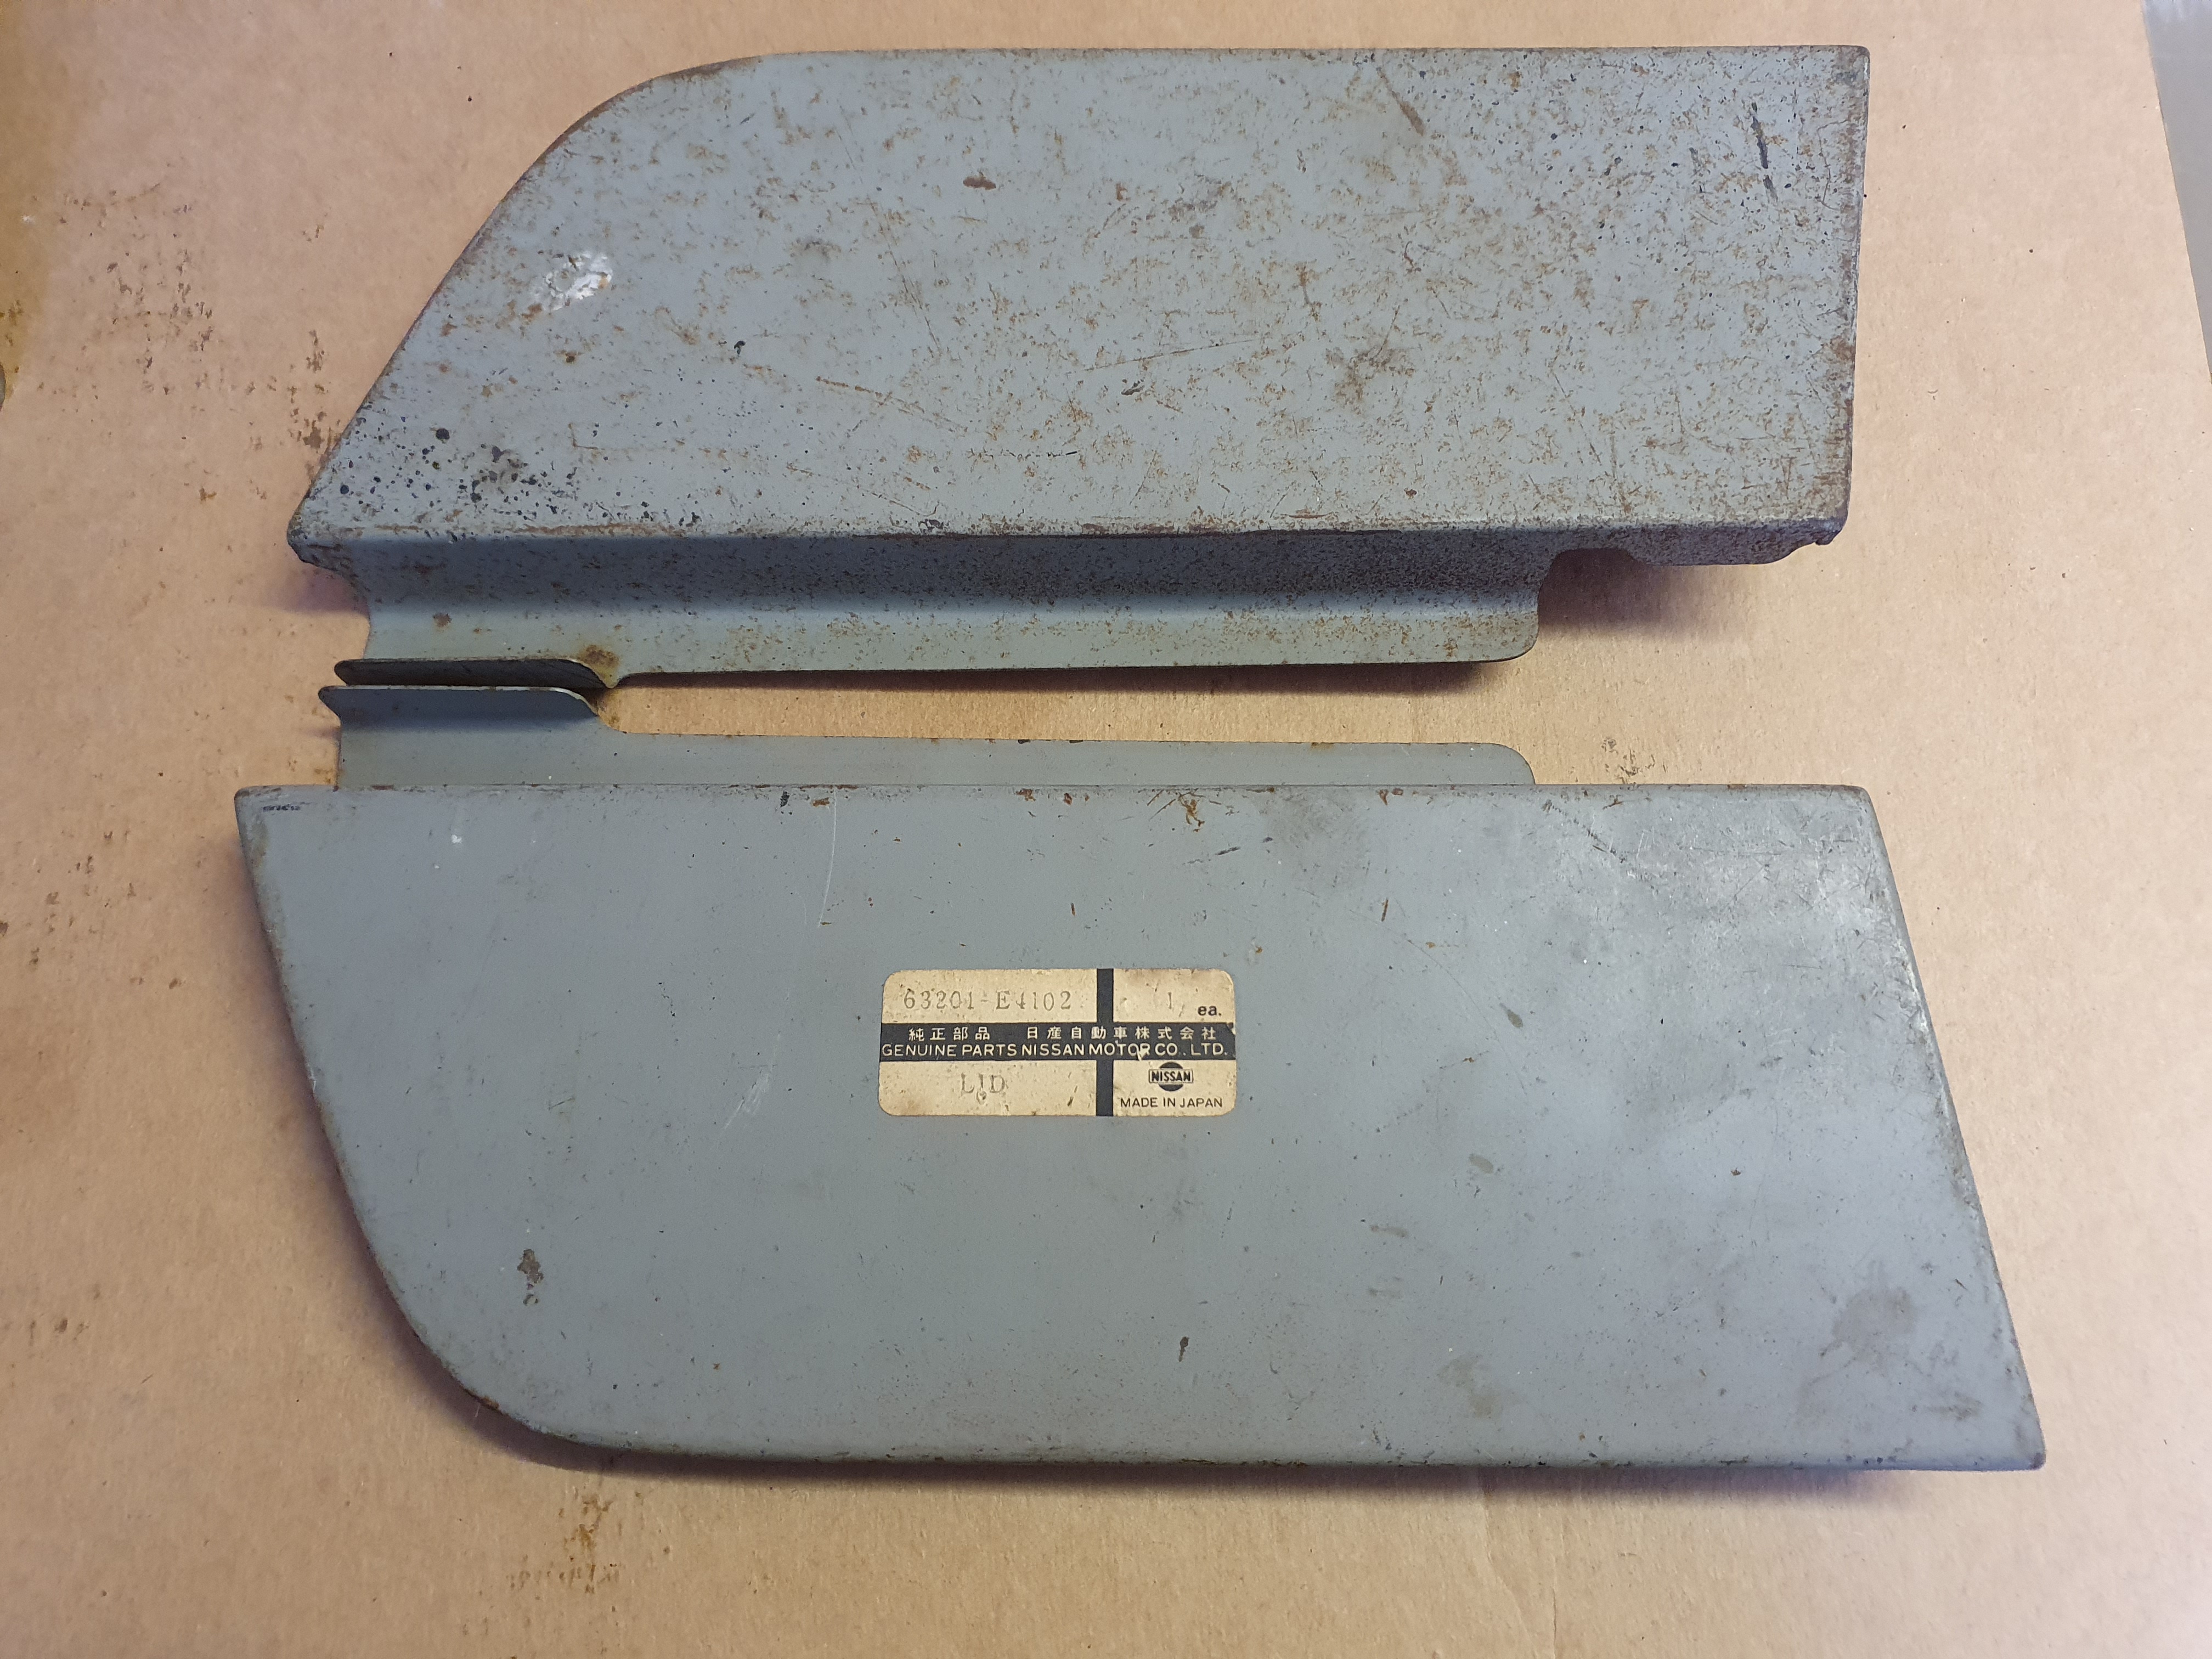
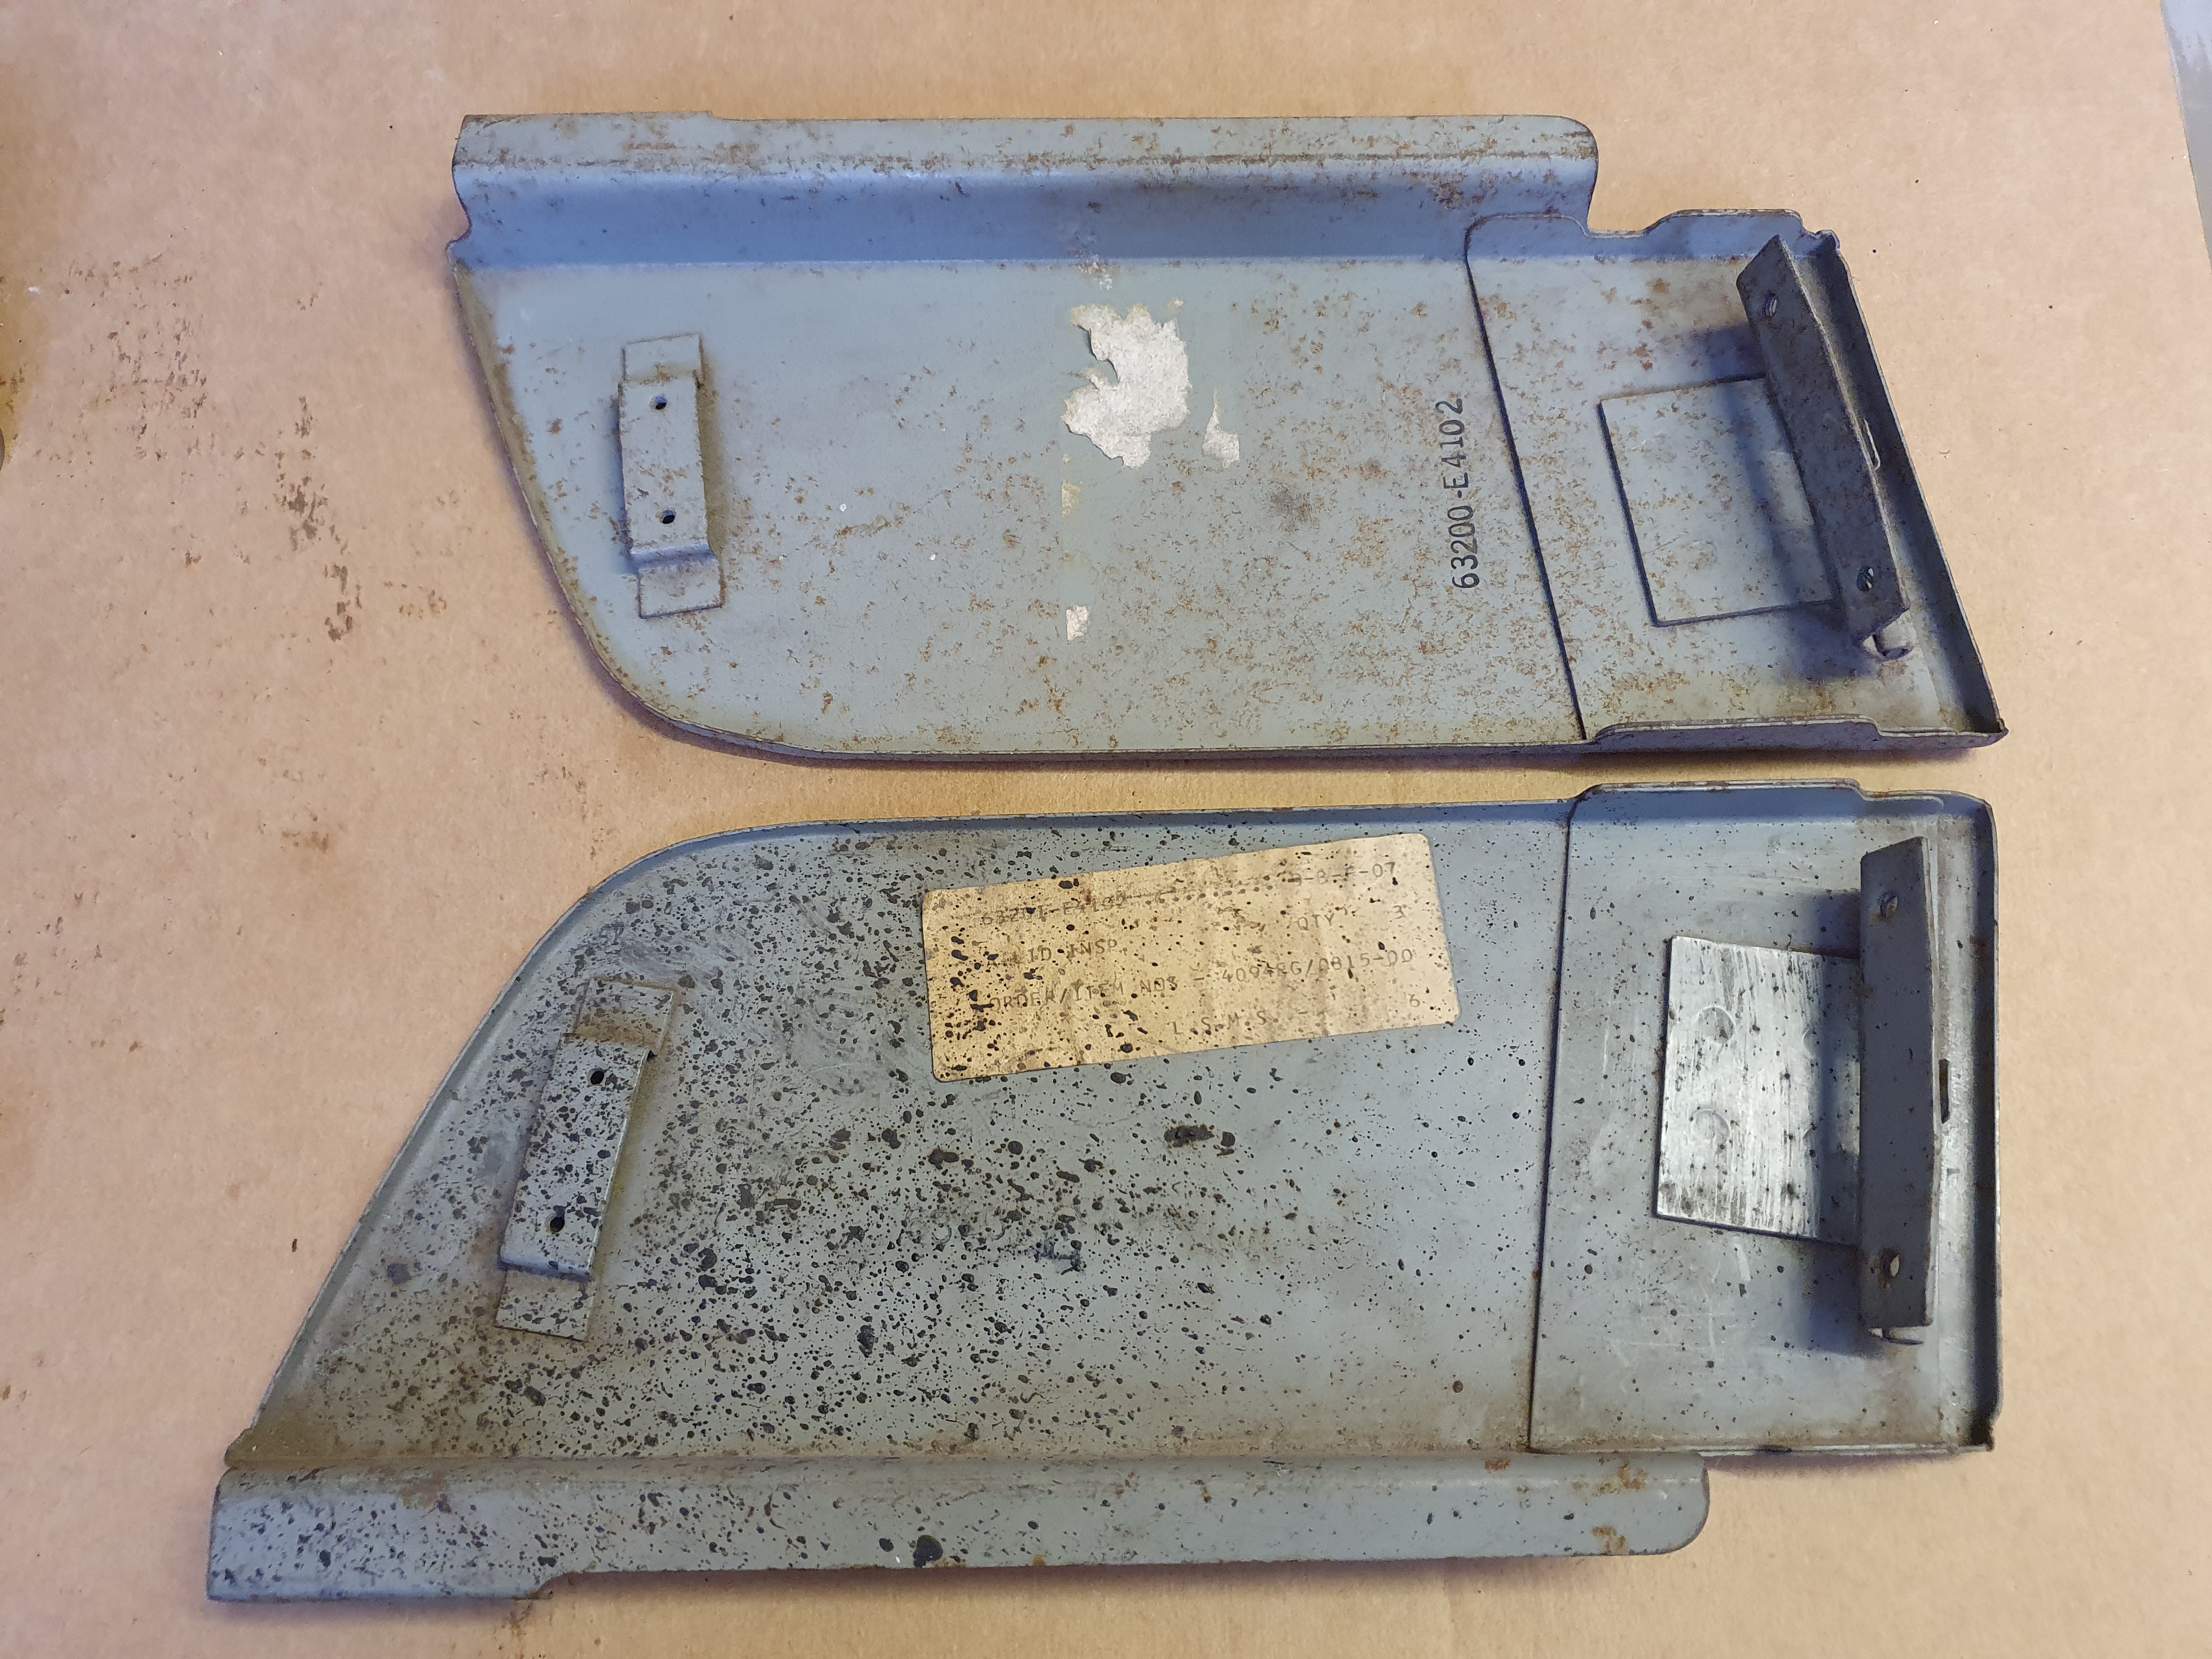
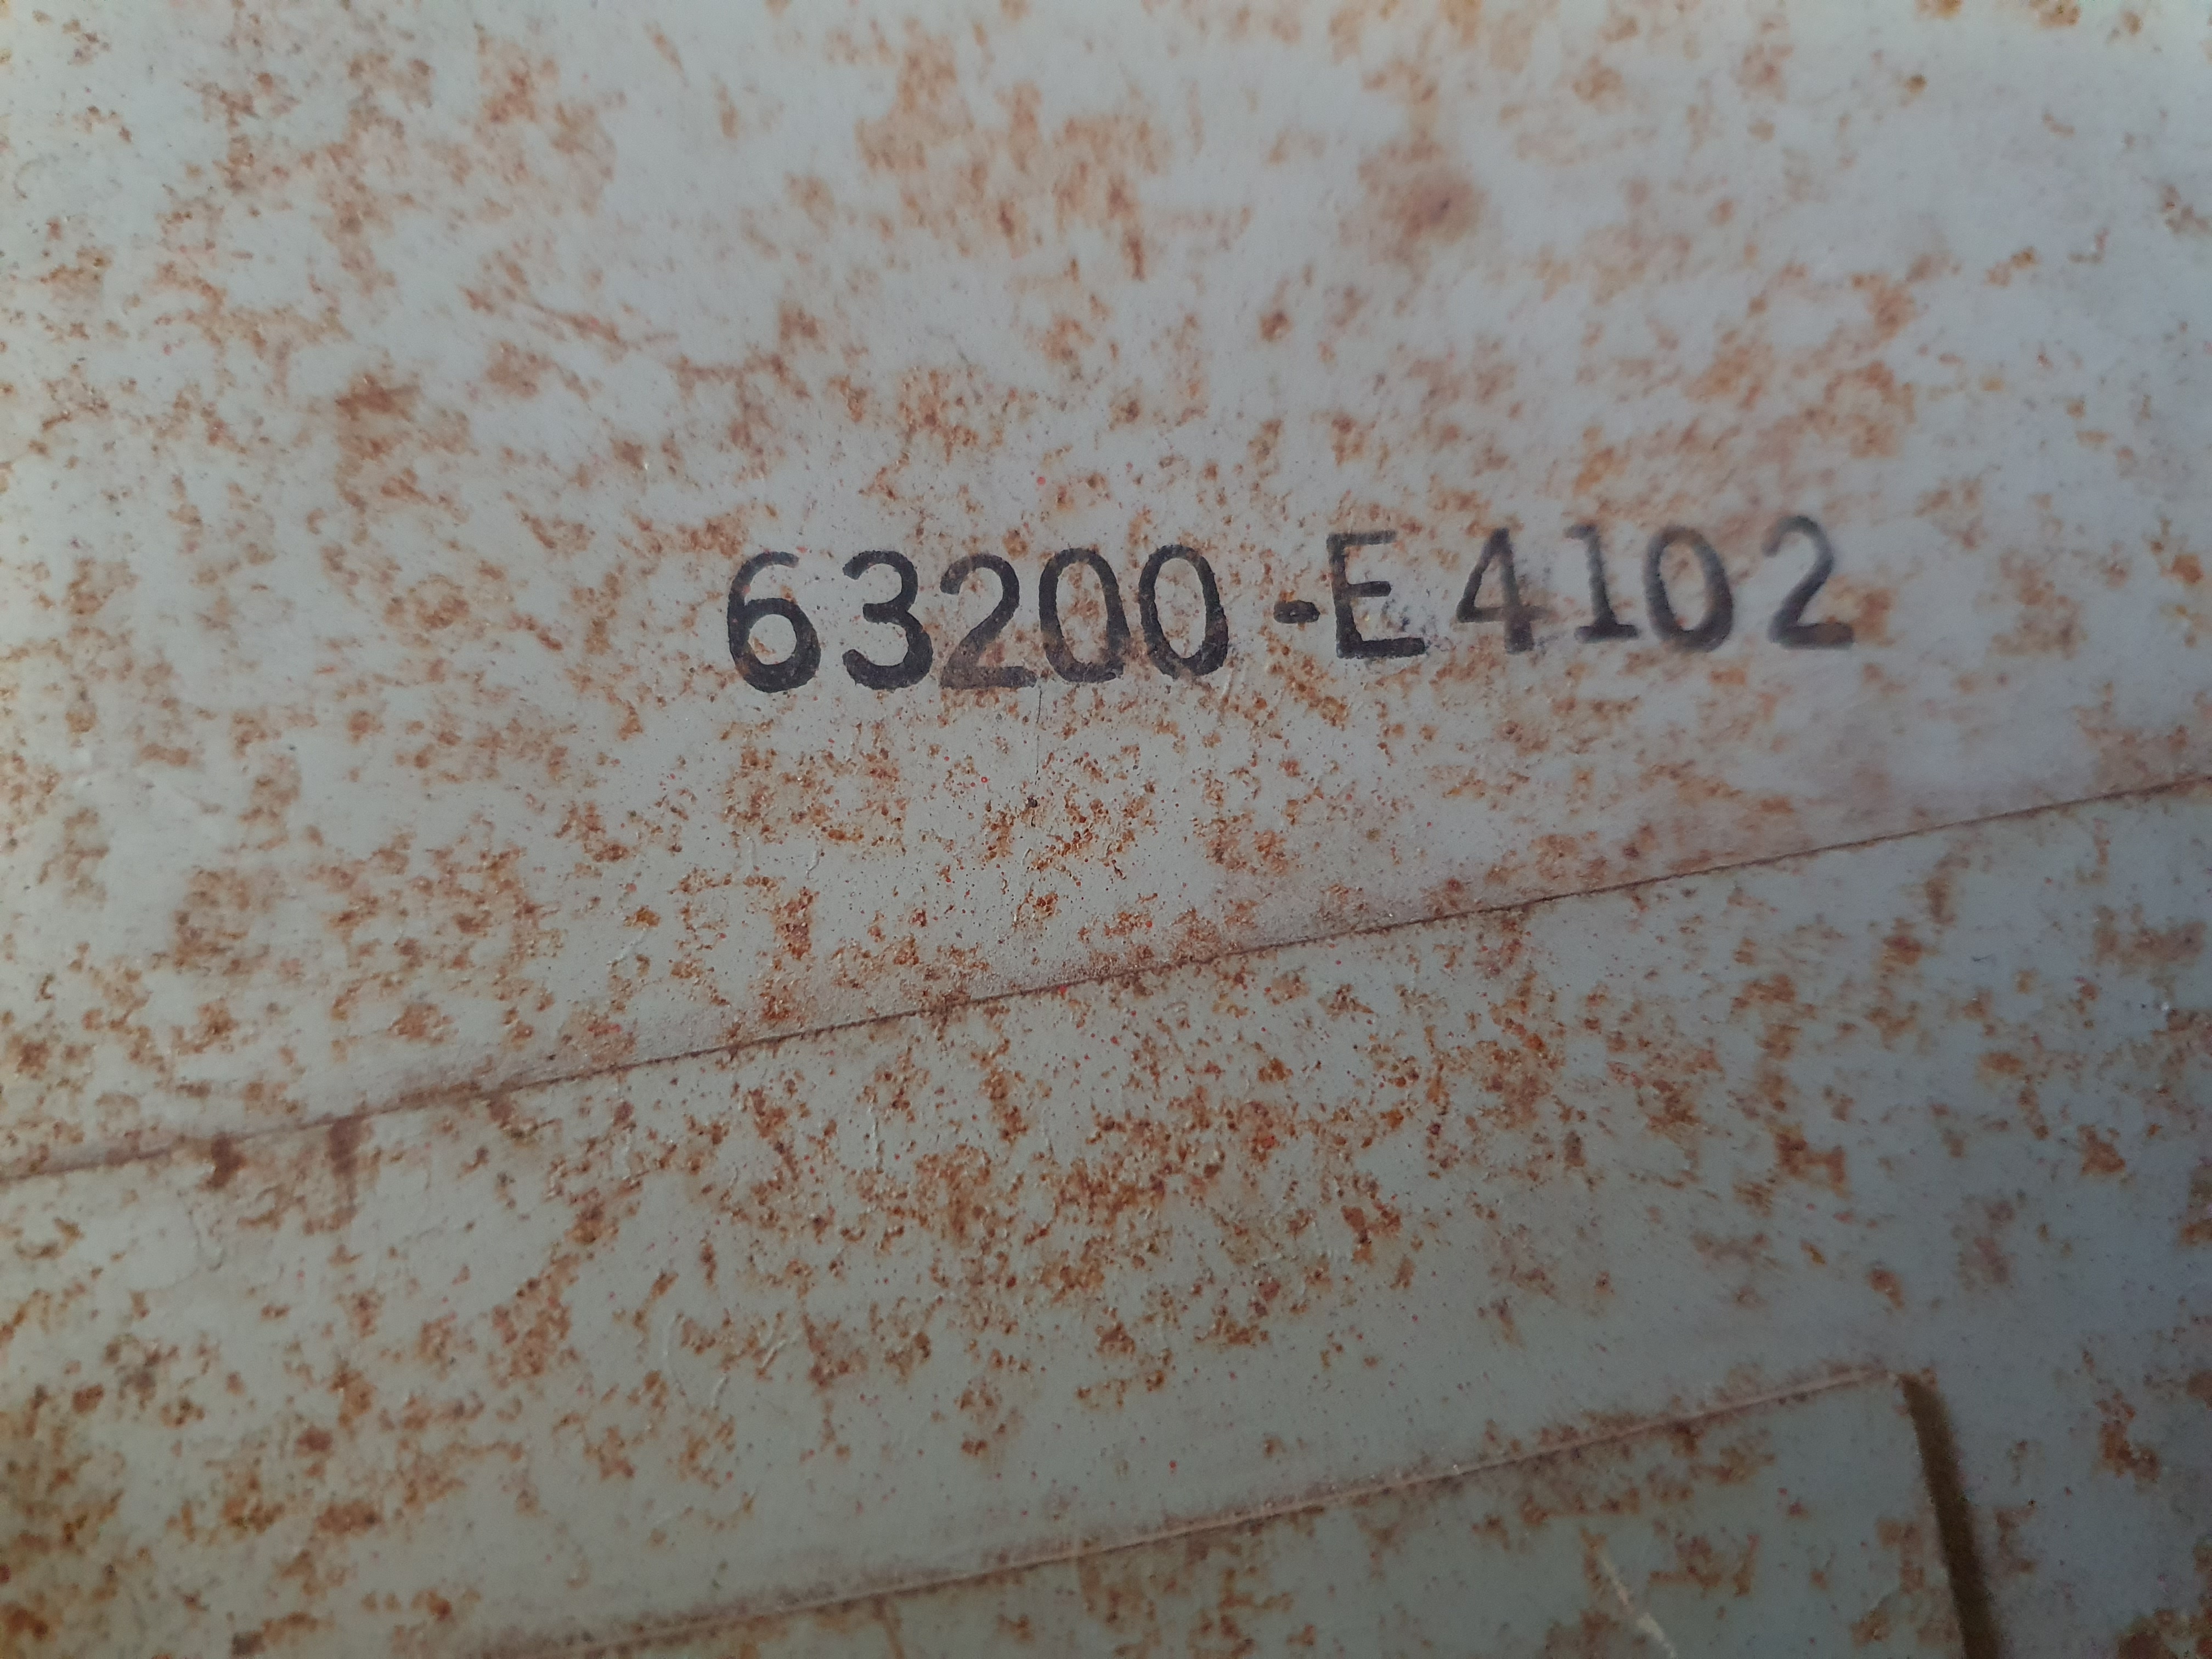
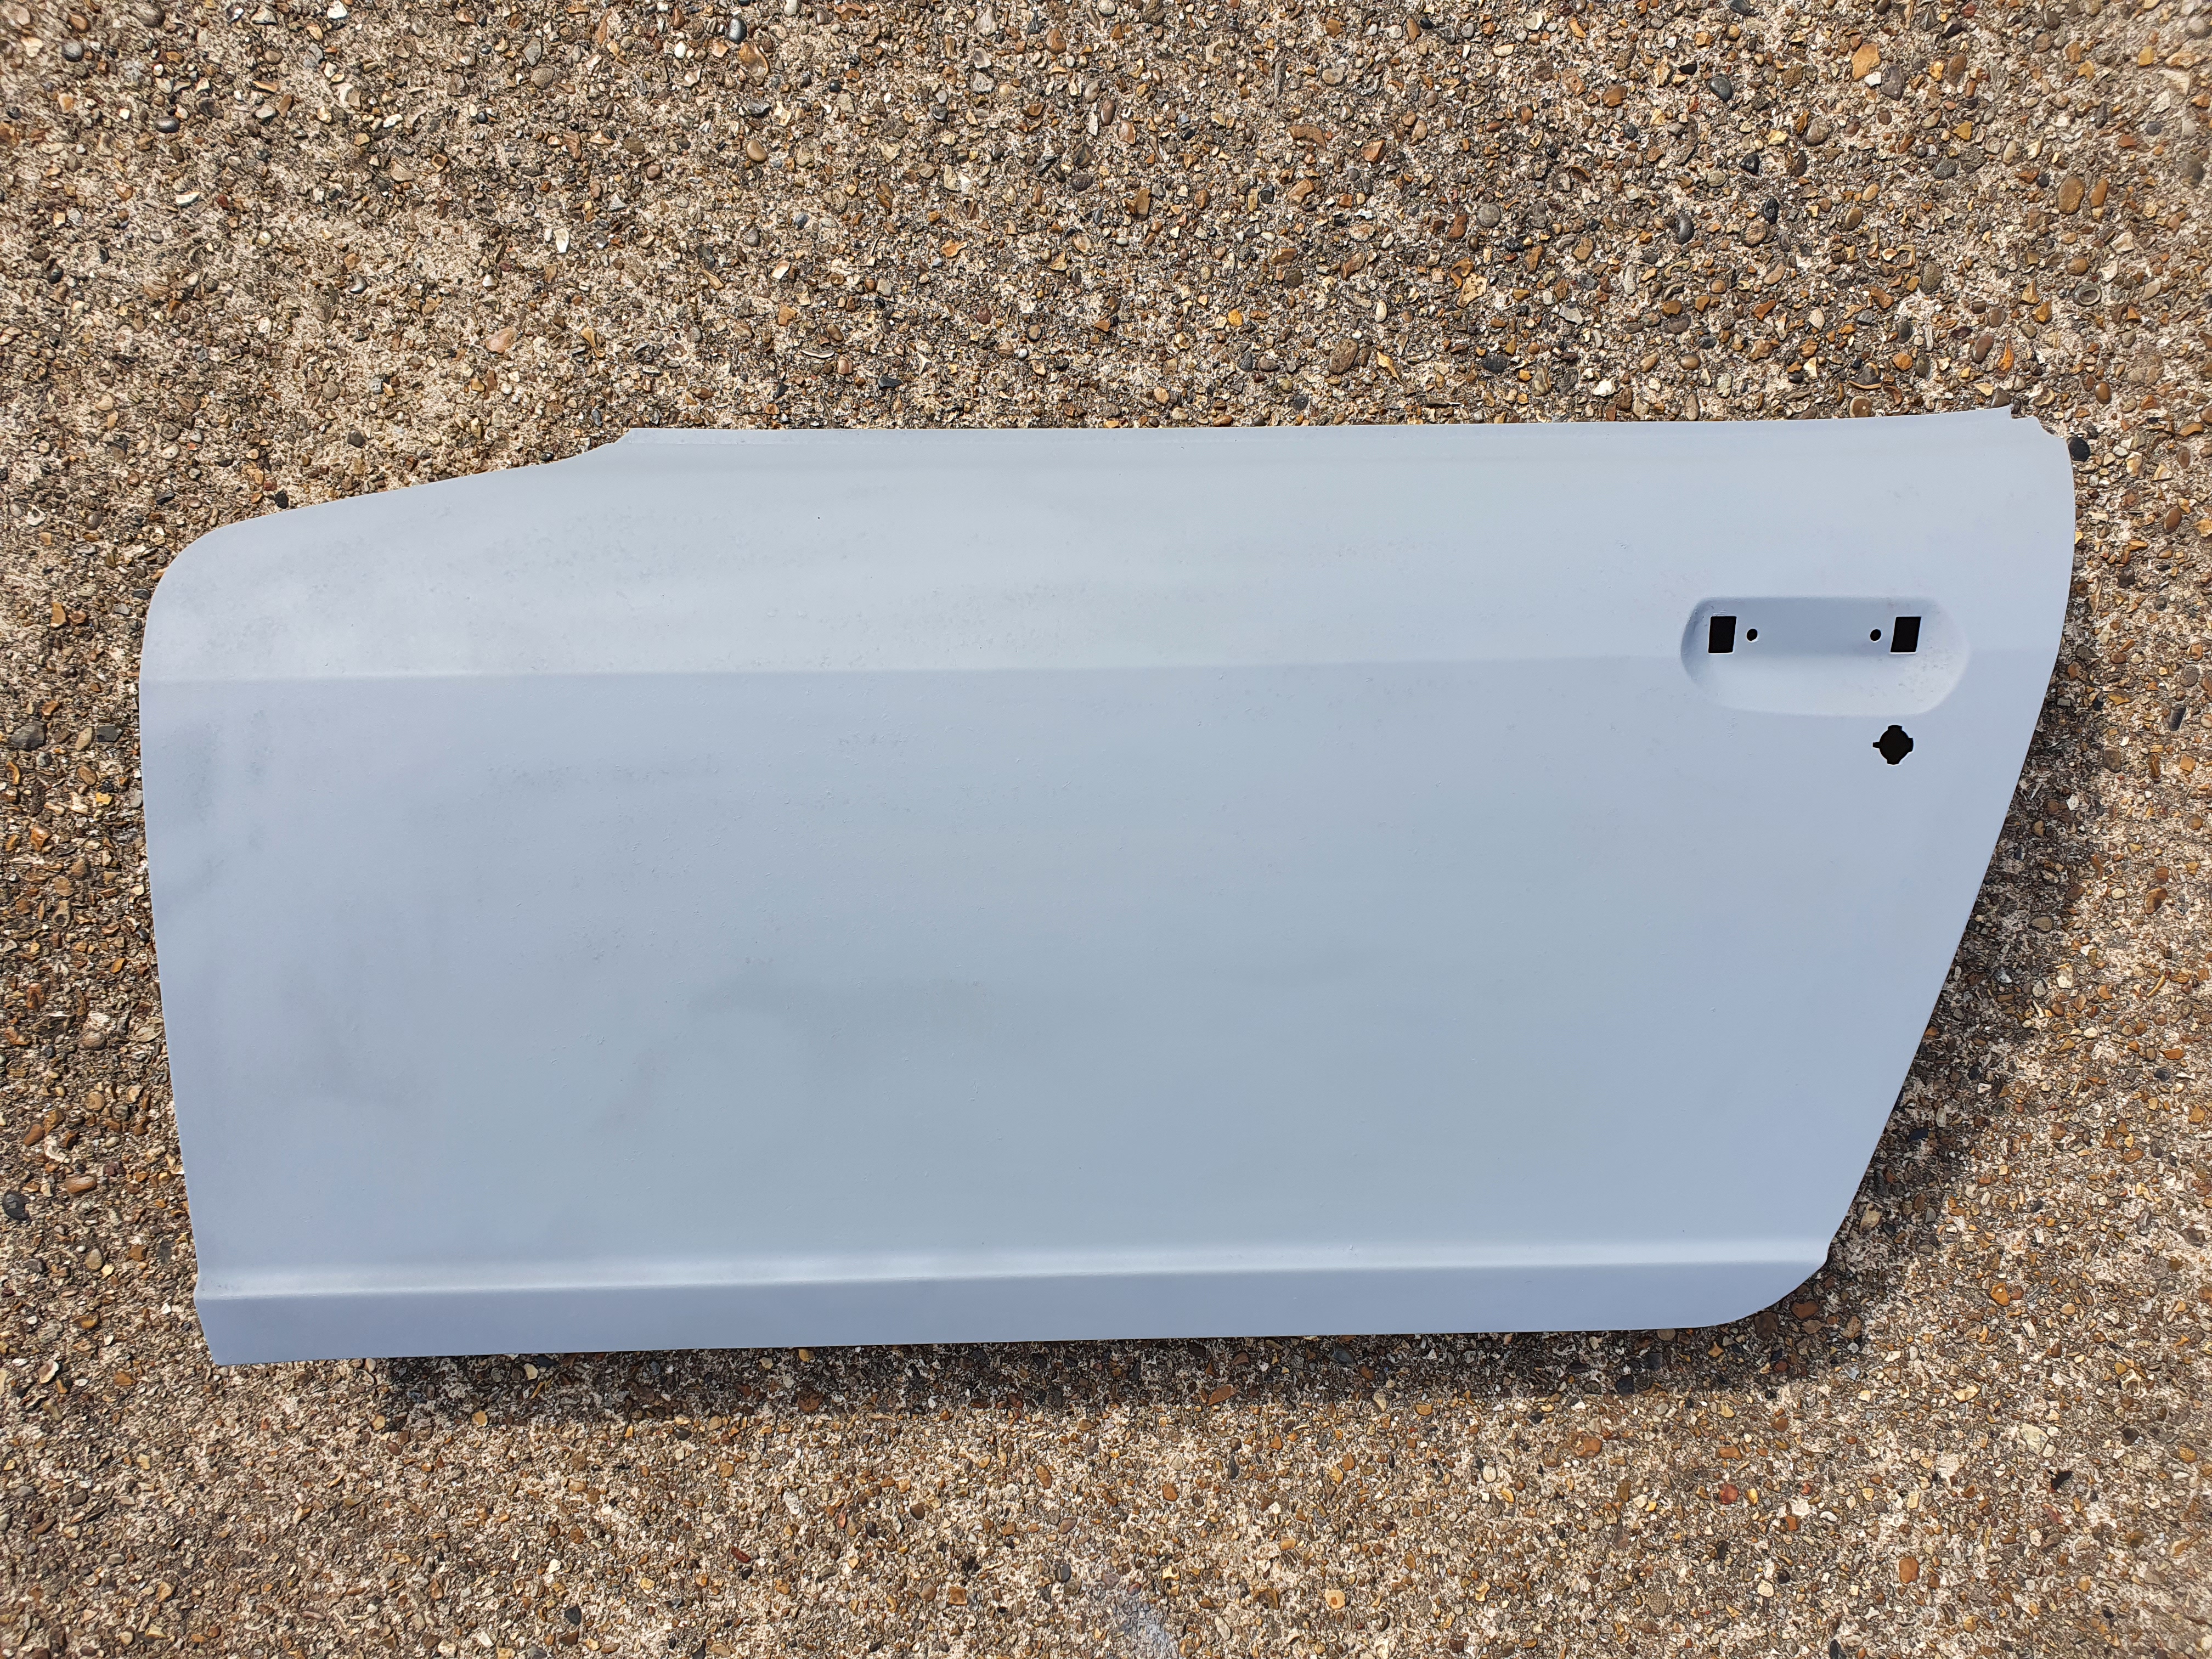
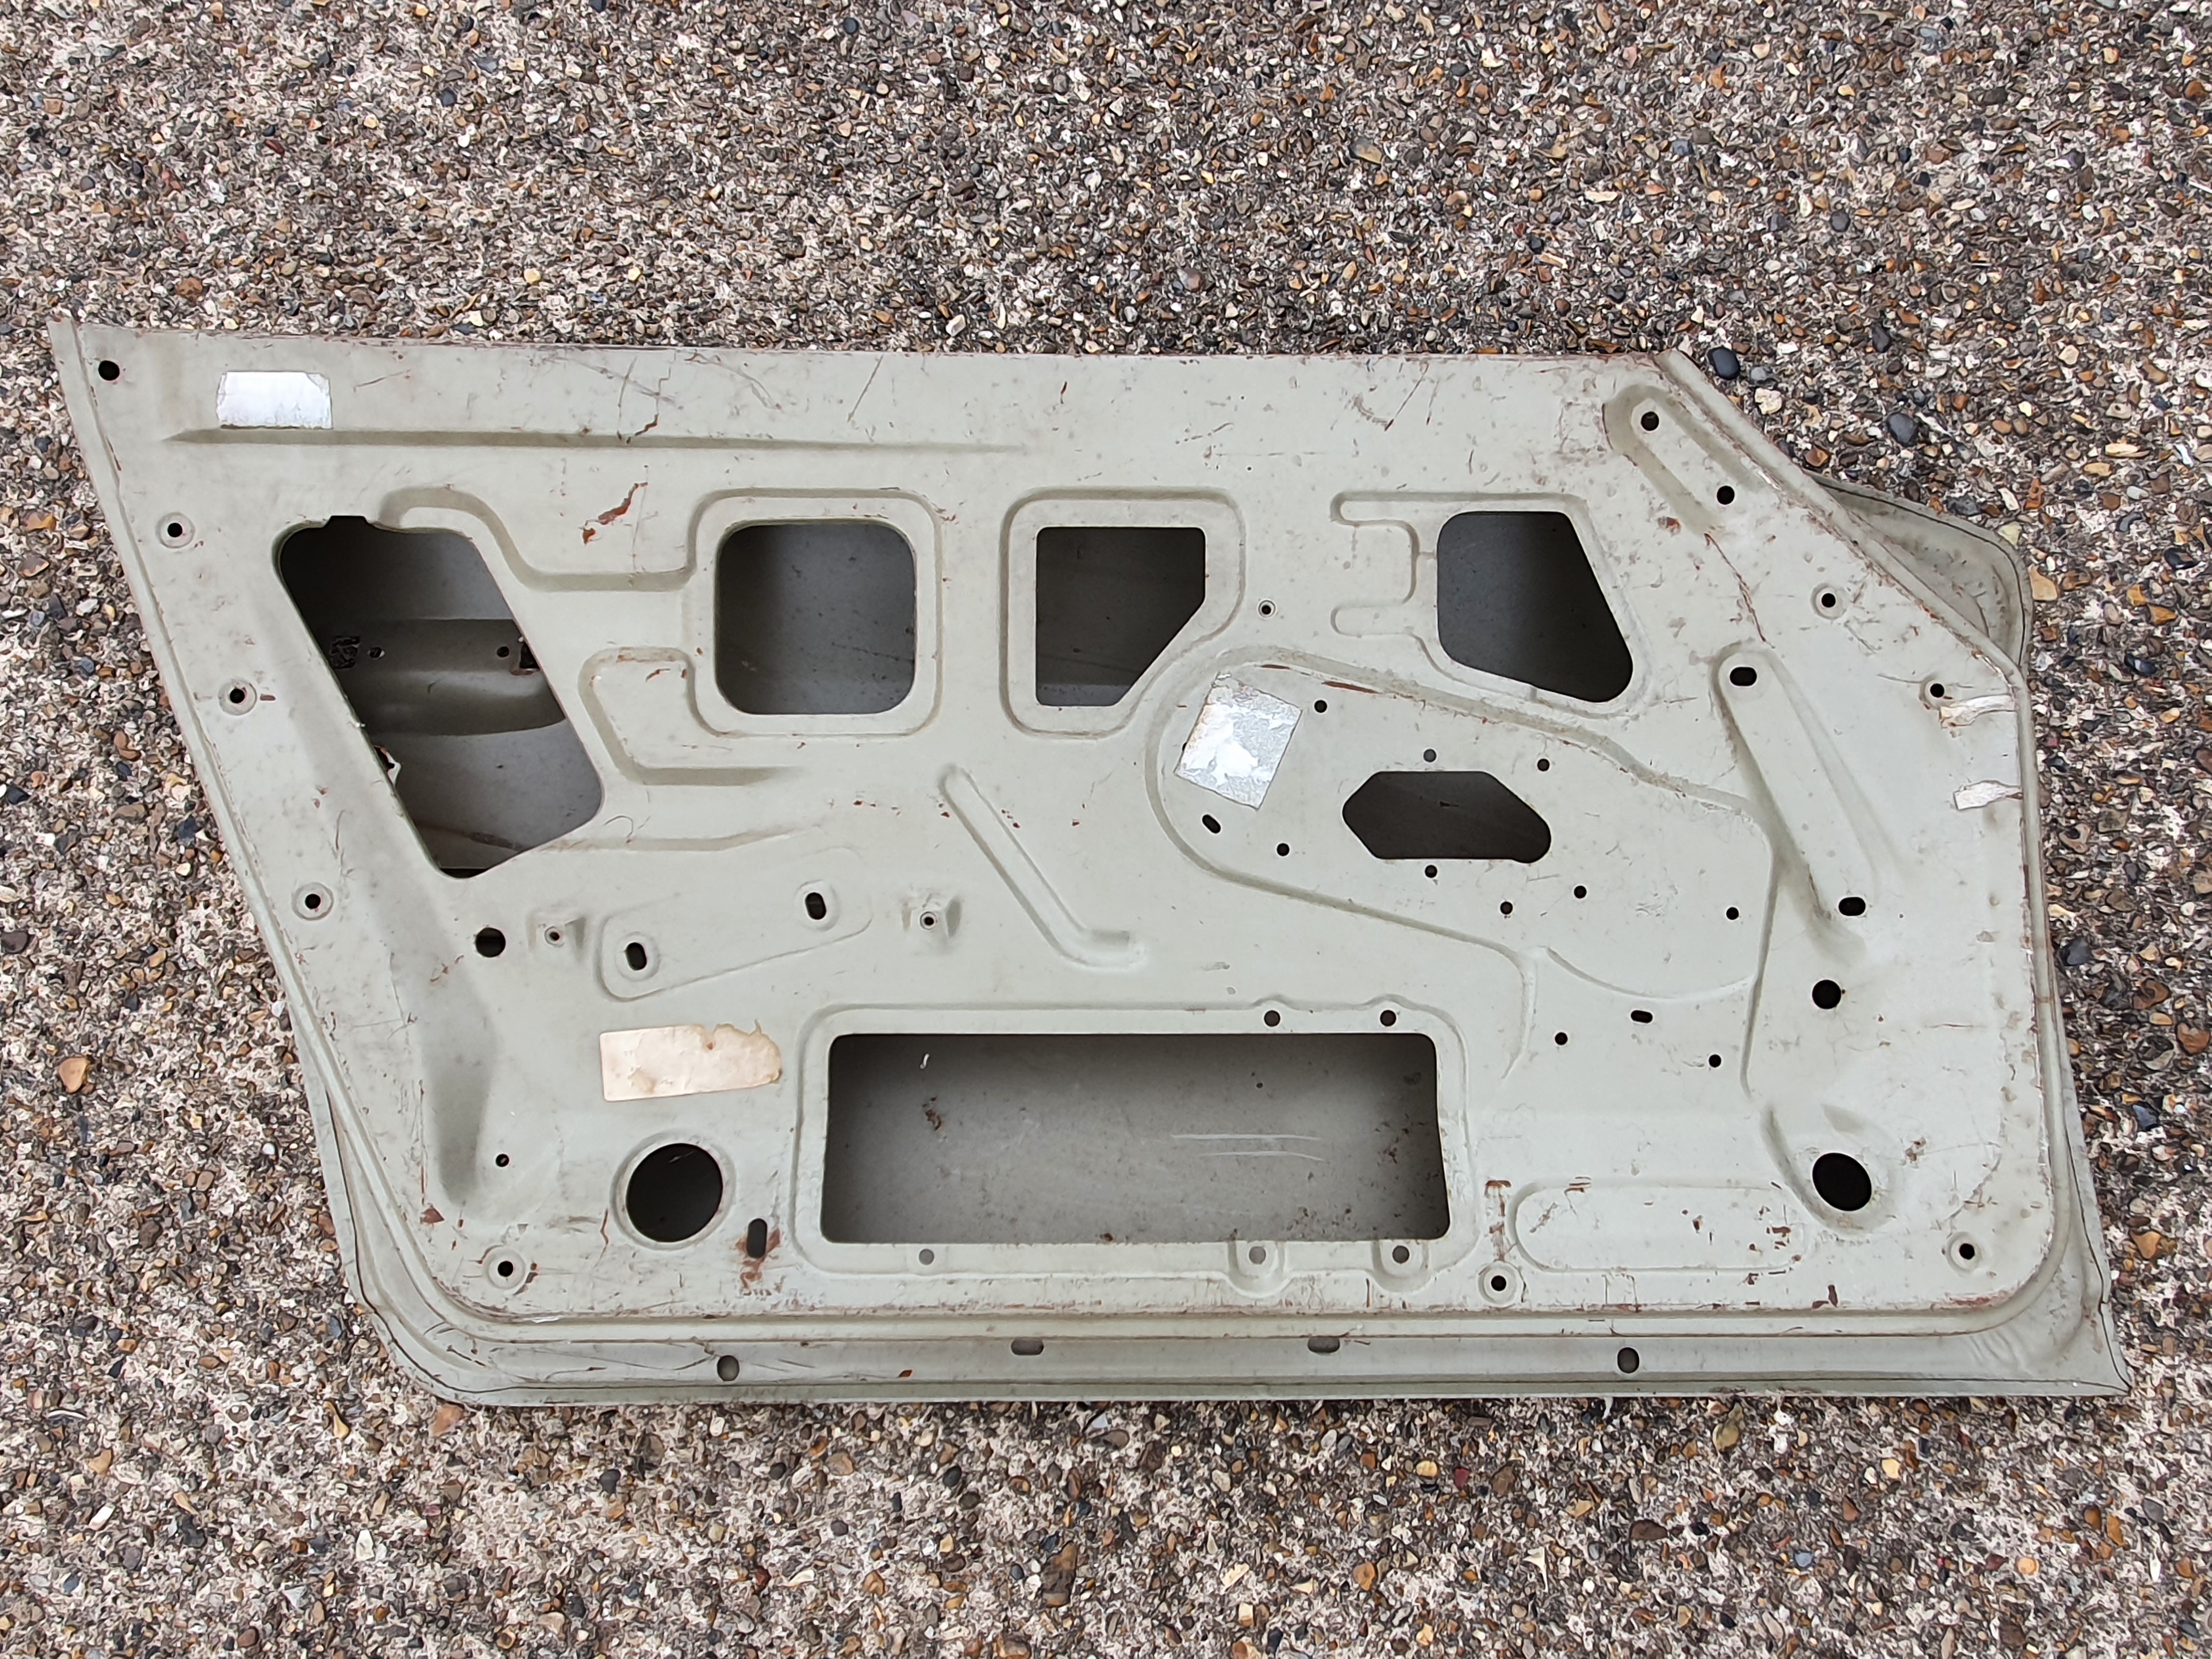
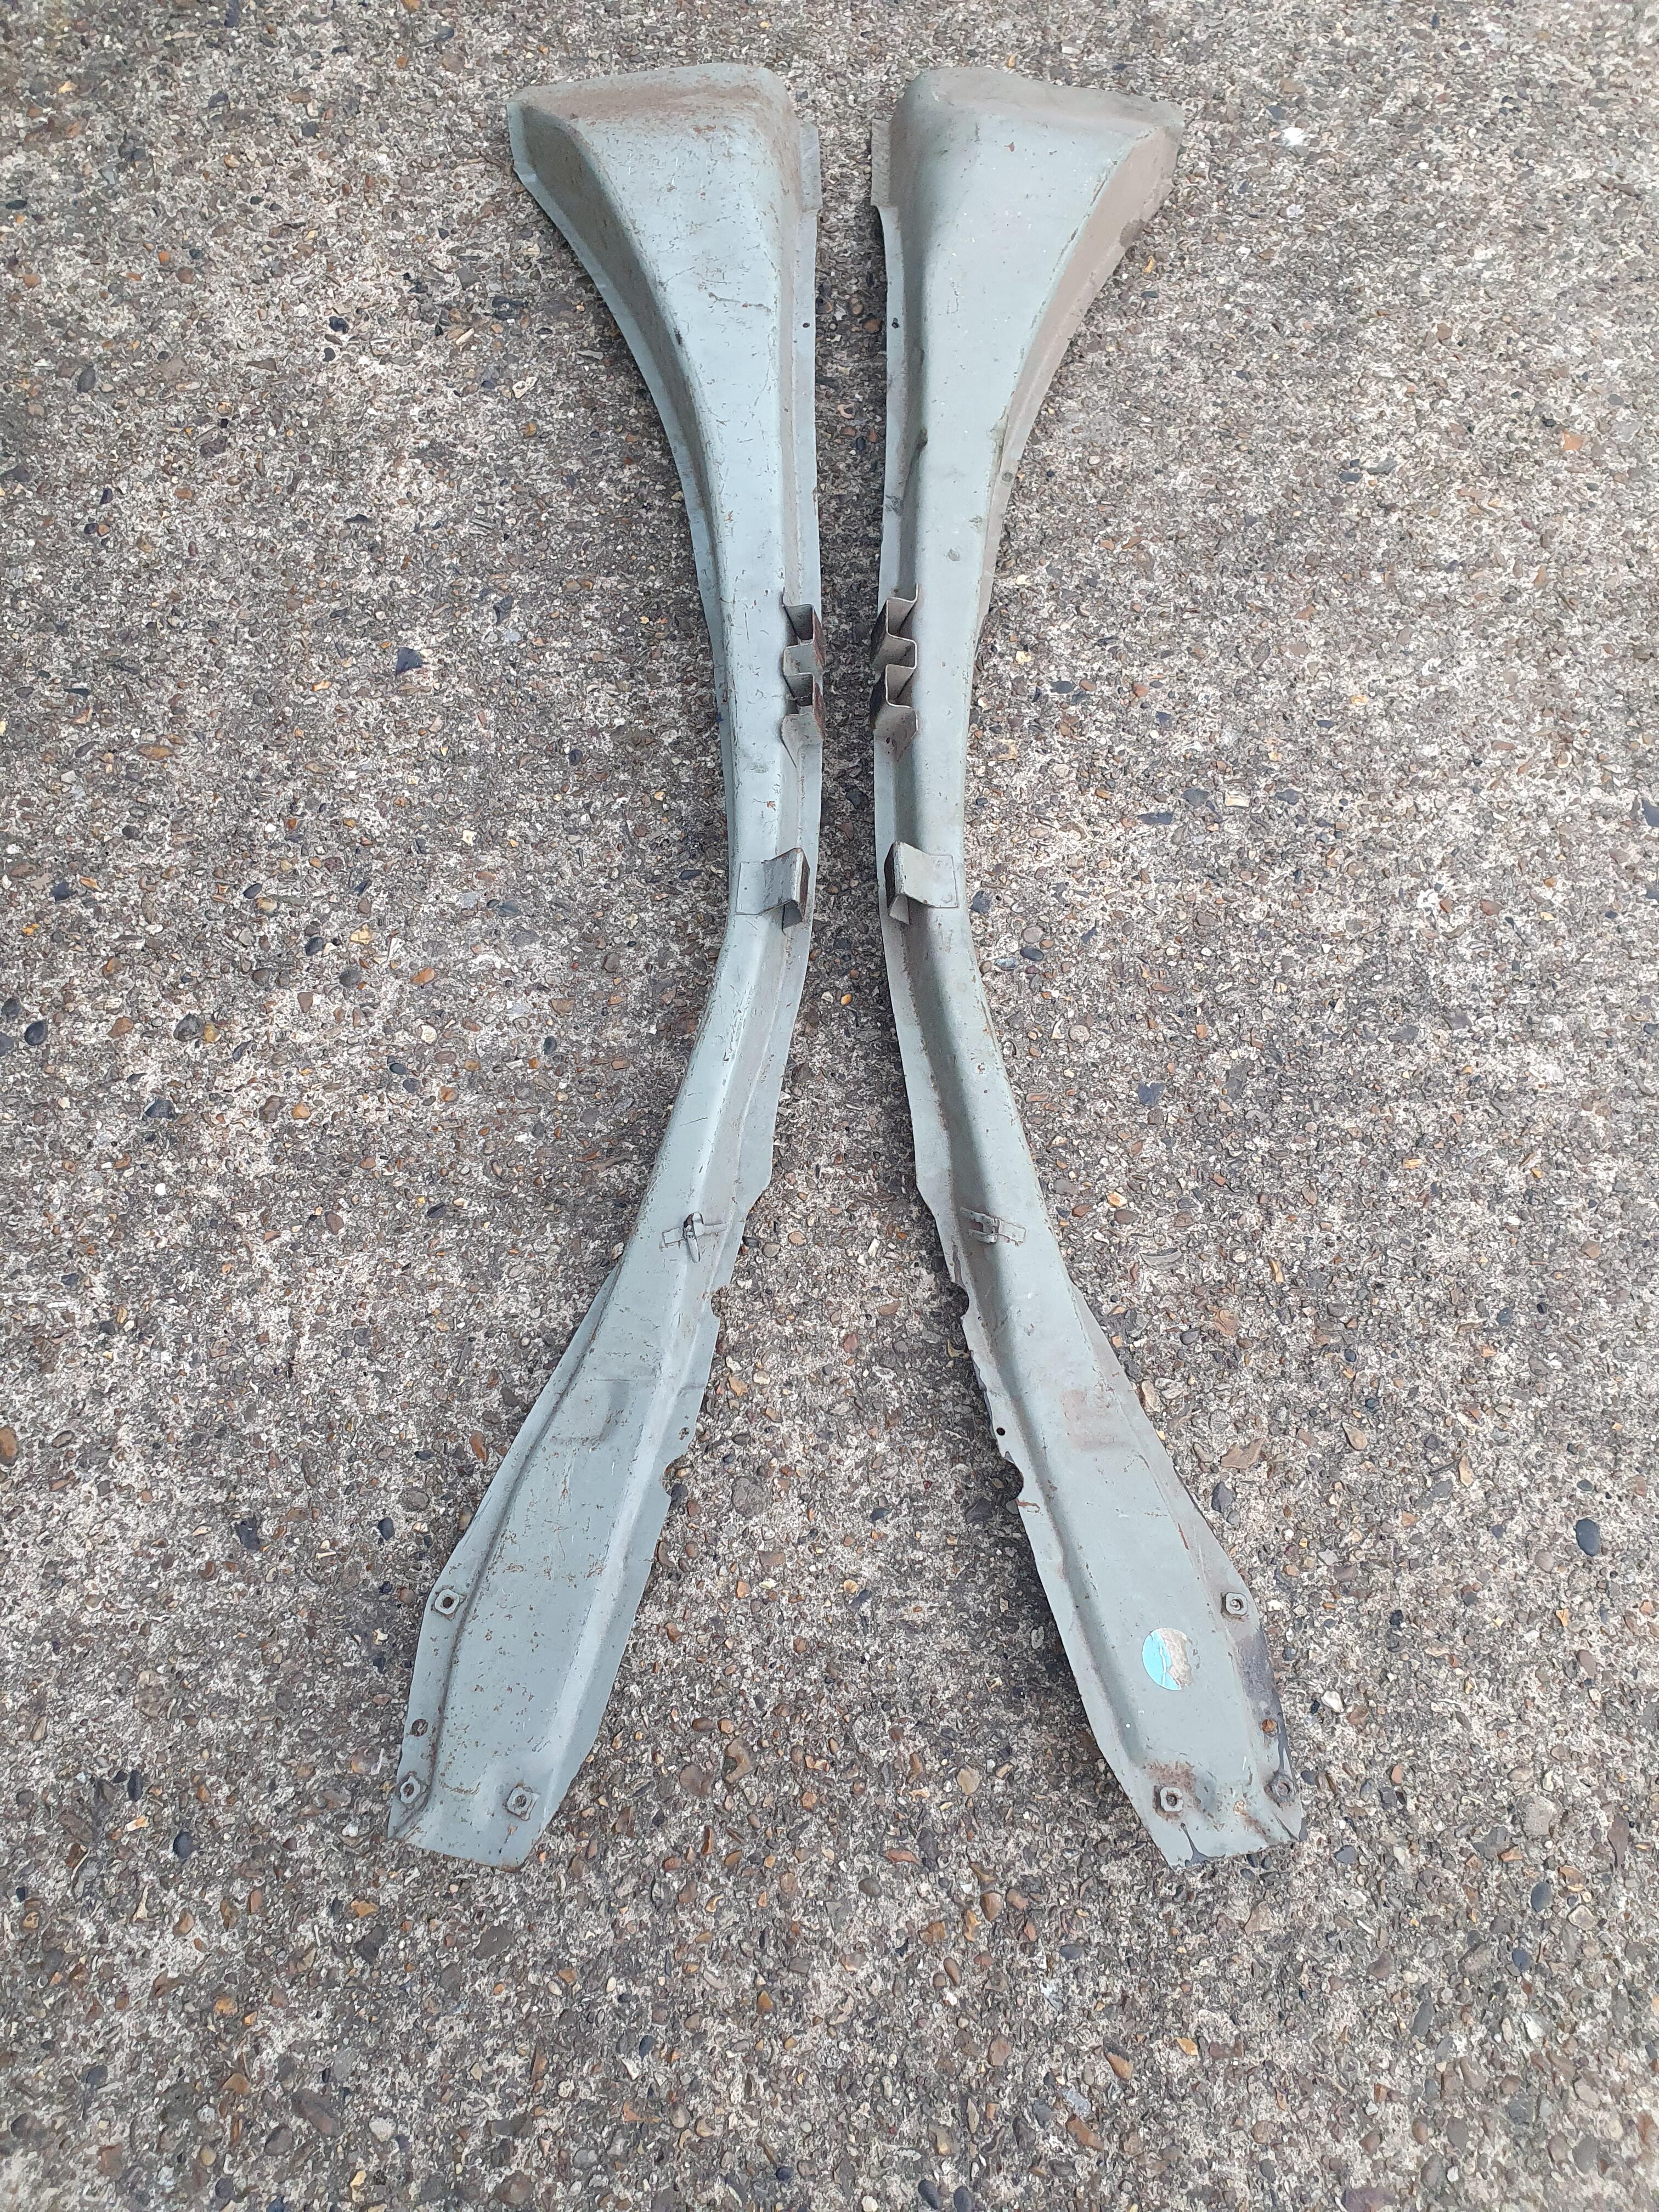
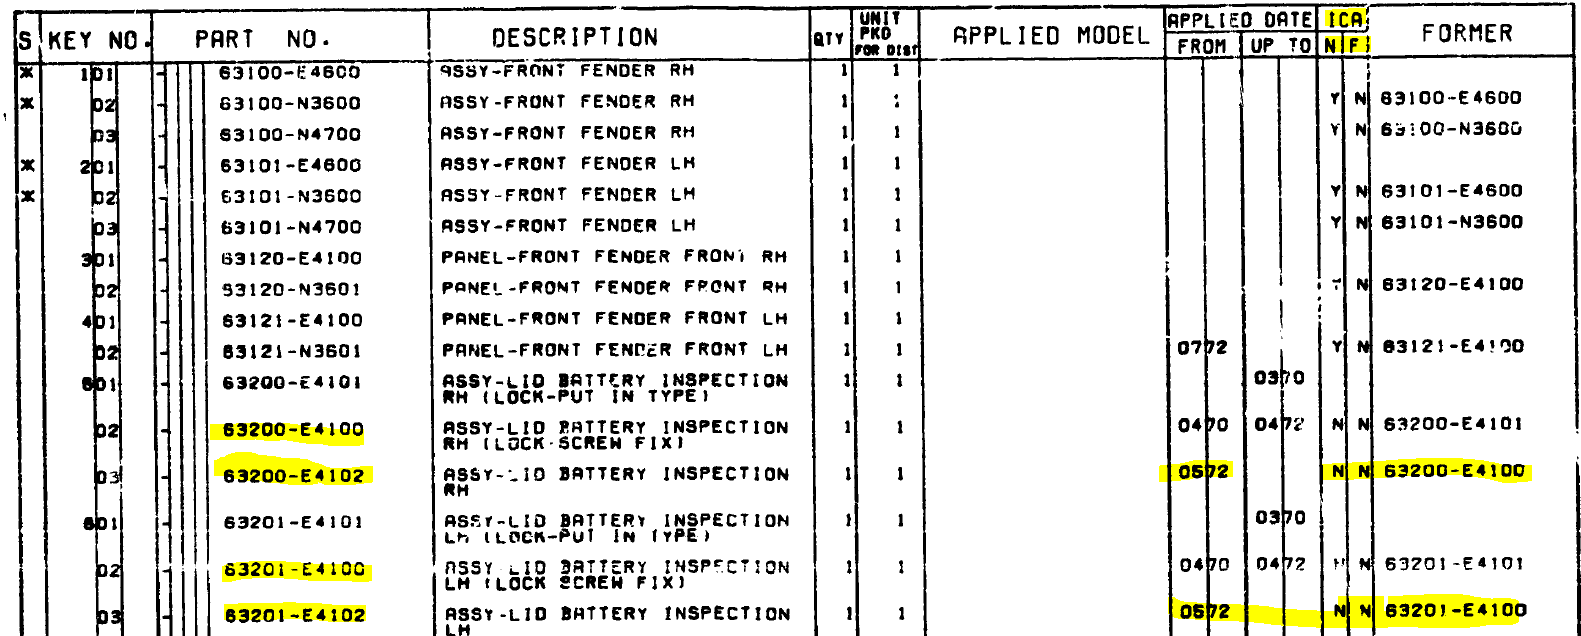
3 pointsI've got a lot of parts both used and NOS, but here are some that I don't seem to see all that often. Its a pair of NOS E4102 Inspection Lids: *63200-E4102 ASSY-LID BATTERY INSPECTION RH (from 05-72) *63201-E4102 ASSY-LID BATTERY INSPECTION LH (from 05-72) A little battered (they must have been on a shelf in the local dealer for the best part of 40 years before I got them) but intact and usable.

 3 points
 -
2 points
-
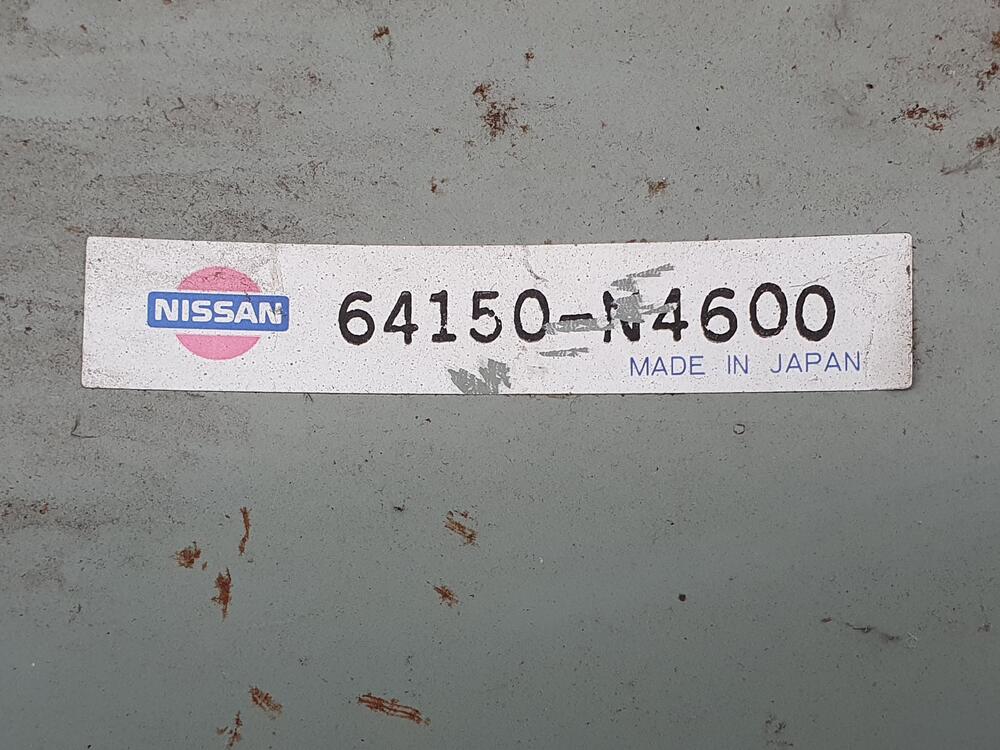
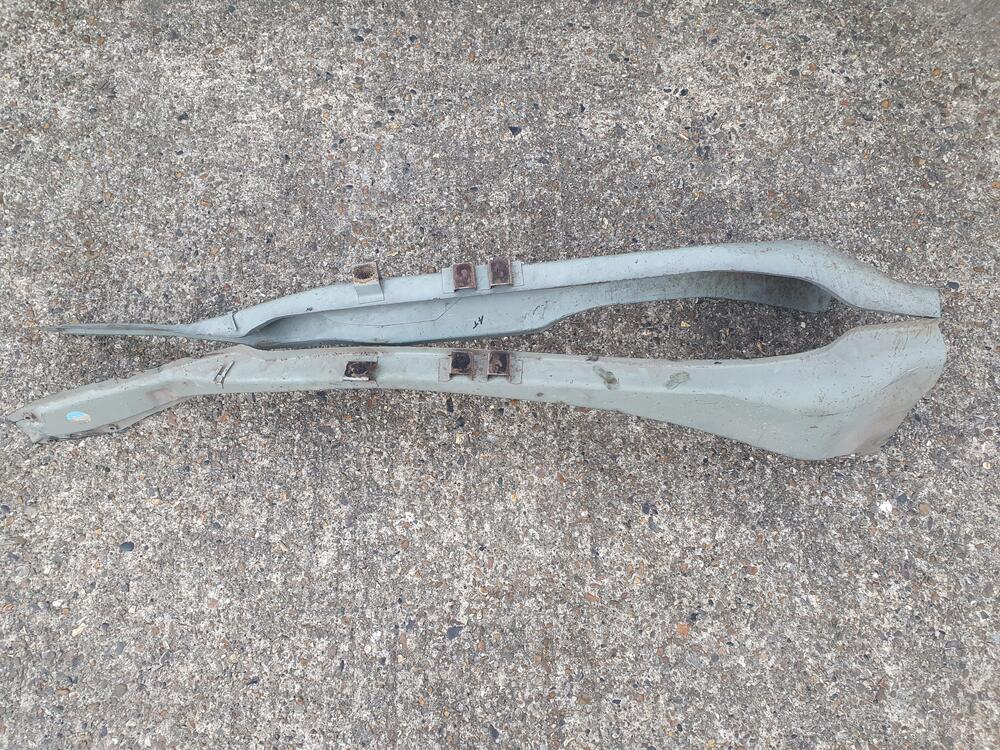
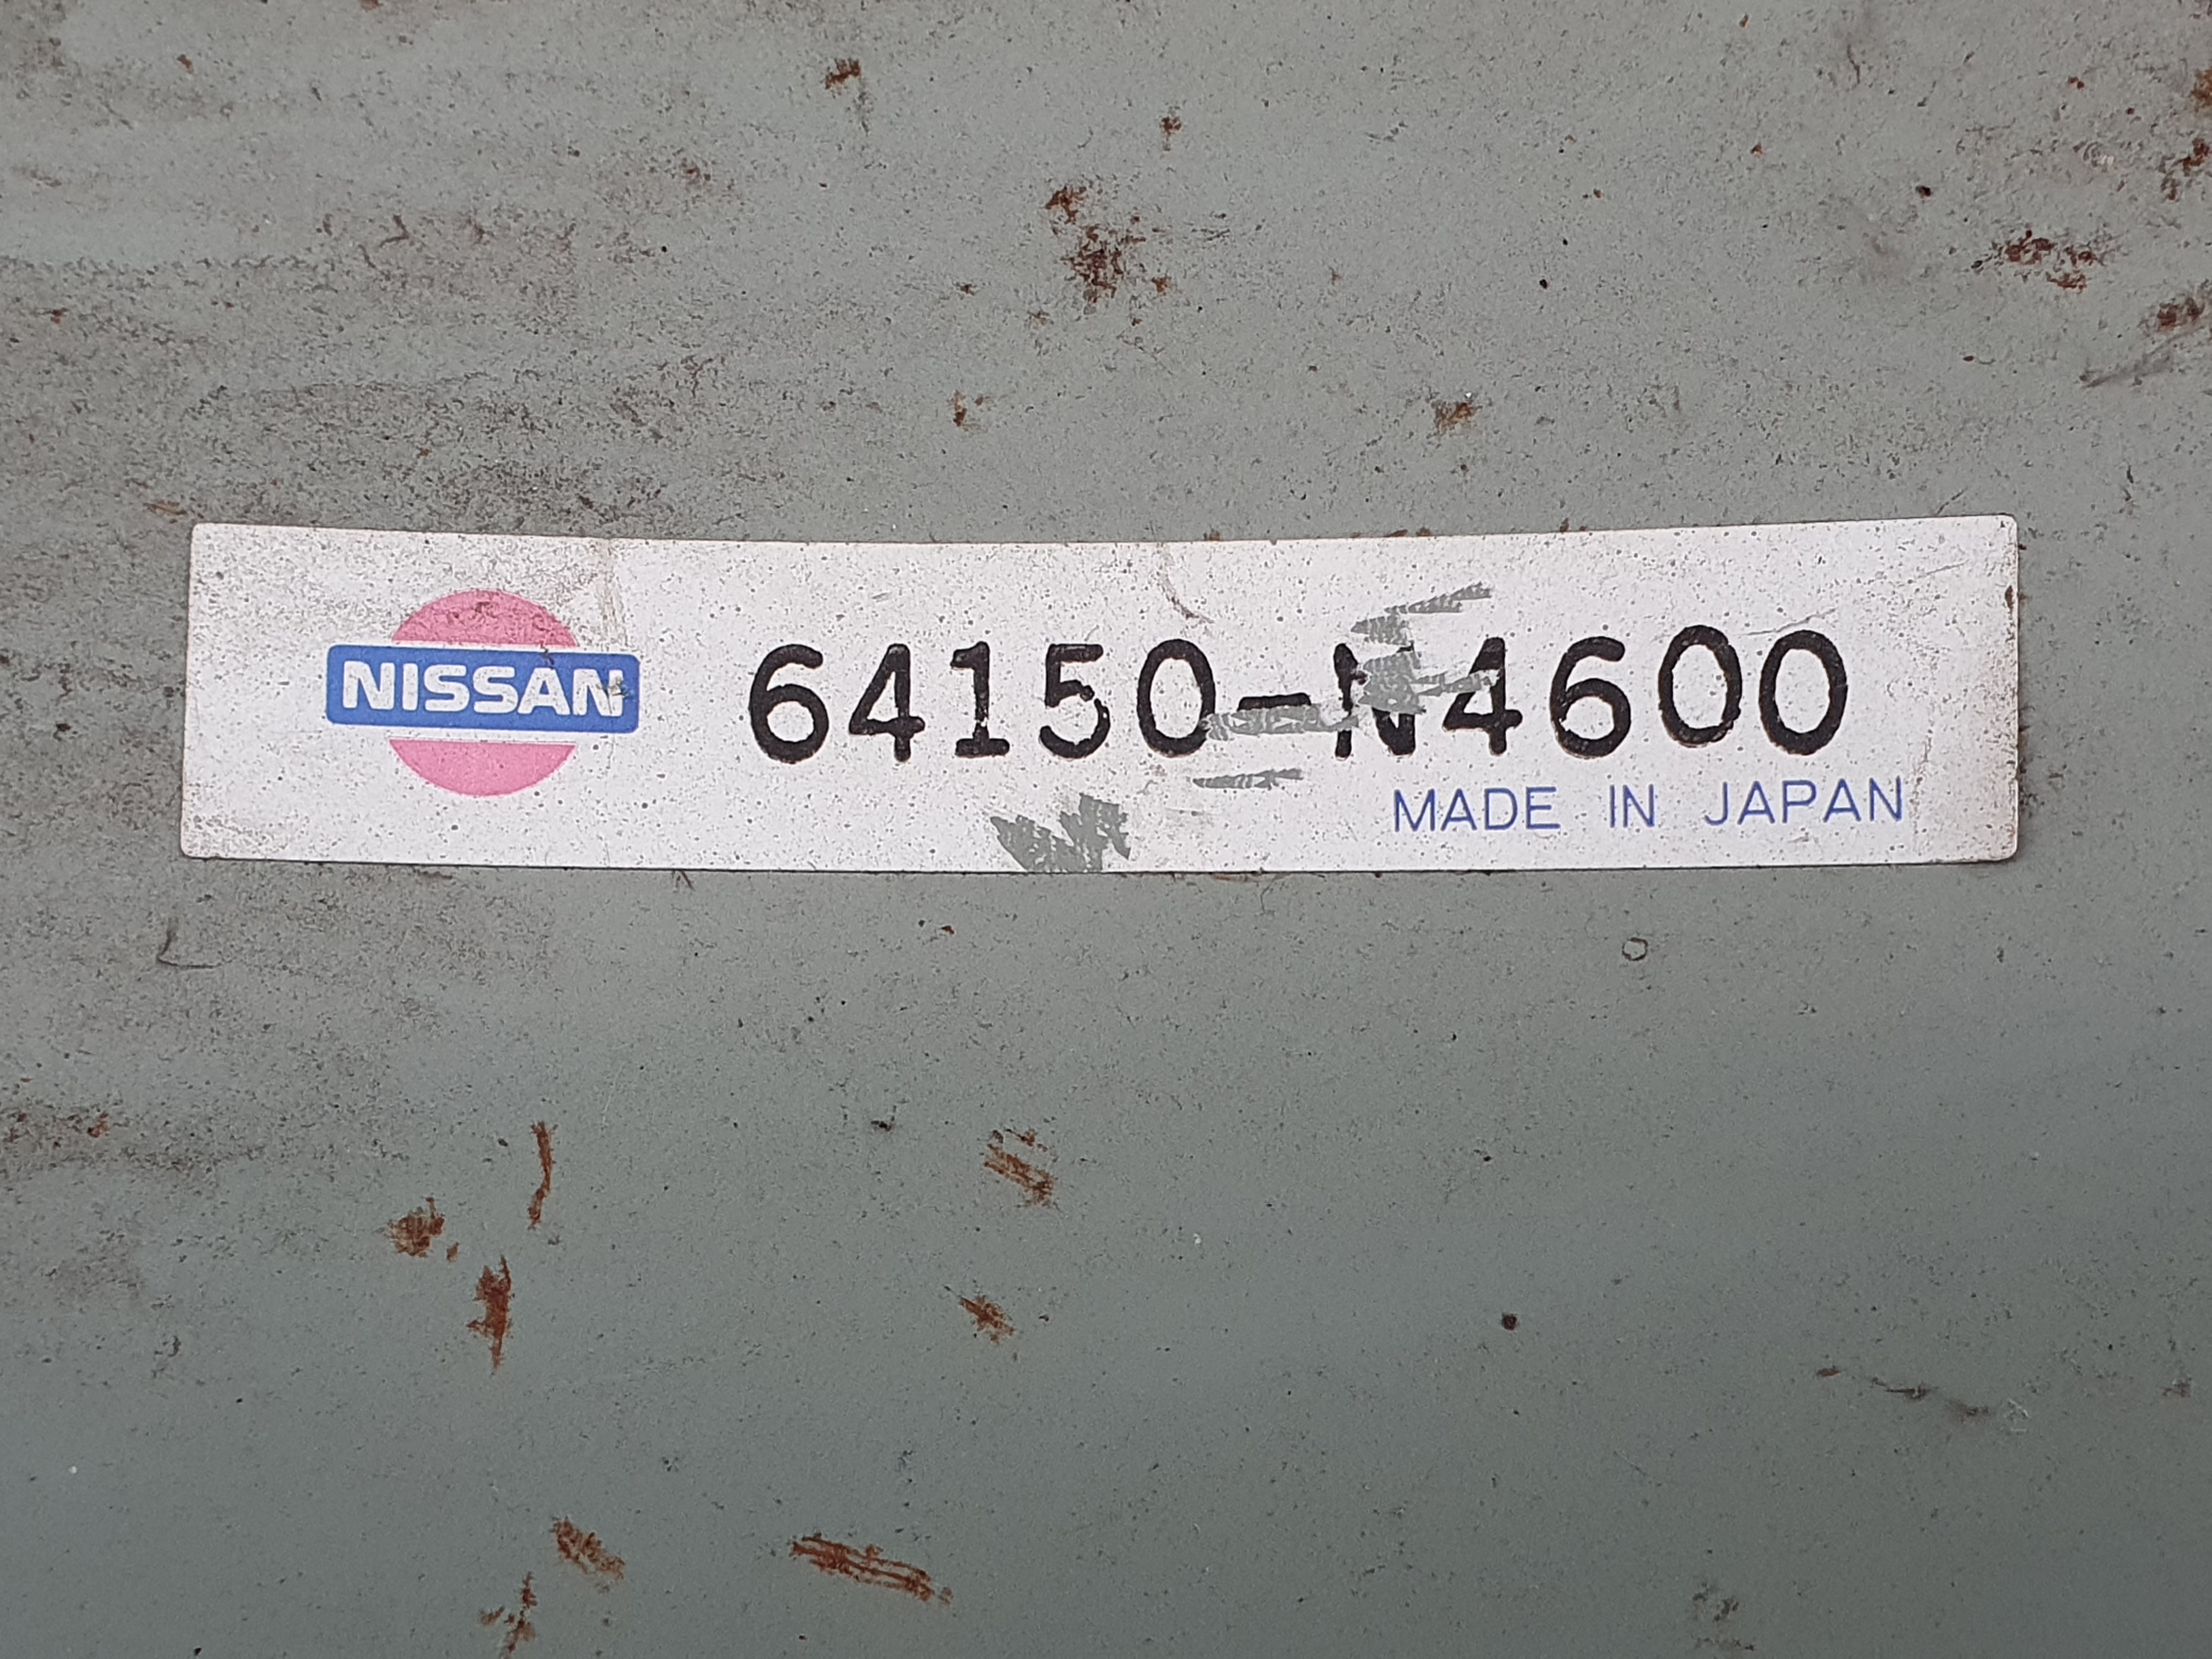
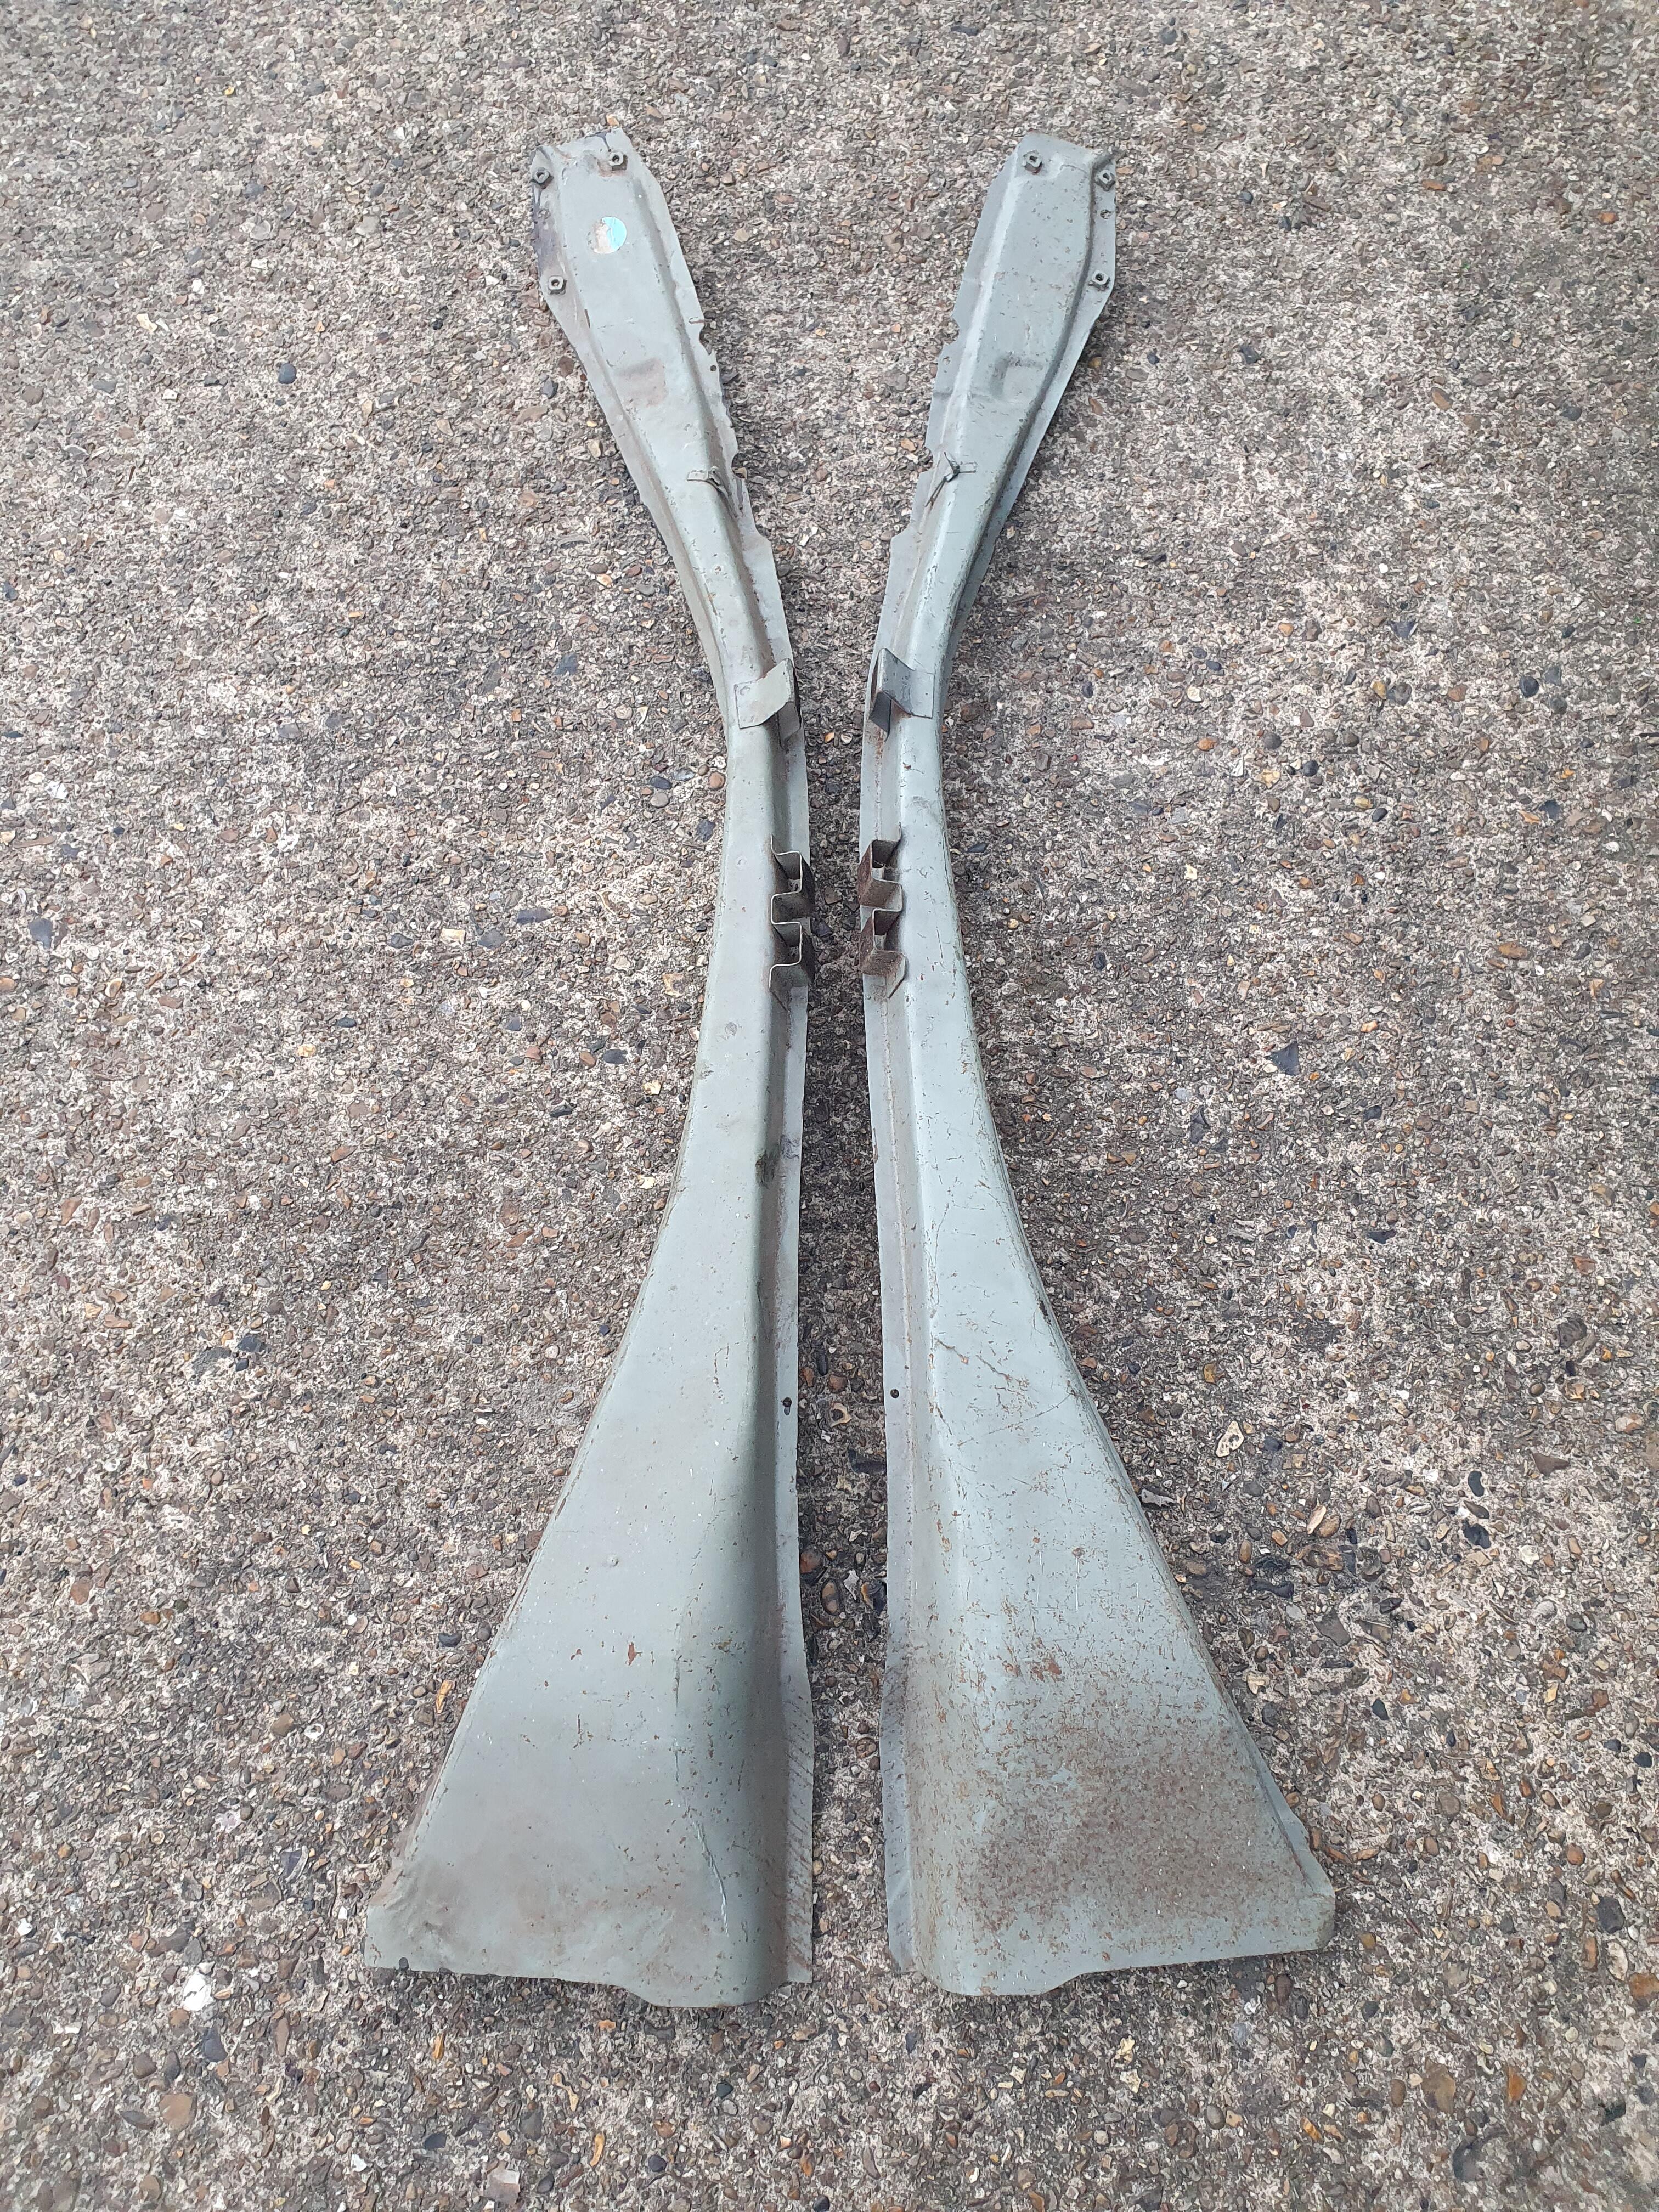
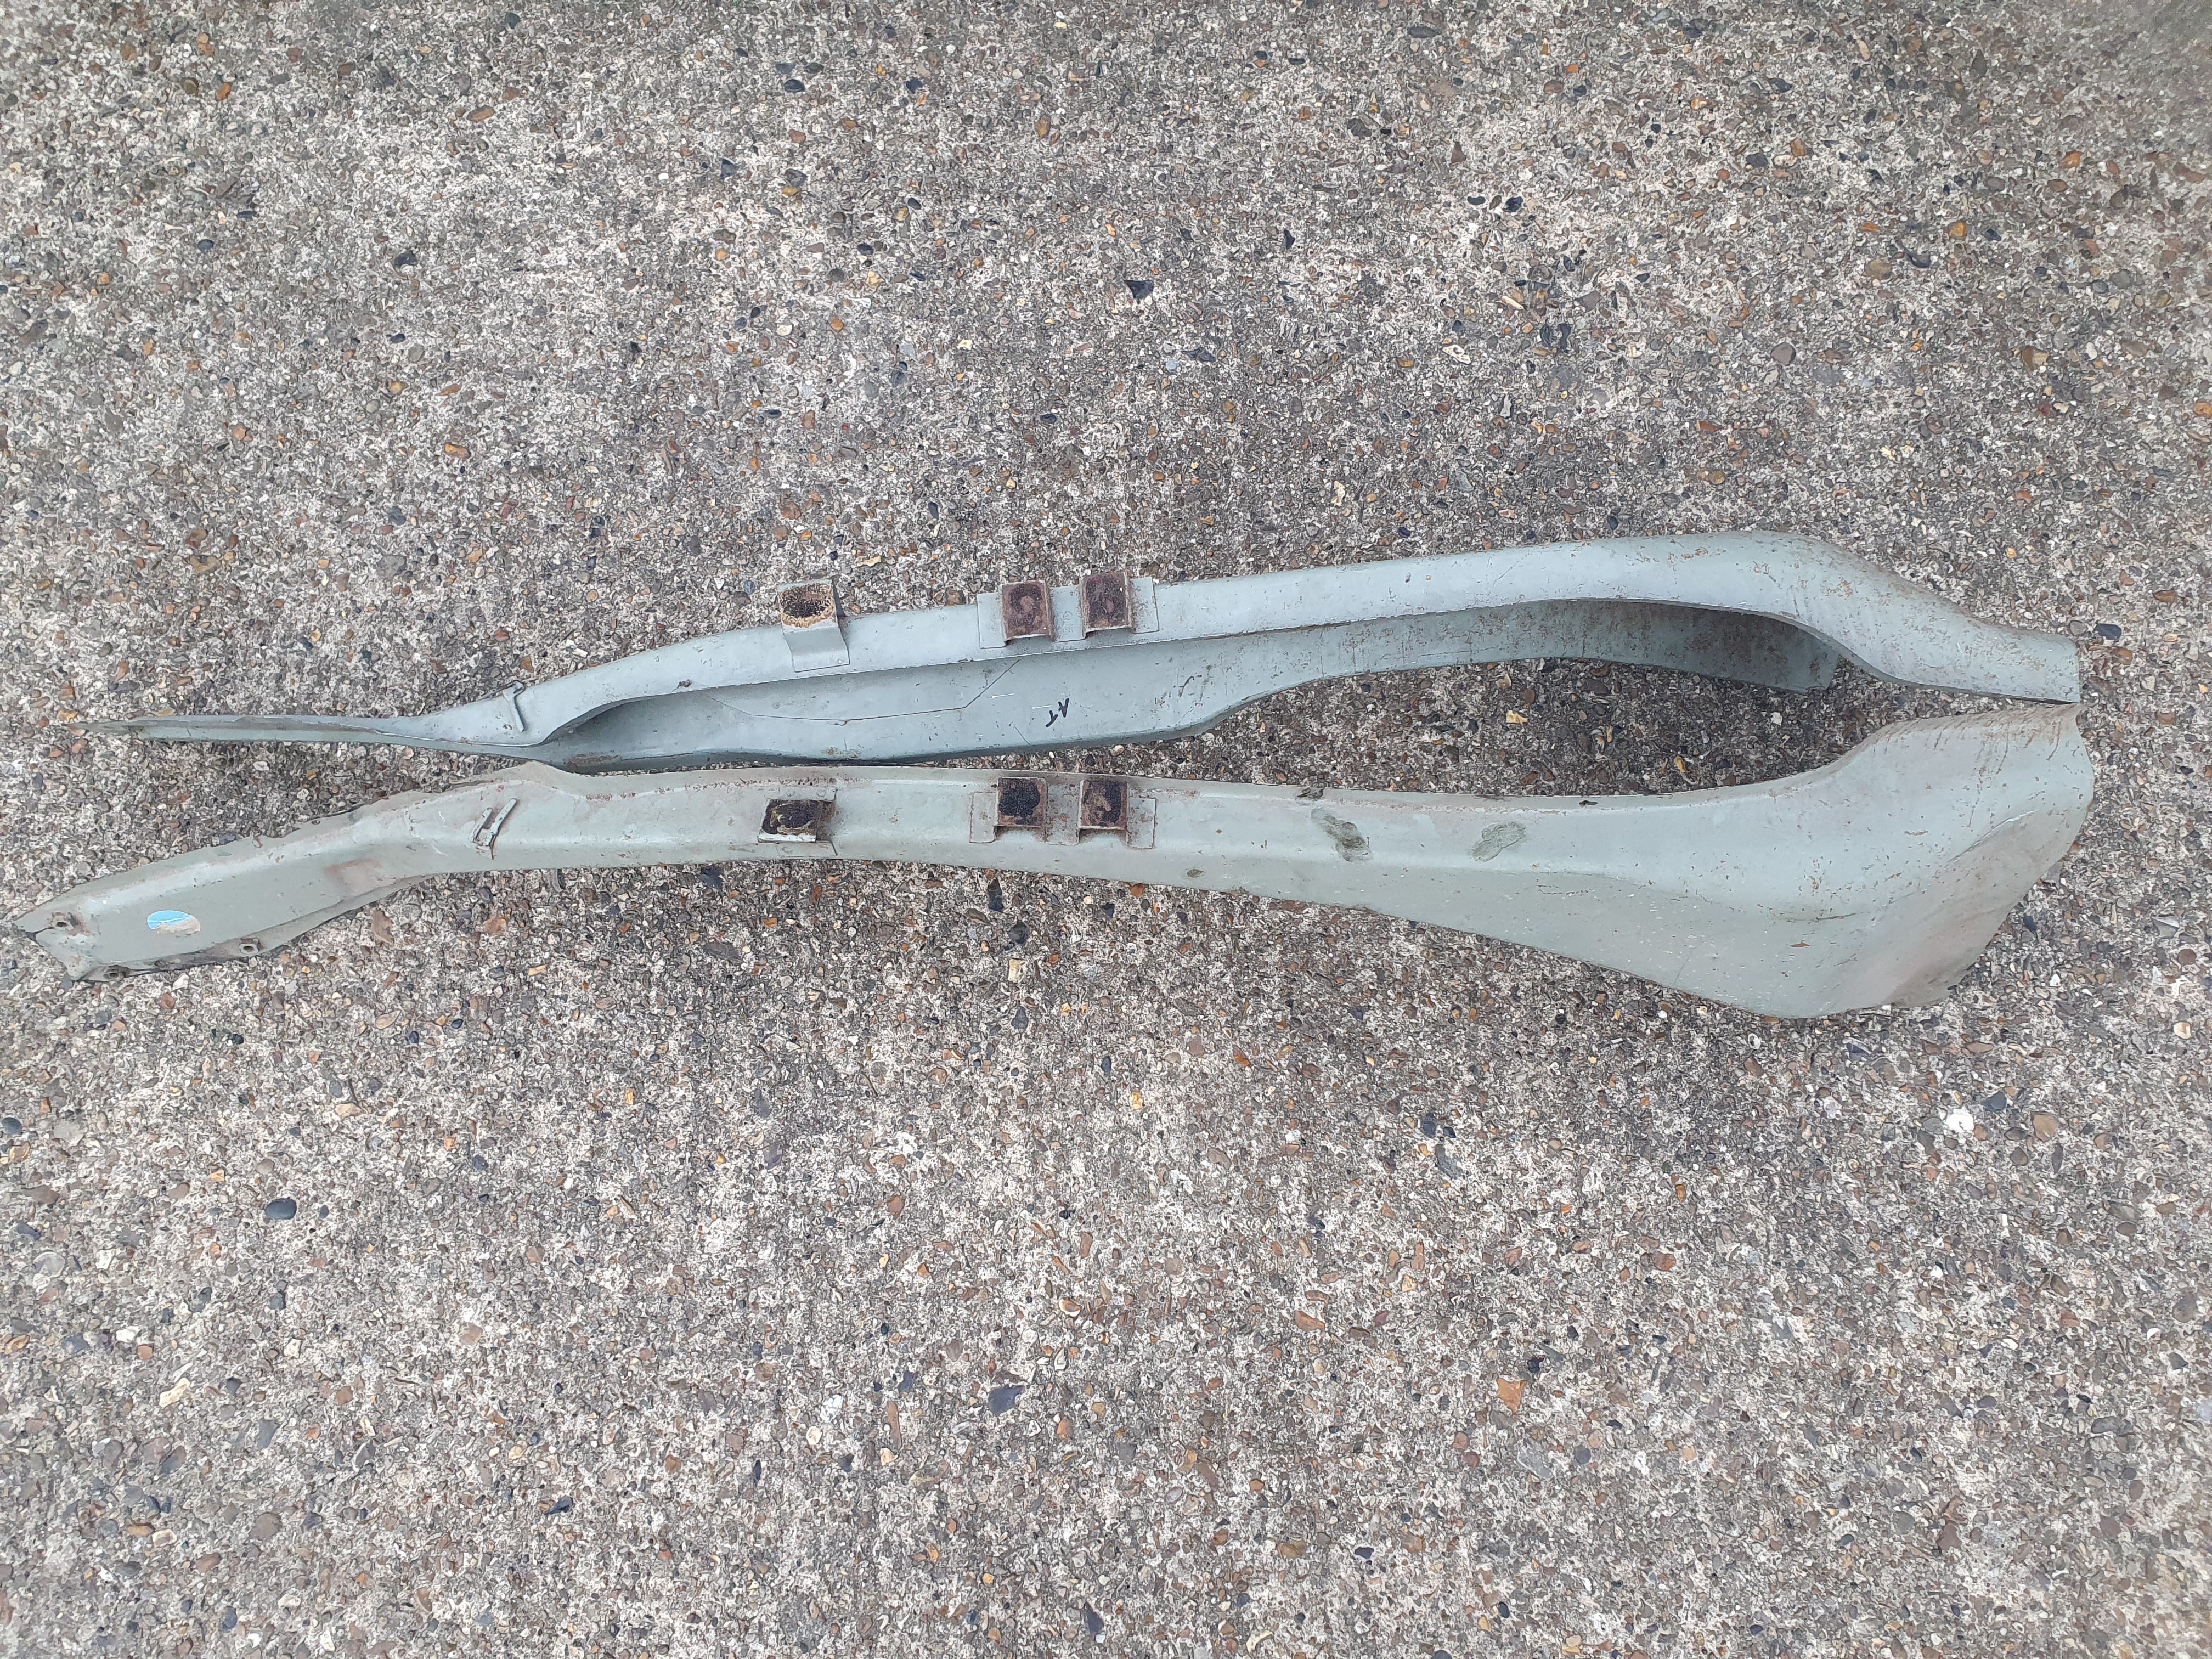
2 points...and a pair of late 'Air Tube'/'Upper Chassis Reinforcement'/'Hood Ledge' panels: 64150-N4600 RH ASSY-REINFORCED HOOD LEDGE 640151-N4600 LH ASSY-REINFORCED HOOD LEDGE


 2 points
 -
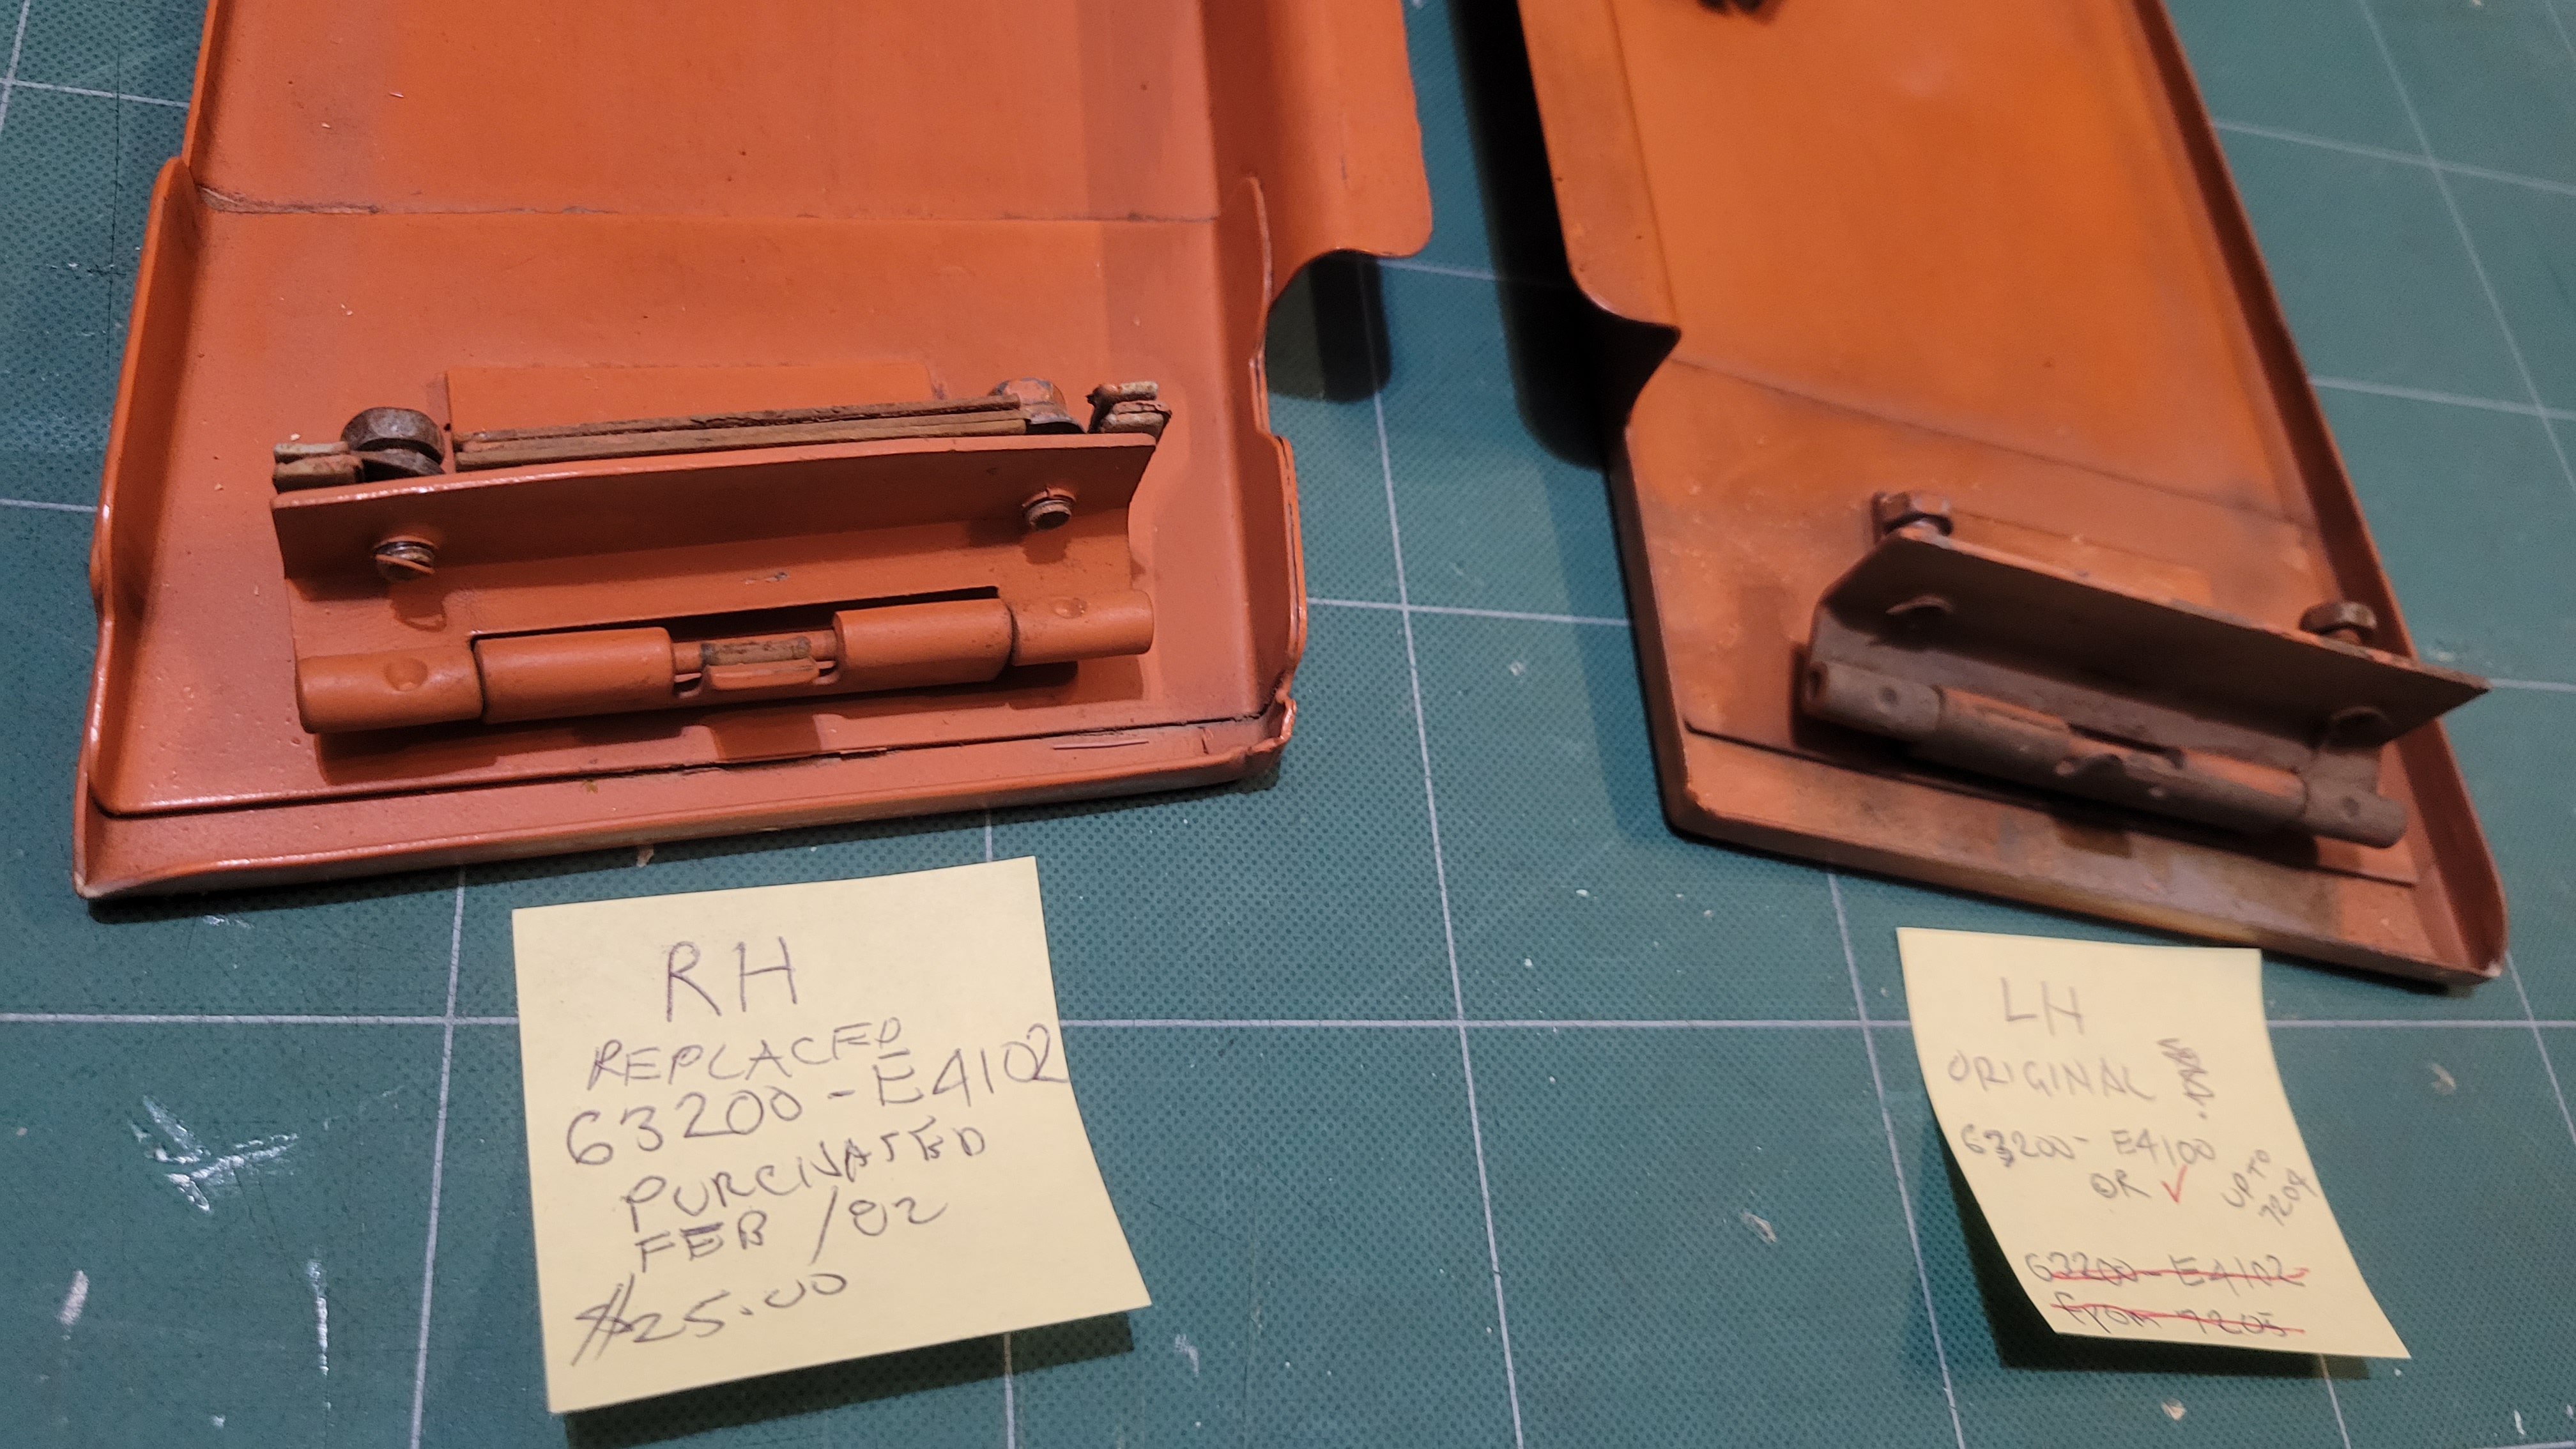
2 pointsNice to see parts like this. When I saw the 5'72 from date on your post it got me thinking about my 7/70 HLS30 that I am currently restoring for the second time. During the first resto back in 1982 my body man suggested I replace the original on the RH side as it was warped. He said it would be cheaper to replace that fix, at $25 for the part he was right. So I had a look at my covers and sure enough the RH is the one from 5/72 on, p/n 63201-E4102, and my LH one is still the earlier used from 4/70 to 4/72, p/n 63201-E4100. For those interested here is a picture showing the difference, The reinforcing doubler is much more robust on the later one. I find it strange that the North American parts book shows these as not interchangeable. Seems like they are.

 2 points
 -
1 pointYes, I think I should probably sell them. However, a few things to bear in mind; First, I don't really want to split the pair up and secondly I'm a long way from you. Shipping cost would be high, as these things are long. Tomorrow I'll have a word with a freight broker I use to see if he can give me a rough quote on freight cost from UK to Canada. Stay tuned.1 point
-
The dash cover supplier agreed to take care of the issue and I just mailed the 240z leather cover back to them in the UK. Hopefully, they will send the right one now. The door card covers and center console covers from them worked out well. Captain Obvious: Yes, you are correct, it is just you. SteveJ: Your second picture looks like my dash, except I ran the wires behind the dash ; )1 point
-
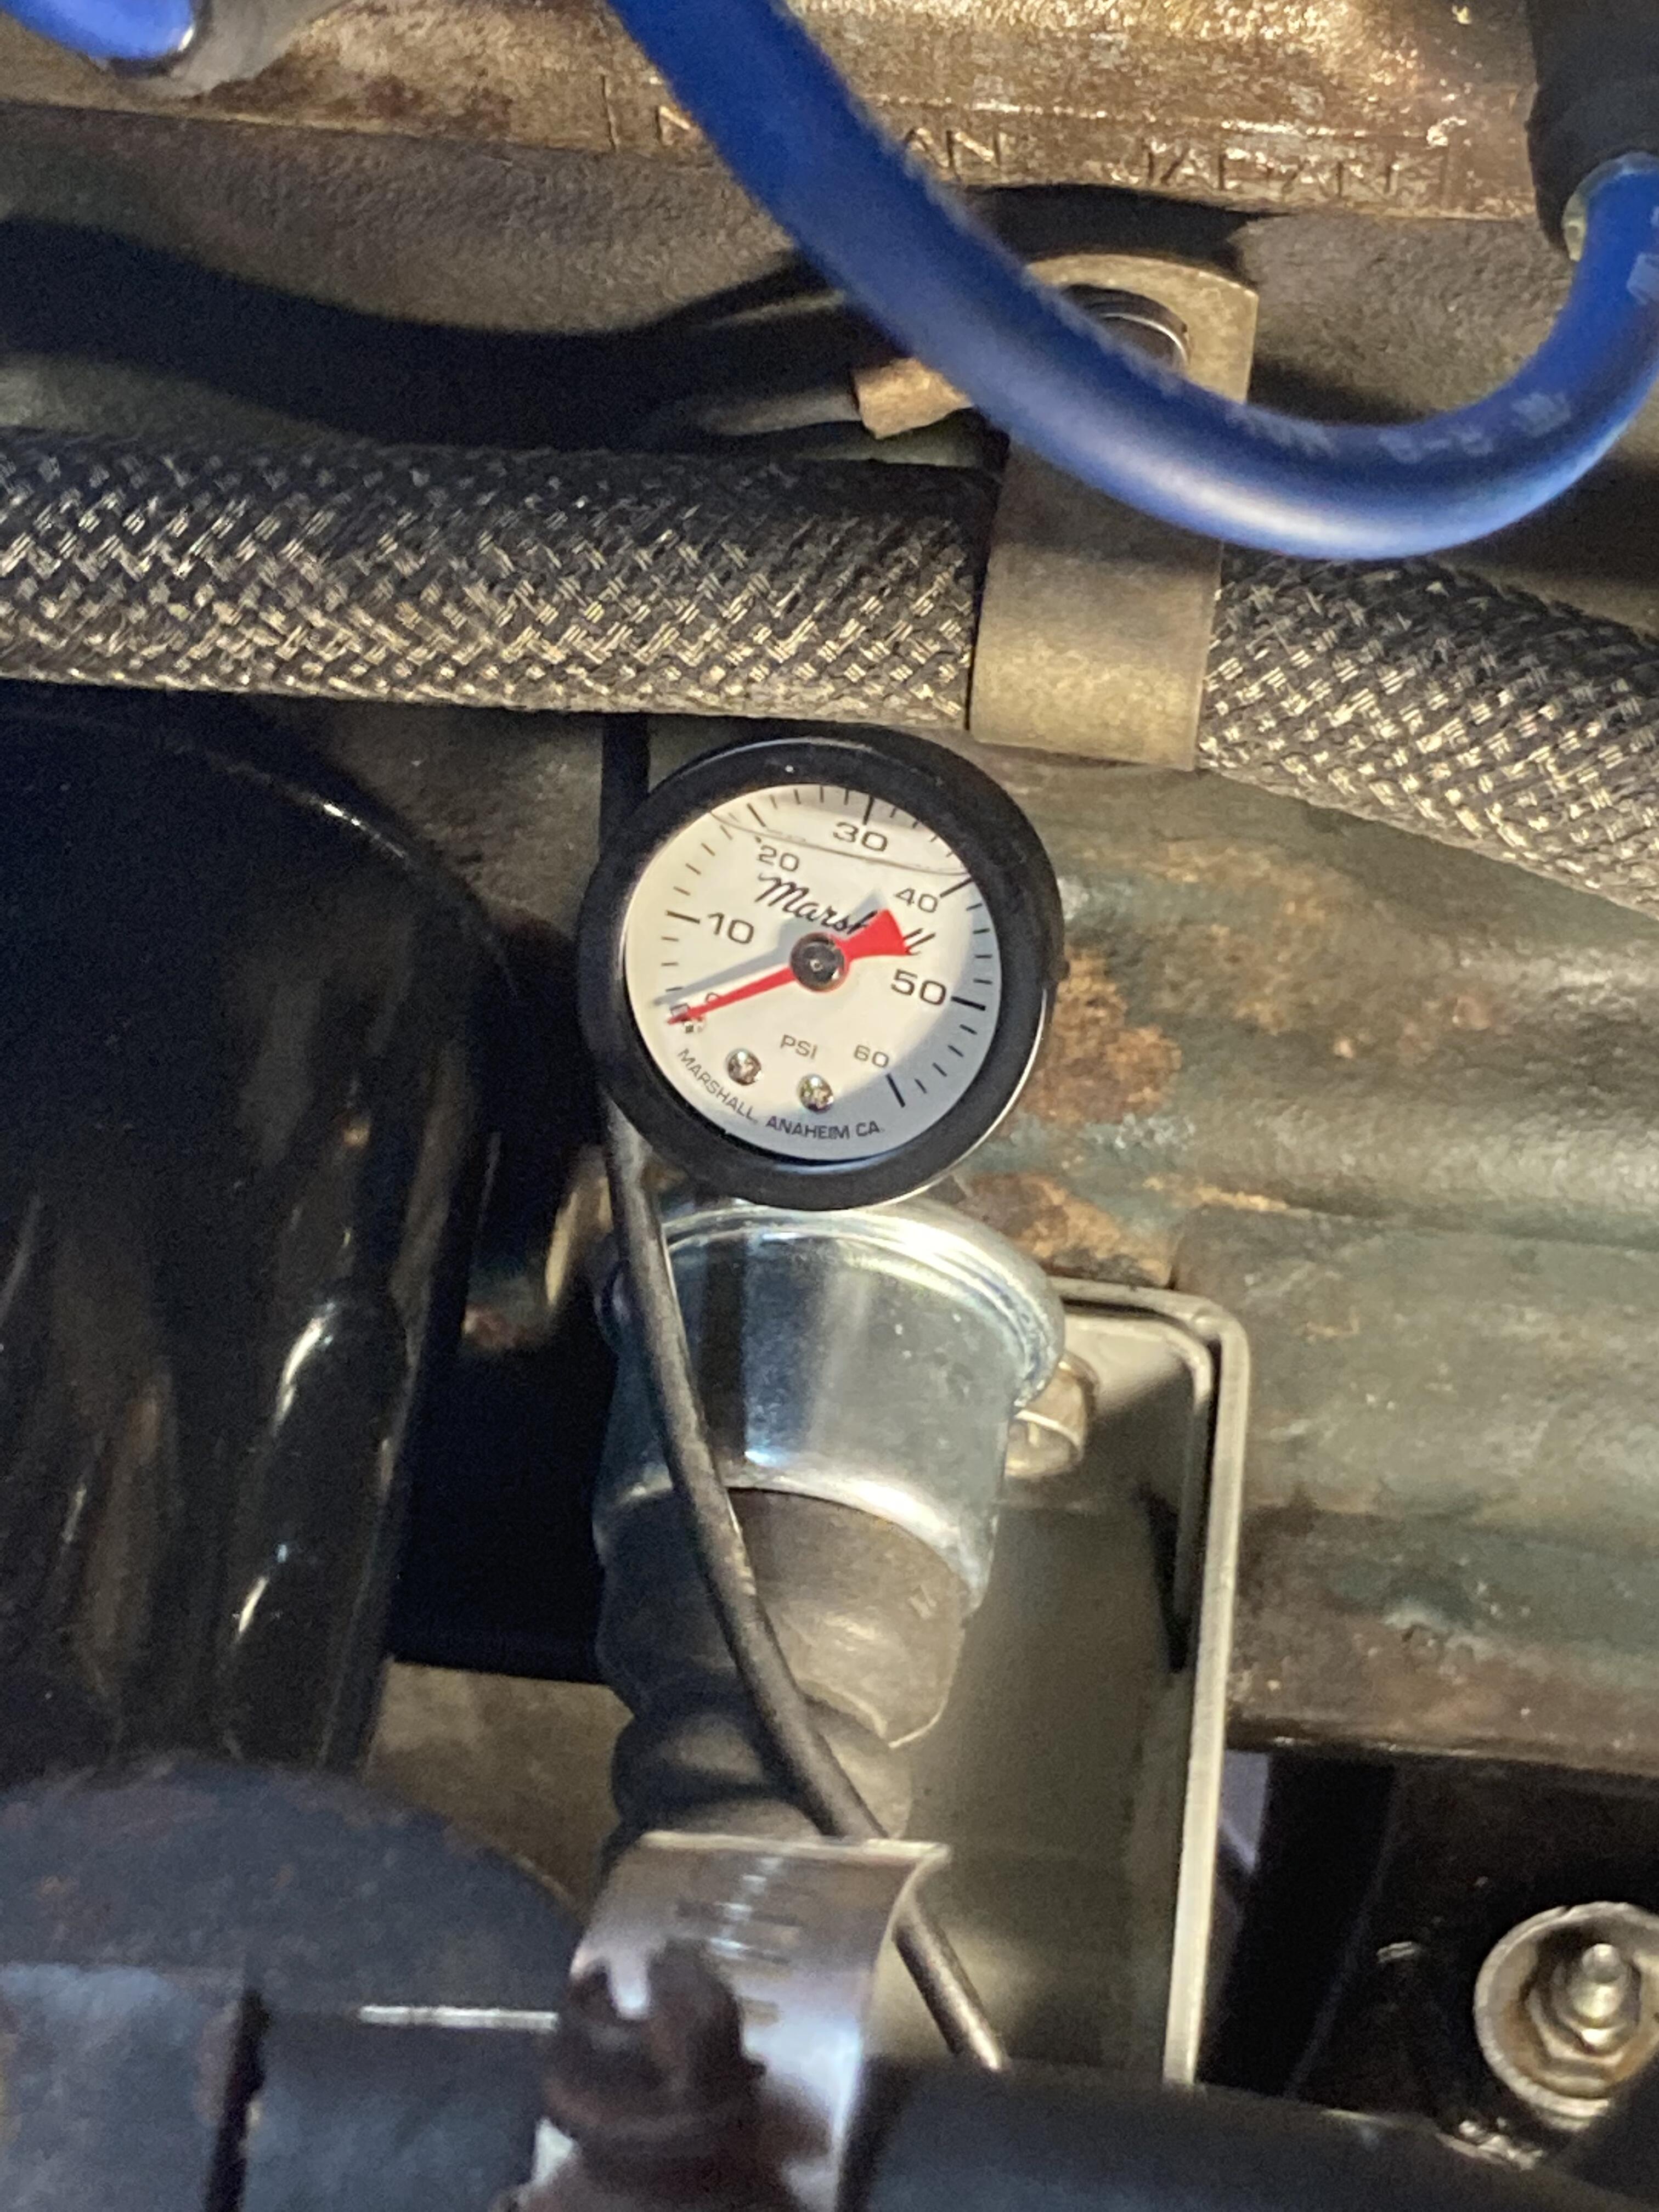
1 pointA comment on the use of Plastigauge. As I mentioned, do not rotate the crank while performing this task, the plastic will get smeared and result in an erroneous reading. Additionally, lay the bit of Plastigauge directly in line with the crankshaft, not at an oblique angle. I find using a tweezers helps with precise placement here.1 point
-
1 pointI agree with BillGTP that it looks like a crude attempt at 'staking' the shaft ends to make them expand a bit (those look like chisel marks). Seems that the perpetrator either used too big a hammer or consumed one too many brews before commencing the work. Possibly both.1 point
-
1 pointWell, again, this is something that should have been addressed immediately with the builder, before trying to suss it out on your own, especially given your lack of mechanical experience and knowledge, but what has been done cannot be undone, so the best we can do is move forward. So far you have an idea of what the rod bearing clearances are. Nothing jumps out there. Next up you should check the main bearing clearances, and post the results here. On reassembly of the oil pickup and pan, I suggest you use thread locker on the oil pickup bolts, and a very thin film of silicone sealer on both sides of the gasket. It looked like the pan rail was pretty clean, and if you recall I did ask if the builder used any sealer. If no sealer was used on the oil pan gasket, and the correct gasket (I’m talking the master the gasket is made from, the OEM, and the OEM quality aftermarket gaskets) was used, it can be reused multiple times, providing it isn’t damaged. Once you have the bottom end buttoned up, refill the crankcase and install a new filter. You obliquely mentioned that you had removed the oil pump, and I’m still not clear if you replaced the pump with new during the rebuild, or if you reused the old one. Did you disassemble it and check it according to the factory service manual? As I mentioned, the process is detailed in the manual, and is easy to do. You clean and inspect the gerotor (that’s what the two metal pieces are called that actually move the oil), then place the parts inside the housing and use a feeler gauge to check the clearances. If it is determined that 5he pump is serviceable, lubricate it and reassemble. Also check the pump pressure relief spring. I’ve already shown you where it is. I suspect there may be a problem either with the oil pump, it may be worn beyond limits, or with the pressure relief spring, it may be broken, or has lost tension, or is simple too weak. After that, if you still don’t have good oil pressure, you really need to have a conversation with the builder. And don’t spend a lot of time running the engine until you are certain that it has proper lubrication.1 point
-
1 pointAll I can say is "Wow". You don't see those every day. The left one would be a good add to my car. Are you serious about possibly parting with them?
 1 point
 -
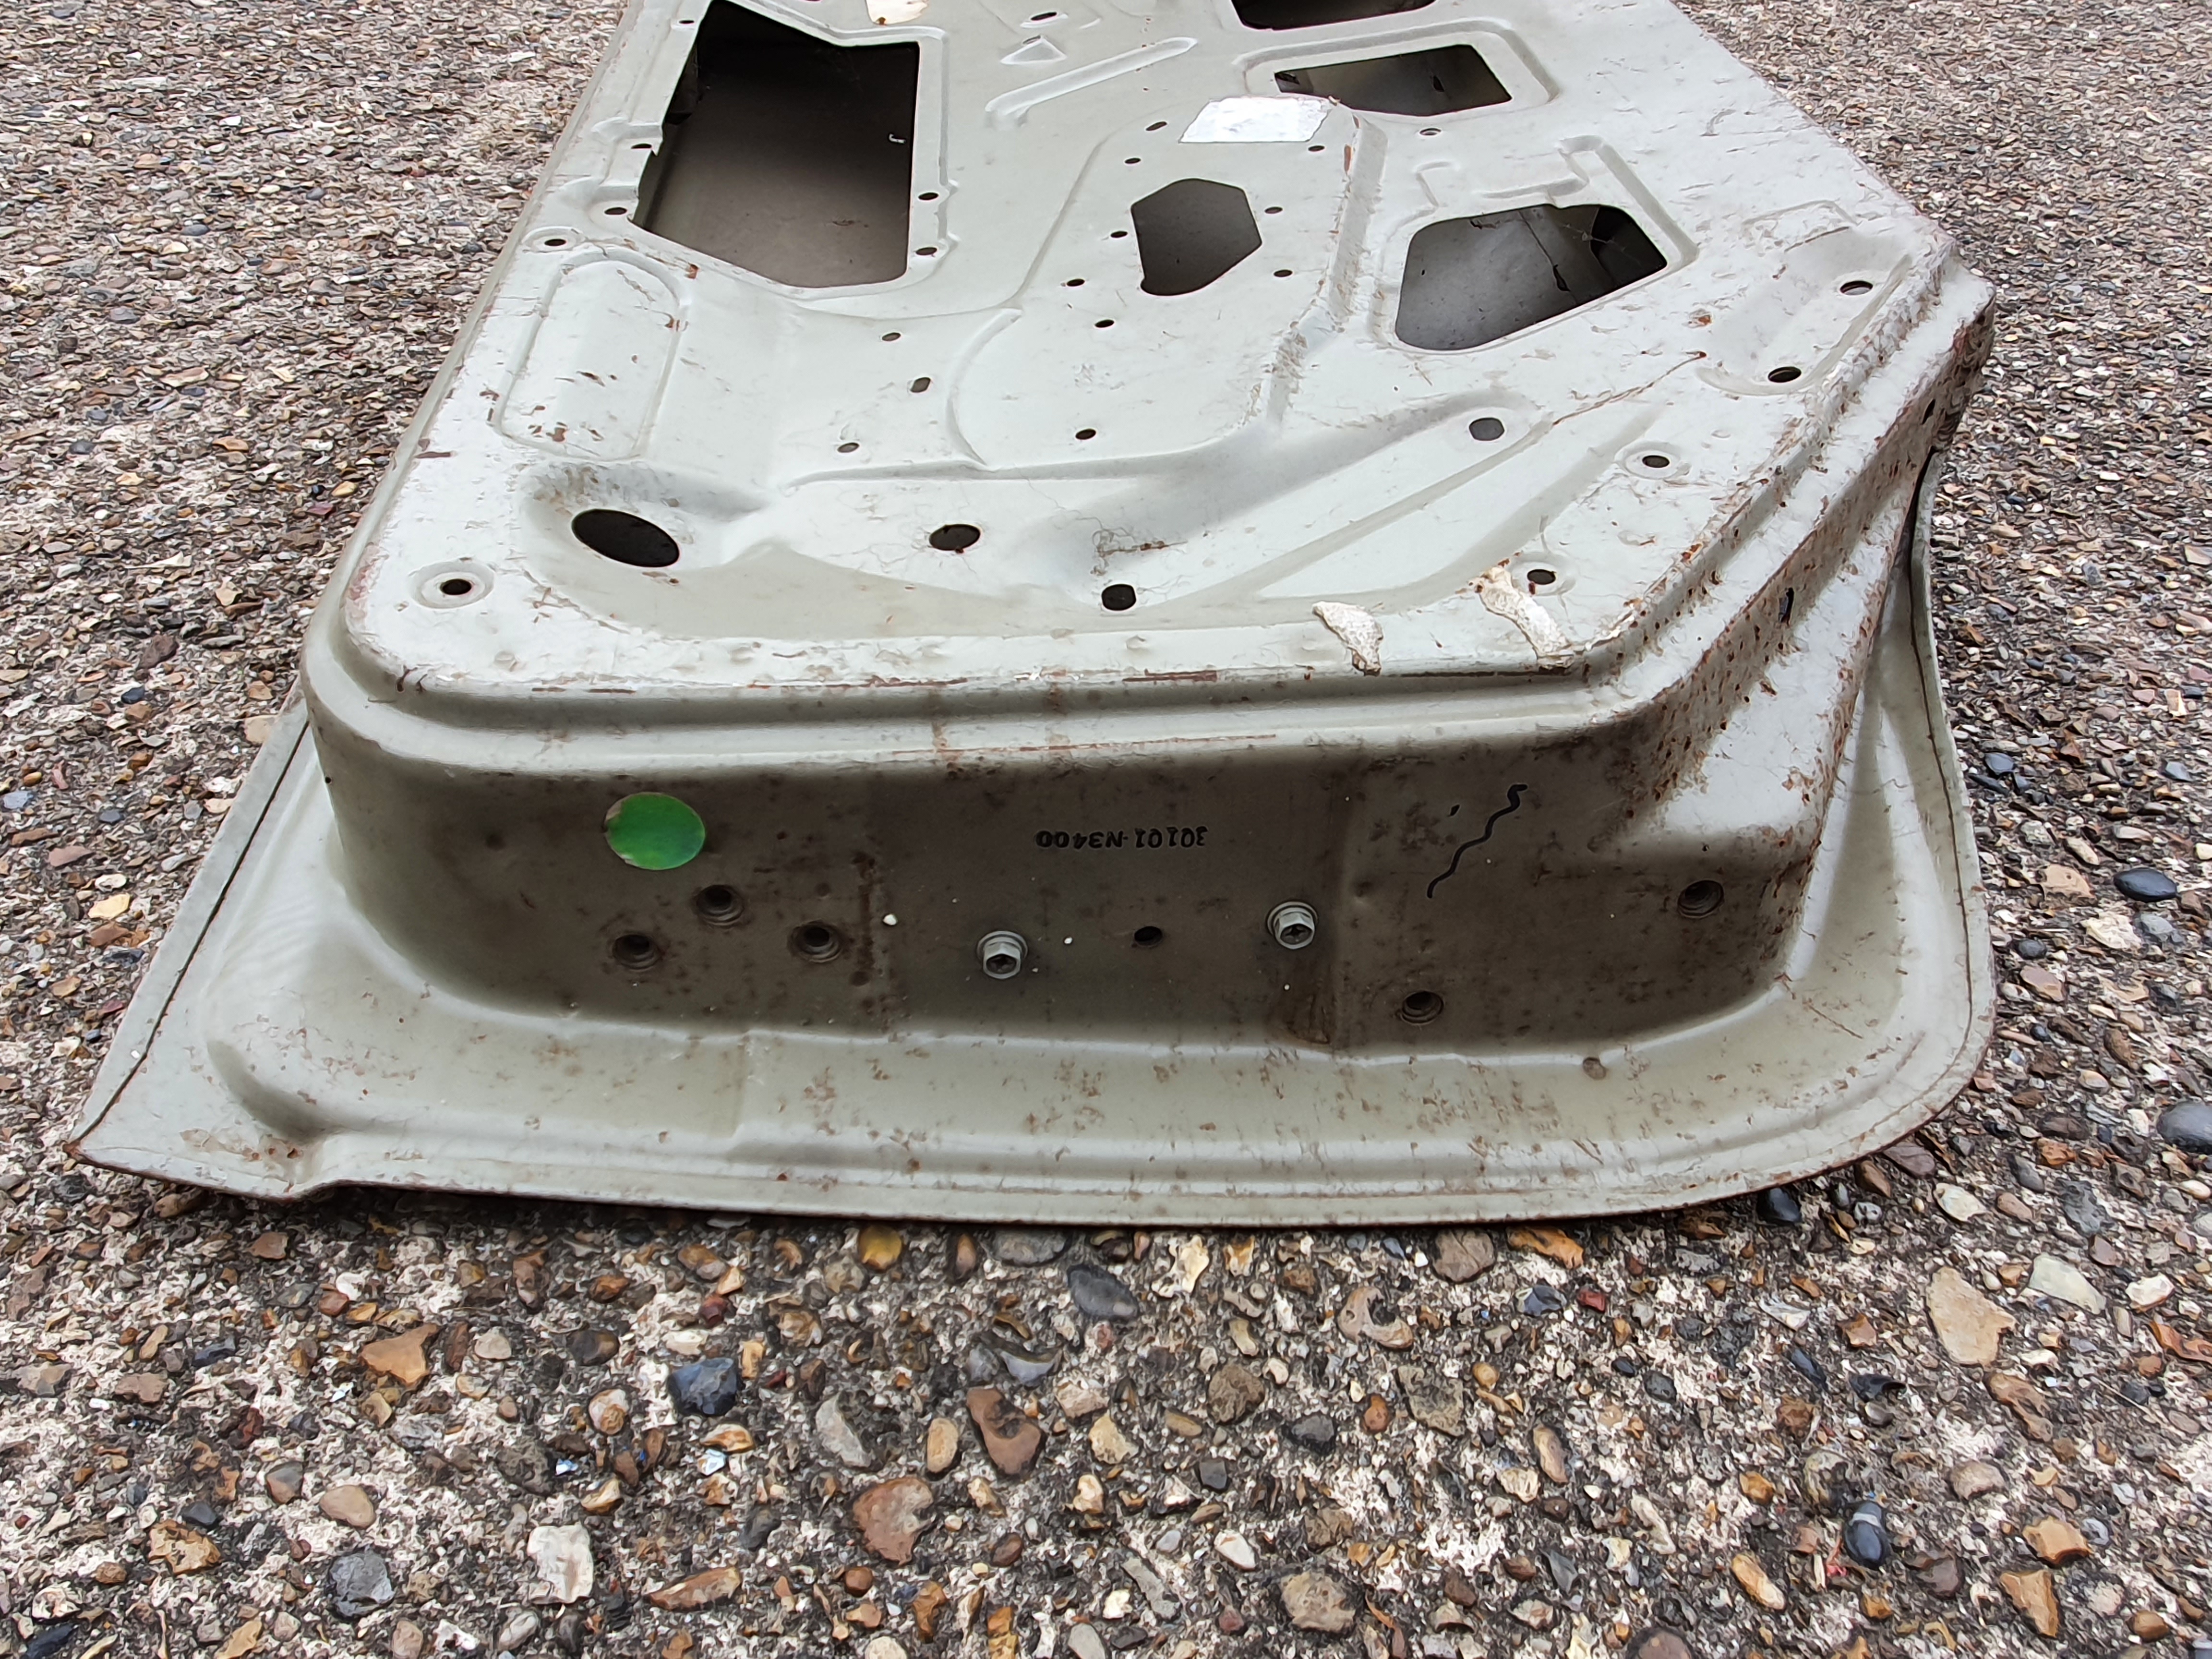
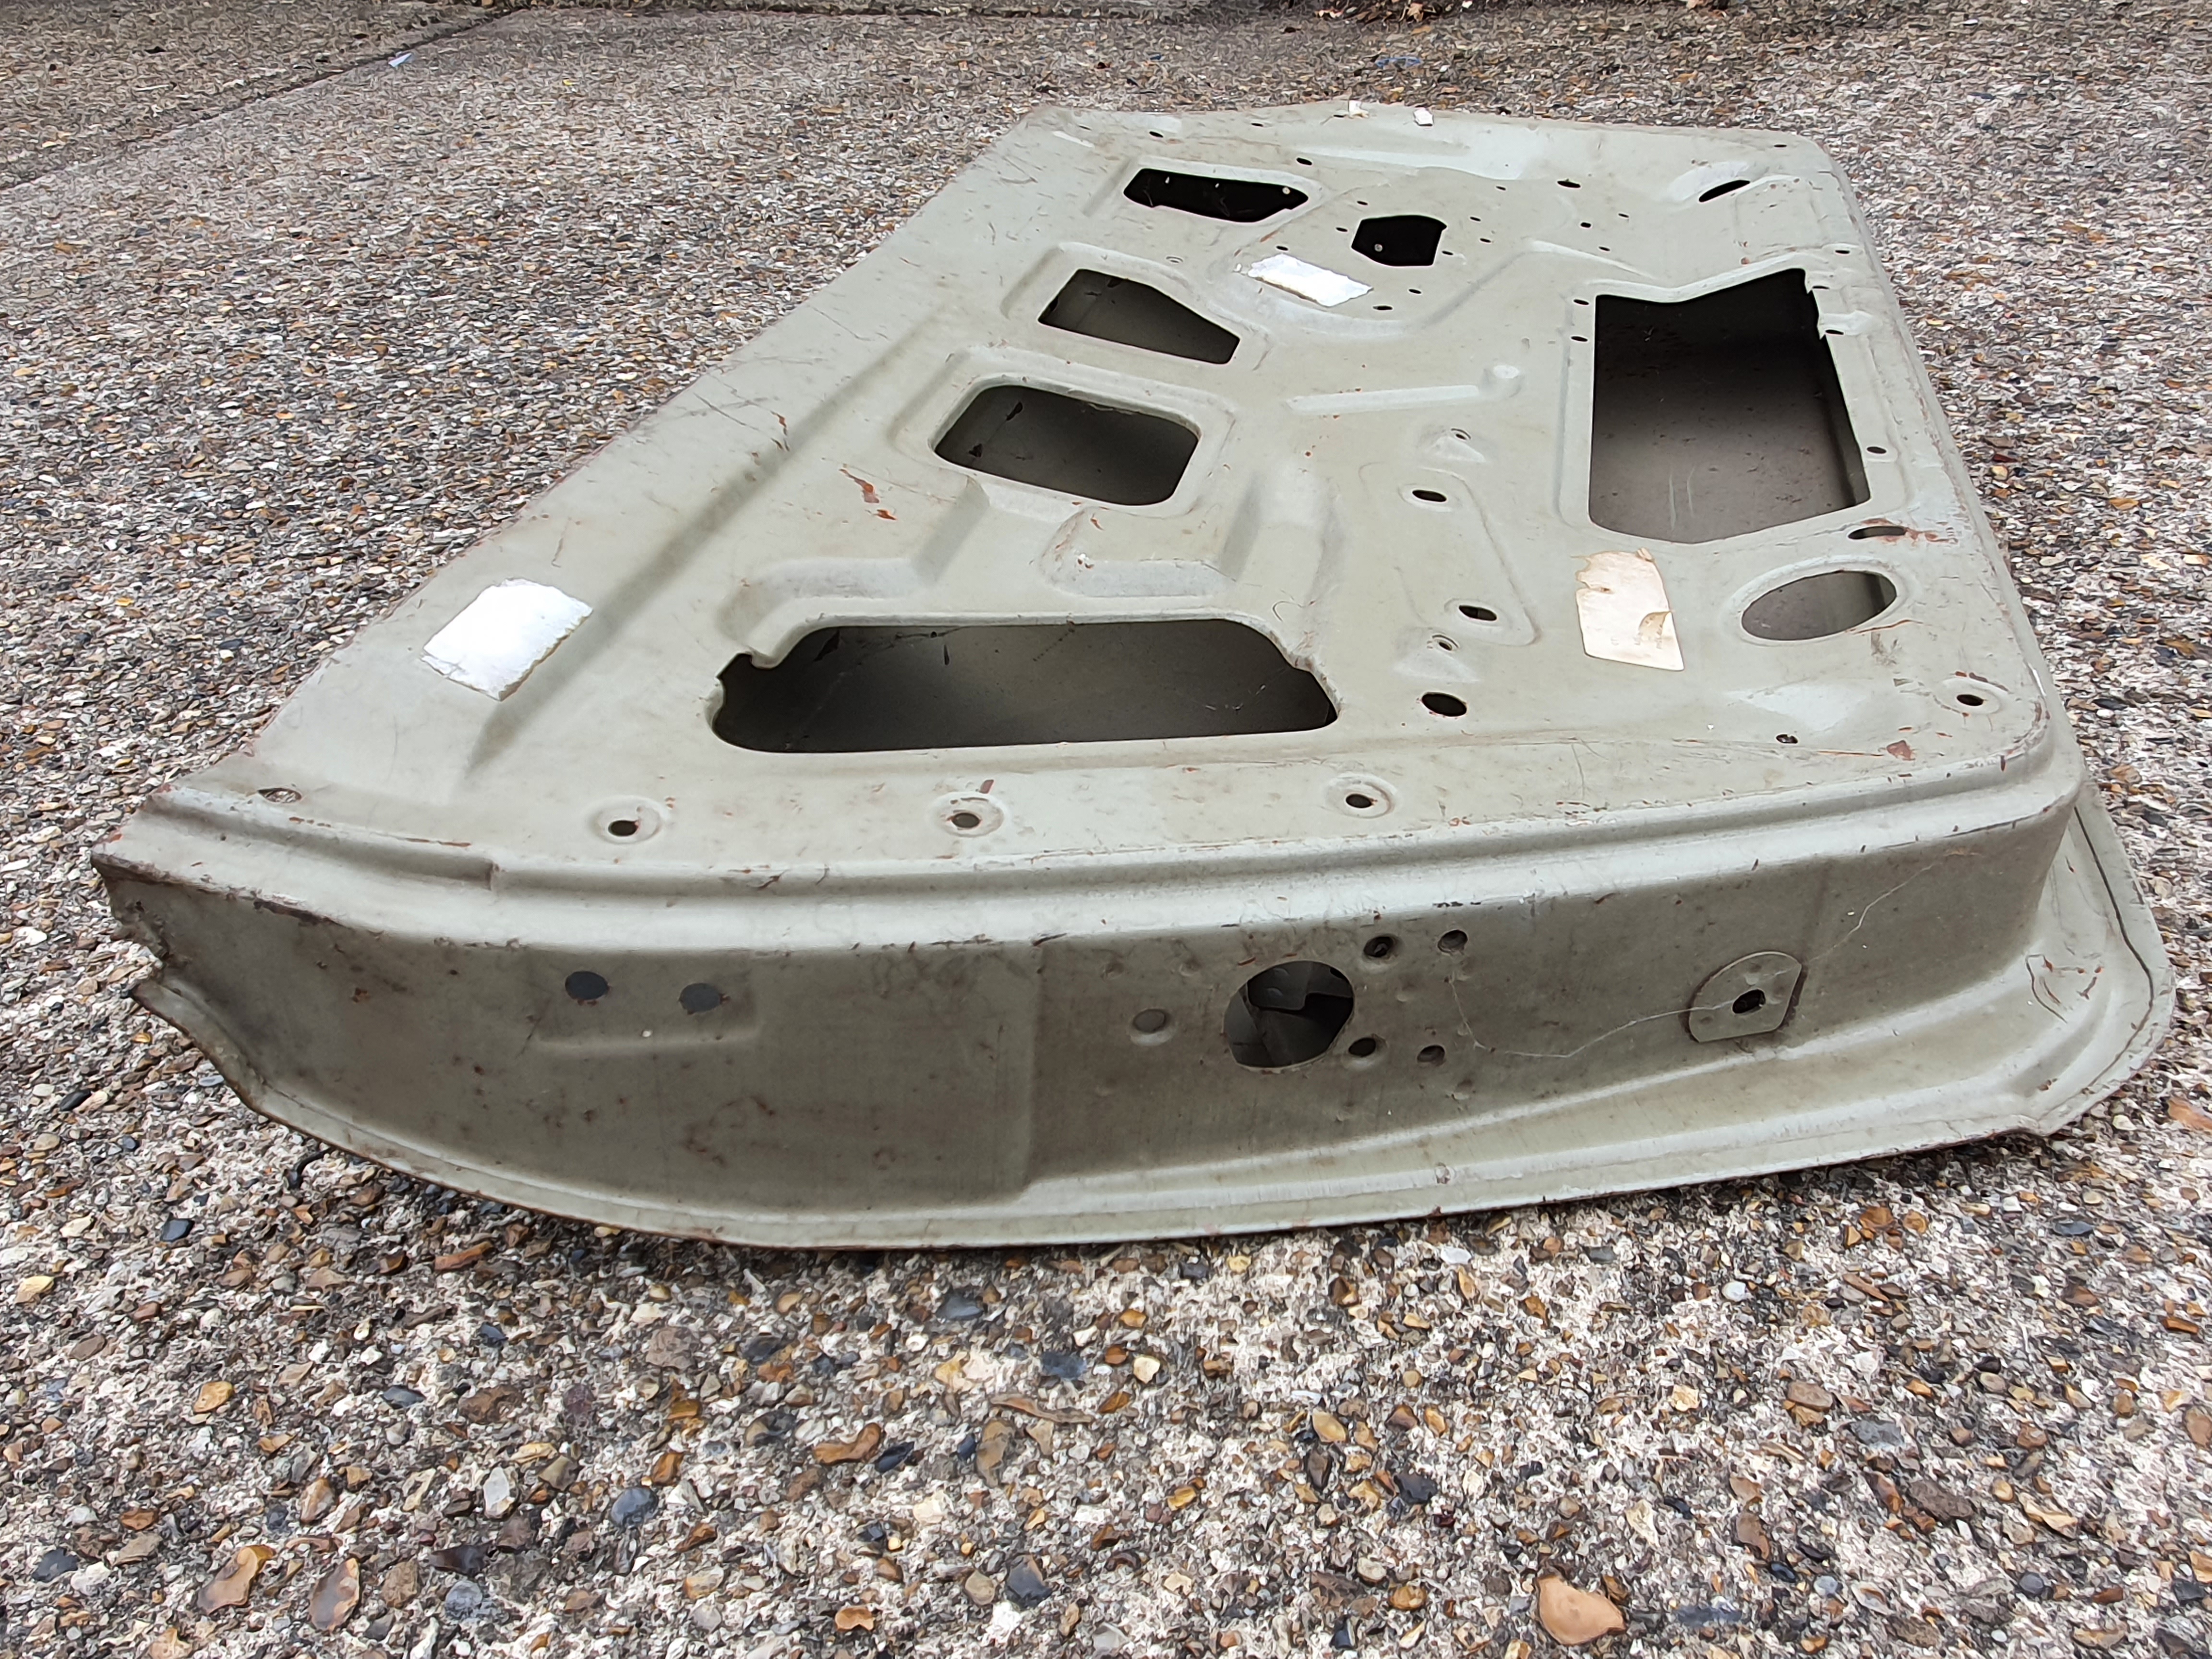
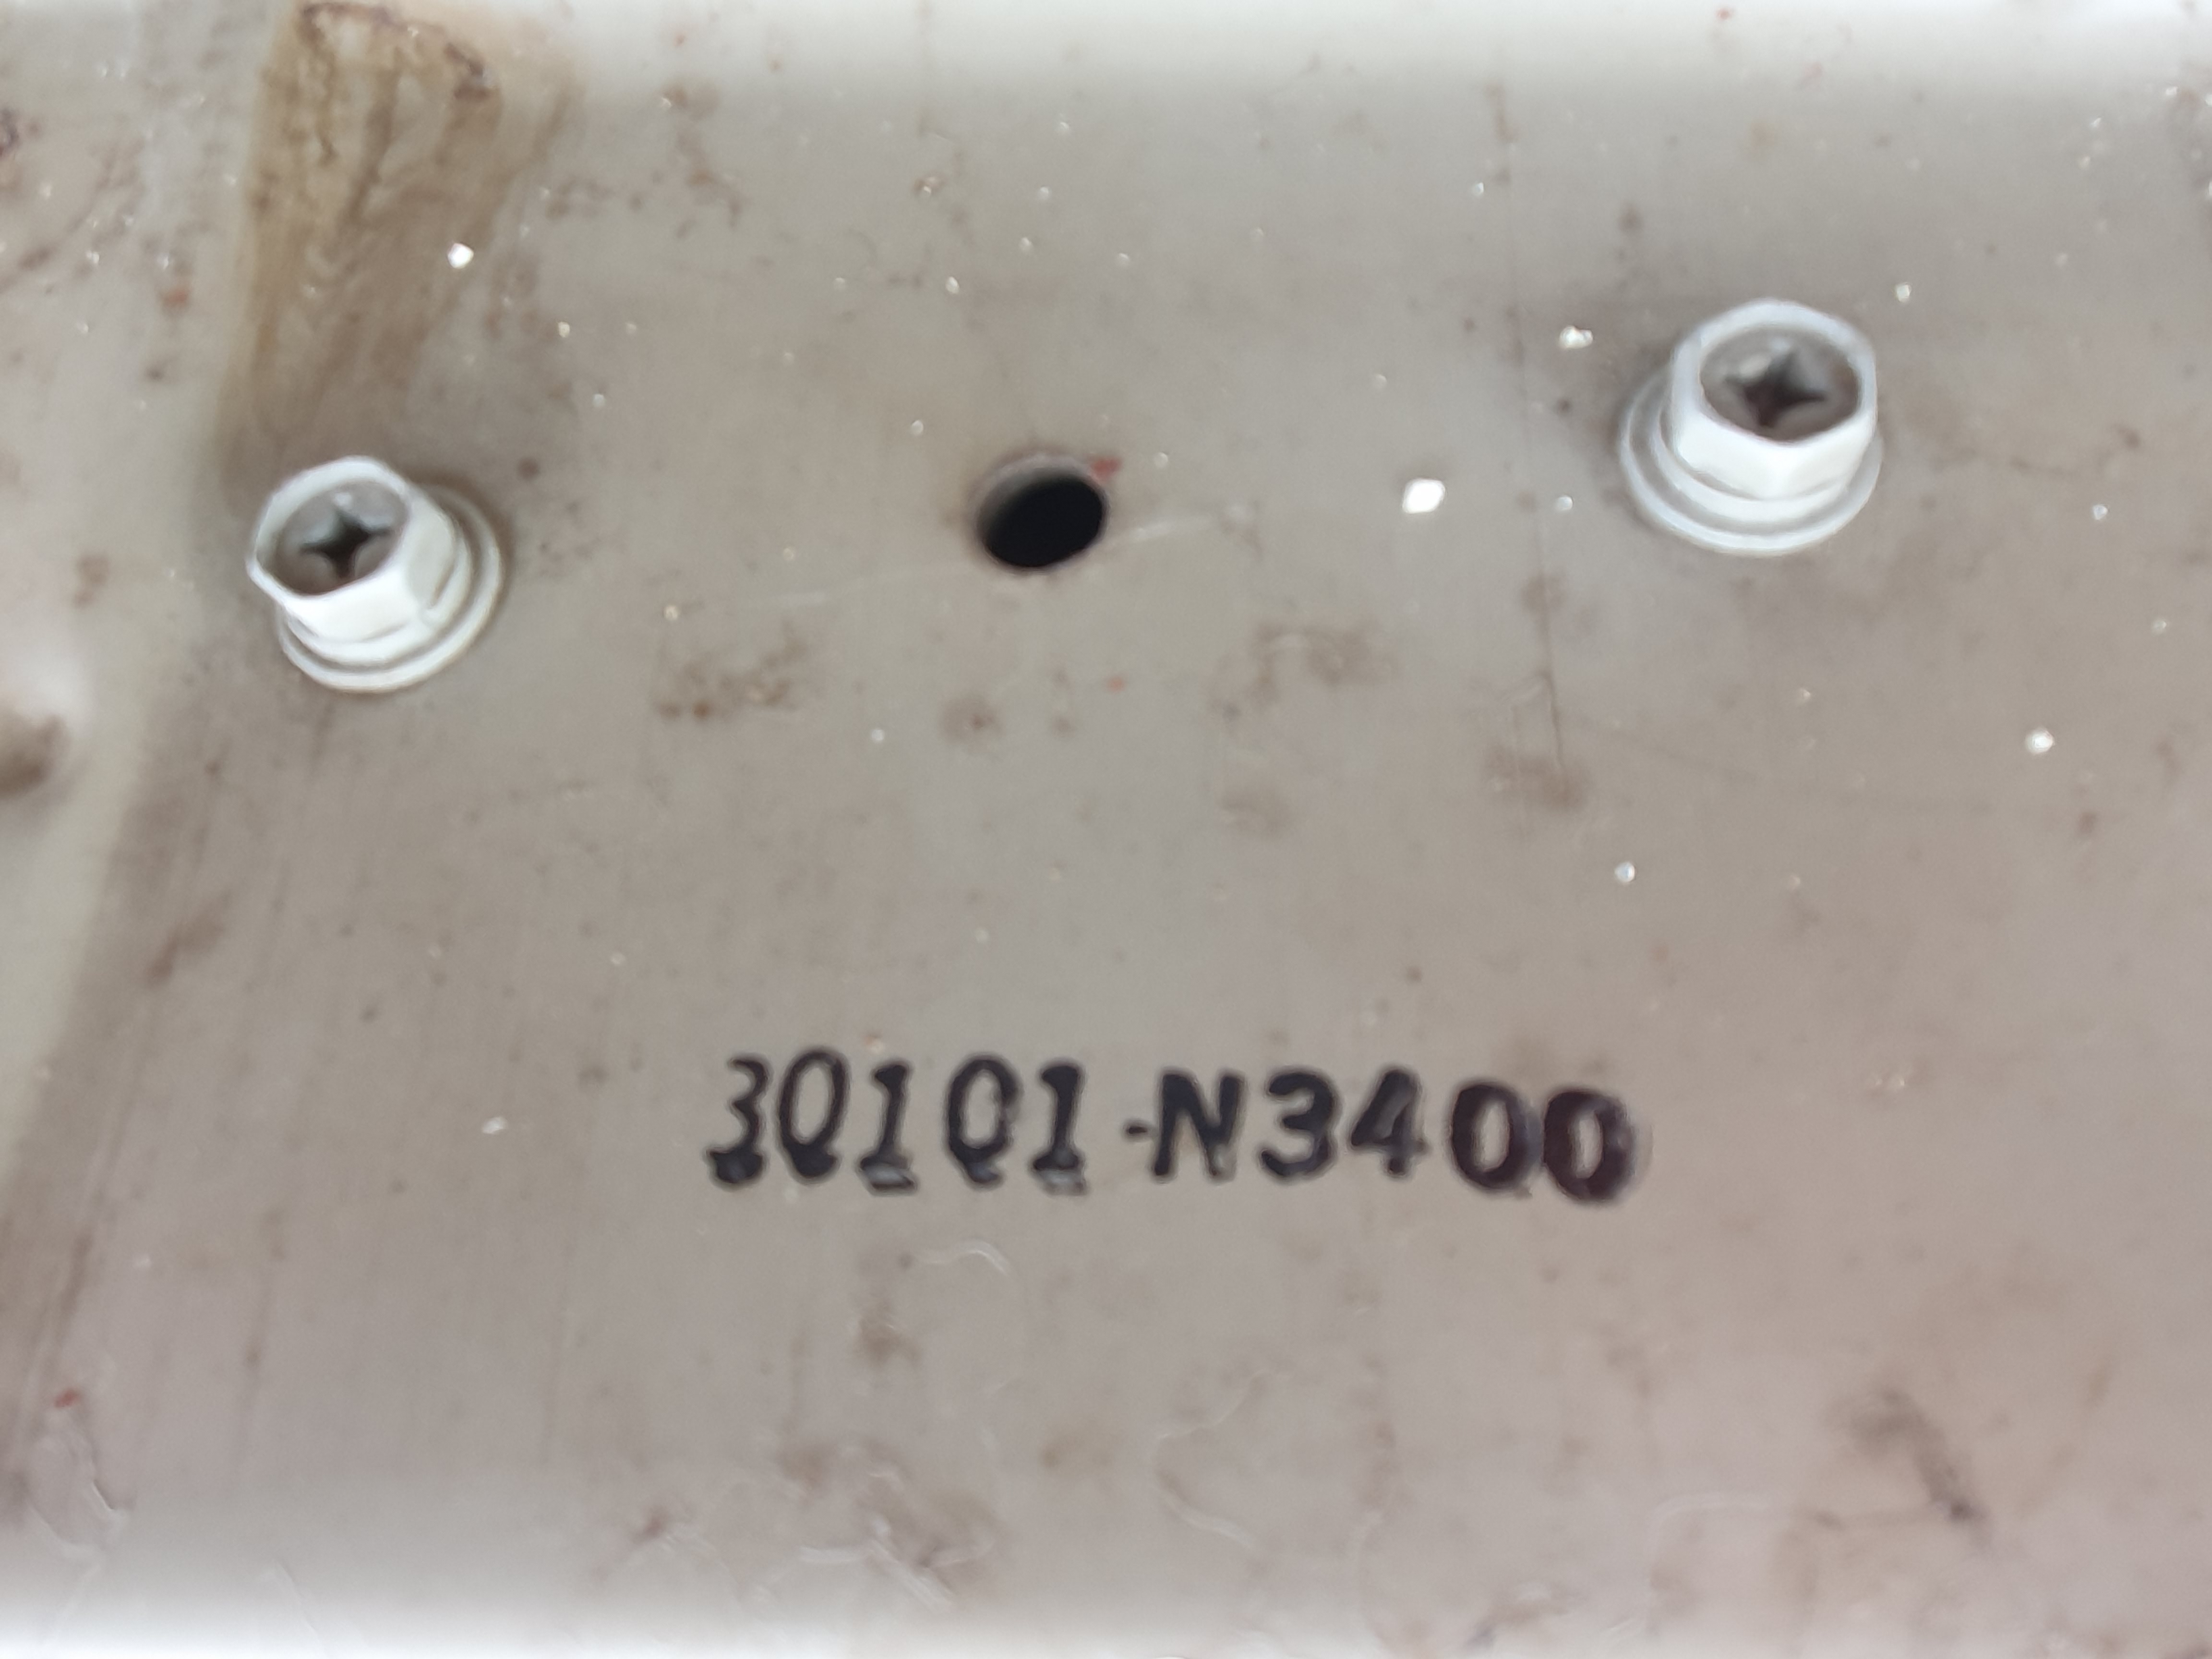
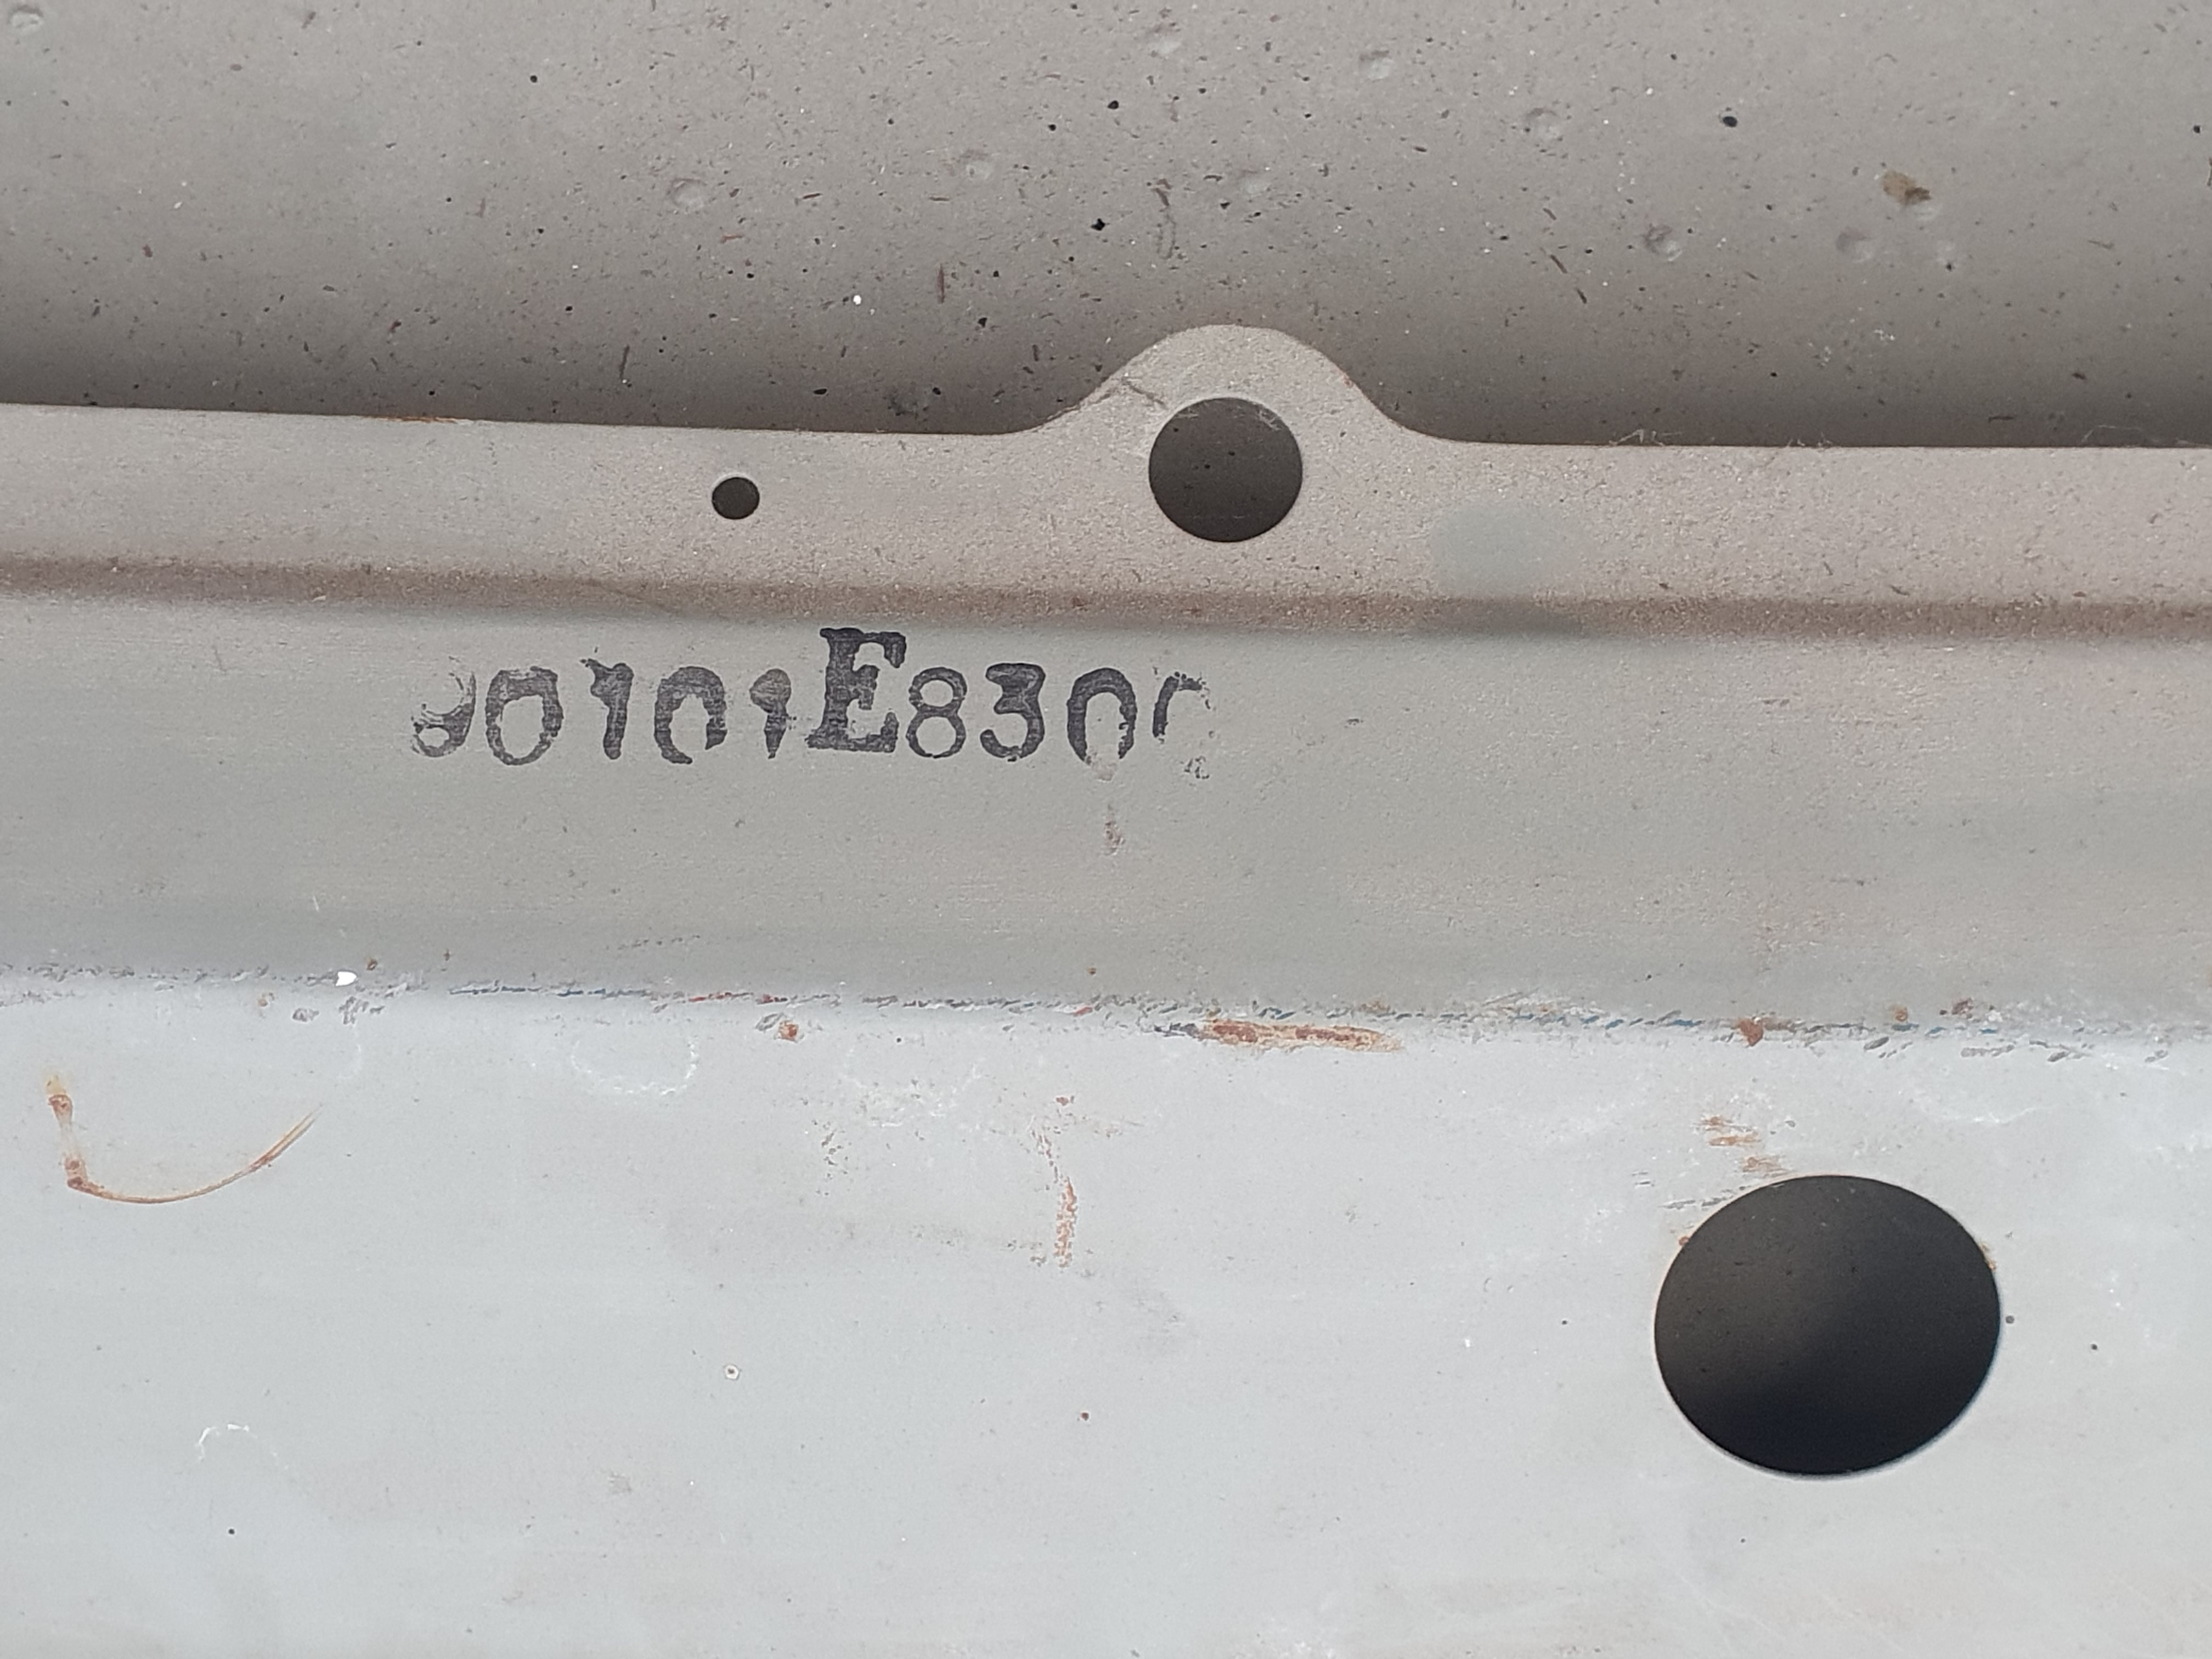
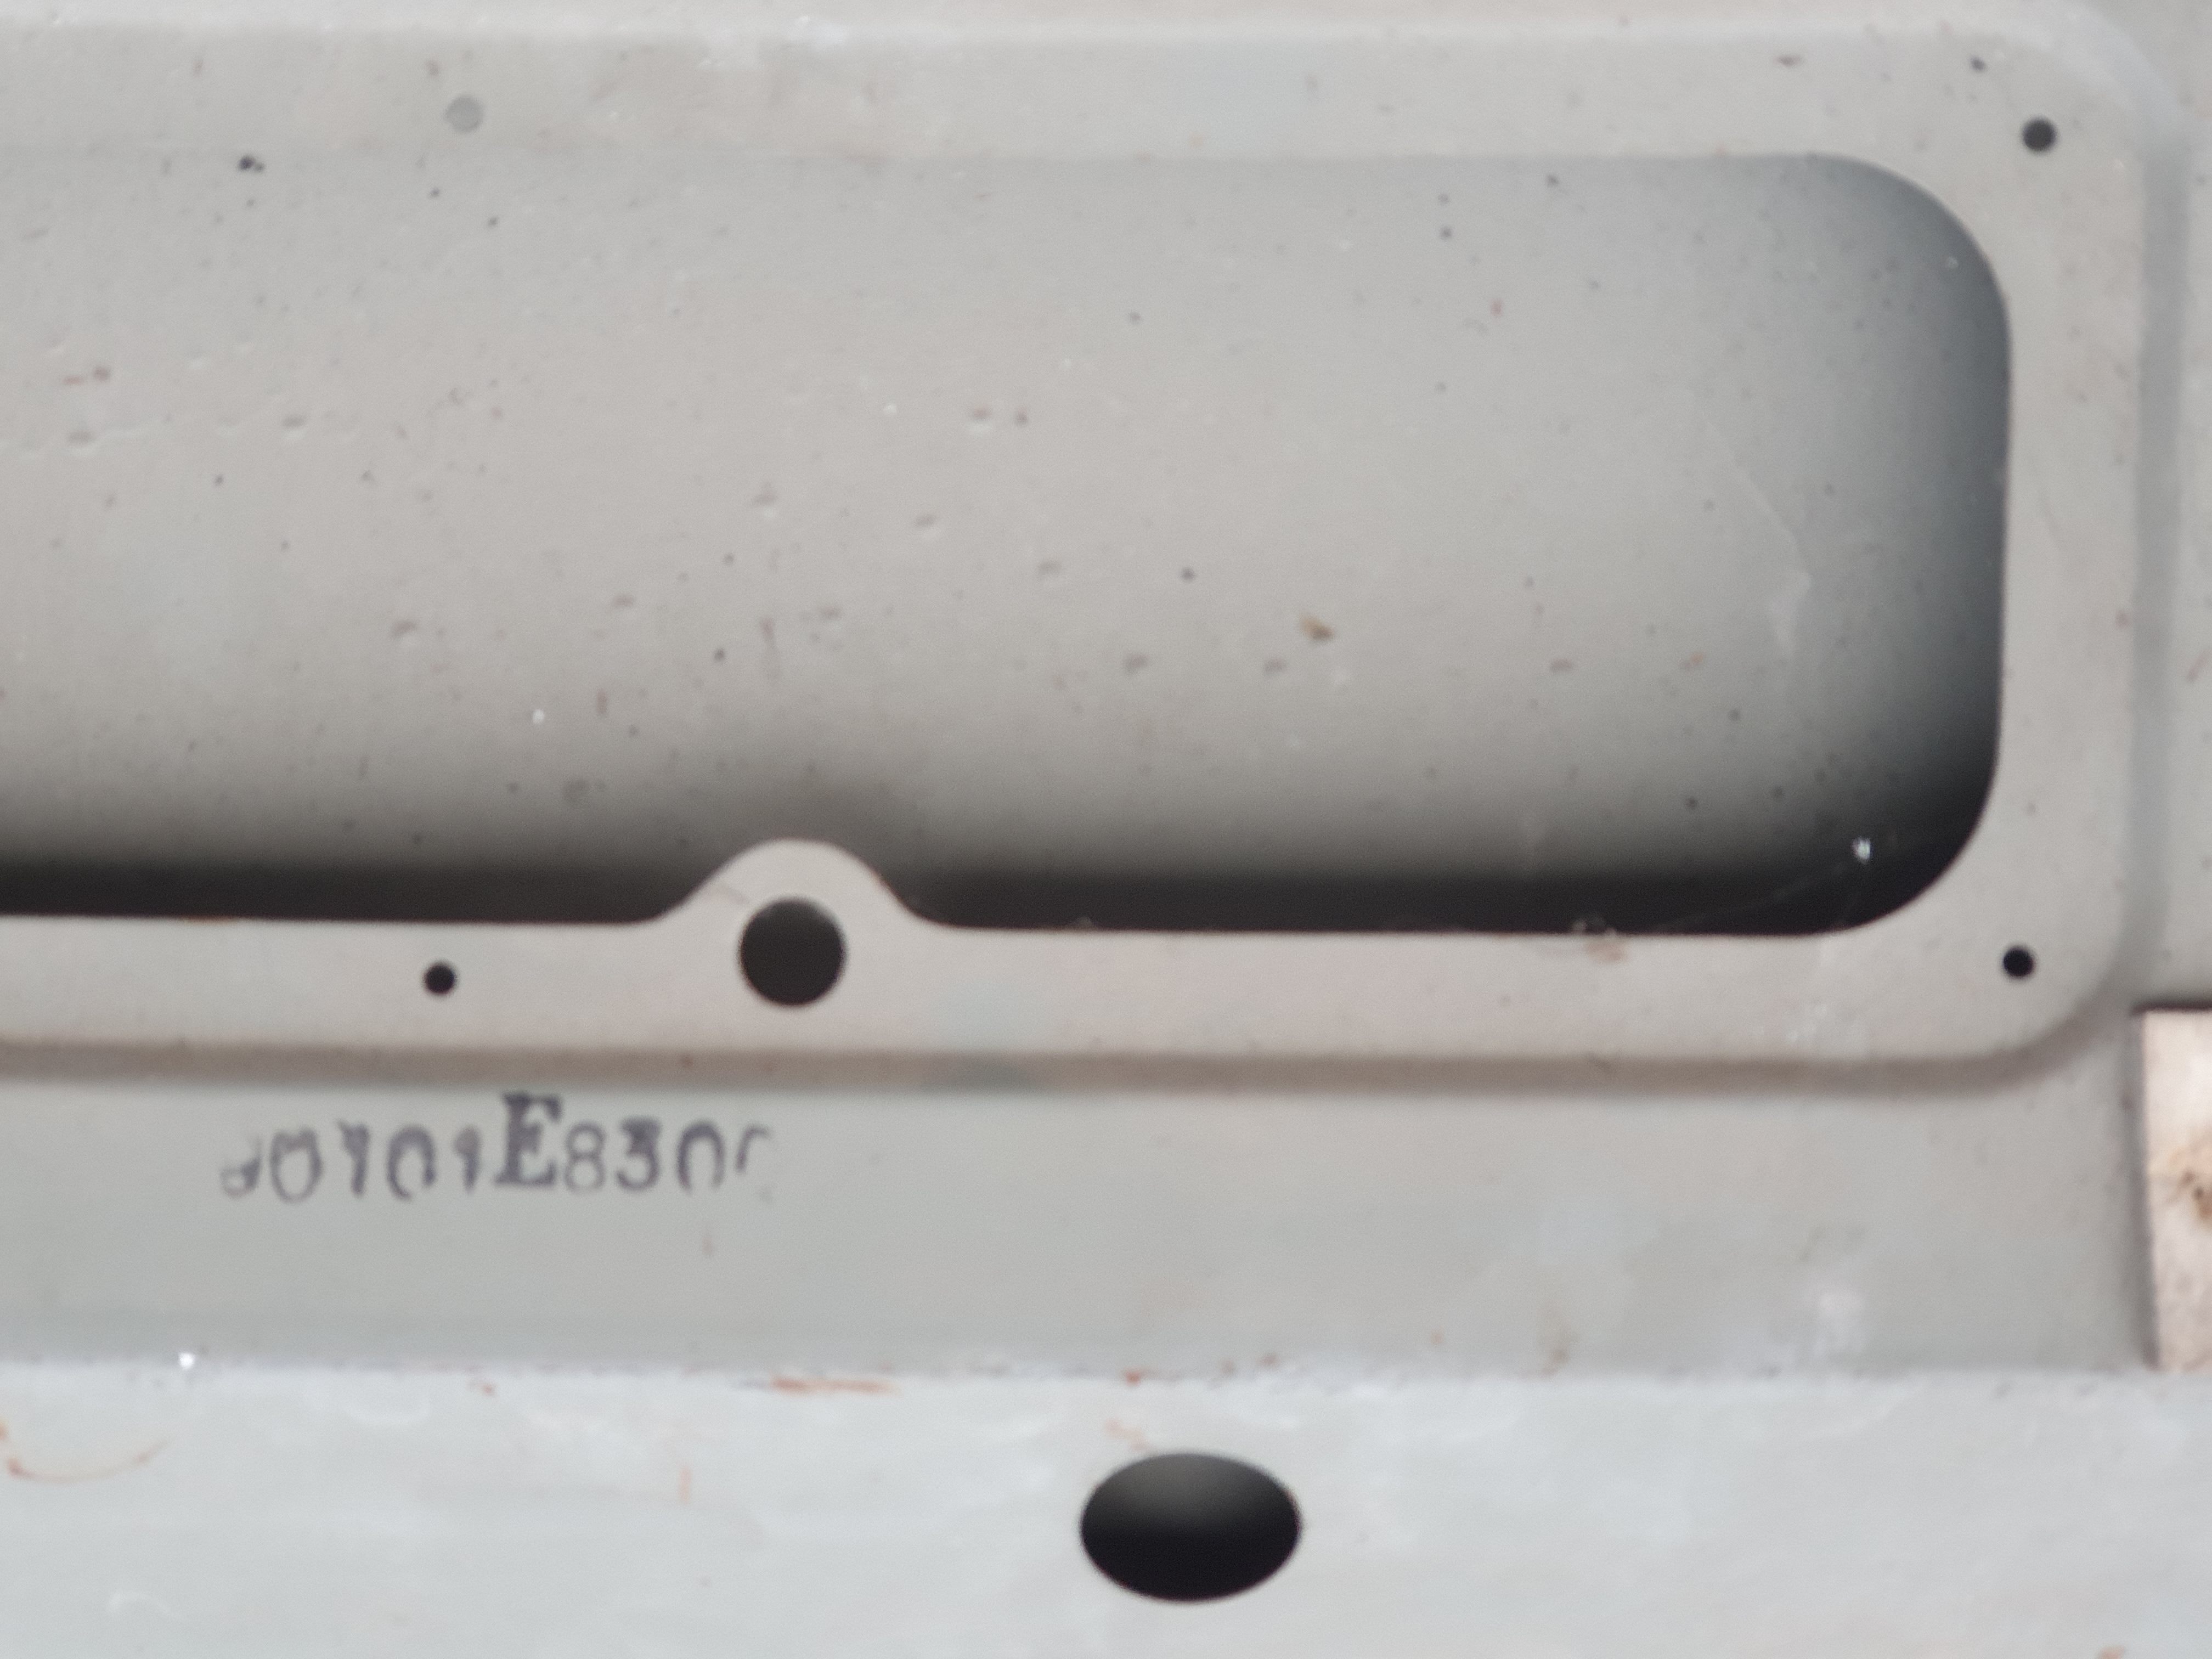
1 pointA few more NOS parts from my 'stash' which - all things considered - are doing no good sitting in a dark corner of my storage garage. They need to find a home that wants and, ideally, really needs them... First up, 90101-E8300 ASSY-PANEL TAIL GATE 01-71 up:

 1 point
 -
1 point1 point1 pointI think I already wrote this but I would spend more time on being sure the pressure reading is correct. If you get it back together without discovering the source of the problem. The small passage that the gauge is ported in to could have flow disruptions that give erroneous readings. If there is a constriction or obstruction the fluid could have a low pressure point at the gauge port. The fluid is moving. If it was mine and I was unsure I probably would have tapped a hole in to an oil filter and stuck my gauge there, just to verify what the gauge port showed. The filter is full of very slow moving oil.1 point1 pointFirst no I did not do this. Found it when I removed all the gunk off of carbs. I posted this to show what butcher mechanics have done to this car and felt you guys might get a kick out of it. I have had to replace a lot of items just from this kind of work. Vice grips on hydraulic fitting instead of using line wrenches etc. Rebuild harness from aftermarket radios, boom box, and just butcher work on all the harnesses. I never use those yellow,red and blue insulated terminals just junk. The shaft was not stuck in the body. I think they felt they could expand the shaft to get rid of vacuum leak. Have a very good friend that was a fabricator for electromotive during the gtp era, worked for Dan Gurney until the indy car program ended and for Patrick Racing. He is going to install bearings for me much like ztherapy does I"m in luck i do have another set of carbs I purchased to just get the fuel inlets. I do have some experience working on cars having raced formula v,formula fords and a Datsun 2000 Roadster. And by friend that let into the above shops and see how things are done correct.1 point1 point1 point


Important Information
By using this site, you agree to our Privacy Policy and Guidelines. We have placed cookies on your device to help make this website better. You can adjust your cookie settings, otherwise we'll assume you're okay to continue.