


Leaderboard
-
zKars
 Subscriber
 10Points3,770Posts
 -

Av8ferg
Free Member6Points1,538Posts -

Racer X
Free Member5Points1,877Posts -
Captain Obvious
Free Member3Points10,081Posts


Popular Content
Showing content with the highest reputation on 11/03/2021 in Posts
-
Well, we recently had some guests over the house maybe 6-8 weeks ago and it was like the 3rd time someone made very positive comments about the Z. I think she finally gets it, she doesn’t love it but she realizes it’s a unique car. So with that said she hasn’t made a single comment about the car or the money I spend on it. As long as I bring home the bacon, clean up my messes she’s been letting me do my thing. So we’ve made progress, plus I’m acting like a politician....just tell her what she wants to hear (like “ l’ll sell it someday when it’s fixed up”) and then blow it off, (I’m never selling it)! [emoji23] Sent from my iPhone using Tapatalk5 points
-
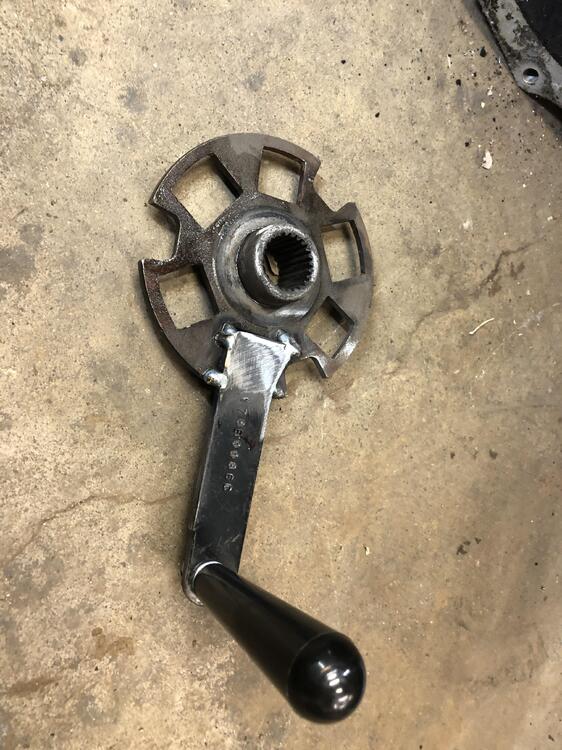
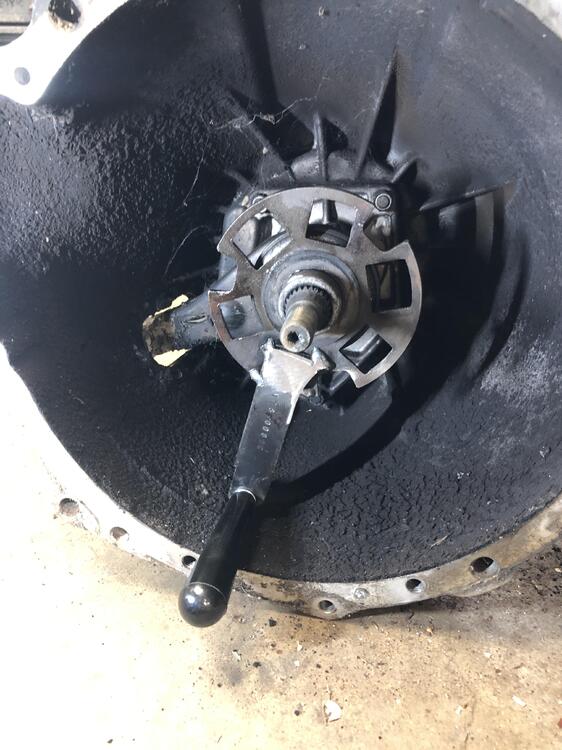
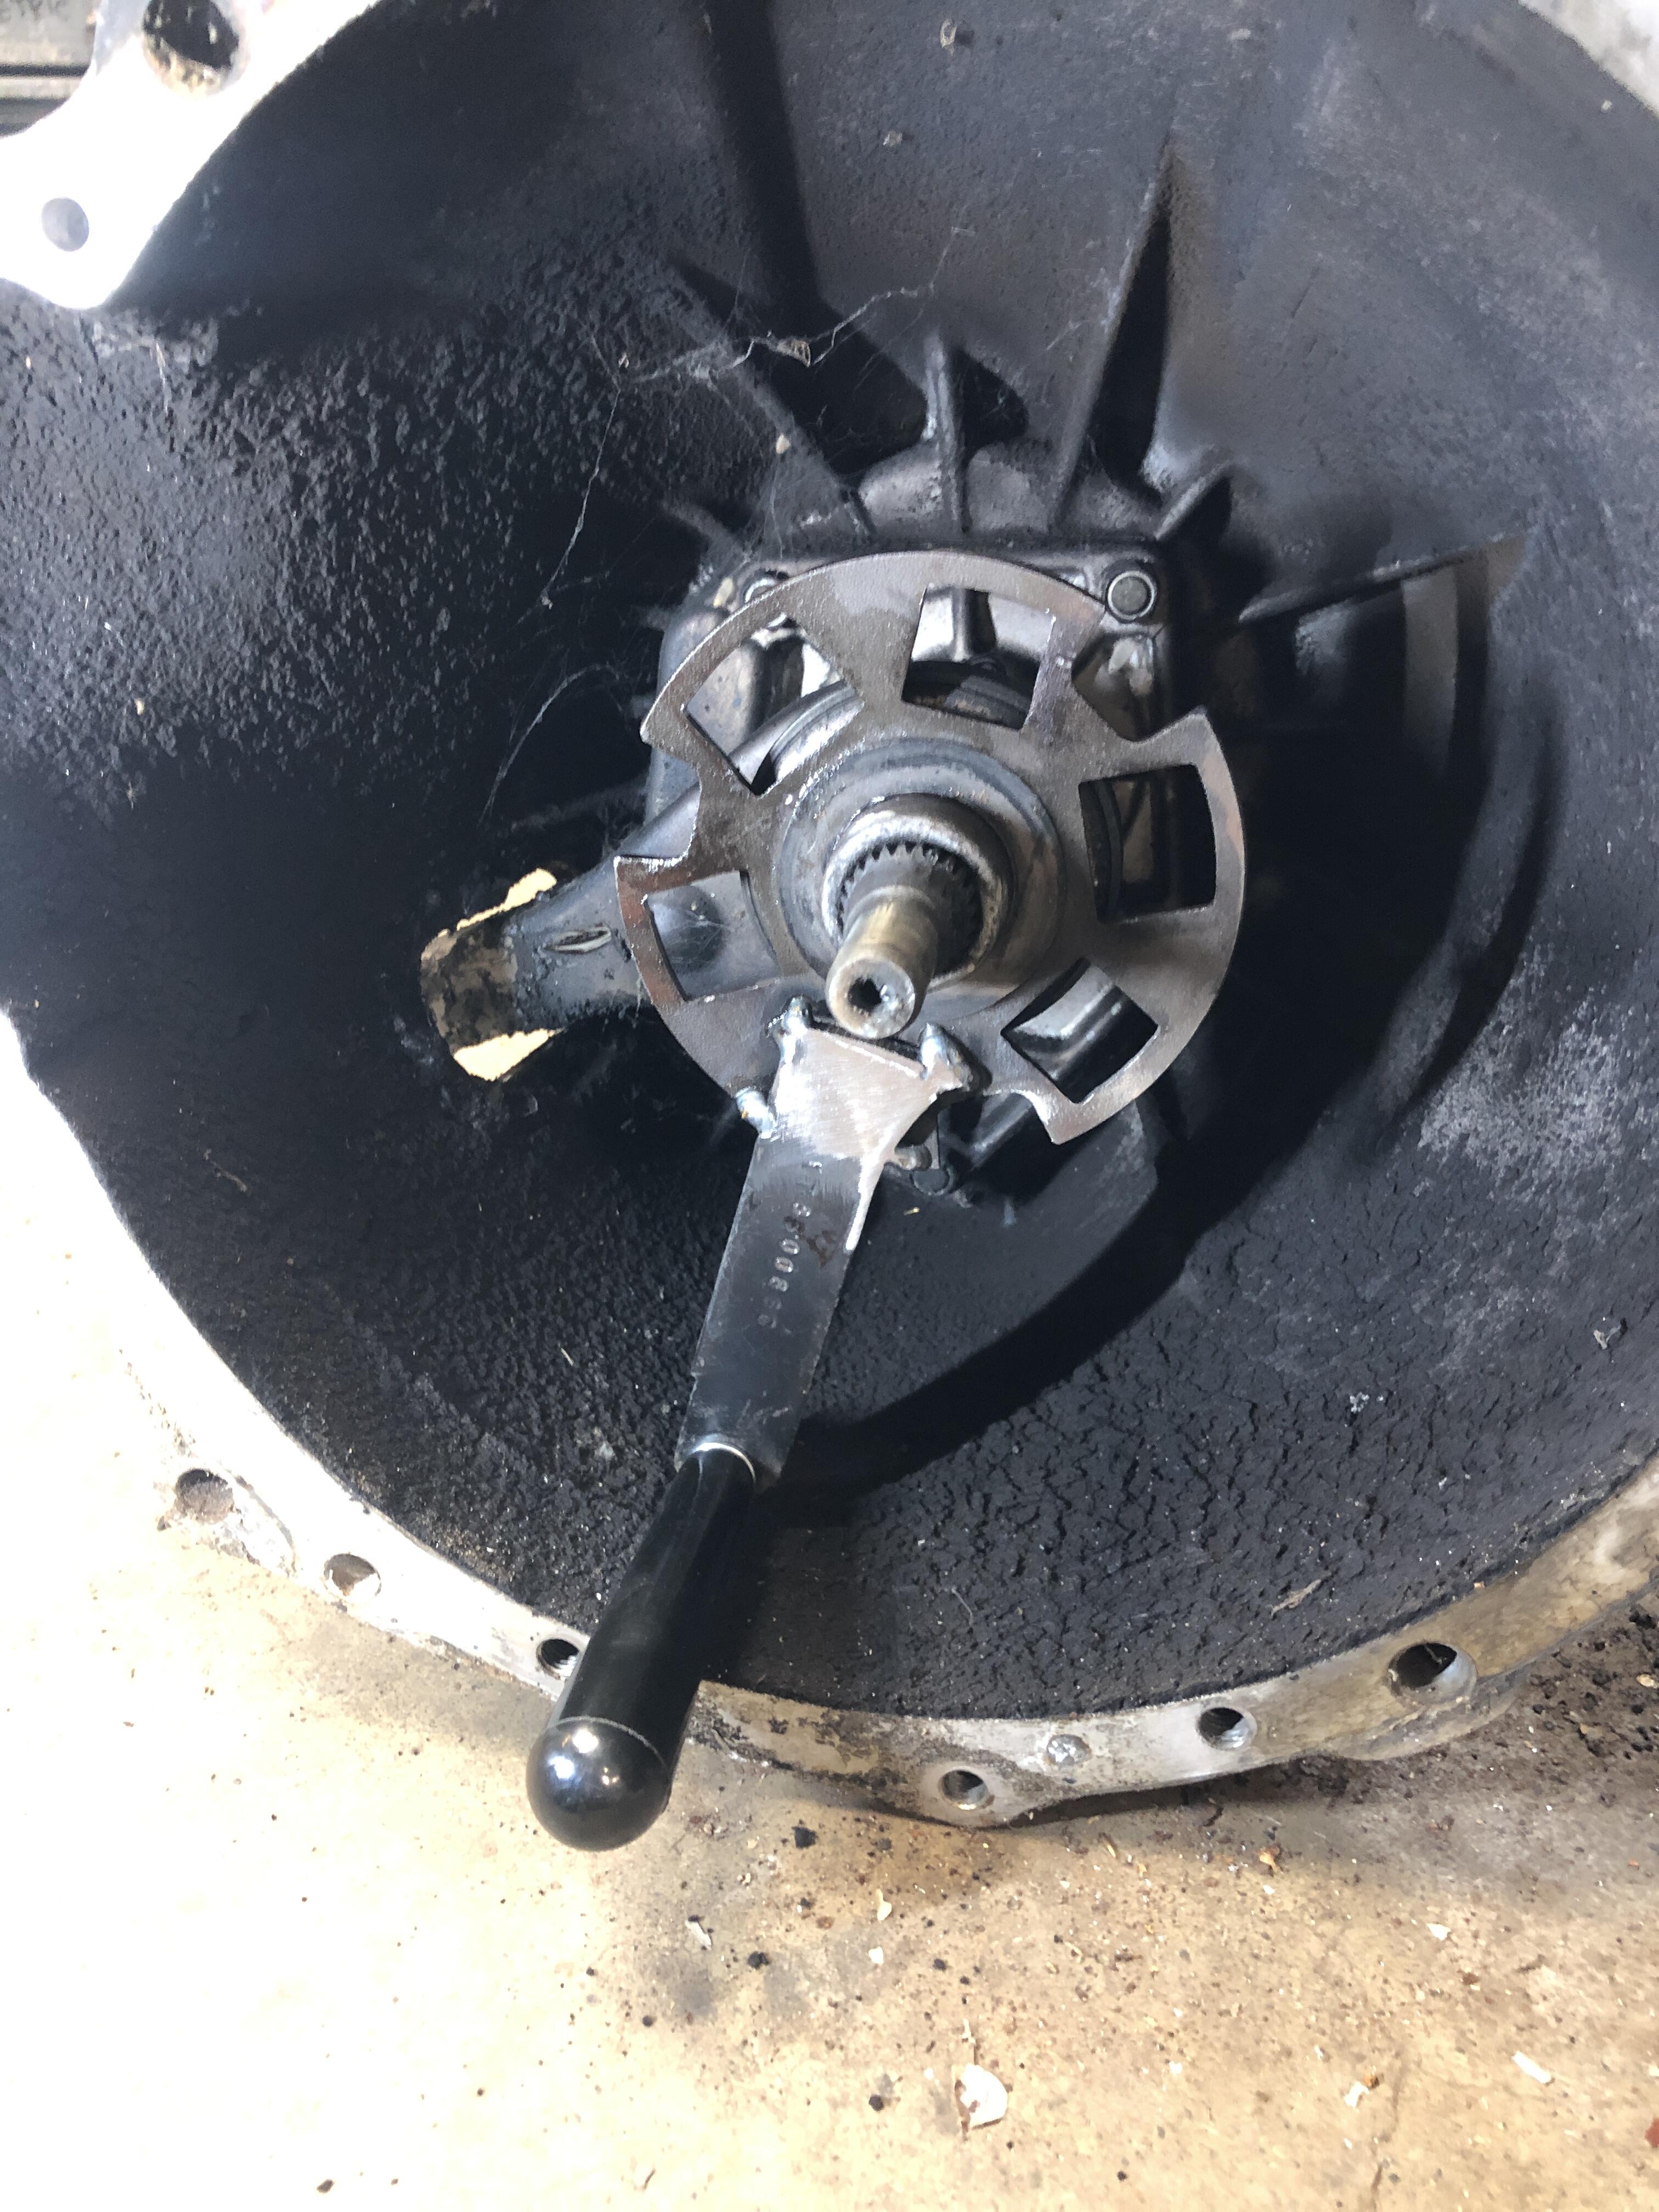
4 pointsTwo submissions today the first is a little “make a job easier” tool for testing manual transmissions or computing ratio’s in various gears. Its just the center spline of a worn out clutch disk with a hunk-o-scrap welded on with a handle. Now you prevent yourself (ok myself) from clamping vise grips on the trans input shaft splines to make it spin.

 4 points
 -
3 points
-
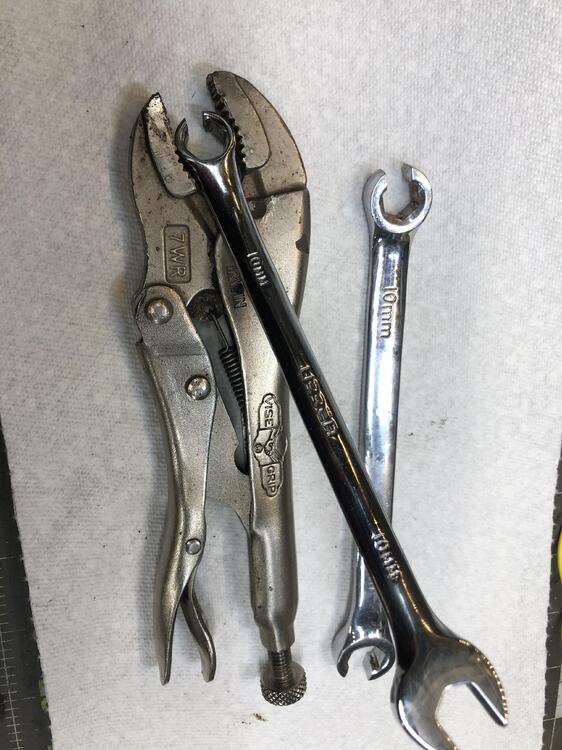
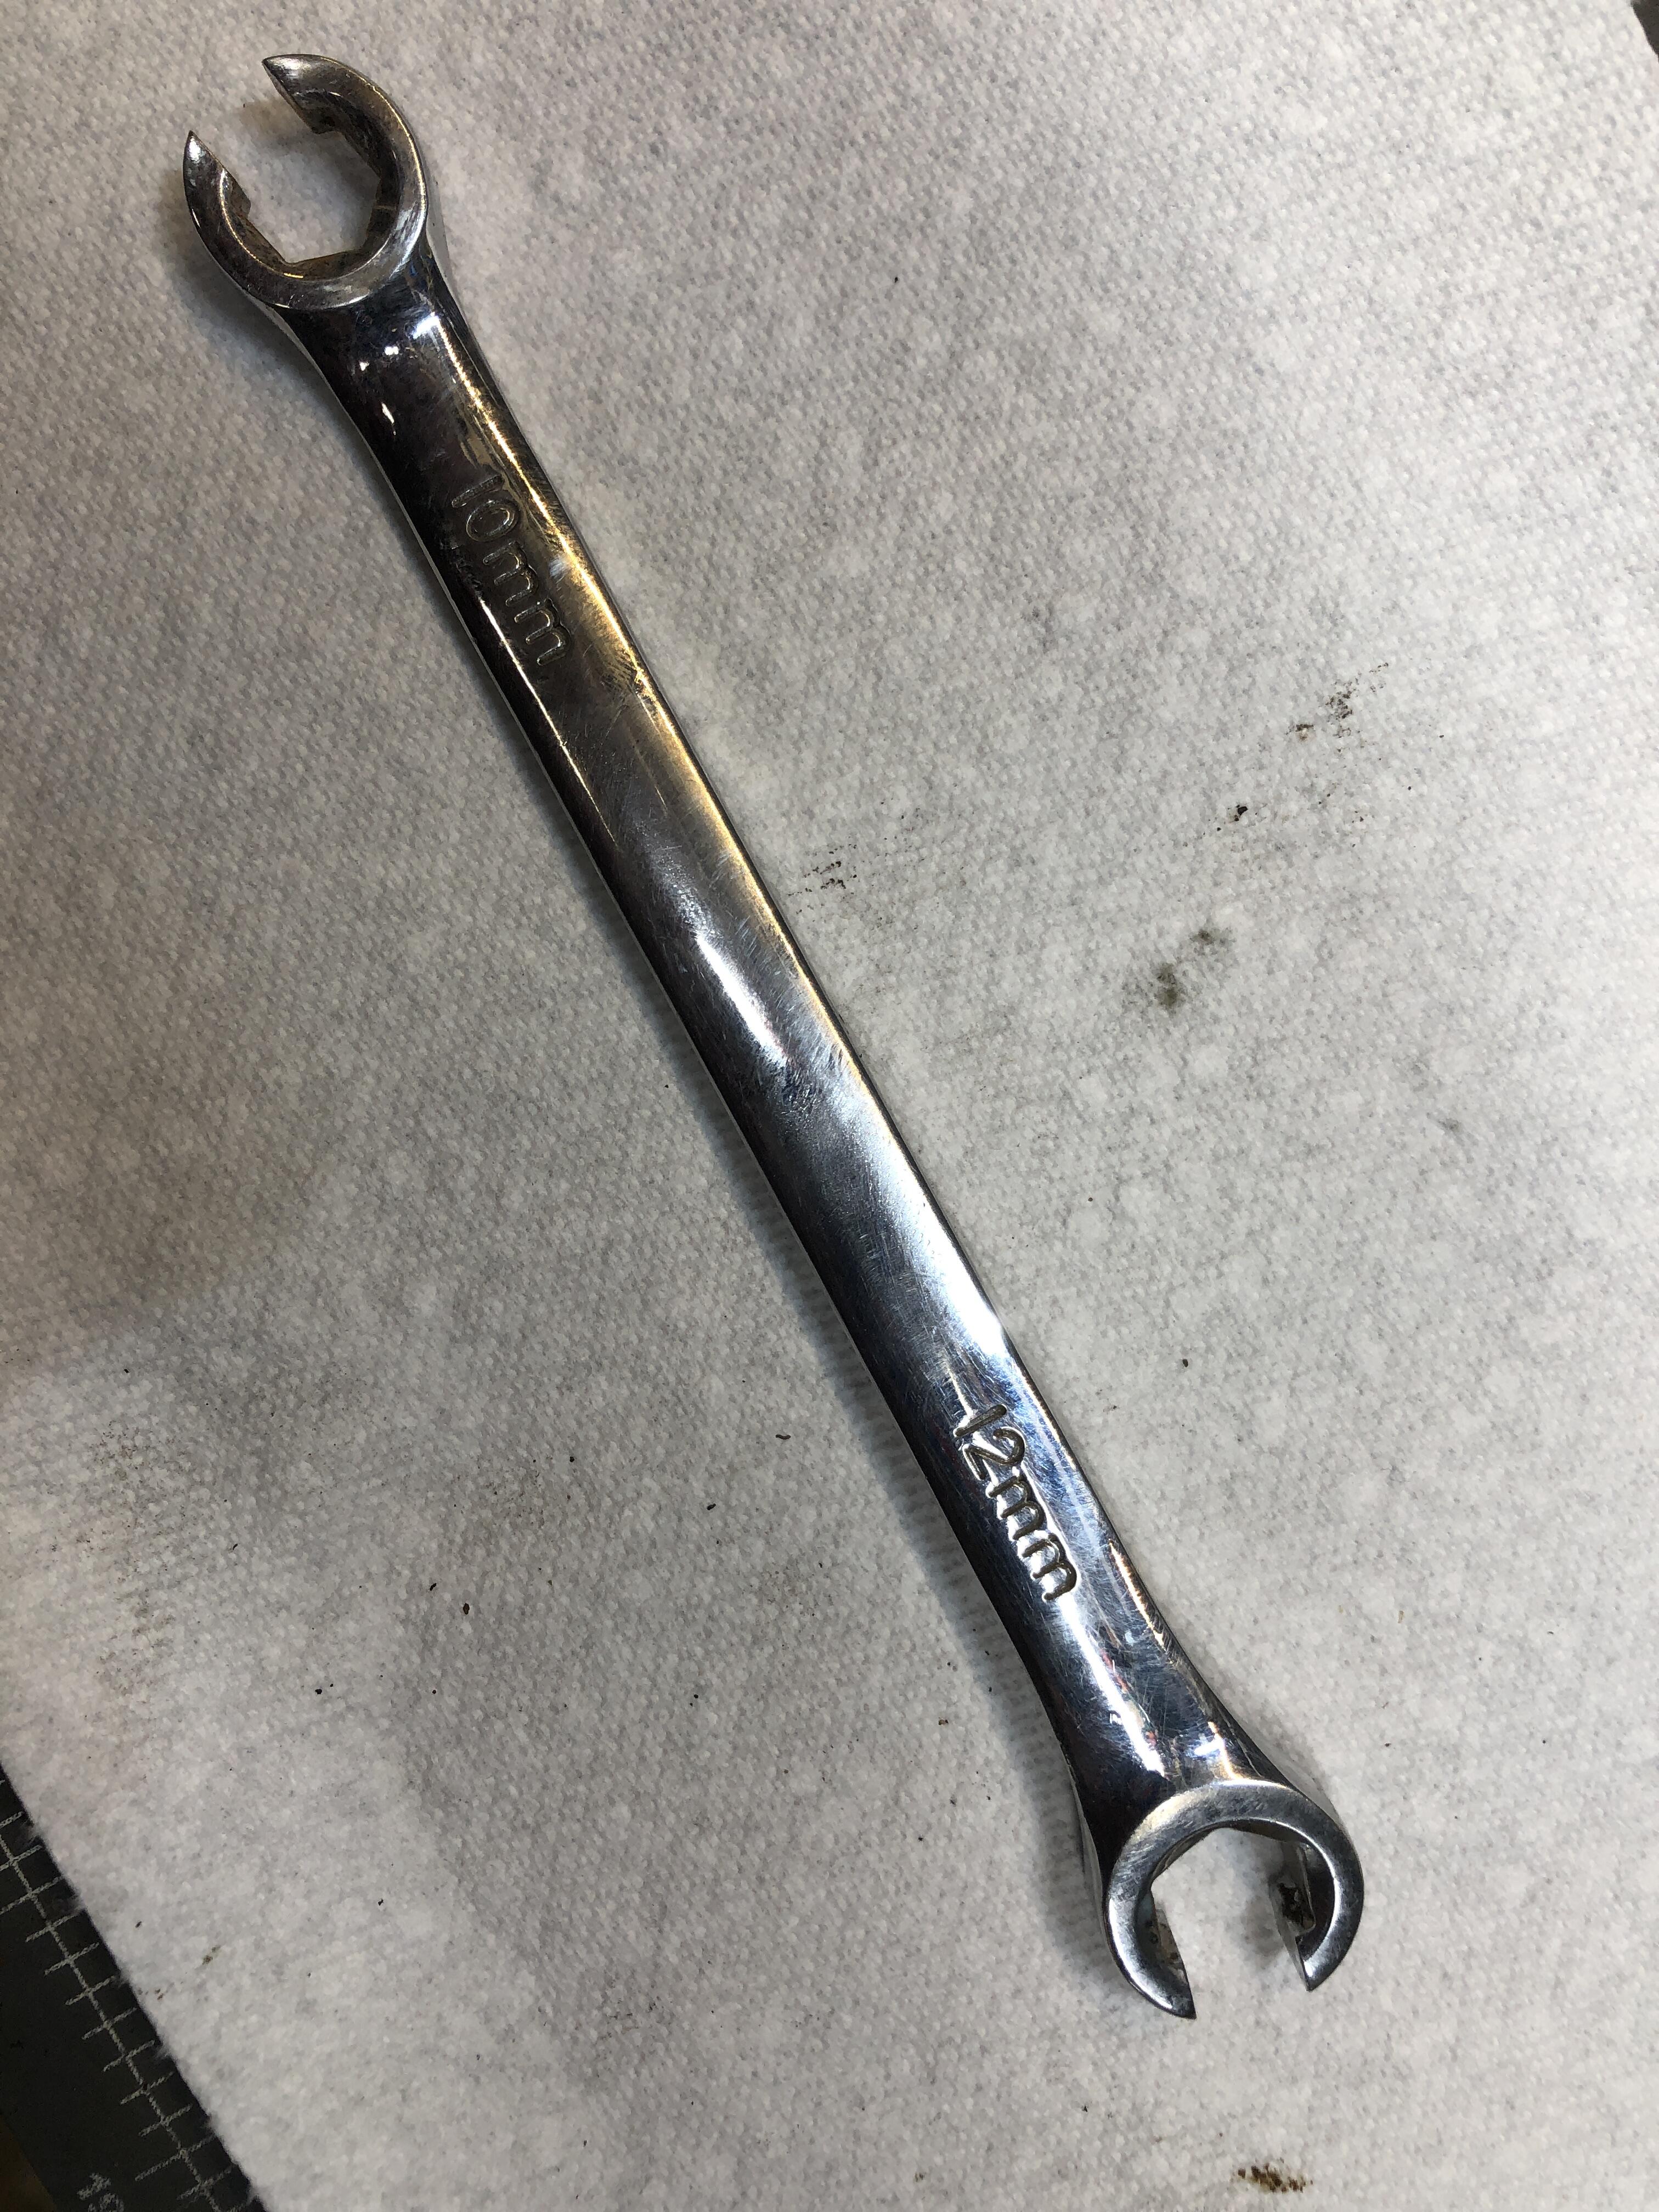
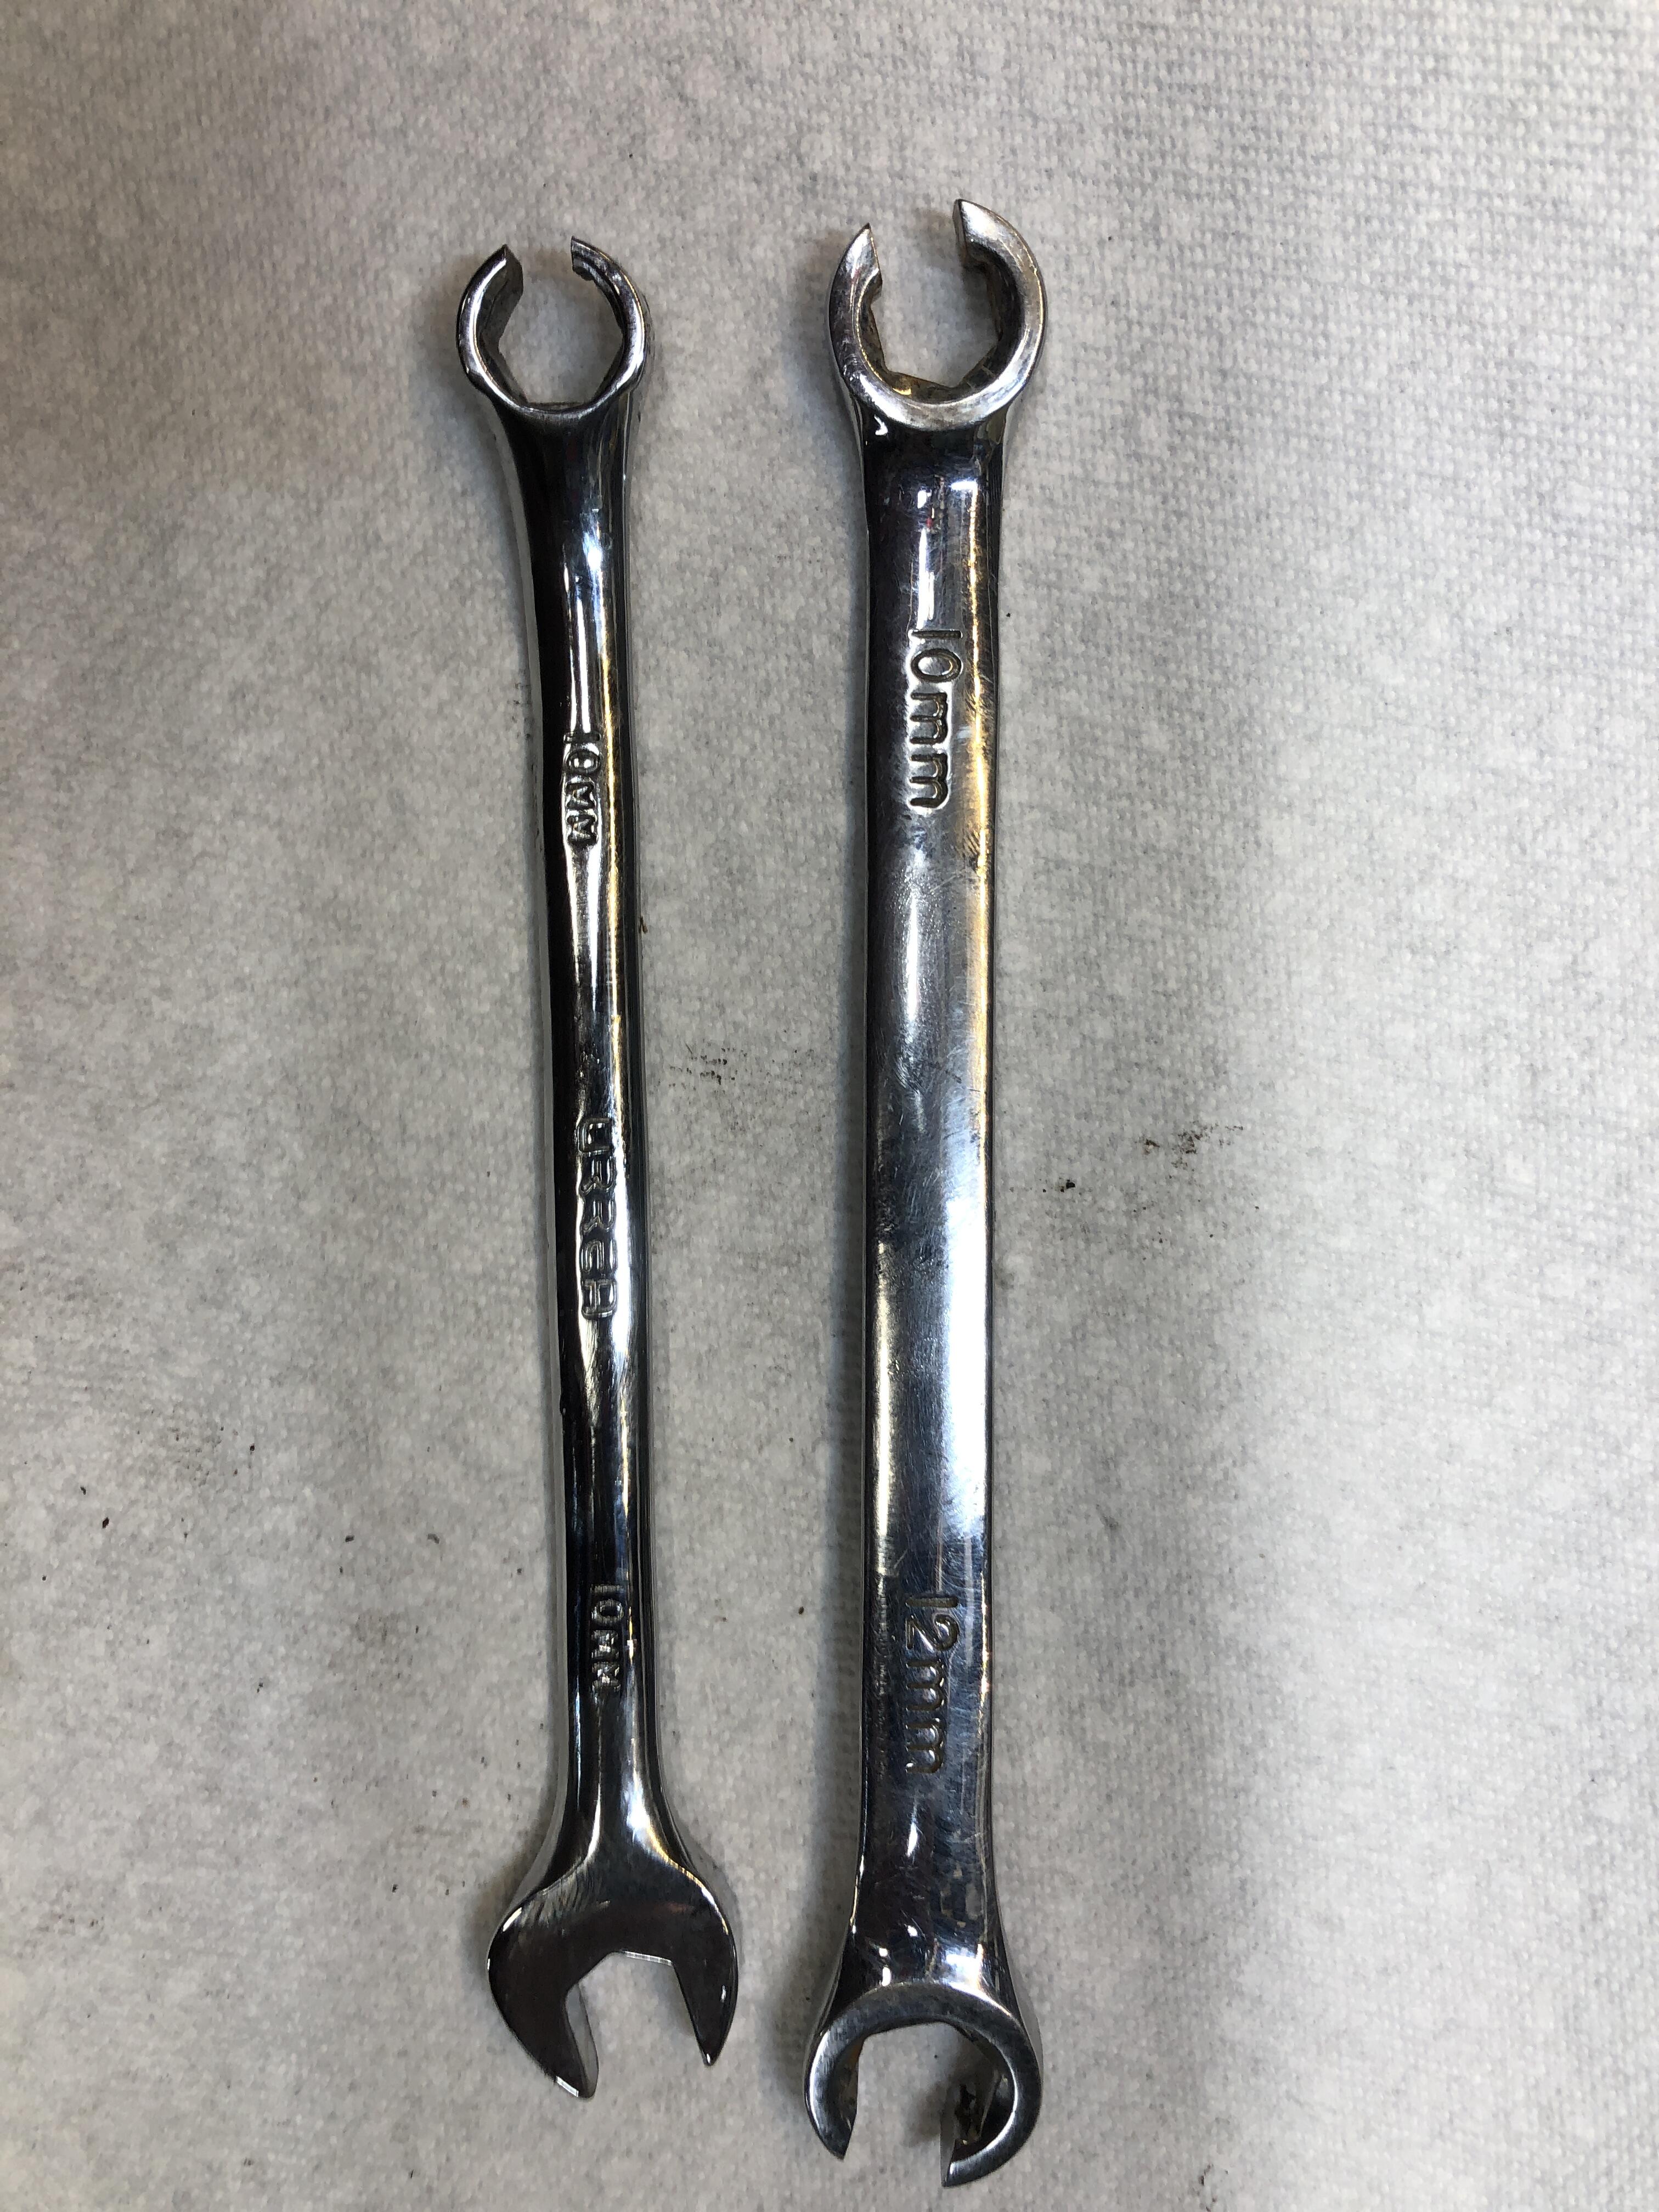
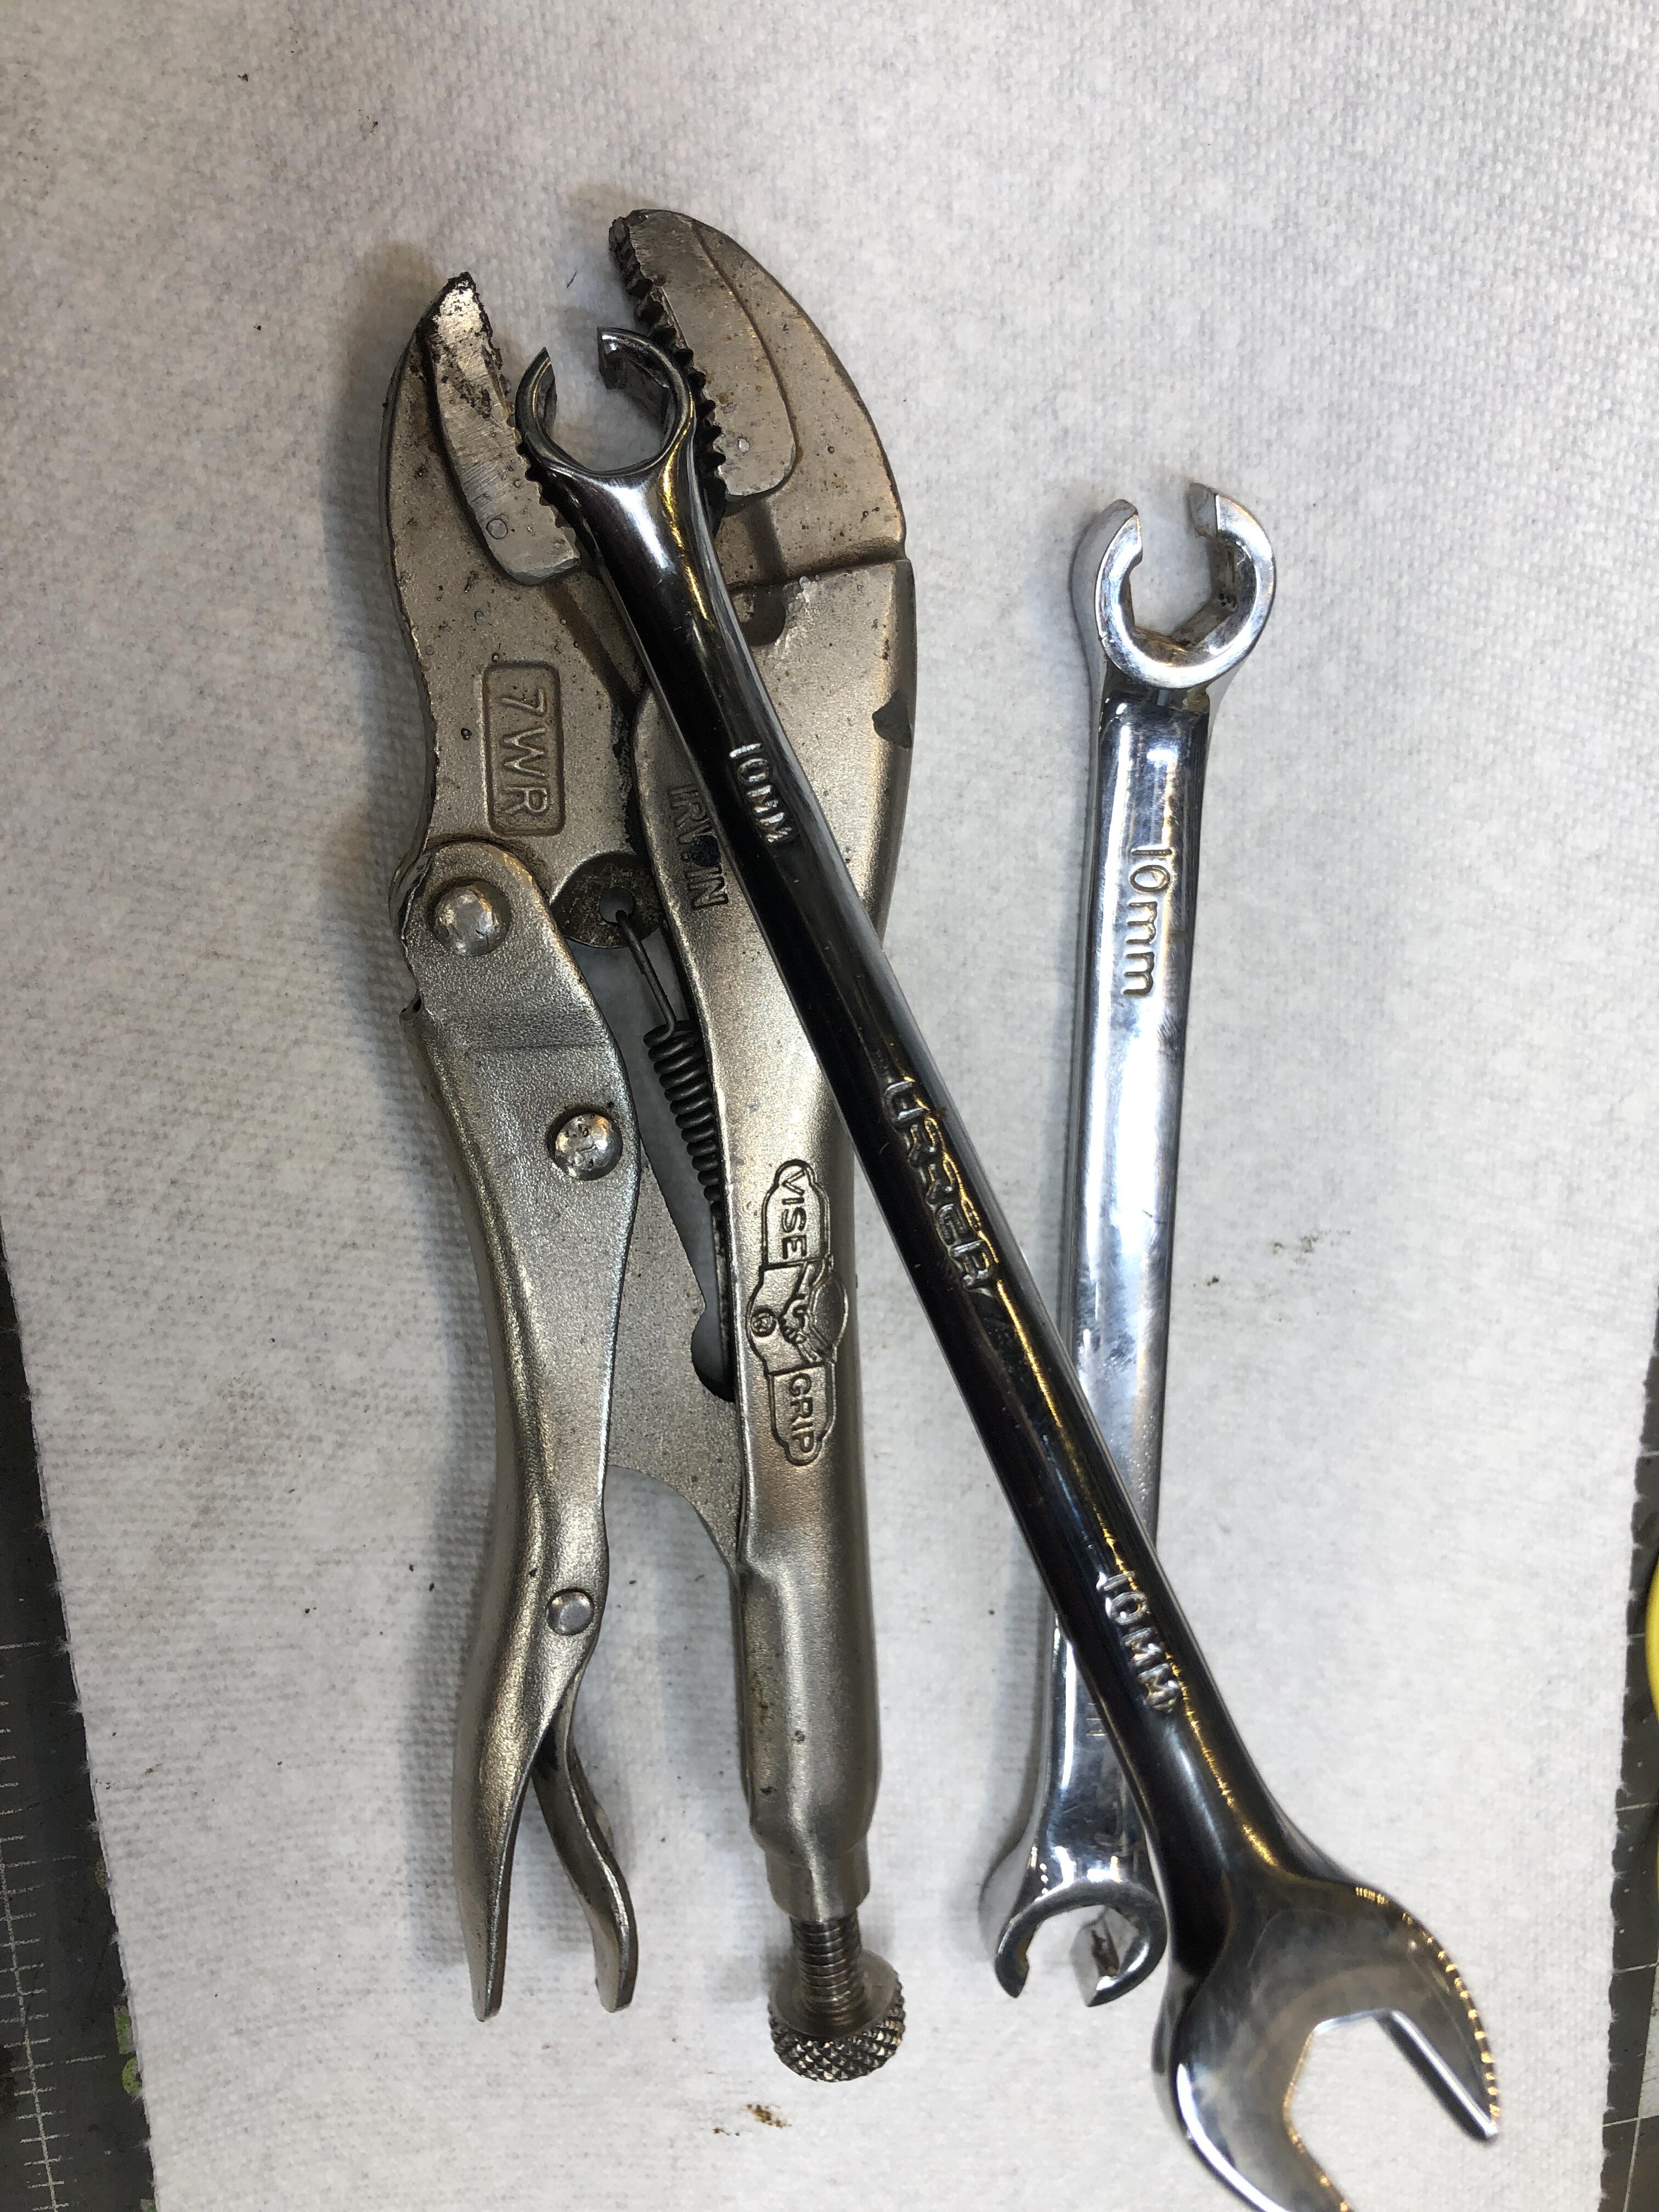
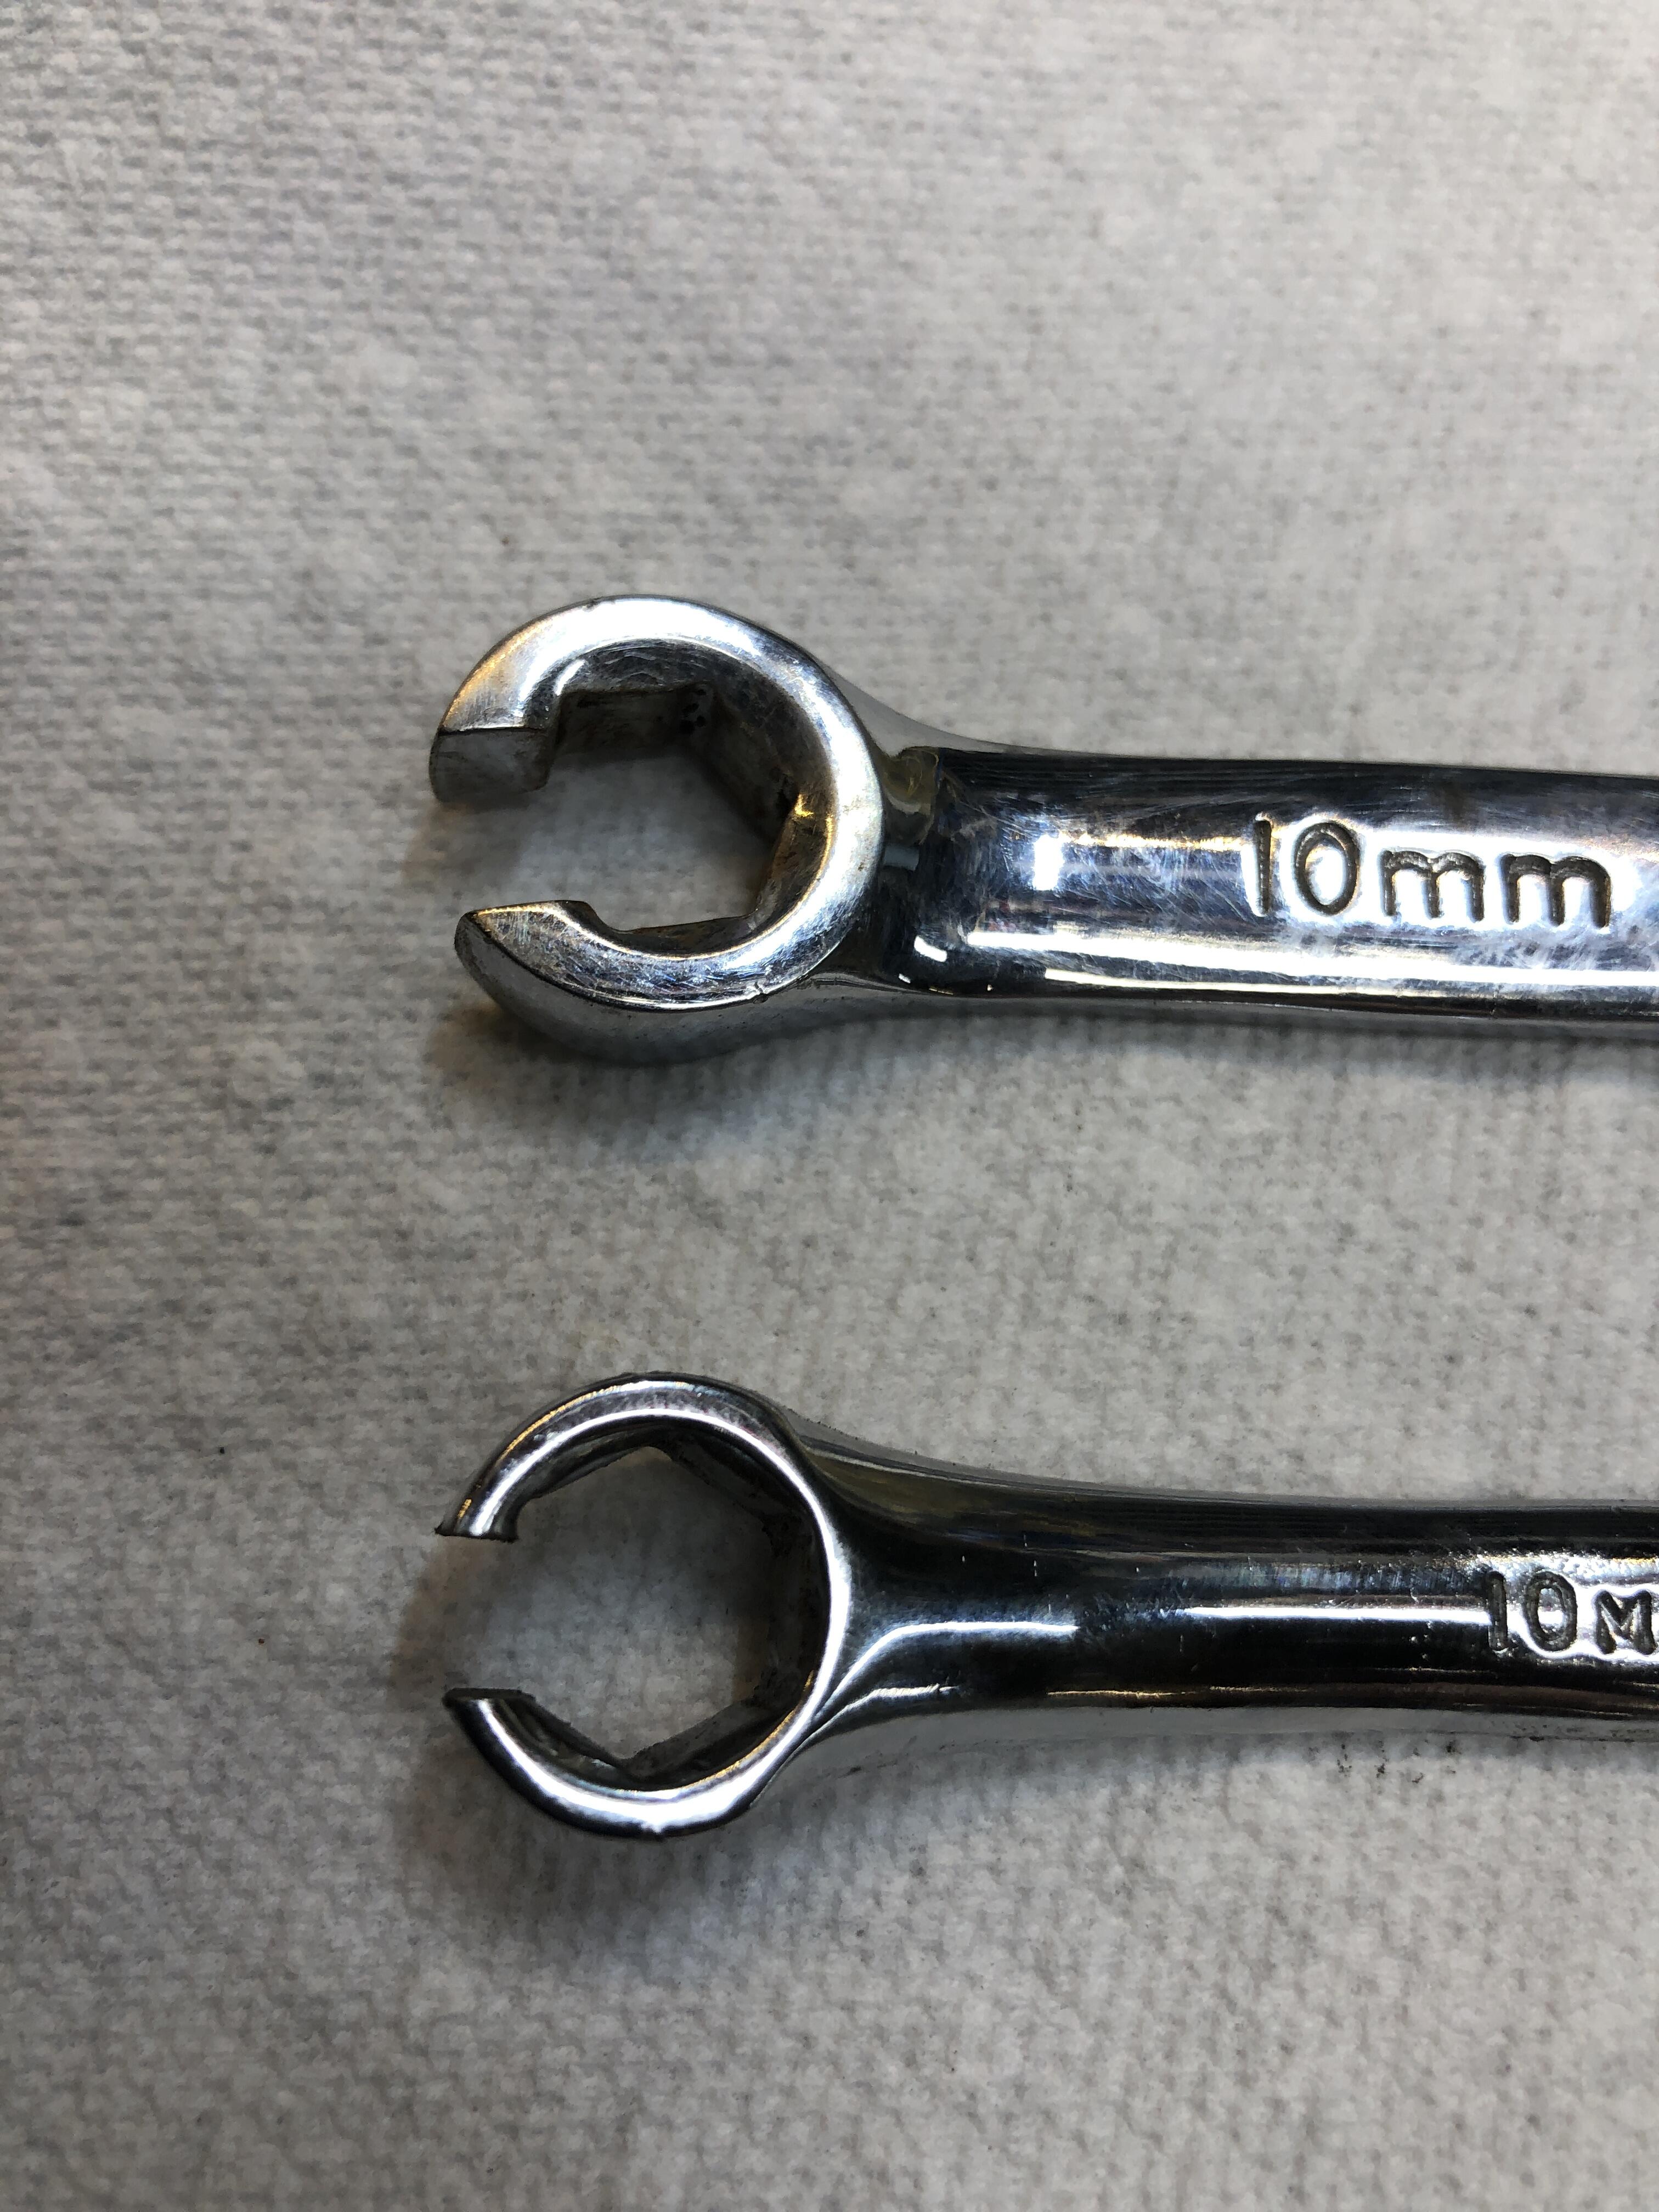
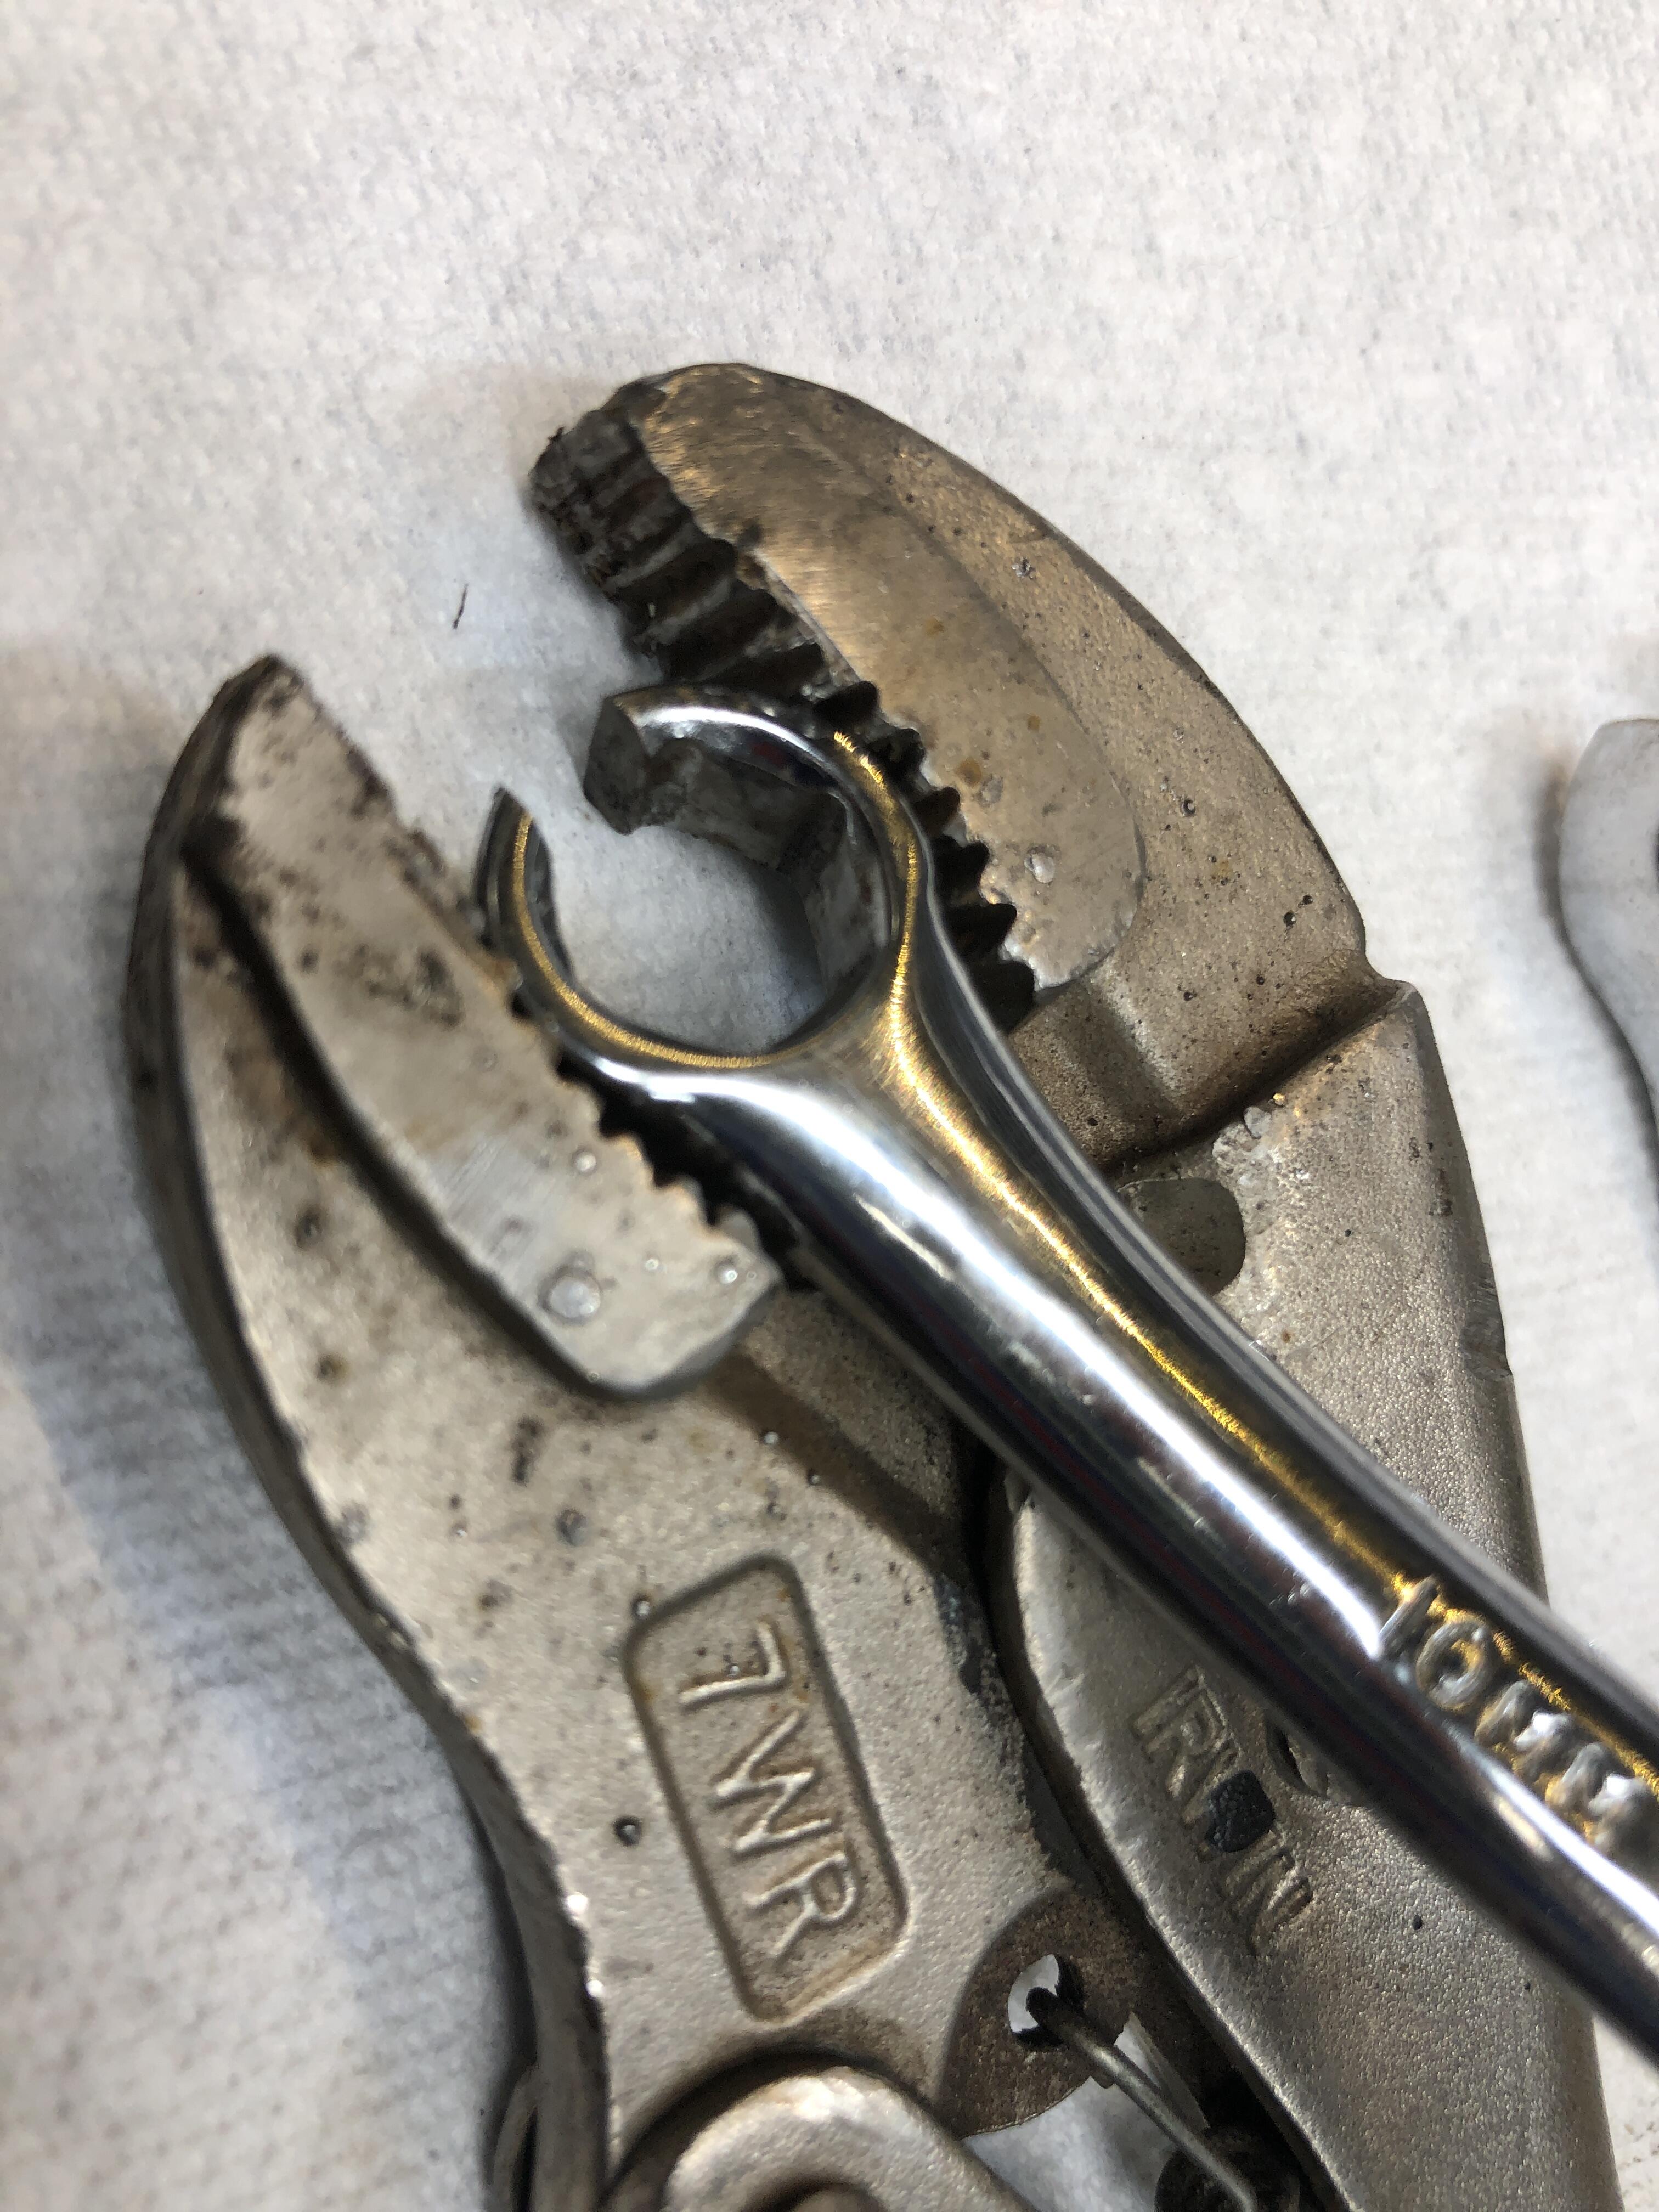
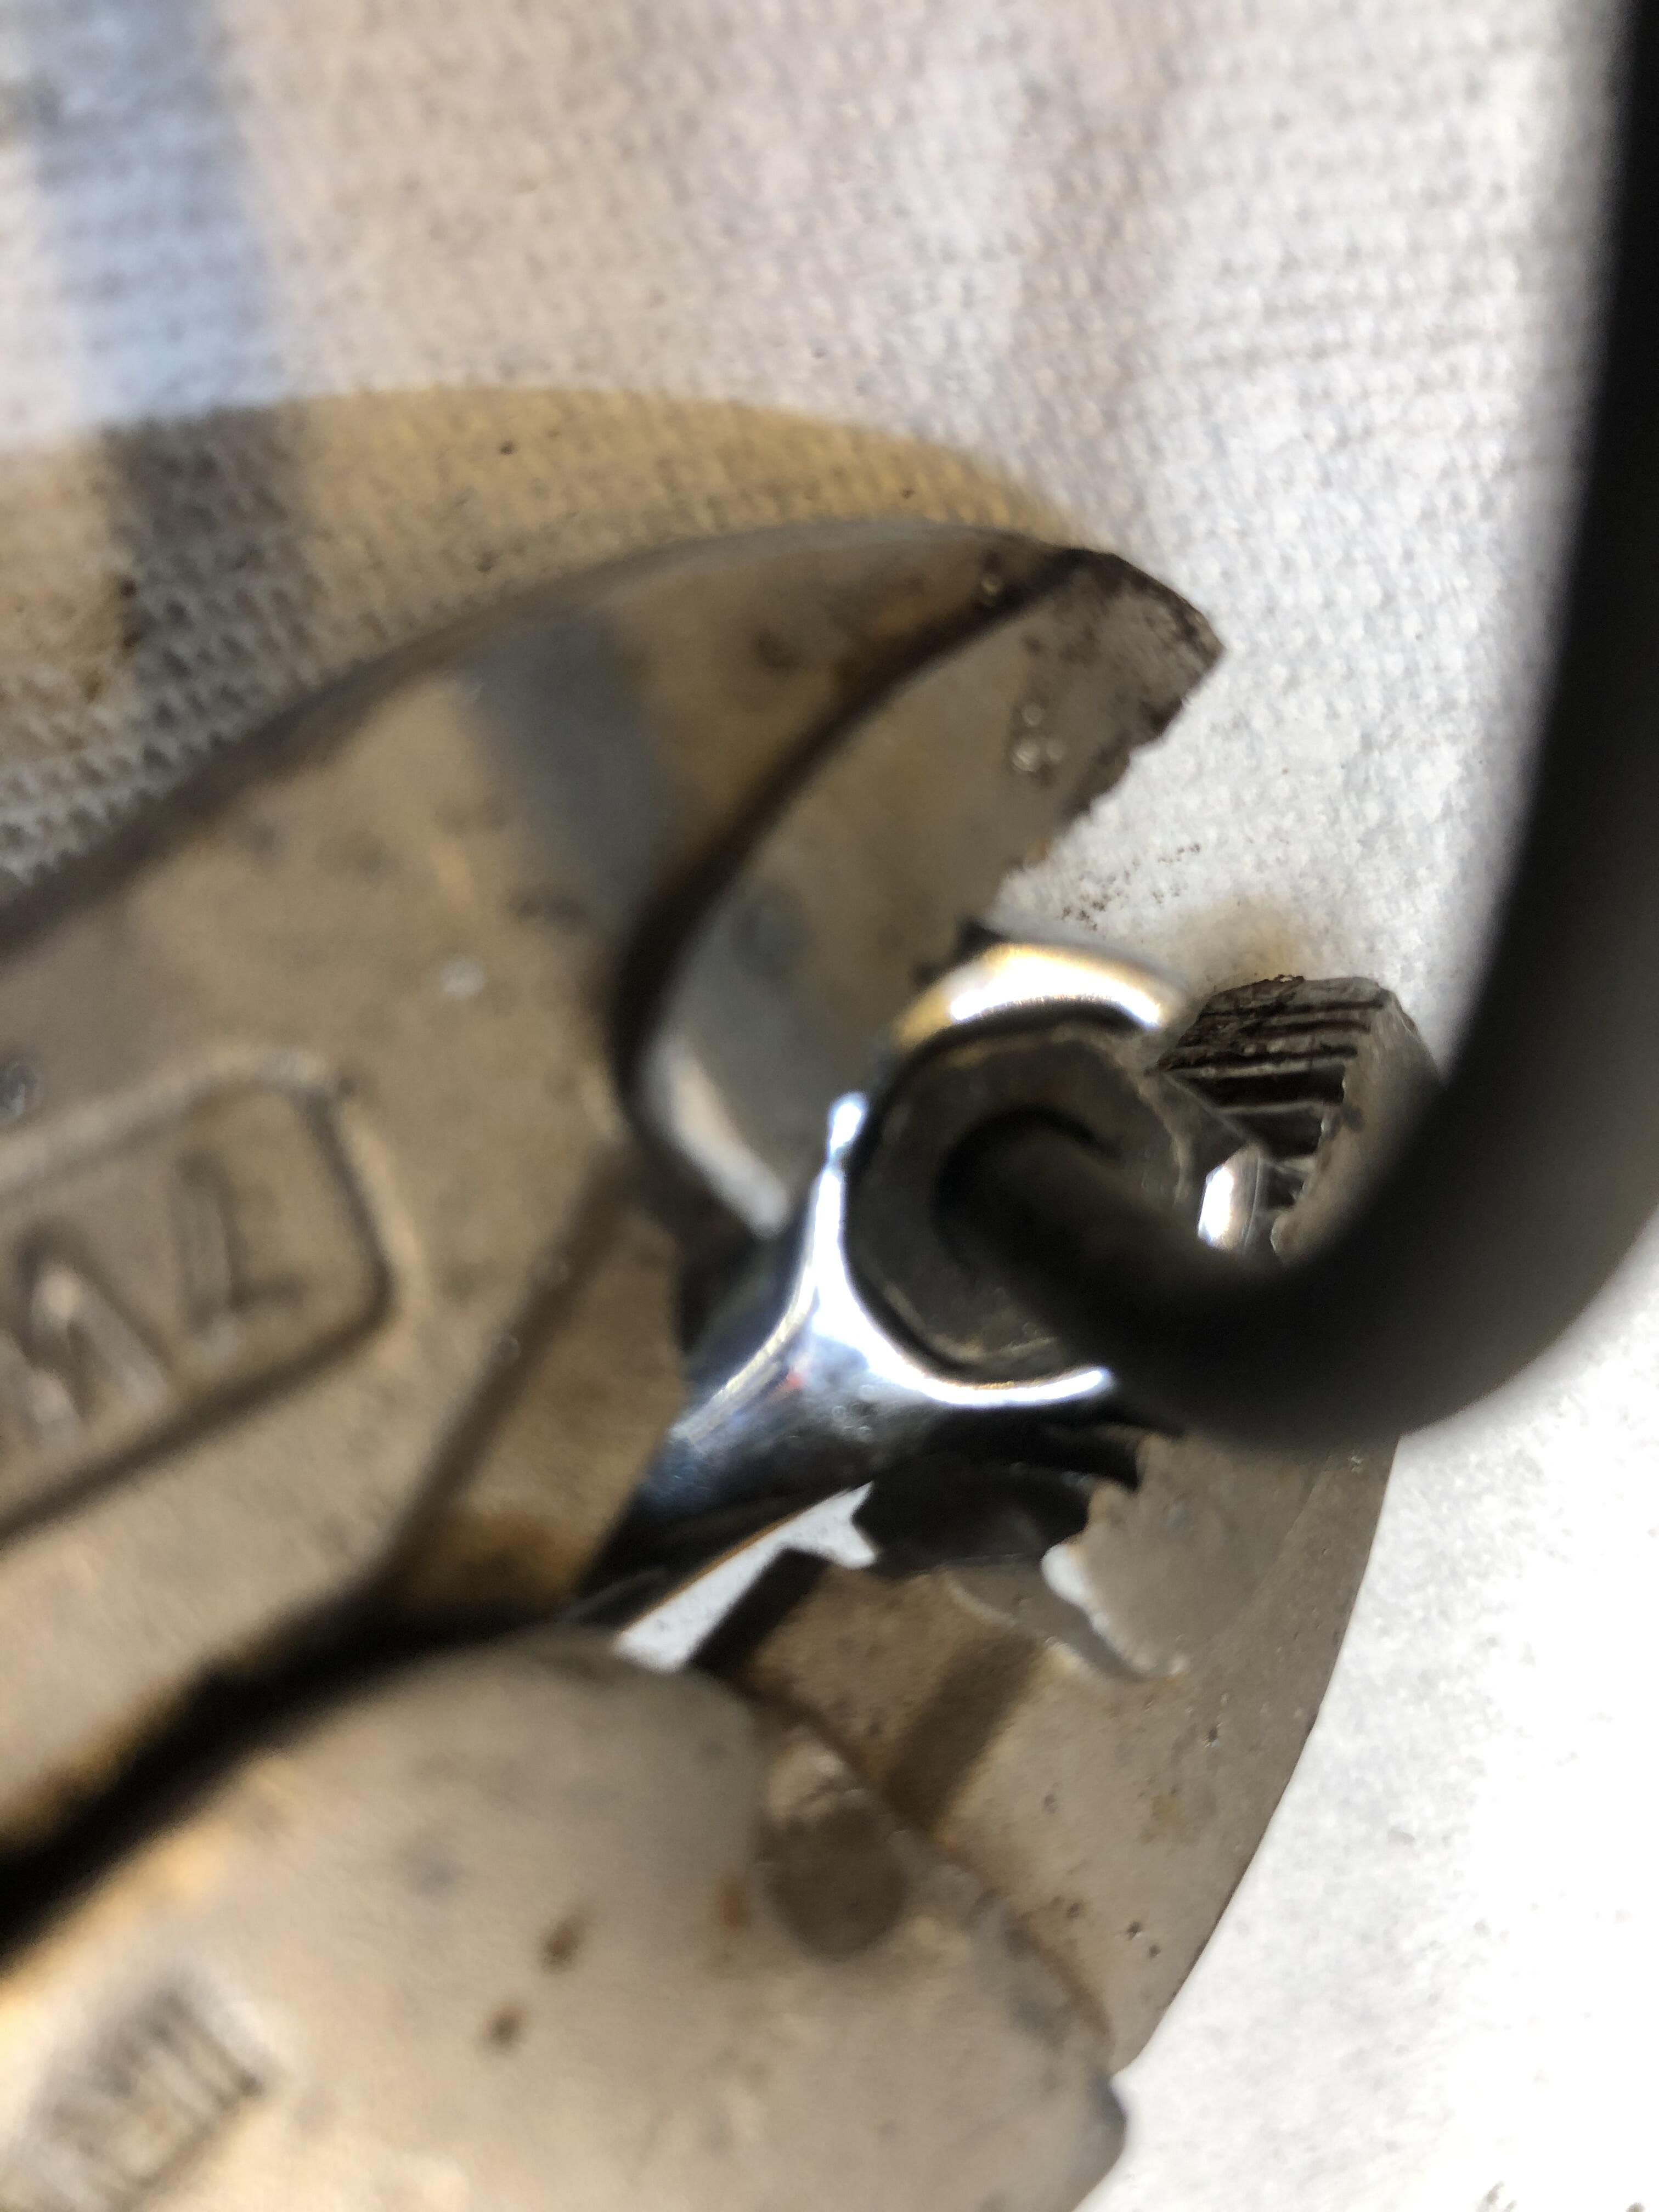
3 pointsOk here is the second tool I promised. Didn’t have pics last night. It relates to loosening old rusty brake line nuts. How many of you have been forced into vise grips on a brake or clutch line nut because your fancy flare nut wrench spreads and slips around a really old and tight one? Come on, fess up, we all do it. You get it loose, sure, maybe with some heat, but the hex of the nut is invariably wrecked. When you go to put the line back on, now you HAVE to use vise grips to tighten it, and the hex soon becomes a circle…… I have tried MANY brands of flare nut wrenches, all are simply not good enough. So, I made my own! With a special feature. Here is the standard heavy walled flare nut wrench. My idea was to add some way of squeezing that wrench hex closed to tightly grip the hex of the line nut, so it CAN’t slip around. First approach was to dream of fancy levers and threaded things to apply the needed force to close down on that heavy open “C” and squeeze the nut, but even with my largest vise grips, I really couldn’t apply enough force to collapse the opening. Ok, so maybe grind down the wall thickness until its thin enough to give? Maybe, but why not find a thinner walled wrench to start with? Well there is no such thing. Unless…. So I just bought a cheap Amazon 10 mm 6point box end wrench and turned it into a flare nut wrench by using a thin cutoff wheel and making a 3/16 gap in the end! My creation on the left, standard flare nut wrench on the right. Now its easy to squeeze that gap with a 8” vise grip So you just place the wrench on the line nut, then close the vise grips over the “C” and squeeze it shut. Then apply all the force you want with a hammer or pipe or whatever it takes to break the nut loose without fear of stripping the hex. After extensive testing on several cars recently, this little jewel is working perfectiy! The only thing I need to do is make the handle longer so I can tug on it by hand without beating on it with a hammer all the time, especially when the room around nut is tight.


 3 points
 -
2 pointsLOL. I like it!! That's a great idea. So what is it that opens your garage door now though?2 points
-
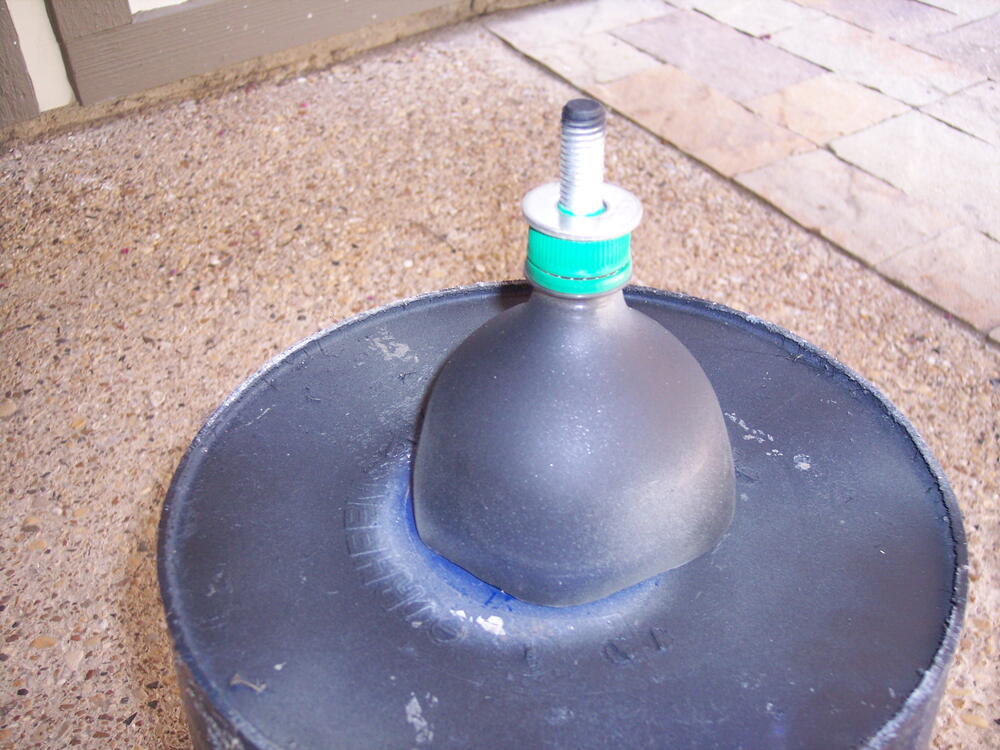
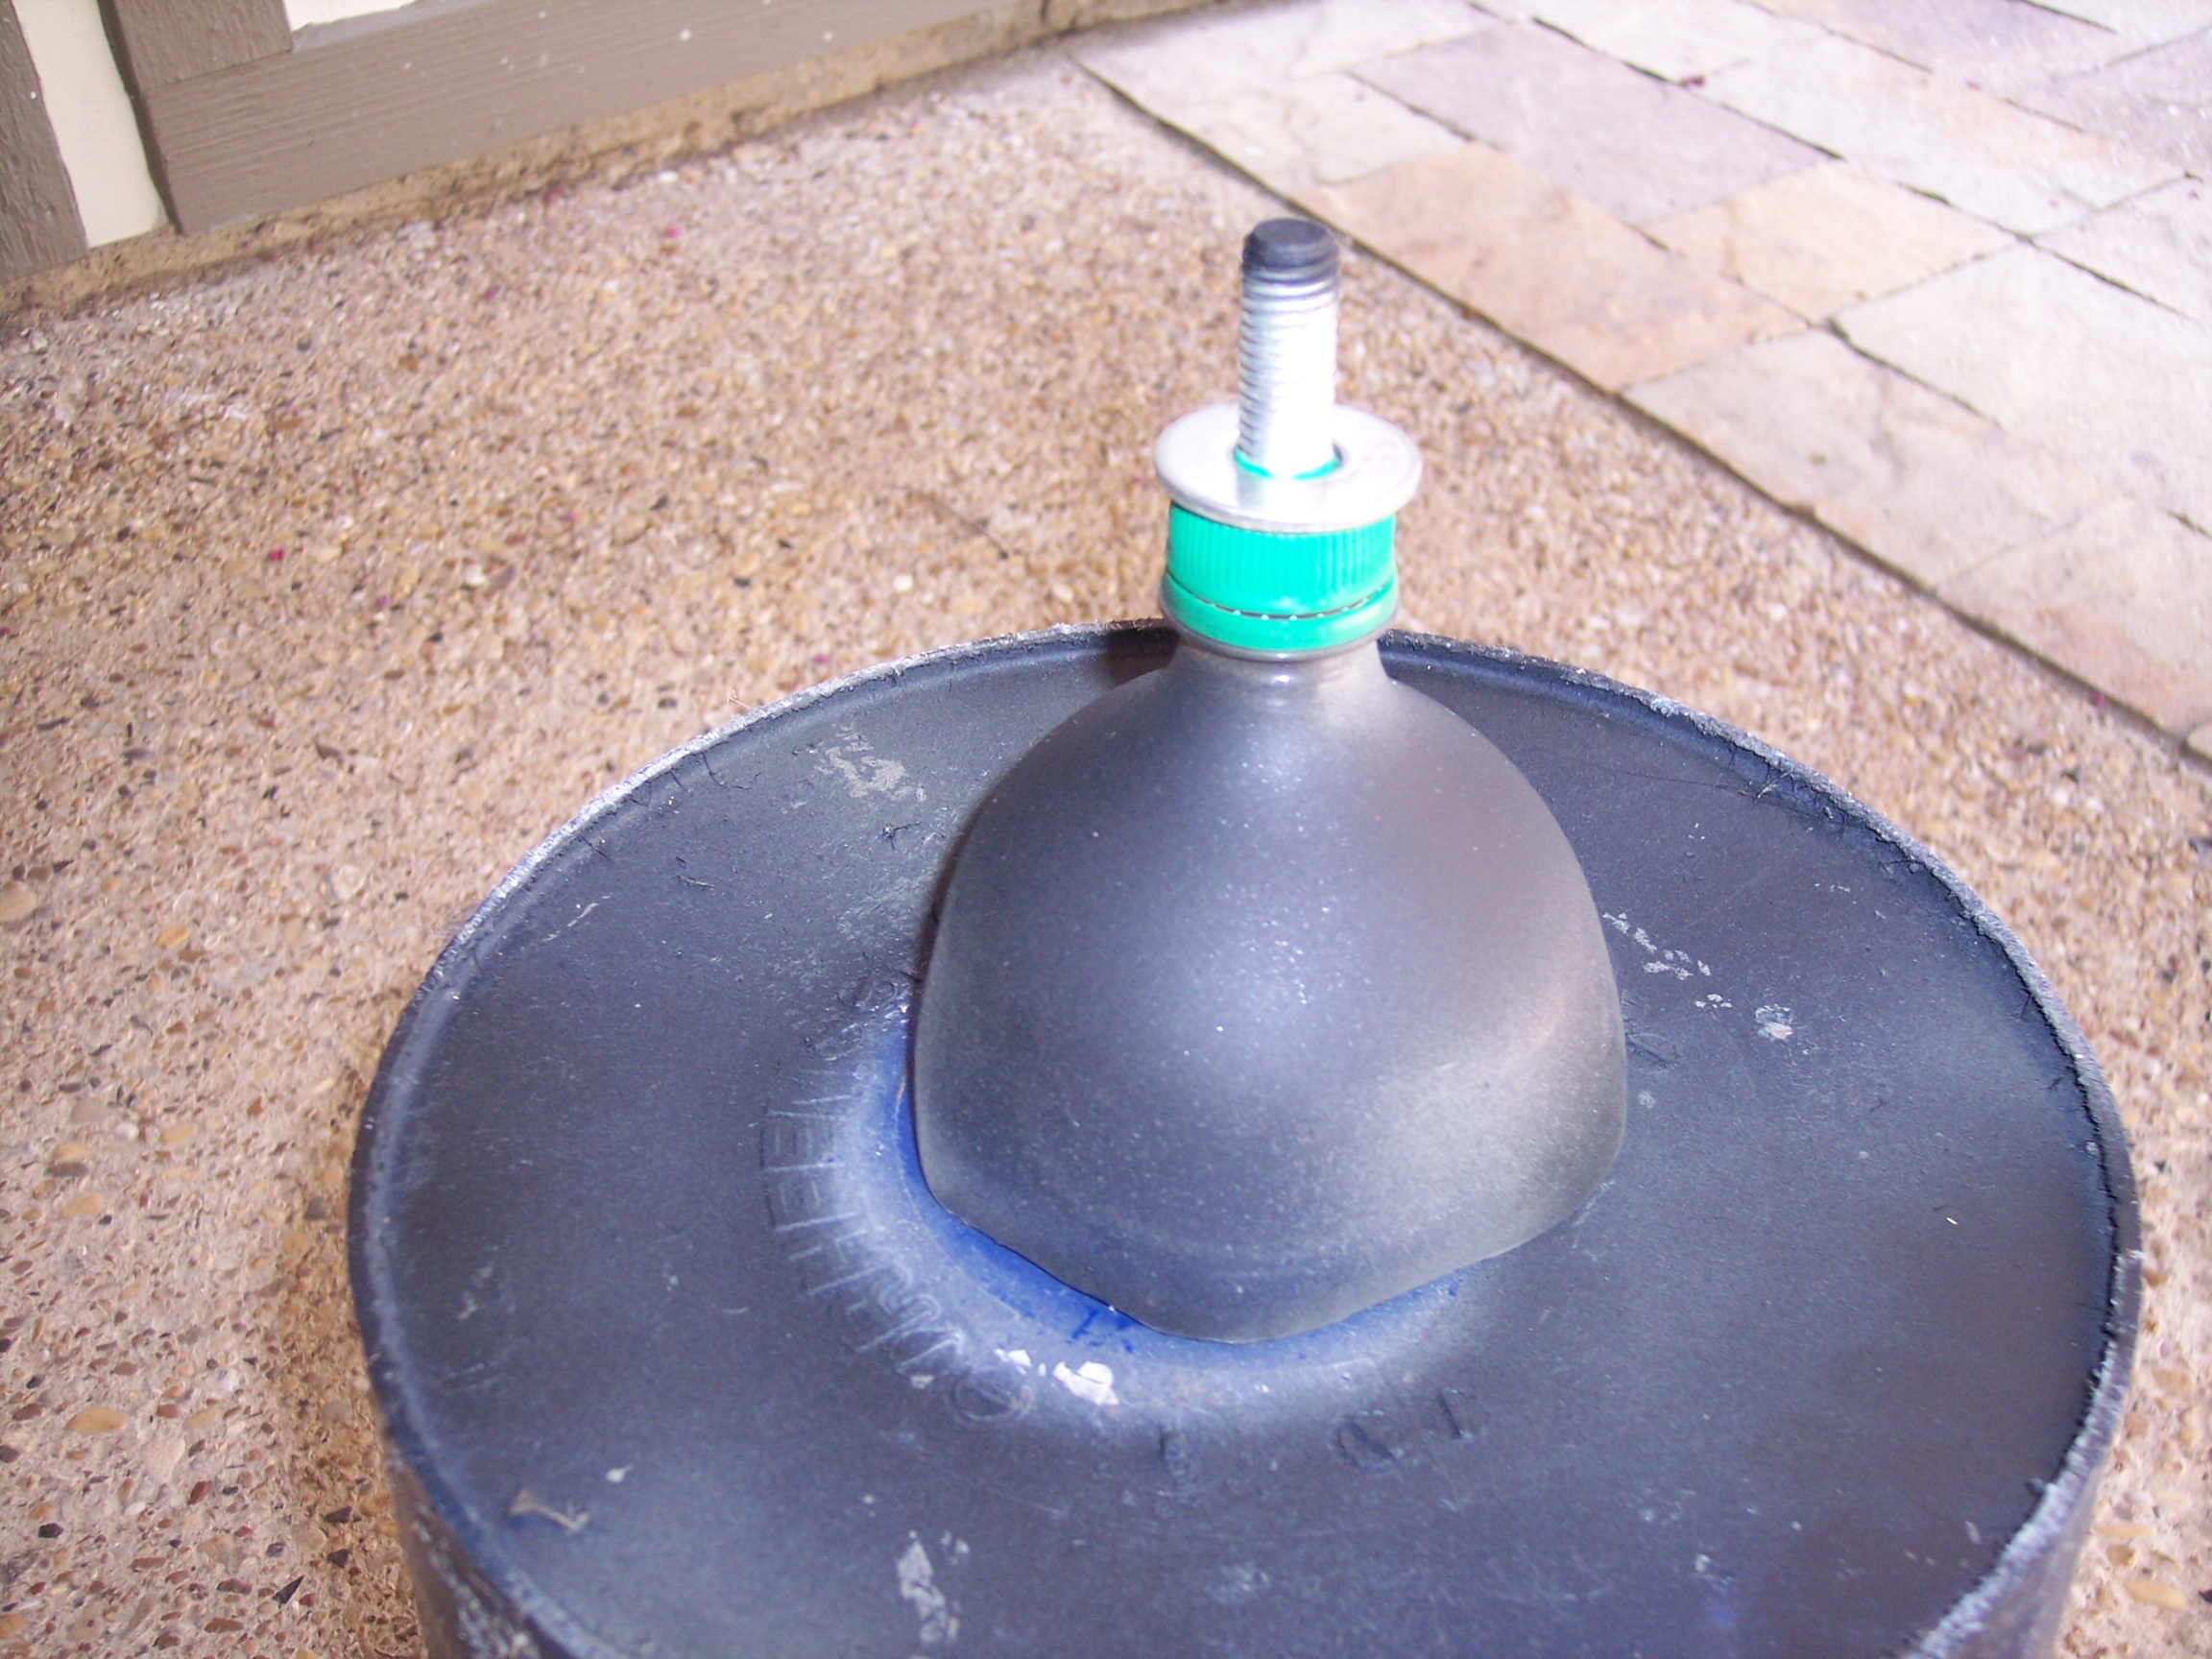
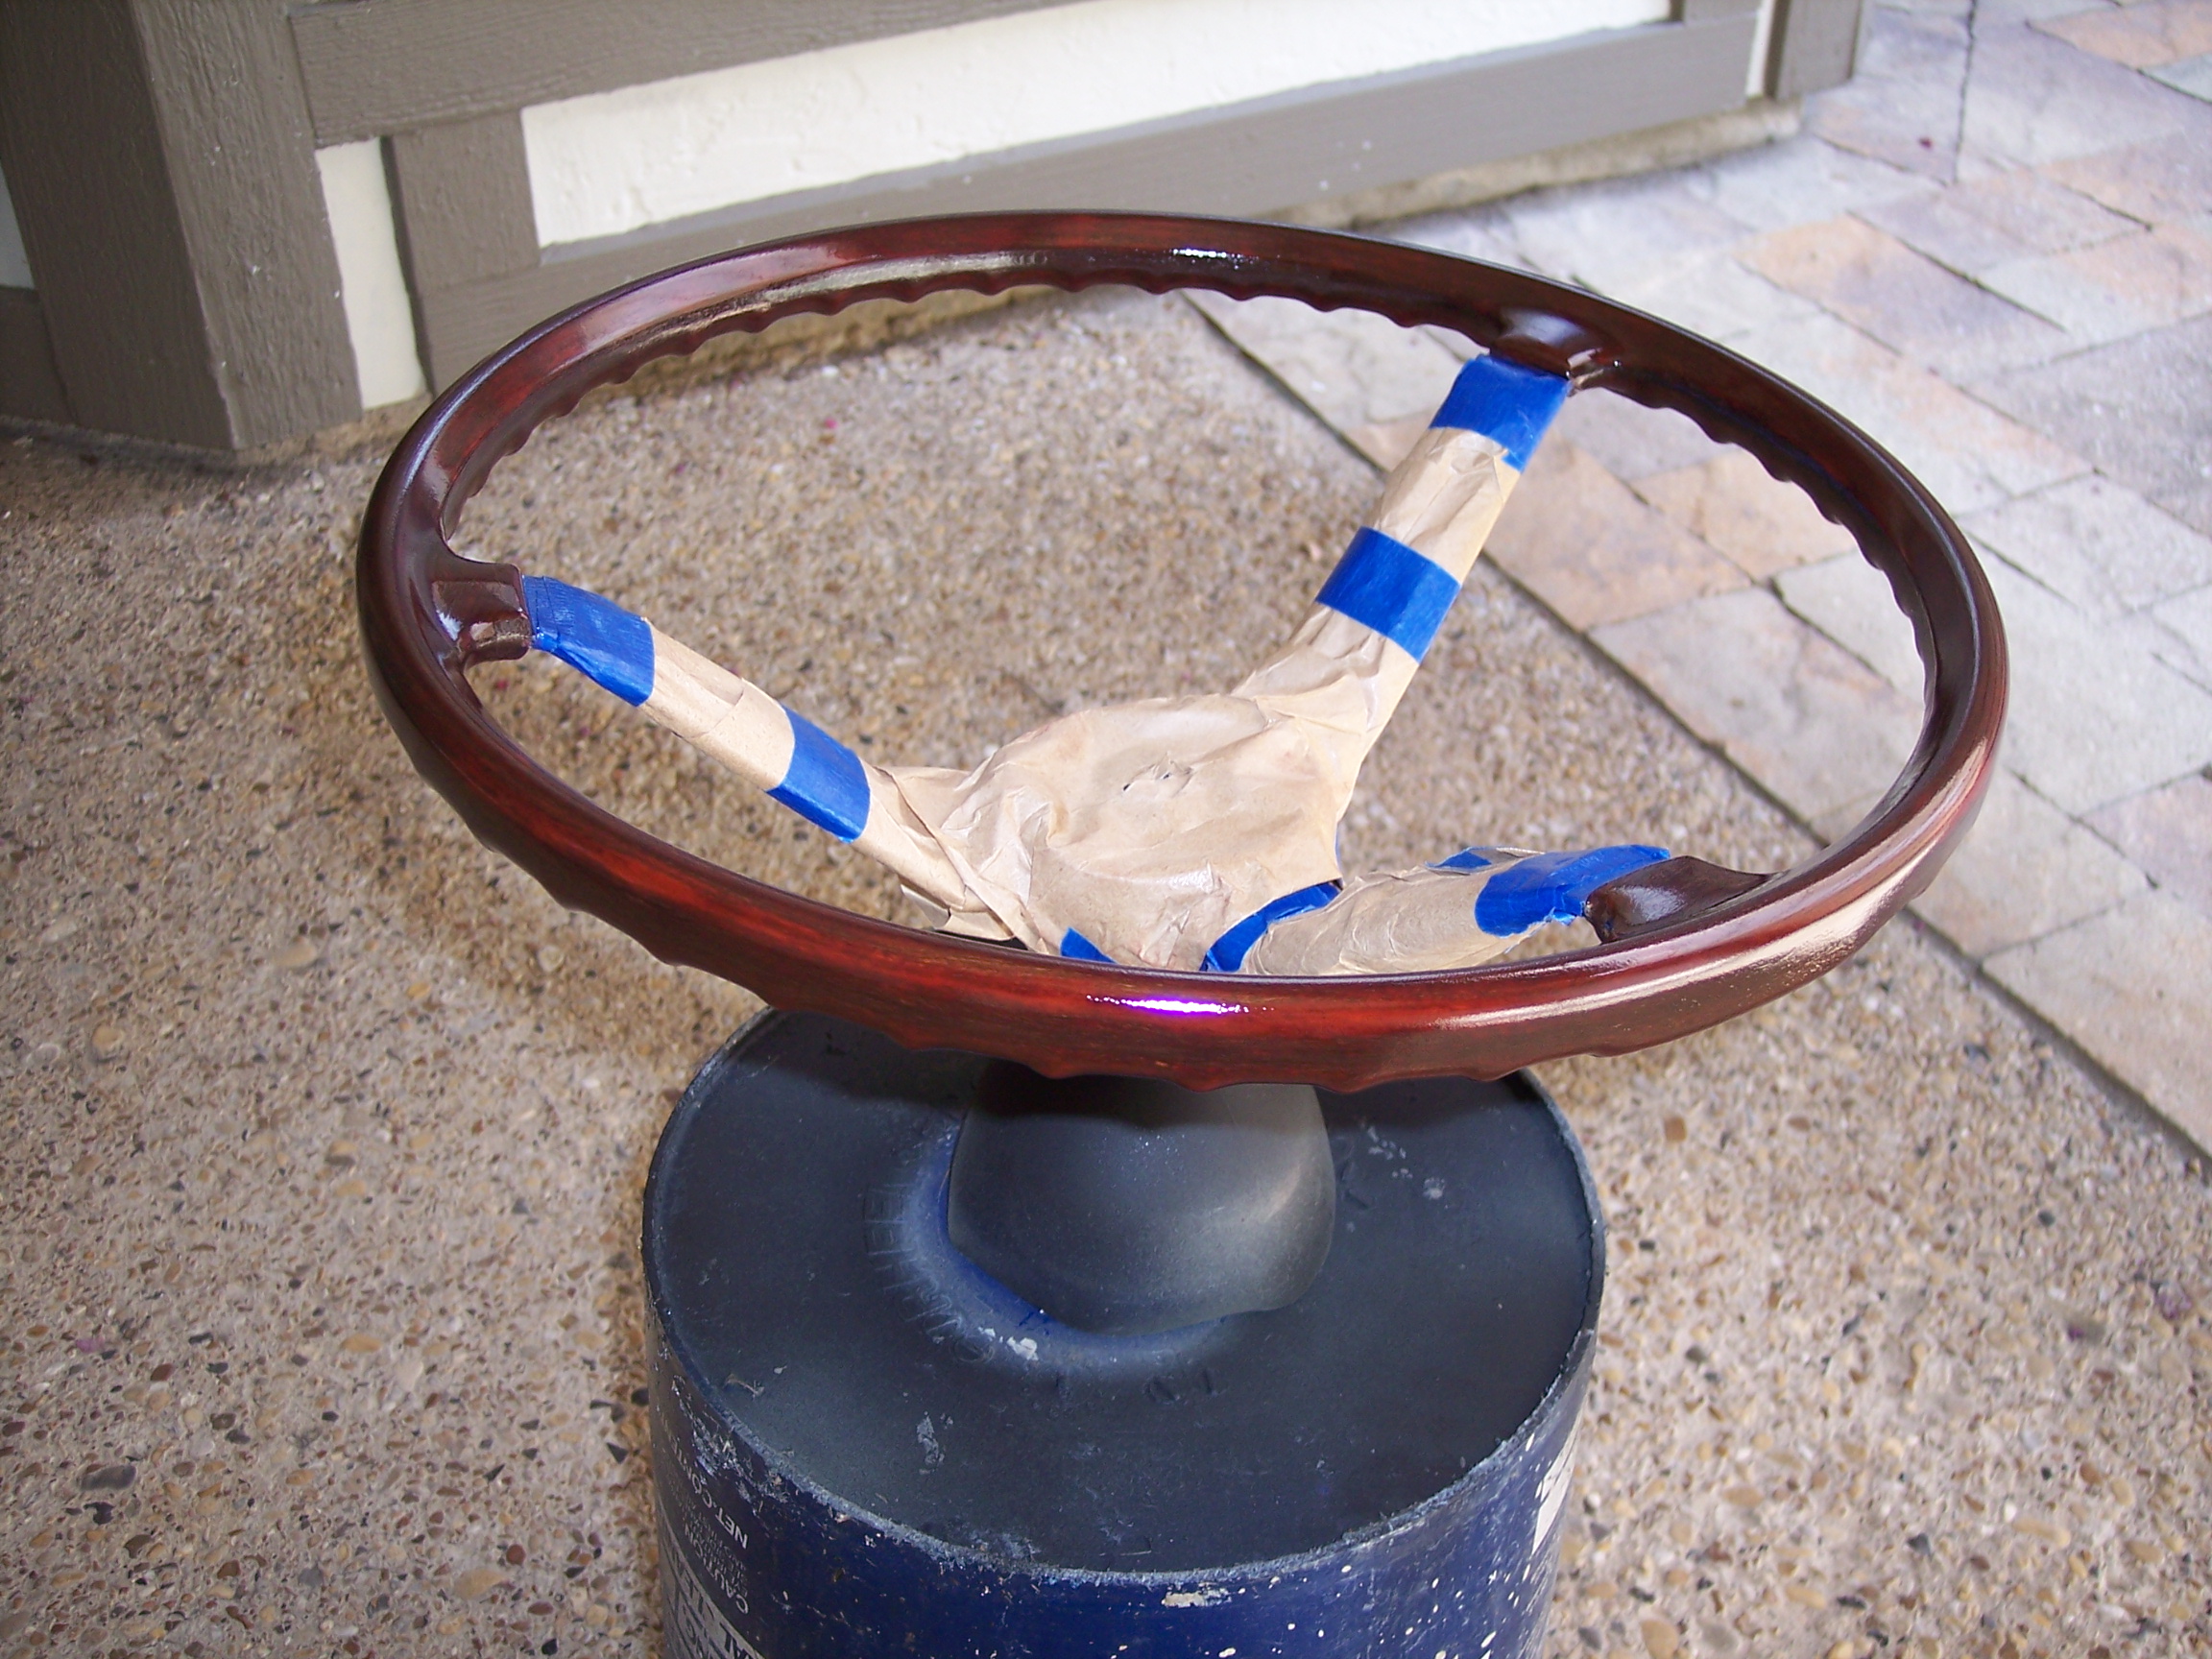
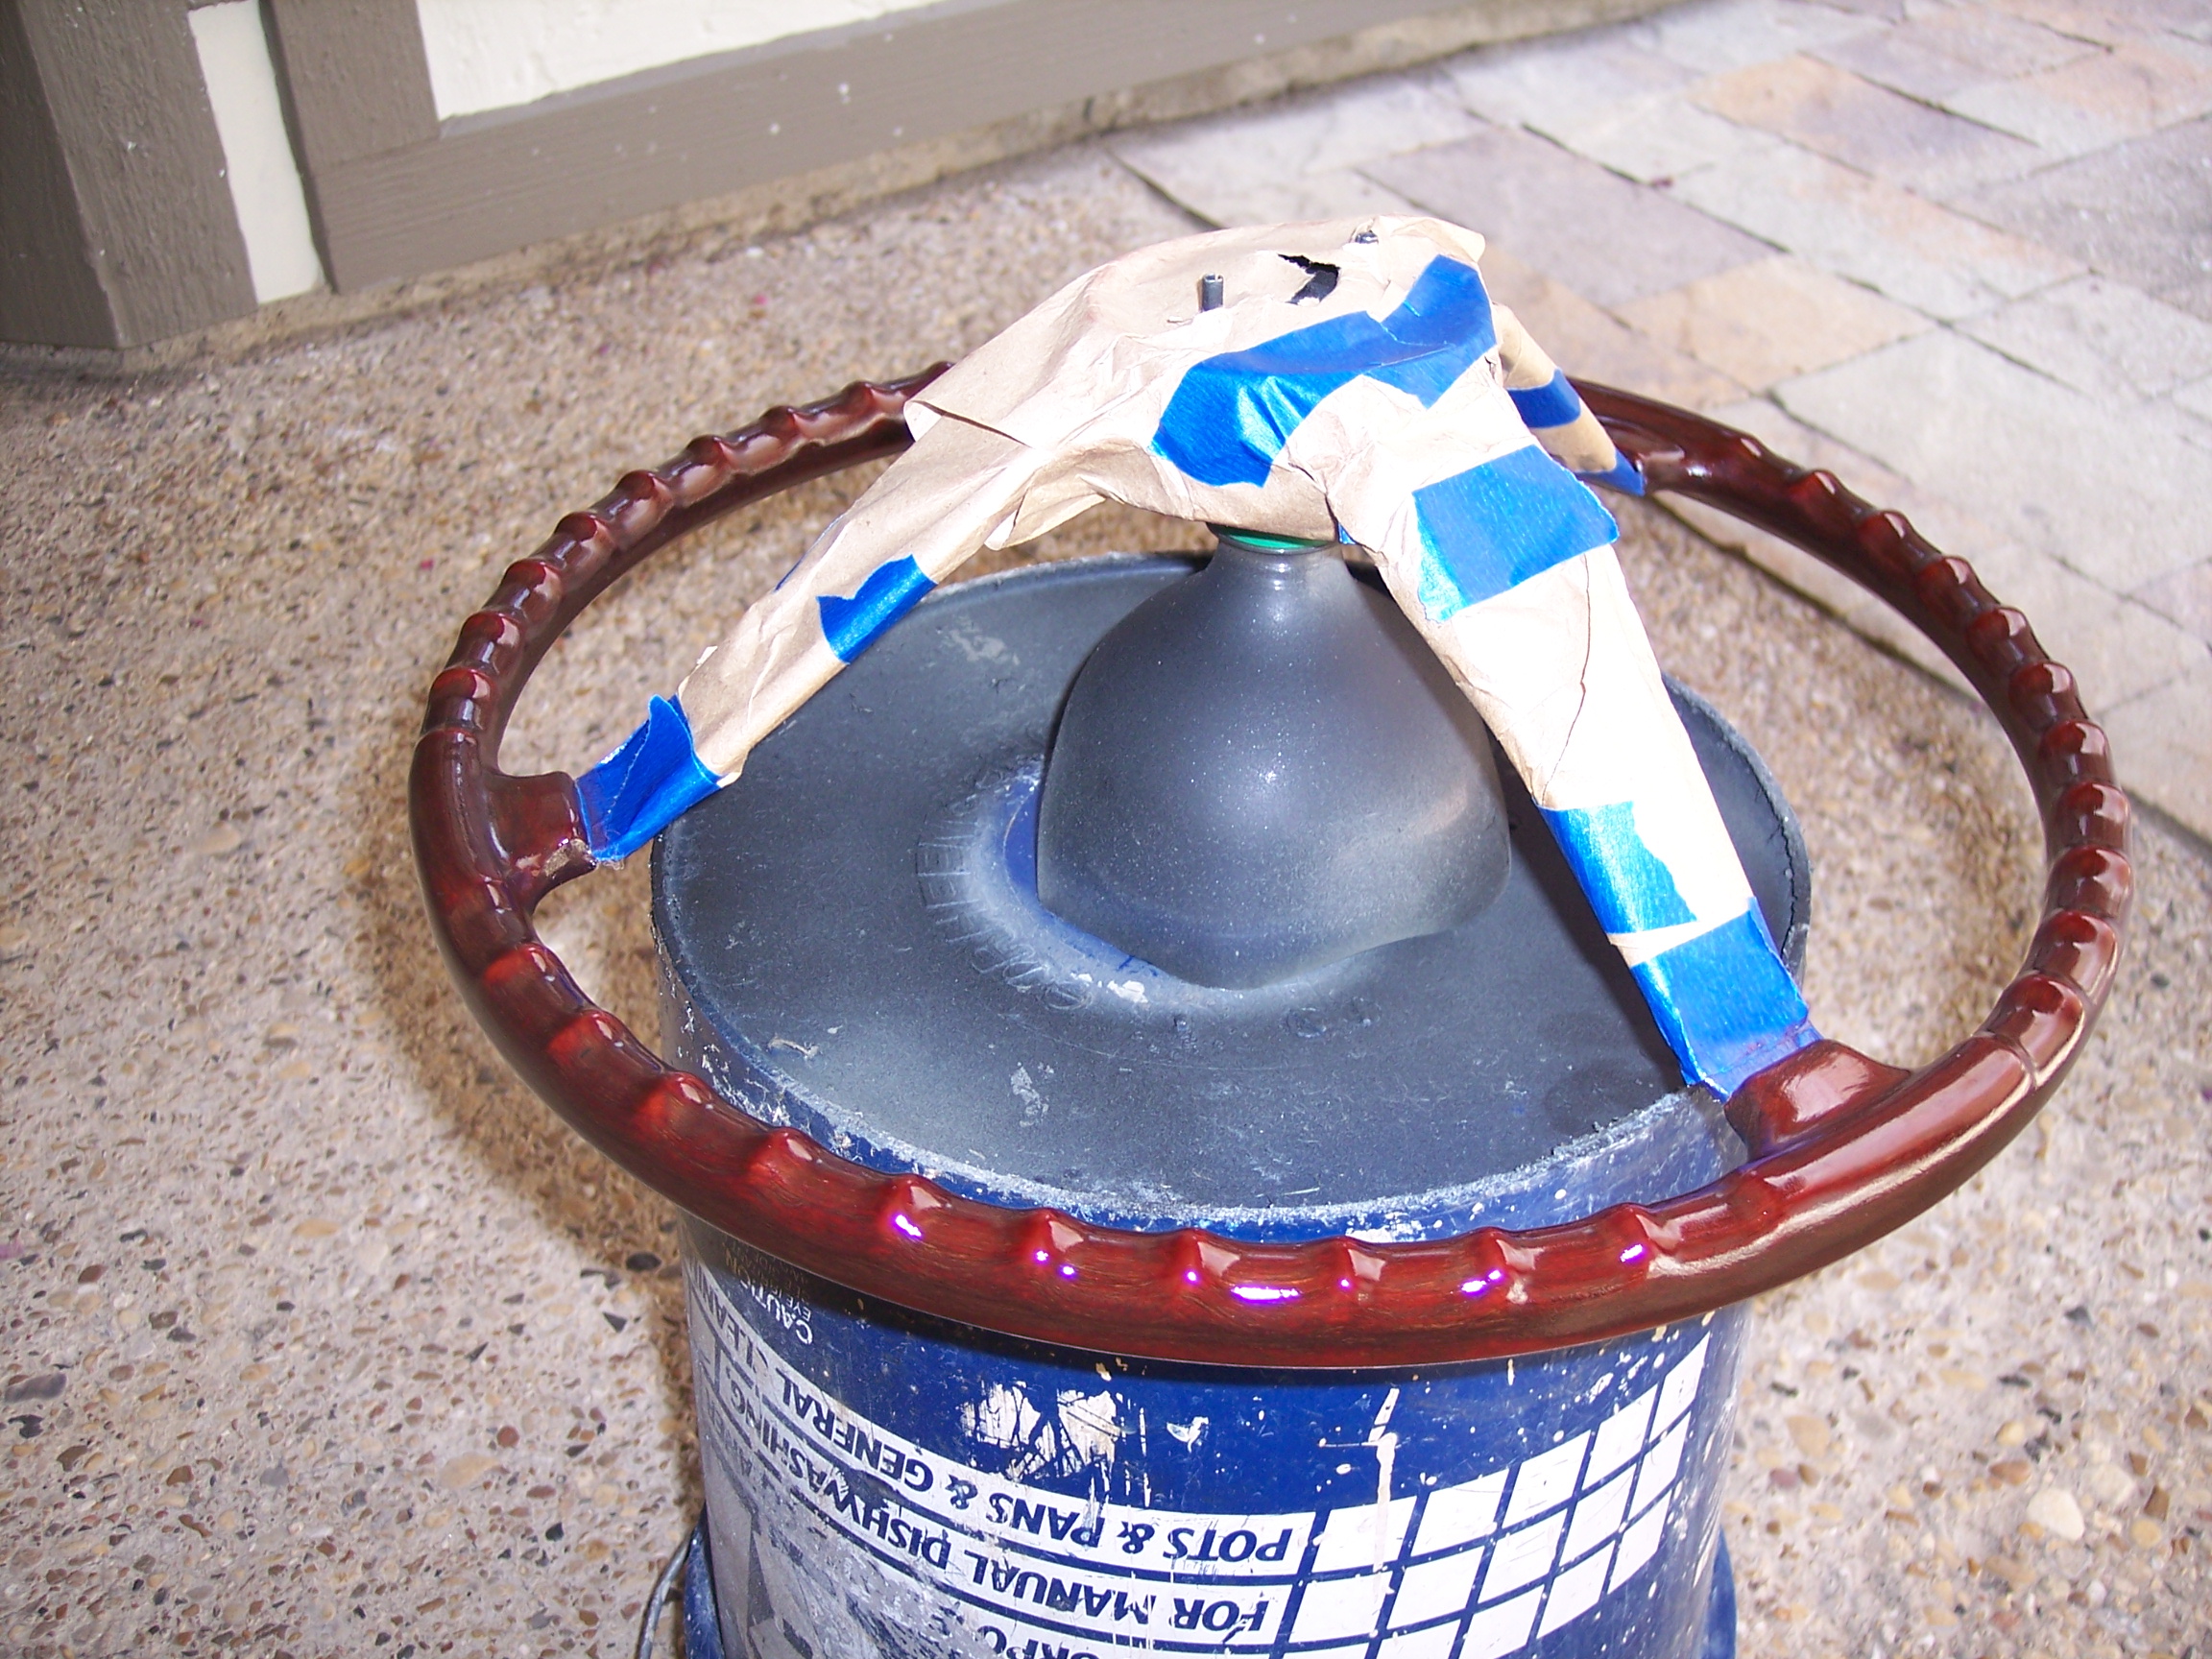
2 pointsNothing as exotic as most of the entries in this thread but here is a little paint accessory I made this week to help in refinishing my steering wheel. It is the top of a 2 liter bottle with a nice fat bolt installed in the cap. It served as a stand for painting the spokes and hub and then it provided a spinner base to rotate the wheel evenly while spraying the spar urethane.

 2 points
 -
1 pointI have jad to do similar with an O2 sensor socket. Even the goods ones flex enough to strip the sensor. Put a hose clamp around the end and no more flexing1 point
-
1 pointWe use these at The Big Shed for hole deburring and chamfering. We call is a rosebud.
 1 point
 -
Okay...Cliff you’re right if I spent that much on taillights I’d be sleeping in the garage. My whole car cost less that 3000 Euros when I bought it. I guess I can be happy with my US spec red tail lights. Sent from my iPhone using Tapatalk1 point
-
Want a second shot at a 2000GT??? https://bringatrailer.com/listing/1967-toyota-2000gt-2/
 1 point
 -
I would think that's a million dollar+ car. Dangerous to do a no reserve auction on that car unless you need to fire sale it IMO1 point
-
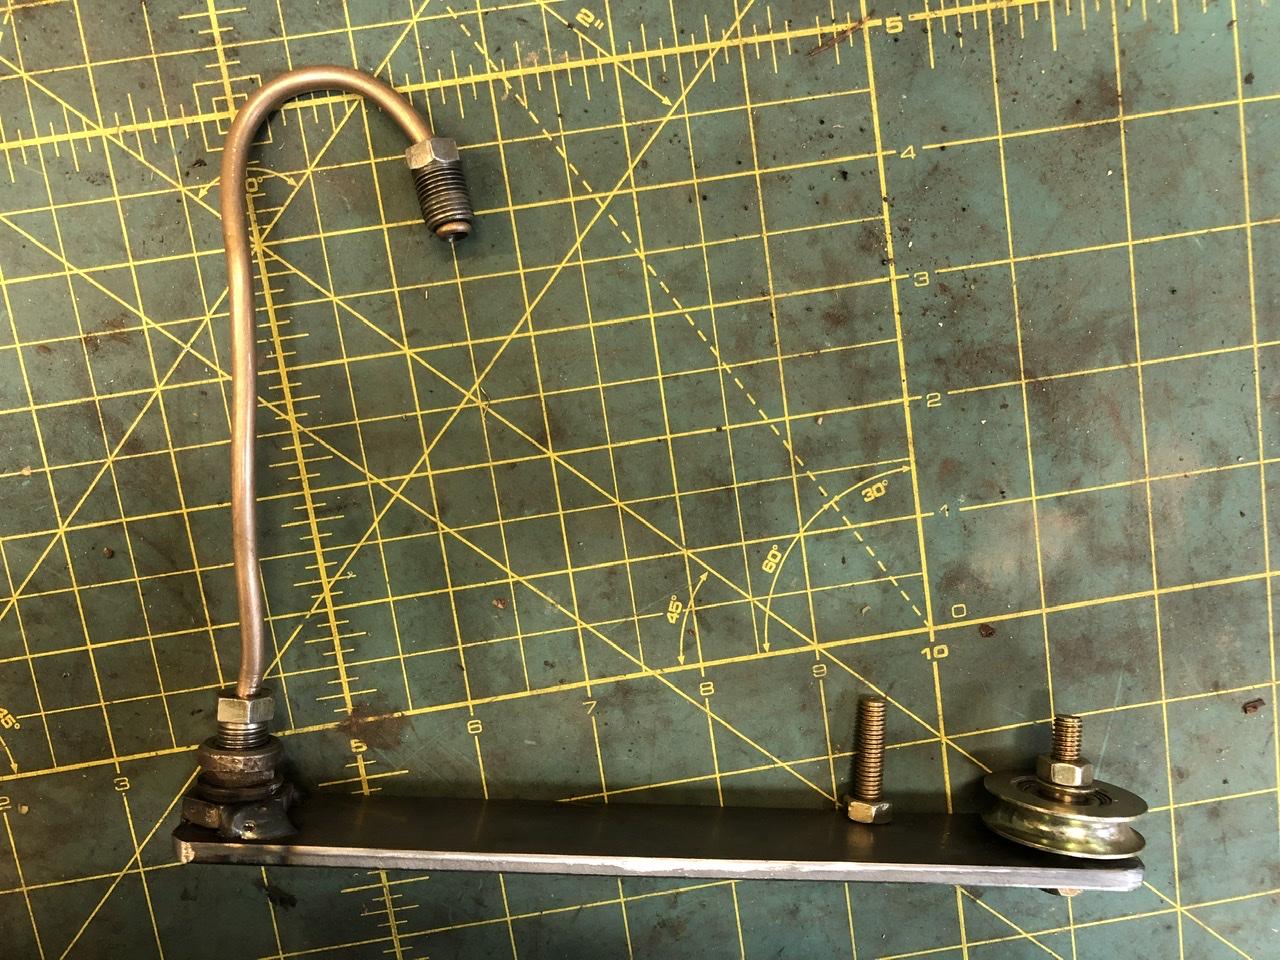
1 point1 point1 pointIt’s mostly Maui Wowie but it has a little Labrador in it. Sent from my iPhone using Tapatalk1 point1 point1 point1 point1 pointJust stare at that little beauty for a minute. The brake line threaded into that little remnant of an old brake line welded to the bar is the secret weapon. I already use the CuNi tubing and have for years. It is very soft and forms nicely in my powerful hands. However, there is one bend type that is always challenging and of course occurs frequently. A tight curve near the end of the tube. Bending the end of the tube requires more force as the leverage is reduced with shorter length. Don’t believe me, make a 180 in the middle of a 12 long piece, then make it again at the end. My finger tips cringe at the thought of it. Dang, if only there was a way to safely, easily grab the end of the tube in a vise grip or something without screwing up the threads or crushing the tubing and giving me an extension handle to increase leverage. BINGO! Thread the tube nut into an old female brake fitting welded to the end of a scrap. Consider that little devil tight S curve on the stock front caliper. TWO tight 180 bends near BOTH ends! Impossible to make it nice and pretty and kink free! Not any more. I made a bunch. Need any? All of these were created on the car on real stock calipers and strut tube mounted hose ends, so they fit perfectly. They are R and L sided. They took literally 5 minutes each to bend and fit. Yes, they are not the exact same shape as the stock ones, sorry. Those bends are ridiculous.

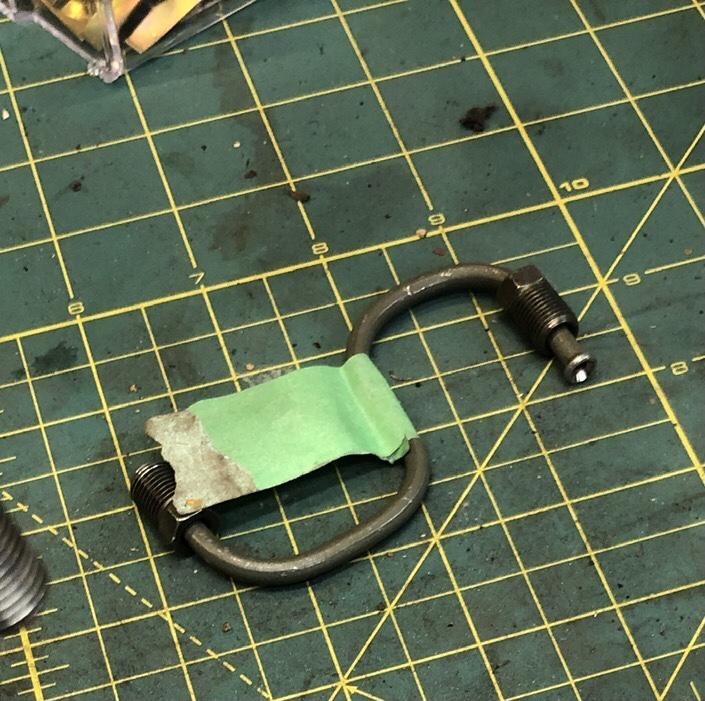 1 point1 pointCool tool of the day for November 8th. Been making brake lines again on the latest project, and finally made that little tool that makes some of the tighter bends really easy.
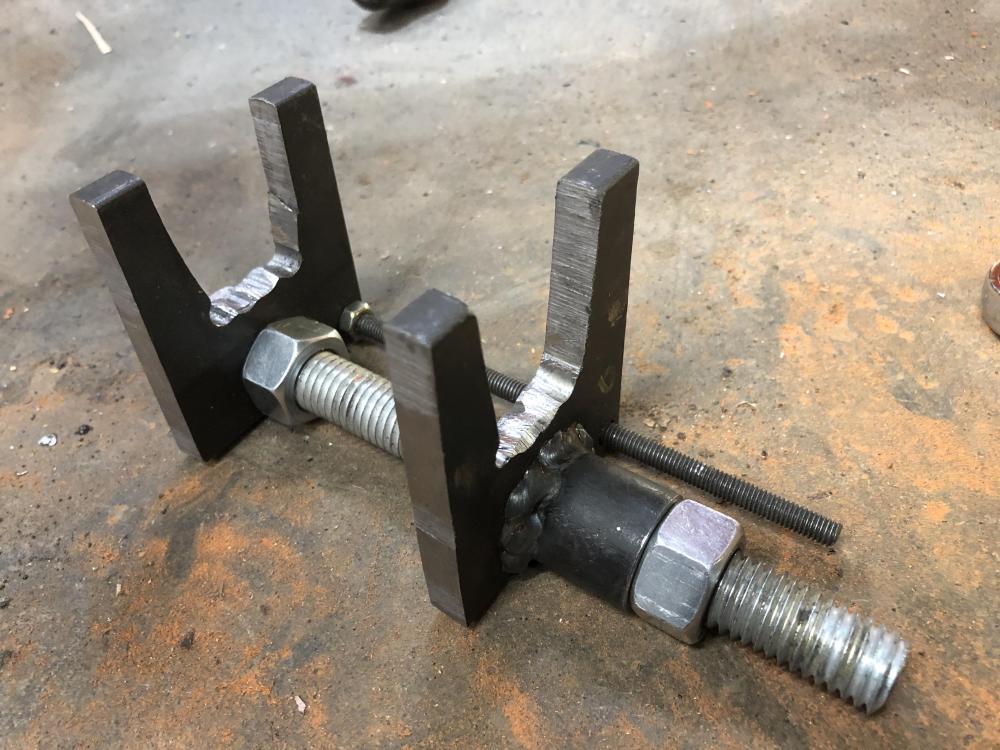
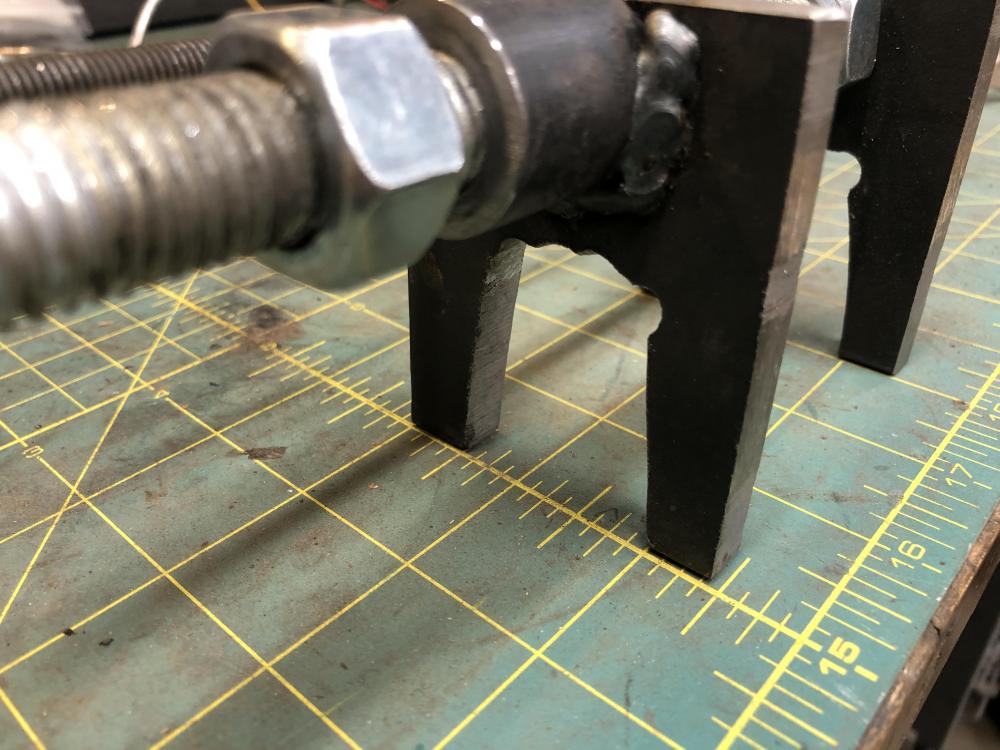
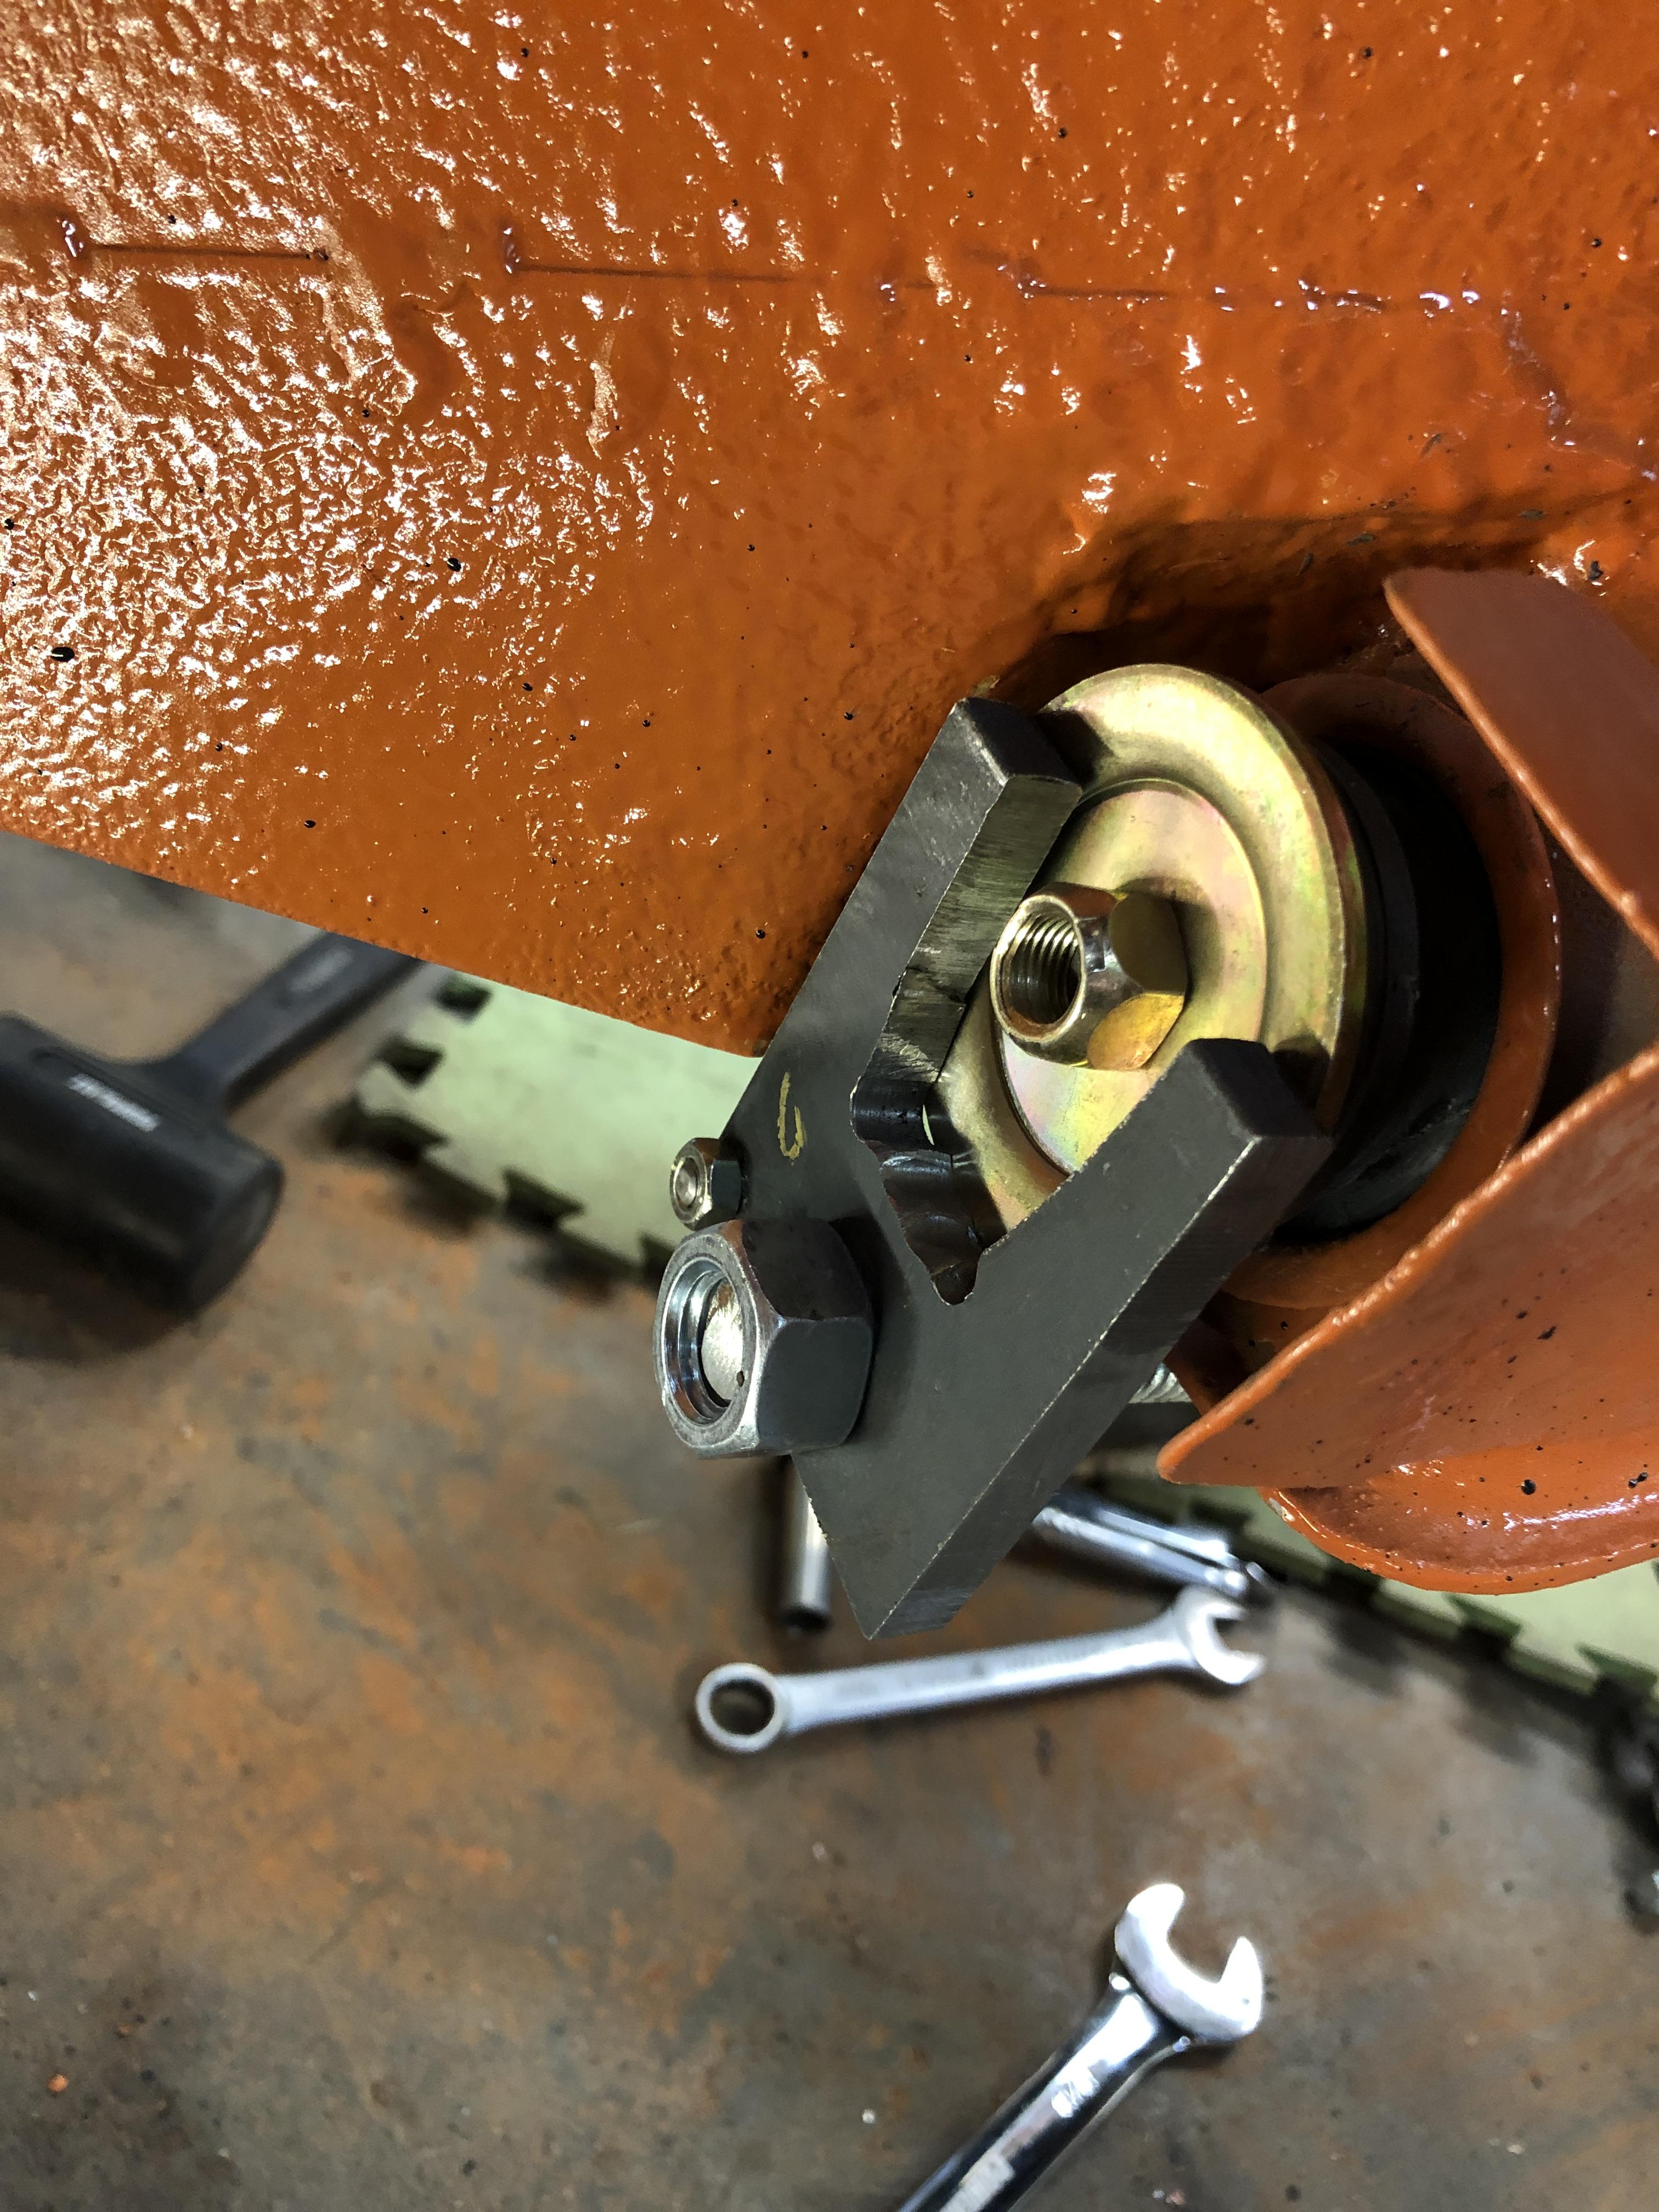
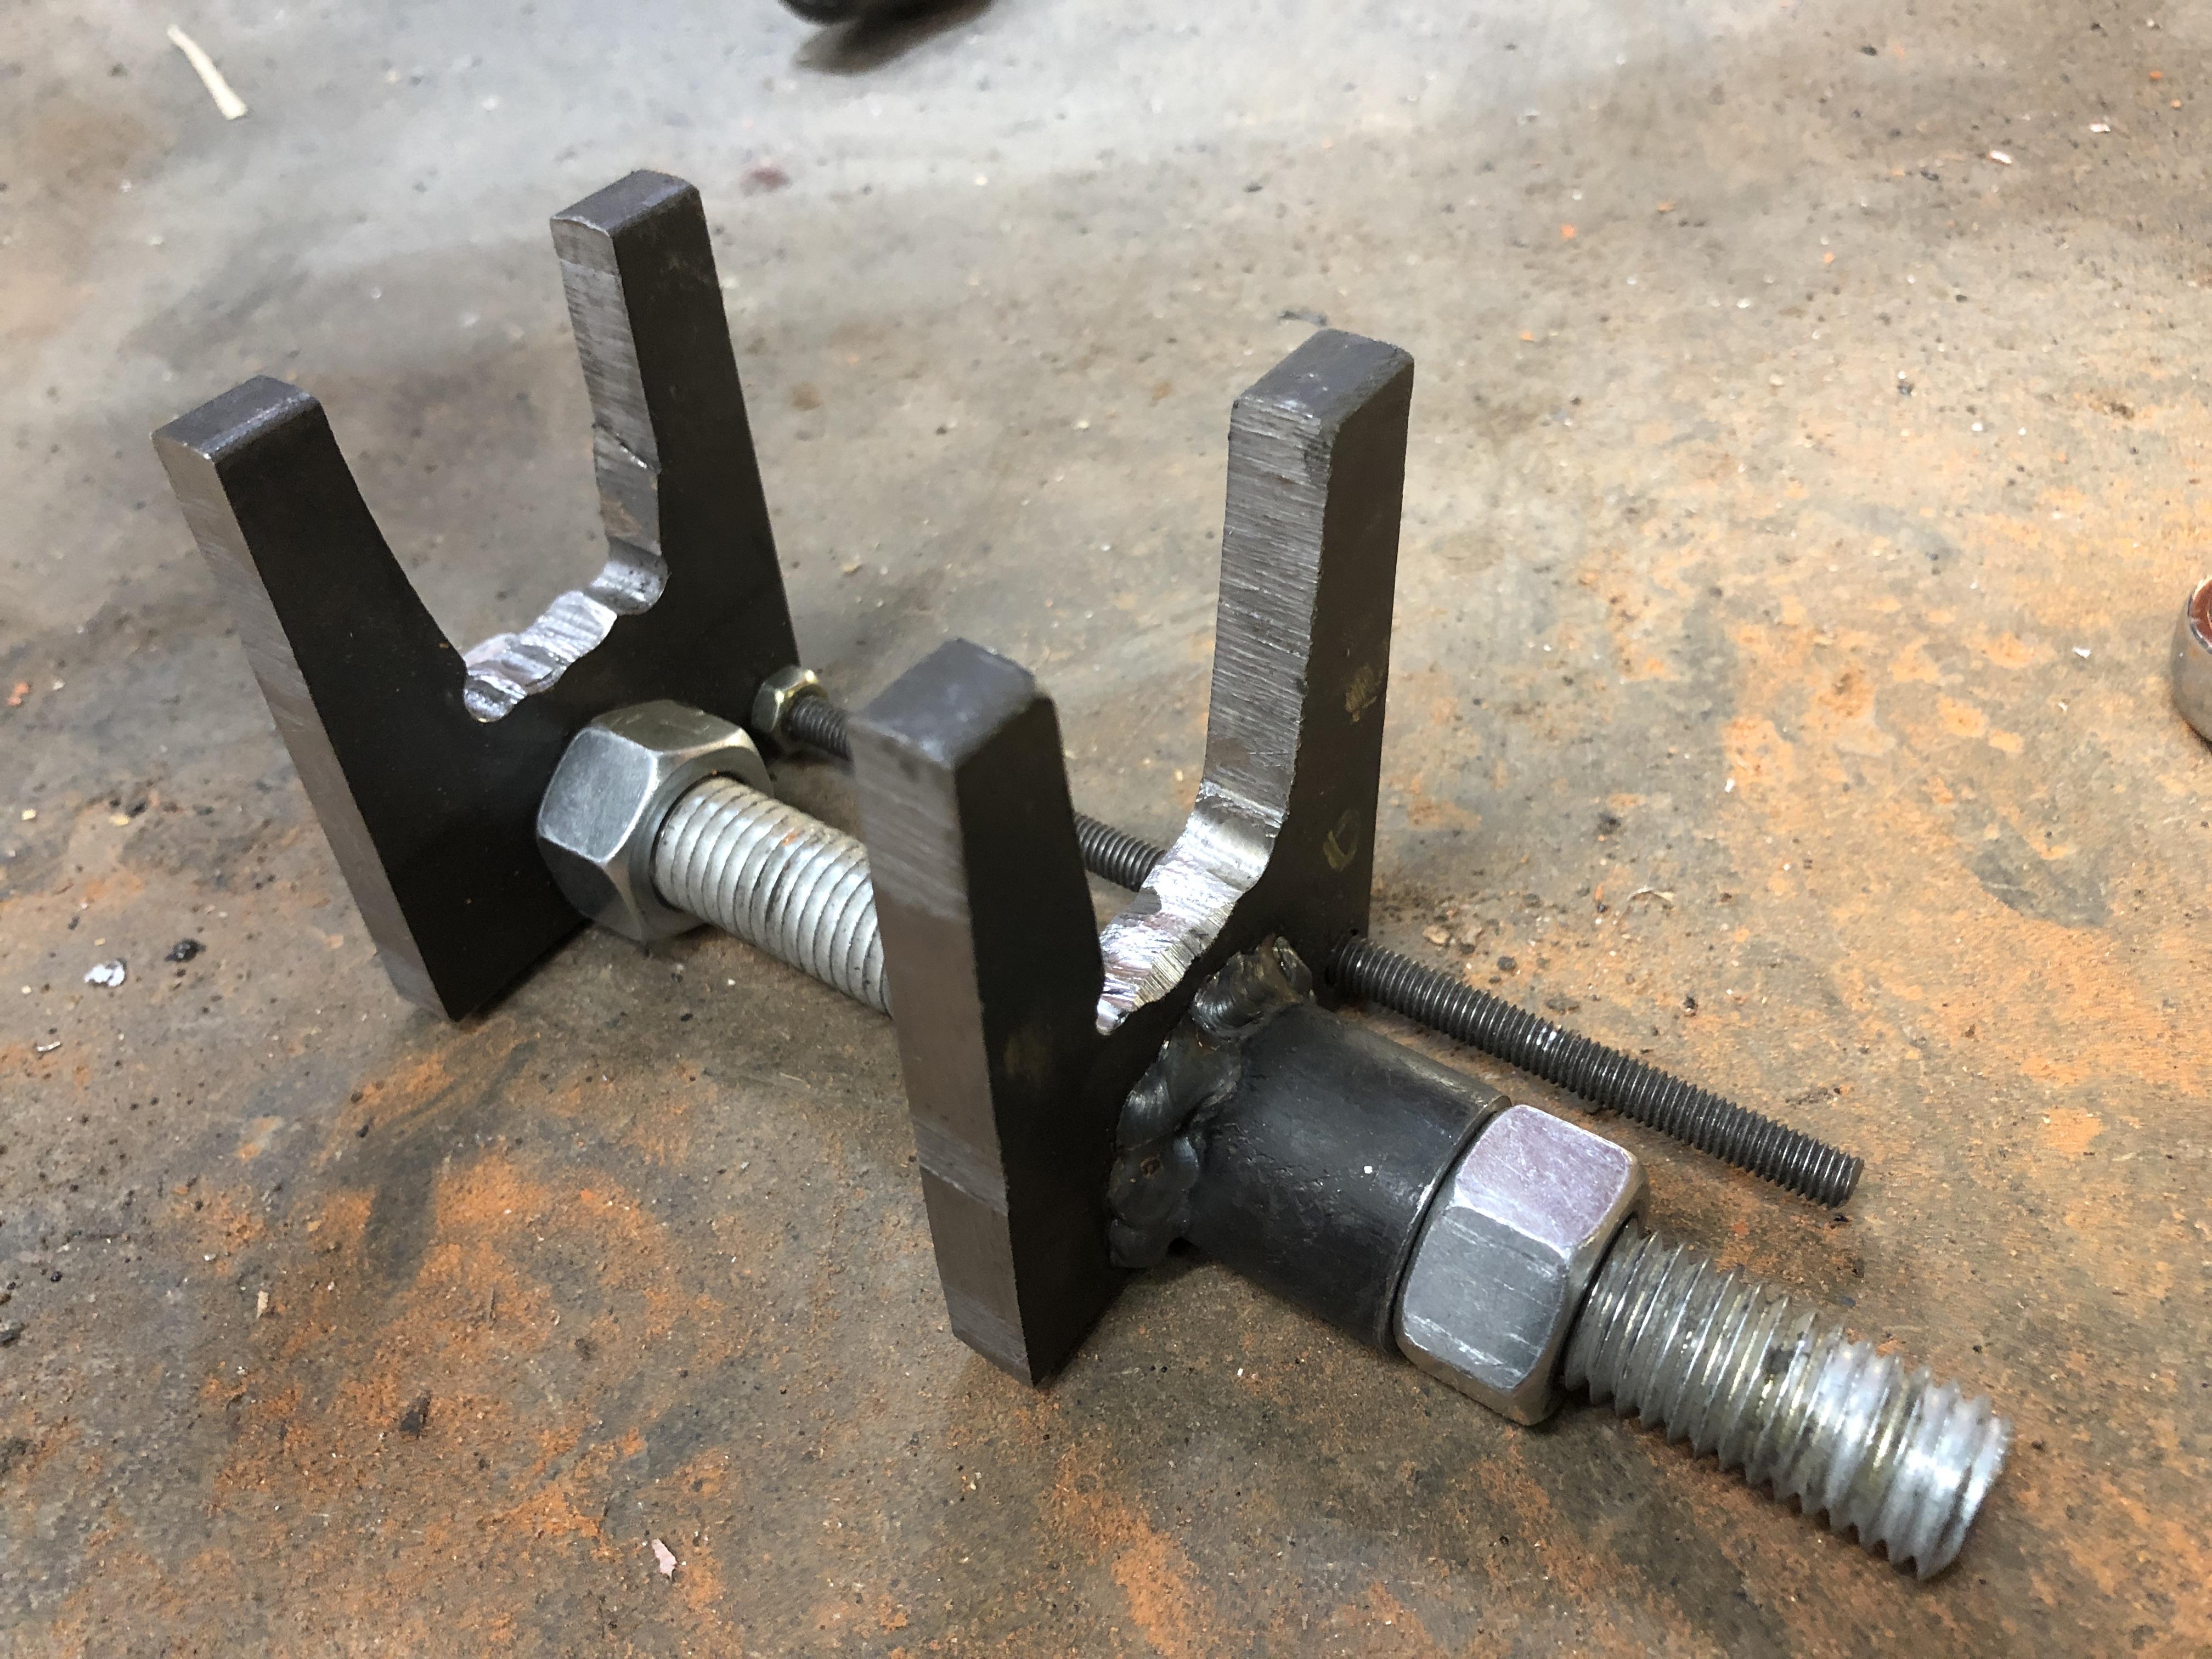
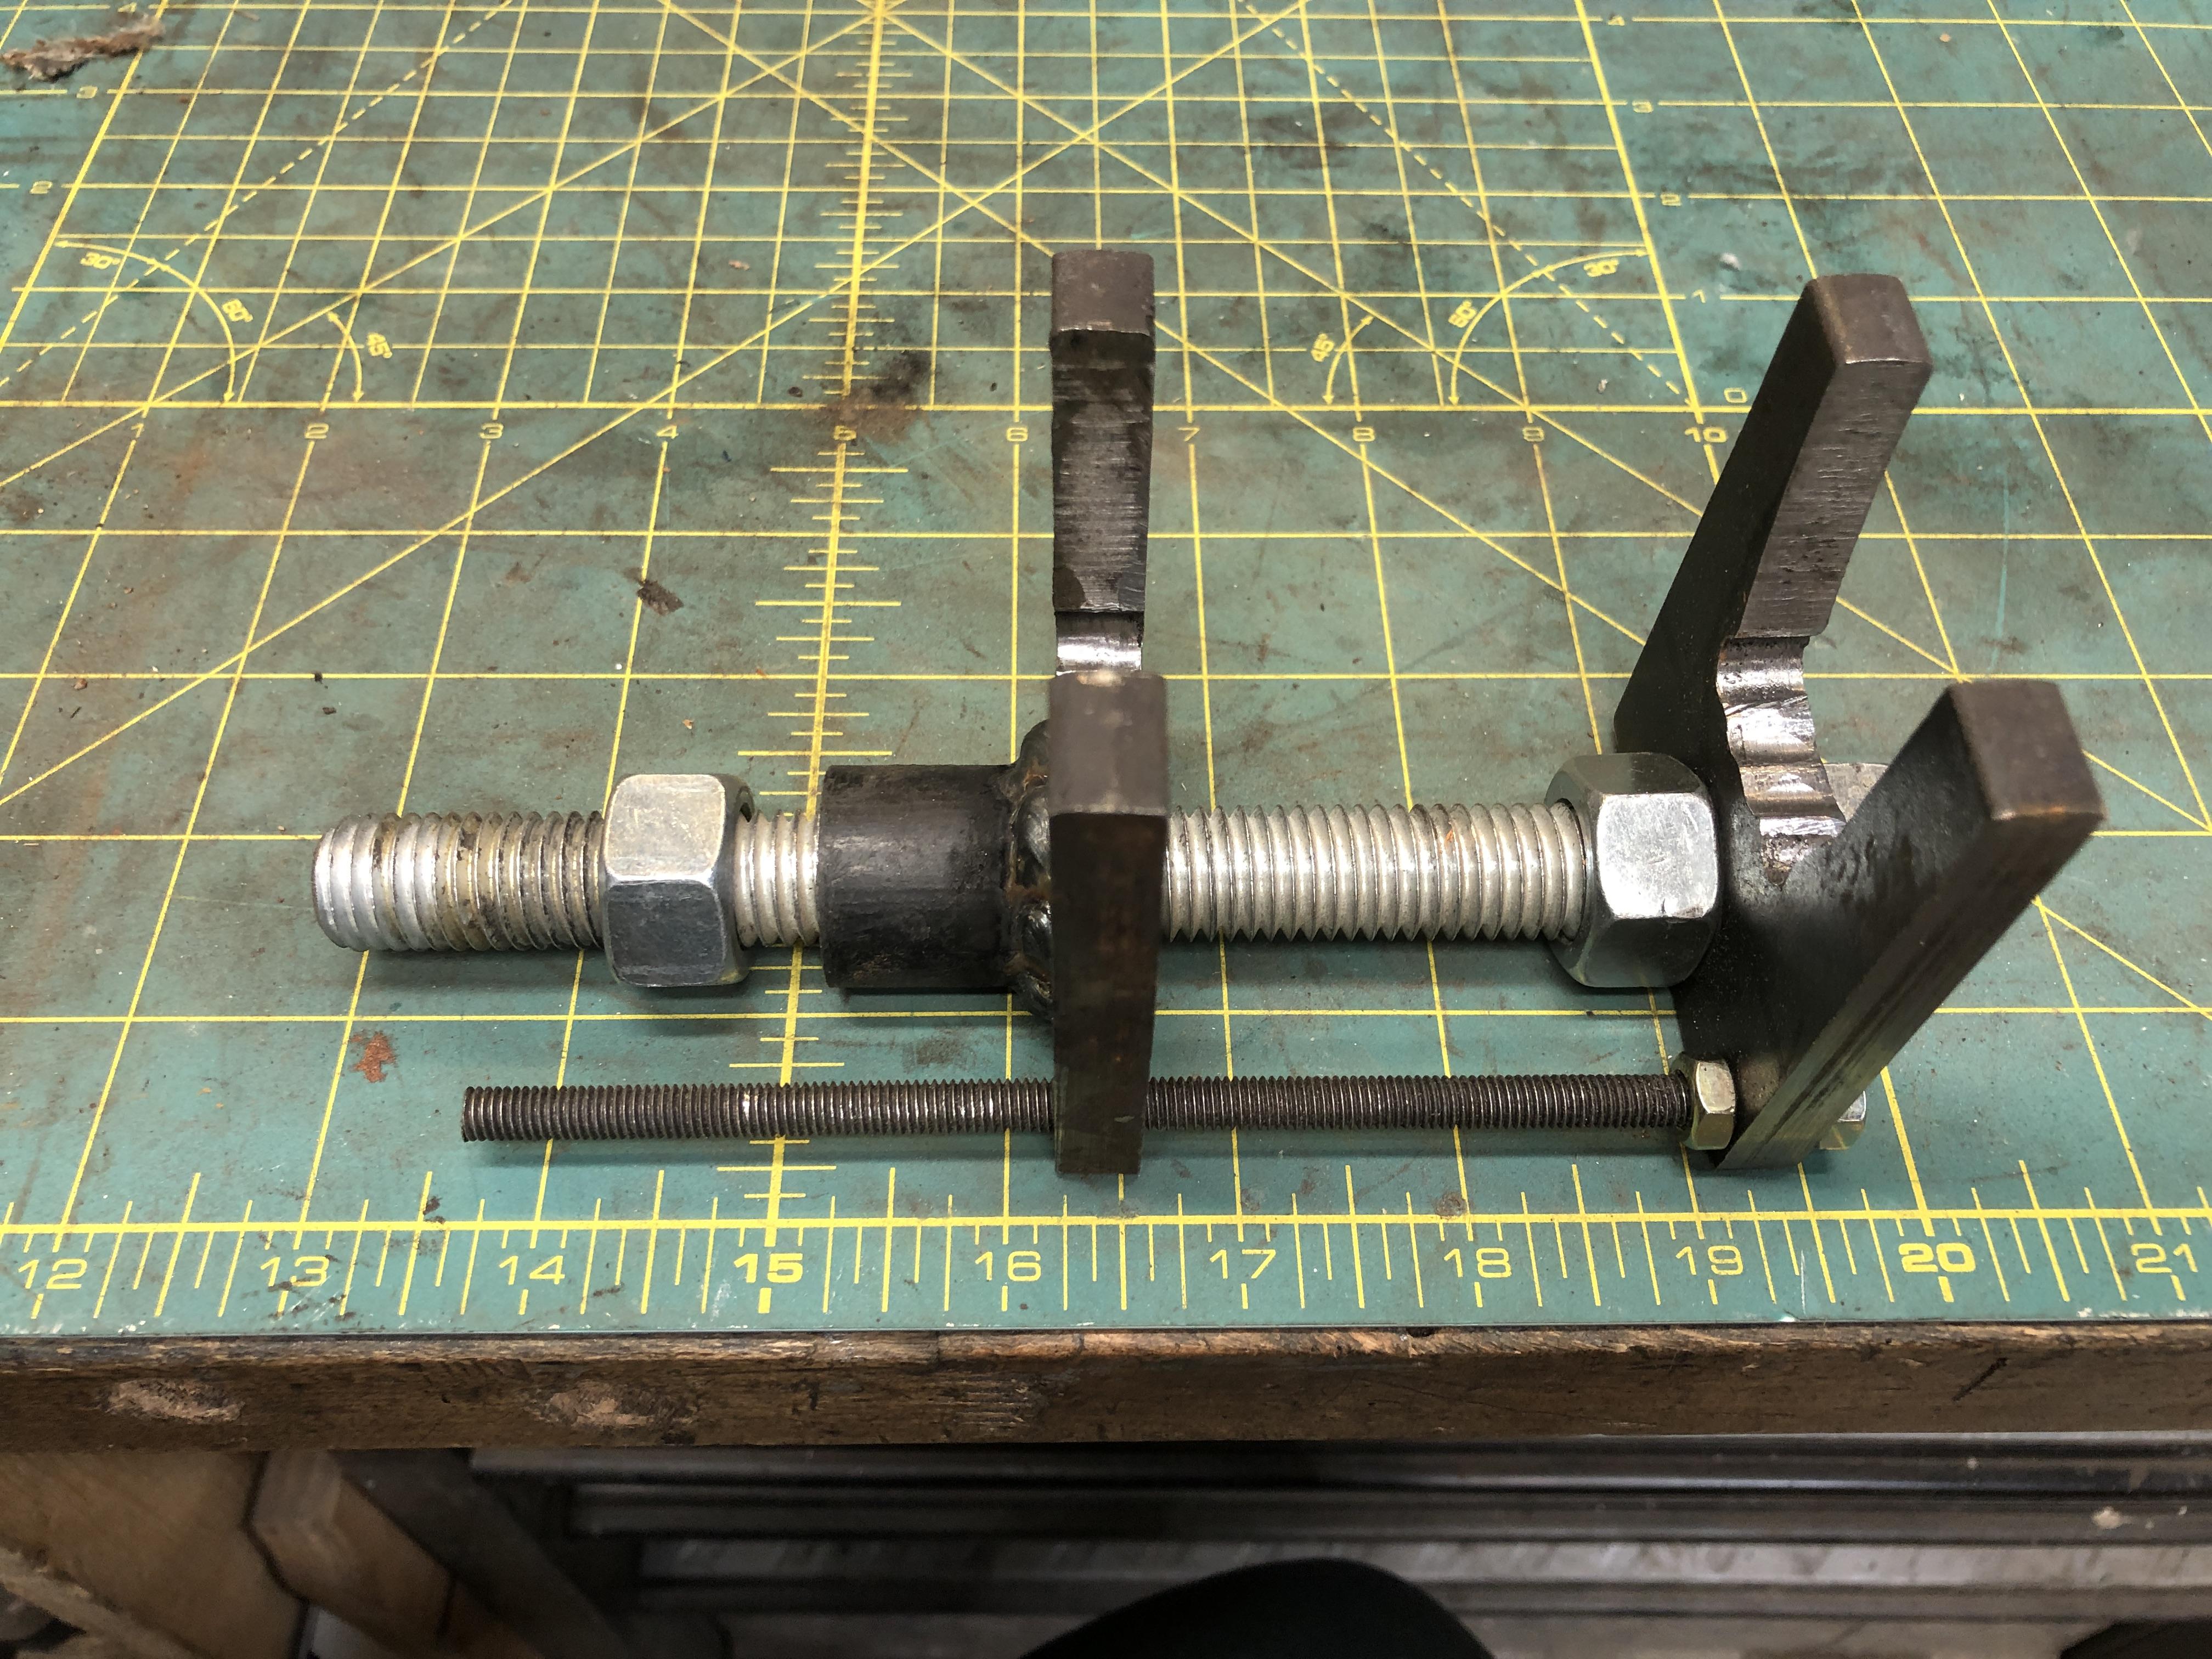
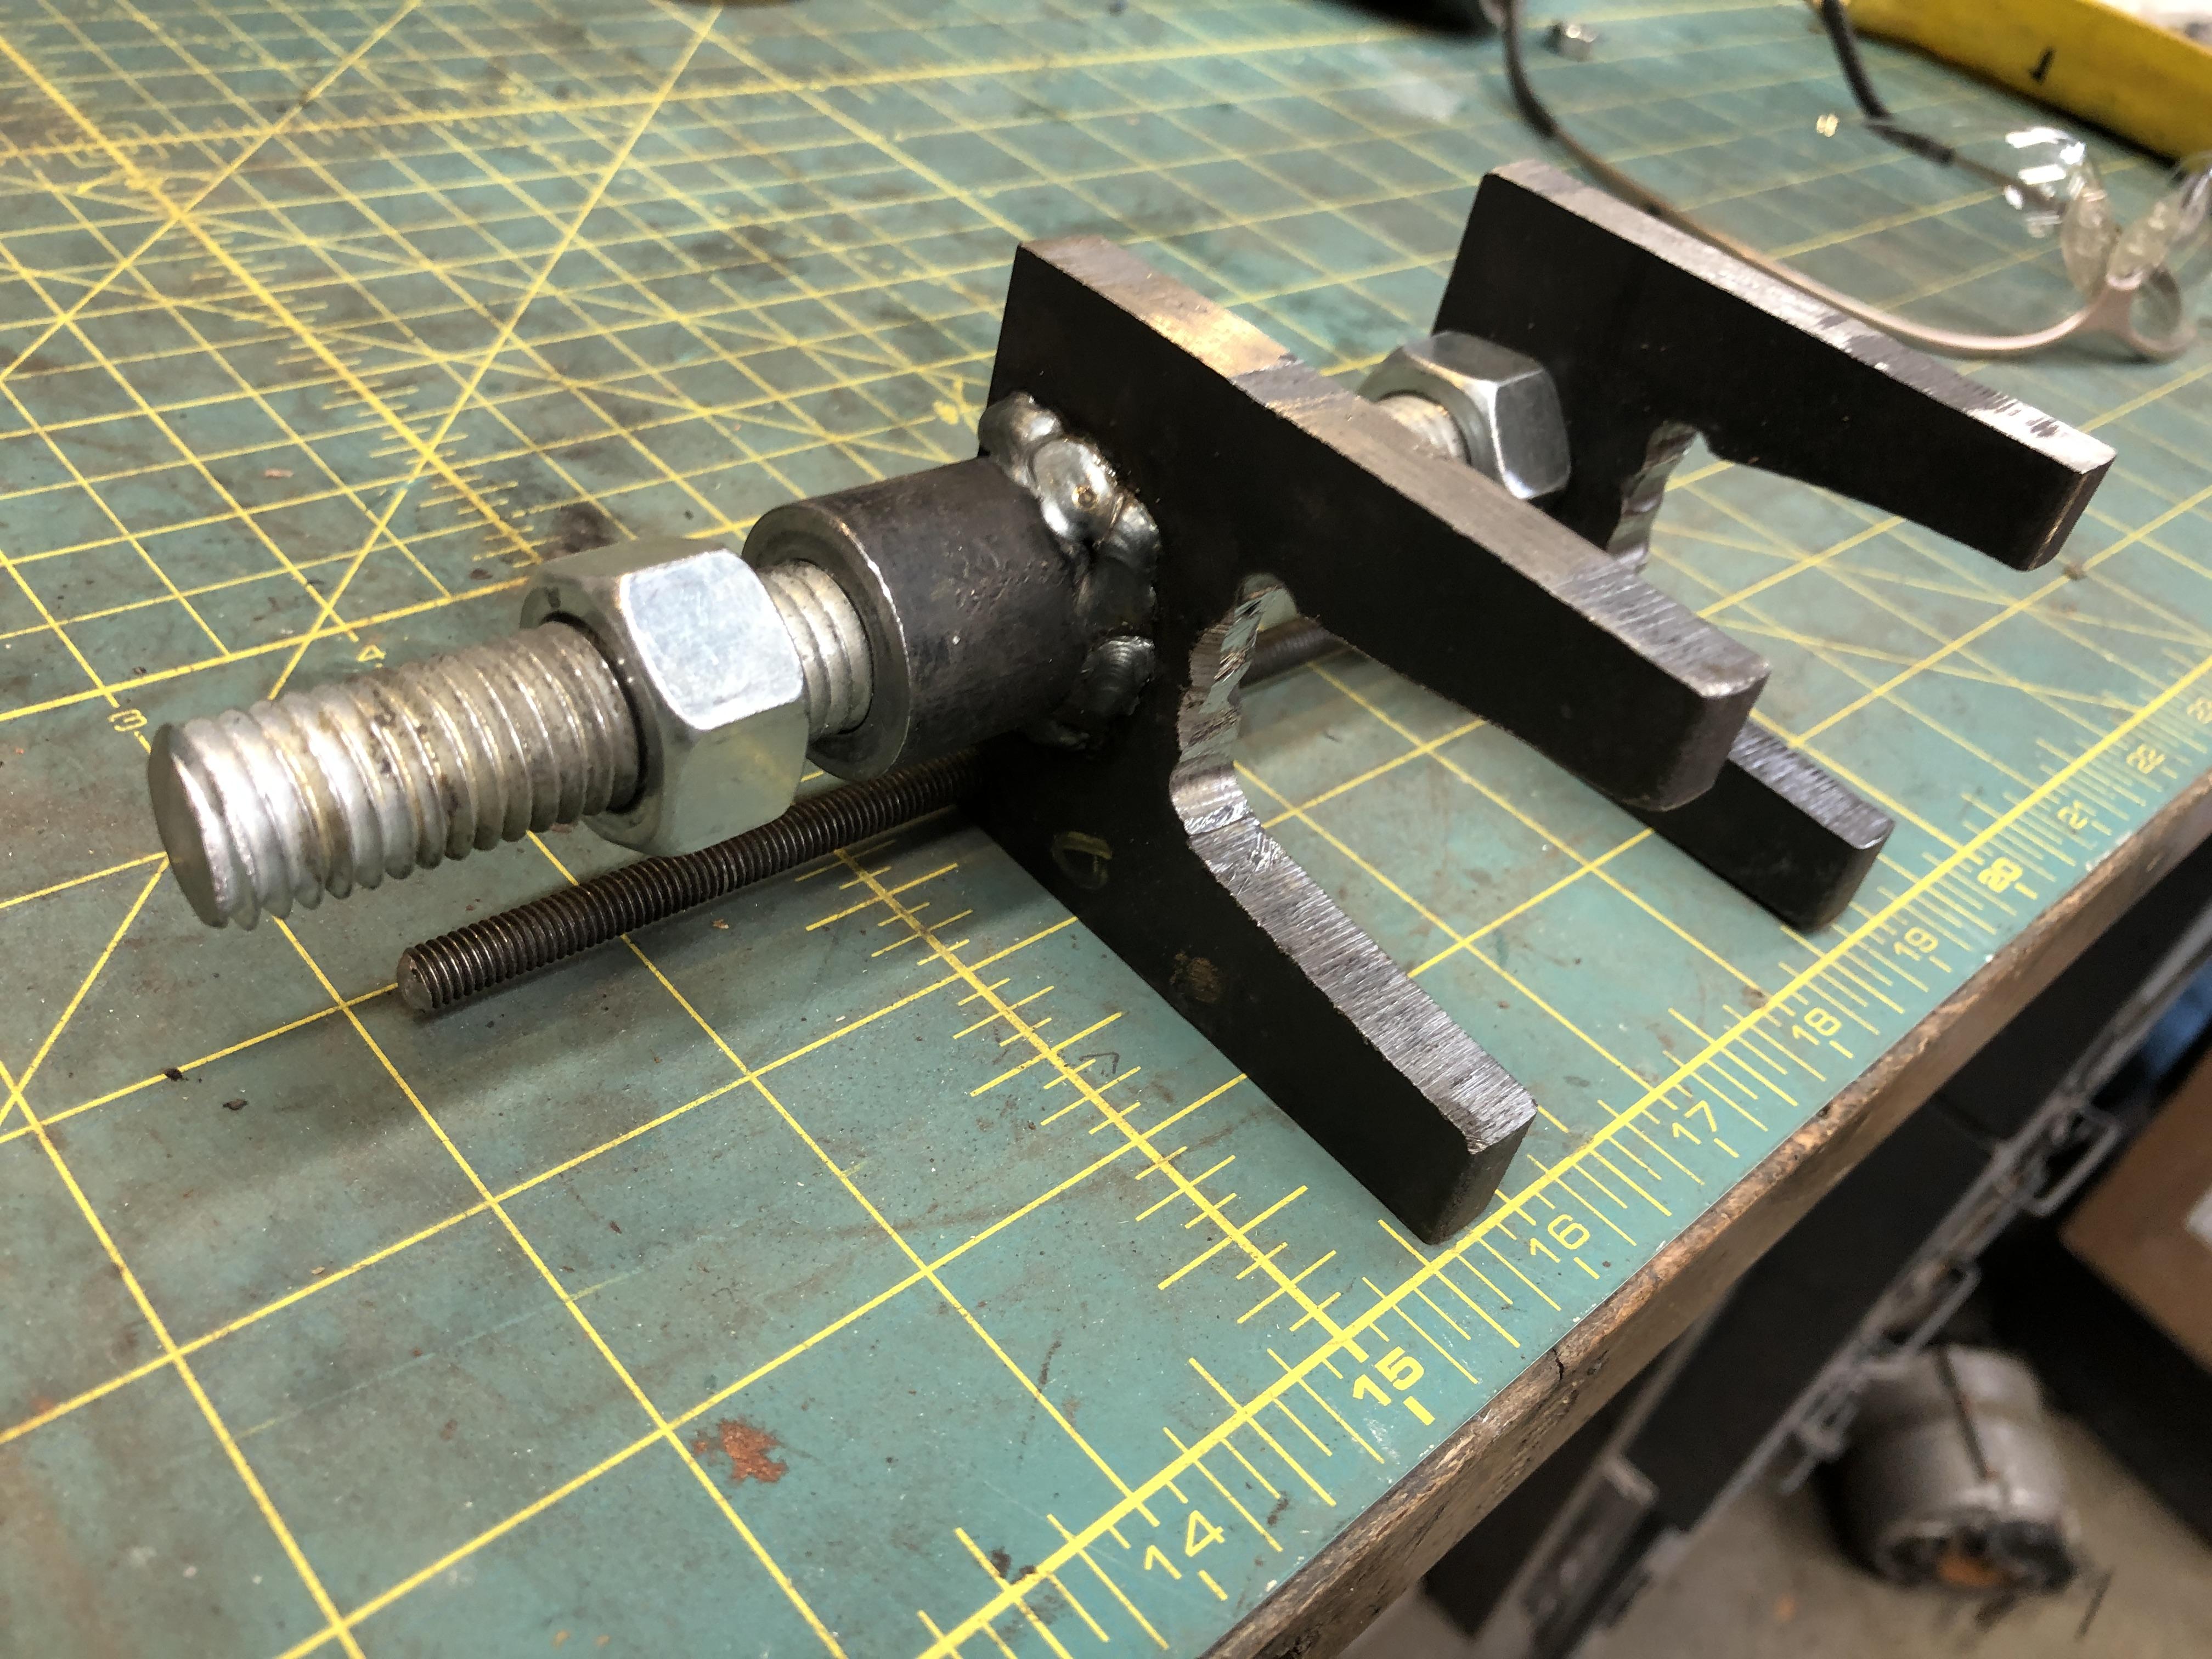
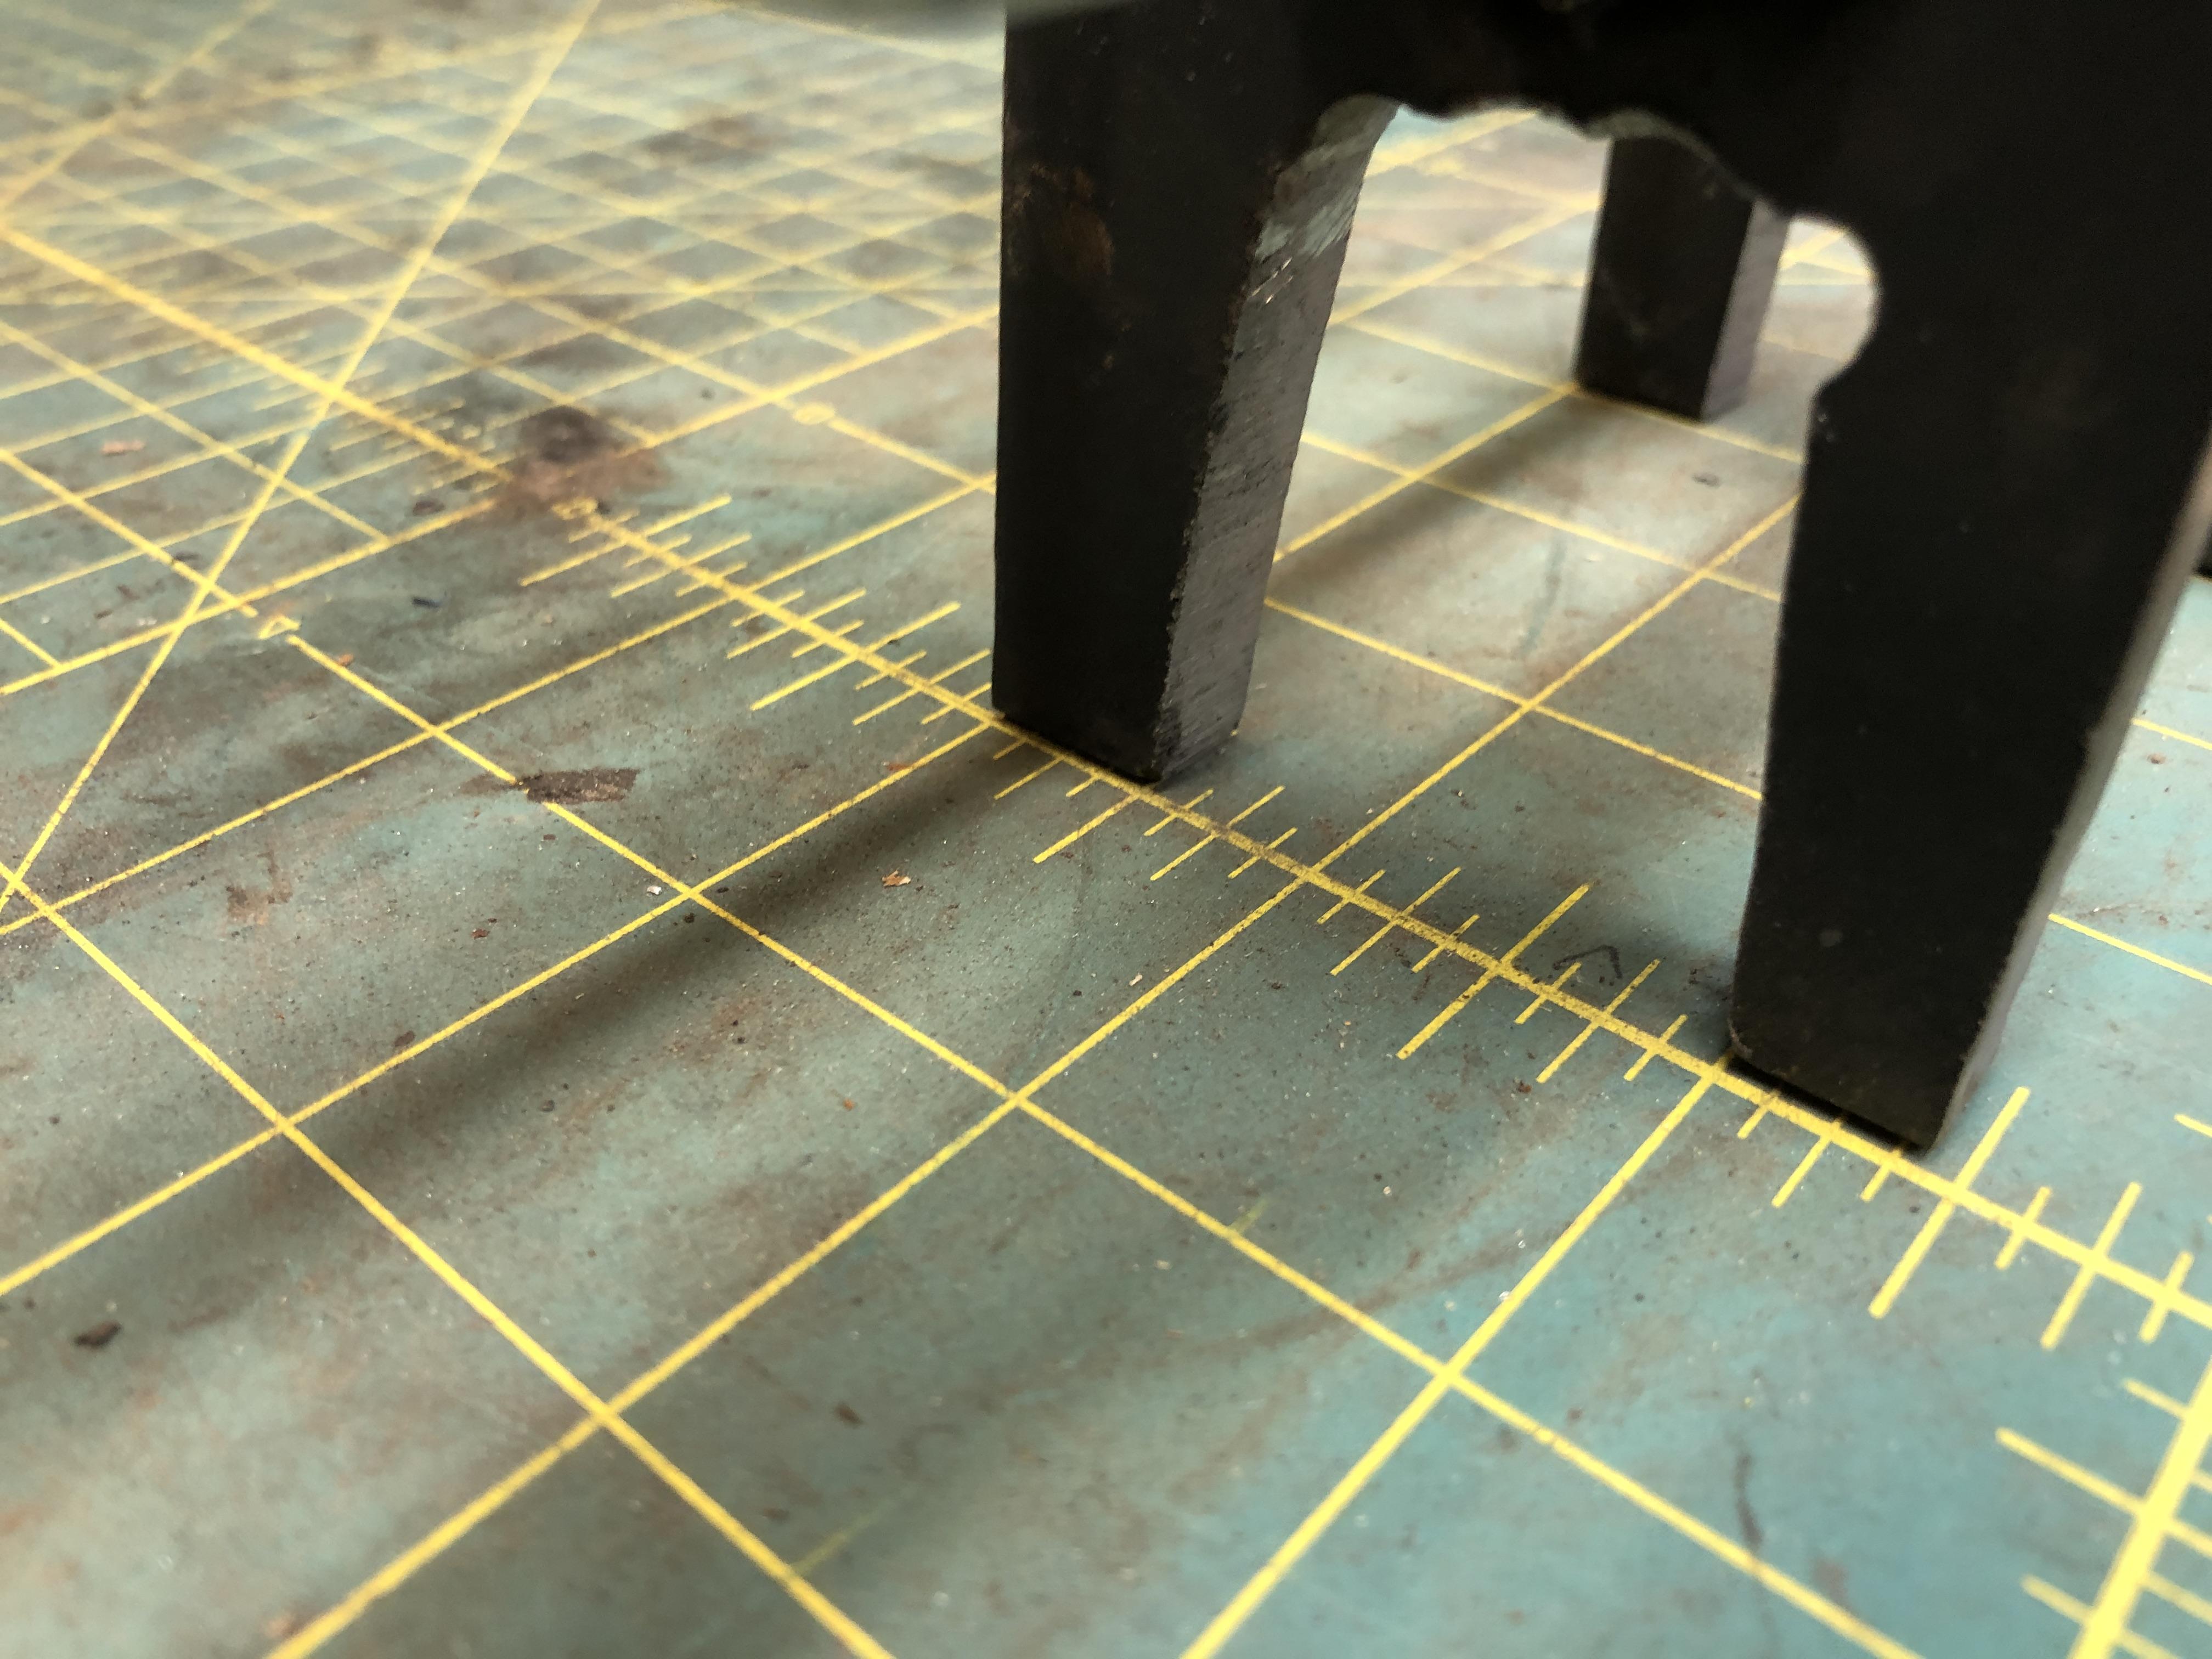
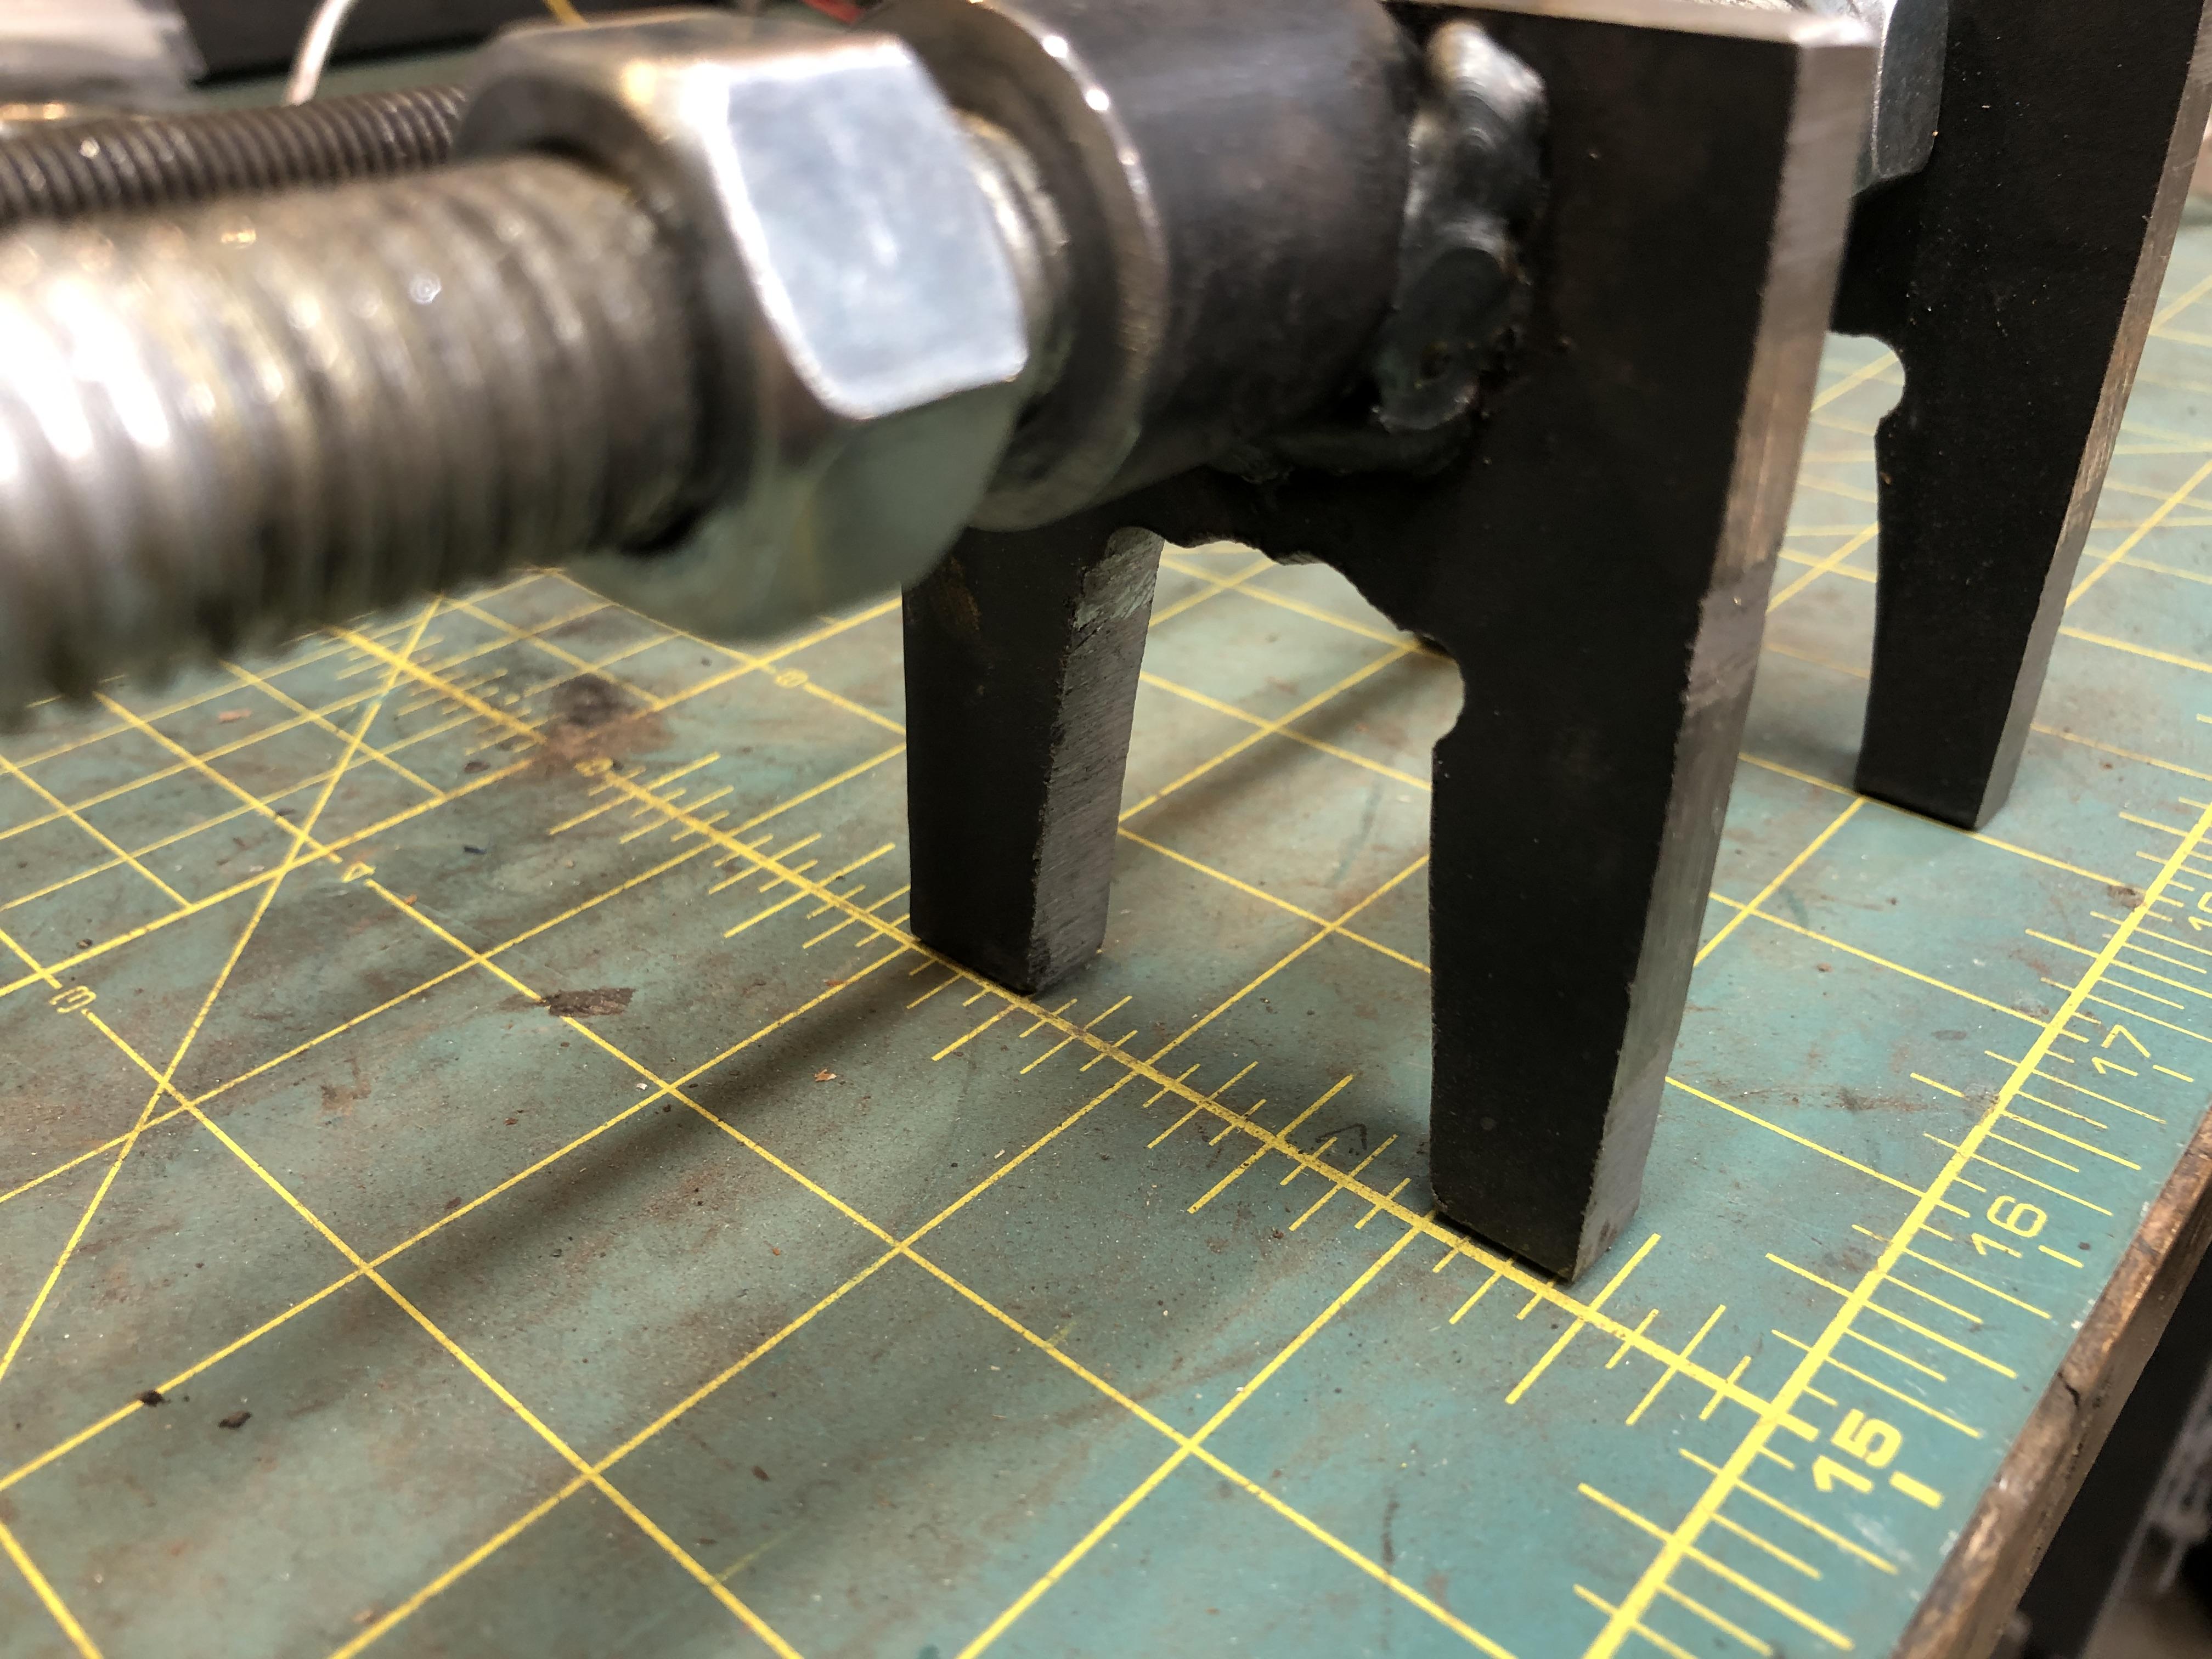
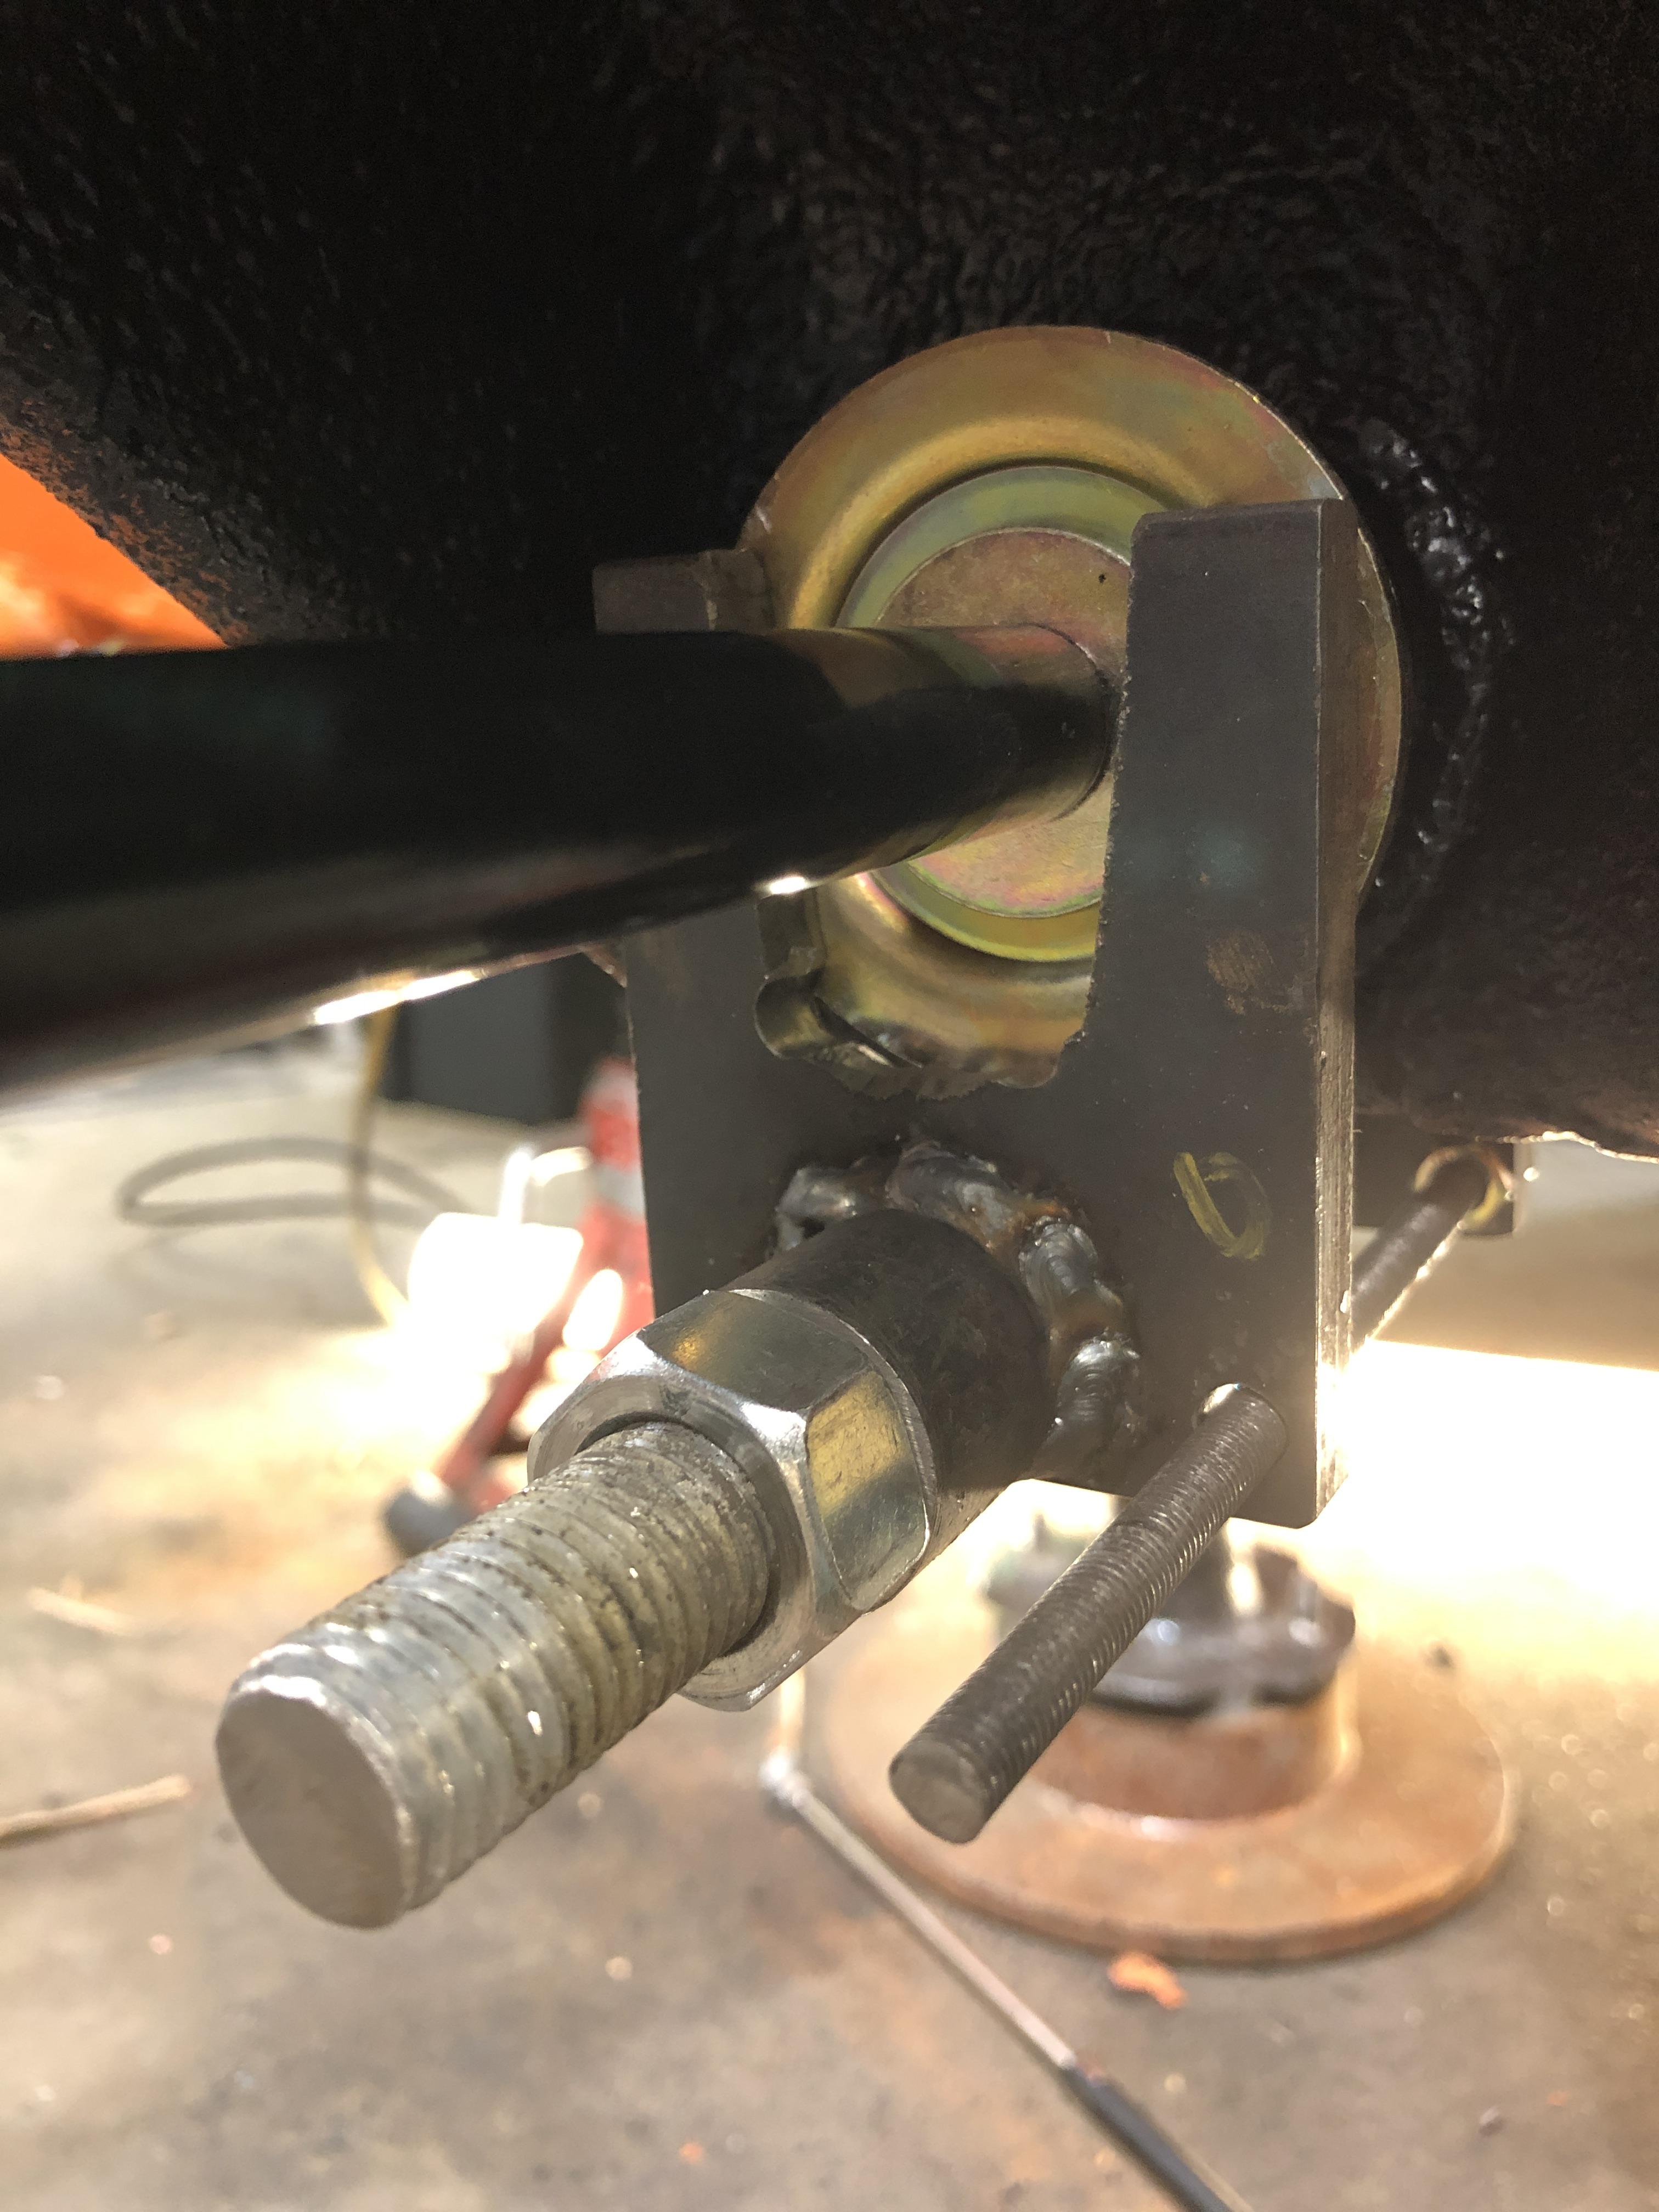
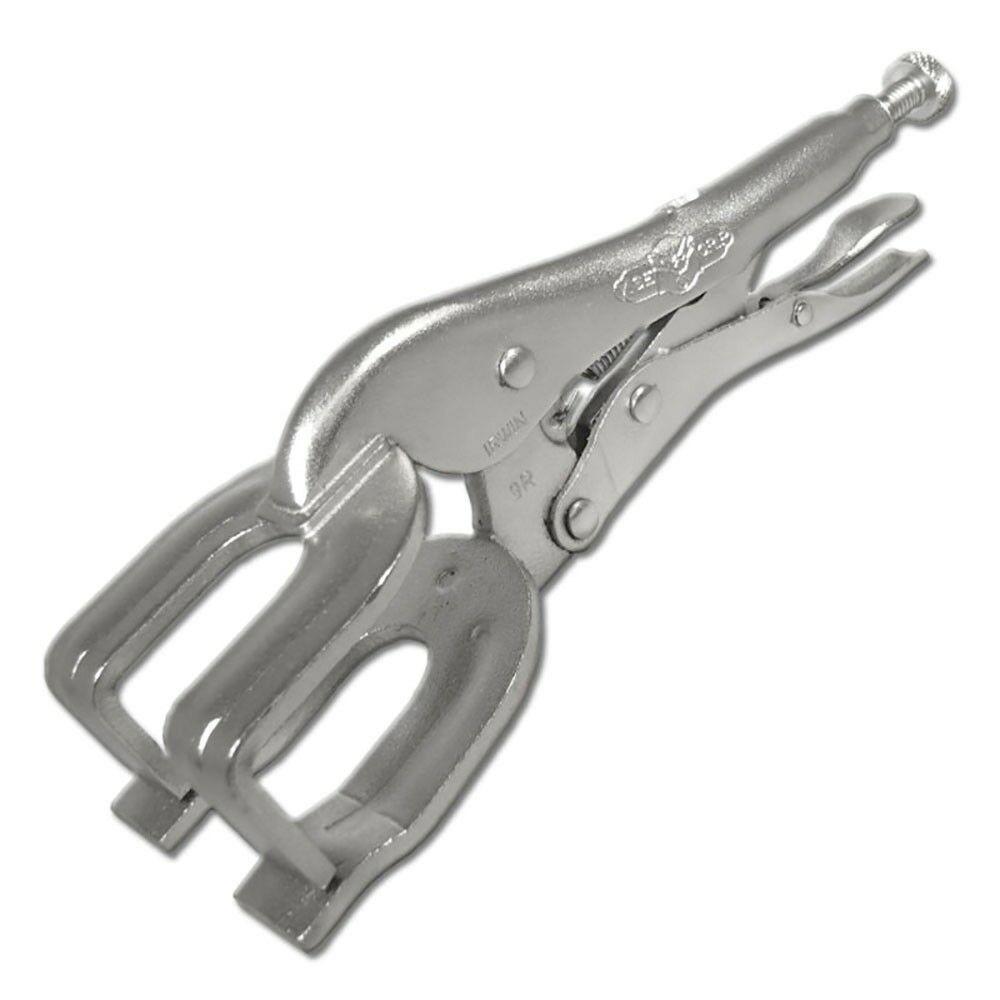
 1 point1 point1 pointI have a drawer full of jigs and things I’ve made over the years to make things “better” but I made one today that I’ve been wanting to build for some time. When installing new stock T/C bushings, you have to compress the rubber quite a bit to get the end of the rod threads to stick out far enough to allow you start the nut. I had previously modified a special welding vice grip, but it was a struggle at best. It is now in the metal recycle bin. Here is what I built. Some 5/8 threaded rod, few nuts, some 1/4 plate steel, piece of 5/8 ID pipe (garage door spring tubing). M6 threaded rod to keep the two halves aligned. Added that after using it to do the first one. This is the vice grip tool I modified before. The jaws are always in a V shape, never parallel.


 1 point1 pointThat red swivel head deburring tool is specifically designed for machine shops, you take your work piece off the lathe/mill and clean up the sharp edges before moving to the next stage, of course it can be used for other things as well. A very satisfying tool to use as the blade is always in the best position for cutting.1 point1 pointMost of the bolts in the video looked like they needed the threads chased too. I'll stick with my tap and die set.1 point1 pointIf I have to pay more to get my antique car bumpers chromed in exchange for my kids having cleaner water to drink, I guess I'll take that tradeoff.1 point


Important Information
By using this site, you agree to our Privacy Policy and Guidelines. We have placed cookies on your device to help make this website better. You can adjust your cookie settings, otherwise we'll assume you're okay to continue.