Leaderboard
-
grannyknot
Free Member5Points5,158Posts -
Namerow
Free Member5Points1,553Posts -
HS30-H
Free Member4Points5,509Posts -

wheee!
Free Member4Points4,607Posts


Popular Content
Showing content with the highest reputation on 01/16/2020 in Posts
-
I've had the MSA header, meh, the stock engine doesn't get all that hot anyway but maybe in your part of the world you have to take that into consideration. If you do a search I don't think you'll find a lot posts saying how wonderful the MSA header is. If you search ZStory you will find many posts praising the beautiful sounds it makes, how well it lets the engine breath and of course how beautiful it is. Welcome to the forum by the way, we would all love to see your very original 240.4 points
-
4 pointsIt's quite easy to make your own low-tension replacement spring. Start with a 12" length of regular (non-tempered) steel wire (stainless preferred), about 1/32" diameter. For a forming device, clamp an old 3/32" drill bit in your bench vise. It should be clamped vertical, with the shank (smooth end) exposed and the cutting end clamped. Now take the length of wire and wrap it ~ 1-3/4 times around the drill bit, so that the two legs form a 90-degree angle when the coiled part of the wire relaxes (it may take you two or three tries before you get the finished angle right). Once you're happy with your result, trim the two legs to the correct length. Remember to form the 90-degree bend on one of the legs before you cut away the excess wire. The lack of temper in the wire won't affect the action of the spring. There's not enough flexure created in the coil or legs to take the wire past its elastic limit. I made my own replacement spring this way several years ago and it still works fine.4 points
-
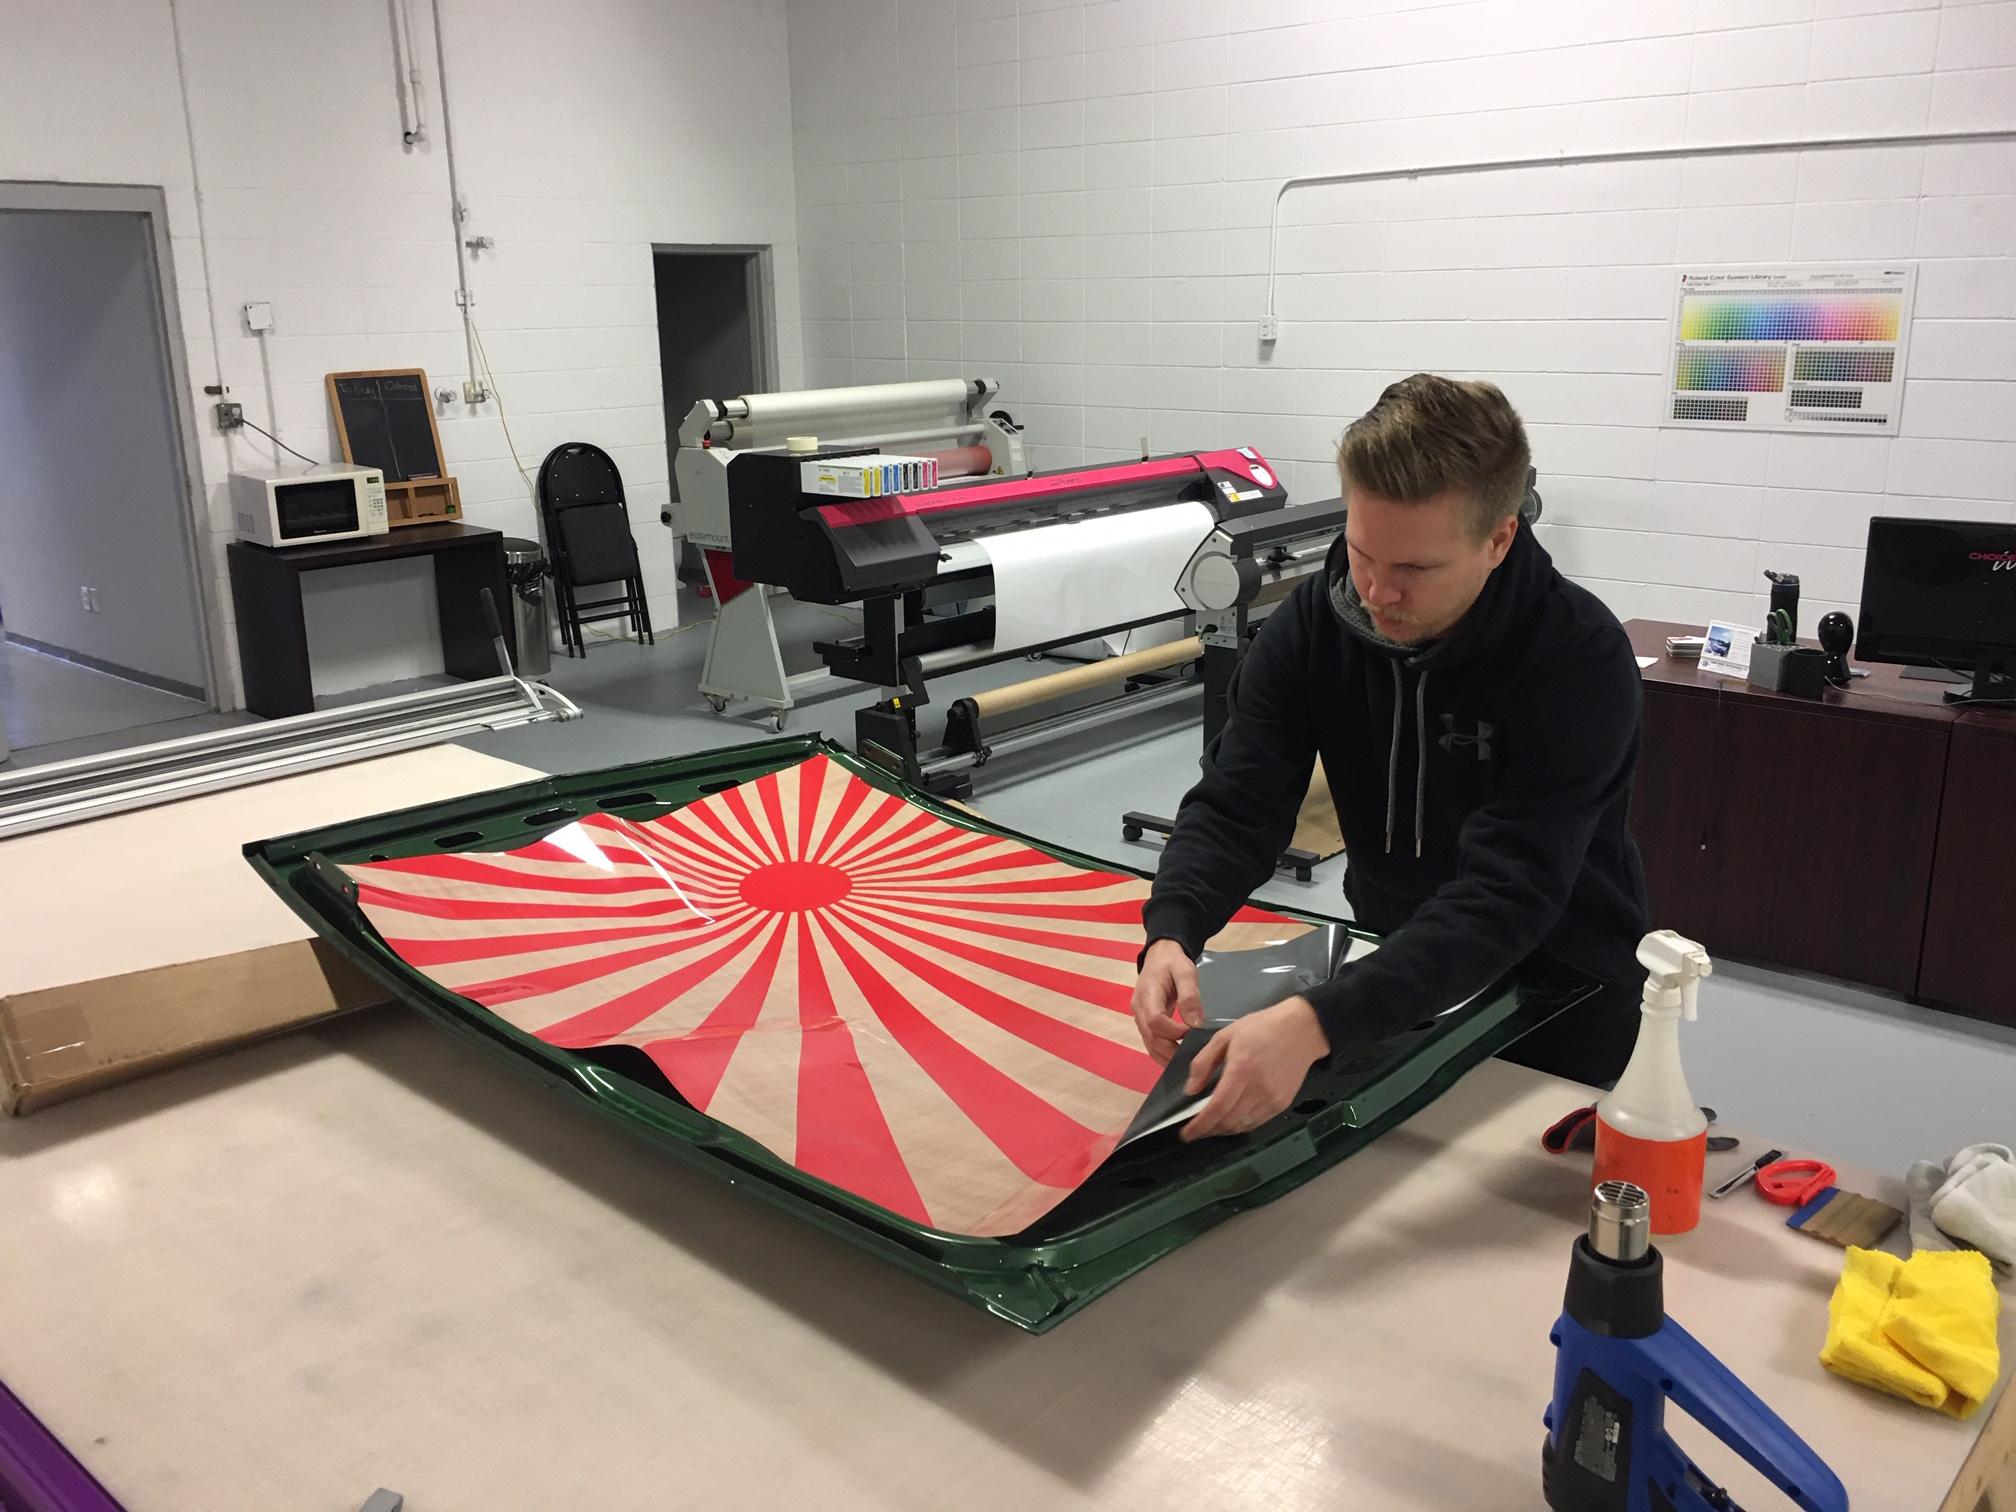
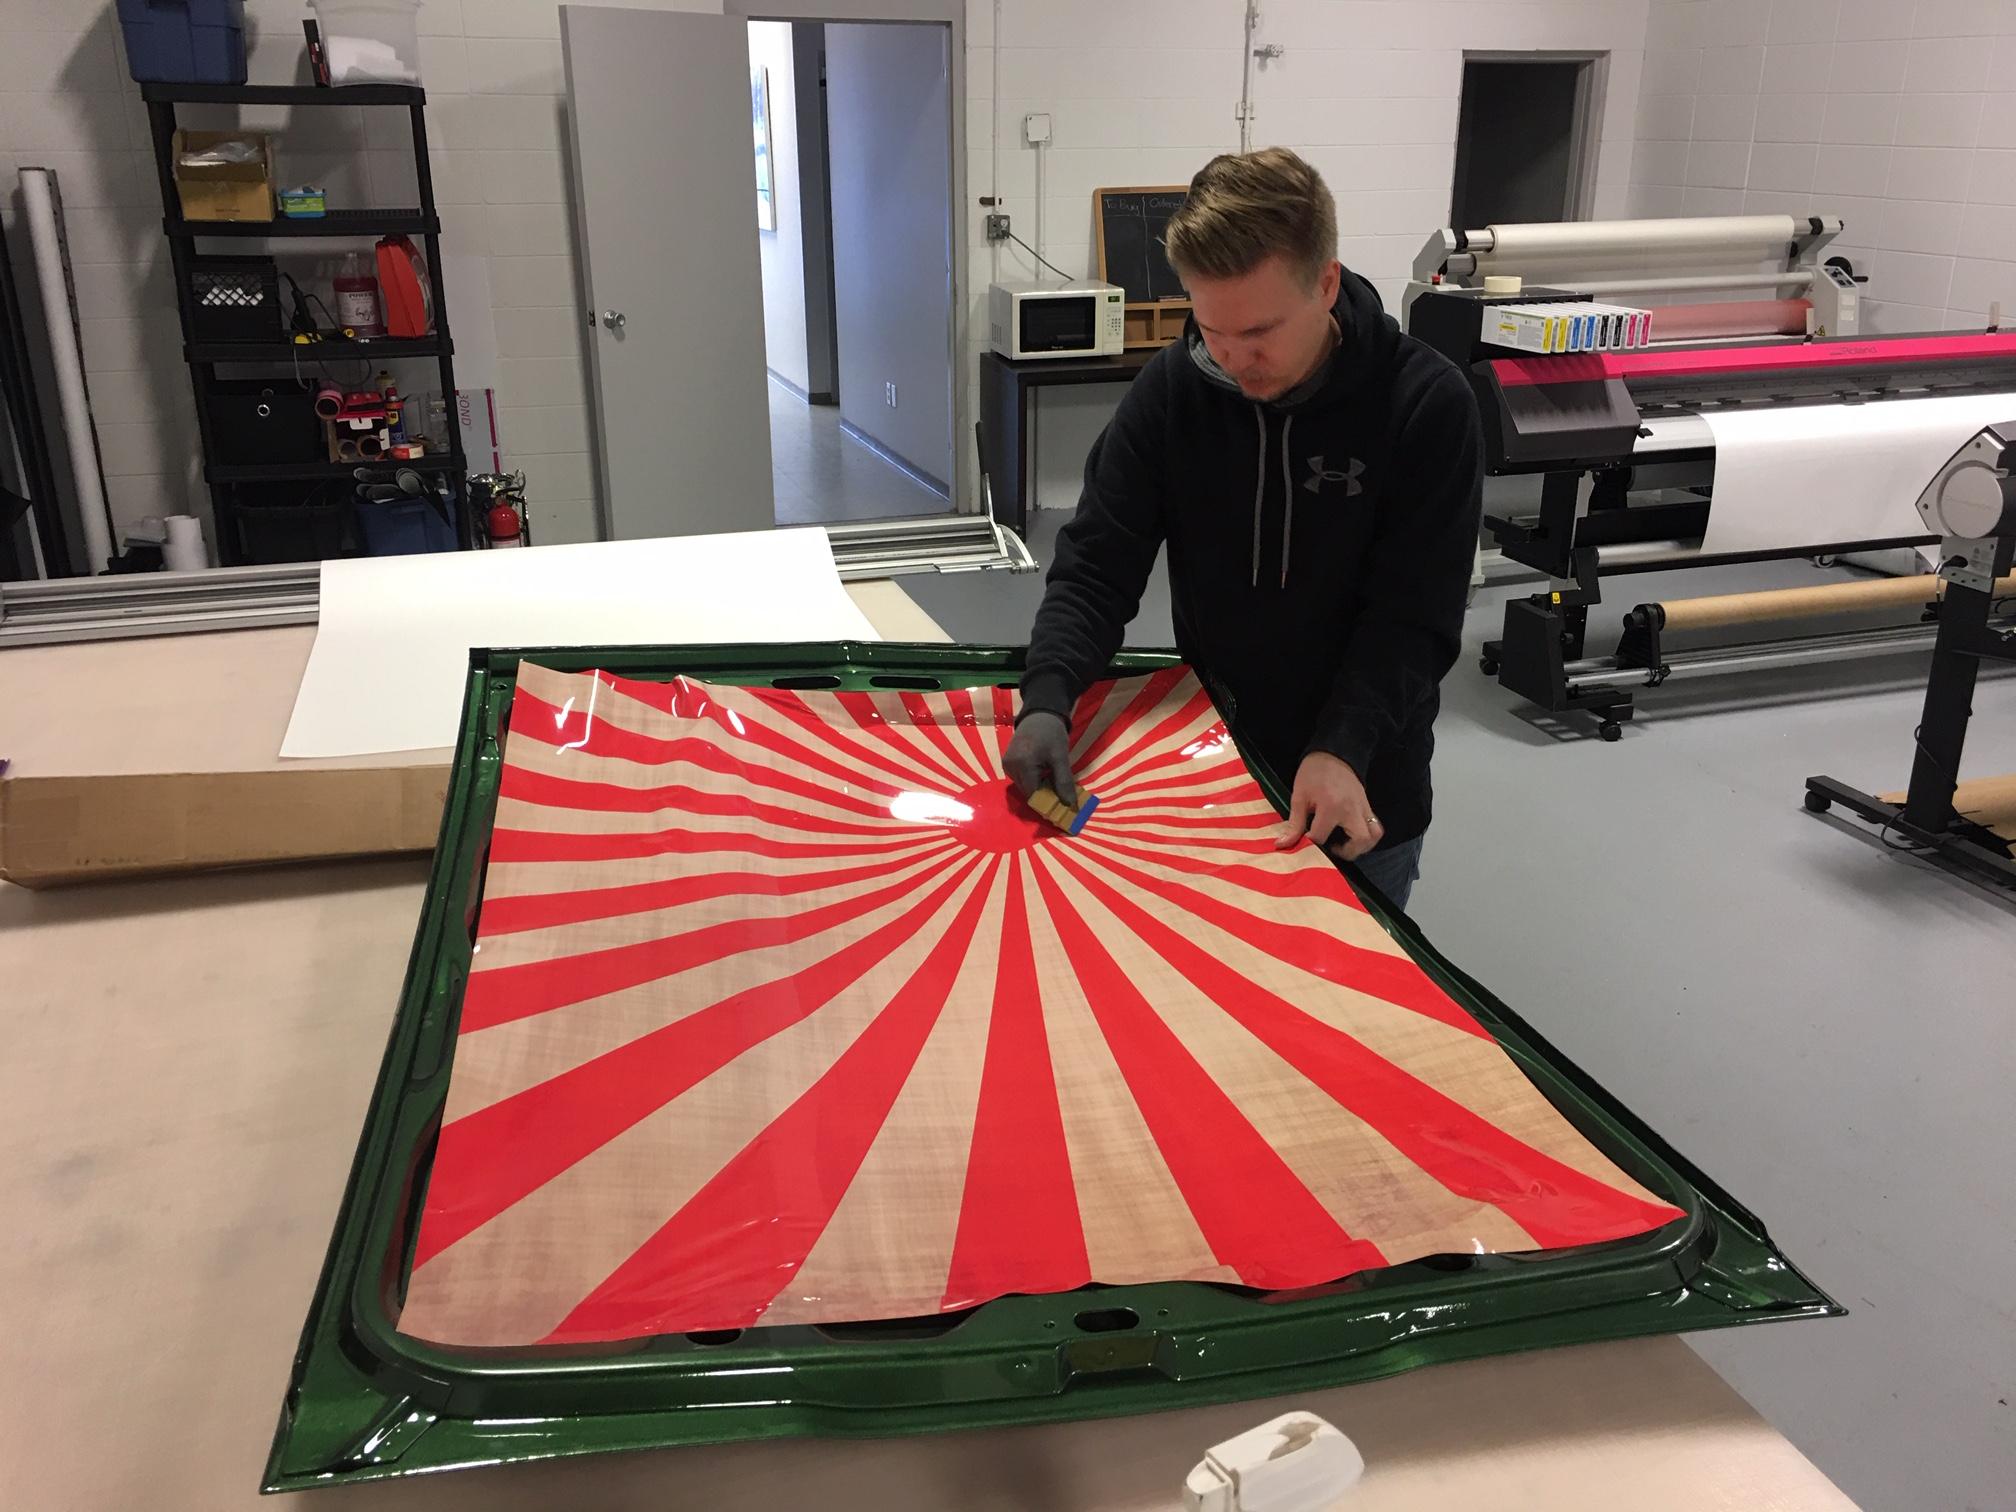
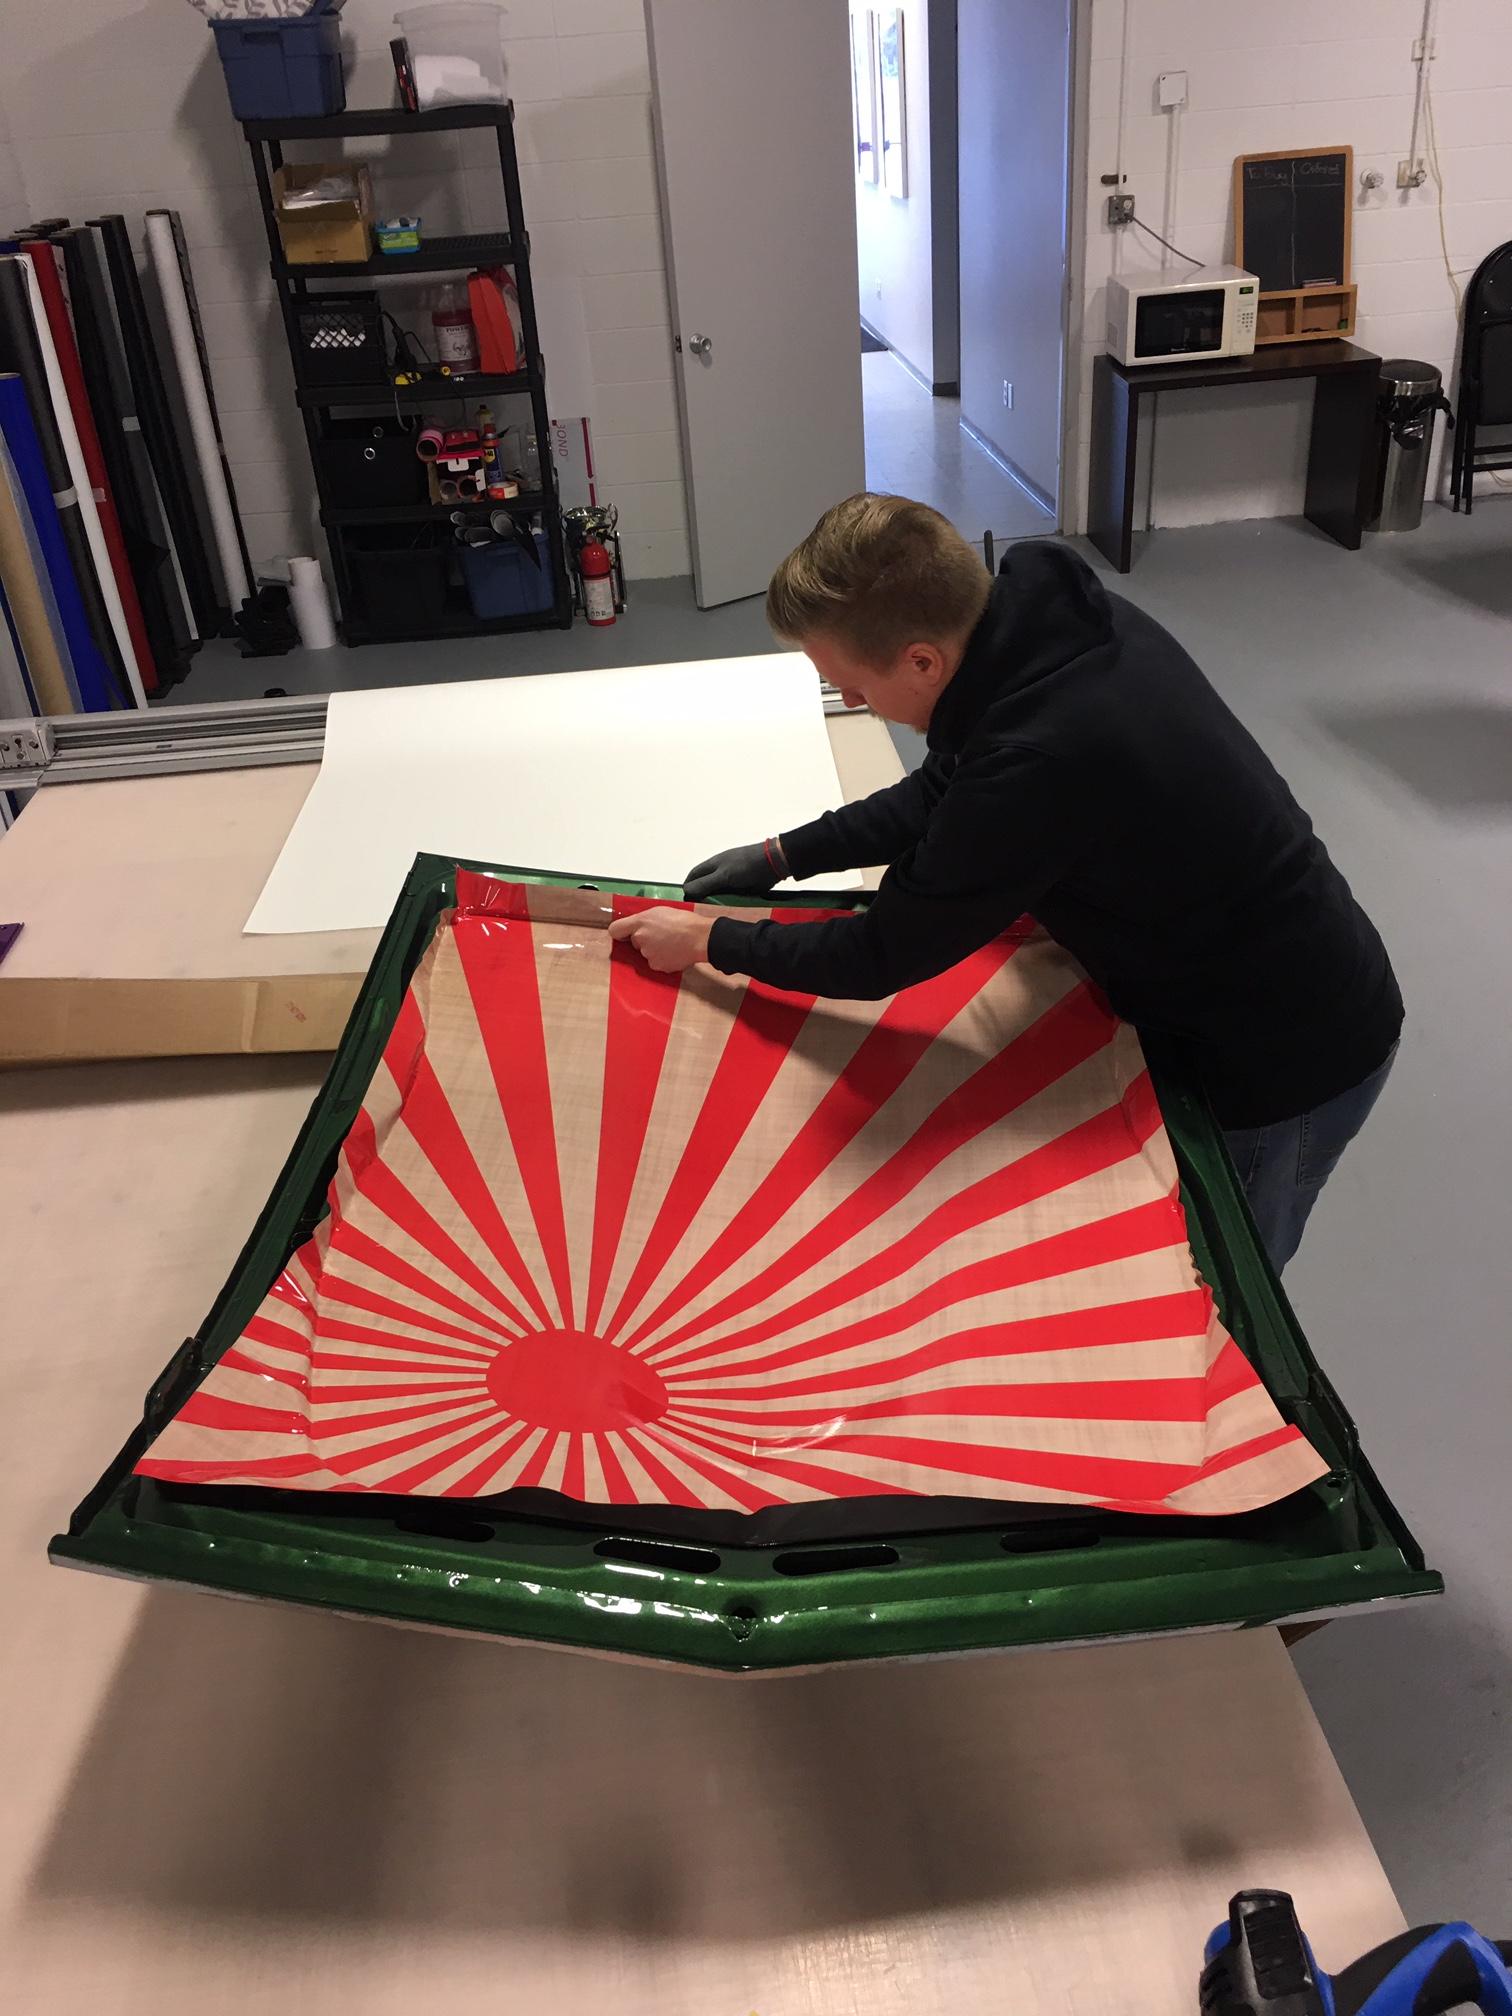
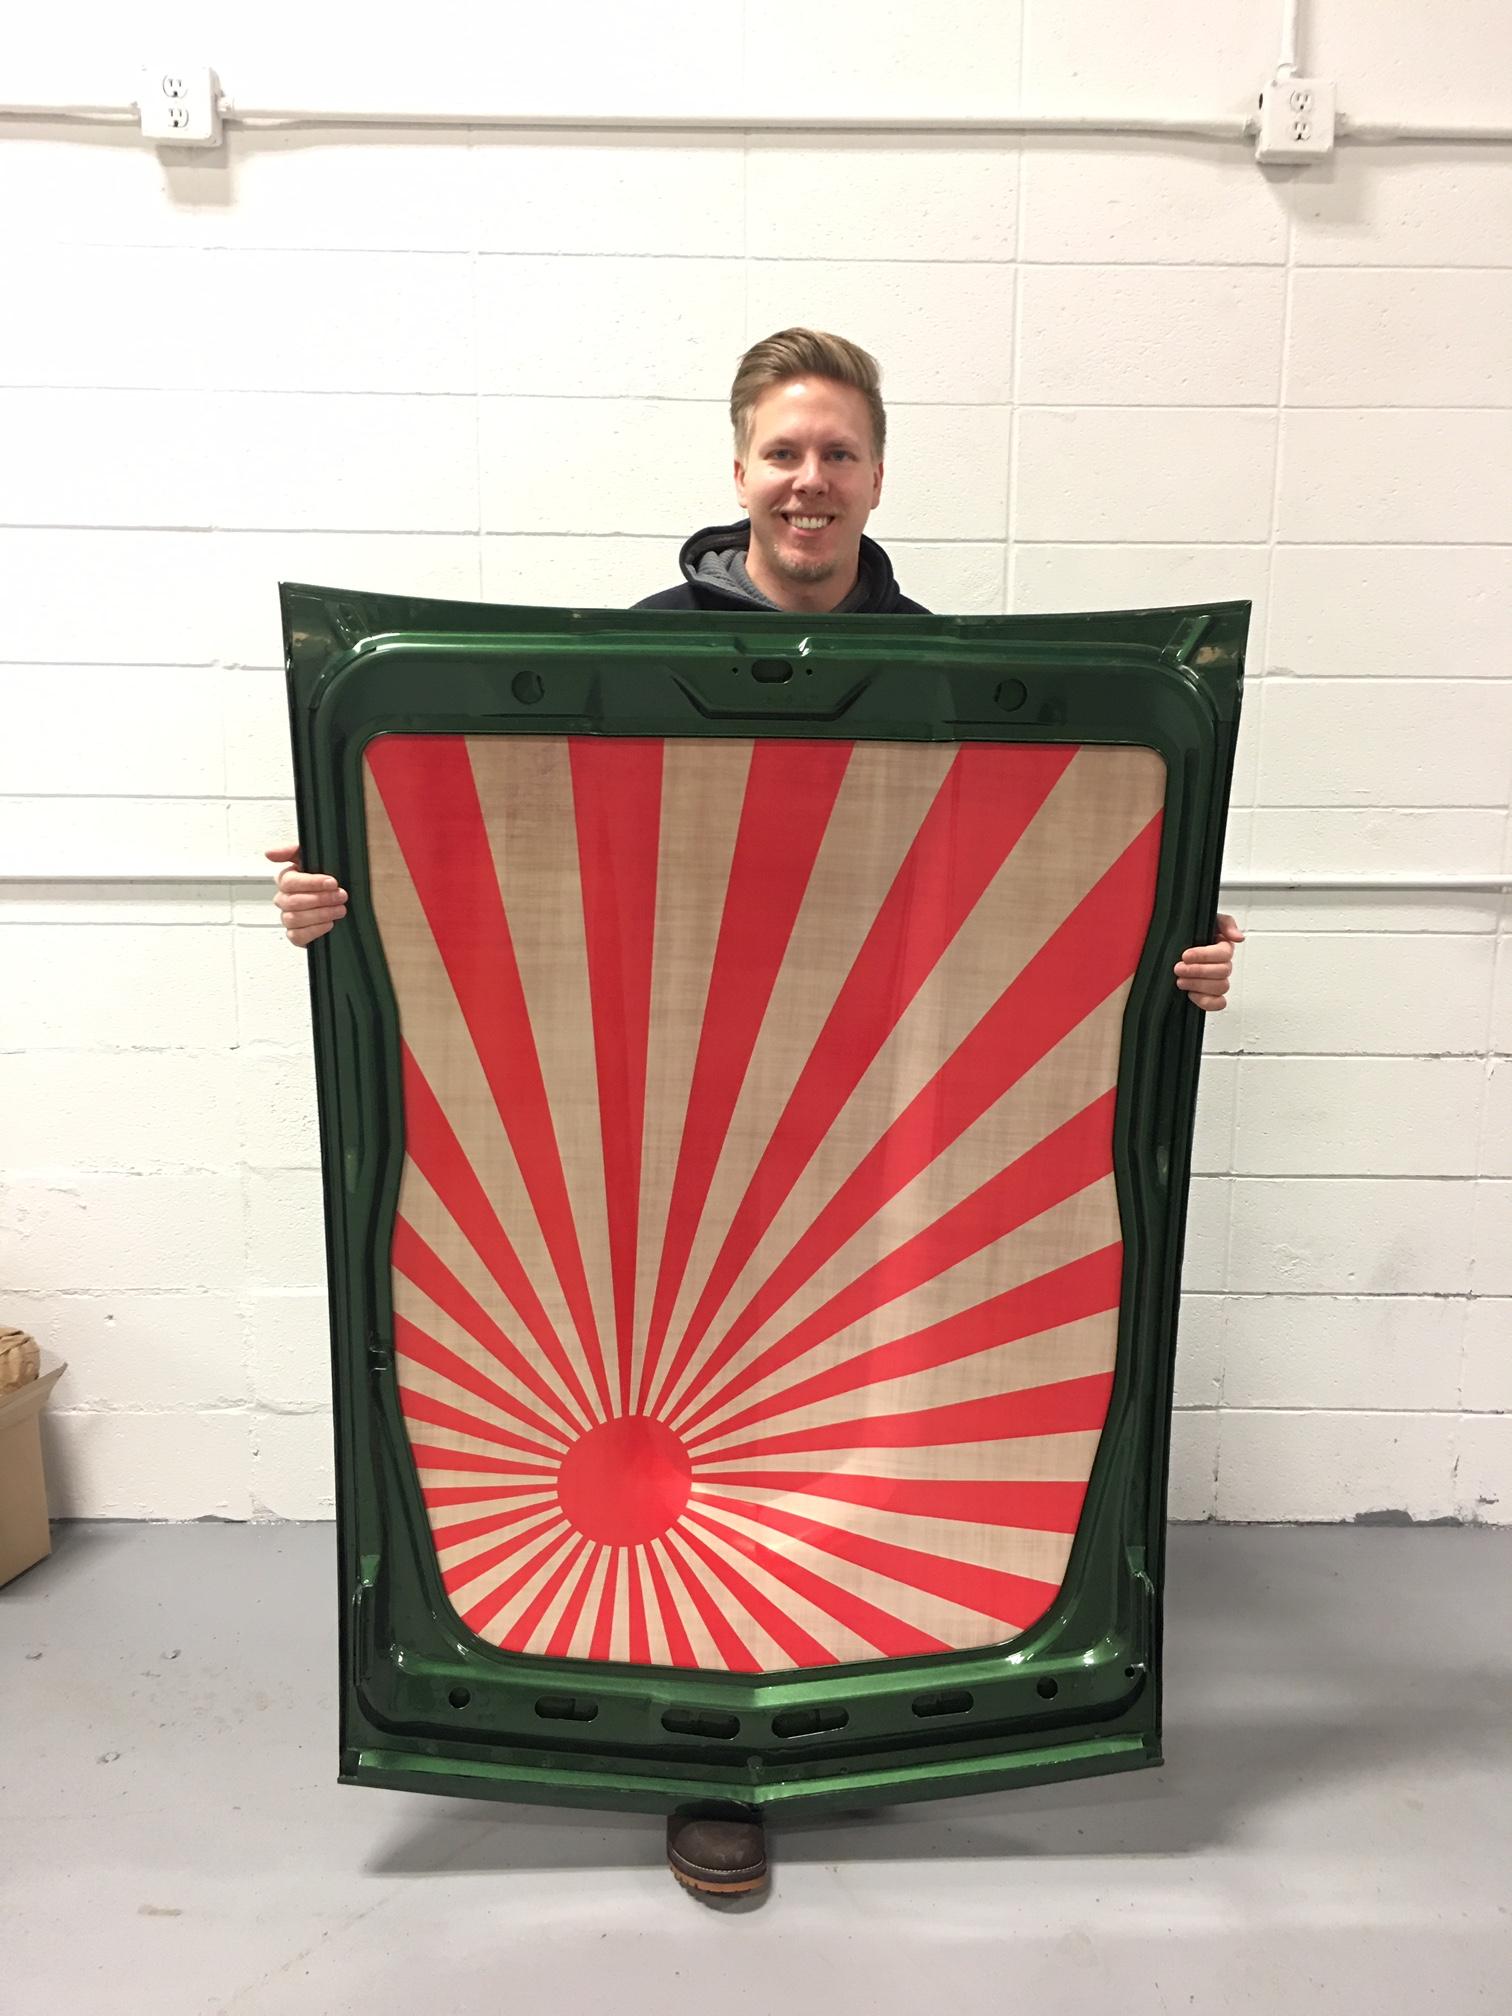
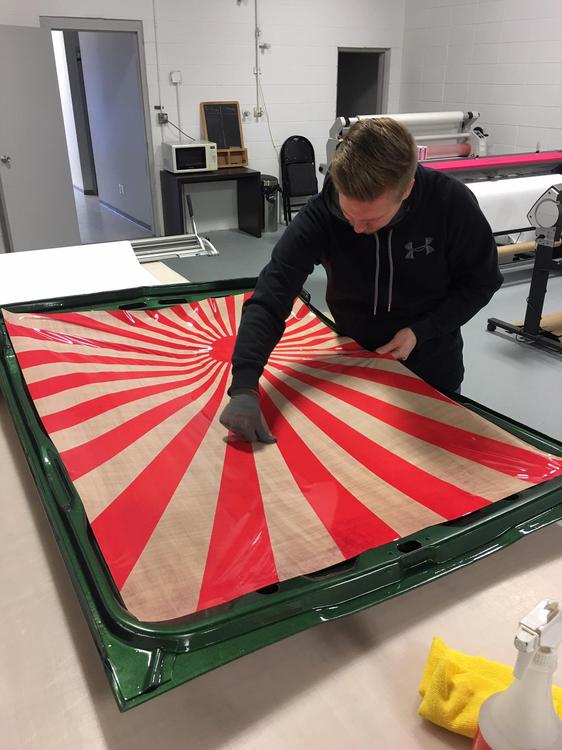
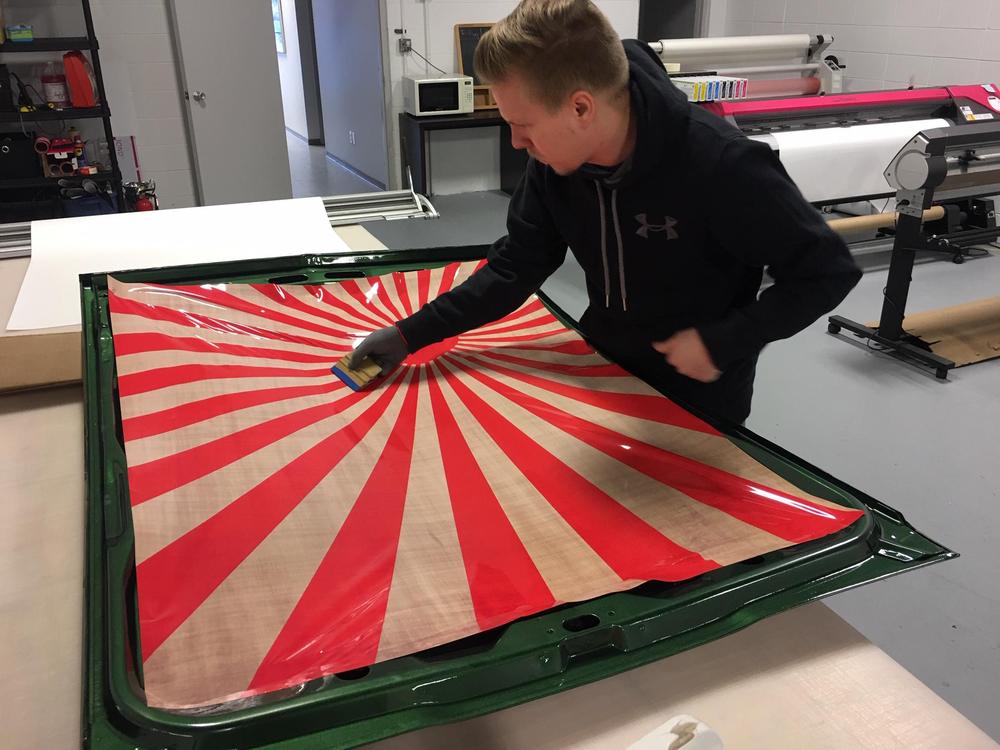
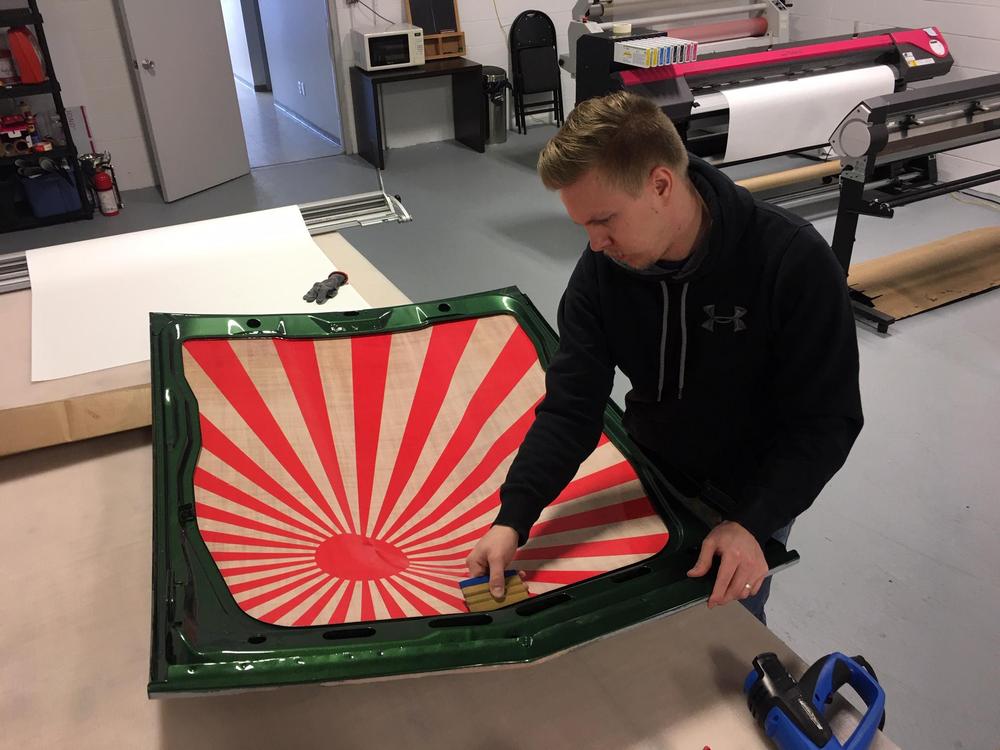
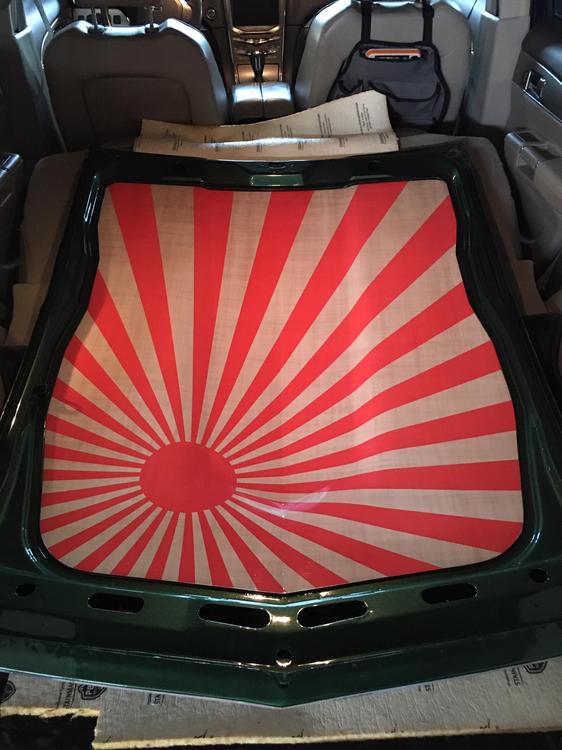
3 pointsLove it or hate it... I don't care! I have wanted to do this to my hood since the first day I started this restoration! The Rising Sun image has a faded linen background which is perfect for the colour scheme of my car. The "dirty linen" background should also hide any dirt or engine grime pretty good too. I purchased the rights to the image last fall and finally got the image printed and installed last week. Looking forward to having this popped open over the engine bay at car shows!


 3 points
 -
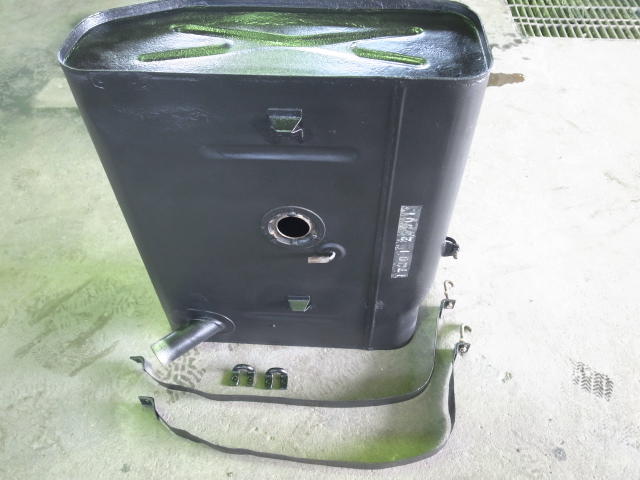
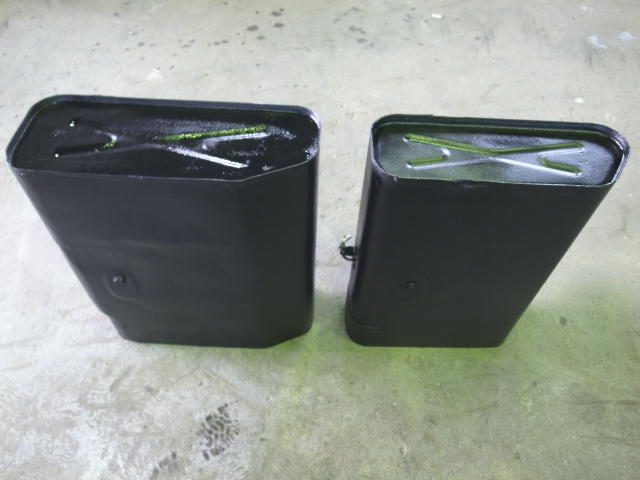
I think they call it 'Informed Inspiration'. The 'Grünvogel' method of strengthening a flat panel - check out the Wehrmacht-Einheitskanister - must have been in engineering text books for the Japanese engineers. On a fuel container it certainly serves to reduce 'oil canning' whilst also allowing expansion and contraction without putting too much stress on the welded seams. A little bit of genius.3 points
-
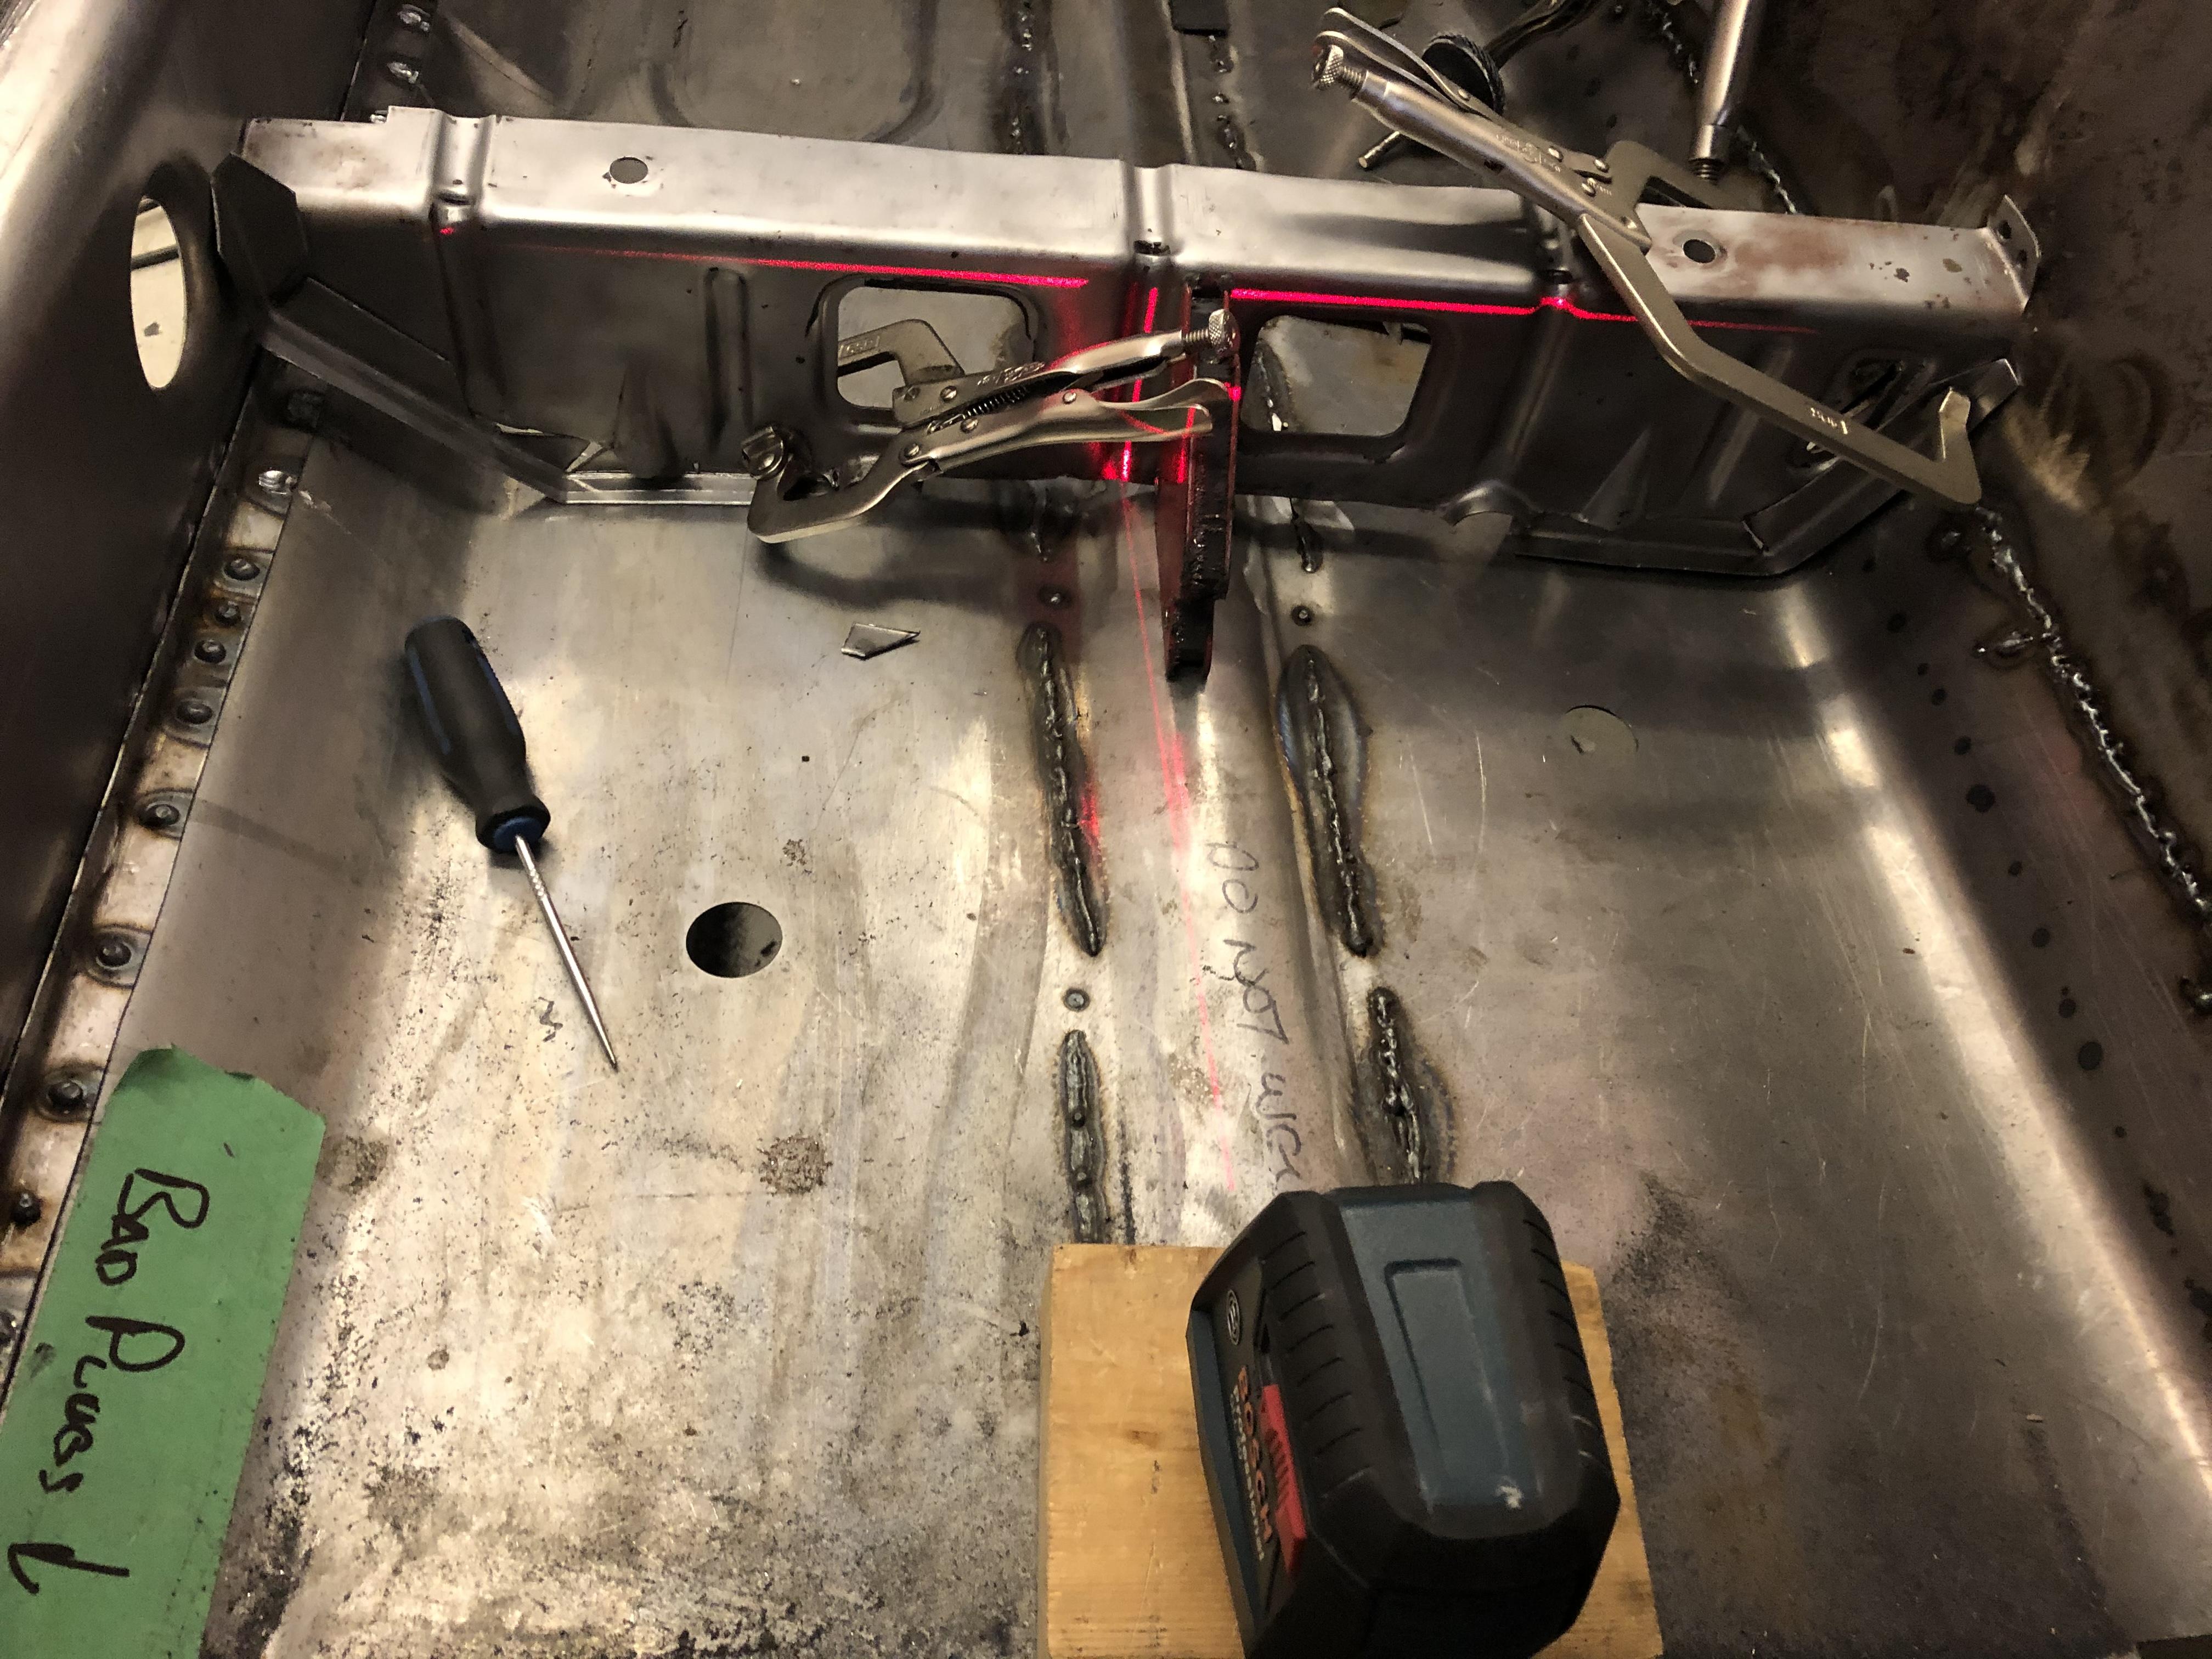
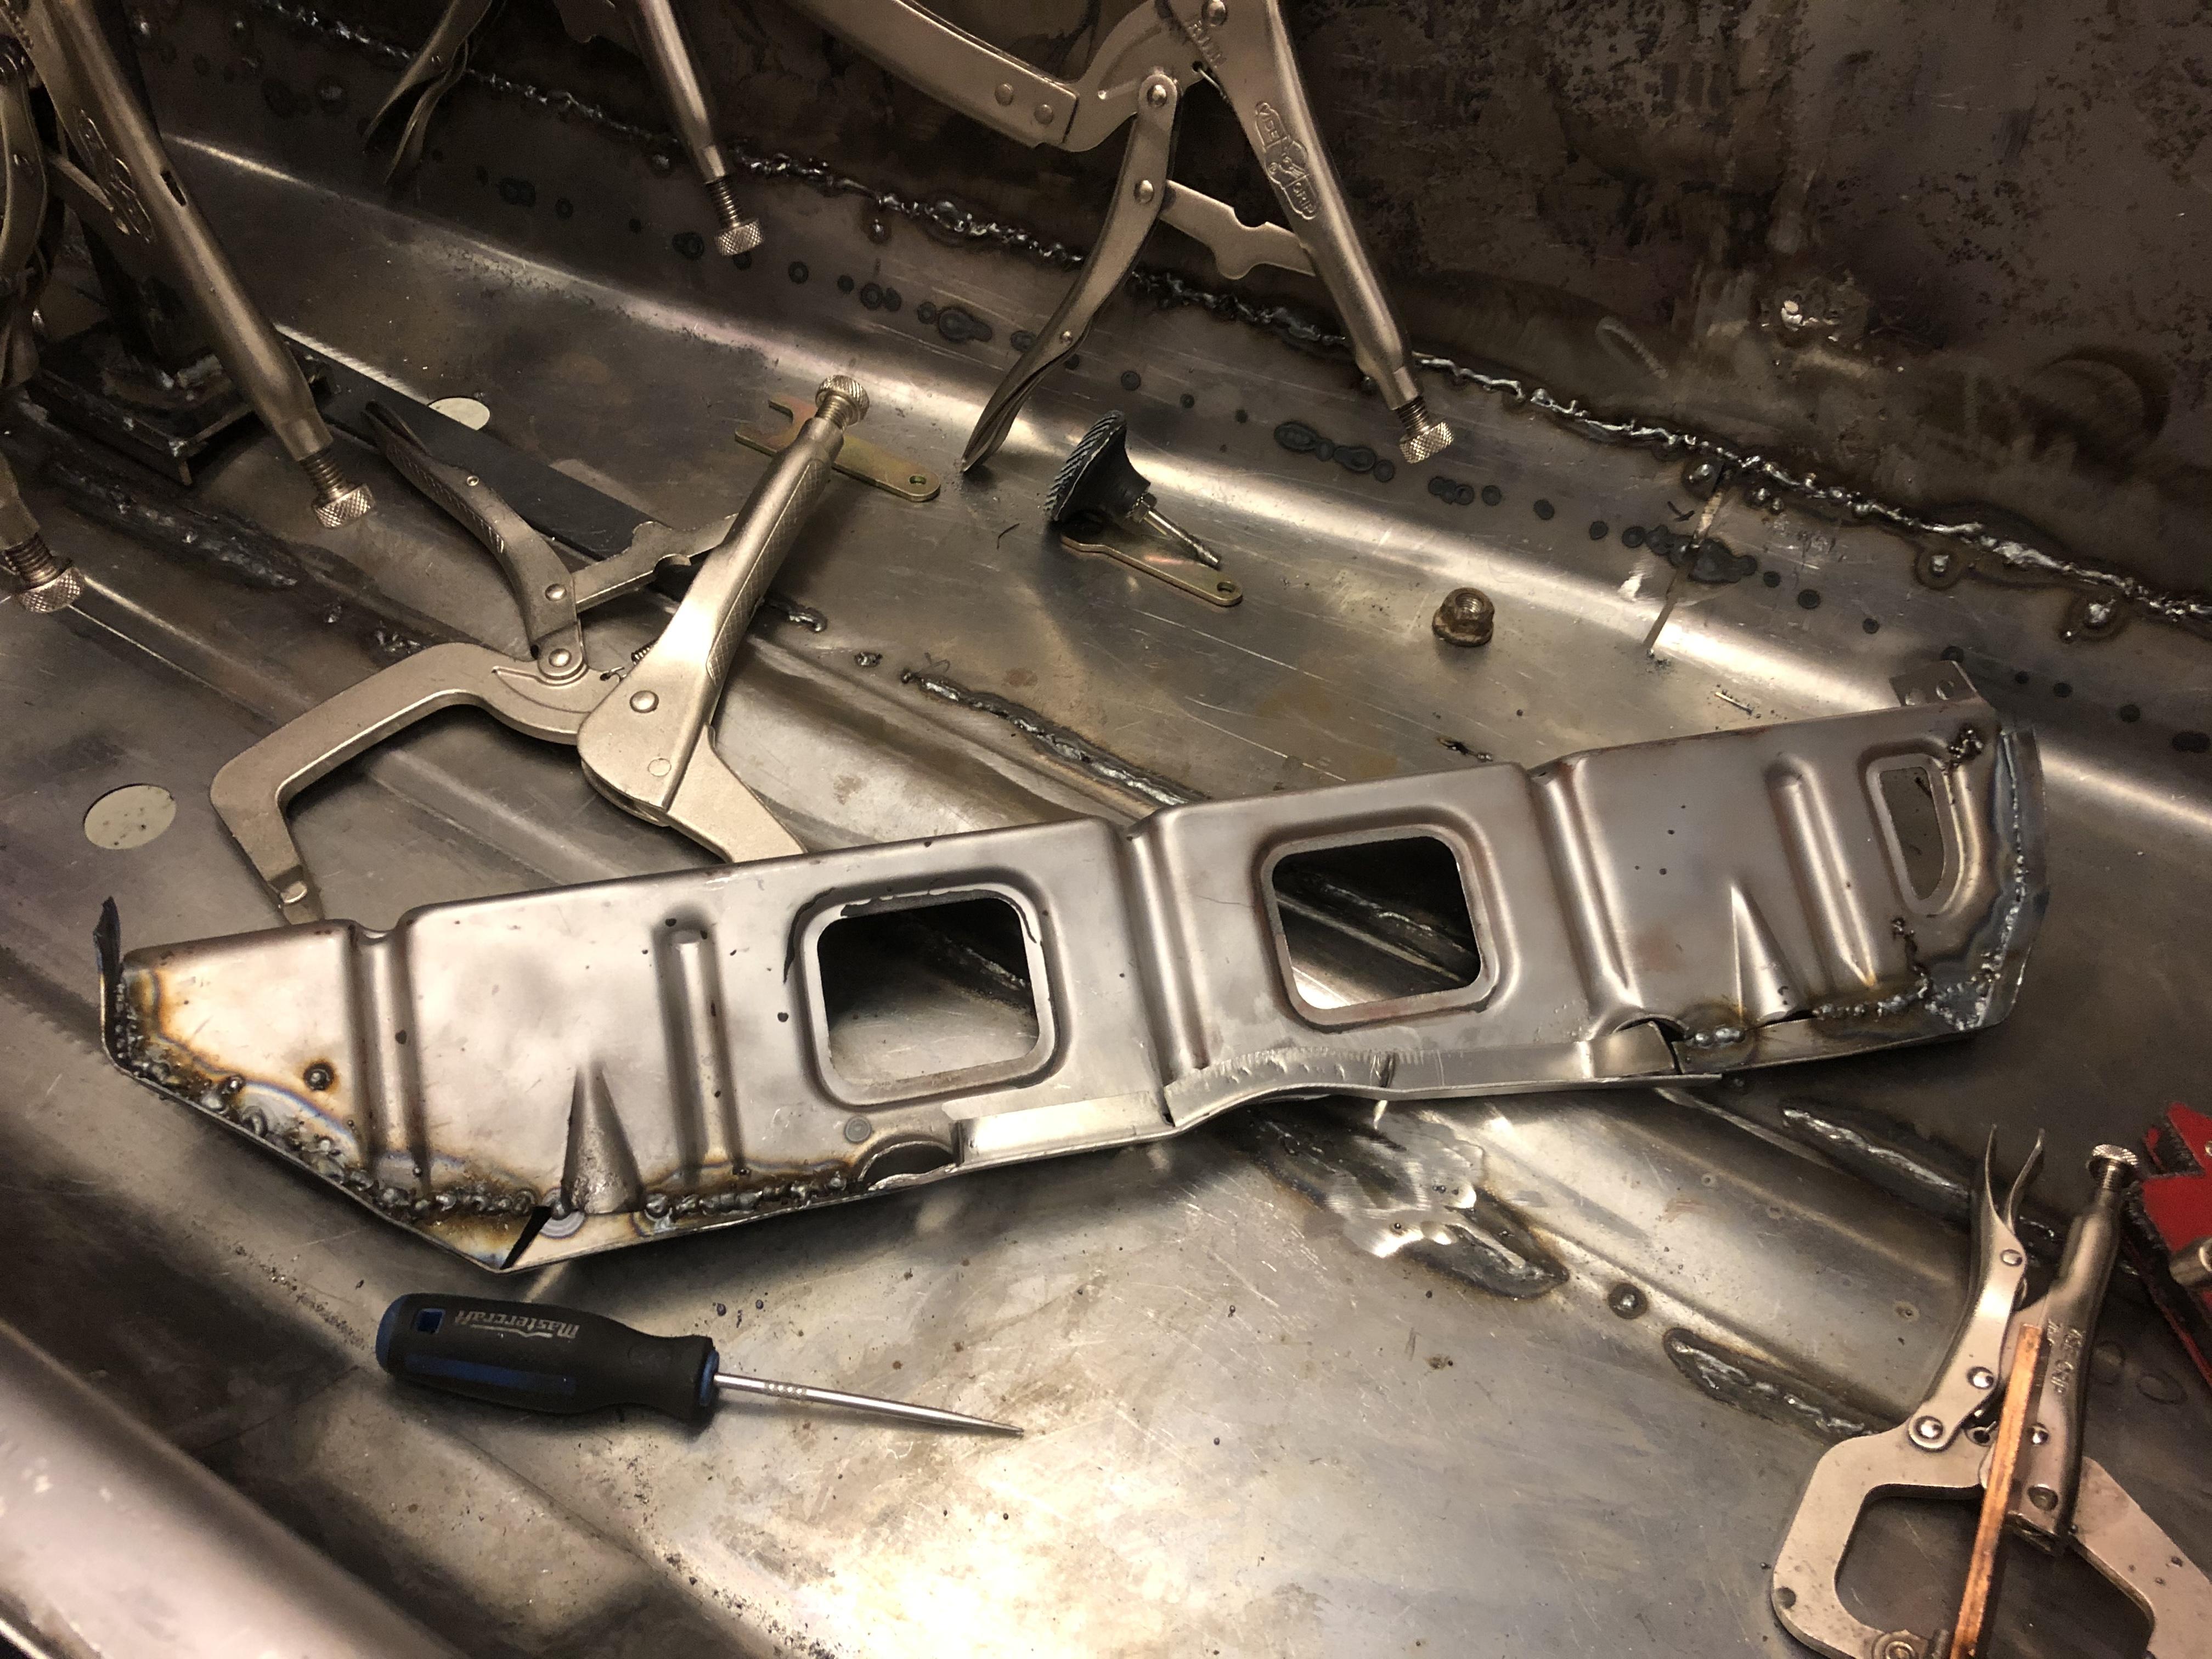
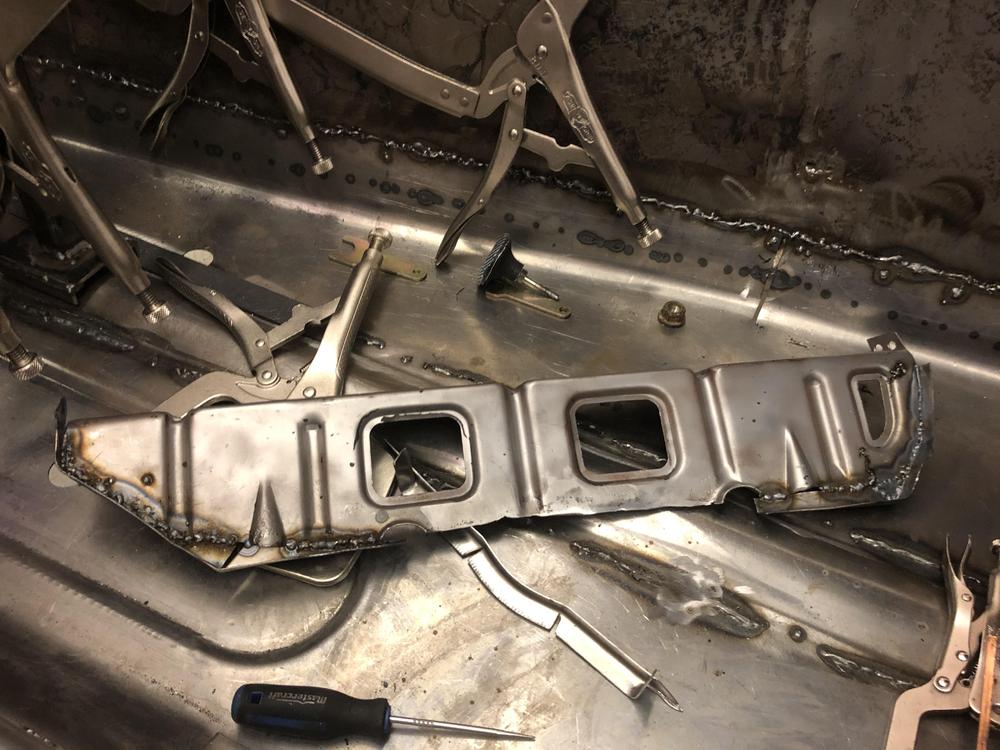
3 pointsSo the seat brackets are actually a) very important as they tie together the floor, trans tunnel and inner rocker and b) actually quite complicated to replicate. So I bead blasted the old one, cut away the rust and am butt welding new metal in place in an attempt to salvage /re-use it. Progress pics ... need to weld in the curved bit and clean it all up ... tomorrow ....

 3 points
 -
2 points
-
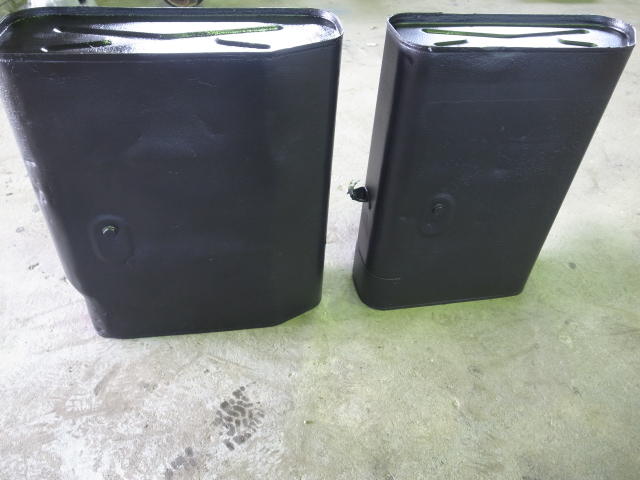
The 100l fuel tank does remind me of the SP/SR311 fuel tank, and its sport option larger version especially. Sports option on the left. Differences, obviously, but the general shape is the similar.
 2 points
 -
2 pointsTo add to @Namerow's post, that would be 20 AWG wire. It might be easier to find that way. https://www.amazon.com/Stainless-Steel-316L-Gauge-Wire/dp/B07CJLTNR42 points
-
1 pointThanks man, I skimmed that article and didn't look hard enough. Thank you.1 point
-
1 pointCool! Should have known Hoover would have found a similar image! I have never seen one done inside the hood before that.1 point
-
1 pointThe steering shaft ujoints are NLA but there is a 4 wheeler U joint that will work. Kawasaki I believe. I don't remember the # off hand.1 point
-
1 pointThe diameters for the wire and the drill bit were based on my sometimes flawed memory. You may need to experiment a bit (wire and old drill bits are cheap). I'll try to post a photo of my restored ashtray later today. It had broken in the usual way -- the plastic boss for one of the door hinge pins had failed (perhaps due to the over-aggressive spring tension mentioned in this thread). I rebuilt that area using scrap plastic and JB Weld. After completing the repair, the OE spring looked to me like it was going to overload the area. That's what made me decide to make a low-tension replacement.1 point
-
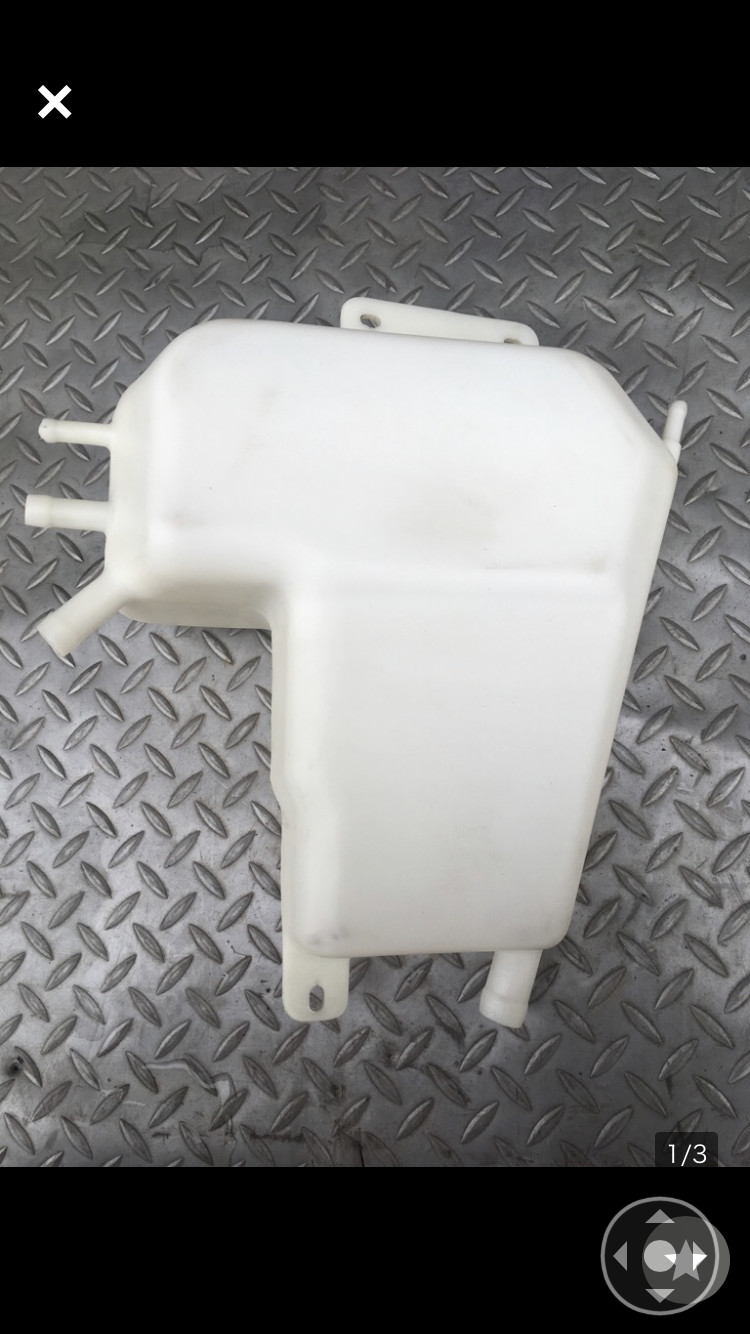
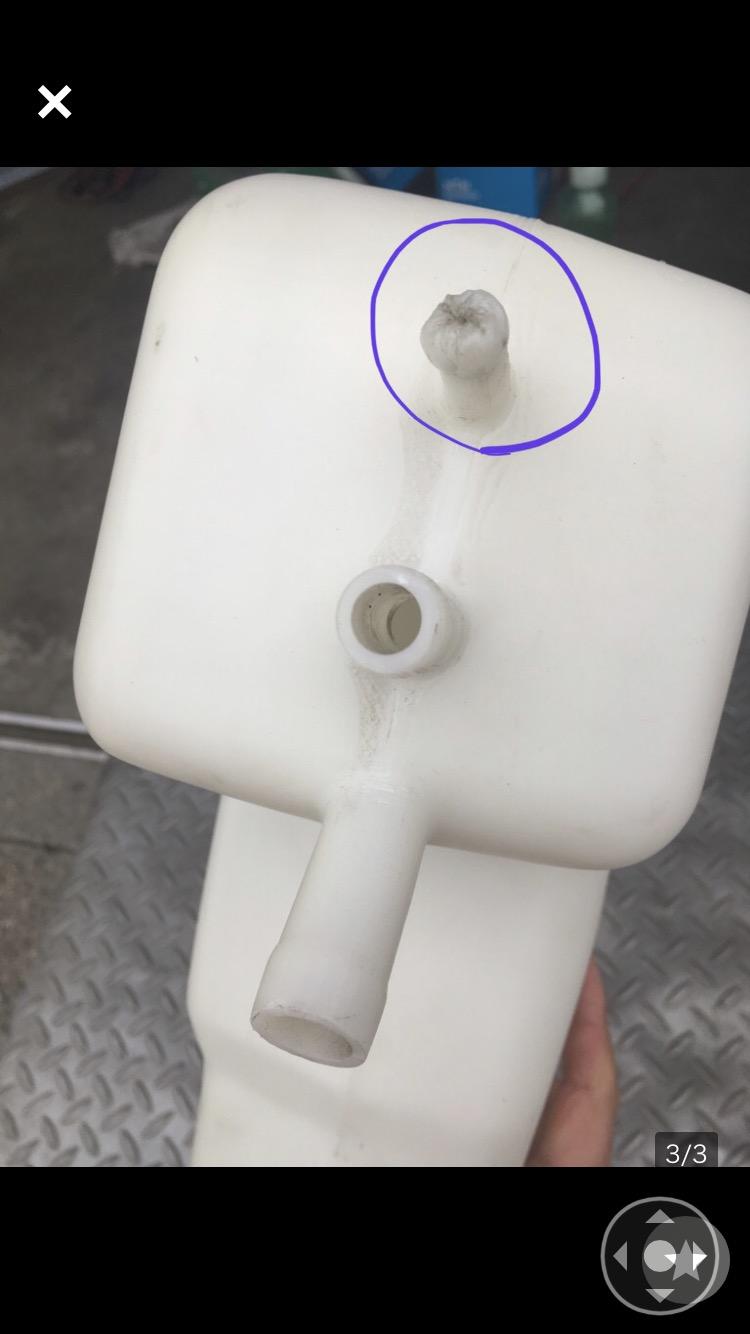
This thread is really nice , so much informative . And finally I have got the answer to the reservoir tank of the Z432-R , the tank is exactly the same as our US and Canada early car except one tube is omitted by hand . Pleae see the attached picture , you see the tube’s end is smashed , looks like heated by gun to melt the tube . I think we can say this tank is shared with our US and Canada tank , just one tube is different. Not only this , the white front window screen , the fuel door knob, also rear deck rubber mat , side sill rubber trims ( left side is a bit different due to a foot rest ) are shared with export cars and Z432-R . Some of the items also shared with a Fairlady-Z , S30S ( Z-std ) . BTW , this tank 17350-E7201 Tank-Reservoir Fuel 4.2L , 2000JPY is now on sale at Yahoo Japan auction. Kats

 1 point
 -
Fujitsubo have clear dyno's for their new system and the old type.1 point
-
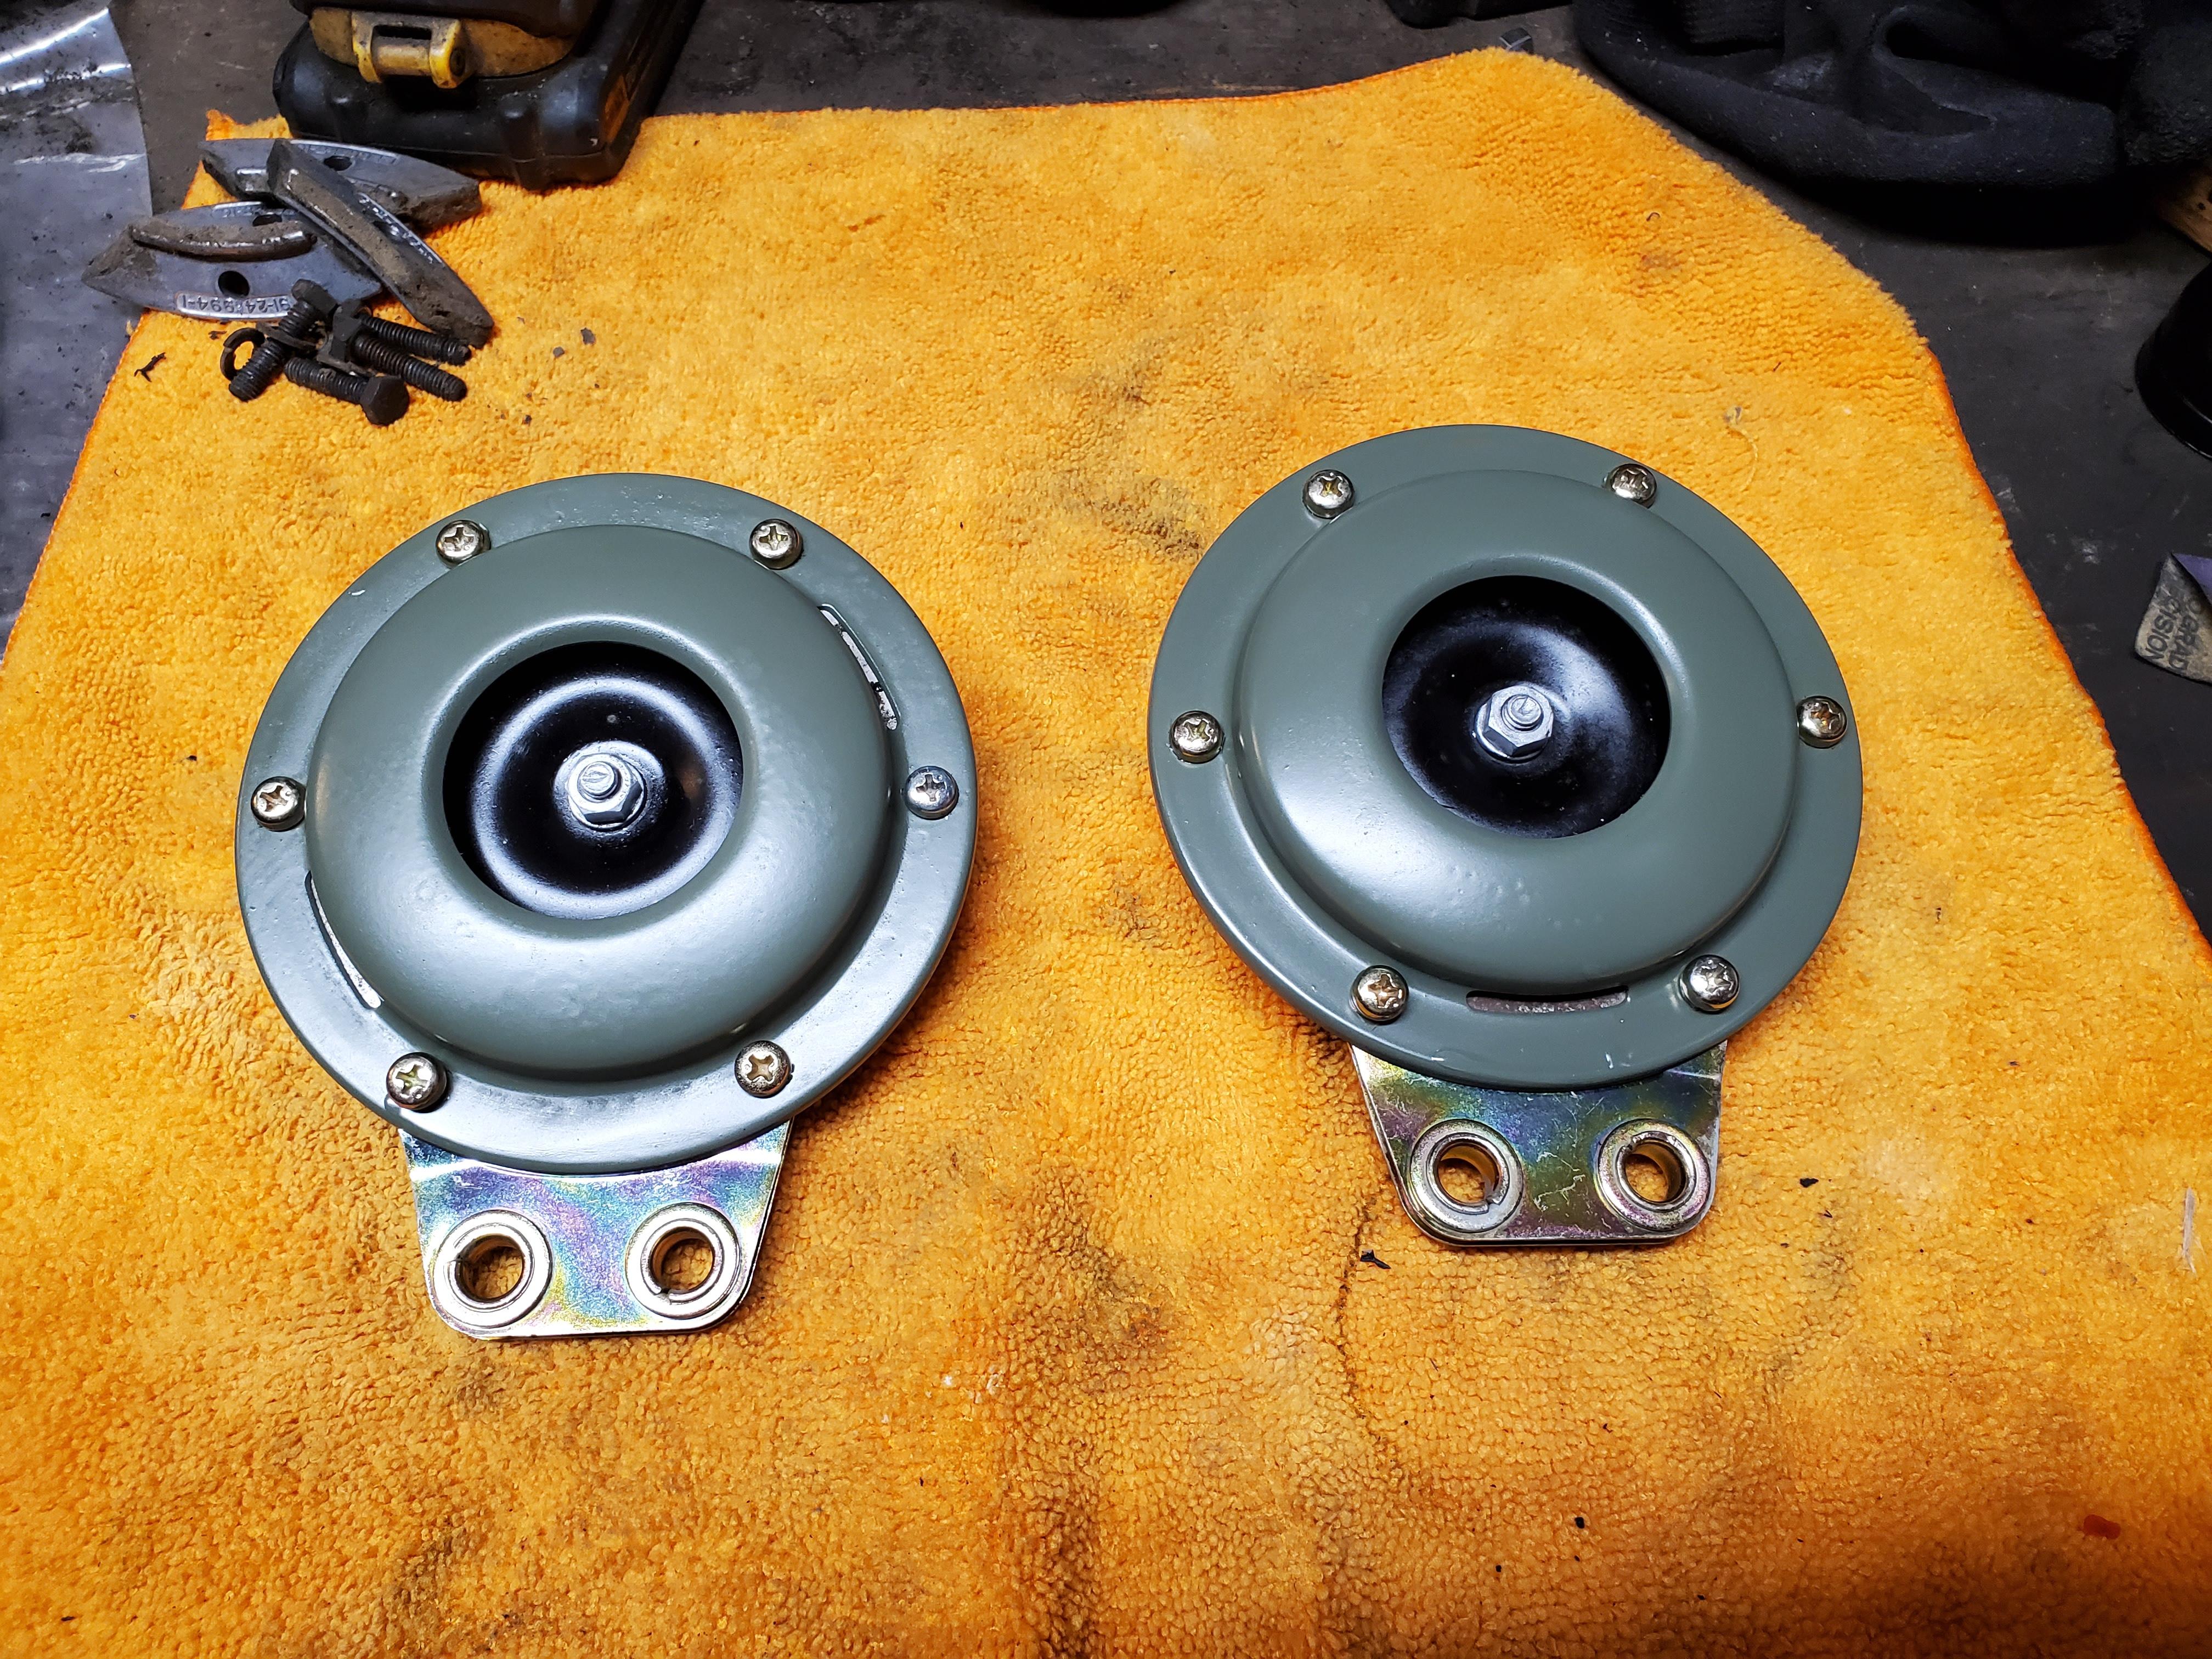
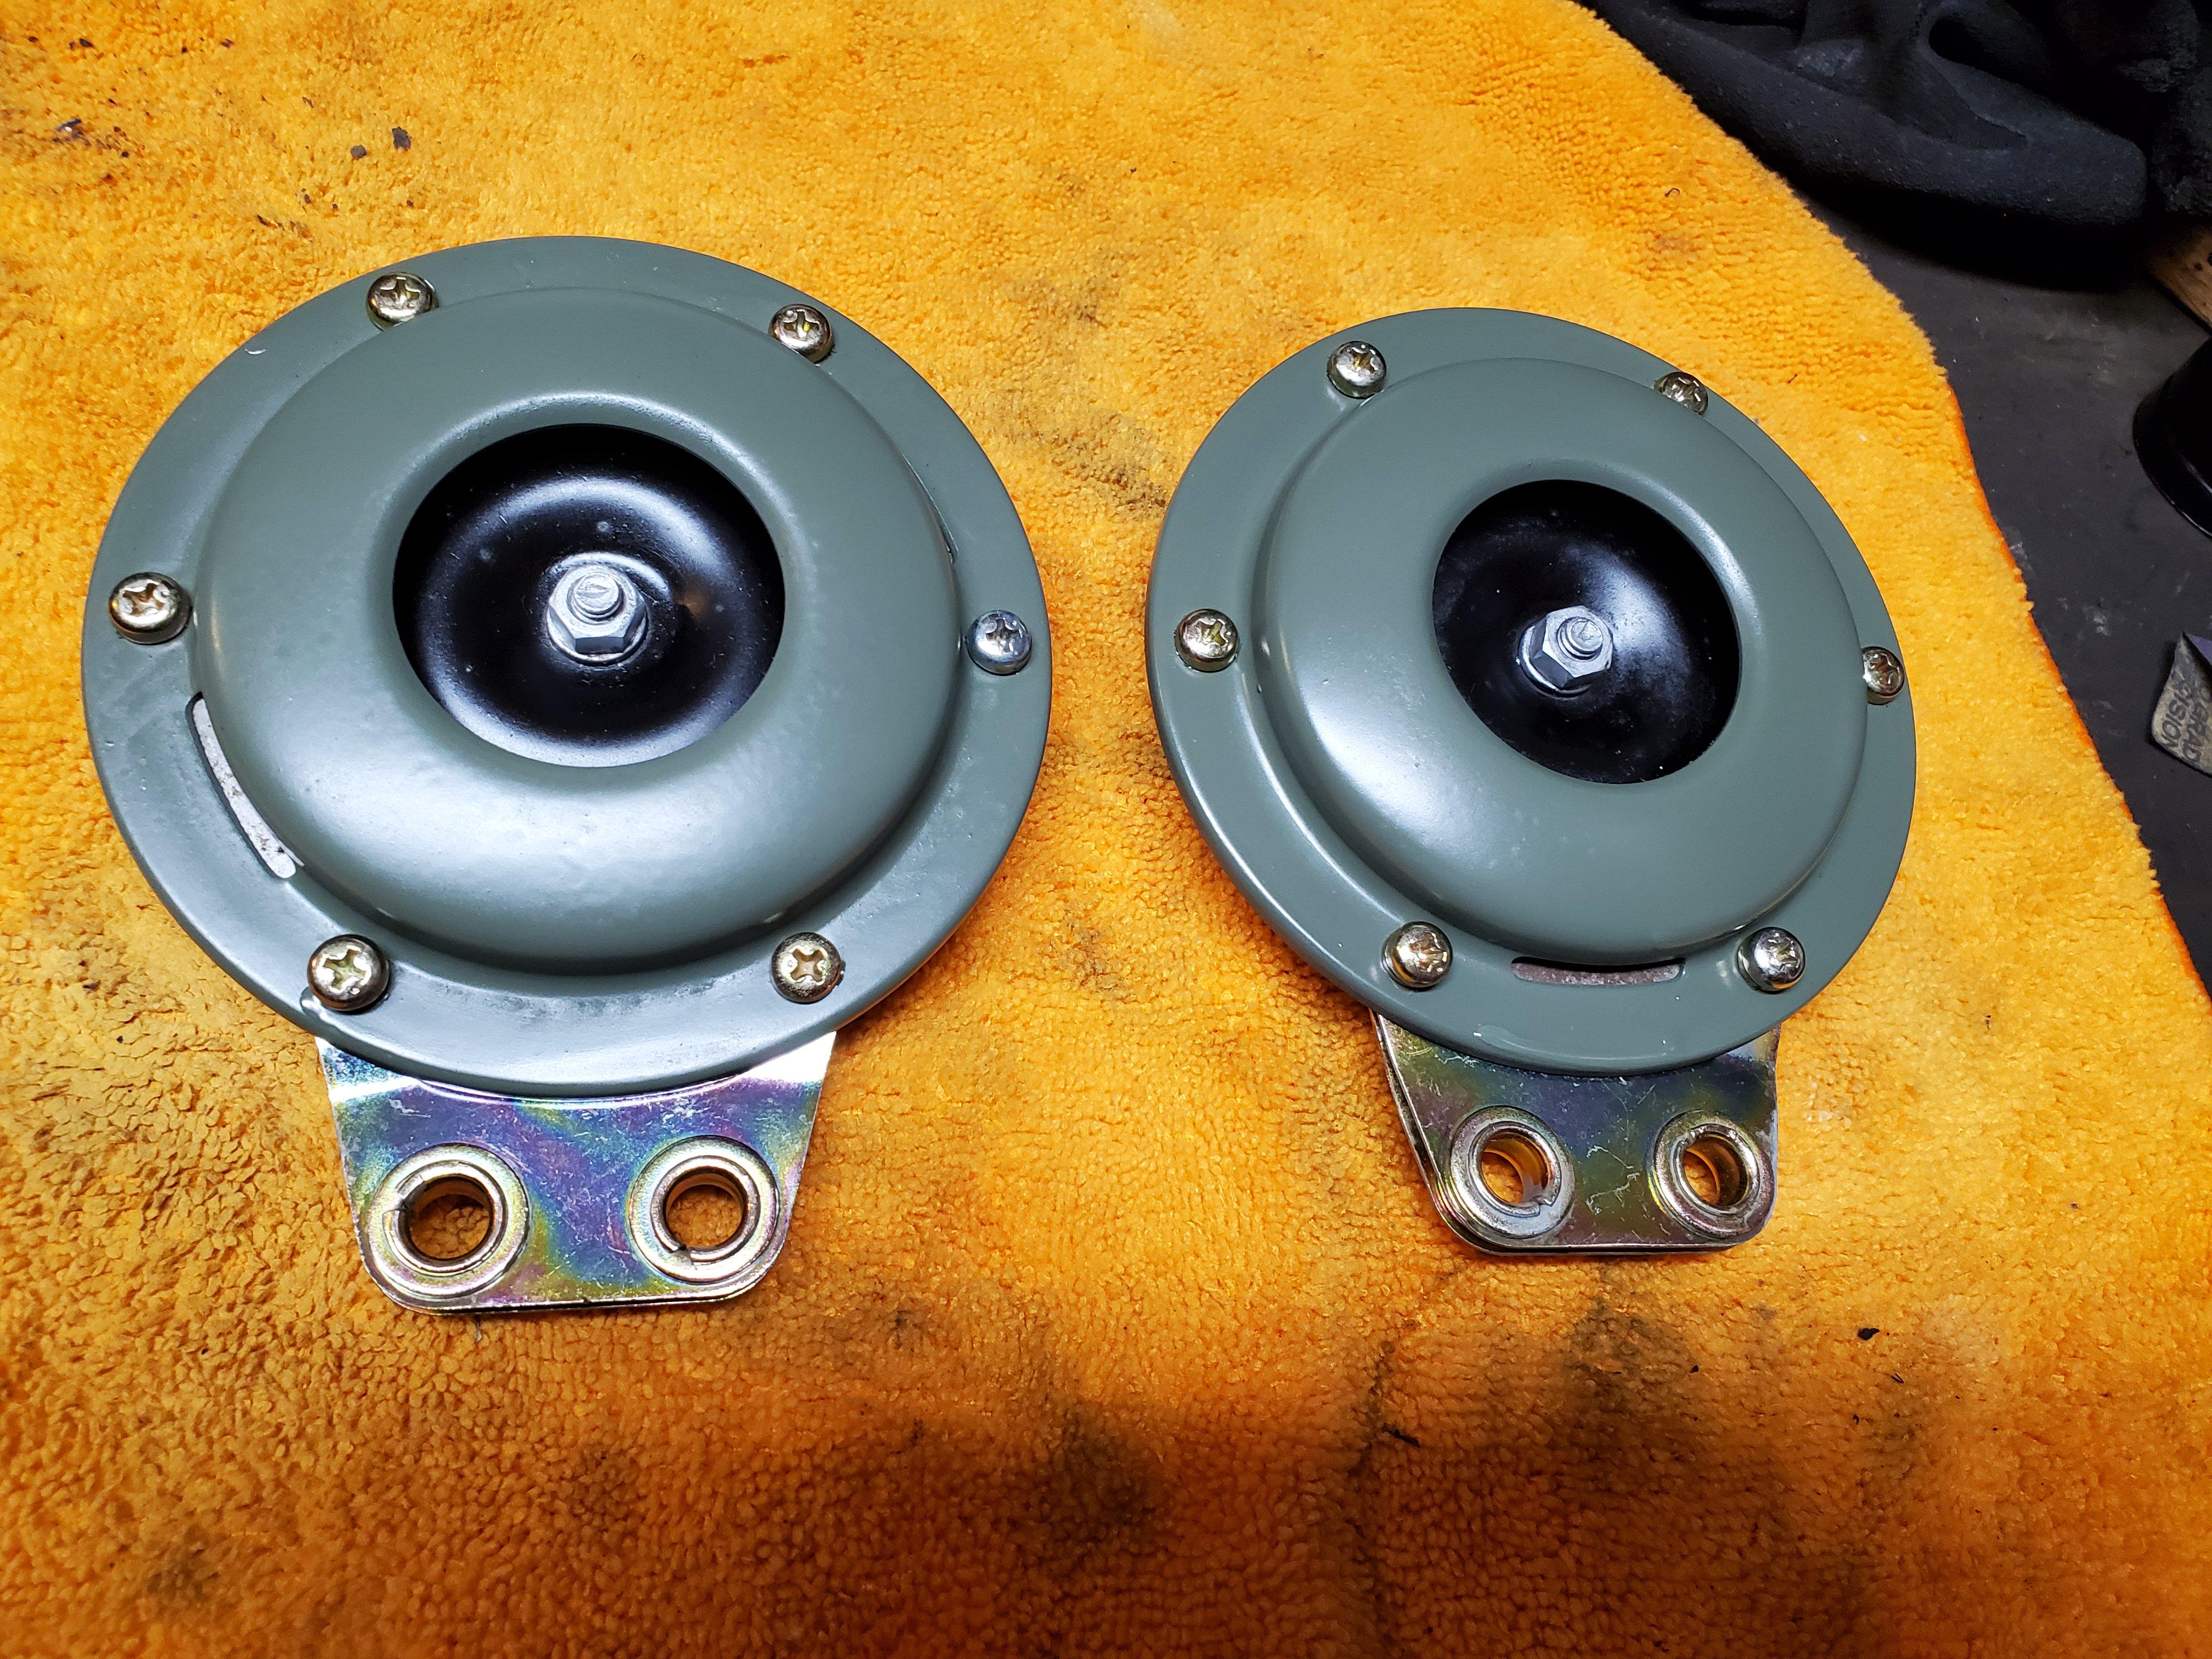
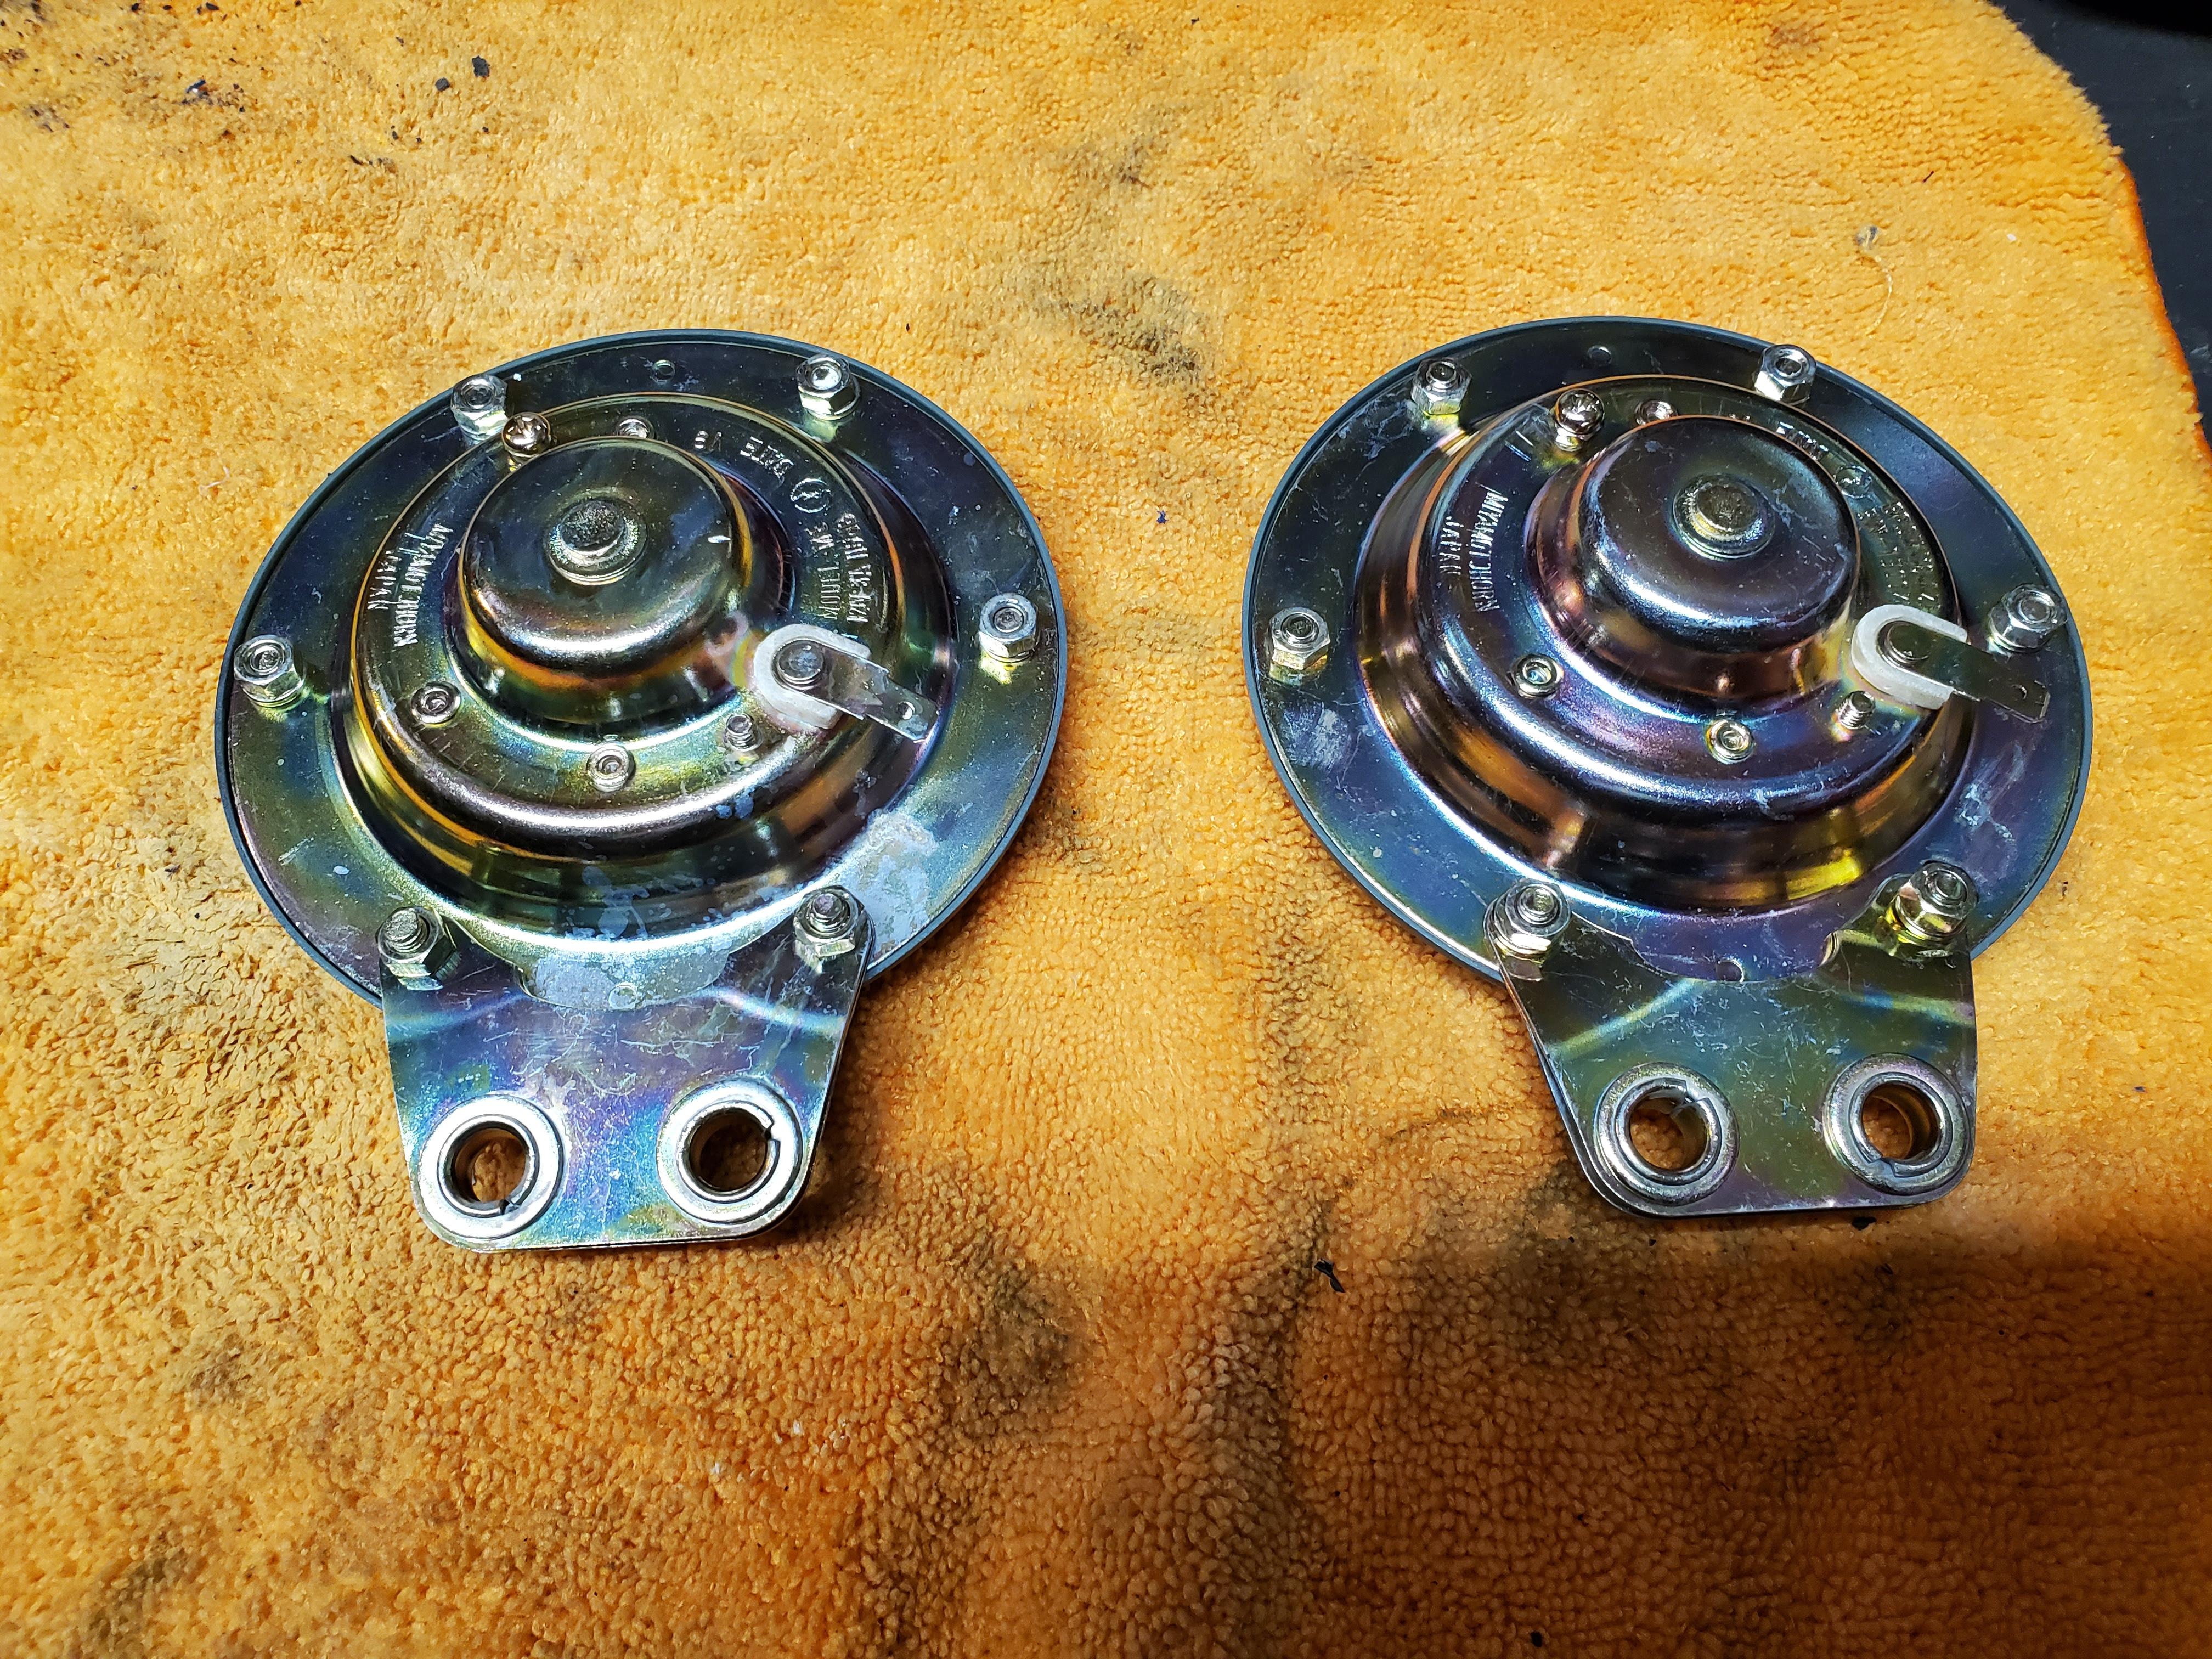
1 pointCleaning up some of the small items here while I wait for the body from the paint shop. Did a clean-up on the horns. I think the olive color is a bit too light, but it's the closest that I could find locally.


 1 point
 -
1 pointHe's not comparing them, he's just saying what he would rather have. I doubt there is a single thing about Datsuns that has not already been discussed here, perhaps Mike should shut down the active forums and we can all just search the archives? I suggest you take the bug out of your azz, we don't need another prig on this forum.1 point
-
The '#68' car was a factory race car, and the photos we are looking at are PERIOD photos from January 1970. Terashima san's car was a privateer race car, it went through several owners, was race-prepped and modified over many seasons (eventually ending up with a Grande Nose and N3020 overfenders) and the photos were are looking at now are RECENT. When Terashima san first got it, and when I first saw it, it had been fitted with a big alloy tank containing a JAF-sanctioned bladder conforming to regulations of its later racing years. Nothing like it had when it was first built and raced. Just because we can observe something on Terashima san's car today - and the hole-drilled dieting is a good example - it doesn't mean that it was originally like that, or that it had anything to do with Works team practices. External fuel tank venting was mandatory. Factors to be taken into account were fuel-slosh in cornering and venting away from heat sources. Obviously you don't want fuel vapour inside the cabin of the car either. Roll-over situations also.1 point
-
Notice the duct tape on the wheel weights in the first photo of the #85 race car.1 point