Leaderboard


Popular Content
Showing content with the highest reputation on 08/20/2019 in all areas
-
Hello all!! As some will remember, I was working on a drop in replacement ECU for our Z's & had to take a hiatus when my daughter was born. This week she started kindergarten (my how time flies when you have young ones underfoot). Last month I began un-mothballing the project and gearing up to finish. Apologies of course for the delay, but rest assured I haven't forgot about this. The status when I paused was this: 1 - The prototype board came up nicely and I was driving my car around using 100% stock L-Jet components (save for the HellFire ECU of course)....poorly tuned at best & no enrichment code was in place which caused some stumbling when I floored it. This was expected & I didn't care, I was all smiles that it worked as well as it did. 2 - The primary GUI functionality is present, but has a *LOT* of debug screens and added test buttons here and there. It's quite cluttered as I continue to test/debug, but will be getting cleaned up as I progress. The GUI does look good and I'm mostly happy with the interface. Still quite a bit of legwork to make this clean and presentable. The communication with the ECU has been rock solid & realtime data is sent continuously to the pc to see while the engine is running. Firmware update via the Laptop needs to be finished. 3 - 20 ECU boards are assembled & just need programming to production firmware. 4 - Sensors (Primarily the pain the arse AFM) still need to be calibrated & the tables loaded with qualified data. Currently I have data that is *close* but can be better. I built a flow bench to calibrate the AFMS. I have about 20 or so AFMs from various years to play with. It will be interesting to see how they have aged. I'm guessing poorly. ? The flowbench still needs some attention & will be the first on the list to work on. 5 - I need to qualify/test the stock injectors to characterize their average opening time and flow rates. I have some stock numbers in the tables now that work, but they can be improved. 6 - Various tuning tables need to be added, (acceleration, cold start, other enrichments) 7 - Then I need to tune it of course to the stock engine. I have one bone stock 77 engine and another that is bone stock plus the addition of a mild cam. I have a wideband O2 on the engine that I will use to assist with tuning. I keep wanting to build a dyno as well, but sanity so far has kept me from running down that rabbit hole. It feels good to be back on the project & I'm excited to make some headway. I'll post some progress pics on the flowbench and AFM results when they are available, and feel free to pester, prod, poke, or ask questions about the project. Len Here's a link to the last thread:2 points
-
2 pointsIt's an art to be able to apply bondo so thick. He was probably a pastry chef in another life. That car is going to be quite a few kilos lighter when you a finished. Car is looking good and coming along nicely.2 points
-
2 pointsI can't help but wonder whether this situation would respond better to big heat and big torque. As in, welding a nut onto the top of the stud and then putting a wrench on it. IIRC, @grannyknottalked about this in another thread a couple of years ago when the topic was extracting a snapped-off manifold stud out of the cylinder head. Something about the merits of using an oxyacetylene torch rather than a MIG? The difference here is that we have a large-diameter stud (bolt shank) that's seized inside a cast-iron engine block (vs. a small-diameter stud seized inside an aluminum head). Whereas it's the galvanic action of dissimilar materials that typically creates problems with steel fasteners getting stuck in alloy castings, for a head bolt it's steel-in-iron so I would think that the causes for the locked threads would be simple air (oxygen)-generated corrosion (unless the block has a micro-crack and coolant (water) has leached into the stud threads -- but let's not talk about that). In my (limited) experience of removing cylinder heads from high-mileage L24's, the head bolts take a lot of torque to break free and some of them really pop when they give way. Looking at the threads after the bolts came out, they appeared 'sooty' but not really crusty-rusty. I think that part of the problem with these head bolts getting stuck in the block is that they were installed at the factory without any lubrication so as to get accurate torque readings during tightening. Having said all that, I will repeat another story that I wrote about previously. In my area of the world (on the fringes of a 7-million pop. Canadian city), I discovered a contractor who provides the new-car retail industry with specialist services for extracting frozen fasteners from customer cars. That's all he does. He told me that there a certain model years for certain higher-end car brands where a key fastener (e.g. suspension mount) is chronically frozen, hard to get at, and often snaps off during attempted removal. That's where he makes his money. I hired him to get the snapped-off studs out of my Z's cylinder head (still mounted on the engine, in the car) and it was one of the best $120 I ever spent. He came to my house, rolled a tool caddy out of his truck, sized things up, and had the job done (without using any heat) in 10 minutes tops. Cheating? Maybe. Depends on your threshold for potentially-painful outcomes. You might consider looking for a comparable specialist in your area. The service managers at your local Benz, BMW, Audi and Volvo dealers might be able to help you find one.2 points
-
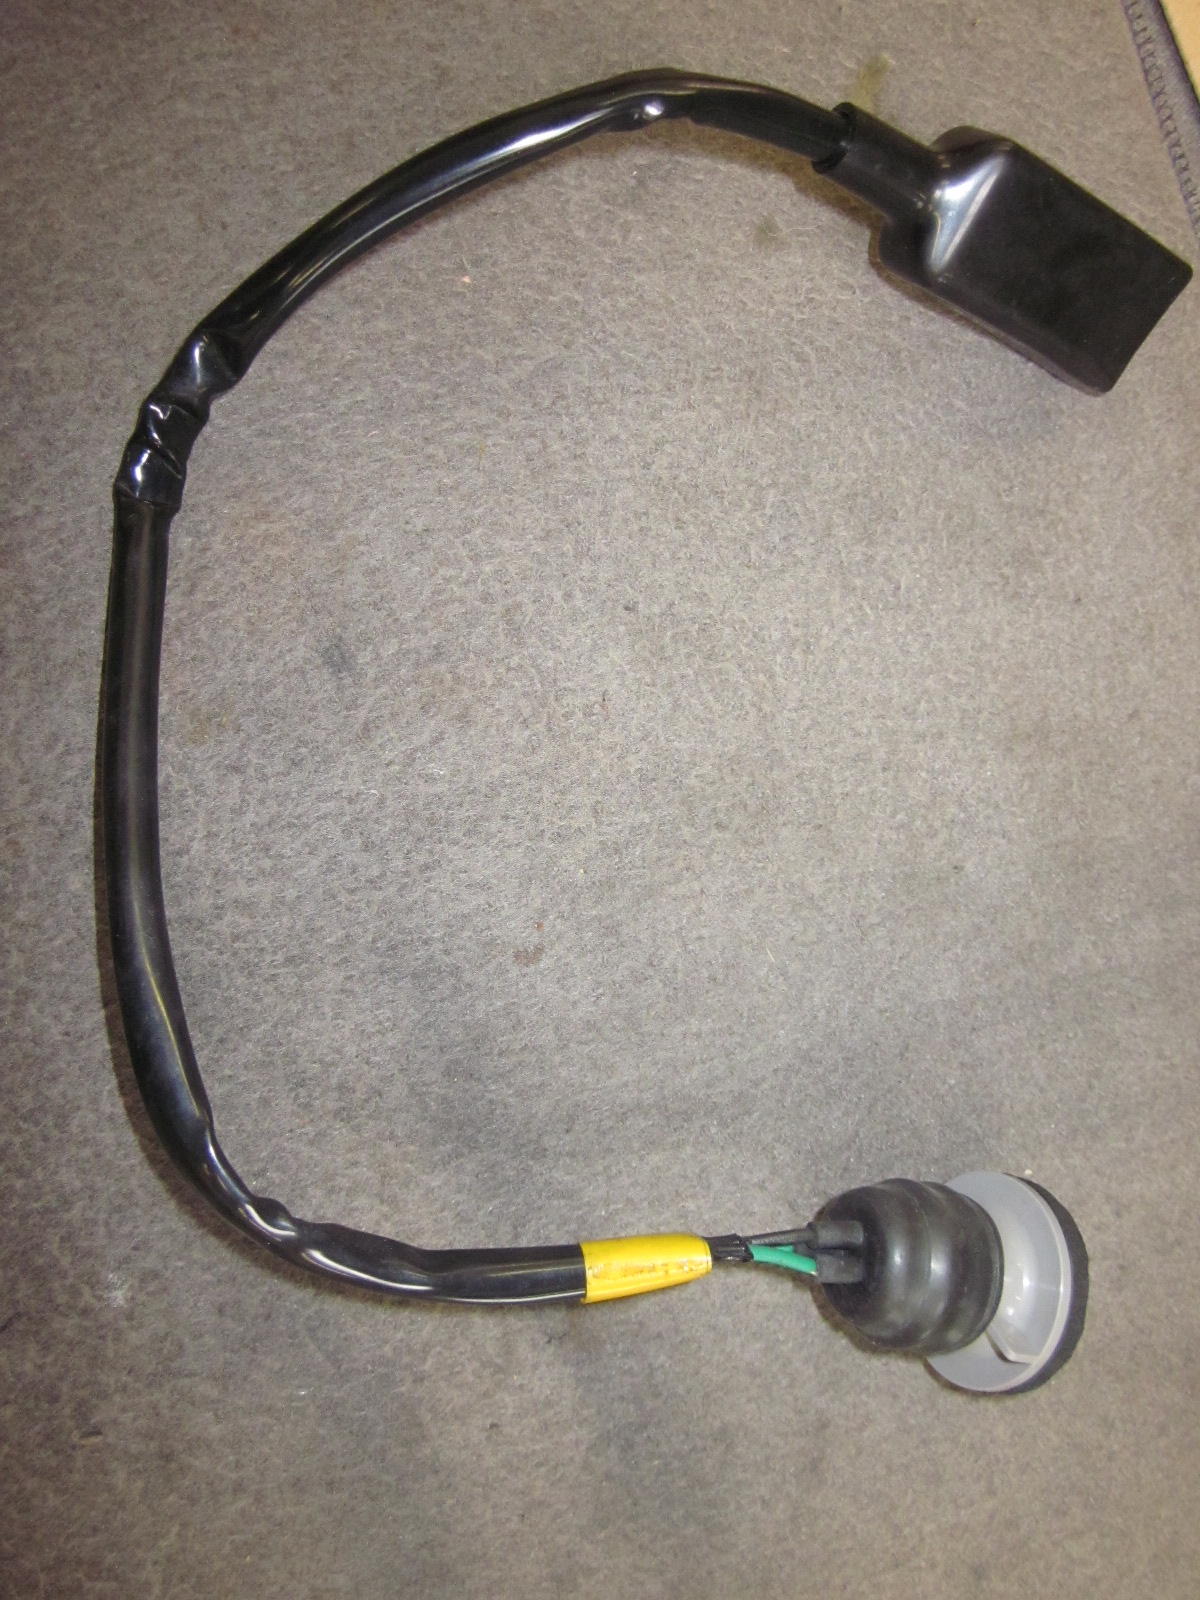
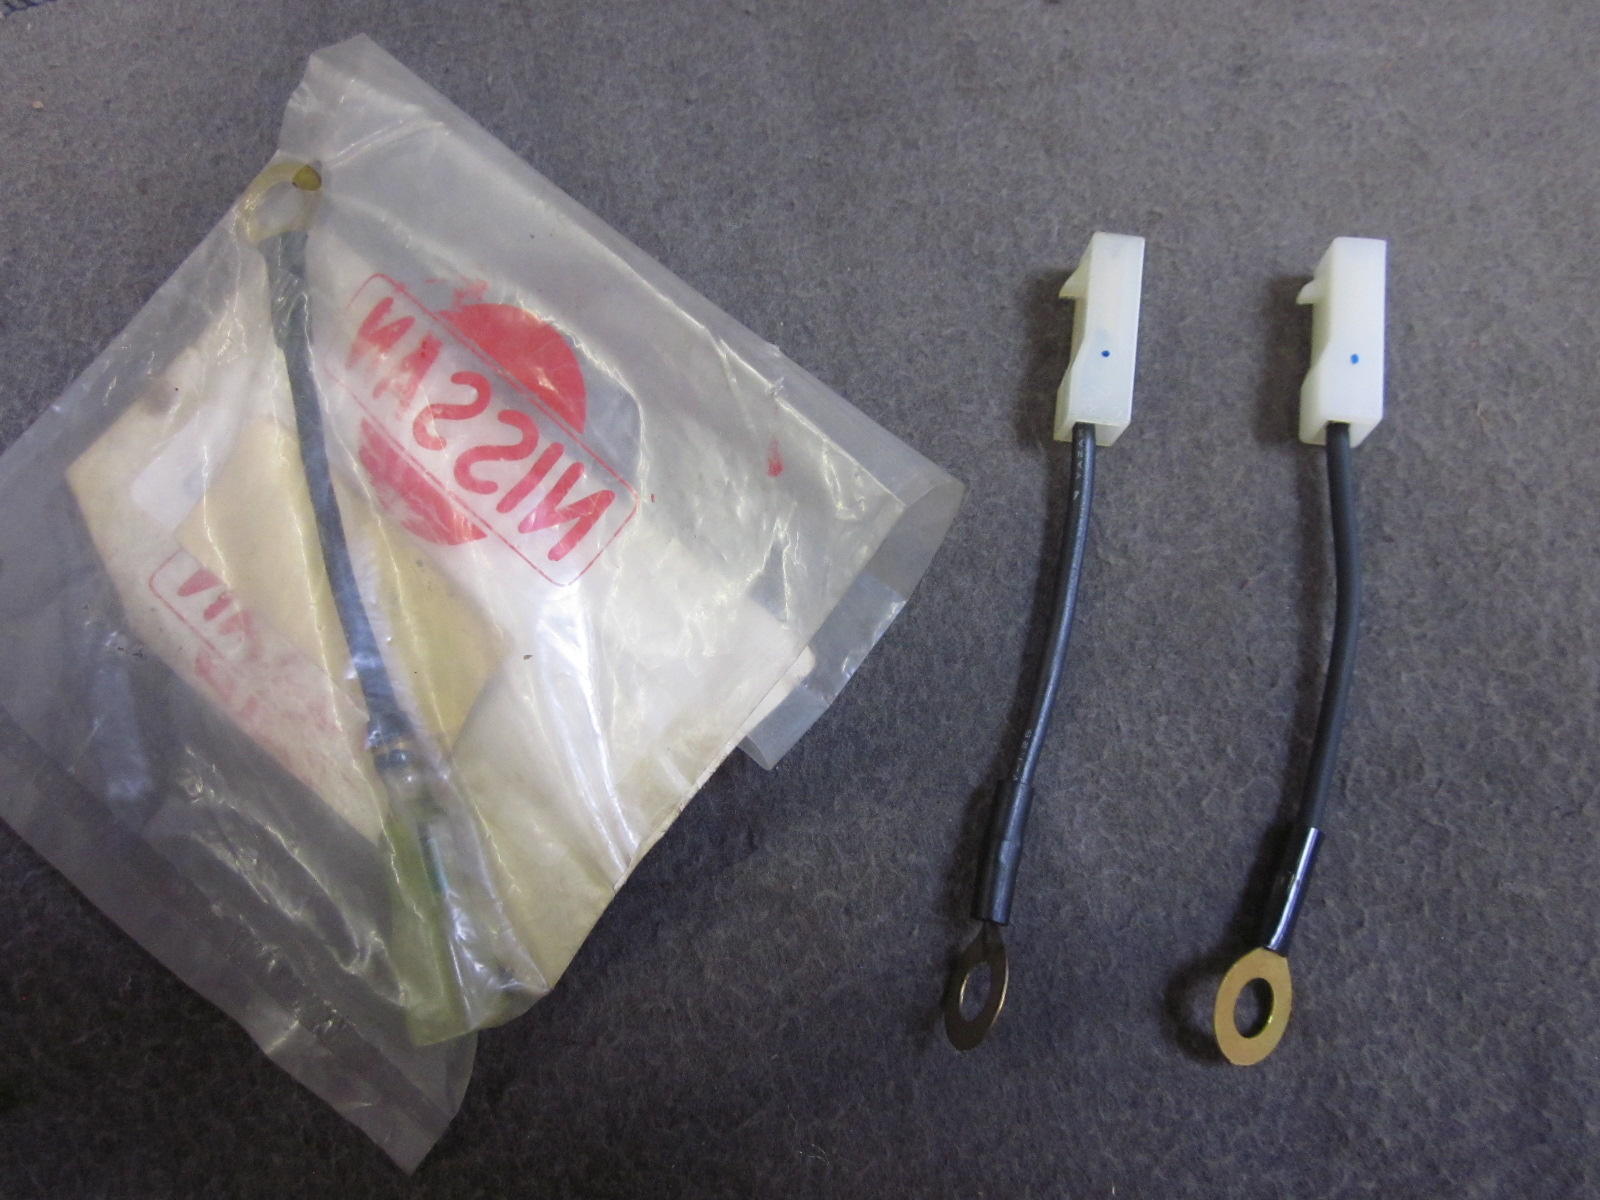
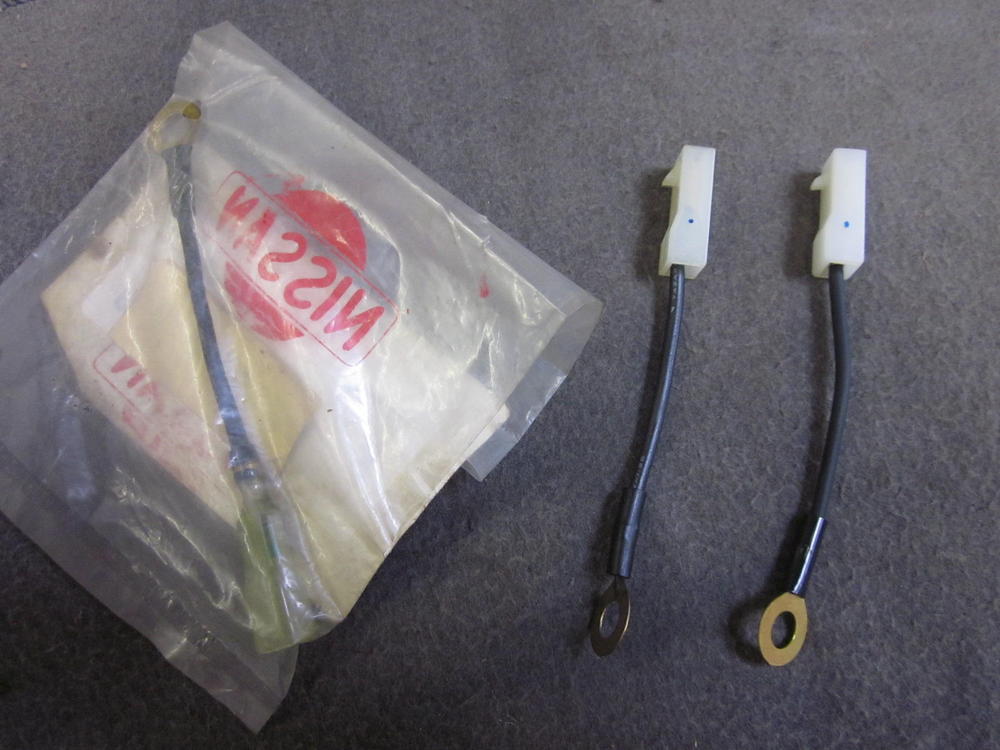
Yellow tape on NOS front turn/parking light sub harness. PIX 2 From left-NOS fuse link for early 240, NOS late 240 fuse link and finally the Banzai Motorworks reproduction

 2 points
 -
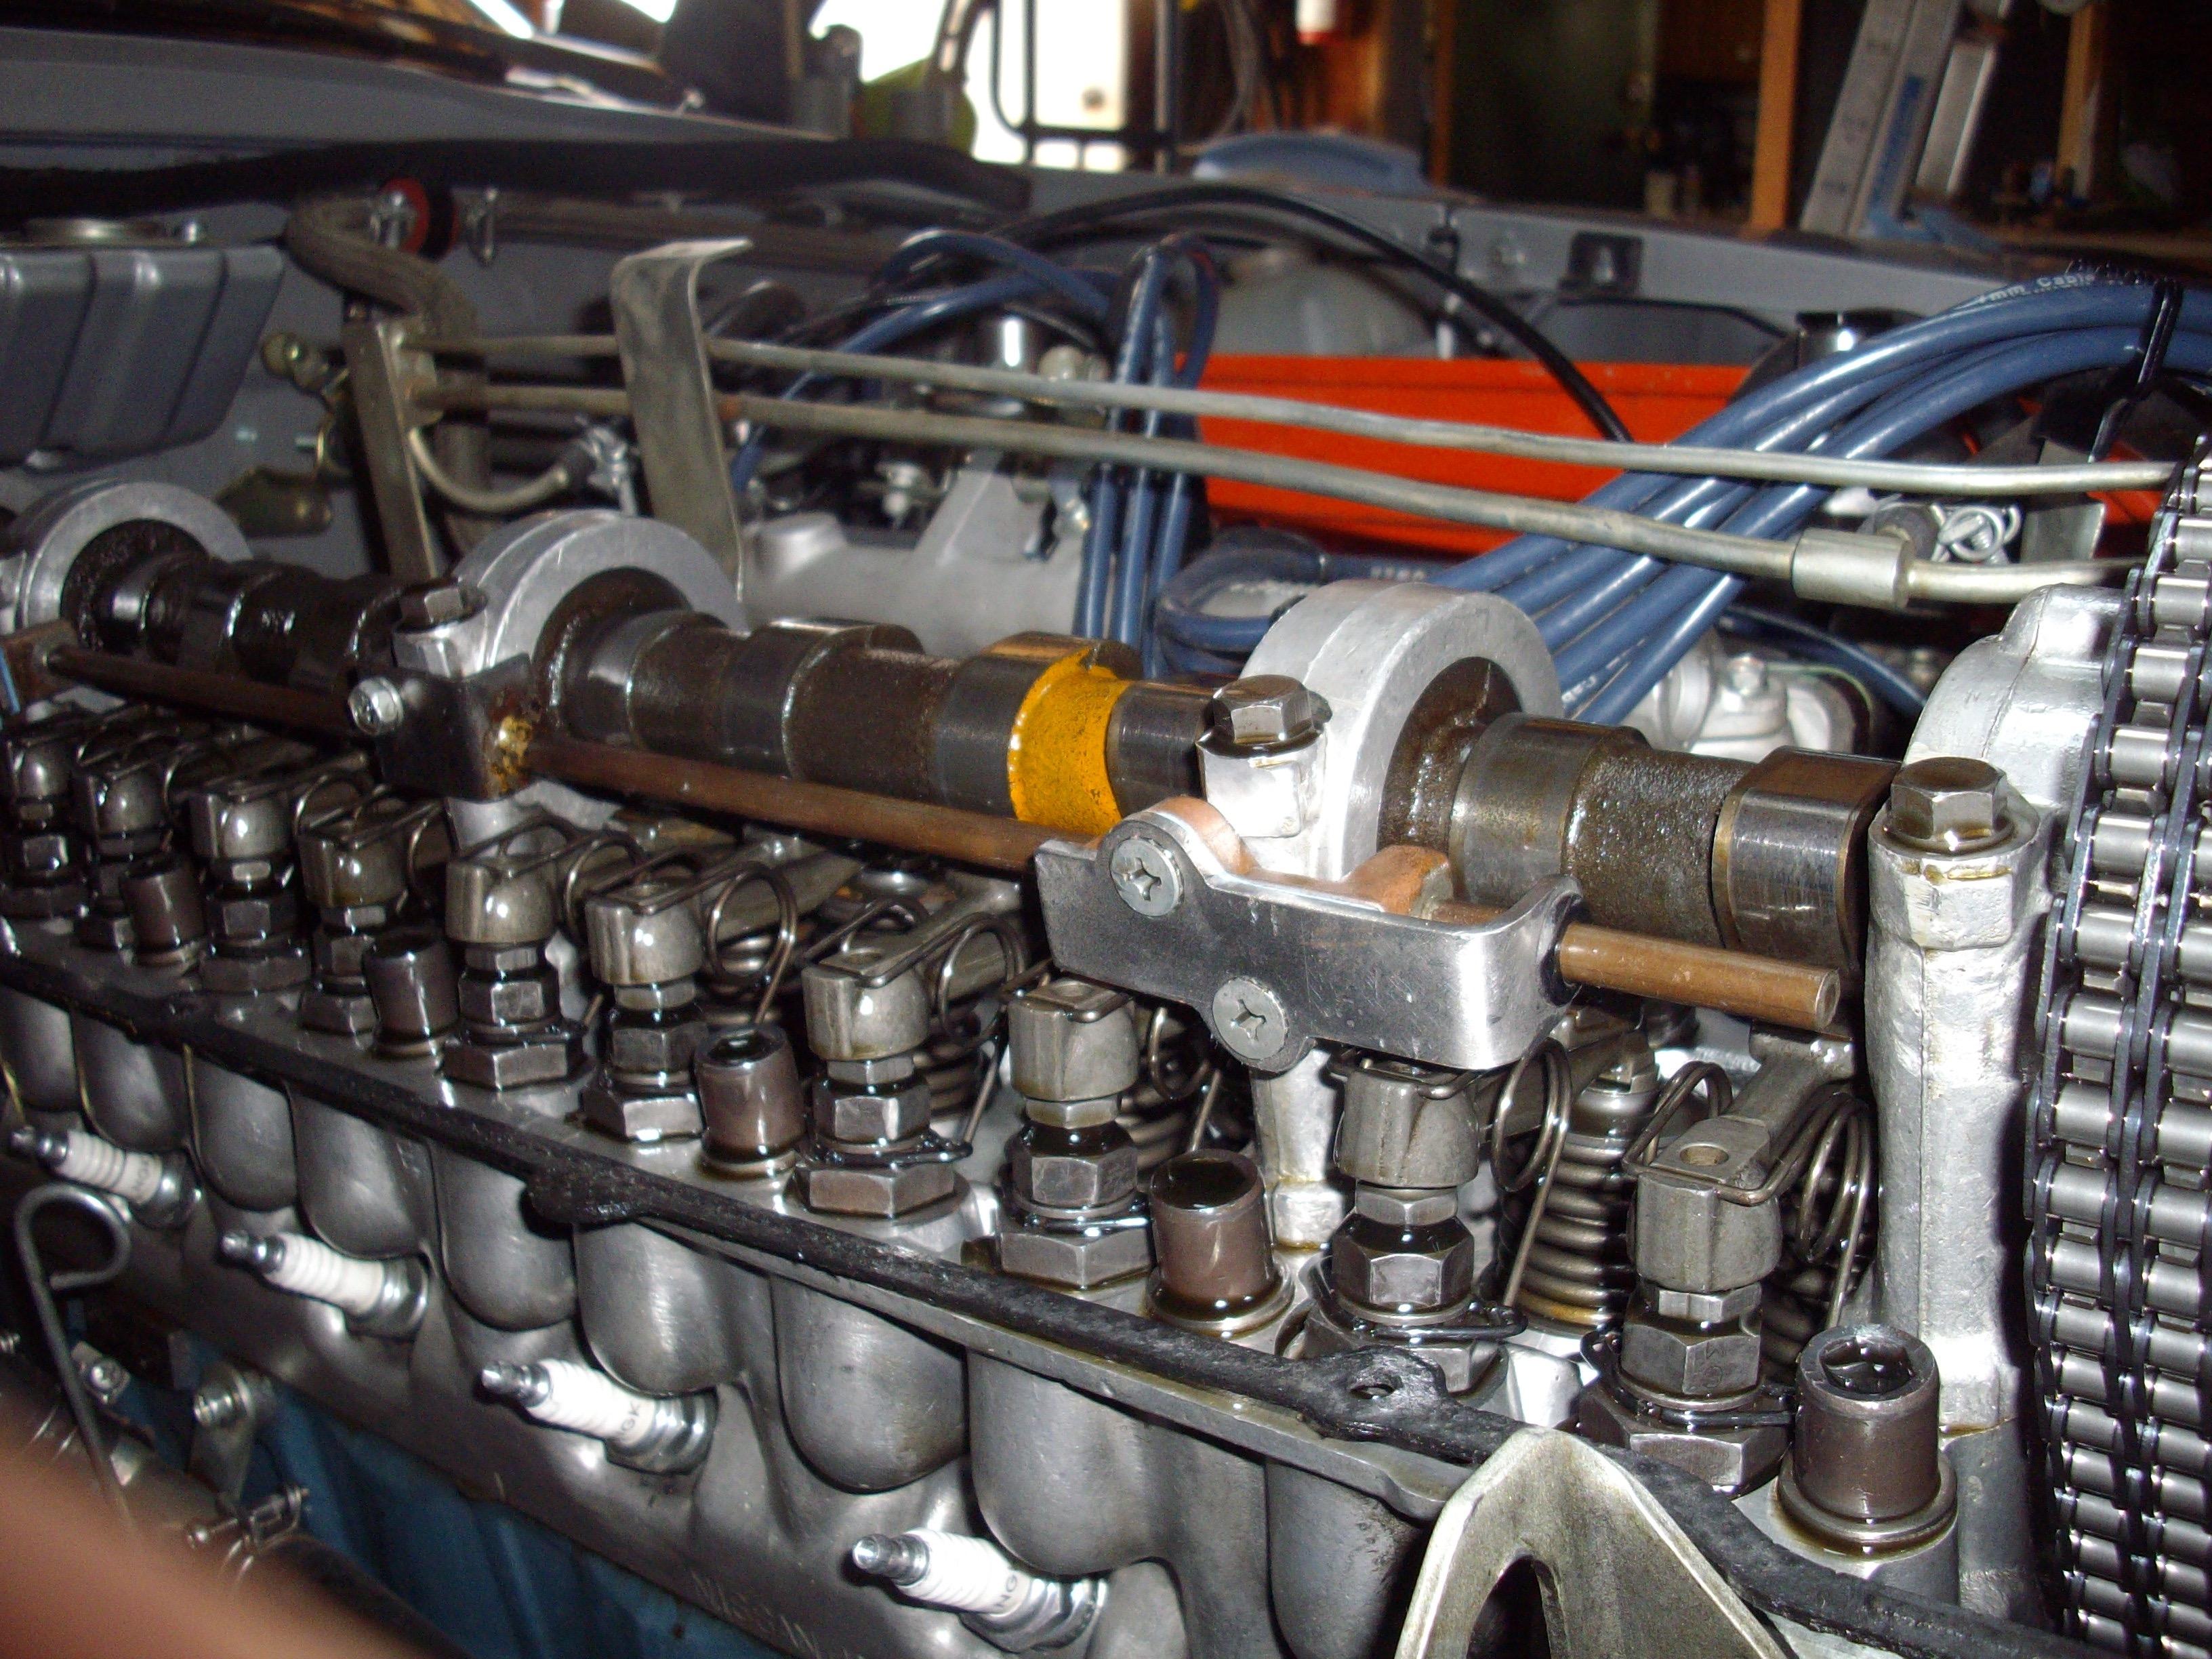
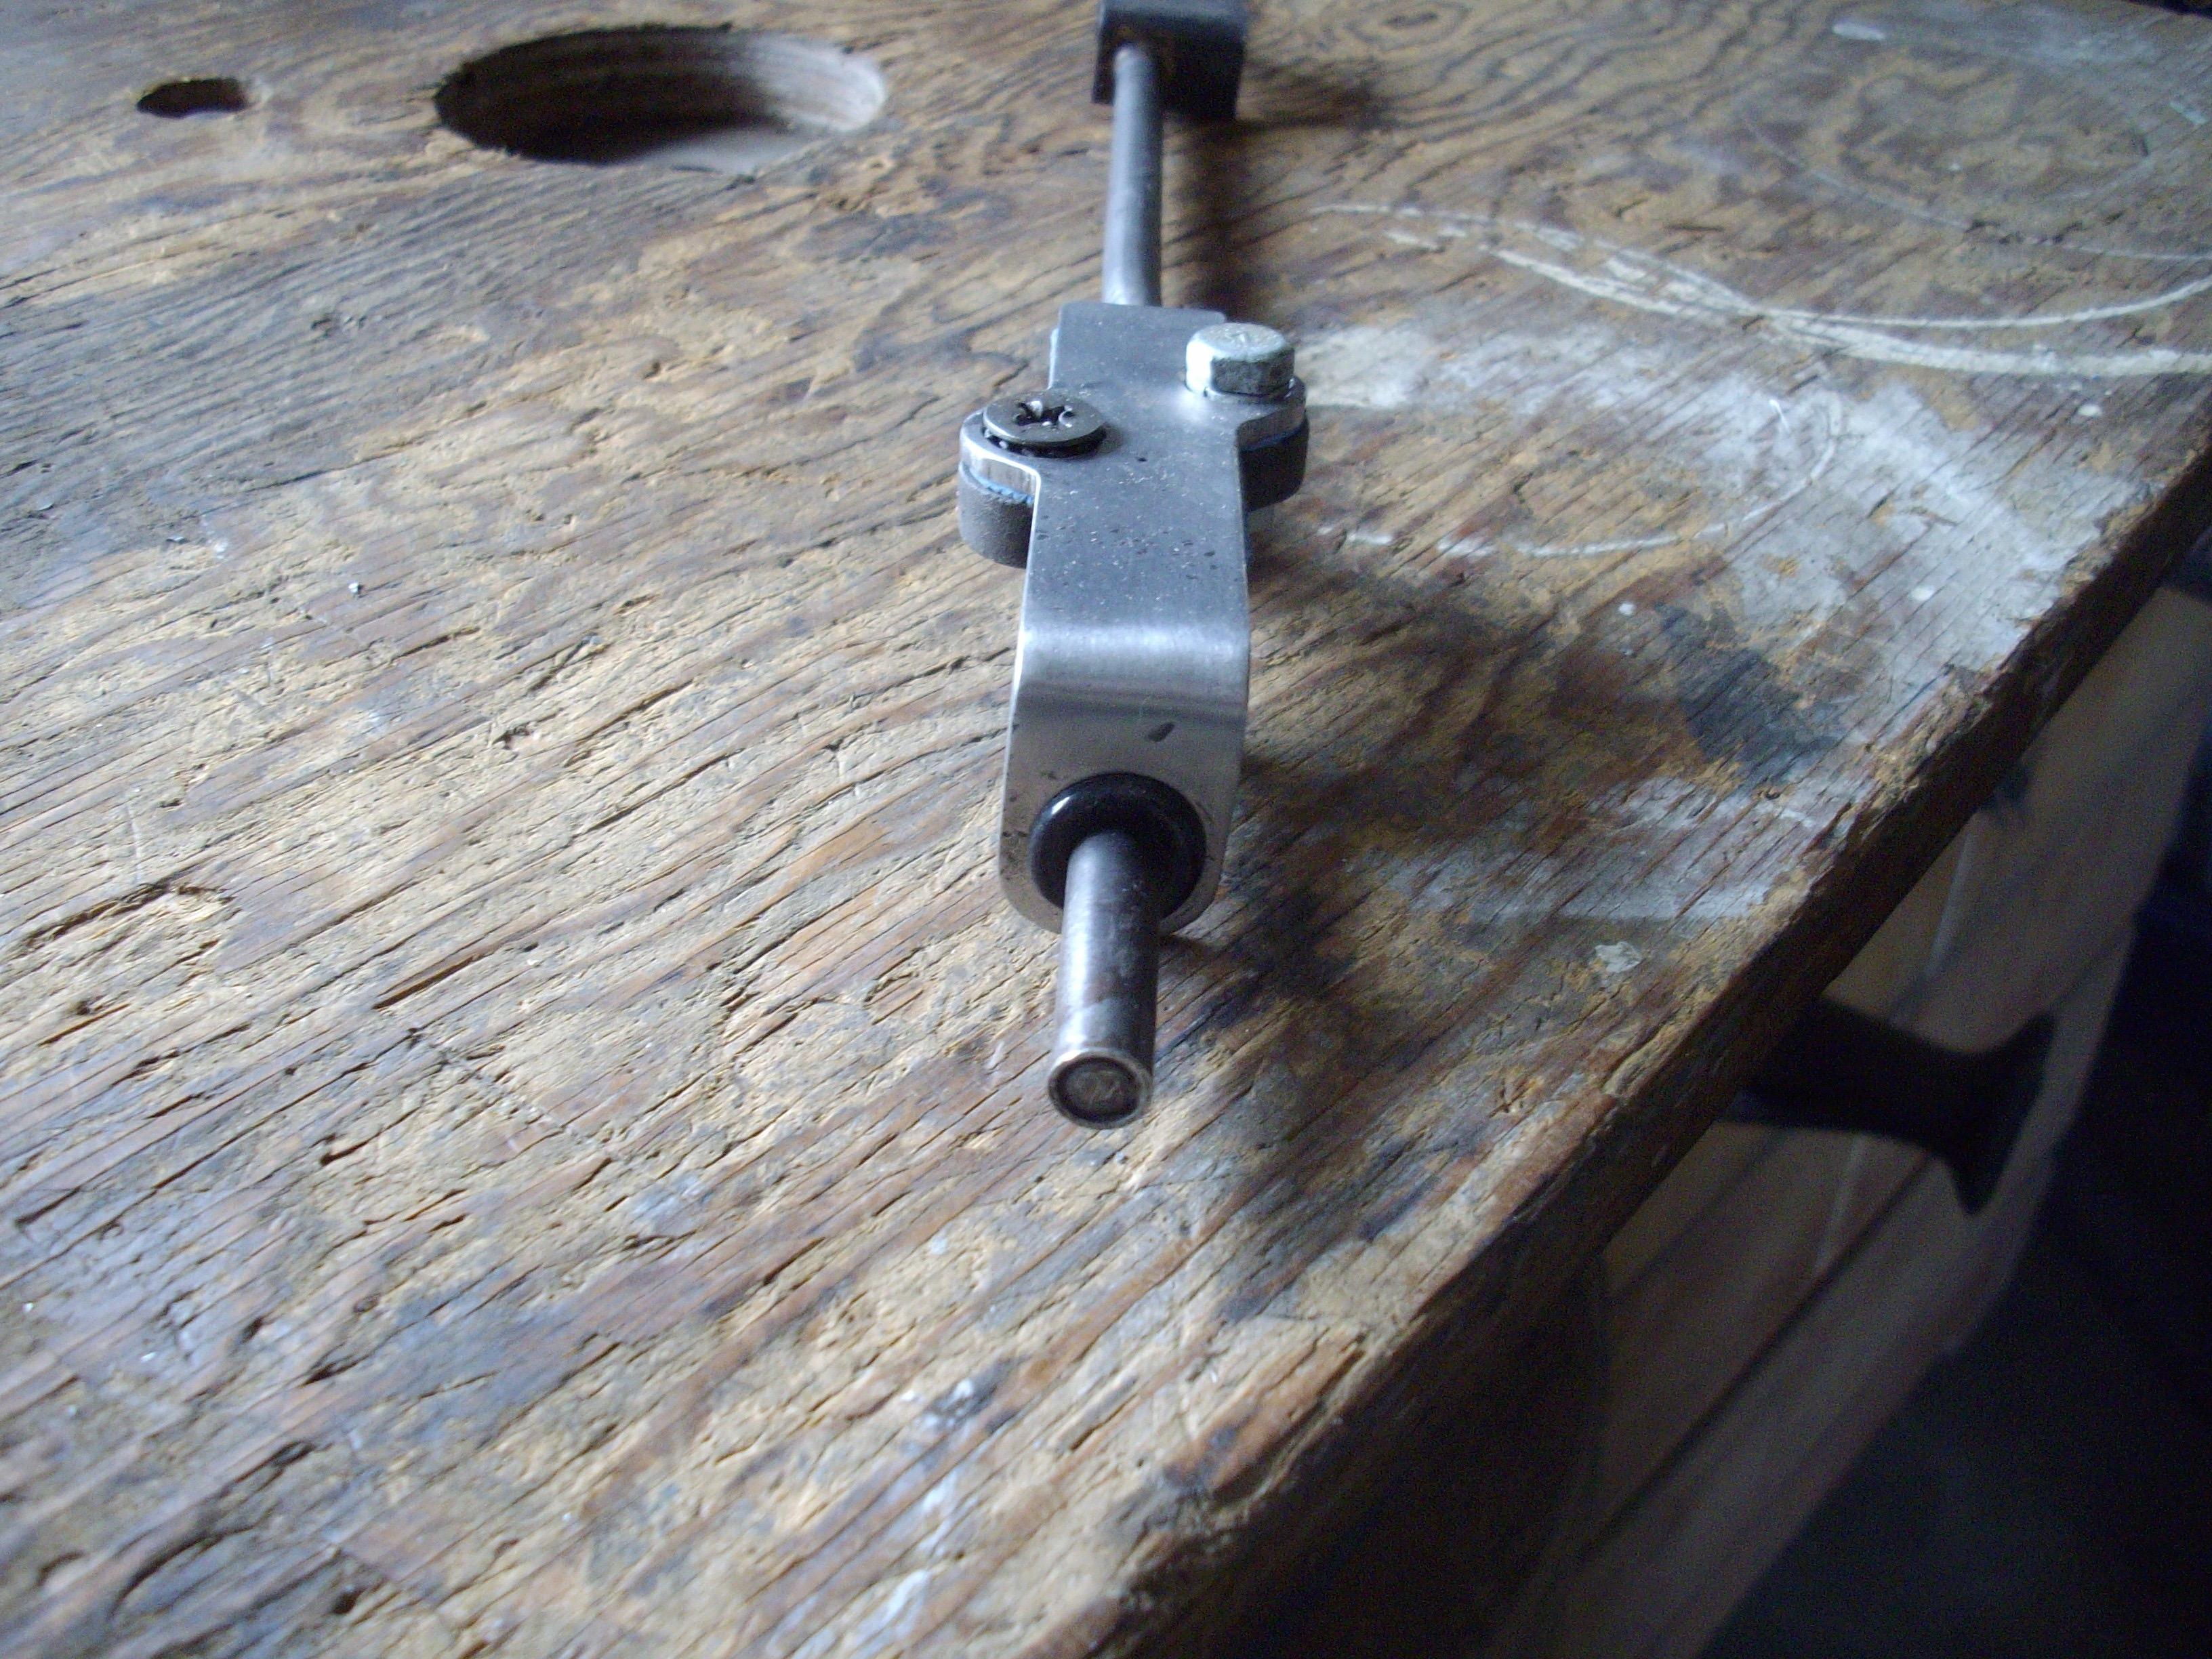
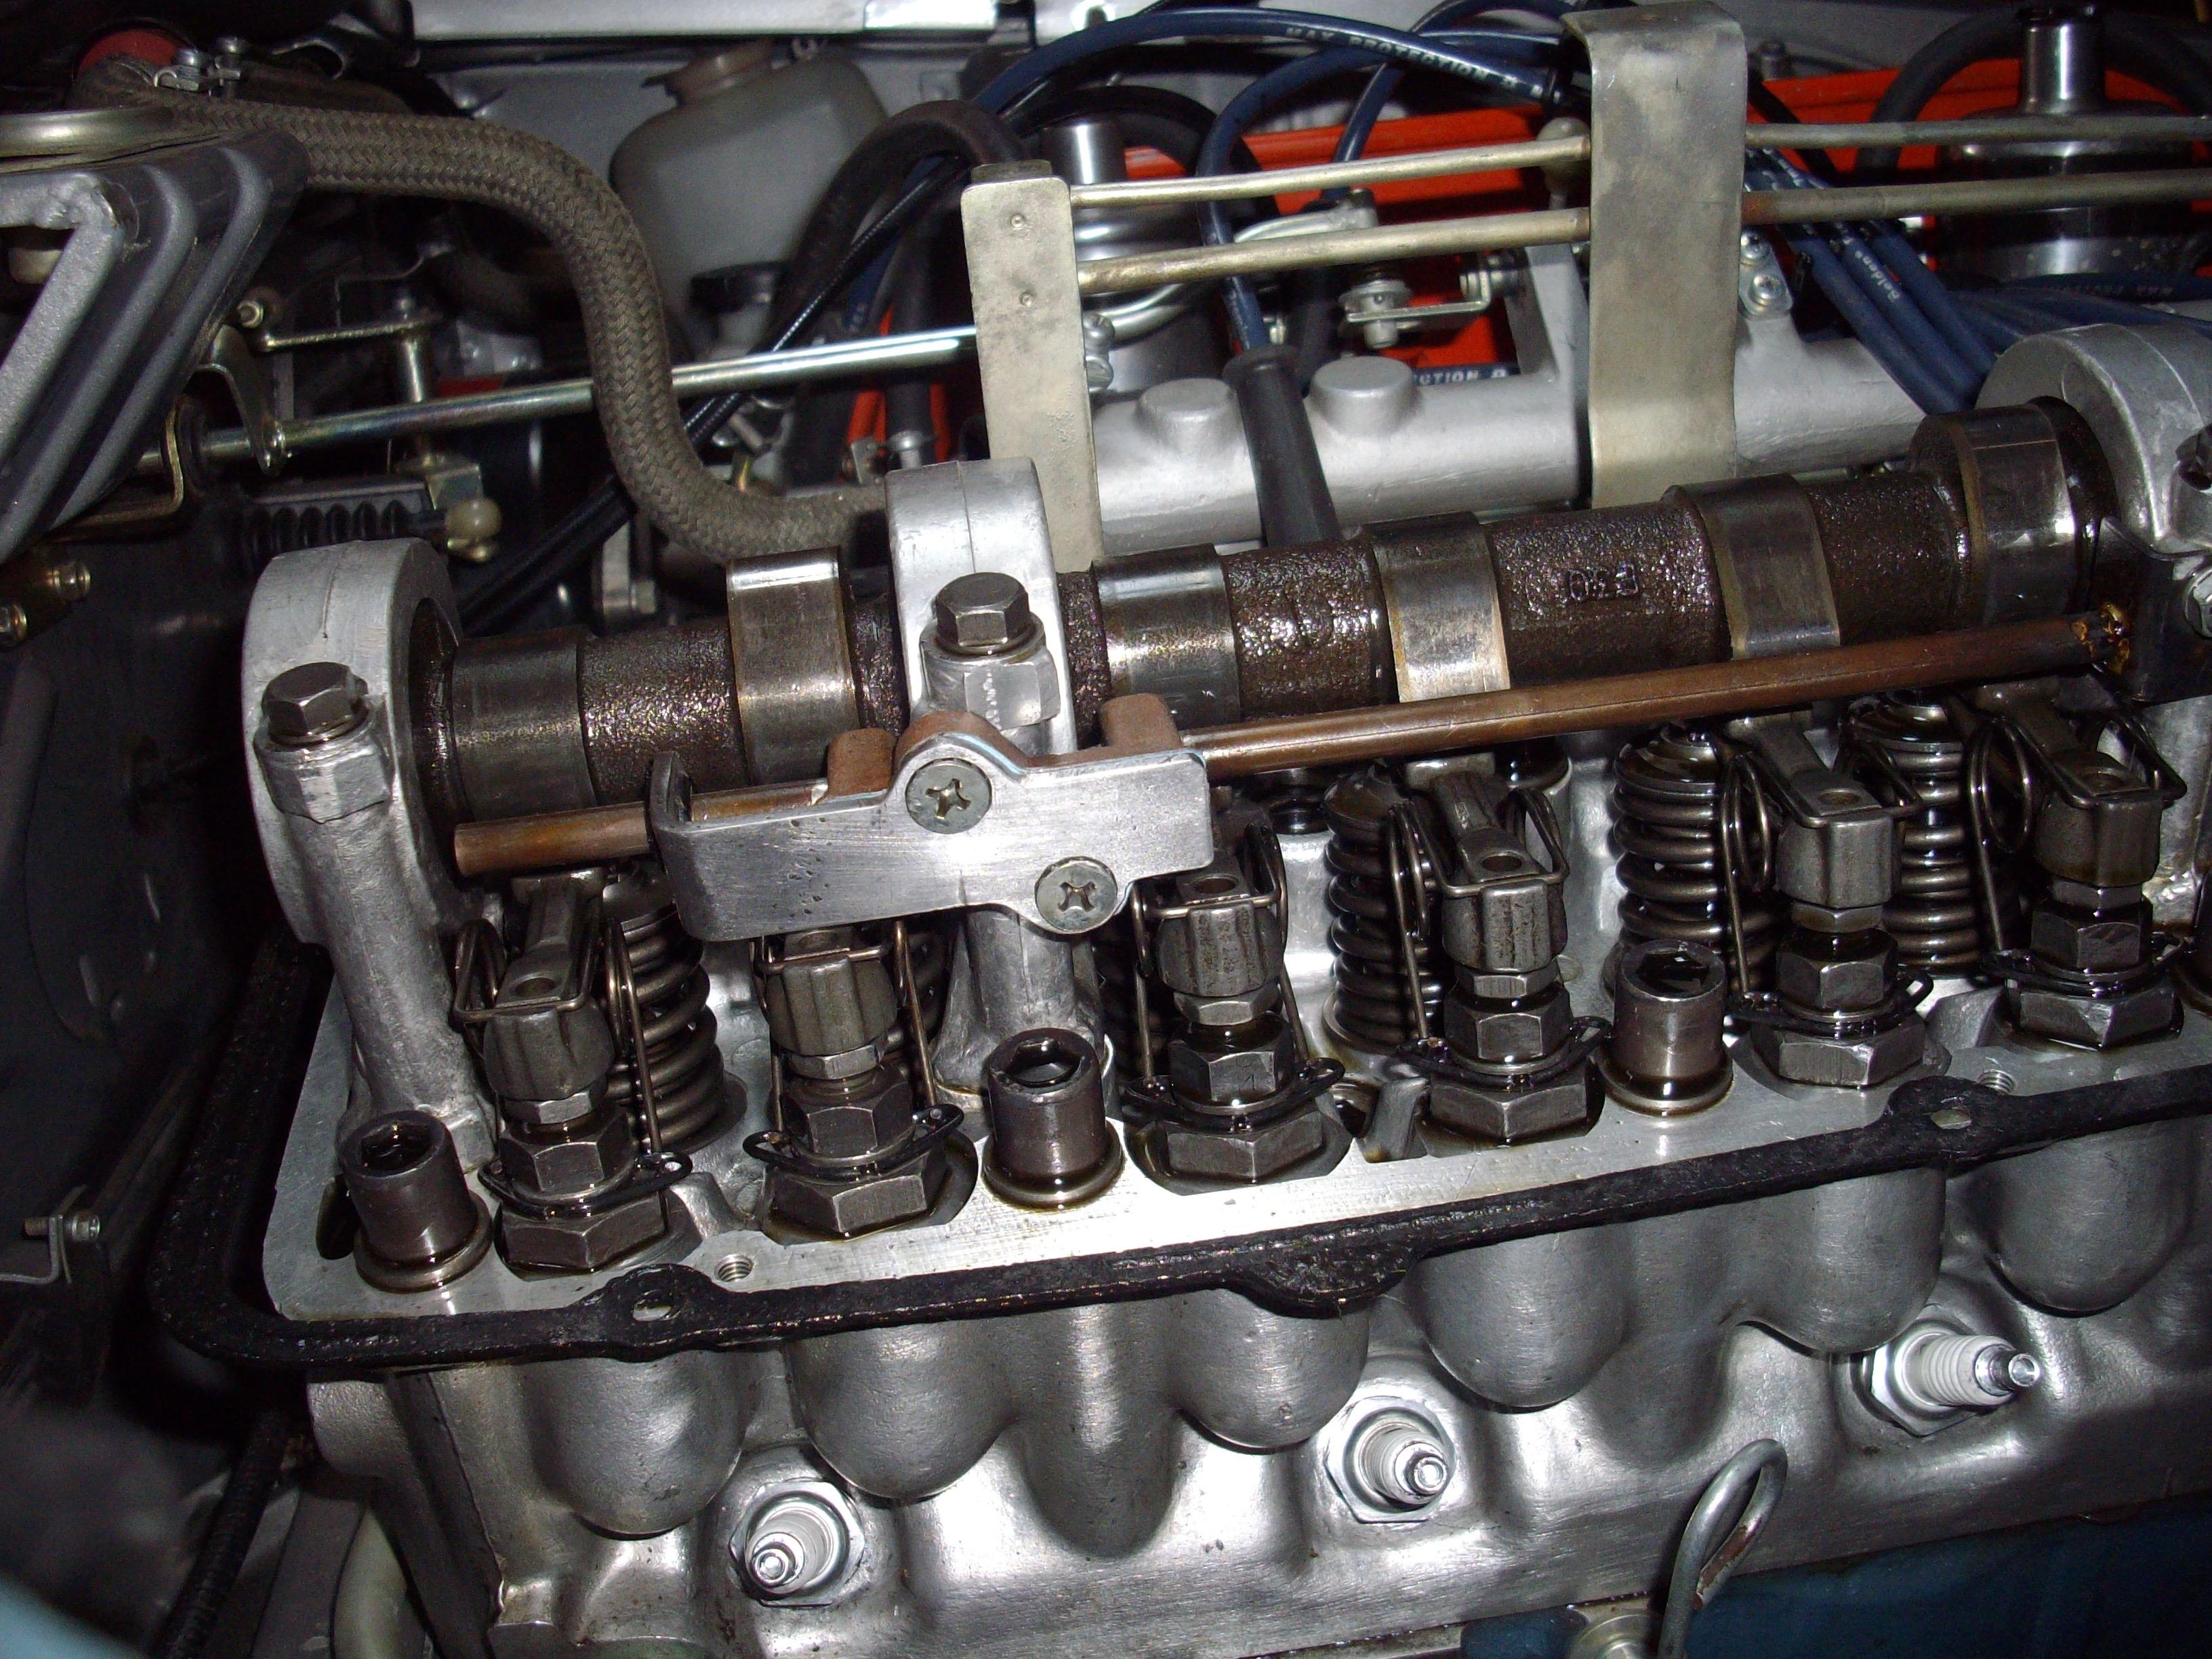
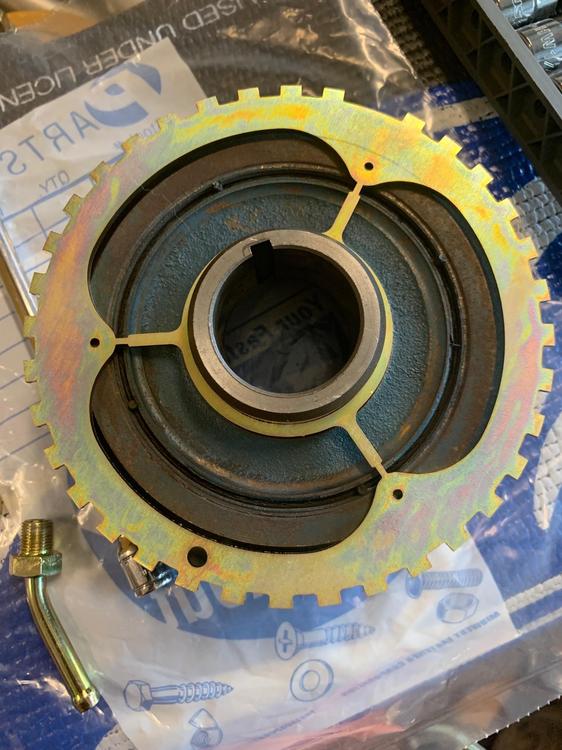
2 pointsSo after seeing what happened to my cam oiler tube, and talking to another Z owner who had the same problem with major results. The front tube fell out and got caught in the timing chain. Trashed the bottom gear and of course bent a bunch of valves. So I decided to try to come up with a way to stop the tubes from fall down into the lower engine if they failed and am trying this to see it helps.


 2 points
 -
1 pointI fixed my 240's cracks with fiberglass weave and ABS black glue. Worked it on the underside and it turned out great.
 1 point
 -
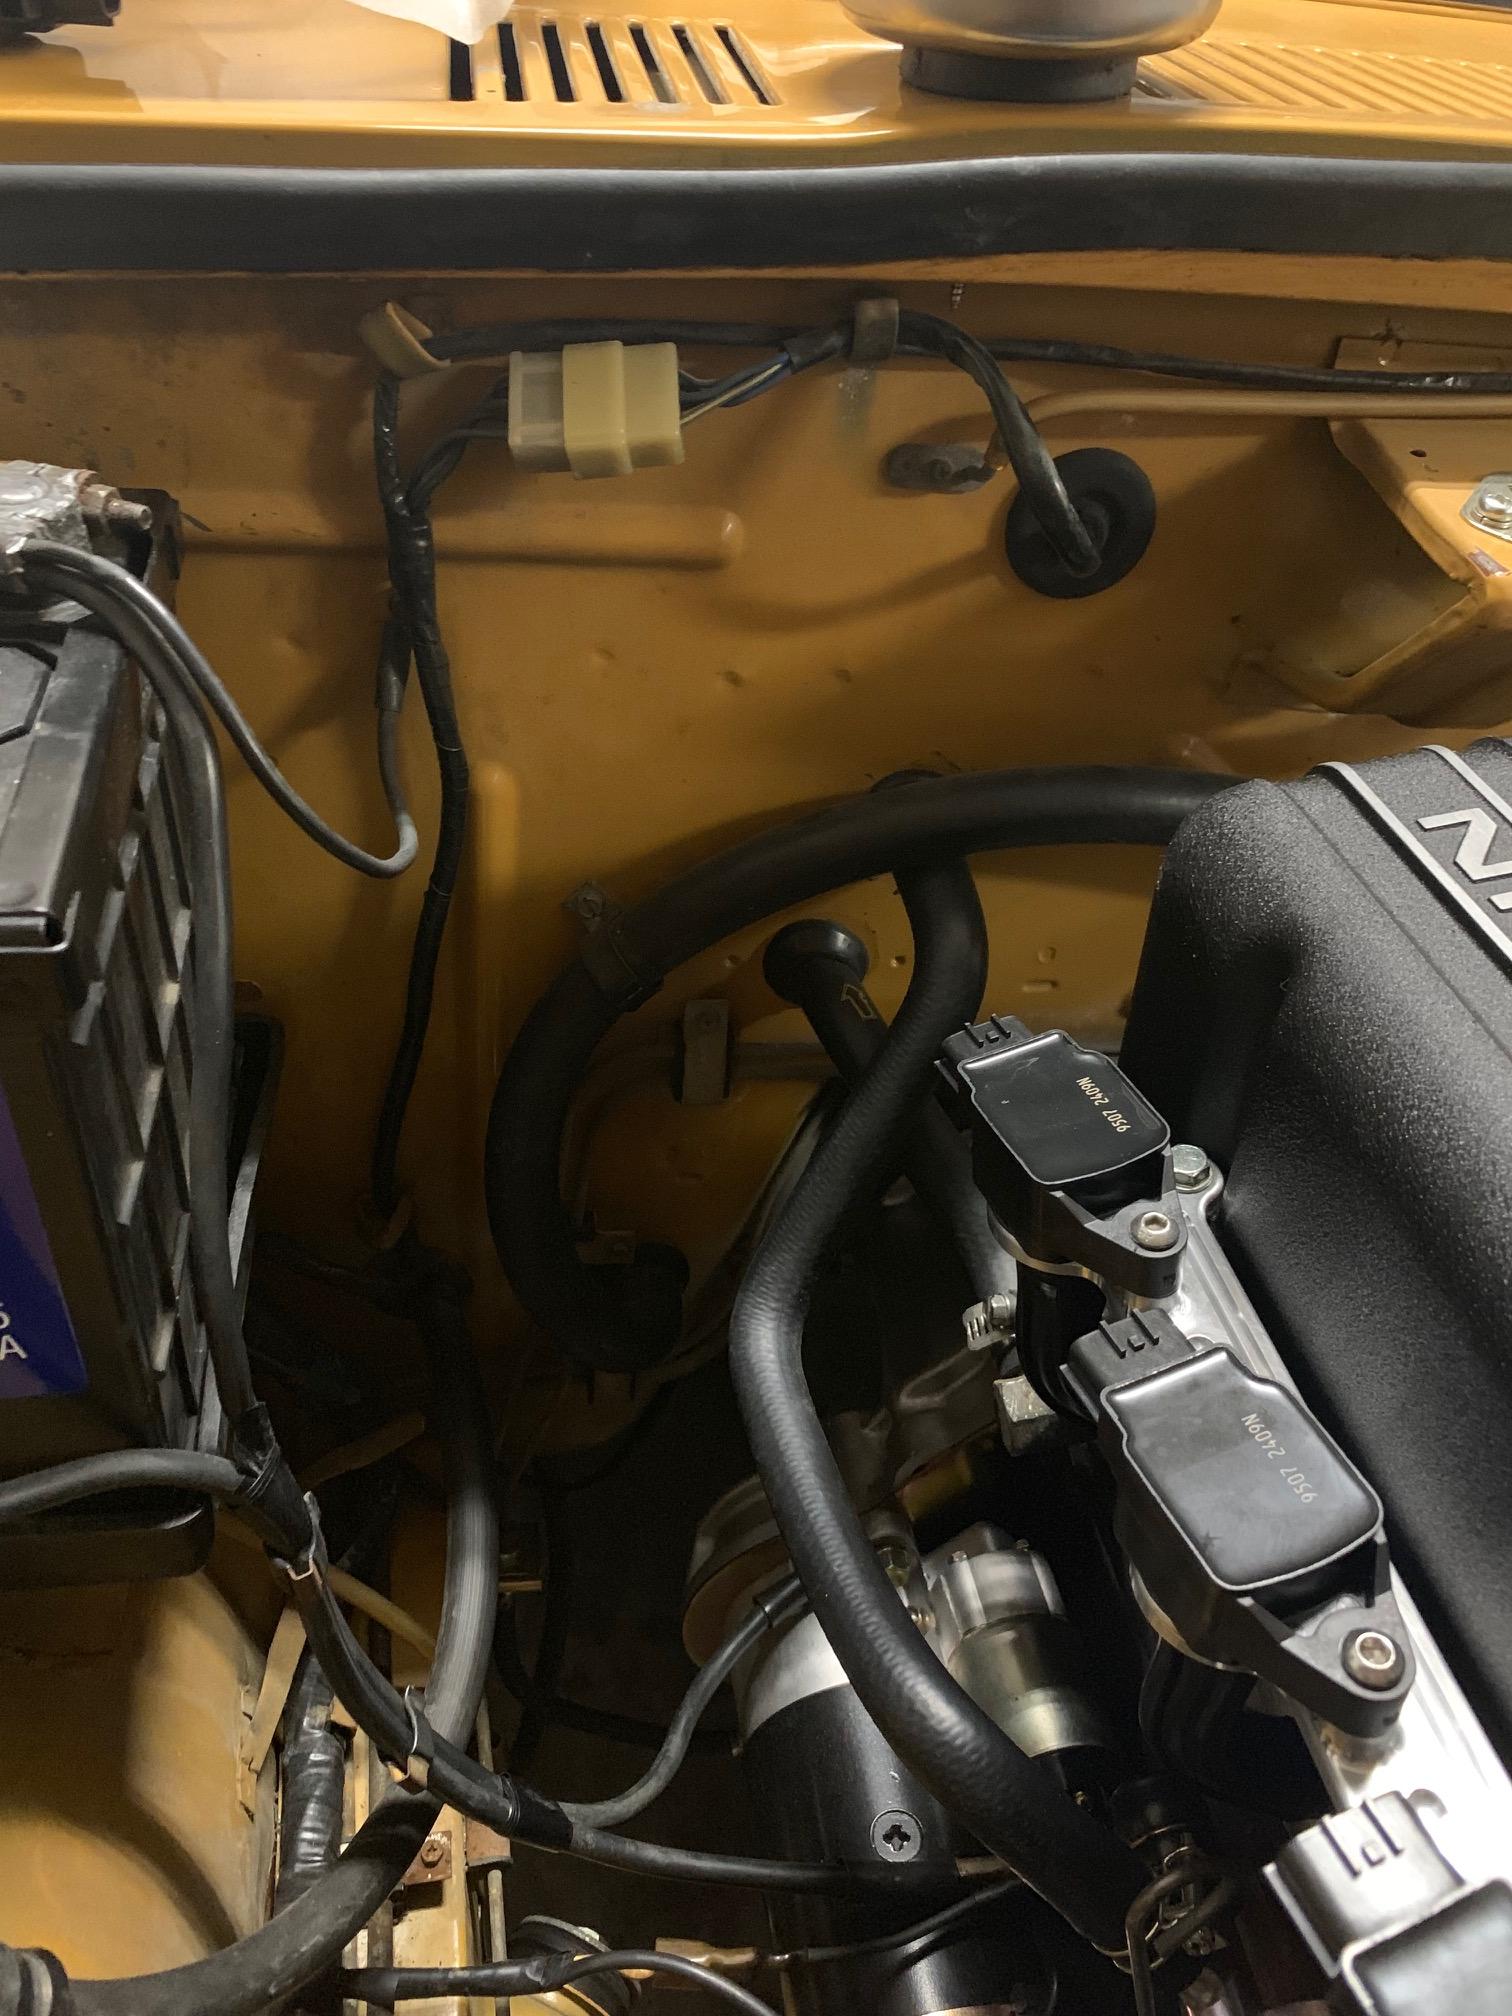
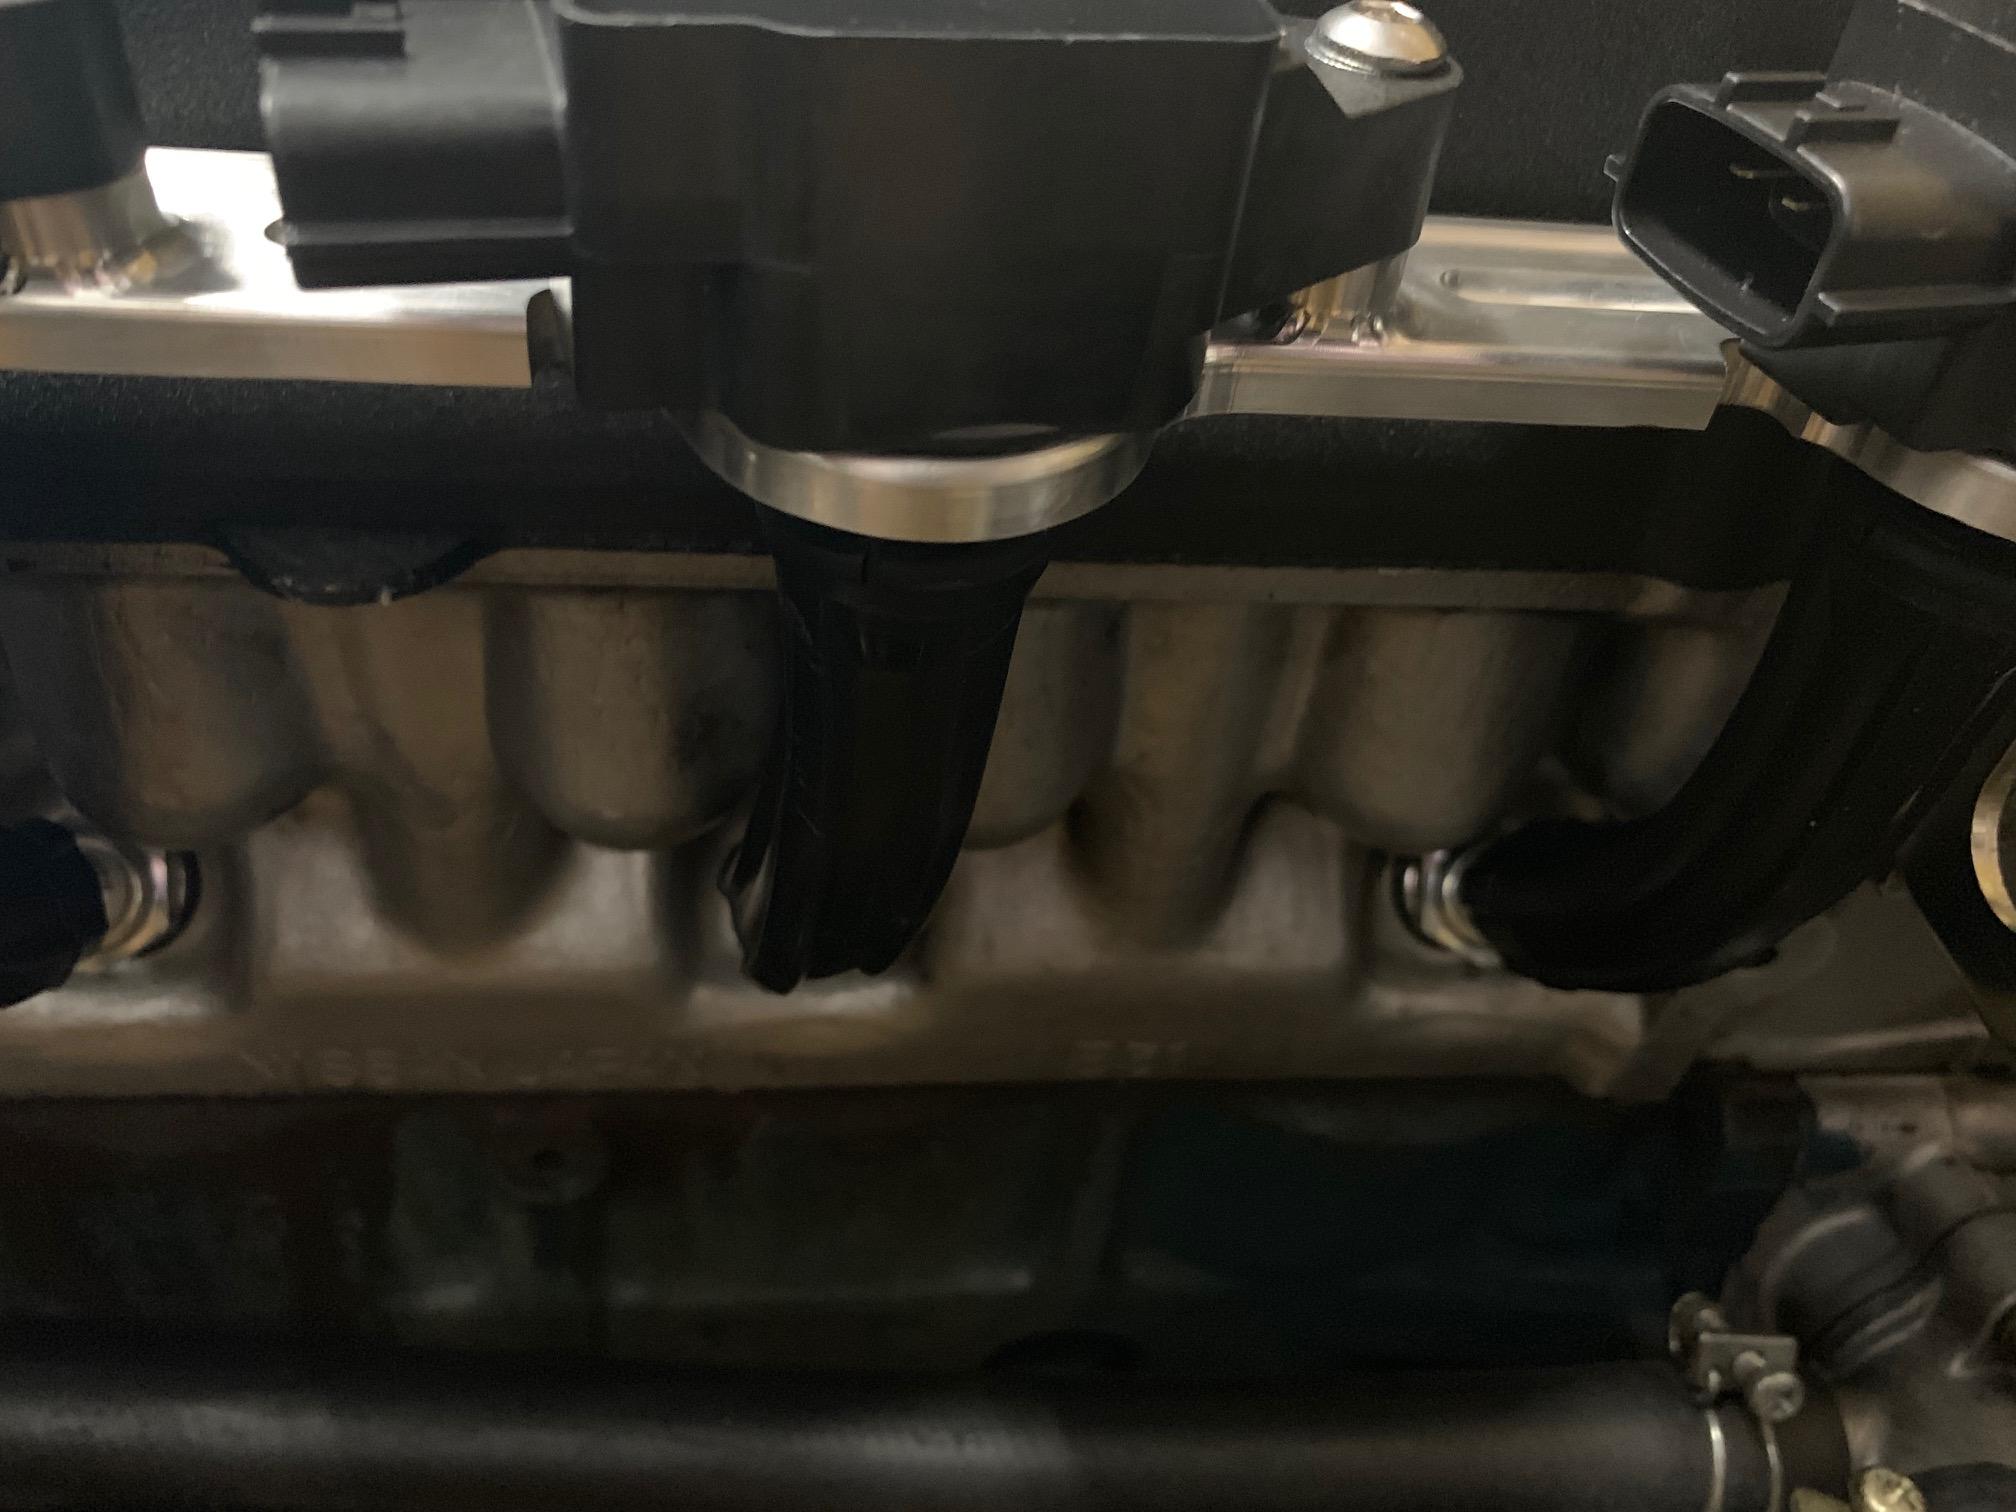
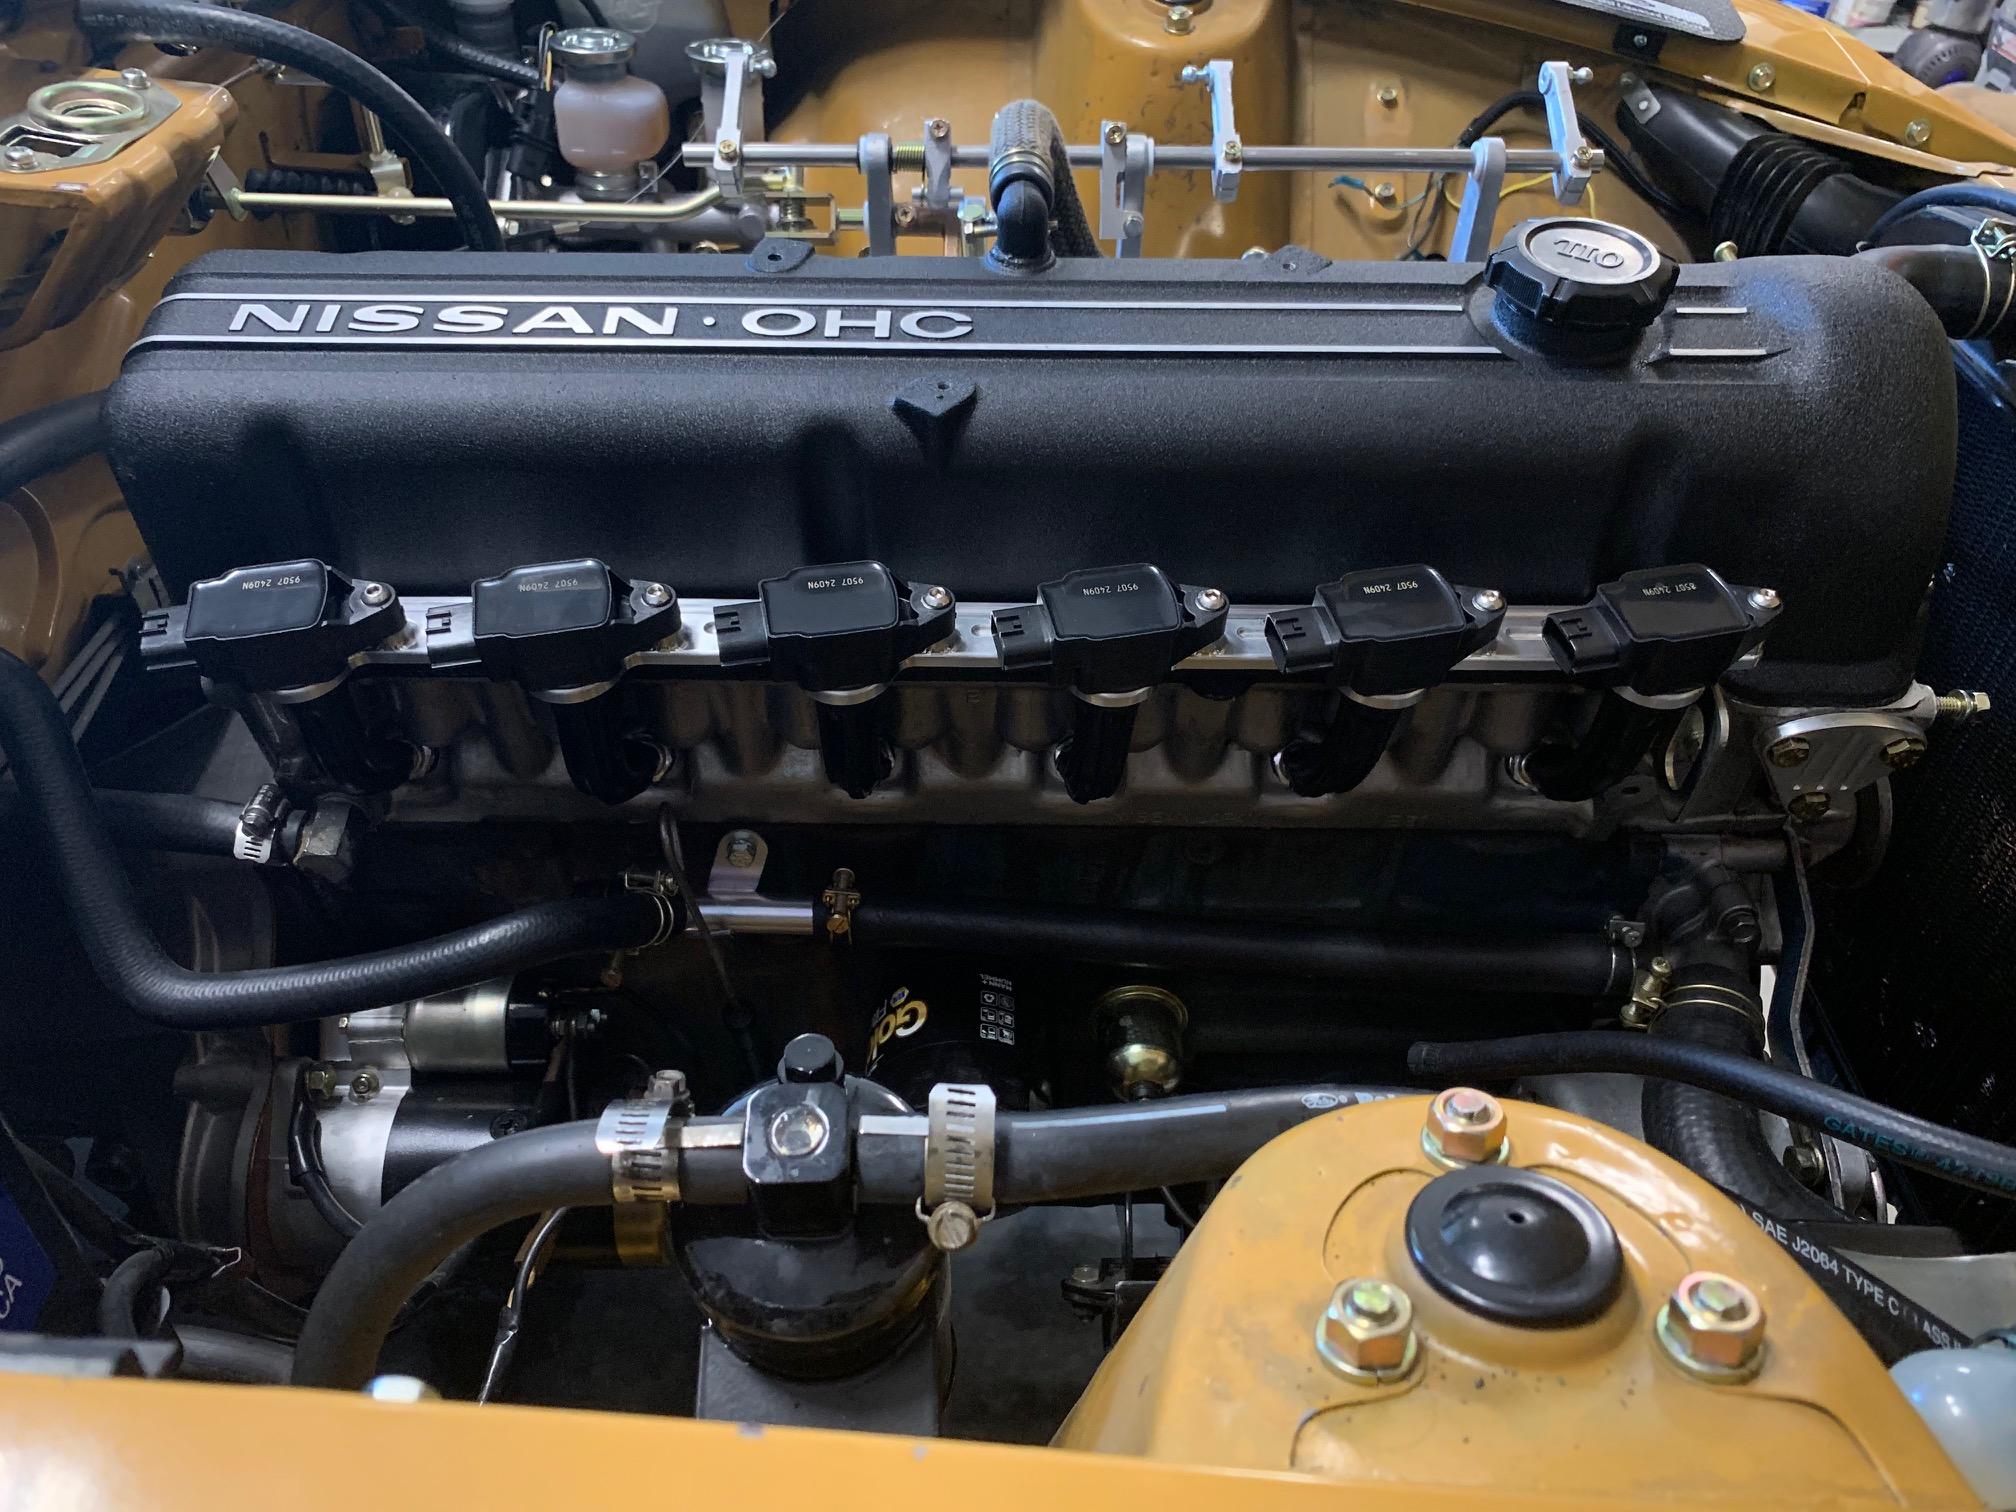
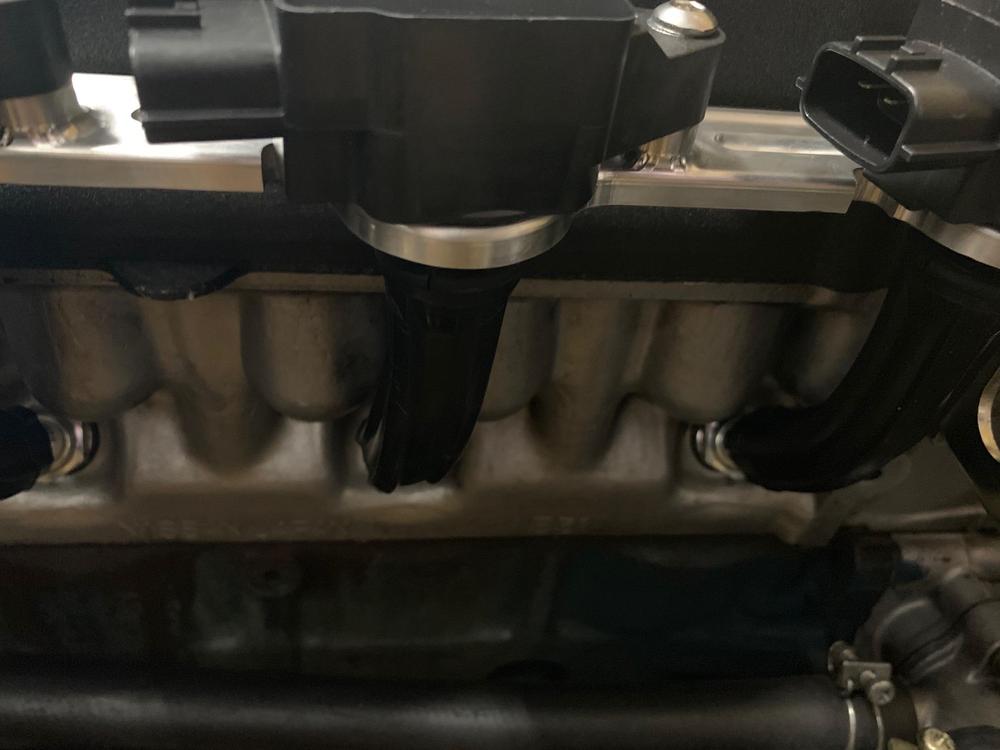
1 pointI got all my boots in, I wish there was an easy way to test the coils. But I know the spring is compressed on the spark plug, so I should be good. How has everyone run new ecu wiring into the engine bay? My early 240z has dealer AC. Which complicates things. Really I only have two holes open. The choke cable hole and the tunnel hole near the shifter. I would rather not cut any holes. If I leave the coil power wiring in the engine bay and do the o2 sensor and maybe the triggers for the coils through tunnel hole I am thinking I might have enough room for it with those two holes? It’s going to be tight, but I think I can do it all clean and nice. I will be using german braied loom for the whole project. No pulsed outputs. Plans Choke hole Injector wiring Cas wiring Air temp Coolant temp TPS Crank trigger wiring Tunnel hole Injector triggers Power and ground O2 sensor Fuel pump wiring is already in place. I also got in the euro kit from Hoke for my crank trigger. Which should work better on my series 1 dampener. I have to remove .08 from the backside to have it perfect. Then off to paint. Blue or black?!


 1 point
 -
1 pointPenetrating oil. Soak it down. Make a flat spot on the end of the stud and center punch it. Drill a small, 1/8" or so hole all the way through it.On second thought if this bolt goes down into the water jacket, don't drill all the way through. If the bolt hole has a bottom, drill all the way through it and fill with penetrating oil. Then use an "easy out" to remove the bolt. Make a bigger hole for the easy out. The really small easy outs can break and they are very hard to remove if you break them.1 point
-
1 point
-
1 point