


Leaderboard
-

Dave WM
Free Member2Points3,591Posts -
grannyknot
Free Member2Points5,158Posts -
HS30-H
Free Member2Points5,509Posts -
That Ozzy Guy
Free Member1Points893Posts


Popular Content
Showing content with the highest reputation on 11/15/2016 in all areas
-
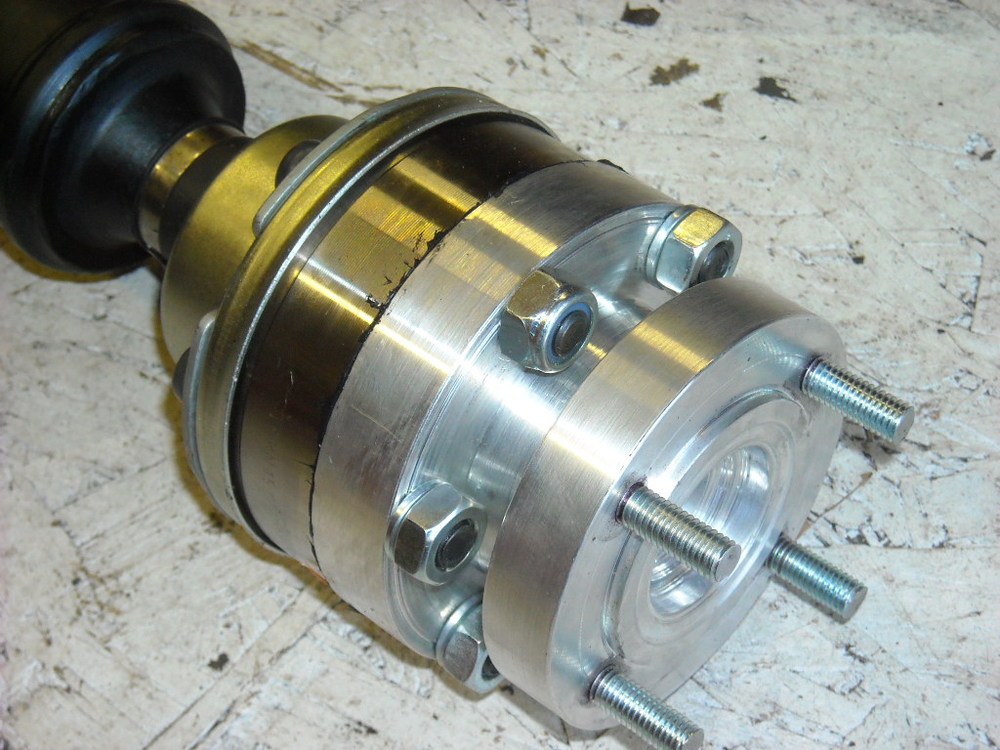
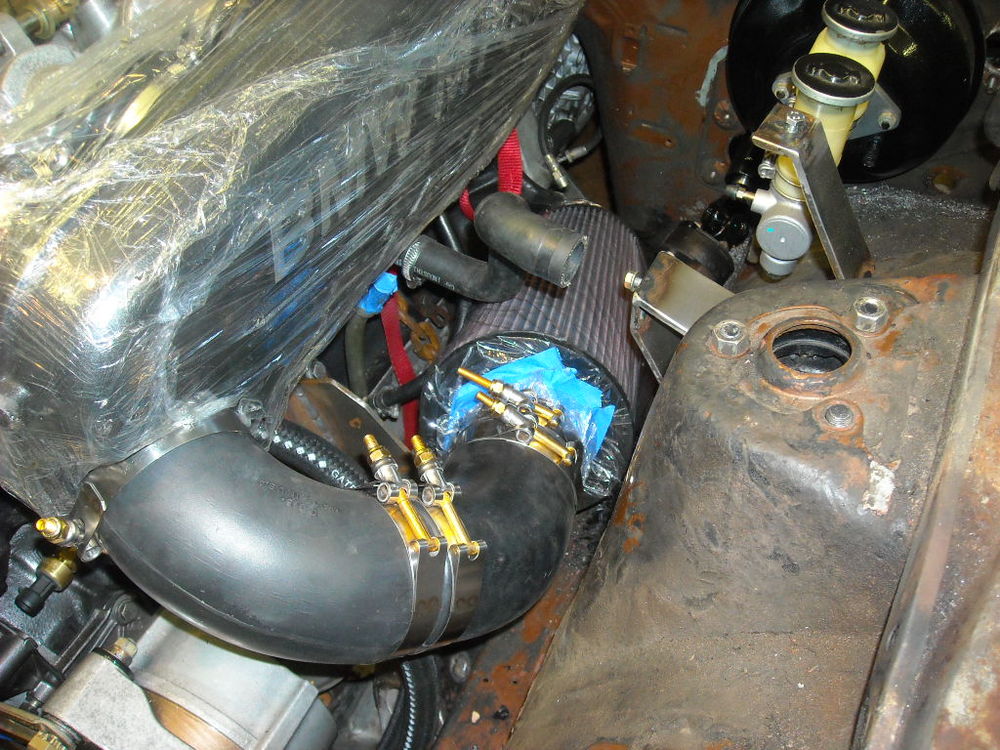
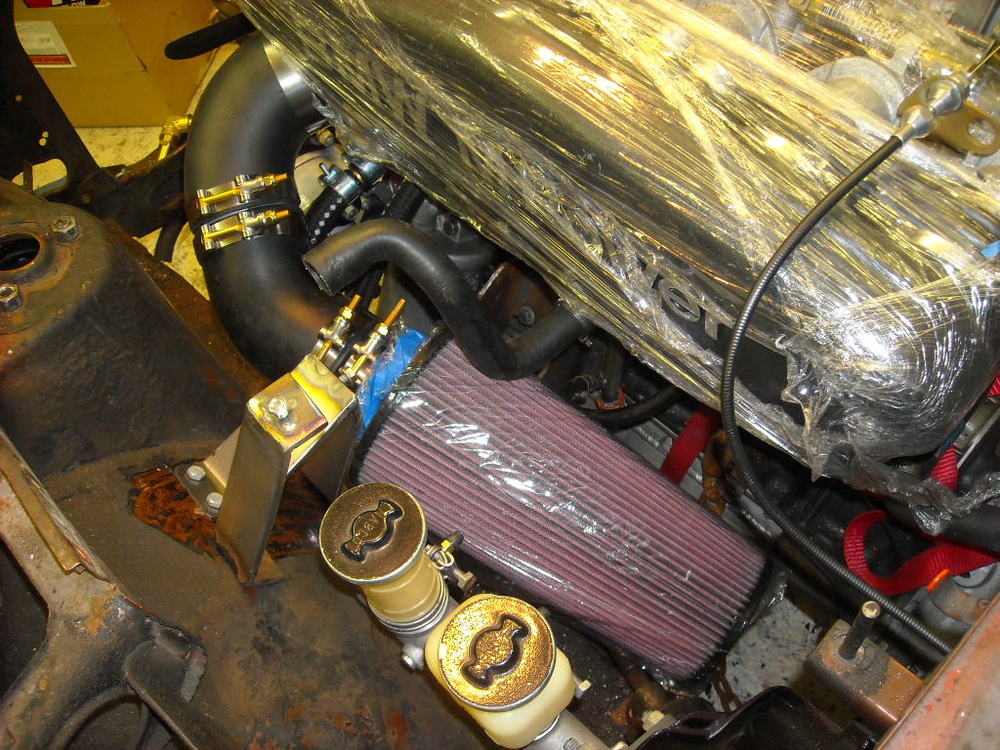
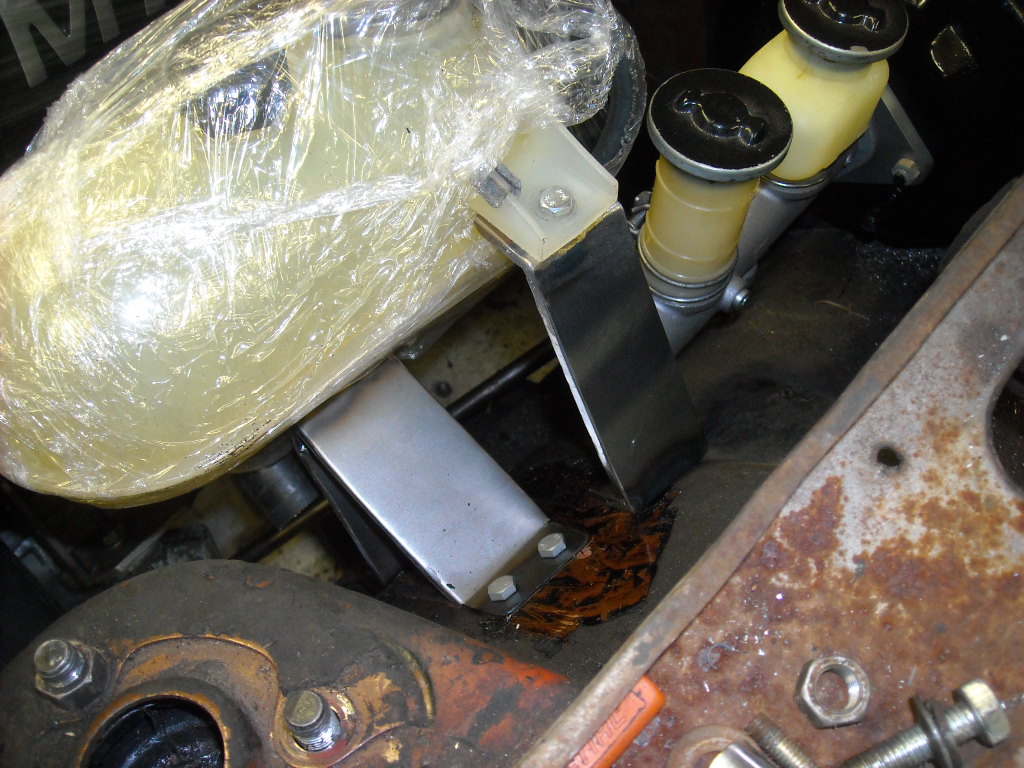
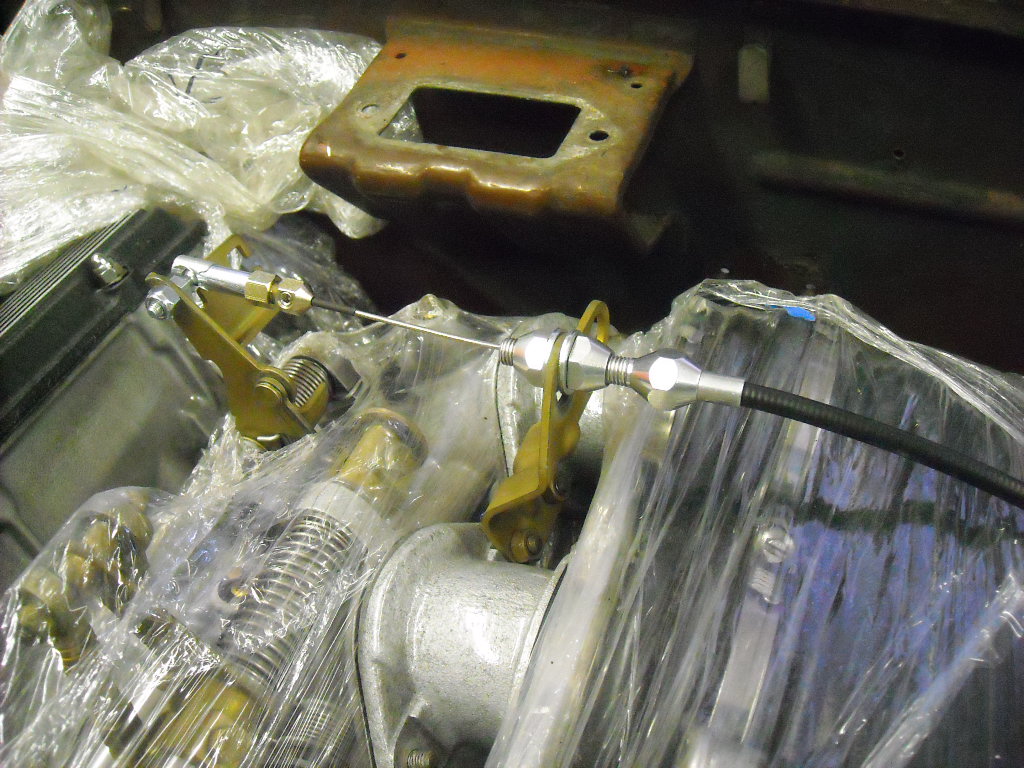
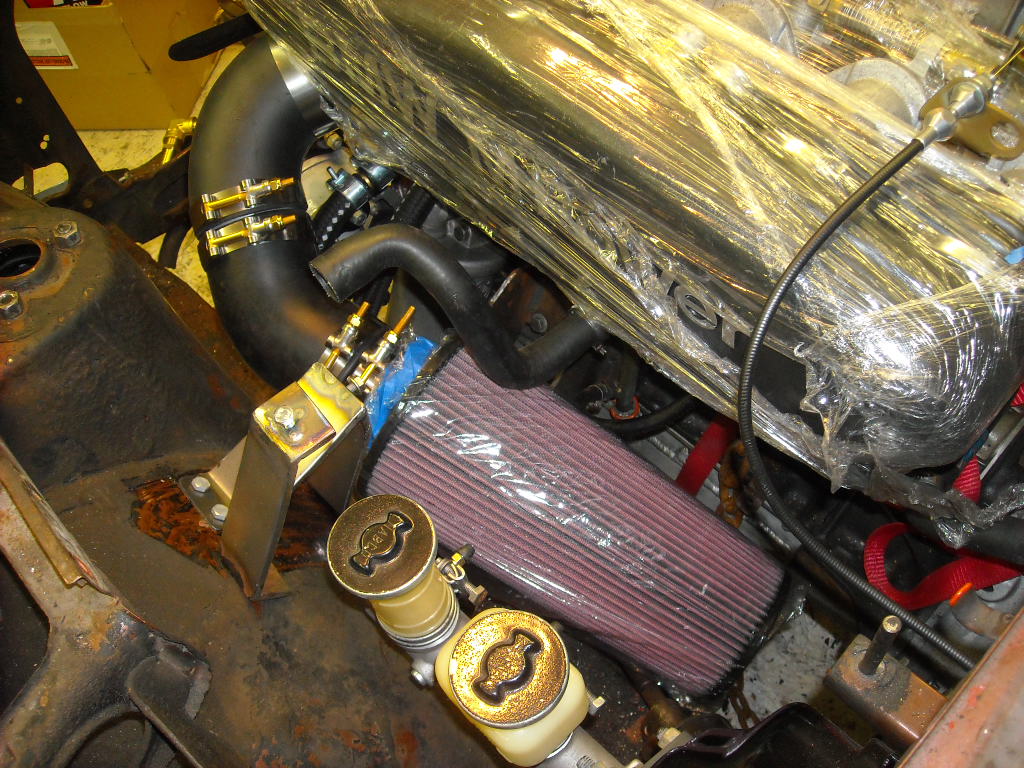
Nope. Raff, I think you have been working on purely original so long now you might be succumbing to Stockholm Syndrome Well I have finally finish installing the drive line, engine mounts, transmission mount, drive shaft and diff are all in and I think, are perfectly a lined. As best as I can measure it I think I'm within half a degree in both axis. So hopefully the drive line will be vibration free Also got the oil cooler plumbed in, the accelerator linkage installed and air filter sorta finished. As much as I hate K&N filters I bought one anyway, after spending lots of money and time trying build or adapt a paper filter airbox that just didn't work. The K&N filter will get me on the road until I can figure something else out.


 2 points
 -
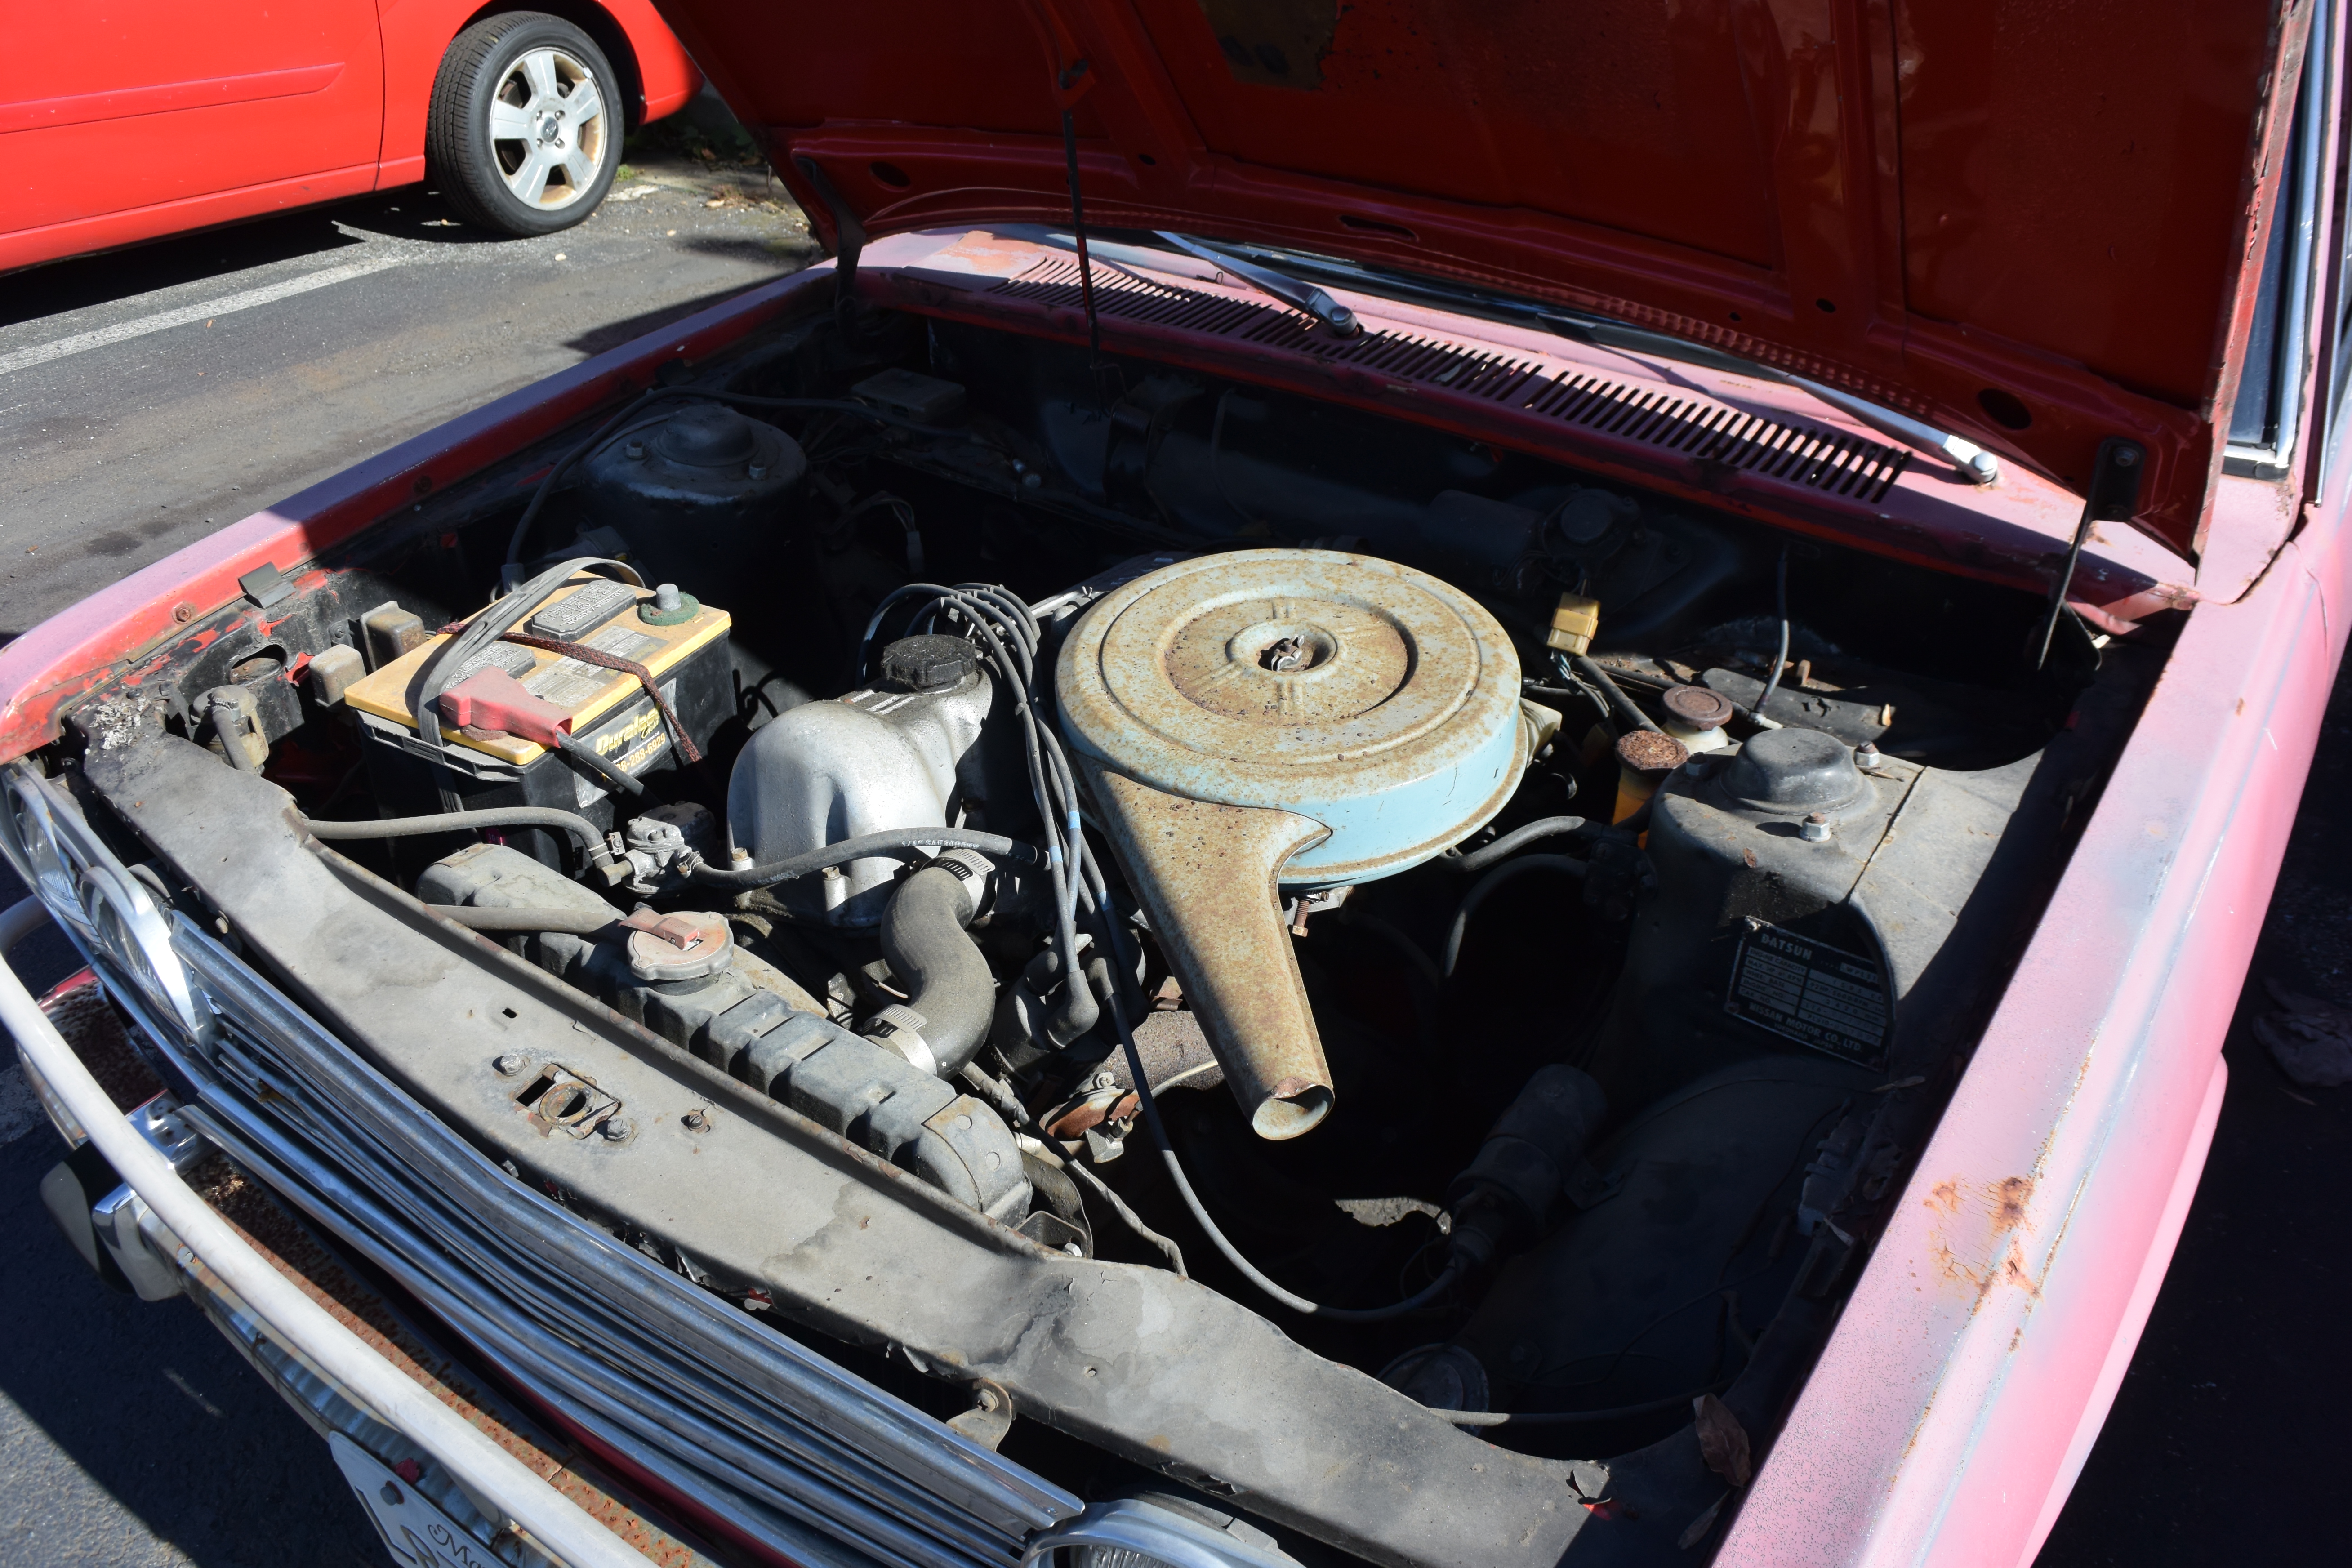
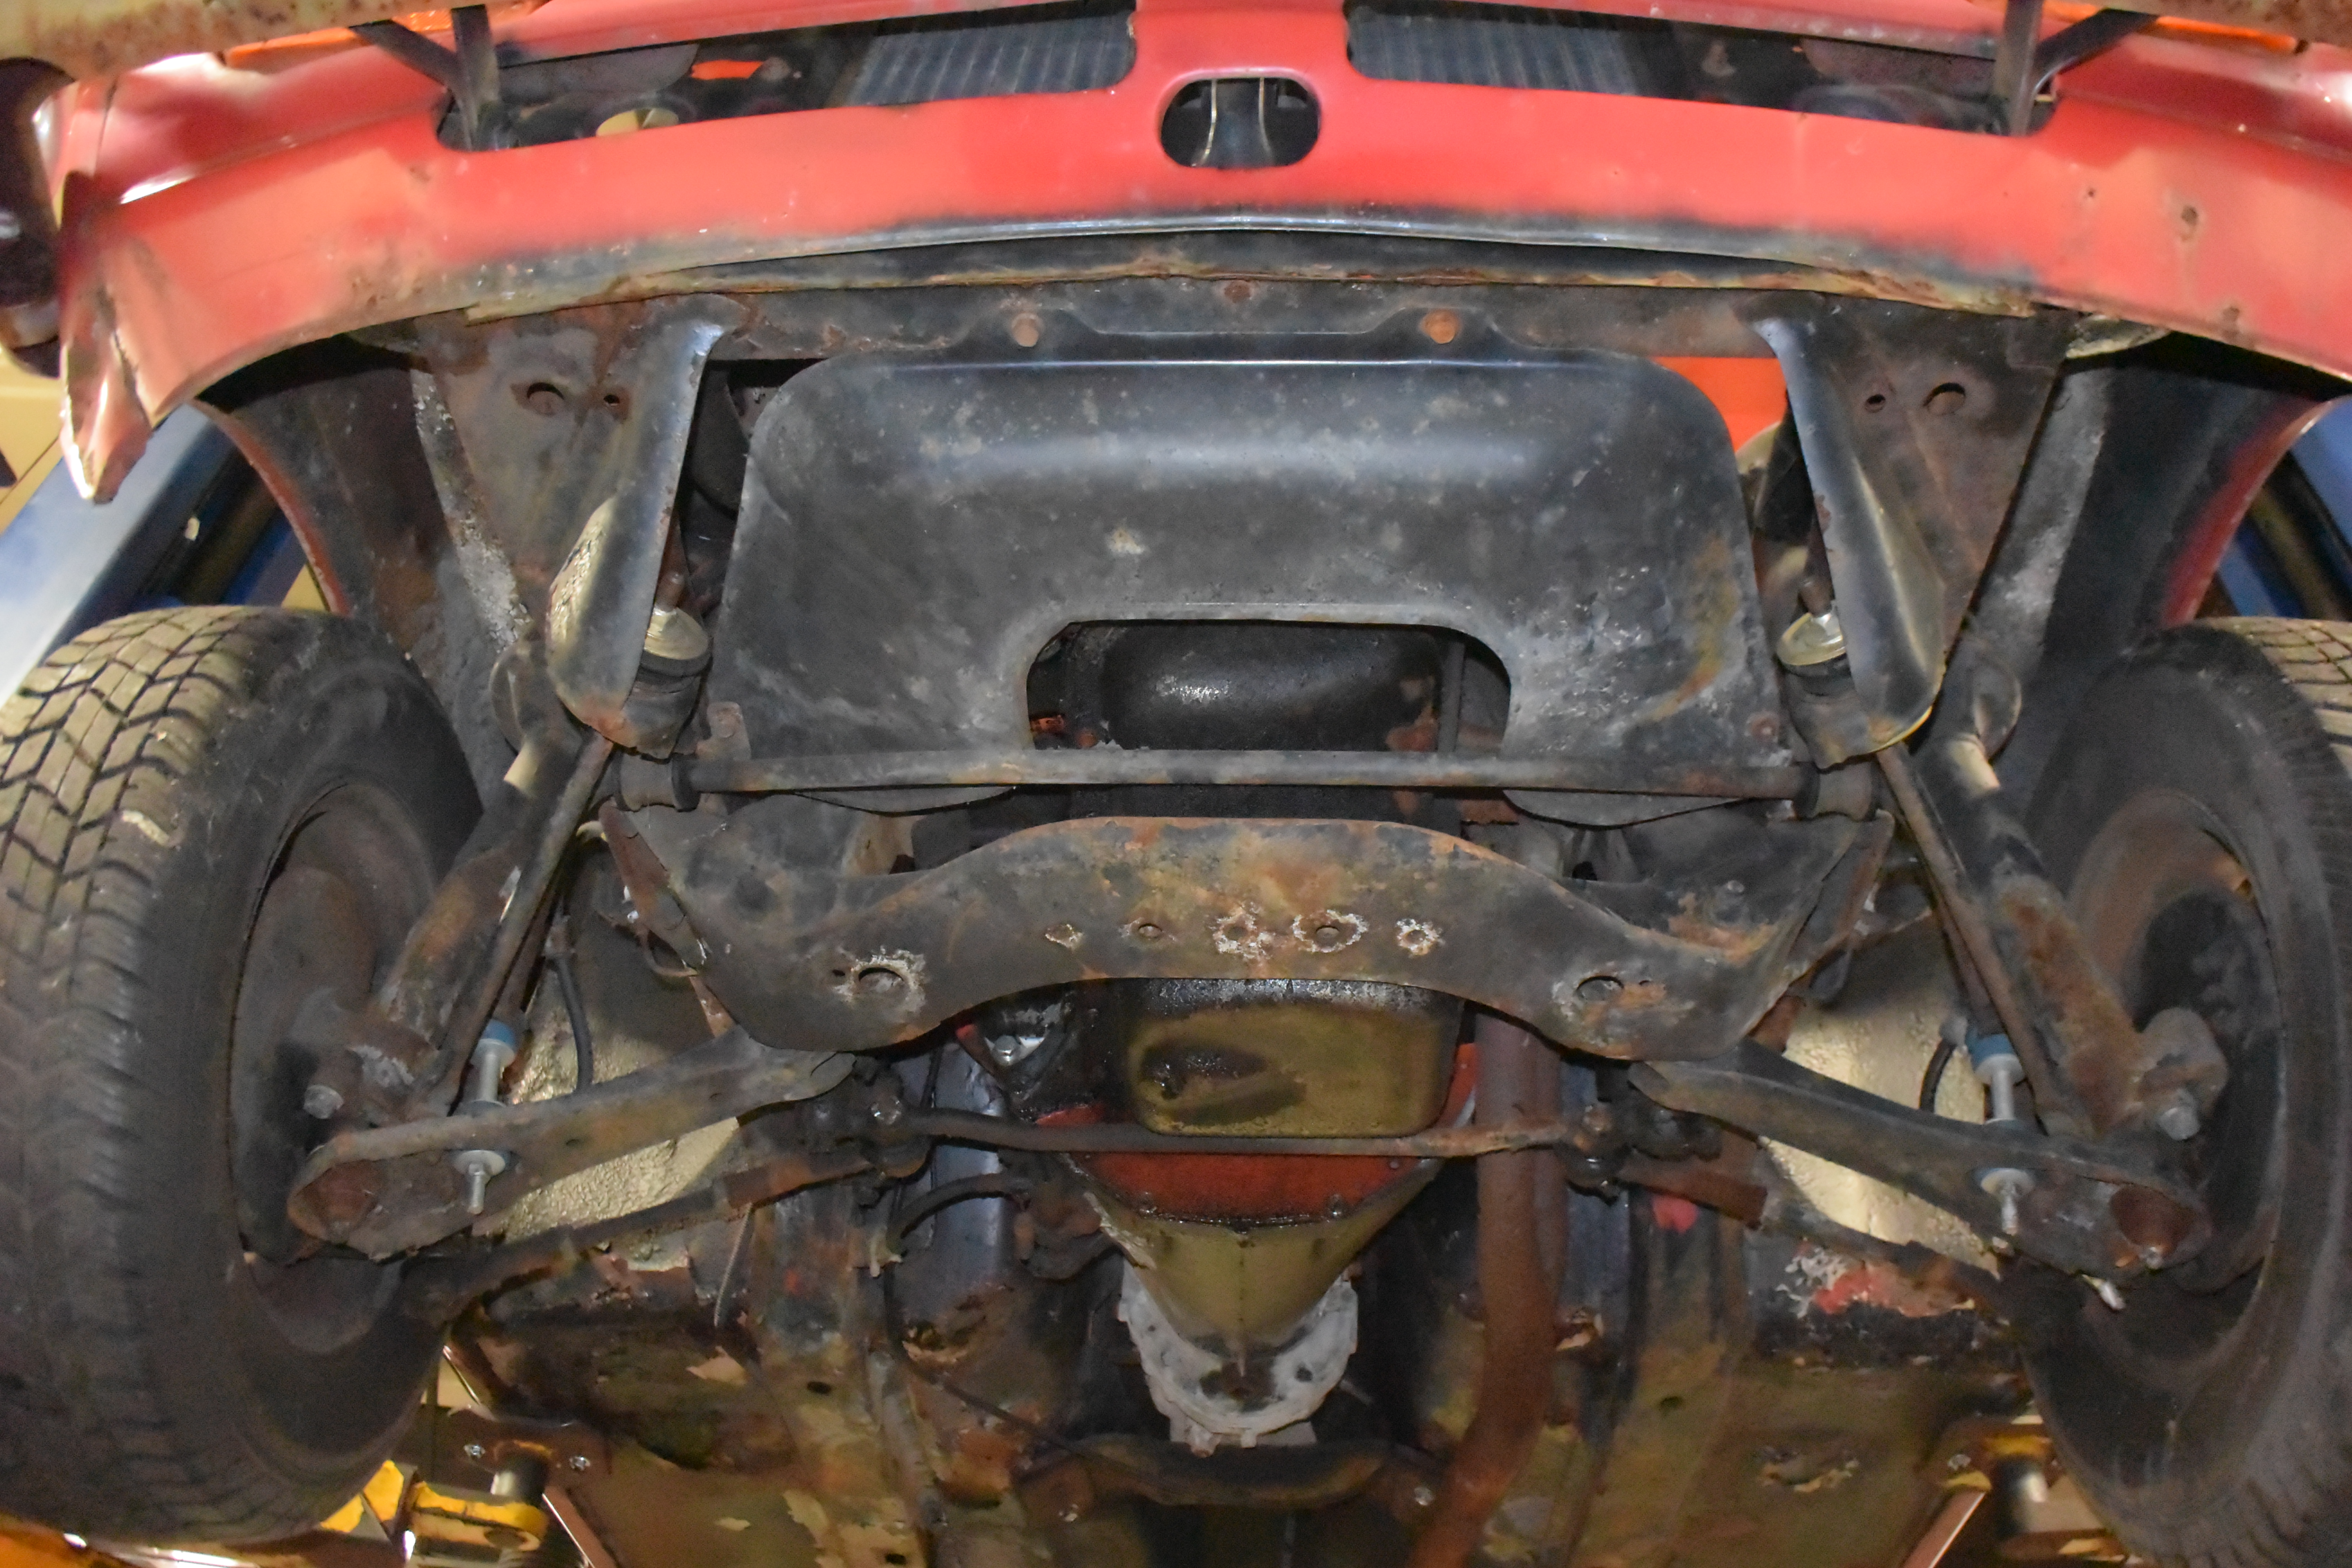
1 pointthe to do list, no particular order outer rear hatch weather seal find source of oil loss pan gasket rear main side seals I see no blue smoke or other evidence of internal leakage (no oil in rad, no water in engine)that being said I go thru about 1/2 quart in 400 miles. I have oil seepage at the rear of the engine around the pan and down the trans cover, Not a lot, so not sure if this accounts for the loss 5 speed from a 81 ZX TC bushings (not in great shape) front sway bar (also not that great) rack bushings (not sure about the condition) ball joints dust boots or new, prob 555's would like to clean and check the old if ok just boots check of drive shaft u joints, no sounds but scary to think of what could go wrong Clutch including pressure plate (same time as 5 sp swap) AC work (install NOS cond/compressor, drier of course) dye carpets (look good but for fading) passenger side seat bottom foam and covering, got new stuff may as well use it. rear wheel bearings check out and replace if needed. half shaft rebuild (no idea if needed). rad to shop for rod out, not sure about this. I like the idea of the OE style vs alum. pull ign module check heat sink grease and any small eletro caps if present IIRC there was one. install billet dove tails on door latch (on the way) head light relay, just a precaution. I don't intend to run high output lights just don't want to stress out the switch. Mustache bushing stoppers (have some nos, the old ones look beat up). fix the broken exhaust manifold bolt on rear of engine. replace cracked FI plug boots and any other rubber electrical connector boots. remove and have the FI's pro cleaned. that's all that I can think of off the top of my head. Nothing critical as the car drives great, just thinking of the maintenance (car had no repair history papers). the slight oil loss bothers me the most I have to remember to check it frequently while making long trips, and even though there is some seepage is just does not seem to be enough to account for the loss. My long range plan is to buy a hoist and engine stand and pull the engine. Detail up the bay and address any engine related issues. my pressure test is about 150-155 across all cylinders, I put in a few drops of oil and it jumped to about 175. I read that a 15% increase is about normal when doing this so I assume the rings are not too bad. the car has indicated about 89k which I think is correct for the amount of wear on the pedals (vs 189k), but that is just my guess. My last trip I got about 25 mpg mostly about 70mph no AC , the plugs look good so I think the FI's are prob ok but still would like to clean just so I can add to the maint history. what I have done Alt (external 60amp) hoses (all but heater inside cabin) vacuum lines (all) fuel lines (all but FI's and pressure reg short ones) filters (air/oils) tank pro cleaned fuel pump OE Nissan G-3 prefilter (no sock on tank pickup) brake booster front wheel bearing service (good just clean and lube) water pump replaced all the worm drive hose clamps used on FI system with correct style Plugs (after faulty ECU fouled the ones installed badly) thermotime (new higher temp 85f) temp sensor water temp sending unit water temp switch for egr PCV valve (Nissan oe) flame arrestor in valve cover vent battery cables with molded fittings valve lash adj OE radio and speaker install windshield leak fixed (sealer on gasket) windshield washer pump new OE style and hoses. Driver side seat bottom foam and cover I am sure there are other things but that's about it for now.1 point
-
You make a good point about getting the 'curl' of the wire correct for each of the four functions. I can see why you've ended up with stiff action. Go back and take a look at the 'floor' photo of my finished levers-and-cables assembly. I curled the new wires so that they matched the shape of originals as they came out of the car (notice that one of the wires actually has a double curvature). To put a curl in the (tempered) wire, clamp a piece of 1"-dia pipe or dowel vertically in your bench vise and then pull the wire back and forth across the round surface with a bit of 'pull'. You'll need to grip each end of the wire with vise-grips so that it doesn't twist in your hands as you're doing the forming. It doesn't take much, so be careful not to over do it (takes a bit of practice --- but you've now got lots of wire to play around with!). Put the curl in the wire first. When you're happy with that, you can now form the 'step' at the end that goes into the control lever hole (as you point out, this requires paying attention to the alignment). As the final step, cut the wire to approx. length at the other (straight) end. Cut it a bit long, just in case. Same goes for your sheathing.1 point
-
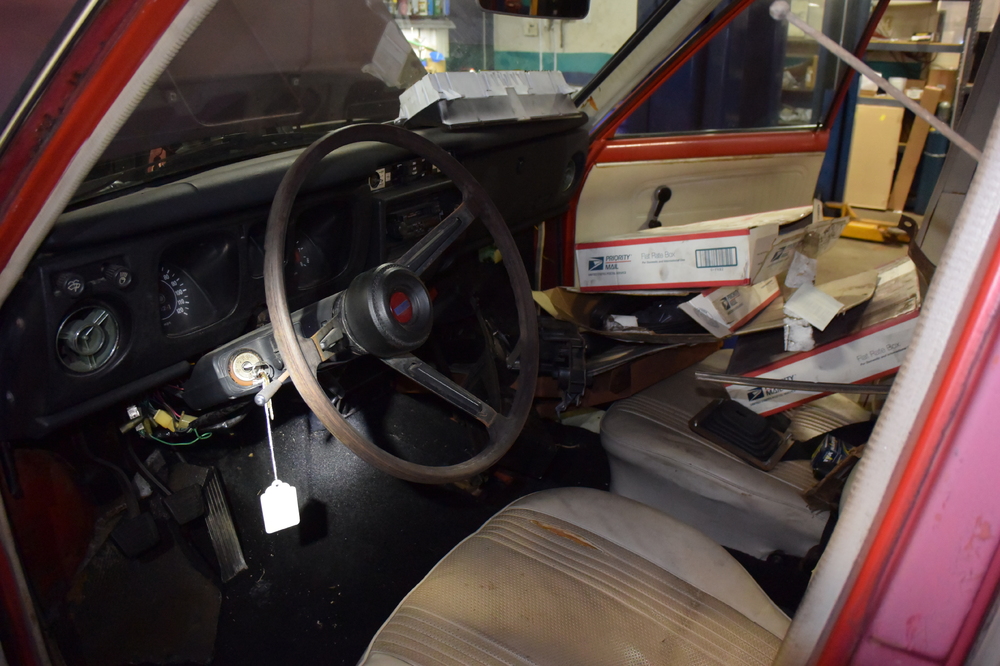
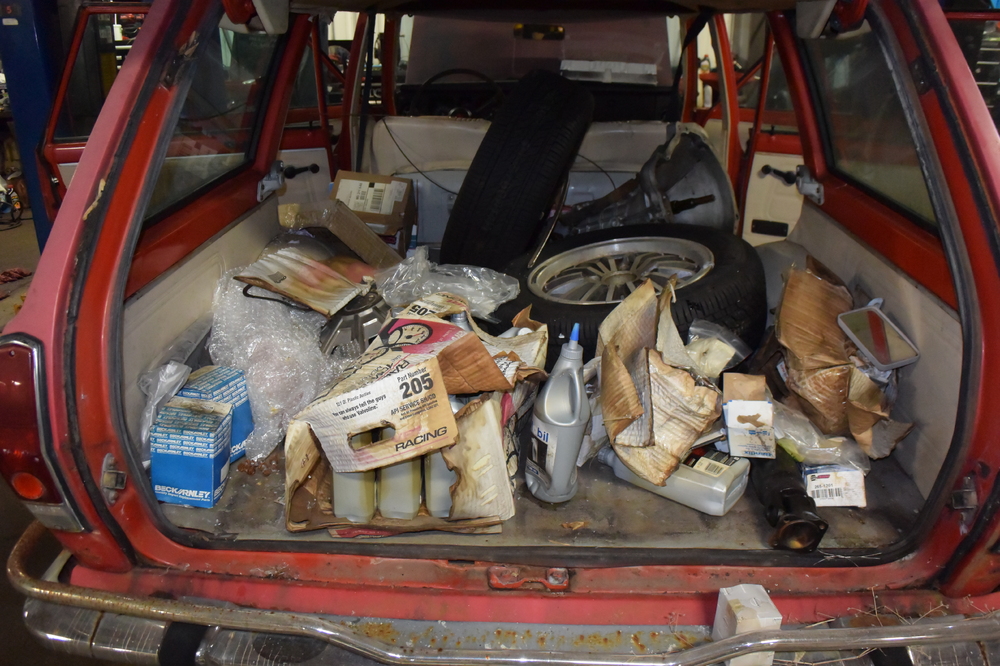
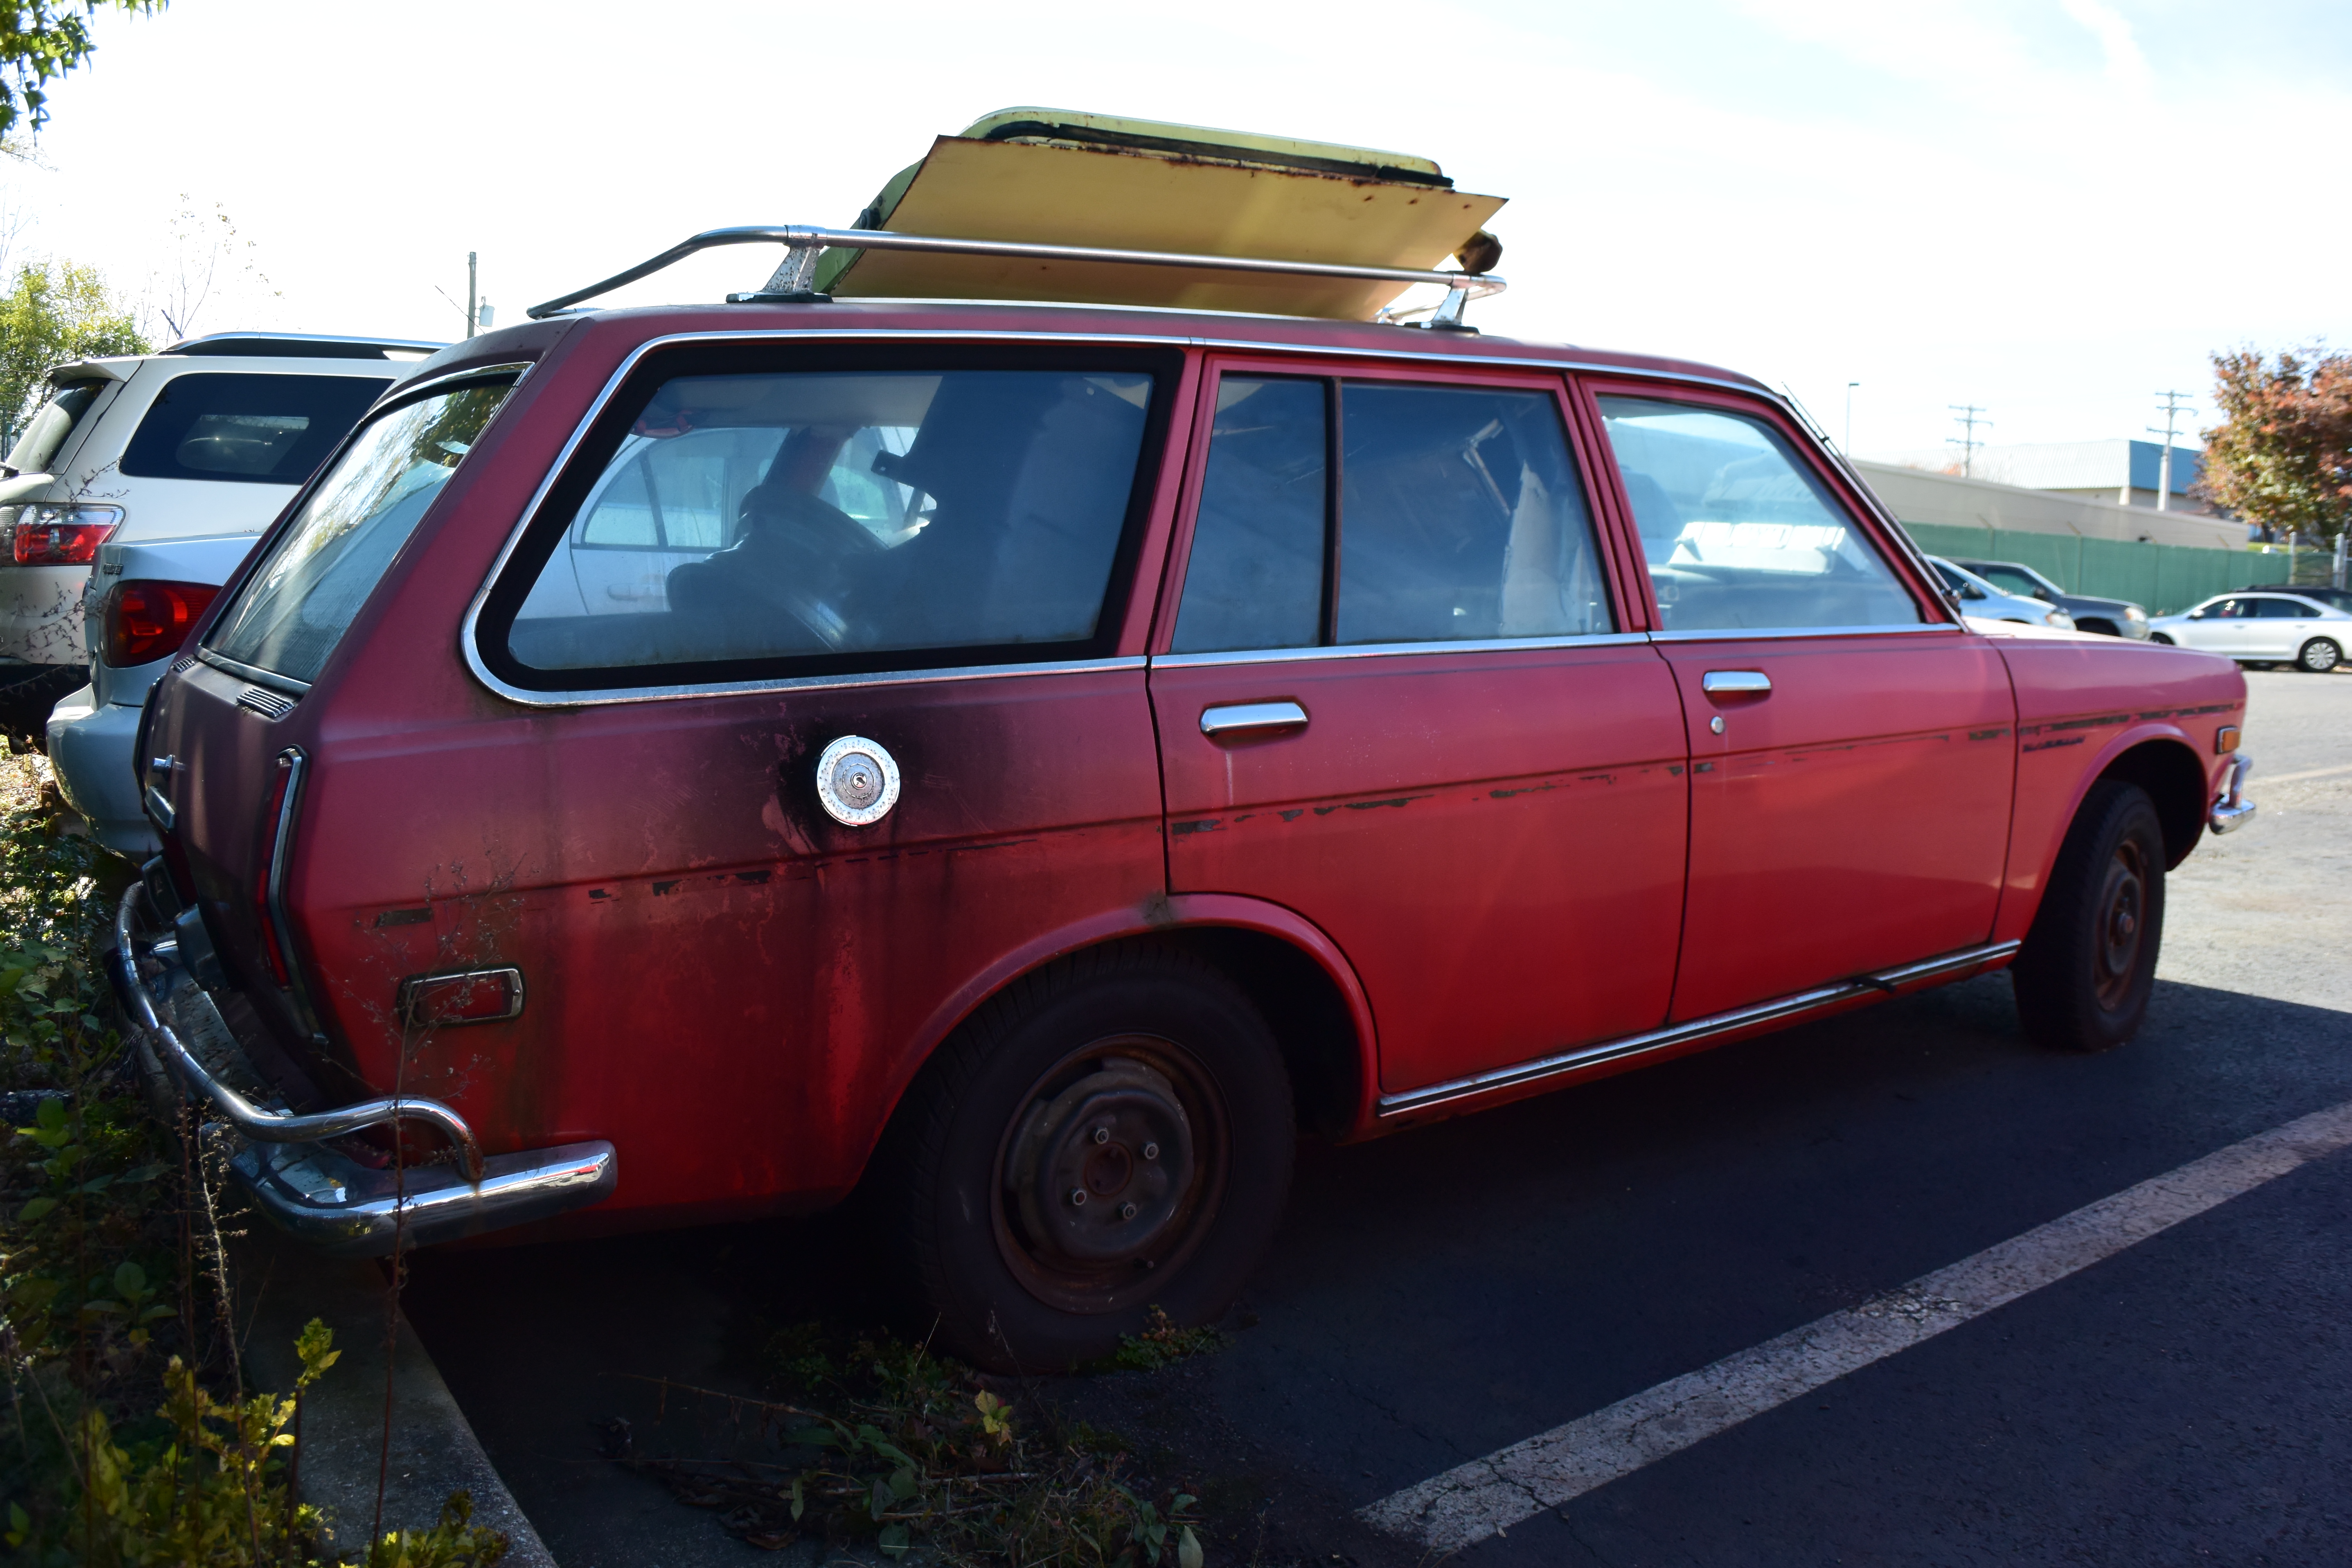
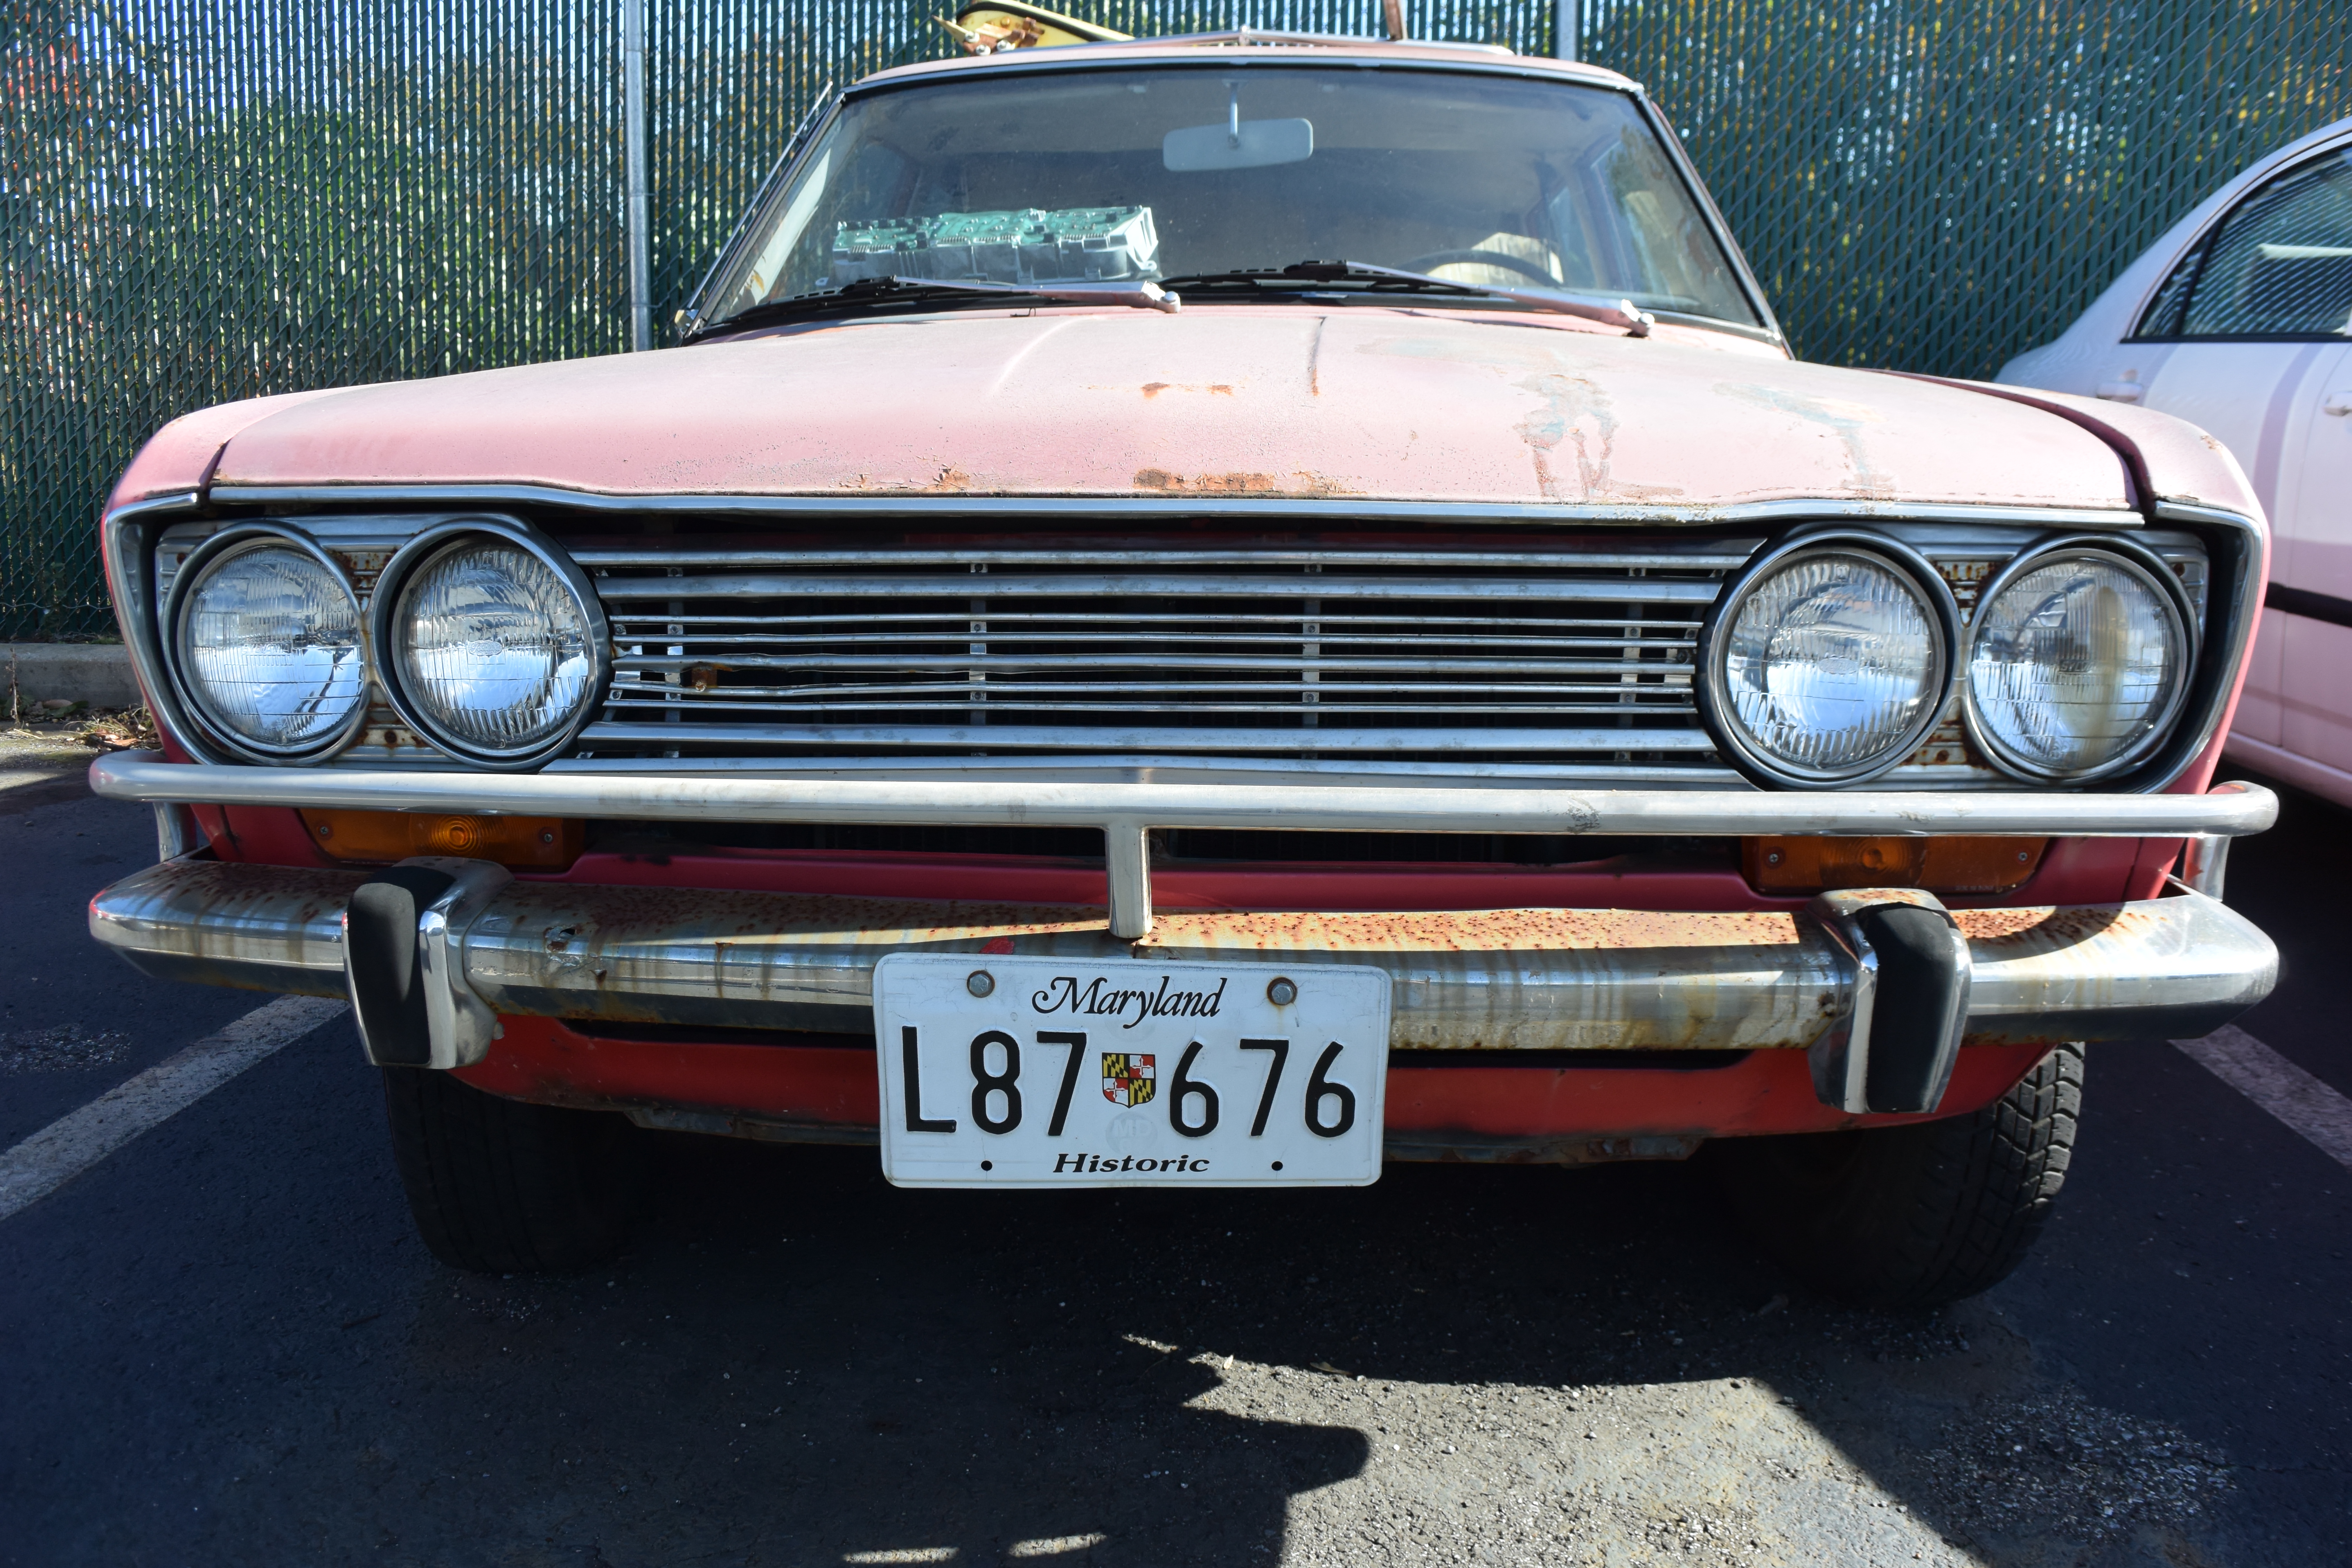
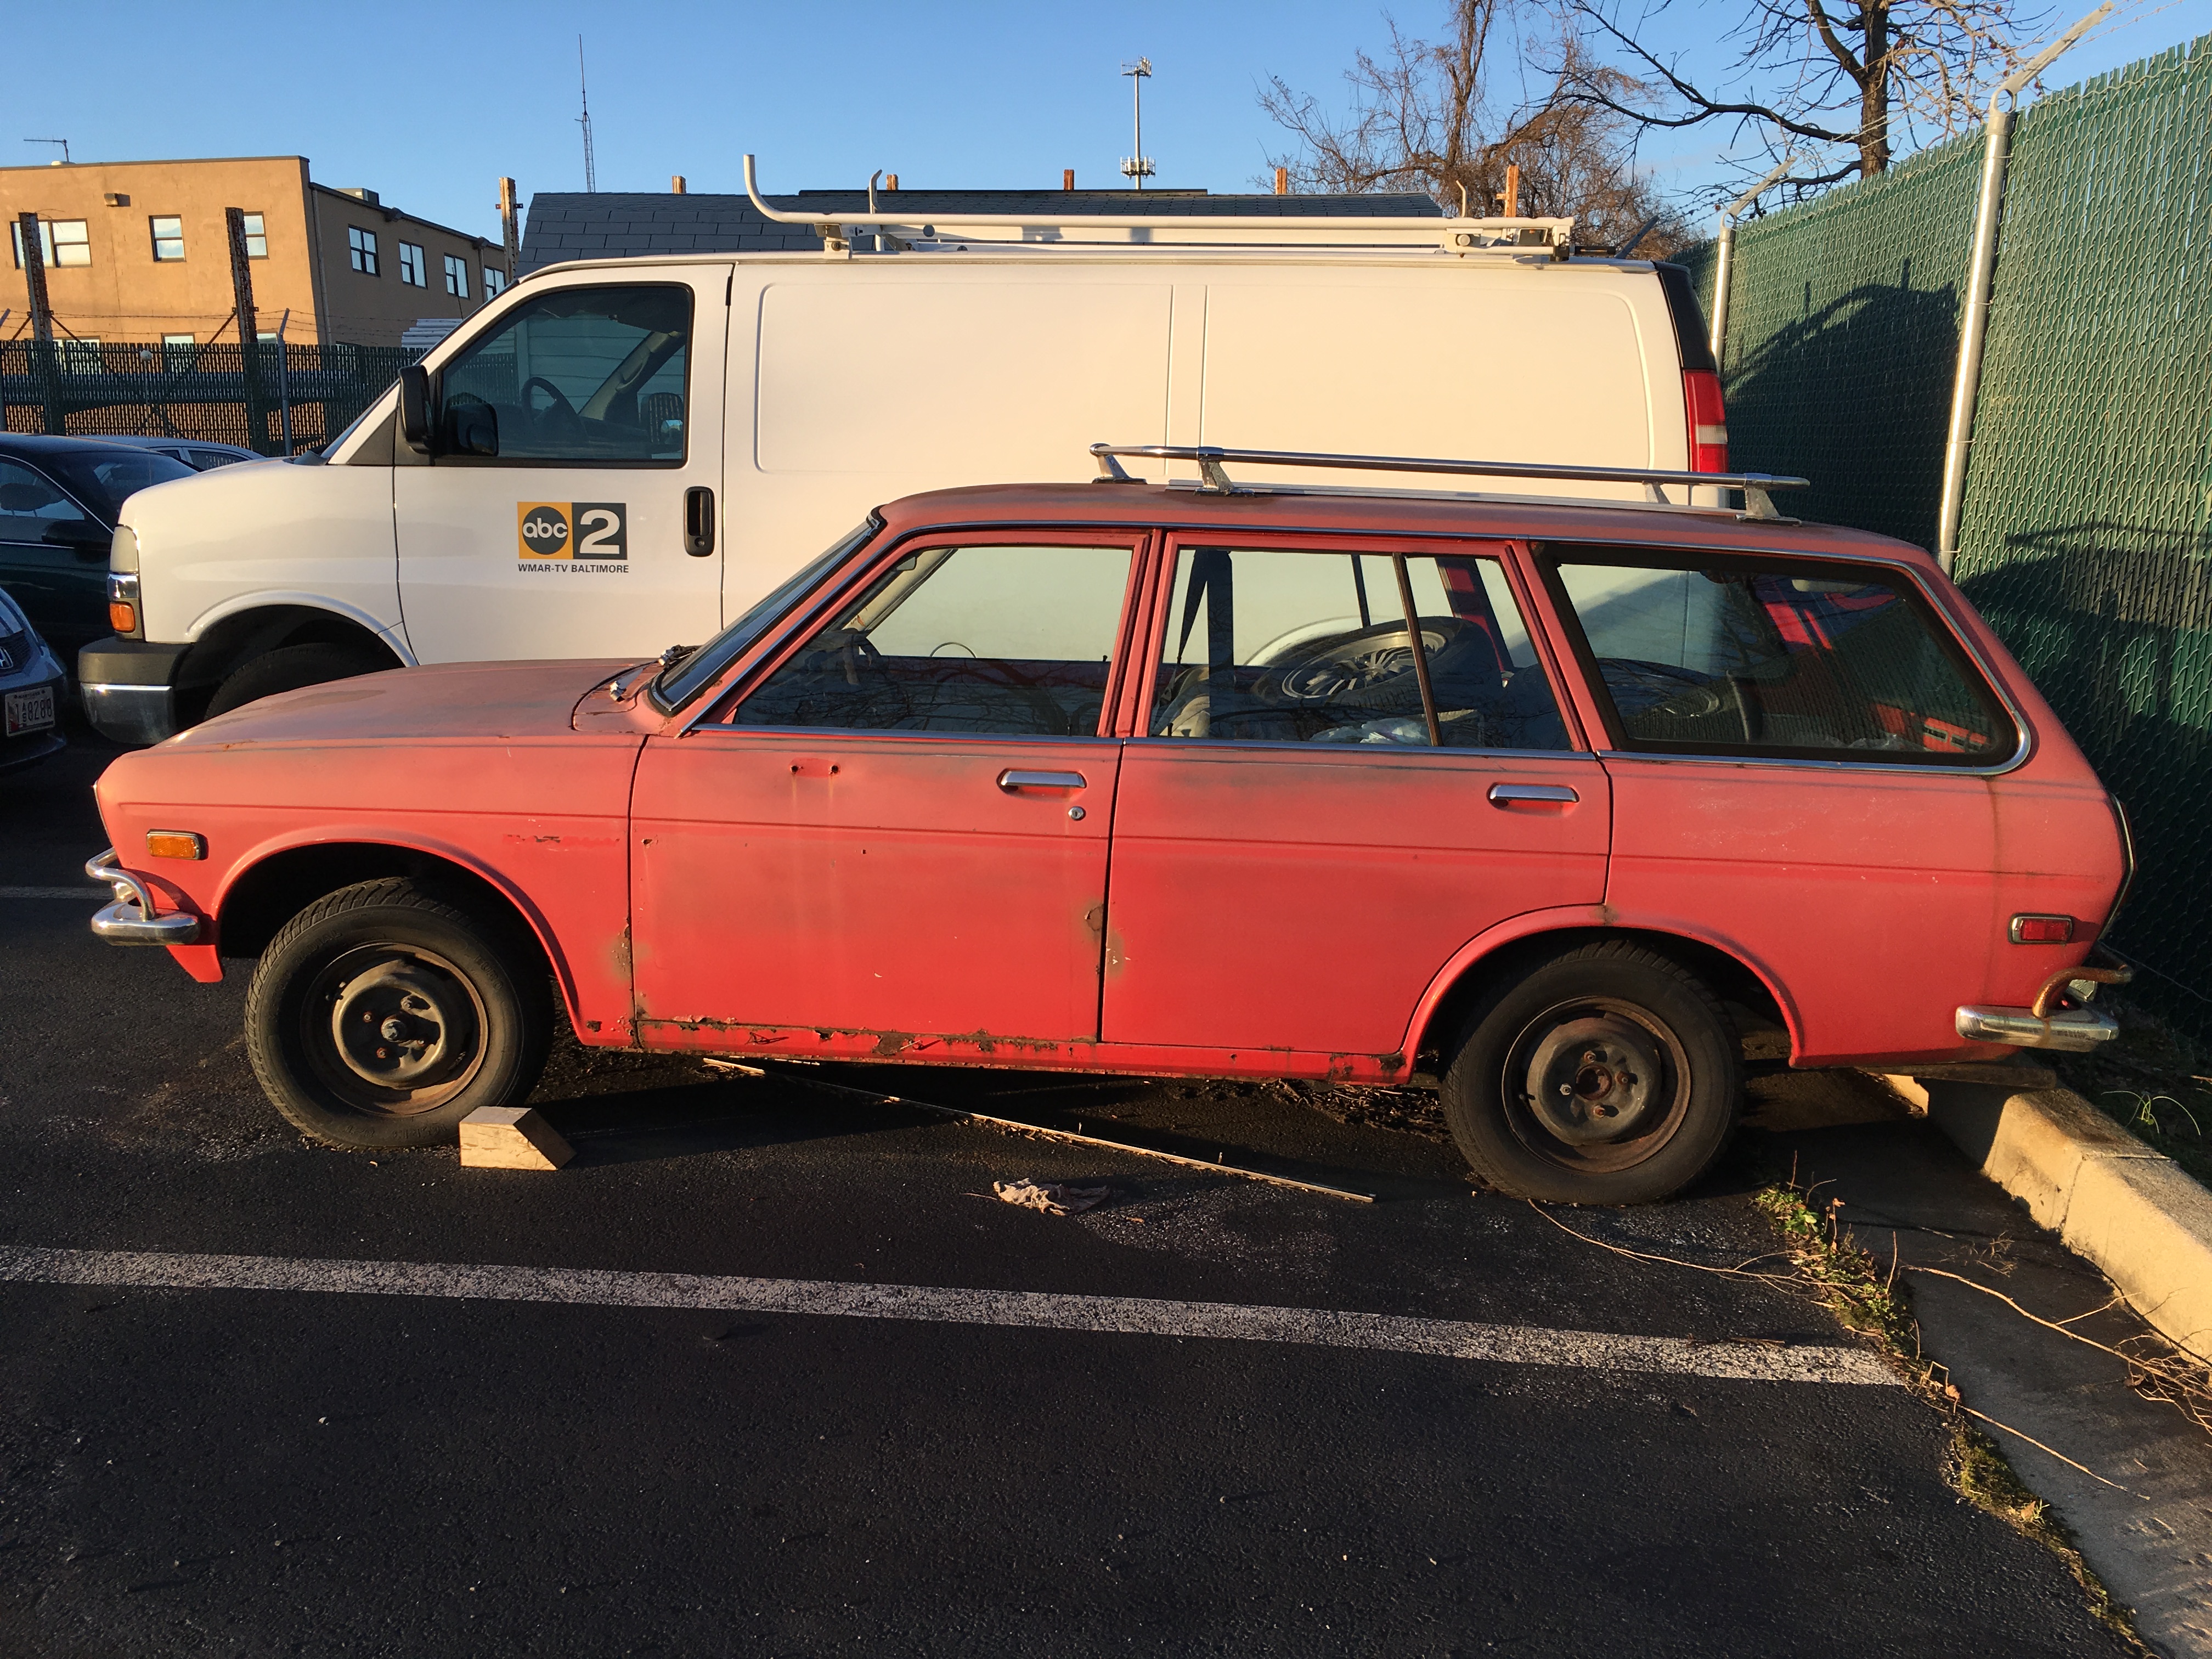
1 pointI saw it CL and the price was right so we got it. I had a 1971 510 wagon that I traded away a couple years ago for a 1971 Fairlady Z. This one is red and has a 5-speed. The original 4-speed came with it. The car runs but IDK if it drives. It came with new weatherstripping and a bunch of other new and used parts. The car is pretty solid overall but I'll probably put it on the rotisserie and make sure that all the rust is properly repaired. The yellow thing in the roof is a spare LF door. Chuck


 1 point
 -
1 pointyeah, things just didn't line up this year with my work and My car was down for 1/2 of the summer for various reasons. Hopefully, I have it sorted out. Next year!1 point
-
1 pointAnother option is to fabricate a rear spoiler out of sheet metal.
 1 point
 -
1 pointI got a response via email from Mike at Whitehead performance: " There seems to be a thin metal plate that bolted into the rearview mirror location that then provided the two screw holes to attach the spotlight. A similar concept plate may have to be fabricated to install the spot lamp " So it's pretty much as Patcon had imagined. Pretty impressive! It would have been nice if this information had been disclosed by Mike in the description of the lamp to potential buyers. The only mention about installation reads as follows: " Fits in the center of the forward roof panel between the sunvisors with two self tapping metal screws. Wires will need to be run from the glovebox light, up the a-pillar, and over to the JDM spot lamp. " Anyways, I'll get on it during my Christmas break and fab up a base. I'll post pics as usual. Should be pretty easy and cool. Thanks to everyone for all the great help.1 point
-
1 point@Diseazd Guy, What rubber is on that white car? The tread is really interesting...1 point
-
1 point
-
1 pointTwo years after shipping the rusty heap we have a complete shell ready to come back home.1 point
-
1 point
-
1 pointFor reference, factory PS30 'Fairlady Z432'/PS30-SB 'Fairlady Z432-R' type coolant overflow bottle and mounting bracket:1 point


.thumb.jpg.75165ae25cbc256d967cf4697fa089e3.jpg)

