Leaderboard
-

ramsesosirus
Free Member4Points367Posts -

siteunseen
Free Member3Points15,115Posts -
EuroDat
Free Member2Points3,309Posts -
madkaw
Free Member1Points4,370Posts


Popular Content
Showing content with the highest reputation on 05/03/2016 in all areas
-
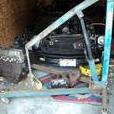
3 pointsBeen working on getting the car going for a few weeks now. Was ready to fire it up last week, tried to jump it. But the battery was obviously far too gone to even jump. I didn't realize a battery could be too dead to jump, but apparently it can. New battery, new starter, new cap and rotor. Still nothng. Checked for fuel pump noise by unplugging starter terminal. Pump was running. Fuel had gotten to the filter up front (I cracked open the clamp). Checked for spark at the coil and at the plug wires with a multimeter and then a timing light. Have spark. Found TDC. Here was the problem: The Chilton's manual shows the #1 plug terminal on the rotor as being the one under the clip, which is one too far down. That is why I could not get the rotor to point at #1 when at TDC. As seen in the image below: (firing order is correct, but the distributor terminals look off to what they actually should be) After researching online, it appears that the #1 plug terminal should be the one just above or at the clip, front most in the car. Anyone else noticed this in the manual? It threw me off for awhile. Once I swapped the wires one position "up", it fired right up! Pretty smooth, but does still need some tuning and work: Lots of smoke coming from the exhaust manifold. I think I missed a bolt or two. Also it appears to have no brakes. Fluid is full, booster is connected. No pressure on the pedal though. Auto trans is slow to engage also, but probably just a fluid or adjustment issue. It shifted fine before. The valve train seems kind of noisy though, but it seems like these cars sound like that normally? Anyways, I have time before I drive it, but it way a HUGE milestone for me, as I've never installed an engine or done work of this extent before. It was also 3+ years ago since the car ran. It made me happy for a minute. At least I know the engine runs...3 points
-
2 points25 minutes at 2,000 rpm, finally! And it's got some snap to it. Exhaust was massive amount of air, no smoke either. 8^) It ran hot but not too far past the right leg of the M in TEMP. That's hot for mine too. I deleted all the stuff off the balance tube so I had to pop the plastic marble off the pedal. It wouldn't get lower than 2400 at first. I'll figure all that out later. It's Miller time now! I'm gonna get on my mower. Thanks for the help guys. As always I couldn't have done it without help from the forum. Cliff2 points
-
Just read through this thread. The pieces you found are from a bearing cage. Its probably from the centre bearing on the main shaft. I have seen a couple go there. If the transmission was running good, I would defenatly cosider rebuilding it. Buying one from ebay is a bit like buying a raffle ticket. You don't really know what you have until you put it in the car and drive it. You could pull yours out and flog it on ebay and no one would know. Pulling the drain plug wouldn't tell them anything. Not saying you should do that, but people do. You have to except that risk on ebay unless its a reputable dealer and then it will cost more. Rebuilding it is not all that hard. Like Mark said, you can find lots of info on you tube. I can post a list of all the parts you need to rebuild it. The bearings are easy to find and the seals and gaskets aee still available at Nissan. You will need a bearing puller set, a good set of circlip pliers and metric spanners. A bench vice is enough to hold the adapter plate. You can also identify which version of the 5 spped you have by looking at the rear extension housing. The bolt holding the speedo adapter above is 280Z and under the adapter is 280ZX. The two "Ears" for 280Z and one "Ear" for the 280ZX at the end of the extension housing will also tell you enough to know if its a wide ratio or close ratio (ZX) transamission. See the pdf for details. Im just back from holidays, so I will post the list later if you want. Good luck FS5W71B 280Z and 280ZX transmissions.pdf2 points
-
1 point
-
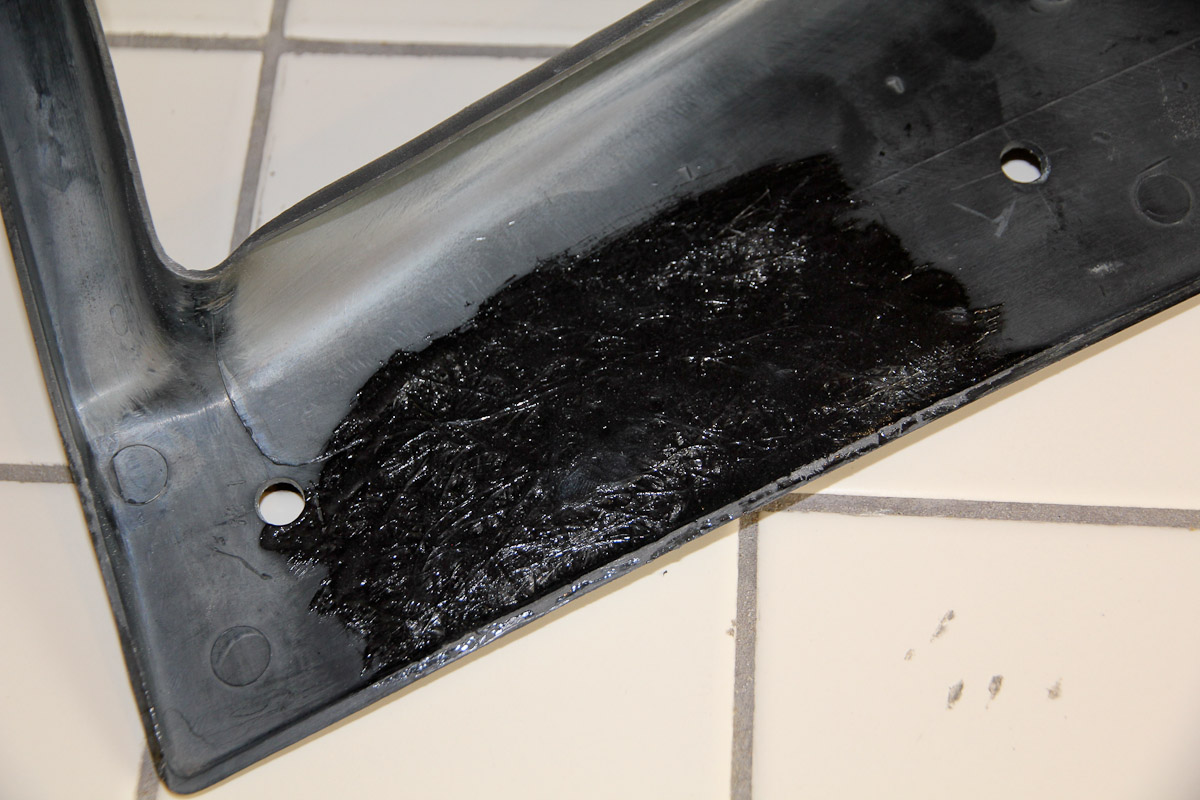
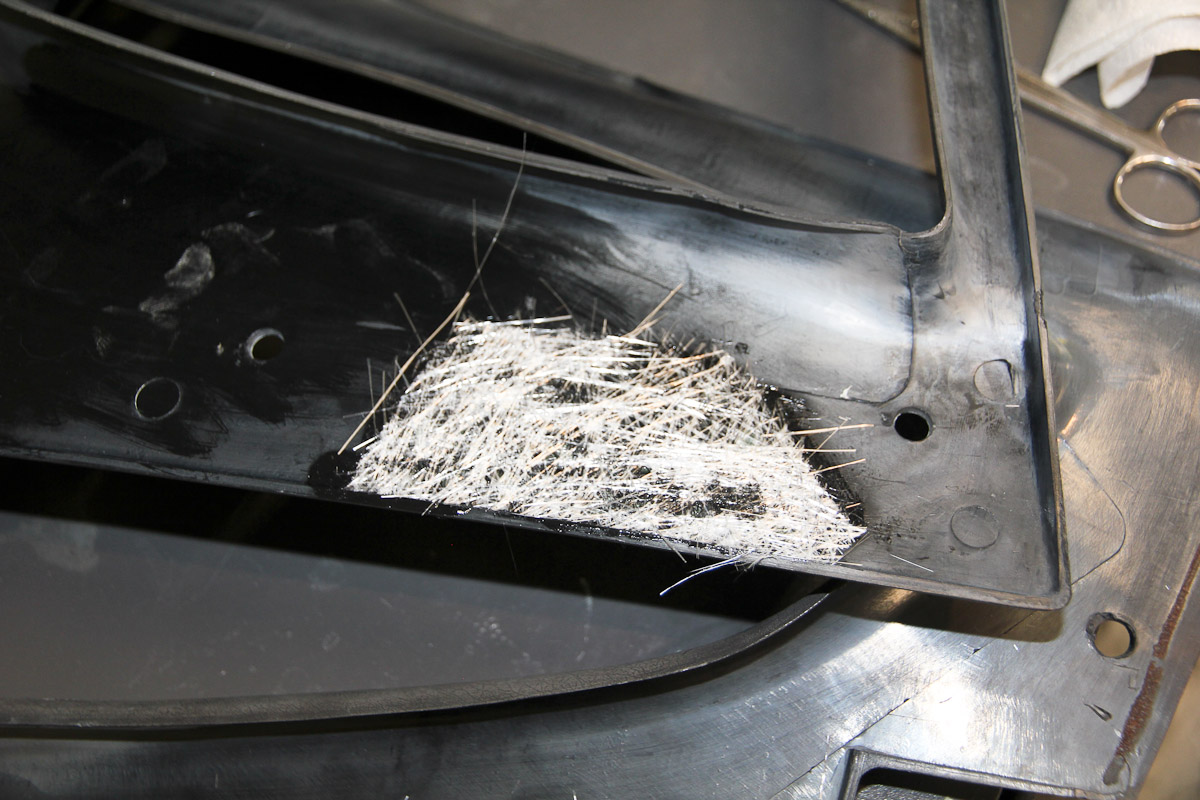
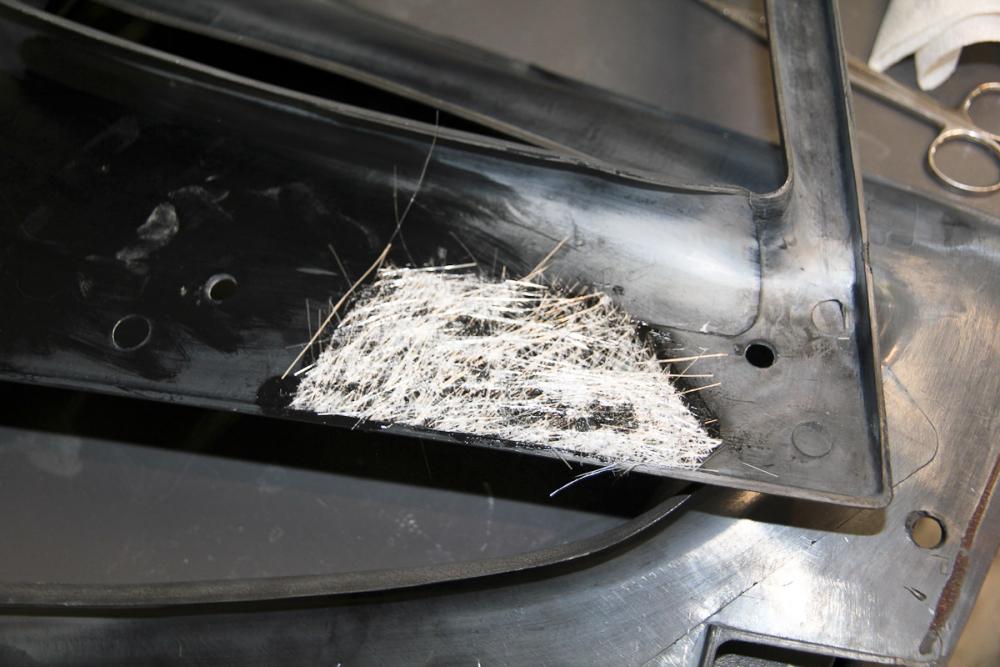
That ABS cement is the exact stuff I used to repair some of my interior panels. It's basically ABS dissolved in (I think) MEK. It will wet out fiberglass mat the same way resin does and dries hard and strong. A couple photos of panels I did recently: first patching up the speaker holes on the window panel: And the vent tank cover. I don't have an after on this one, but the repaired panel fell of my workbench and landed right on the corner of the broken side and was perfectly fine, and survived a fair amount of flexing to get it back in the car.

 1 point
 -
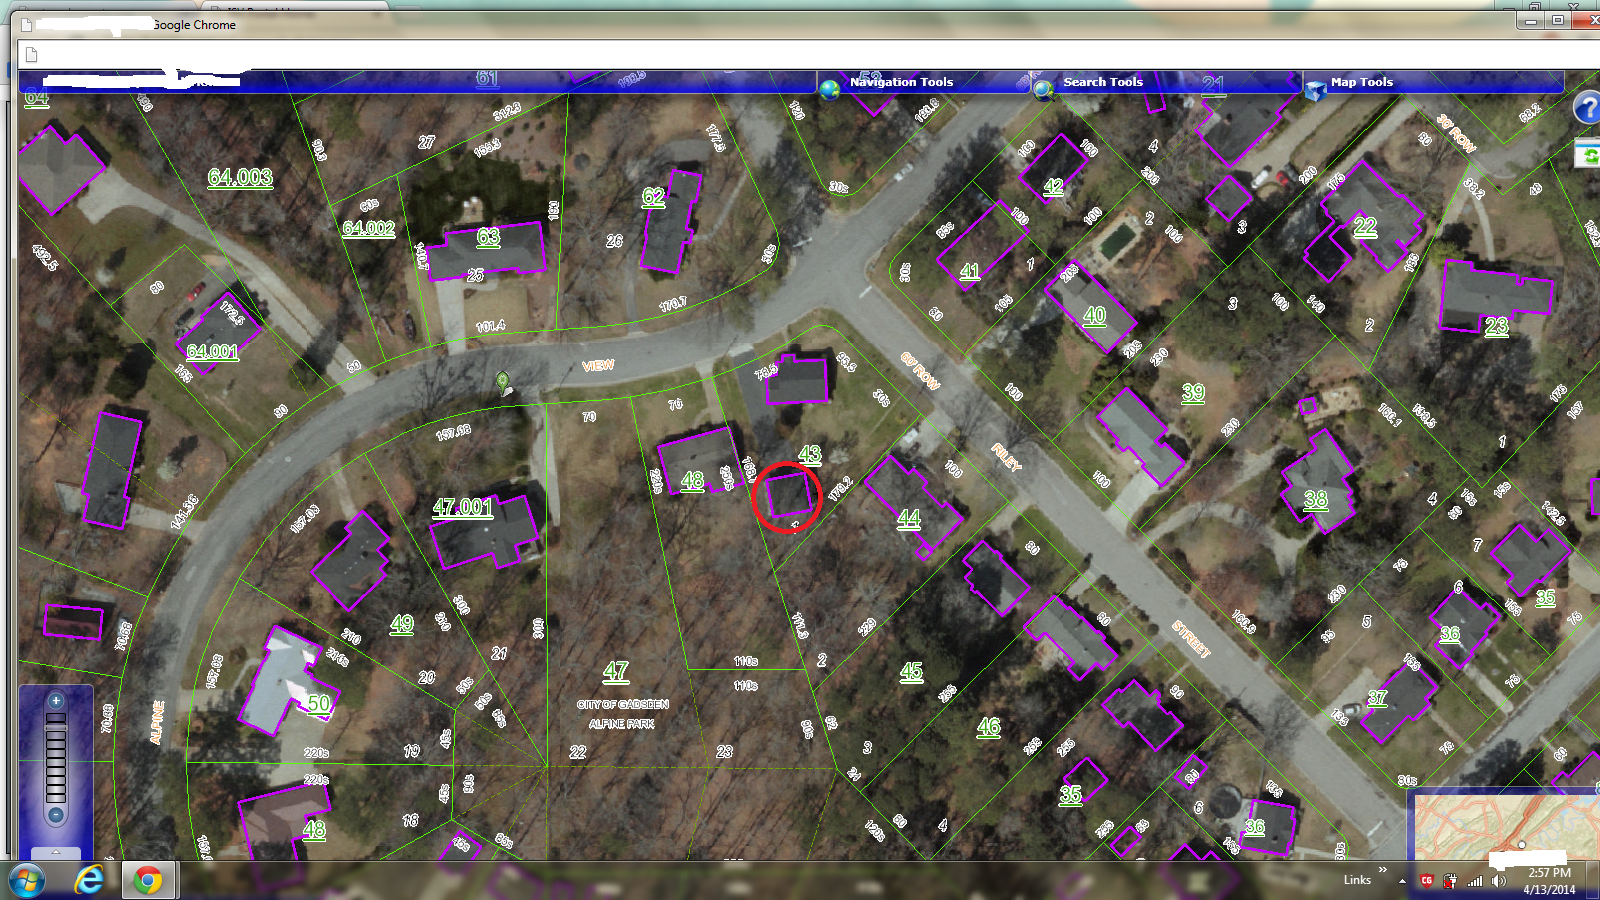
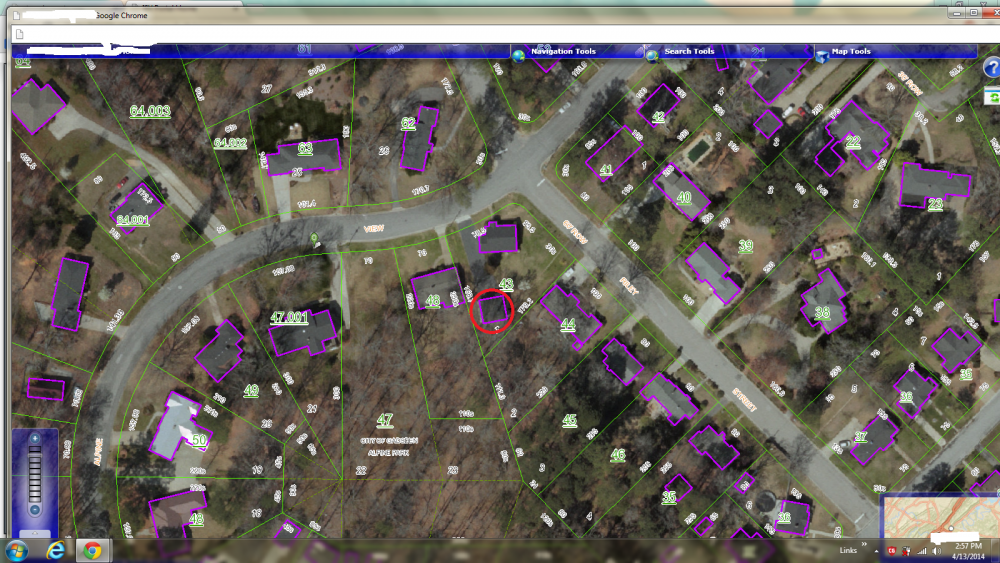
1 pointI have a house and a 3 car garage with an apartment on top. I'm single and spend most of my time in the garage so I live back here and rent my house out. The renters pay my mortgage and homeowners insurance plus a little extra for my pocket. Luckily, fortunately or thank God according to my Mom, I quit all my evil ways in '06 and moved into the apartment and rented the house out. FBI moved in next door in '08. He keeps me from doing anything stupid again. My garage is the red circle and my rental is in front to the right. He lives to the left. It can be nerve racking but we're adults, he's on the property line not me.
 1 point
 -
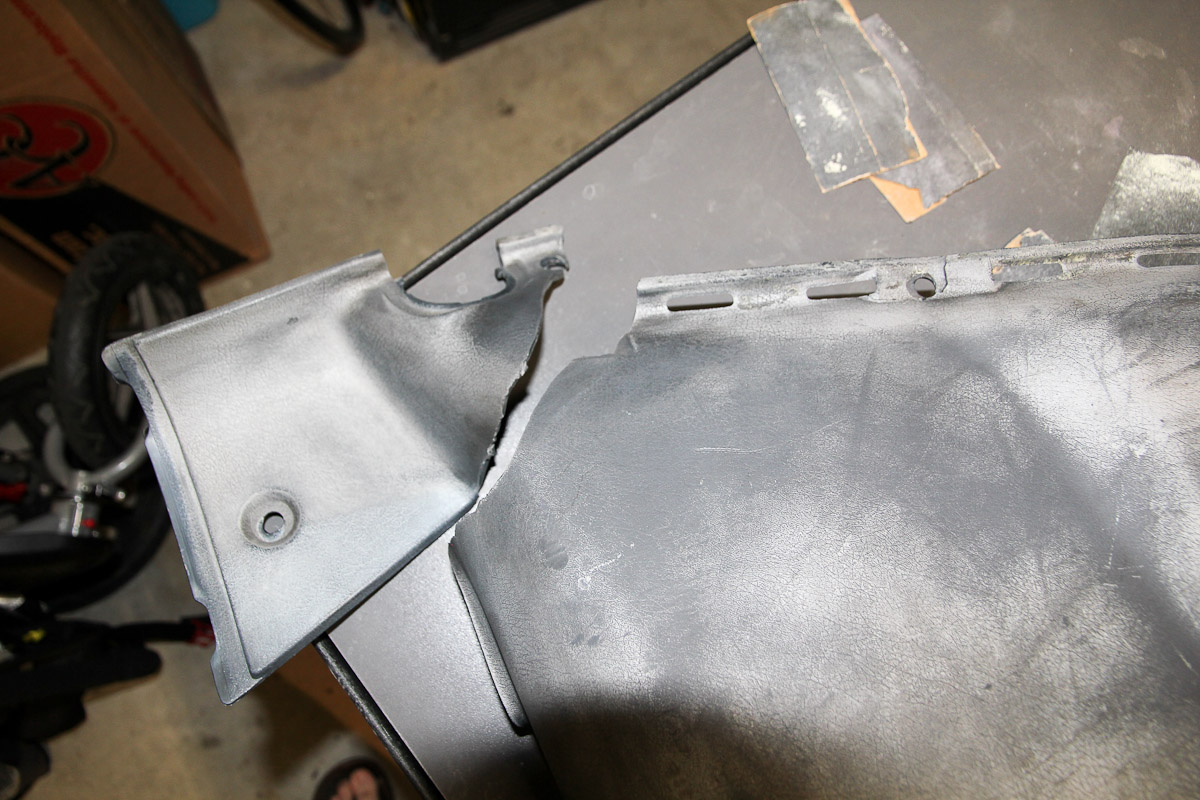
My experience with console repair has been to cover cracked and stressed areas with fiberglass cloth on the backside of the unit. I've used two part epoxy putty to fill holes. Works well and looks good after a fresh coat of paint and a little touch up highlighting. I don't think I'd try plastic pipe glue. See pictures here: Dennis1 point
-
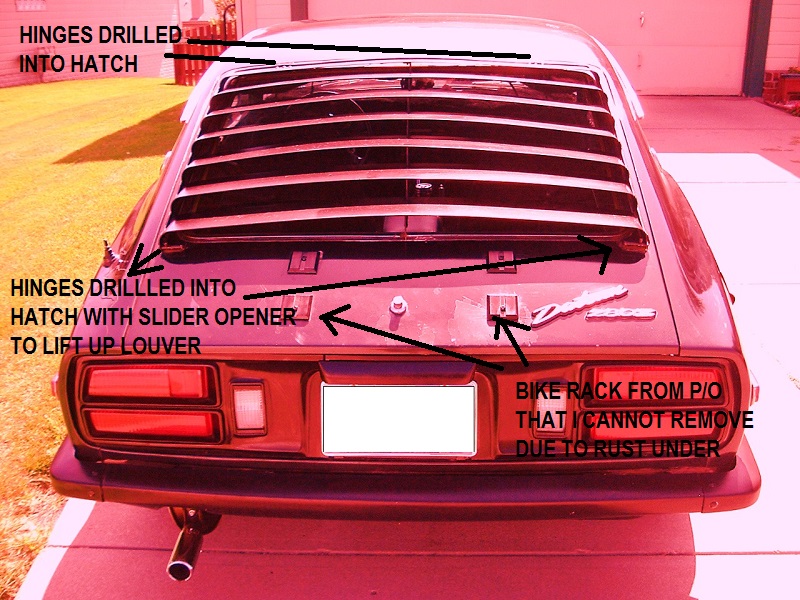
1 pointI did some silicone and rubber gasket work to the louver to minimize the clanging noises. Sorry for the color filter, I was playing with Photoshop and lost the original... I'm not sure what "type" of louvers I have, but I kind of like it. It has two slider hinges on the bottom, so I can lift it up to clean, etc... But it is drilled into the hatch in all 4 locations. Not sure there would be a way to install without drilling. I actually removed the louver once, since I do like the smooth look of these cars without them, but the condition of the paint underneath the louver brackets was not good. So I painted the louver and put it back on. Definitely helps with some sort of privacy and heat reduction, and is awesomely retro for this generation of cars. I like mine, not a fan of the other, more "square" style though.
 1 point
 -
1 pointYes - thanks for the heads up. Even Todd admitted that he was more a race tune guy than a street tune guy. It's hard to find that kind of knowledge anymore. Sent from my iPhone using Classic Zcar Club1 point
-
1 pointMine don't rattle and it came with a rubber u shaped channel strip for the center piece.1 point