


Leaderboard
-

siteunseen
Free Member4Points15,115Posts -
bartsscooterservice
Free Member3Points1,900Posts -
EuroDat
Free Member2Points3,309Posts -
Mike W
Free Member1Points453Posts


Popular Content
Showing content with the highest reputation on 04/19/2016 in all areas
-
3 points
-
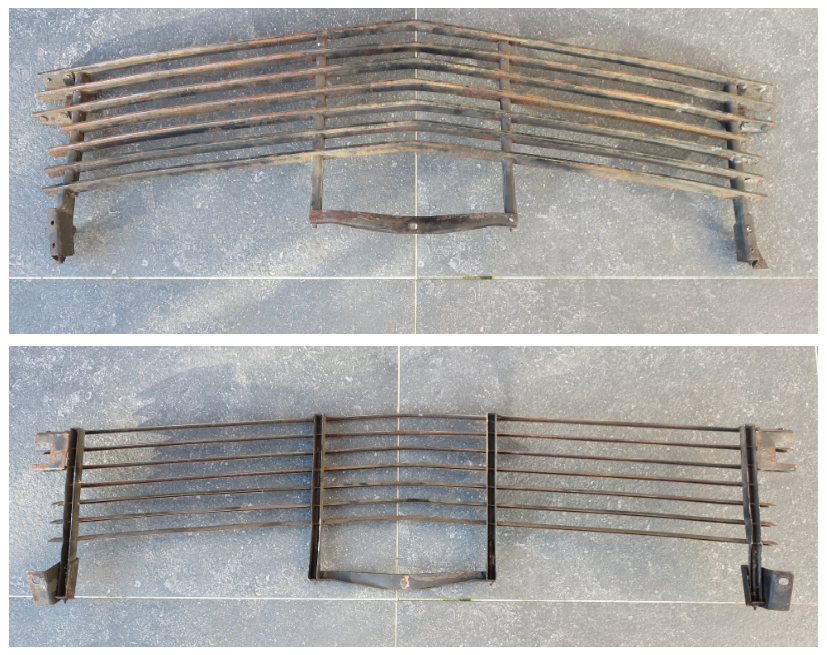
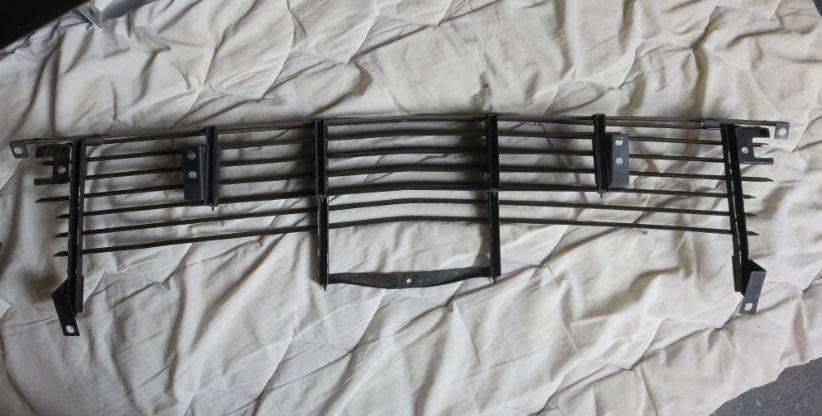
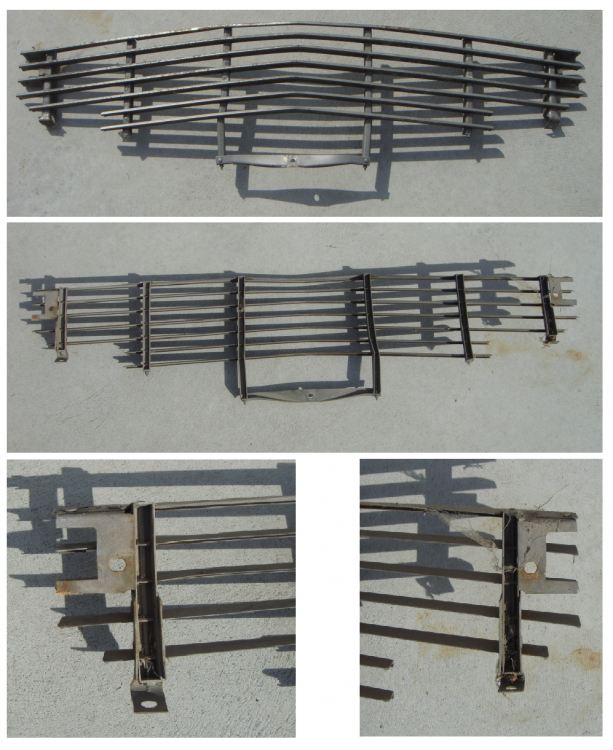
2 pointsYou basically have two types for the 240Z. Type 1: The series I & II and the Euro model. See first set of photo's The Euro model has 3 long, 1 very short and 3 short horizontal bars. You can see it in the photo I posted and in the photo here below. Type 2: The 240Z Series III (73 model) is a lot different because of the differant bumpers mounts used on that US model. You can tell them apart easily by the two short bottom bars and two extra vertical bars. See second set of photo's Do you have a photo of what you have? See photo's. Note in the 240Z grille US series1 photo a 280Z grille in laying on top. Its basically the same as the Euro except the fourth bar is the same as the bottom 3.
 2 points
 -
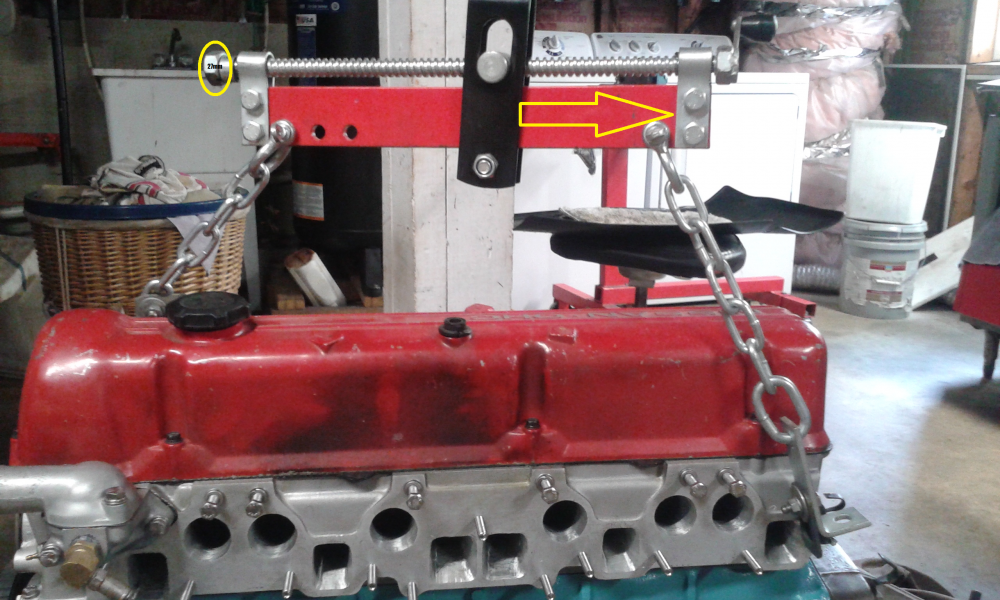
2 pointsJust to let everyone know, the way that worked for me was to have the "fulcrum" part of the leveler as far back towards the transmission then level the whole assembly with the chains. My little handle on the fulcrum got pretty tough to turn and had to be bent out to keep from hitting the chain, luckily the opposite end just has a nut. And I got lucky again! That nut is the same as the crank nose bolt, 27mm. So I used a ratchet and that socket to smoothly lower the tranny down then back up.
 2 points
 -
1 pointSome pics of the powder coating parts I ordered... Thermal temp sensor 2400w baking light1 point
-
1 pointstop in at your local mom-n-pop muffler shop, they'll have a catalog with plenty of options. i'd go with a longer resonator (looks like a small diameter, round muffler) at least 18" and have them weld new connections in. and avoid 3-bolt flanges if you can, they can be leaky. very simple work, not expensive and you will be much happier on the freeway. the longer resonator seems to help with drone in the 2-3K rpm range.1 point
-
If you do it right and remove the rear finisher you'll need two different size push pins. The big ones on top and two smalls behind the tag. You may be able to reuse the old ones if you're careful and able to find the center pins. Those on top are hard to find. I've got both style Nissan part numbers at home, if you need them let me know.1 point
-
If you're not going for an award winning car, gunmetal grey from duplicolor I believe is close enough and you can get a spray can at any chain parts store. I've used it and am happy with the results. Buy you should do a search as 26th suggest for more info and images.1 point
-
Classic Datsun Motorsports / 240Z Parts / Misc. http://www.classicdatsun.com/index.html Or you can do a website search and read all the comments about the color.1 point
-
1 pointKira, Here is some pics of the A/C controller I have. It looks different than one I see on Ebay right now. It could be aftermarket. Perhaps someone here on the forum could chime in on that. It came out of a 71 I found at the junkyard. I thought it was a good piece to snag as I don't find many cars with A/C in them.
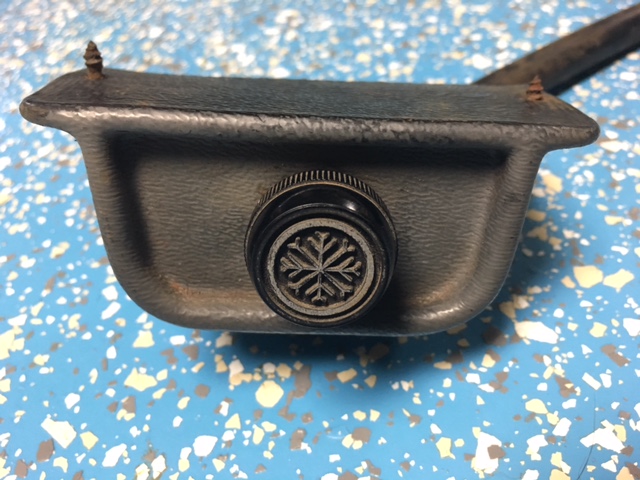
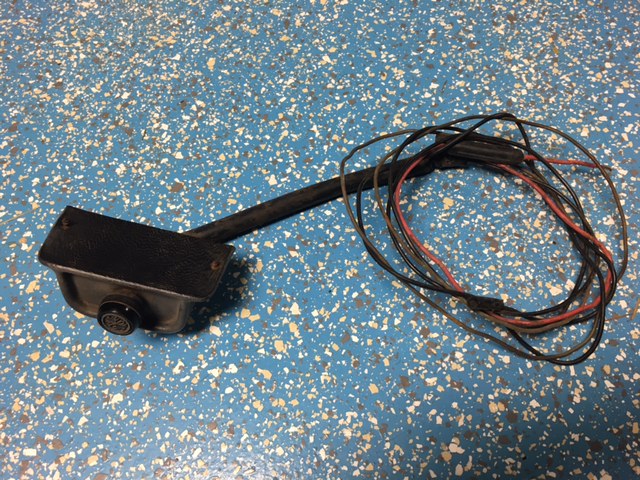
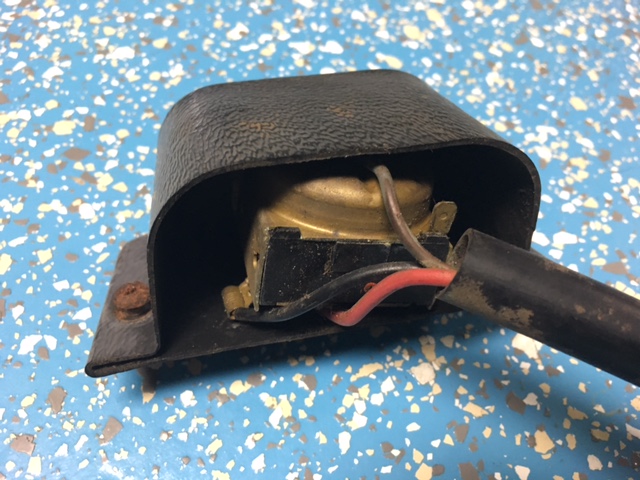 1 point
 -
If you are not sure if they have been replaced recently, then I would just replace them while you have them out of the car. That's what I did when I refinished my rear end suspension. Everything got replaced, regardless. You know how it goes............. while I'm at it....... Admittedly the half shafts are not that difficult to remove from the car, but it is still work and they are accessible right now. In any case, dealing with the boot replacement is much more of a PITA than replacing the u Joints in my opinion. I completely disassembled the half shaft sections so I could slip the new boot on. My old ones were in bad shape and so needed to be replaced but I could not find a way of getting the new one on the shaft without disassembling them. If you decide to do this be very careful as there are both roller and ball bearings that will easily fall out as you remove one part of the shaft from the other. There is also a C clip you will need to remove from one end in order for the inner shaft to be removed from the outer. Finally getting all of the balls and rollers back in was tedious and time consuming. I used lots of grease to help hold the bearings in place as I re-assembled and this did help but it was still a lot of work. I have pictures of this operation if they would help you out. Just let me know and I will send them to you or perhaps this is the reason we have been looking for in terms of trying to get together one of these days. Let me know if I can be of some assistance. Mike.1 point


