Leaderboard
-
esmit208
Free Member2Points855Posts -

siteunseen
Free Member2Points15,115Posts -
grannyknot
Free Member1Points5,158Posts -
Captain Obvious
Free Member1Points10,081Posts


Popular Content
Showing content with the highest reputation on 03/24/2016 in all areas
-
2 points
-
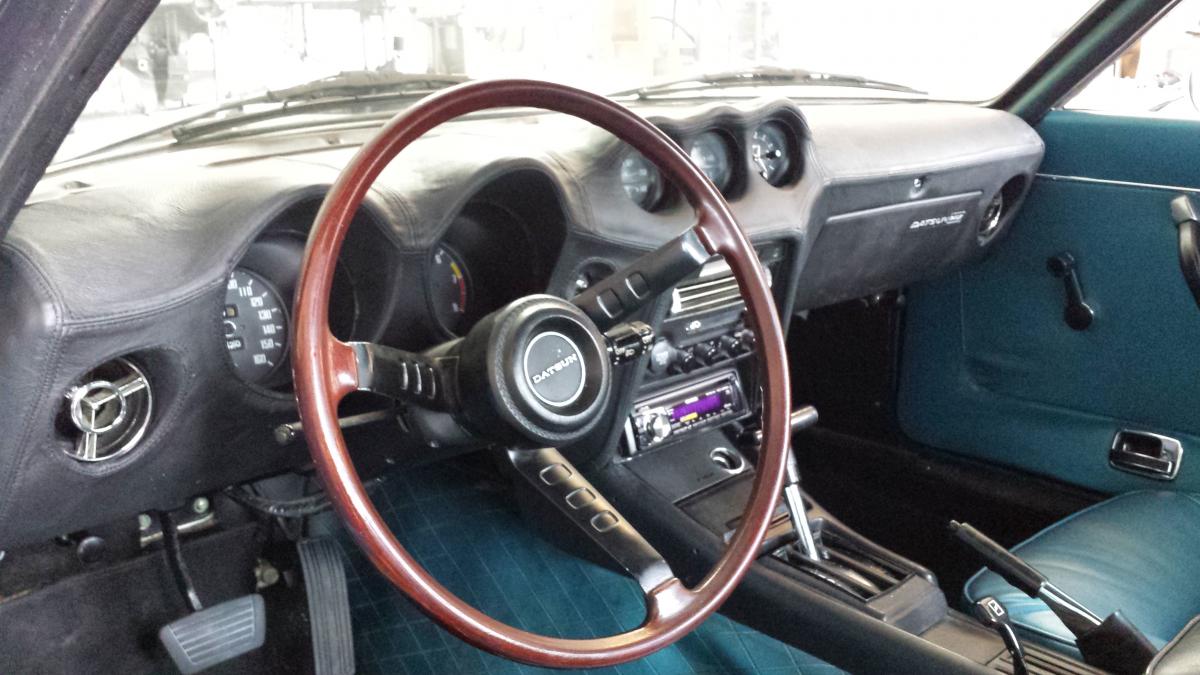
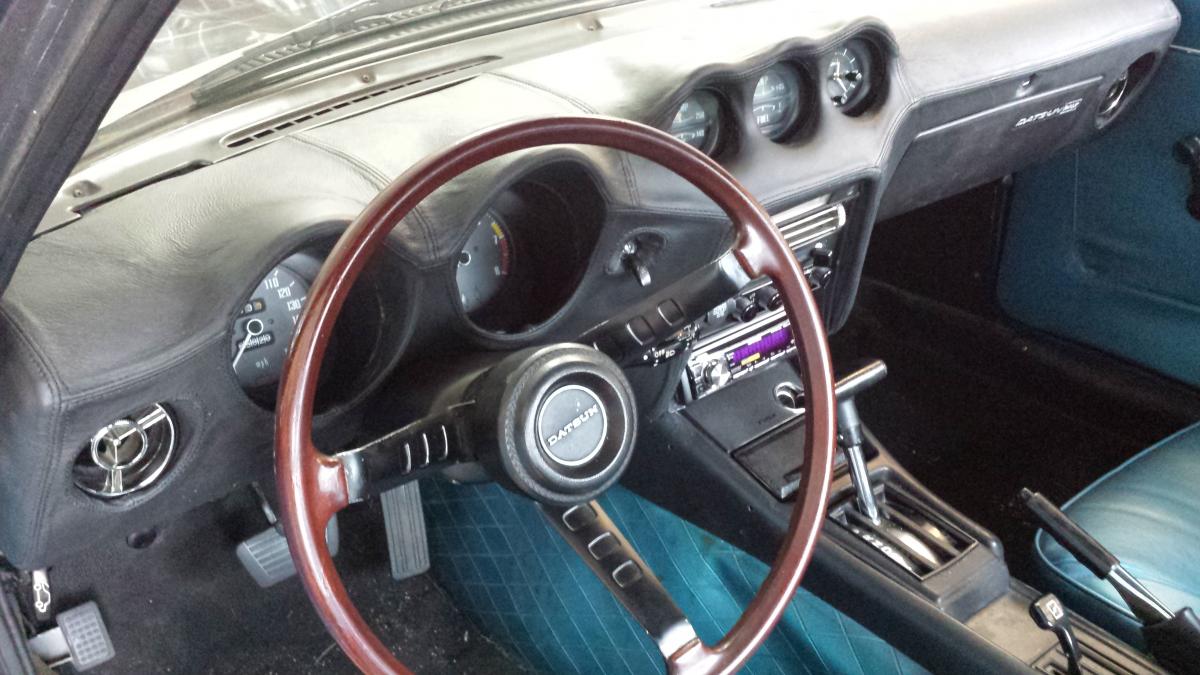
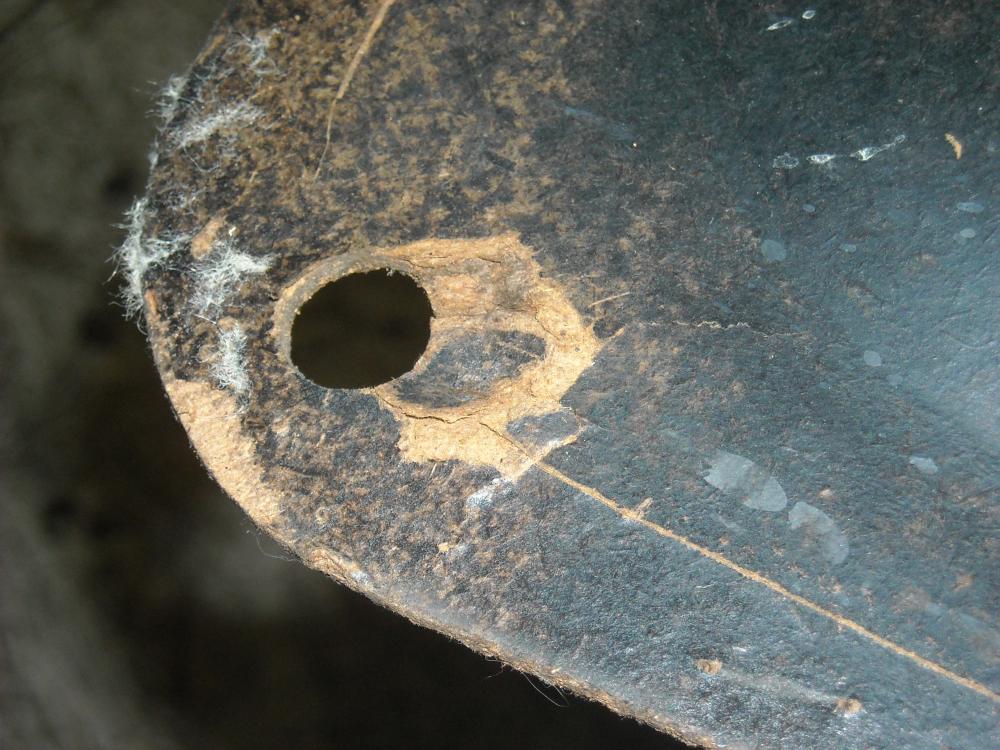
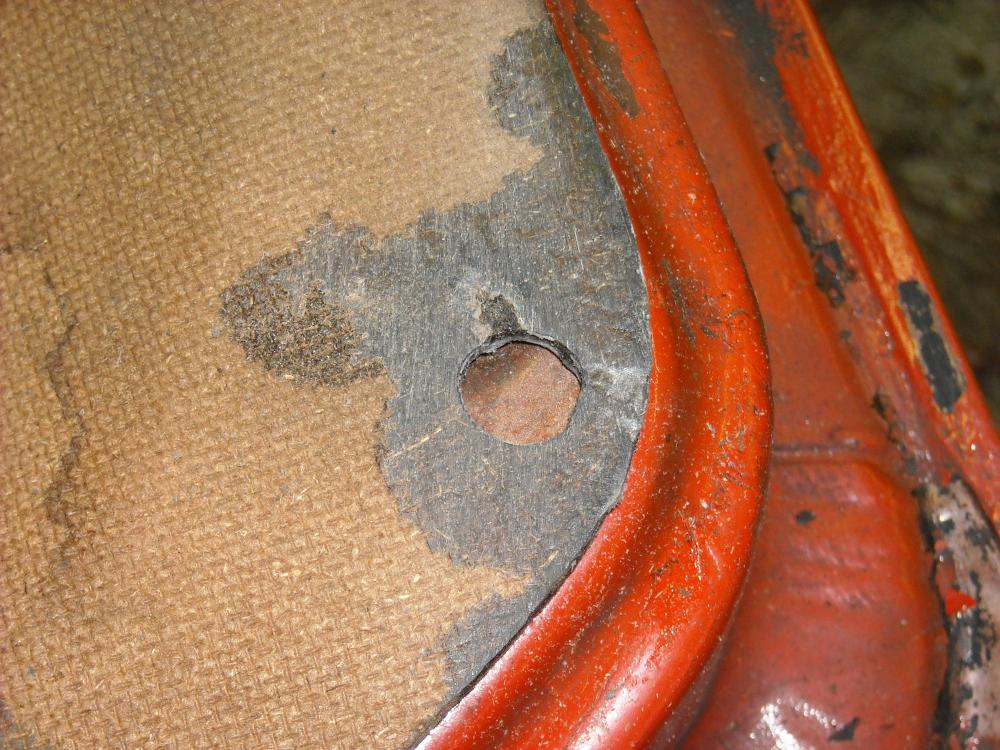
Yeah it's not like i've been not doing anything on the car lately but im corrently working on what is probably the most complicated assembly on the car and it needs a lot of time to figure out how to handle the adventerous electronis design of the Niles Electric company from 45 years ago. As you might know I'm a senior electronics engineer in my daily job so it's kinda fun and i want to do it right. However it's a bit tricky to get such an weird and oldschool design "right". So it needs time. But let's start with something else: Last week i loaded the hatch into my car: Brought it over to R-performance so they can add new studs to the rear spoiler and he asked for the wing so he can align the studs to the holes in the hatch. Good idea This time they were busy preparing the full-carbon bodied K24 Turbo Integra for the coming time-attack season. This car is serious business! What really gave me headaches was the turn signal switch. After days of trying different things i finally brought of the switch knob from the turn signal arm and was able to disassemble everything: Here you can see how the (what the manual calls) Dimmer switch works. Contact open: Contact closed (the wire is short circuited to the turn signal arm which is mounted to the body, so basically it's connected to ground once the button is pushed): Of course i broke the plastic knob while attempting to removing it. either i manage to remove one of the other two i have without braking it or i will need to have one 3D-printed for me since nothing is available.. I decided to exchange the old and brittly cable whilte at it so today i took two of the switches to my office and soldered in new wires. Before: After. Tried two wires with different stiffnes so i can see which one works better. You can see the original wires on the right side. That's it. next step is getting a good turn signal switch knob and assemble everything back together since everything is clean and all the contacts nice now1 point
-
1 pointI should have used A B Normal with this avatar. That's my reality.1 point
-
1 pointMittens are for outdoor winter activities. Driving gloves are for driving, cycling gloves are for cycling, and when you are done with your activity, you take them off. If I were to keep wearing my racing suit or cycling uniform, I'd keep wearing the gloves- albeit, I'd be wearing the stuff on the right venue.1 point
-
1 pointWhile I don't think chicks dig dudes wearing gloves in todays world. I do think chicks wearing gloves are pretty damn hot!!
 1 point
 -
1 pointHaha!! Exactly! I knew my bud has my back when I throw that stuff out there!! One of the greatest movies ever. As a matter of fact, I was considering Waco Kid as my nickname here, but didn't want to continuously field the question "Are you originally from Texas?" So I went for something a little more realistic. OK, a lot more realistic. I also considered Mongo, Black Bart, and Governor Le Petomane (you should look that one up...)1 point
-
Forgot to say, one of the main weaknesses with the Pertronix system (not bashing, just pointing out [obscure pun!]), compared to other electronic options, is that it doesn't do current-limiting. That's why you have to balance the coil and ballast, and I think it's why the tachs often don't work right. The tach is expecting a certain quantity of current. That's what the game is, finding that quantity. I think.1 point
-
1 pointThe soaking in methyl hydrate and pressing flat did the trick, all the edges are clean and straight now so I can add a layer of fiberglass to the back of the panel now to give it some stiffness. Got to say that I'm really impressed with the cyanoacrylate glue, I've only ever used it in drops in the Krazy Glue form but used liberally it soaks into the fibre of the panel and reinforces it. (not sure what I did to change the type face of the lettering?)


 1 point
 -
1 pointBlazing Saddles!!! "The sheriff is BONG What did he say? The sheriff is near No dad blame it...the sheriff is BONG"1 point
-
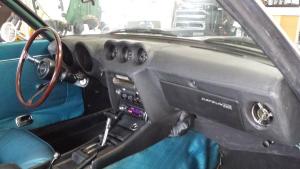
1 pointGot the dash reconnected to the point I could start the engine and verify my electrical connections. I still have to do some smoothing with a steamer and clean things down, but I promised some pictures. At this point, you can get a pretty good idea of what is will look like when I'm finished. When I started this, I said I would let you know the vendor if I would recommend him. And to those who have guessed it is an English firm doing business on Ebay as "topgaiters". I paid $225.00 including postage. I have been providing feedback to them as I installed the cover and hopefully your will be better and easier to install than mine.

 1 point