Leaderboard

 Subscriber


Popular Content
Showing content with the highest reputation on 11/24/2015 in all areas
-
2 points
-
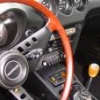
Installed my 40 DCOE webers on the L24: Engine specifications 2.4 liters original motor/head/cam. Pertronix ignition Pertronix 1.5 Ohm coil MSA 6-2-1 headers adjusted idle mixture screws 1/2 turn out Adjusted all idle speed screws (without actuator rods hooked up) until they were about to uncover the first progression hole I had at my disposal, an wideband O2 gage installed into my header (innovative LM1) and a Air Sychronizer tool with weber air horn adapter (note, air horn adapter not shown) My factory out of the box settings for my 40 DCOE 151's were: 30mm venturi 130 main Fuel Jet 170 Air corrector F11 Emulsion tube 55F9 idle/slow running mixture jet Car would not start at all. It would run off of the gas put out by the accelerator pump, but would not stay running. I kept increasing the air fuel mixture (note NOT touching the idle speed screw at all) until the car would start and stay running. This ended up at 2.0 turns out from fully closed. At this point, you MUST let the car warm up to operating temp. After the car warmed up, I was getting an AFR of 10.1 on the LM1. Too Rich. Mr. Franck's of side draft central's white paper points out we should always aspire to 12.5 with our DCOE's. Well I managed to get it to be there running about 1.5 turns out from full close don the air fuel mixture. Car ran smoother like this as well. Initial drive was very promising. However, the dreaded flat spot did exist in the transition point between my third progression hole and when the main circuit came in. I dove back into the side draft central white paper, and a way of getting the main circuit to come in faster is to reduce the size of the air corrector. You see the air corrector is like a vacuum bleed off. In order for the main circuit to work, you have to get the column of liquid up the emulsion tube and down to the venturi. This is done by way of sensed vacuum from the engine. See 3rd picture on the left. The larger the air corrector the more engine vacuum is bled away and it takes more vacuum to pull the fluid up the emulsion tube chamber. Capillary action only gets you so far, and often the stumbling effect is the engine vacuum is too low to effectively make the transition from progression circuit to main. This should happen at about 1400 rpm according to Mr. Franck. Upon driving around I noticed that my part throttle, 4th gear, low rpm (2000 rpm) steady state cruise I was reading about 15.9:1. This is too lean, BUT I knew that running 130 main jets which are really a bit large for 400 cc of displacement I did not need to richen up the main jet. So instead I put in 160 Air Correctors,down from 170. I touched nothing else, and went for a drive. My flat spot on transition was greatly reduced and even eliminated in 1st gear. But was still present on all other gears. However the lean stumble was smaller and the main recovered quickly. I bet your wondering, Hey Zedyone, what about your floats? Well I am not going to change anything else until I check those. Let me make one thing clear, you should always check your floats BEFORE you do any tuning. The float level can drastically effect how and when your main circuit comes in, as a low float level will increase the distance the fuel has to travel up the emulsion tubes. I purchased the Keith Franck float measurement tool off side draft central webshop. I will be trying to see where I am this week. It would be foolish to spend any more money until I check the float levels. Also, not mentioned here, but I did check the air flow through the carbs for balance with my sync tool pictured above. Right off the bat with the engine warm, they were within 0.5 of each other on the tool. So I left them alone. If I wanted to change that, the only way to make fine tuning adjustments between the carbs is to adjust each idle speed screw located on the side of each carb. I did check balance on both barrels of each weber individually and the flow was identical on all three carbs. Weber does include a way to balance each barrel of one carb individually, but I figure that adjustment is probably to make up for some external imbalance, be it rings, seals, etc. If the butterflies on one carb are open the same, then the air flow should be the same. If they are different, there is an external reason. New webers the air flow should be identical. When I check my floats, I will post pics and report back.1 point
-
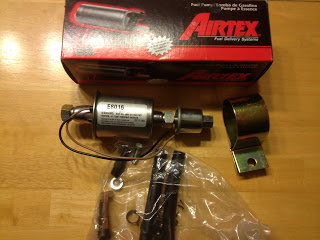
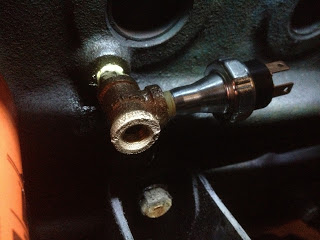
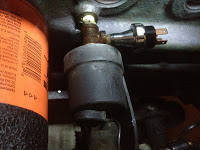
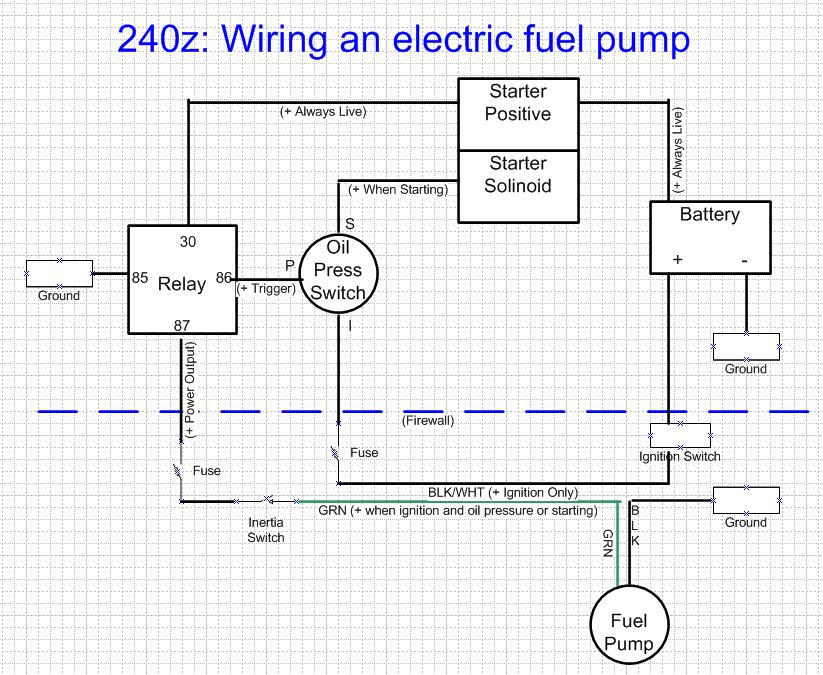
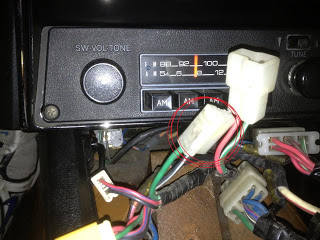
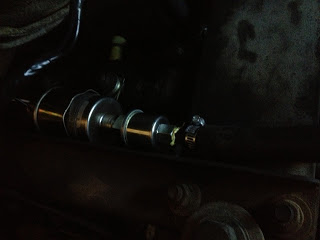
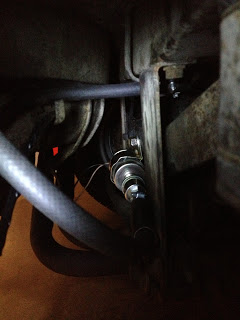
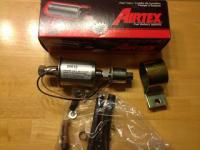
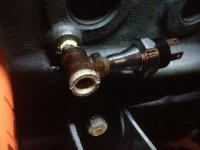
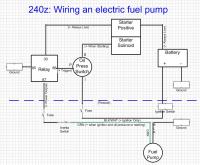
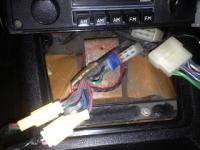
In an effort to make the 240z more reliable, I've decided to upgrade to an electric fuel pump and then retire the mechanical pump. By using quality parts and a smart plan, this will prevent vapor lock, keep the float bowls properly filled, and should allow for the car to start easier. Parts List Fuel Pump (low pressure, 4.5PSI max, 30GPH): Airtex E8016S (~$38) Oil pressure switch: Airtex OS75 Safety Switch Oil Pressure (~$15) Mechanical fuel pump block-off plate (~$25) Brass "T" (1/8" FIP): Watts AC-704 (~$5) Brass male-male (1/8"MIP 1/8"MIP): Watts AC-714 (~$2) 30amp automotive relay: Dorman 84601 (~$5) inertia switch (optional) Wire, fuses, and miscellaneous connectors Fuel Hose My first step was to plumb the engine block for an Oil Sensor Safety Switch. As you can see from the picture below, I inserted a "T" joint to allow me to keep the current oil pressure gauge (second picture) as well as the new safety switch. Next I needed to design a reliable and safe wiring scheme which would incorporate the factory wiring for a fuel pump but also allow for the safety switch and relay. In the diagram I drew below, the GRN wire and the BLK/WHT already exist in the wiring harnesses; the plug is just taped to another set of wires below the fuse box. The fuel wire harness is held with blue tape (see circle). The BLK/WHT wire is live with the ignition switch. The GRN wire goes back to the fuel pump (wired from the factory). There are two unused harnesses. Left is the Fuel Pump, right is the Fog Lights Here are two initial photos of the new electric fuel pump installed. I ended up using an existing bolt/nut for the mustache bar to mount the pump.


 1 point
 -
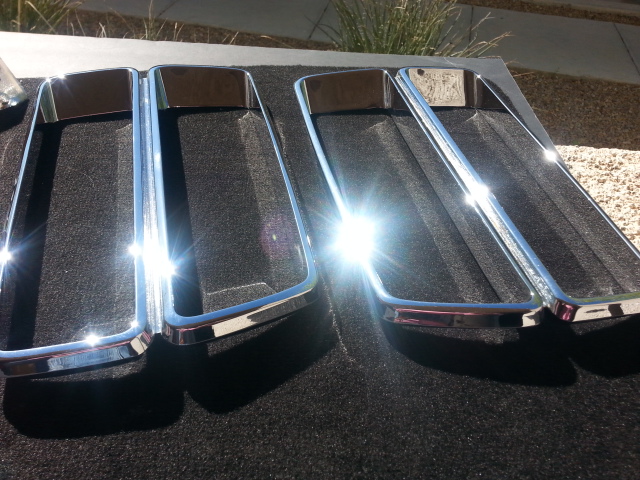
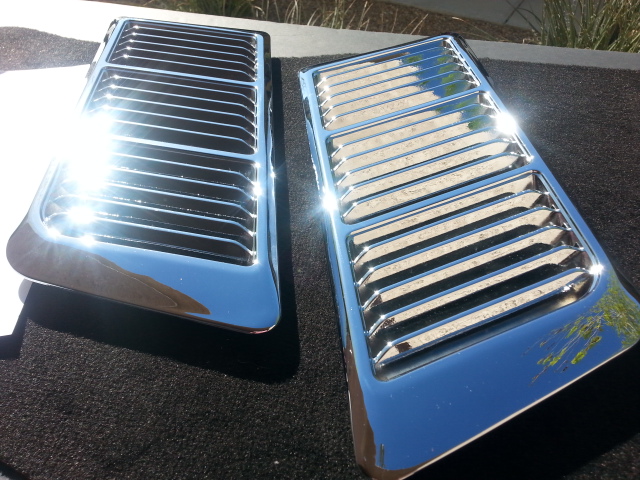
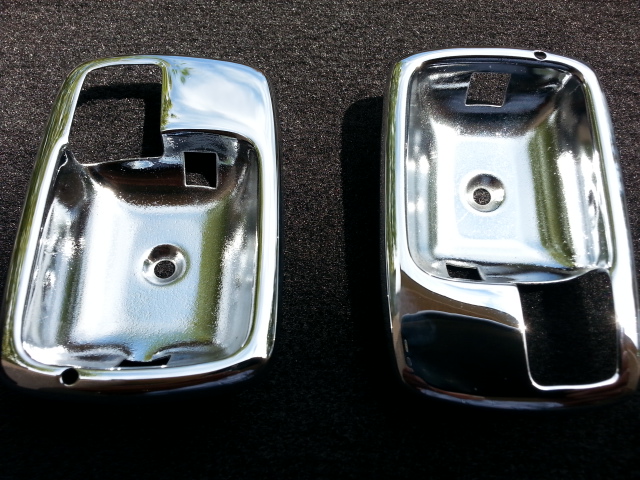
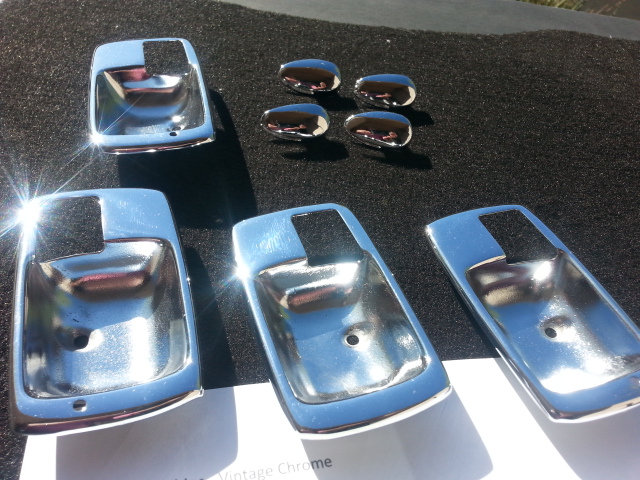
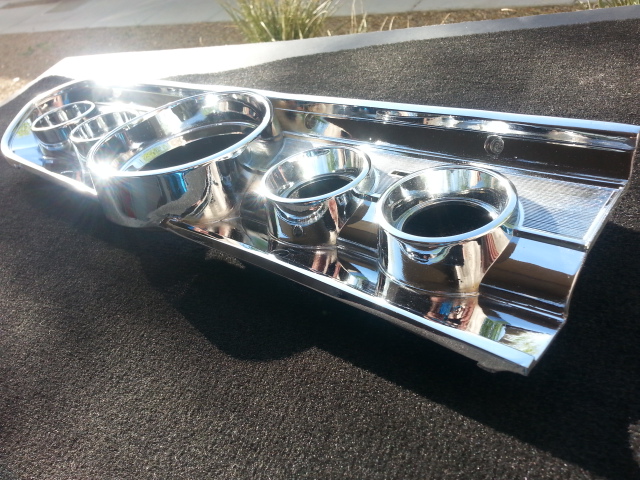
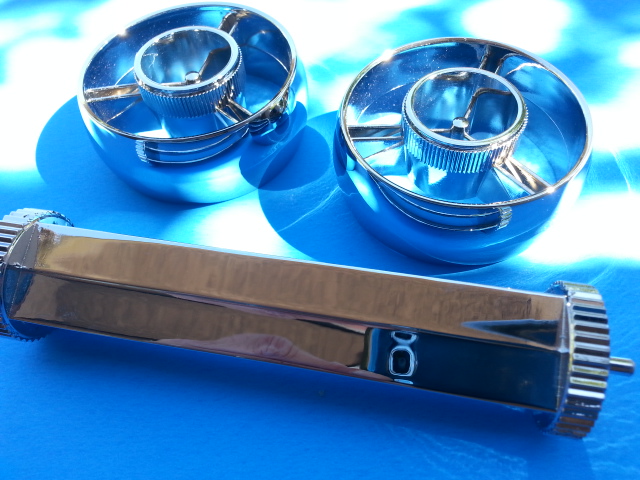
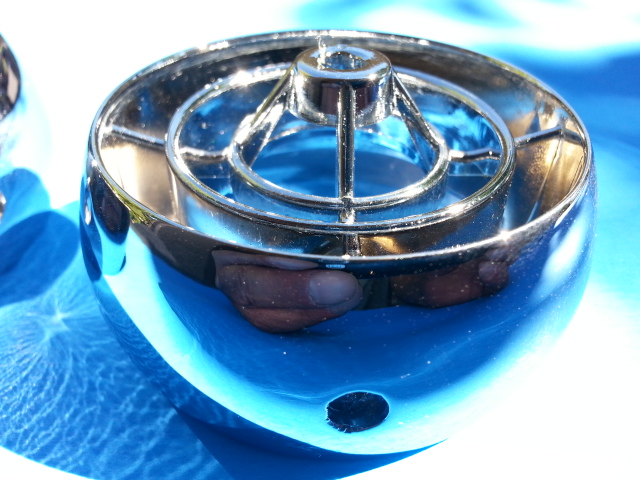
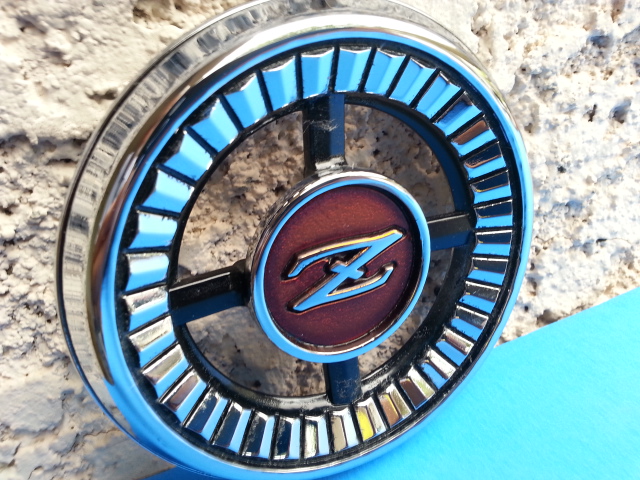
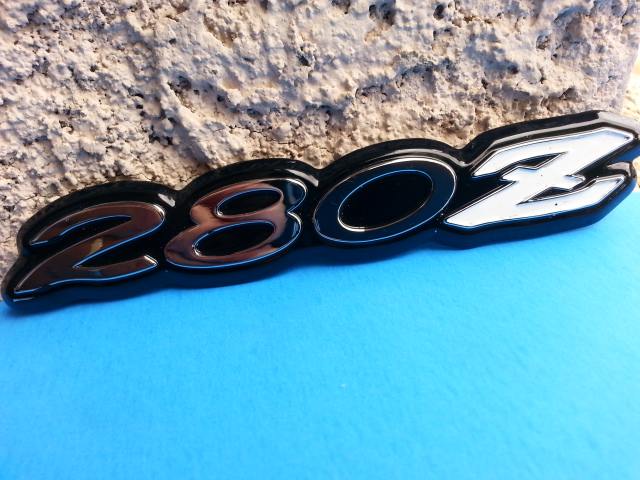
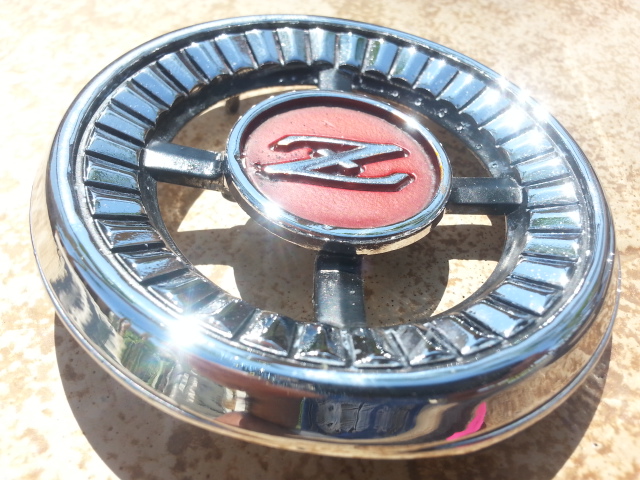
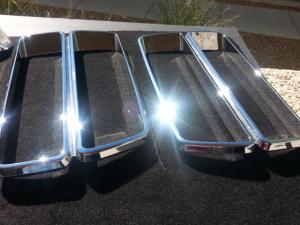
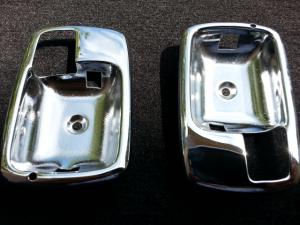
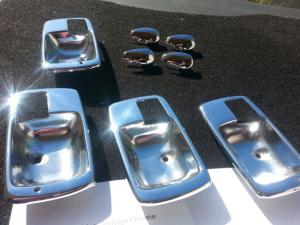
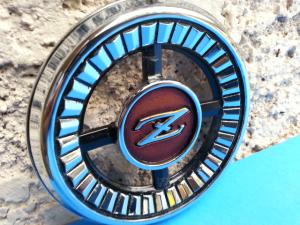
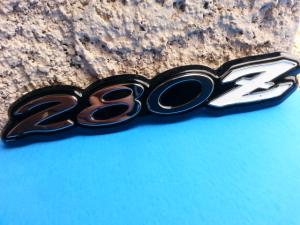
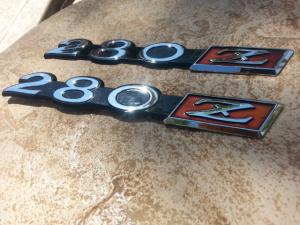
For what is rapidly becoming an annual tradition, Vintage Chrome is once again proud to offer our fourth quarter/year end forum promotion for your plastic plating needs. While we did include metal parts with our promotion from last year, this year we will continue to focus on our core business of chrome plating plastic. We have had to endure 2 cost increases this past year, but have been able to absorb most of them without increasing prices. In fact, in the case of one of our most popular items (260z/280z taillight bezels) we have actually been able to generate a substantial price reduction by leveraging volume commitments. Another significant development this past year is we can now offer, for the first time, detail finishing on all parts that were previously painted by Datsun (such as emblems). Our detail team has even successfully replicated the resin-type "fill" that was used by Datsun on such parts as fender emblems. Now, you can have your original Datsun parts fully restored, instead of just chrome plated. For reference purposes, I am including a link below to last year's promotion and a new collection of pics from recently completed jobs. I will follow this post with this year's pricing. In the meantime,for specific quotes or more detailed general information, you may contact me at vintagechromellc@gmail.com. http://www.classiczcars.com/topic/50576-affordable-chrome-plating-year-end-forum-promotion/?hl=%20chrome%20%20plating. Mike


 1 point
 -
Bear with me, this could get interesting! I had an idea last night while watching the news. Some poor soul had lost everything in a fire and was being supported by a crowd funding page to help them restart heir lives. Then it hit me! What if we were to treat the Z community like a family? What if we, as Z owners and caretakers treated every Z project as one of our own? We already are there for the owners, restorers with helpful tips and hints, even physical assistance when possible. If each member of the Z community (classicZcar forum members especially) were to support the restoration project of other (vetted) members, we could potentially make it possible for a lot more Z's to be back on the road in good or better than new shape! Think about it. We each donate a small amount, say $10 to the project fund for a calssic Z car restoration. the receiving member posts a full blog with pictures, intentions, projected costs and a solemn promise to finish the project with the funds raised. Any projects that fall apart or do not get finished would require the member to "pay it forward" with the balance of funds to another members project or multiple members projects. I have learned so much from other peoples projects and posts this would be a great way to repay the Z community at the same time as making it possible for people to get their Z's restored! More Z cars saved from the scrap heap! I know this will meet a lot of skeptisicm from some people, and no, I am not looking for handouts. I just think that money is the biggest obstacle for some people to get a project going or finished. With the added responsibility of having people invest in your project, you would be motivated to finish it! I personally would be on board with sending $10 to at least five different projects on this forum as a way of morally and financially supporting other members. How do YOU feel about this?? Flame suit on, do your worst,1 point
-
1 pointwheee! I would suggest you experiment a little, shoot some color over a white primer, over gray and black. I believe you are shooting the green metallic. Then see which color you like the best. Under lighter colors it can make a big difference. The guys at the paint shop told me about this. Your green may not change that much or you may like the effect of the other darker colors underneath. This is why red Ferraris are primed with pink primer, it makes the red really red. ksechler I agree with wheee! the engine bay probably won't matter because there are no large flat surfaces and they are at irregular angles and different lighting. Edit: Also remember with yellow, every coat you add changes the color a little bit, red does the same thing, so it is important to try to lay on the same number of coats on the panels and the same amount of paint.1 point
-
I find that time not money is the bigger challenge for me completing my car projects. Now don't get me wrong we live very modestly on a very tight budget but I go months between episodes in the shop working on the Z. That being said there are several projects that I can think of I would donate to. Blue has a very low number car that is on his project list and the super low number car on the forum that looks like swiss cheese is another. Another way to invest in the projects would be to help with parts. I have quite a number of parts laying around and would gladly help these projects that are very rare cars. I suspect that between the entire forum we could cobble together a lot of the parts necessary for some of these low number cars.1 point
-
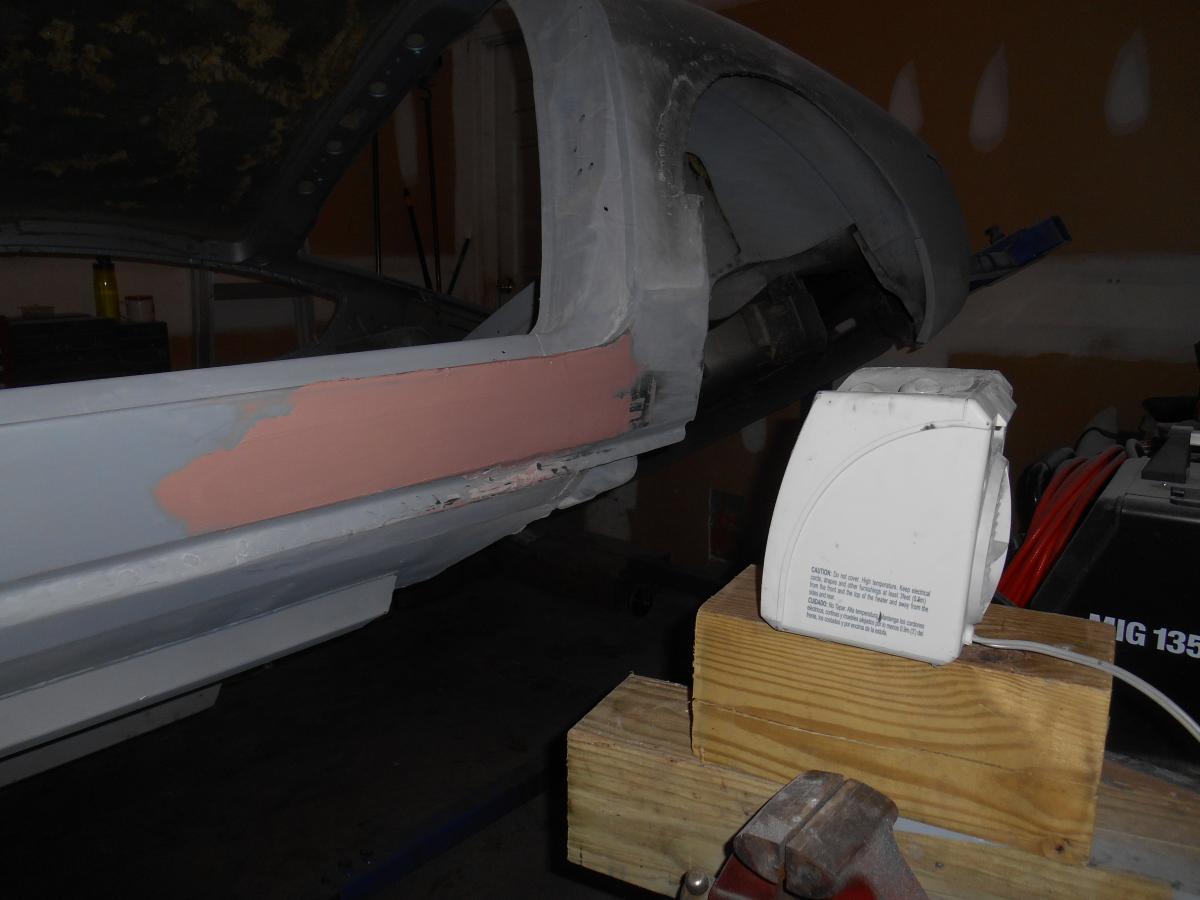
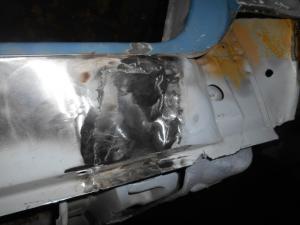
1 pointNo mat just the fiberglass. I use an Evercoat product that is catalyzed the same as body filler. It's green before adding the catalyzer. It is a little thicker than body filler. Smear a thin layer over your welded areas after they are ground down. If you have a pinhole it will fill it so water can't come up through it from the back side and bubble the paint. body filler is not water proof, the FG is1 point
-
1 pointI'll meter out the sending unit after I get it cleaned up properly. Hopefully it is still working correctly as it looks intact the throughout the electrical resistance windings. The tank is one of those things that will haunt me if I can't repair or replace it. All the work of a complete restoration but still leaving a damaged tank installed would kill me! Even if I couldn't see it. Hopefully the Texas unit I asked about will be in good shape and reasonable price to get here. It is listed as an "A" class part....1 point
-
1 pointThanks! Funny the thing that turned the project around is I changed jobs and got rid of a 2 hour commute. I work on the car almost every day. Frankly, I do a lot of rework. For example, I put the hardlines on and off the car multiple times. First the old rusty lines to remember how they went, identify the right hardware, and weld new mounting points (replacement floors didn't have any). Second time, to fabricate and put new lines on. I botched it and third... my second attempt to fab new lines, which I nailed. Then everything came off (and got labeled a lot better) and I painted the undercar and engine compartment. Finally, fourth, the hardlines went back on, I put in the suspension and took it off the rotisserie. Four times to get it right!1 point
-
1 pointLooks good. I assume your finish paint for the exterior is yellow? Have you shot any test cards? When I did test panels I found that I needed to shoot white down first to get the yellow to look good, over grey it has a little green color. You're jambing the car out like I have; I used single stage over uncatalyzed white base coat but you have to top coat within 24 hrs. I have planned on 2 stage for the exterior but I think single stage looks more period correct. I still have time to decide since I haven't finished painting the suspension yet...1 point
-
salt trucks out on the weekend. zed put away till spring.1 point
-
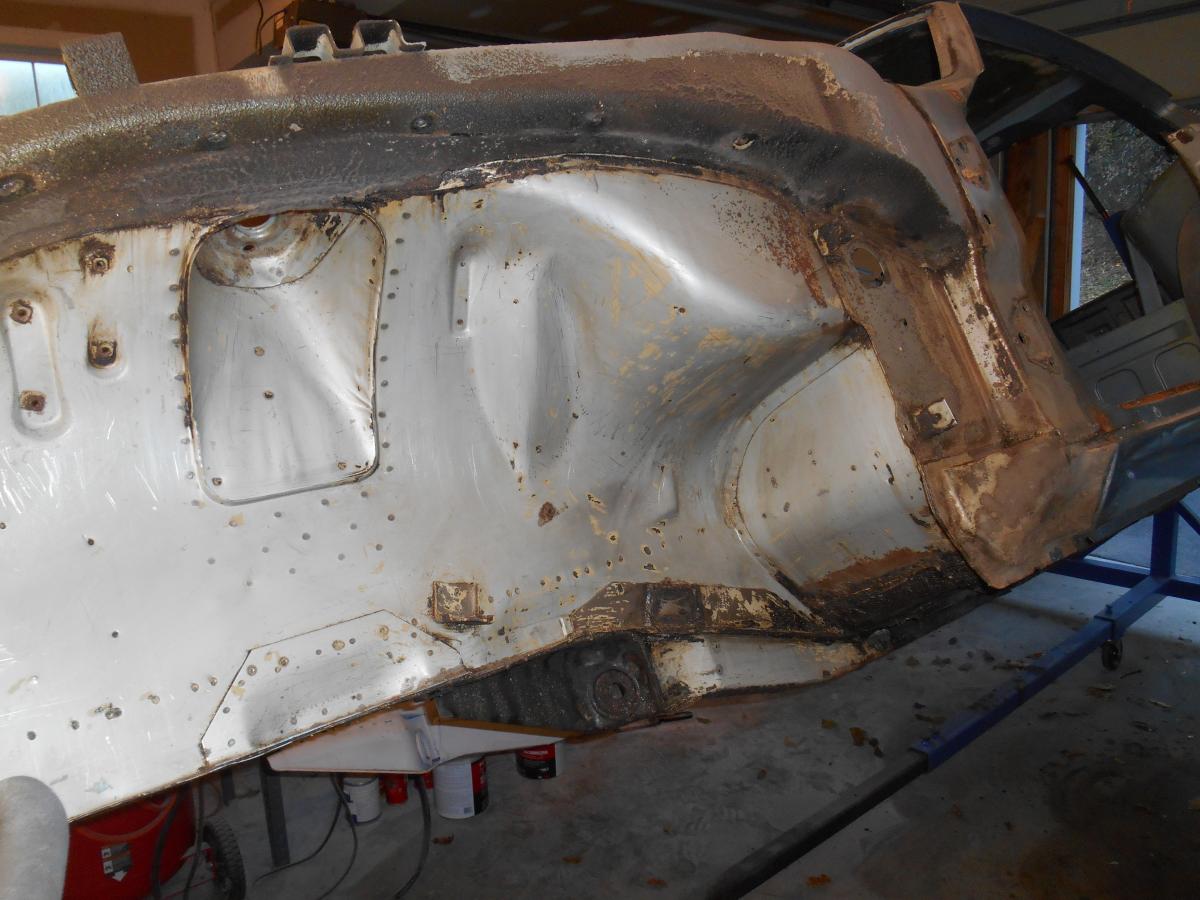
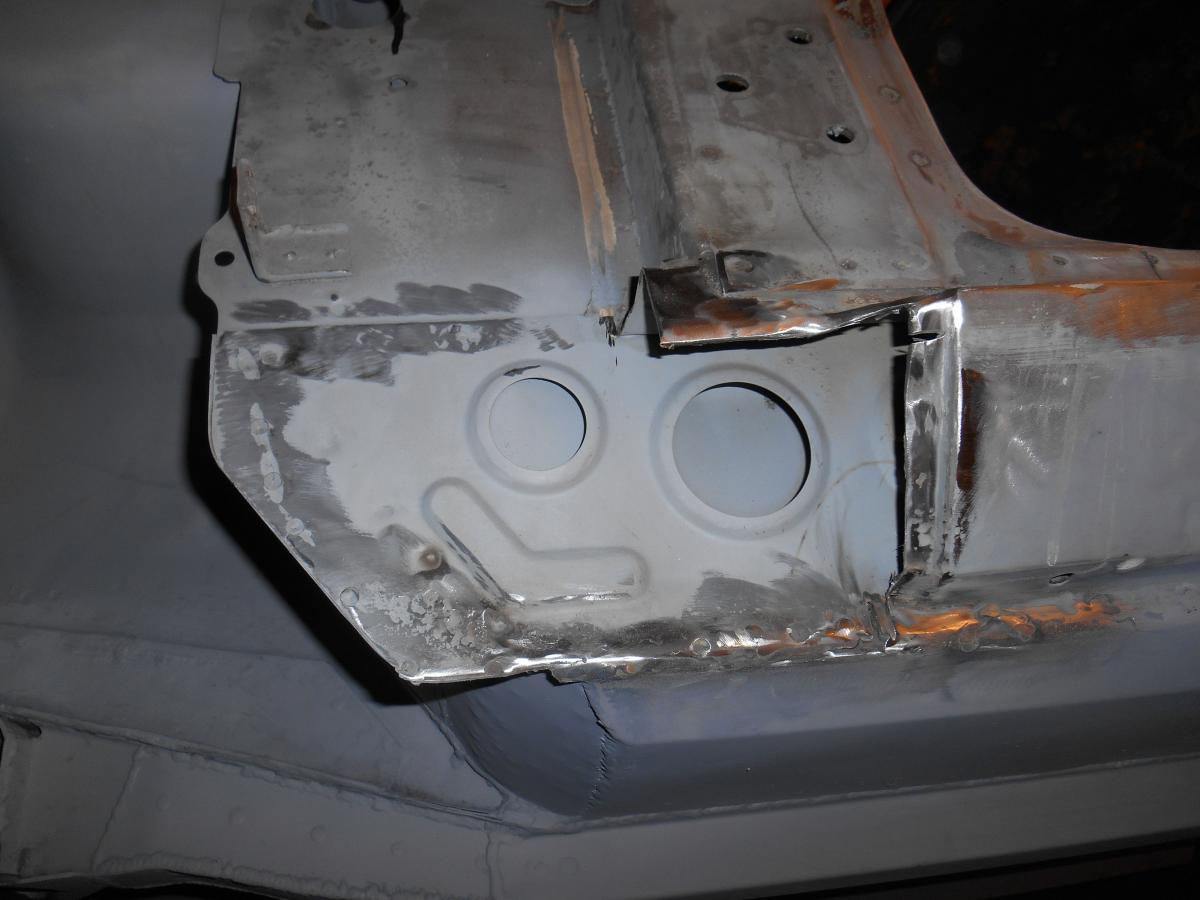
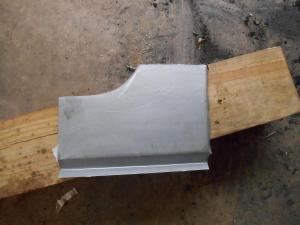
1 pointCharlie Osbourne makes the best floor boards in my opinion. Stampings are really close, with a little massaging on install the repairs are invisible...1 point
-
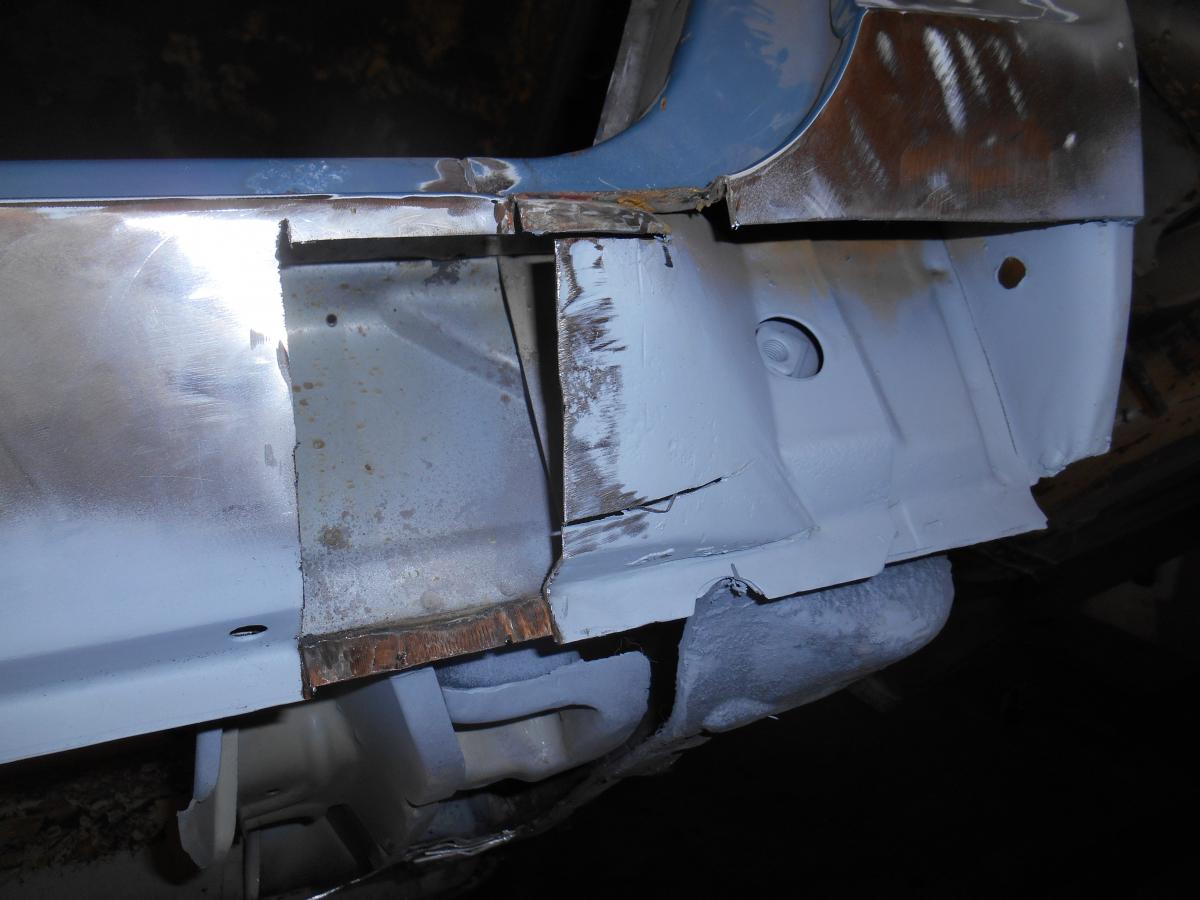
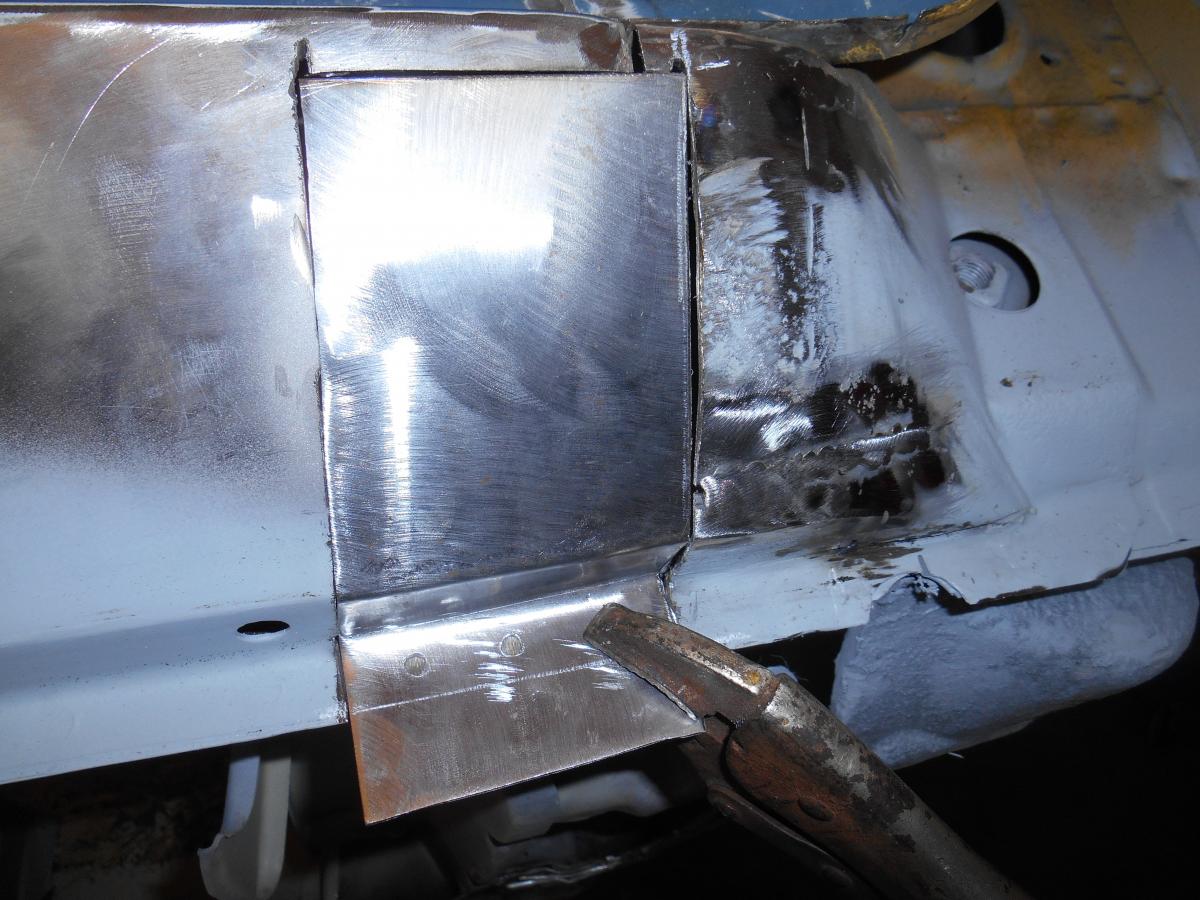
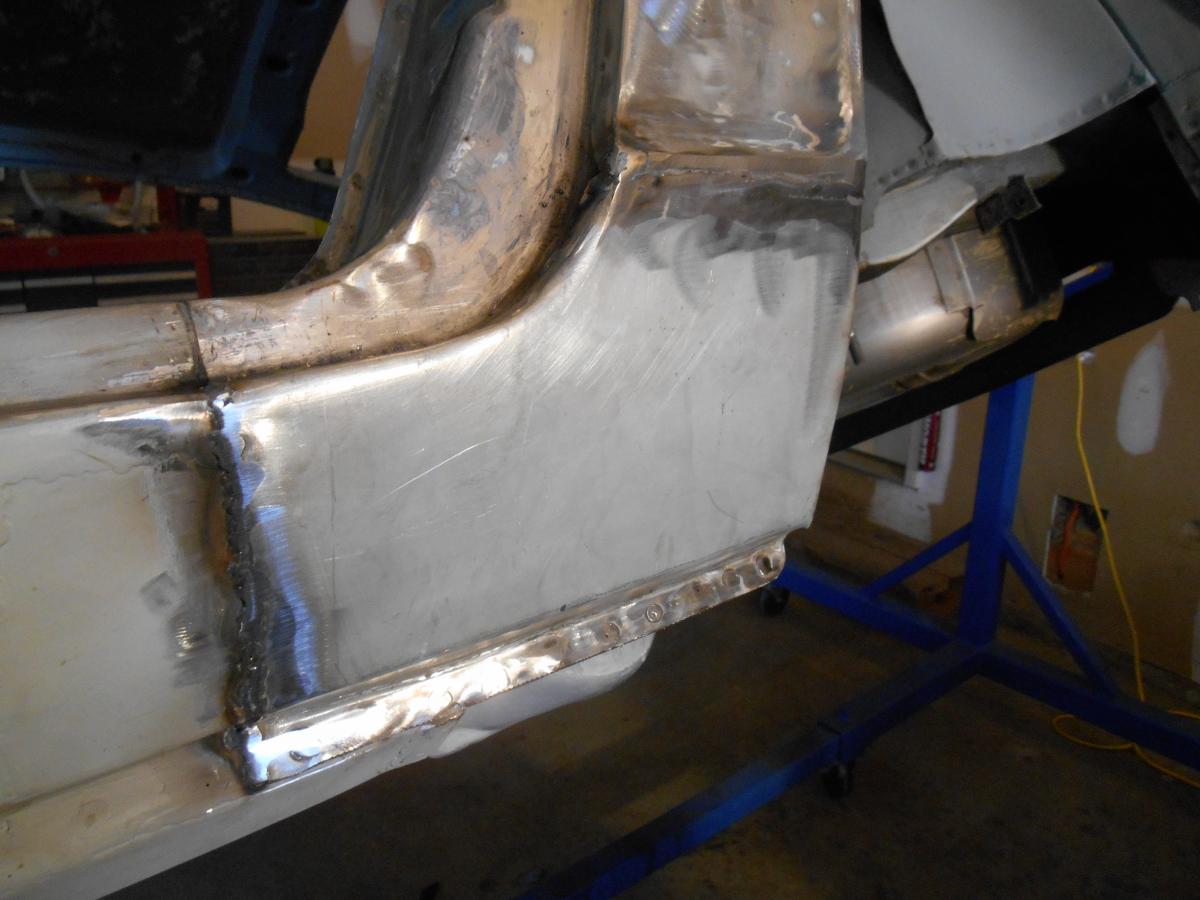
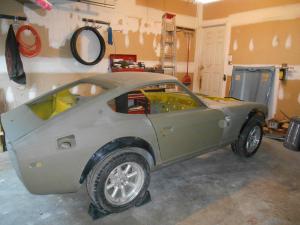
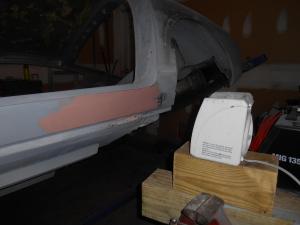
1 pointThis is older stuff. I've been incredibly remiss in posting as I go. Most of this work was done two years ago. I'll throw some more photos together and continue to post. I have a ton of stuff. Right now this is how the car looks:
 1 point
 -
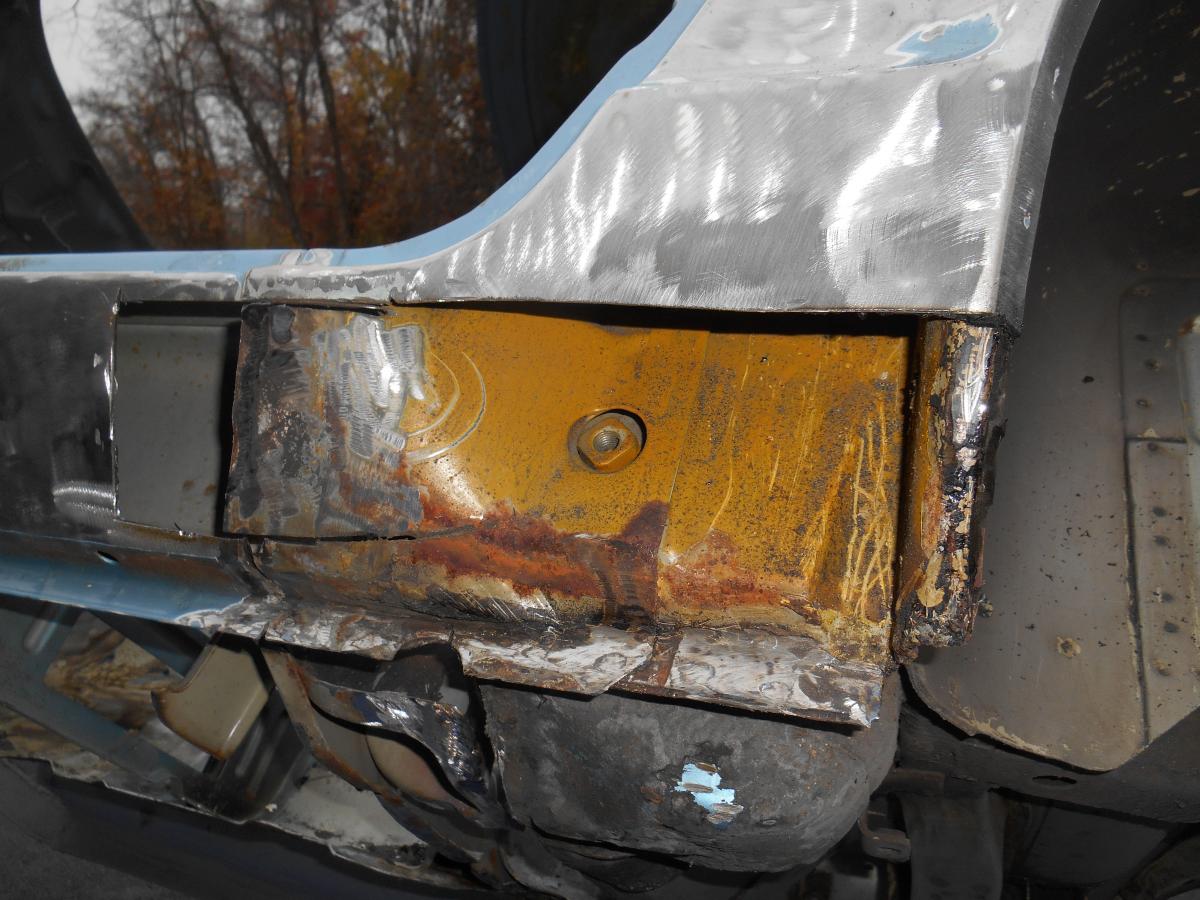
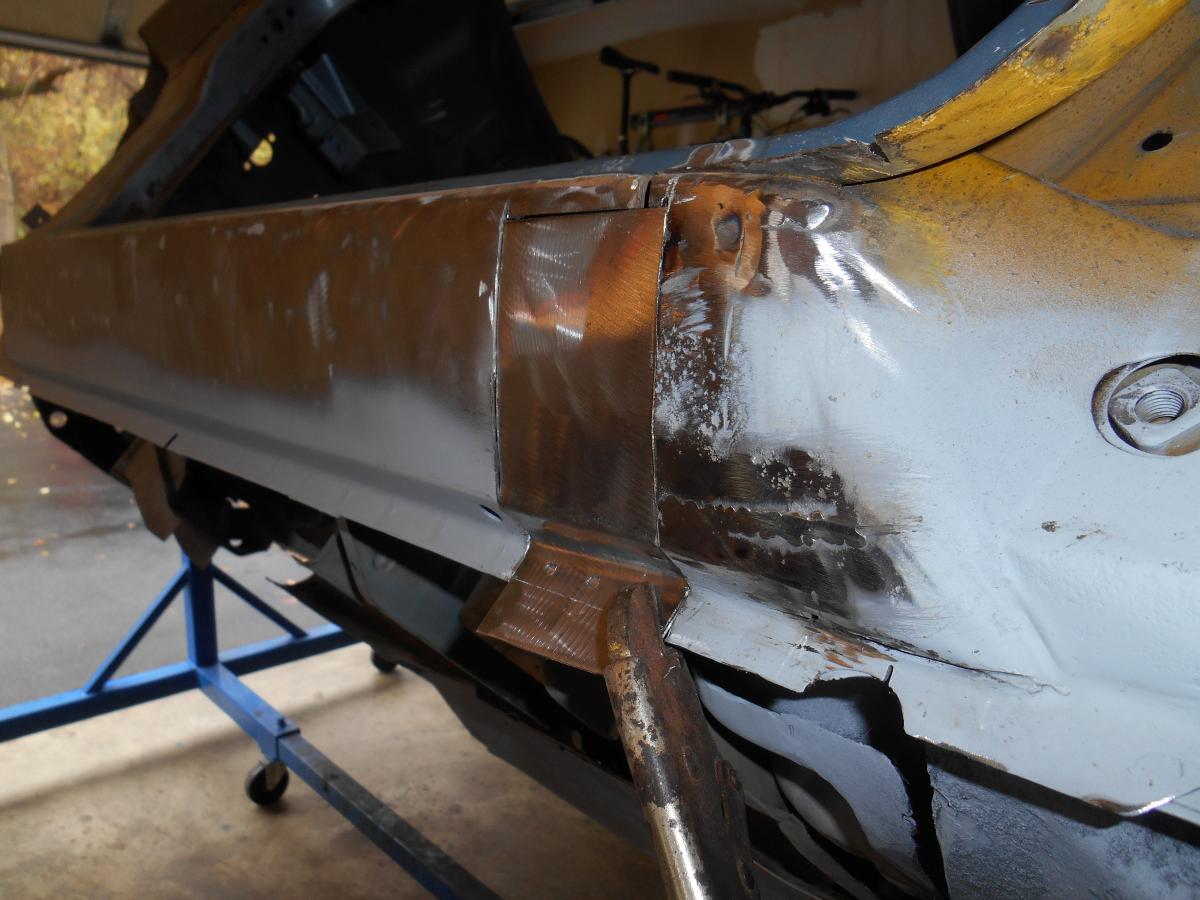
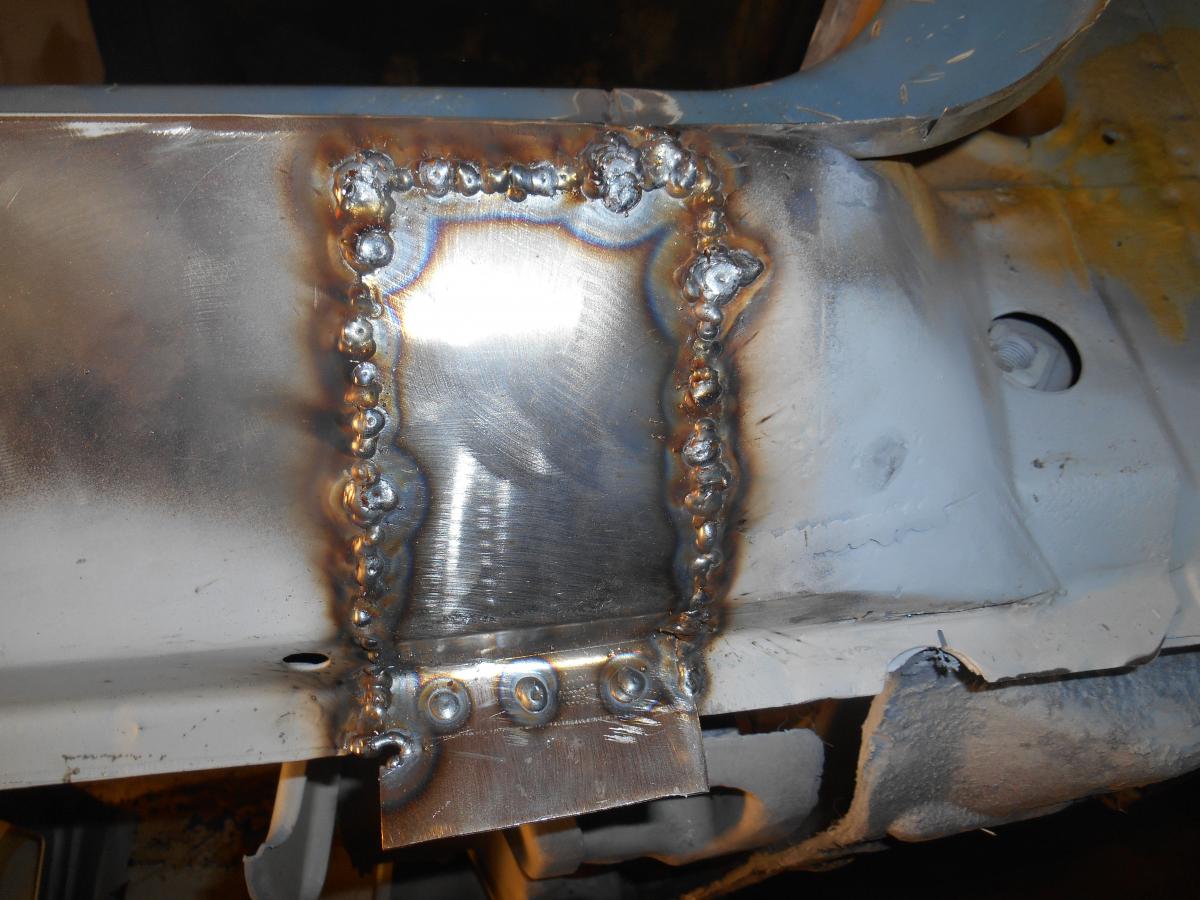
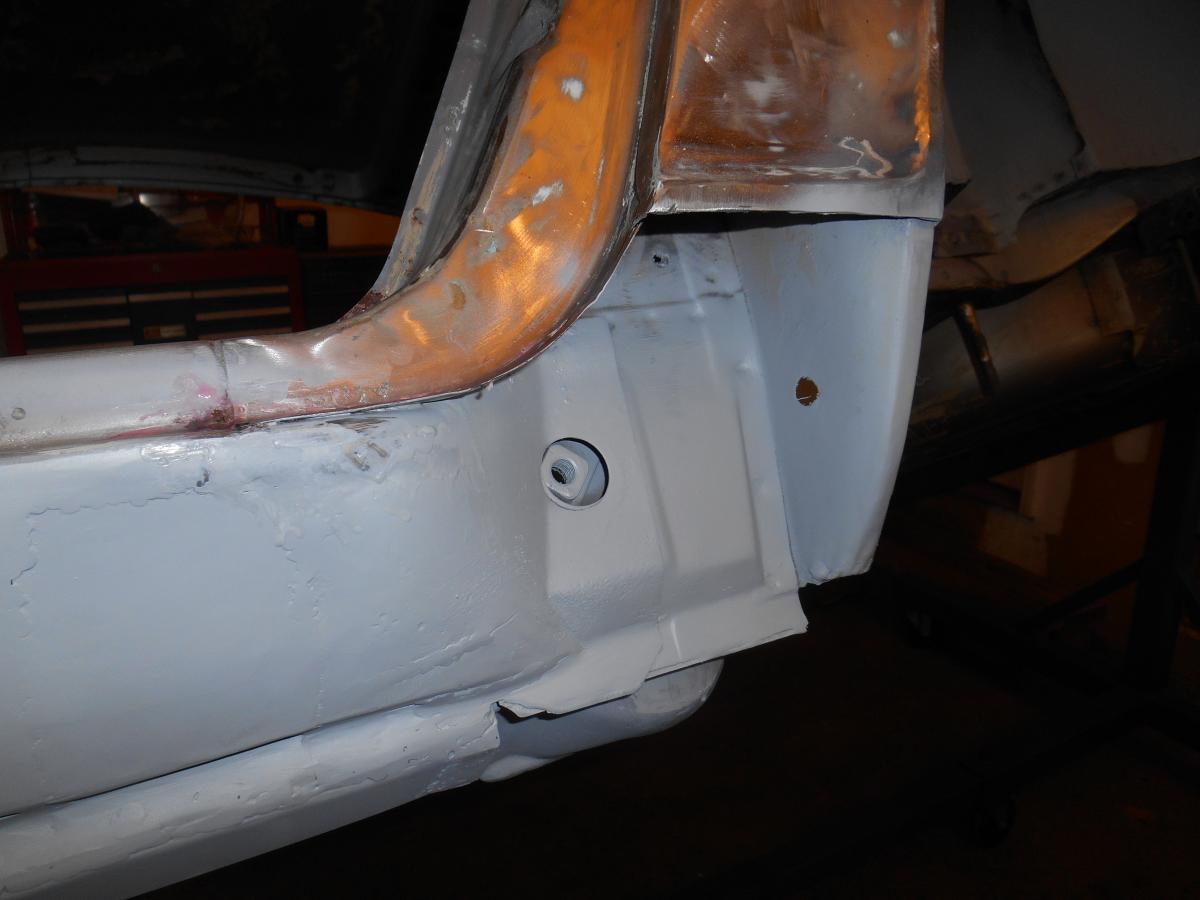
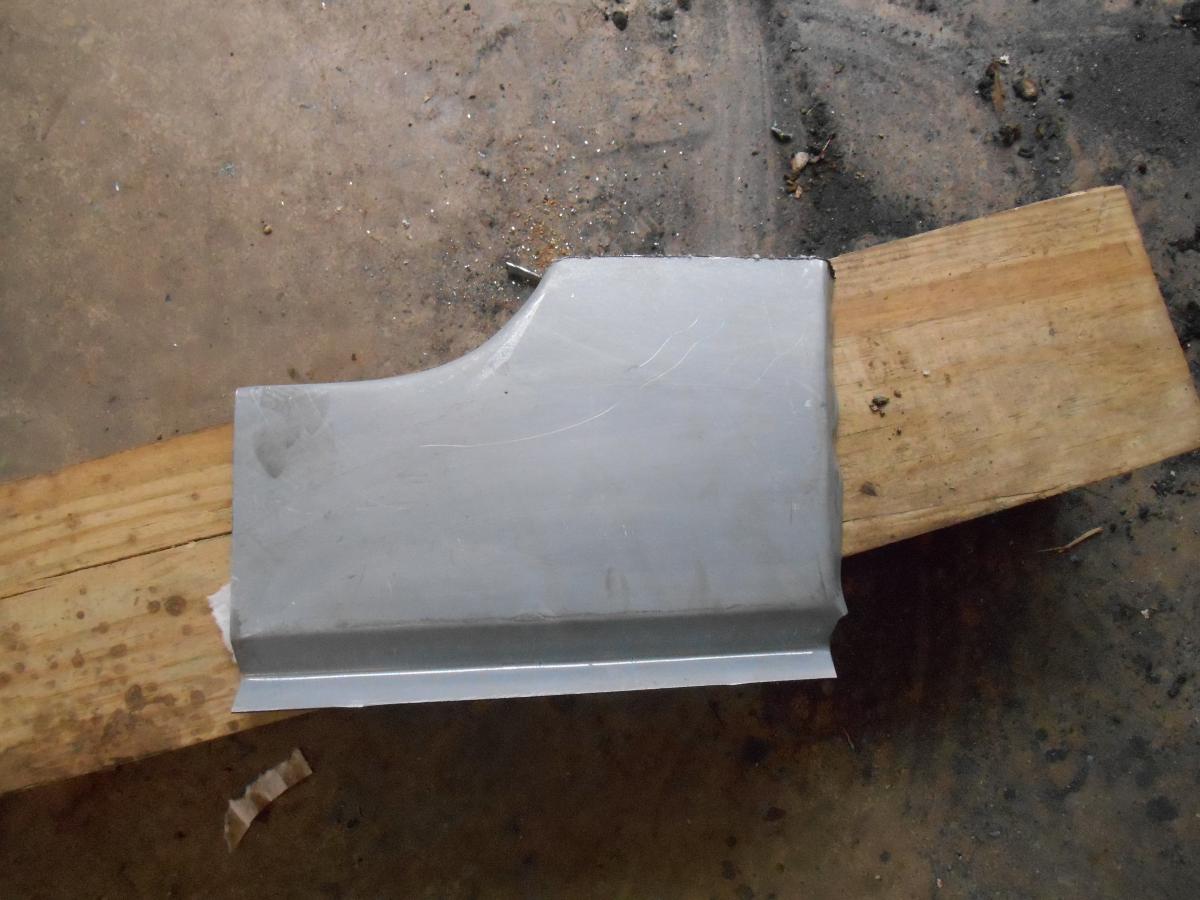
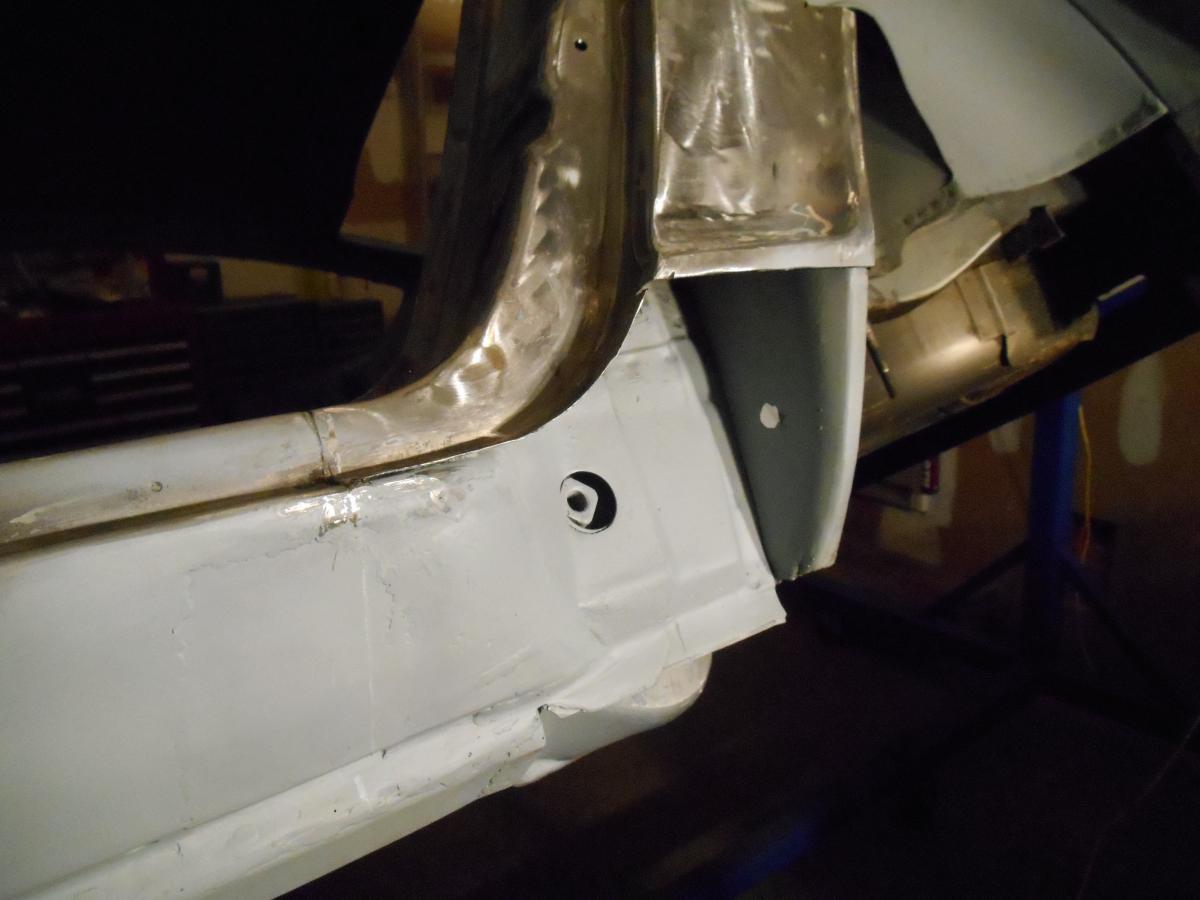
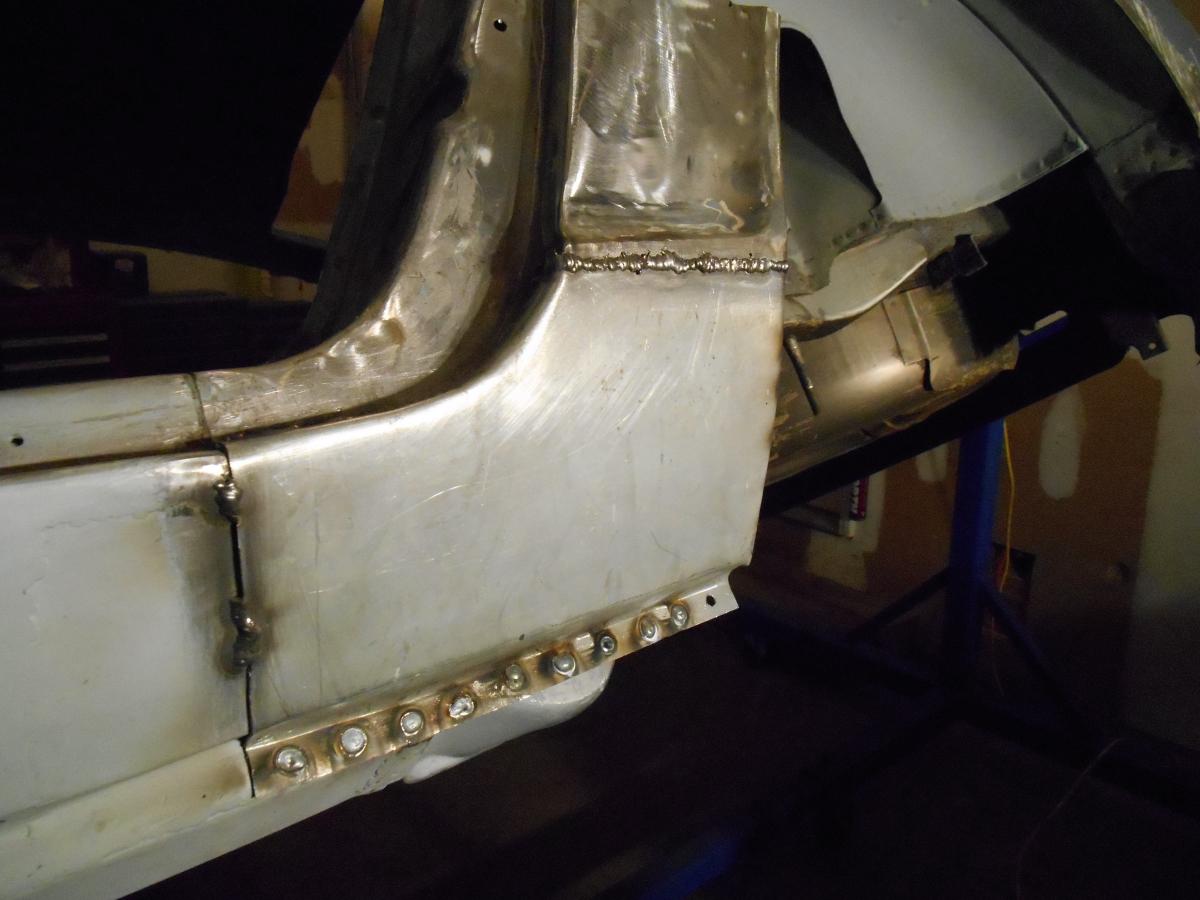
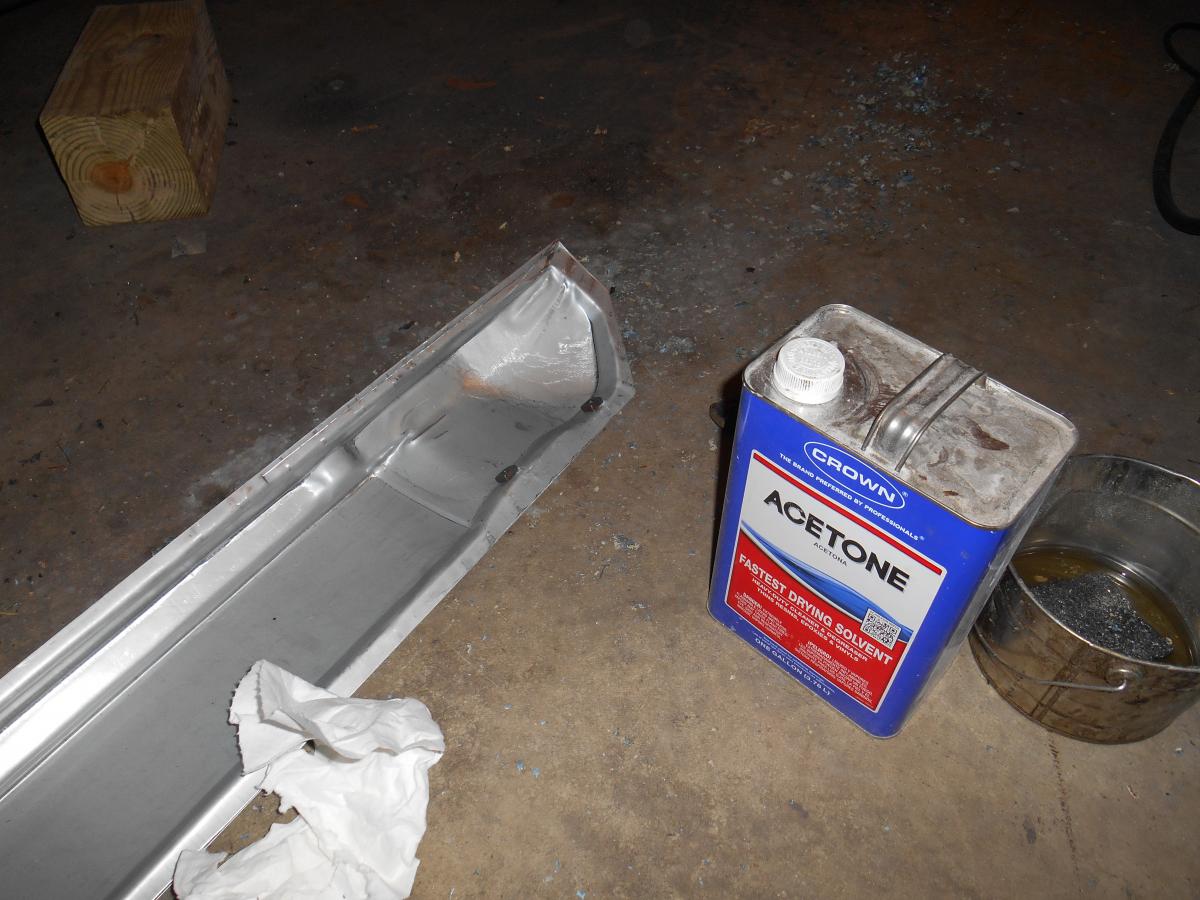
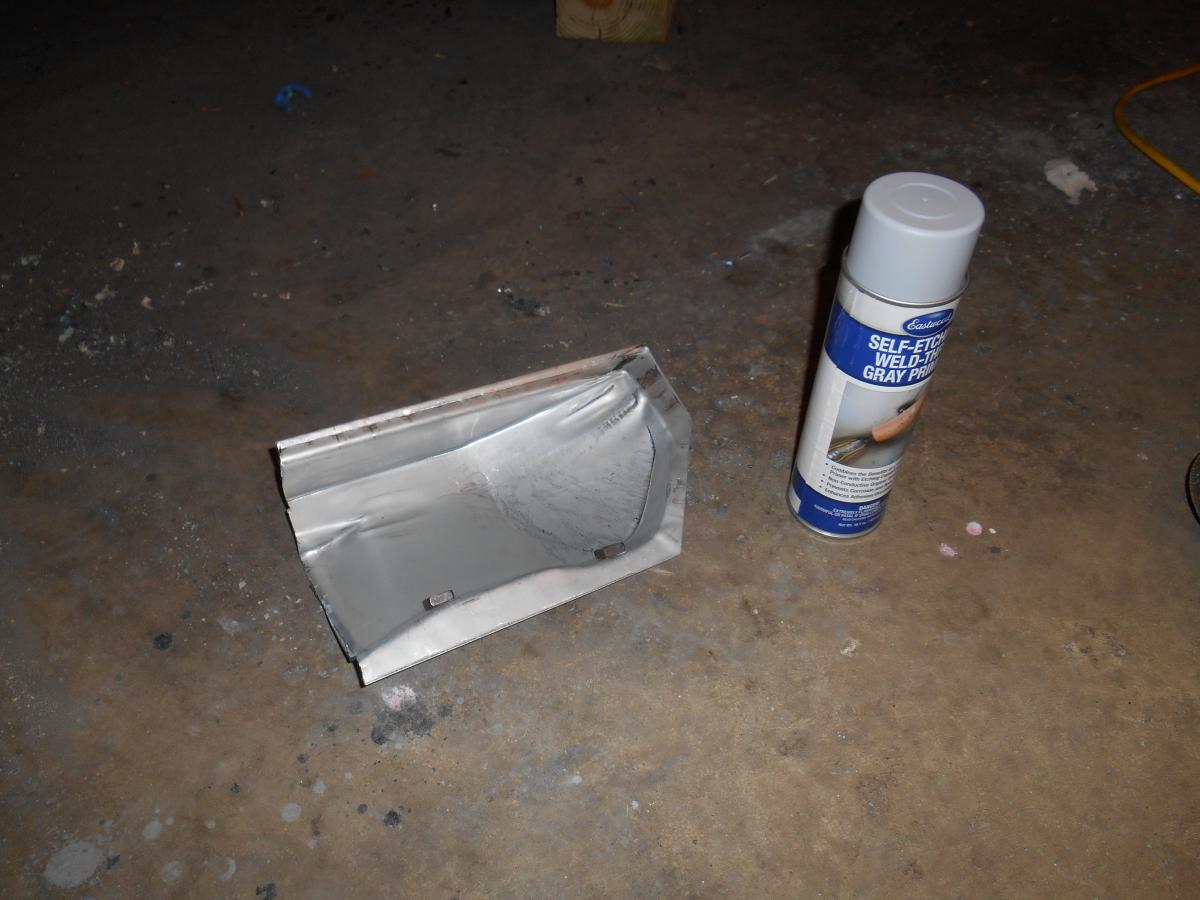
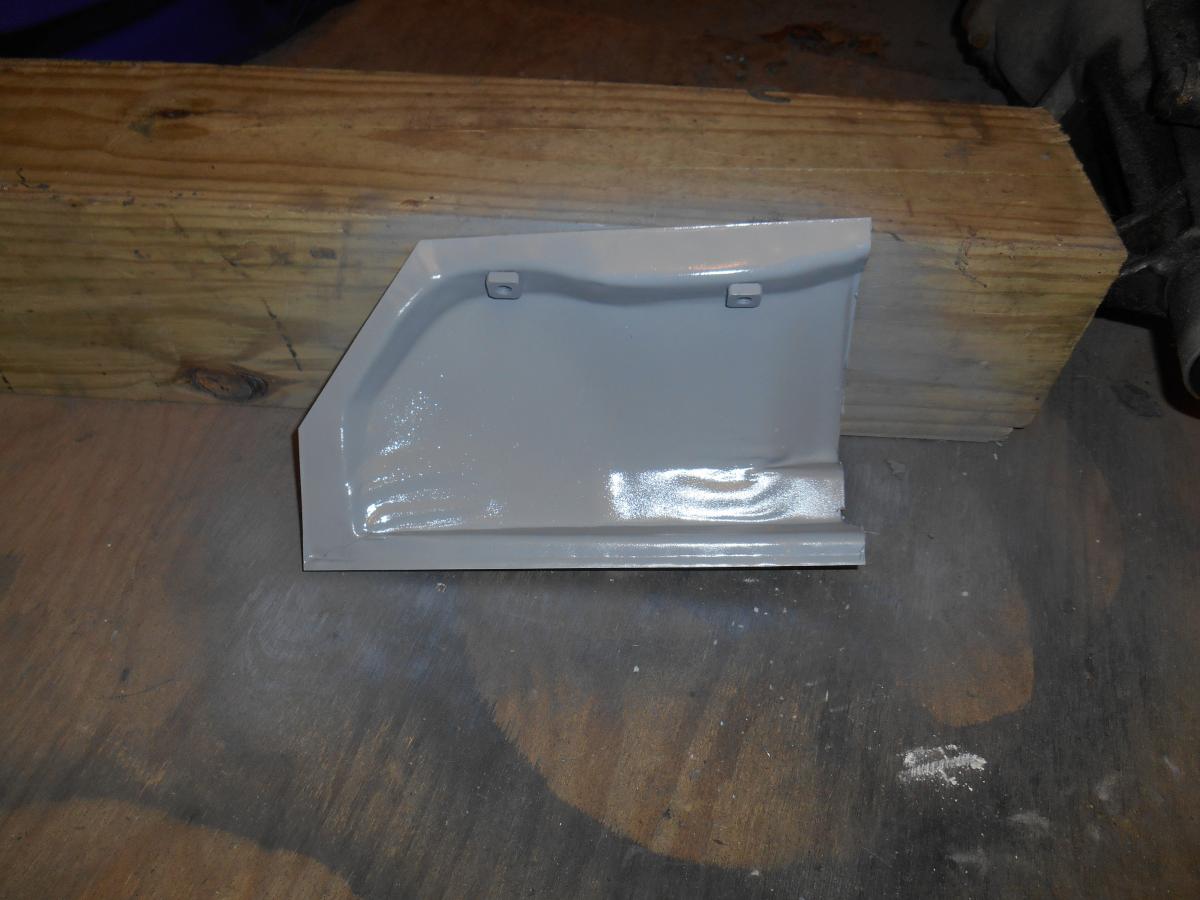
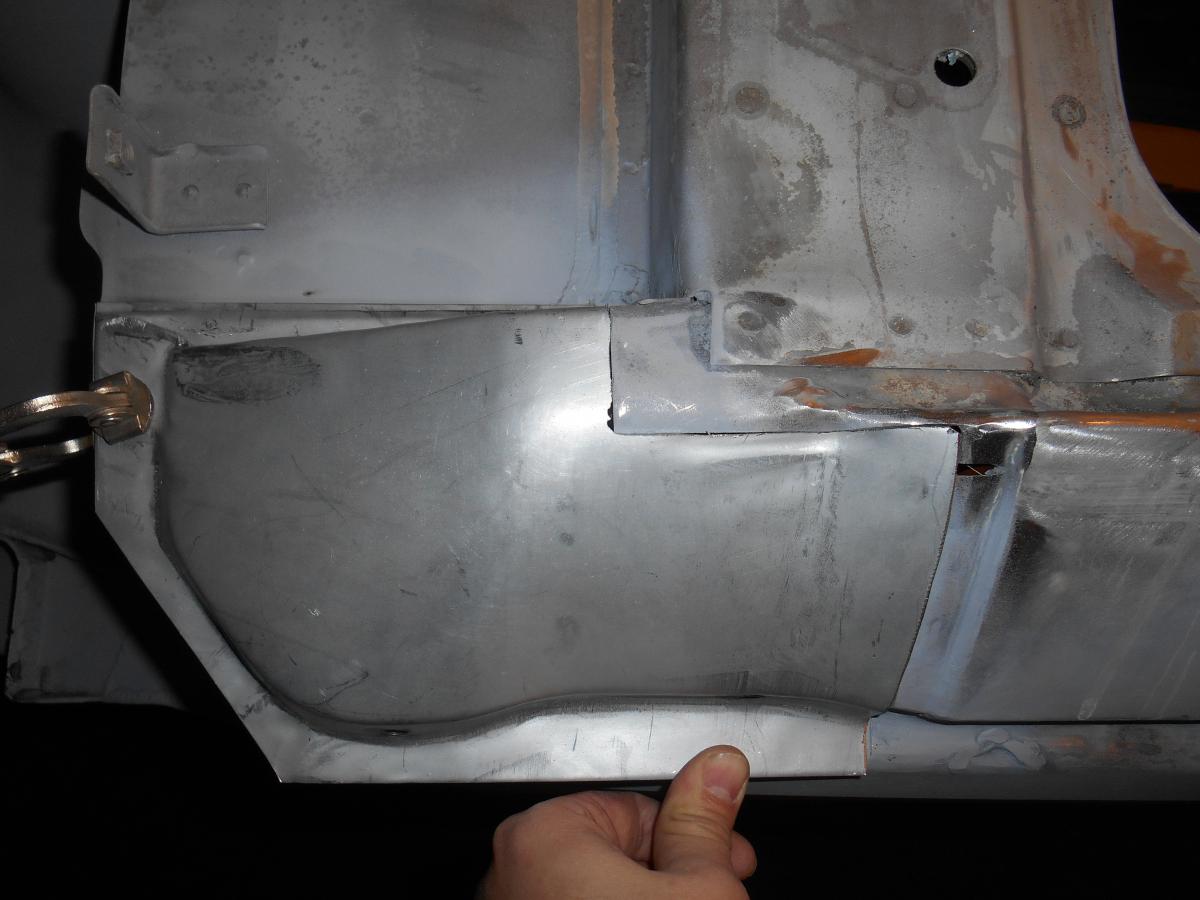
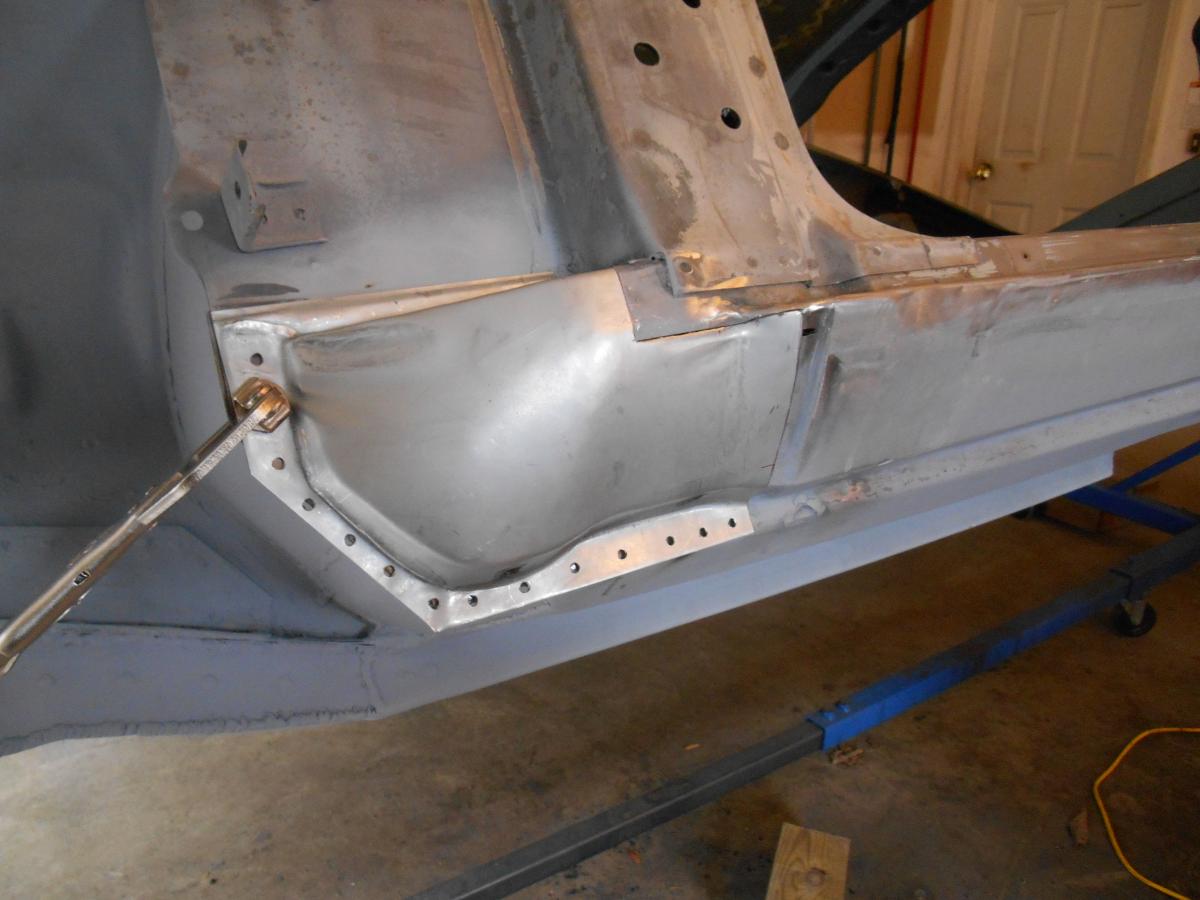
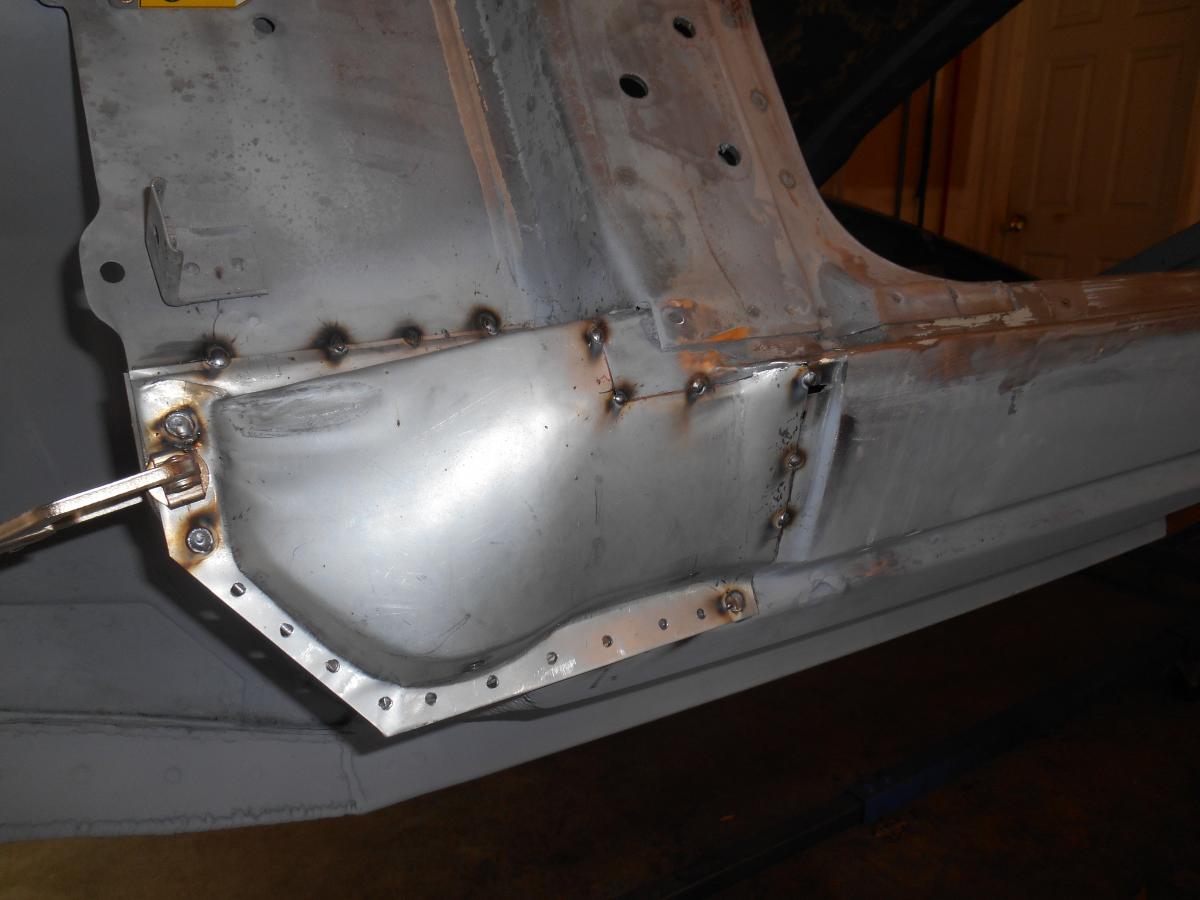
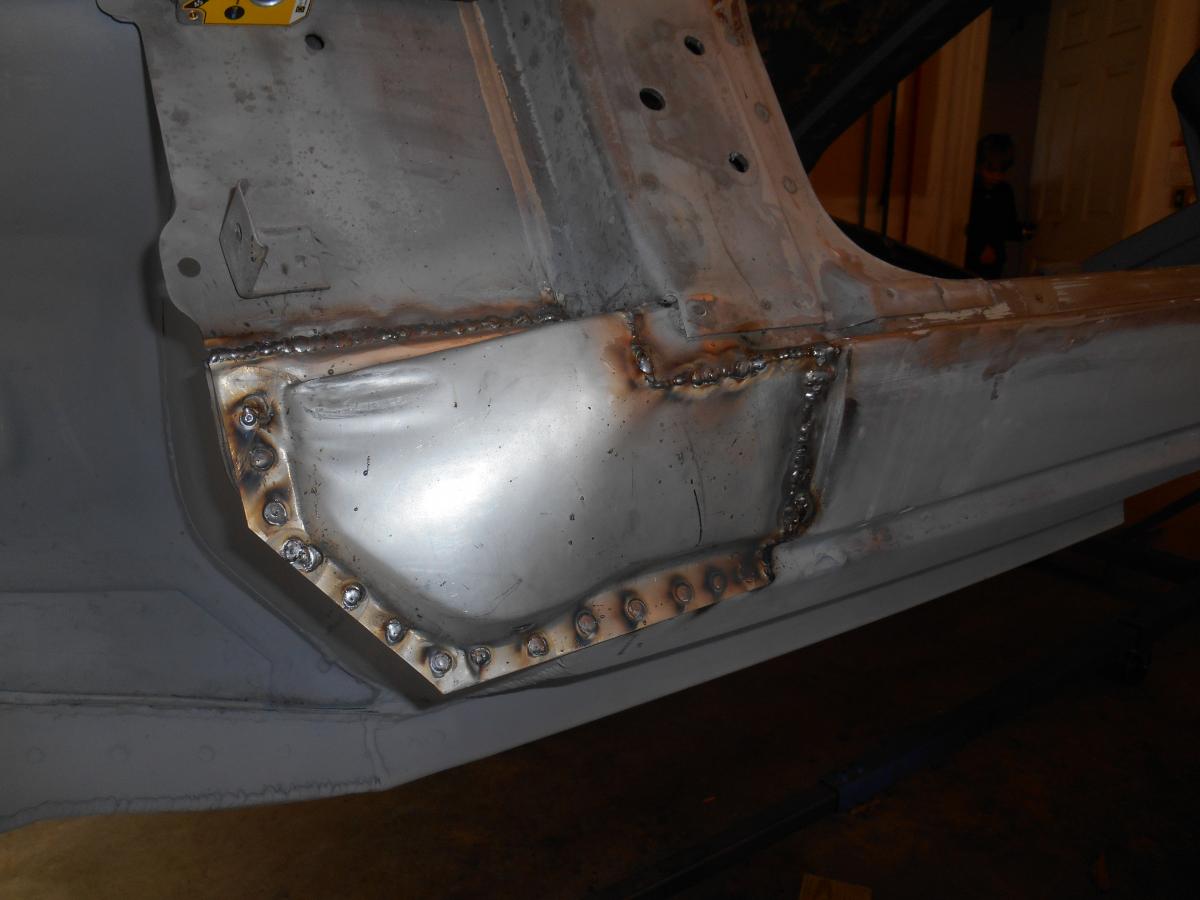
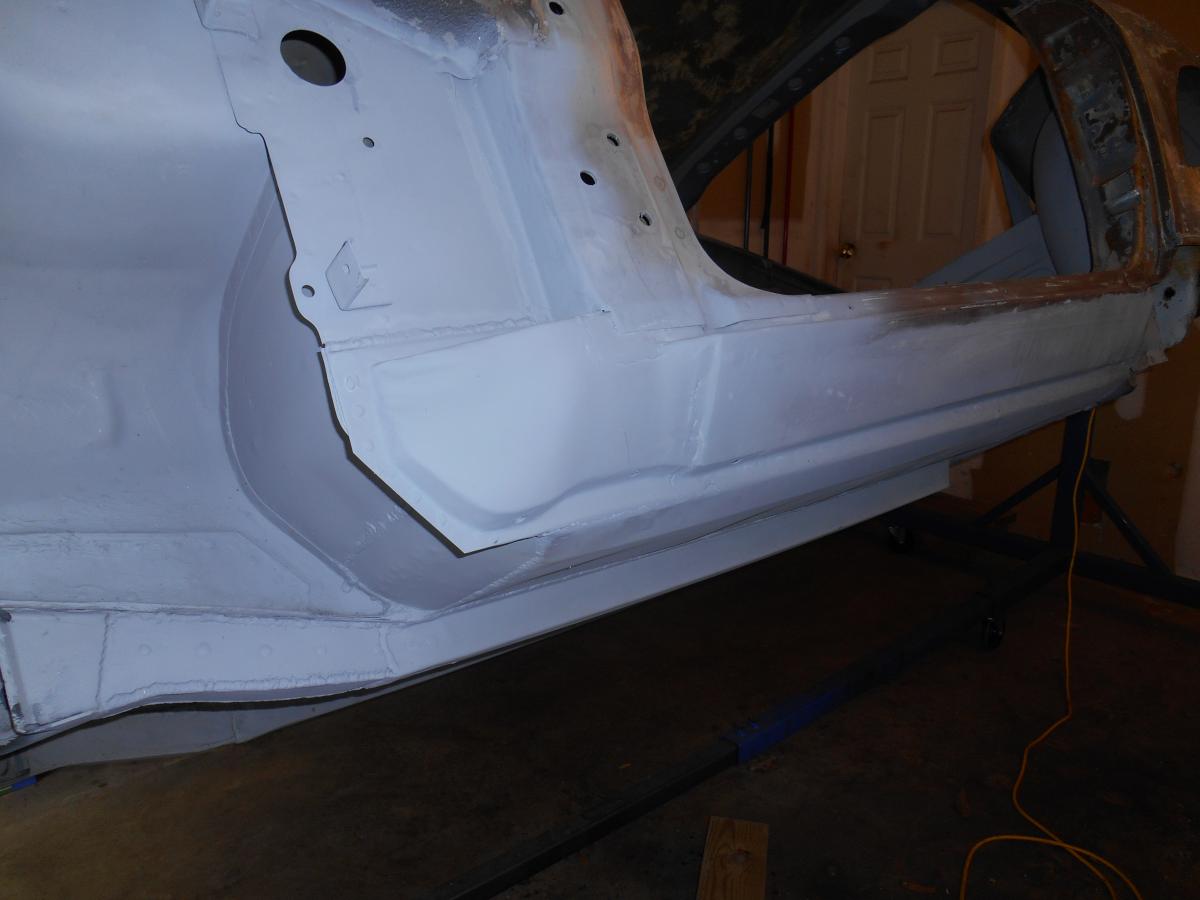
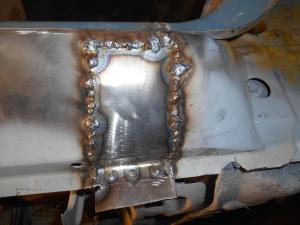
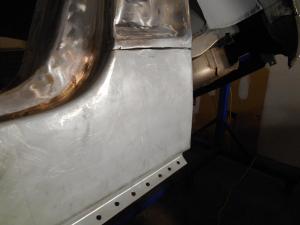
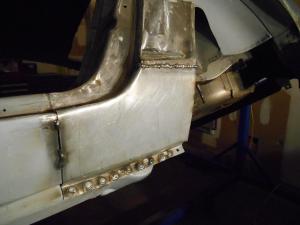
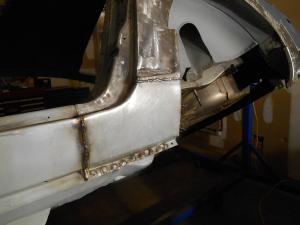
1 pointHere is my repair of the driver side dogleg. I chose to eliminate the stock seam. It's my car so :-P


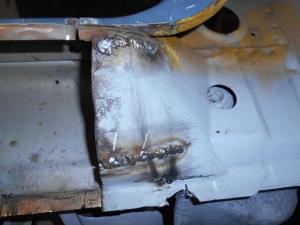
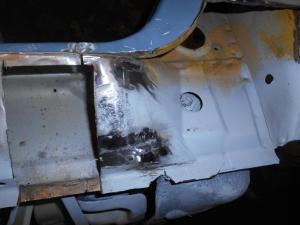
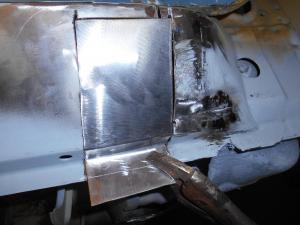


 1 point
 -
1 point
-
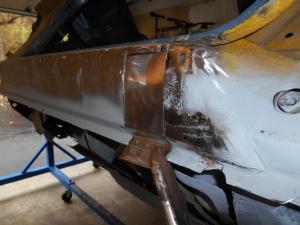
1 pointbeen a busy week getting this pig ready for epoxy-sealer. i left the heat in my shop on set a 62* and that stopped any possibility of rust. cant wait for the power bill epoxy went on this morning. what a difference1 point
-
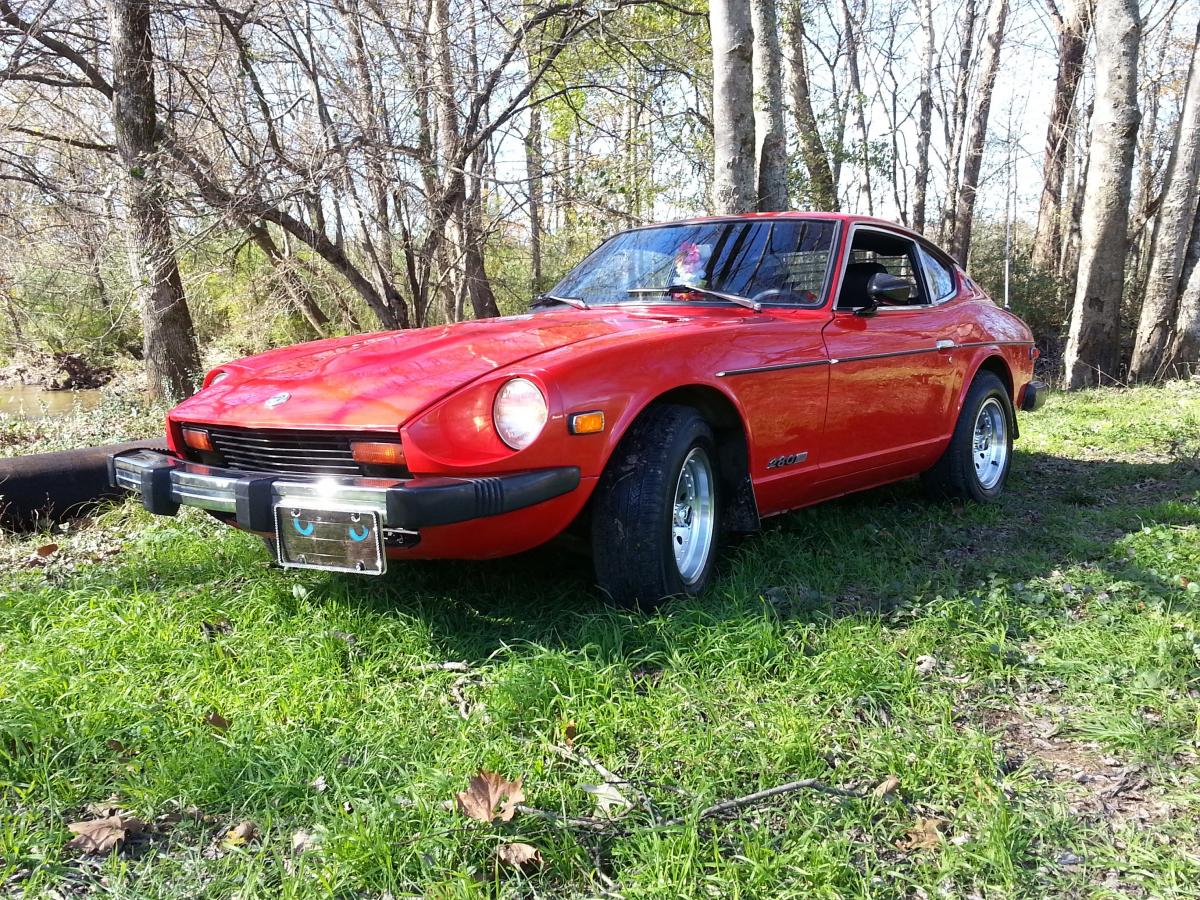
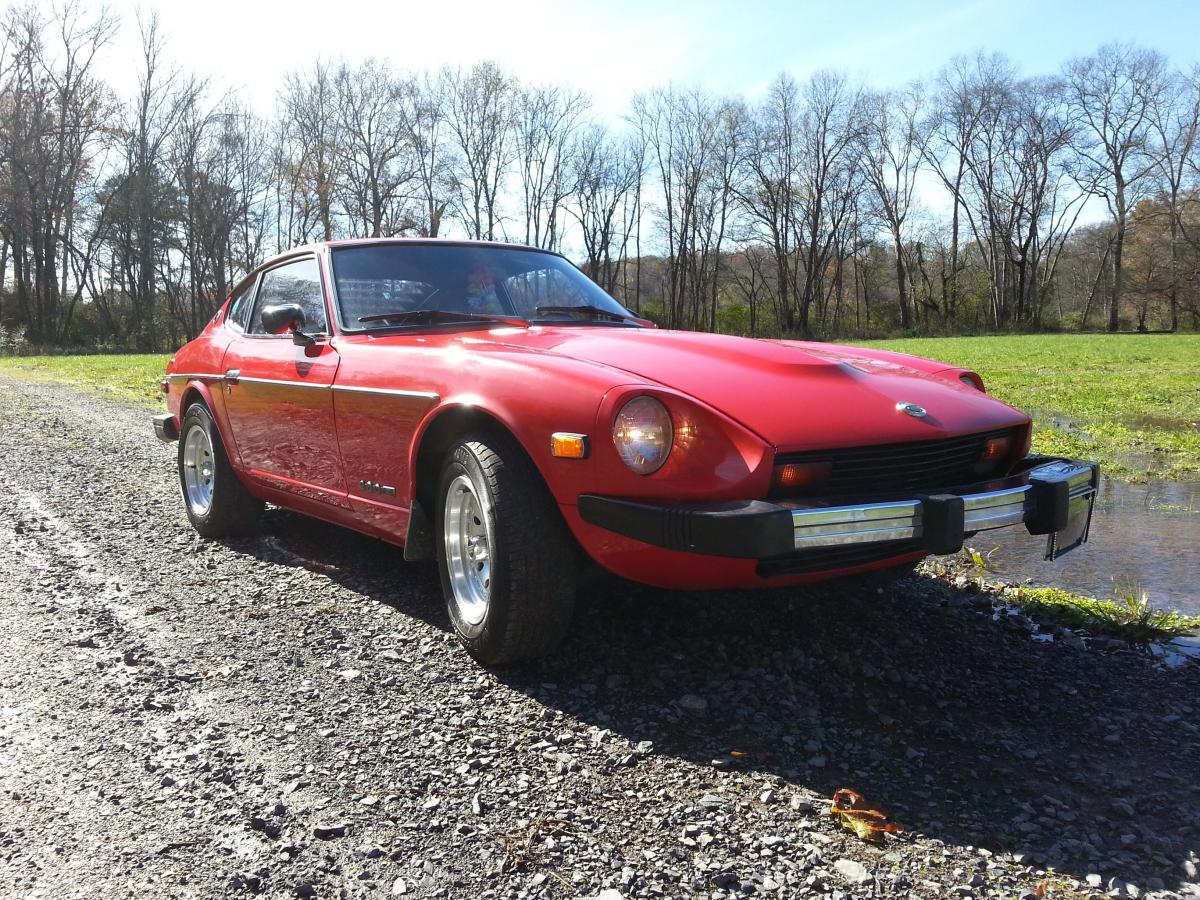
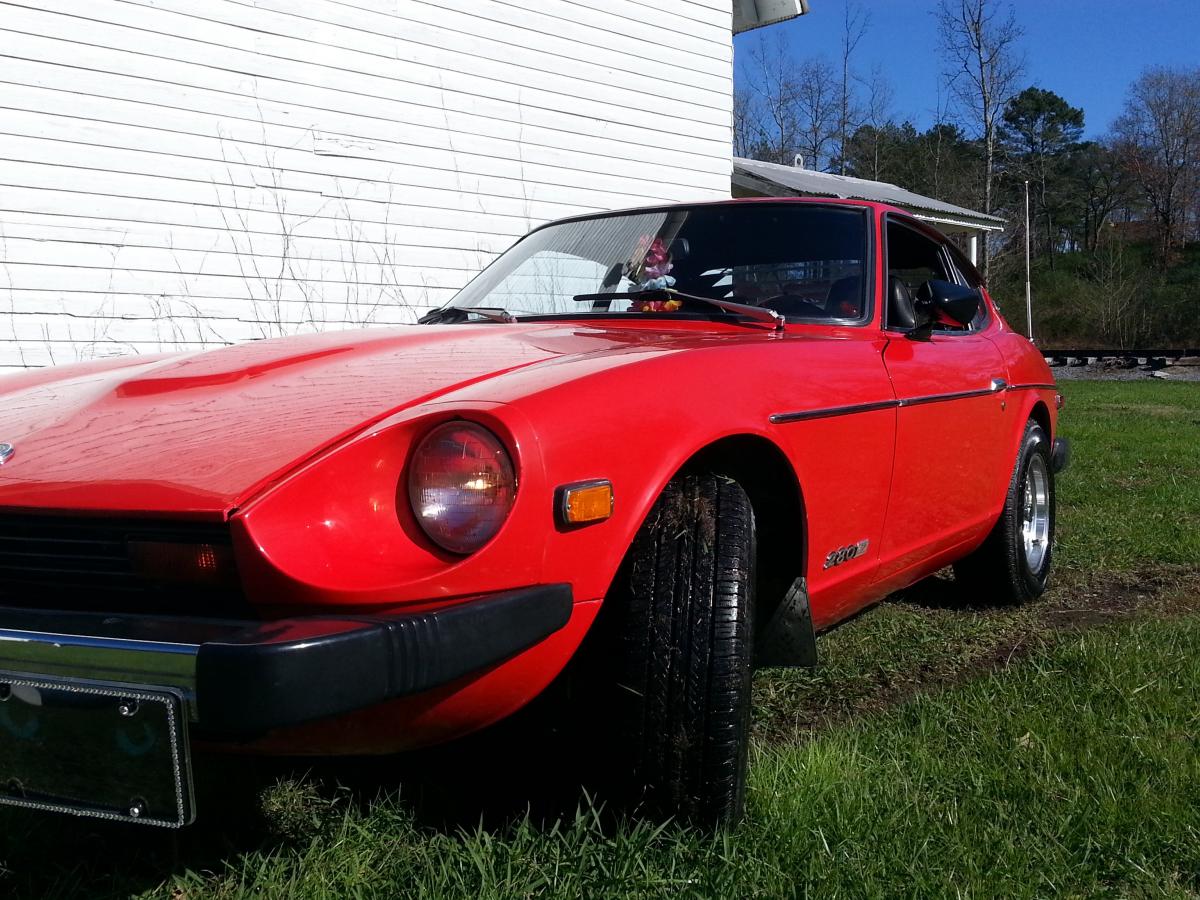
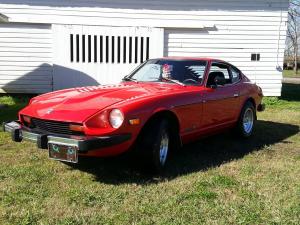
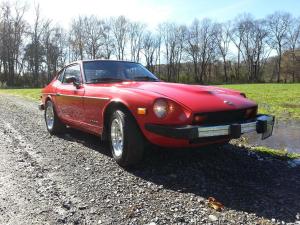
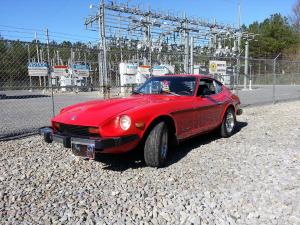
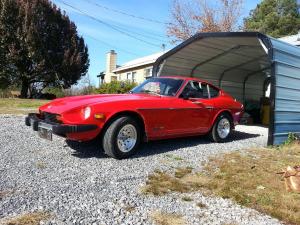
1 pointHere are my photos of RedBird, at a park on the way back home. The one with the electrical plant, I am calling POWER! The last one is of her back home again, ready to snuggle back into her safe carport. I left her out for a bit so I could go feast my eyes on her a few times before it gets dark. Oh I love her so much, I'm very happy she is back in my arms. 💜 Jai 😇 🚘


 1 point
 -
Finally managed to adjust my twin Hitachi HJG 46W. I did the balance with the unisys synchronizer and the ball was in the bottom level in both carbs. If you accelerate the ball rises. So its fine. However after setting the idle speed to 1,000 RPM and driving the car a couple of blocks i noticed that the car mantained the RPM between 1,500 to 2,000 and did not lower to 1,000 on traffic lights or stops. The mechanic says that the problem is the carburetor springs and says i need to cut them. I dont share his opinión. THere must be something wrong in the tune up. Any advice?1 point
-
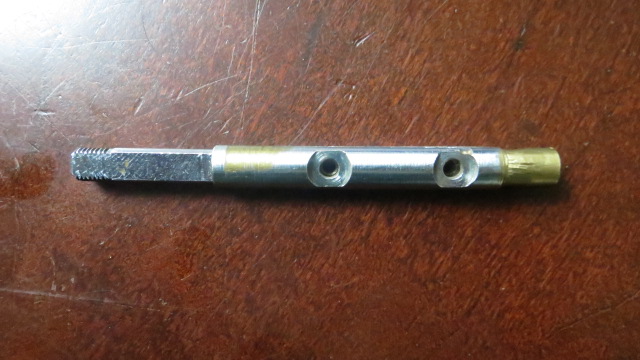
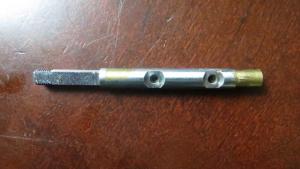
1 pointIt's the flapper for the inside of the carb. What's the real name for it ? I need to find one for my SU carb rebuild because this one is no good. Thx !
 1 point
 -
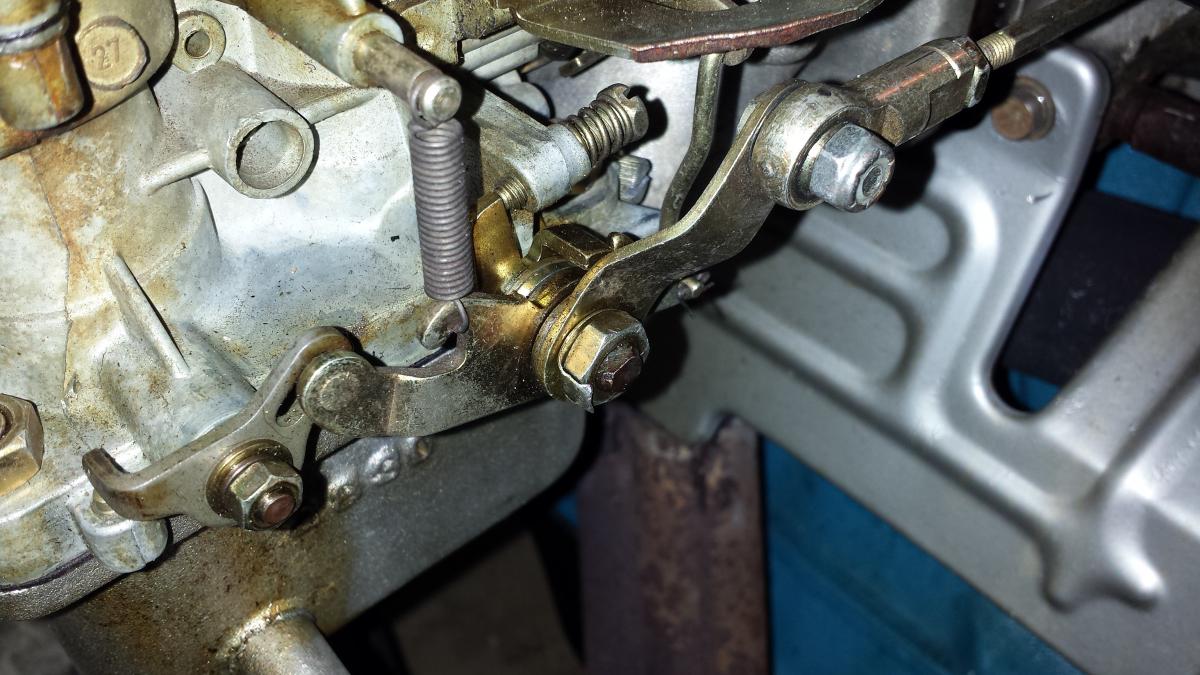
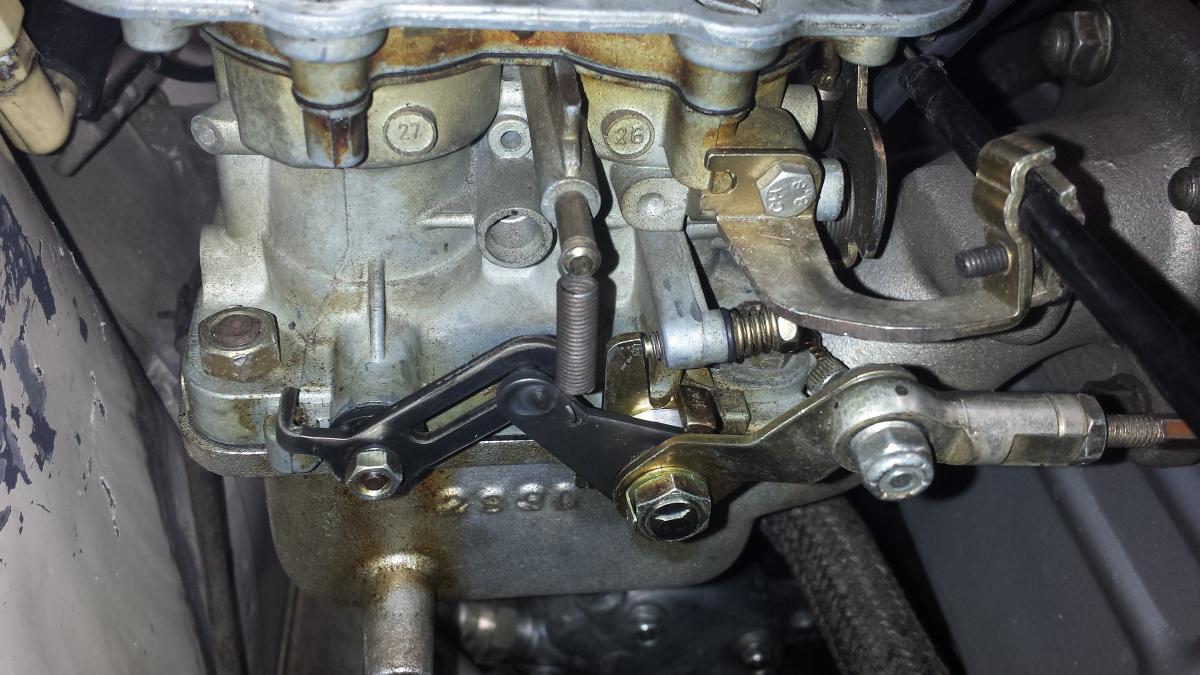
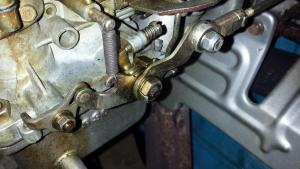
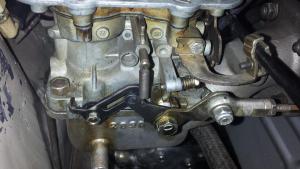
I was stimulated to investigate my Carbs when I continued to accumulate soot around the exhaust after my engine overhaul while the plugs showed the classic tan. I was also not particularly happy with 0-60 times of my 186K mile AT car. Even after a fresh overhaul, I was able to post a 10.9 second 0-60 without over-revving the engine prior to launch. An August 1971 Road & Track review of an AT 240Z said the best 0-60 time they could achieve was 10.4 seconds. This serves as my benchmark. My engine is otherwise completely stock and wouldn't benefit from going to triple DCOEs. Researching Webers, in Pat Braden's HP Book on WEBER CARBURETORS, the author states the magic of Webers is that the can be tuned to fit your needs whether it economy driving or for the race track. It turns out DGVs have seen track service on Escorts and other smaller cars. In addition, Theory of operation for the DGV is almost identical to a 40 DCOE. So I began to wonder just how many people install DGVs accepting the jetting that came with their kits. And just how much more performance could be attained by proper tuning. For those unfamiliar with DGVs, they are two barrel progressive carbs with 32mm and 36mm barrels. Common opinion is that they are sedan carbs with decent fuel economy but definitely non-sporting performance. So I contacted Redline, the US distributor for Genuine Weber (as opposed to Asian knock-offs) for any additional information they might have about proper tuning on out 240Z's. I received fantastic support from them and was able to make substantial improvements. One of their first comments is that modern gasoline formulations burn much leaner than even 5 years ago and that any carb that was tuned more than five years ago is likely to under perform. Second, they stated that they have changed the specs for the plastic floats, lowering the closed level and reducing the range of travel. They now measure plastic floats from the top of the float as opposed from the previously specified bottom. 17mm closed and 21-22mm fully open. Redline also suggested a 10-15% performance improvement could be made by converting the linkage from progressive to synchronous operation. With a progressive linkage, the throttle travel operates only the first barrel for the first half of travel and starts opening the second barrel after that. With synchronous operation, both barrel open together. While this doesn't affect wide open throttle performance, it provides the equivalent of a 49mm single barrel carb compared to the 48mm of our SUs. The standard 32/36 DGV operates solely on the primary about 90% of the time. First, I documented the jetting that came with the car, these turned out to be standard jets for a generic 32/36 DGV 5A carb and were not at all tuned for a 240Z. The standard idle speed/mixture setting procedure indicated that the primary idle jet was in fact too rich. There is a half size jet difference between the primary and secondary idle jets. swapping the jets so the primary had the leaner jet made an improvement, but it now indicated the main jets were too lean. This was enough to confirm my need for a pair of jetting kits. I order a set of synchronous linkages at the same time. I have installed the linkages and richened the main mixtures by three steps as well as leaning the idle mixtures to the proper sizes. Mid throttle response, where we live 90% of the time, has dramatically improved since I'm using the full 49mm equivalent rather than the 36mm of the original setup. It makes driving the car a much more enjoyable experience. I haven't had time to do a 0-60 run, but if there is any wide open throttle performance improvement, it will be from the richer jetting and not the synchronous operation. The original progressive linkage The new synchronous linkage All in all, for less than the cost of one new carb, I've gotten a significant boost in performance. ​
 1 point
 -
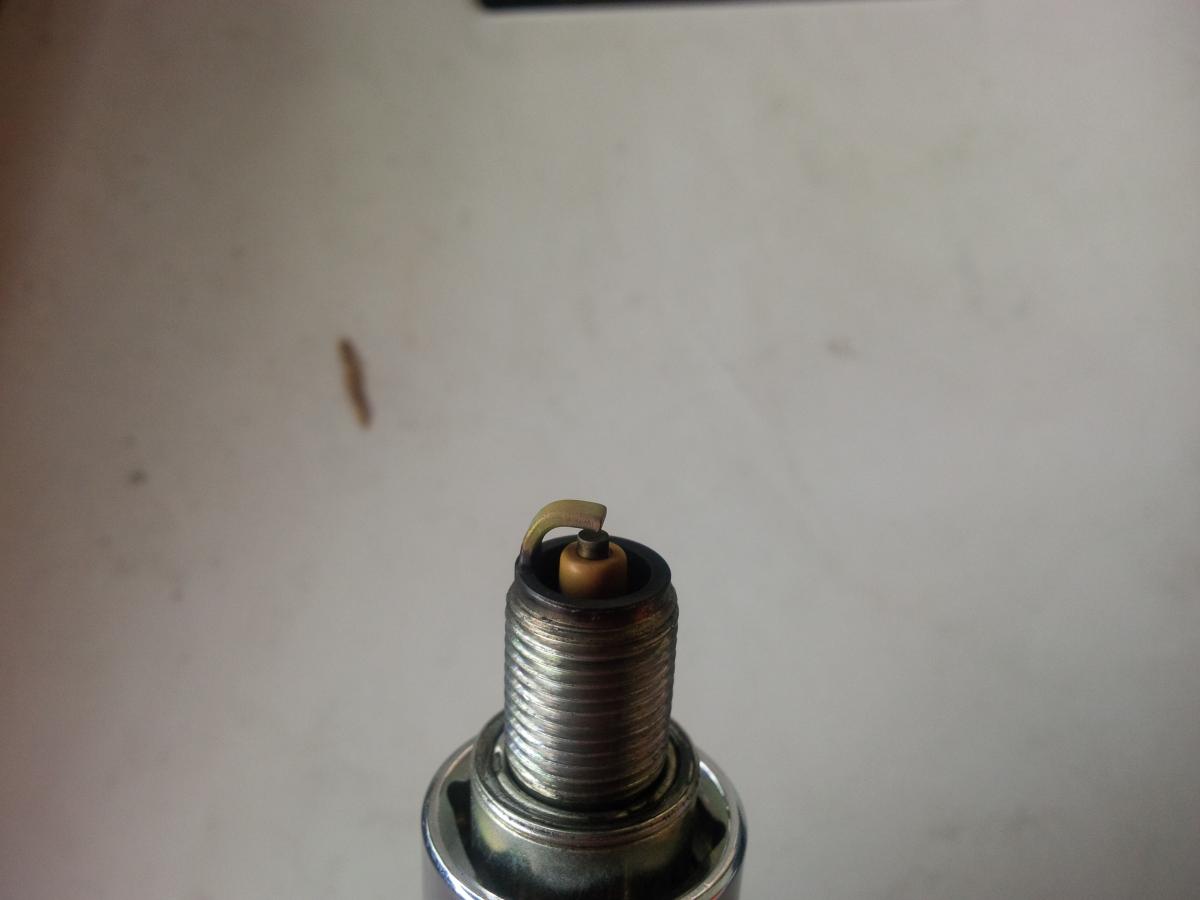
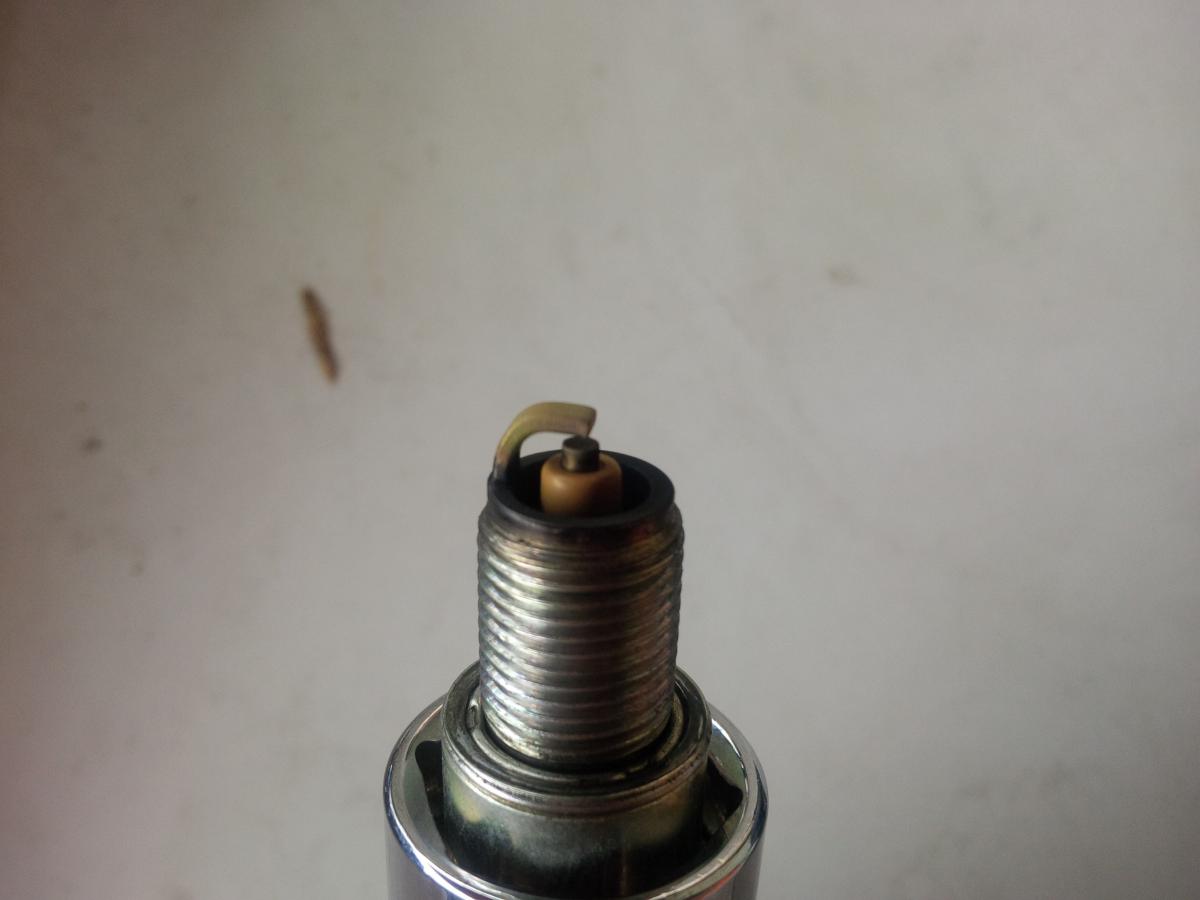
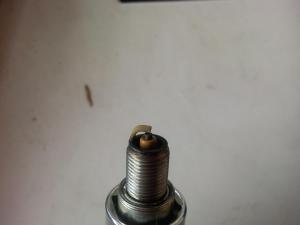
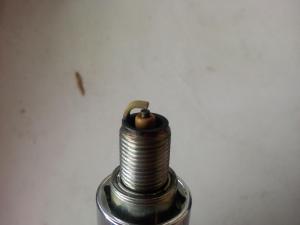
Just tuned both of my recently remanufactured by Ztherapy SU Carbs to 3 turns clockwise on my 1972 240z. I am getting this color of burn on the 6 spark plug wires (NGK BP6ES at .32mm gap). The car seems pulling okay. However if i get stucked in traffic, the plugs start to get black and the car rpms start to drop a Little bit more. I already made the following mods to the car and still cannot get a completely steady idle: - Change pertronix coil and ignitor (3.0 ohms) - Bypassed the ballast resistor - Swapped the Far 311 Race cam to a 274F Schneider cam -Changed rocker arms -Retainer springs -Lashpads Am i still too rich and need to go down to 2.5 turns?? One of the mechanics says this non stable idle is due to a valve or couple of valves being damaged?? How come?? I did a compression test and the result was the following: cylinder 6 --------------------- 175 psi cylinder 5 --------------------- 180 psi cylinder 4---------------------- 180 psi cylinder 3 ---------------------- 185 psi cylinder 2 ---------------------- 180 psi cylinder 1 ---------------------- 180 psi I do not want to keep on replacing parts that are not necessary. My aim is to bring the car to the steadiest idle and install an AC system. Anyone????
 1 point