Leaderboard
-
sdyck
Free Member4Points151Posts -

siteunseen
Free Member4Points15,114Posts -

wheee!
Free Member2Points4,607Posts -
S30Driver
Free Member2Points1,580Posts


Popular Content
Showing content with the highest reputation on 09/29/2015 in all areas
-
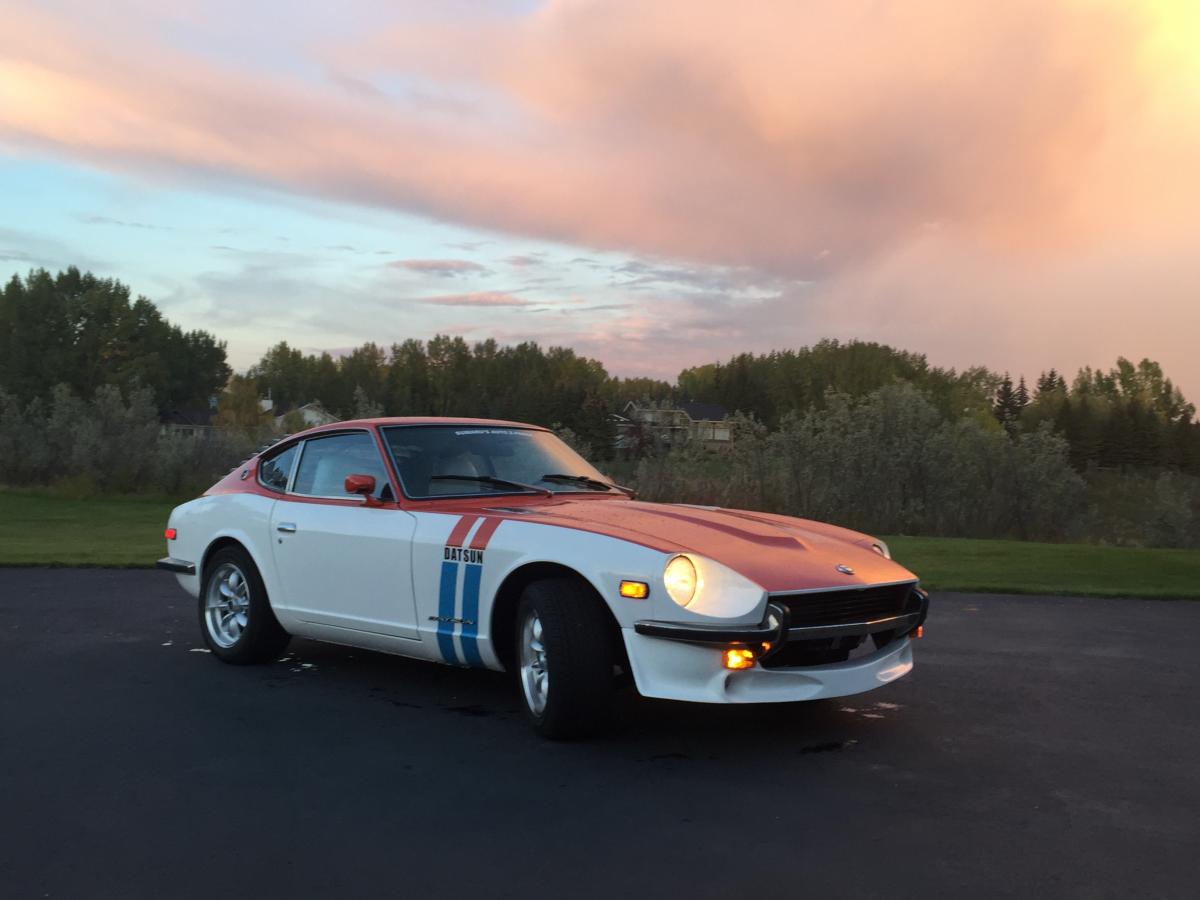
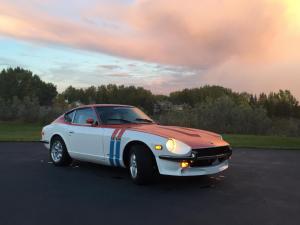
Had a great time in my Z this summer, this pic is from a couple of weeks ago, leaves are turning here in Calgary and we expect Saturday to be barely above freezing Hate the thought of putting her up for the winter.
 4 points
 -
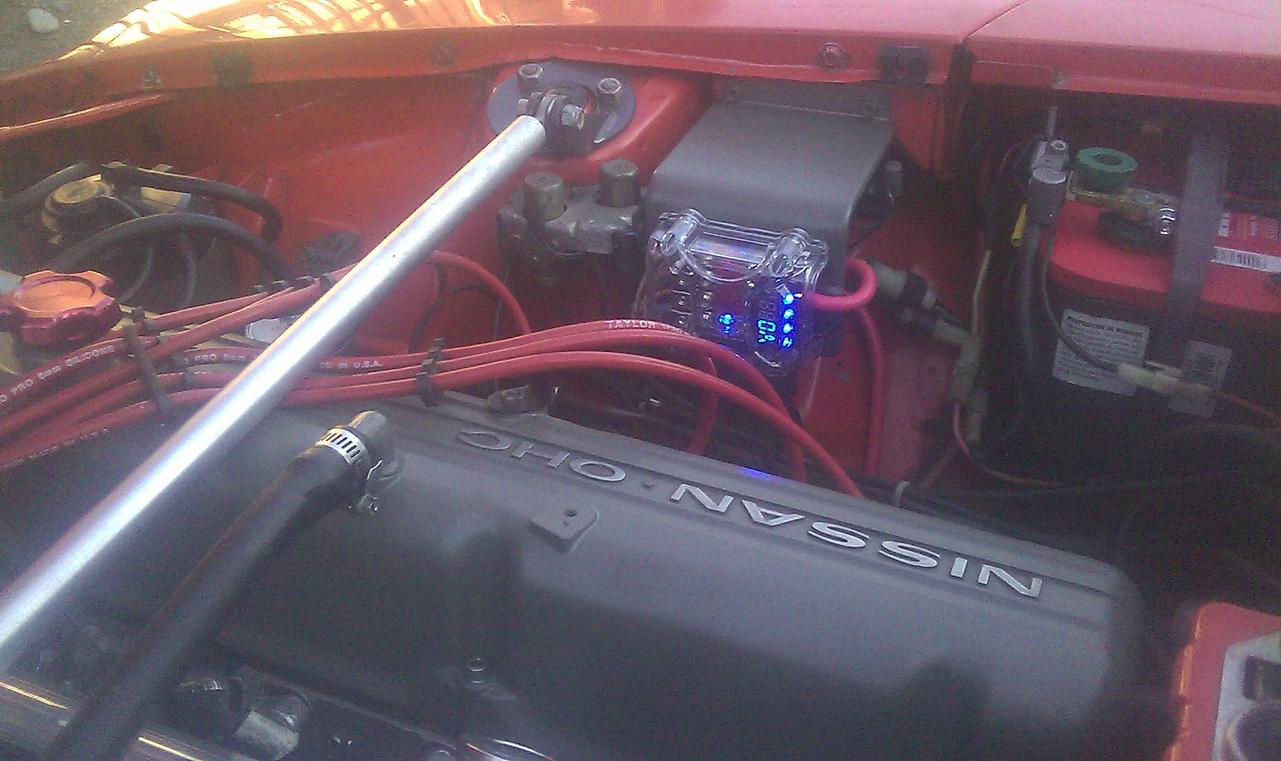
2 pointsCompleted my installation of a fuse block to replace the ageing fusible links. Used the same Mini ANL block that Mike W used in his 260, except purchased the 4 fused output block. One 80A ANL for the alternator feed back, and three 50A for the other circuits were the fuses I used. This model has 2 inputs so I will eventually run another cable from the unused port to a inexpensive 2 output small fuse block without the digital bling for the FI links. The display has 4 led's for the fuse status, and the system volts / current. The display cycles between volts & amps about every 10 seconds and shuts itself off in 90 seconds if there is no circuit activity. A good thing, I was worried it would stay lit up all the time & was getting ready to put a small toggle switch on the ground wire for the display to kill it. Worked out well. Fairly accurate, shows my battery to be 12.9 volts when the car is off. Shows my parking / dash lights are 3 to 4 amps when on.
 2 points
 -
2 pointsl Each part must be shiny to start with, I also make sure my zinc plates are shiny and clean and not dull. Agitation is a must when plating and I do use a small amount of zinc brightener. Then it all comes down to your technique what will work with your own setup. What works for me might not work for you, I tried many other peoples way and it just would not work for me. very important is the prep and the correct calculation on amps to use, if this is to high you will burn your zinc plates and if it is to low you will get the same result as being to high, which is dull plating. That is why you must do a lot of trial and error and figure out what will work for you. If you use to much brightener your chromate will wipe off, to little and it will be dull. Once I figured my setup out, I do it the exact same way even down to the seconds on some of the steps. As funny as it sounds but seconds count on some of the steps. sand blast wire wheel acid dip wash I then plate at .14amp SQ 100 deg bath 2 agitation pumps 20 min plating time 85 deg chromate bath2 points
-
2 pointsYears from the finish line but the wife got her vanity plate already... Sent from my iPizzle ringy dingy device....2 points
-
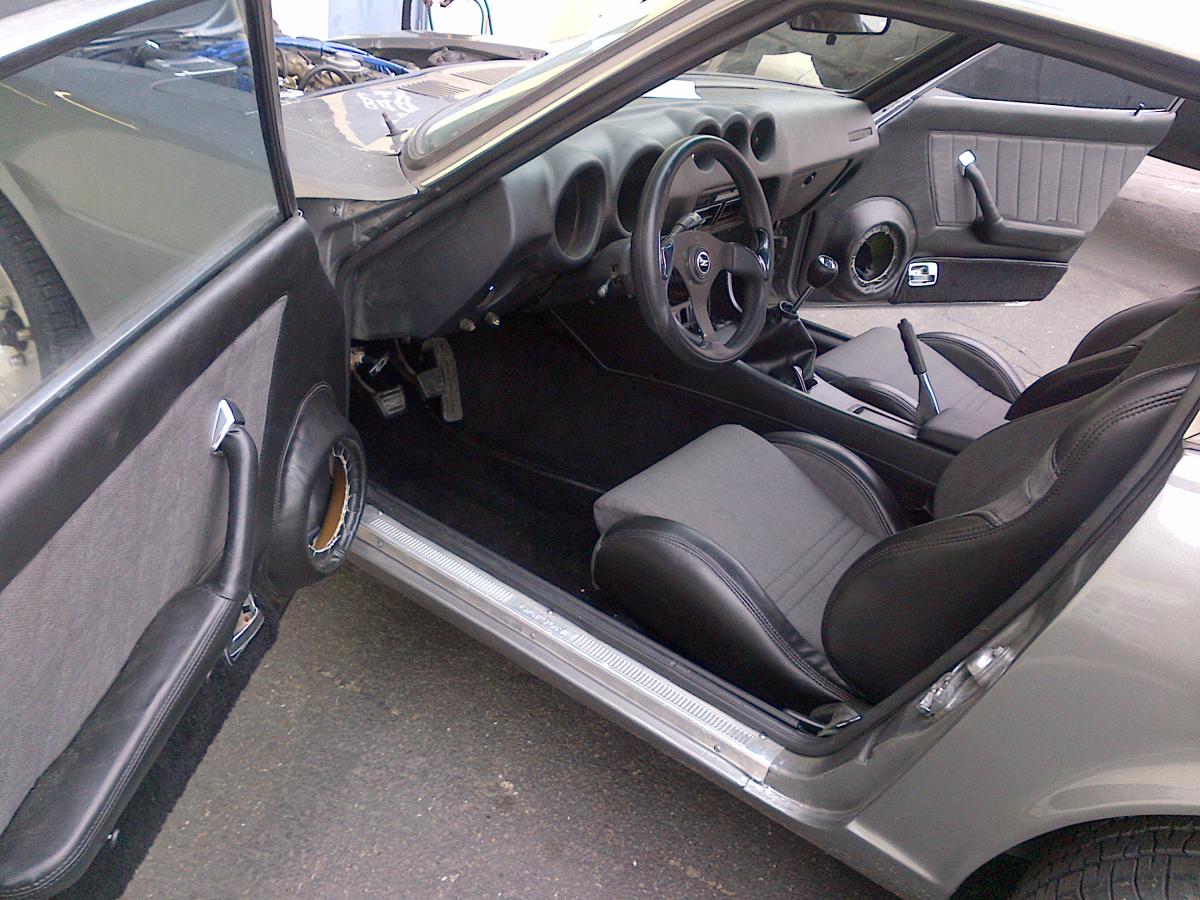
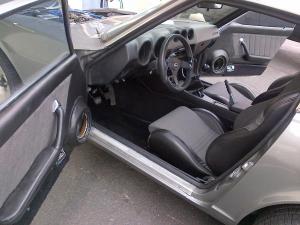
I bought some custom fiberglass door cards with built in speaker holes for my 260 which was already cut up by a previous owner. My speaker system consists of 5-1/4" speakers in the doors, 6x9's in the toolboxes and an 8" sub in the spare tire well. I am really picky about audio but am not quite audiophile status which is why i tried so hard to get a nice system installed, but it ended up being overkill. From my experience my best advice is to get a pair of 6x9's behind the seats and fire them up toward the ceiling with a slightly forward tilt before cutting up your car. The 6x9's in the toolboxes didn't require any modifications that weren't reversible: I simply removed my toolbox doors and built a wooden frame for the speakers using the toolboxes as speaker boxes. Should i want to return to stock i only need to pull the wood out and re-mount my toolbox doors. After all was said and done i found the front speakers werent making much of a difference in sound quality because the 6x9's were closer to my ears. It sounds like audiophile blasphemy but try it out before cutting up your doors.

 1 point
 -
I've been meaning to post about this topic and just haven't had the time to get to it until now. Hopefully this is not too late to help you out. First, I have been down this path multiple times with Champion radiators and electric fans. My first implementation used an adjustable temp control module that required a probe to be inserted into the fins of the radiator. Although this setup was fully functional and provided the ability to select the temp at which the fans turned on, I never particularly like the idea of the probe going through the fins of the radiator itself, so I searched for a more elegant solution. I found a really neat product from a company called Dakota Digital, which is essentially a digital fan controller that is highly programmable. You can set fan on temp, fan off temp, have the fans run for X minutes after the car has been shut off, etc. They also provide a temp sensor specifically made for this unit which I also used. I ended up removing the coolant drain plug on the drivers side of the engine block and replaced it with the sensor, although I did need a thread adapter to make this work. The setup works flawlessly and I have had no issues with it what so ever. You can find more about it here: http://www.dakotadigital.com/index.cfm/page/ptype=product/product_id=852/category_id=403/mode=prod/prd852.htm I ended up mounting it in the glove box so the controls and display are easily accessible from the interior of the car. I also found that the generic type fans that came with the Champion radiators were marginal at best. In the hot summer weather here in Texas I found that the combination of the Champion radiator and the generic fans could not keep up with a high heat situation in traffic. I would find in this situation that my temp would continue to go up while sitting at a stop light and this was not an acceptable solution to me. So I ended up changing out both the radiator as well as the fans. Went with a radiator from a company in New York called Wizard Cooling. These guys were unbelievable in the service they provided to me and their product (all made in the good old USA) was far superior to the Champion both in terms of build quality as well as cooling performance. They even designed and made a custom fan mount for me which was a significant upgrade to the "tie wrap" approach that the generic fans used. For the fans I went with two 12 inch Spal fans. Although a lot more expensive than the generic type, these things are unbelievable. They sound like a turbine engine when they start up and their cooling capability, along with the Wizard radiator is nothing short of spectacular. I can be sitting in traffic in 110 degree weather in Austin and my temp will begin dropping as soon as the fans kick in. Never had any sort of overheating problem since I made this change. You can find more about Wizard cooling here: http://www.wizardcooling.com/Datsun-s/1826.htm I don't have access to my picture files now, but if anyone would like pictures of my setup I'll be happy to post those when I get home this evening. Just let me know. Hope this helps and is not too late. Mike.1 point
-
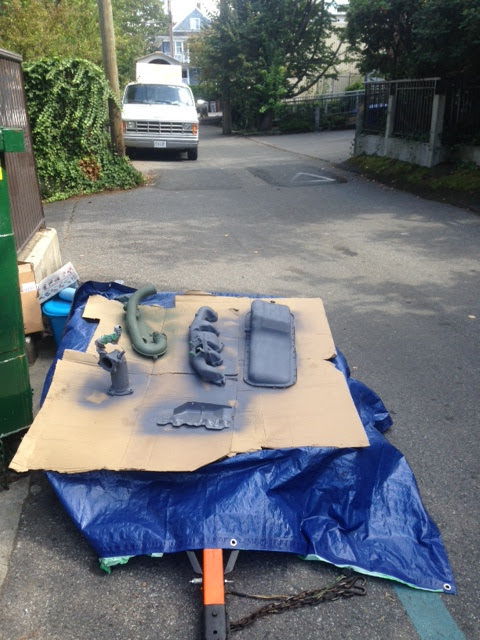
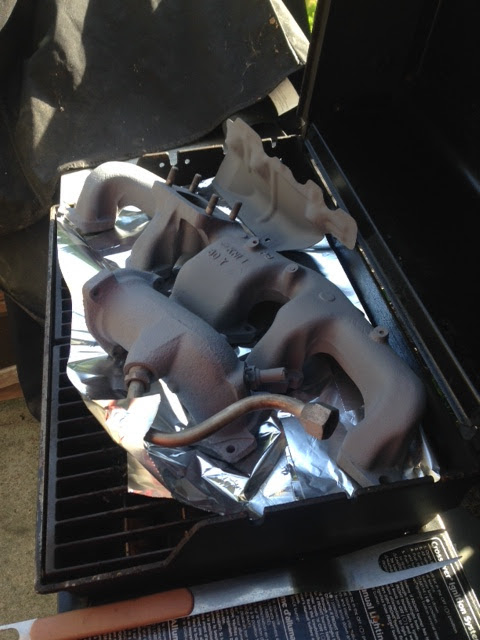
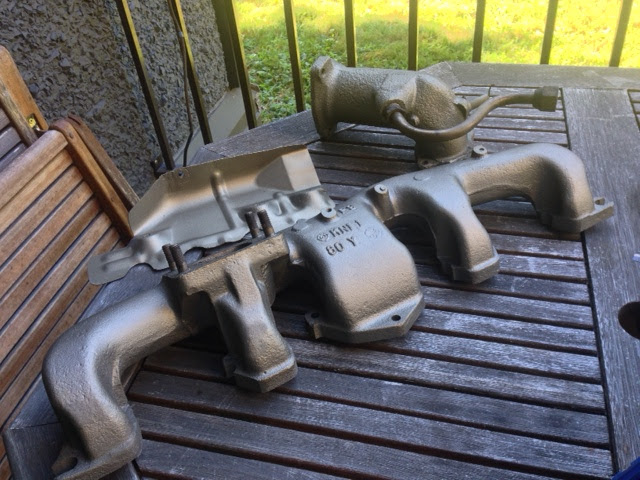
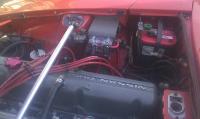
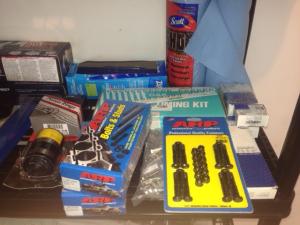
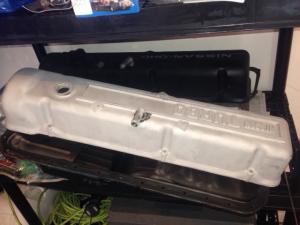
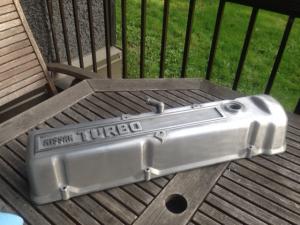
1 pointLuckily all my heads just use the internal oiling so everything should be interchangeable. Here's a few more pictures of some progress. Mostly cleaning, and making things pretty. But everyone likes pictures so... Parts for the rebuild are growing. I also ended up going with .040 over ITM pistons as there was a single gouge in cylinder 5 which just wouldn't go away. There items pictured are ARP head studs, rod and main bolts. Clevitt77 bearings,OSK timing set and some other odds and ends. Turbo cover glass beaded My little trailer also acts as a mobile painting platform I can wheel around in my back alley. It is essential since i'm in an apartment. Setting up the paint booth in my living room was just taking it's toll on the wood floors, laminate or not. Some parts being primered in high heat primer. curing process in the BBQ Cast iron cermamic paint, cured and ready to go. I'm hoping it lasts. I love the polished look on classic vehicles, but I honestly can't get the process down. Maybe I just don't have the patience. The black textured paint looks great, but I still wanted the classic look. I ended up finishing up with this. Brushed aluminum and polished lettering for that little bit of pop. The bottom end is supposed to be ready to go next week. Then I can start assembly. I have to send out my cam for the regrind, and also have to decide if I want to send the rockers to Delta for a resurface or order some aftermarket new ones. Both options are risky, but I think i'm leaning towards a resurface.


 1 point
 -
1 pointWhen you are that close to perfection, there is much more to say. While in the Military Airlift Command, they started a cargo airdrop competition. The first year we got dinged for surface rust on the exterior rivets on our C-141A. The second year we got dinged for having paint on the rivets because the judges couldn't determine if there was surface rust underneath.1 point
-
1 pointCongrats Greg! You had a whole cheering section in the bleachers at the horse-shoe.

 1 point
 -
1 point
-
1 pointWhen I sent my cam to Schneider they used it as a core trade in and sent a nice clean cut cam back to me, I marked mine with a Dremel engraving bit to see. If you have some spare towers I'd use them, peace of mind for the future. I cleaned mine with 600 grit and WD-40, just enough to get a shiney finish inside the cam towers.1 point
-
1 pointDo the Nissan heads not use a pressed in cam bearing? I have never looked that close...The one with the deep grooves are pretty deep. I wouldn't think sanding them out would be a good idea. If there is no bearing then replace the towers or have them line bored and add a bearing sleeve.1 point
-
These 4" Pyles fit perfect in the spaces below the quarter glass on my 280. They came from Walmart for about $20 and are loud enough to overcome the exhaust howl. It needs more but without cutting anything, it sounds okay. I had a trunk box out of a BMW I had with 10" X-plodes laying in the rear of the hatch, but my dog likes to lay back there so they had to go.1 point