All Activity
- Today
-
 Where are you located?
 -
 Hi All, In a final push to get my 280z across the finish line and through a safety/registration for the summer after 7 years of garage bound ownership, but I've been thwarted by a stubbornly wiggly driver side rear wheel bearing. The rears had wheel bearing play that showed up in the original safety inspection. I've replaced the bearings and seals on both sides. The passenger side is fine, but the drivers side still has a lot of play even after managing to get the full max recommended 240 ft-lb torque into the stub axle nut. I took it apart again and noticed the inner bearing was able to be slid in an out of the hub by hand and on inspection there is some evidence of the outer race (of the old originally removed bearing) having spun in the hub. I confirmed the OD of the new (installed but not driven) and originally removed bearings that did have miles on them appear to be the same (to the 100th of a mm) I'm going to try to call some machine shops tomorrow to see if boring and sleeving is an option since strut assemblies are hard to come by. Does a bearing with the same inner race ID for the stub axle but a very slightly larger outer race diameter I can bore back to an interference fit without sleeving exist? Is there somewhere I could find replacement strut assemblies or something with a new or used hub I haven't managed to find yet? I imagine I could go full T3 coilovers or something like that that will provide a new hub, but I would far prefer to not to go down that pricey rabbit hole just yet. Any other ideas are greatly appreciated. Thanks.
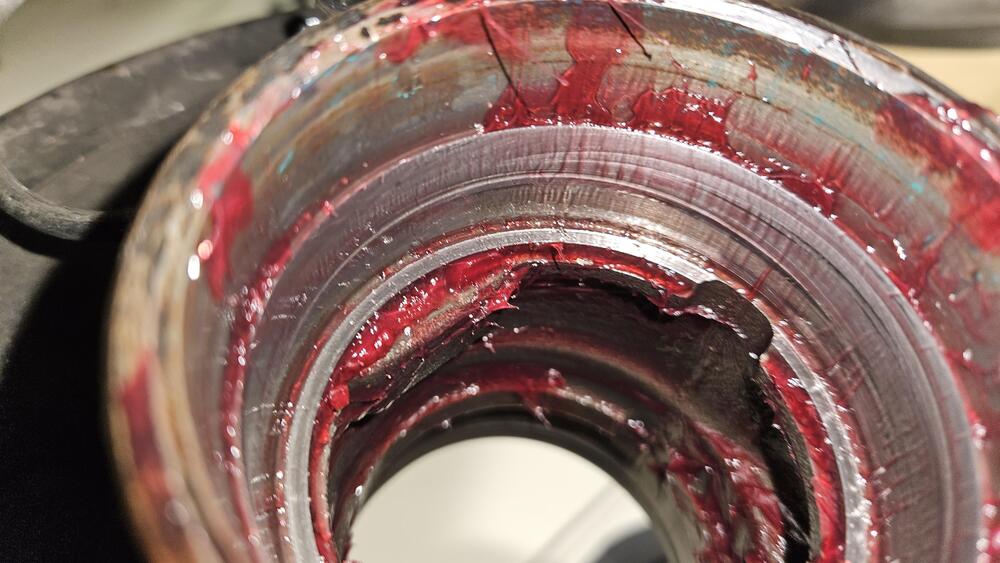

-
 That’s exactly what everyone needs to do.
 -
ZROT joined the community
-
 zbfpitt32 joined the community
 -
 The last time I got tires I took the wheels off the car and went to the tire store. They did mount and balance (no outside weights), I took them home and put them back on the car. No issues.
 - Yesterday
-
 For our Canadian friends... We appreciate it! Yes! Y'all brought back my favorite thread.

-
 We appreciate it! This whole album was good. You might also remember Hard to Laugh and She's So Young. Both had pretty solid airplay back in the day in Canada.
 -
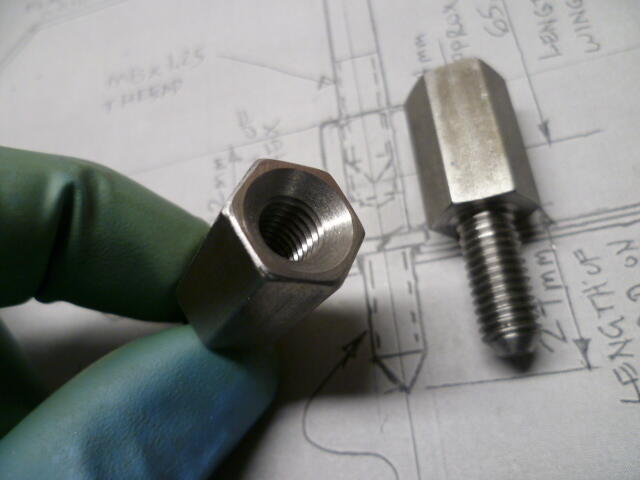
 You're welcome. I'm glad that my sketch was useful. And great work on the parts. Regarding the "unprofitable time" to make them, the $/hour rate you made is more than offset by the priceless feeling of accomplishment. Unless of course you don't have a day job. Lol
 -
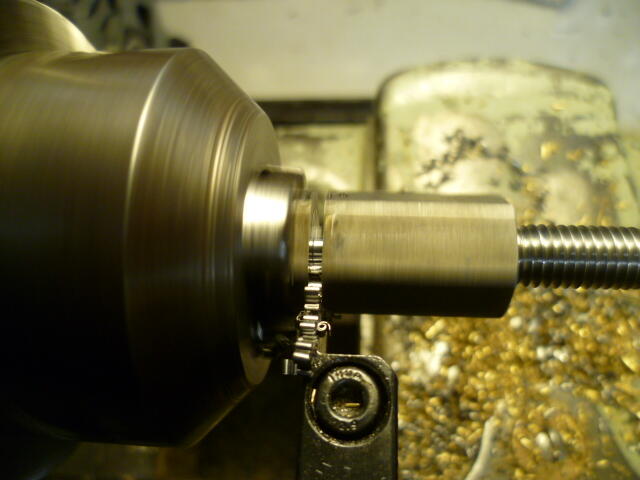
 @CanTechZ Thanks!! And a completely unprofitable amount of time later, I have these...
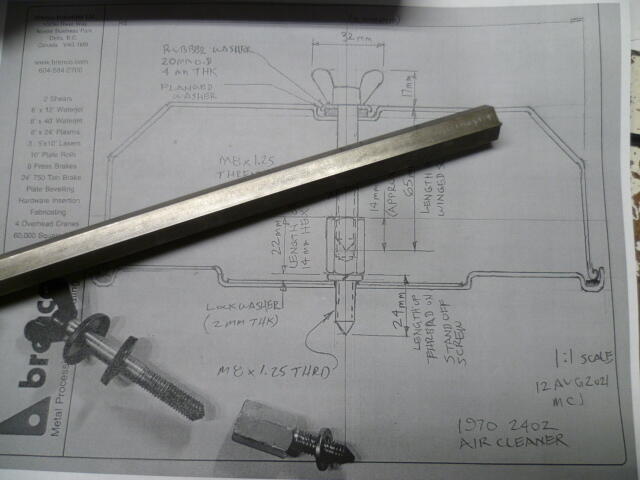


-
 Not that its a huge amount of info to go on, but I got some NOS hose clamps which are correct fitment for the 520 truck heater, in their bag, and they are clear/plain zinc. I'm working on a different era of hose clamps, period mid 1960's for the CSP311, and it seems Nissan was in the midst of changing and constantly changing, thread, head and style of clamp, and for different places on the car. I think its also a moveable thing through the S30 pruduction years.
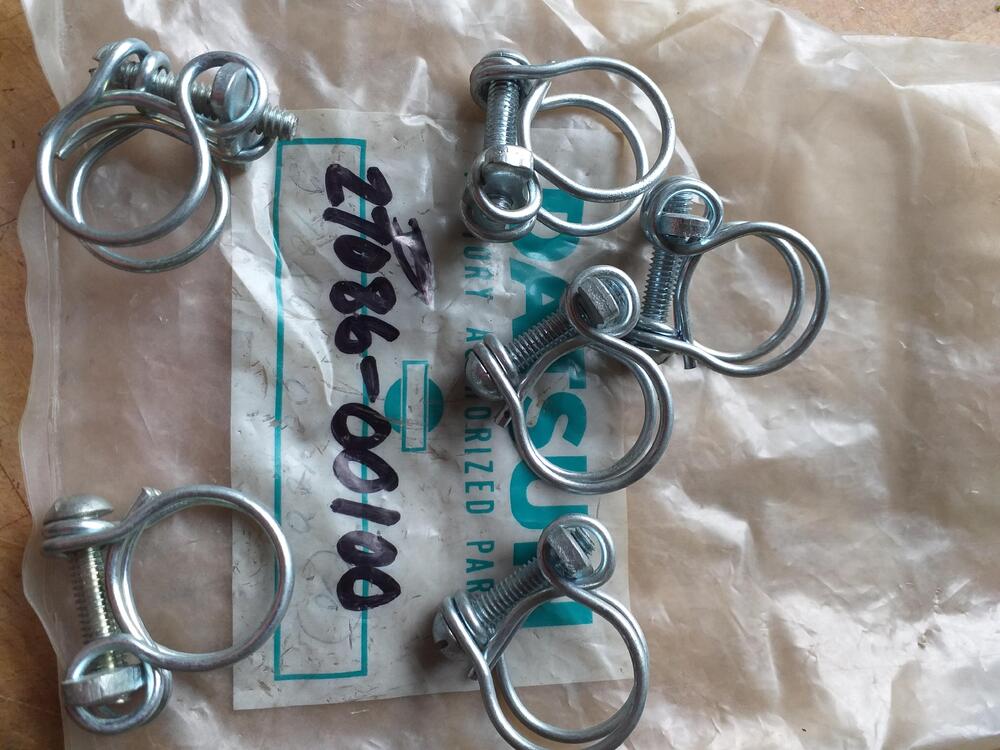
-
 Don't know if this has already been posted, but Urban Cowboy FTW.
-
Right on the mark IMO, what a great photo.
-
 Never heard of it.. but after listening, i CAN imagine that it stays in my head today.. thanks hahaha!
 -
 Finally figured out who played this song I've been hearing. Need to share. For our Canadian friends...
 -
IMHO, That is not a good idea moving forward. You won’t be able to access all points of concern if it’s not on the bench. I personally have gone through a couple of the “B” series and access is critical. You’re already half way there removing the shaft. Not to mention you’re going to have to rotate the tail shaft back and forth to remove and install. Personally I wouldn’t do it in the car. My 2cents.
- Last week
-
I wouldn't want to split the transmission in the car. I would rather have the whole unit on the bench
-
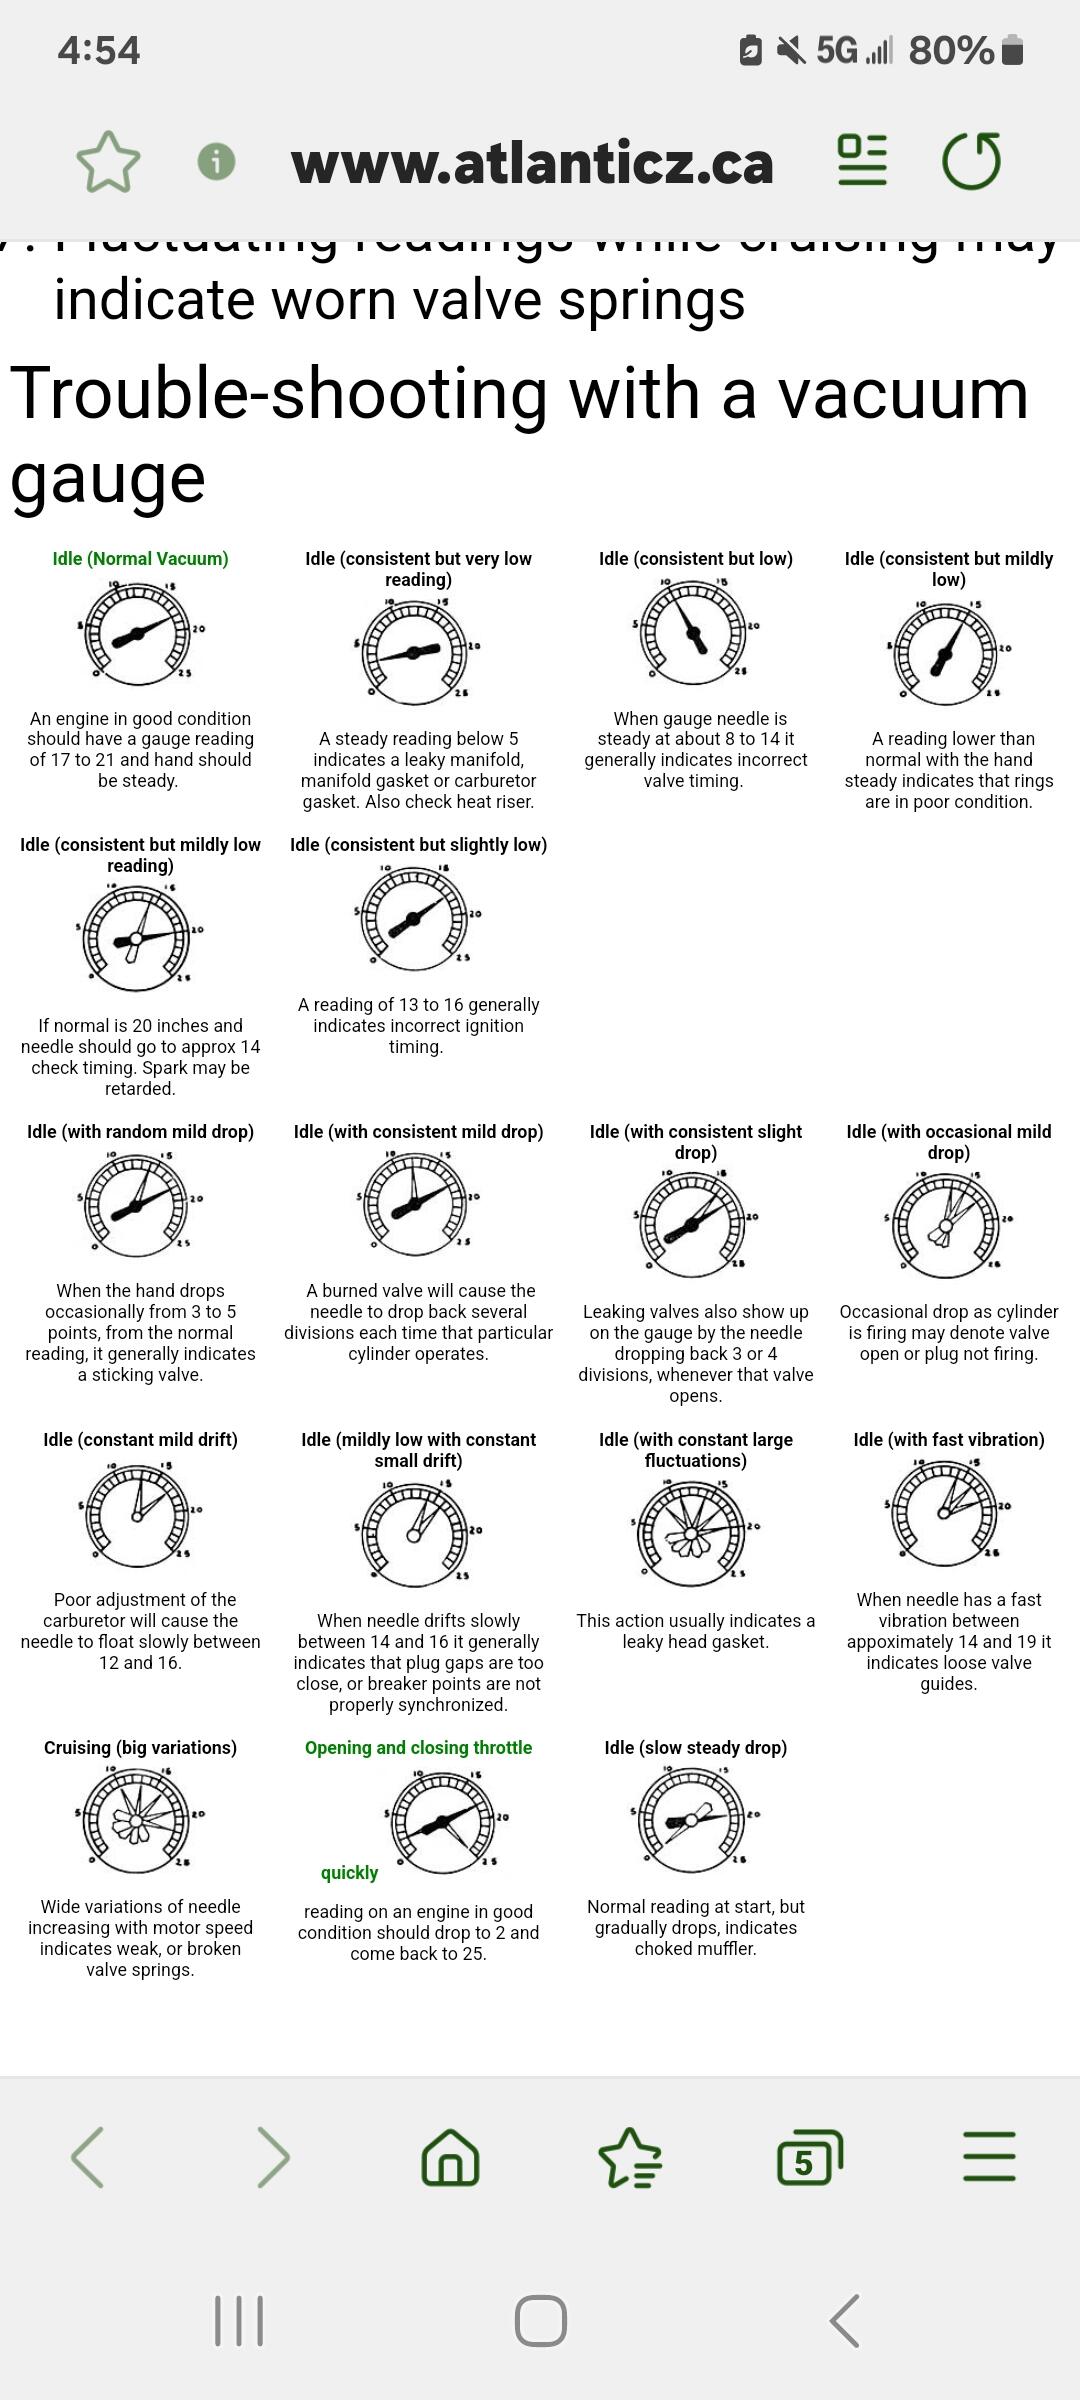
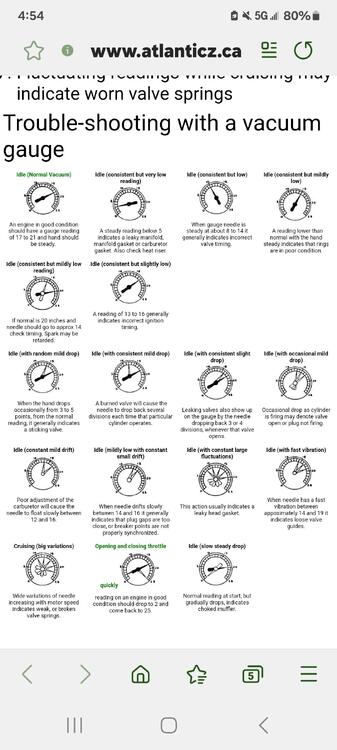
Hooking up a vacuum gauge is somthing else that helps find problem. You can get them at chain stores with loaner programs for free.
-
 I ran into this at a local tire shop: Several years ago I had them install tires I purchased elsewhere and they were happy to do it. I told them I wanted them to use a floor jack and lift by the front crossmember for the front tires and by the differential for the rears. They did exactly that. A few years later I went back and asked them to do the same thing and they would not - telling me that new corporate guidelines prohibited using a floor jack - they could only use the installed lifts. You can do that at home and possibly if you find a small shop that will agree to that method, but most of the large chain tire shops will probably not. Couple that with a crop of installers only used to dealing with modern cars... The damage to the above fender was done by failing to use an extender under the pad at the end of the lift arm. It's the lift arm that did the damage because it wasn't properly spaced to avoid contact.
 -
 No, I am investigating my transmission rear bushing. I have two of these on hand I bought years ago: https://sales.omegamachine.com/Nissan_FS5W71C_Extension_Housing_Bushing_p/71411.htm I slipped one onto the old prop shaft yoke and it fits nicely. Not loose and not tight. I will have more time later tonight to measure ID and the OD of the new yoke. I'd say the new yoke is deflecting a good 0.030" to 0.040" up and down (total) inside the tail of the transmission right now. I am thinking I may need to pull the transmission tail section out of the car to do this bushing replacement.
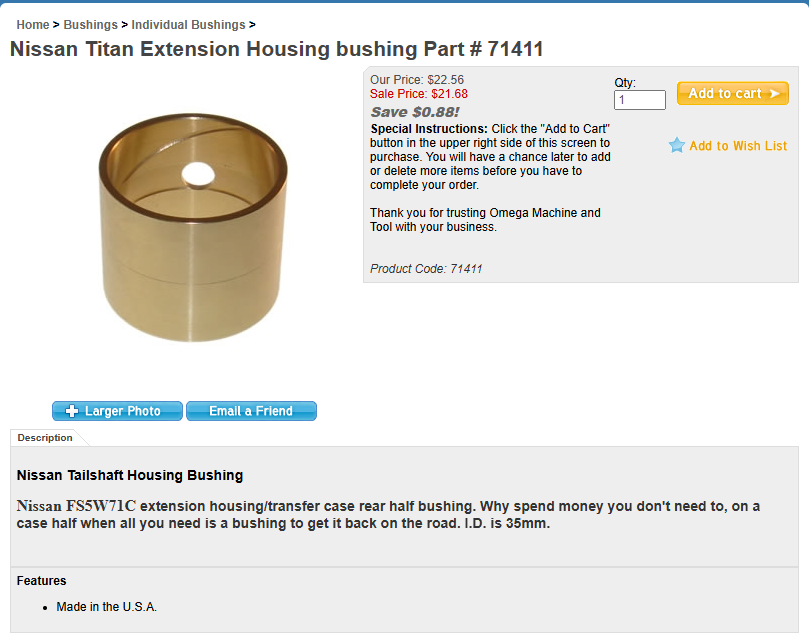
-
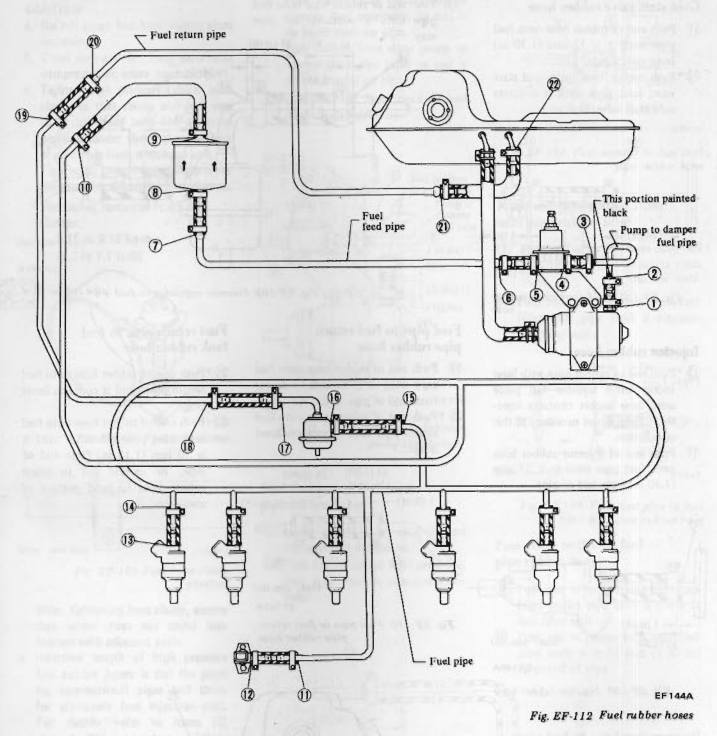
Seems unlikely that the engine would use so much fuel when accelerating that fuel pressure would drop. Probably learn what you need to know just blipping the throttle by hand with the hood open. You could connect to the cold start valve hose. It's basically "on the rail" and sees what the injectors see. Don't forget to block the hole in the manifold. Never mind, no need to remove the valve. Just the hose. Good luck.
-
 I purchased this a few days ago. I'll start there BETOOLL 0-140PSI Fuel Injector Injection Pump Pressure Tester Gauge Kit Car Tools (Master)
 -
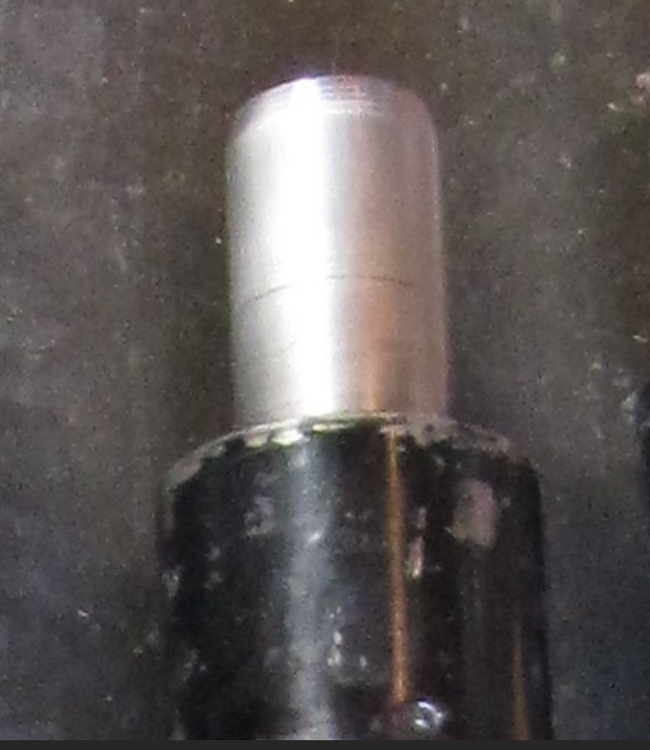
Can't tell where the seal is riding in your picture but here is a picture of an old early 240Z shaft I picked up that had a groove from a worn seal, for reference. Gives an indication of factory engagement. The wear pattern in your picture is very weird.
-
I'd fix this first. Besides the bushing, the fit of the splines should control play also. Are you sure that you have enough engagement?
-
Have you driven it yet with the new setup?
-
 I just semi-permanently installed the electric fuel pressure gauge in my car. My job (and helping the parts cannon crowd) has conditioned me to have more diagnostic info readily available.
 -
 After replacing the insanely expensive cracked windshield in our 2025 Mazda CX-70 next week, I’m going straight to a shop to get Tera Shield installed on it. ZRAuto. Claims its three layers, clear for ever, blah blah blah. No idea about price yet. If it saves me one windshield it will pay for itself. That’s the brand the place I’m going to uses. I’ve looked online, and found a couple of retailers selling DIY kits in the $200 USD price range. Might try the DIY stuff on the Datsun just to say I did it.