All Activity
- Past hour
-
 Most of the components in the ECU would be available generically. Caps, resistors, discrete transistors... No problem. The integrated circuits, however... Nada. You should be able to get pretty much anything but the ICs at Arrow and Mouser. But before you condemn the ECU, I would suggest try to isolate the problem. Even if it's an electro-mechanical issue, it would be important to know if the problem is in the wiring or connector to the ECU, or inside the ECU itself. So, the first thing I would try, would be to slowly and gently wiggle the wiring harness to the ECU and see what happens.
 - Today
-
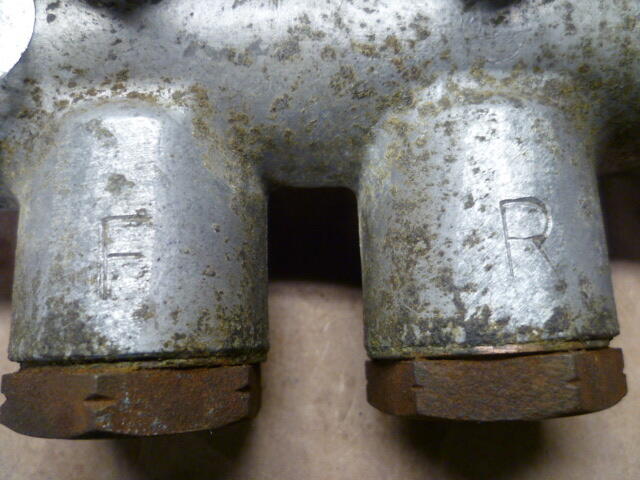
Roo, Nice work on the brake stuff. I have a couple comments / questions about the master cylinder: First, where did you find the rubber seals you used to rebuild the master? Second, the pistons originally had a black oxide coating presumably for friction reduction and/or corrosion protection. It looks like you hit the pistons with a wire wheel and burnished that coating off? Any thoughts about having them recoated? And last, a little pedantic, but I'm thinking that is not quite the correct master cylinder for a 5/70 car. I'm no expert on the early cars, but I think you should have the one with the ground and stamped "F" and "R", not the cast-in markings. The correct one I believe would look like this: There was some discussion about such matters here >> https://www.classiczcars.com/forums/topic/65579-brake-master-cylinder-46010-e4602-up-to-91971/?&page=3
-
 Hey All, I hope someone can help me out, this is a rehash from another Z forum, but I'm spreading it in the hope of finding a solution. I'm in the early stages of restoring a 71 240z and thought a chassis jog would make life easier. As of now, step one is creating headaches, as described below. As of now i have built a chassis jig/frame and am in the process of bolting up my bent 240z to it. And here is the rub. I spent countless hours pouring over the only chassis dimensions document out there. That being the BF-3 204z dimensions PDF. As described previously I was thinking that the dimensions are wrong, or my car is very, very bent. With what I describe below, I don't think the car can possibly be 'that' bent. Some framing of the problem, with a crap pun: I have used four mounting points (described from rear to front): (1) Rear diff mount (not mustachio bar), (4 lateral bolts) (2) Front mount to the rear lower control arm, (4 lateral bolts) (3) Transmission mount, and then (two lateral bolts) (4) Front Strut Tower Top ("A" point). The dimensions (that don't work): (1) Reference point. (2) 465mm from ref. (1). this one is 15mm to short. (closer to 480mm) (3) 1427.5mm from ref. (1). This one lines up. (4) 2381.3mm from ref. (1). This one is 20mm to short. (closer to 2401.3mm) To my point......what the heck is going on here??!! Between point ref 1 and 2 my car is 480mm. In the BF-3 document, there is no reference to a 480mm dimension.... The car cannot be warped by 15mm, it's all structural mounting points. So, what am I missing? Moving on to the dimension between 1 and 4. Again, too short by 15 to 20mm... So, what is the actual dimension? All of the lateral dimensions are correct. I scratch my head. It's great though as it gives me something to talk with my wife about over dinner. Thank you in advance!
 -
 I'd love to have quick jacks, but I've used a set of standard plastic ramps for a couple of decades.
 - Yesterday
-
I've used common jackstands for years. )n the 280ZX in both front and rear there are obvious places which can support jackstands. In the rear, I slide a floor jack under the differential, lift on it and place jackstands under the places in front of the axle where the suspension bolts to the underbody. it's not hard to find stout places that can support the stands. What the factory manual says aren't the only places you can support the car if you're thoughtful about it. In front on my 280ZX, I slide the floor jack under the cross beam beneath the engine, then position the jackstands under the stoutest place in the frame rails with a chunk of 2x4 on top of each jackstand to spread the weight out. On my 280ZX I jack up the front first, then the back. It's low enough that getting much of an angle on either end makes it hard to access the other end. you may have to slide the jack in from the side, not the front or back. Lift carefully. Push on the car and make sure it's stable. Push on it after the jackstands are in place, and double-confirm that it's stable. Patience and thought will yield a safe result.
-
 These units are primarily “pth” assembly. They have aged with time IMHO have passed there designed life span. There isn’t as far as my knowledge a test bench that will run it through post diagnostics. My suggestion would be to search this forum and find someone that doesn’t have any use for the spares they have accumulated over the years. Mine are gone to other folks in the same predicament.
 -

-
-
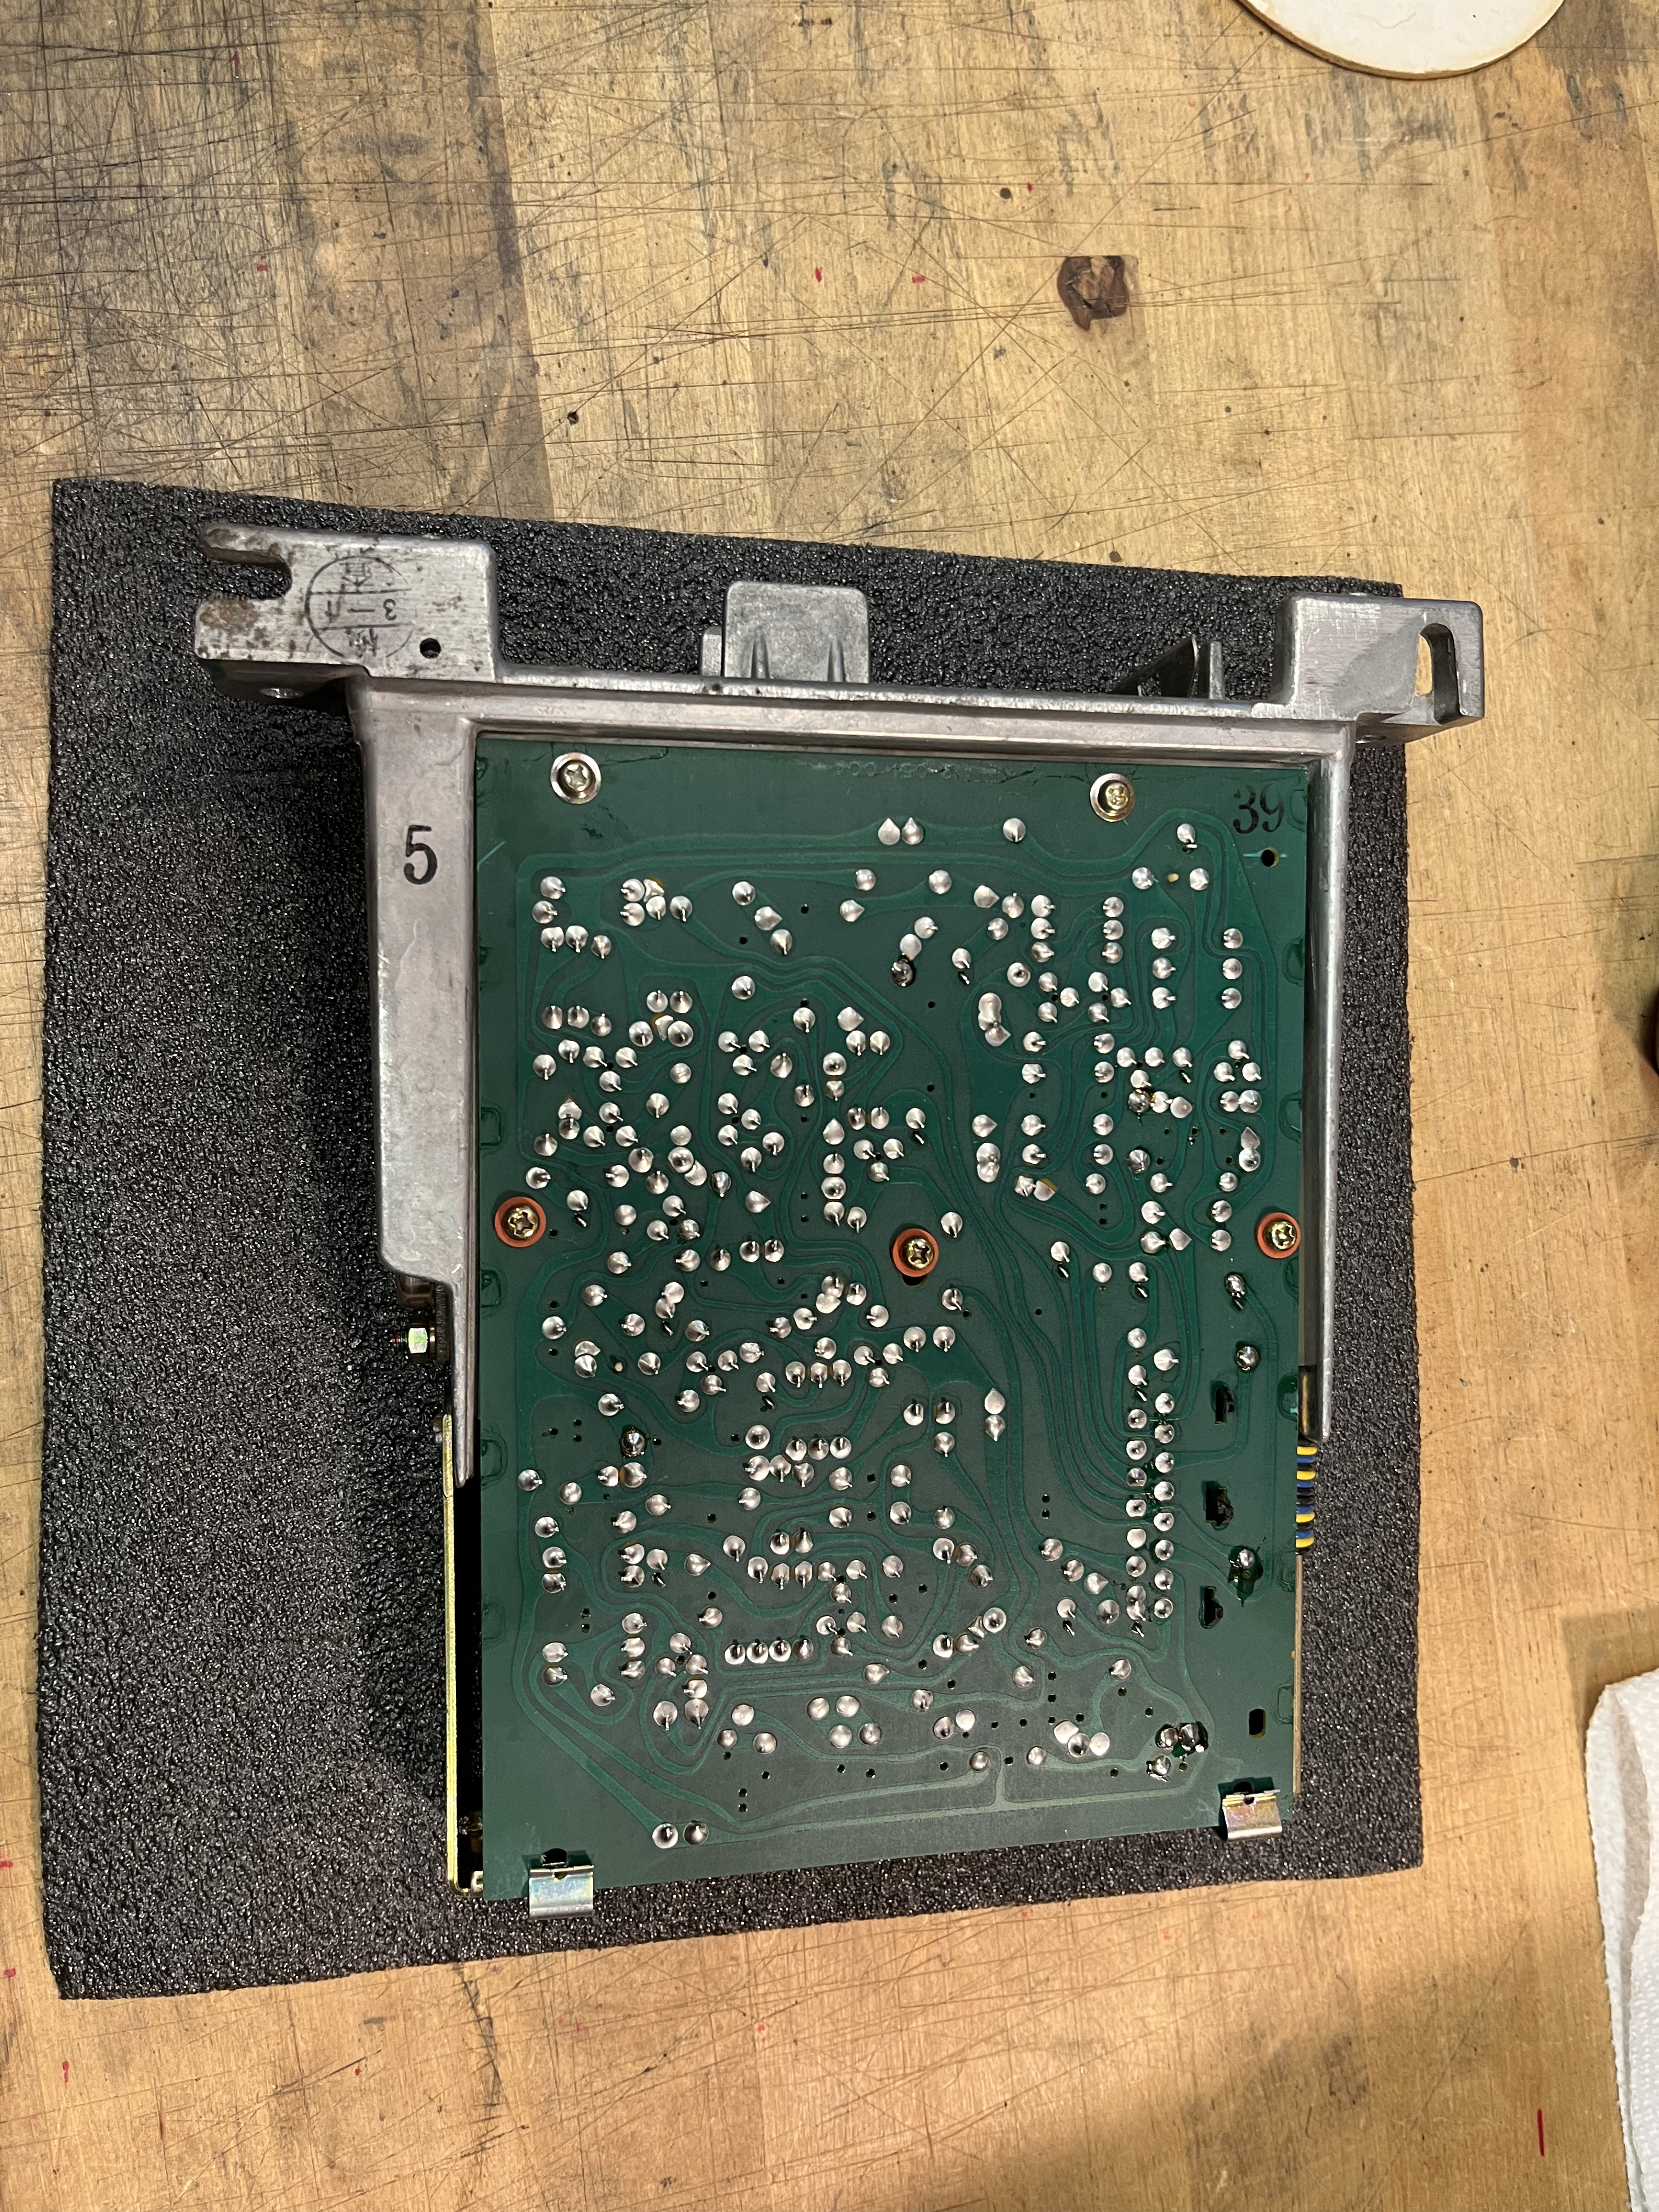
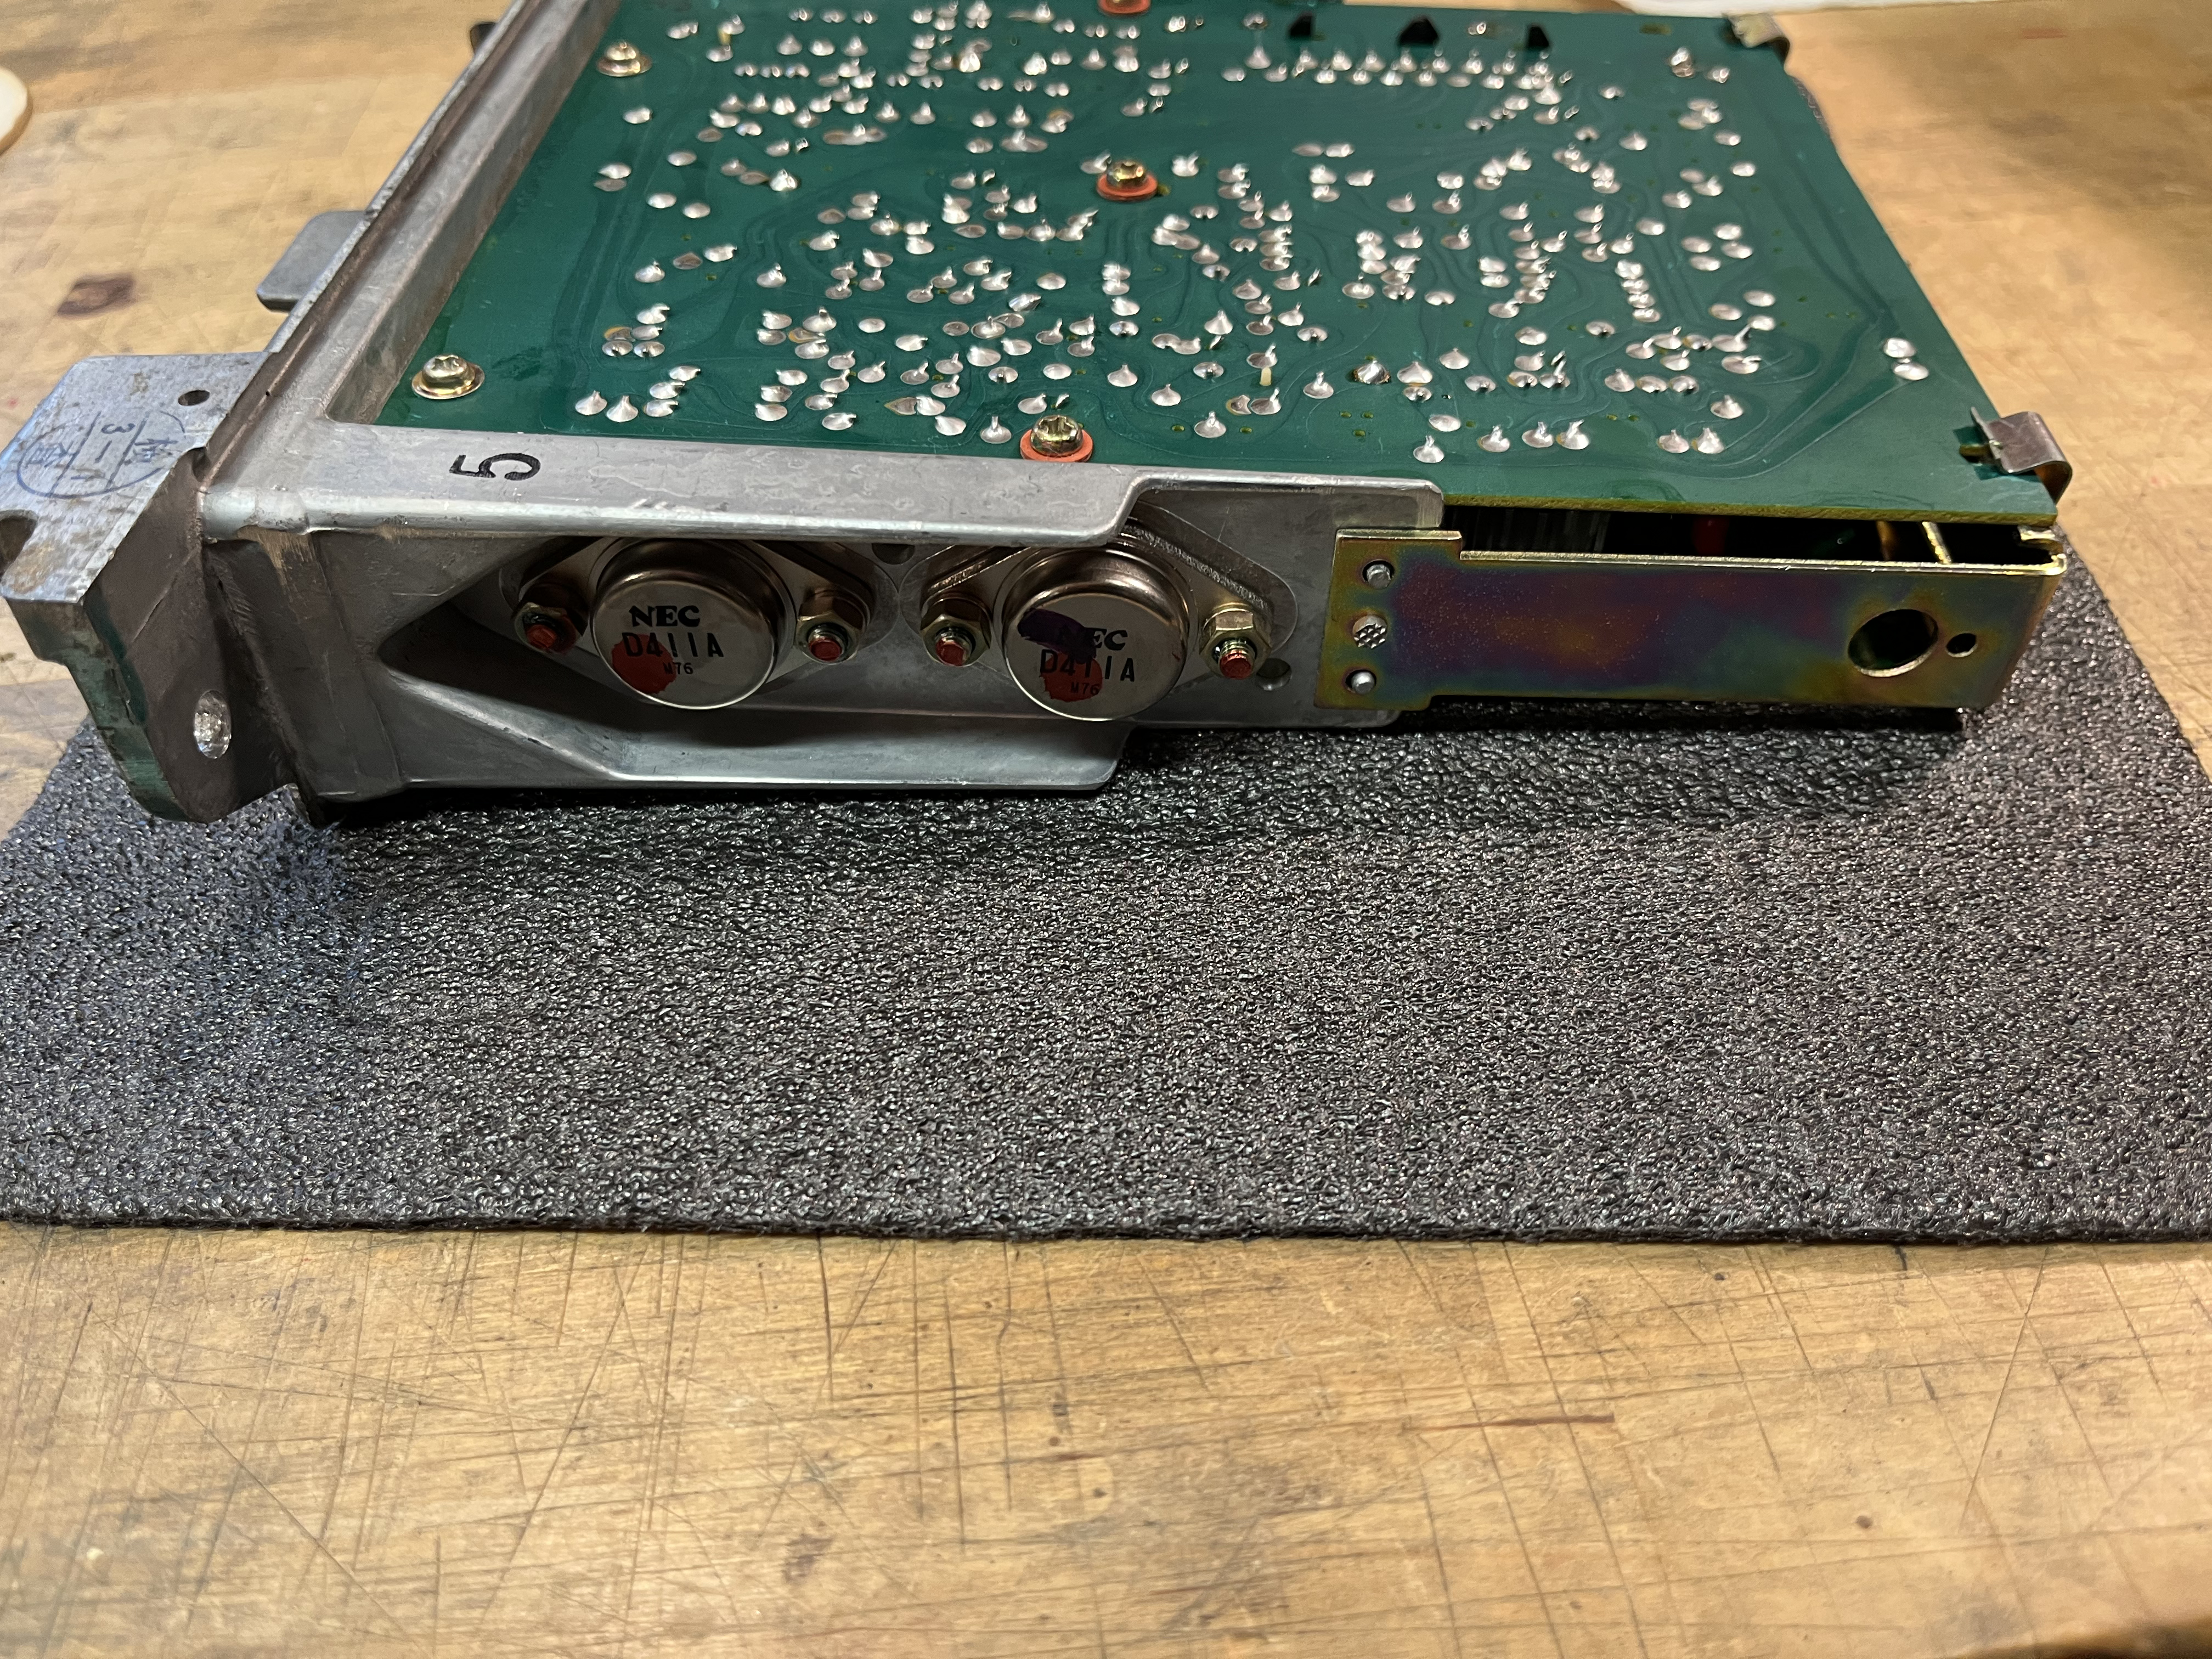
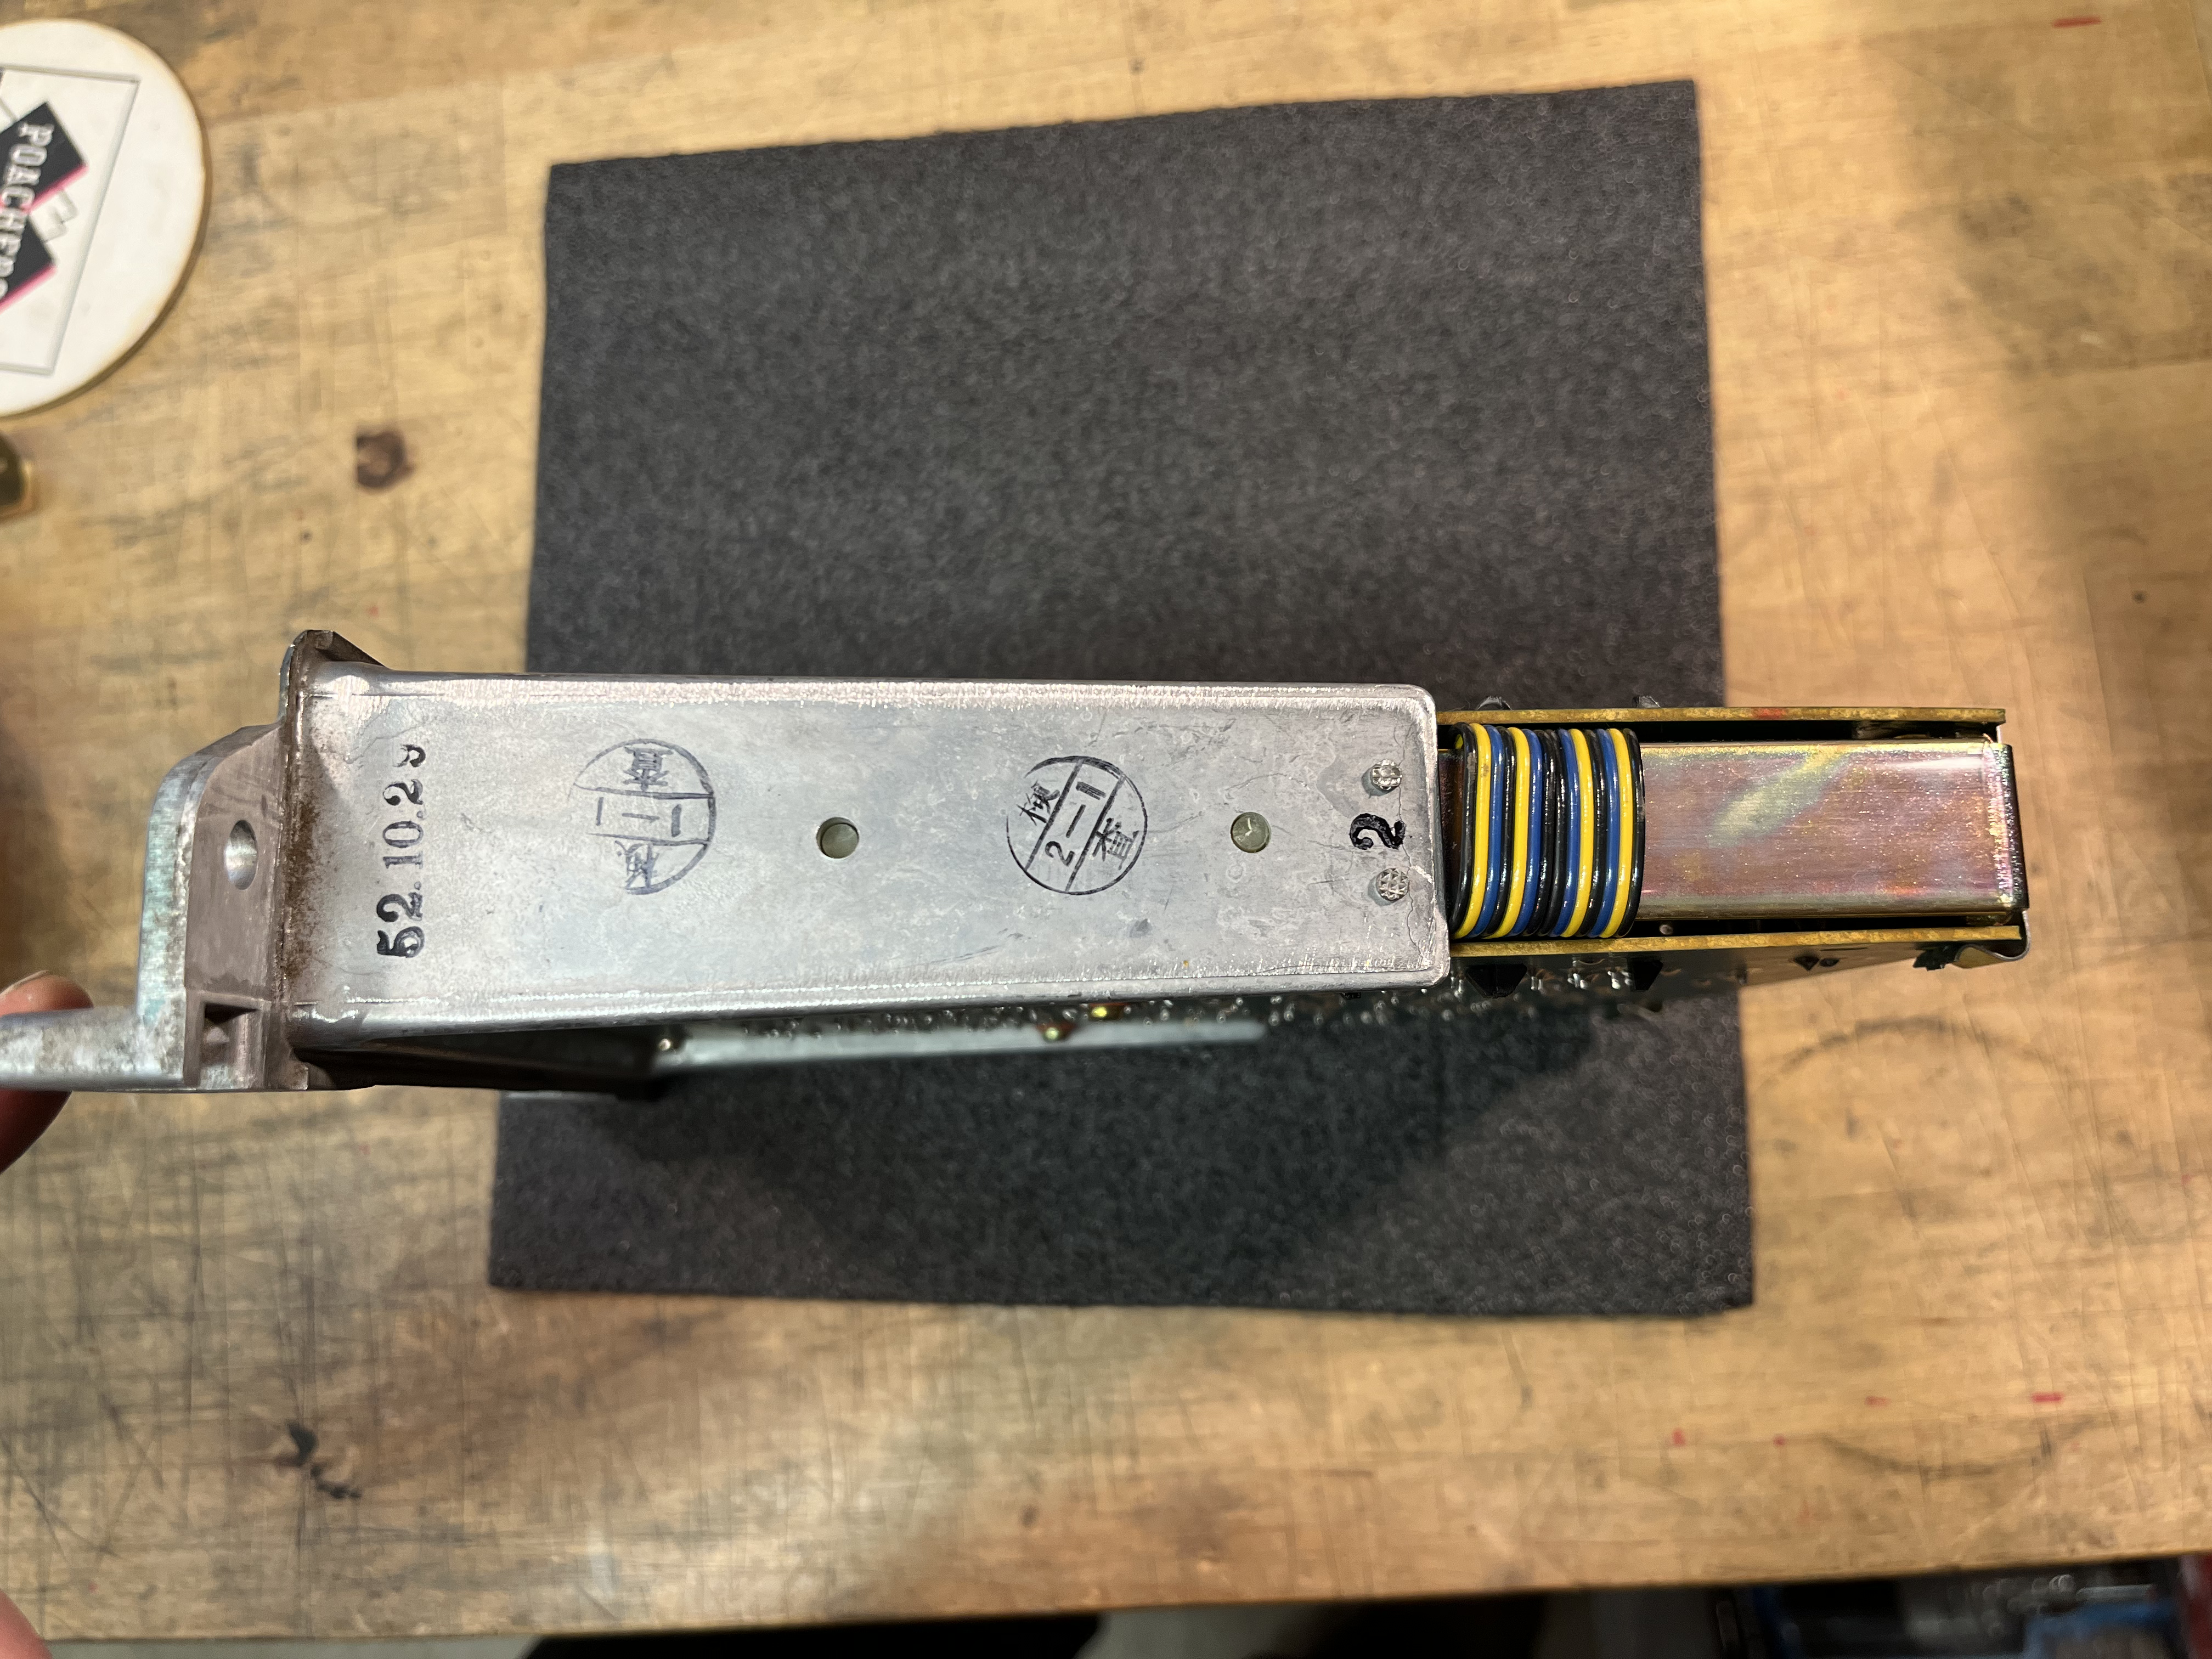
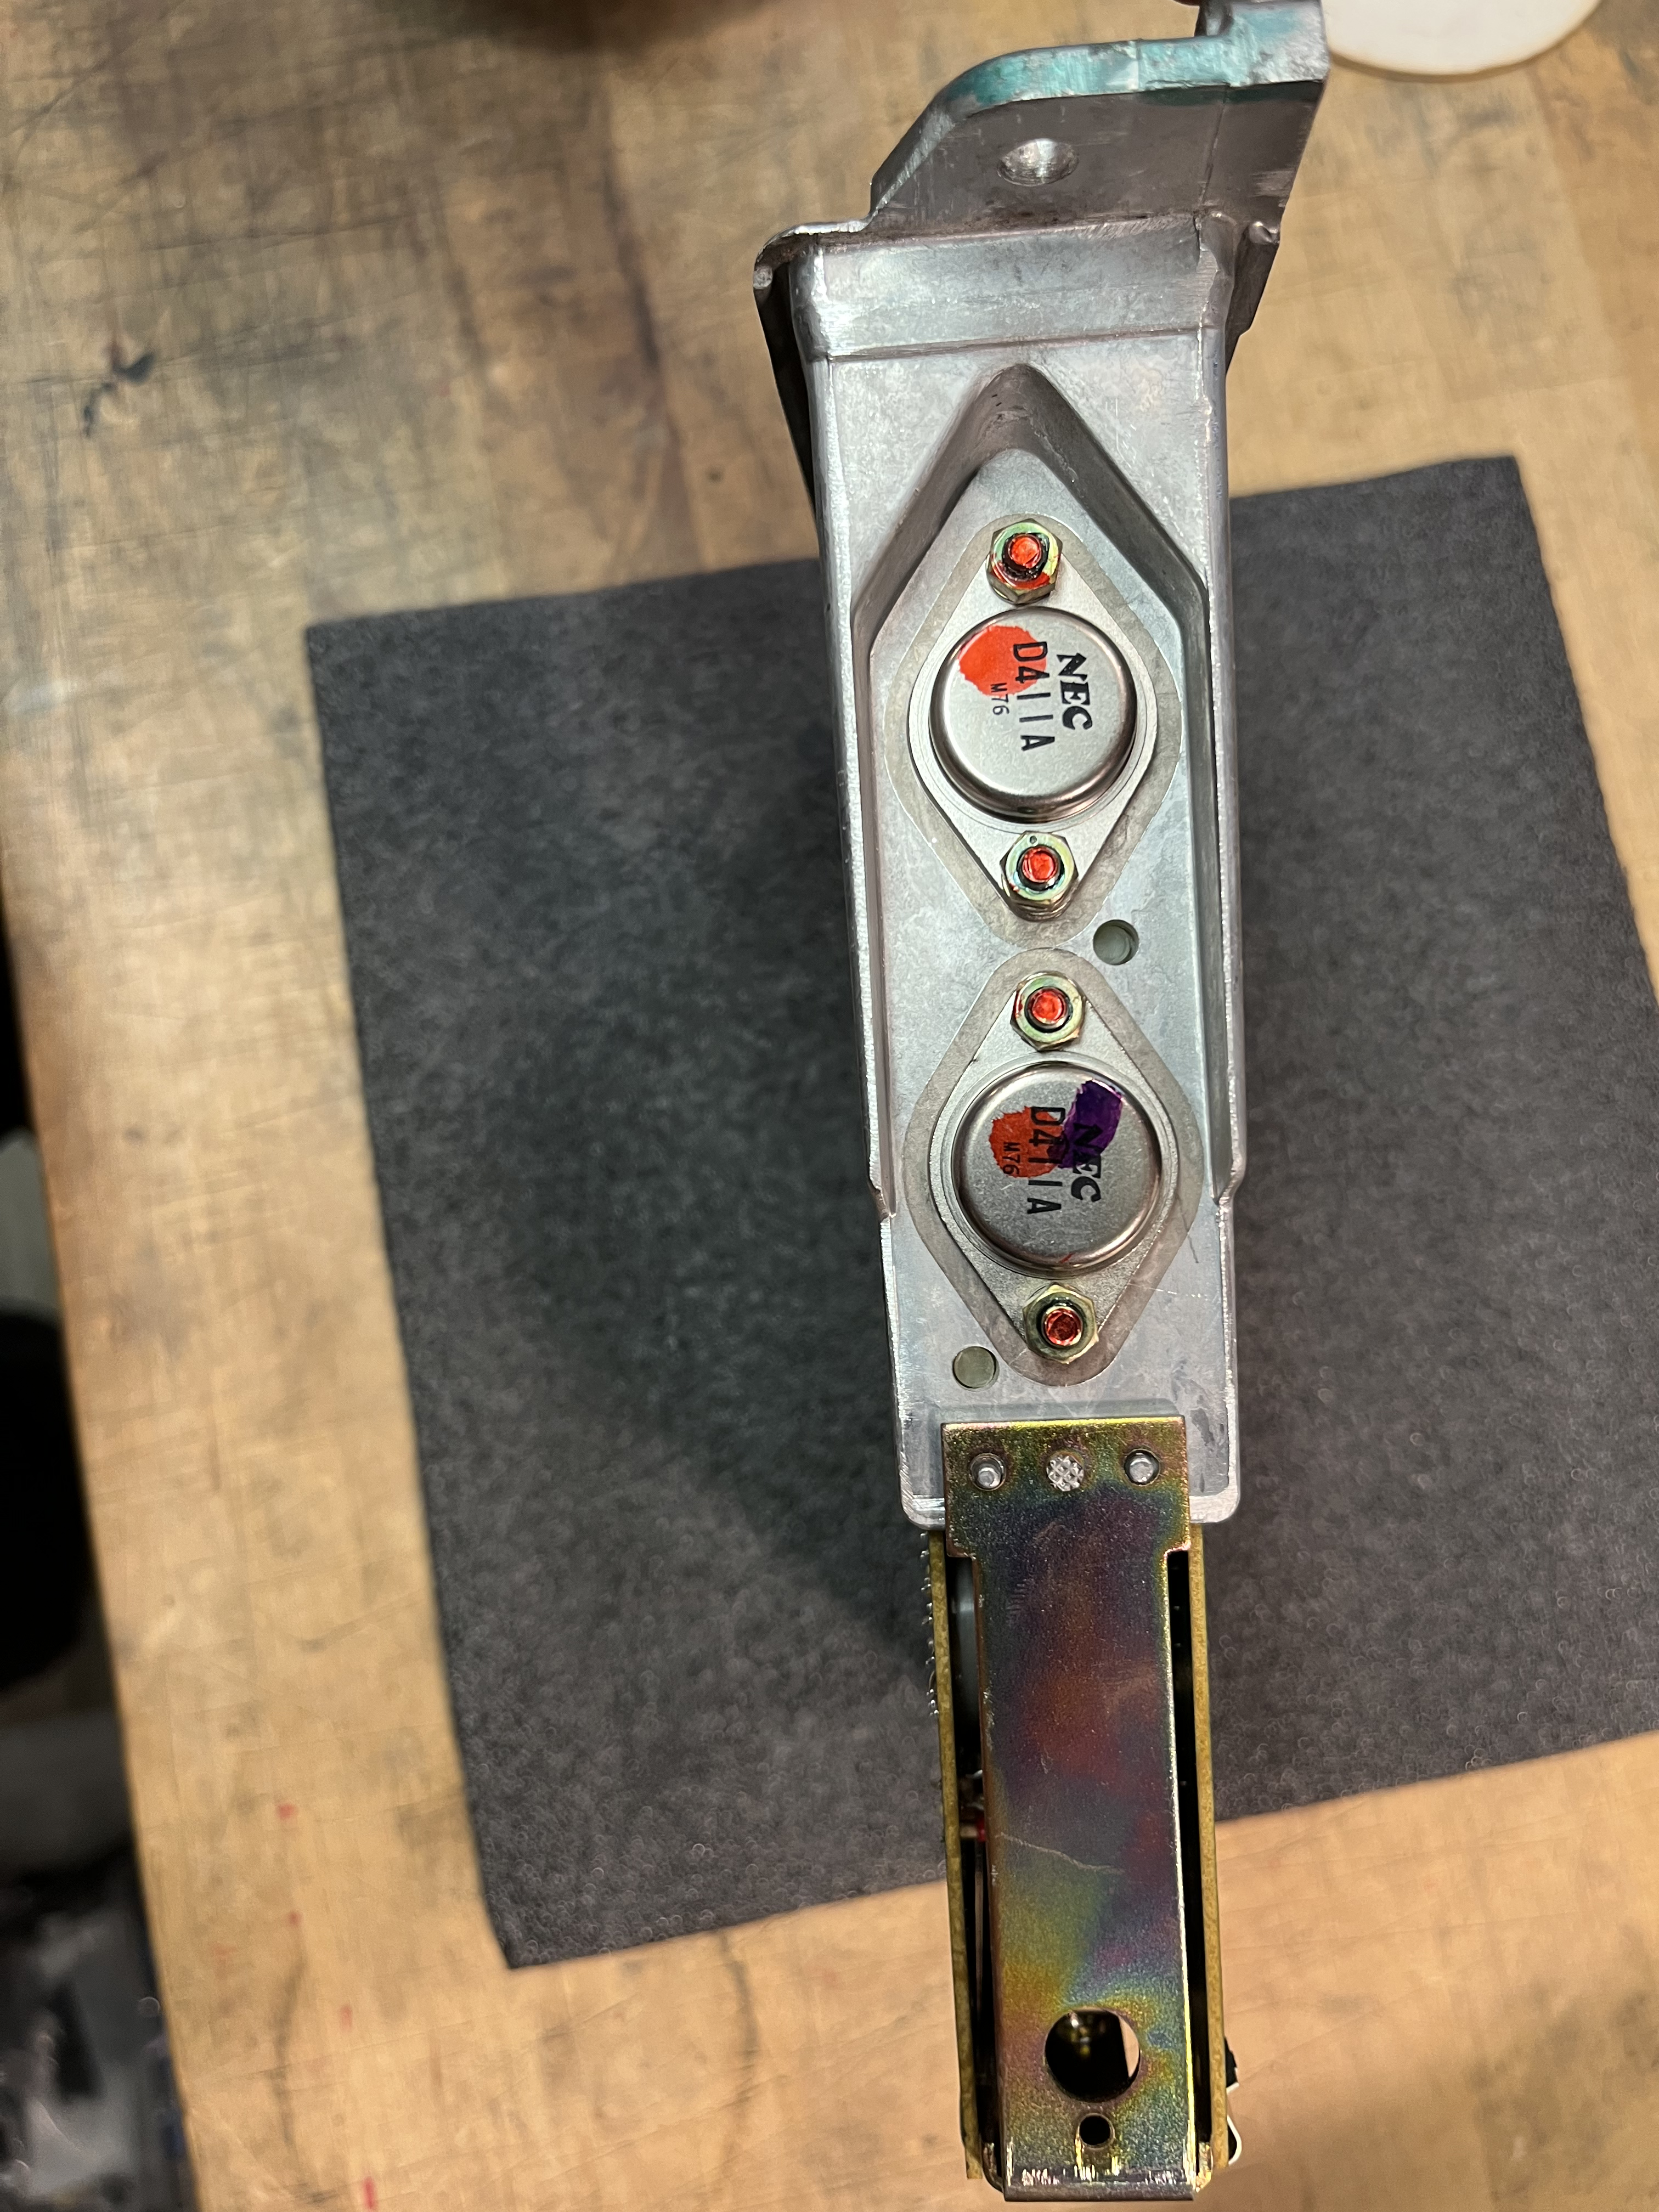
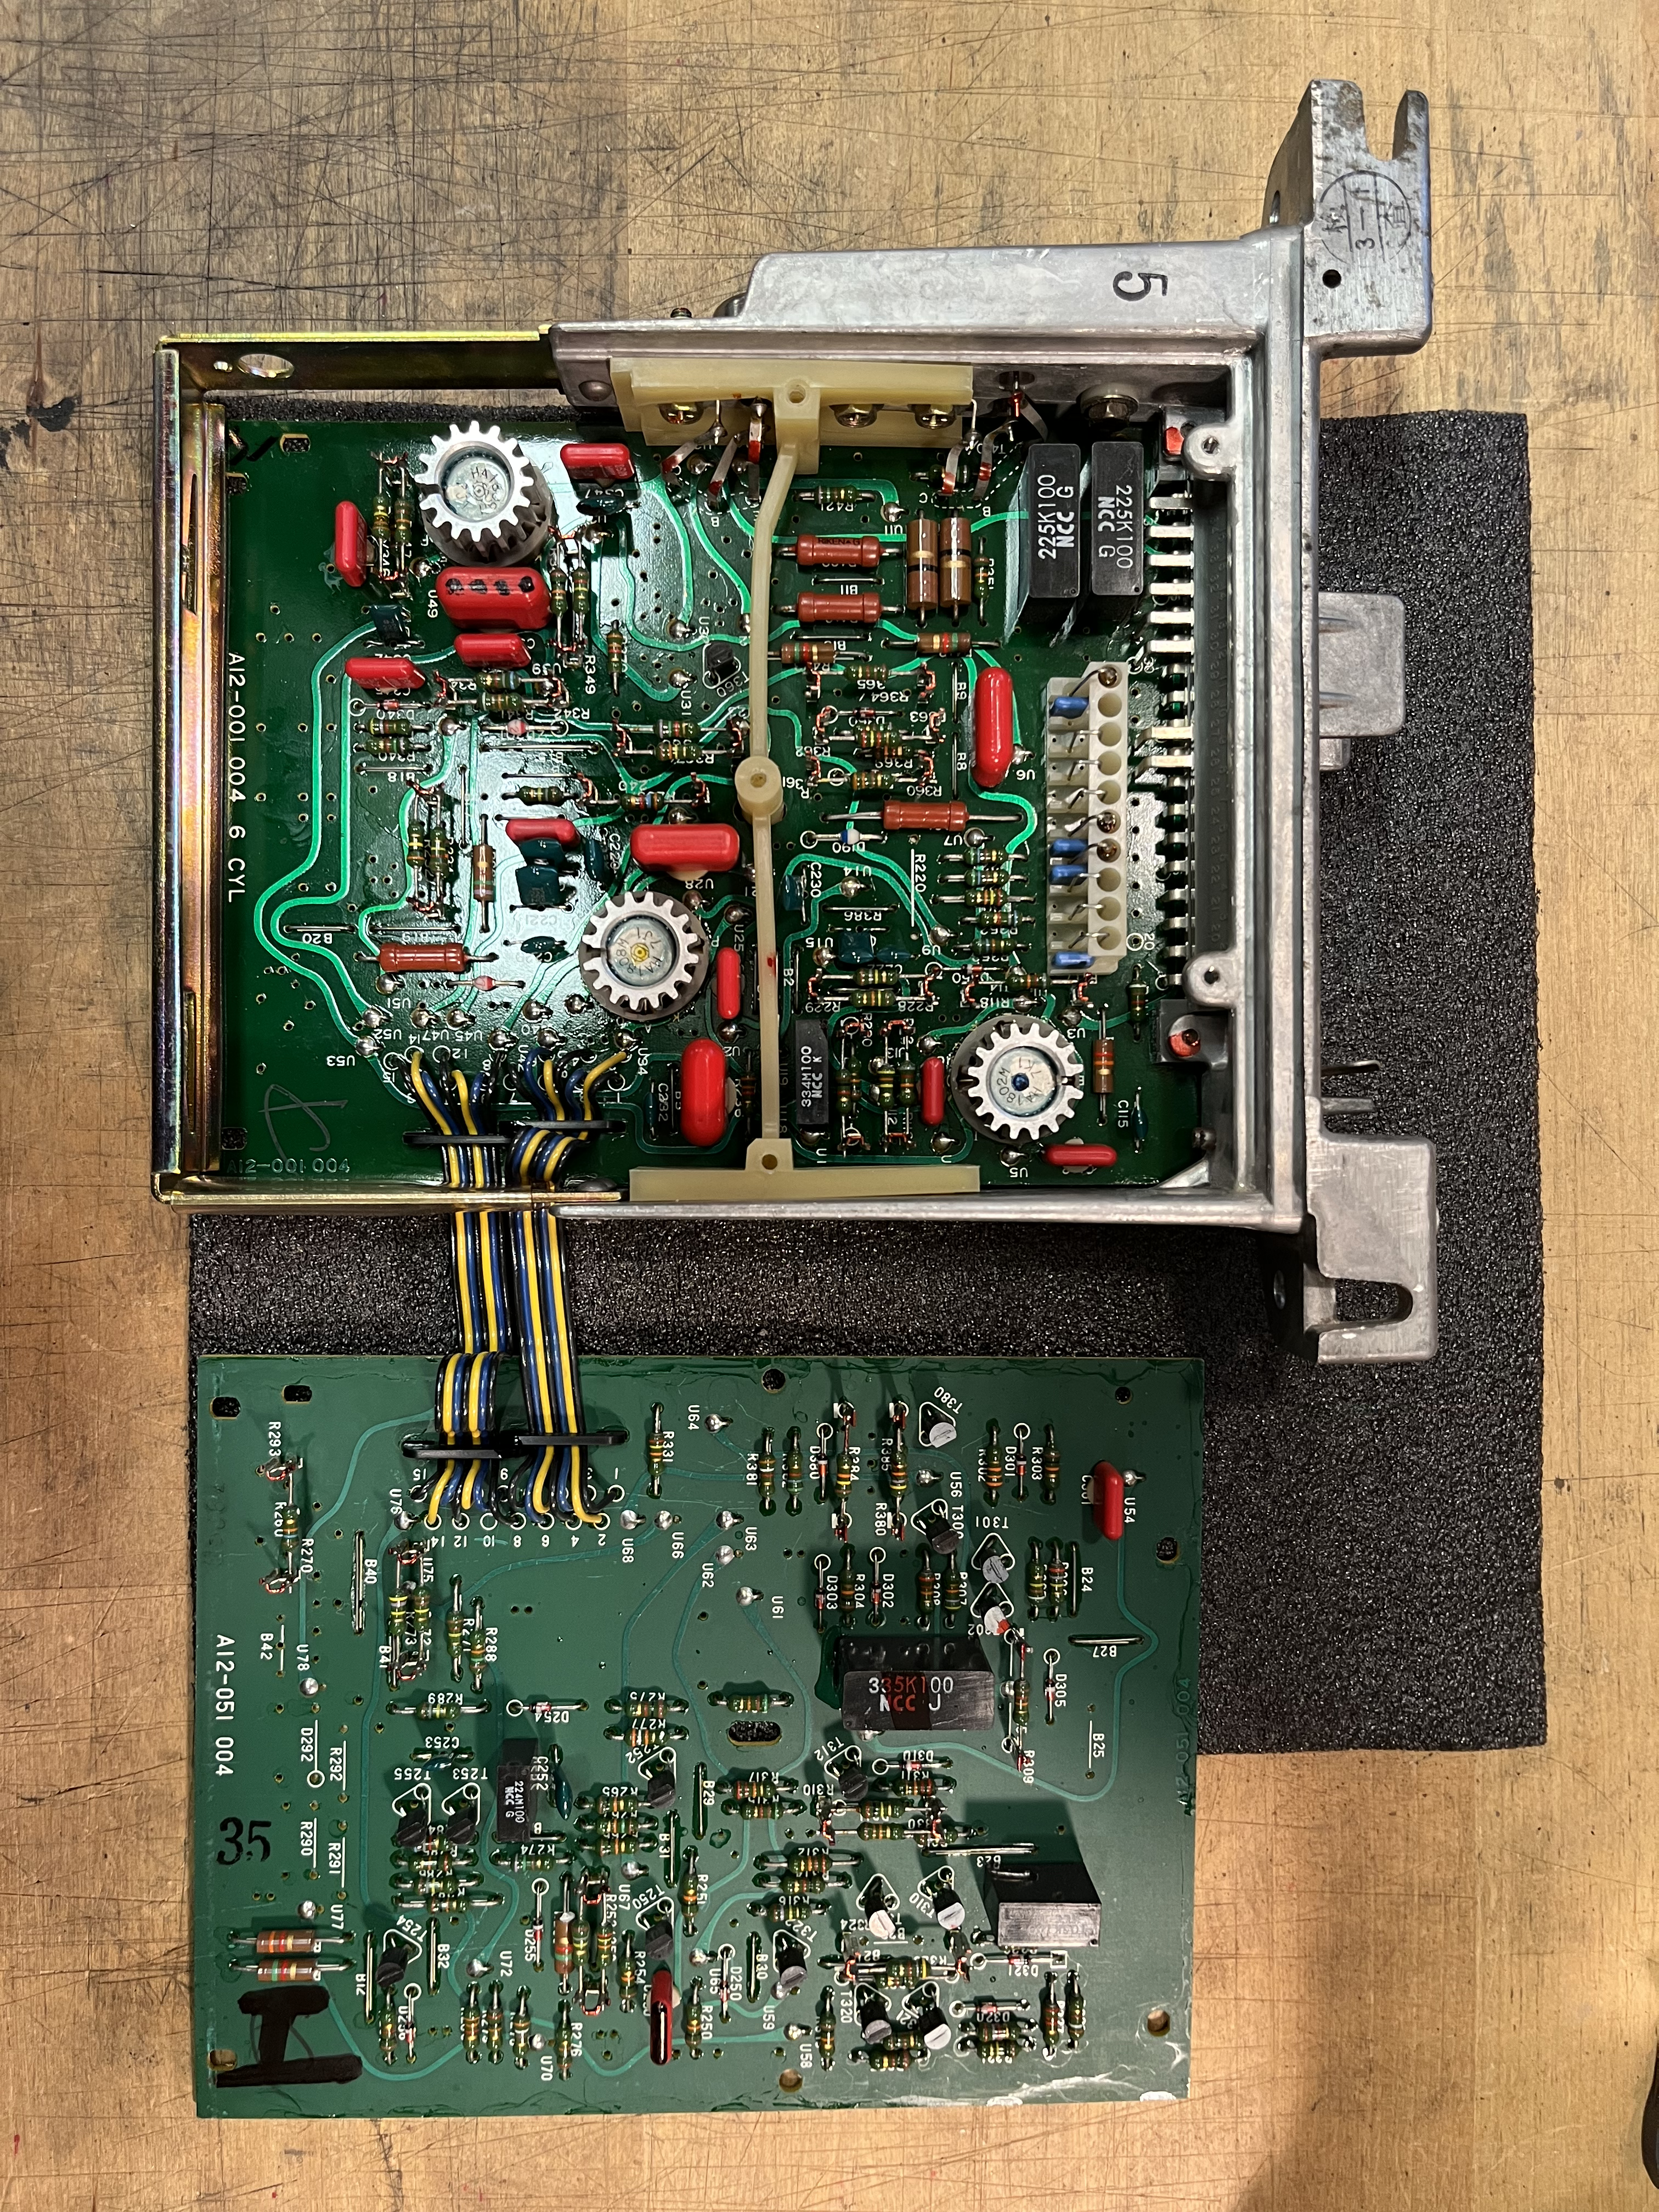
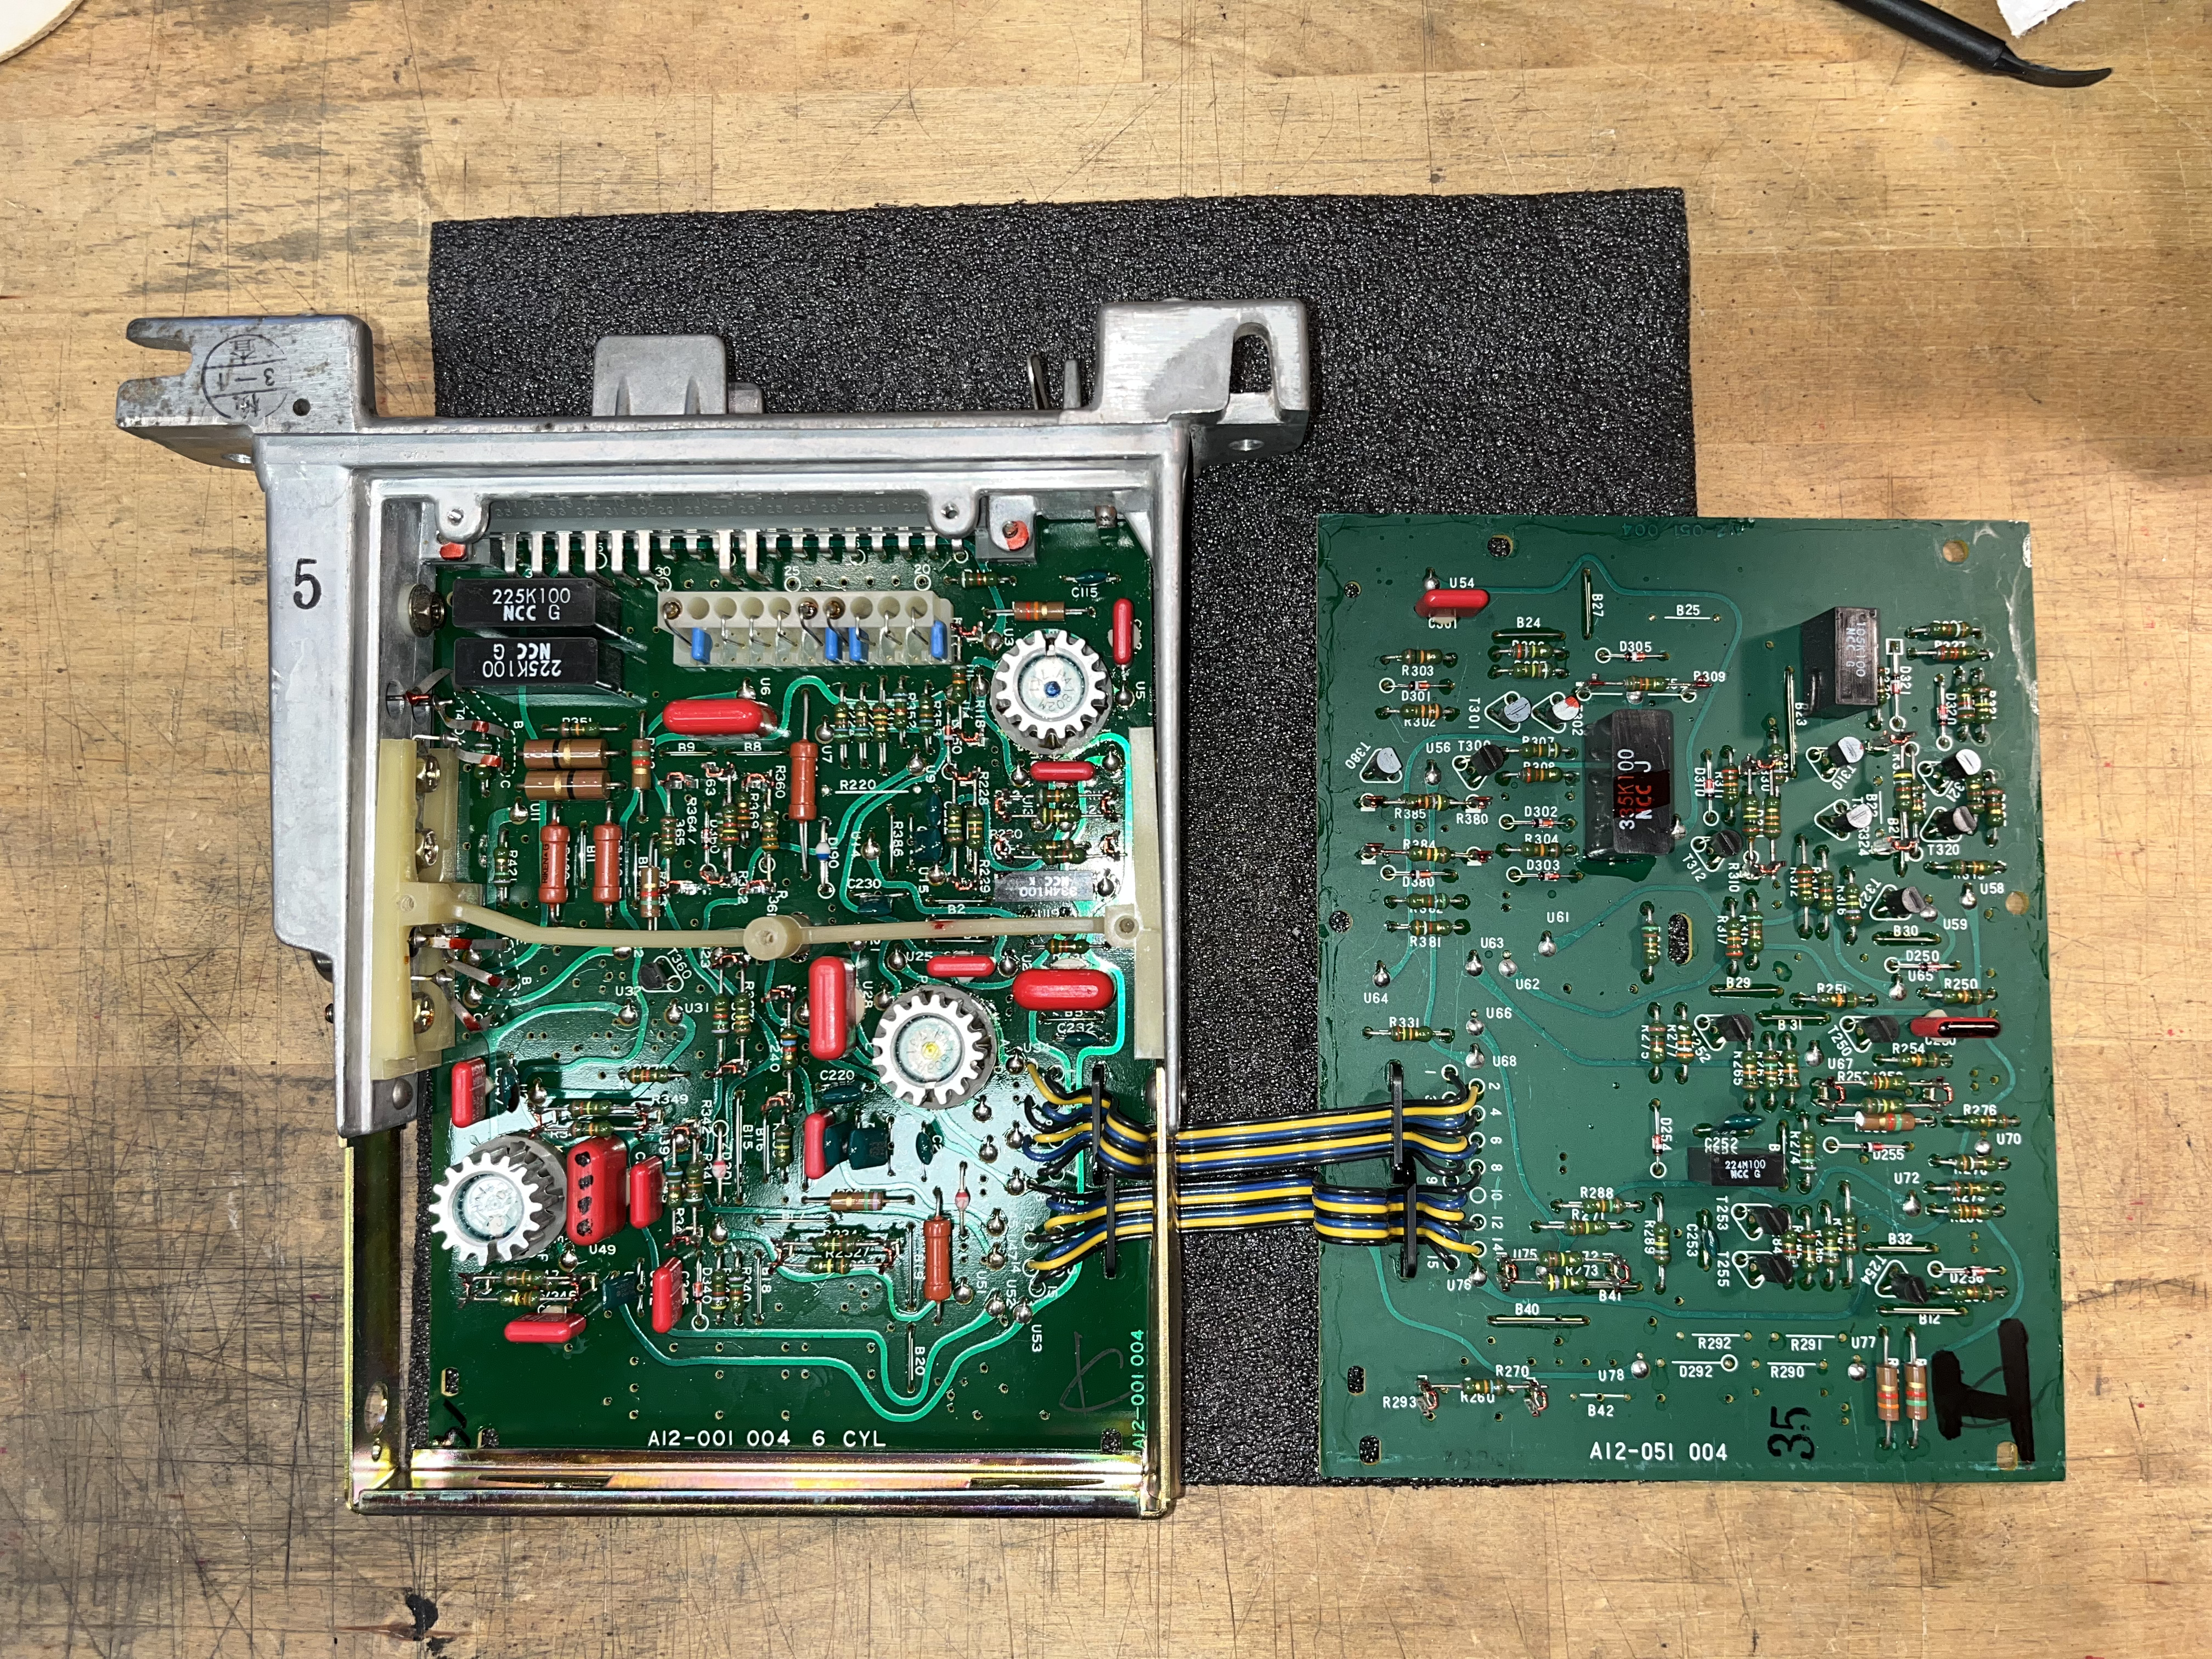
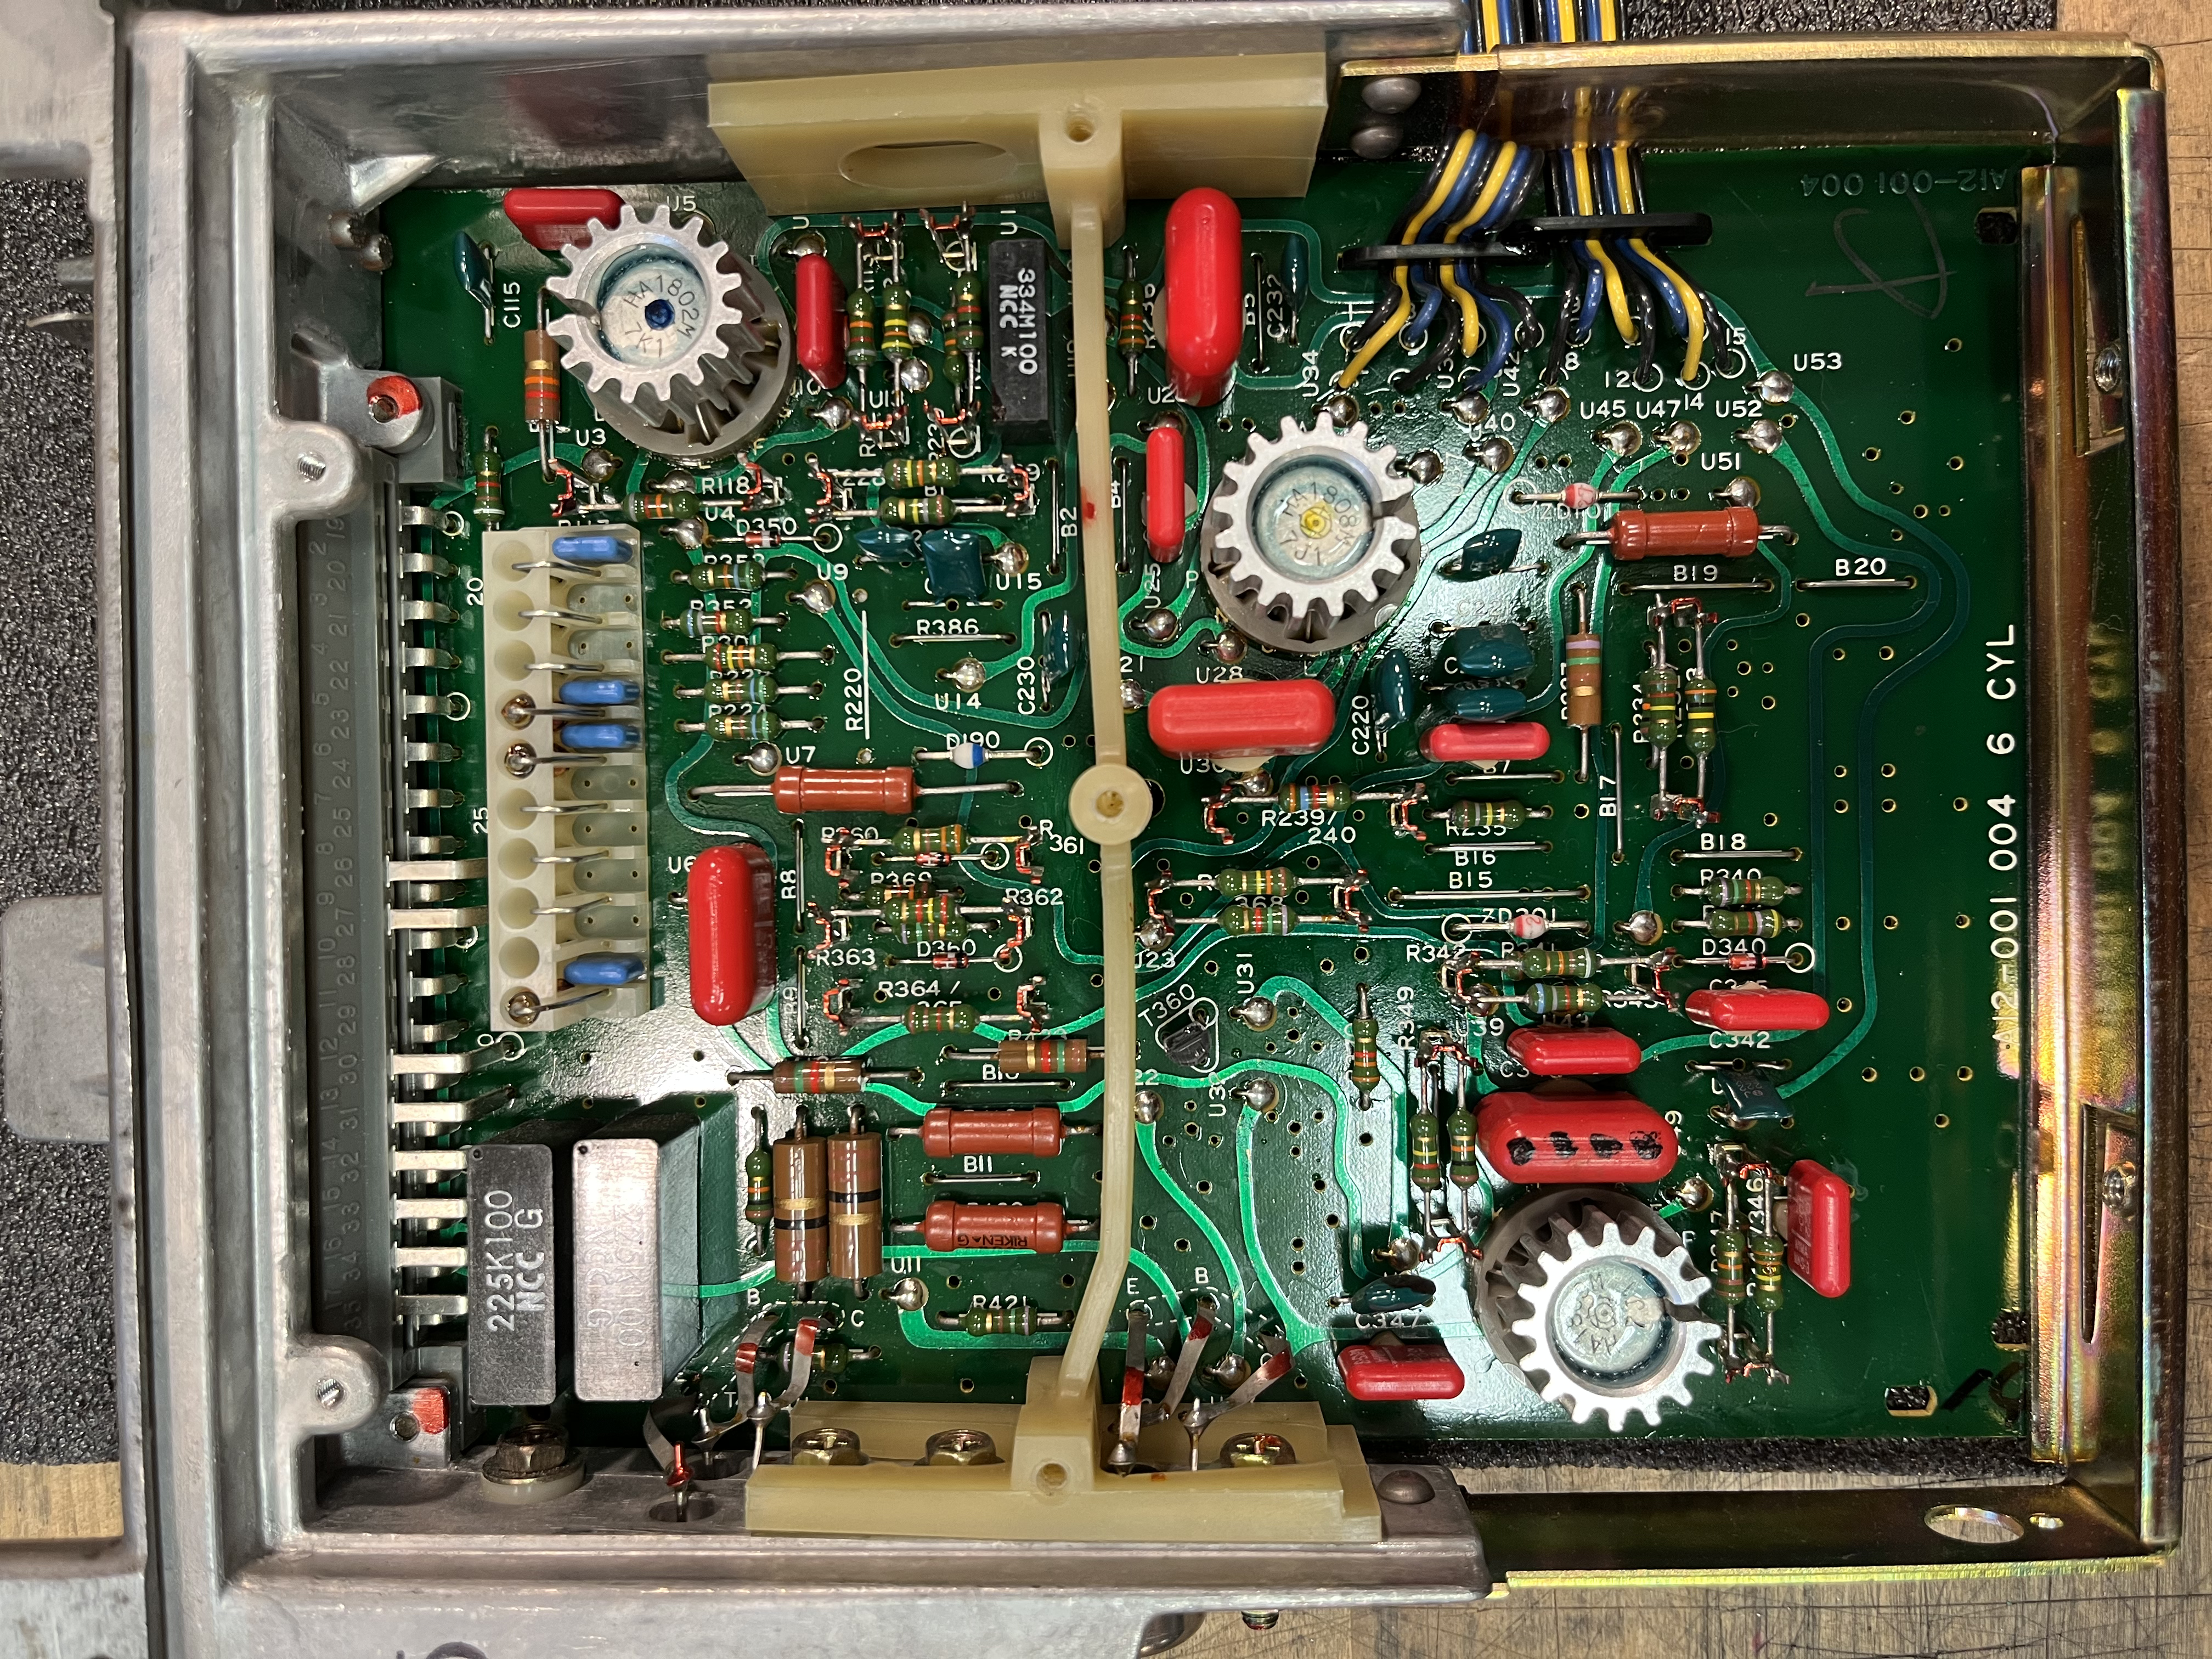
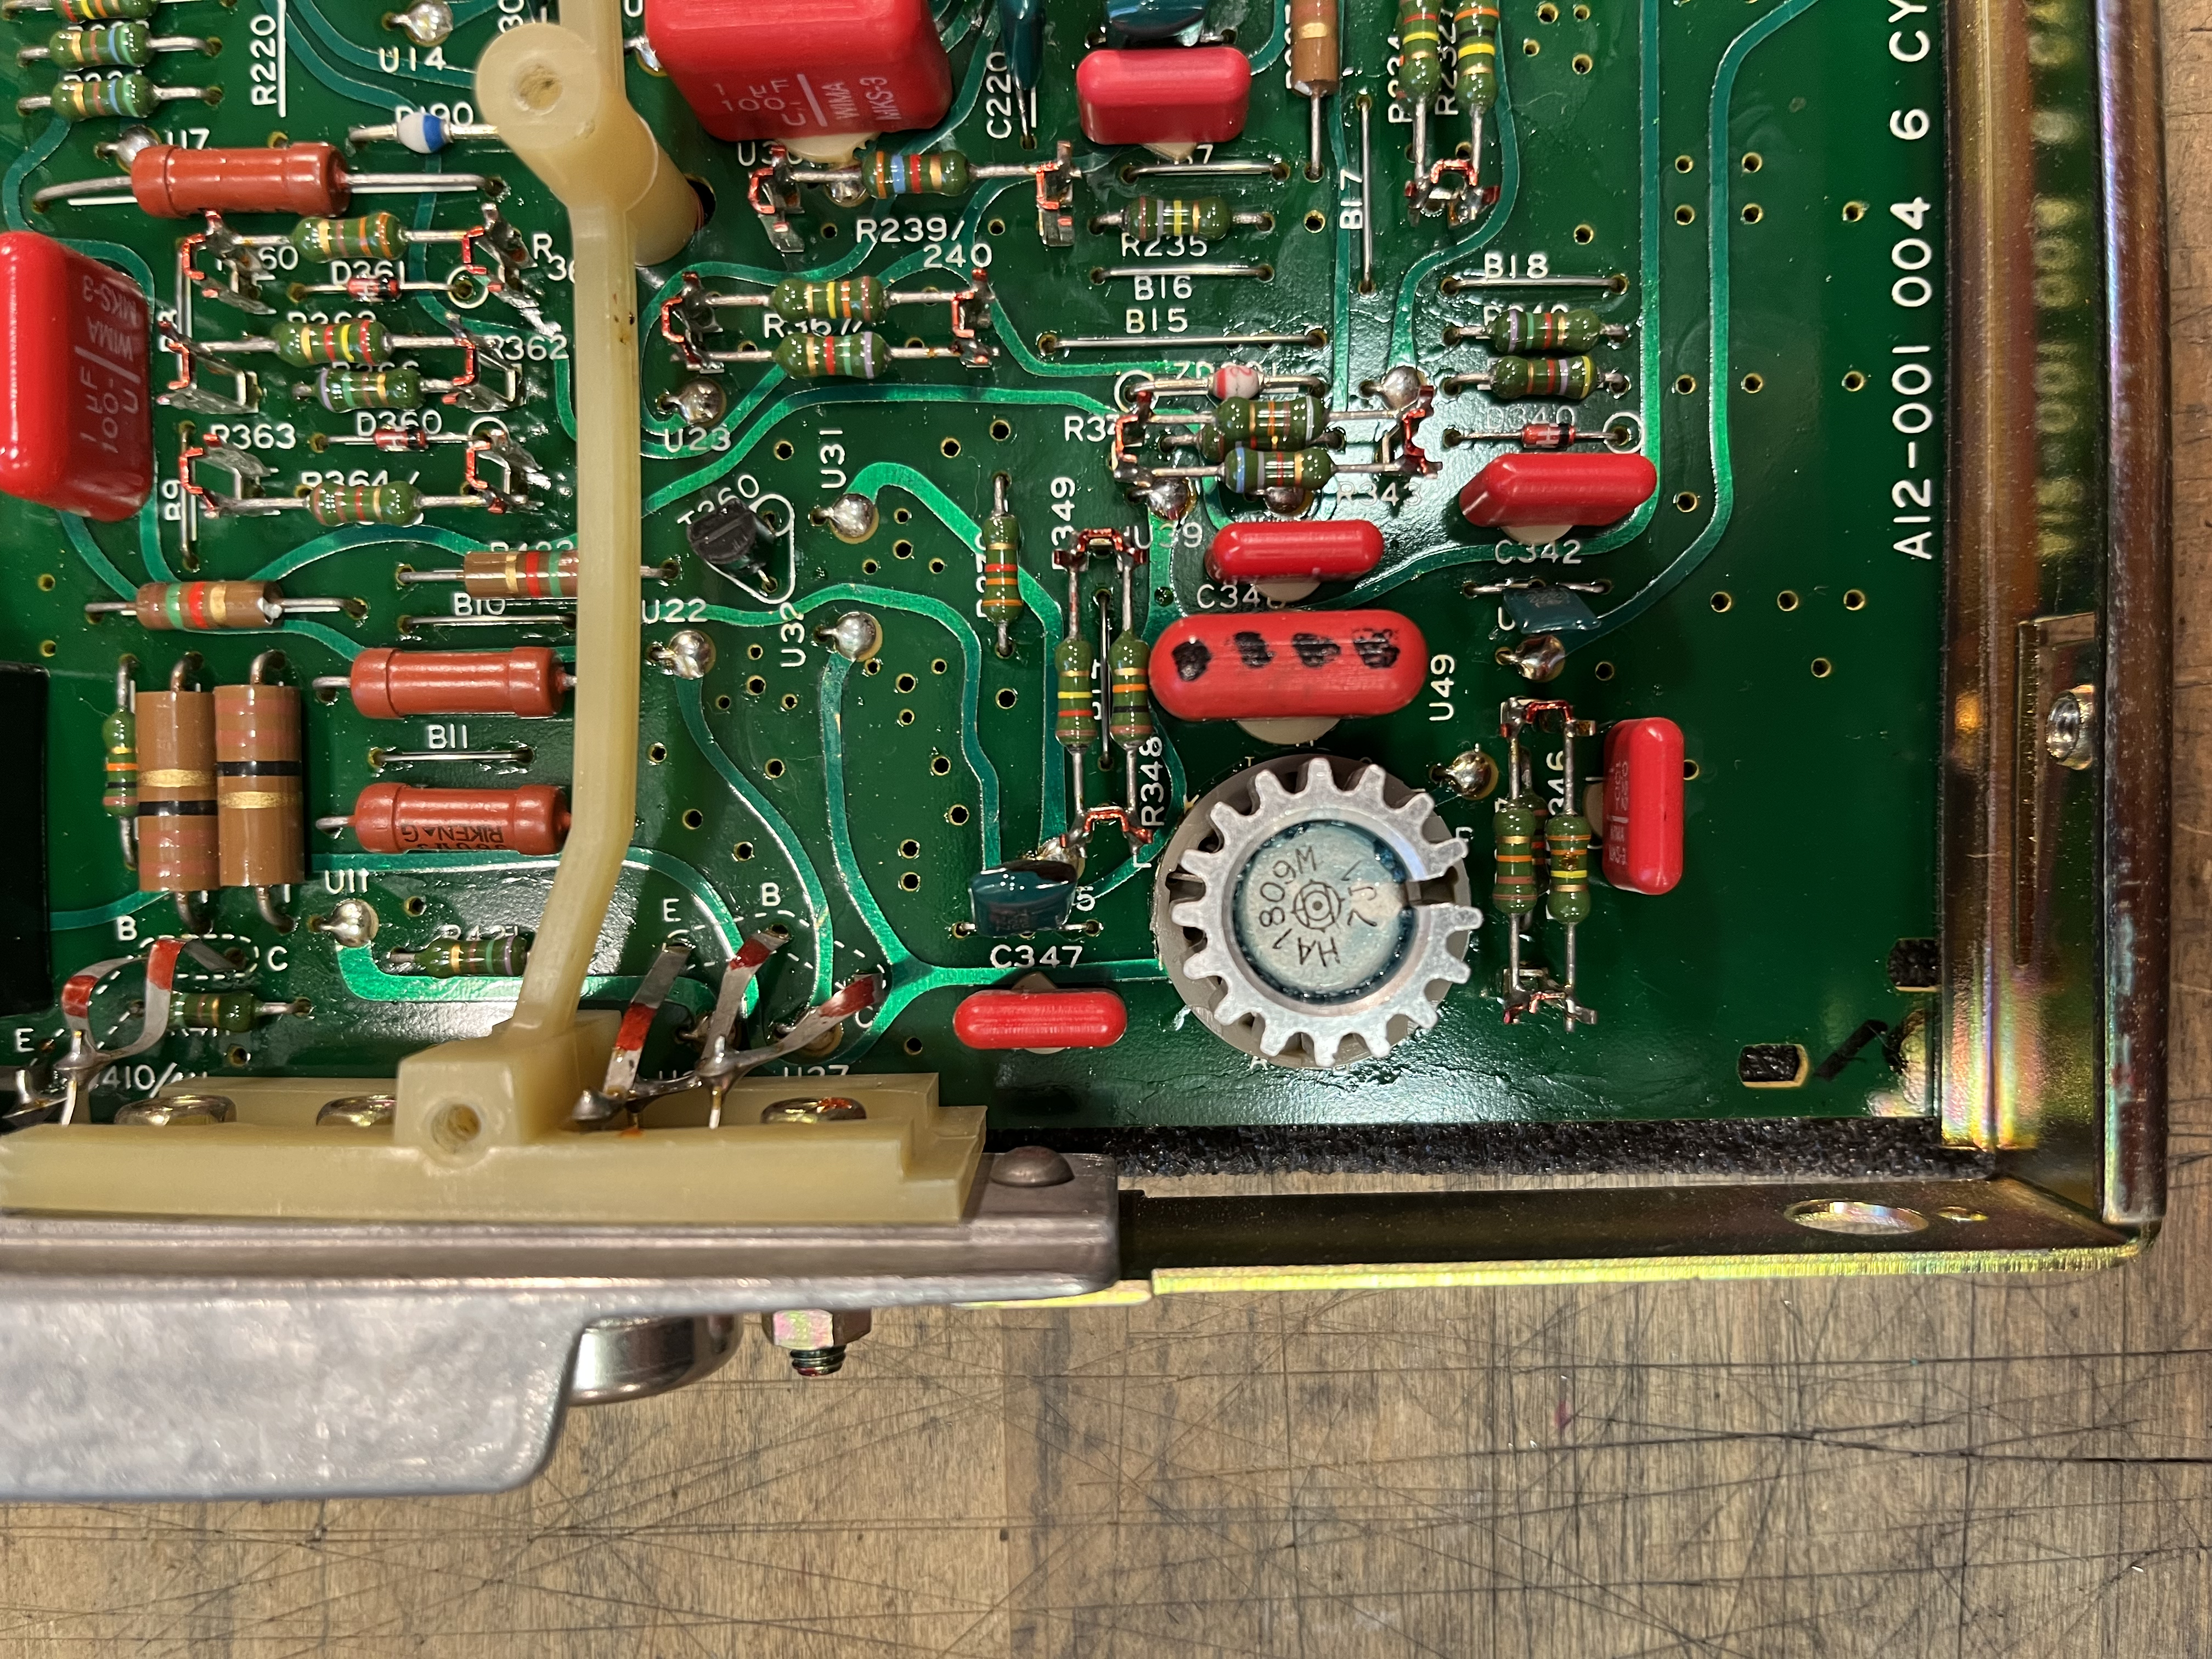
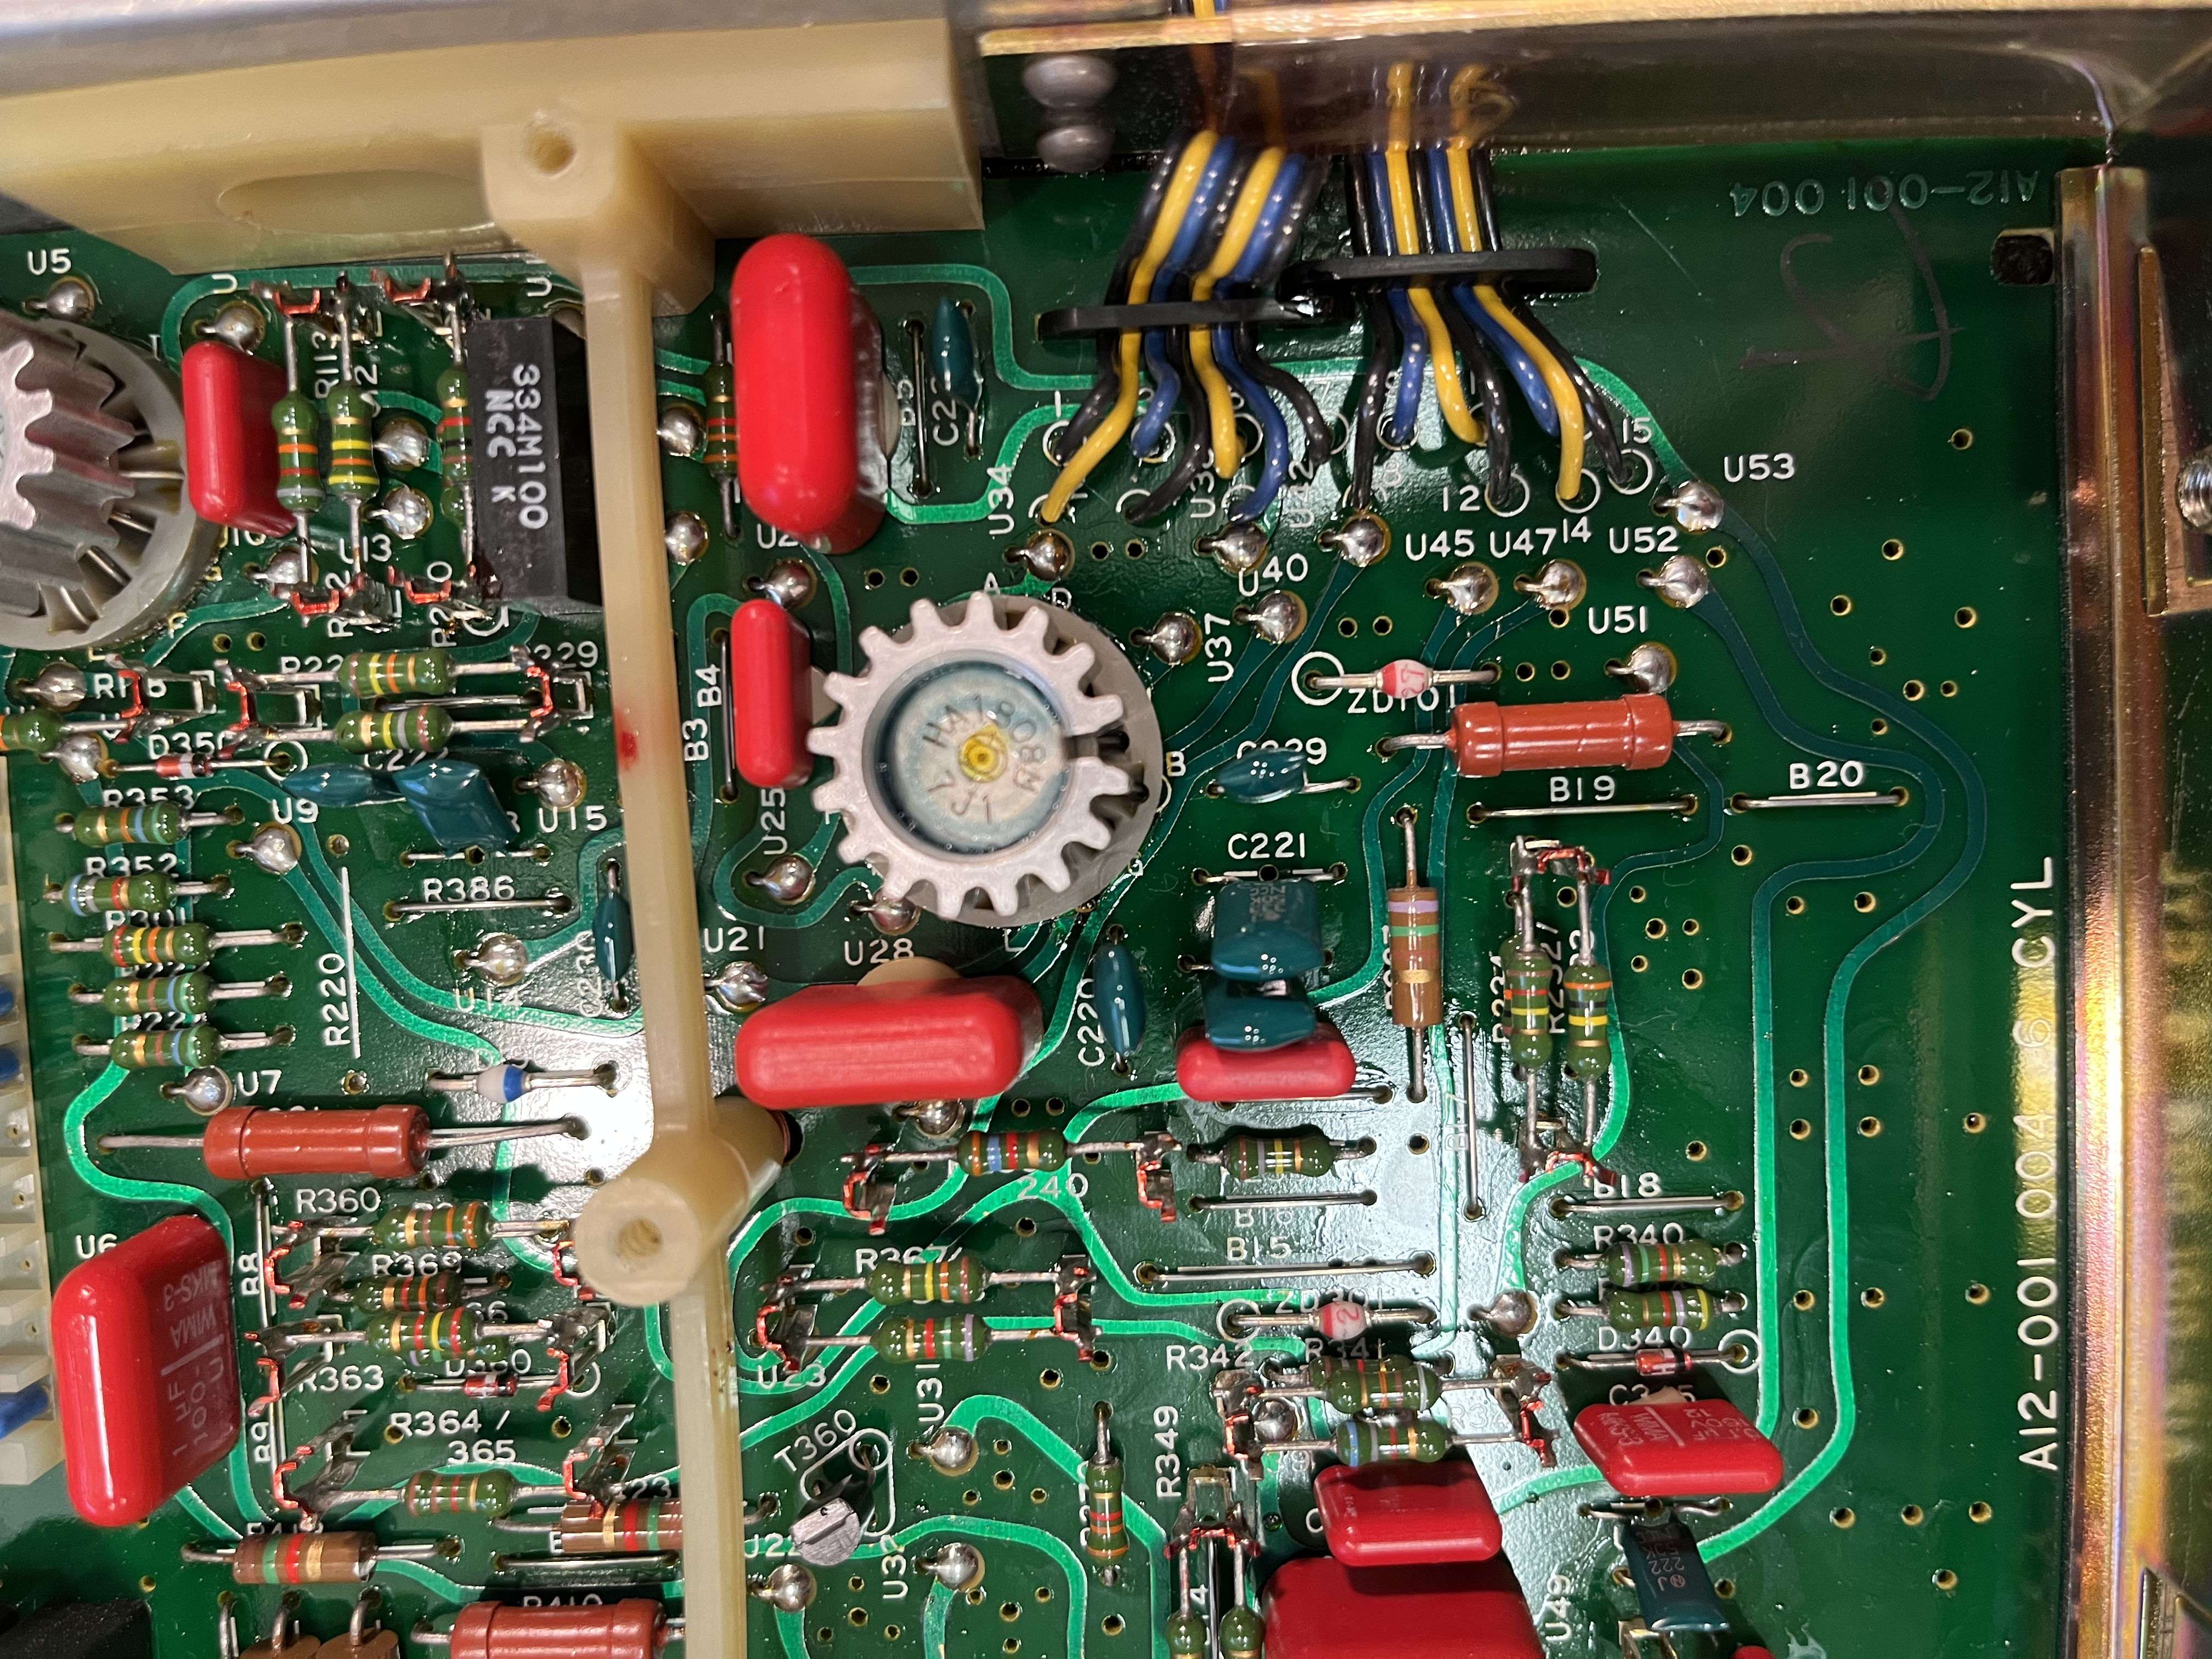
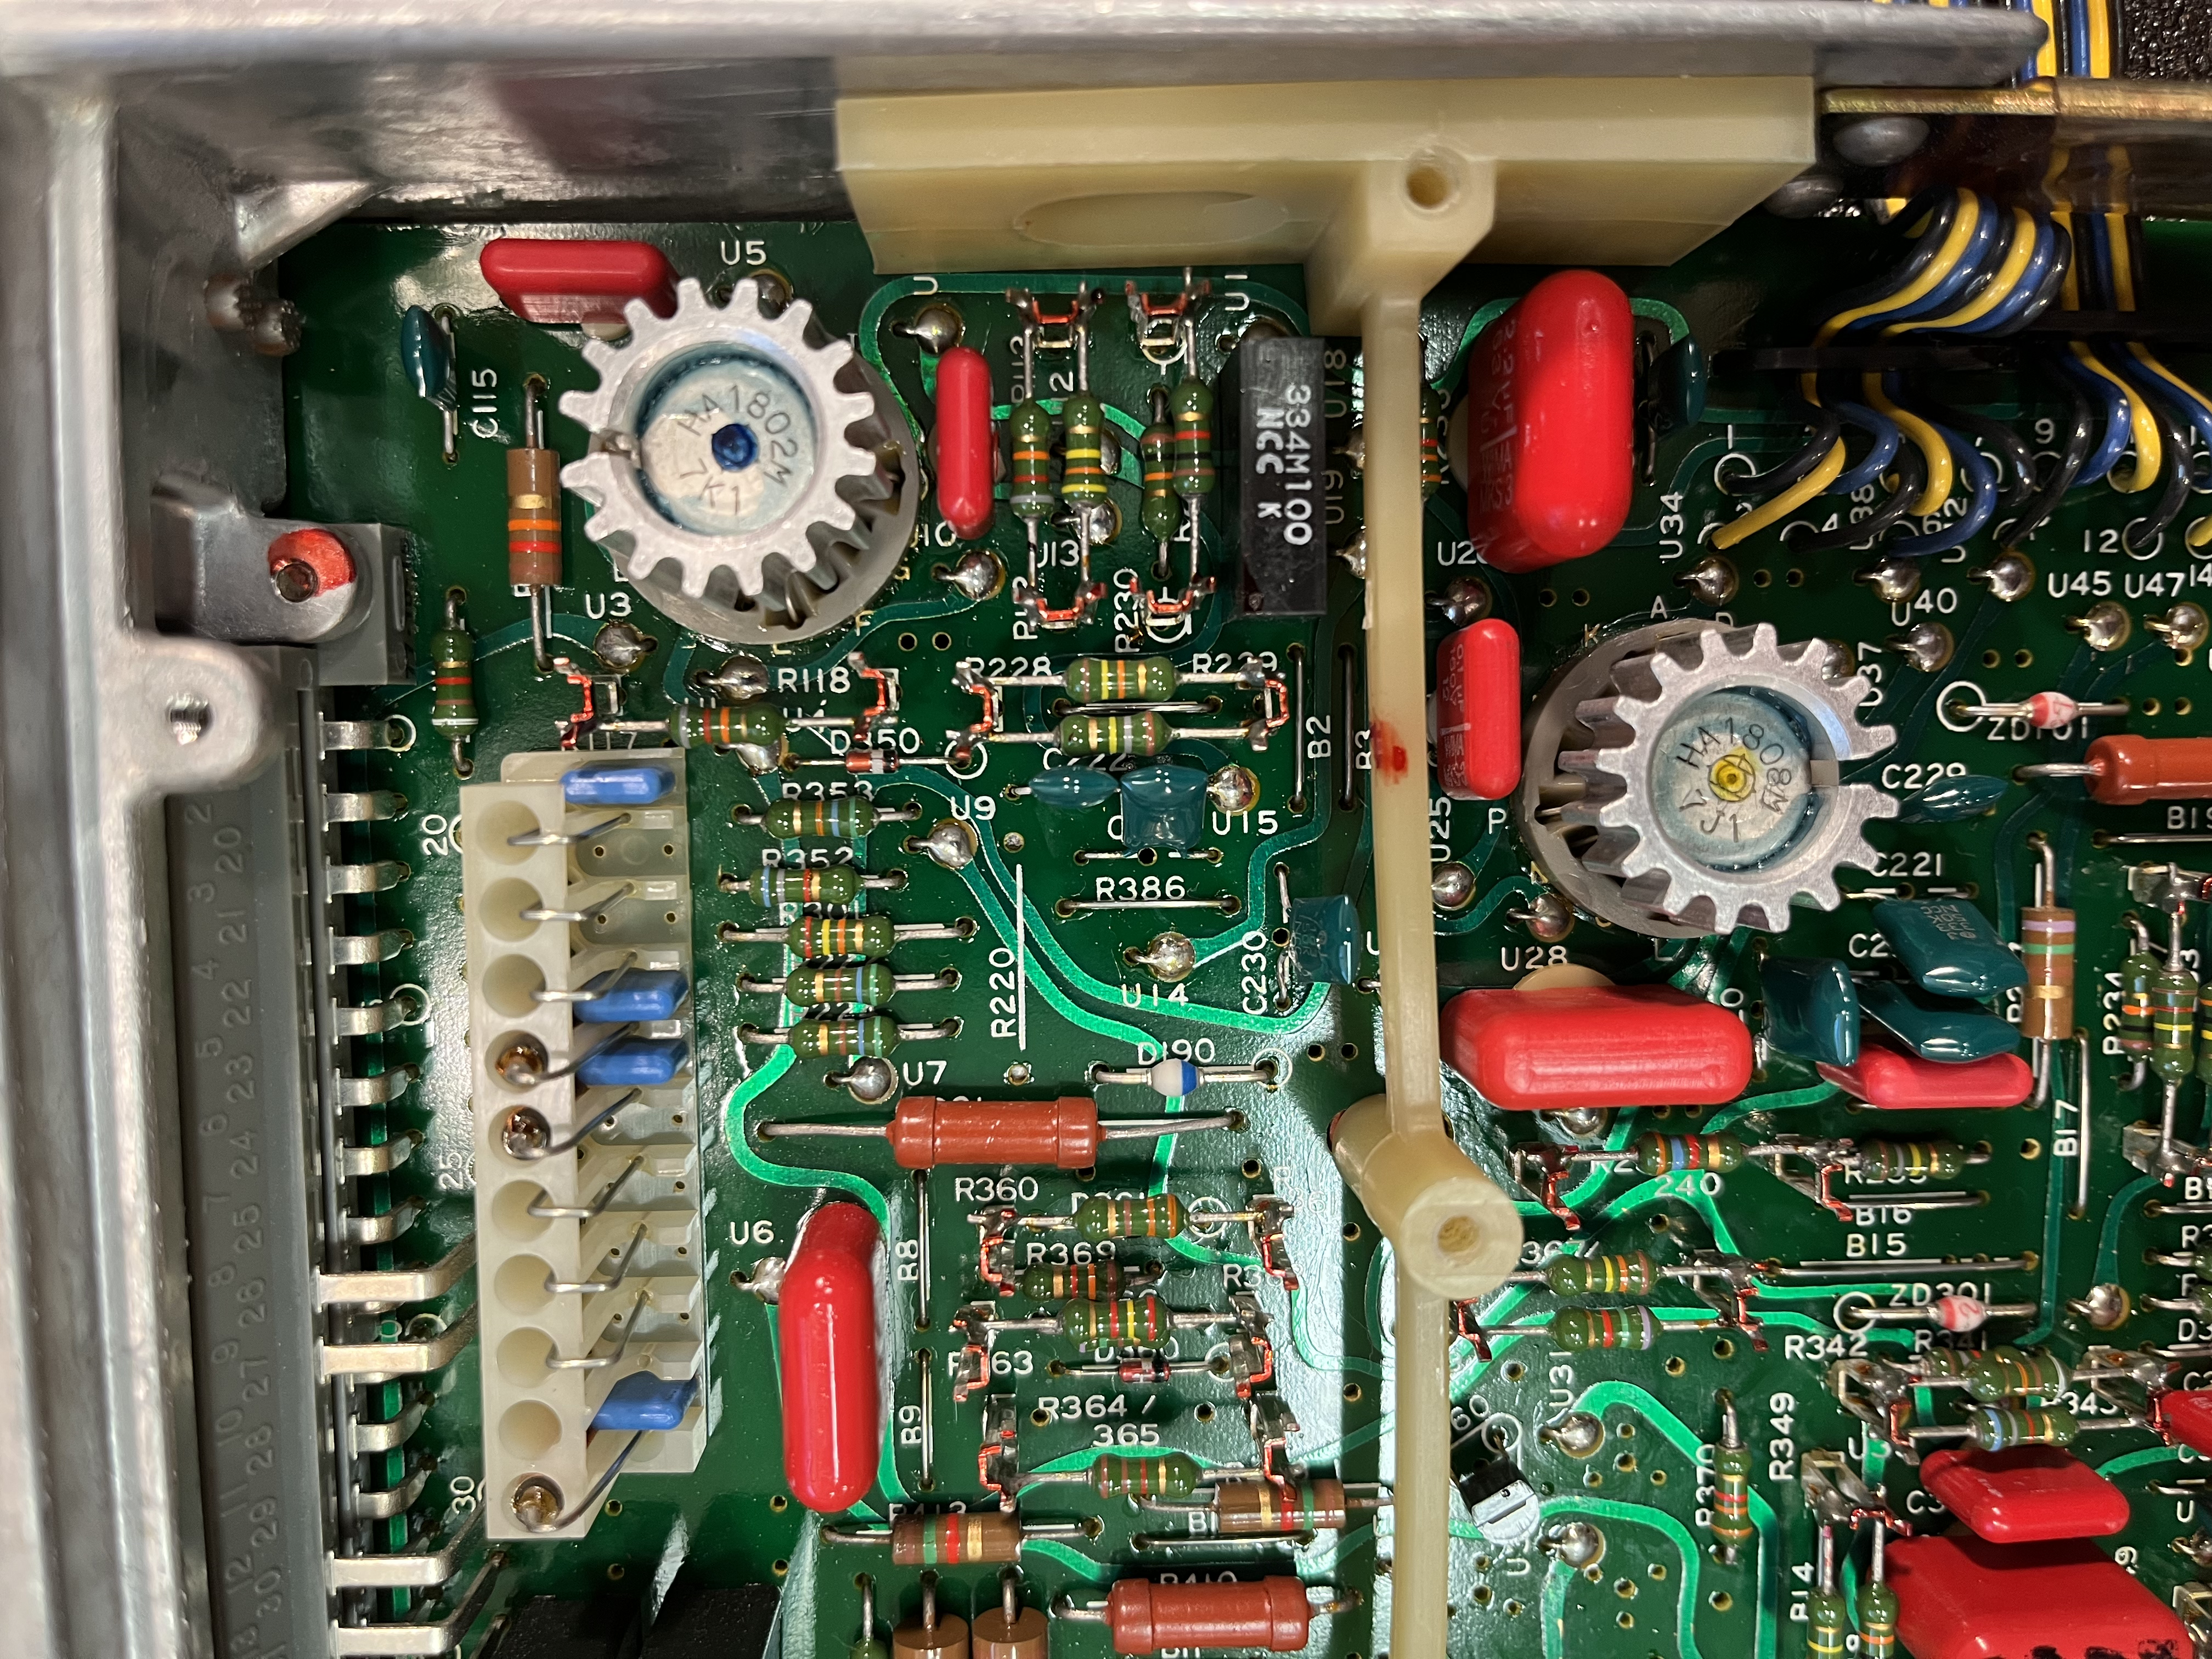
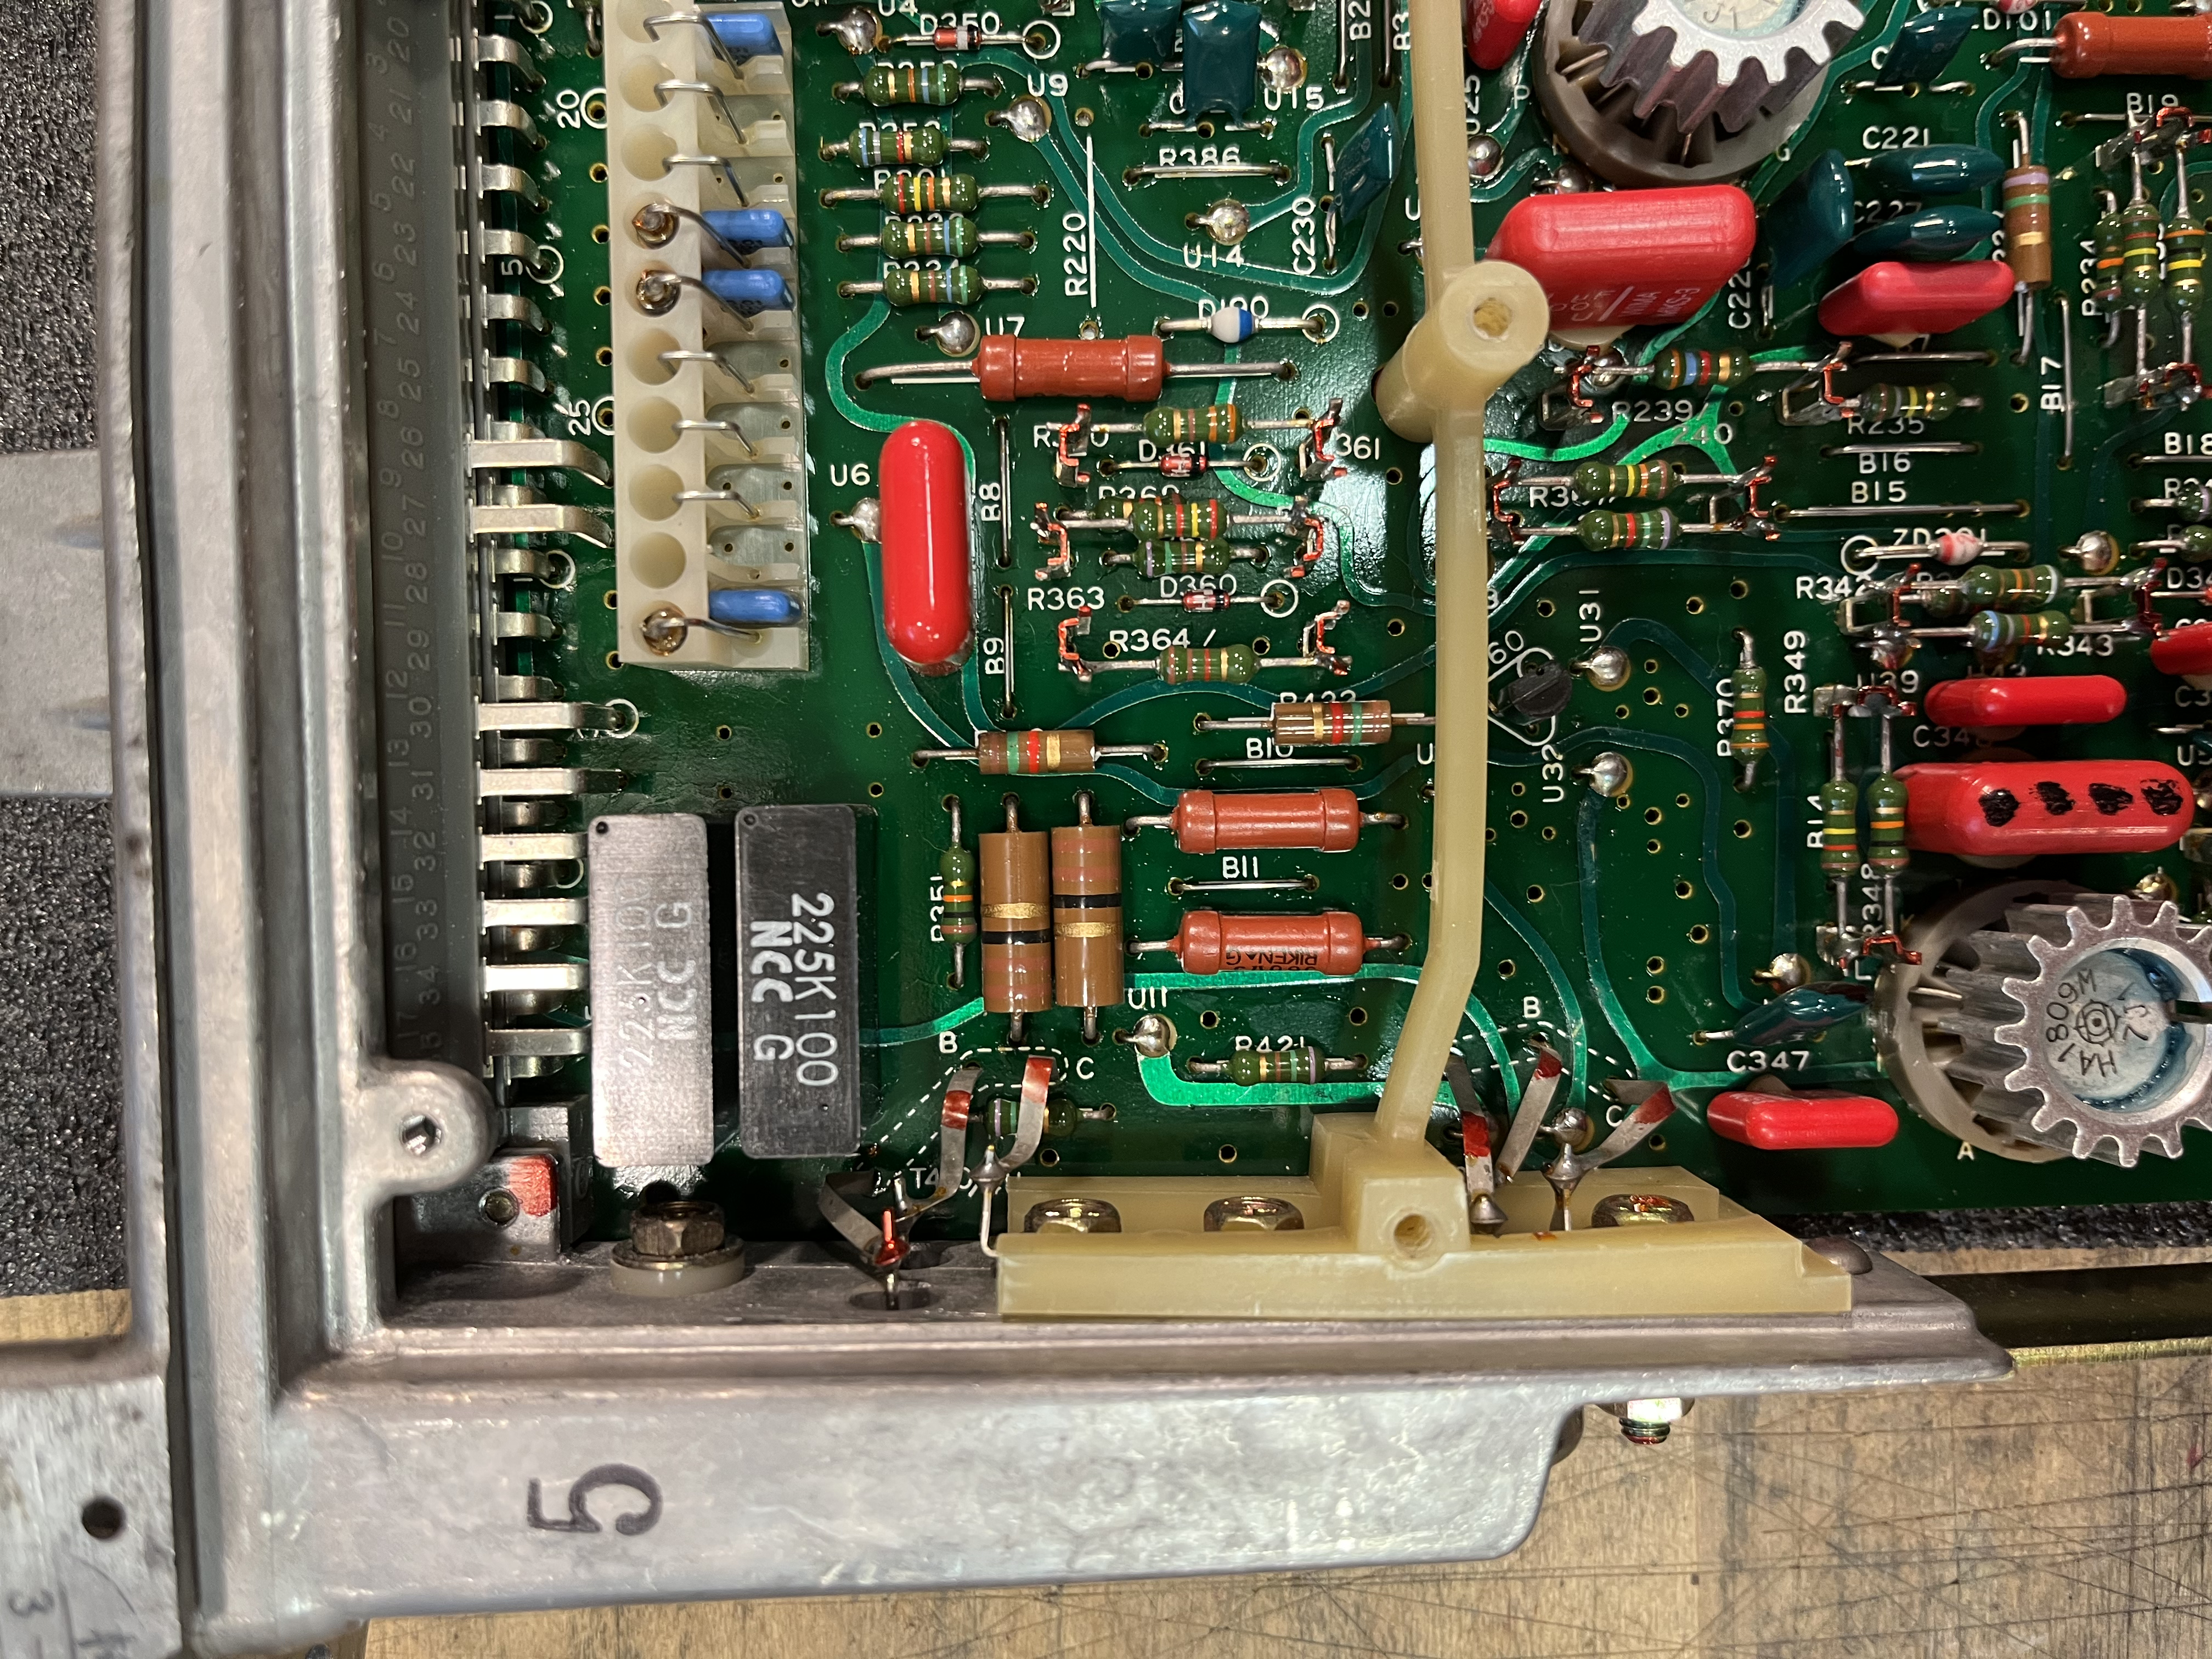
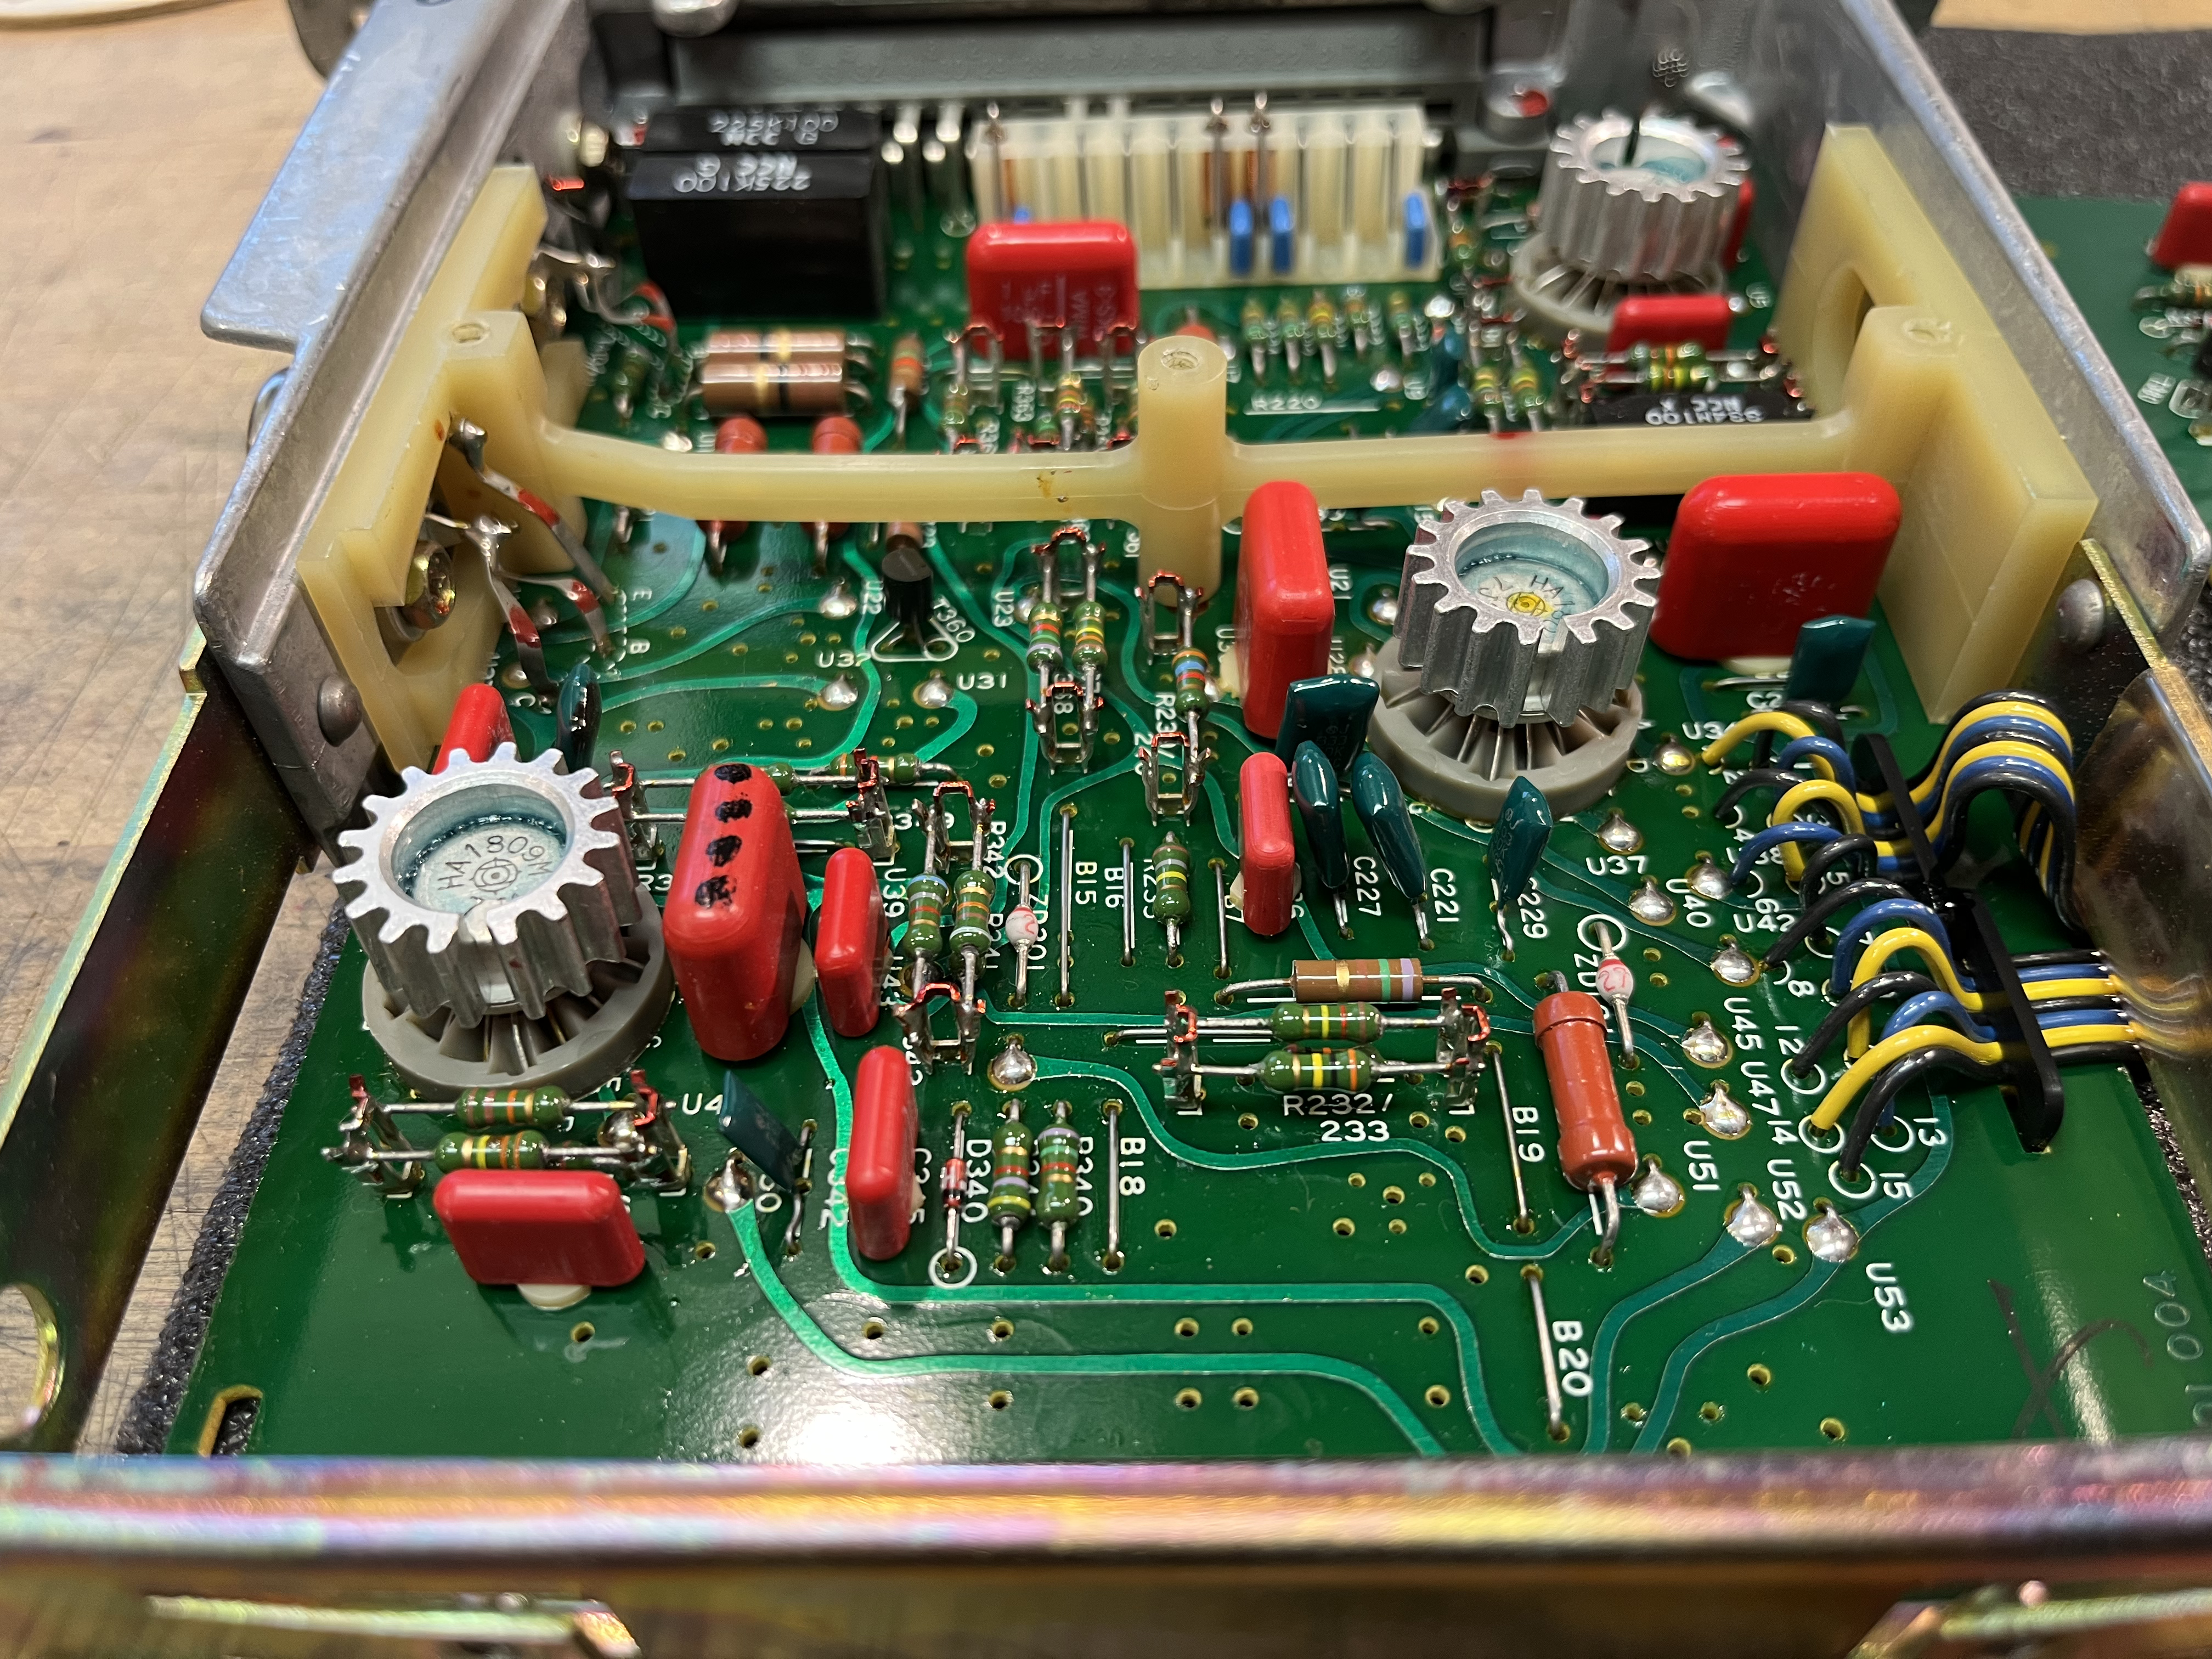
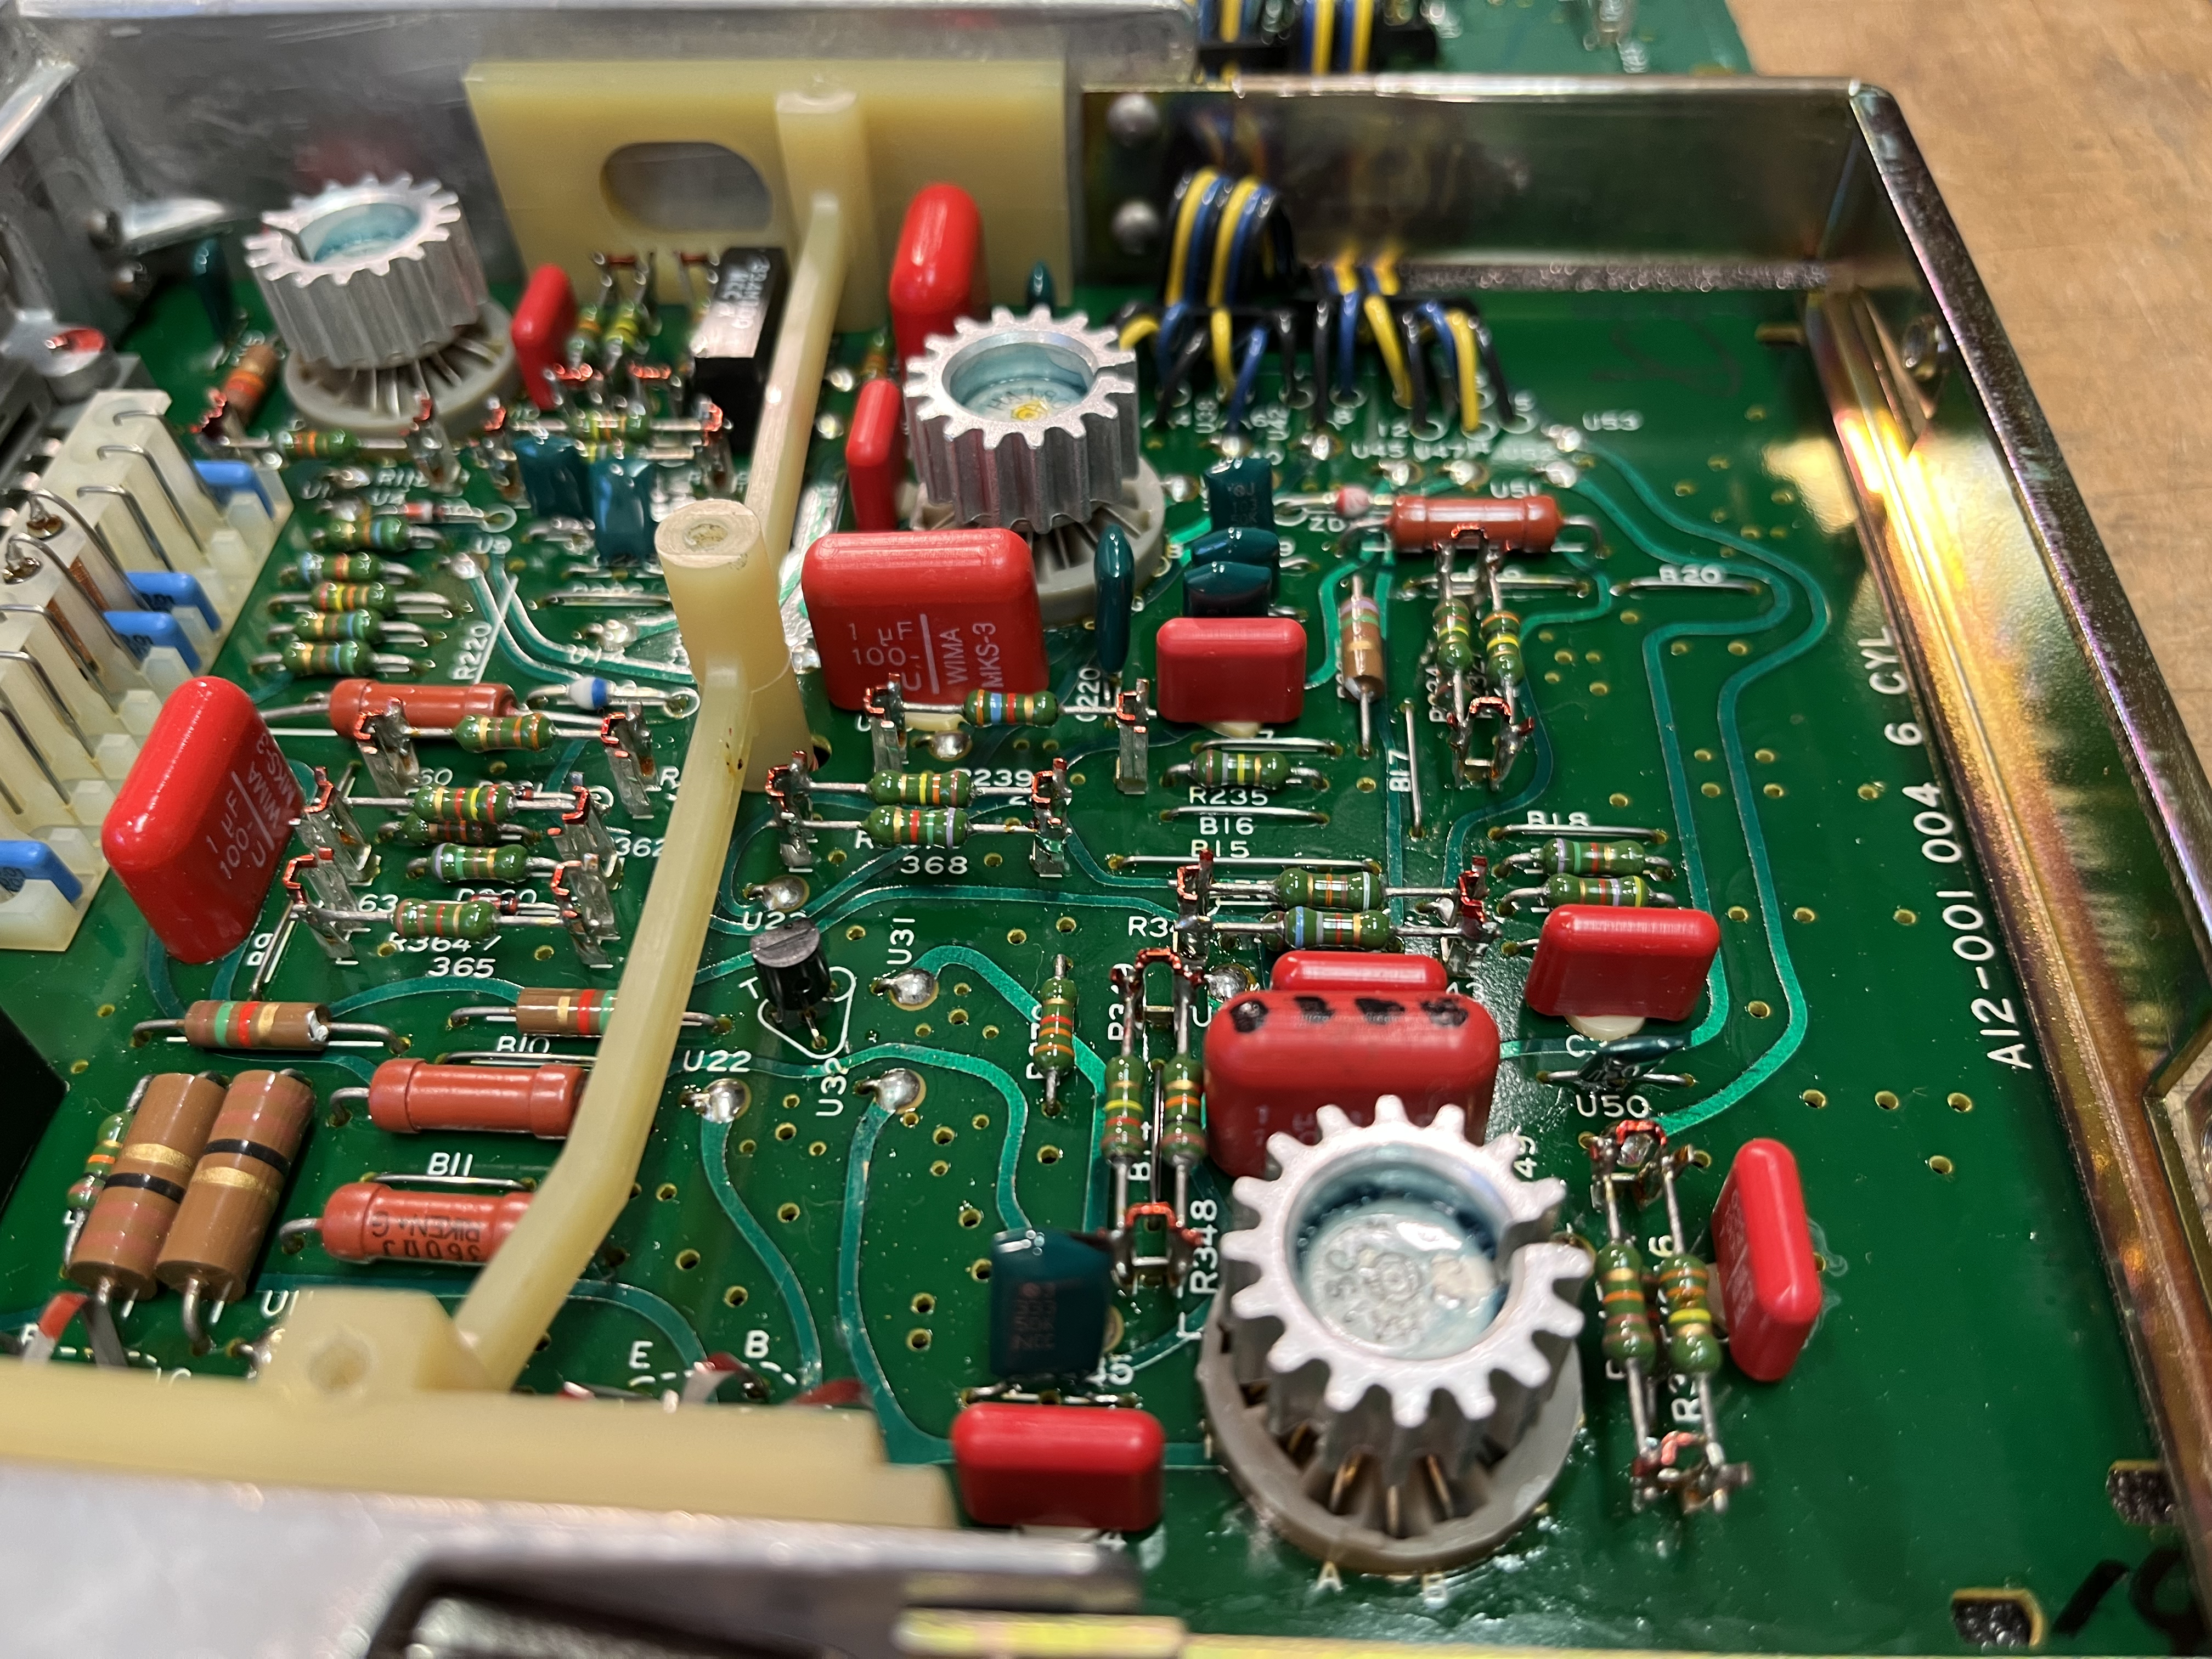
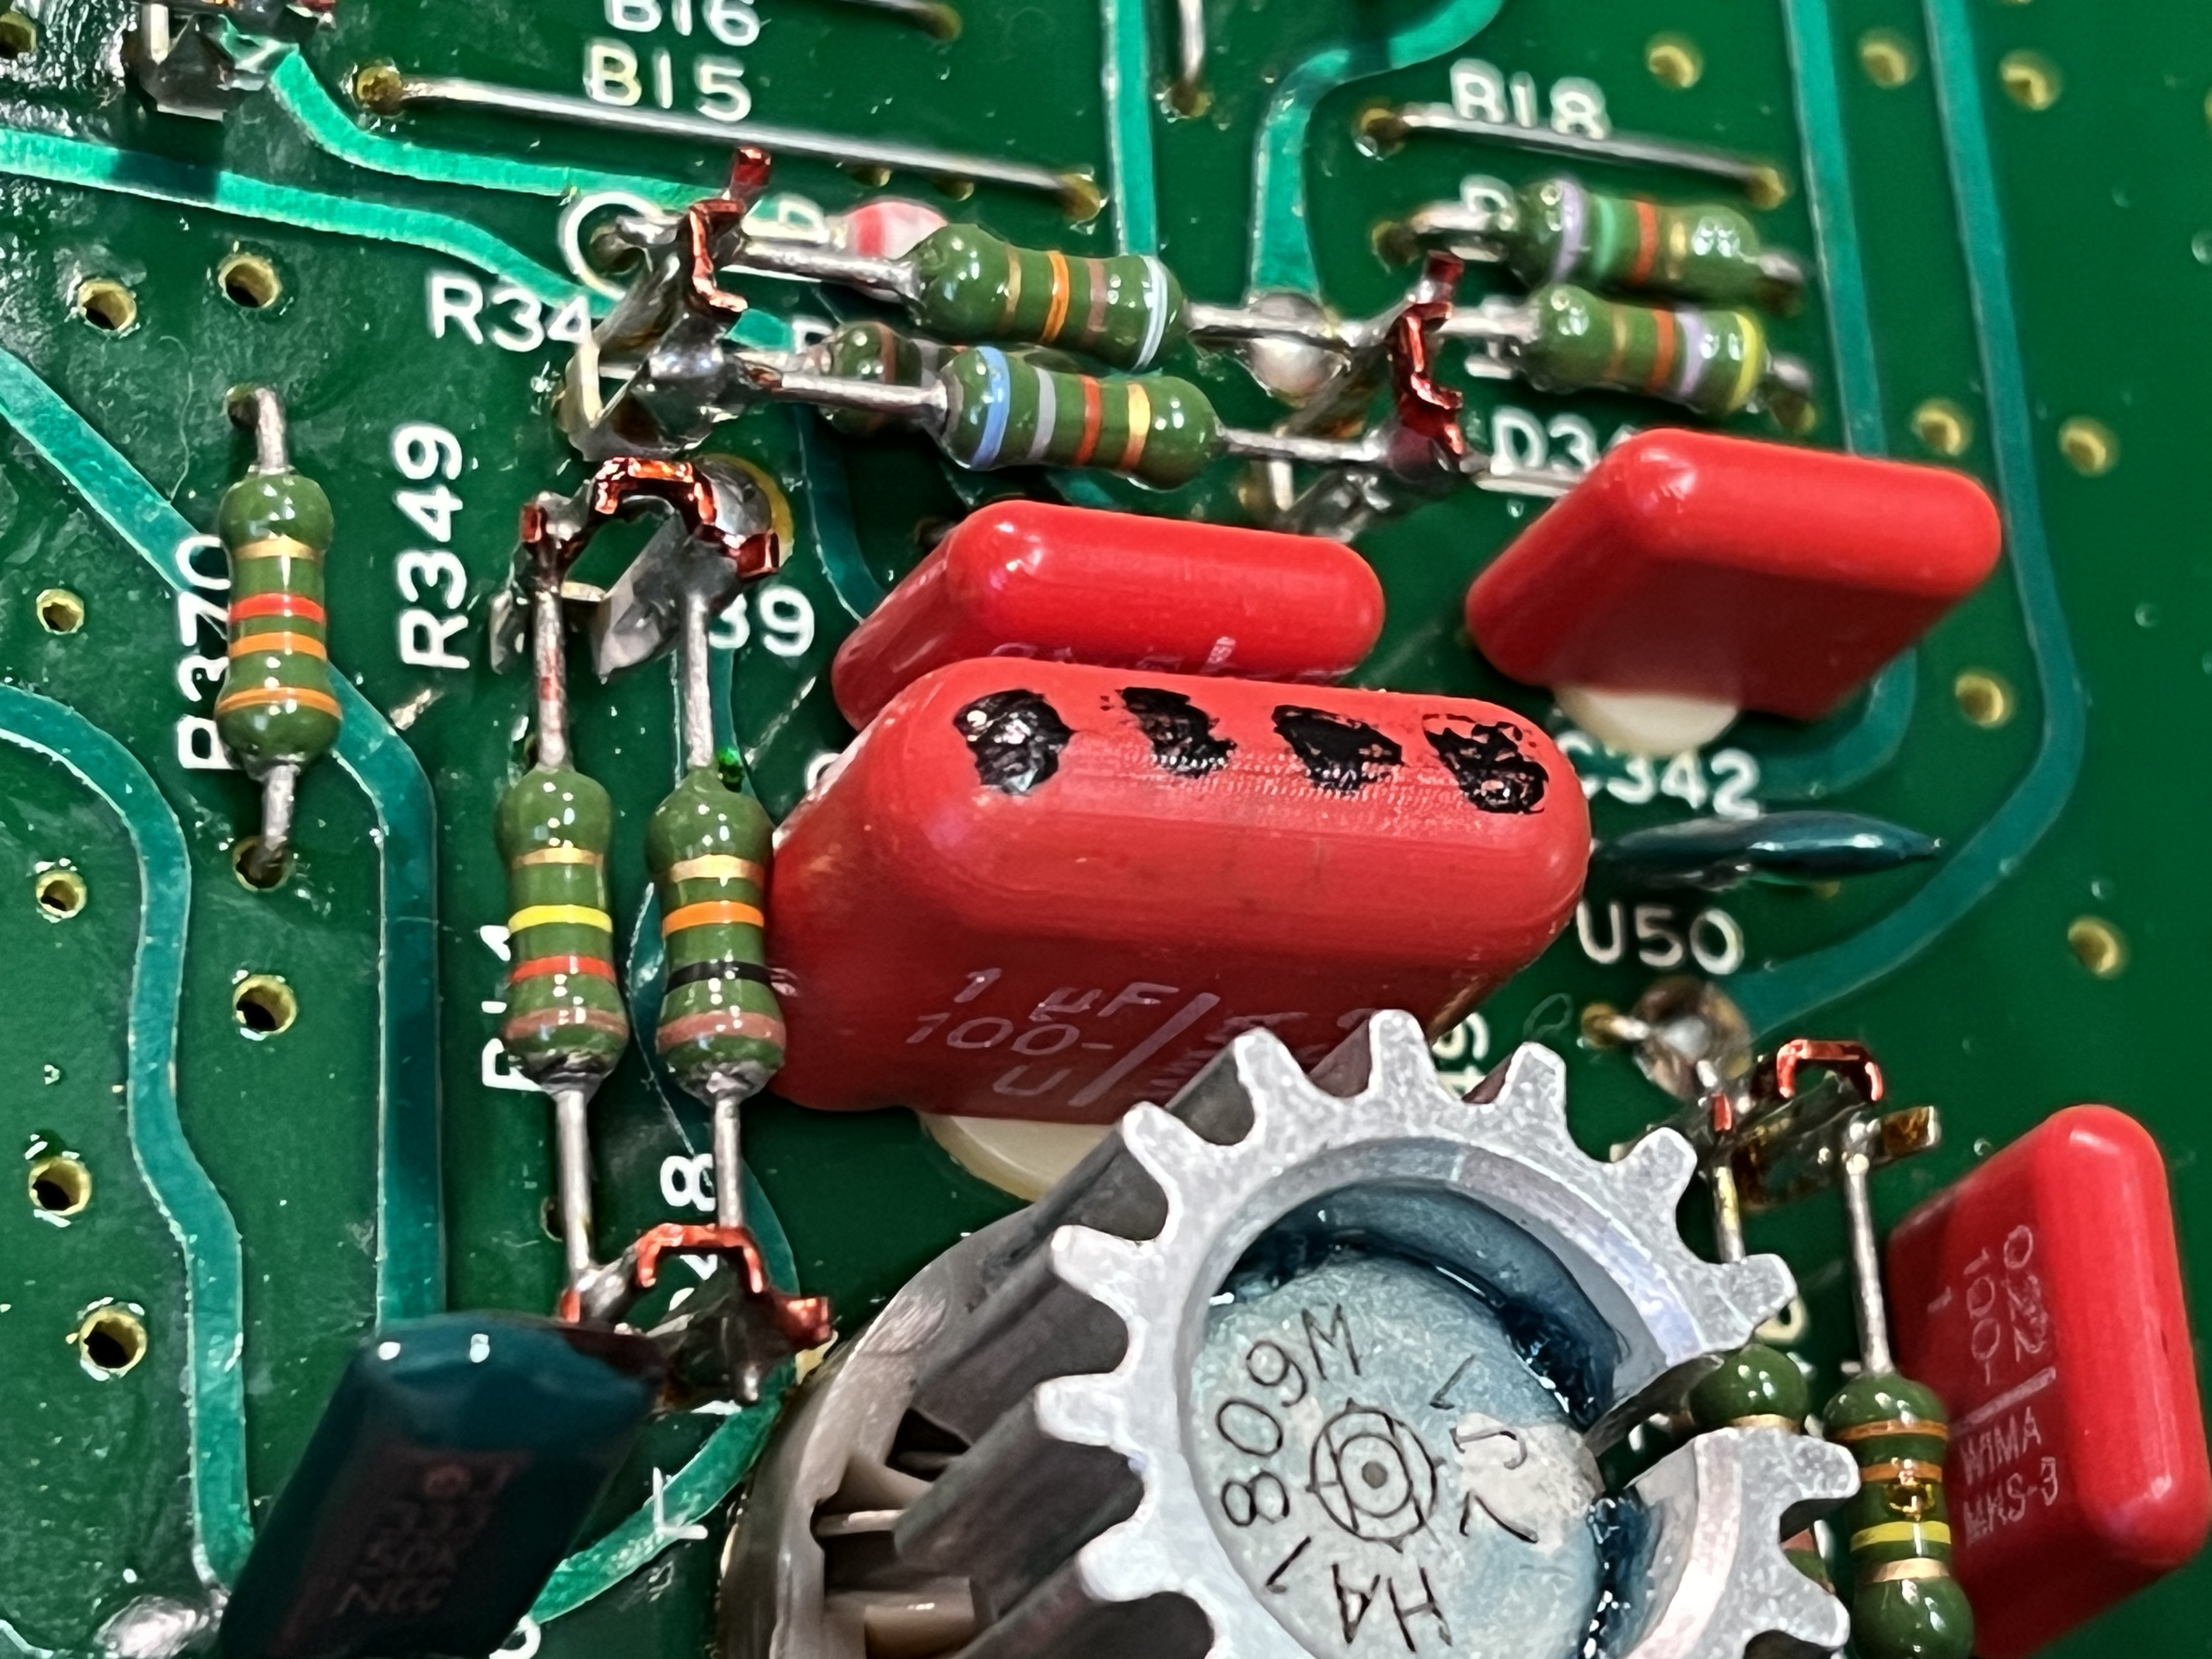
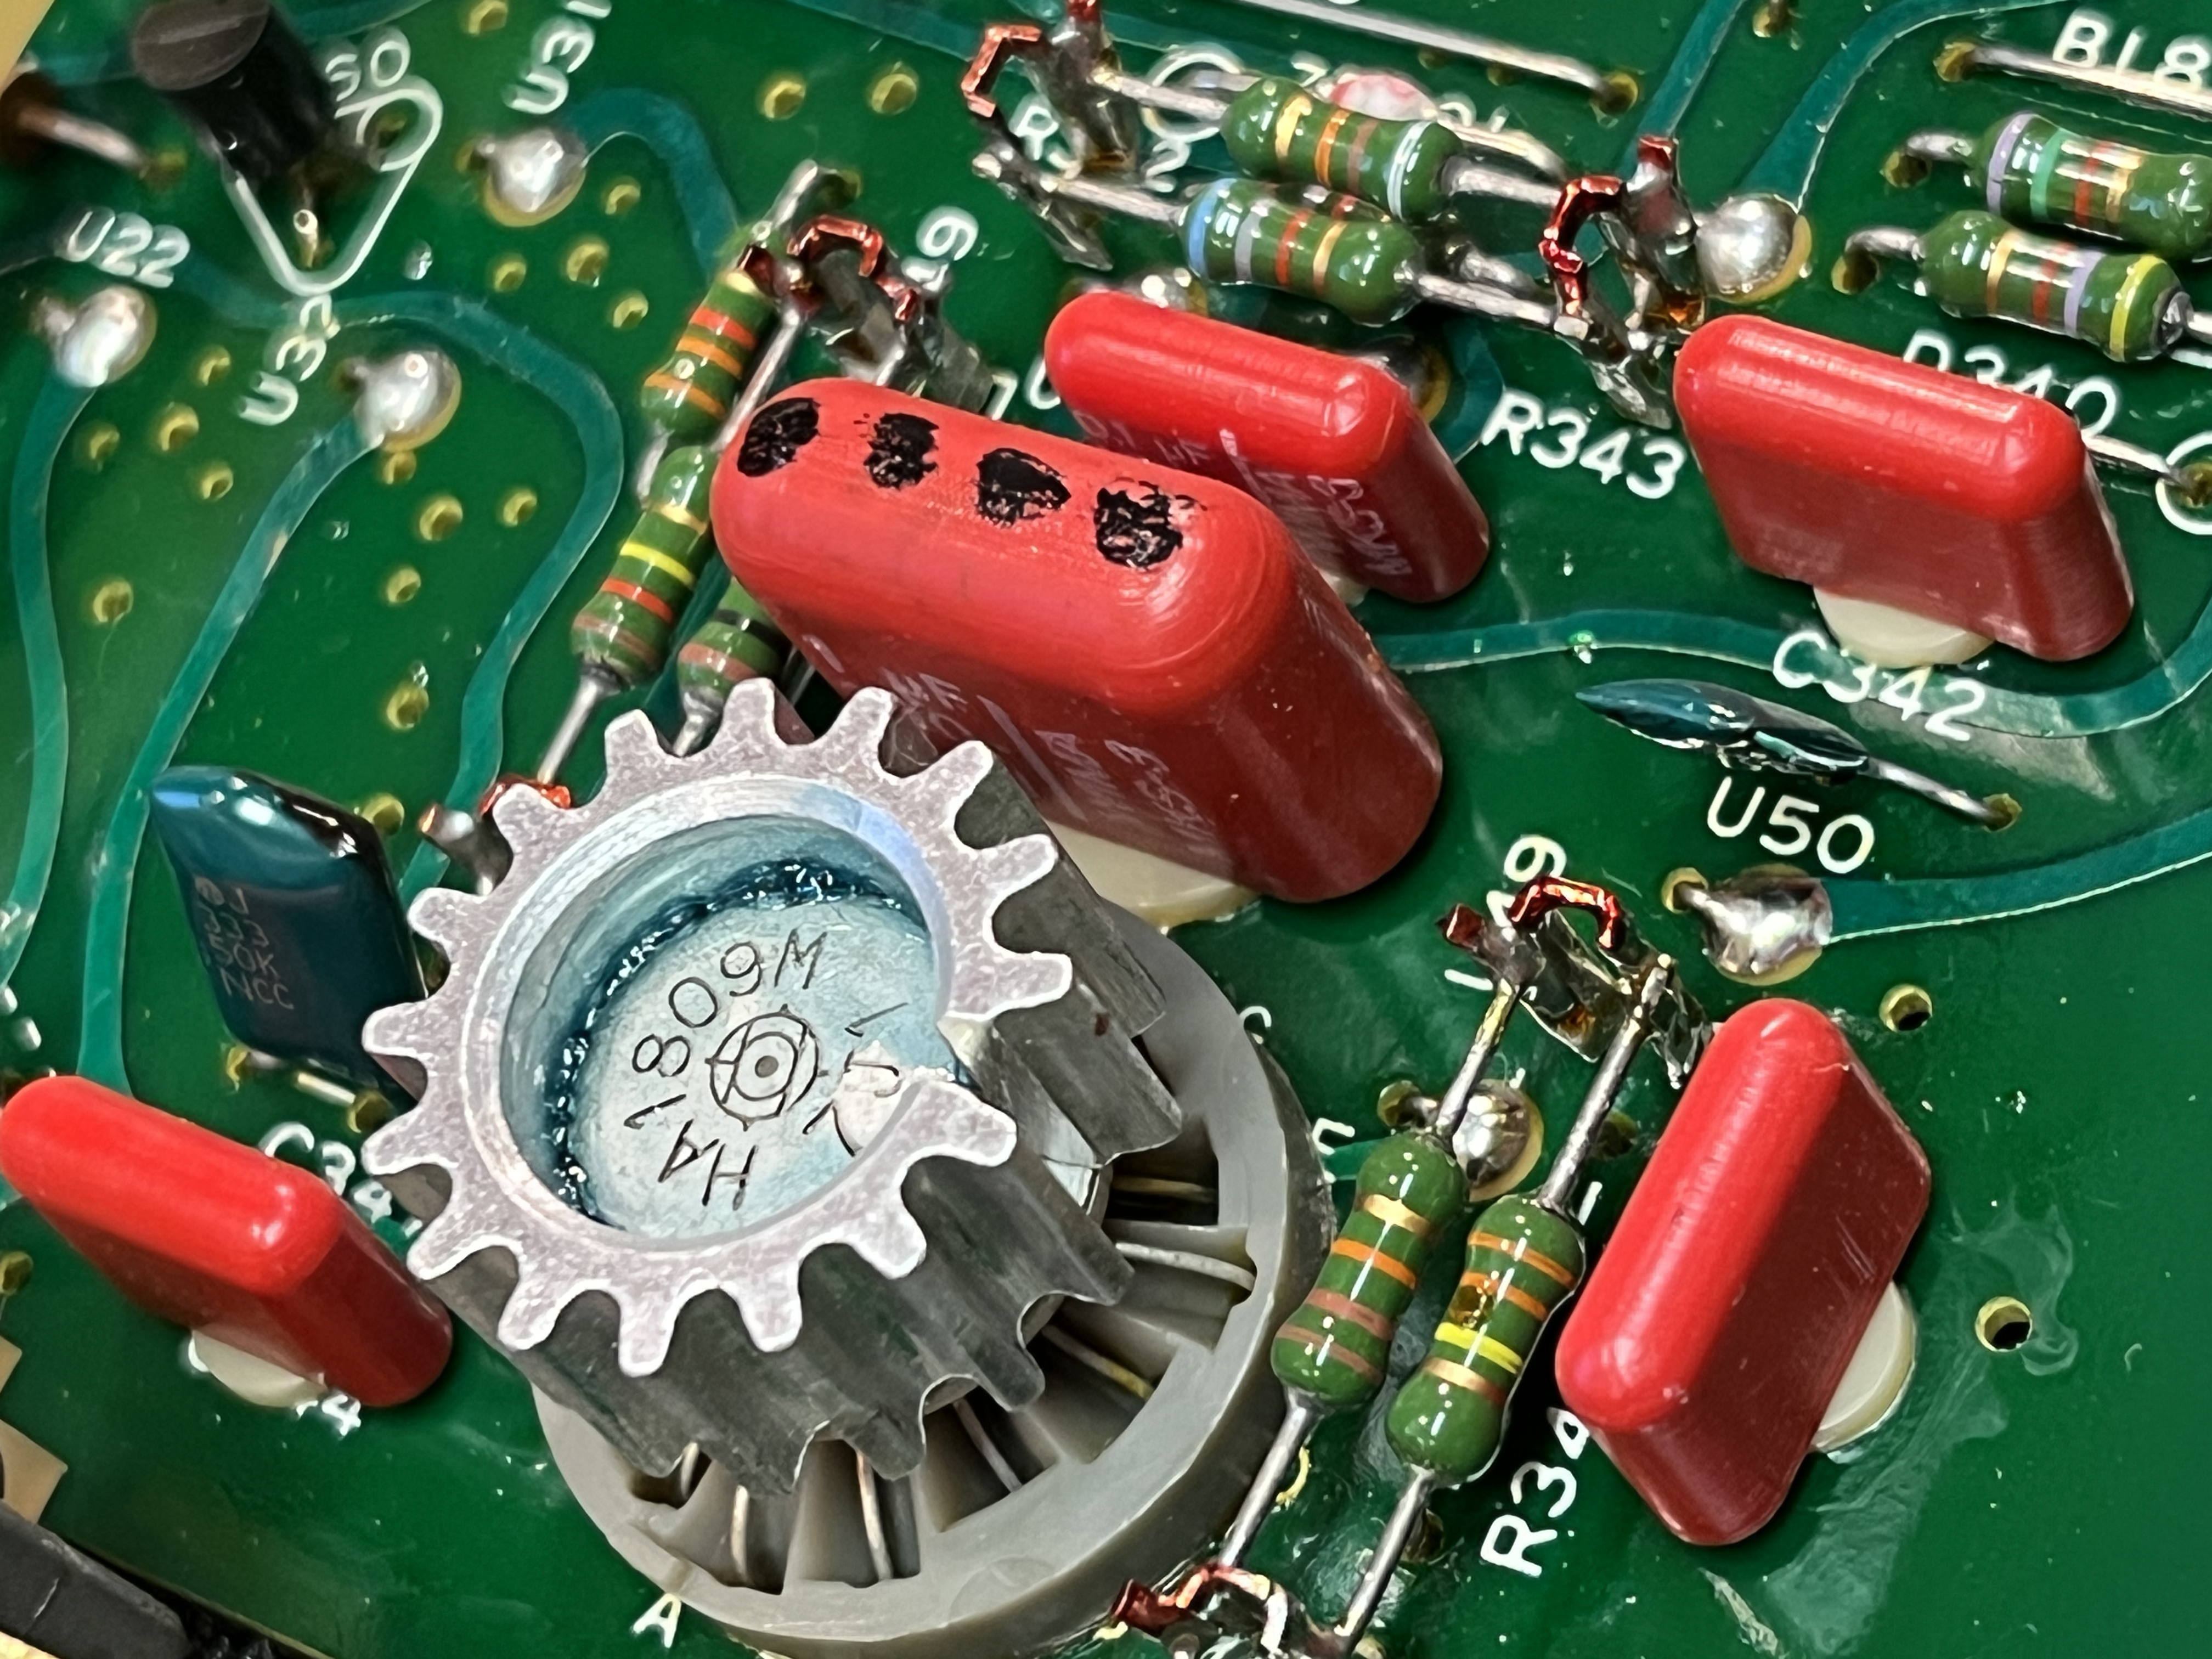
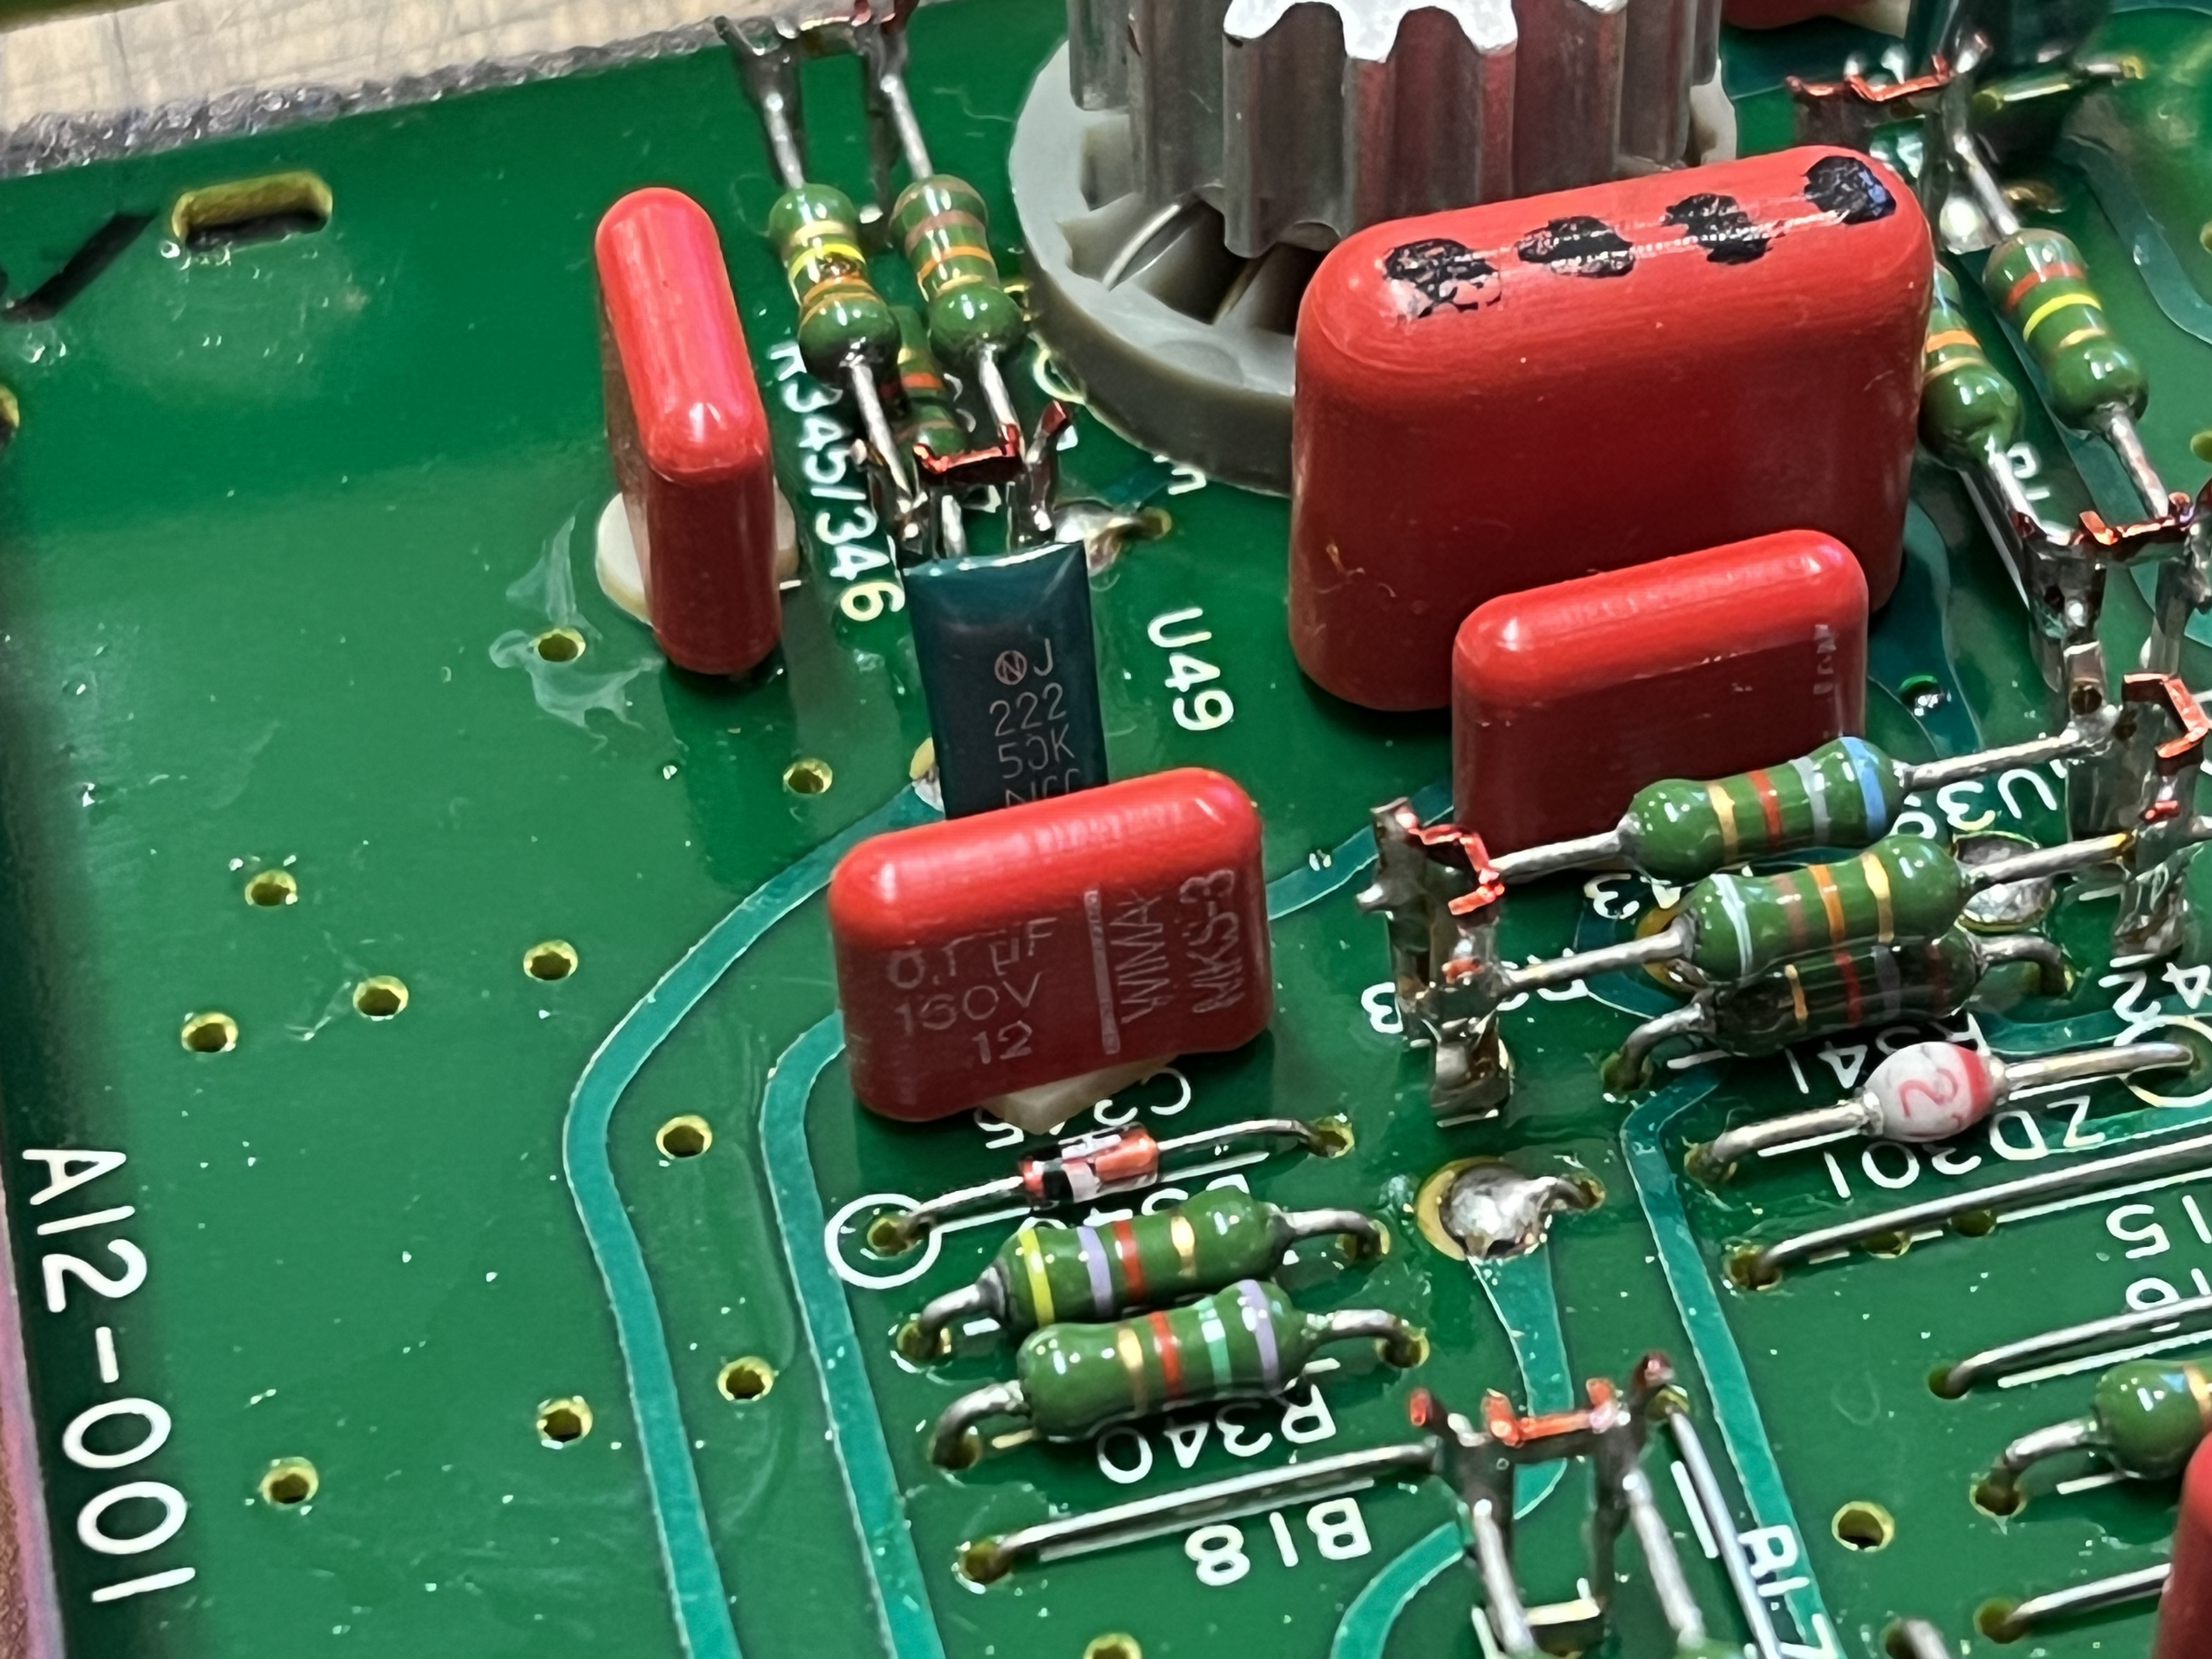
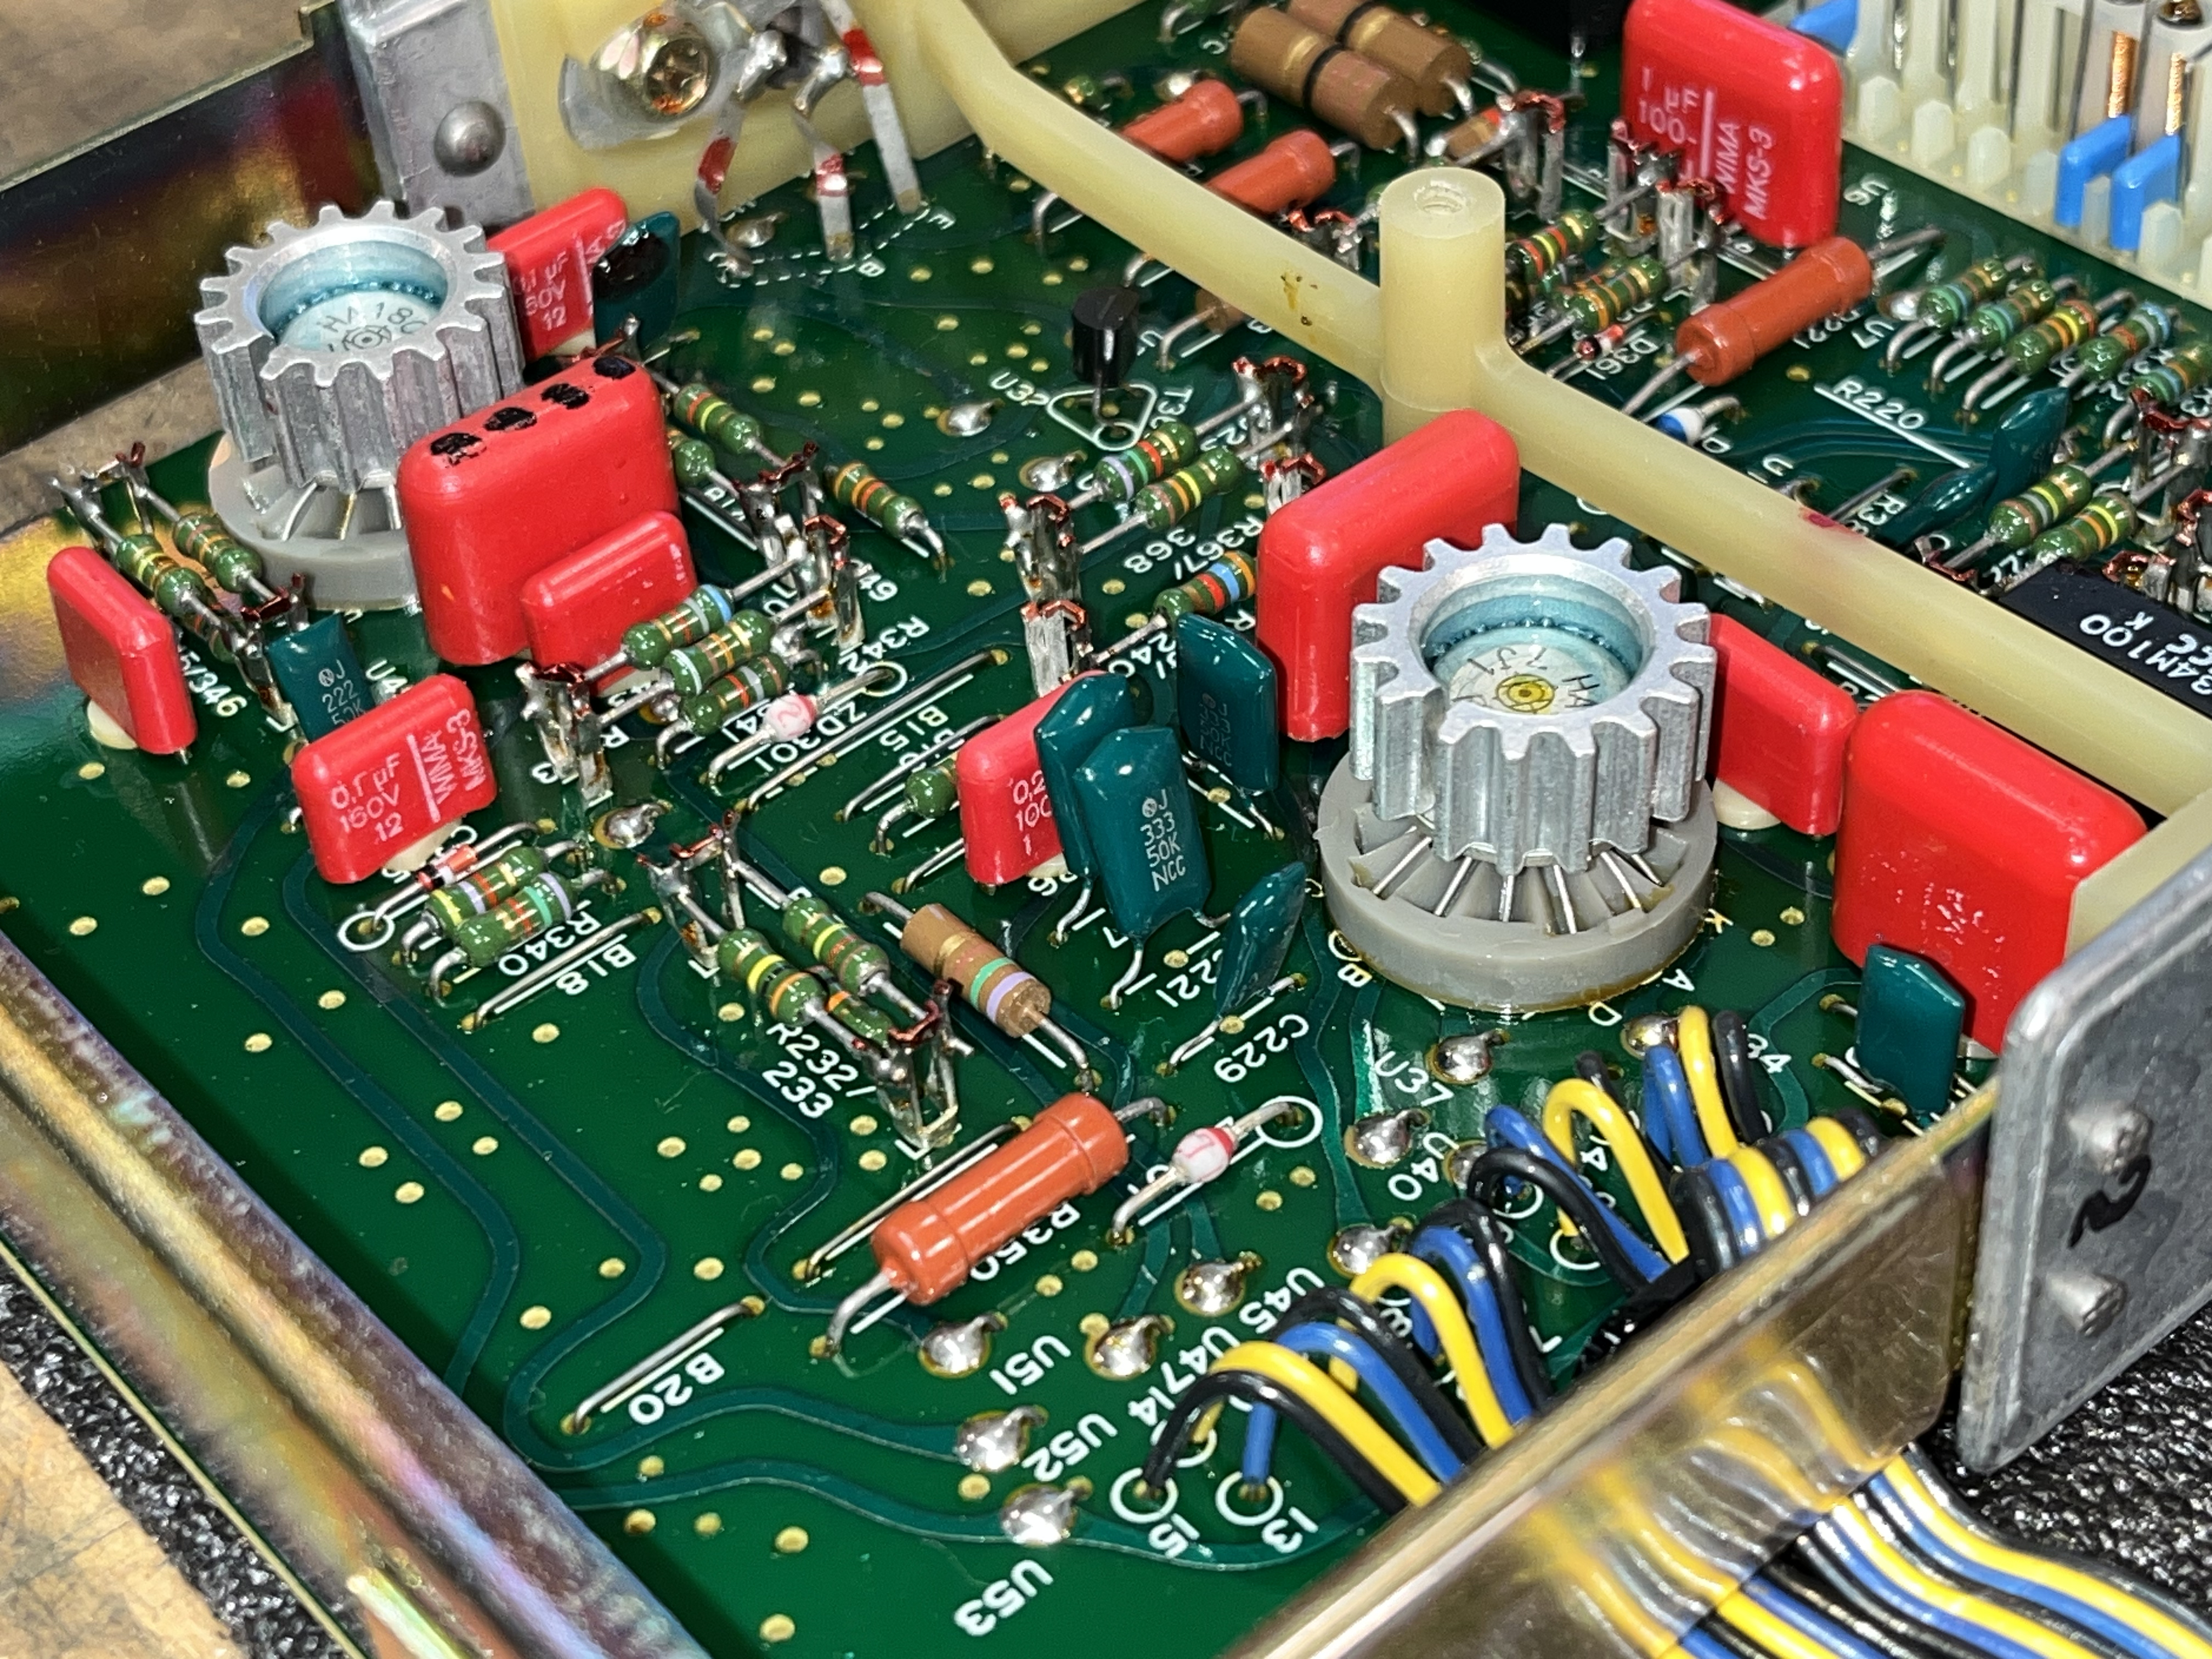
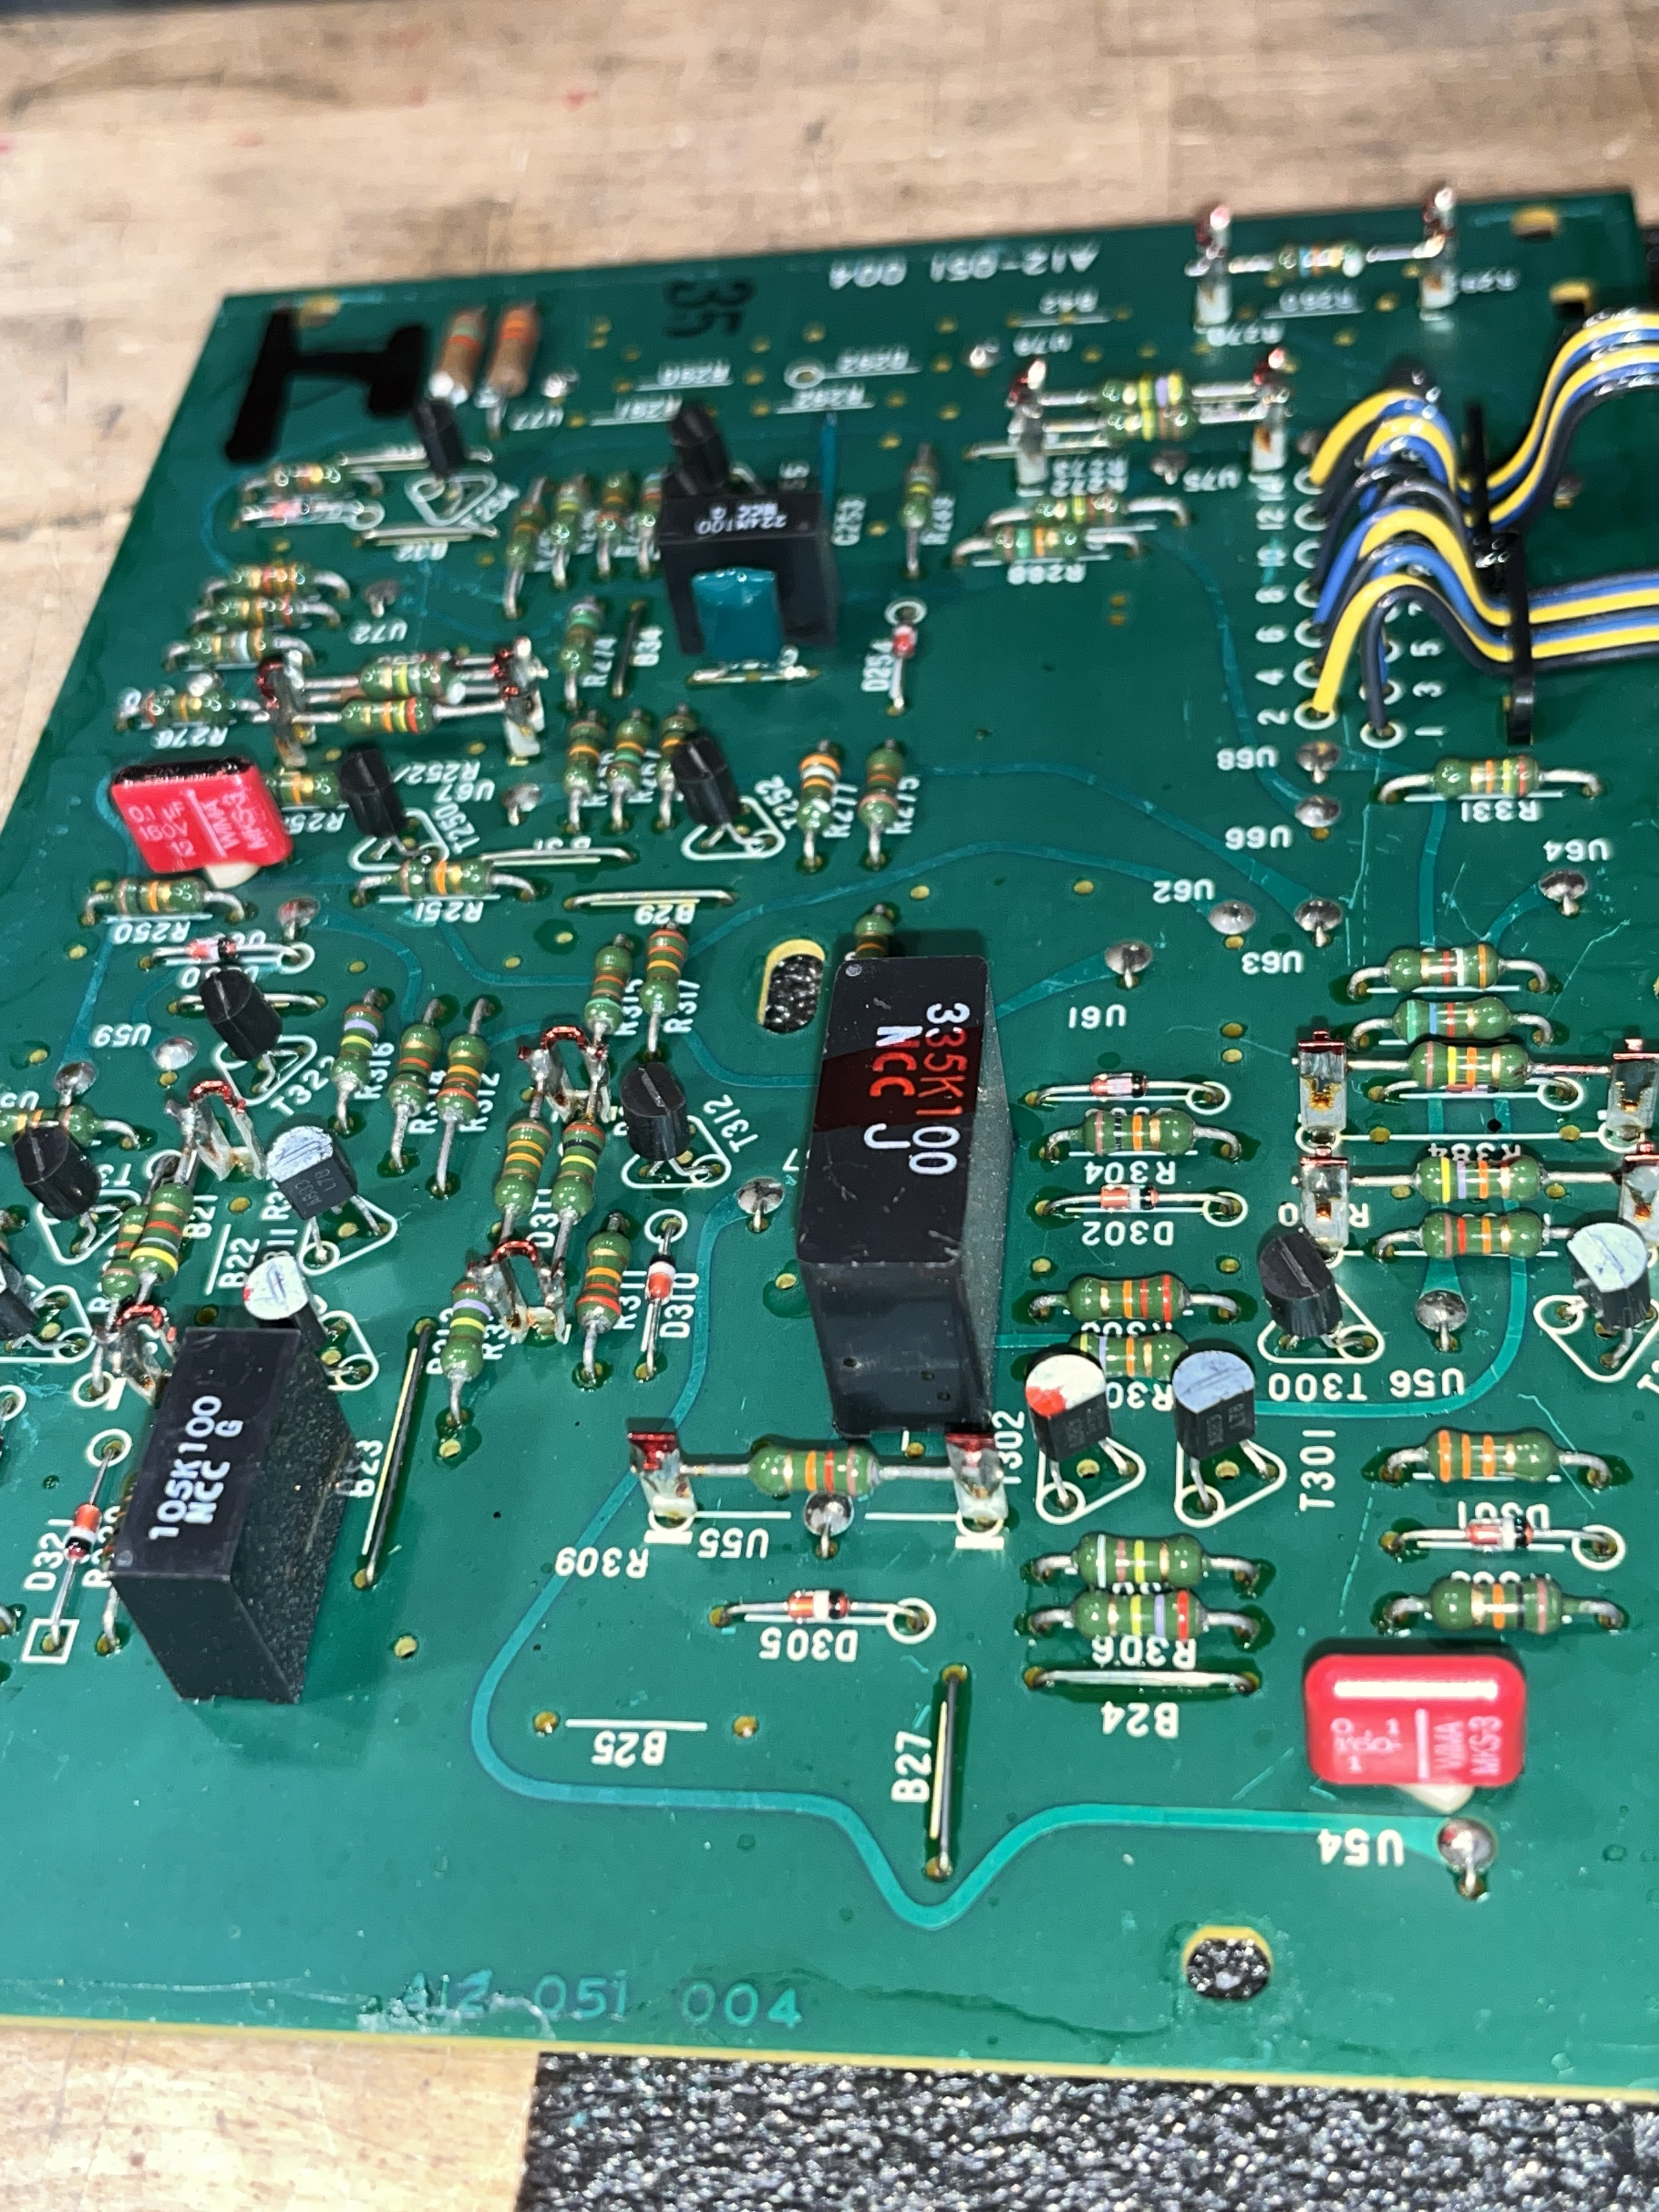
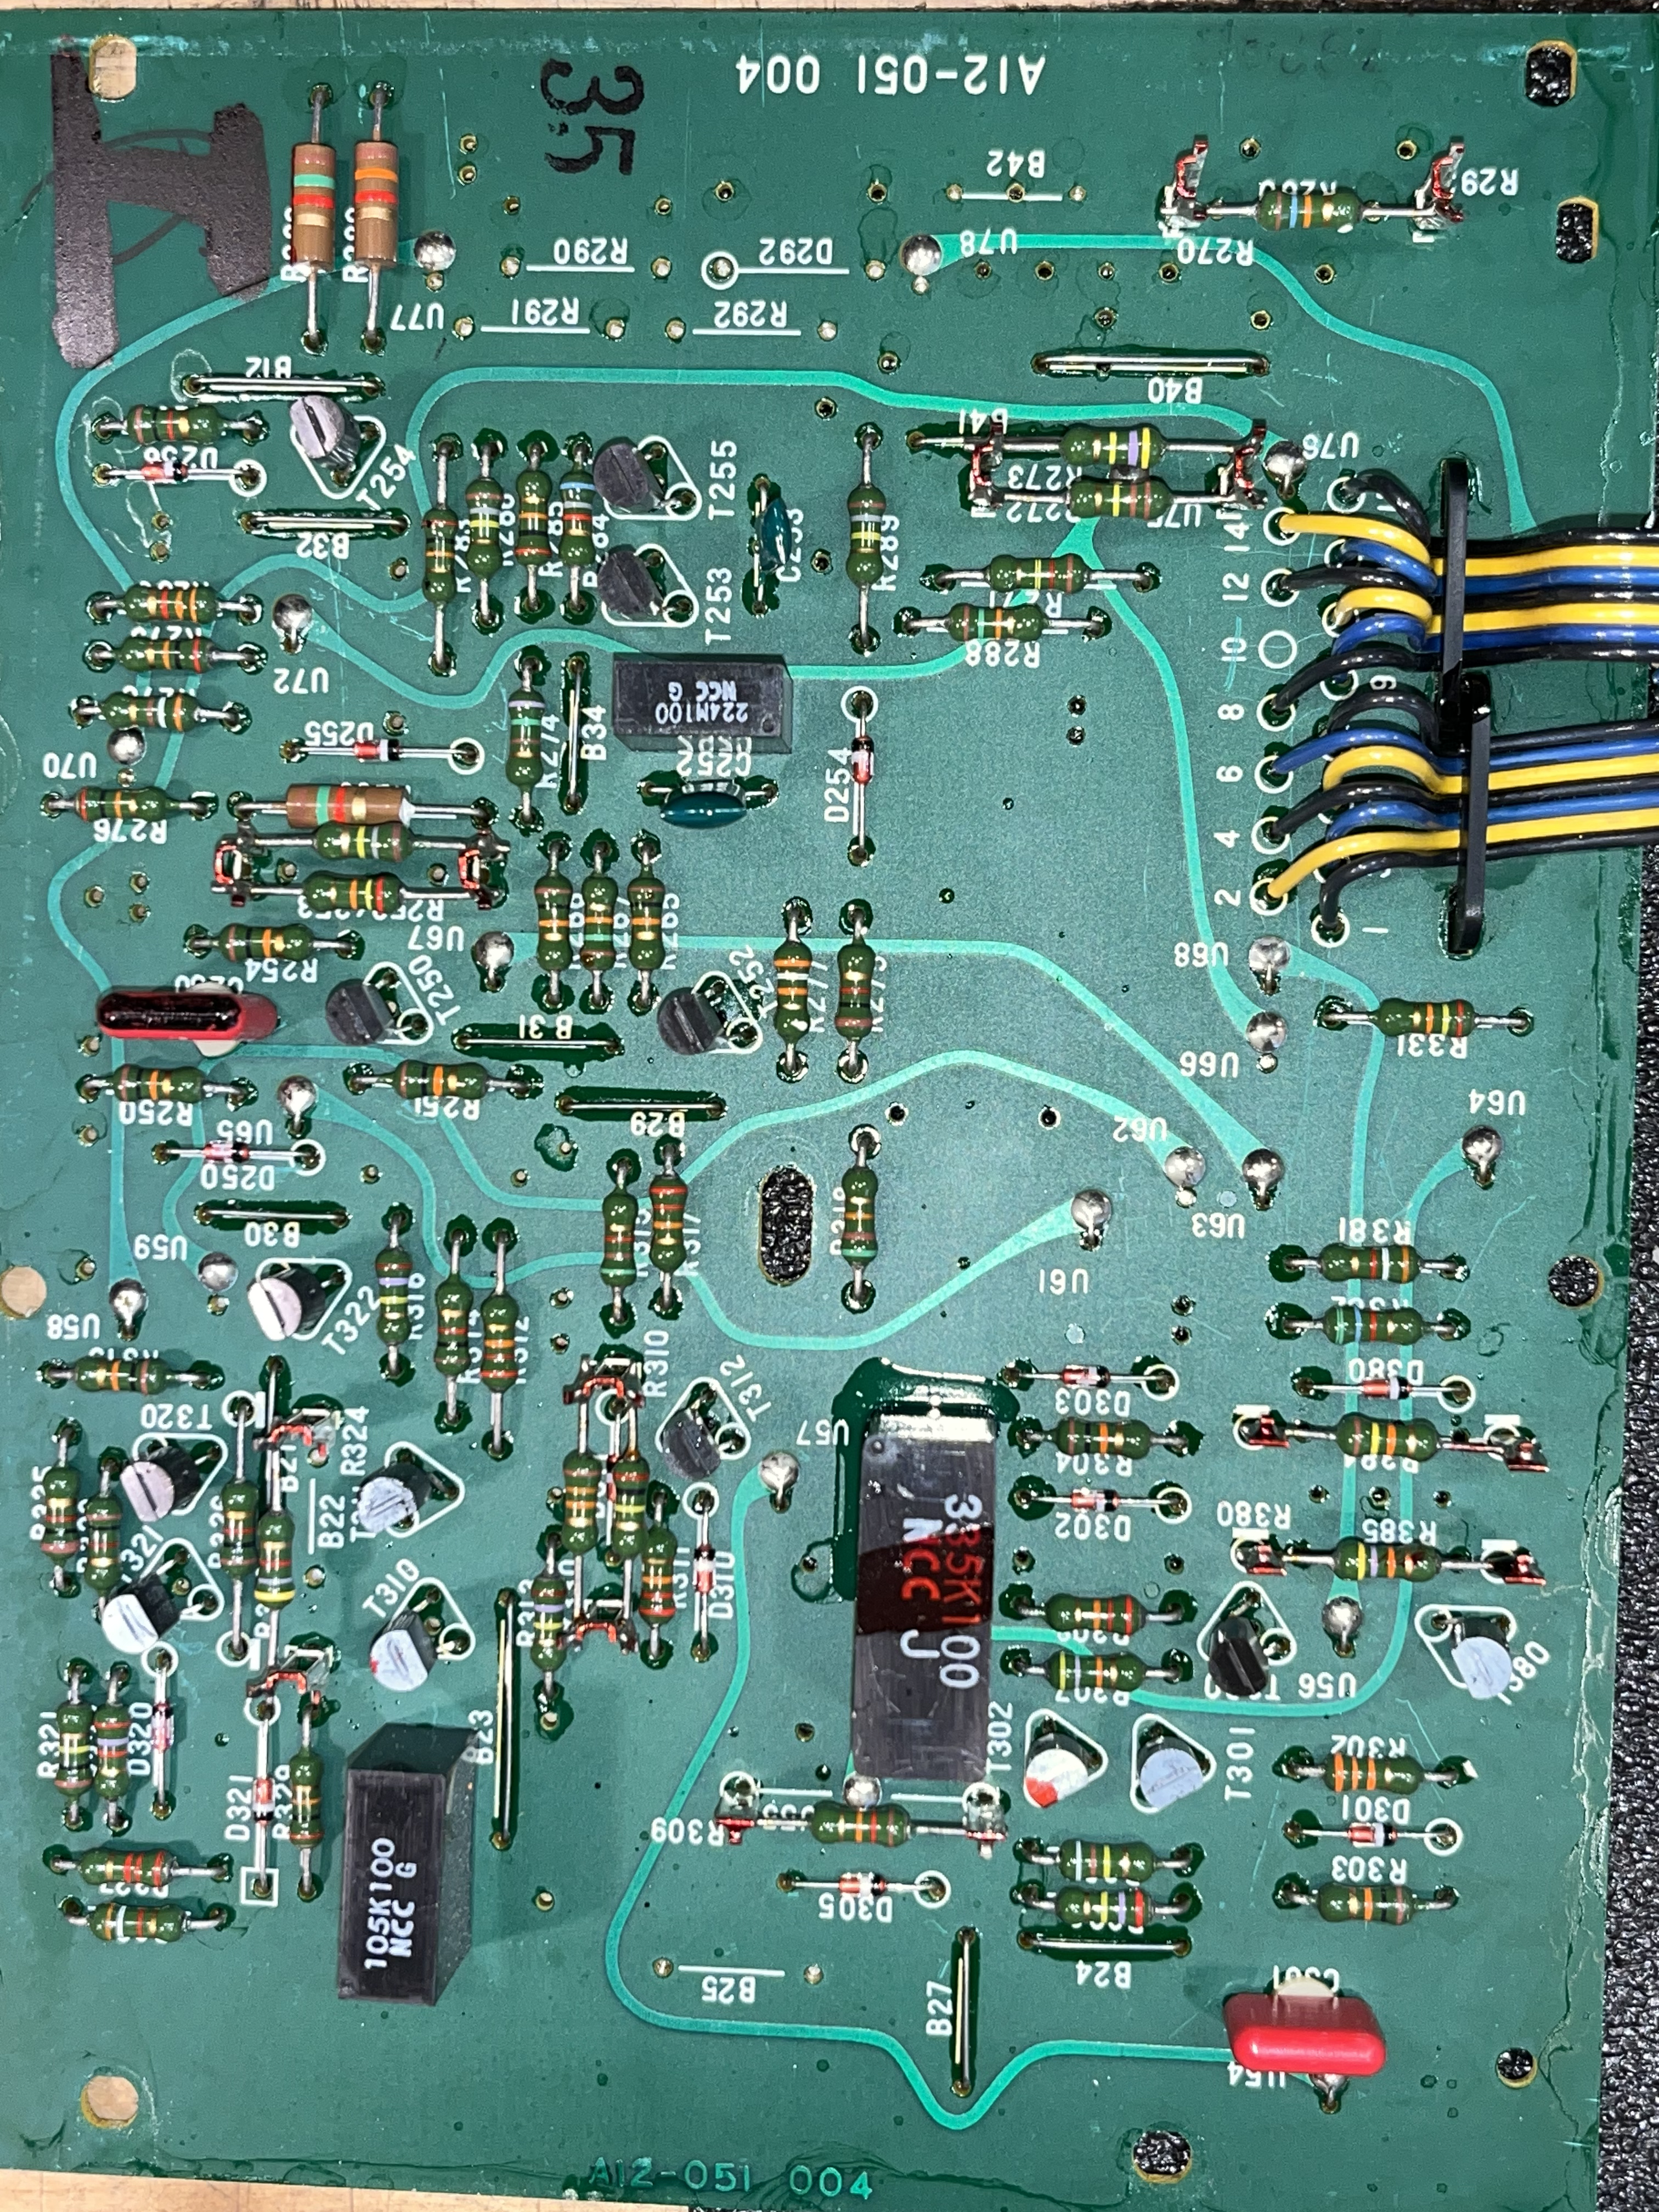
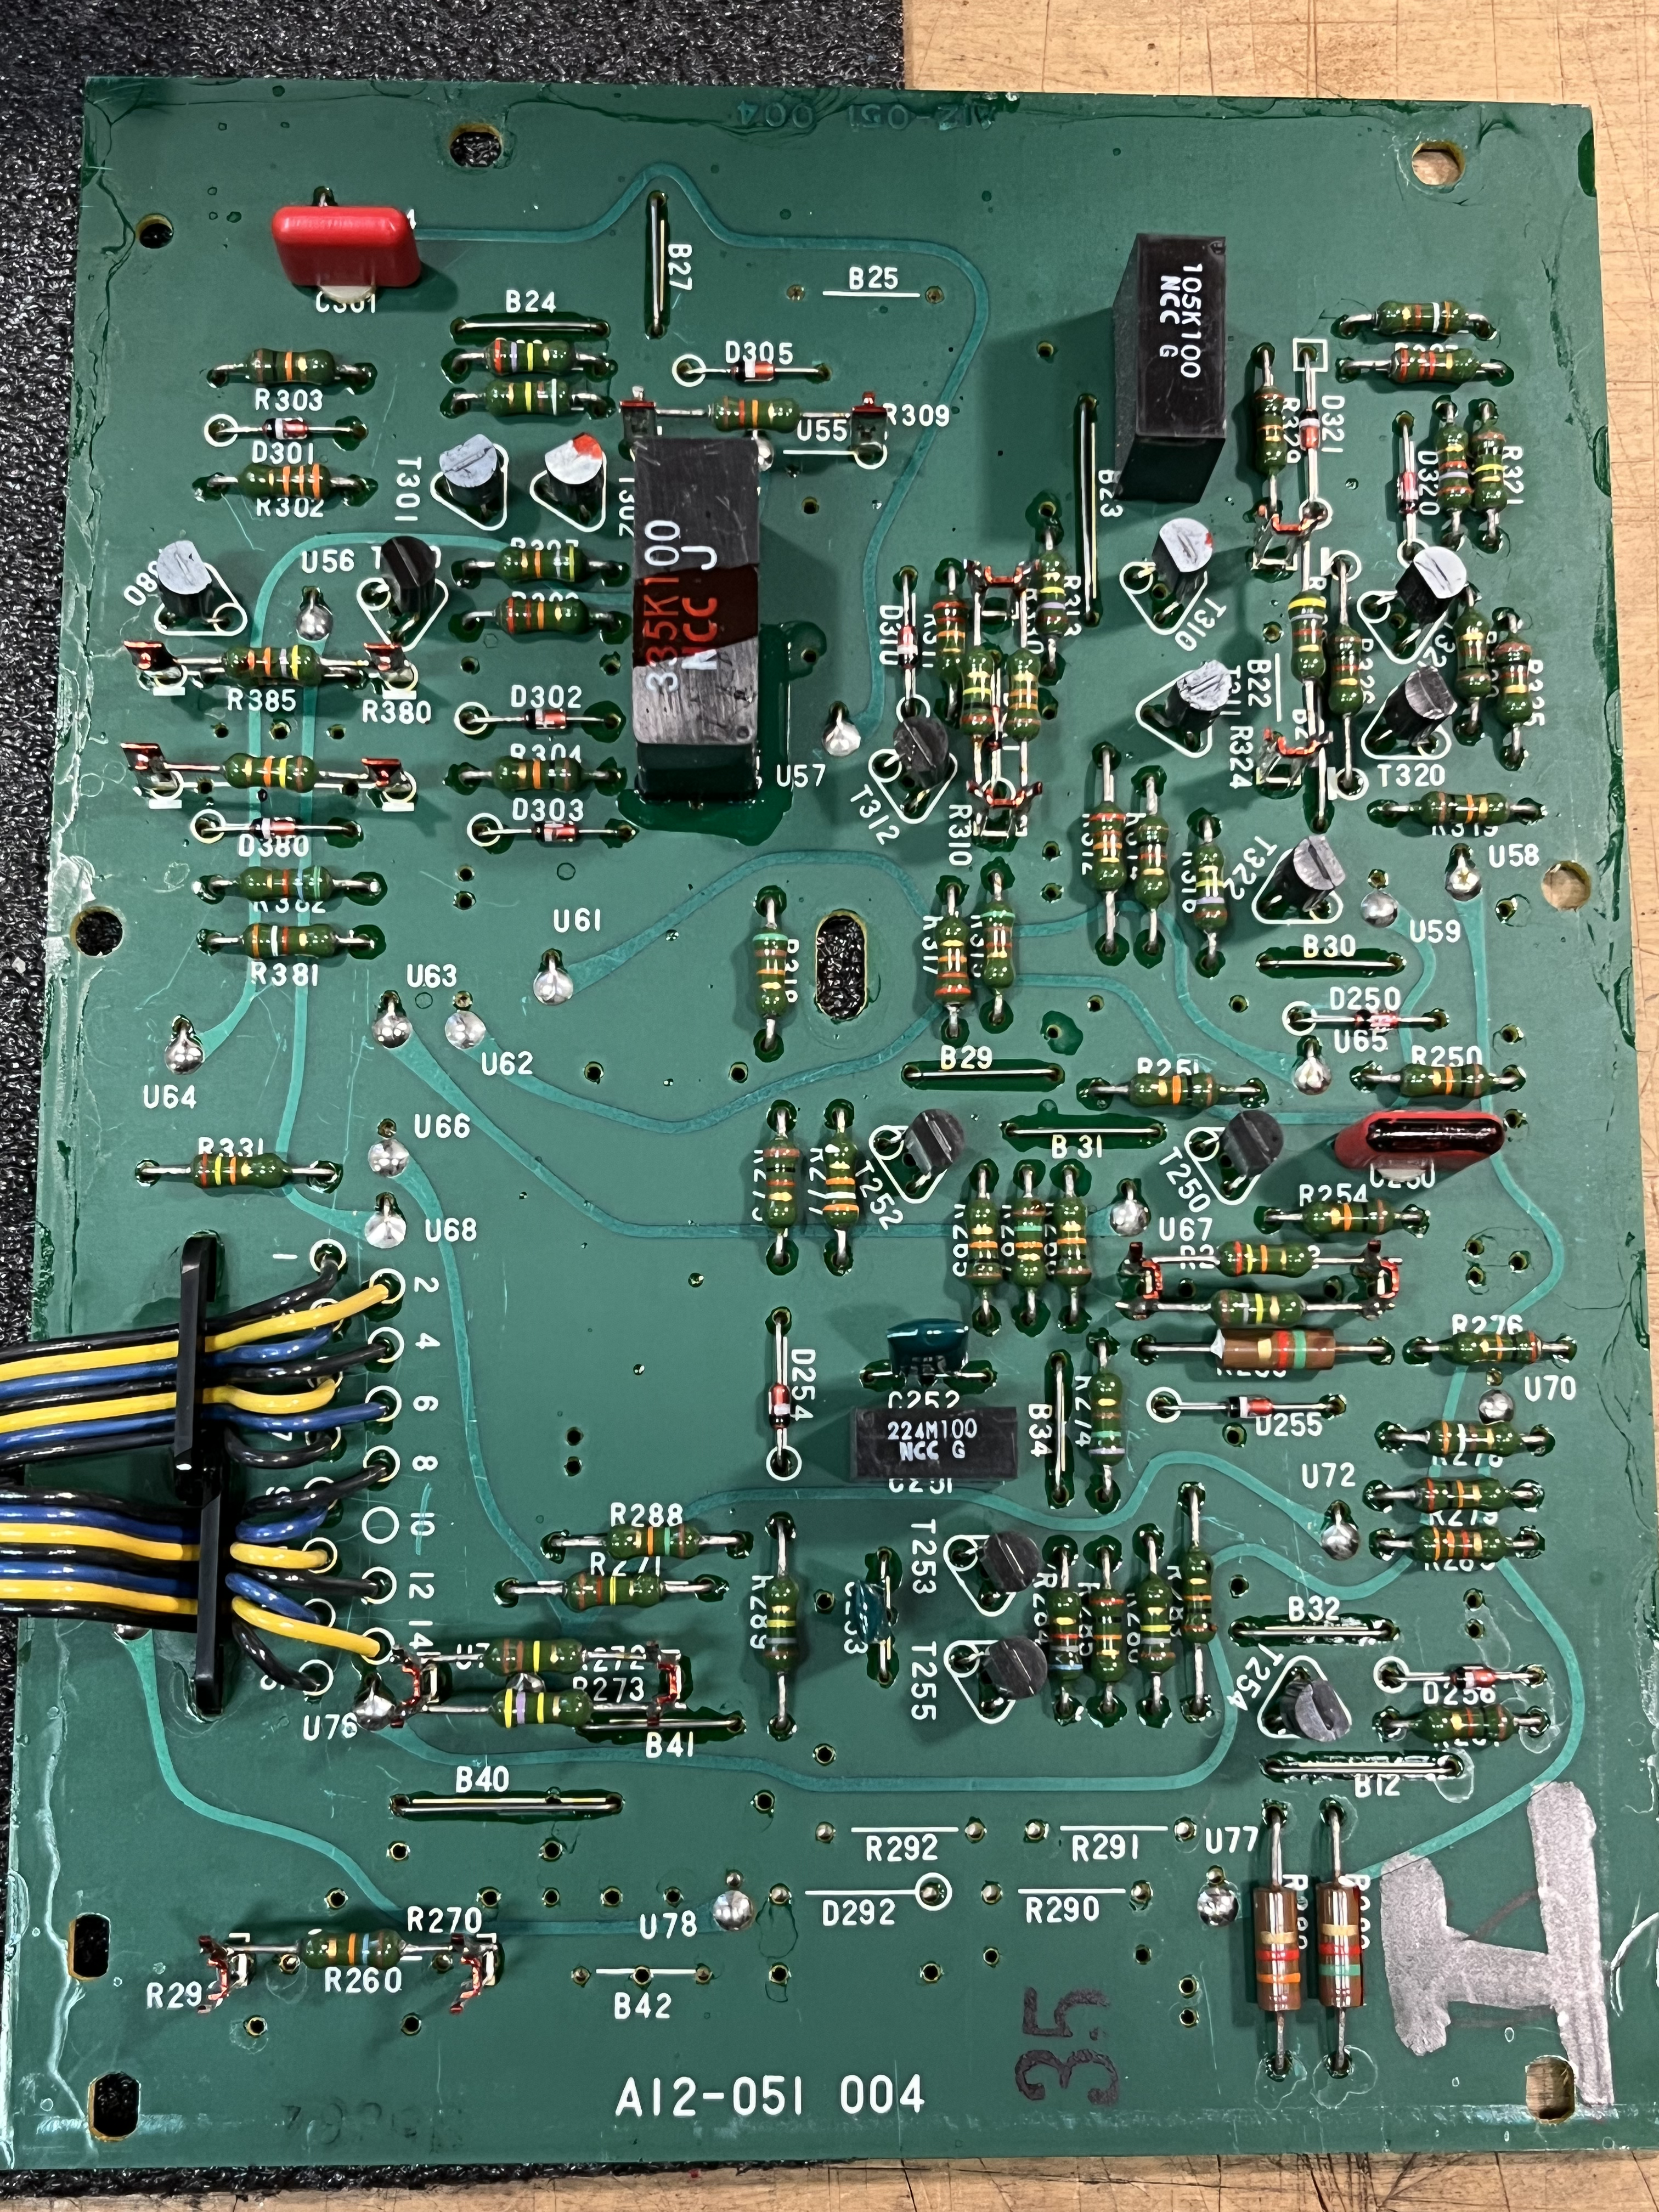
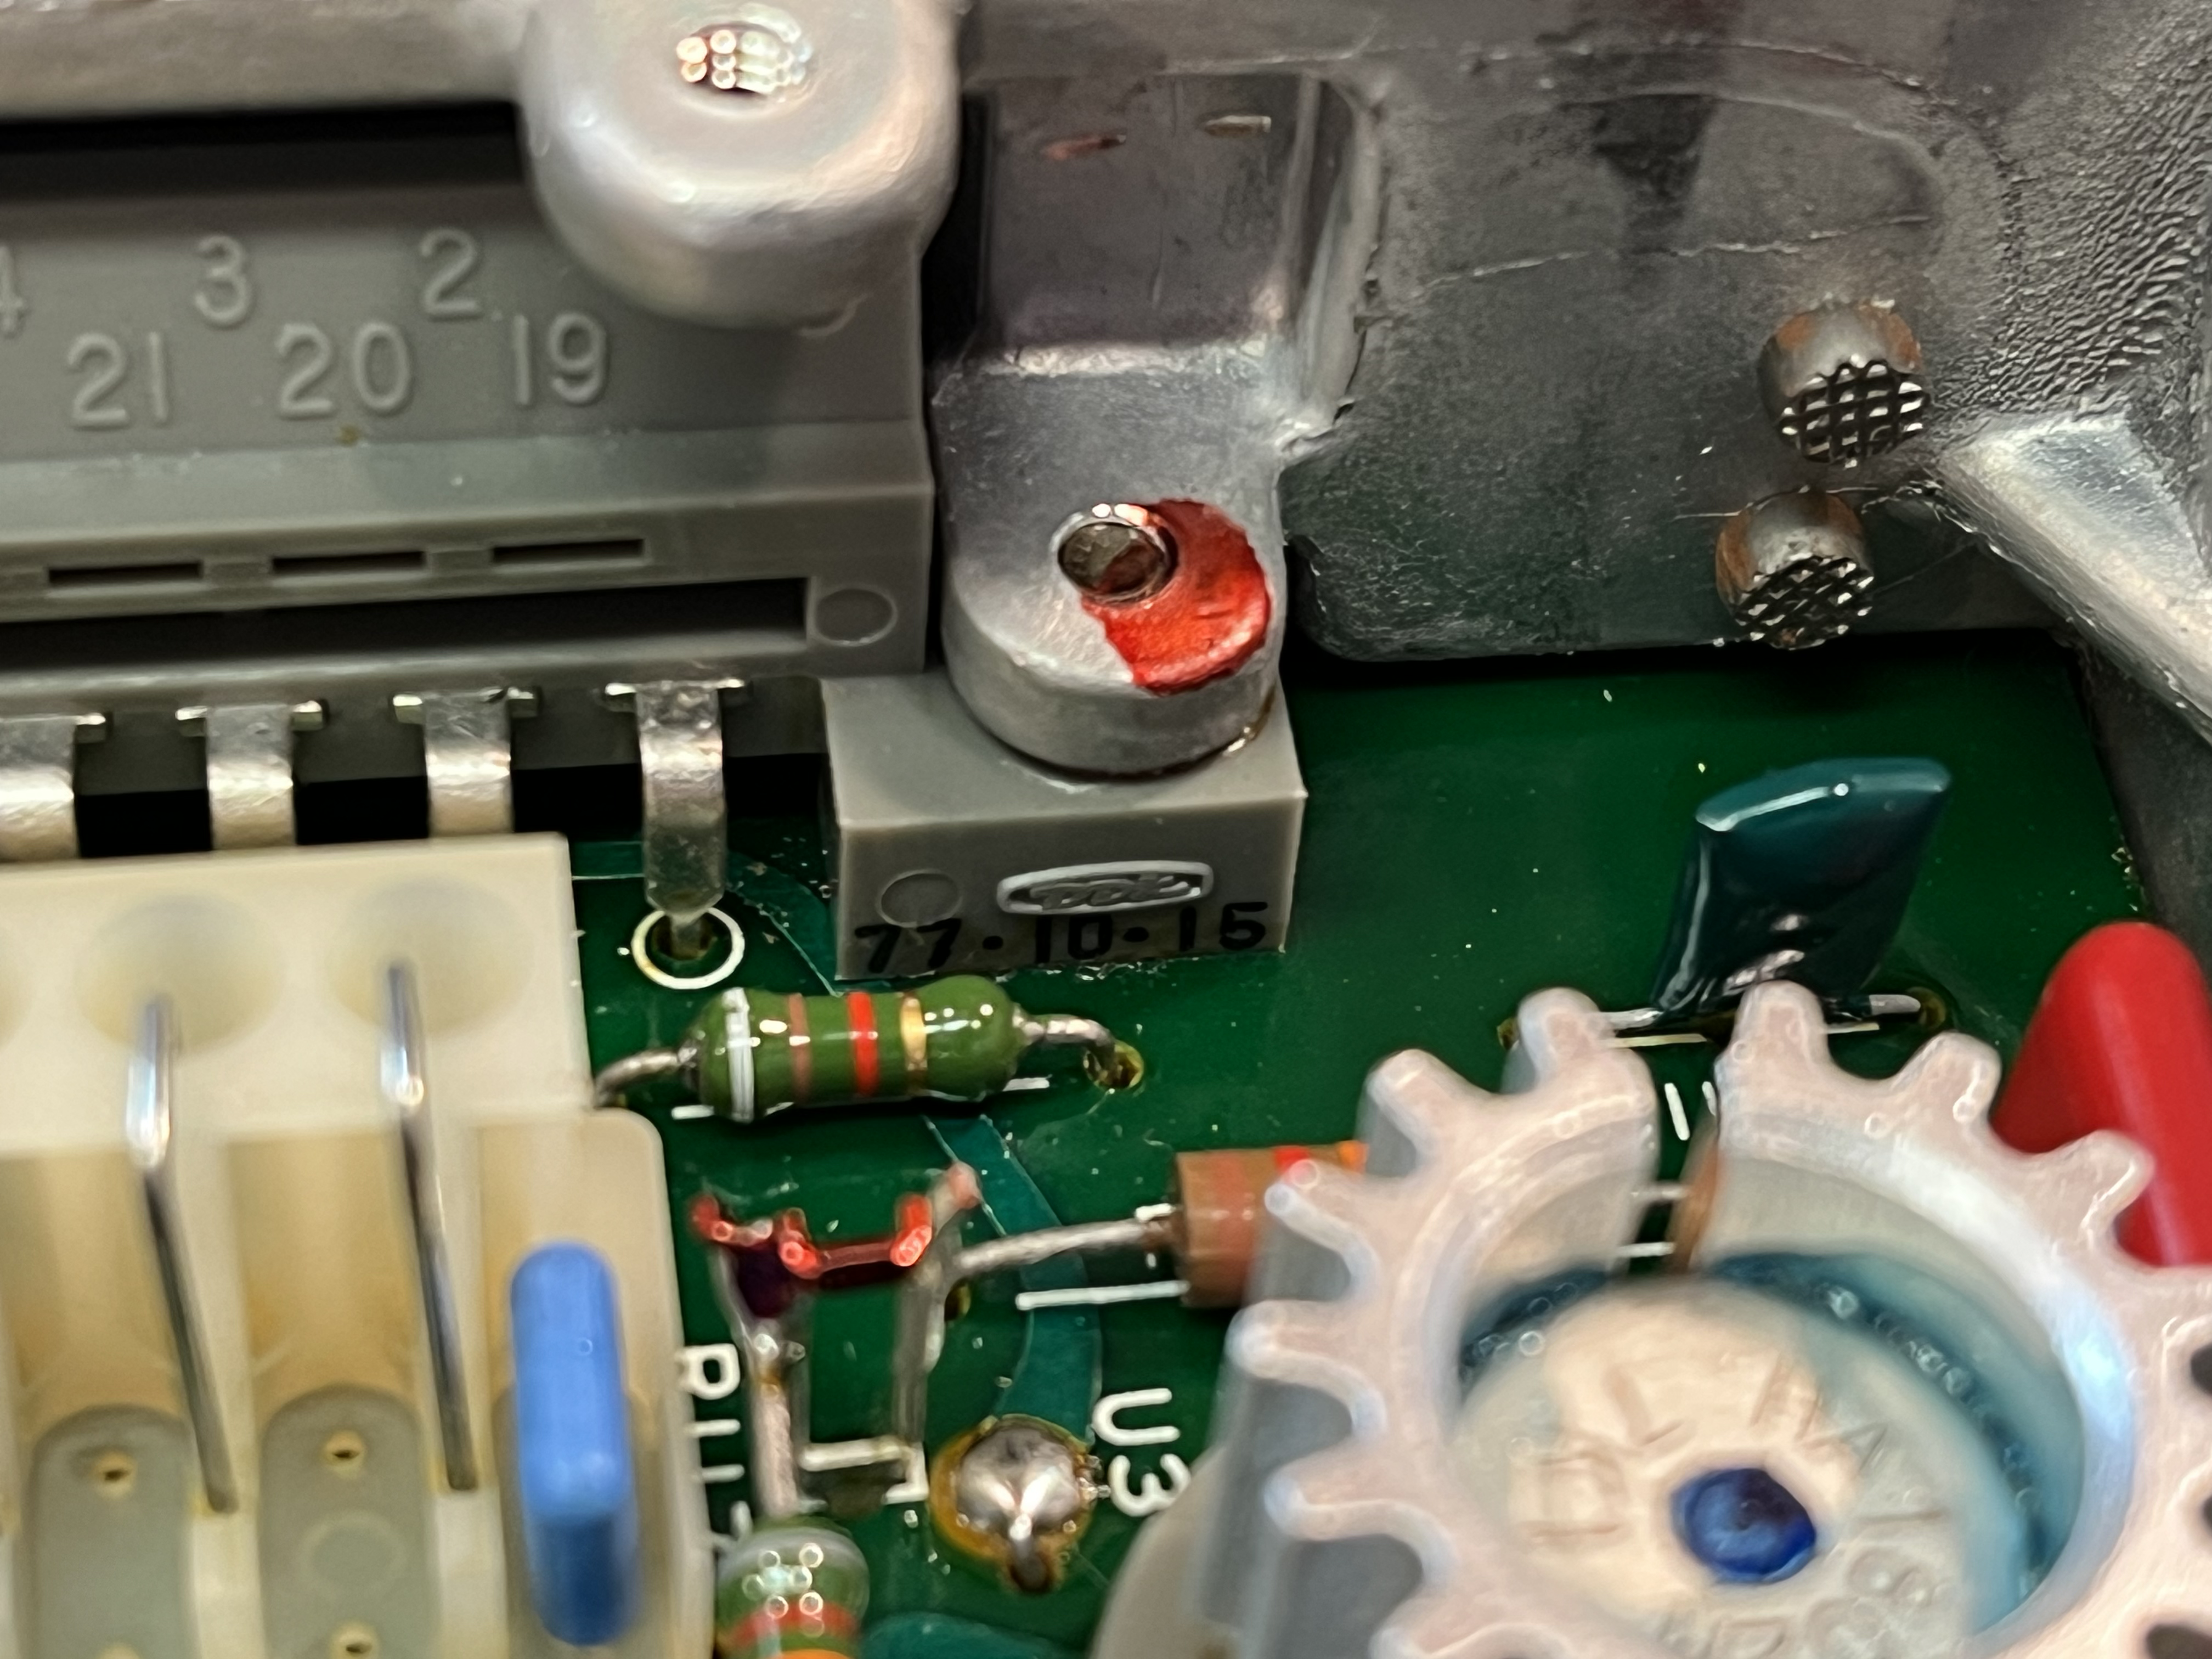
Hi all. Longtime listener. First-Time caller. My question to to community, in short: If you have a rock-solid 280z with the stock EFI, what happens if you "Tap Control Unit" while running? Anything? What if you knock it "a bit harder"? I have a '78 280z that will very random-ish-ly very occasional-ish-ly simply turn off as though I had removed the key. After 10-20 mins of sitting, it fires right up and runs like a train...until it randomly turns off again, leaving me in some scary circumstances. Sometimes it fires up immediately like nothing happened. I have been trying to diagnose the issue for quite a while. After the last episode, I've decided she's never leaving the garage again until this is sorted. While testing in the garage I randomly closed the car door and it immediately shut off. I thought it was a coincidence. Later, when I opened the door, it shut off...but then started immediately. I found a couple posts online of similar examples: https://old.reddit.com/r/Datsun/comments/1f38p25/280z_shut_the_door_car_shuts_off_bad_ecu/ https://old.reddit.com/r/Datsun/comments/1iu2huj/280z_random_stalling_issue/ I have since checked every ground, pulled the drop resistors, cleaned/de-oxed all the connections and made sure they were tight. Just for good measure I swapped-in my spare ECU. I thought that had fixed it...I've been running it for an hour-per-lunch for the past 4 days, opening and slamming the door every 5mins, without issue. I was beginning to think I was good, until today. After about 20 mins of running I opened/closed the door and...stumble stumble stumble...running on 3 cyls...stumble. I gave the ECU a kick, and Poof. Back to normal. Kicked it again...sumble stumble...kick again...stumble...OFF. Won't start. Wait 10 mins. Starts immediately, runs like a train. In the reference book "ELECTRONIC Fuel Injection - 280Z Electronic Fuel Injection Theory Troubleshooting" on page 39 it also has a small reference under "Engine Misfires - HC Reading Too High" it says "5. Tap Control Unit While Driving To See If This Aggravates Or Alleviates The Problem. If So, Try Another ECU." So...have both my ECUs aged-out and need rebuilt? Or is "kicking the ECU" always going to result in some stumbling while 'something' re-sorts itself, even on a "known-good" ECU? I found a thread of a similar-but-different issue where a fix was successful: https://www.zcar.com/threads/efi-harness-continuity-voltage-problem.311536/page-2 And a quick-comment-on-the side by @zedhead that "In my case, I replaced the transistors and that fixed it. " (shot him a DM) My follow-along questions would be about rebuilding and where to get parts...Trying to find a rebuilt unit seems like a non-starter. I spoke to David at MSA today about timelines, because "The rebuilder is locating a qualified Bosch-experienced technician"...for about 3 years now. I'd be entirely happy to rebuild it myself and document the process...but I have no idea where to find components. Arrow and Mouser came up empty. Someone mentioned I should ping @Captain Obvious, which is what brought me here. Would love to hear everyone's thoughts.
-
 cristian joined the community
 -
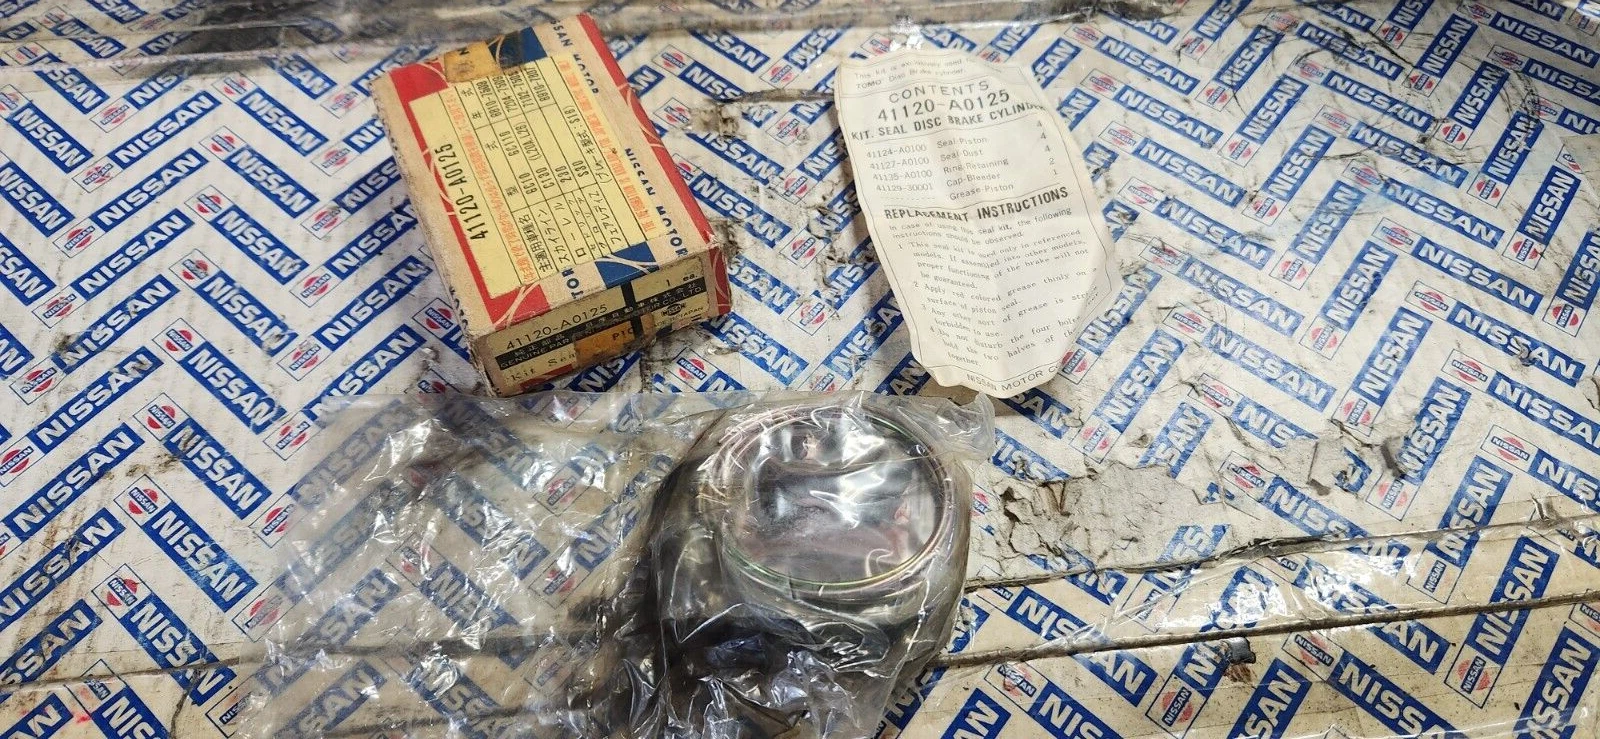
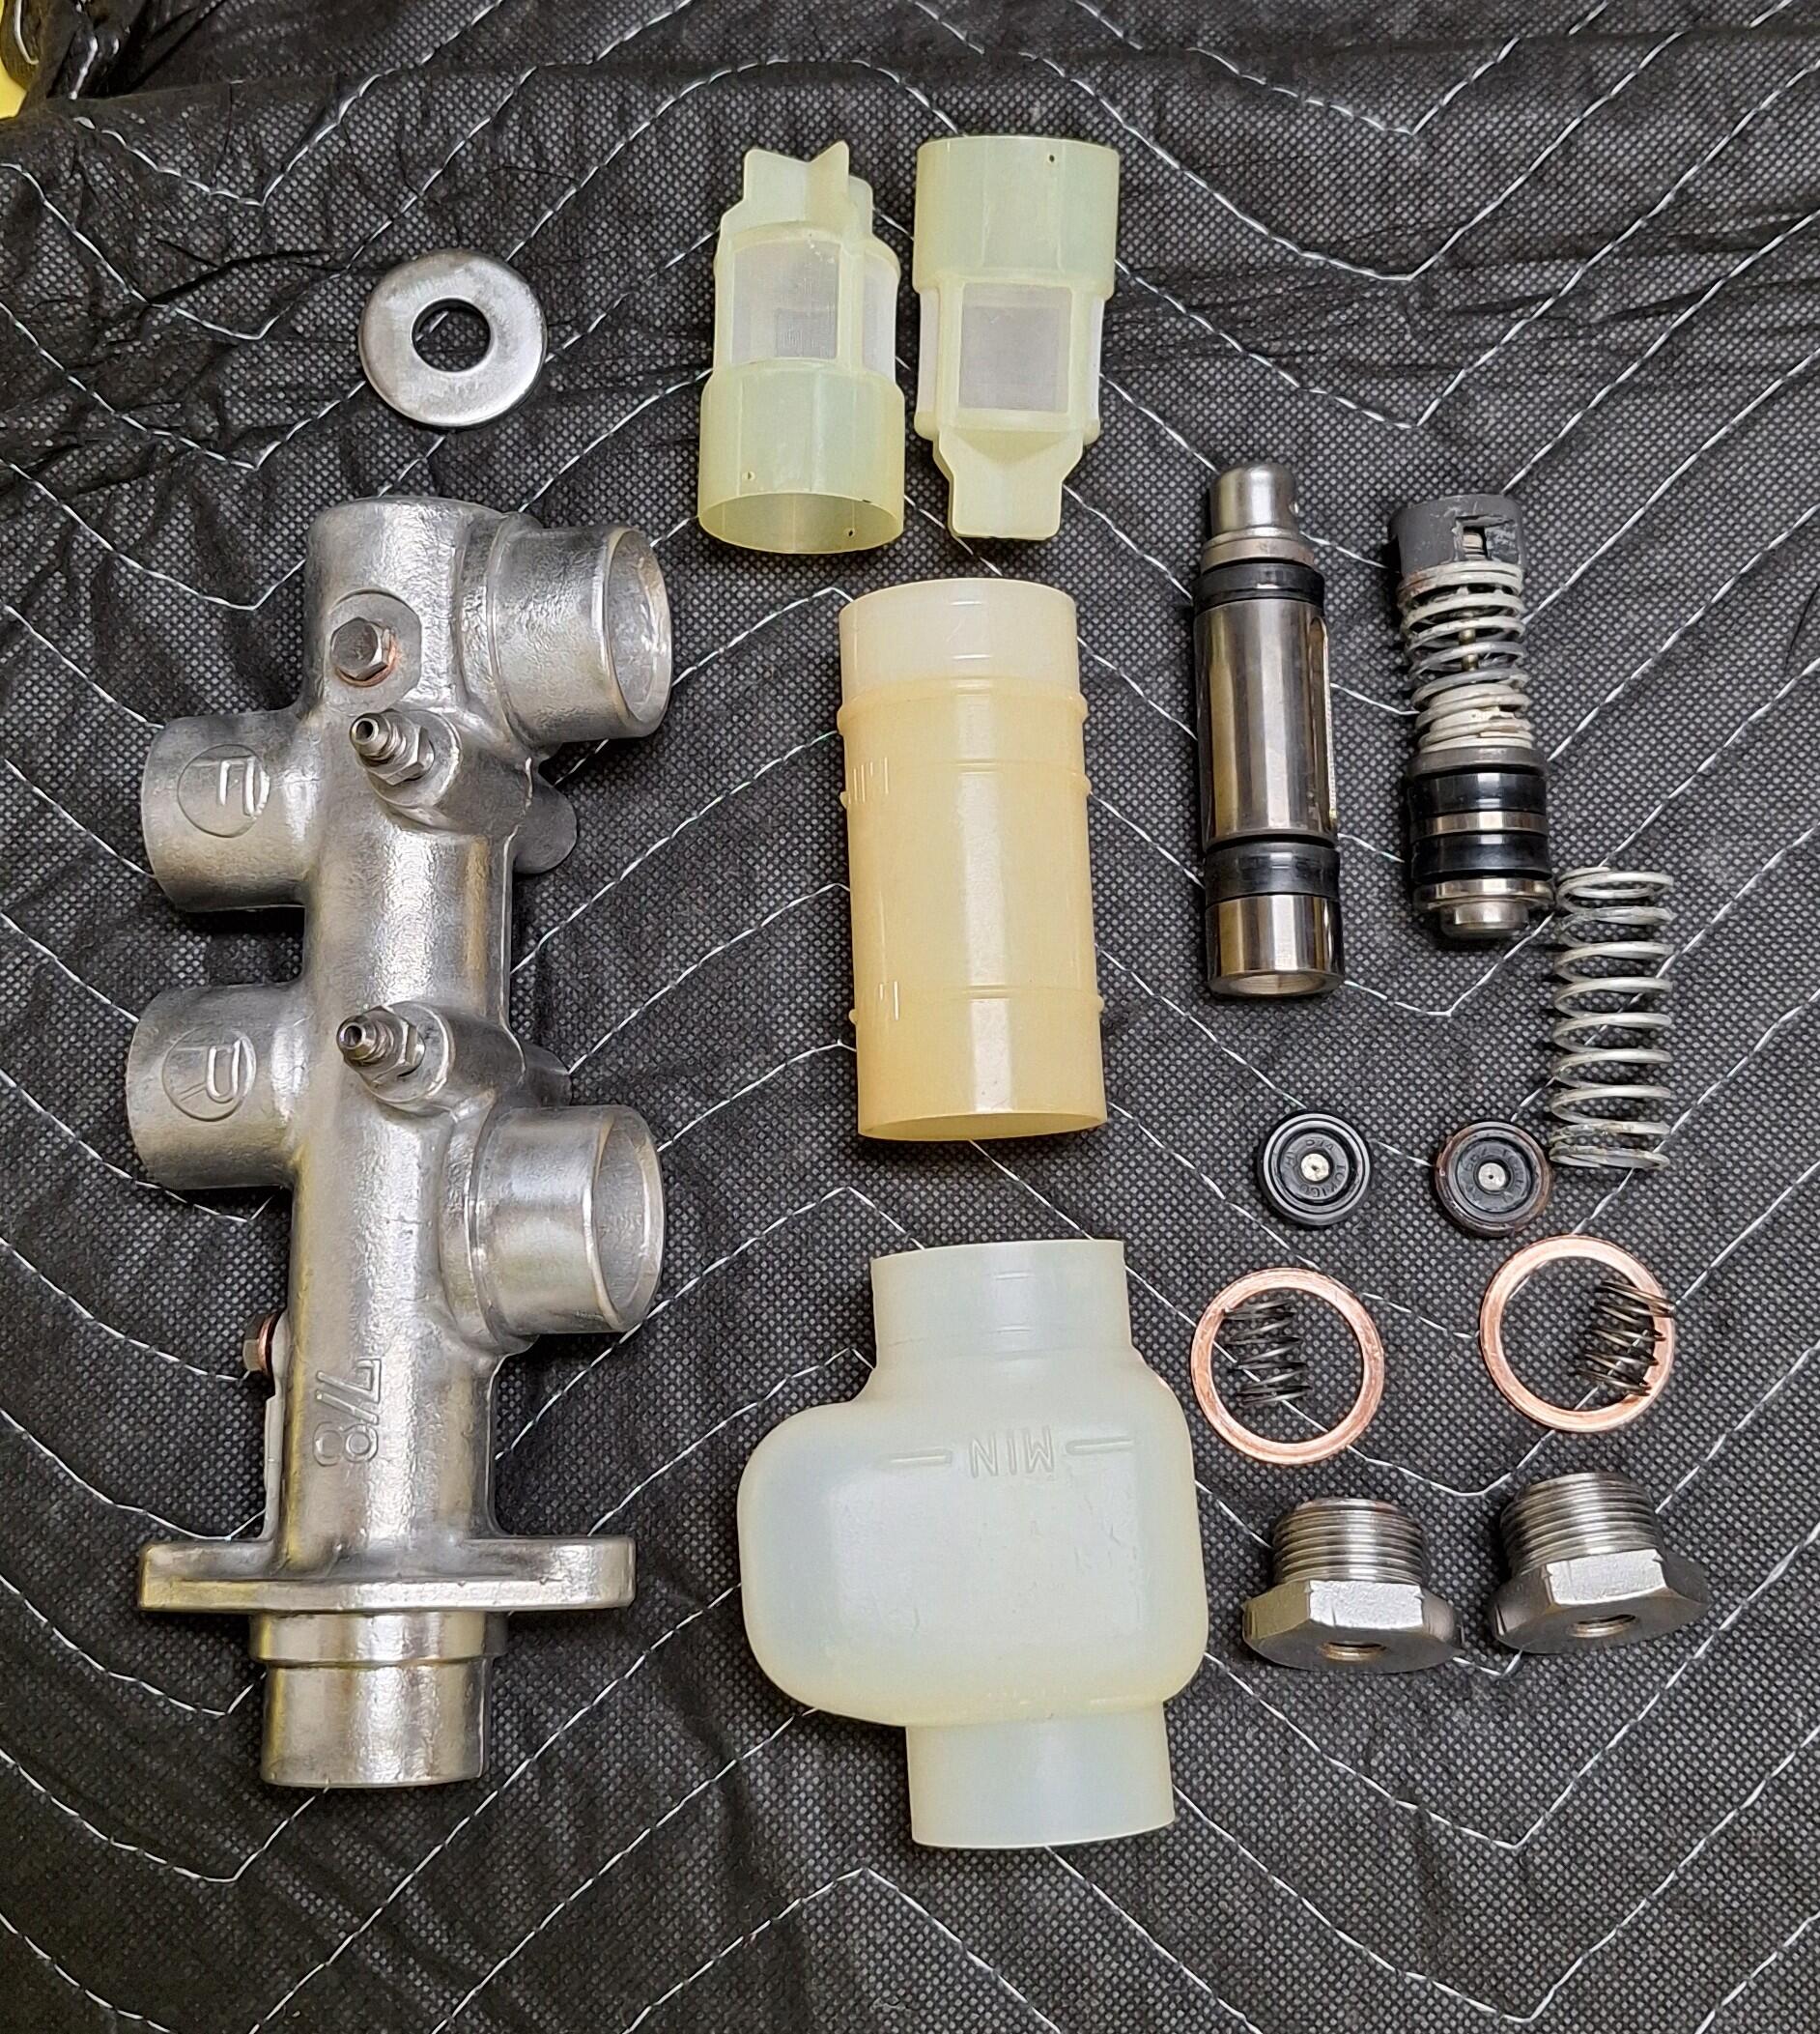
 An original early brake master cylinder was also sourced for the restoration. The ultrasonic cleaned it up nicely and I've disassembled it and replaced all the seals with original Nissan/Tokico parts. I just need to bleach the plastic reservoirs so they are nice and white. It should look like this once complete.
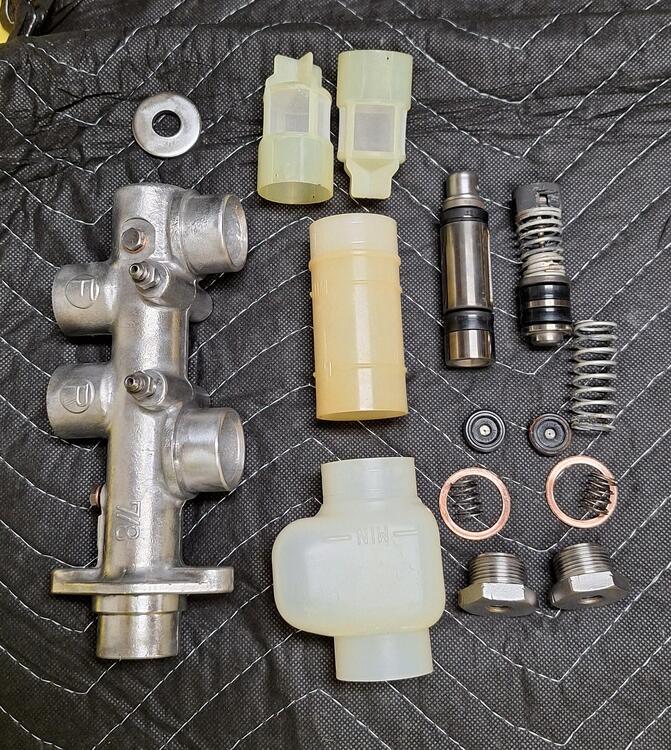
.thumb.jpg.87eb9fd21aedde67e10d3655830517b3.jpg)
-
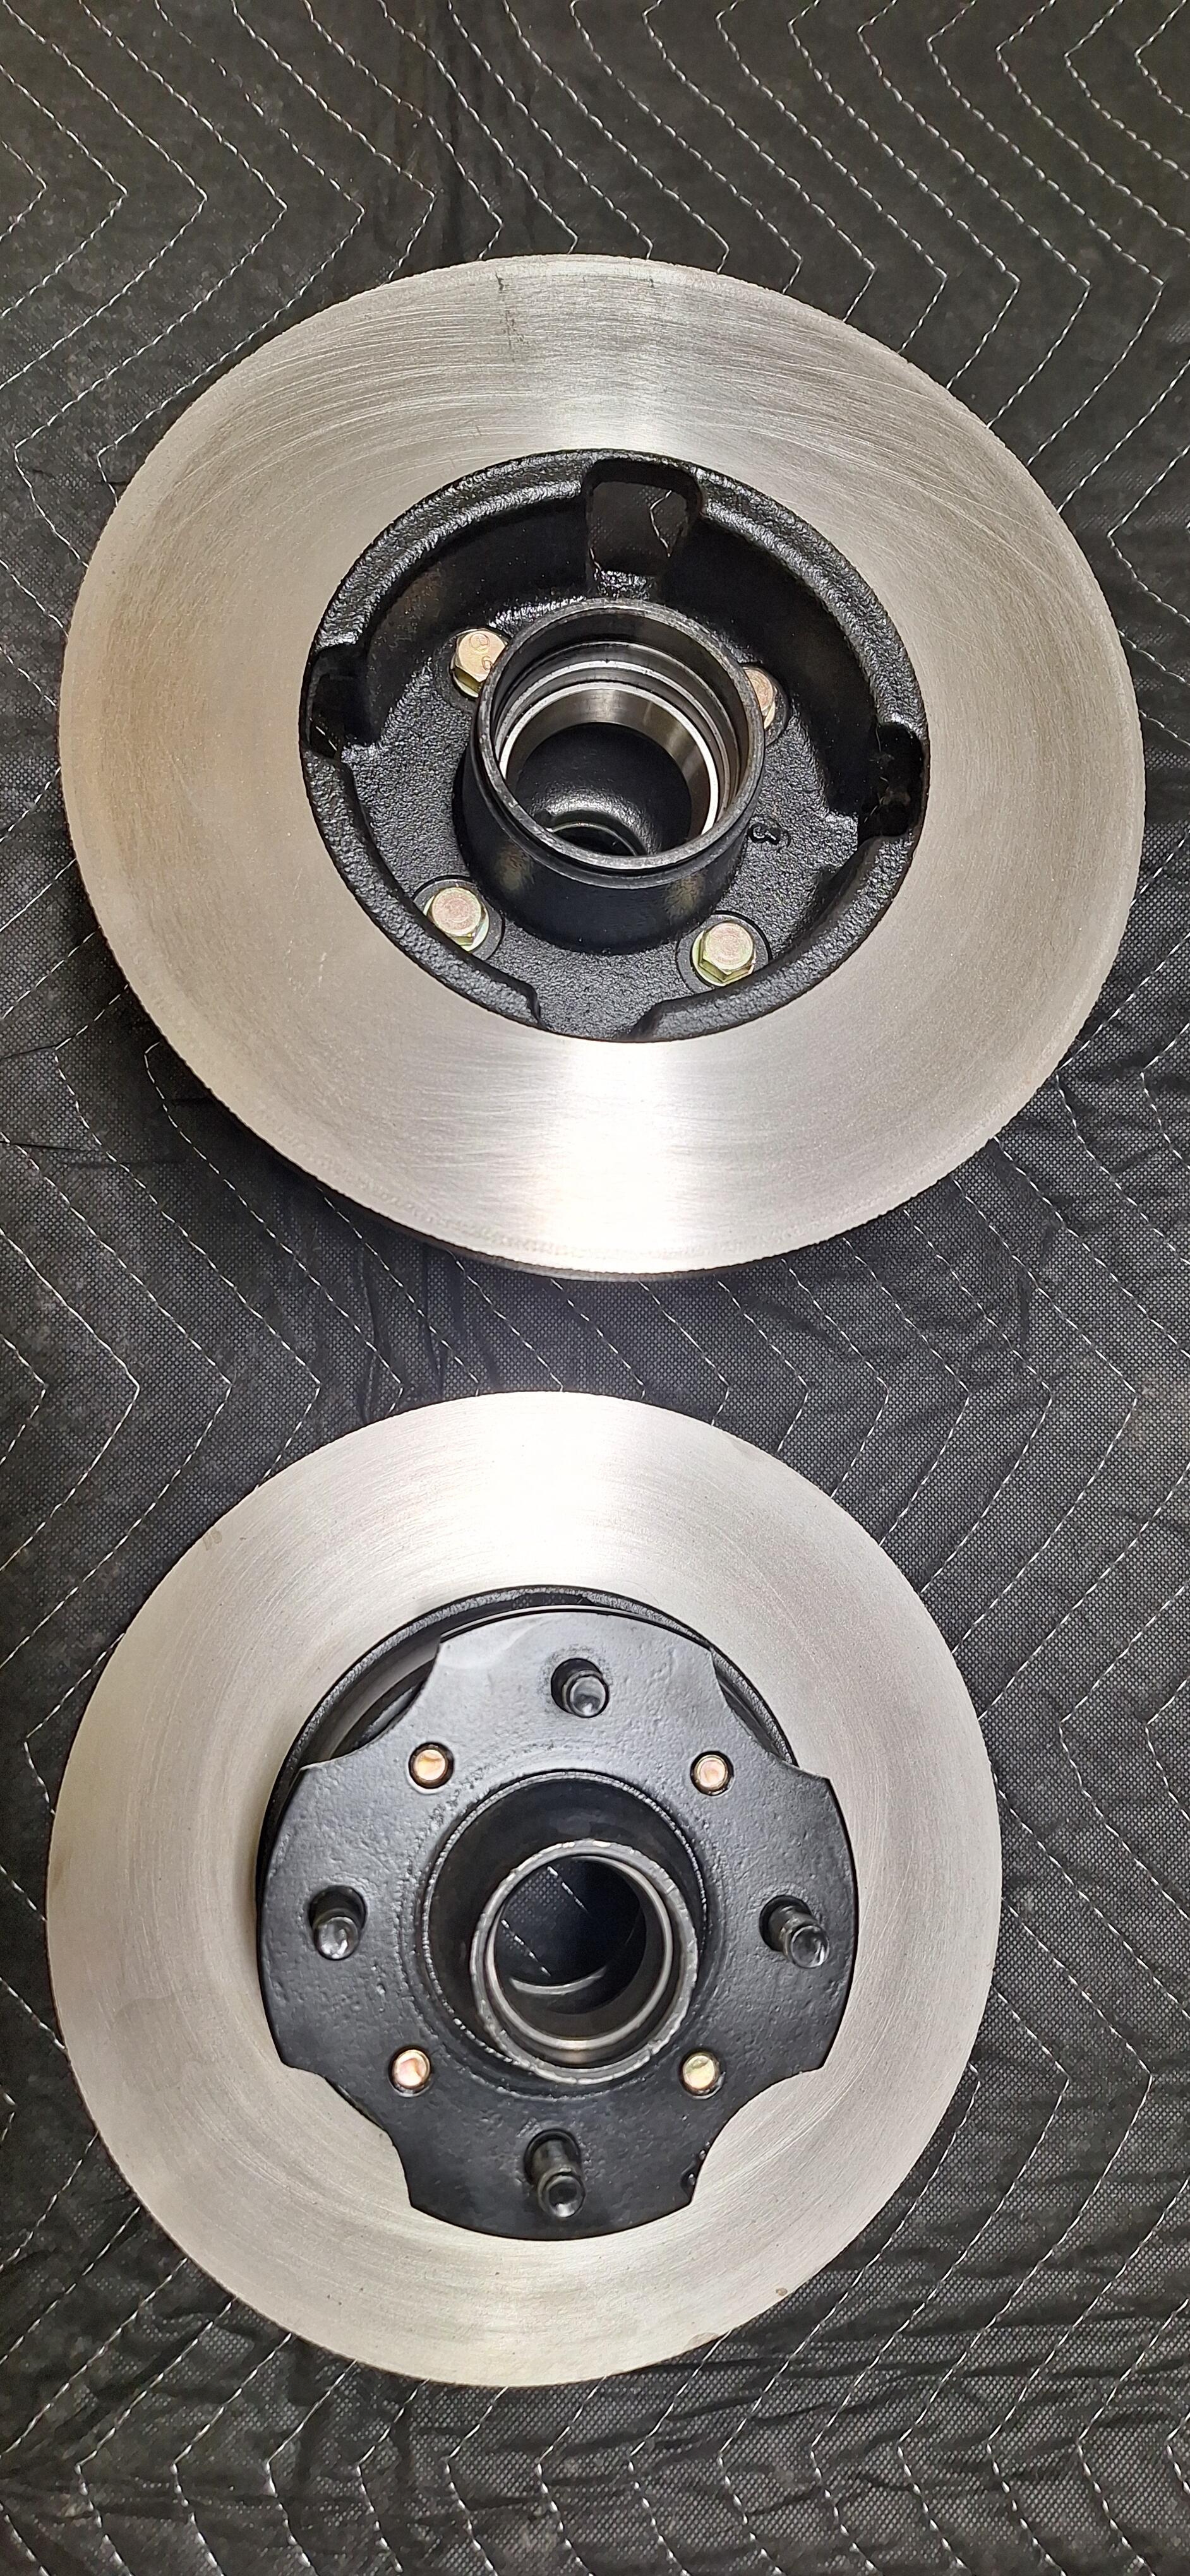
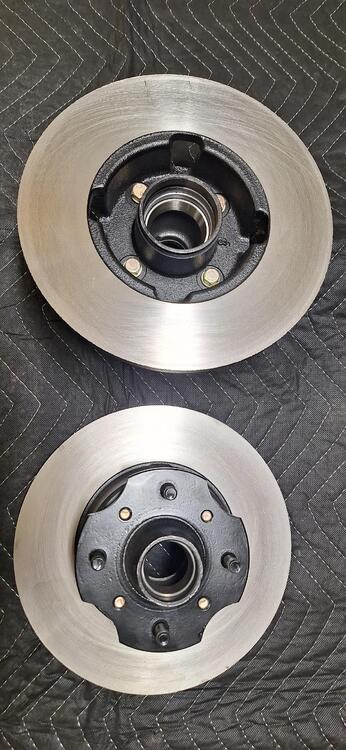
Continuing on from rebuilding all the original suspension components, brakes are next in line. Fortunately my May 1970 240Z came with the early brake rotors. I have derusted them, machined to tolerances and painted them to original spec. The hubs are cleaned and painted and I have NOS OEM bearings for them. A set of original Nissan brake pads have also been sourced. The brake calipers are the correct date coded set for 1970. I have degreased them in the ultrasonic, cleaned off all the corrosion using a acid solution. A light sandblasting and high temp satin clear finish give them the factory new look. A NOS OEM Nissan caliper seal kit is used to finish the build. All bolts and fittings are re-zinc plated. My goal is to use all original/OEM parts in my restoration.

-
What a load of rubbish, there's no way the ball can wear out that much! The Japanese engineers that designed that part knew enough about metallurgy to design the part so that never happens. The cheap stuff now coming out of some countries may be a different case, but not the originals.
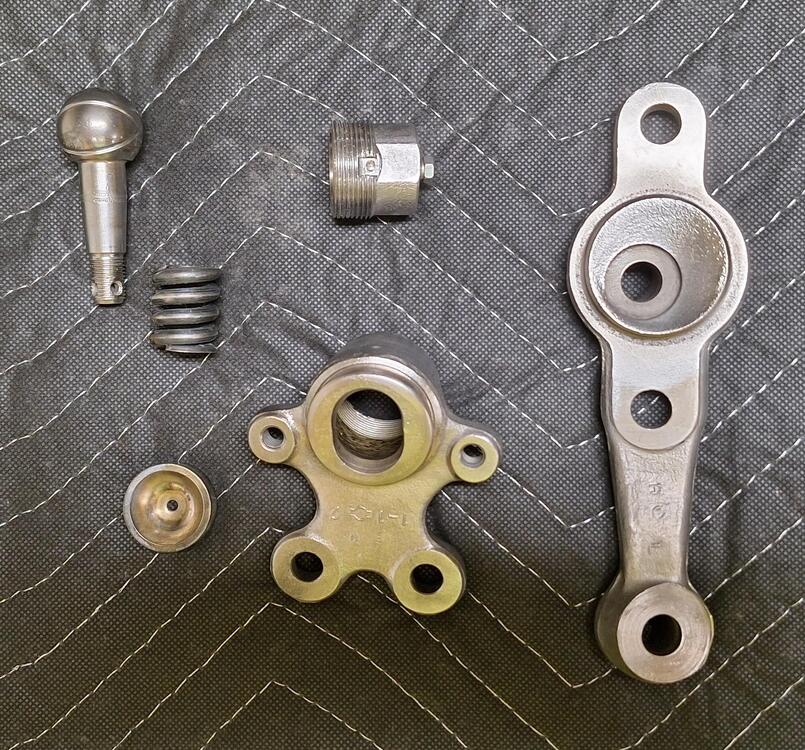
-
G'day @26th-Z , easiest way to check if you have the 11mm 40160-78500 or 14mm 40160-A8610 is by the diameter of the thread on the ball shaft. The early ones measure 11mm. The early steering arms 40052-E4101 R and 40053-E4101 L also have the smaller diameter tapered hole to match the 11mm shaft. The original ball joint is peened on the body to lock the lower cap into position. Careful grinding away of the peen allows the lower section to unscrew without damaging the threads. The parts are then degreased in the ultrasonic cleaner followed by corrosion removal in the cleaner. A brass wire wheel is then used to polish them up. The ball is lapped into the housing and bushing using valve grinding paste. I've managed to find four of the early 11mm ball joints and steering arms in my parts stash and have rebuilt them all. Everything is cleaned, re-greased and assembled. The tolerances and loading are checked per the data in the service manual. Once it passes, it's then painted in VHT satin black, a new dustcap fitted, the grease nipple removed and a OEM filler plug 40189-7300 fitted. They are now ready for fitting back to the car. The beauty of many of the parts on the early 240Z is that they were designed to be serviced or rebuilt rather than discarded and replaced. I've been fortunate to find many new old stock parts to rebuild my May 1970 240Z with.
-
 I love the claims about patents considering that design is very common.
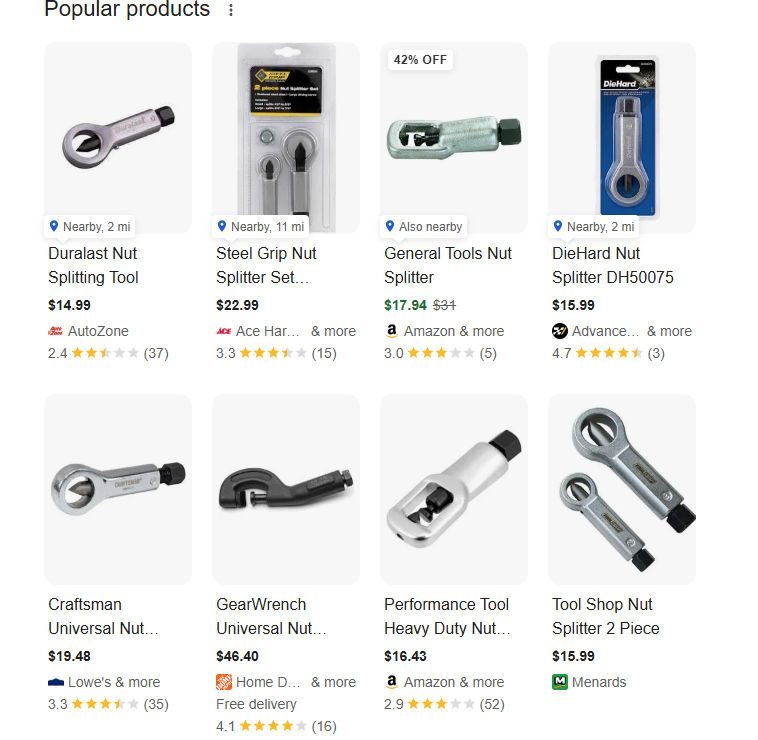
-
 What do you measure to determine if they are 11mm or 14mm?
 -
 Your hard starting issue sounds like a problem with the fuel mix not being rich enough. Are you using the choke when you start it? Make sure both jet tubes under the carb get pulled down all the way when you pull the choke handle back all the way. Check that the fuel mixture nuts under the carbs are turned down 2.5 turns at least, and that the float levels are correct.
 -
 I've had one of those in my toolbox for years and, yes, it does work. However, if the base of the nut is flush with face of the part it secures, the chisel point will tend to climb up the side of the nut when you start applying torque to the drive bolt. That means that part of the upper part of the nut gets split first, while the lower part hasn't quite separated. If you're lucky the nut will pop, even though it hasn't been completely split. Remember that you'll need adequate clearance in all directions to make the splitter fit, as well as enough room to get a wrench or socket on the drive bolt. That makes the splitter useless for recessed or restricted-access nuts. For example, it'll work great on the top nut on the front anti-roll bar link, but it won't work for the nuts used in some locations to secure the intake/exhaust manifold.
 -
Just make sure that the block-off strategy (whatever it might be) used at the Y-connection on the other side of the engine is sound and secure. For example...

-

-
 If the ball wears out it can come out of the sleeve and make the car completely uncontrollable, never seen that happen in reality? Over here in the Netherlands we have strict rules about them, over 1mm play (around that) means new baljoints! It's just for safety.. but hey in the Usa.. no problem offcourse..
 -
 Alex Kay joined the community
 -
 Location and price of the turbo engine
 -
rabrooks1028 joined the community
- Last week
-
 Hi SpeedRoo Please post some photos when you are done so we can see how they turn out.
 -
 Nut breaker if it attracts wives or girlfriends? Imagnaryto🔥Last Day 49% OFF - 🛠️Nut Breaker Pliers - 9-12 mm❤️TIPS: All goods are authentic, with genuine patents, counterfeit must be investigated! Customers, please identify our products! SHIPPING WORLDWIDE. 💯Payments Via PayPal® and CreditCard.⭐F...
 -
 Awesome, thank you!
 -
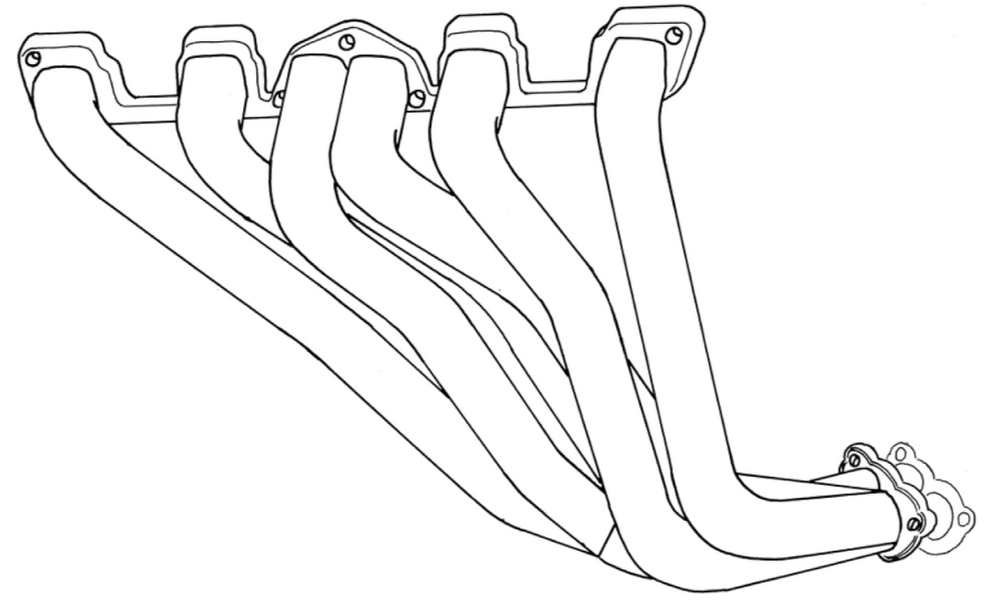
 Perfect thank you guys for confirming that for me. Just on the topic of "new" systems and "old" systems I'm currently limited to the Legalis R exhaust pipes product number 750-15414 from fujitsubo themselves and the super Ex headers (510-15037) just to make sure these are the ones that would fit as I didn't know there were older or newer version of the exhaust. see the images for reference


.jpg.9e31a279c45b30b776172e97c43ec927.jpg)