jfa.series1
 Subscriber
-
Joined
-
Last visited
Everything posted by jfa.series1
-
 Yep, the antenna switch power is independent of the radio being present. If you get inconsistent results from the switch it may be that the contacts are fouled - that happened to me. Its an easy disassembly and cleaning job to get fresh contacts for smooth operation.
 -
Dan, I'm not aware of a relay associated with the antenna switch, at least none on my car. I presume you have a OE rocker-style antenna switch from your description of the wires. You are correct on one wire (blue) providing power into the switch, the other two wires provide power out to the OE antenna for either the up or down action. How this might work for an aftermarket antenna I can't say. You might have to experiment with testing a variety of connections off the car with a battery and some clip-on leads. Jim
-
The OE antenna is grounded to the body by a bracket at the bottom of the antenna - the bracket usually attaches with a wingnut to a screw welded to the body down in the space below. The two wires from the antenna are for the up/down power. If the antenna is out of the car, test it by attaching a ground to the body and then power to each lead one at a time.
-
That is an amazing looking car! Congratulations on a great find. You have exquisite taste in color (no bias toward Safari Gold here, none whatsoever )! I'll add to the recommendations on the relay upgrades for the headlights and turn signals / parking lights. Those changes will take a huge load off the fuse box and switches. Also consider upgrading the flasher cans for the turn signals and hazard lights to newer electronic models. The turn signal can is on the steering column, the hazard can is on the right side kick panel.
-
He looks to be too big for that small car. Stay close - he'll probably be looking for friends to exercise it for him!
-
I texted Stephen @Zedyone_kenobi this morning to check on him, no response yet. Power / cell service may be out.
-
Jeff, You did really well by this car, congratulations on a job well done! We'll all be looking forward to the next chapter in your Z life. It was a pleasure to meet you and the car in Austin, looking forward to catching up with you in Atlanta (if not sooner). Jim
-
What he said.
-
I used a big C clamp to compress the assembly to get the nut on the rod.
-
You've got two weatherstrip products with attached welting - why not try each of them to see if one works better than the other. I tried PRP several years ago and encountered the "fat seal" problem, switched out to Kia and happy with the results.
-
If you're absolutely set on OE rubber bushings, then consider contacting David House at Courtesy Parts (david@courtesyparts.com). He can scan dealer inventories across the U.S. to see if any are available. If so, he can have them shipped to Courtesy and then he can ship to you. You'll pay parts cost and all shipping.
-
The stock finish is satin black - no reflection onto the windshield.
-
Hi Dave, The write-up I was thinking of was just the electrical aspect for your lights and sidemarkers in keeping with this post topic. I suspect there are any number of 280Z owners that would be interested in this creative mod. Beautiful work! Jim
-
Here's the sidemarker kit for 240's. I have it installed as part of the relay upgrades and it works great. We need a tech write-up from Dr. Dave on how he did it for his 280Z. Actually... we need a tech write-up on the entire project! http://www.thezstore.com/page/TZS/PROD/classic10l/12-4654
-
WAAAYYY COOL!!!!
-
Its a far better purchase than this mess in Houston: http://www.ebay.com/itm/1970-Datsun-Z-Series-/222586197679?hash=item33d32bd6af:g:KVEAAOSwn~ZZbpyE&vxp=mtr
-
Very nice work on the dash. If you want to stick with incandescent bulbs for the instruments, consider the Eiko A-72. It is a 4W bulb that is a perfect fit. My experience with the MSA offering several years ago was that they were not a good fit unless you were willing to give up the lens over each bulb. I really like the additional brightness from the Eiko's.
-
I've been using only Mothers California Gold carnauba cleaner wax (paste) since getting the car painted 7 years ago. I credit the great clear coat work by my painter for giving me such a fantastic foundation to work with. The carnauba goes on super easy and polishes out just as easy with clean microfiber cloths. I don't trust myself with a power buffer and working with the cloths allows me to get to all tight areas with no fear of damage.
-
That's the way all Series 1 cars came. Not sure when a strap was added to the left door.
-
Put it in the oven before bedtime, leave the oven on WARM all night. By the time you get the smoker ready it will have been in for about 12 hours.
-
My approach to brisket is a bit unconventional but its worked well for me for many years. I start with a packer style brisket - trim nothing. Put it in a big roasting pan fat side up, dump a bottle of Allegro marinade all over it, cover and put it in a WARM oven overnight. No rubs or other prep. Next morning get the smoker (similar to yours) going with charcoal then switch to oak for heat. When the temp is up to 250, remove brisket from oven and transfer to the smoker, fat side up, large end near the firebox. Add mesquite chunks (or specialty wood of your choice) periodically throughout. It usually takes about 5-6 hours at 225-250 to get the meat up to 195. Remove from smoker back into the roasting pan, cover and let it rest for 1/2 hour. Slice and serve! The overnight prep really cuts down on the smoking time but I still get a lot of color and smoke in the meat.
-
Whether its new cars, tools, smokers, ...etc., we need pictures or it didn't happen. I've been known to smoke brisket and chicken - haven't had any of my food rejected (yet).
-
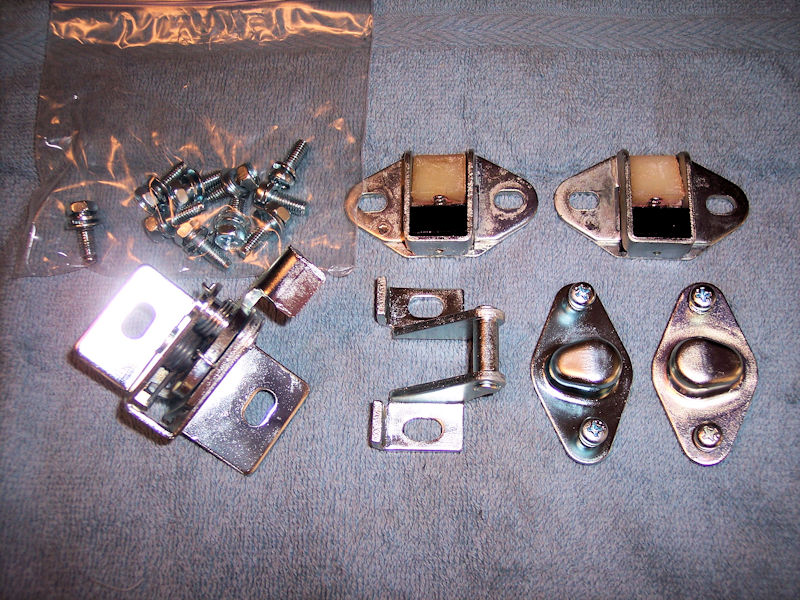
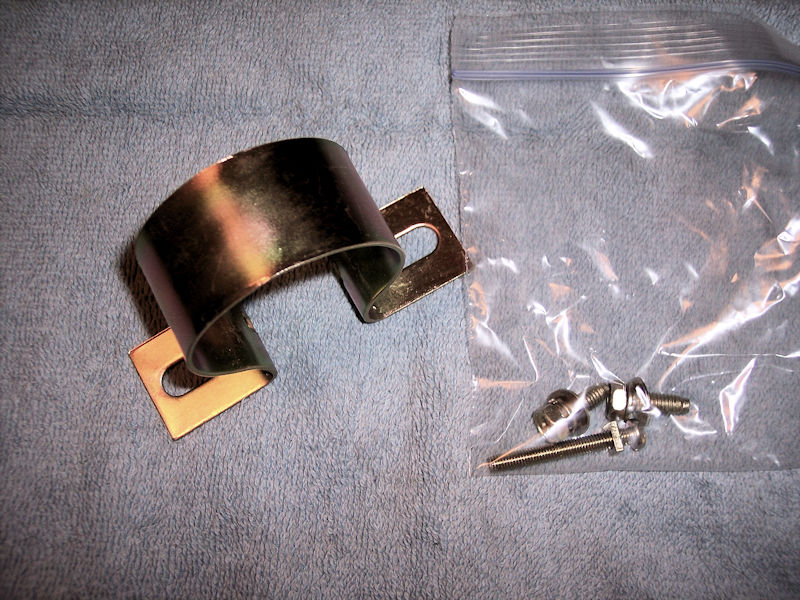
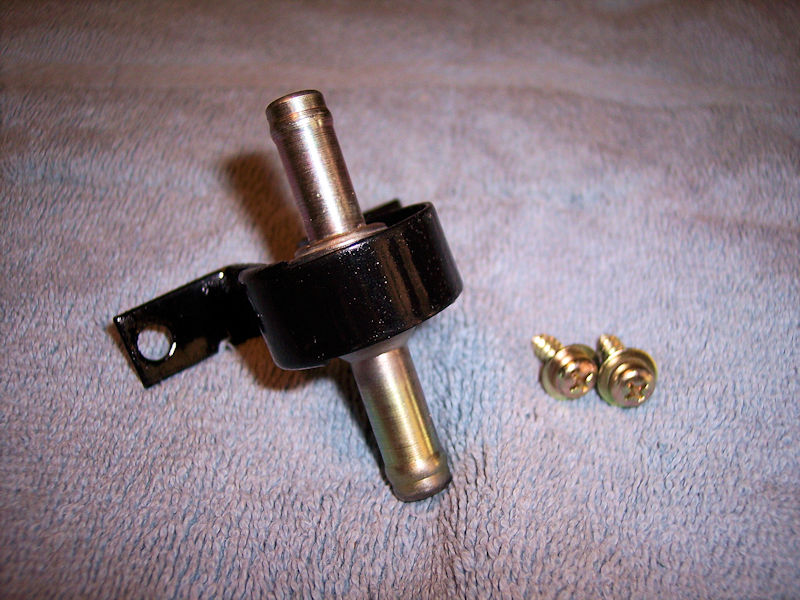
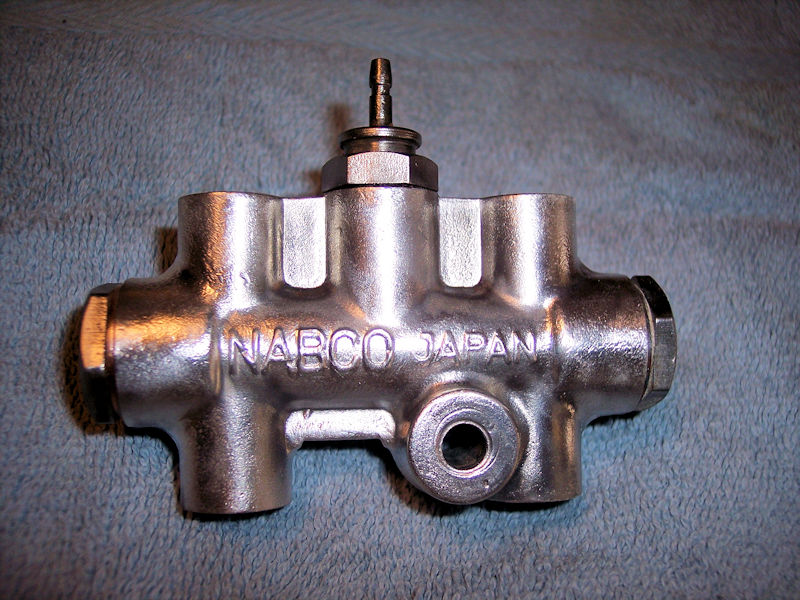
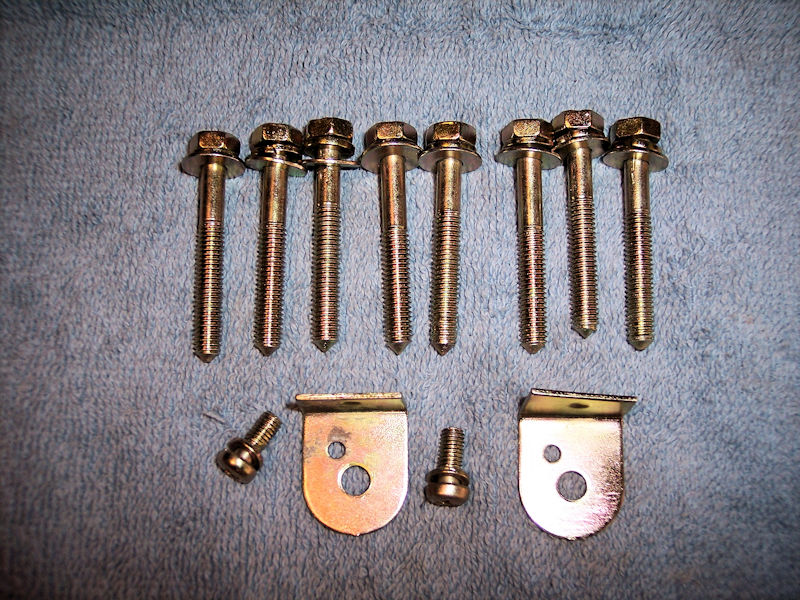
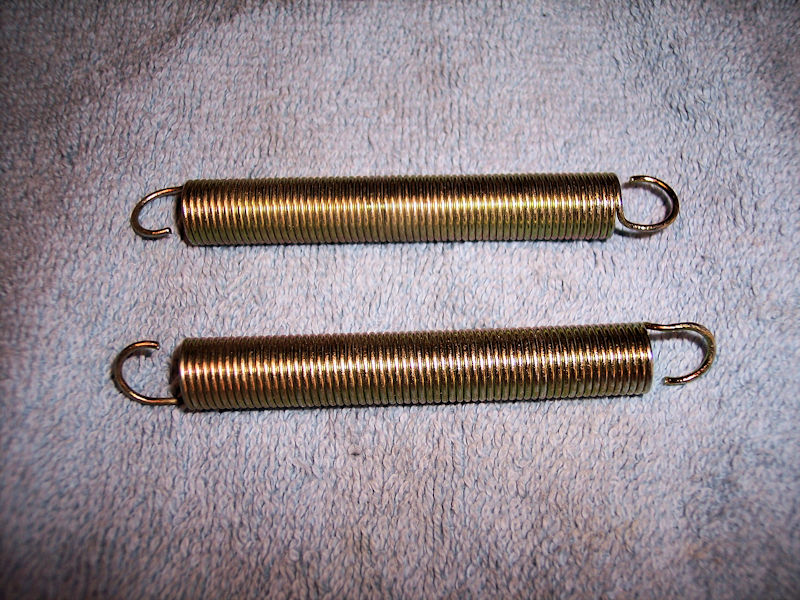
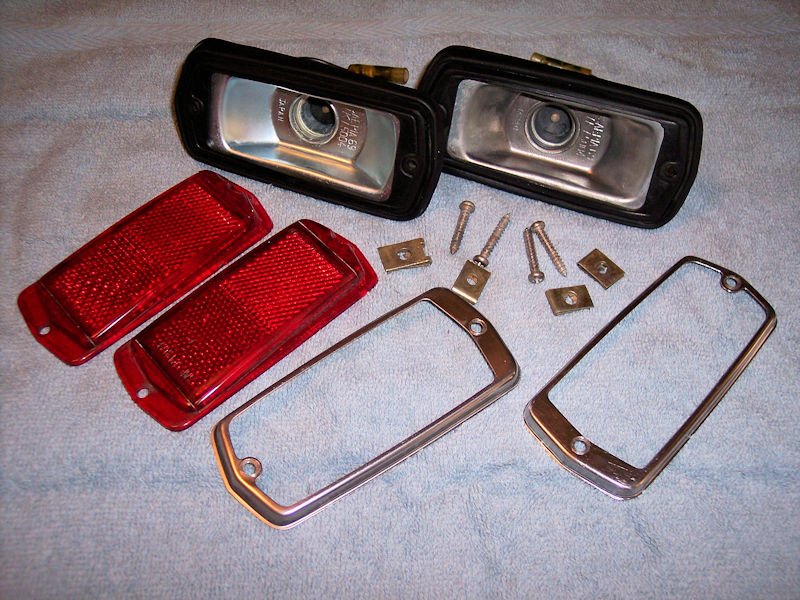
Another item sold but still lots of parts available to tart up your ride a bit, here's a few:

-
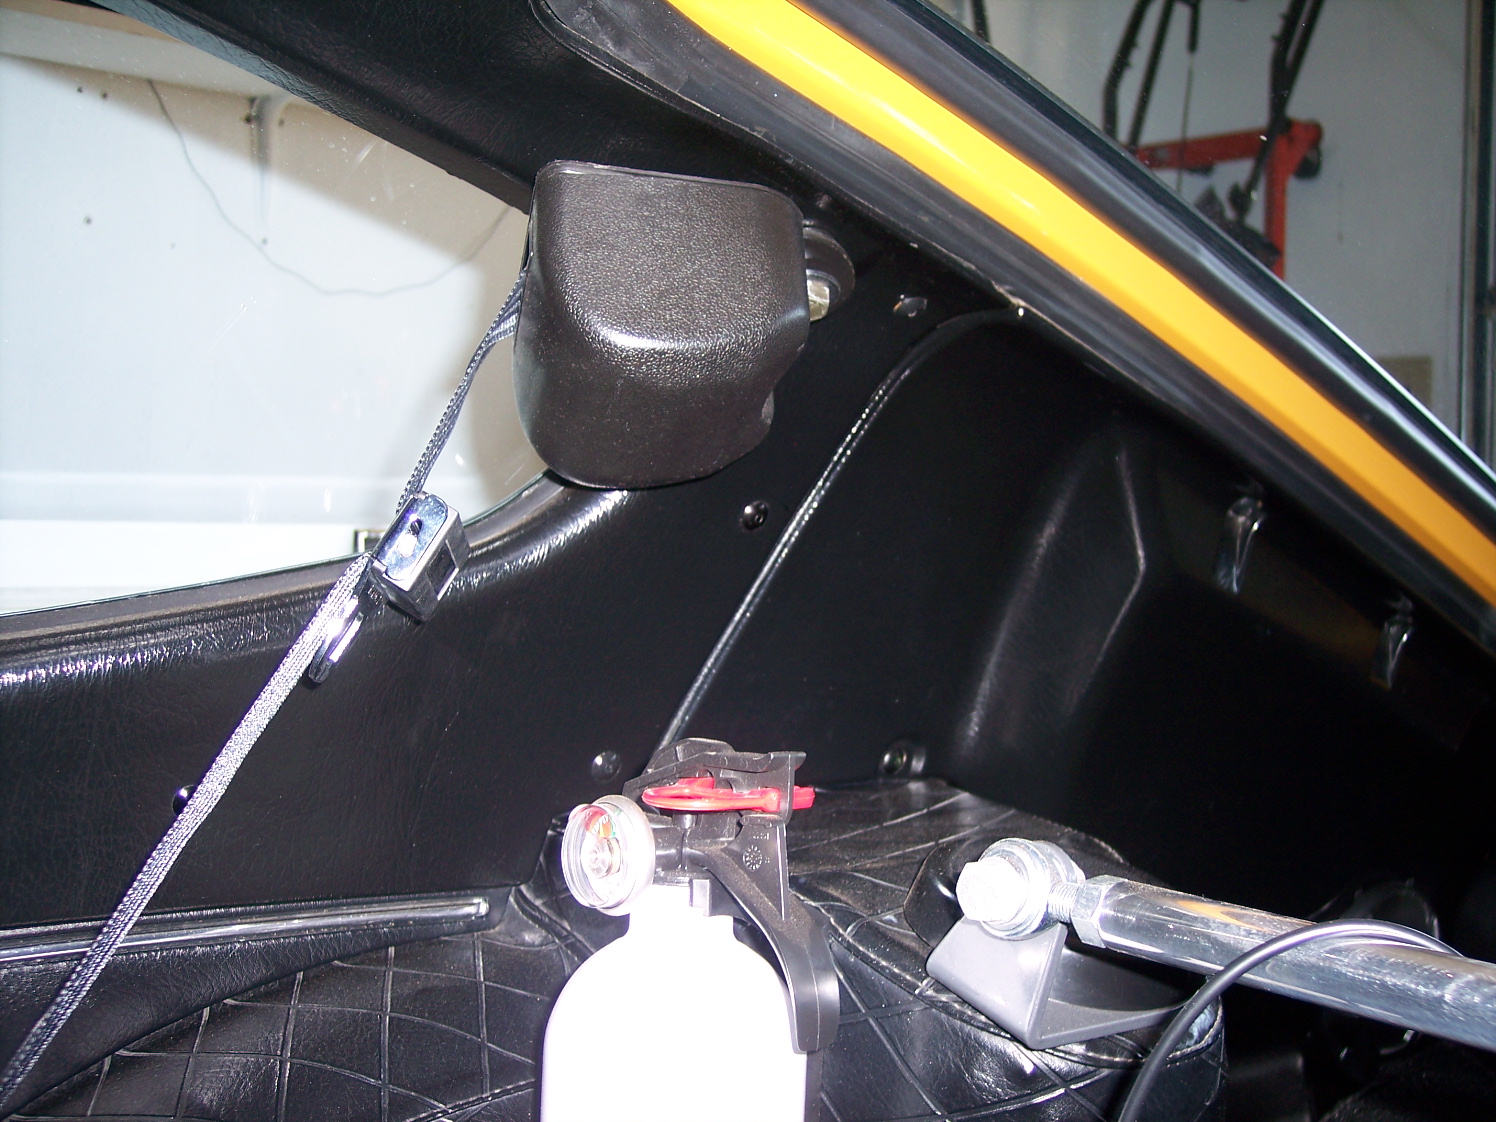
If you decide on the Wesco Roadster unit, this is what it looks like with the retractor mounted at the shoulder belt location above the quarter window. The other end of the belt is attached at the outboard seatbelt location on the floorboard.

-
I seem to recall a rant emanating from NS last year - something about don't buy cheap Chinese tools. Words come back to haunt? Janet probably has to pay good $ to get nails done like that.