zKars
Supporting Member
-
Joined
-
Last visited
Everything posted by zKars
-
They are black M4 x.7 yes. Oval head is what I believe they are called, not flat, slightly curved face. Phillips or JIS equivalent driver. Fairly long, like 25mm?
-
It is just a hole, normally has a rubber plug in it. I have used it to mount seat belt retractors with proper re-enforcement underneath where it exits through a frame box member.
-
E31 is “right” for your 71. N42’s were from 75 onward. E88’s were 72-74
-
-
I snagged one of the earlier Nismo Safari Z Seiko’s back in 2023. They were a bargain at $299. I’d completely forgotten about it until a friend mentioned this new series and asked if I seen the news about it. Maybe it will be worth $399 at some point….. duPont REGISTRY NewsNissan x Seiko Debut The NISMO Safari Z Watch At SEMA, Li...When it comes to honoring motorsport history, Nissan knows how to do it in style. At the 2023 SEMA show, the JDM legend took the wraps off the new Nissan
-
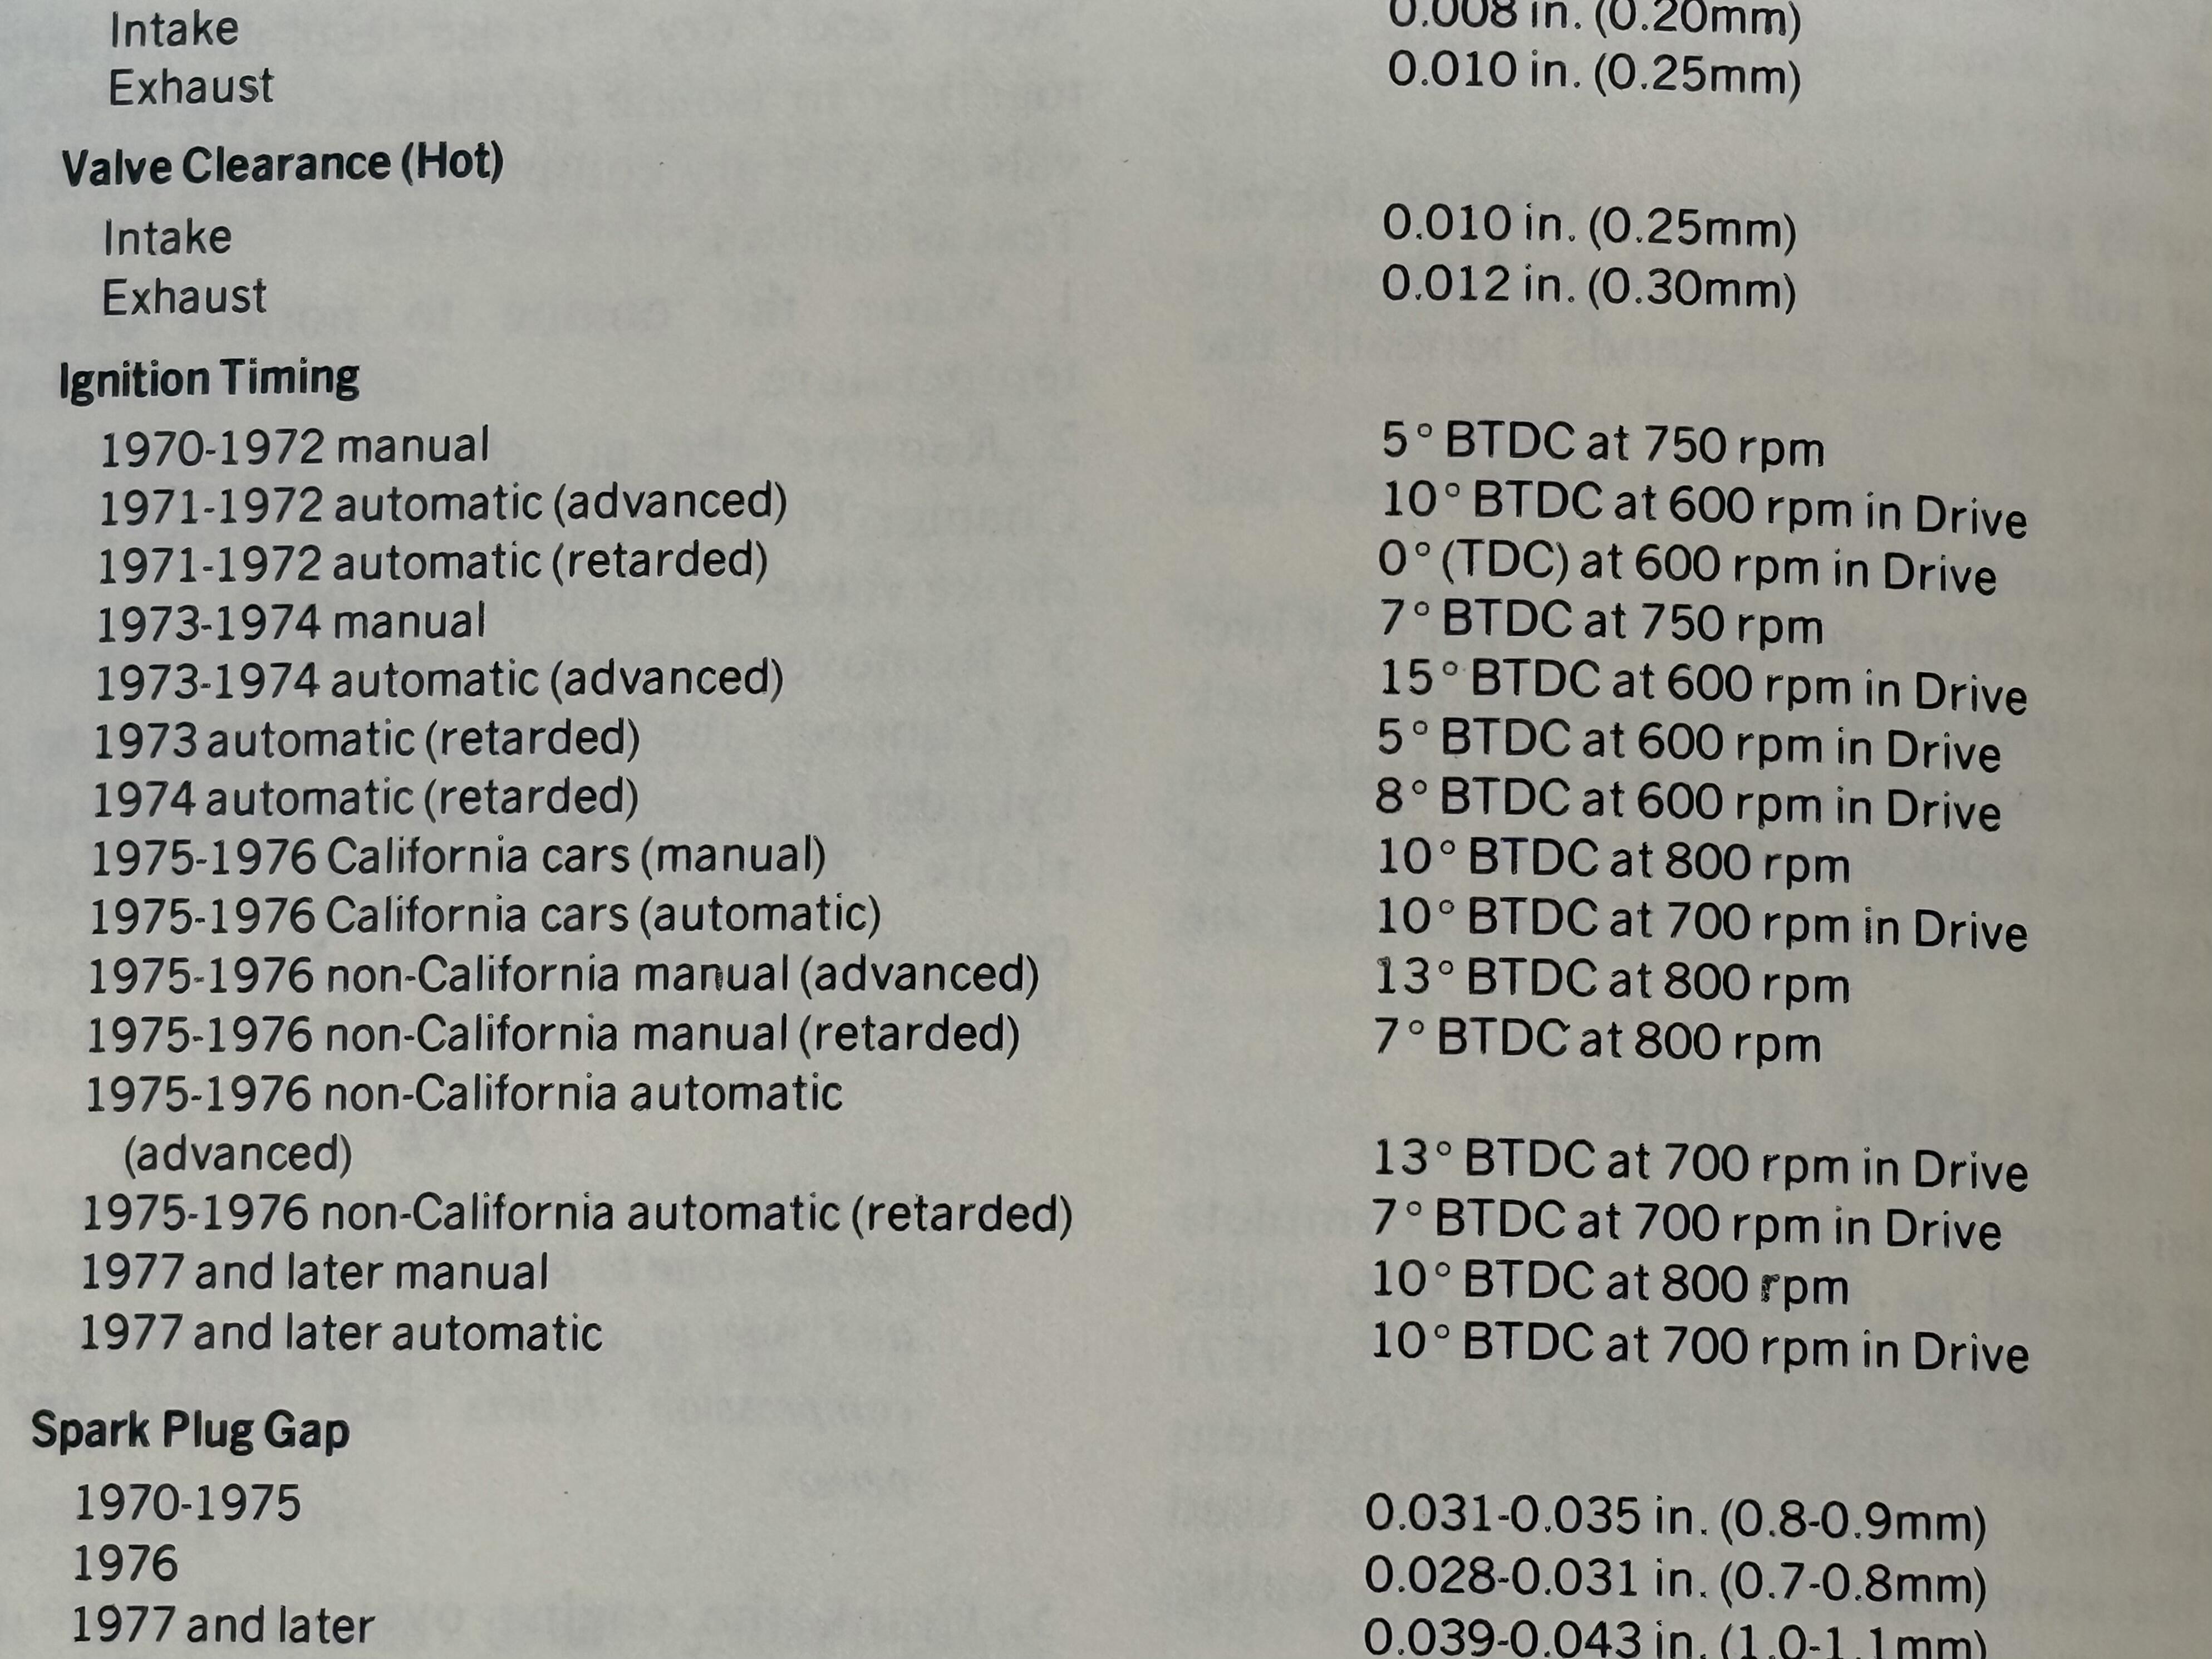
I’ve never had much respect for the Chilton or Climer (sp?) service manuals, once I realized they were nothing more than stolen excerpts from the real service manuals and how they claim to handle all Datsun Z models from 1899-2050 in one book. Talk about cherry picking and massive omissions I thought Now that the real manuals are available online, I rarely look at them. However, the other day, I got a Climer manual with a parts horde and happen to flip through it just to see if I was missing anything. I might have to eat my critical words, when I found a compilation listing of what seems to be ALL the possible timing options 70-78. “Maybe” they did a bit more than just decide which pages of the FSM’s to include. This was sparked (see what I did there?) by a Z friend with limited Datsun knowledge who was asking me about timing specs for his 71, telling me he looked on line and found really wildly varying numbers and couldn’t decide which one was right. Well, there you go. the list shows a large variation depending. PS. It also has a pretty high quality set of schematics for the various years and transmissions all in one place. I read most of the text! .

-
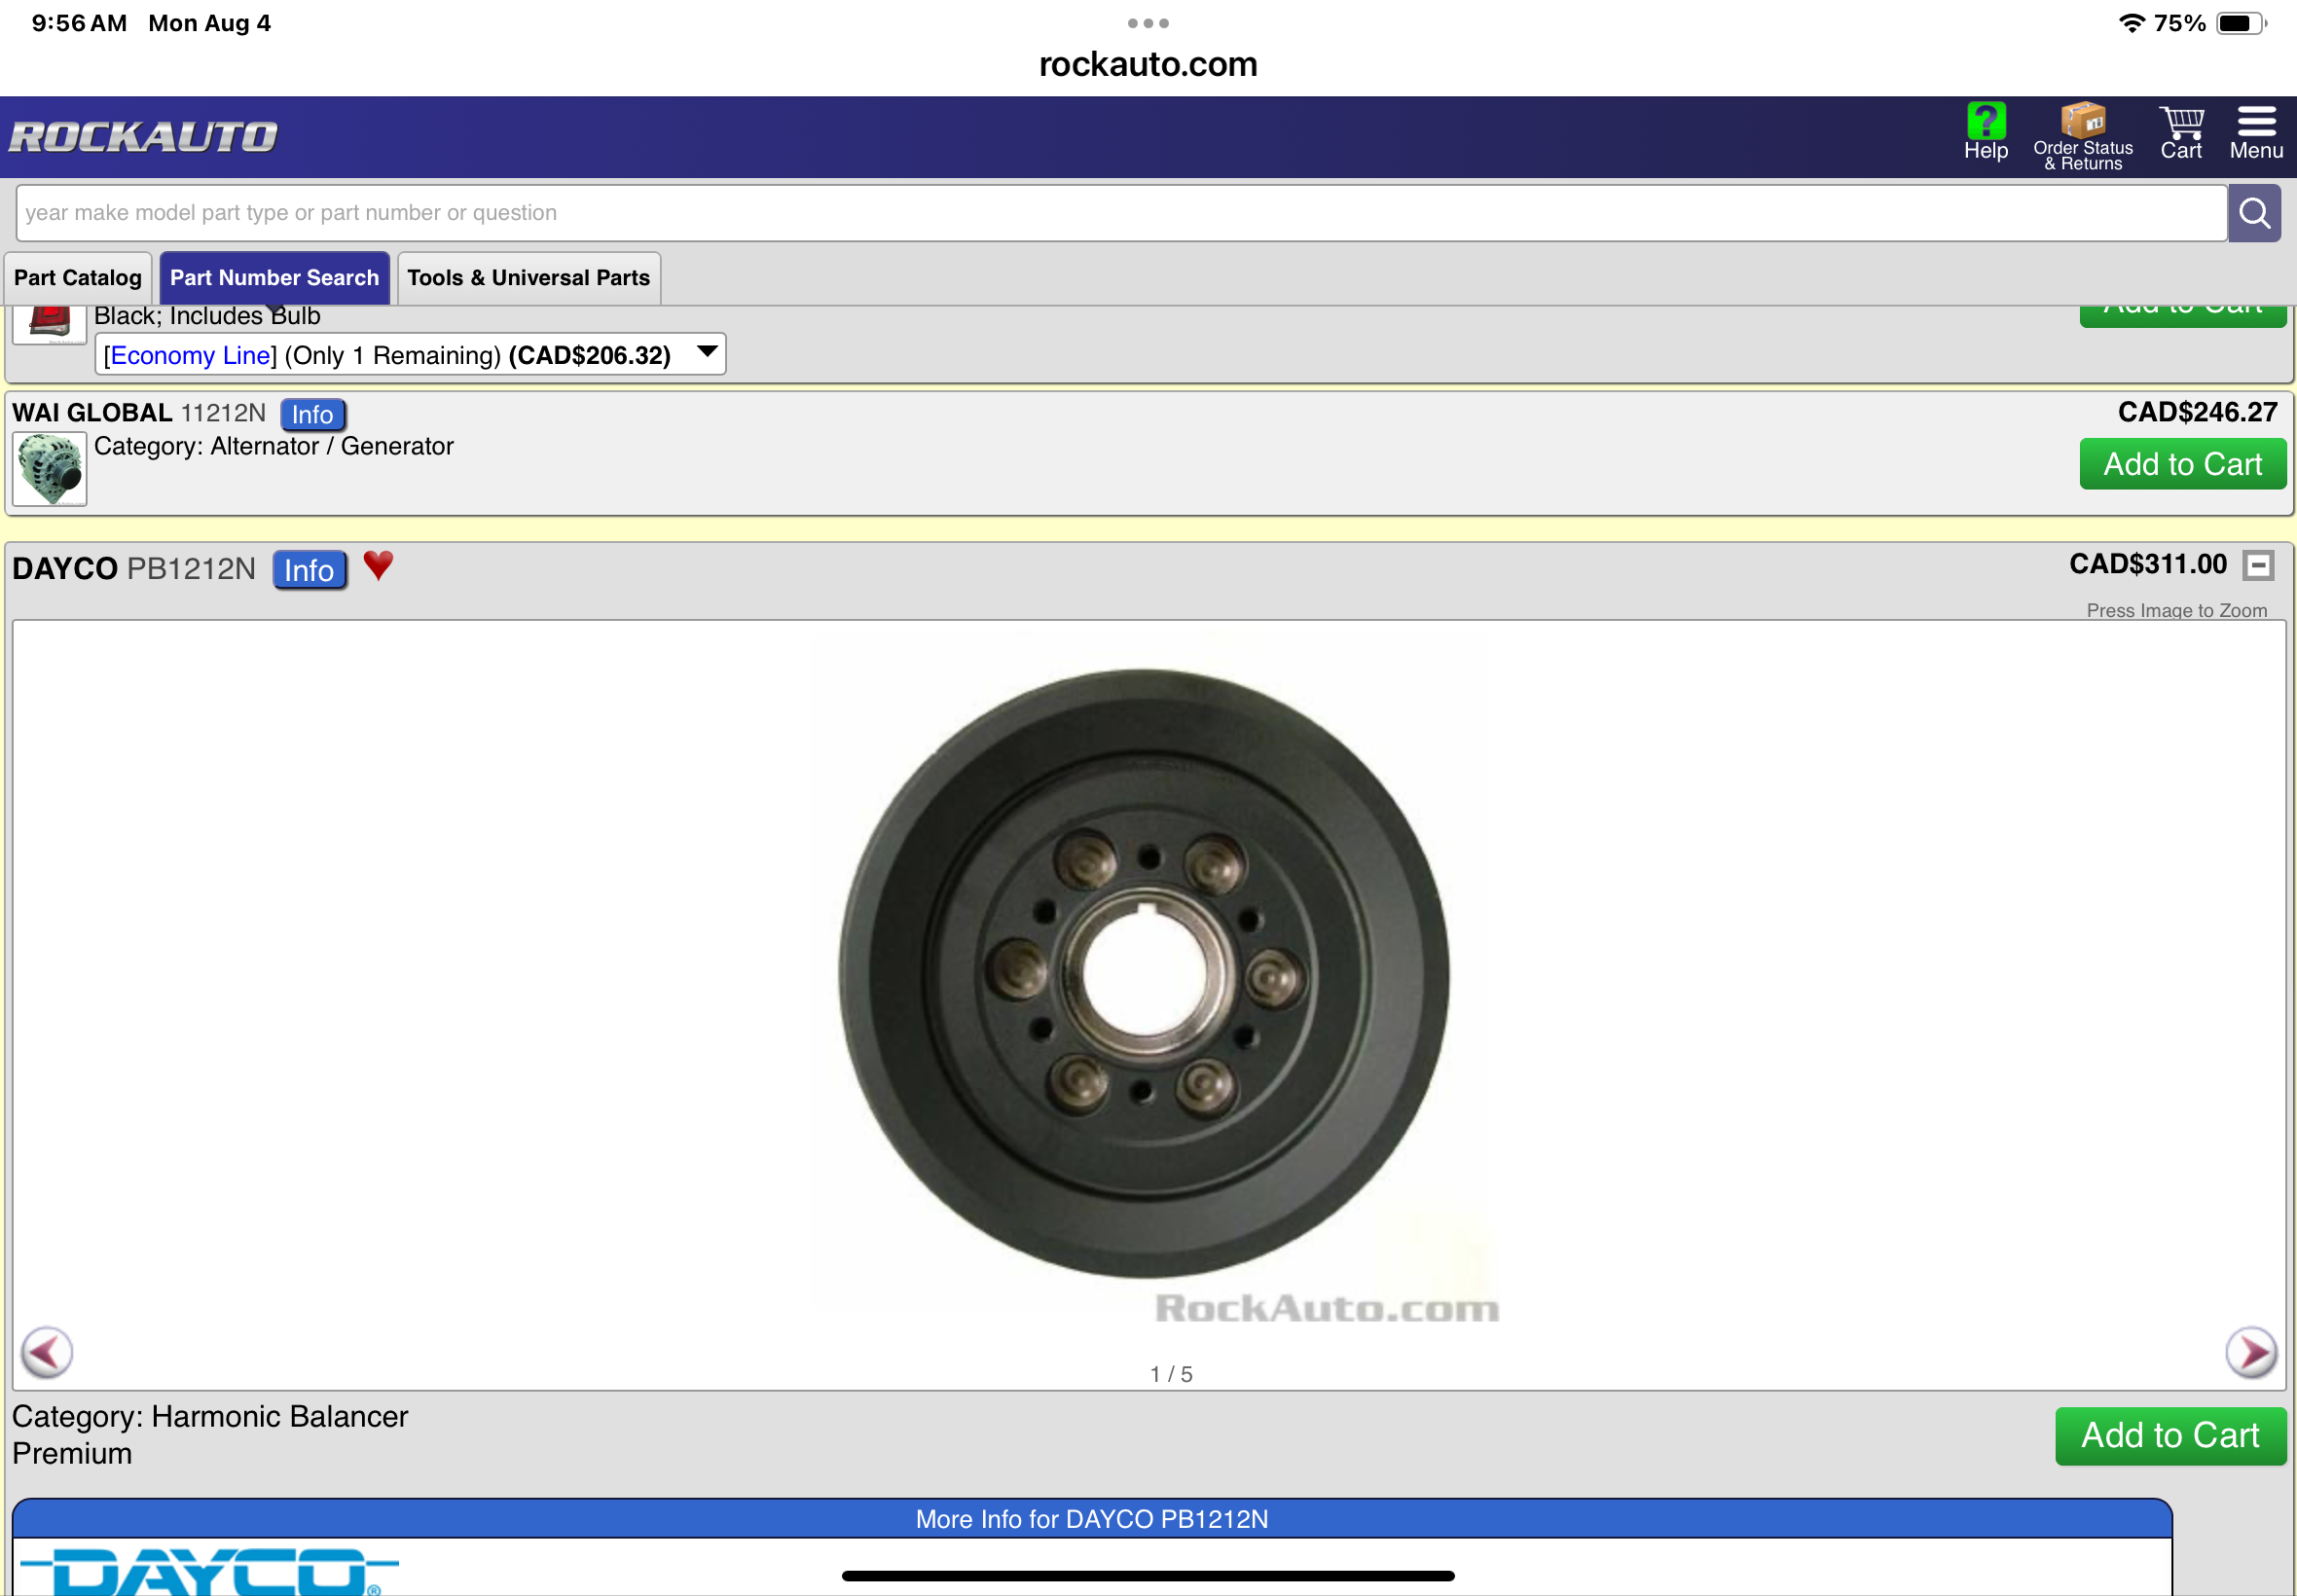
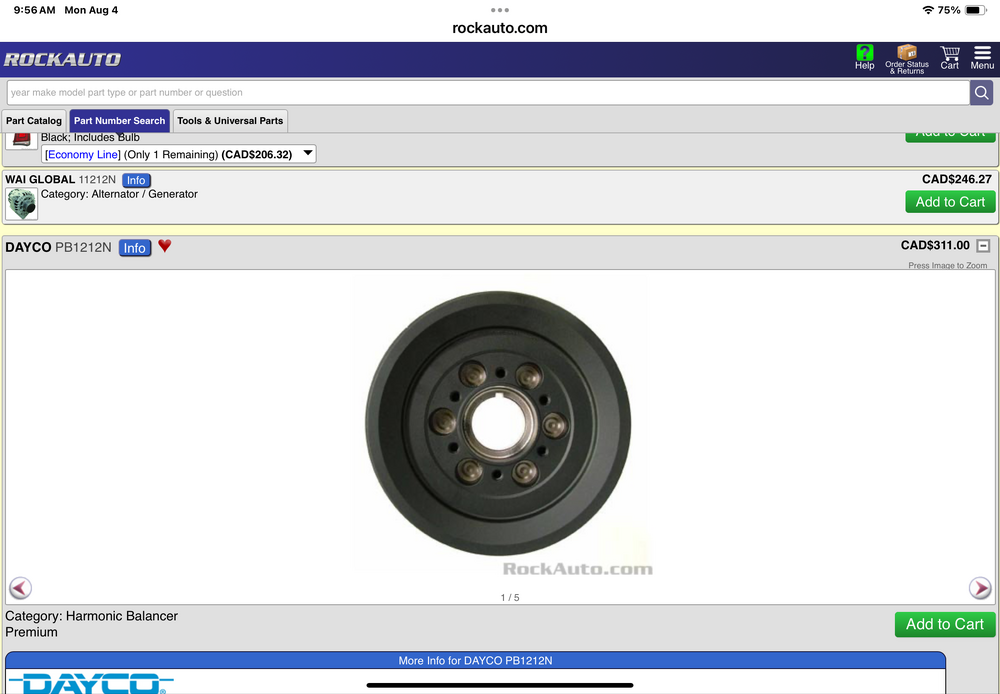
I do have some used dampers. Happy to send one your way, Early 240 2 pulley or later 280, again 2 pulley I recently purchased a Dayco damper from Rockauto. Pic below. Option 3 is send yours (or mine) to DamperDocter.com for rebuild
-
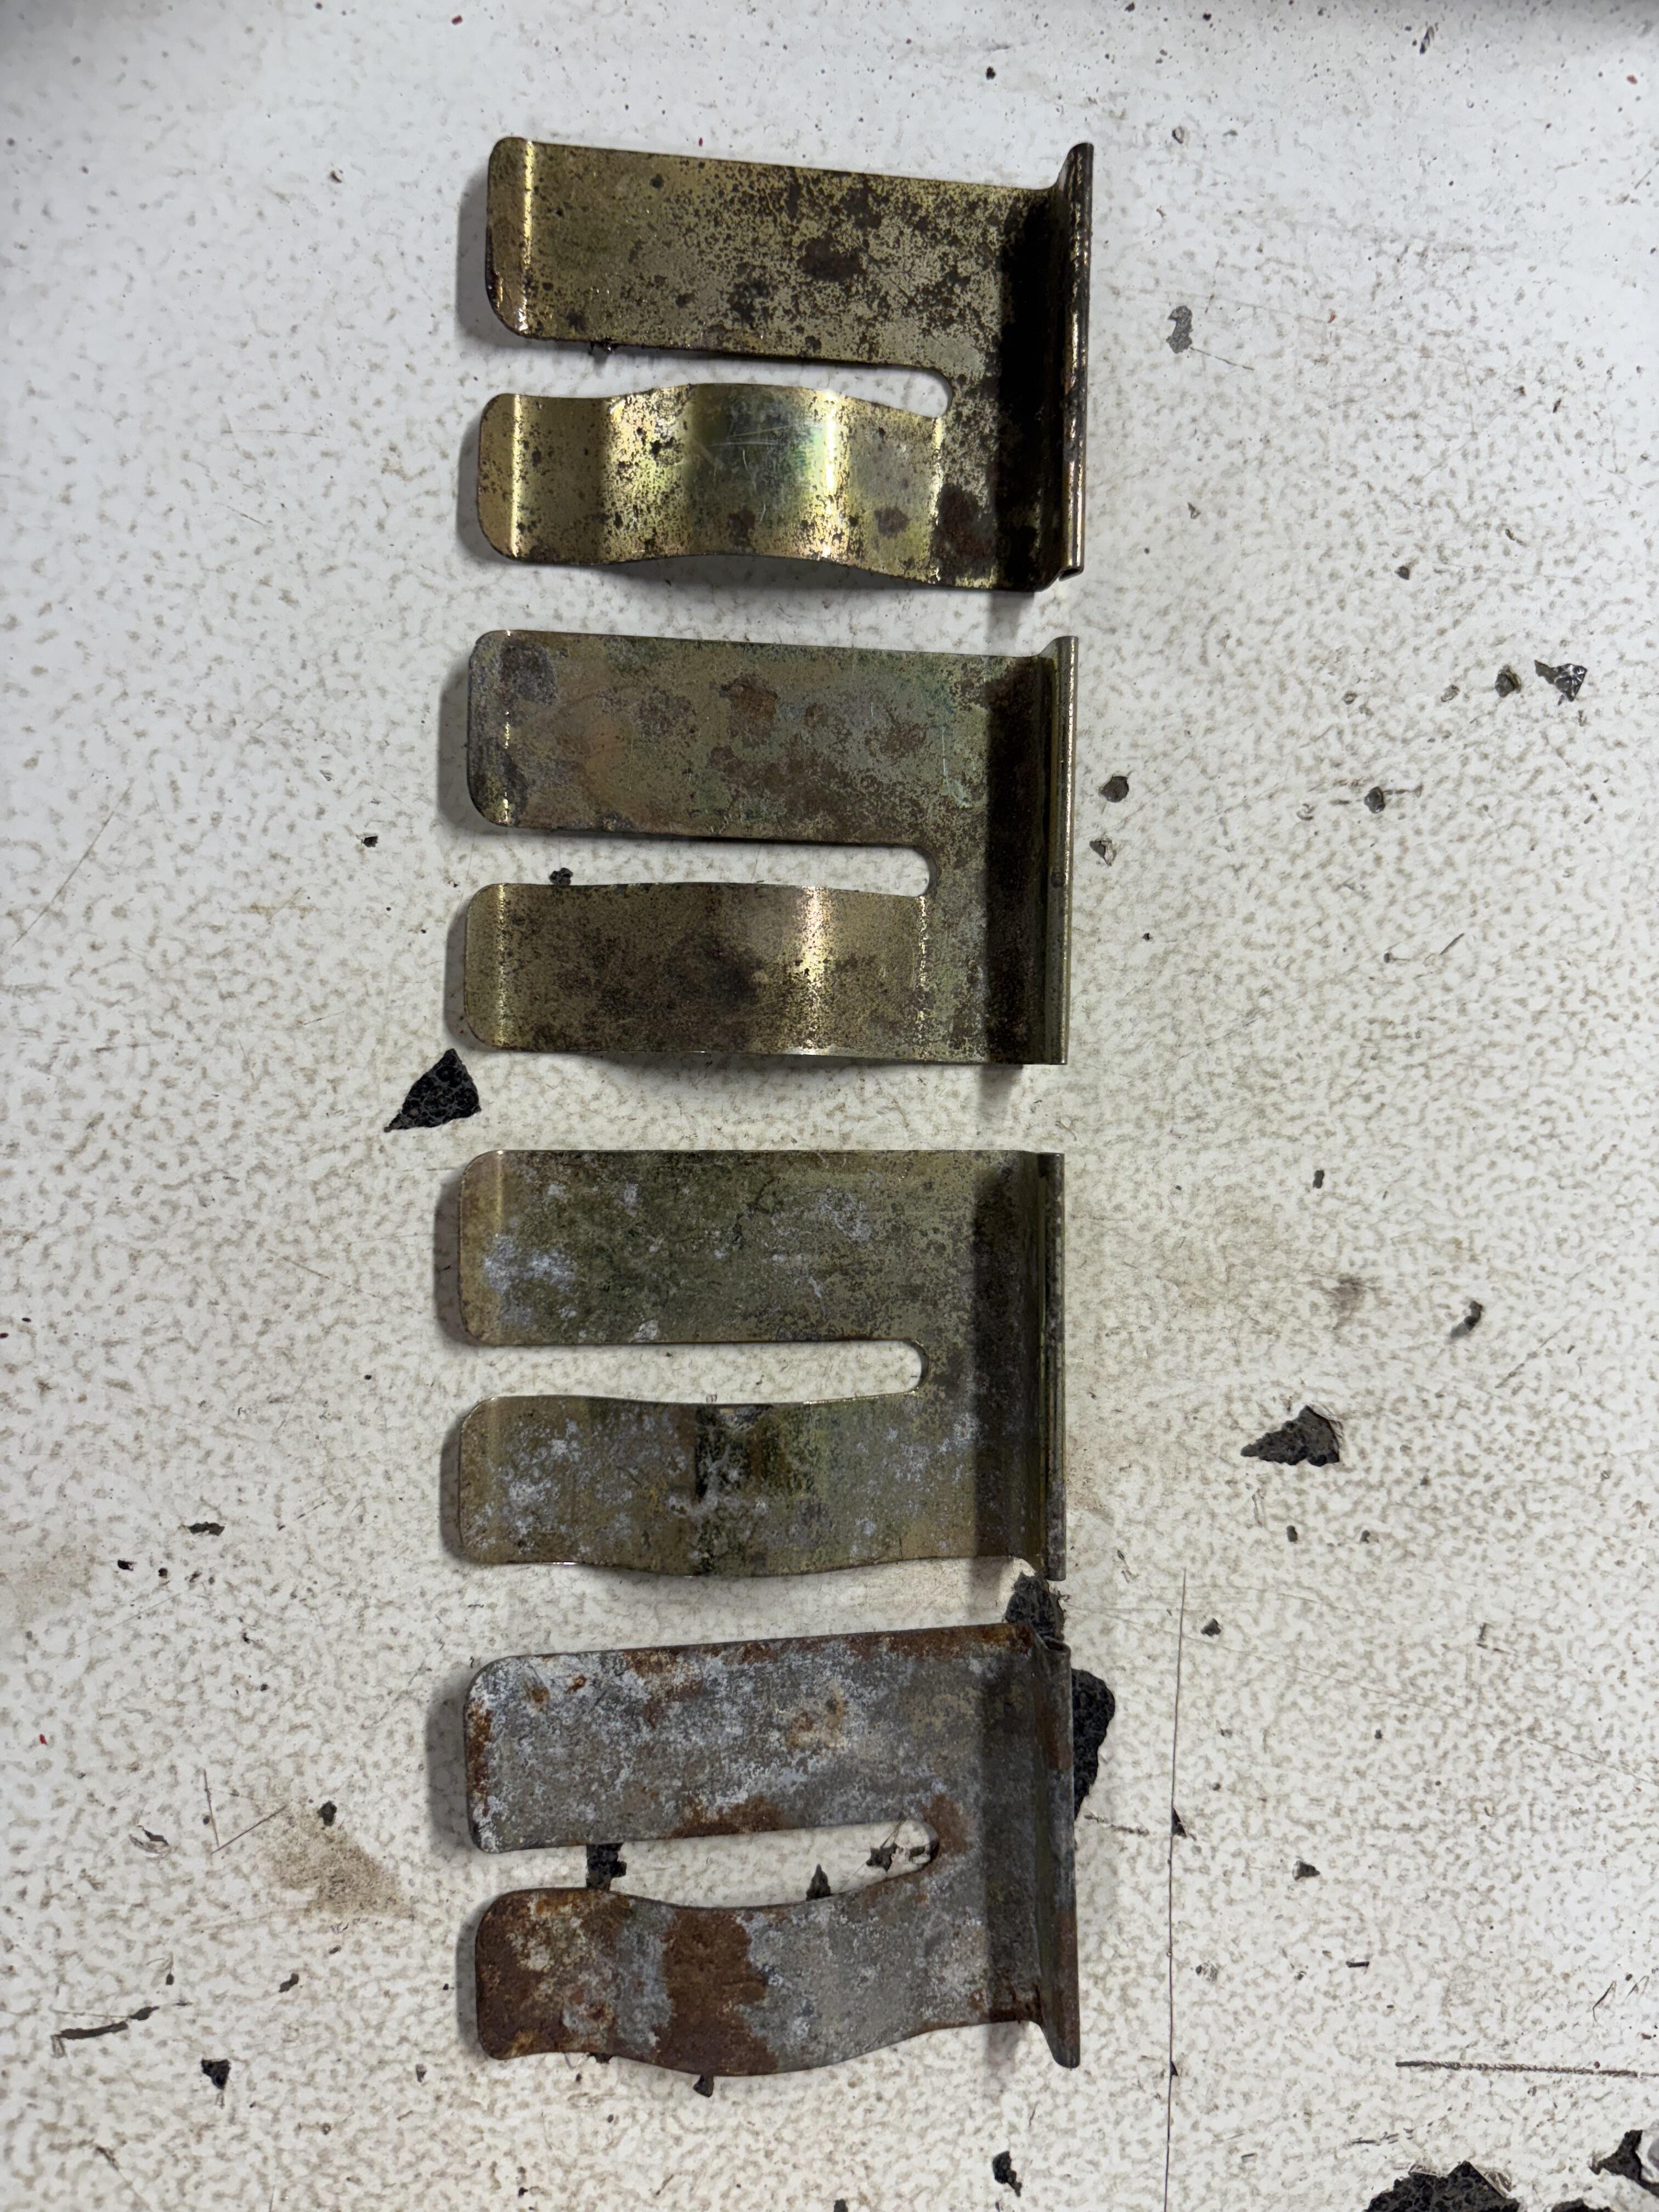
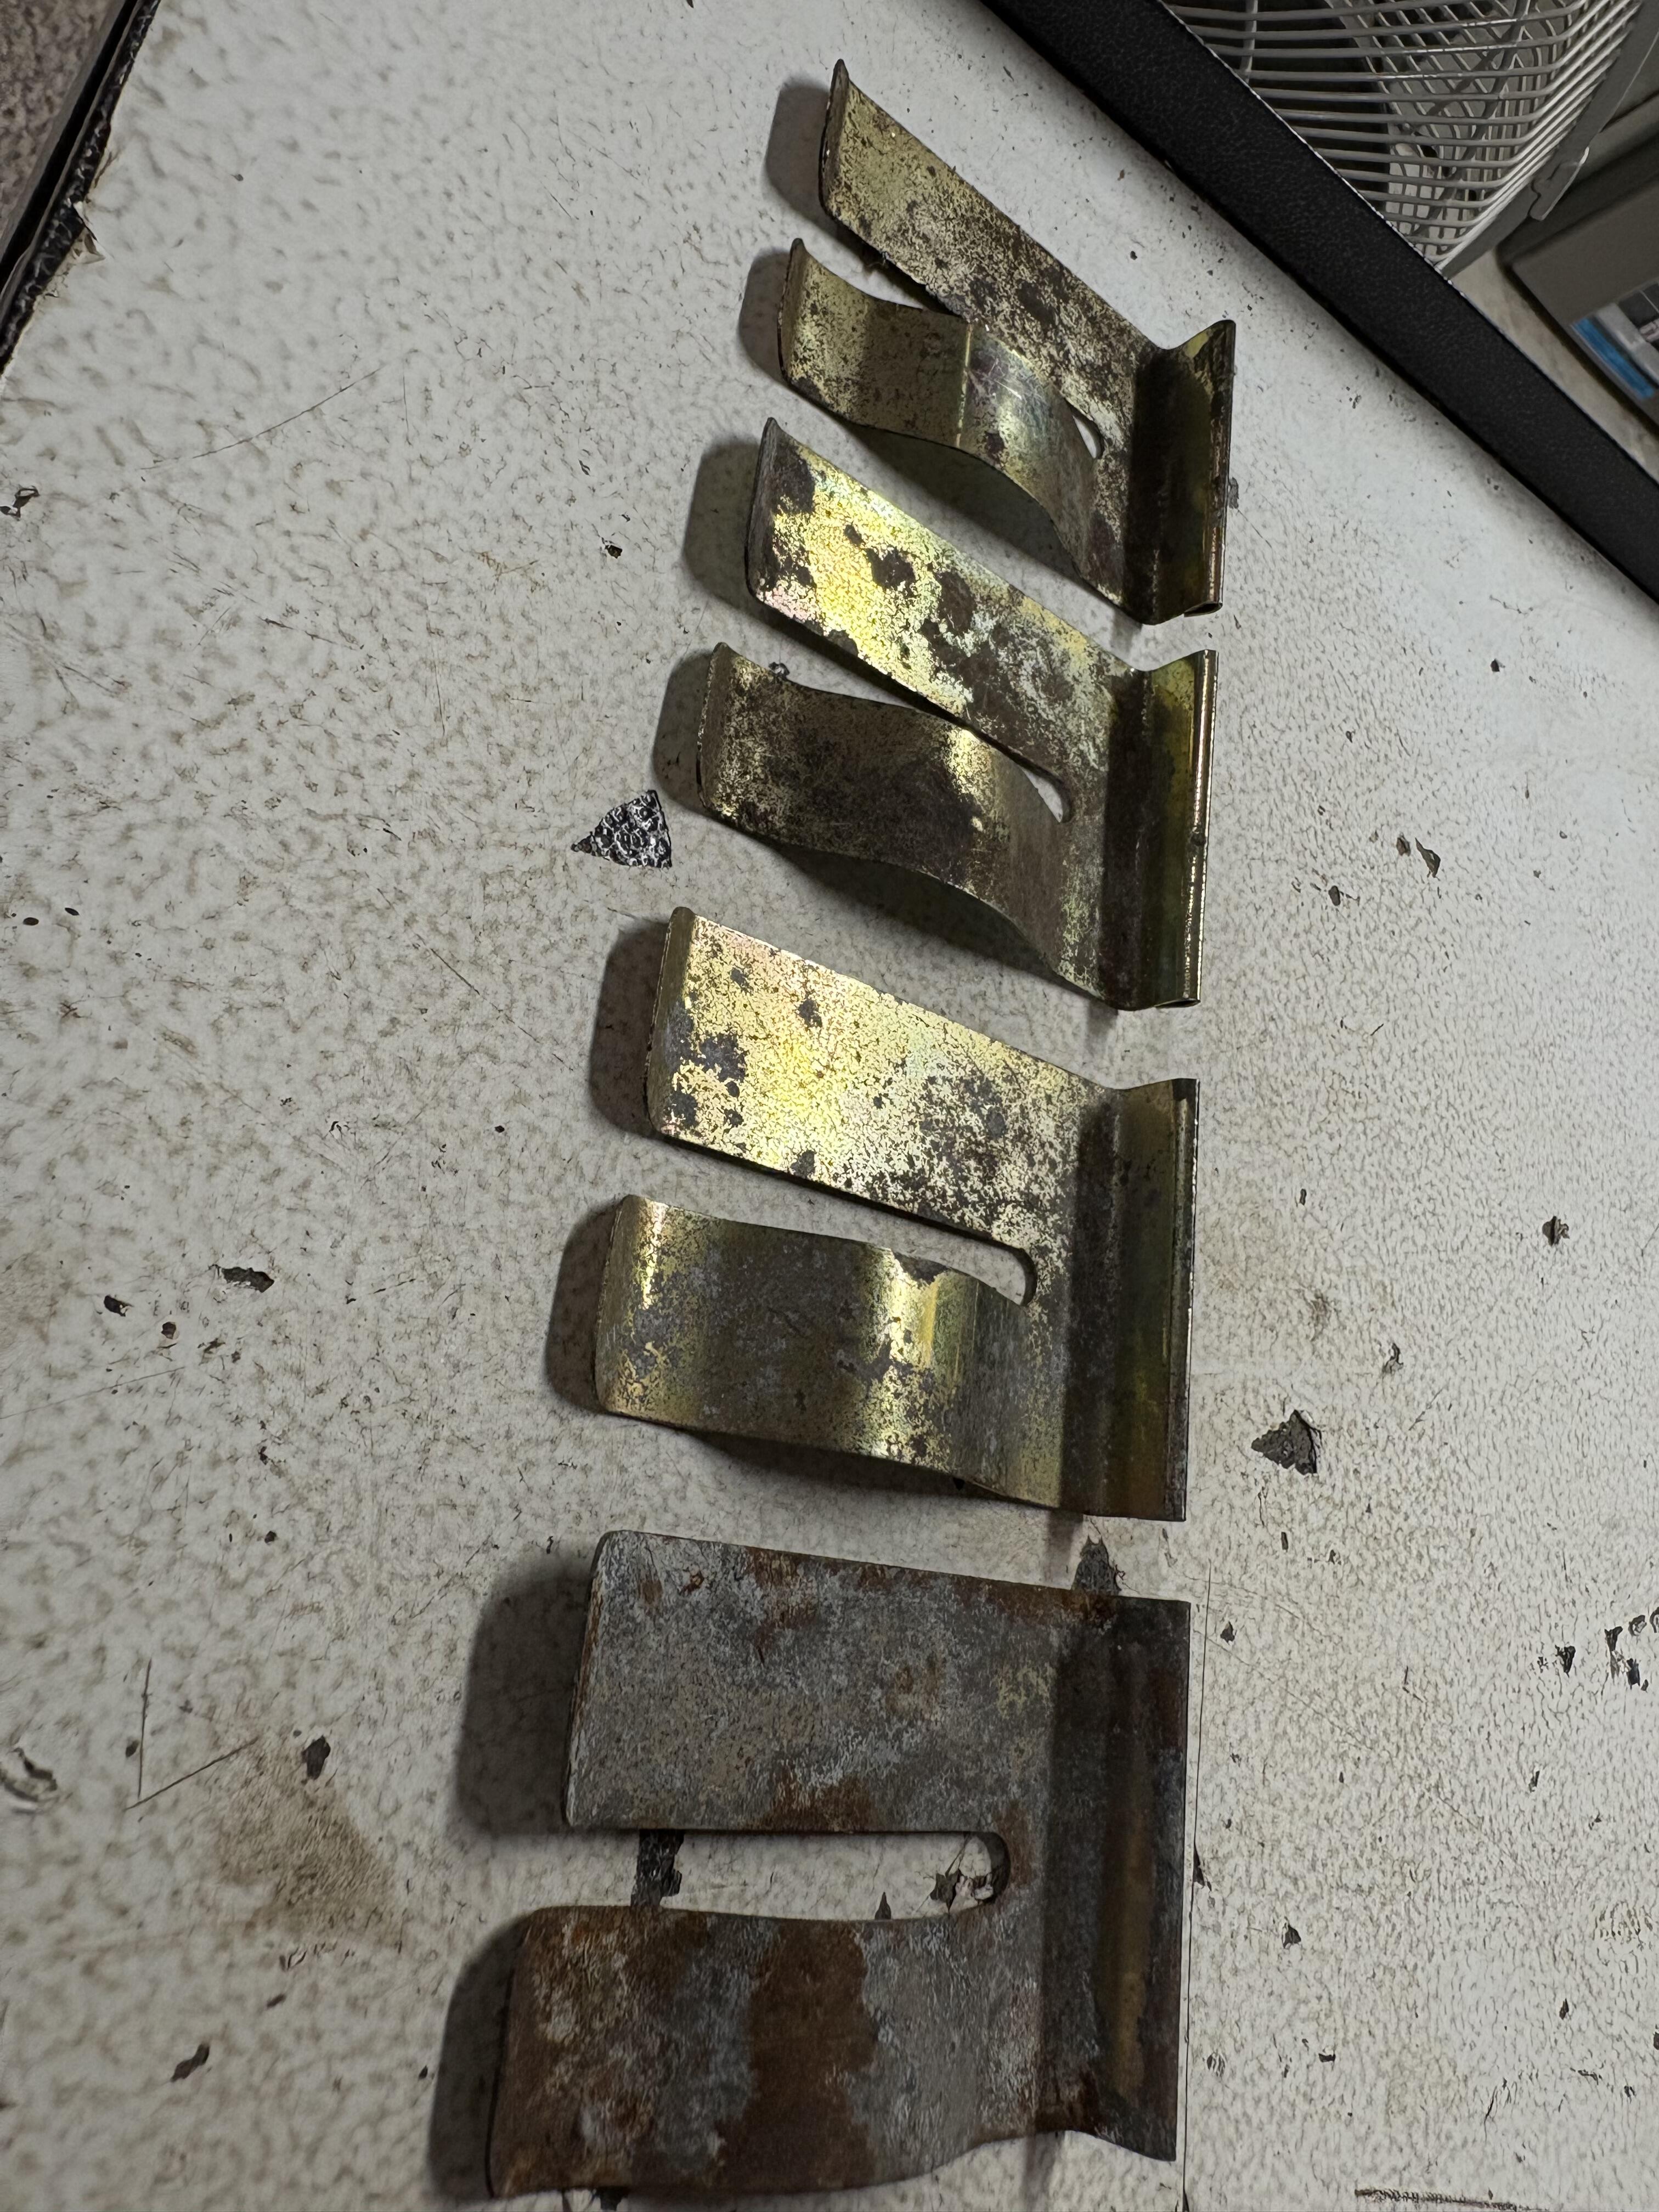
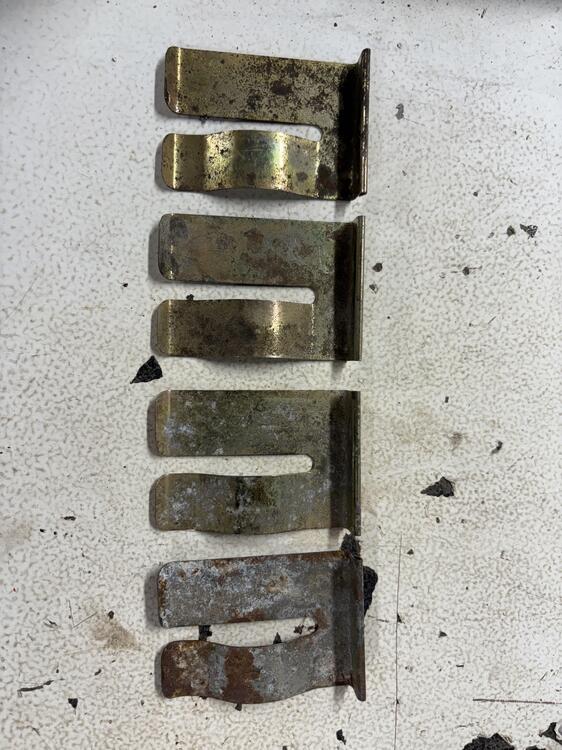
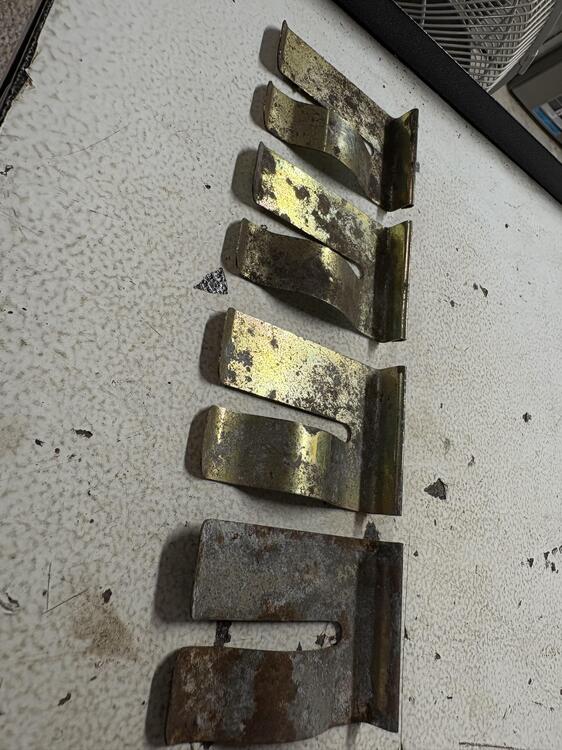
I was very lucky to find a full set of 4 carpet clips in a recent parts haul. Never actually touched one, vaguely remember a thread here about them 74995-E4100 Qty 4 in the fiche. Three are nice enough to use, yellow zinc plating is pretty good, but one is a rusty mess. Usable, could just sandblast and spray yellow zinc. I see SS reproduction sets on some of the usual vendors. JDM-car=parts has a OEM refinished group of 7 for $99 USD. Asking $50USD for my set of 4 plus postage.
-
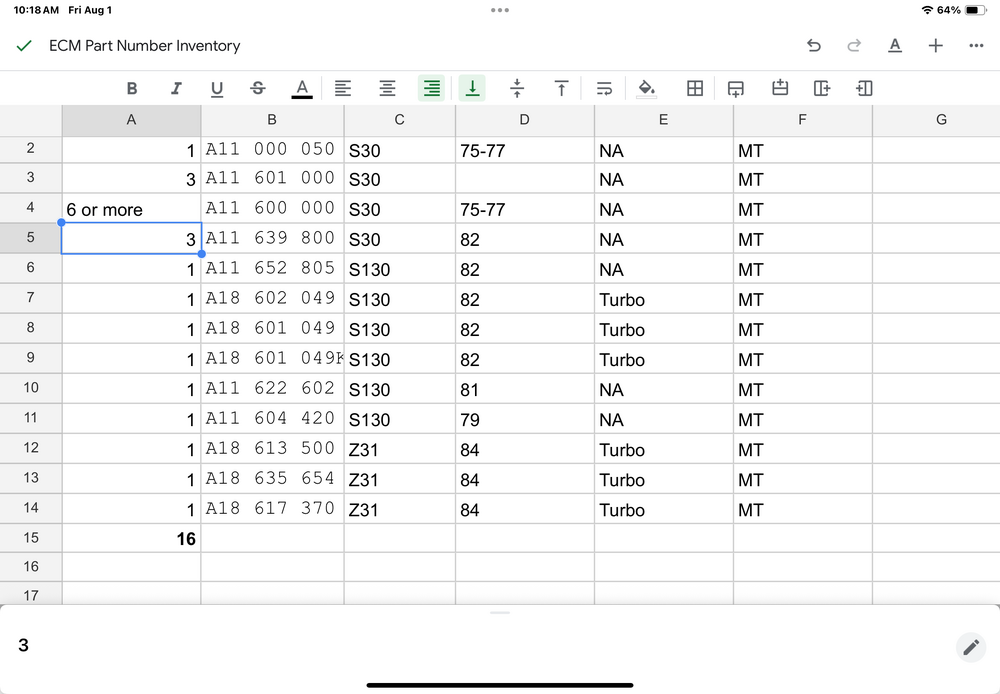
This is a spread sheet of what I had couple of years ago when I tried to sell on Facebook. Not many left the building…..
-
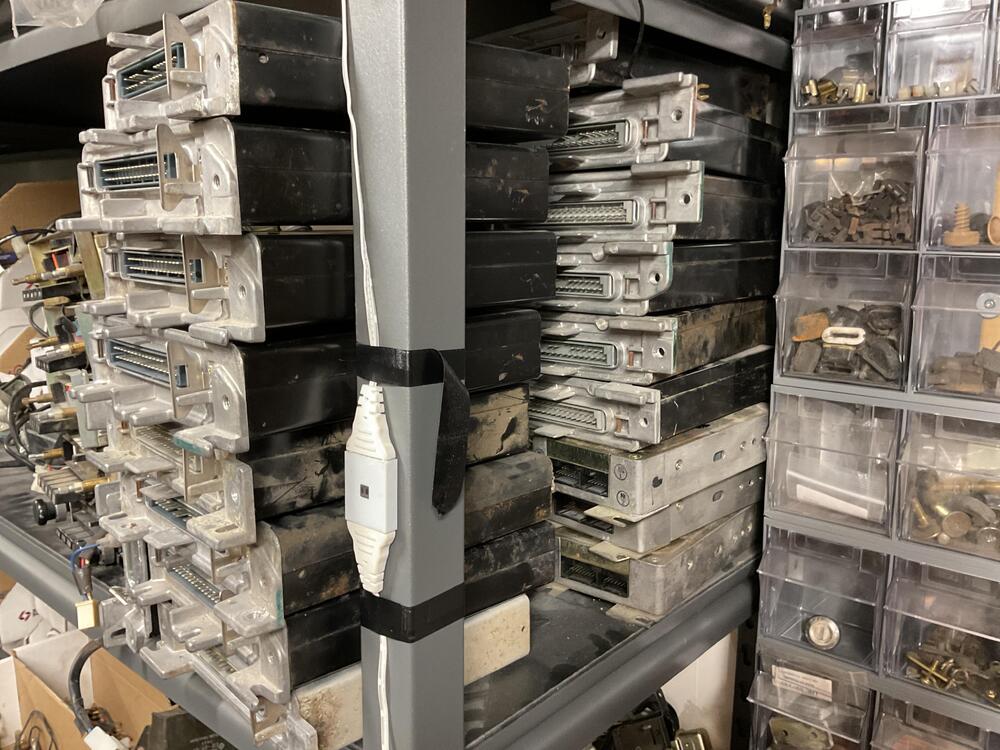
I have an embarrassment of riches when it comes to standard A11 600 000 ECU’s for 280’s. Can’t ever see using them all locally, so anyone interested in picking up a “Few” in the USA where you can distribute them from there to those that need? Asking $50 each. Ask me for volume discounts….. There are a few ZX turbo, both 280 and 300 if that suites your fancy. I can try to build a list. Similar situation with AFM’s…..
-
Your hard starting issue sounds like a problem with the fuel mix not being rich enough. Are you using the choke when you start it? Make sure both jet tubes under the carb get pulled down all the way when you pull the choke handle back all the way. Check that the fuel mixture nuts under the carbs are turned down 2.5 turns at least, and that the float levels are correct.
-
47 thumbs up for precision shims in Auzzie land. Flat and recessed bottoms.
-
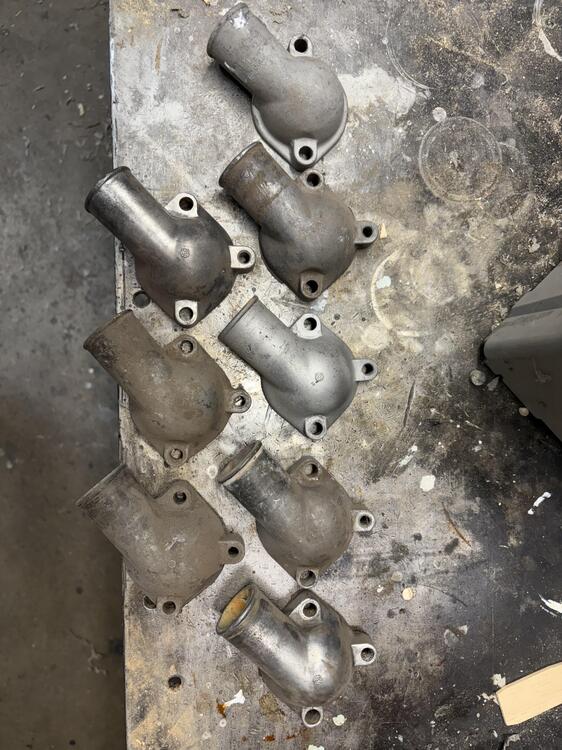
Only 7…. All used, you’re welcome to a decent one
-
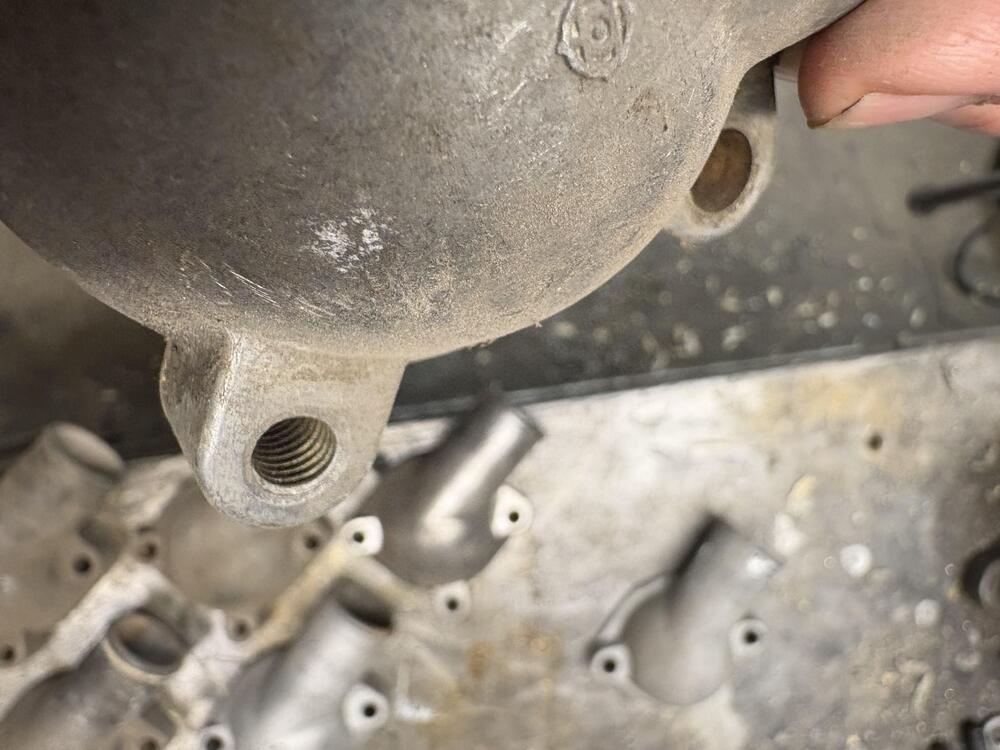
Cool. Seen that hole before on some housings, but never noticed it was threaded. Only ever seen the spark plug holder bracket go under the rear therm housing bolt. Let me see if I have one
-
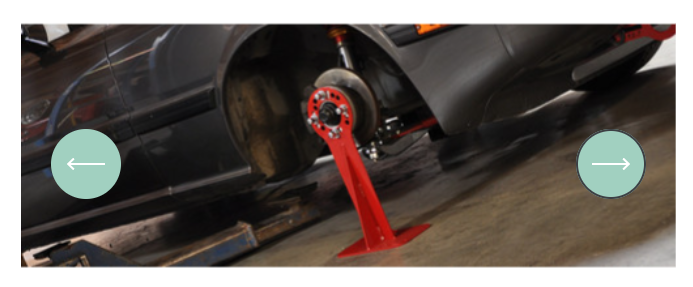
https://technotoytuning.com/garage/parts/techno-toy-tuning-hub-stands?srsltid=AfmBOopa6jRW6cUSQ9PXFDILN9oYNqUzVHqm3tx5nVKNJKdkWBs52W8E
-
Happened to me too, engine shop didn’t put it back, “someone” forget to check if its there….. Wasn’t….. There is a back one as well…. Just have to ask, you’re spinning the priming rod CCW right?
-
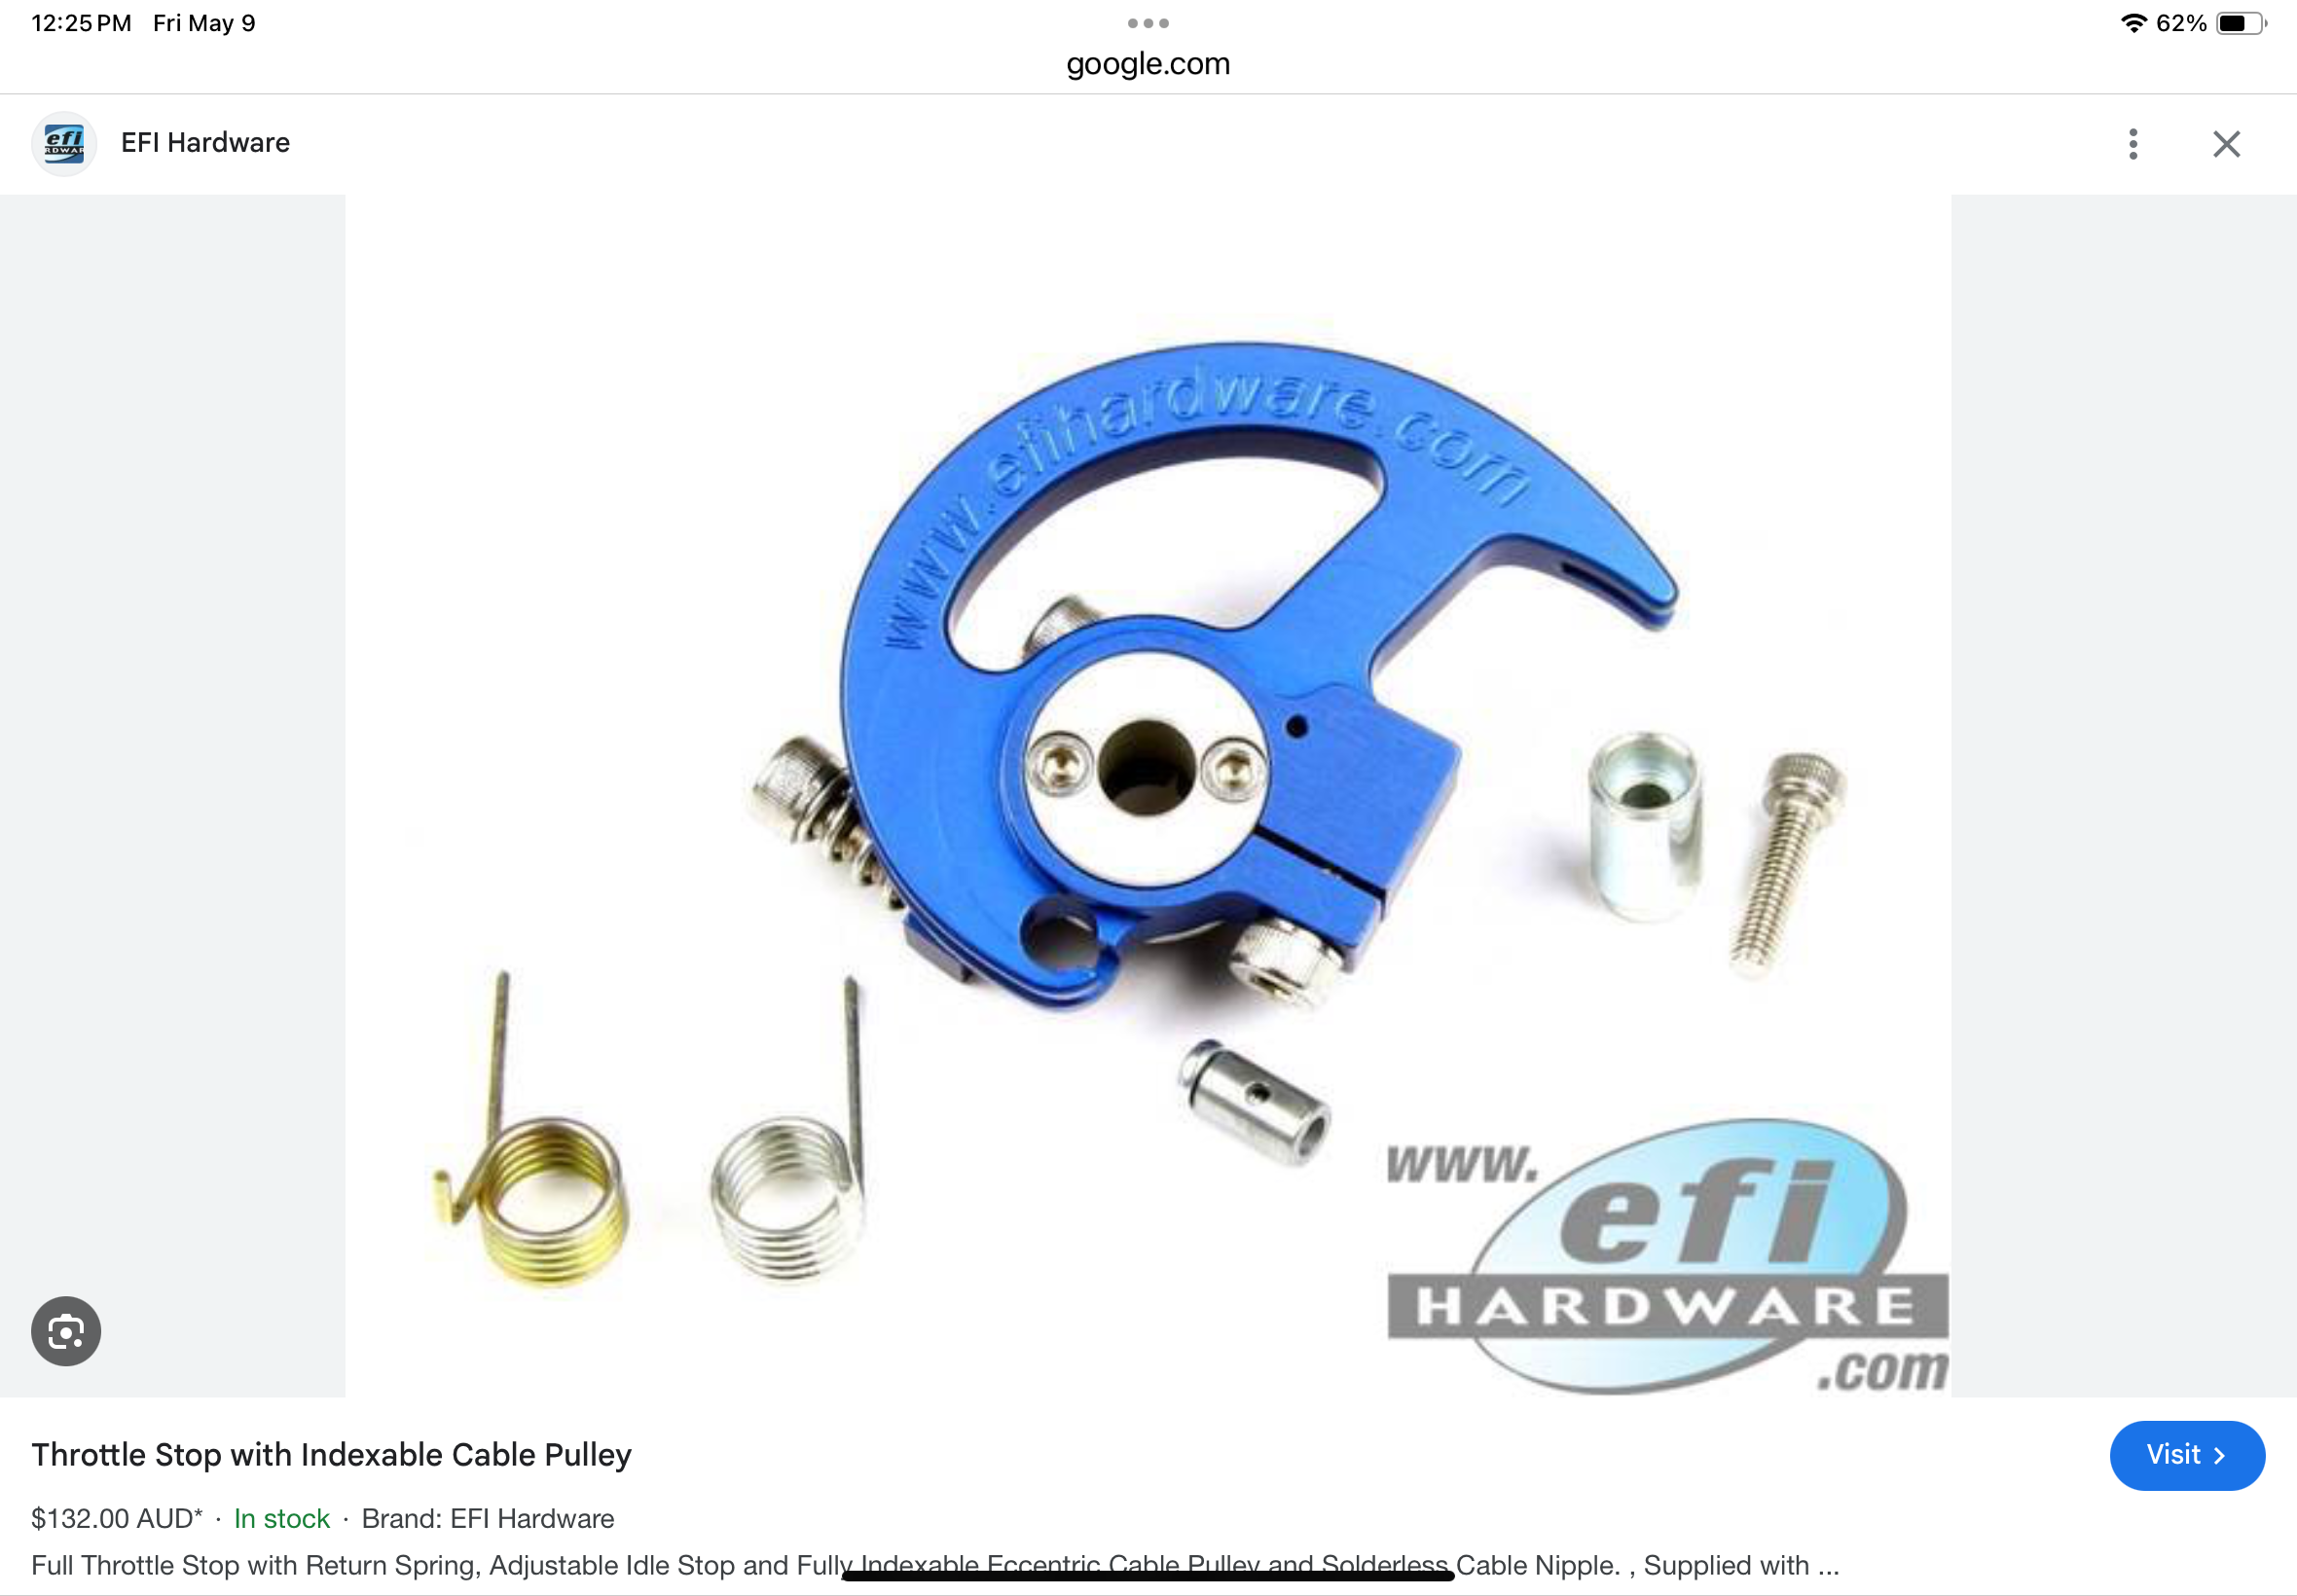
Goggle “Throttle Pulley”. Came up with several sources. efihardware has nice stuff.

-
Great! I’ll send you a PM here and we can exchange better contact info.
-
I can help with a hub I think, will look tomorrow for sure. What part of western canada zRot? @ZROT
-
After replacing the insanely expensive cracked windshield in our 2025 Mazda CX-70 next week, I’m going straight to a shop to get Tera Shield installed on it. ZRAuto. Claims its three layers, clear for ever, blah blah blah. No idea about price yet. If it saves me one windshield it will pay for itself. That’s the brand the place I’m going to uses. I’ve looked online, and found a couple of retailers selling DIY kits in the $200 USD price range. Might try the DIY stuff on the Datsun just to say I did it.
-
73 bumpers still have a pair of studs, they are just farther apart to fit the much heavier bracket design. The location of the bumperettes changed as well. The 74 early 260 skinny bumpers changed again as it was mounted to hydraulics and it had a single mount stud as I remember. This bumper seems to have that. Another indicator is the little weld in studs (M6) alone the top inside face that mounted that rubber spacer strip that filled the gap from bumper to body with the farther out 73 and 74 bumpers.
-
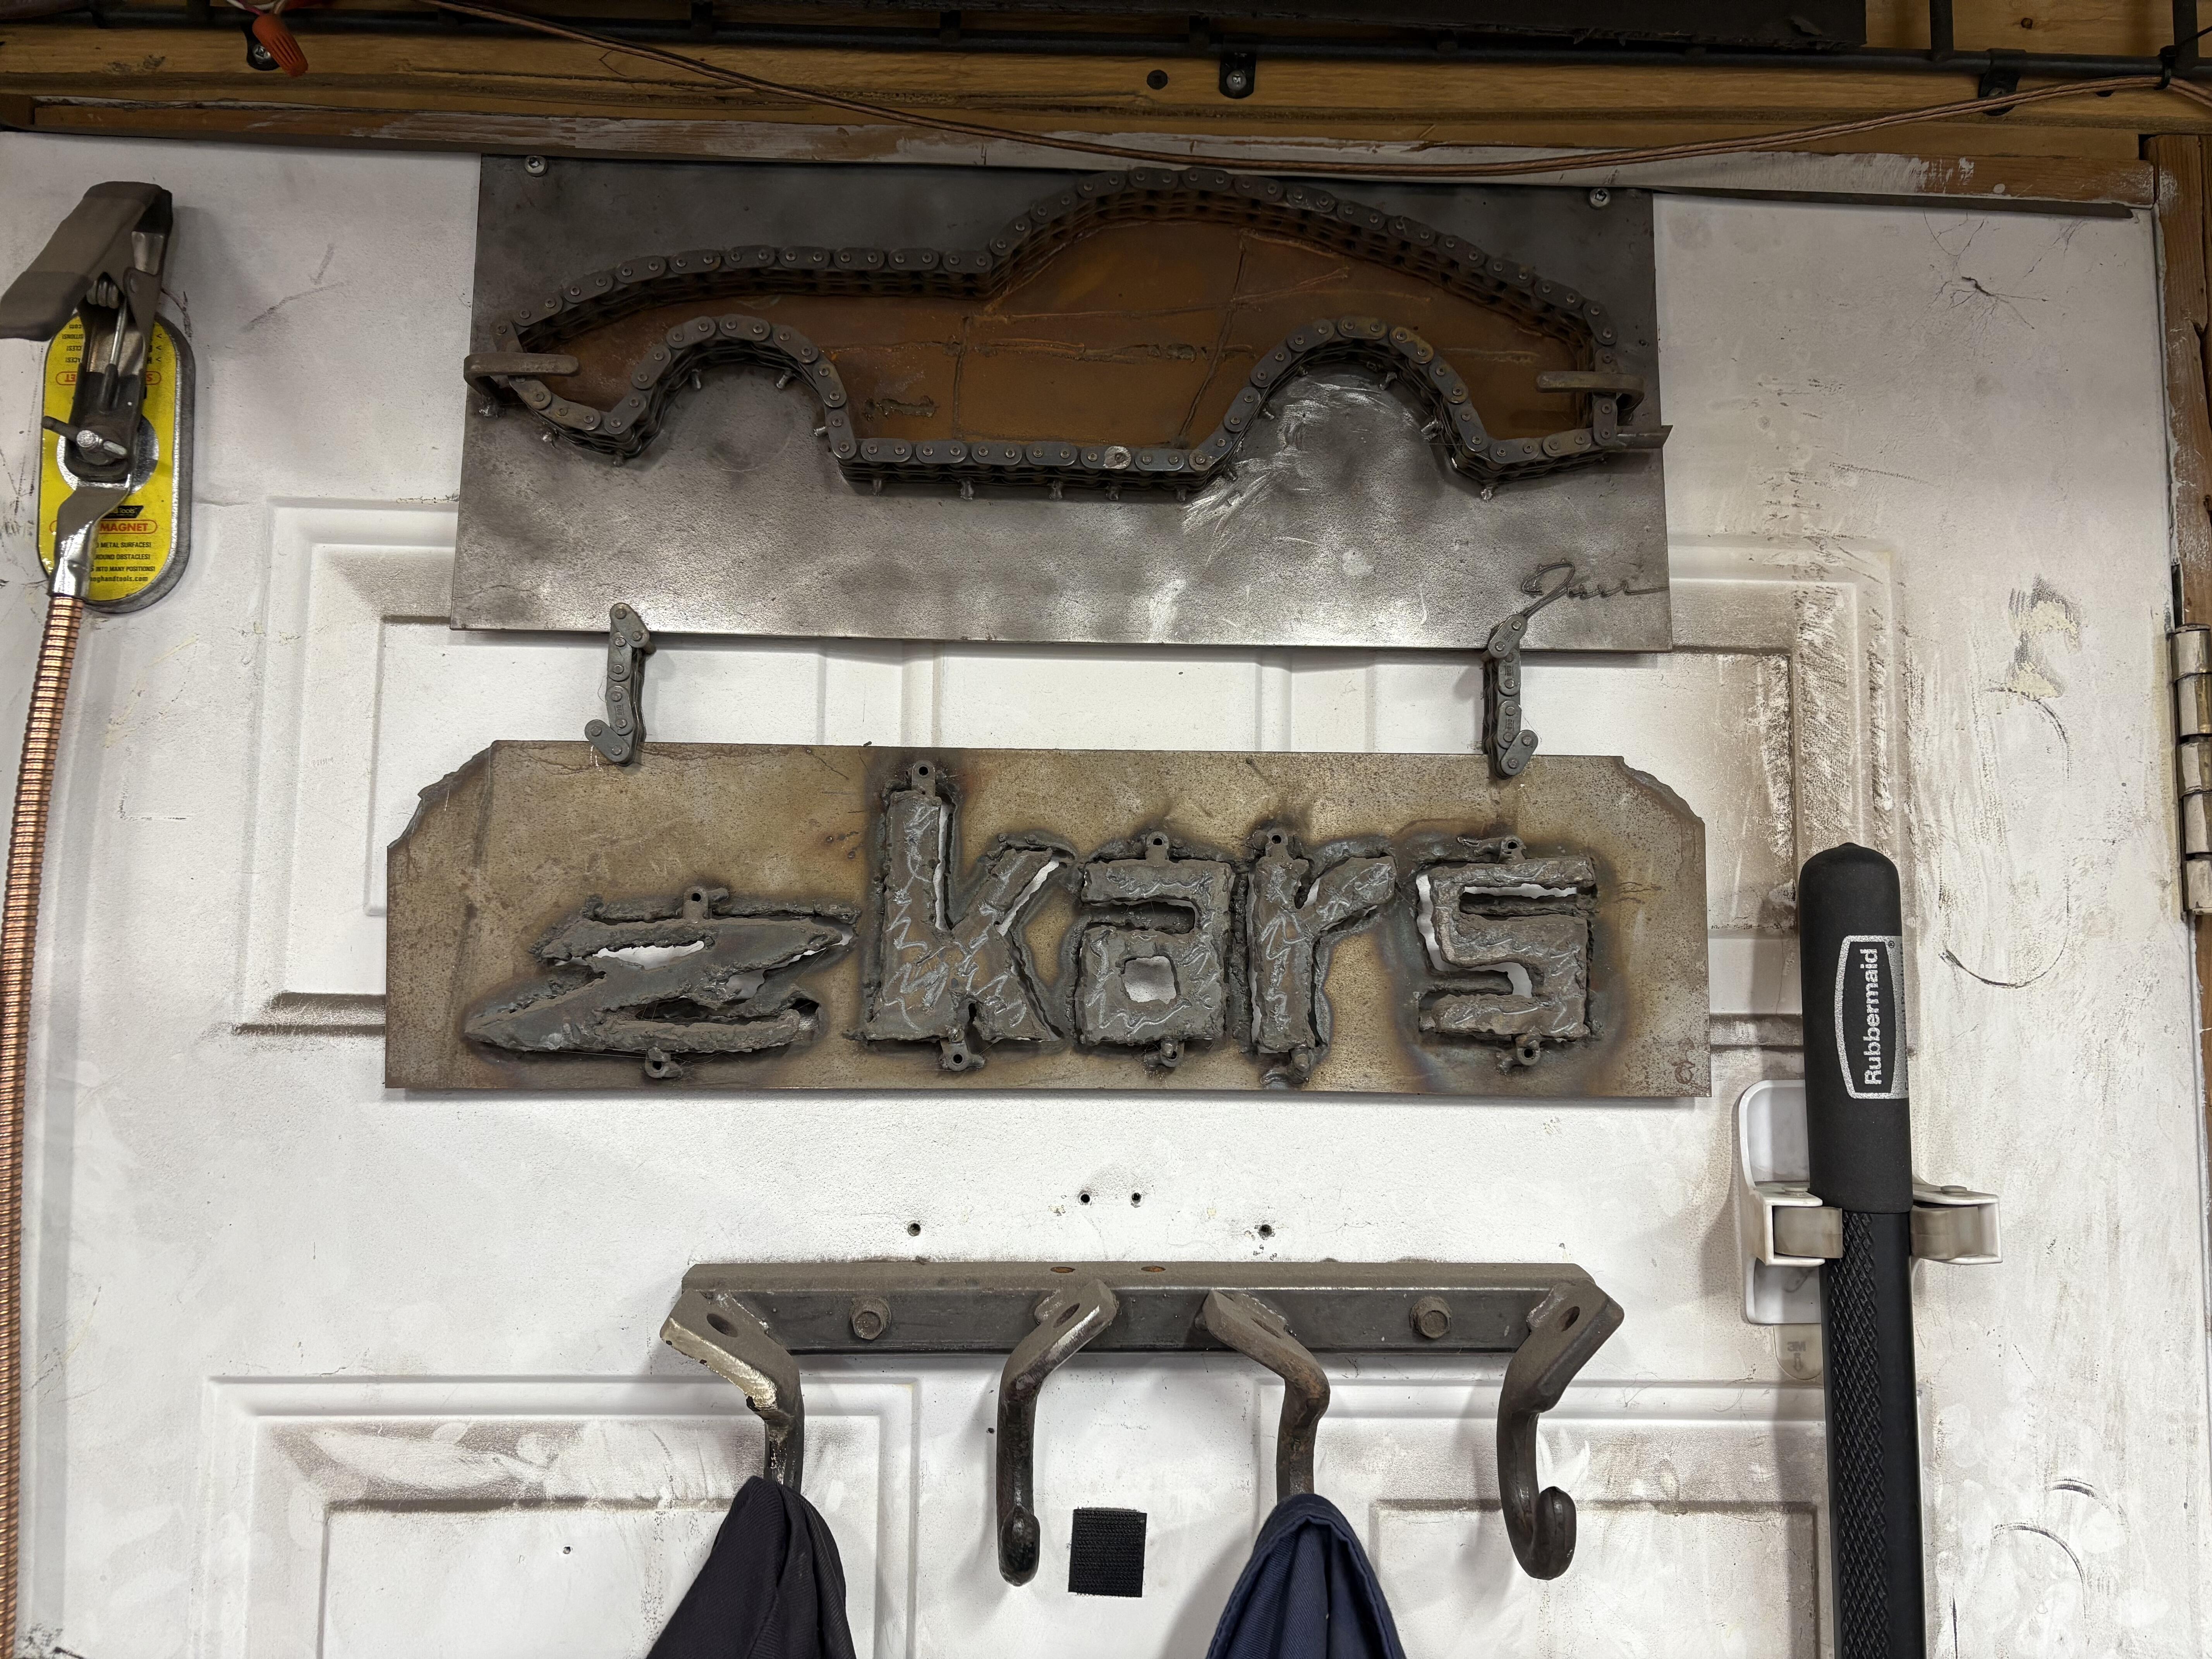
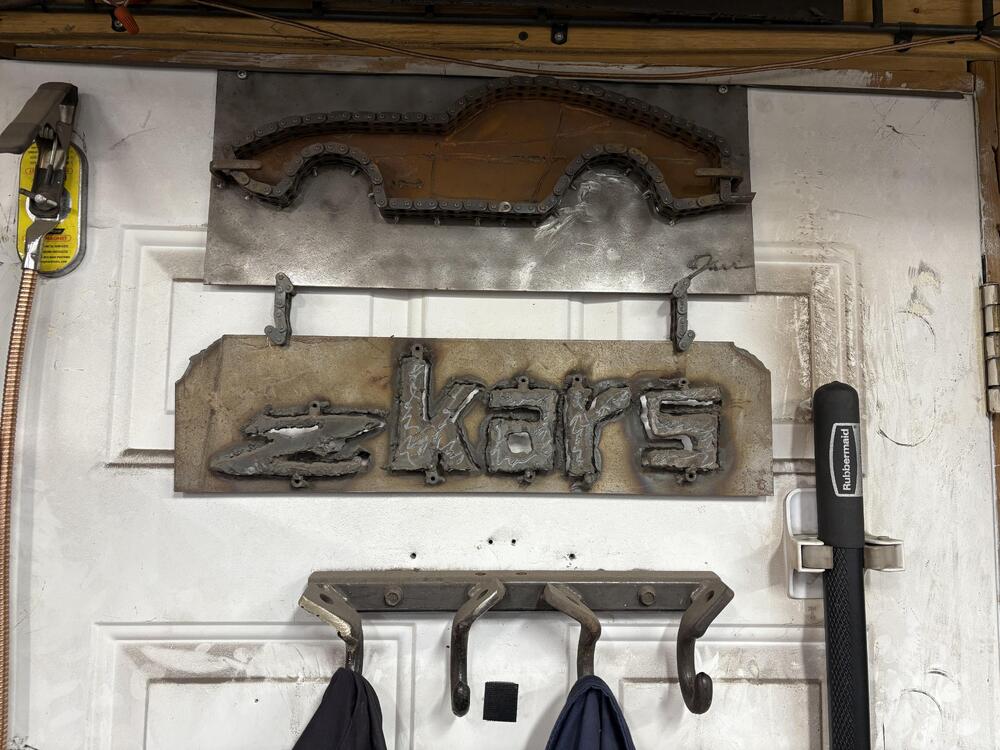
Exactly one chain. Printed out a side view and laid out the chain around the outline. Took a couple of zooms in and out to get the scale down to exactly one chain. Added a couple of embellishments. Gotta do a 510 next. Can do another Z if you want!
-
The memory is swirling with details of tow hooks, but I would like to point out that from the point of view of originality, the presence of tow hooks is optional. First remember they are tie down hooks, not tow hooks. They secured the car to the boat they came over on. Memory of past discussions suggests there was a Nissan order to dealers that they be removed before selling. Correct me if that’s wrong. Seems from the many Z’s I’ve seen, most still had “some” so I suspect many dealers didn’t bother. So it would appear to be “Correct” to have them or not on a restoration. If you could somehow know if they were there or not on delivery day for your particular car, then you would know to either include them or not to make it “right”. Then the issue of what particular style was installed at each of the four spots comes up, but I think that was covered in some other thread. I made a coat hook rack for the back of my shop door out of some of the ones I have laying around. Probably sacrilege to some. Too bad.
-
Wow, that Tacomacompany stuff is top notch. I’ve made all kinds of mods to my Harbour freight/Princess Auto cabinet over the years, and it woks pretty well, but I see the advantages to almost all of their products. Will be upgrading the feed and vacuum controls for sure. The one huge thing I recommend is to make the top glass area into your access door rather than the big door on the right. My compressor is right there, never able to get bigger parts in there anyway And use plexi sheets instead of glass. I buy a 4x8 and chop it up into 16x24 pieces to fit my frame. Disposable and cheep. I use cheap LED strip light strips ringing the entire inside top of the cabinet for lighting. They are surviving just fine. What really amazes me is the amount of sand that makes out of my supposedly sealed seams….
-
Some of you have dealt with this little annoyance, and I have found a perfect solution. When doing a full restoration, or at least the full interior, you often have to replace the head liner and the A pillar vinyl, as well as the vinyl trim that goes across the top of the windshield where the sun visors and rear view mirror mount. While I won’t discuss the pain of installing these items, what I have found is even more of a pain, is finding the nine M5 threaded holes to put the visor and mirror mount back in. All that fresh painfully installed lovely vinyl, and 9 secret little holes you have to find to poke holes through. Get out the pokey thingy of your choice and start poking until you find them. If you put some kind of thin foam behind the vinyl like you’re supposed to, those damn holes are just a nightmare to sleuth out. Not any more! I put some nice long M5 grub screws in the nine threaded holes, THEN do the upholstery. Then finding the tips of them sticking out is easy! Make little “X” slits to expose them, grab your M3 hex key, back them out and screw in the visor and mirror mounts. Five minutes each! Easy peasy.