zKars
Supporting Member
-
Joined
-
Last visited
Everything posted by zKars
-
Very cool picture Bart. Where did you find that? and the $10,000 question, who are the other finely dressed gentlemen in the picture?
-
You do not have a problem, just slightly saggy rear springs. THere is no way you have a 3" difference. Trim front springs to match, but no more than one coil with stock shocks, can't afford to remove much rebound stroke. Make sure you bump stops are in good shape too.
-
I had one similiar problem with one SU. The float level would not stay where I put it. In playing with it in my hand, I found there seemed to be friction between the ball on the needle valve and the float tang, like the angles were funny. Move the float by hand, and it would jam, but intermittently. In the end, I replaced the needle valve. It worked smoothly after that and I was able to adjust it normally. Worth a shot.
-
David: Let me first thank you for your service and the service of all the organizers to make this event possible. I don't just say that to suck up. Well, maybe a little I have witnessed what it takes. I will be there. Bringing 3 other Z's full of Z friends. I will review my brain re: my first ZCON in 2012 and see I can recall things that confounded me or could have gone smoother that I can share with you. I can tell you the list will be short.
-
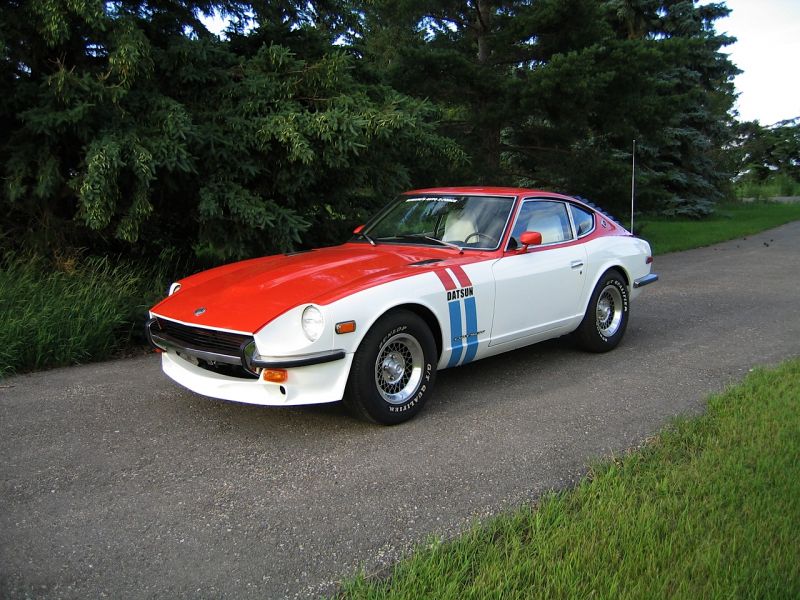
Tires and wheels and hub caps are easy to swap around, but that sail panel emblem is NOT simple to change. The 70/71 panels that have a "240Z" emblem there,that Jim A. mention do not have a hole behind them like the later ones that have a vent hole into the cabin and a round "Z" emblem like we see on your dad's car. The locating pins on the two kinds don't even line up, so it would not be a swap you would do on a whim. At my age (and your dad's) back in 2011, it wouldn't surprize me that I forgot exactly what year it was when I got my first Z if he hadn't thought about that in a long time. My 113 green color guess is based on that picture may very well be off. The two greens were never offered at the same time, so it would be an important clue. Any other pictures? We all love a good detective story. Every little clue, no matter how small is important. Now if only we had that fancy photo enhancement stuff they have on TV, we could make out a date code on those tires...
-
Really a touching story, thanks for sharing it. If any group of people can help you find it, its this bunch. Jim is right, it's not a 70, but not a 73 either. Front bumper is not the slightly sticking out version that the 73 got. The 113 Avocado Green Metallic color that it appears to be (old picture and compute variations factored in) is a 72-73 only color, so that seems to narrow it to being a 72. You will need to find the VIN to help with the search from there. Anyone else see any more clues?
-
I'm thinking your rear end is dragging and your front end is just fine. Side shot picture please and list your tire size.
-
And just which green is that? 2010 Camaro Synergy green metallic or did you have it custom mixed?
-
Dave, that's an interesting idea. Nothing special about one float bowl over another, other than volume and availability of parts (floats and needle/seats). I suspect the hardest part might be mounting a different one to the carb body at an appropriate height, but the current setup is just one lousy little through bolt, how hard can it be to come up with a bracket for that? And just what is that soft mount we have now good for? Heat isolation? Vibration mounting? Do we really need to keep that? Heck you could mount the float bowl(s) in the trunk if you can get the height right... Just realized I should clarify the trunk mounting thing; "Could", not "Should"
-
I remember the discussion well. Such things take more than wishes.Something about time and money... sigh... I was sanding away on the body of my latest project with one of those black firm "Durablock" sanding blocks this weekend and for whatever reason I said to my self, "hey, this rubber stuff this thing is made of is pretty light. I wonder if a chunk of it will float in gasoline? and stay floating....". For some reason I couldn't bring myself to chop a hunk off my $35 sanding block... I'de take yours out, float it in a little container of gas (glass, outside, away from children, you know the drill...) and see if it changes floaty position. Betcha it won't. Yours may be rubbing the side of the bowl or some such causing irregular action.Or the needle and seat are sticky, that happened to me once. If you get stuck, I can "rent/lease/sell/pawn/give/provide/finance" you a float.
-
Please check out the 72 described in the Auction listing in Alberta : 1972 Datsun 240 Z - NO RESERVE For Sale: Okotoks Collector Car Auction, Okotoks, Alberta, Canada It's described as having previously belonged to someone in the Arizona Z Club. Please let me know if you used to own the car or know who did. We are looking for more detailed information on its past and condition as we have several interested parties wanting to bid on it in the coming auction. Drop me a PM or note to z240@shaw.ca if you don't want to publicly discuss. Thanks!


-
Snow if finally melting here, forecast is good for a week or so. Maybe, just maybe, spring is here....
-
Let me guess what you were doing last night.....
-
It would be hard to imagine two different reasons for having a "Z car event" than the MSA show and the ZCON conventions, "IF" you consider it from the "why did we do this" point of view. That point of view comes from the organizers. Both serve to promote the marque, but one serves to have that heighted awareness enhance and sustain a private business, the other serves to promote the global visibility of the marque to ensure its lasting importance in the auto-verse. Both causes are worthy. Can't have one without the other if the current situation is any of expect to continue having our fun. From the point of view of the "unwashed masses" (most of us), the ones that decide to attend these events, I believe there is only ONE over-reaching reason why we go. To share our love of the stupid pieces of Jap Scrap with like-minded souls, for whatever list of incredibly diverse reasons you can imagine that results in most of these events being enjoyed by most that attend. In short, I go to "have fun" and "meet new people who are like me". Sometimes I buy parts, sometimes I buy t-shirts. Sometimes I sell parts as a result of the new people I meet. It all keeps my wheels turning and my mind happy. Some also go to have their cars judged along with the fun, with hopes of having their investment in time and money legitimized and to be recognized for their efforts. Some are happy with the result, many are not. This topic has been discussed at length here but is outside of this discussion. This situation will never change for reasons also rehashed here many times. Get over it. So stop worrying about why these shows are held, or if one is better than the other, just go to as many as you can, and have a good time while you're there and remember to thank the organizers for your chance to have fun. The more the merrier. Let the business side be what it is. See you all in San Diego.
-
Well of course I can part with it. Now the early ones are MUCH more valuable than the later ones due to scarcity. And I sand blasted and painted that one... Hmmmm... Let's see.... what will the market bear.... $25 + shipping?
-
First thing I'de check is the integrity of the wire crimp on the bullet connector that goes on the temp sensor. Pull back the outer clear (well, used to be clear... now yellowed) boot and have a good look and maybe replace the connector. The wire strands get corrosion buildup inside and maybe only a couple of strands are barely hanging on. Same for the starter trigger connector.
-
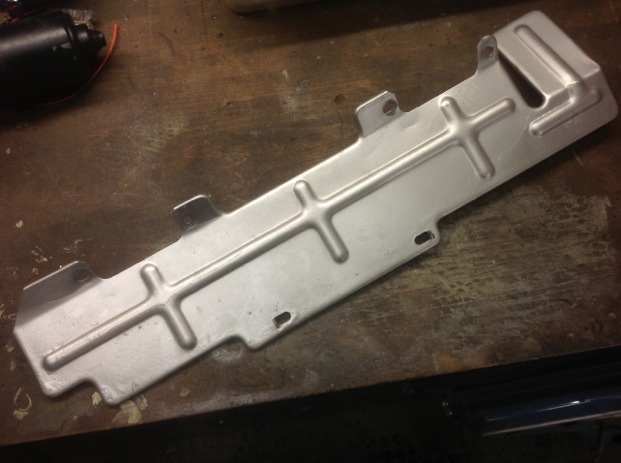
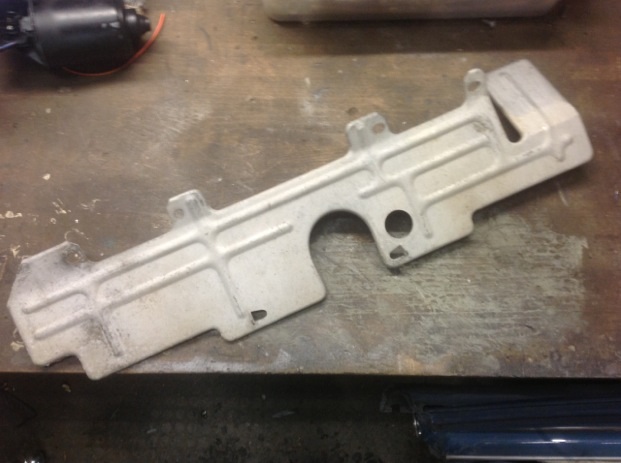
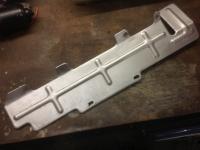
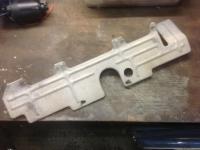
Act coming together. Here are the two styles that I have: Let me know.
-
I just realized it has a line in AND out. Might be a line lock to the front brakes. Foot on brake, turn it on, valve closes, pressure stays trapped in front, do burn out, carry on. and what you do with a towel in the cowl area should stay between you and the car... Surprised it took you 15 minutes.... and philip beats me to it. But my joke part was better...
-
I'll guess, Hydraulic pressure actuated Brake light switch. Cause putting that in was easier than replacing the 2$ switch at the brake pedal....
-
When I get my act together (soon, ever?) I'll take pictures of the ones I have to post and maybe Bruce can point out the one that would work best for your manifold. The only difference is in the cut-outs, ie what they fit around and how. Bruce, help!
-
Bruce, I know it was April 1 when you wrote that, but stilll... Fine, ha ha. I probably only have the special "cold weather" heat shields too that are extra thick and won't fit your US "ZEE's"... You do know that the US is the ONLY country in the world where they say "ZEE", it couldn't be that maybe, YOU guys, have the funny name for them? nuck nuck? or is that Canuck? My little stock of these should probably live at your house anyway. What good are heat shields in the frozen north?
-
How many would you like? There are a couple of styles depending on years. Give me a email to z240@shaw.ca and I'll send you pics of what I have.
-
I think we have now established the car does not have to be moving, so its not the drive shaft u-joints. So we are down to an exhaust leak or something in the transmission perhaps. Ok, answer this question. If you are sitting in the car at idle, and you hear the sound, then you increase the RPM's slowly up to say, 2500 then back down to idle (do not move the car, only touch the gas pedal), does the clicking rate (clicks per second) increase and decrease at exactly the same rate as engine RPM? I have another an idea, remove the console and the boot around the shifter hole in the transmission tunnel so you can see and/or hear the noise source more clearly.
-
If it happens while the car is sitting still, its an exhaust leak. If only while moving, its what Cappy says.
-
I bought one too! Nice. And, as if it's not enough to be pretty, I now have a way to remember the measurement from the front tire center line to the front marker light! I'll never have to look it up again! Wahoo!