


Leaderboard


 Subscriber
Popular Content
Showing content with the highest reputation on 12/19/2025 in all areas
-
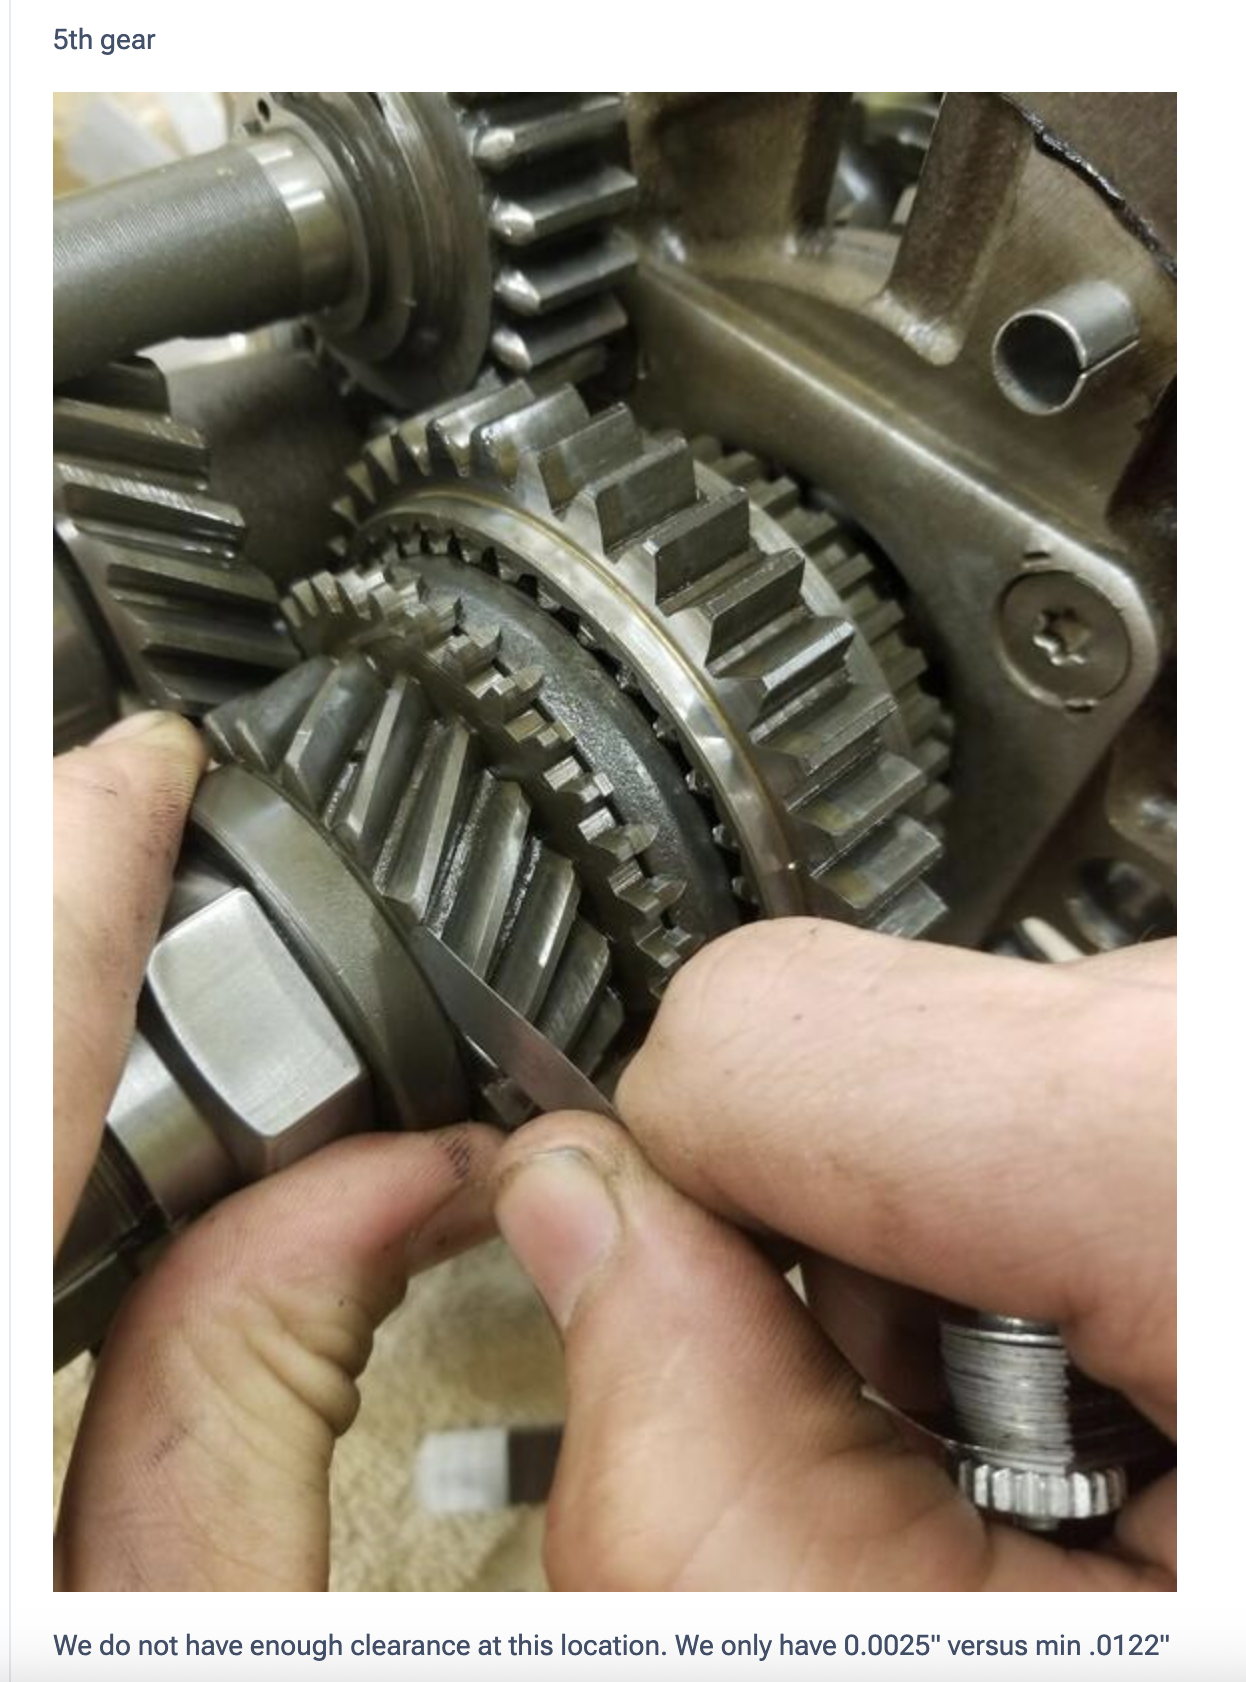
If you check the length of part 54, you will find that it is shorter than 48. That is the root of the problem. As a result, thrust washer 64 is clamping hub 48 instead of the inner bearing bush 54. The previous owner may have encountered this issue and attempted to compensate by loosening the nut😪 To resolve this properly, you will need to shim 54 until the specified end-play tolerance for 48 is achieved. You can determine the required shim thickness by measuring with Plastigage and then adding the specified end play to determine the correct shim thickness. Once you understand how the parts interact, this becomes a straightforward fix.2 points
-
" I assume that the no. 64 is to tight to 54 and thats the reason why there is basically no gap between 55 and 64 and therefore the gear 48 is blocked" The photos and video of the loose nut make the situation much clearer now. No. 64 should be tightened firmly against 54. The problem started when the nut became loose, allowing 54 to spin with the gear and wear against the thrust washer (64). Everything being done now is essentially compensating for the wear on the inner ring (54). If 54 is loose, it will also vibrate, which is most likely what is causing it to jump out of gear.2 points
-
2 pointsI found it - @Patcon does your transmission still work ? :_____: https://www.classiczcars.com/forums/topic/64852-zx-5-speed-rebuild/page/10/#findComment-644305

 1 pointWhy then replace it? I drove a 240z that had it's original distributor for 54 years!! Why do people assume it will be bad??? I sold it and it was still in there and will be for a long long time! (maintenance IS KEY HERE !!!) In 25 years i used 2 sets of contacts.. and heard A LOT of complaints about elektronic ignitions that where A LOT worse than the ORIGINAL ignition !!! So, clean up that old fart and use it and maintain it, there must be some instructions in the serv.man how to check if your ign. equipment is good! And don't start about flamethrowers and 123ignition and all those other junk compettitors that say theire ignition is the best, the best is a original one. (That has been maintained properly!)1 pointThe next best thing to a 240-Z. Bring a TrailerBobby Rahal's 1967 Toyota 2000GTBid for the chance to own a Bobby Rahal’s 1967 Toyota 2000GT at auction with Bring a Trailer, the home of the best vintage and classic cars online. Lot #224,826.1 point


Important Information
By using this site, you agree to our Privacy Policy and Guidelines. We have placed cookies on your device to help make this website better. You can adjust your cookie settings, otherwise we'll assume you're okay to continue.