Leaderboard
-
Captain Obvious
Community Member15Points10,150Posts -
conedodger
Community Member7Points13,008Posts -

siteunseen
Community Member4Points15,183Posts -
w3wilkes
Community Member4Points1,002Posts


Popular Content
Showing content with the highest reputation on 08/25/2025 in Posts
-
With the additional pics, I stand by the assessment that it's a Fall 1970 car with a rolled over odometer. It'a no "survivor" requiring a minor wash and buff. It's got all the wear and modifications and aftermarket parts that are typical with such a car. Oh, and a poorly applied re-paint. The annoying part is that the seller knows that some of the major claims in his listing are false. And he hasn't changed it. I do think, however, if he cleaned it all up and took copious good quality pictures, it would do better. As it sits, I don't think it's going to sell. And I think the seller knows it. I think at this point, it has become a test. Just to see what happens. If I didn't know better and bought that car, and then found this thread later?? Man, I'd be upset.5 points
-
4 pointsThanks for the recommendation. I think my wipers work. My current plan is it's not going to rain while I'm on the road.4 points
-
3 pointsThe way my insurance policy is with Hagerty's if it catches on fire I'm breaking out the weenies and marshmallows and enjoy the bonfire. But my luck some dumbass would stop and put it out before a total loss.3 points
-
@WJ4Fun When I did the LED conversion on all my lights I used the same flasher for both blinker and hazard lights and both work just fine. No idea why Nissan would have different part #'s for the flashers.2 points
-
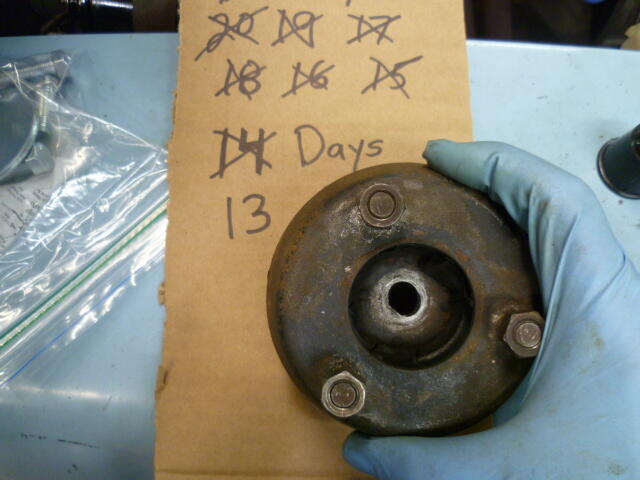
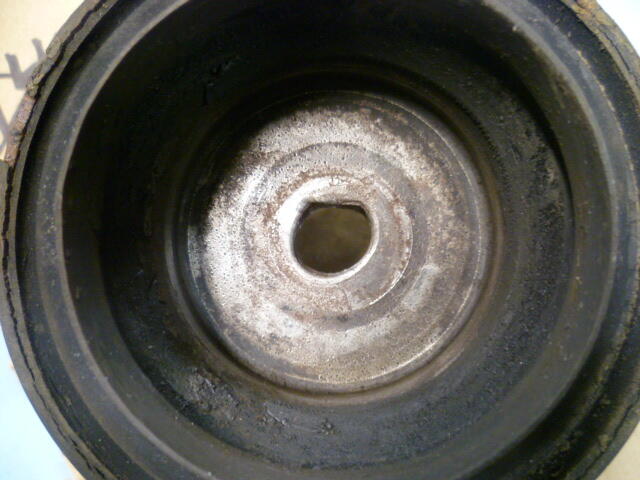
2 pointsSo I've been working on struts. Had a hard time getting the second one apart. Strut shaft kept turning in the "D" shaped hole. Got it apart and found this: Hoping I can dot a couple weld lumps in there to mitigate that issue. More news as it develops.
 2 points
 -
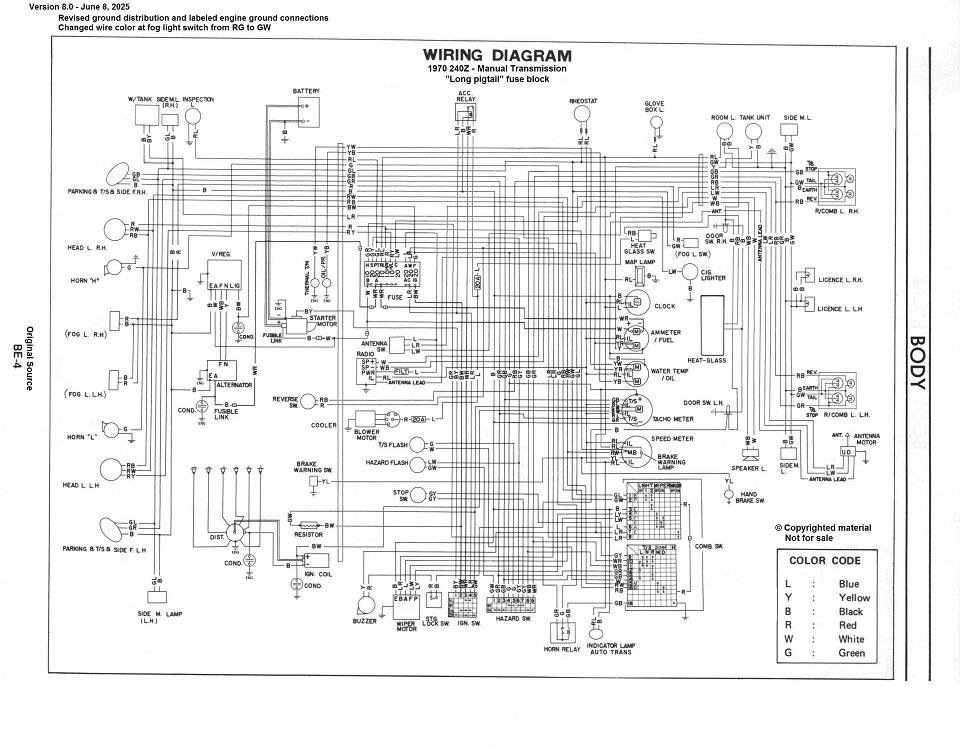
I've been maintaining a wiring diagram for the early cars. It's currently version 8, and you can find a copy here: https://www.classiczcars.com/forums/topic/69026-1970-wiring-diagram/page/7/?&_rid=23457#findComment-676548 It's not large or laminated, but it's accurate.2 points
-
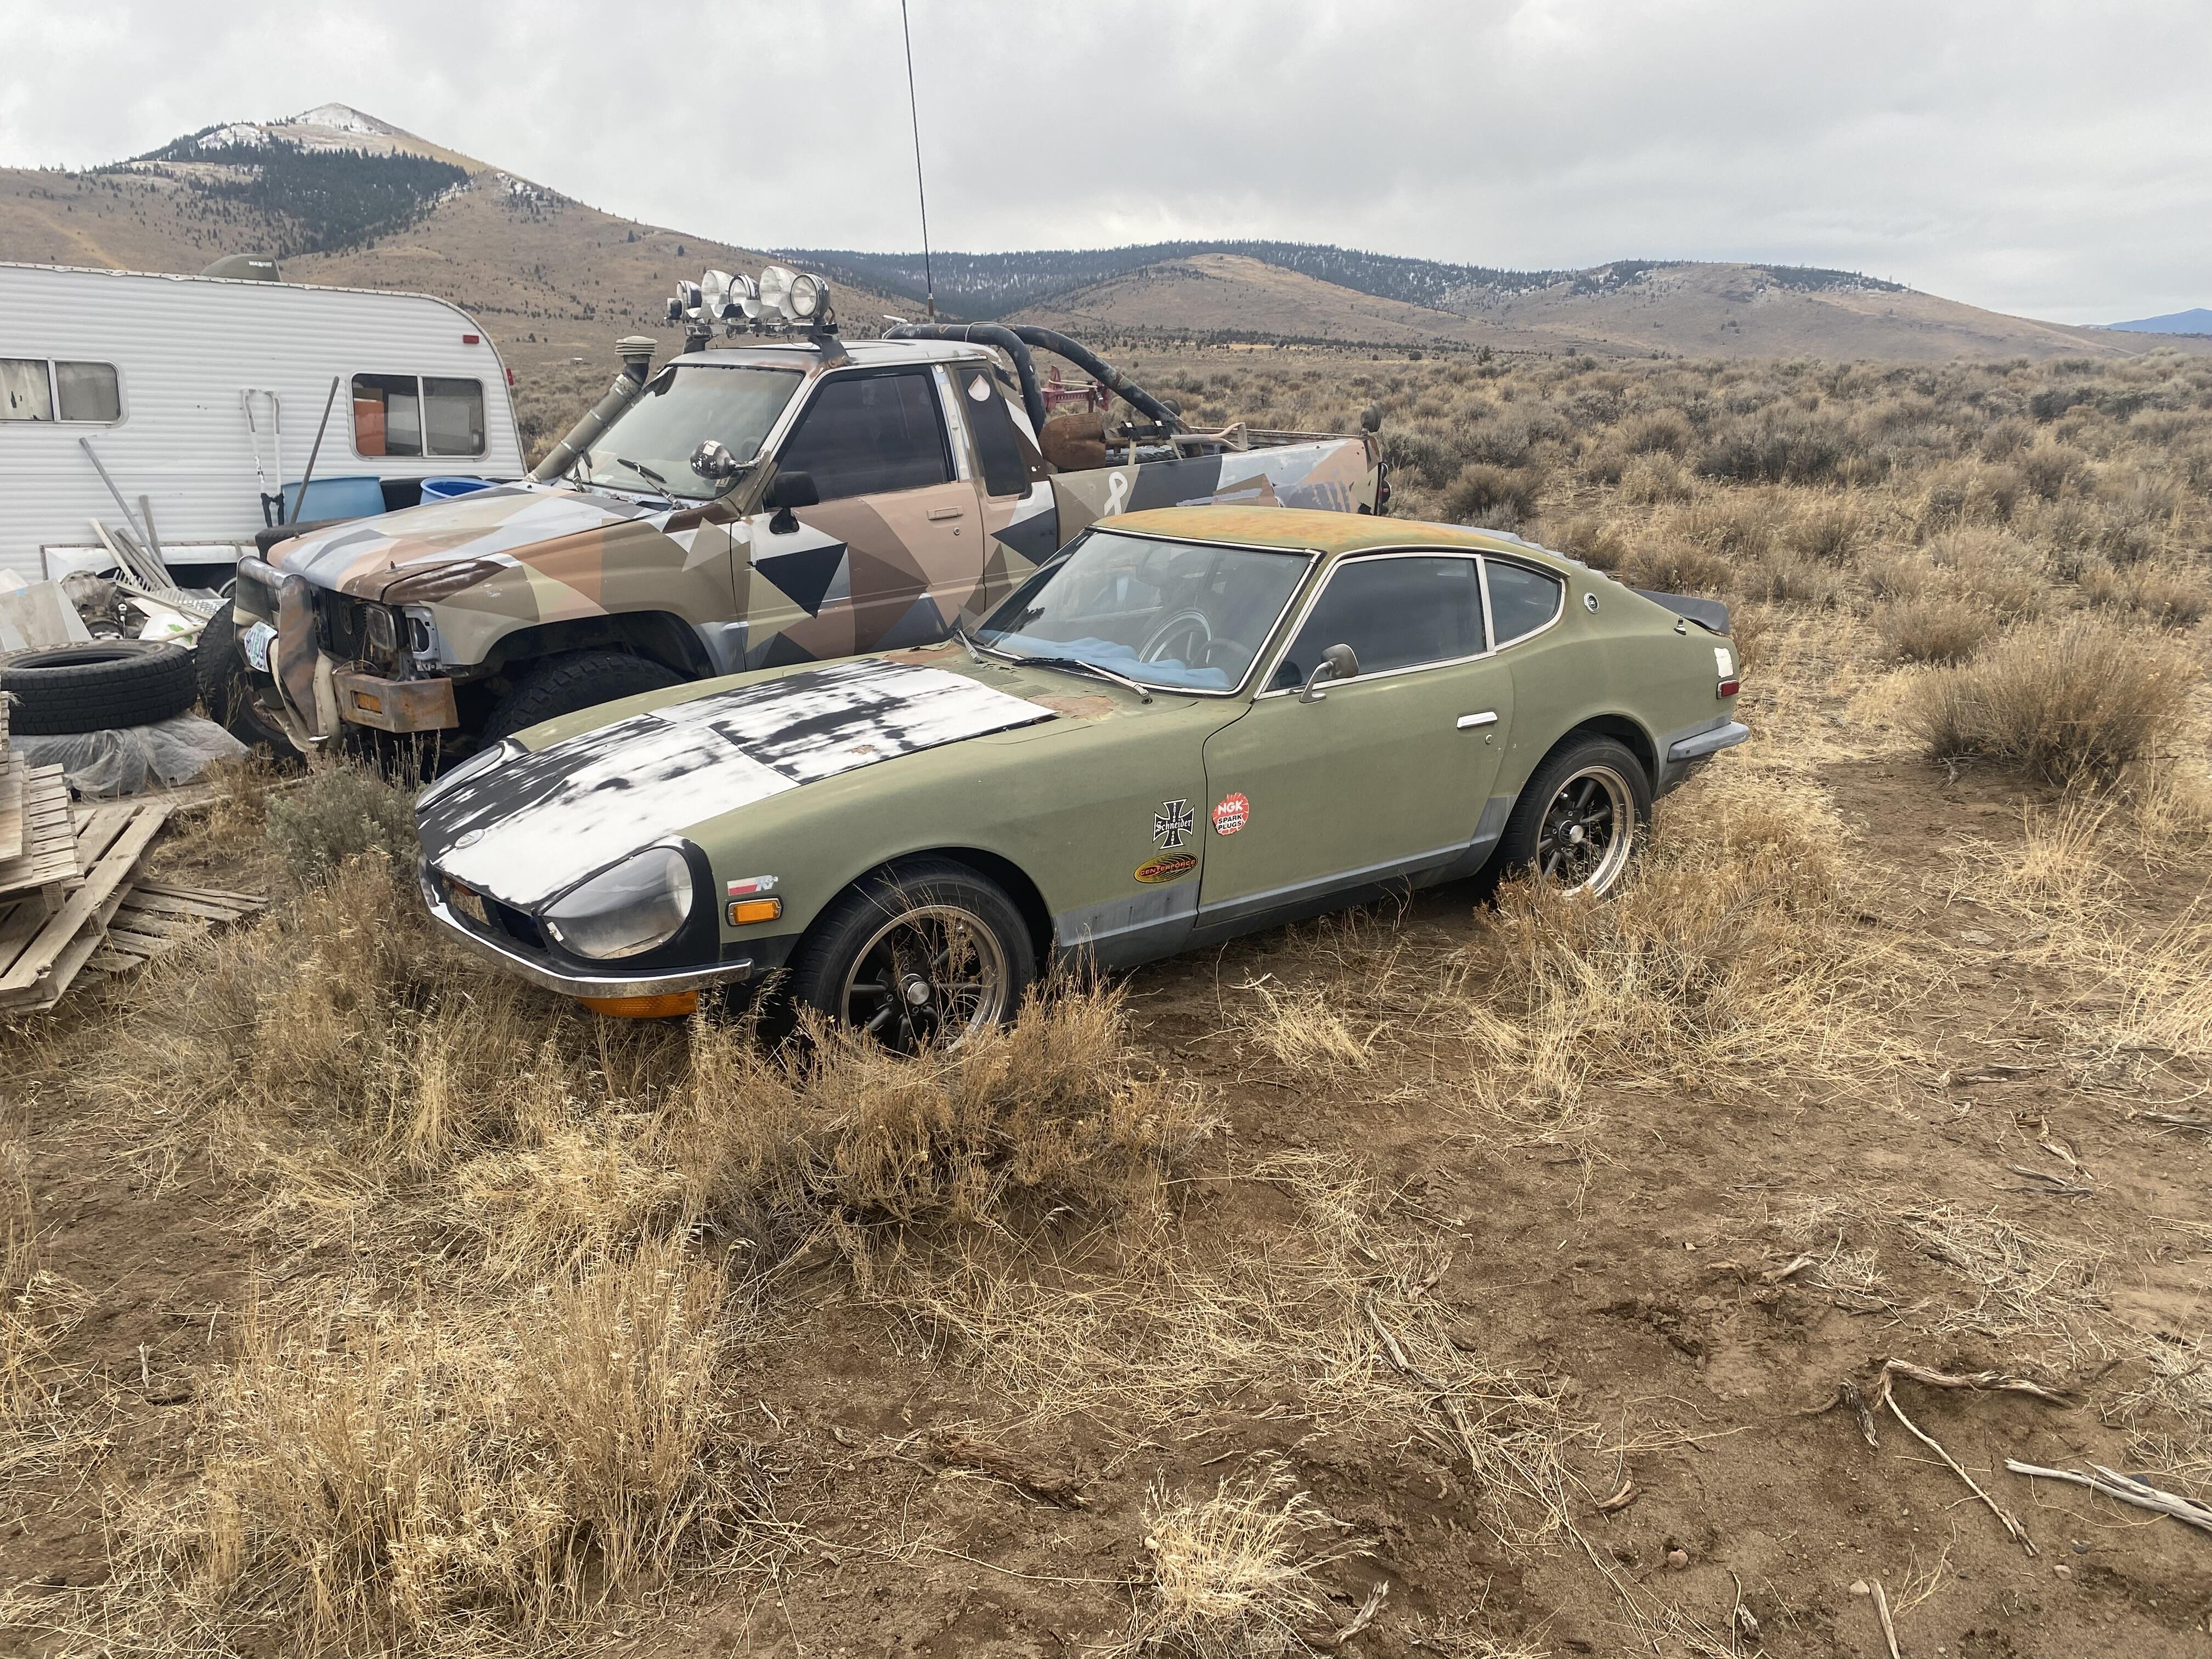
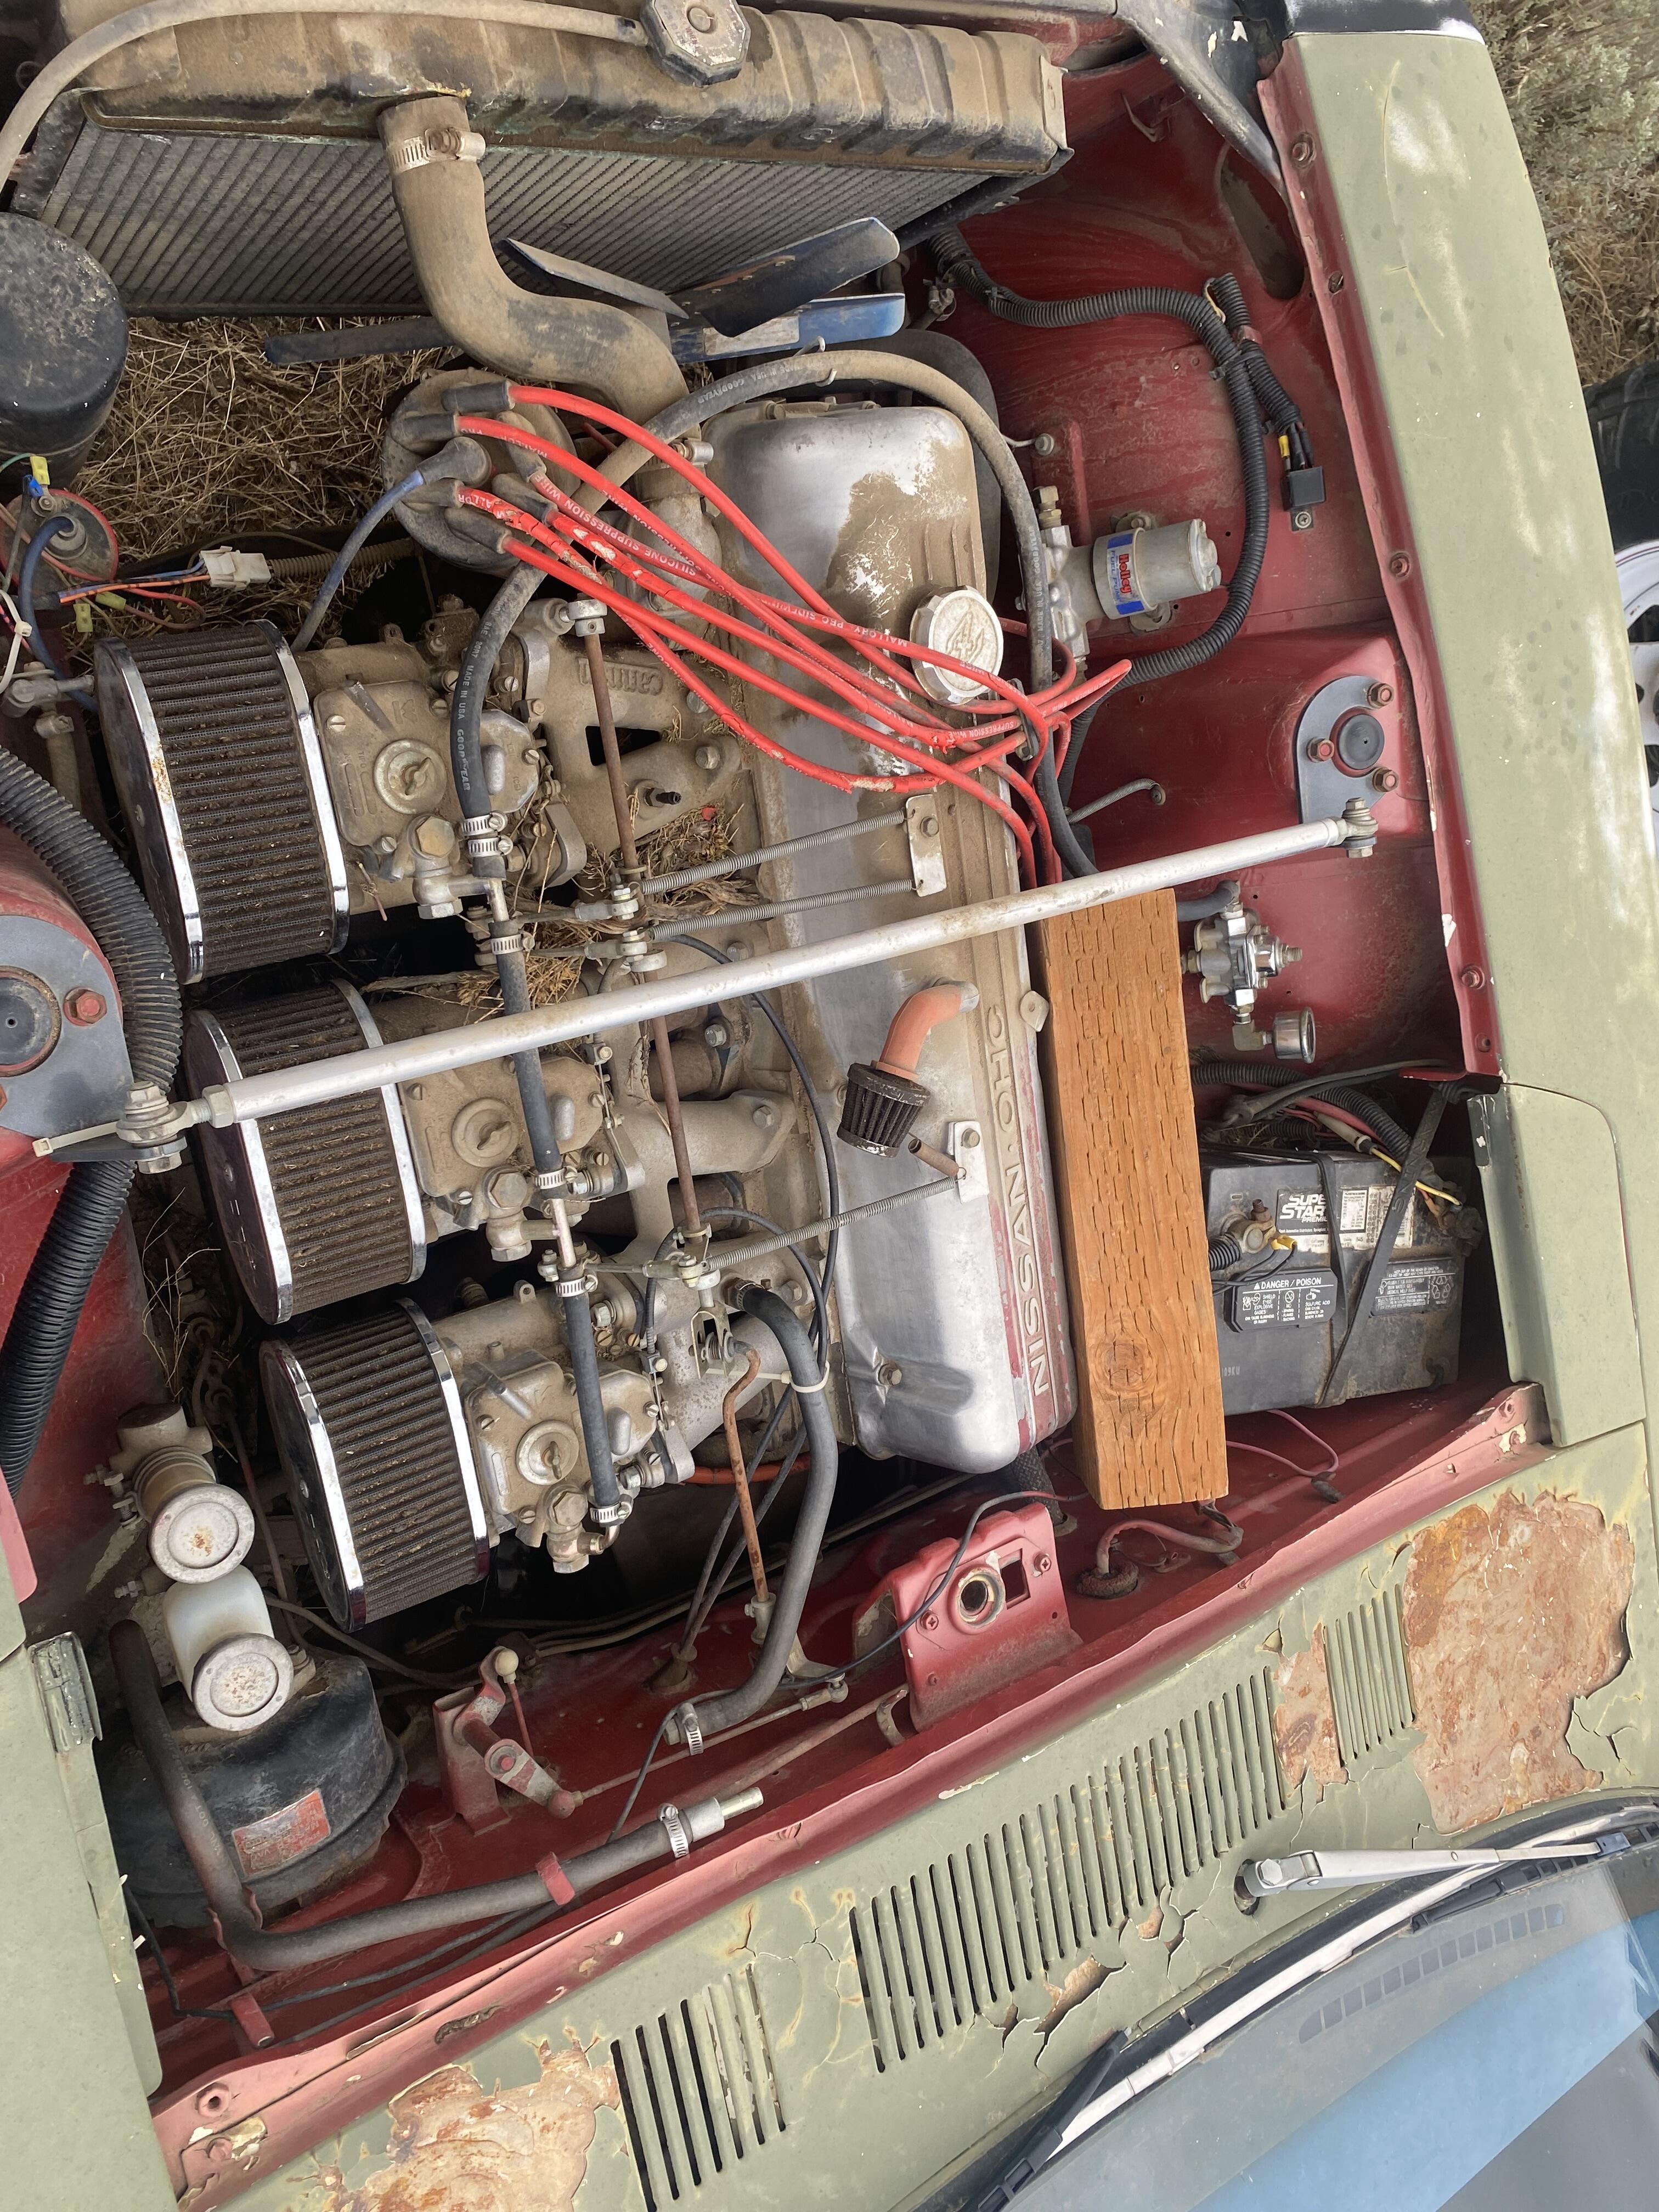
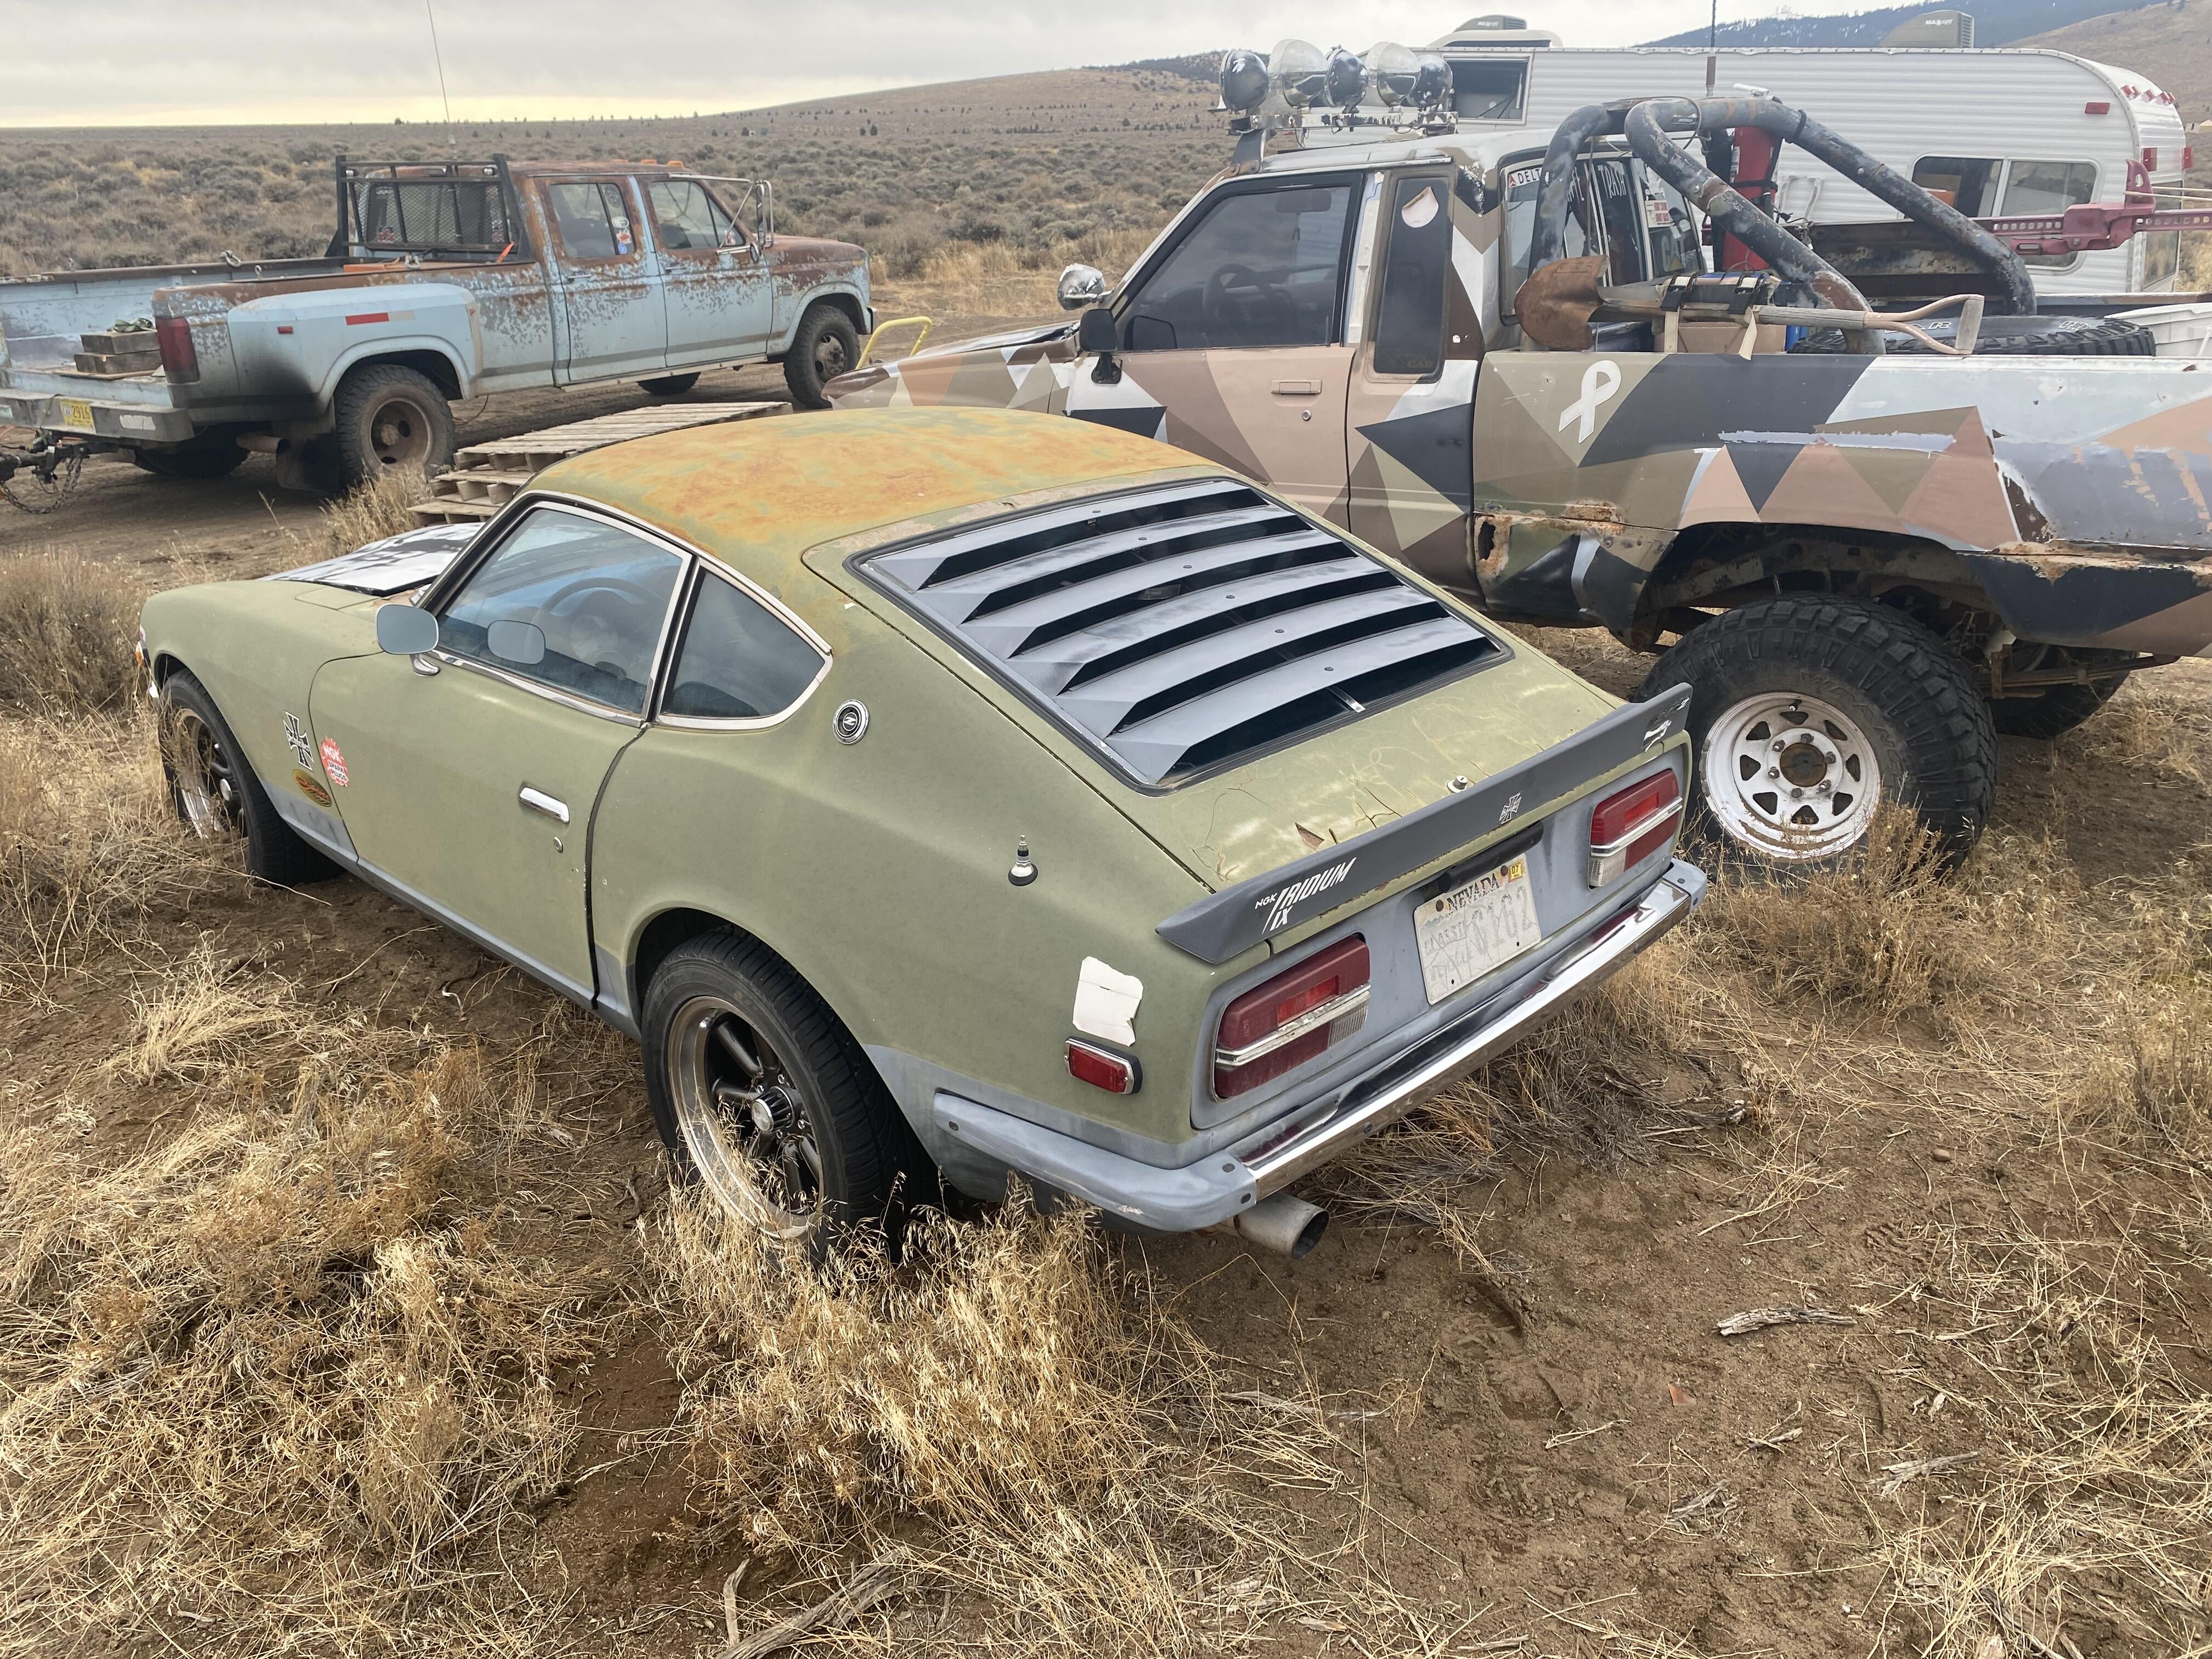
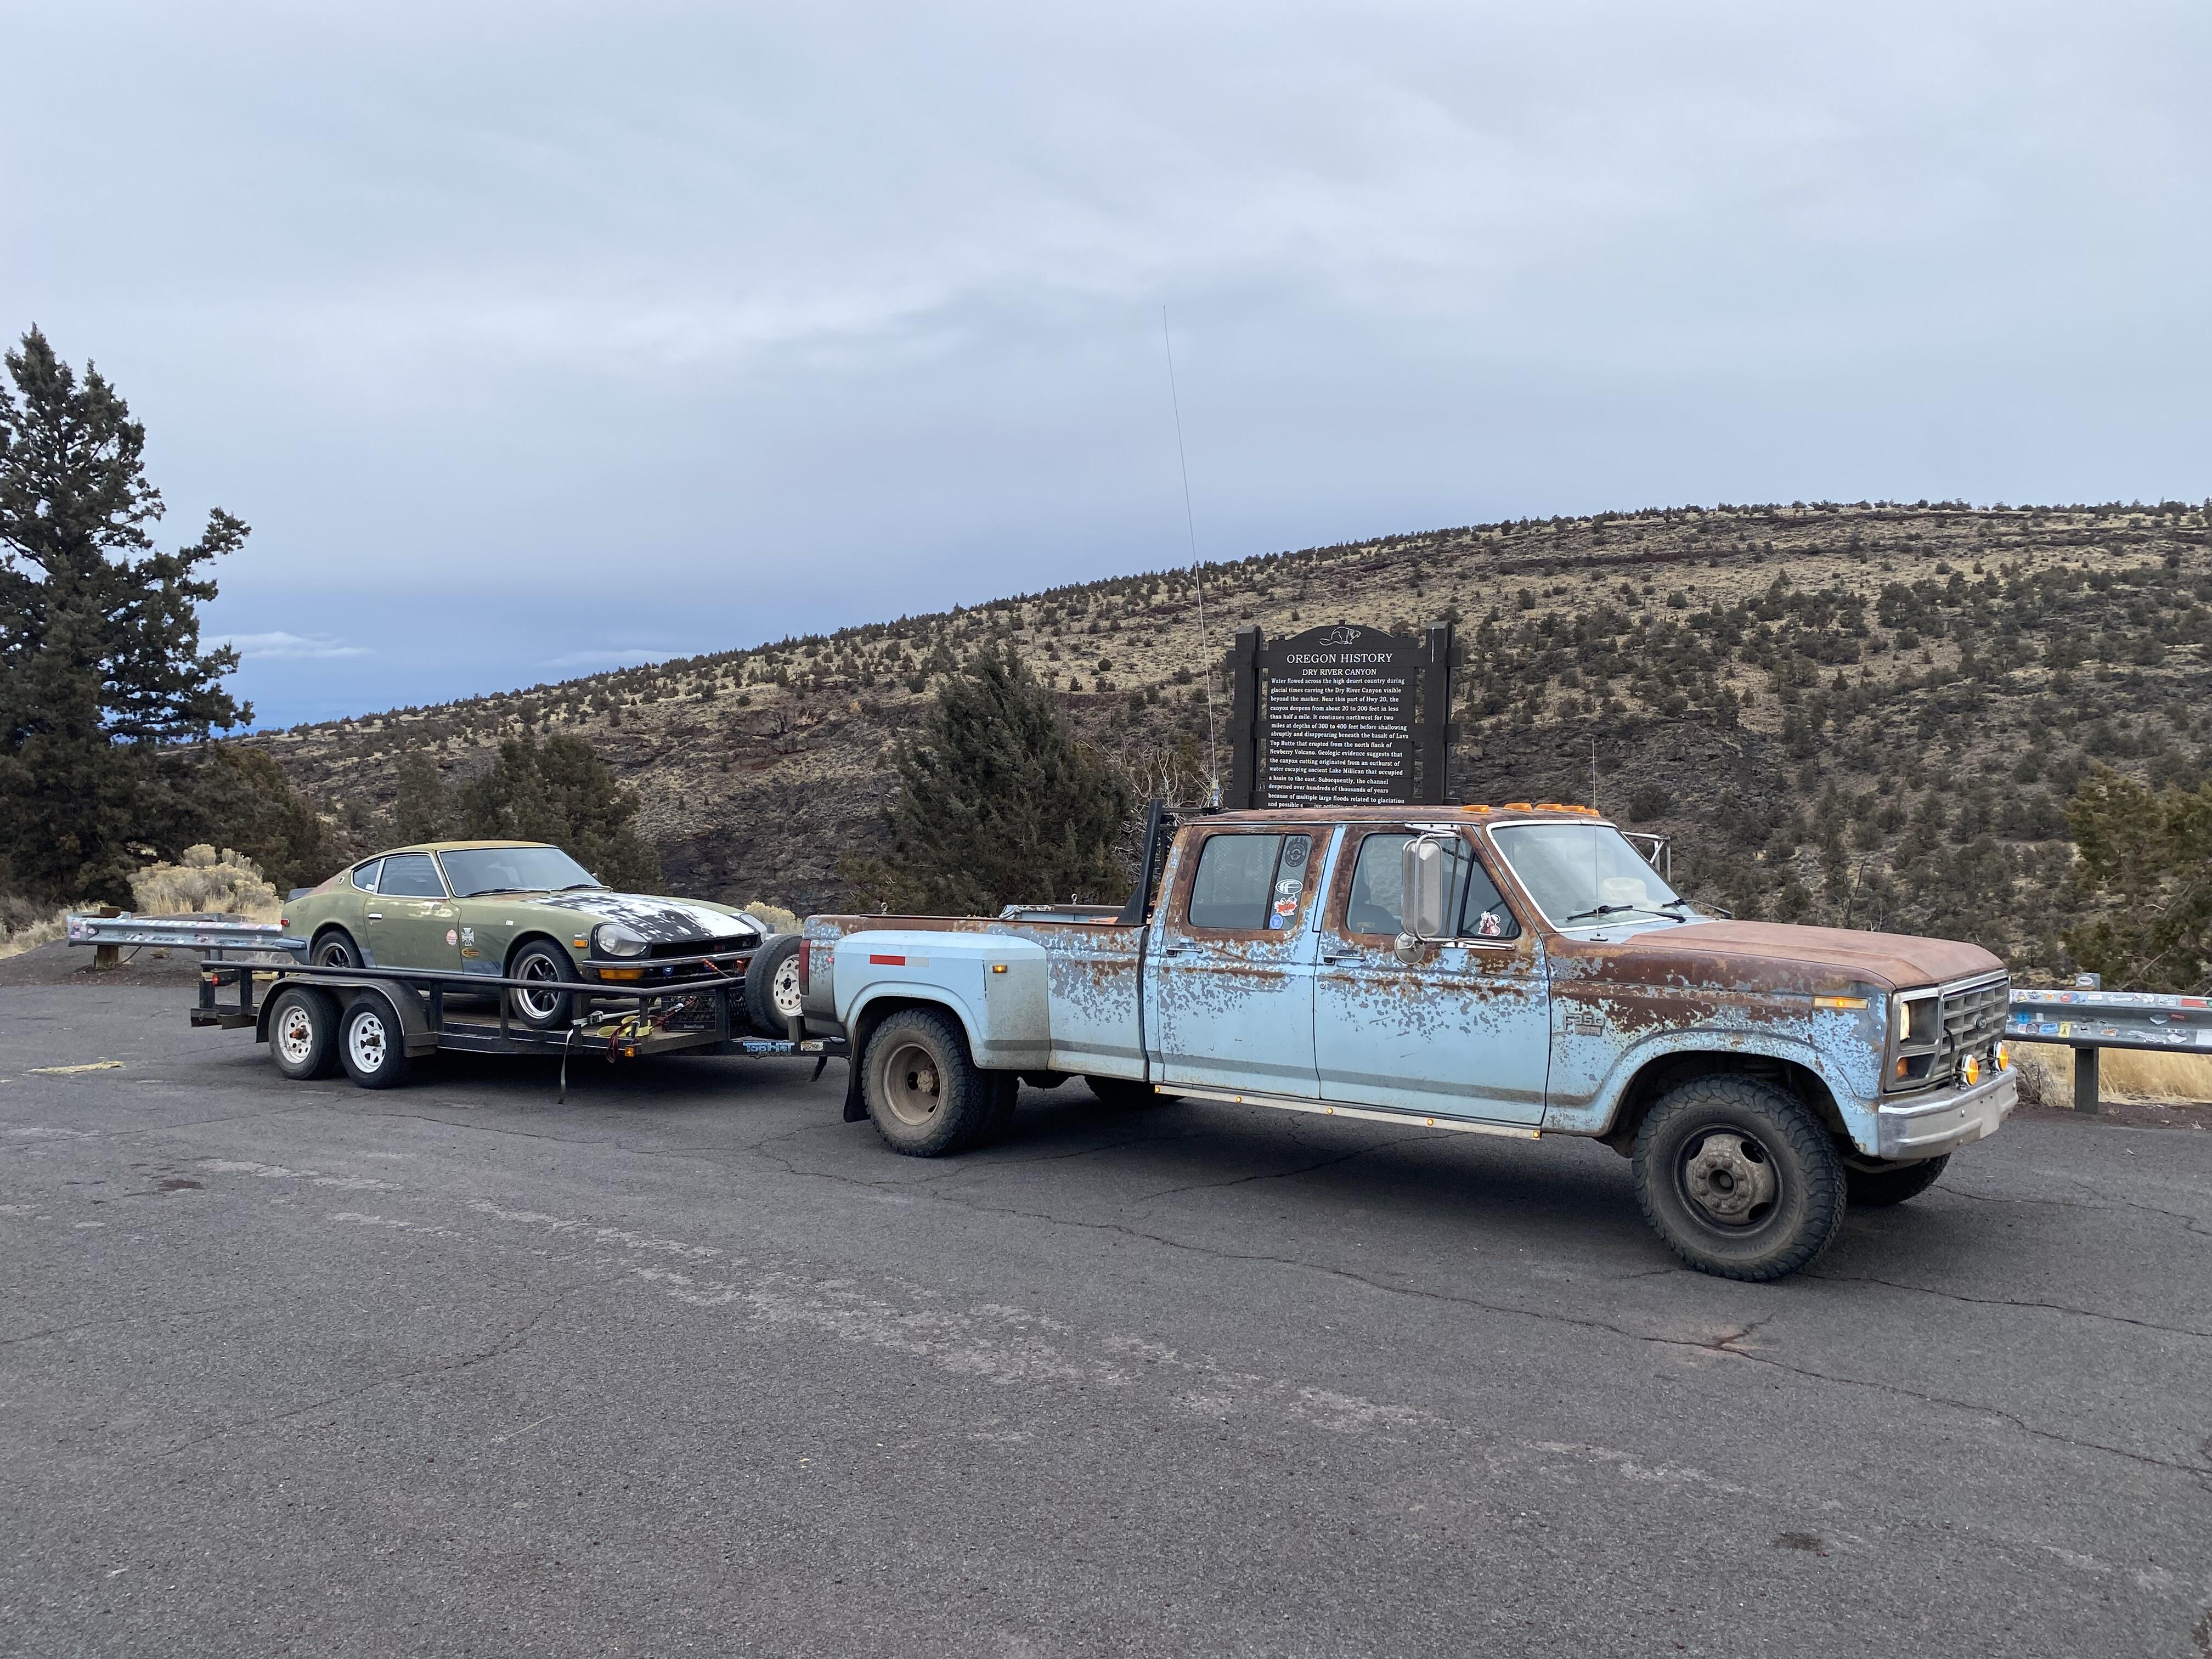
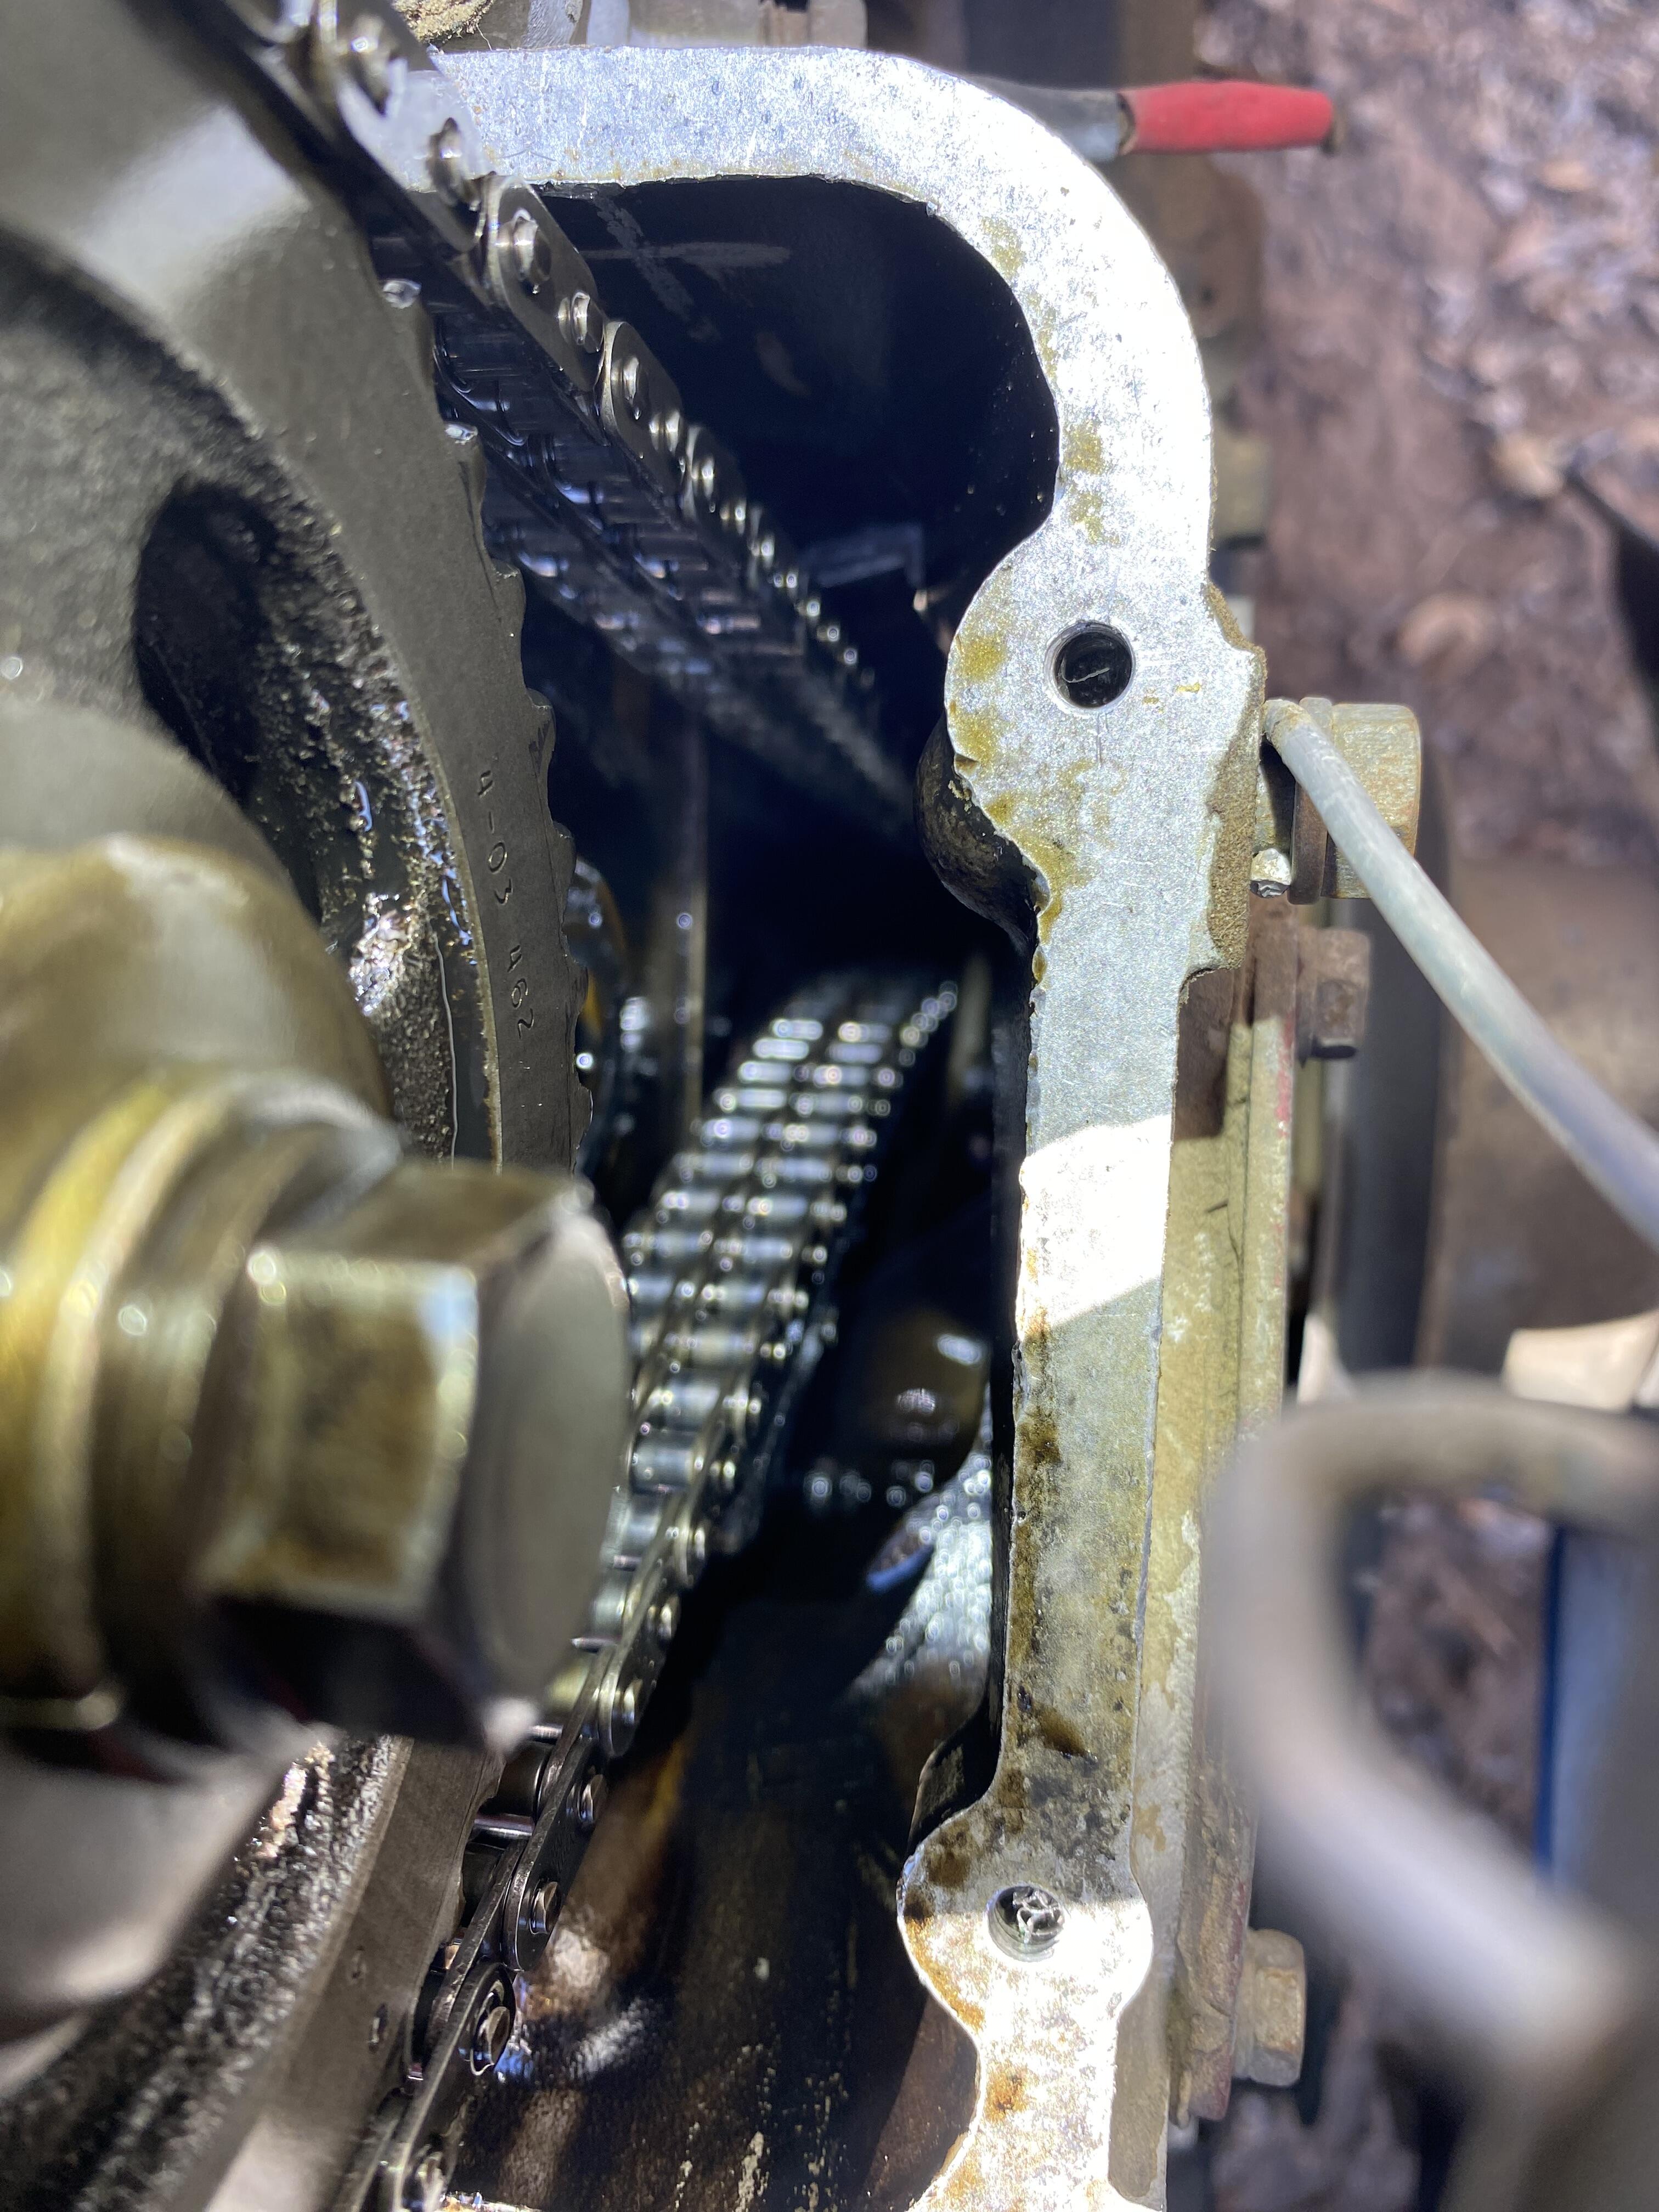
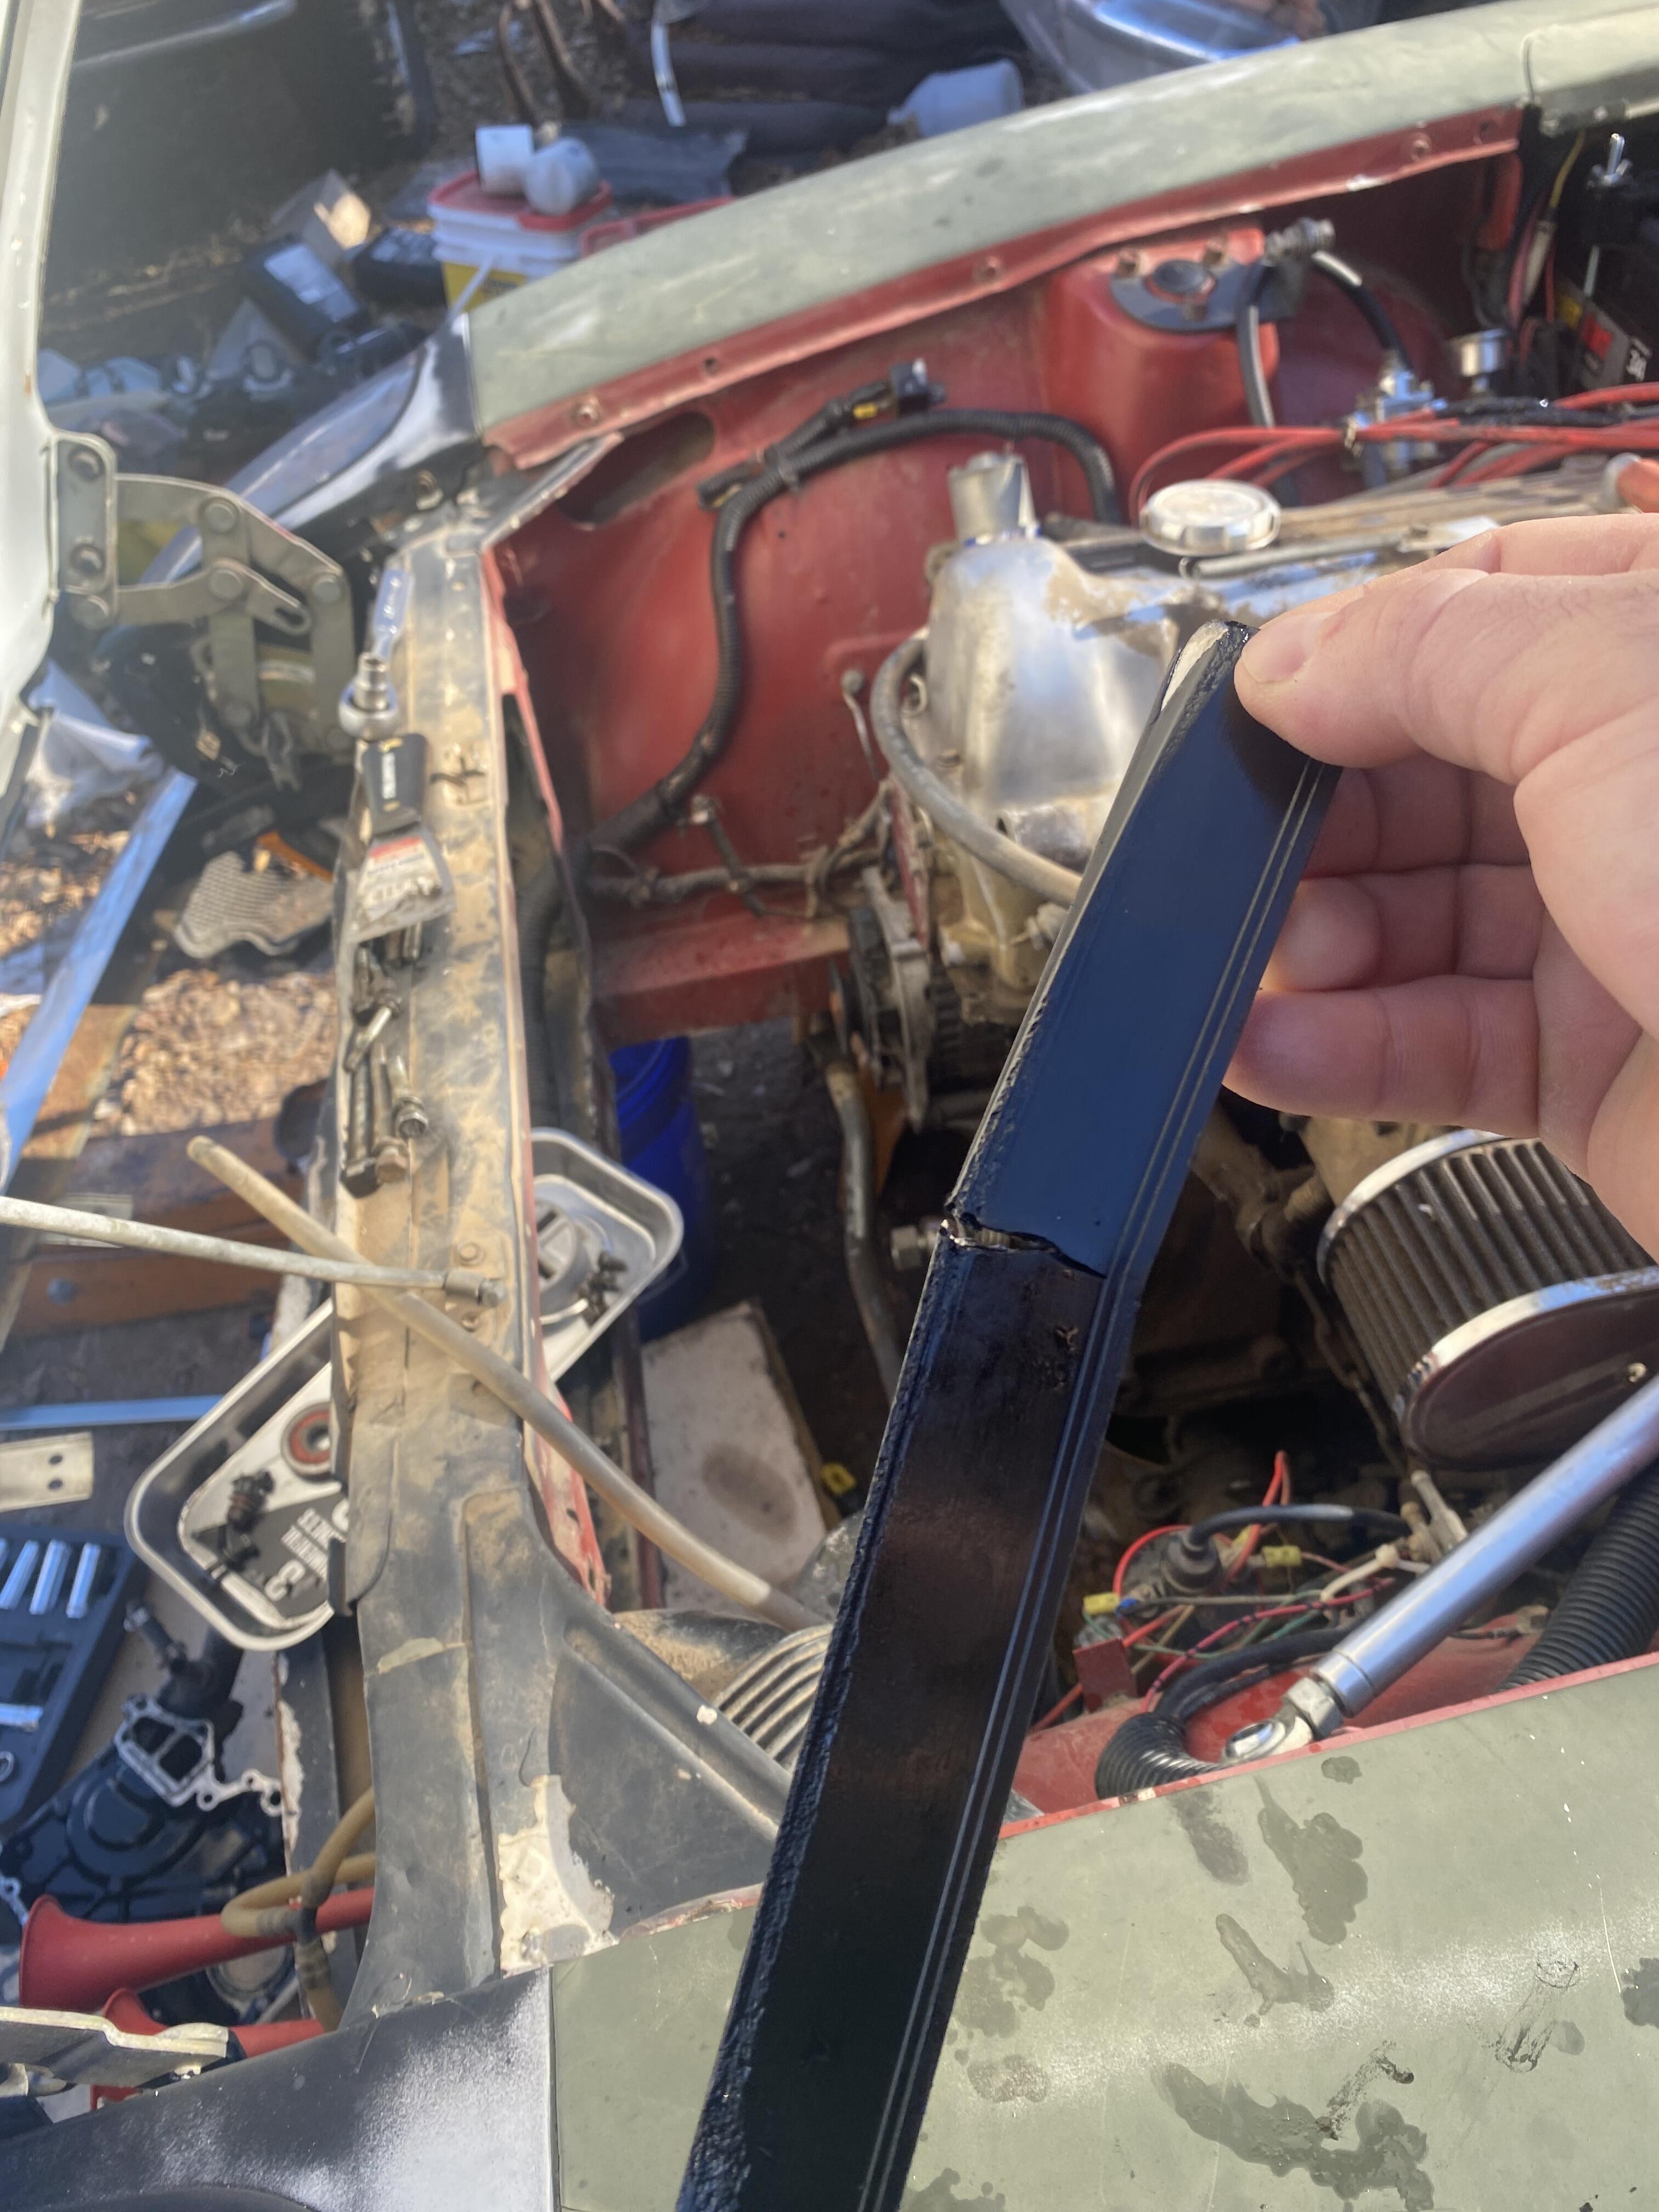
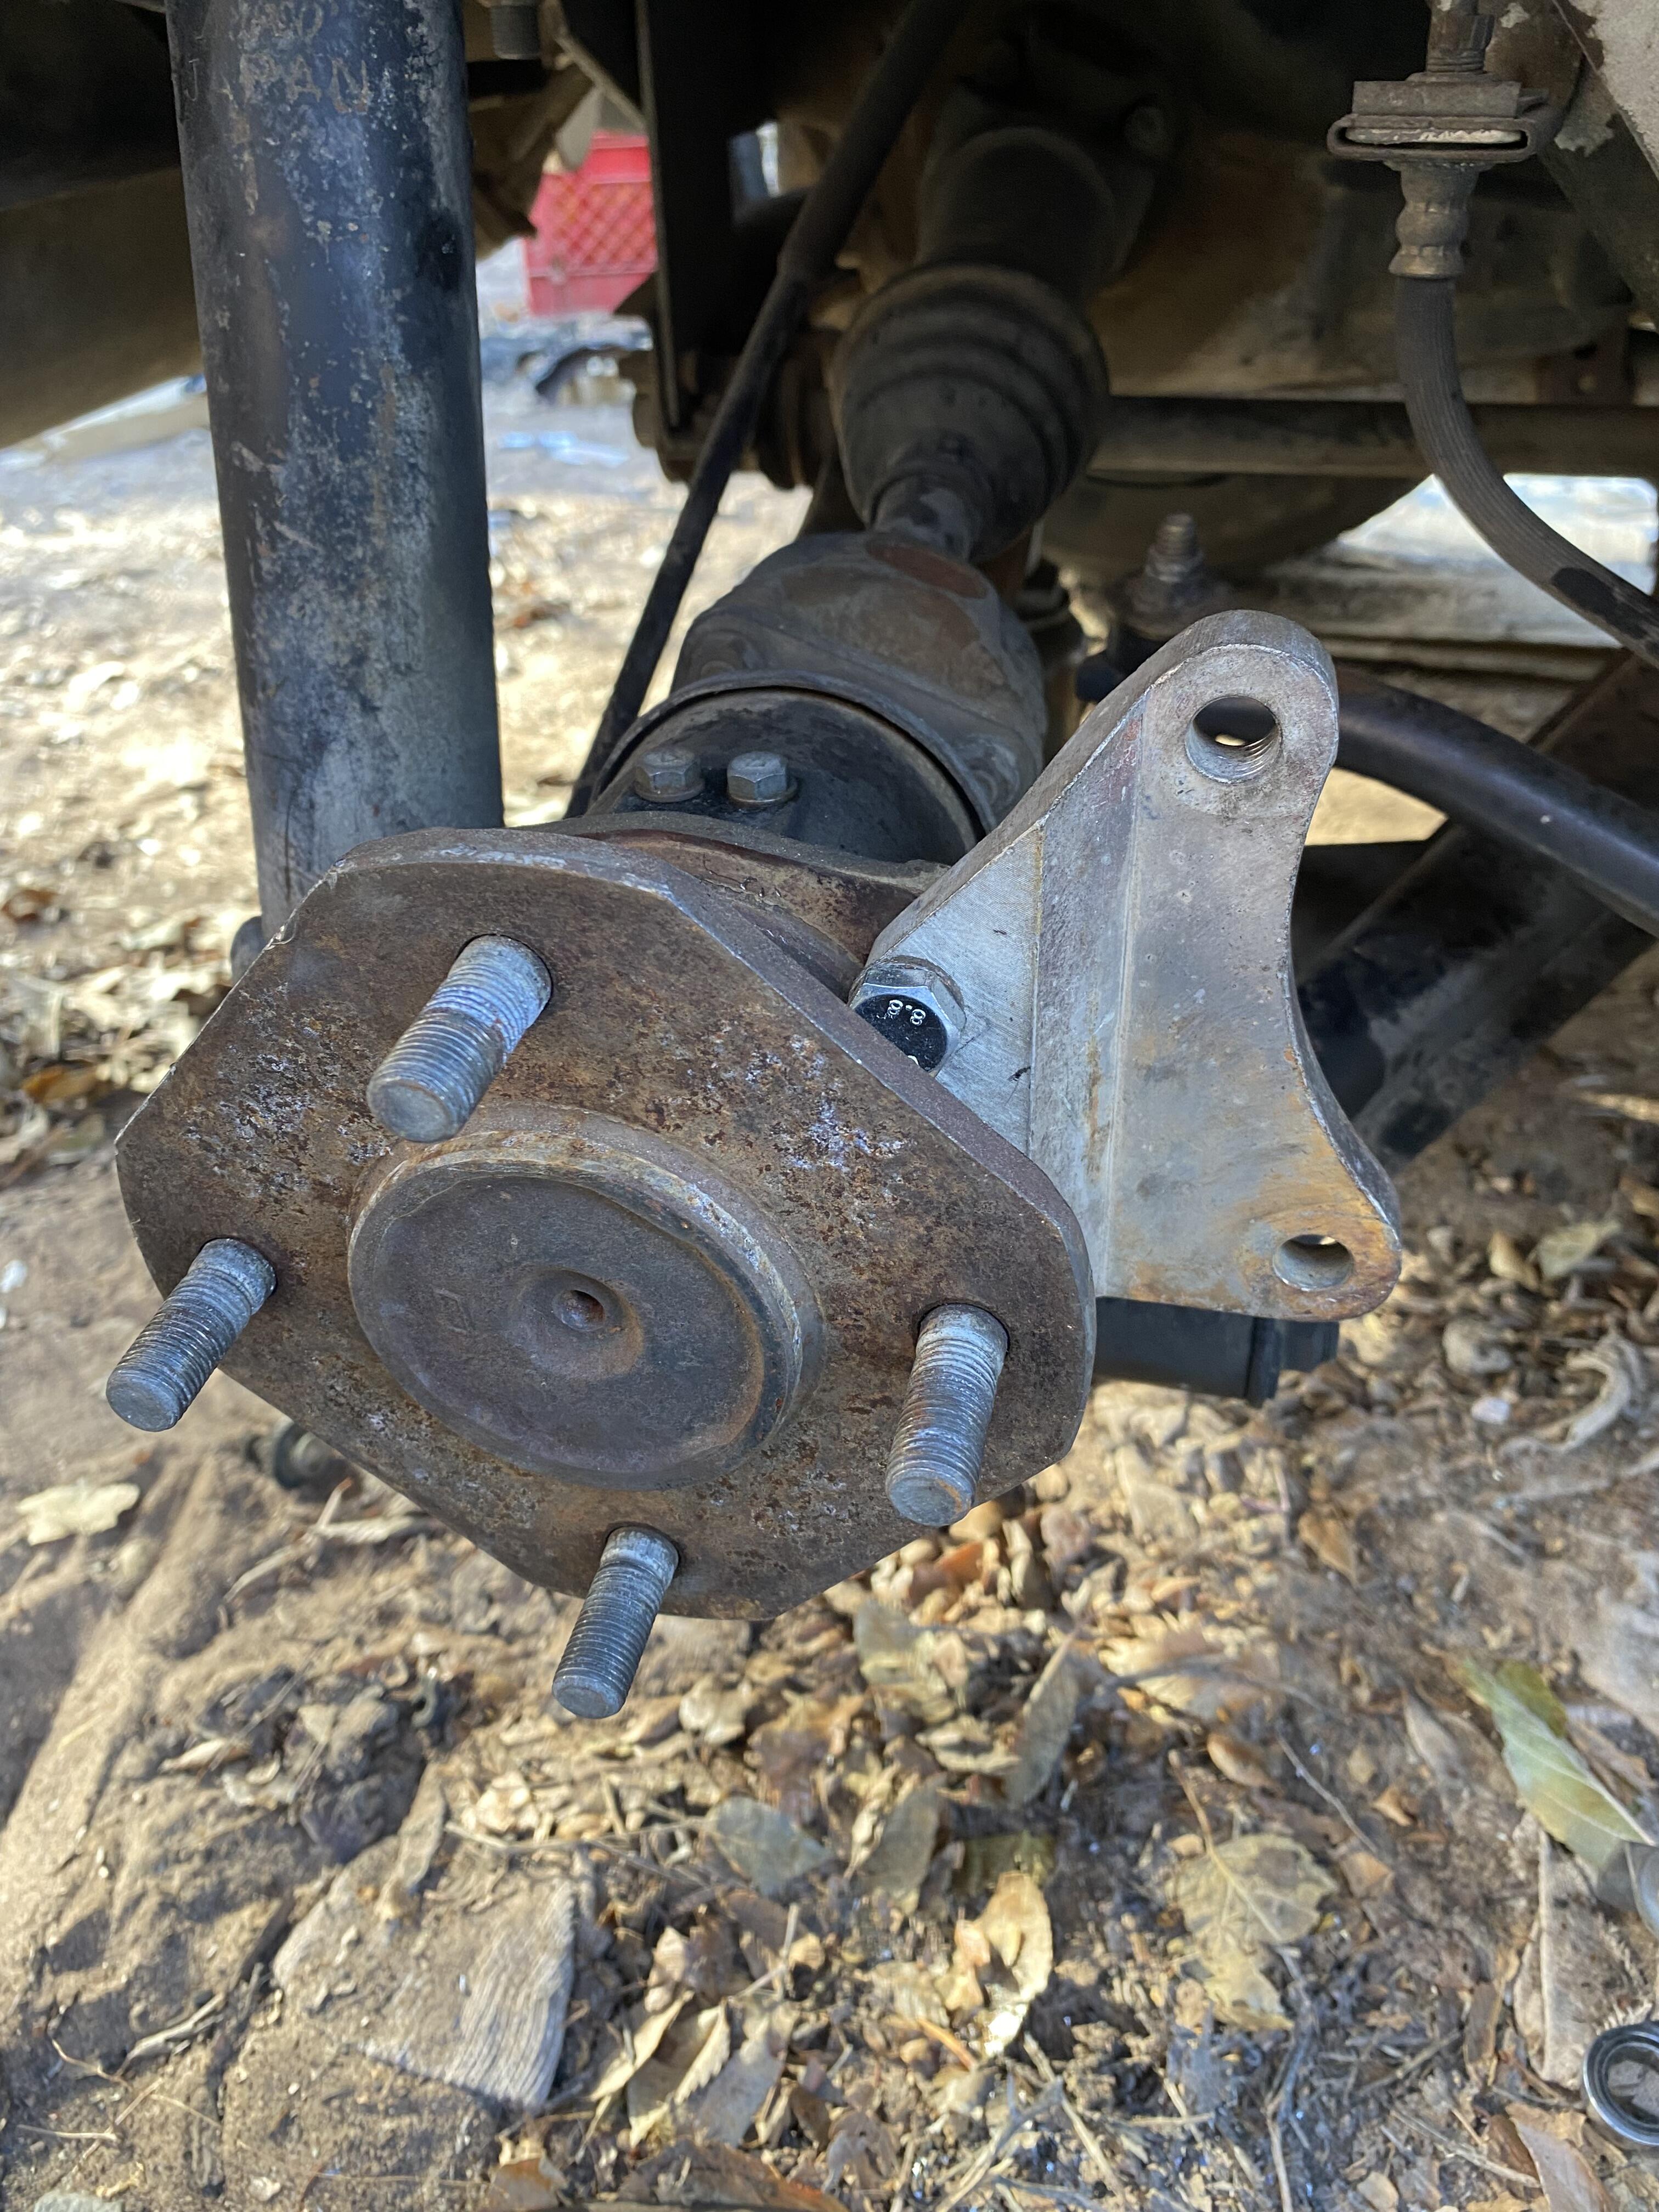
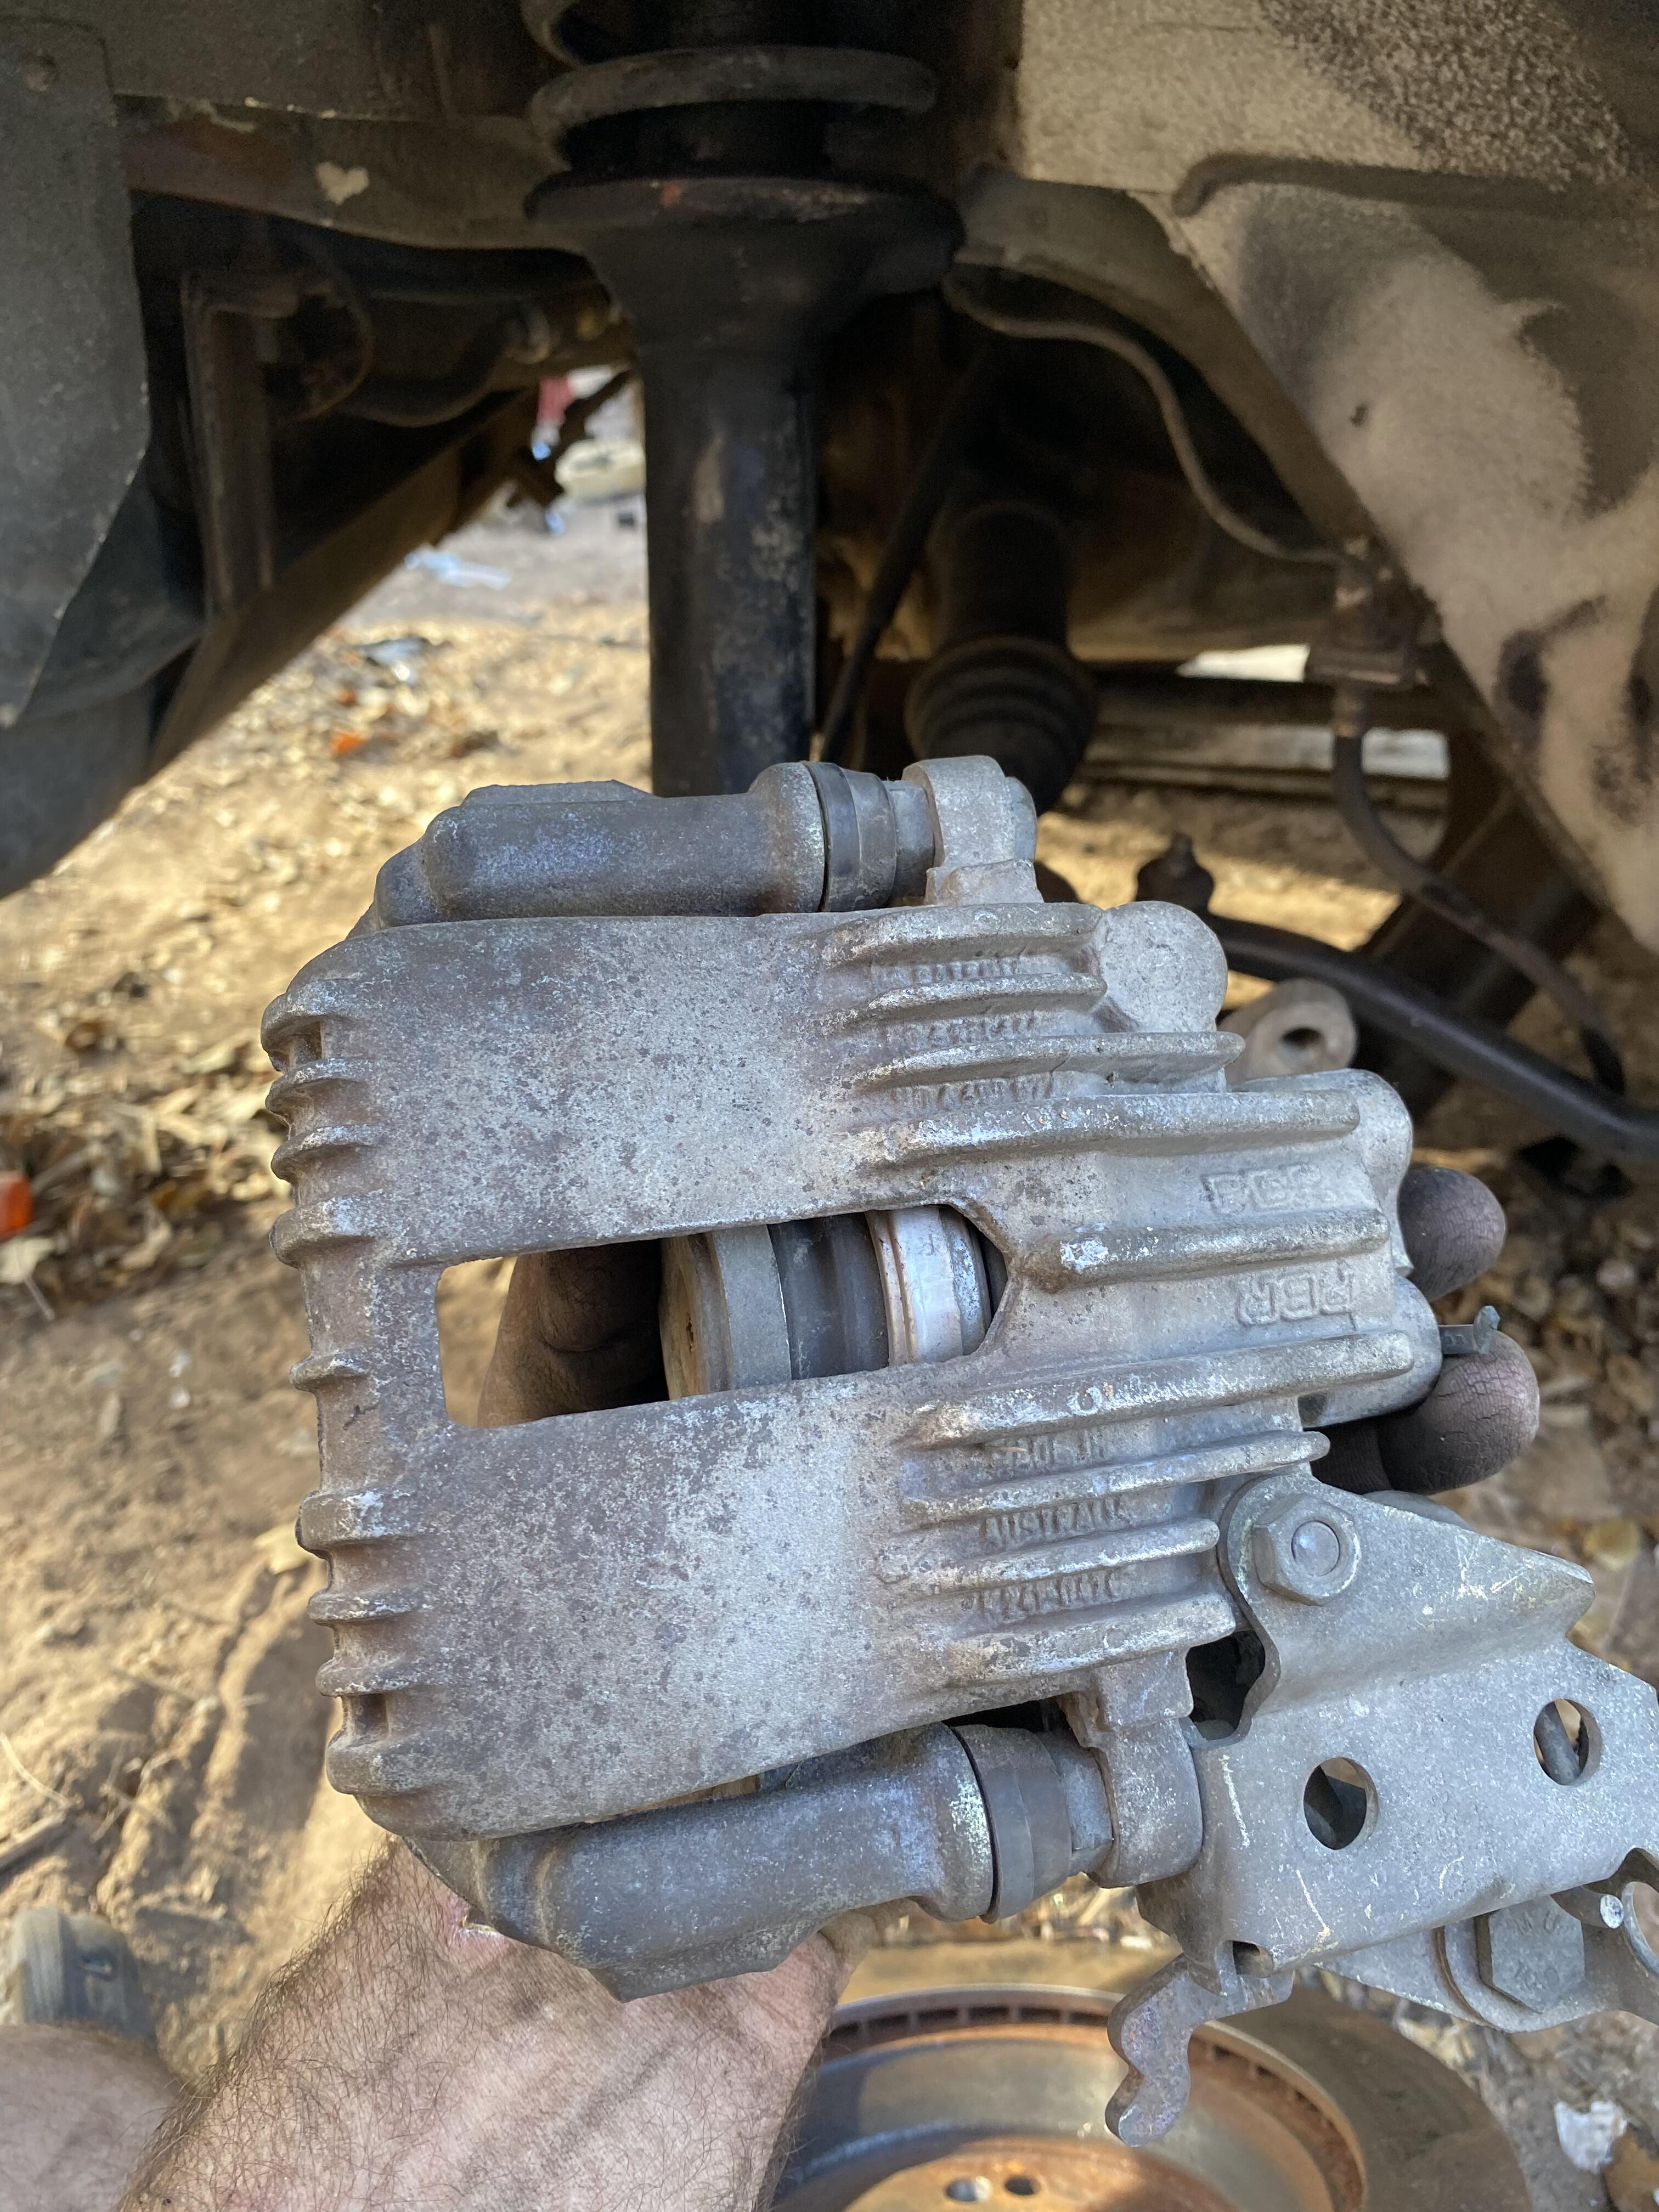
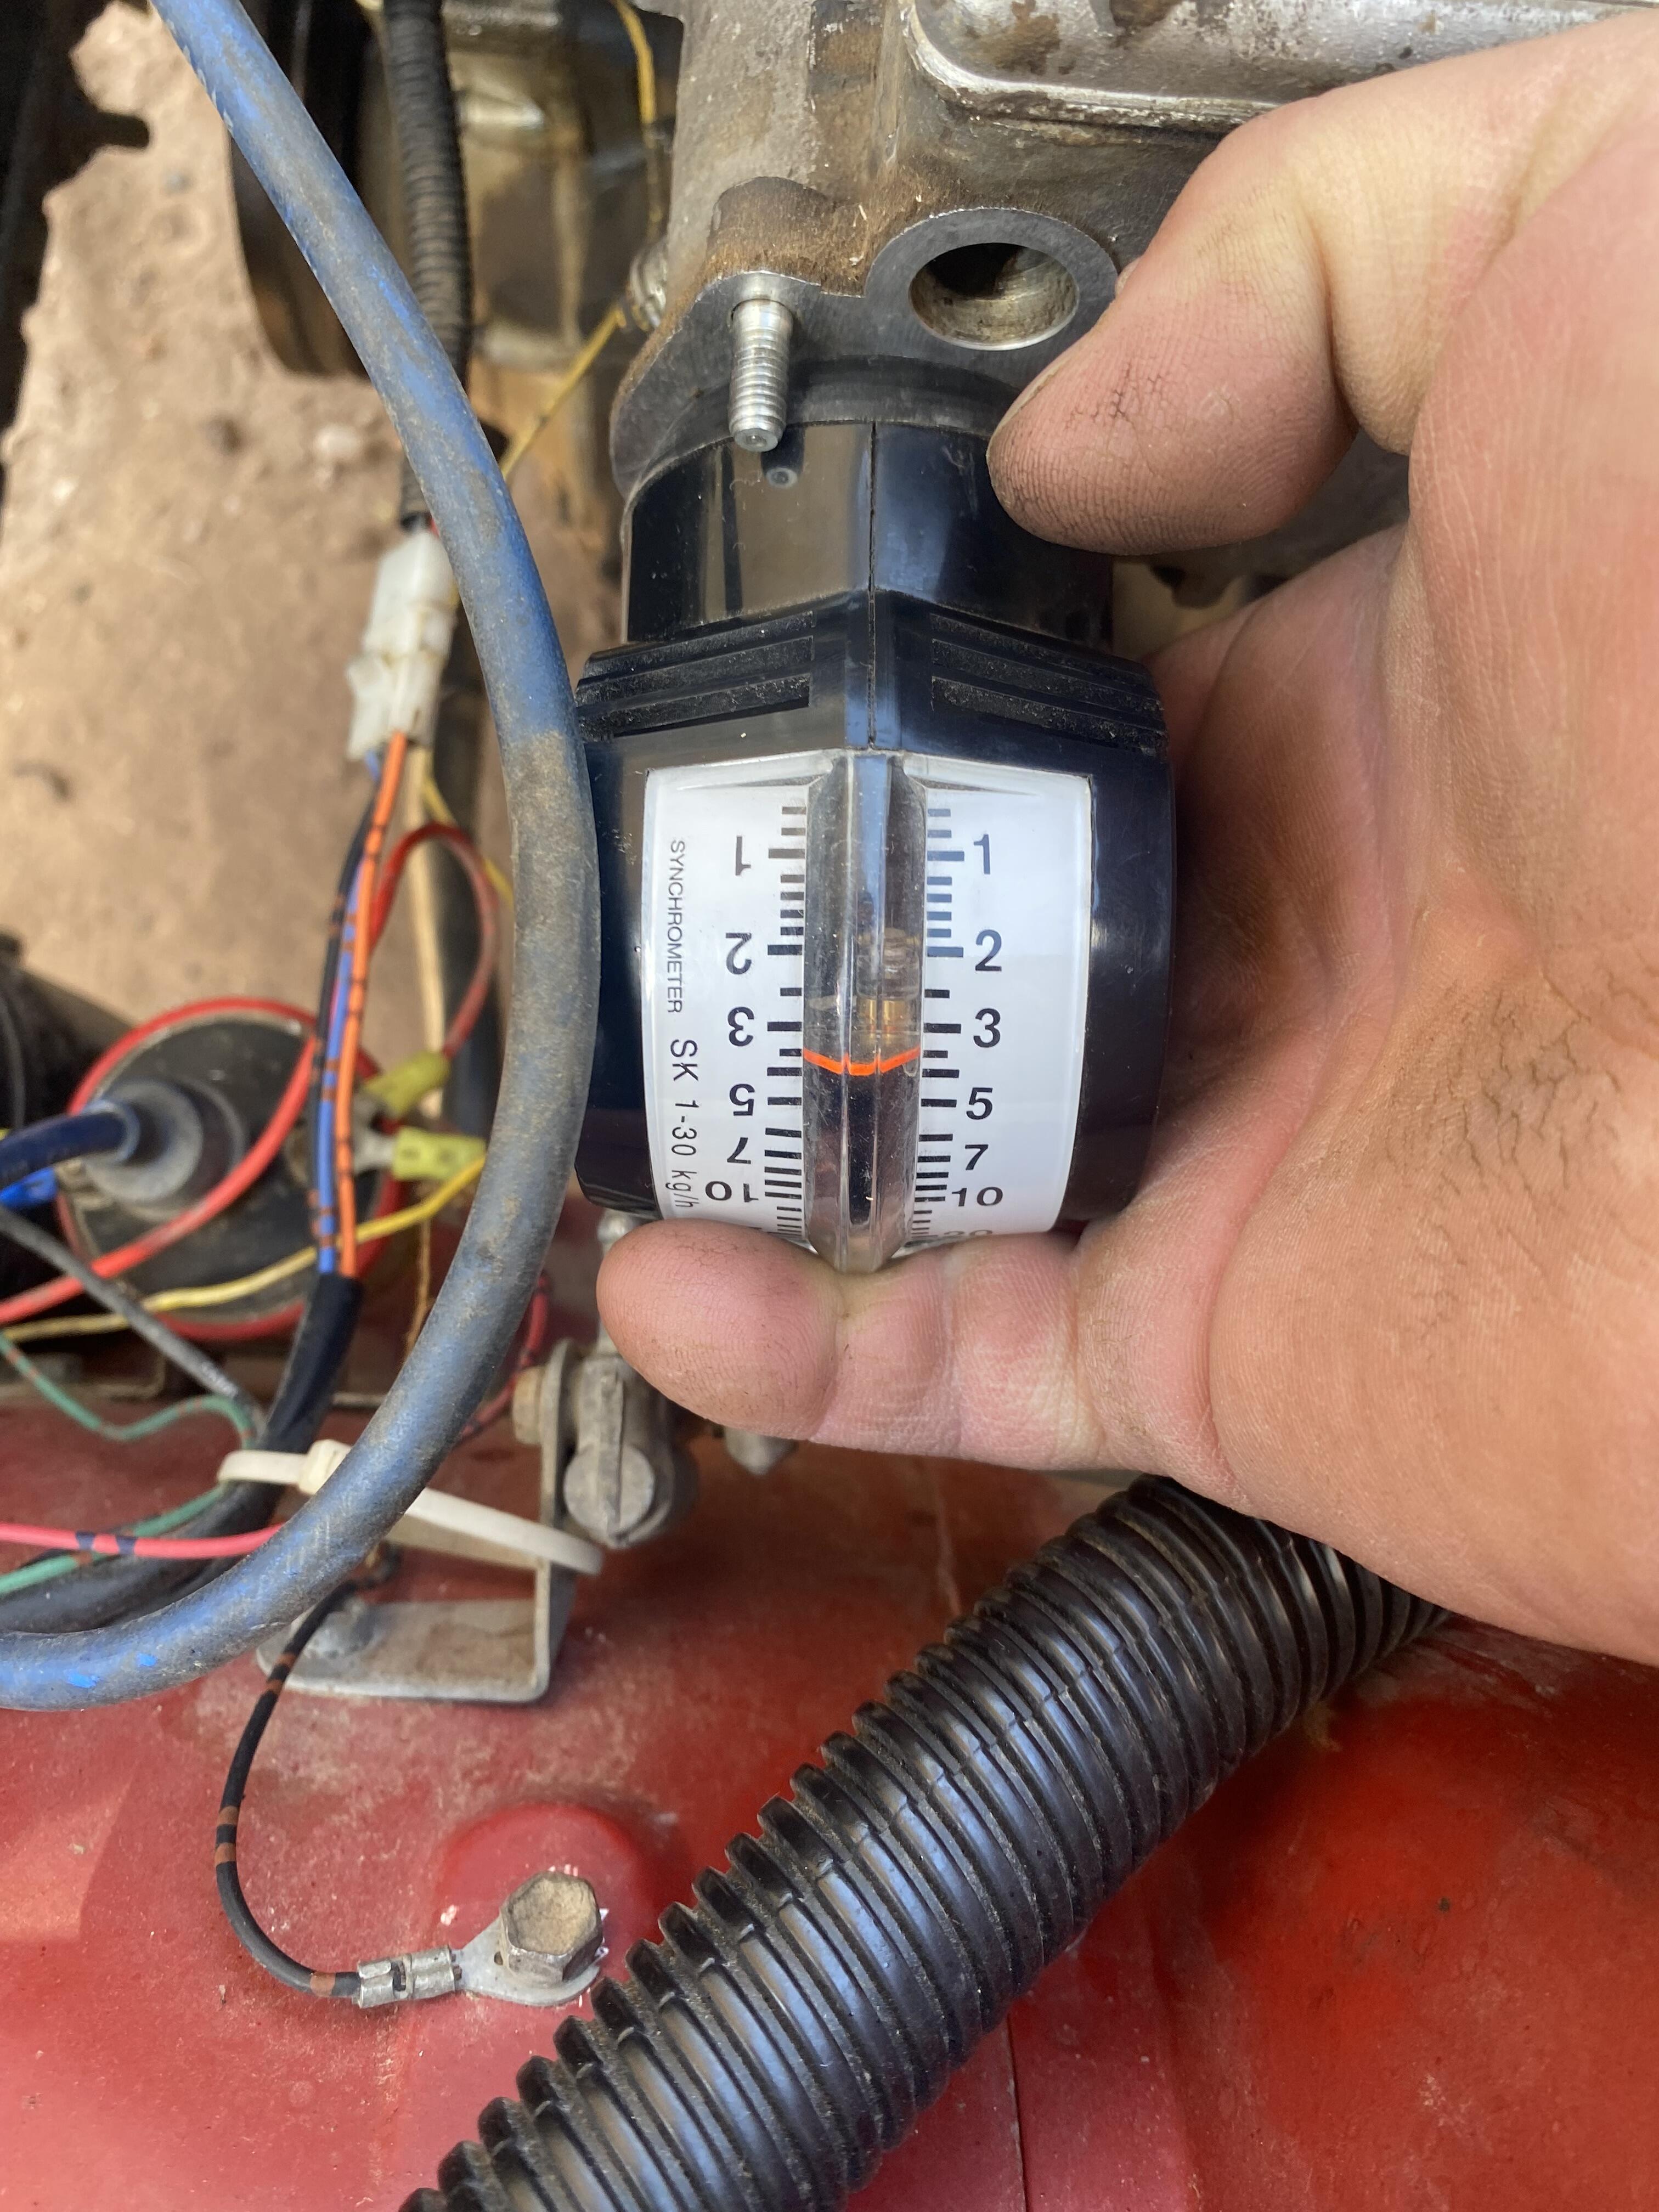
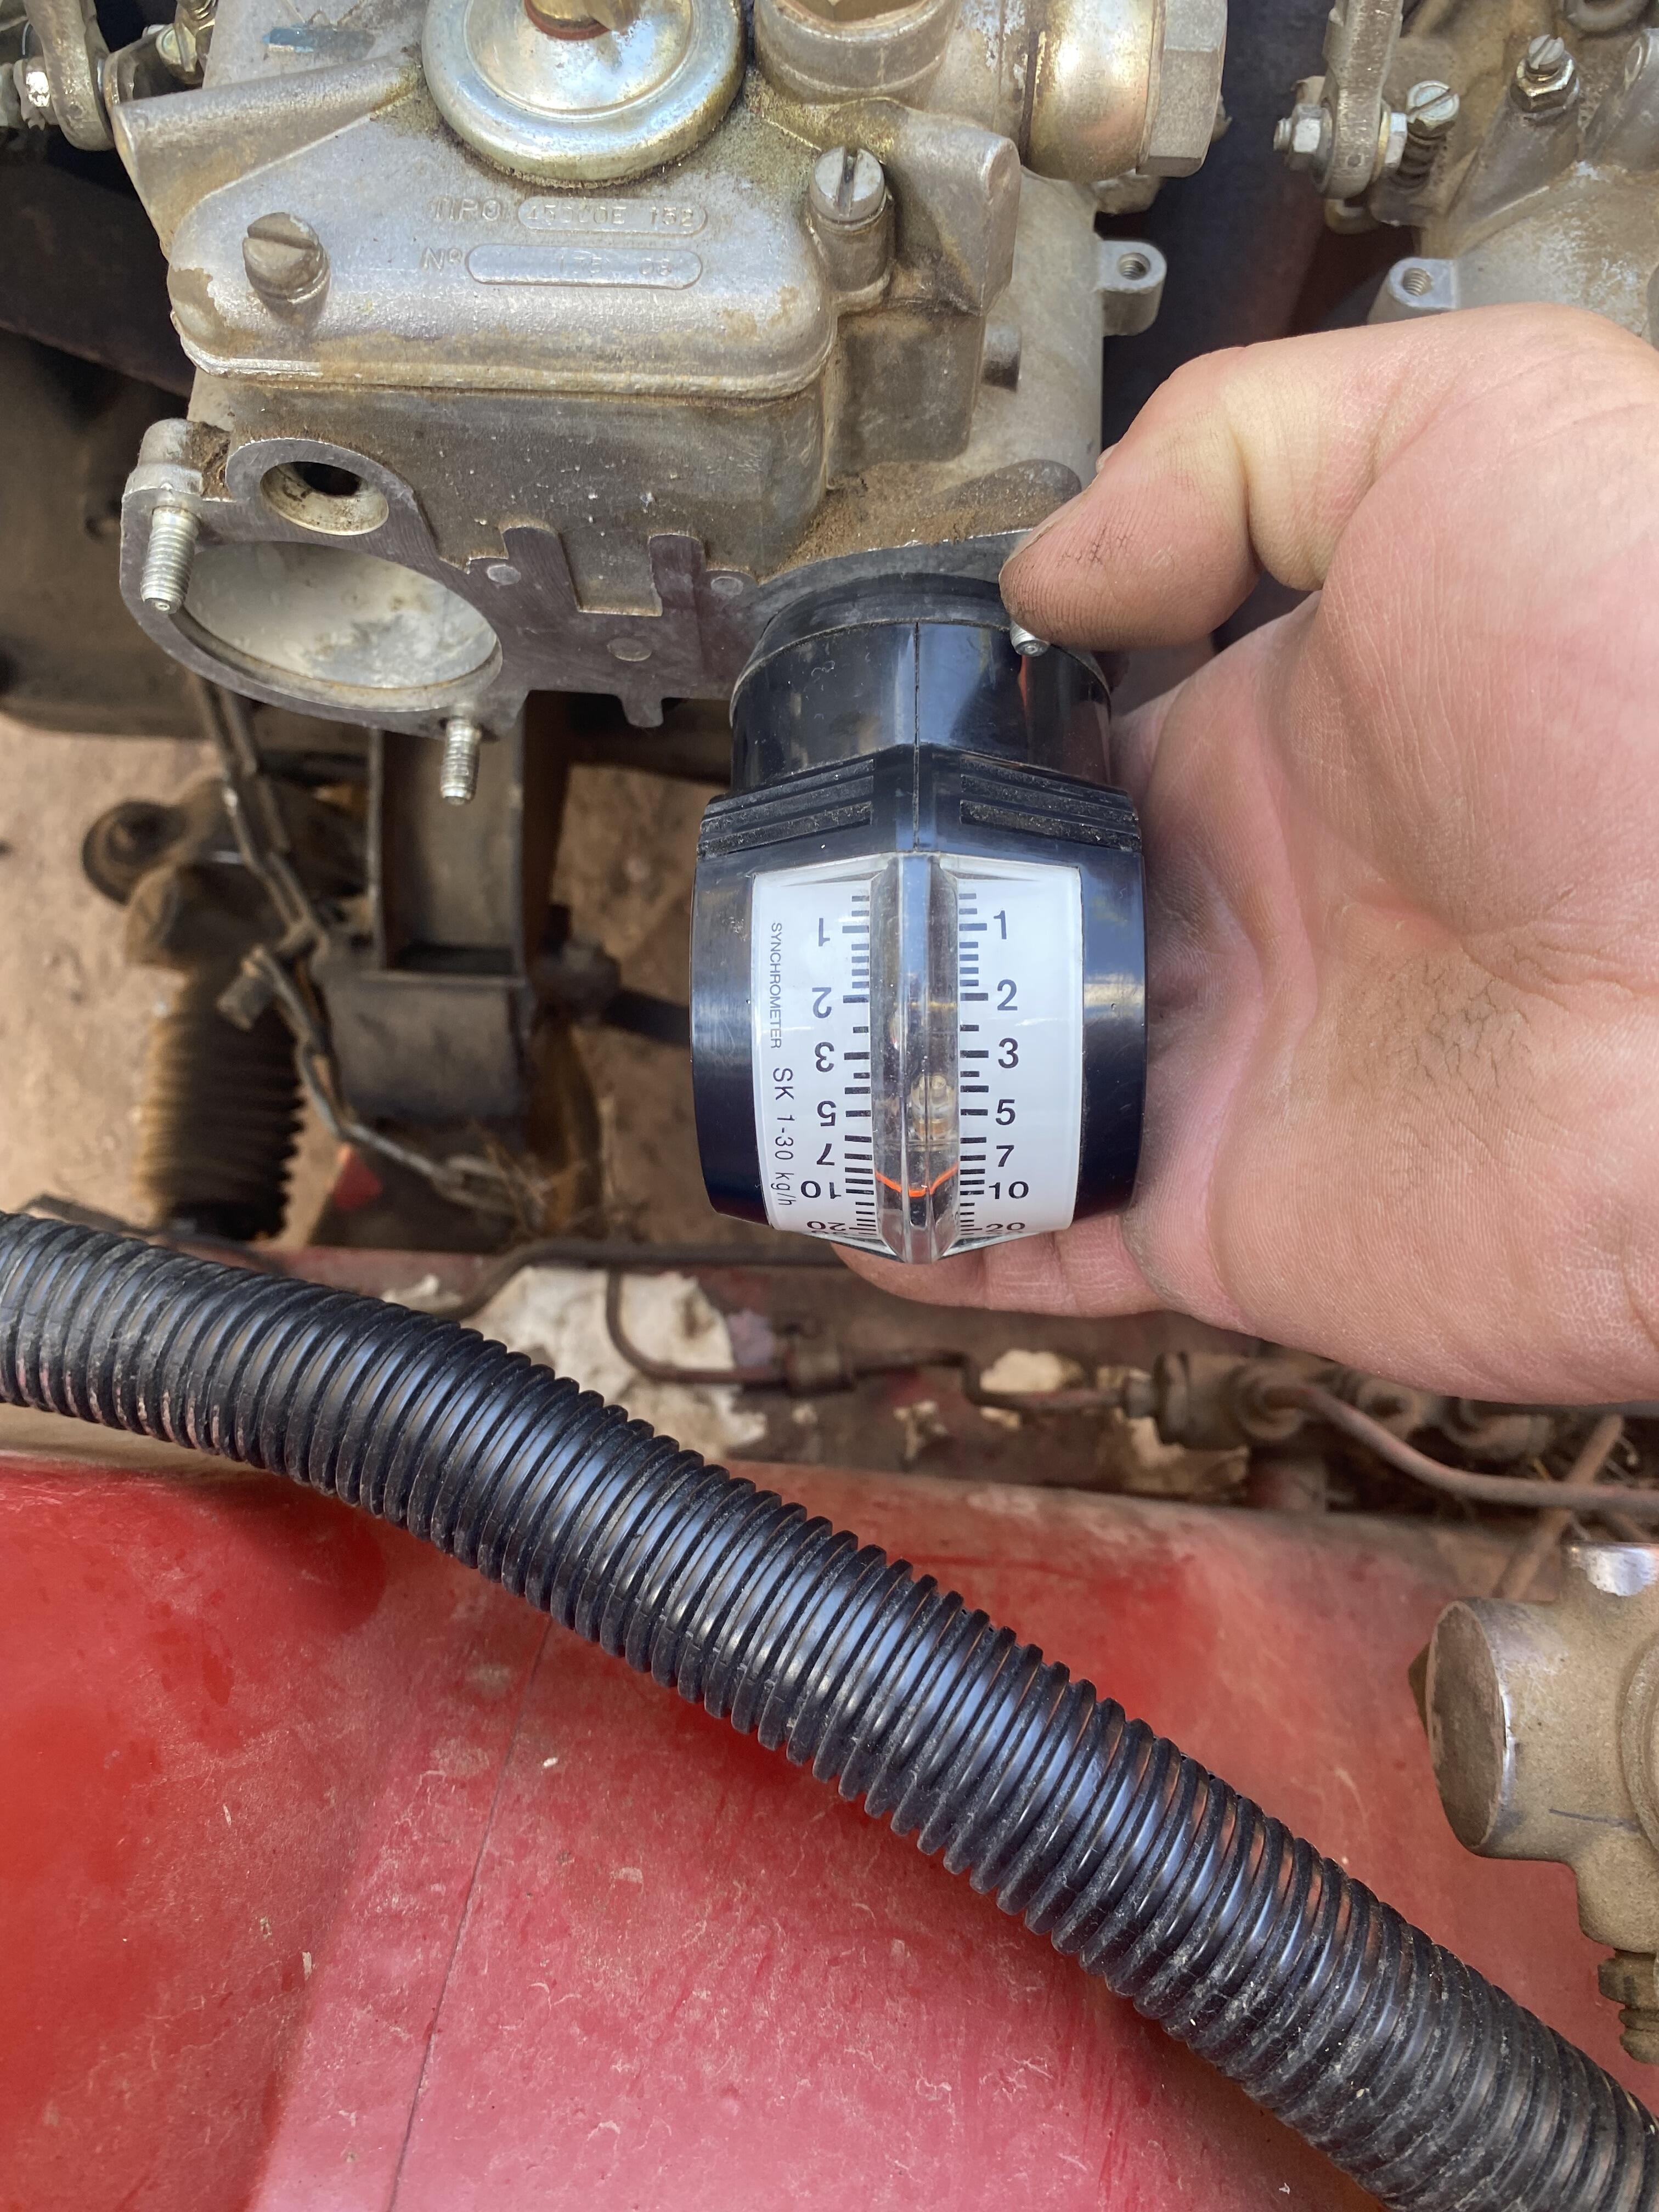
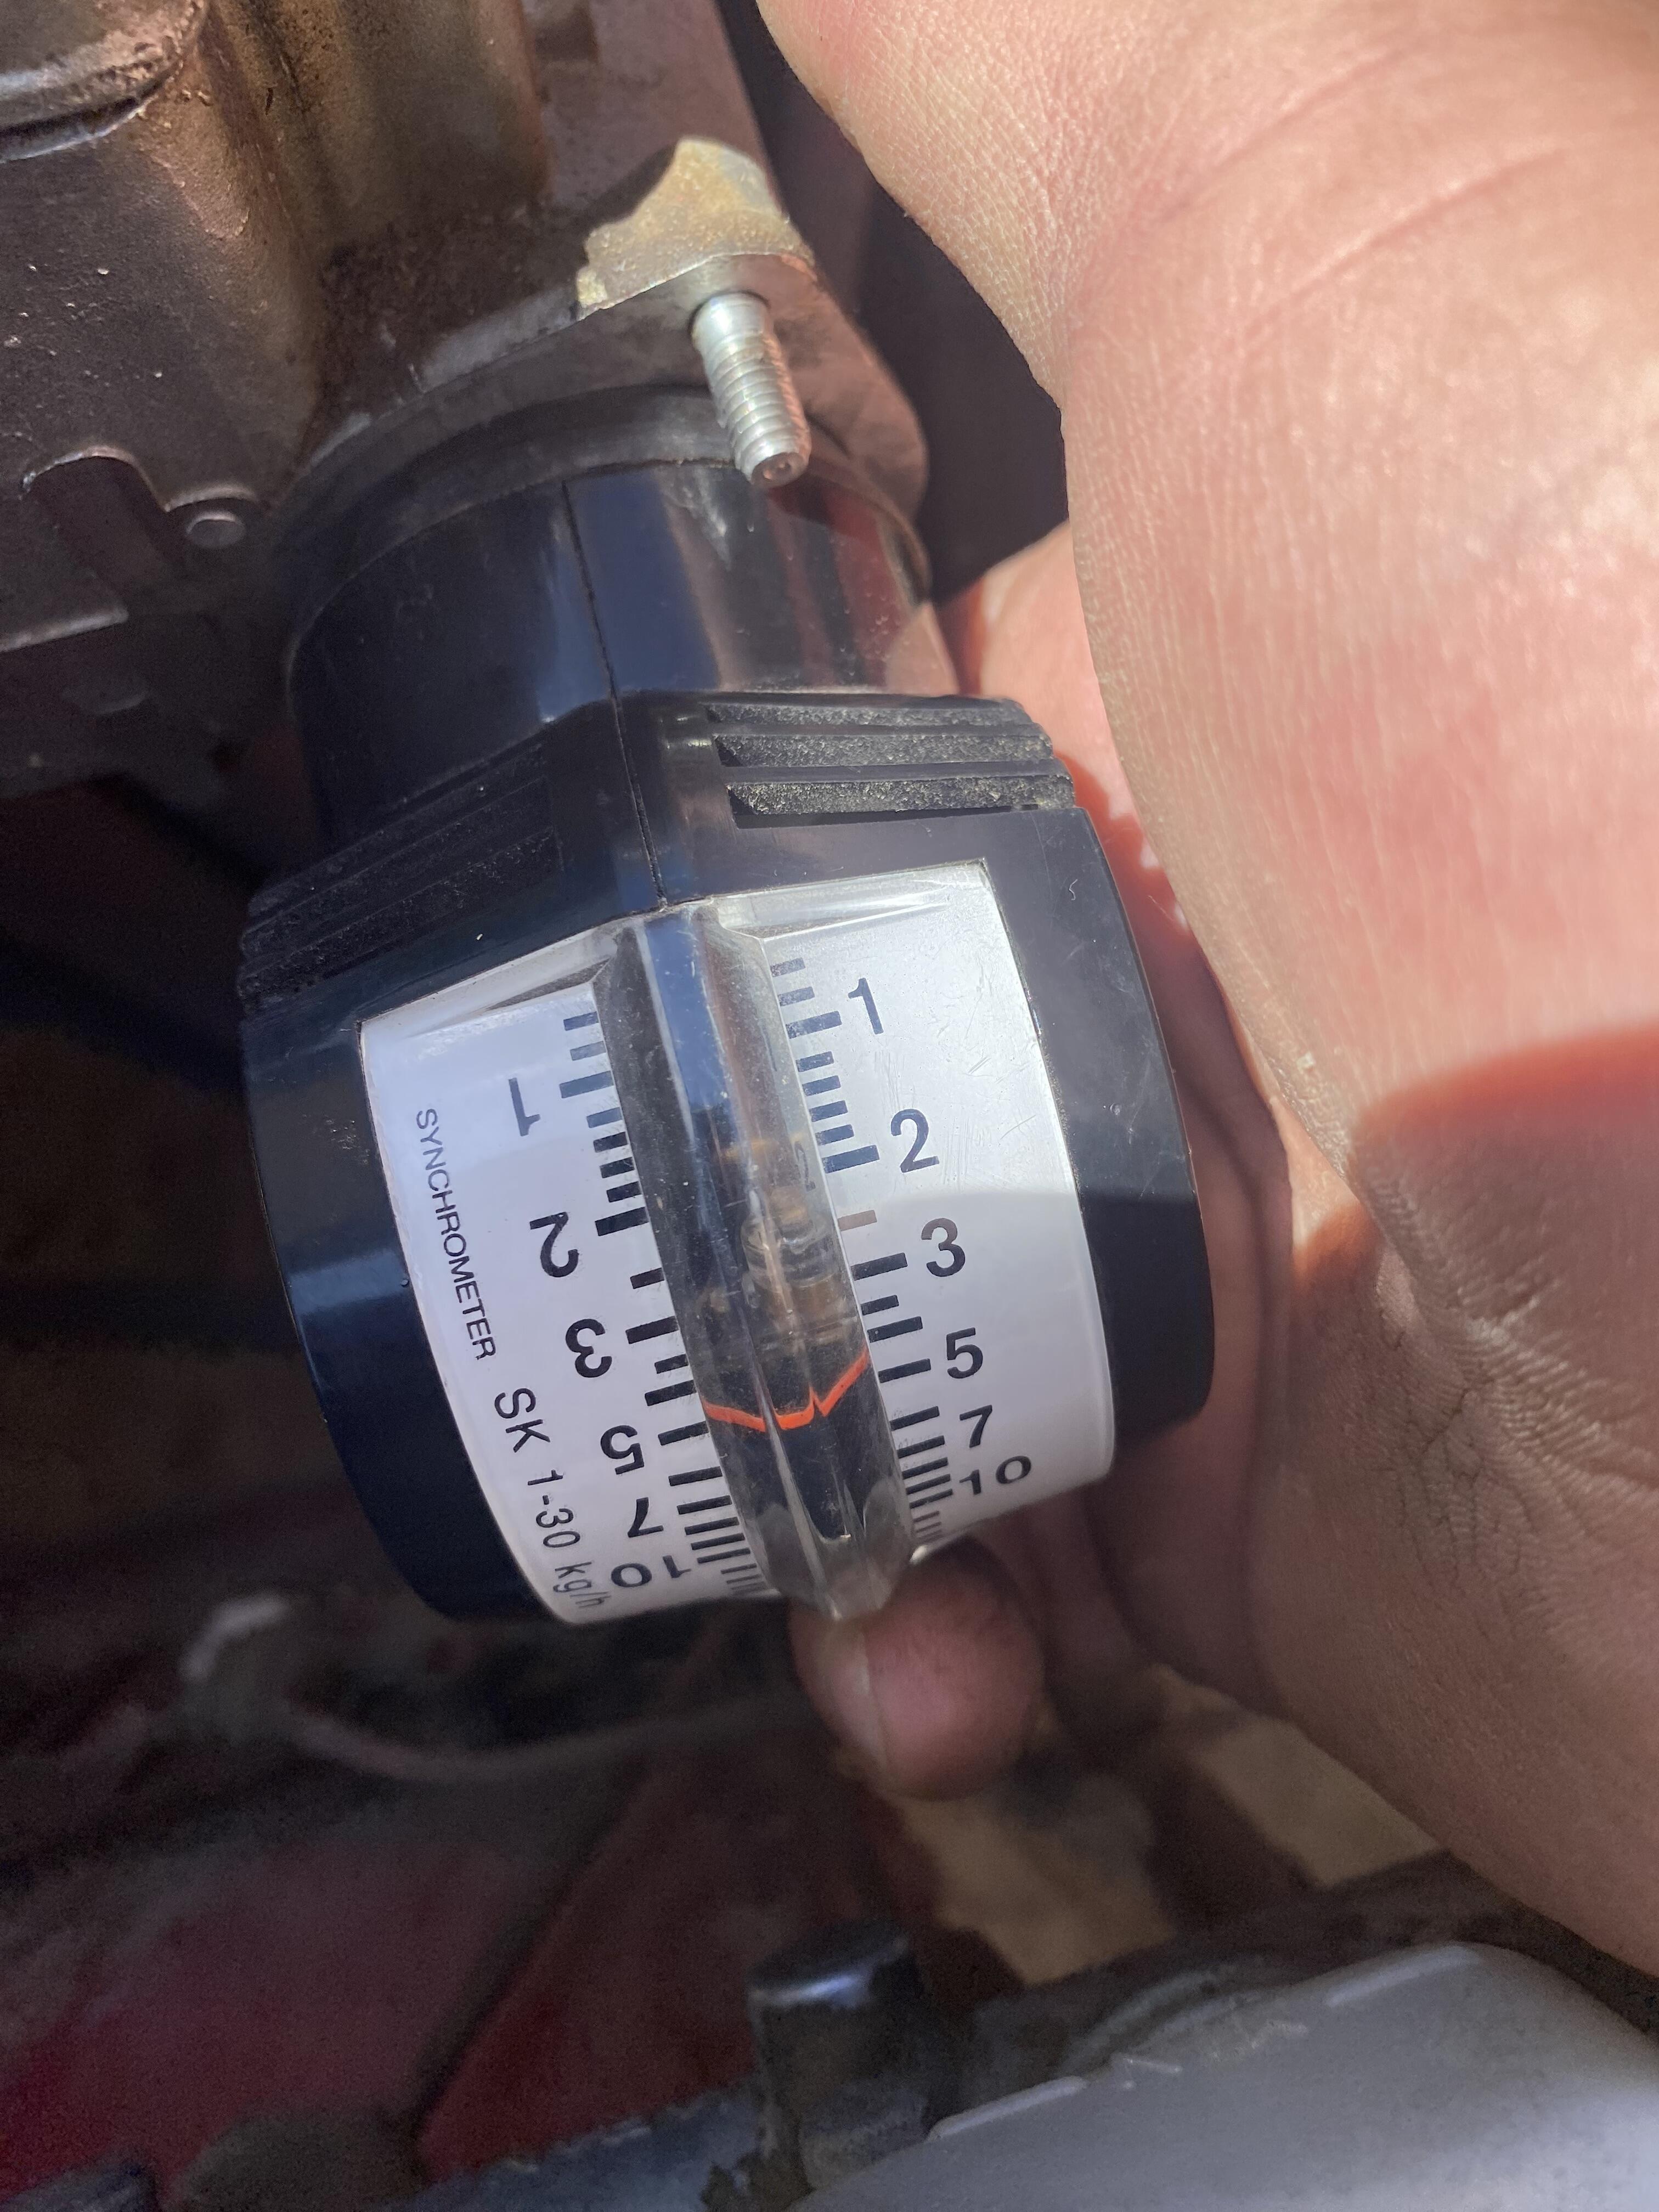
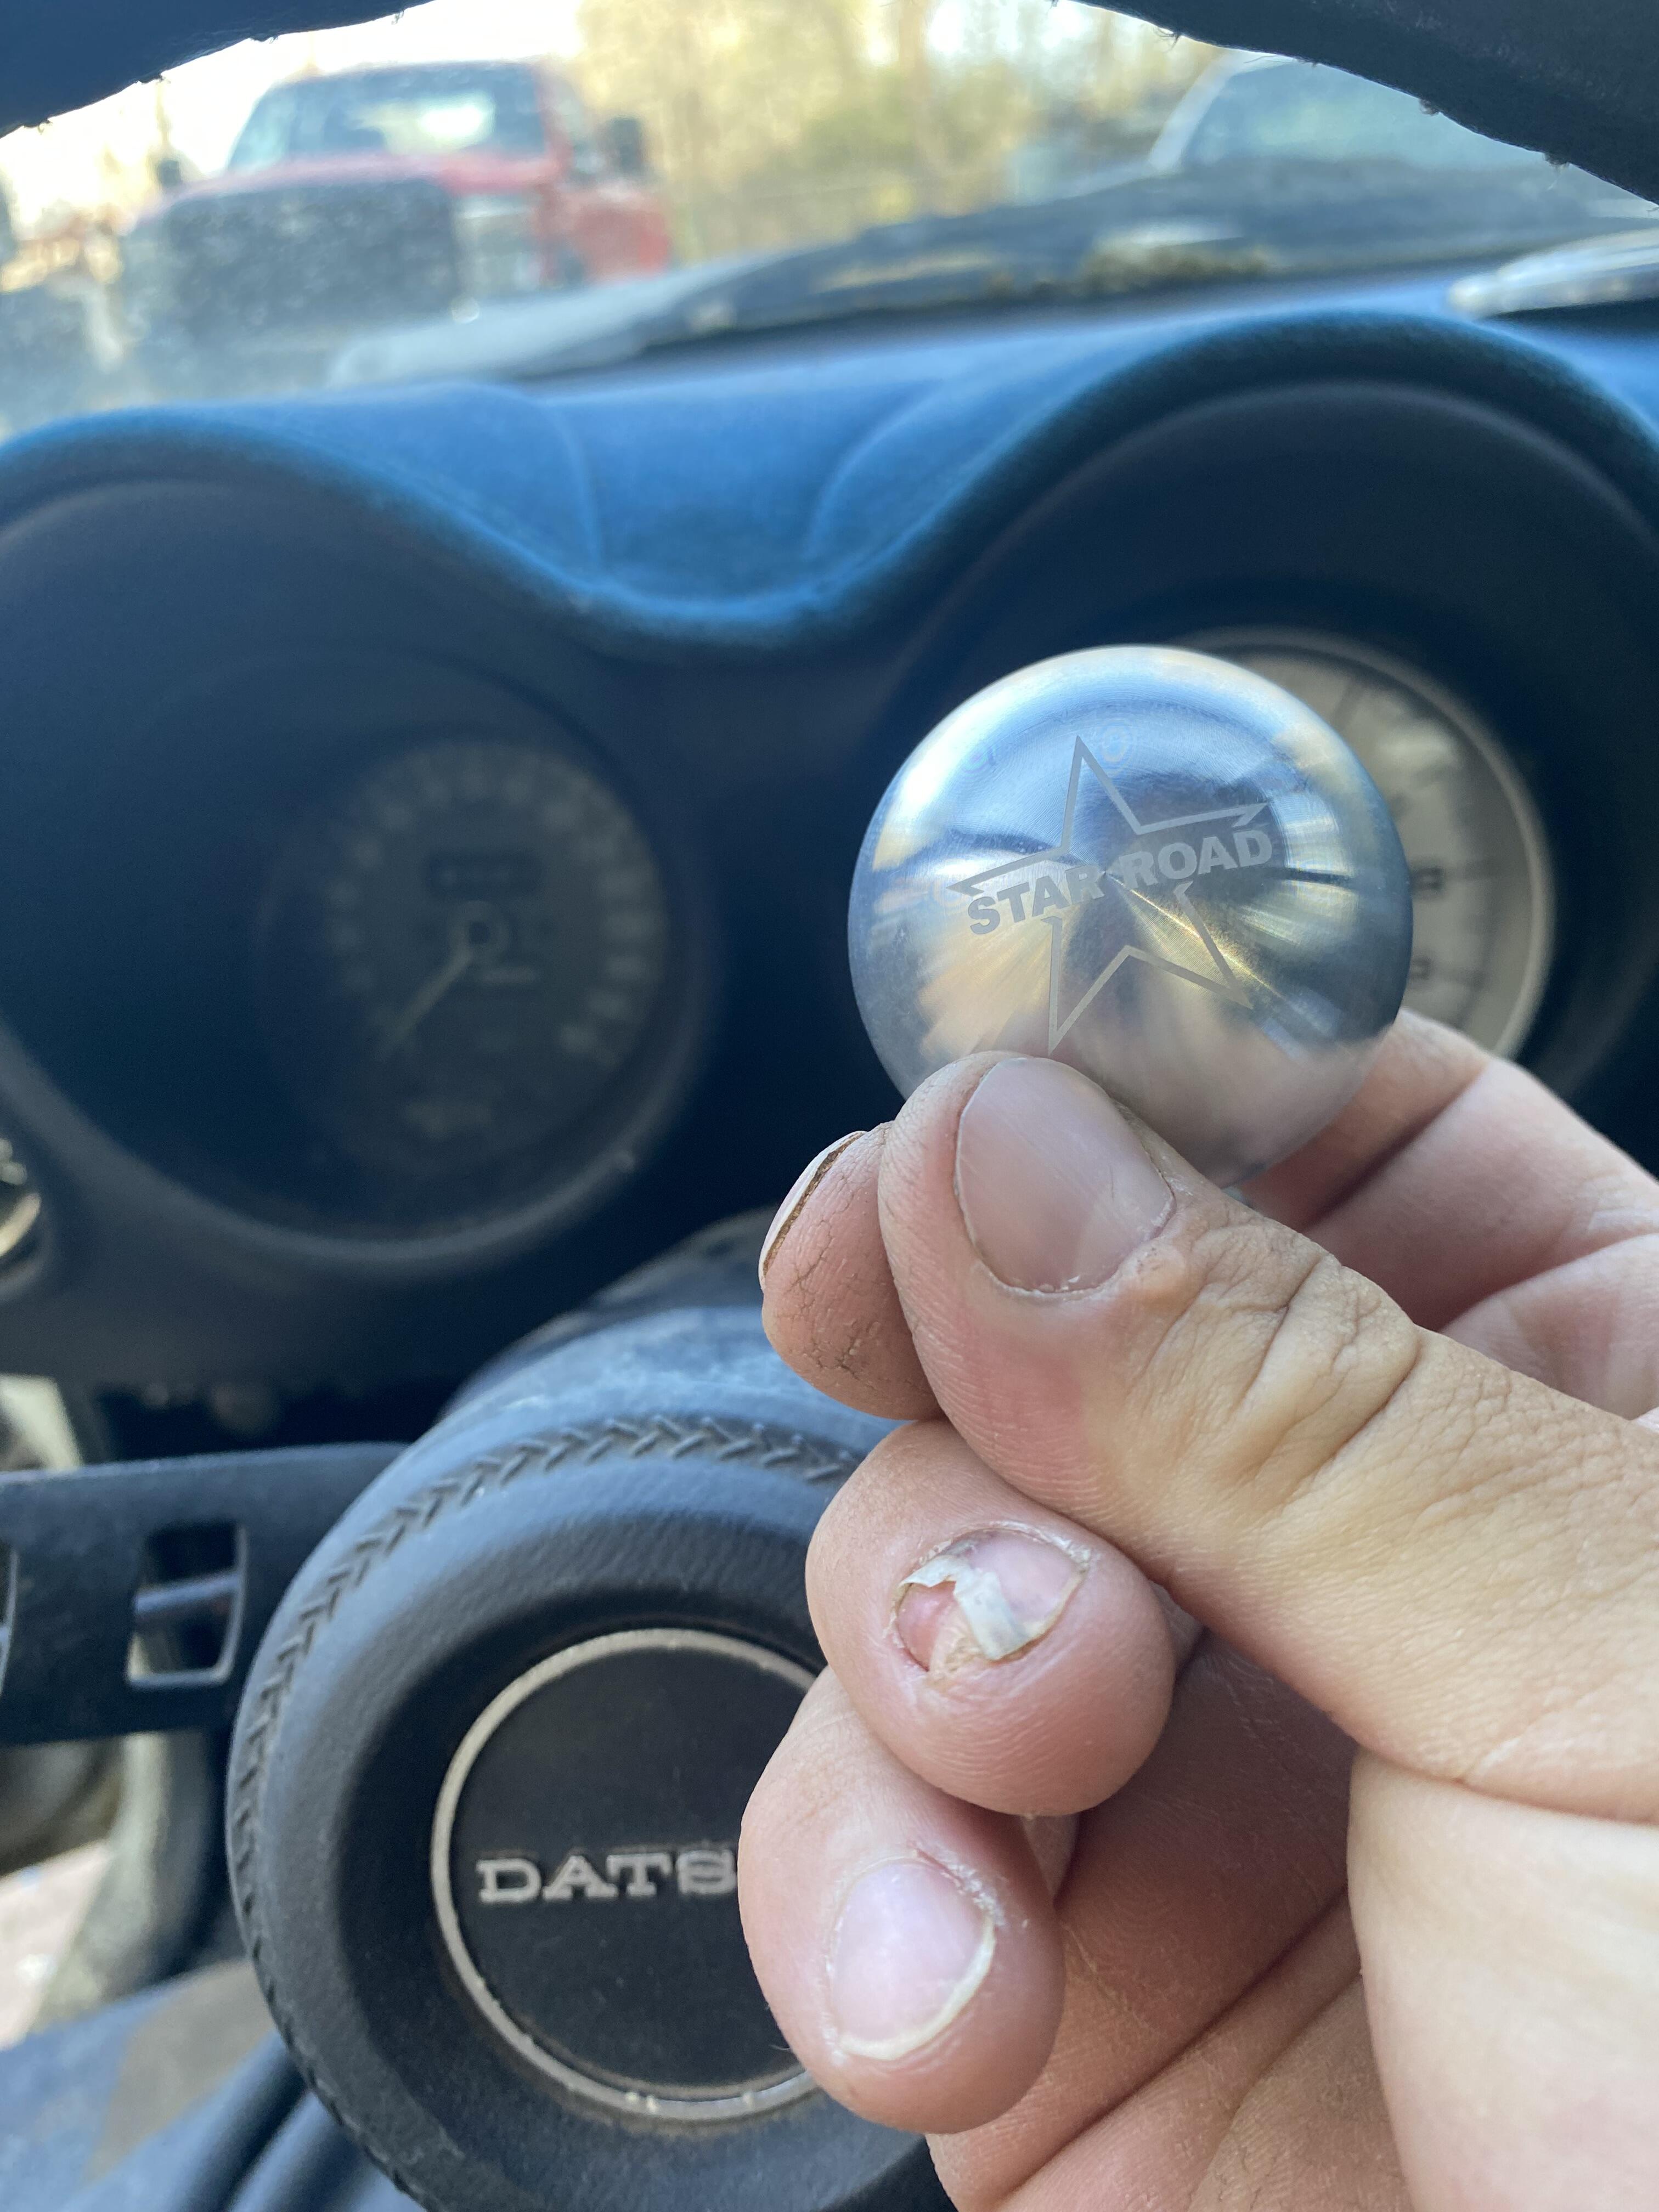
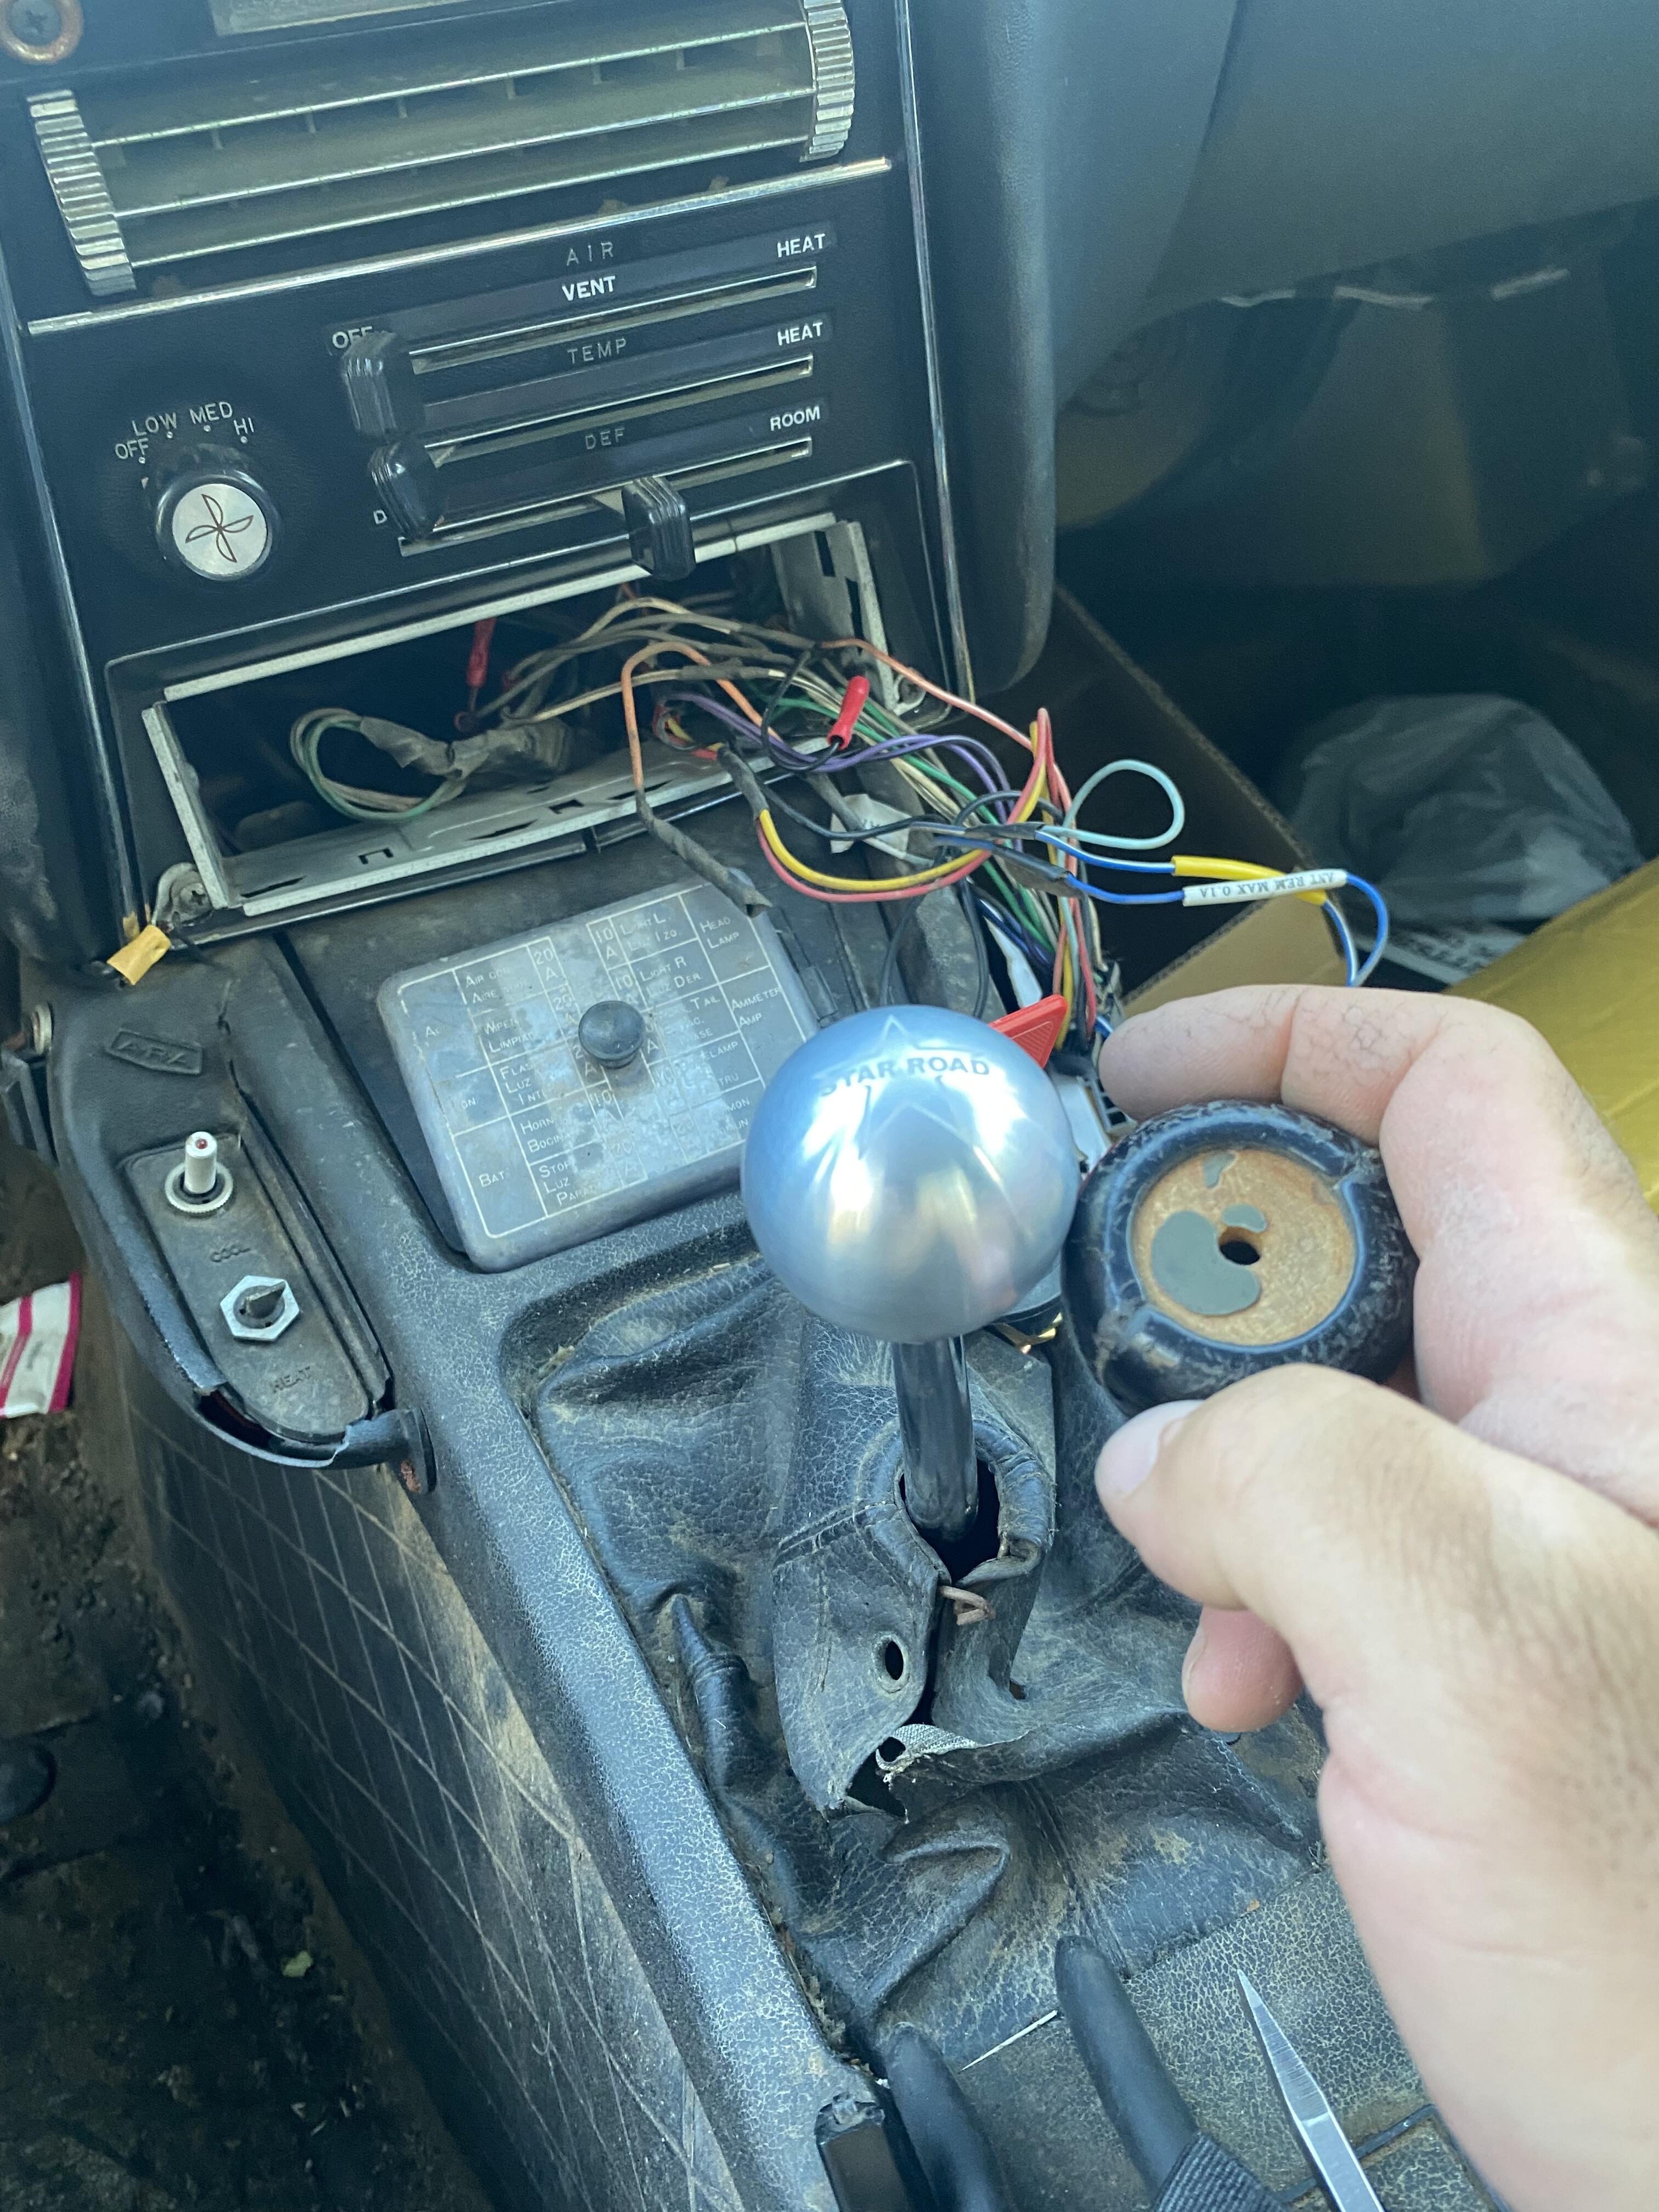
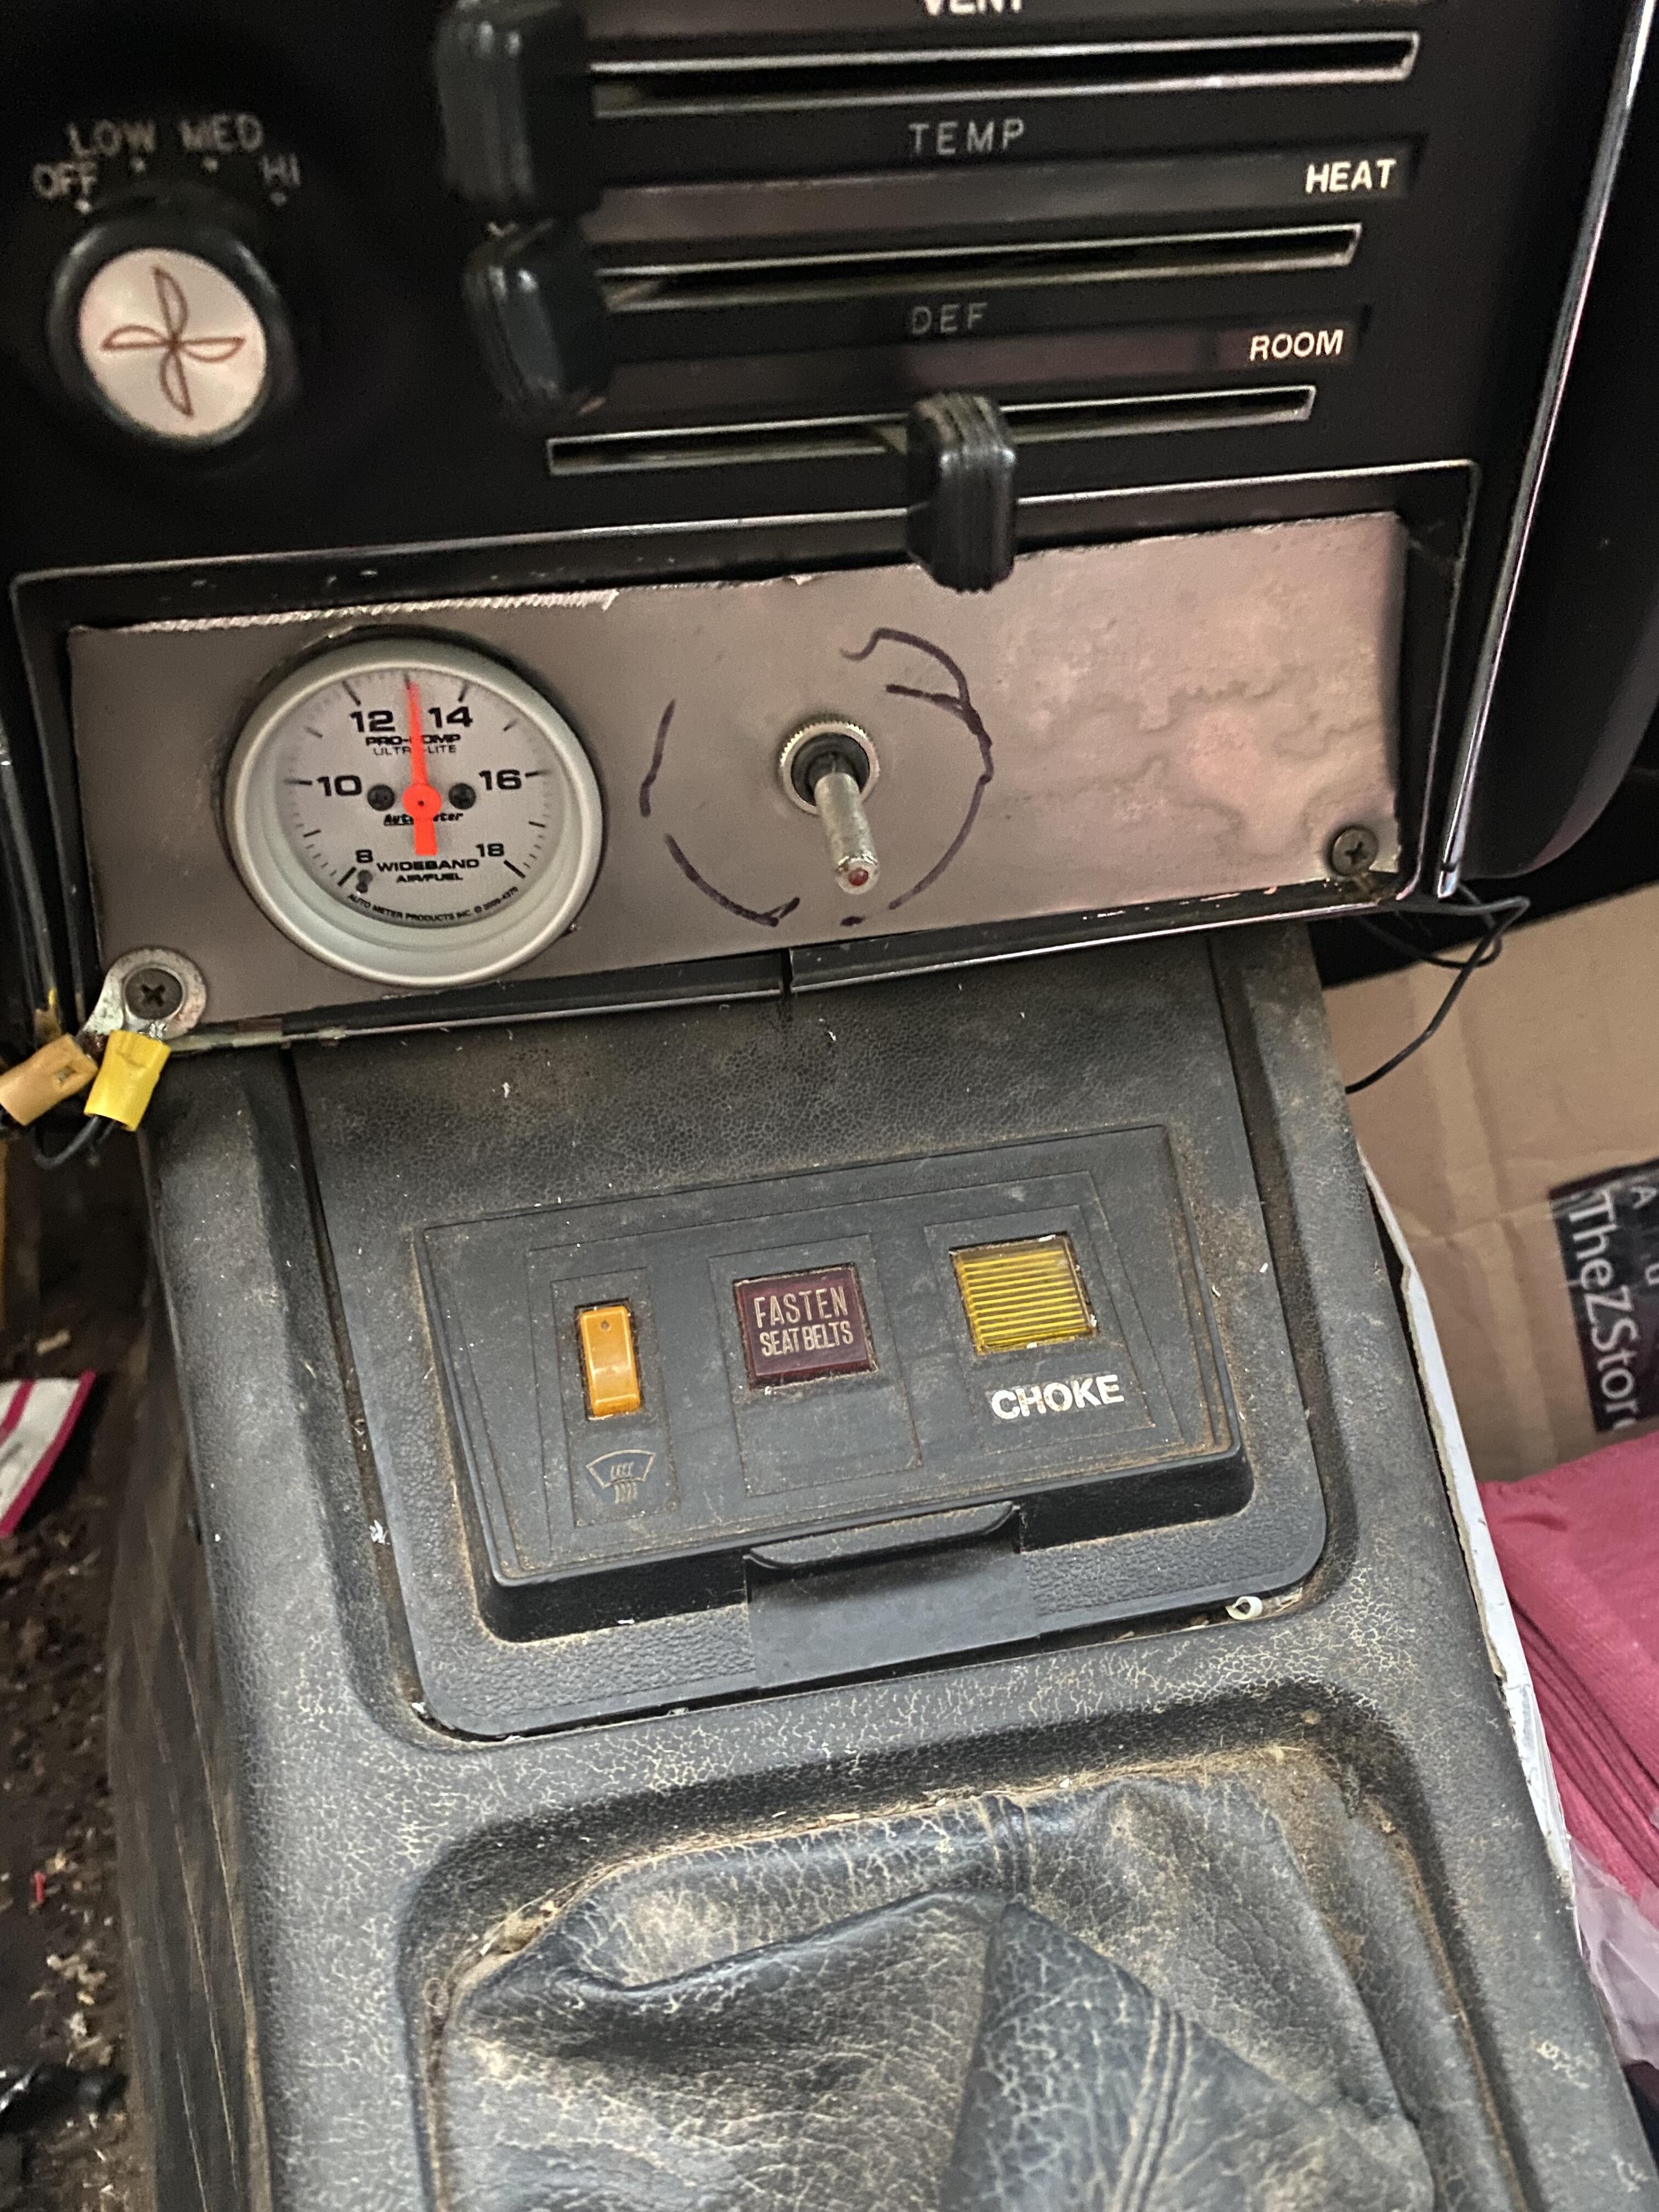
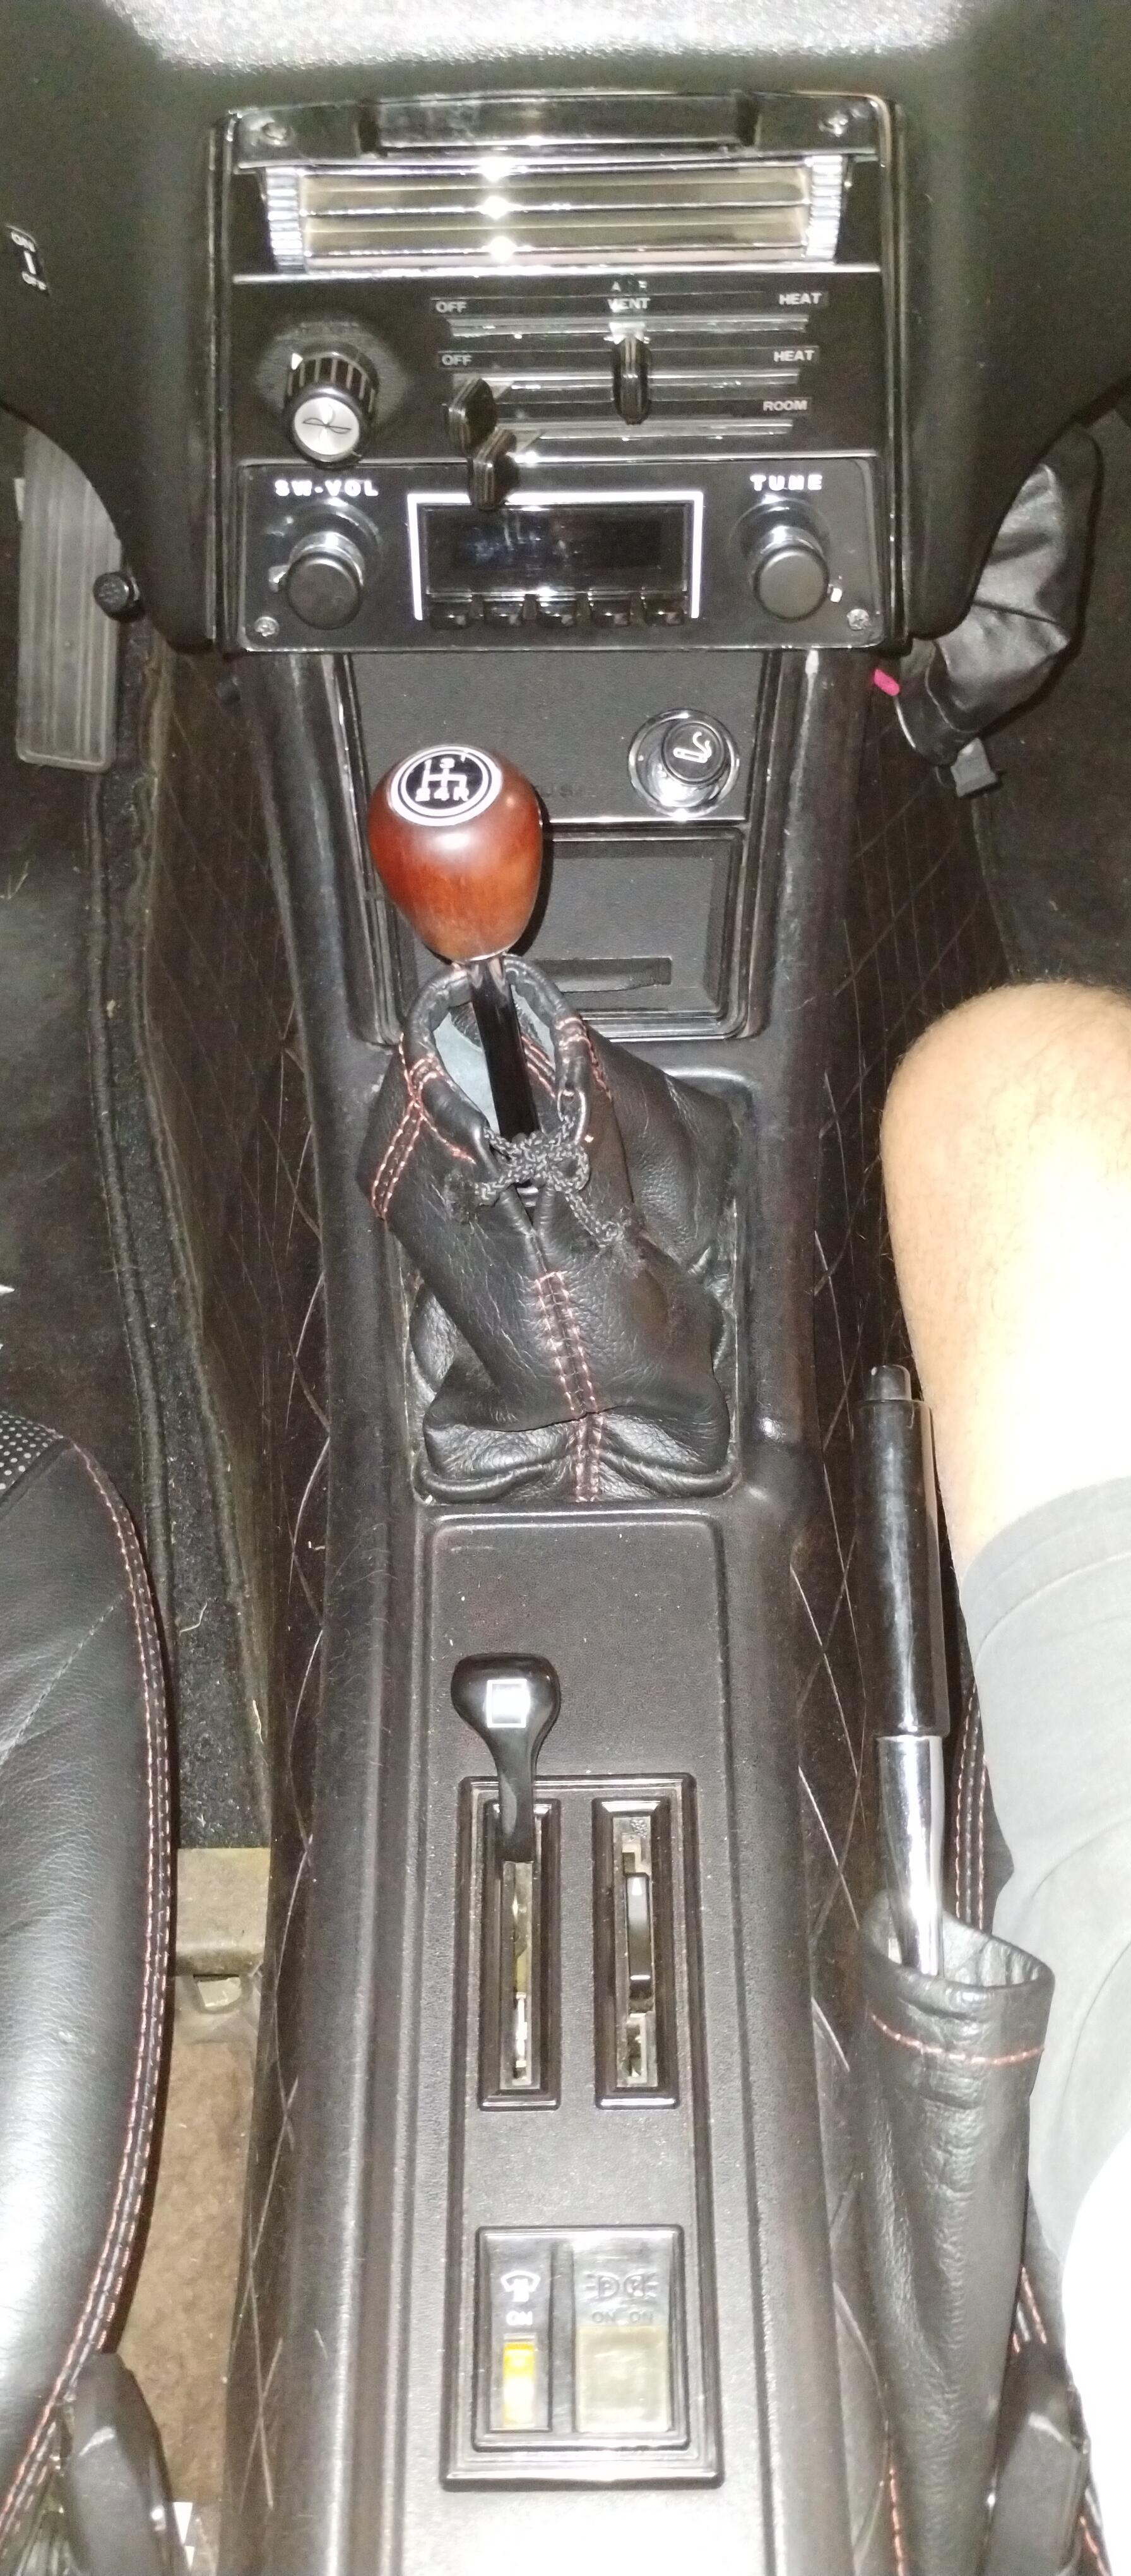
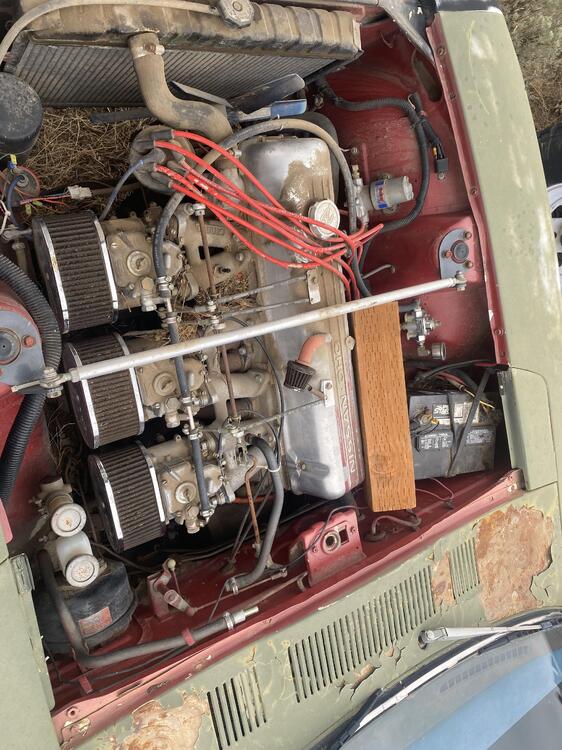
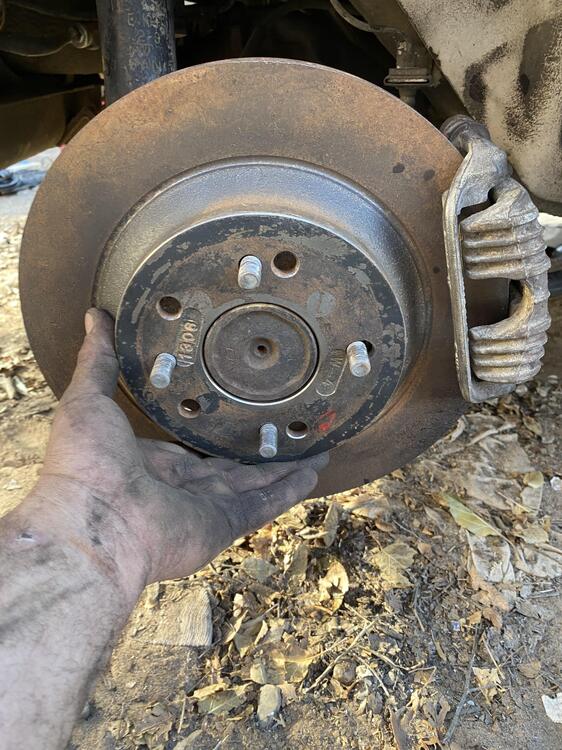
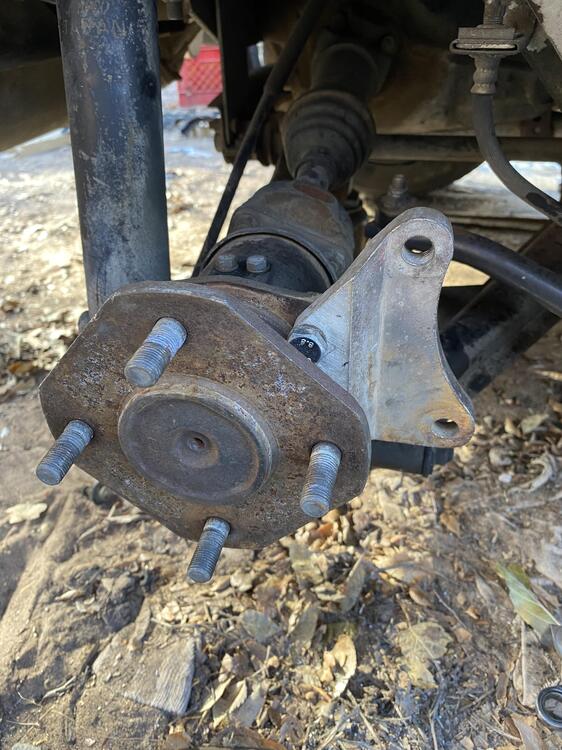
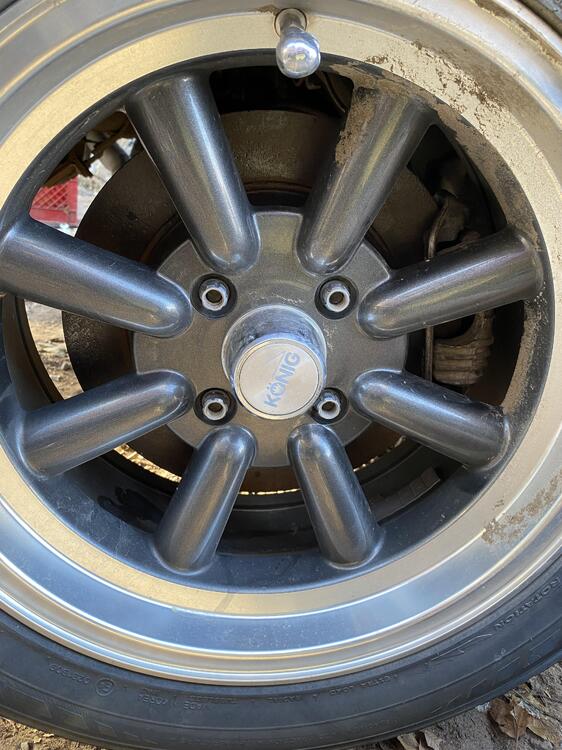
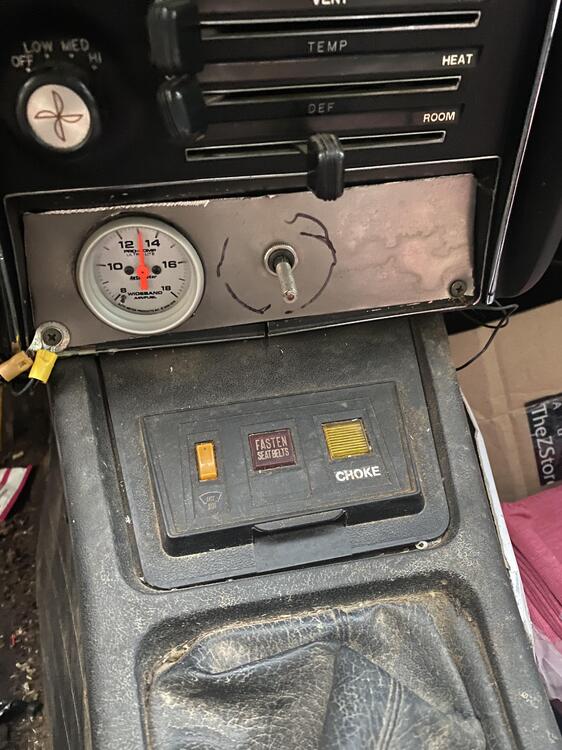
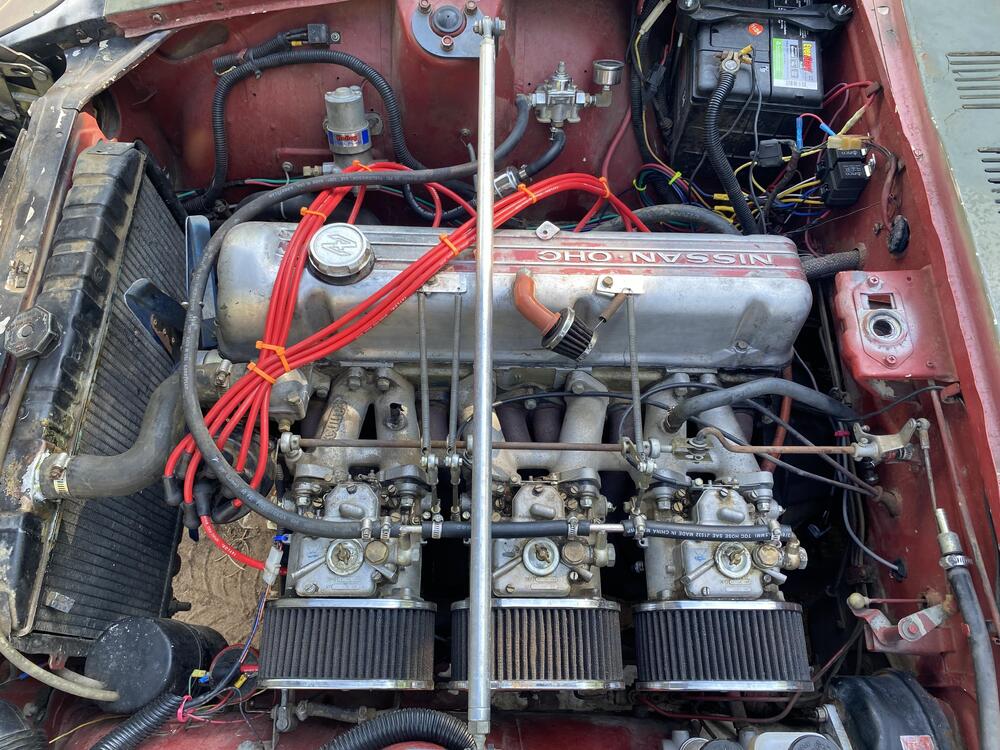
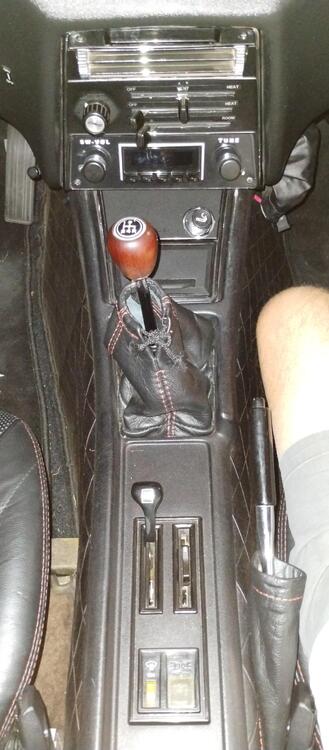
So just a little progress of working on my 1972 240Z that I’ve resurrected twice now since I’ve owned it from 2005 or so ..it’s been a long project and not perfect but it was my daily driver . This is where it sat for 8 years untouched next to my 1988 Toyota pickup in December 2024 All loaded up for the 1500 mile return trip in my 1986 f350 diesel I pulled from a field for 500 bucks a year earlier Once I got it home I got it running pretty easy but noticed an immediate problem in the form a rattling noise from the timing cover to discover a broken tensioner and missing bolts . After that issue was fixed I decided it was time to install my big brake kit I got from a junk yard 260z about 15 years ago .. don’t know who made the brackets but the calipers and rotors are from a 90’s corvette .. 12 inch rotors too ..don’t worry about the wheel studs they have been replaced since It also needed the carbs tuned As you can see they were way off plus I discoved the carbs were loose too ..explained why the erratic idle lol I just had to get a star road shift knob Radio was full or rodent crap and figured why not add a wide band afr gauge from auto meter in its place along with my driving light switch ..I still haven’t cleaned the marker off Also had to make my own headlight relay upgrade to run flosser h4 90/100watt ralley lights It’s an L28 with N47 head from a 1979 280ZX upgrades include 45dcoe triple Webbers . Msa 3 into 2 headers msa stage 3 schneider cam along with schneider valve springs Holley blue fuel pump . Kameari Racing distributor and fidanza light flywheel with centerforce clutch . Also running a single grove dampener . I will get the engine rebuilt in the future and get it up to 10.1 cr so maybe I’d get more out of the mods I have ..but still runs great and sounds amazing .


 1 point
 -
1 point
-
From the pics that’s in really nice shape if the rest of the car looks like that.1 point
-
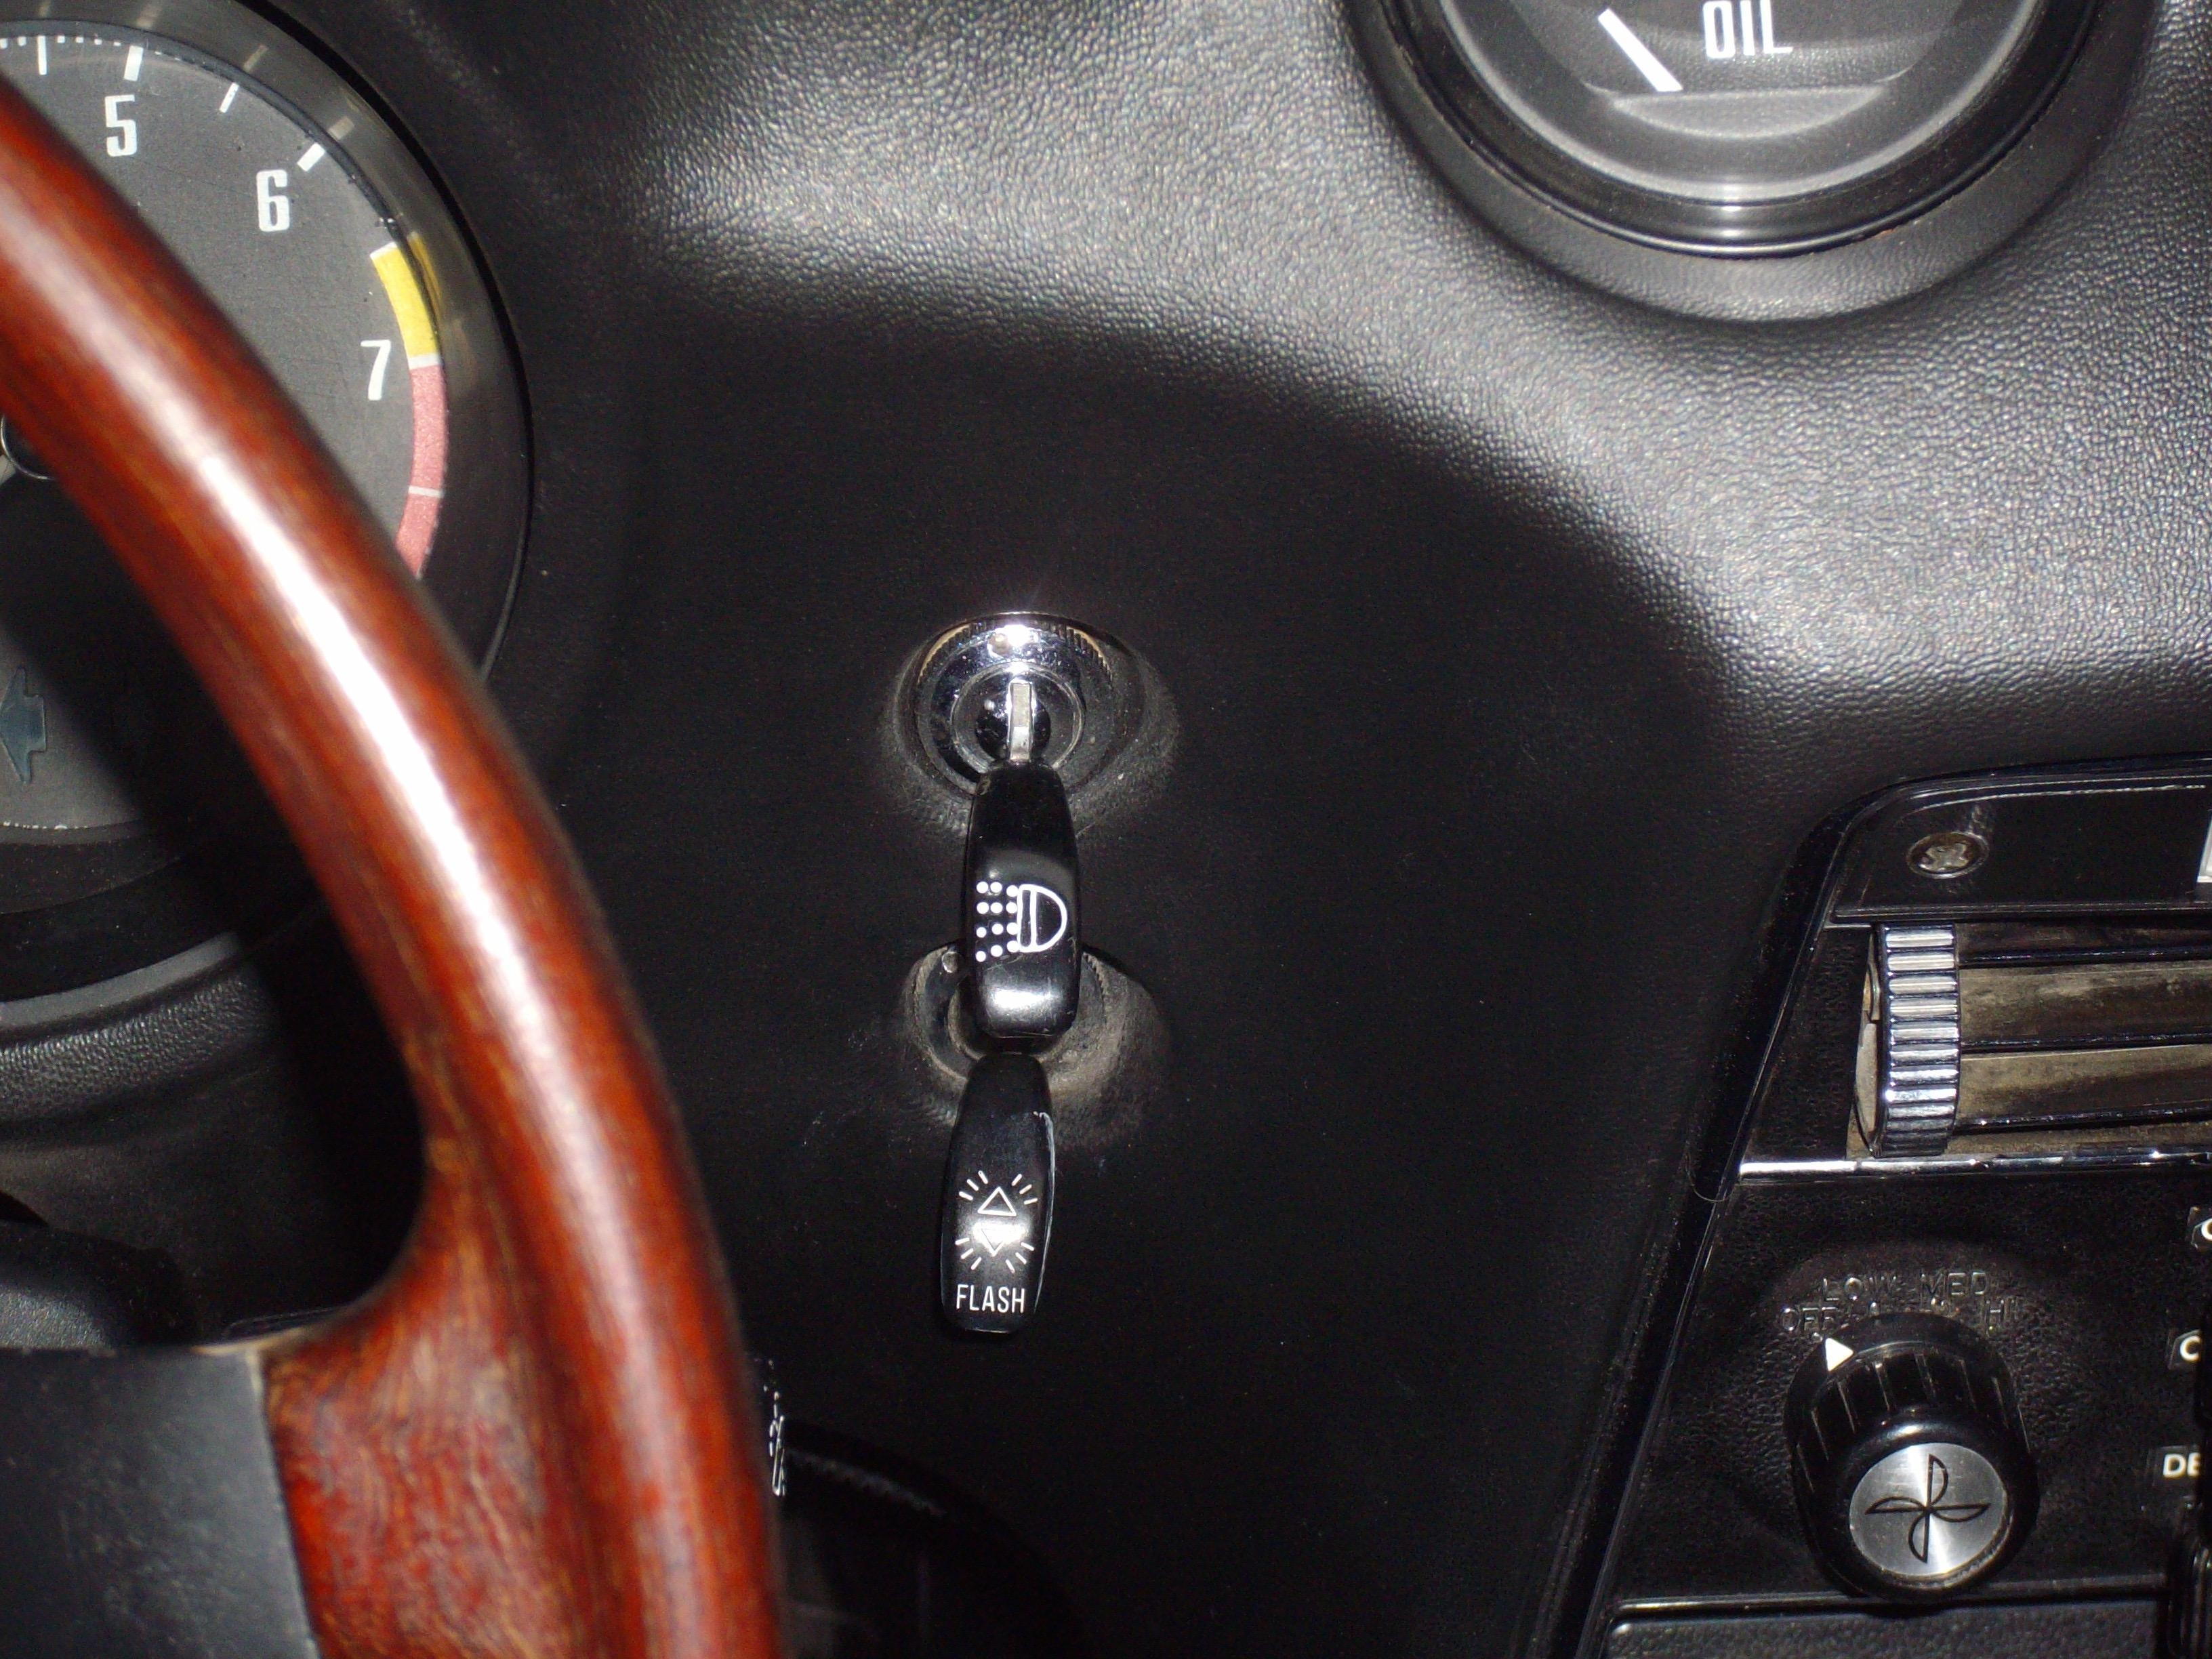
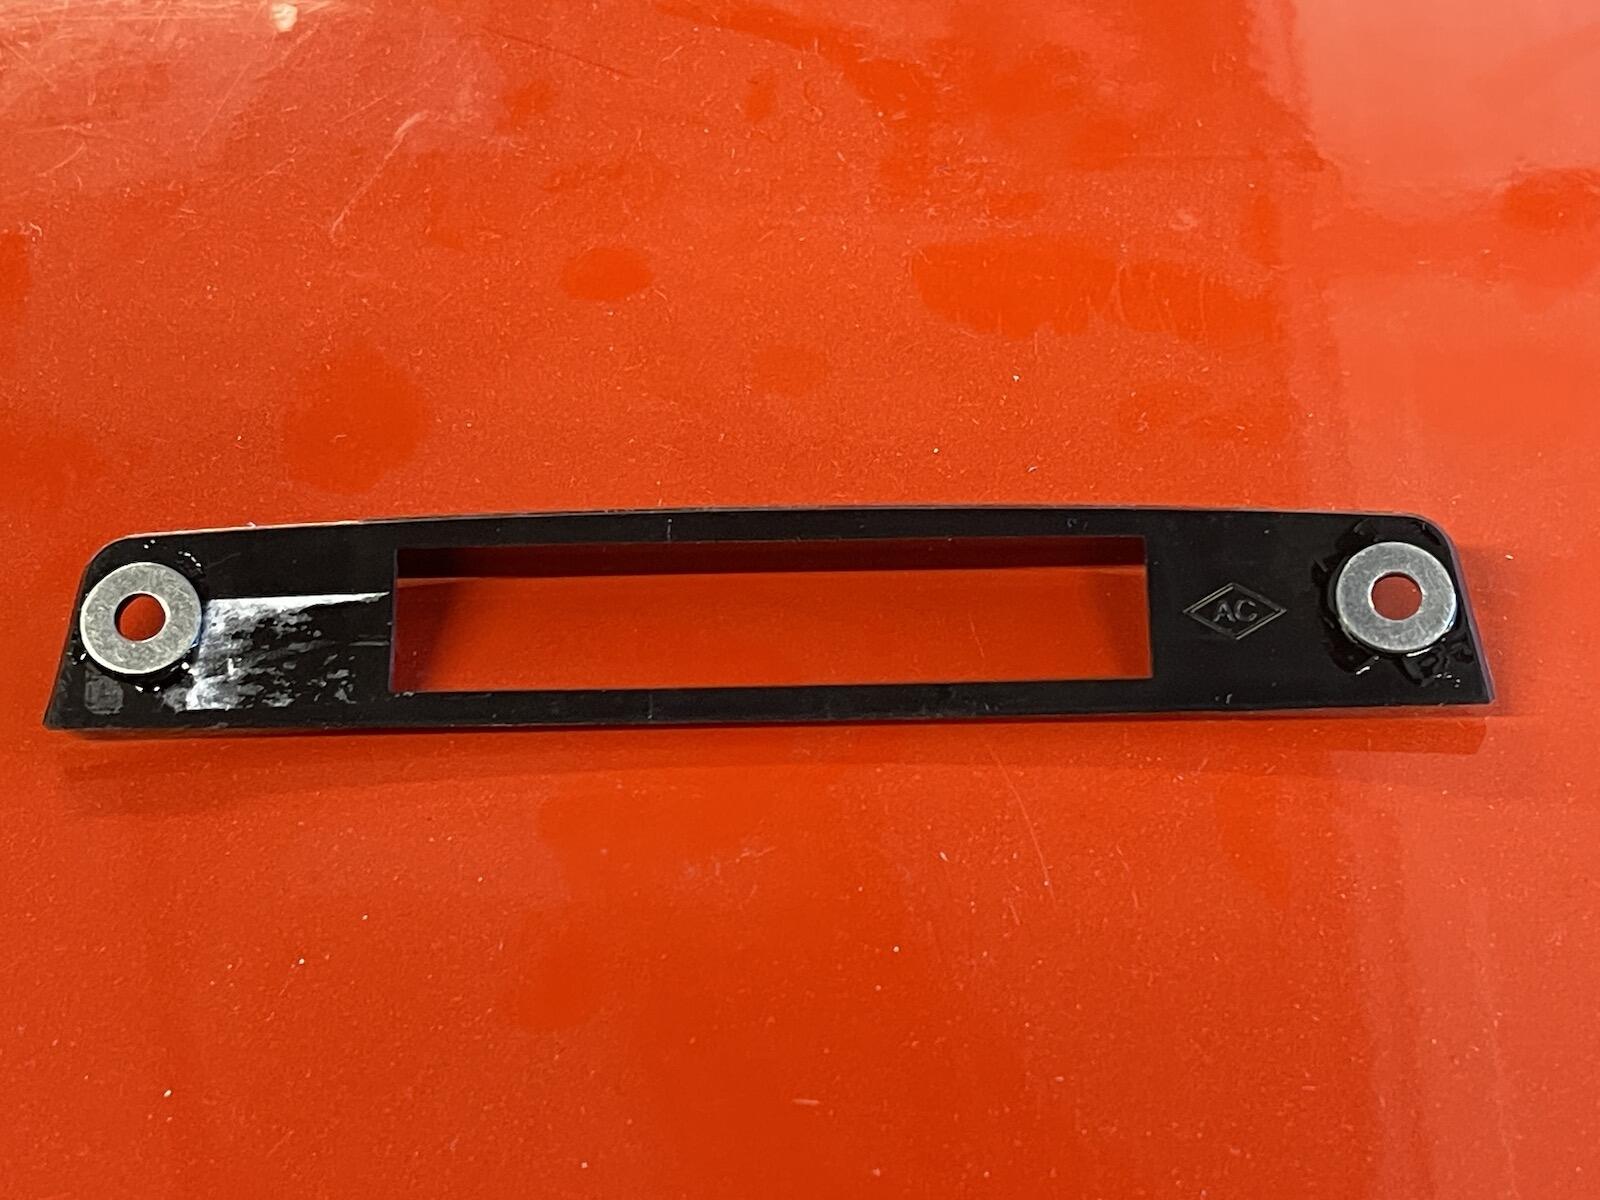
I left mine blank, but I don't have driving lights. I did repurpose the slot for the manual throttle next to the choke for the antenna switch when I swapped out the stock radio back in '91 for a Sony cassette player that I've now replaced in 2017 with a RetroSound Bluetooth radio. Our son 3D printed the faceplate for the radio with the raised lettering and the surround of the radio face that I painted white so it has a more stock look.
 1 point
 -
1 pointI wasn't taking sides on the cadmium versus zinc issue. I have no knowledge or expertise to bring to bear on that topic. 26th-Z said "but how does this all matter", which is what HS-30H was referring to with the Brute quote. I think one of the hallmarks of this group is believing that details matter. My comment was meant to commend that behaviour. And Zed, you're definitely one of the people who cares about detail in my view. I don't always enjoy the exchanges themselves, but I think we all benefit from the willingness to engage, and the level of knowledge that results. Sorry that I wasn't clear.1 point
-
1 pointcgsheen was letting people know that the new Nissan fan he bought flexed and let the blades get pulled in to his radiator. That's a concern to be aware of. Maybe the replacment fans are more flexible than factory issued fans. I was responding to suggest that maybe it was his fan clutch that caused it, not the qualities of the fan. Could also be that his Koyo radiator did not flow as much air as the factory radiator and this caused a lower pressure inside the fan shroud. Just trying to save darom's radiator.1 point
-
1 point
-
1 pointMaybe that would have been better off on another post. Totally threw off where to get an NOS or comparable fan. Difficult sometimes to understand what the post was about originally unless you begin at the beginning. I hope you understand what I’m trying to say. Thanks1 point
-
1 point
-
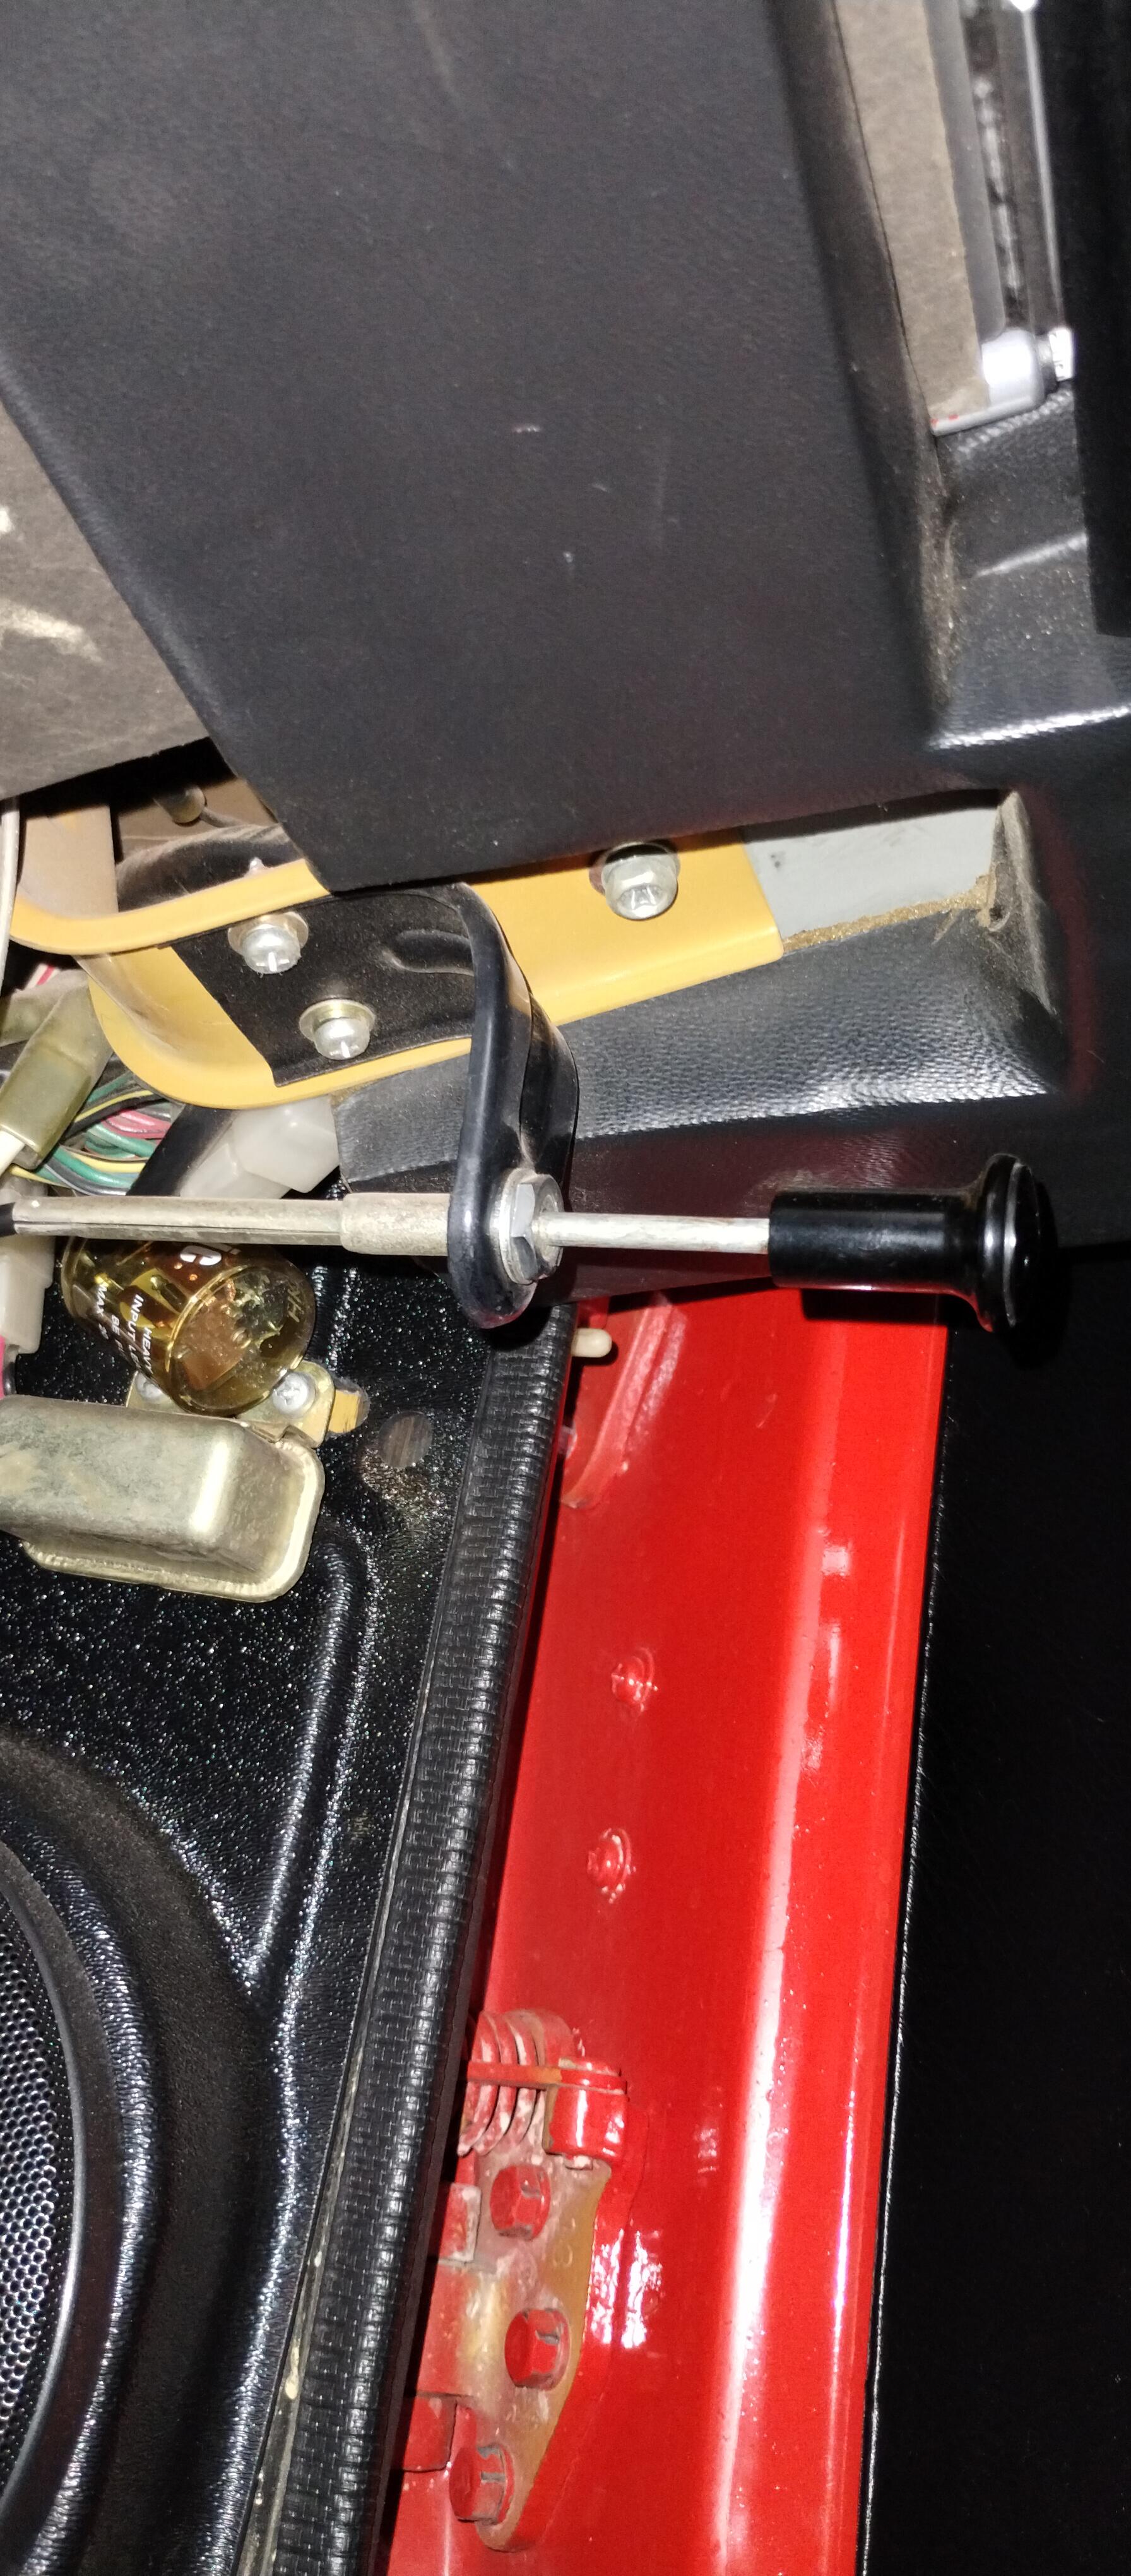
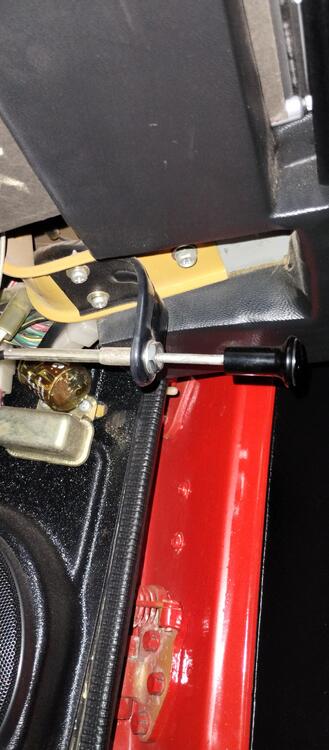
Here it is over hiding against the passenger side relays just behind the vent pull rod.
 1 point
 -
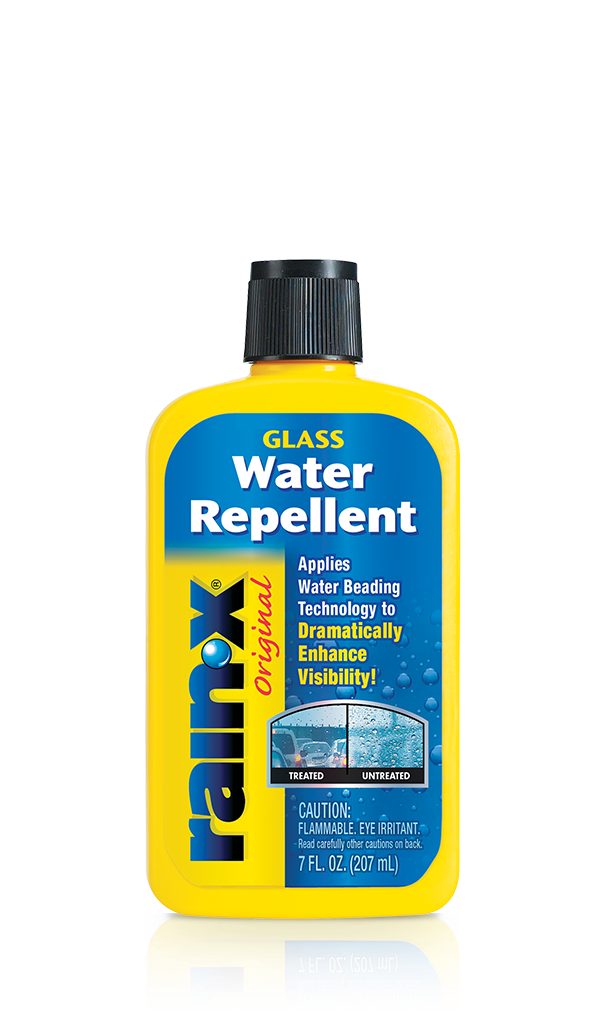
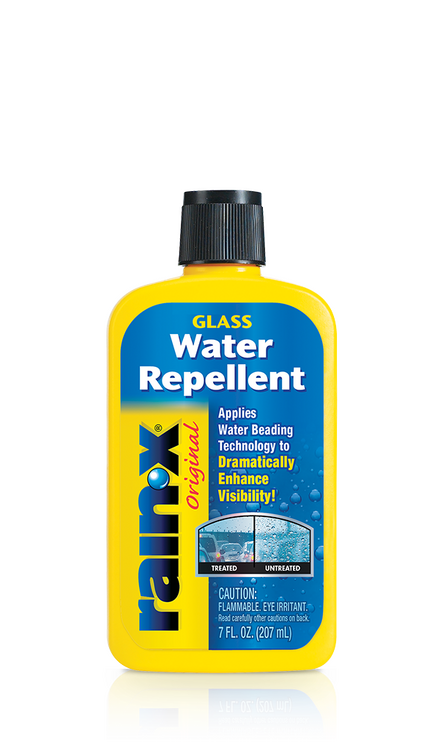
Unless you have rebuilt the wiper motor and all of that, you should throw a bottle of Rain-X in the glove box just in case. If you go fast enough it works when the wipers don't. I kept a bottle in my Hardbody Nissan when I was driving back and forth to Destin after hurricane Opal.
 1 point
 -
1 point
-
1 pointGood information. Thanks for the followup. There was none, now there is some. Well done.1 point
-
1 pointI have taken the time to research this on the Japanese side, trawling through numerous Japanese market factory parts manuals for Nissan models made during the 1960s and early 70s period. I found some pointers. Dates quoted are the dates for the publication of the parts manual concerned: *Model 31 Nissan Cedric - 1963 - Both Zinc and Cadmium protective coatings applied to fasteners/components. *Model 310 Nissan Cedric - 1964 - Both Zinc and Cadmium protective coatings applied. *Model 410 Bluebird - 1964 - Both Zinc and Cadmium applied. Then, *B10 Sunny - 1966 - Zinc. *510 Bluebird - 1967 - Zinc. *T44 Nissan Miler (ex-Prince) - 1968 - Zinc. *T65 Nissan Clipper (ex Prince) - 1968 - Zinc. *Model 60 Nissan Patrol - 1968 - Zinc. *521 Pickup - 1968 - Zinc. *C30 Nissan Laurel - 1968 - Zinc. *A30 Nissan Gloria (ex Prince) - 1968 - Zinc. *SR311 Fairlady - 1968 - Zinc. *130 Nissan Cedric - 1969 - Zinc. *C10 Skyline - 1969 - Zinc. *C20 Vanette - 1970 - Zinc. *GC10 Skyline - 1971 - Zinc. *A-321 Cabstar - 1971 - Zinc. ...so, judging from the above, it seems likely that Nissan's use of Cadmium for protective coatings was discontinued around 1965. I also searched factory parts manuals of Prince Motor Co products (Prince were forcibly merged with Nissan in 1966) but they carry no data on protective coatings for their parts. Your move.1 point
-
Yeah, there was something wrong with the forum. Wasn't working properly, but it seems to be back now.1 point
-
1 pointI'm not about to wade into this discussion except to say that I think there's a lot to be said for the quoted comments. First, I like, and get in this context, the Shakespeare reference. Ouch! I'm betting it was a weak moment for 26th and he'll be back onside soon. But more importantly, if there's a community on the internet more dedicated to knowing everything there is to know about Datsun Z Cars, I haven't found it. This is it. Sometimes it takes a long, rancorous discussion to get to the answer, but down the road it's only the answer that will matter. Good for you guys for caring enough about this stuff to challenge each other to get to the right answers. Not everyone will care about whether it was cadmium chromate or zinc chromate, but a few will, and we stand a better chance of determining the answer today than we ever will in the future. Cheers to you guys for your dedication to the cause!1 point
-
Over the last few days, I was busy in my workshop, getting some small tasks completed on my Z project. Time for a little update. After installing the partial gearbox to test fit the brackets and stuff, I realized that the gear lever is too much in the front of the hole: A quick look into the manual made it clear: I had mounted the lever the wrong way. So, gear box rear-end out, gear lever corrected: And back in, this time, correctly: Then I spent a lot of time at the rear end of the car. I had to clean the holes for the three taillight panels, so that the plastic rivets would lock properly. After that i re-installed the taillights, and ensured the sealing rubbers were set correctly, using my "string-trick": Next i have to finish the slightly worn chrome / metal trim around the taillight panels and get them back on: While working at the rear, i decided to install all those fasteners, stoppers, alignment pieces, guides, etc. Like those rubber spacers: And trunk dampers. I have a NOS set of everything, so the installed ones are only temporary, to not mess up the new ones: And the last bit at the rear end was to align the trunk / hatch. The body shop had installed some spacers to get it straight, but after all the parts got installed, I had to remove them again and massage a few areas lightly to have it all aligned: Next? Seat rails. I had those Bride seat rails from my Histrix lying around for a while and wanted to test-fit them. I'm most probably going to use something different setup in the end, but I wanted to ensure that the distance and position of the seat mounting brackets was right after all the bodywork. I thought the best way was to use the original seat rail mounting studs and spacers. Since I had several highly-damaged OEM seats, I hammered out the fasteners and used the plastic spacers after grinding away the factory spot-welds on the bolts. This worked unexpectedly well, so now I can do some trials with different seats, rails and setups - to figure out what will go into the car in the end. Next: I realized that I didn't have any upper rear number plate light in my part collection. Luckily, Florian from Datsun-Autowerk was kind enough to send me one of his broken ones including some other parts (more on that in a following post), for trials. After puzzling and glueing all the parts together... I could mock it up all together and drill the required holes. Fun-fact: I always thought that slight "dent" in the gray metal piece was a production fault of the reproduction panel, but it's actually there to make space for the number plate lighting bolt. After the holes were done and cleaned, I got the upper plastic part installed. And then the whole thing with the lens. Note all bolts and the light itself are temporary units for the mock-up only, final parts will be correct and fresh. Looks good if you ask me! Special thanks to the person who gave me the hint with the holes (I wasn't able to find the mail anymore, but you know who you are!) And then? Spoiler-Alert. Again. After i realized that the currently installed spoiler is beyond repair, I remembered that I had another one lying around. But it was bent in all directions and super wobbly: But all the brackets were still in good shape, so I gave them a little wire wheel brush and corrosion protection: I placed them on our terrace, which tends to get quite hot now in summer And let it take the heat every day. My thought was that the Polyurethane gets weak and goes either back in its natural shape by itself, or can be massaged. At the end, some areas turned out to be pretty stiff, even with heat and required some proper bending over my special bending bench :-) It didn't really work out. It's way better than in the beginning, but still super wobbly. I thought if i'd install it on the car, it might straighten itself a bit. Let's see. I have my doubts. The good thing is, there seems to be another spoiler on the horizon :-) I've seen worse ones, but yeah. Not good enough for me: I also went through my plated fasteners and sorted them a bit. I got various boxes over the years from various collectors and Z-specialists, so it was about time to ensure I find what I'm looking for :-) The to-do list gets smaller by the week. And there's not much left from my side, but some tricky bits. I guess I've earned my favorite Japanese "Hitachino Nest" beer for today.1 point
-
1 pointHere's the latest wiring diagram. I changed the ground distribution scheme to add the dedicated ground strap directly from the battery terminal to the firewall, and also labeled the ground connections that are through the engine metal. Hope this helps depict how the car is actually wired. I also changed one of the wire colors leading to the fog light switch. Might only matter to people in other parts of the world who have fog lights. <V8.0> _obvious 240Z Wiring Diagram 8.0.pdf
 1 point
 -
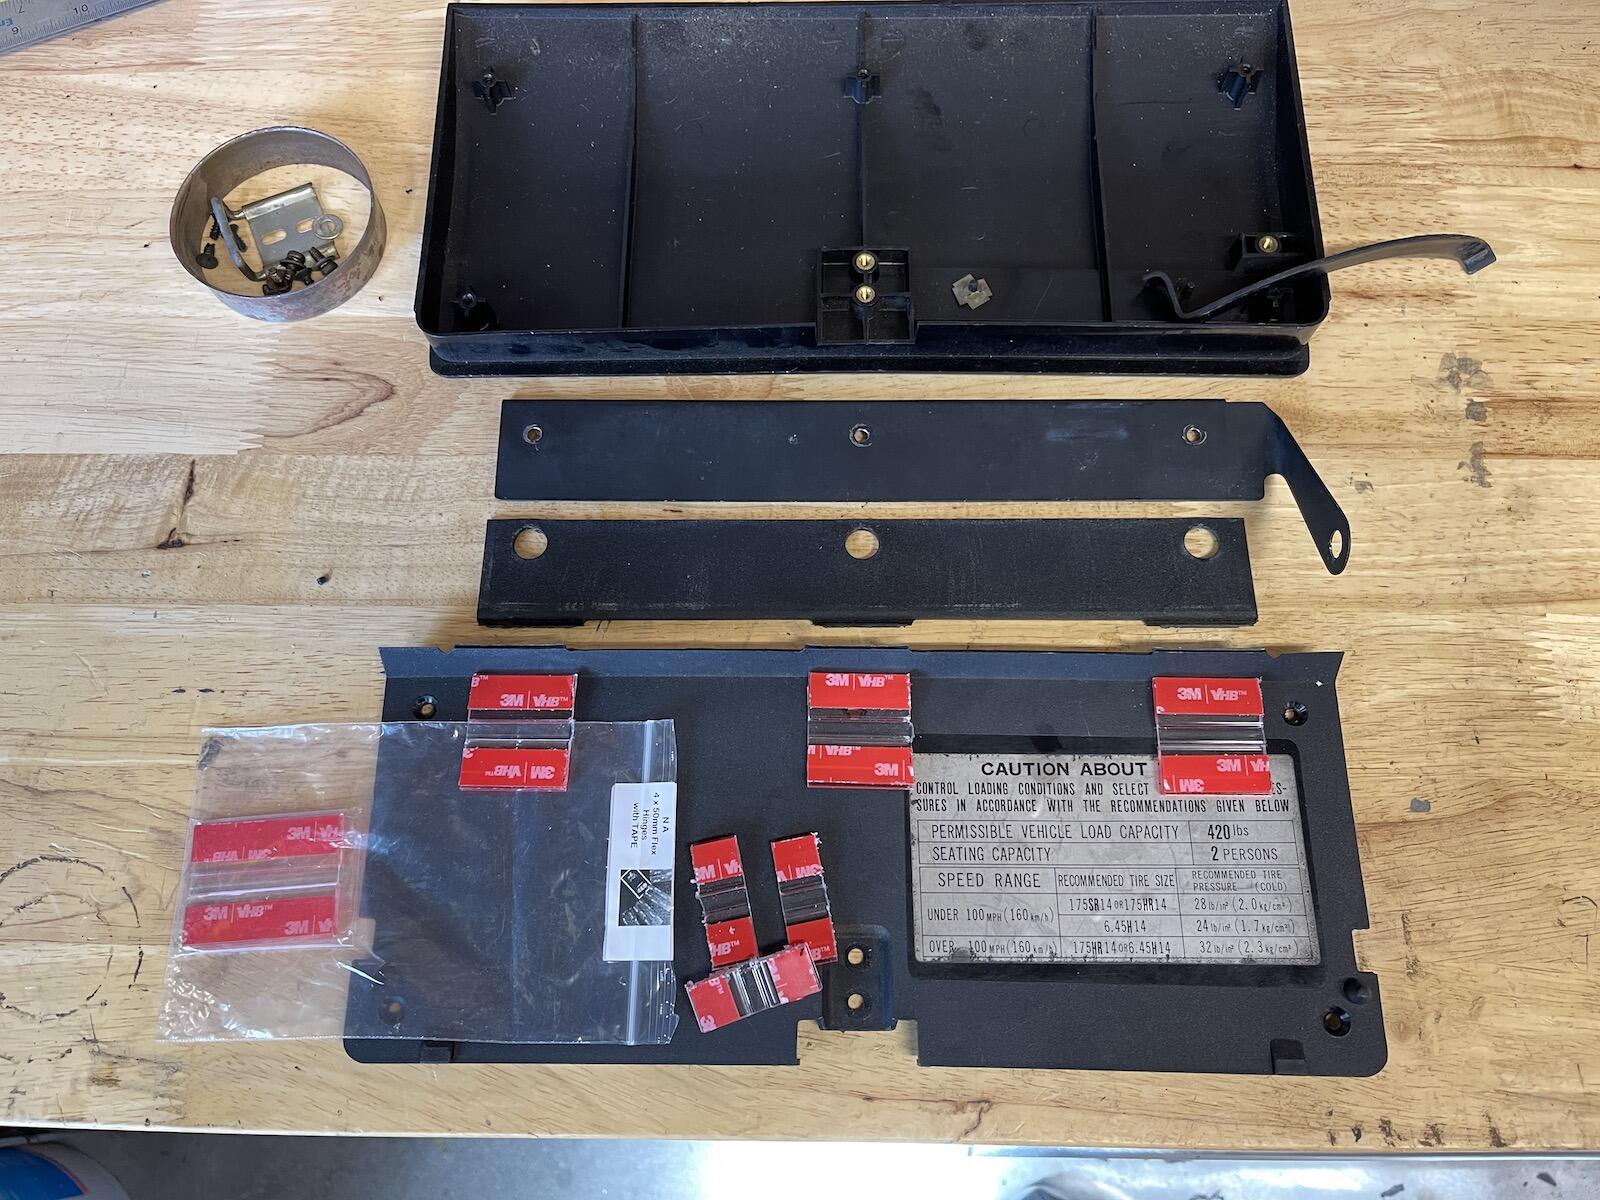
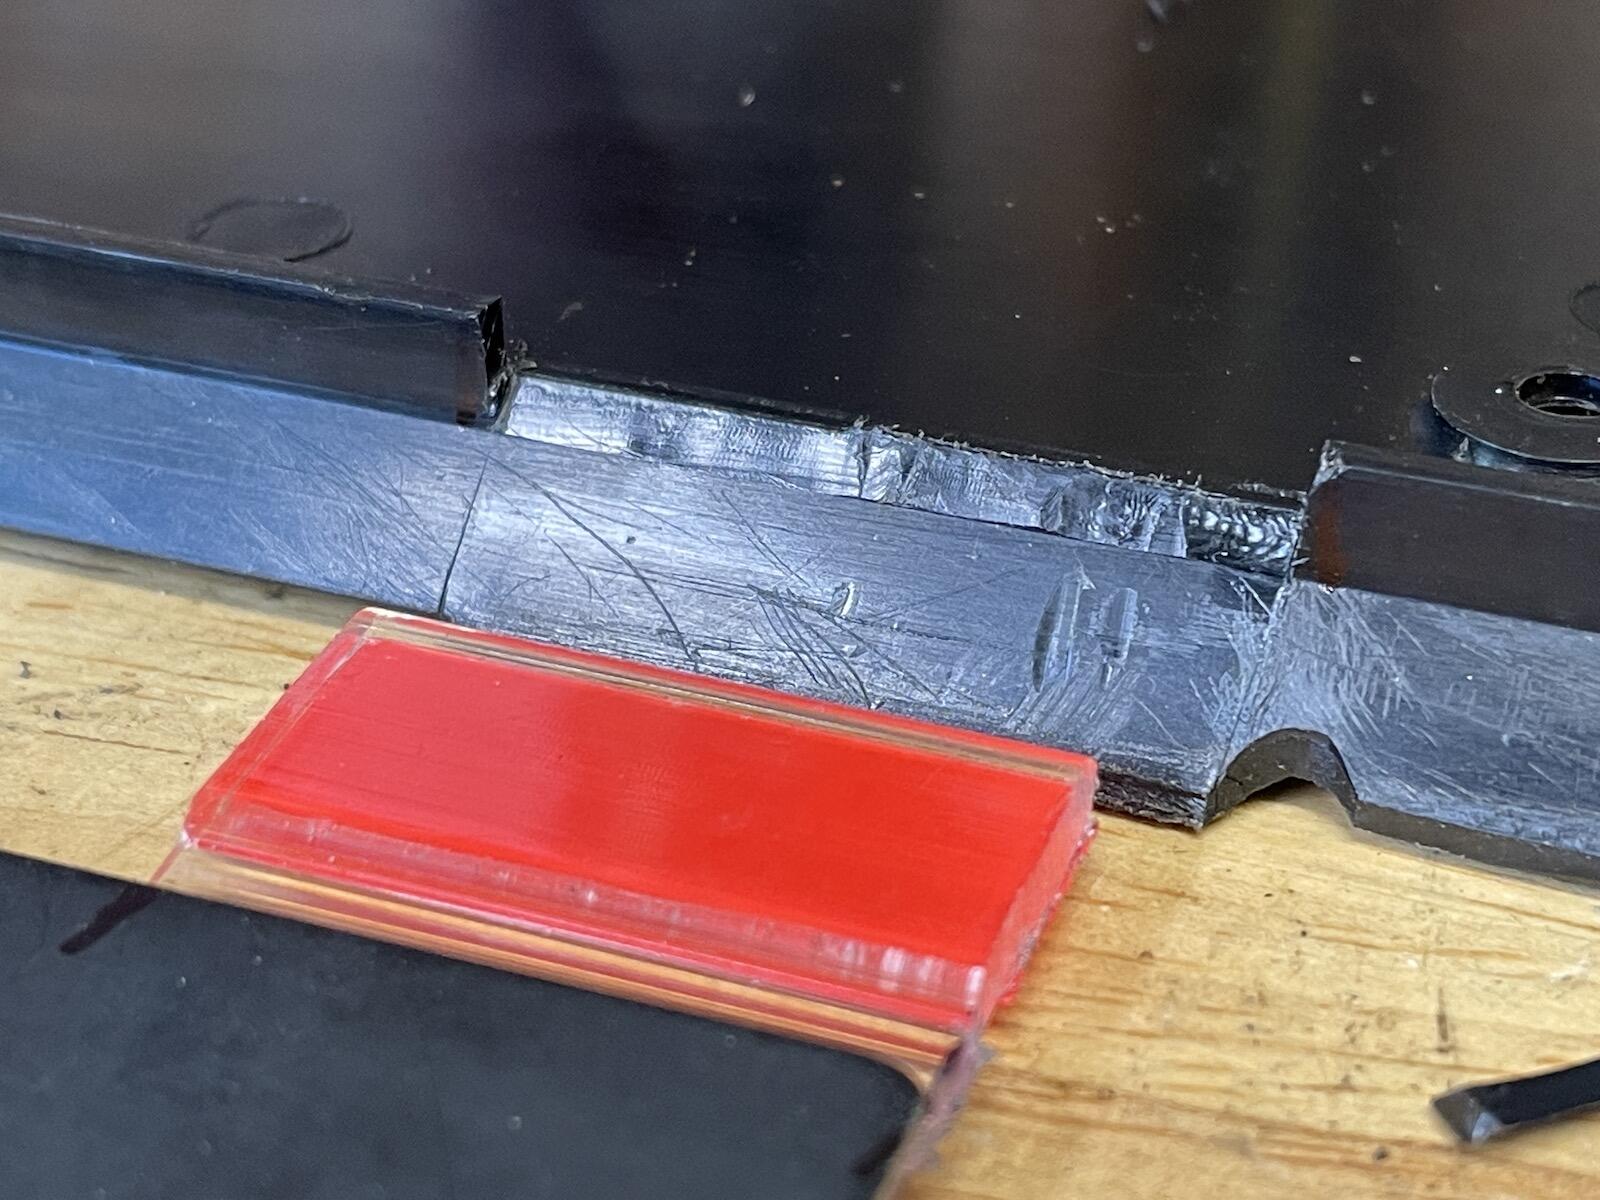
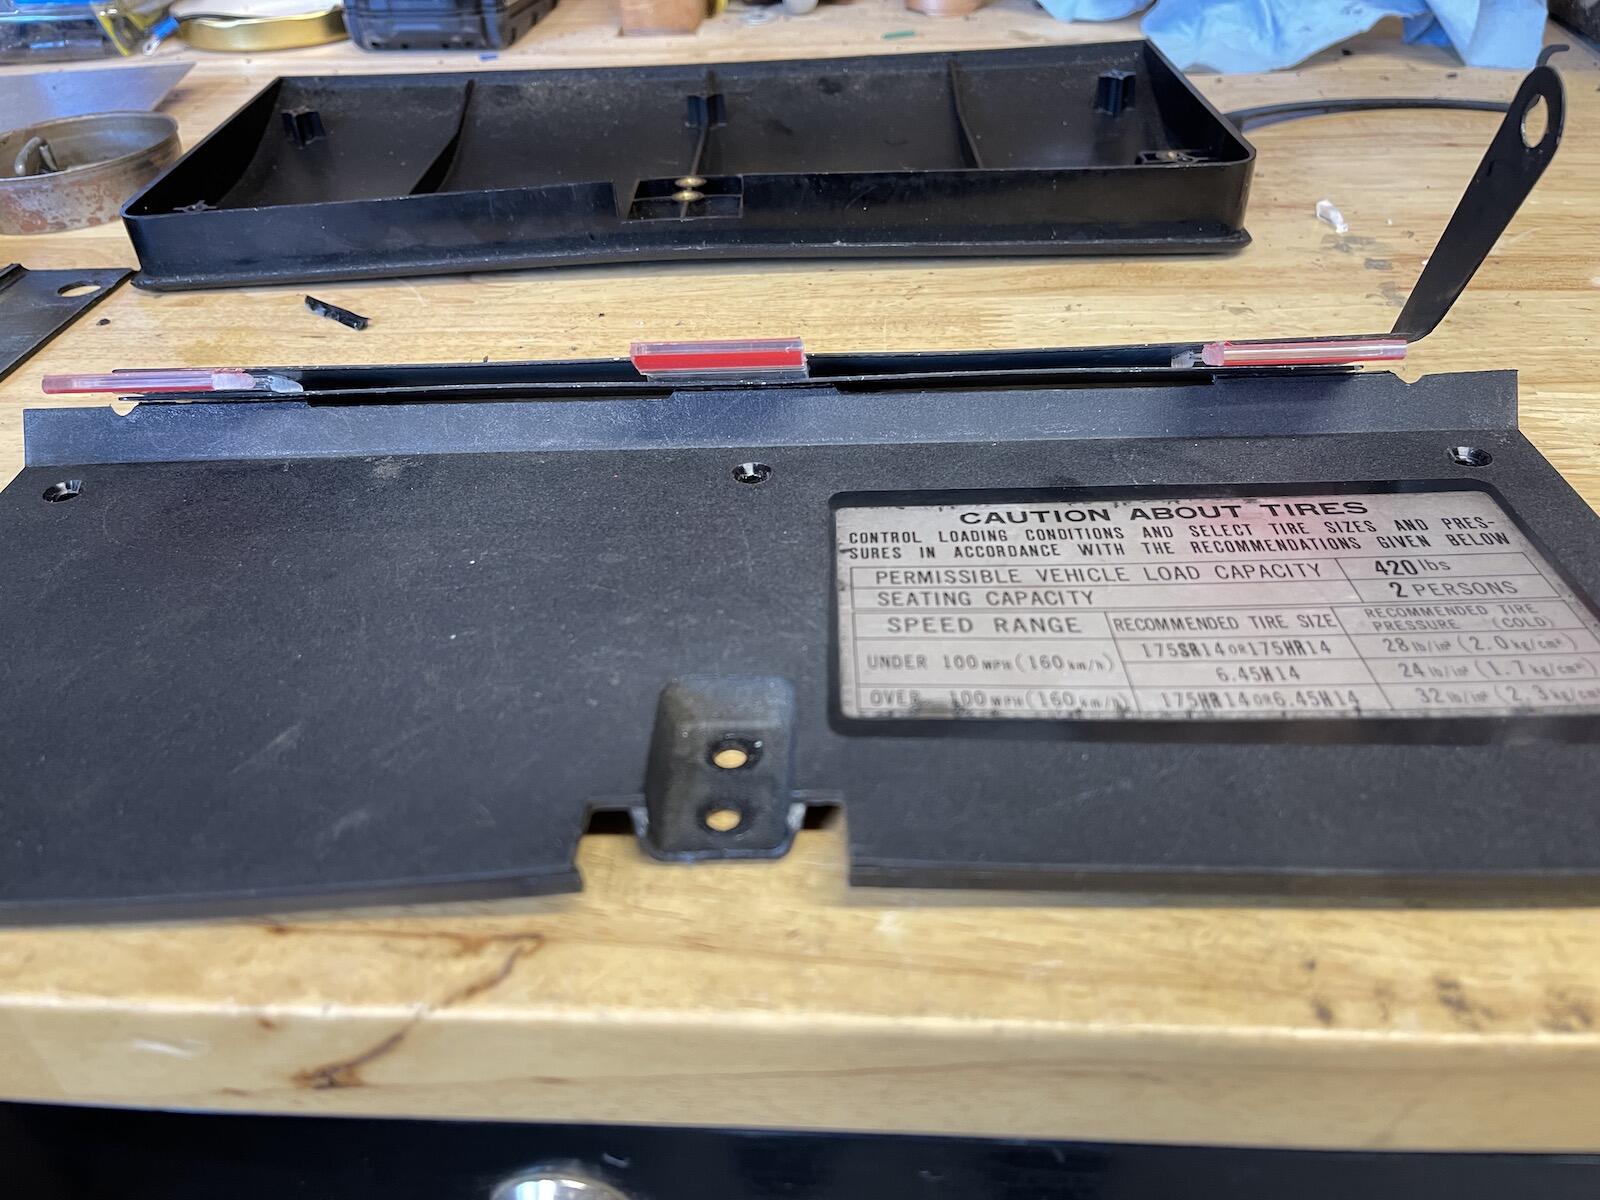
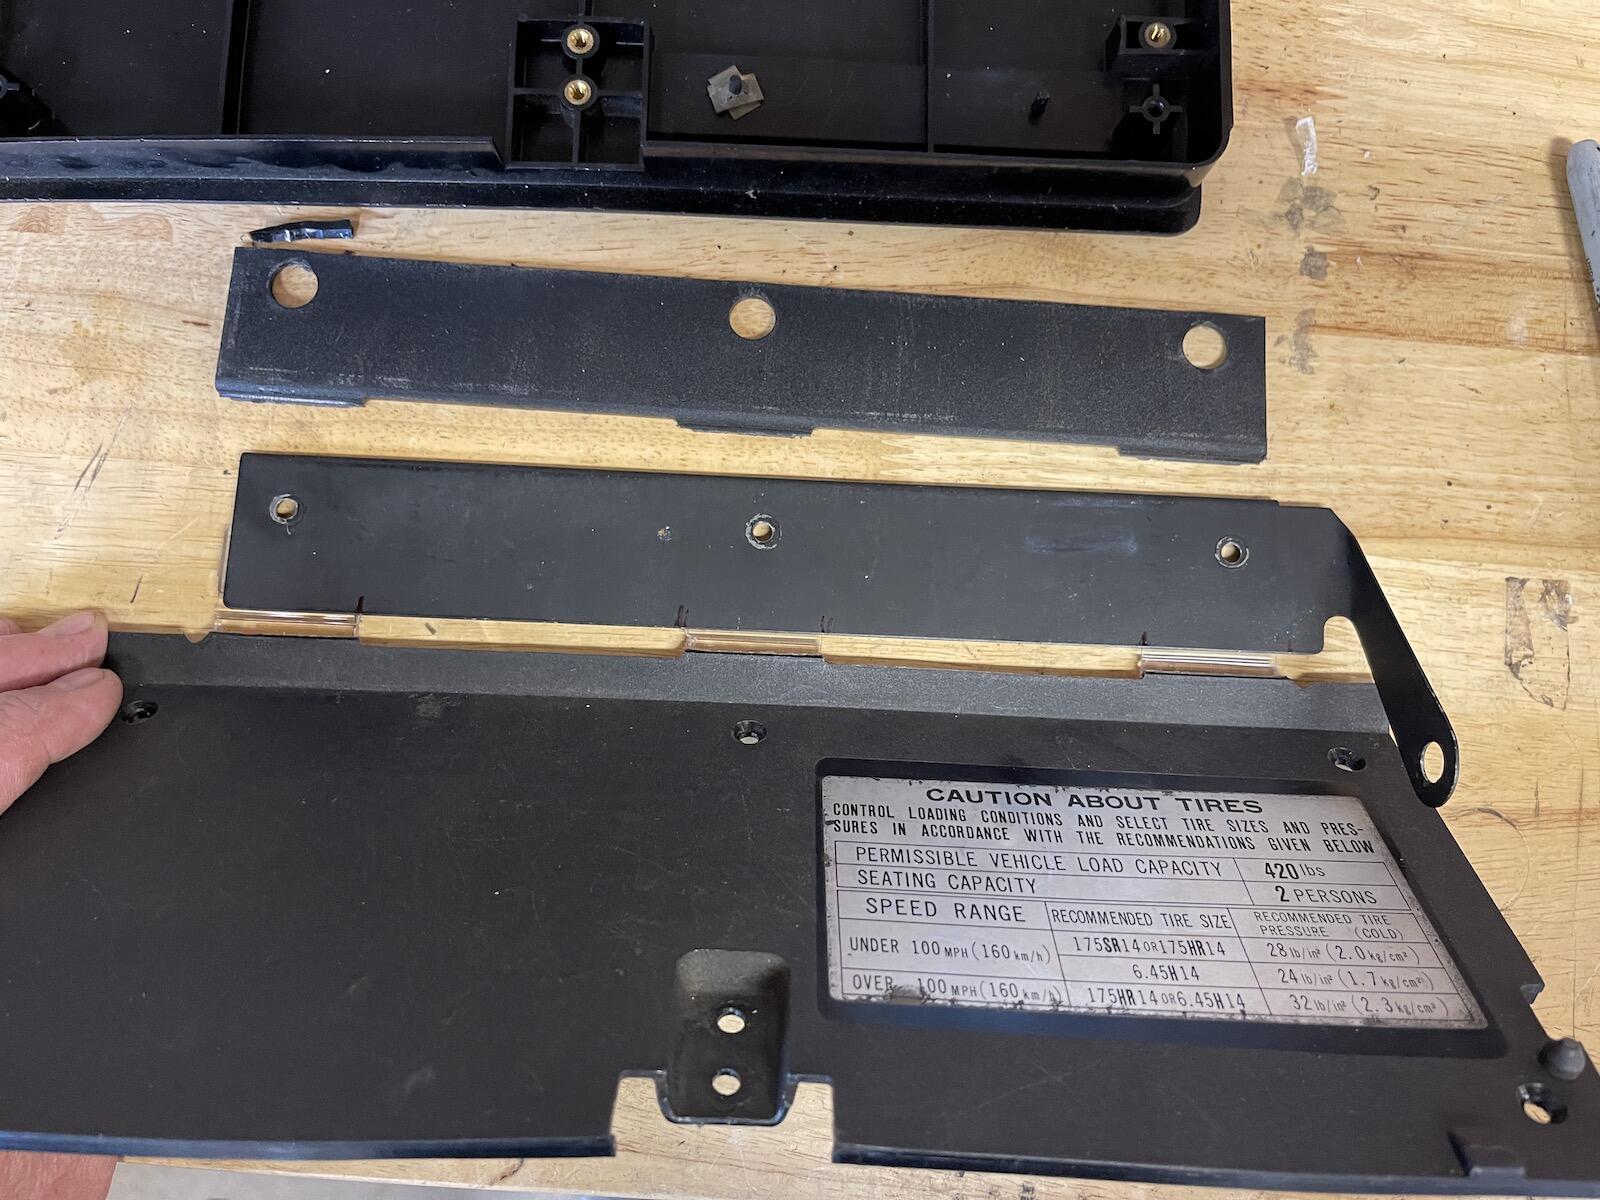
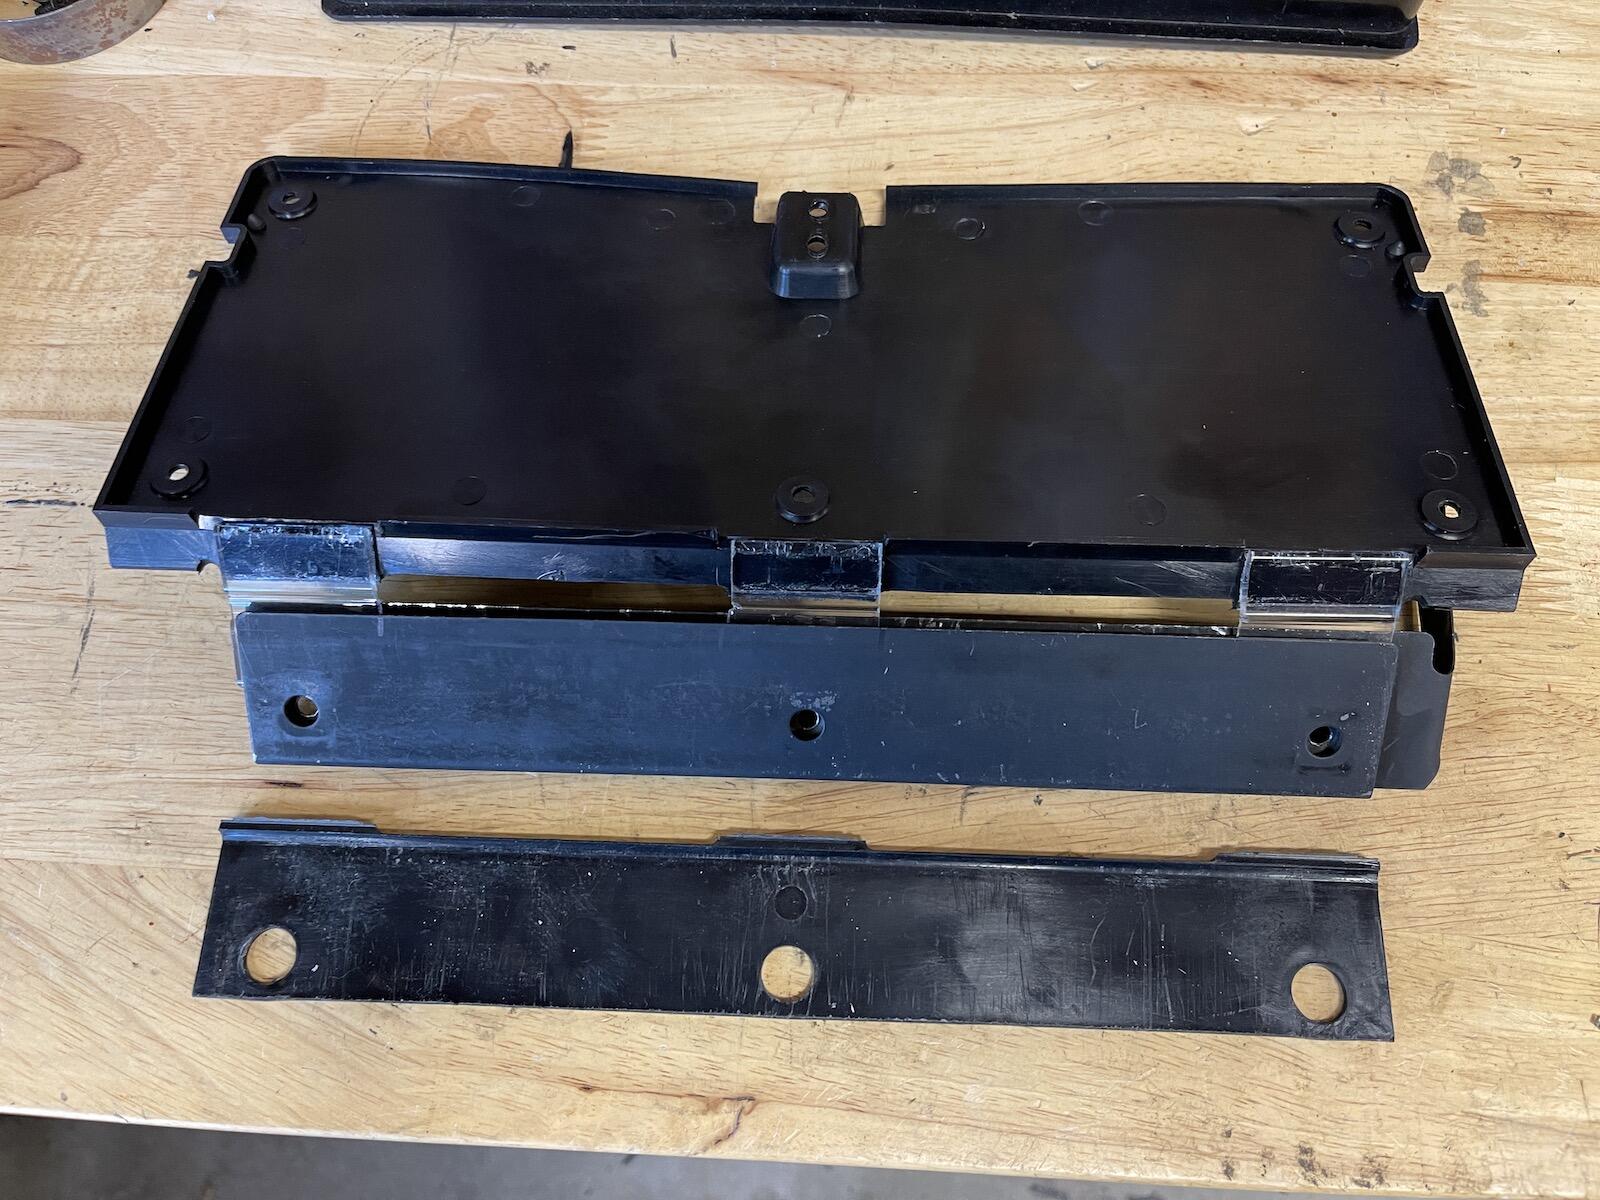
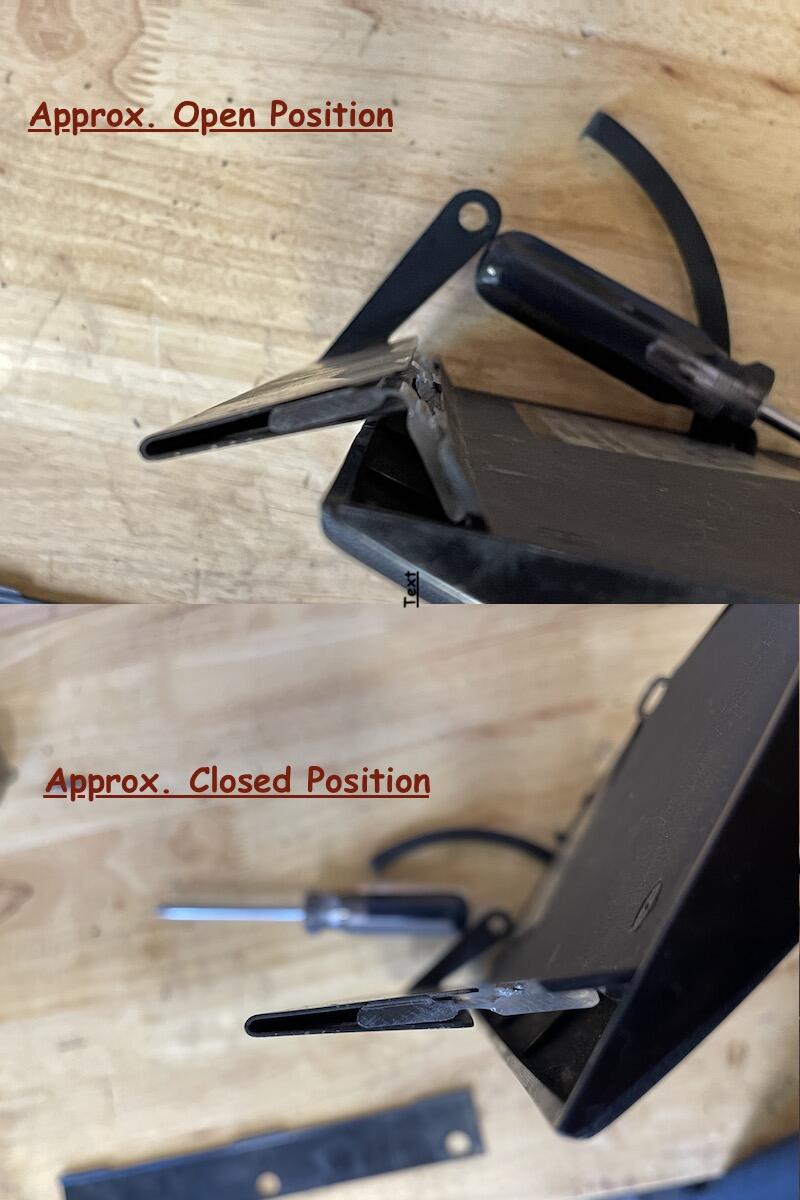
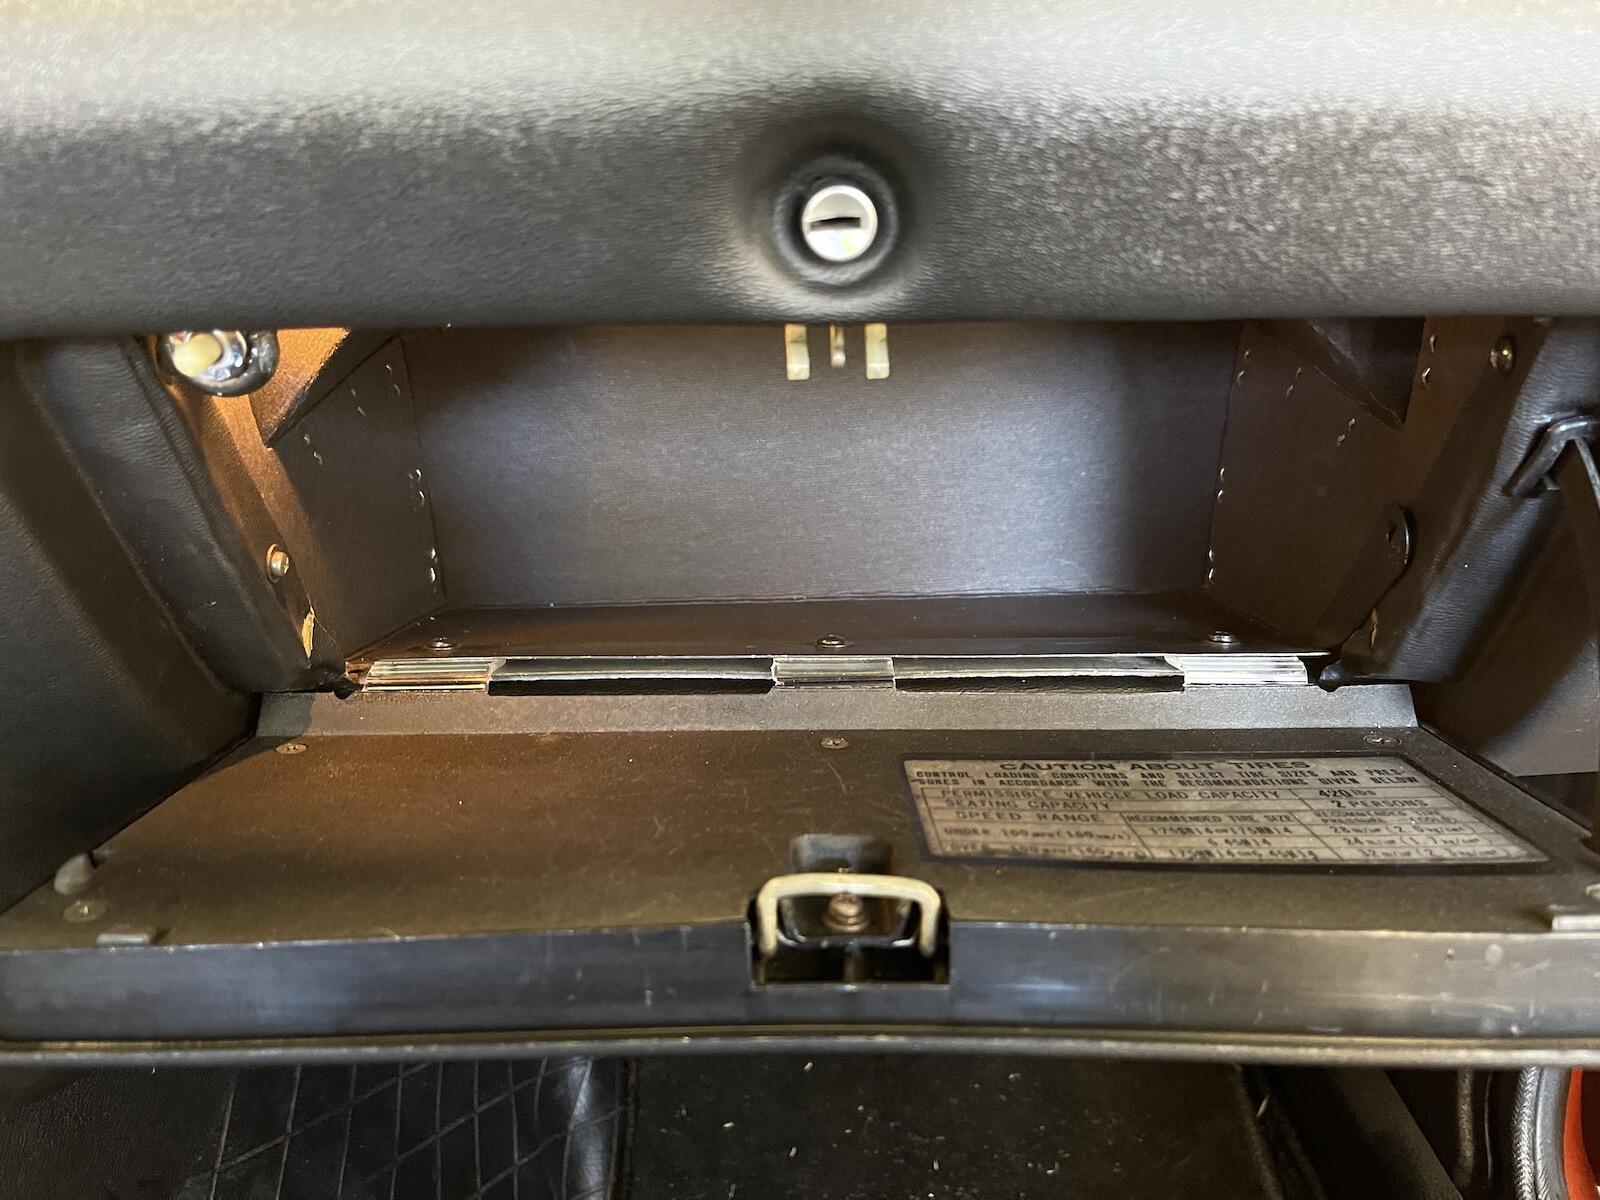
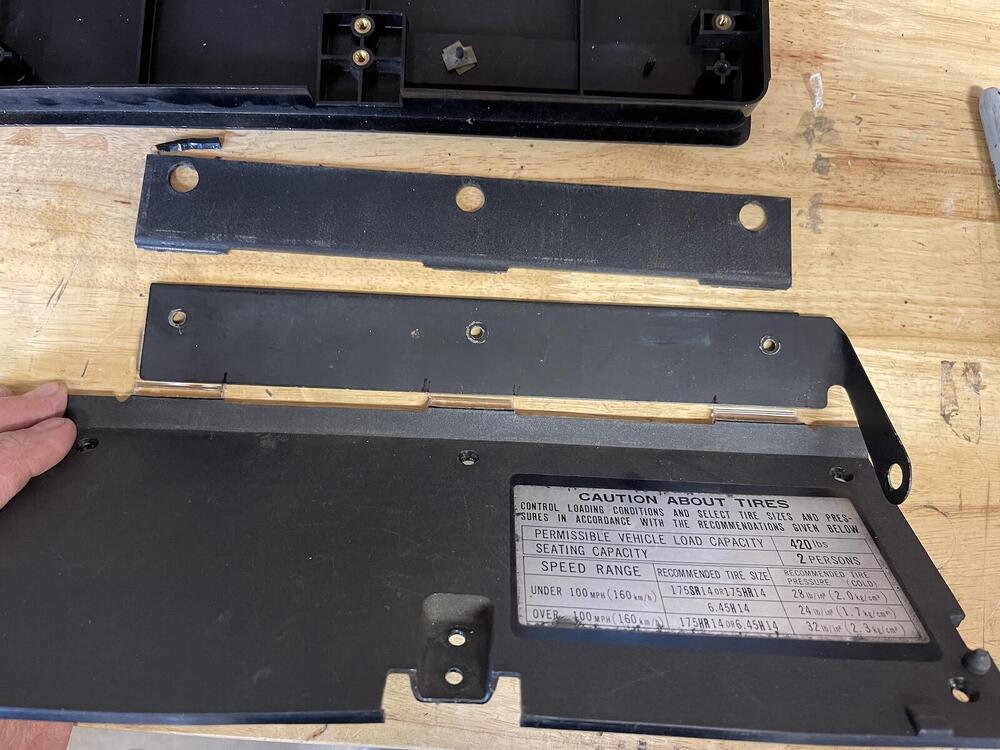
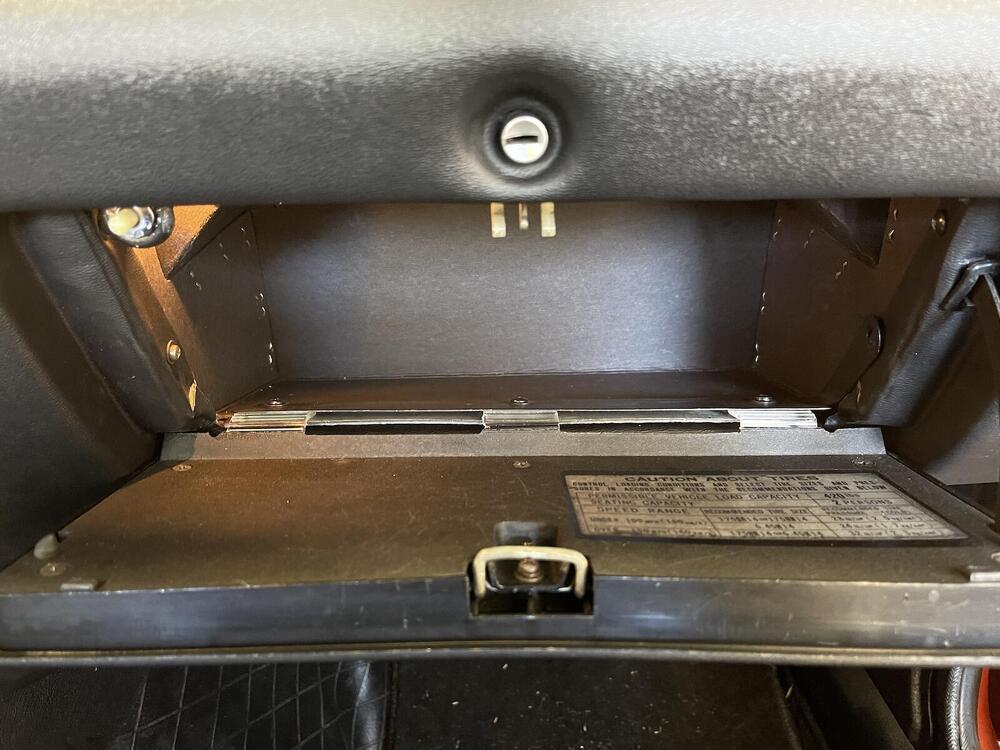
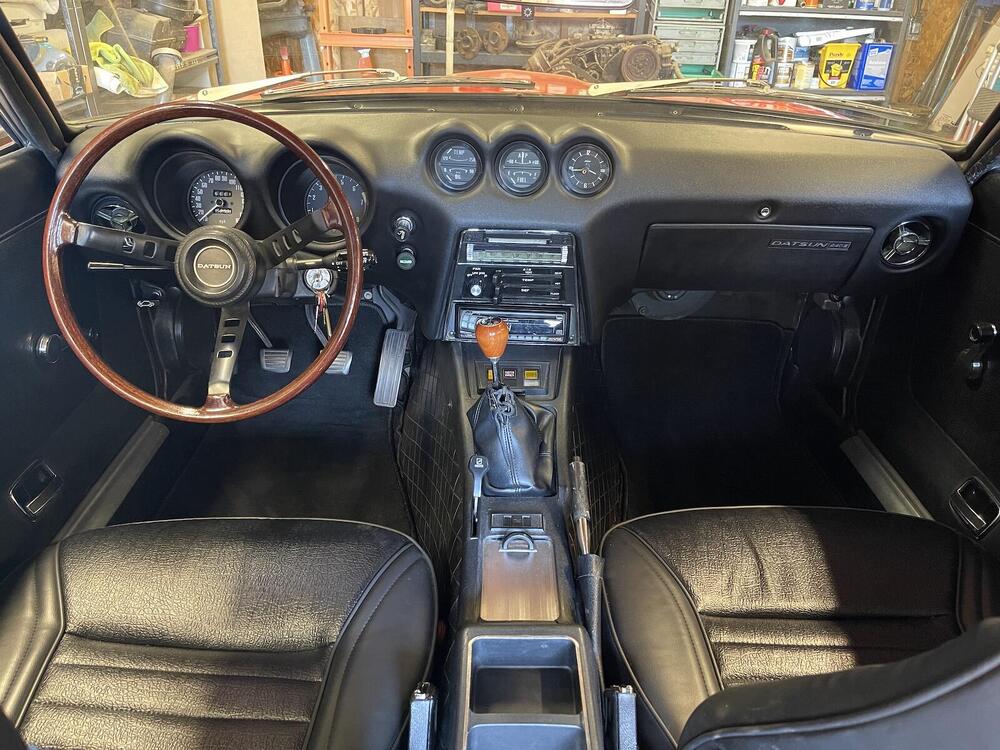
1 pointFinally got it all back together! Had a few issues, nothing serious. My horn and dome light aren't working, I'll try to fix those later. I did have to run a new separate wire for the tach out to the coil, so tach works fine now. And I broke my glove box door! 😡 While installing I latched it close without taking the time to adjust the latch correctly. Of course it got stuck and I had to resort to prying it open with some plastic pry tools. As soon as it popped open it promptly broke those plastic flex hinges. I figure I could just get another off eBay, or order a 3rd party metal replacement inner door, until I saw the prices. My first thought was to use some small steel hinges to fix, but that seemed a bit heavy-handed. So, I ordered some plastic flex hinges off of Amazon. Original is also a flexible plastic hinge, which I'm surprised lasted ~50 years. I cut new hinges to approximate length of the original hinge. Used a utility blade to flatten out the area where the door side hinge adhesive will stick, 3 places. I pried open the channel so the hinges would fit inside, but not too far that it won't act like a vice when removing tape from adhesive and installed. This will make the channel about 1/16" thicker than original, and I did use slightly longer screws when installing on the dash. I removed the tape over the hinge adhesive and assembled. I did pry open the channel so I could slide hinge into position. And I marked the horizontal alignment to match old position, then glued door in place. Here's the back side. The old broken side of the hinge, which use to fit inside the channel, is not used, on the shelf. Side view of hinge. Installed. Too bad those hinges don't come in black. One other thing I did was epoxy a washer on the back side of my new map light bezel, so hopefully it gives the screw something to push against and won't crack again. Done, except for the dome light and horn. I'm very happy with the way new da$h fit, although it was quite a project to install it. Car has collected a lot of dust while sitting, time to go blow the dust off it!


 1 point