Leaderboard
-
conedodger
Free Member7Points12,513Posts -
grannyknot
Free Member4Points5,158Posts -
chaseincats
Free Member4Points1,035Posts -
Patcon
 Subscriber
 2Points11,142Posts


Popular Content
Showing content with the highest reputation on 03/24/2024 in all areas
-
4 pointsGreat news, I fiddled with the adjustable latch under the license plate panel and was able to get it to line up way better by pulling the latch down and to the left. Thanks all
 4 points
 -
2 points
-
Unless they changed things, Group Harrington bumpers are stainless.1 point
-
1 pointI know on one side or the other I had to use a hammer and give the axle a sharp rap to get the circlip up onto the splines.1 point
-
1 pointI'd remove any burrs from the end that needs to slip through the circlip. Maybe even smooth the end of the axle down and reshape it a bit so that it slips through the circlip easier. Add some grease. Once the end gets started it should slide easily until the grooves align and the clip drops in. The axle end is probably jamming the circlip against the back of the groove instead of expanding it.1 point
-
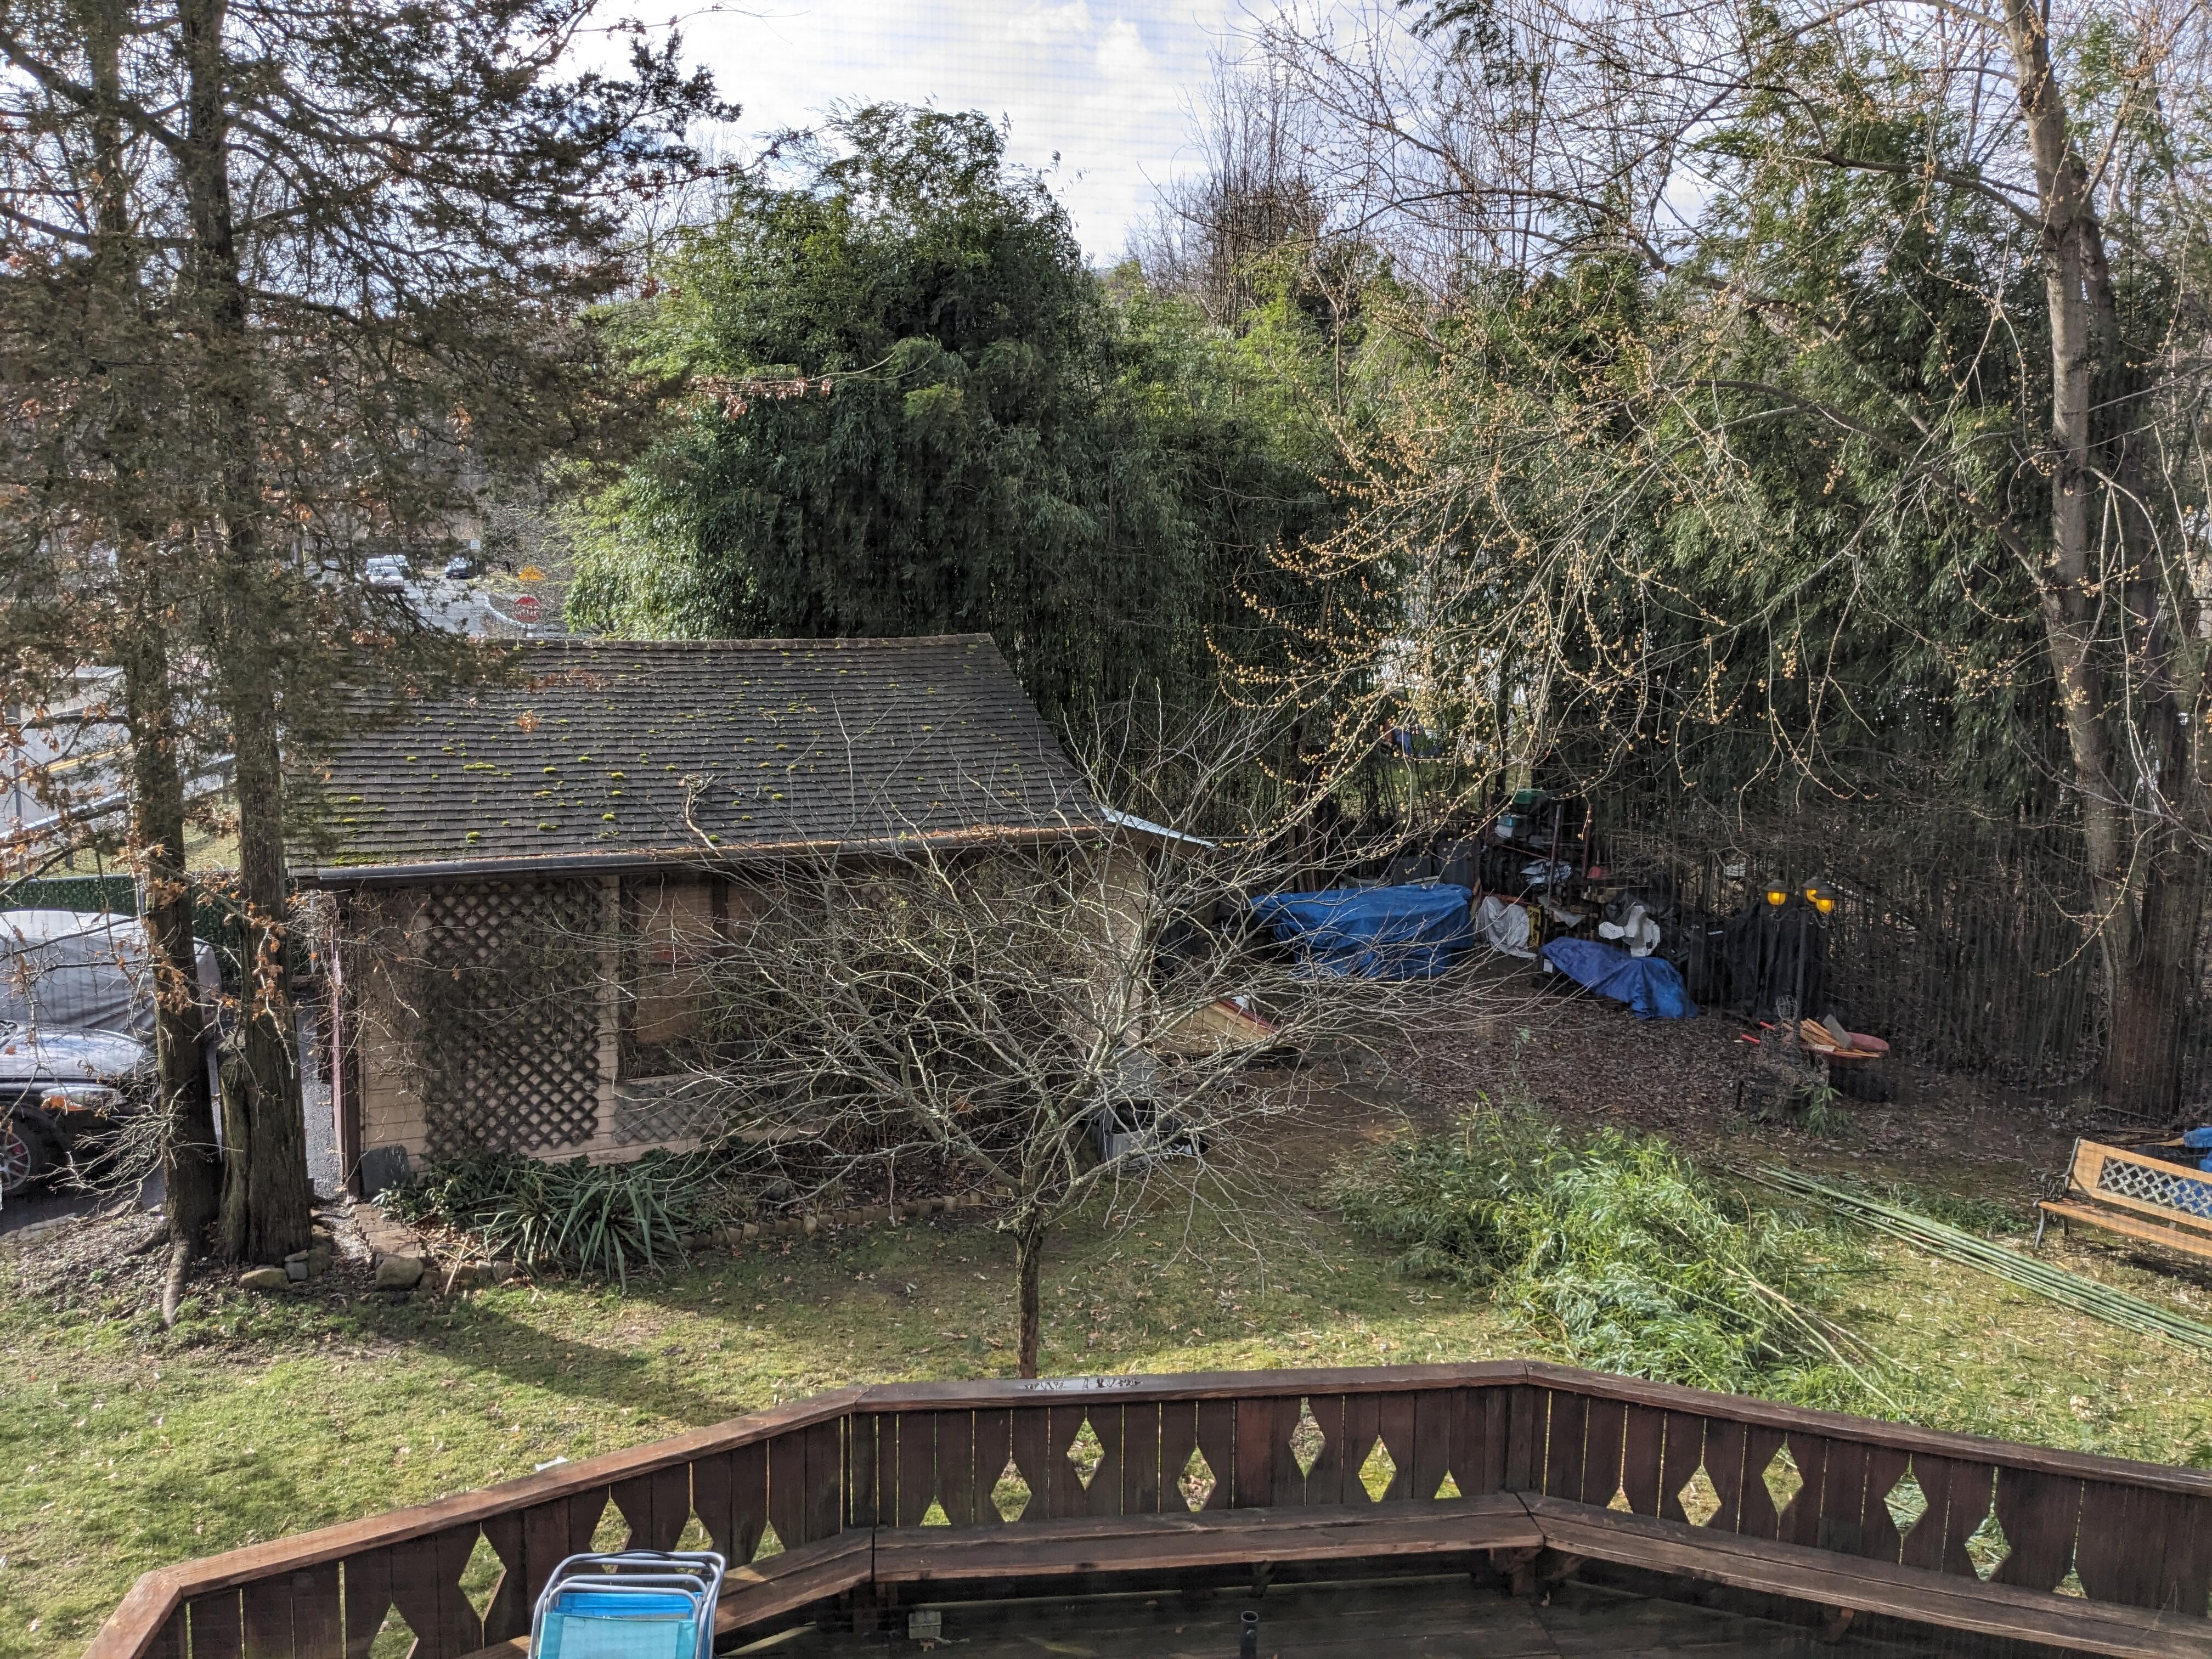
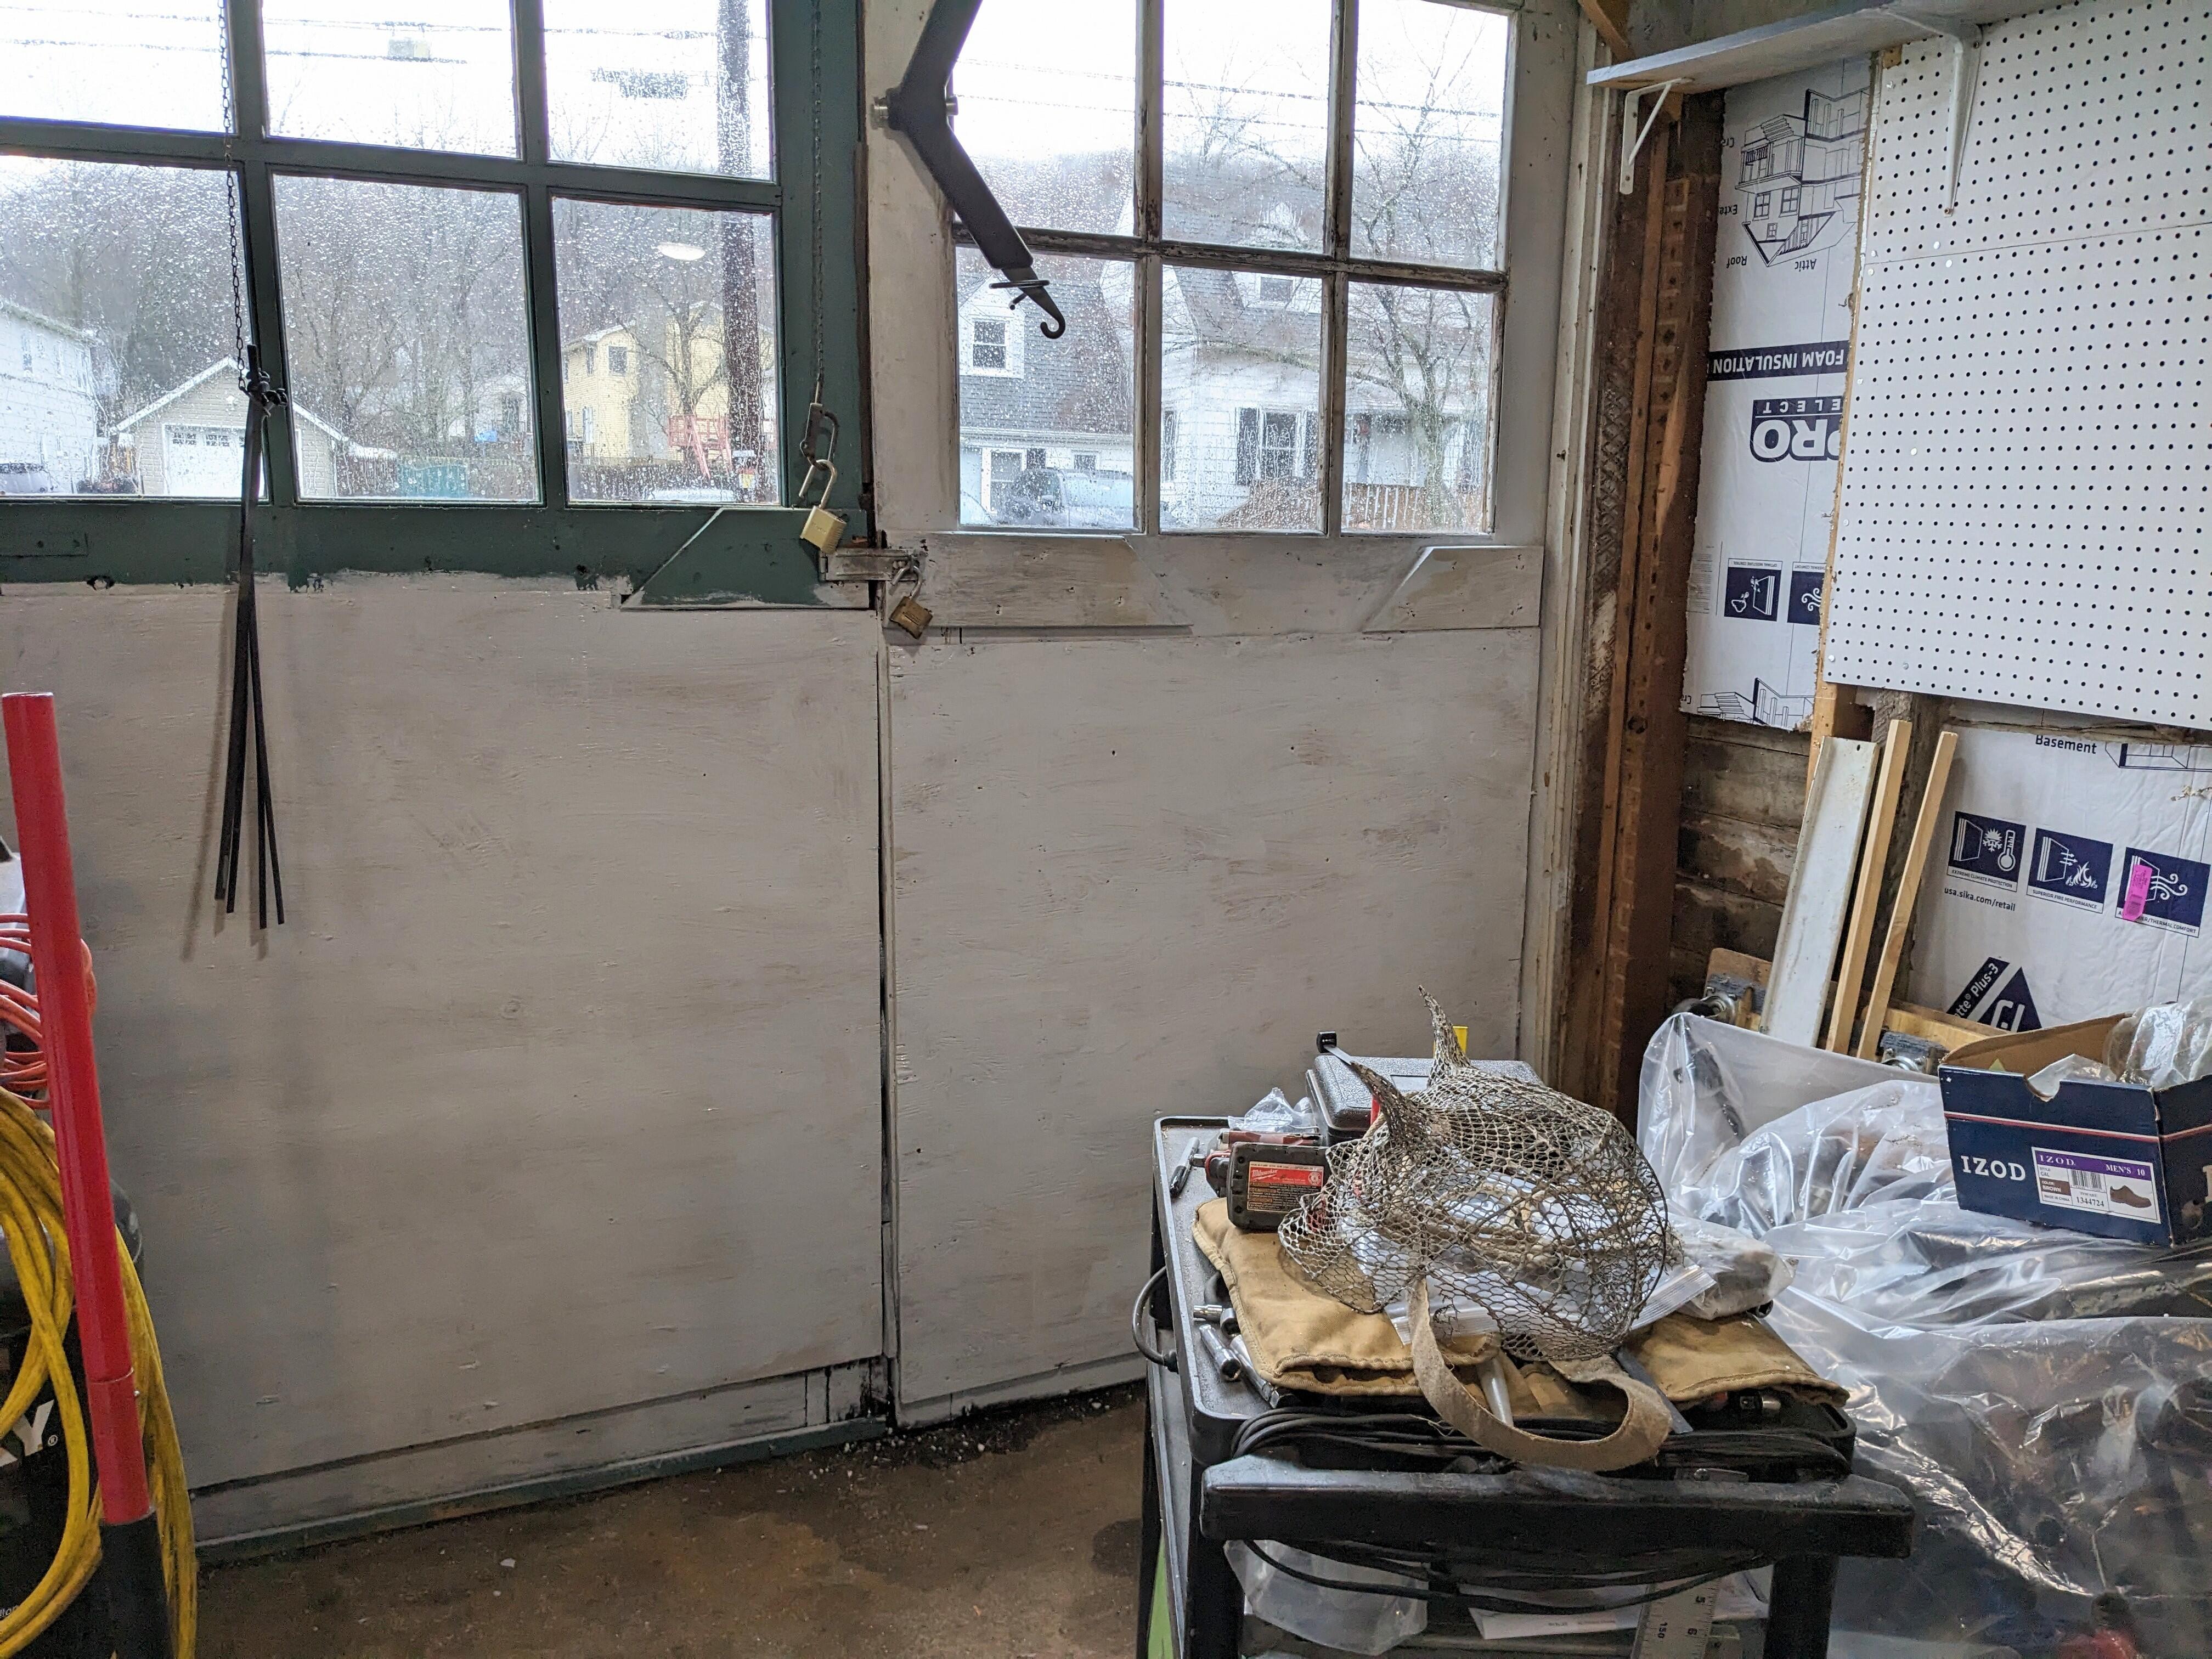
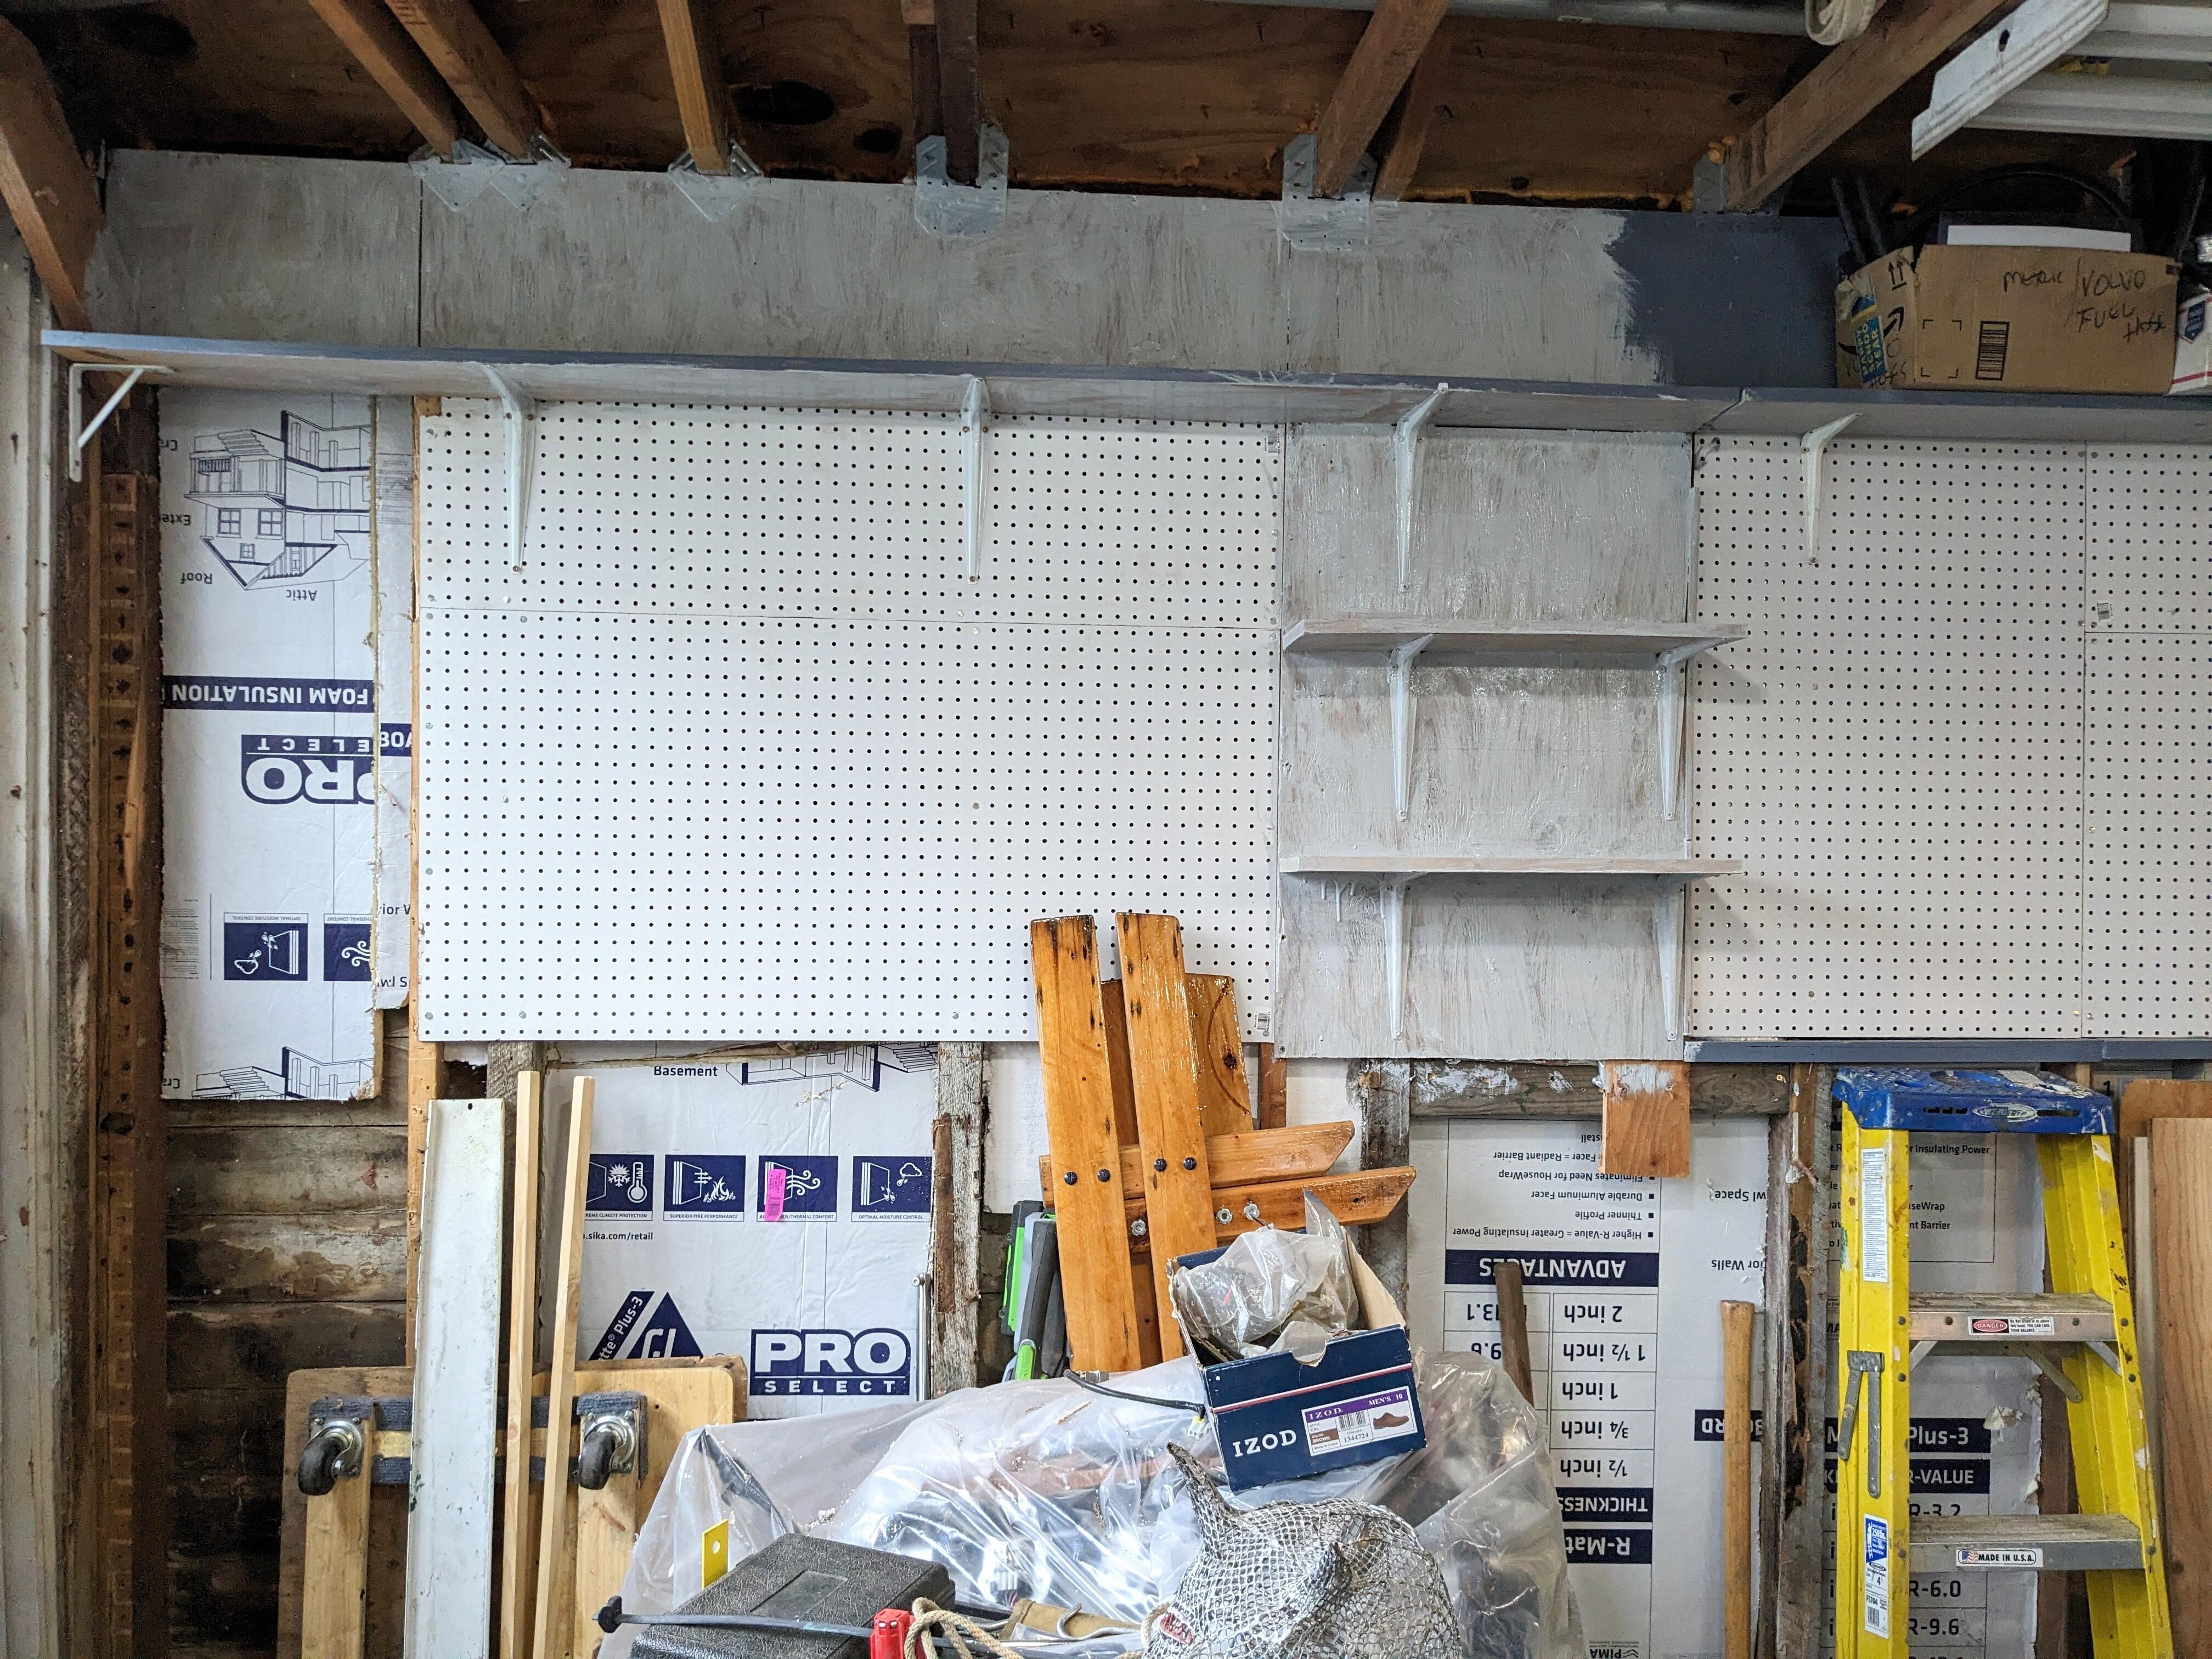
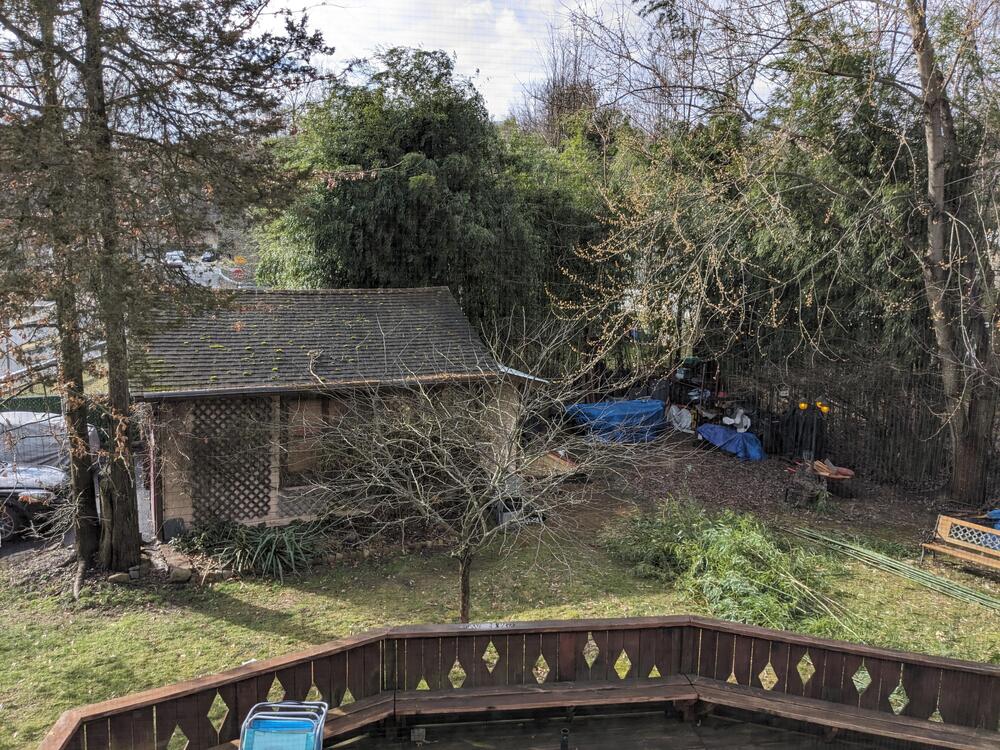
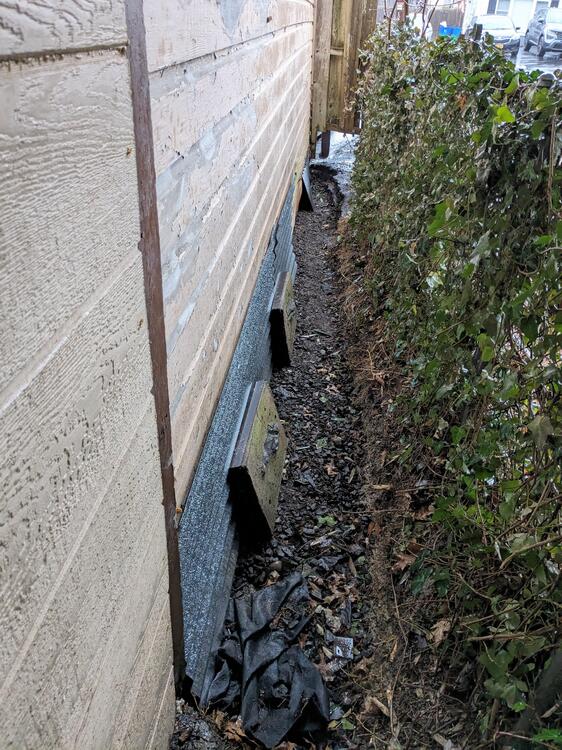
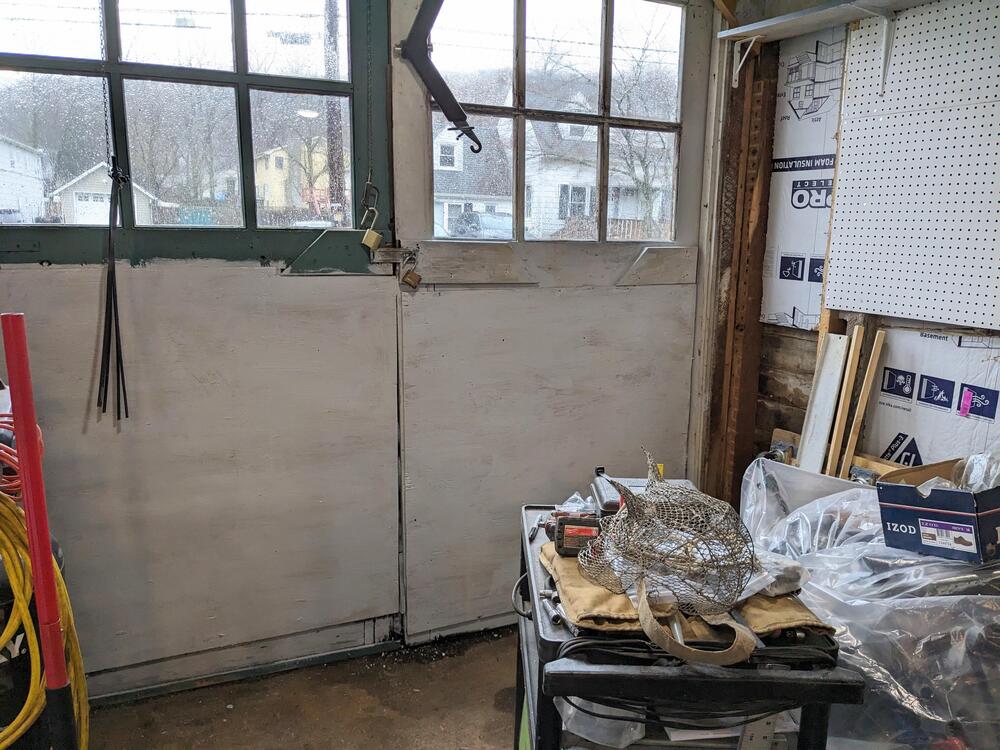
Thank you Pat. I still have a few good length dimensional lumber from the original wall - so that would be good for the top plate, and I think I have several in about 8' lengths which would work for posts. It did indeed rain all day today - this is what the back of my yard looks like whenever we have heavy rain. It's a very high water table, there is a stream that runs around the outside of the property between me and my neighbor, and the soil only goes down maybe 2 ft or less before it becomes clay For perspective, this is the view from the house (different day) right-hand side (West) is where it pools.. Even with that, the back of the garage did not get very wet or have any accumulation to speak of. So, I think I can just backfill that area with gravel. Since I couldn't work outside, I just did some more cleanup inside. Added sheathing to the inside of the garage doors, as those were pretty darn drafty and also a little wonky. While I was at it I also put some primer on the new shelves and upper sheathing Rain is supposed to stop later today, so hopefully tomorrow I can start with the jacking and replacing of the sill sections.

 1 point
 -
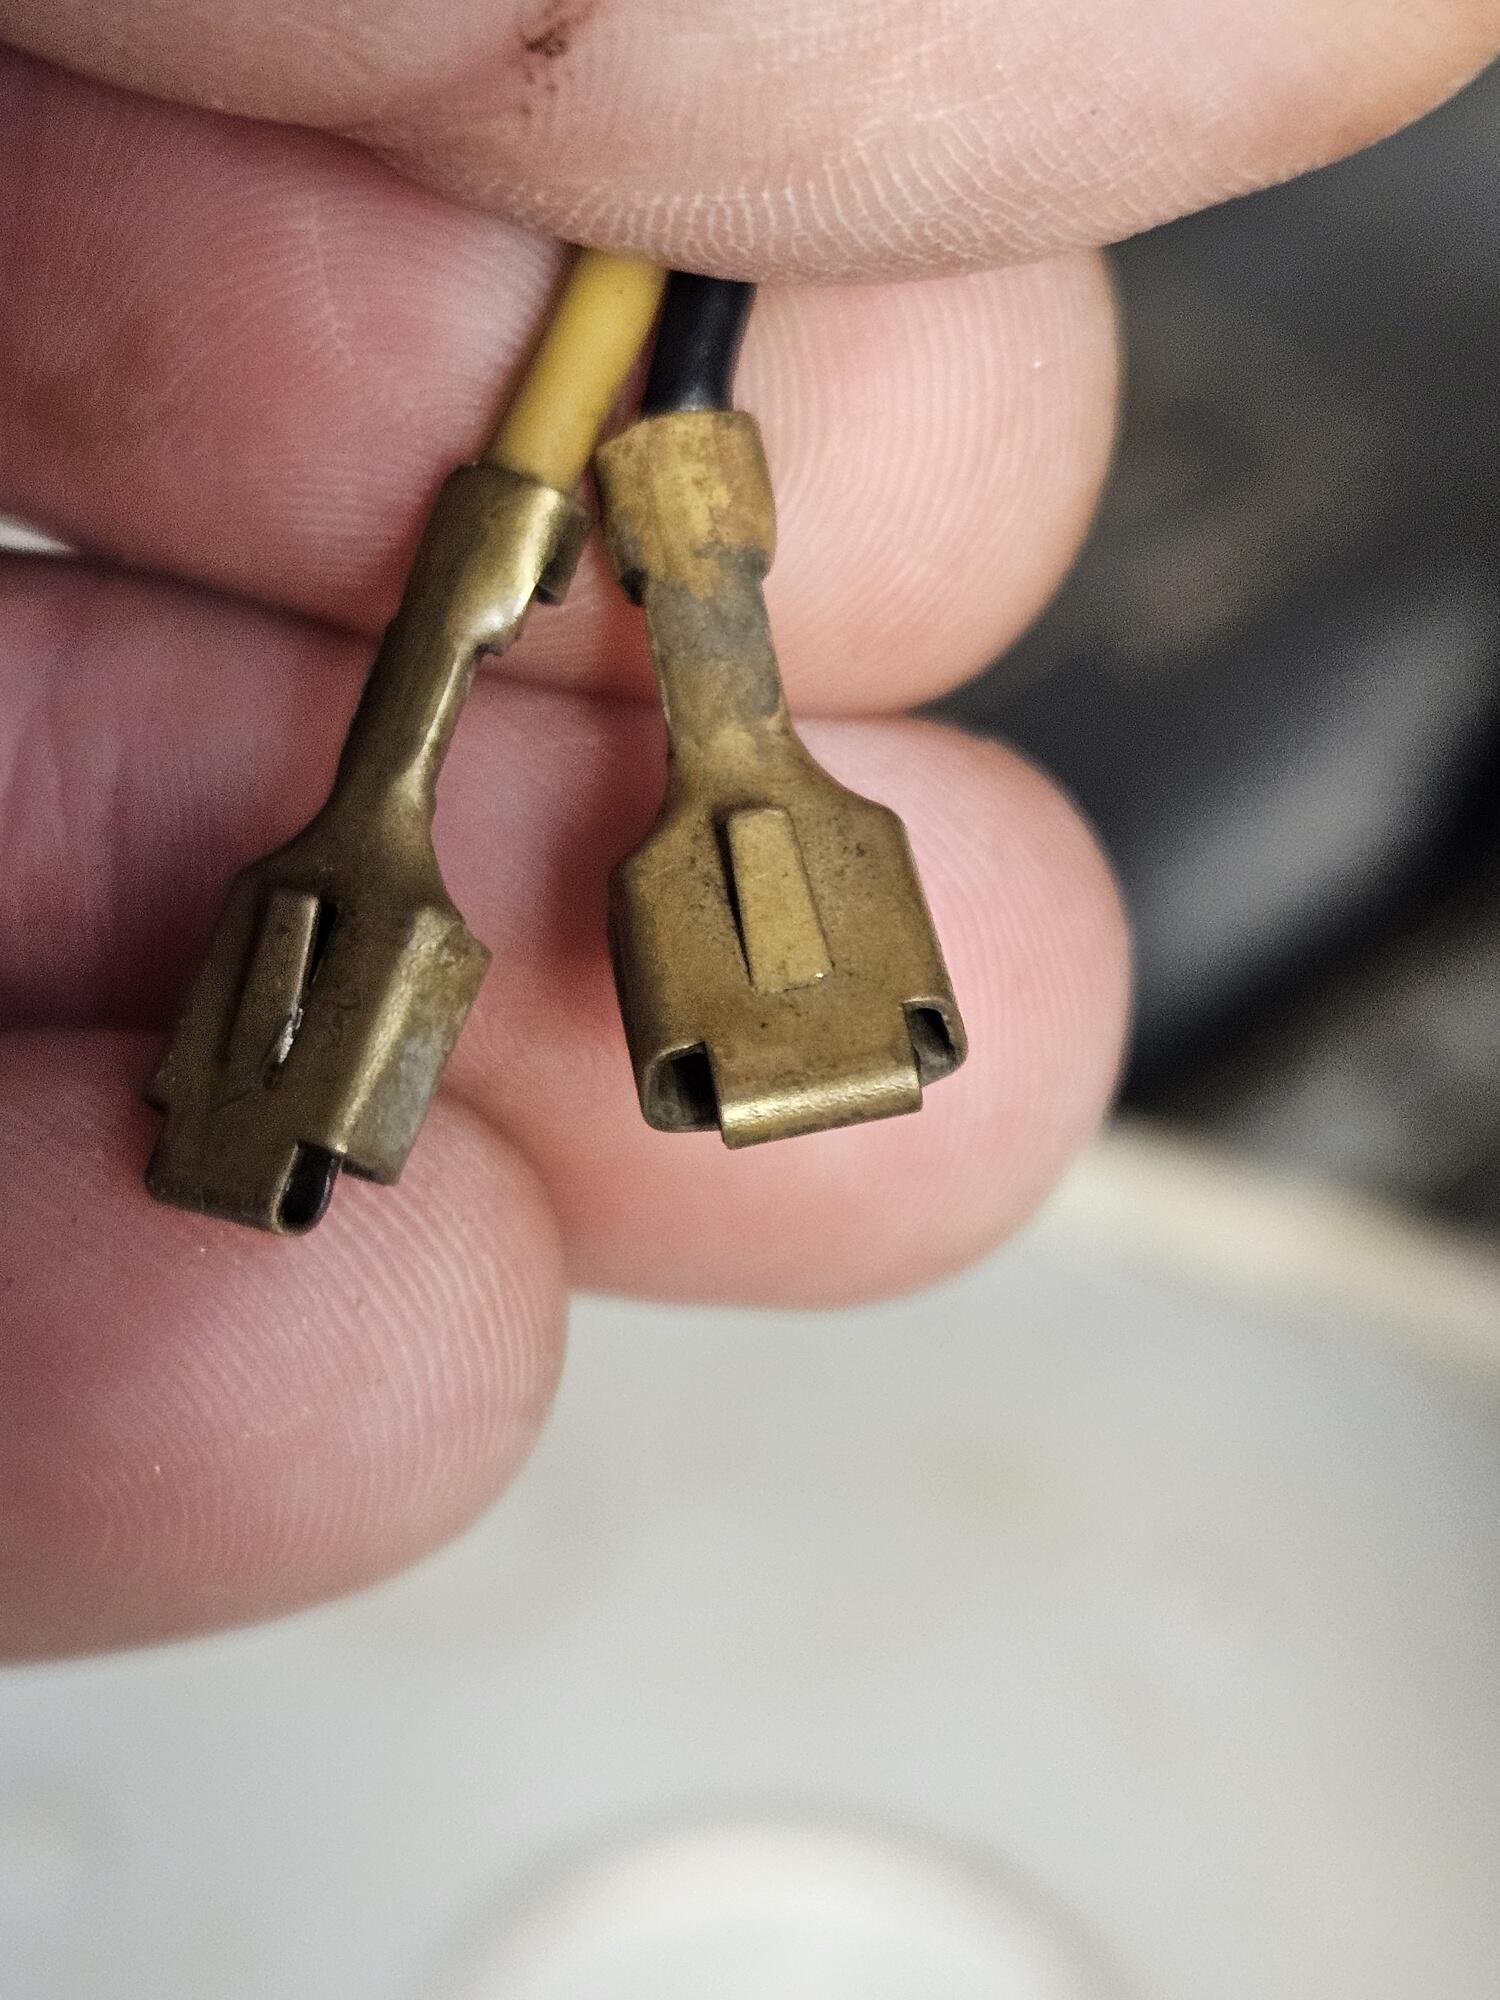
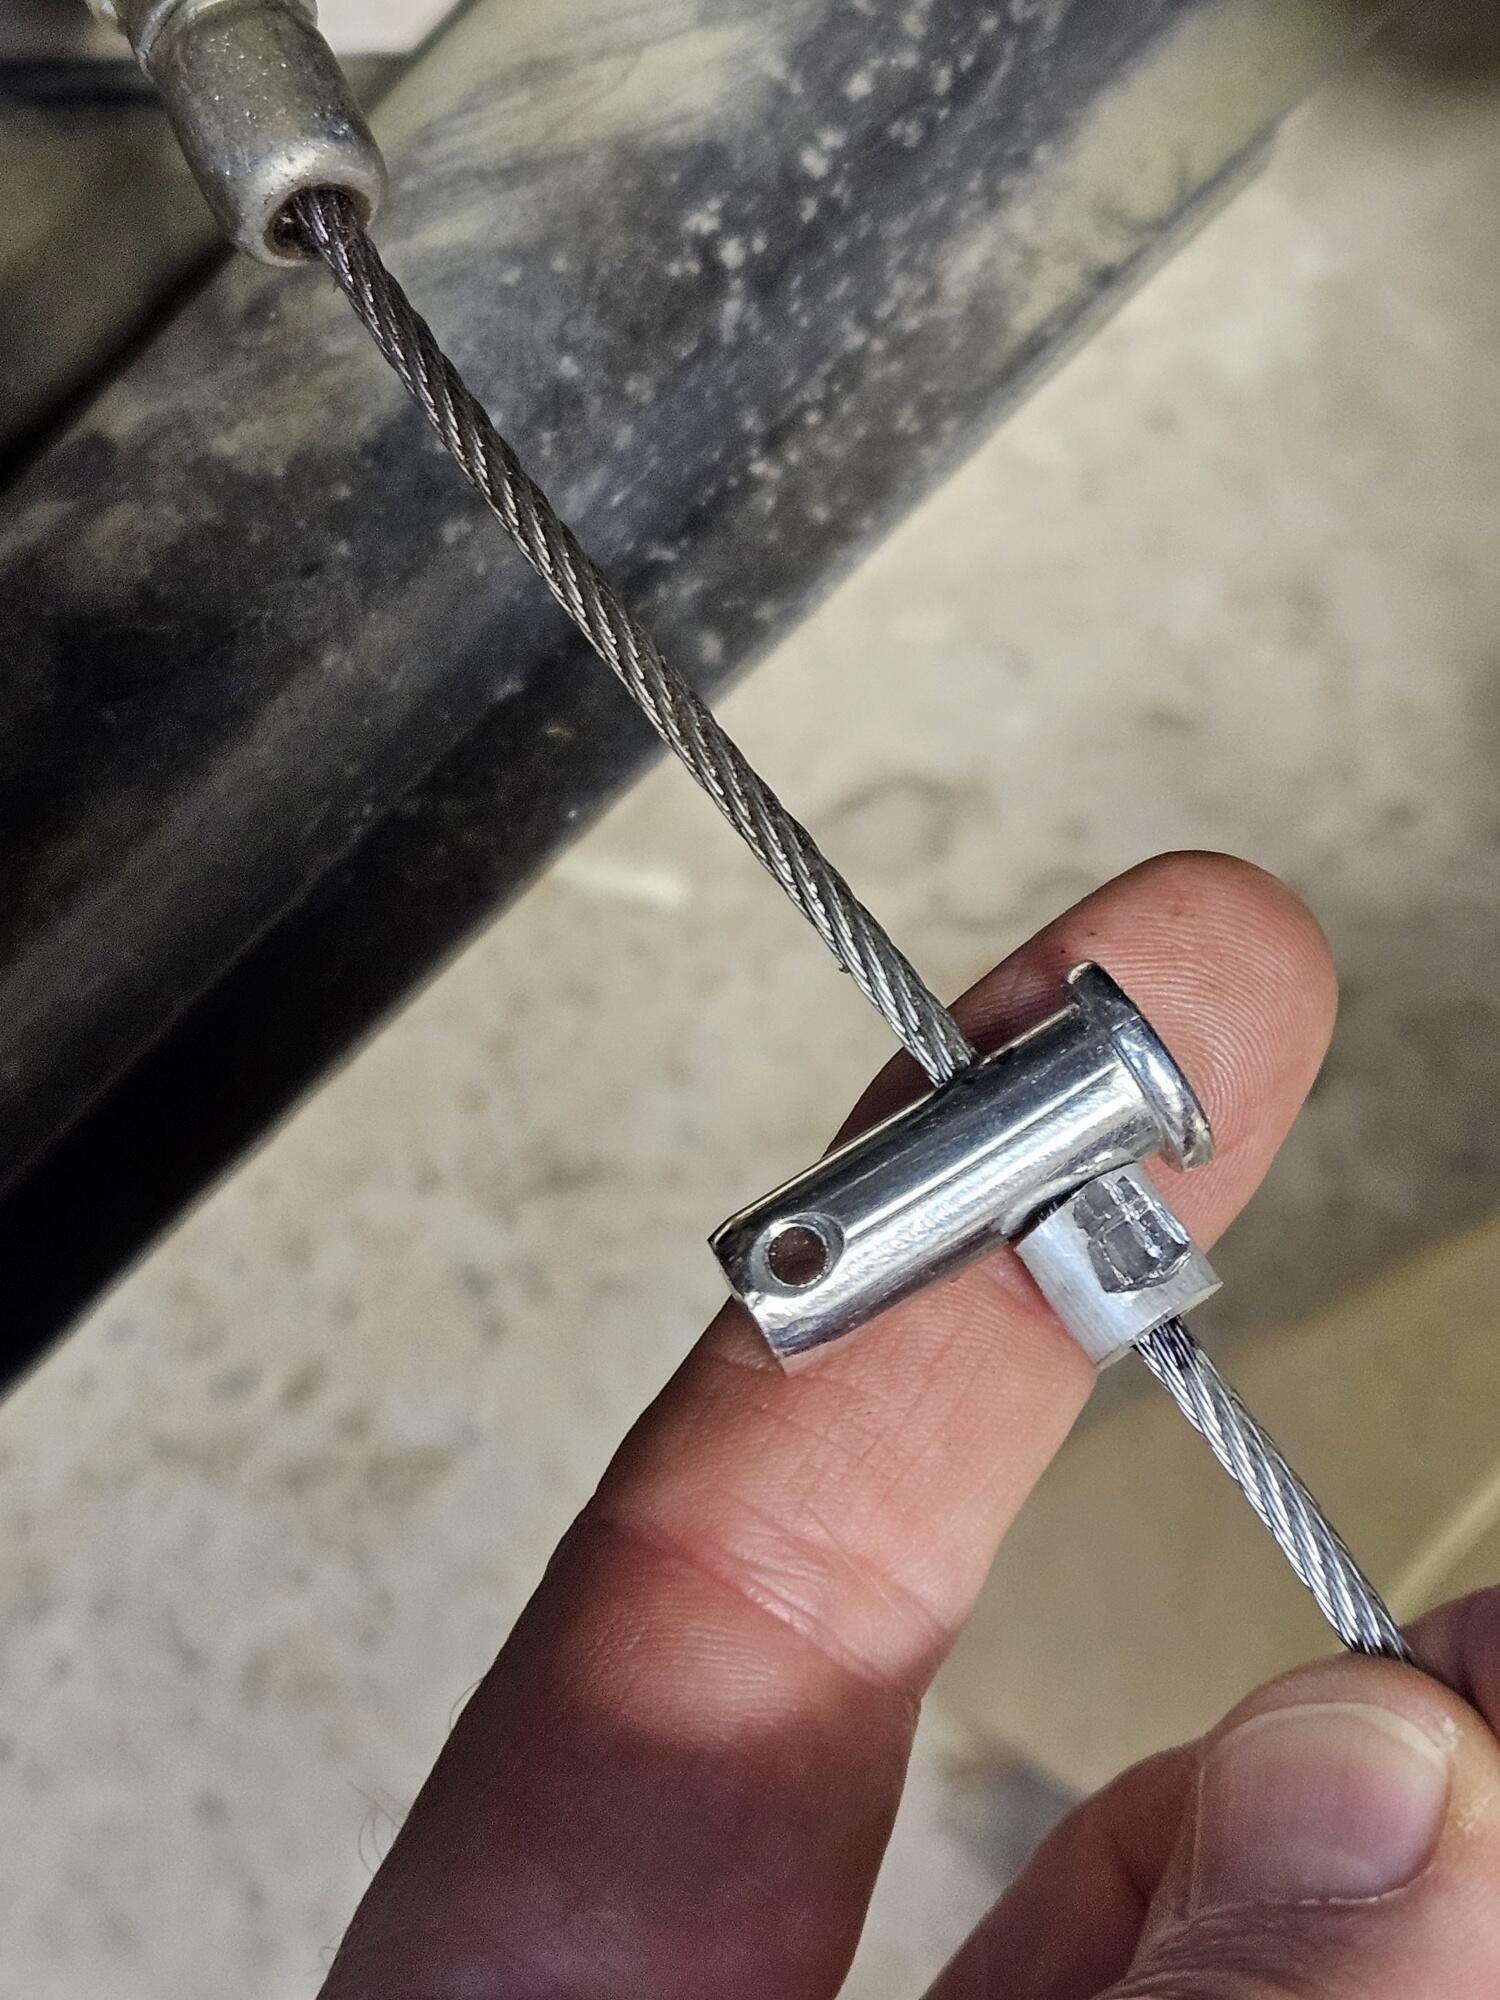
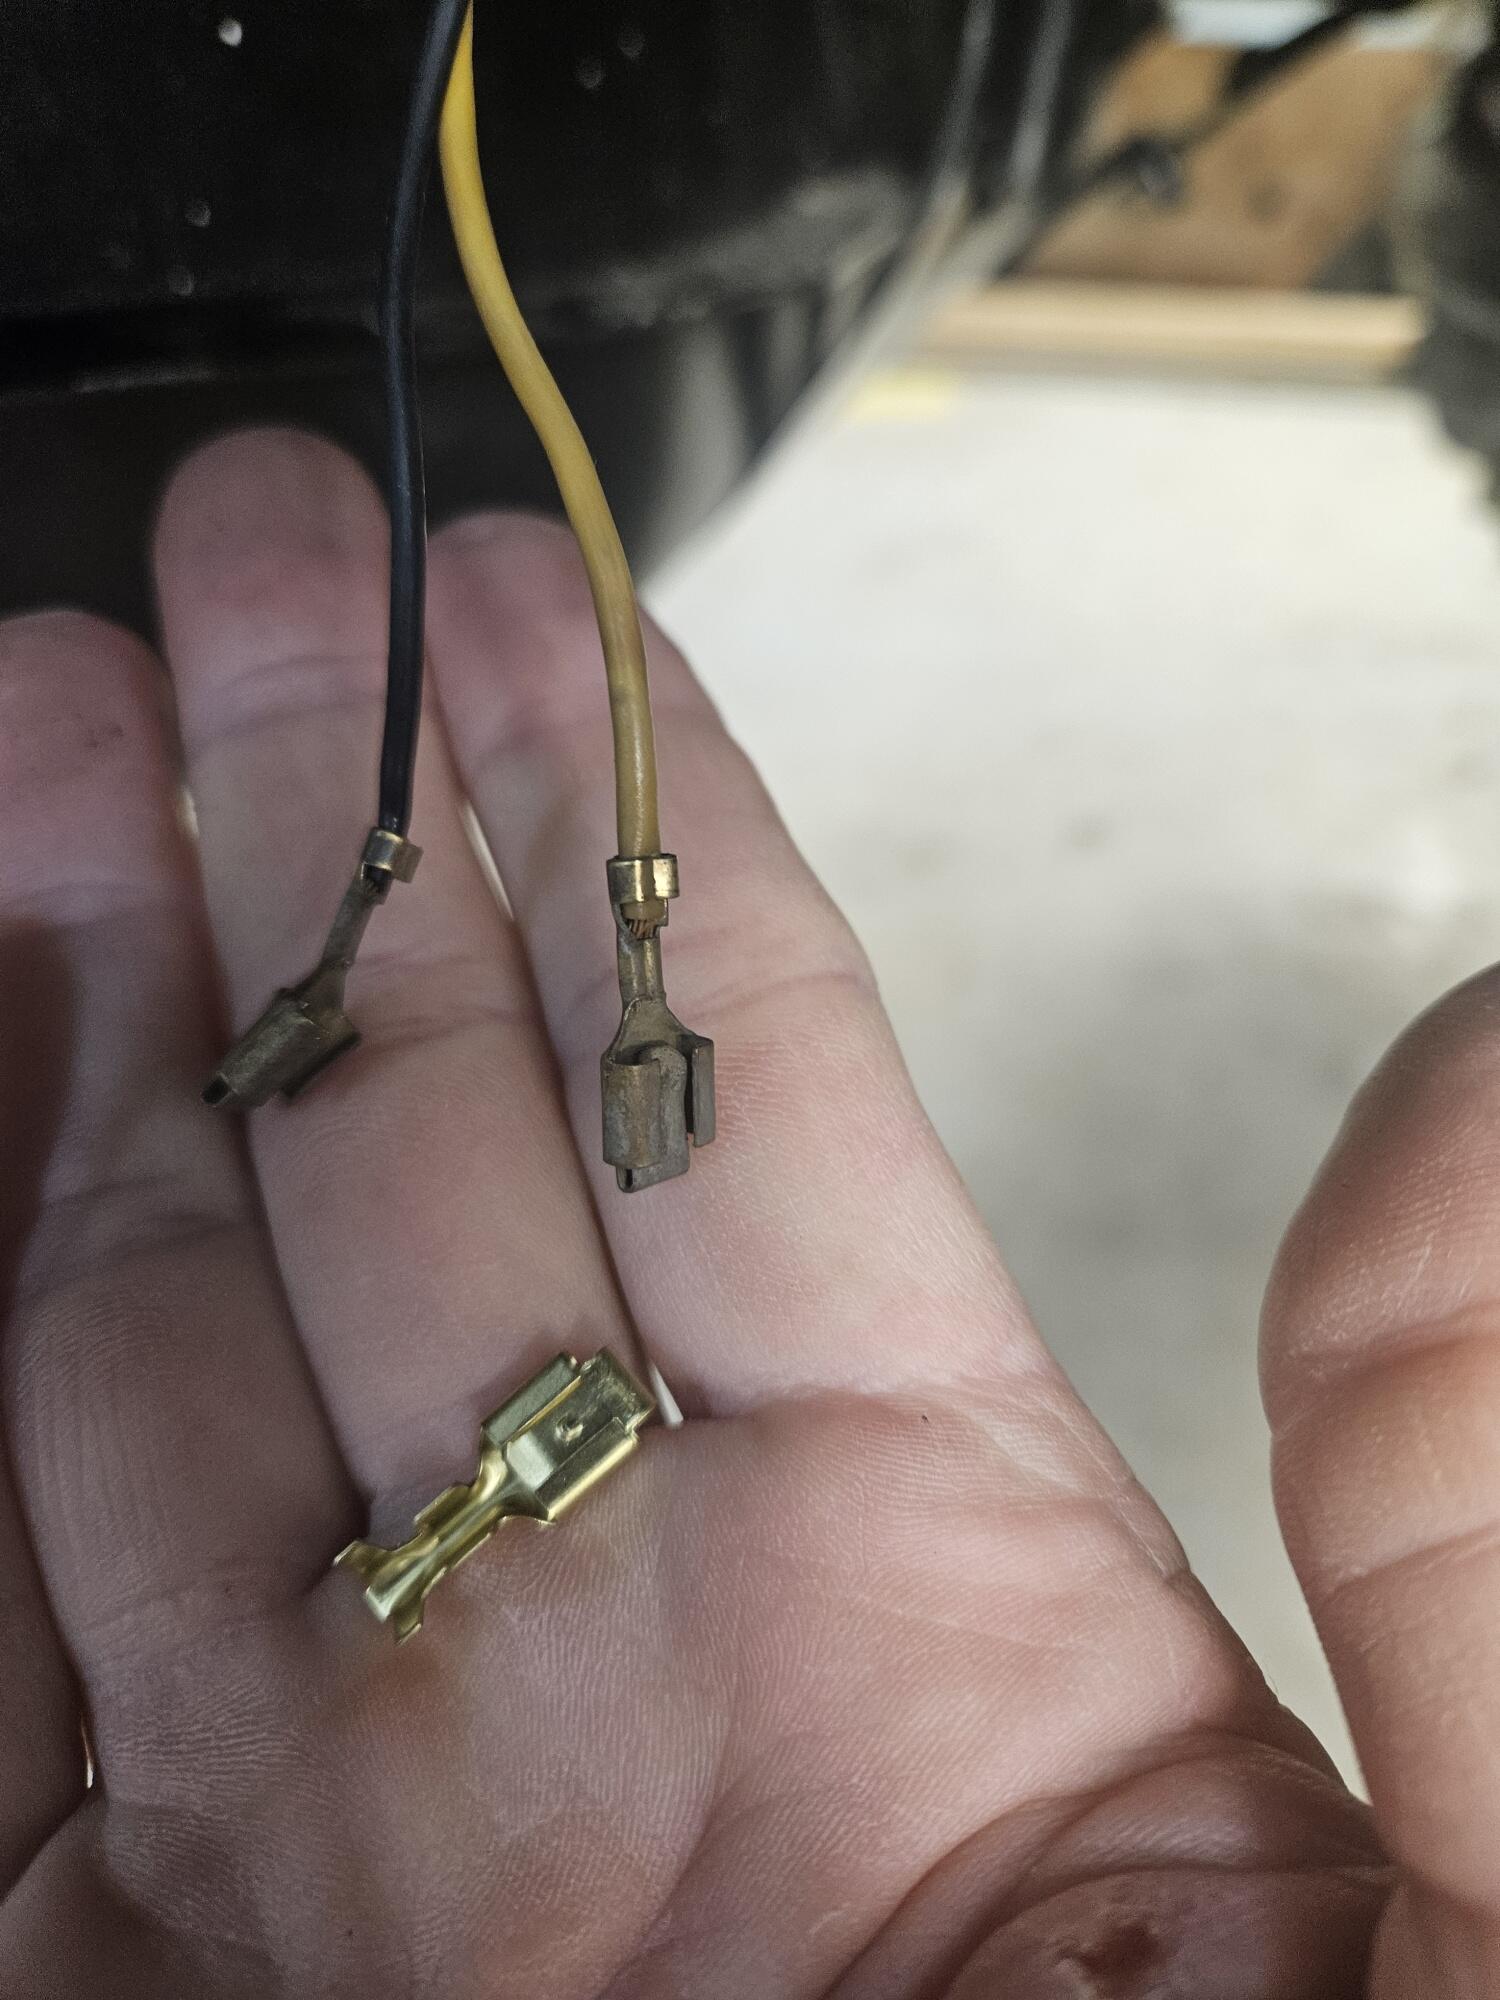
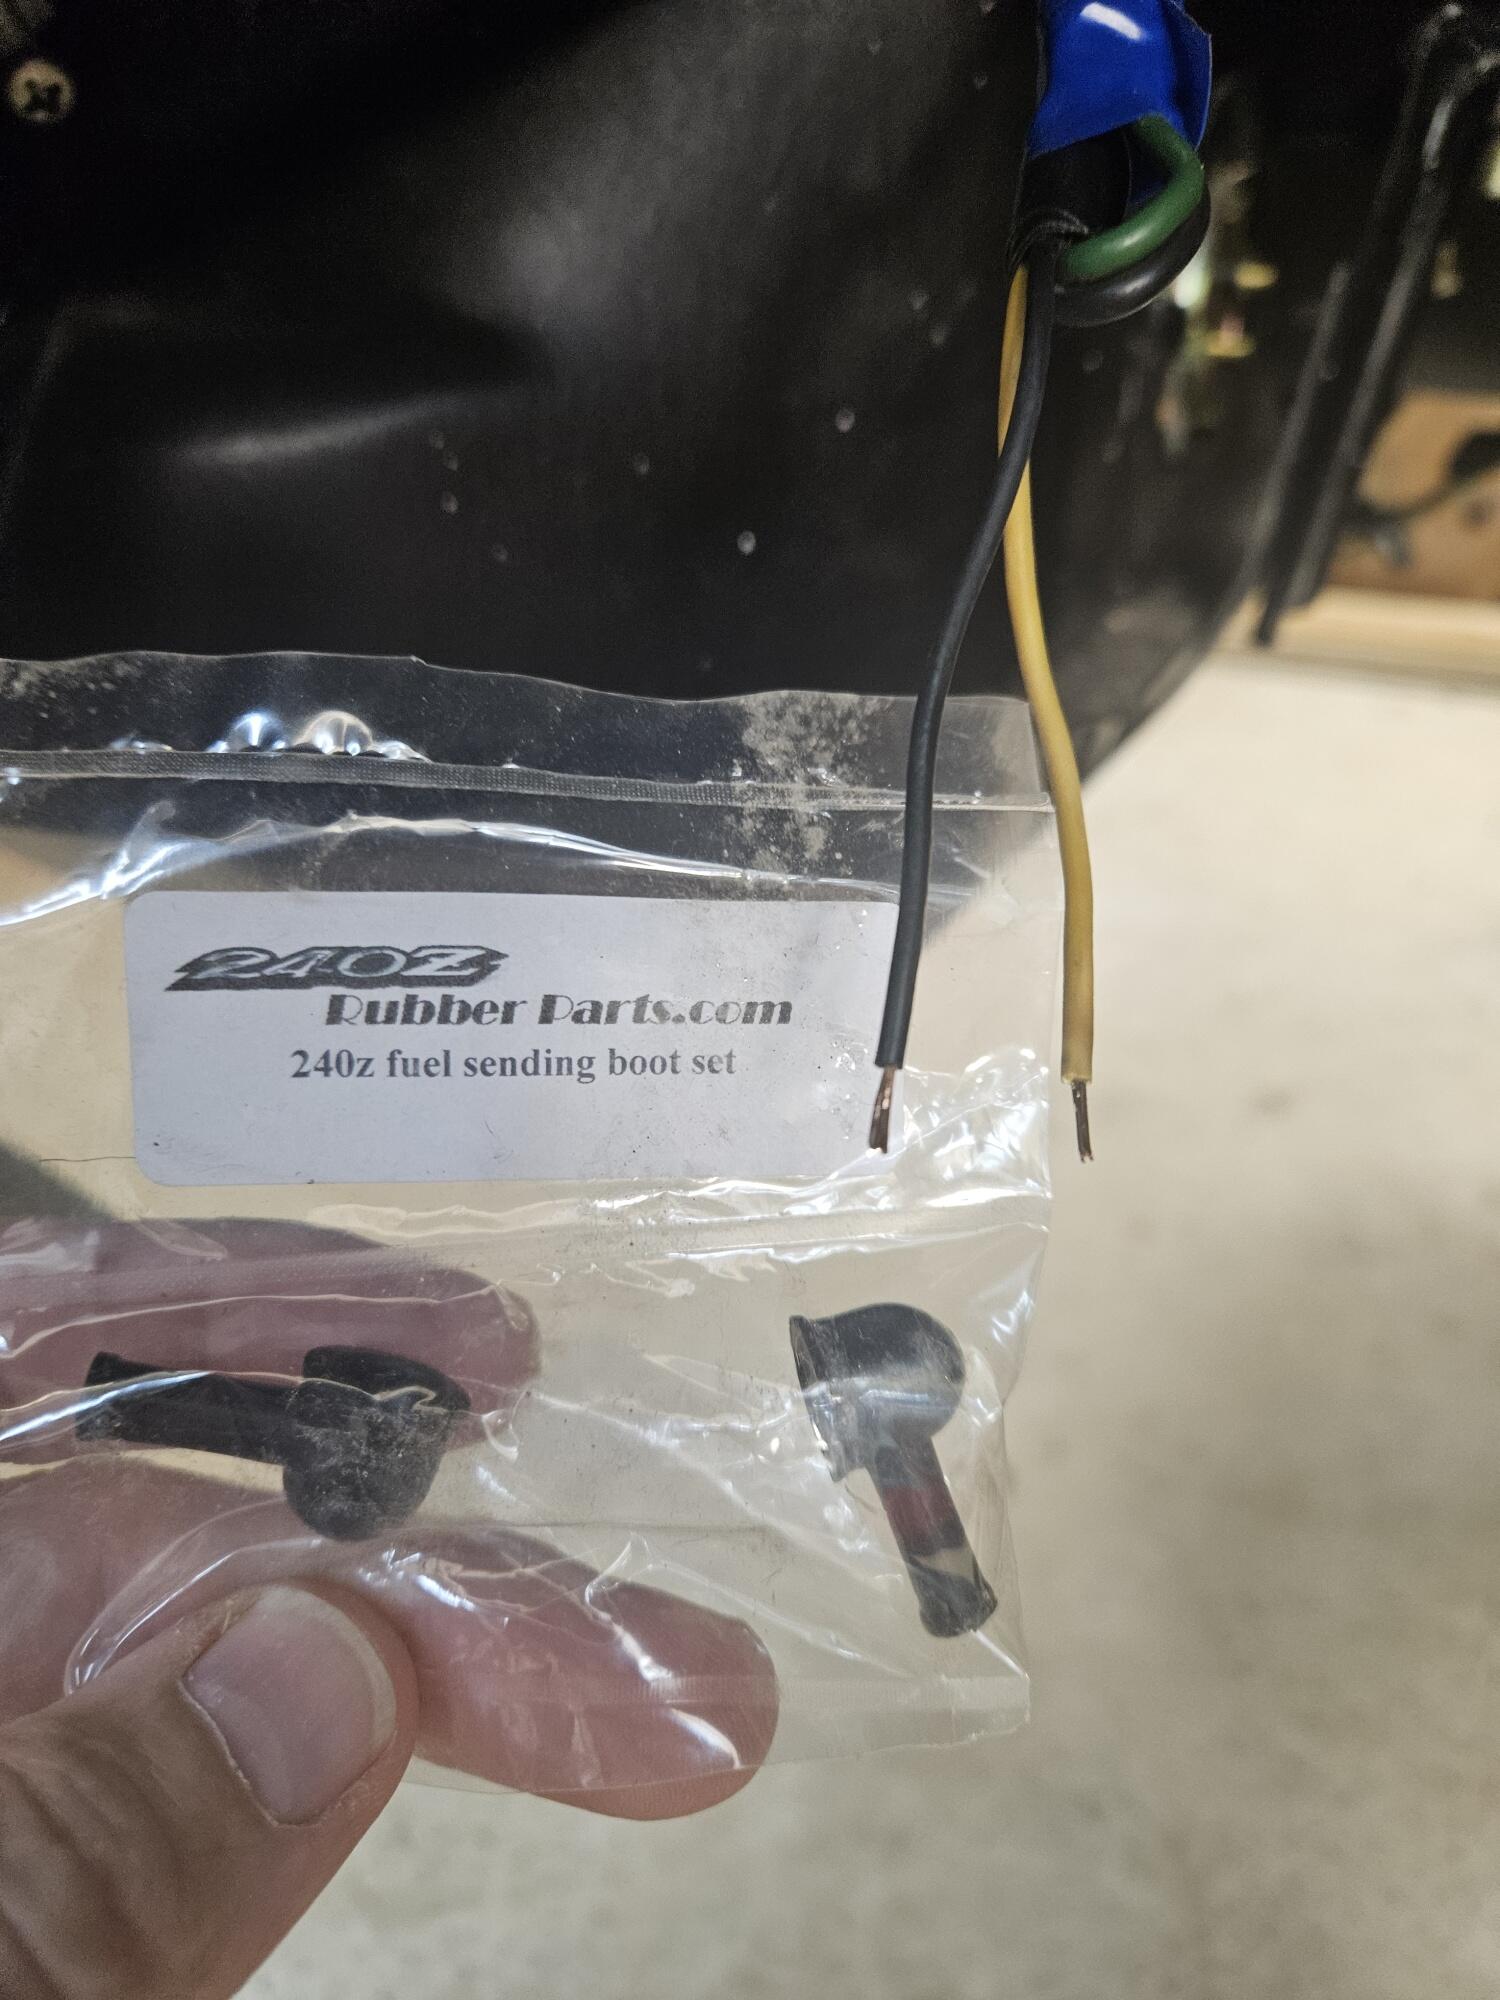
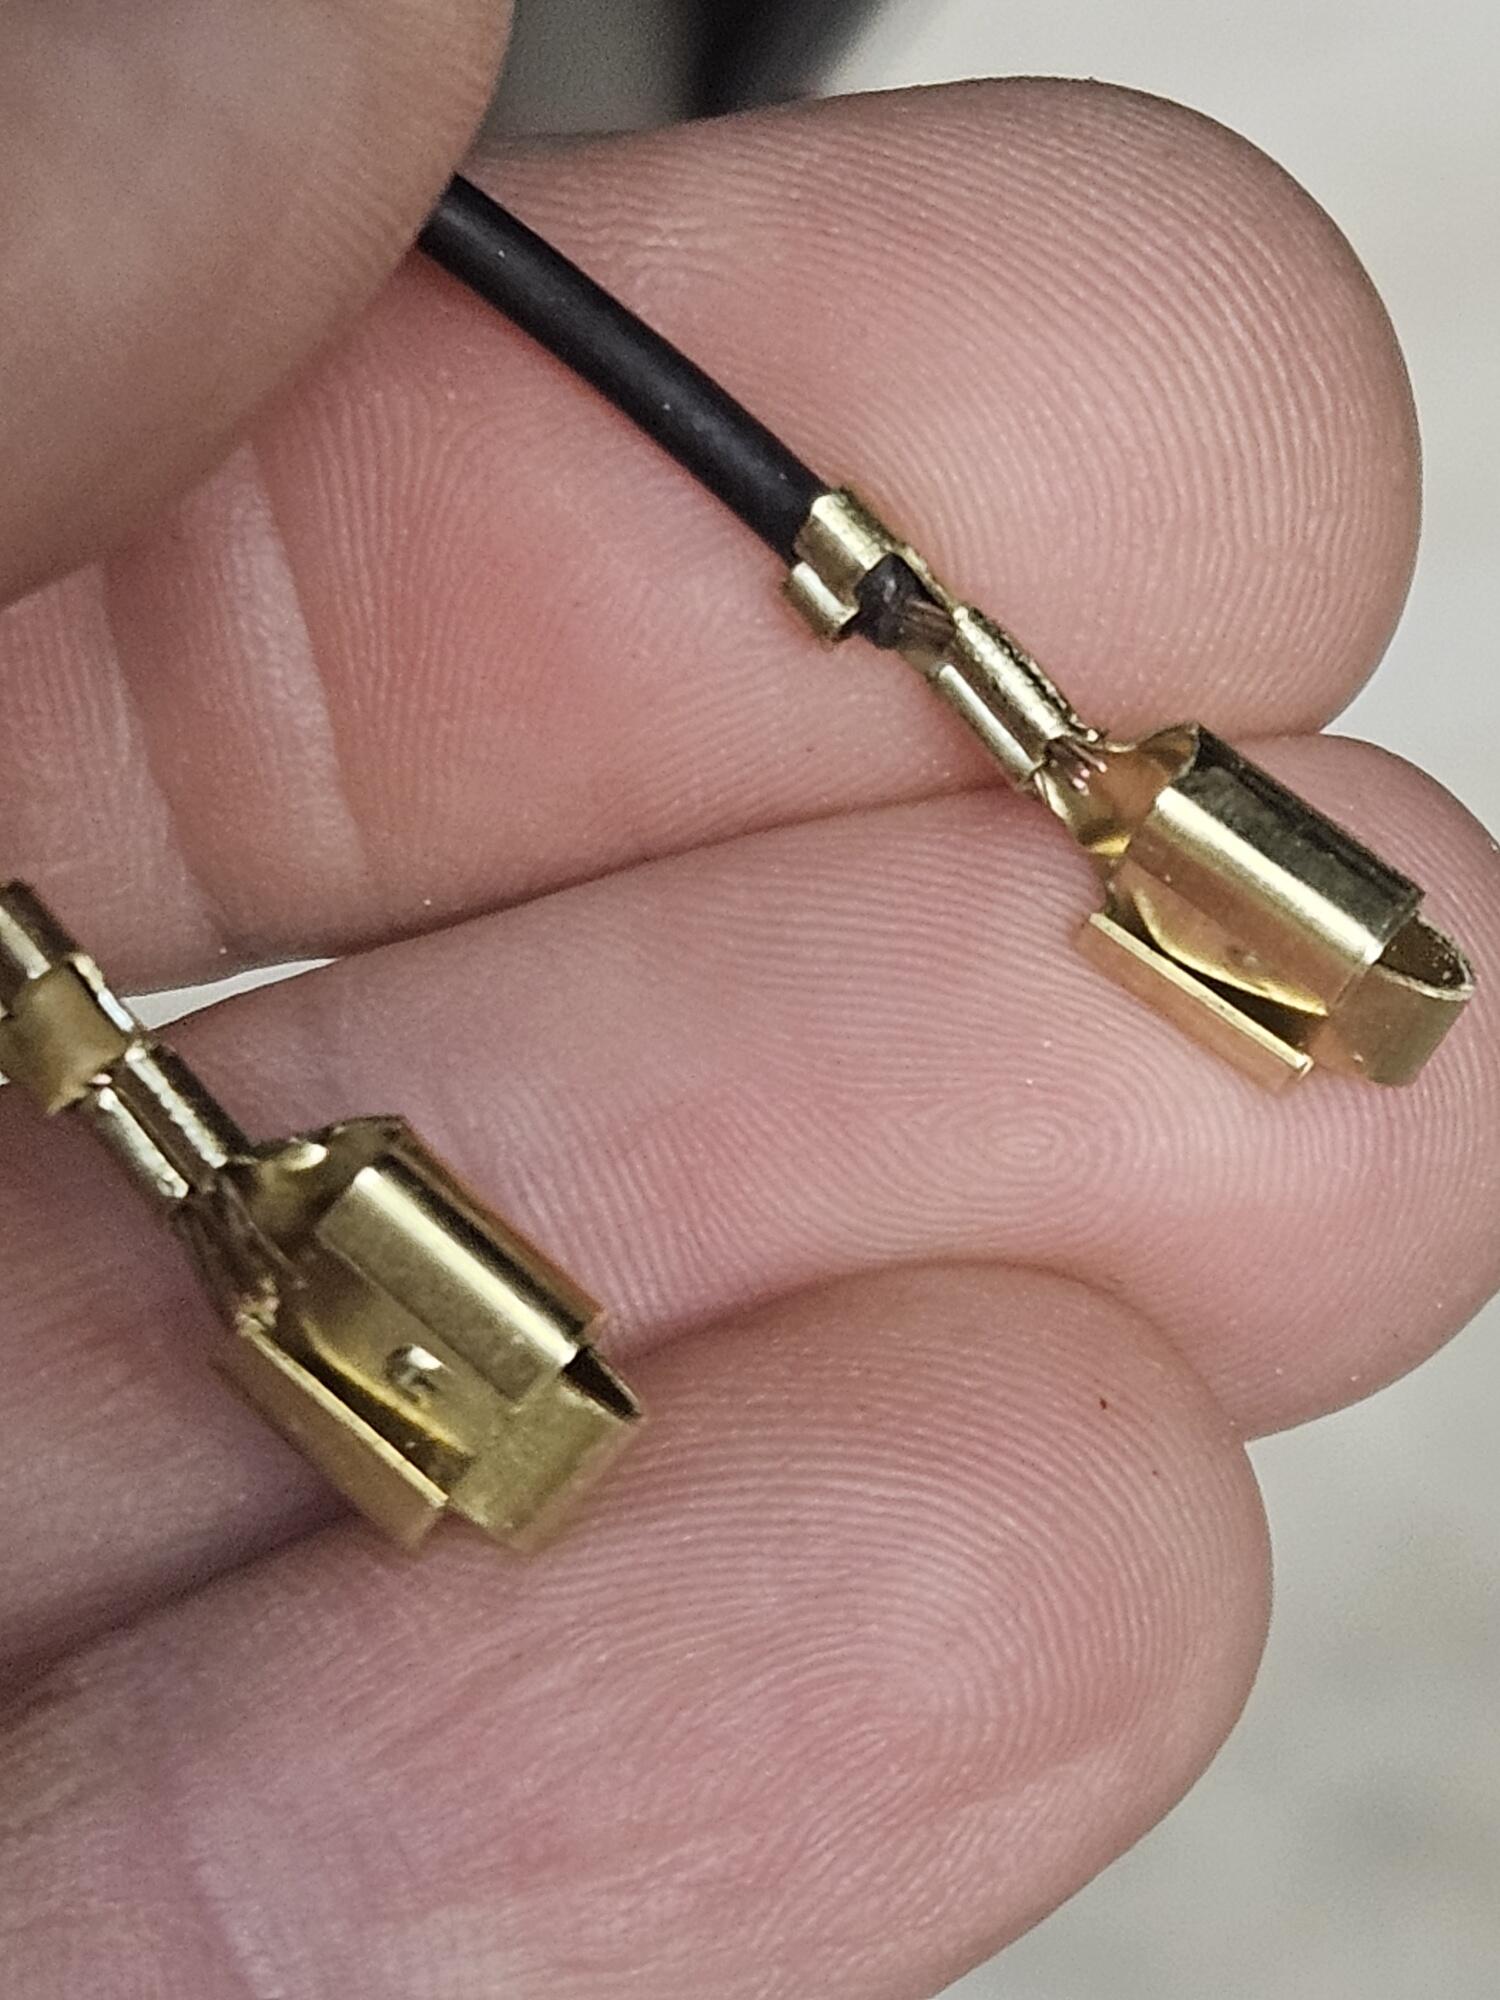
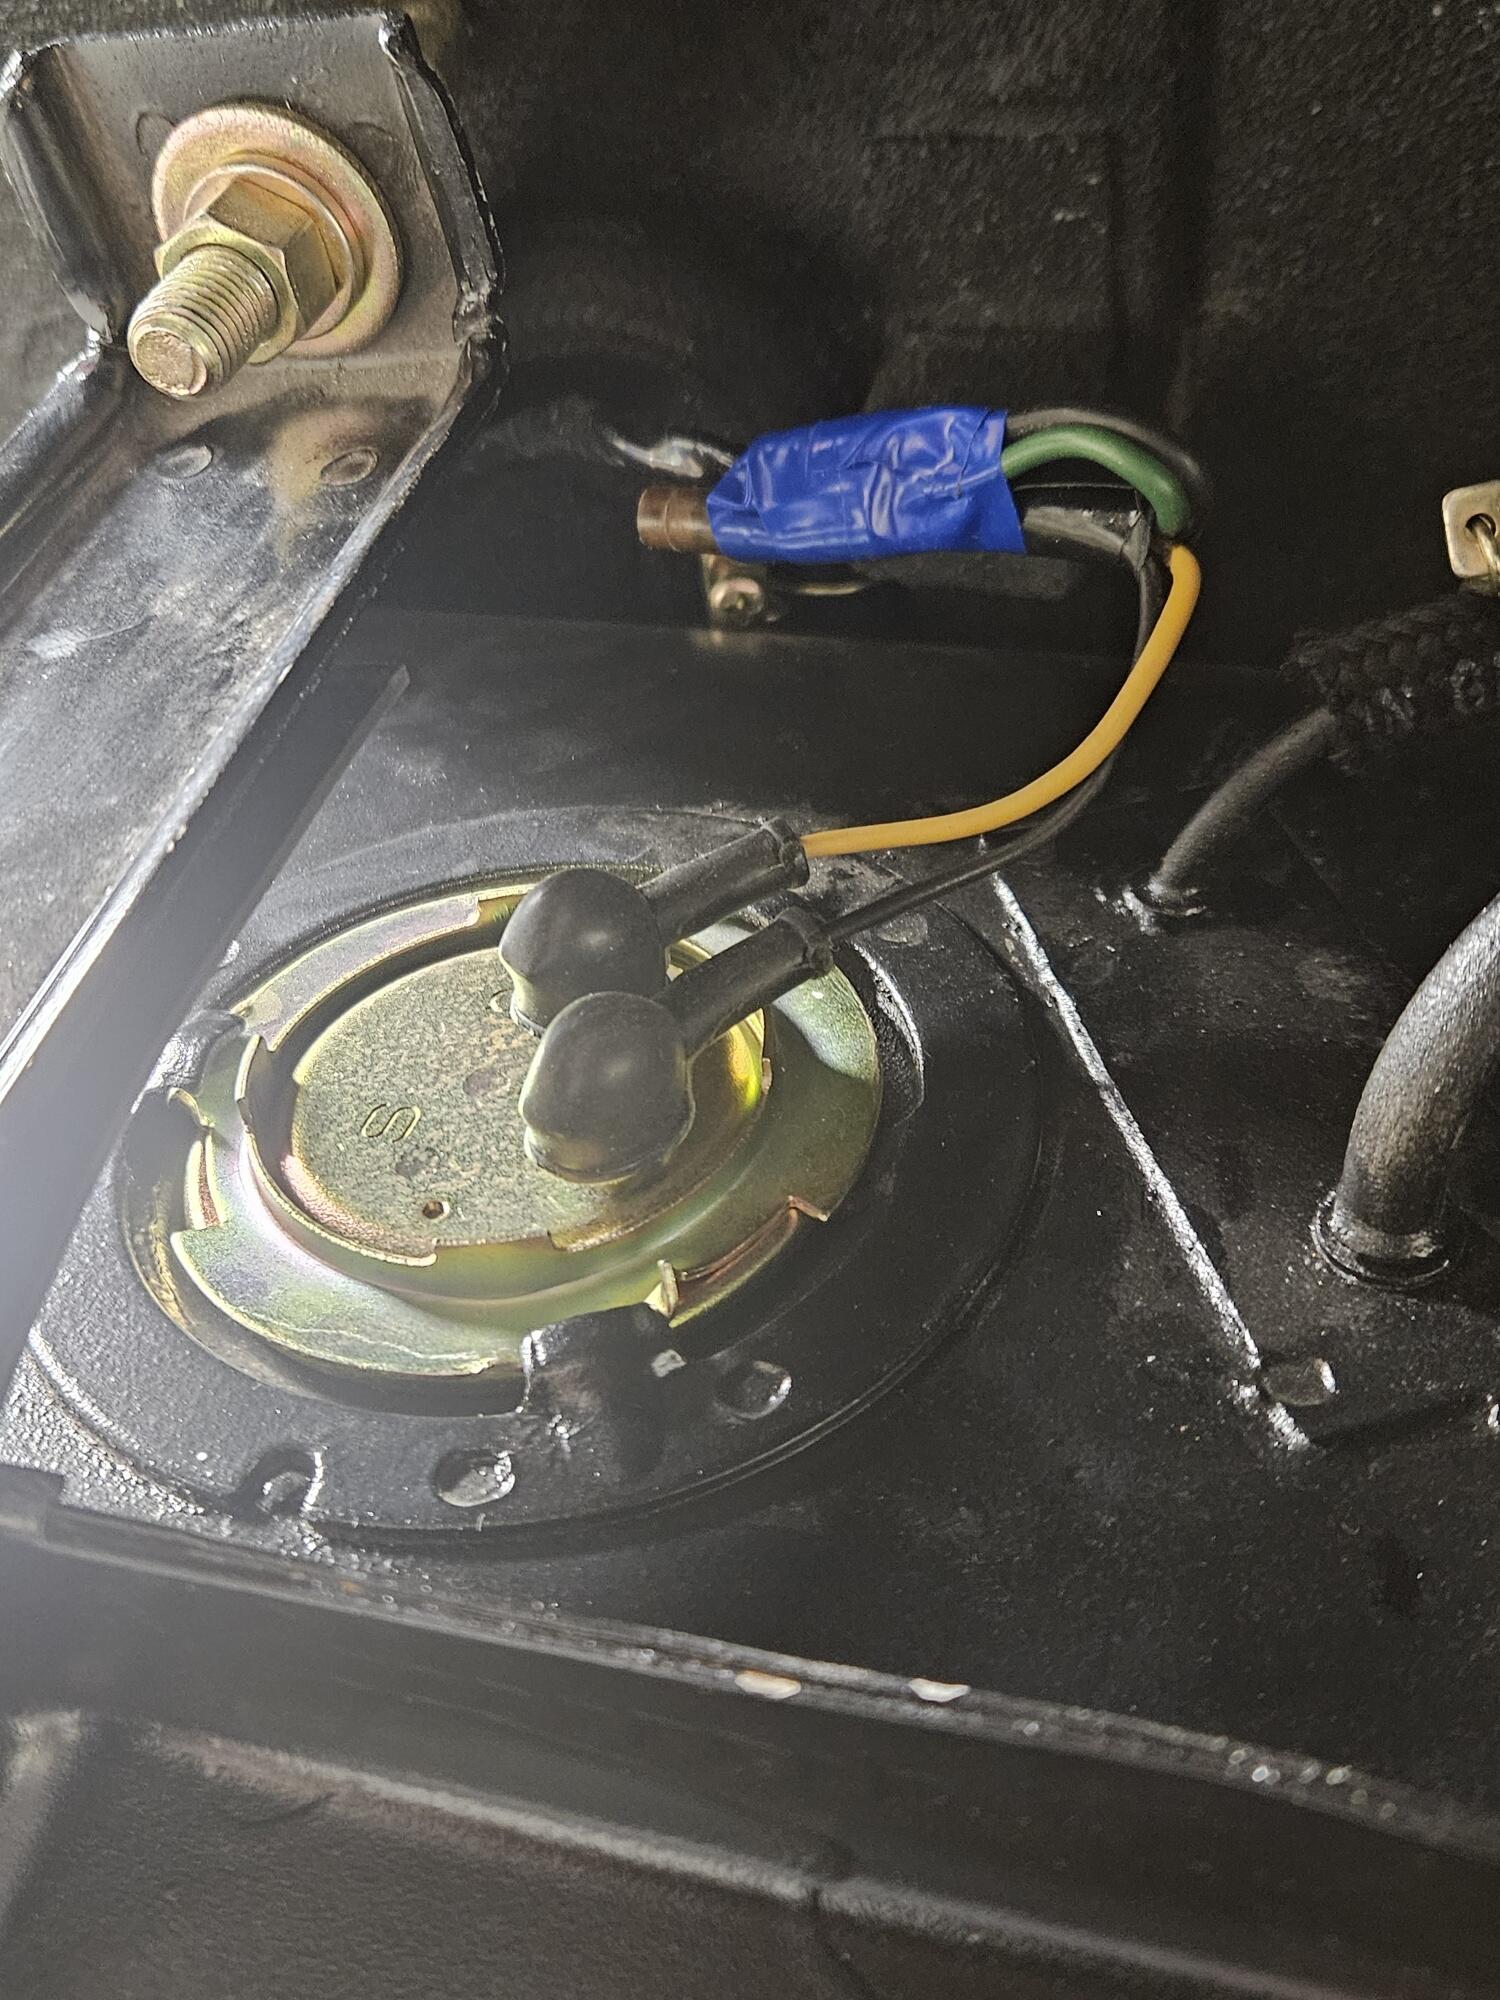
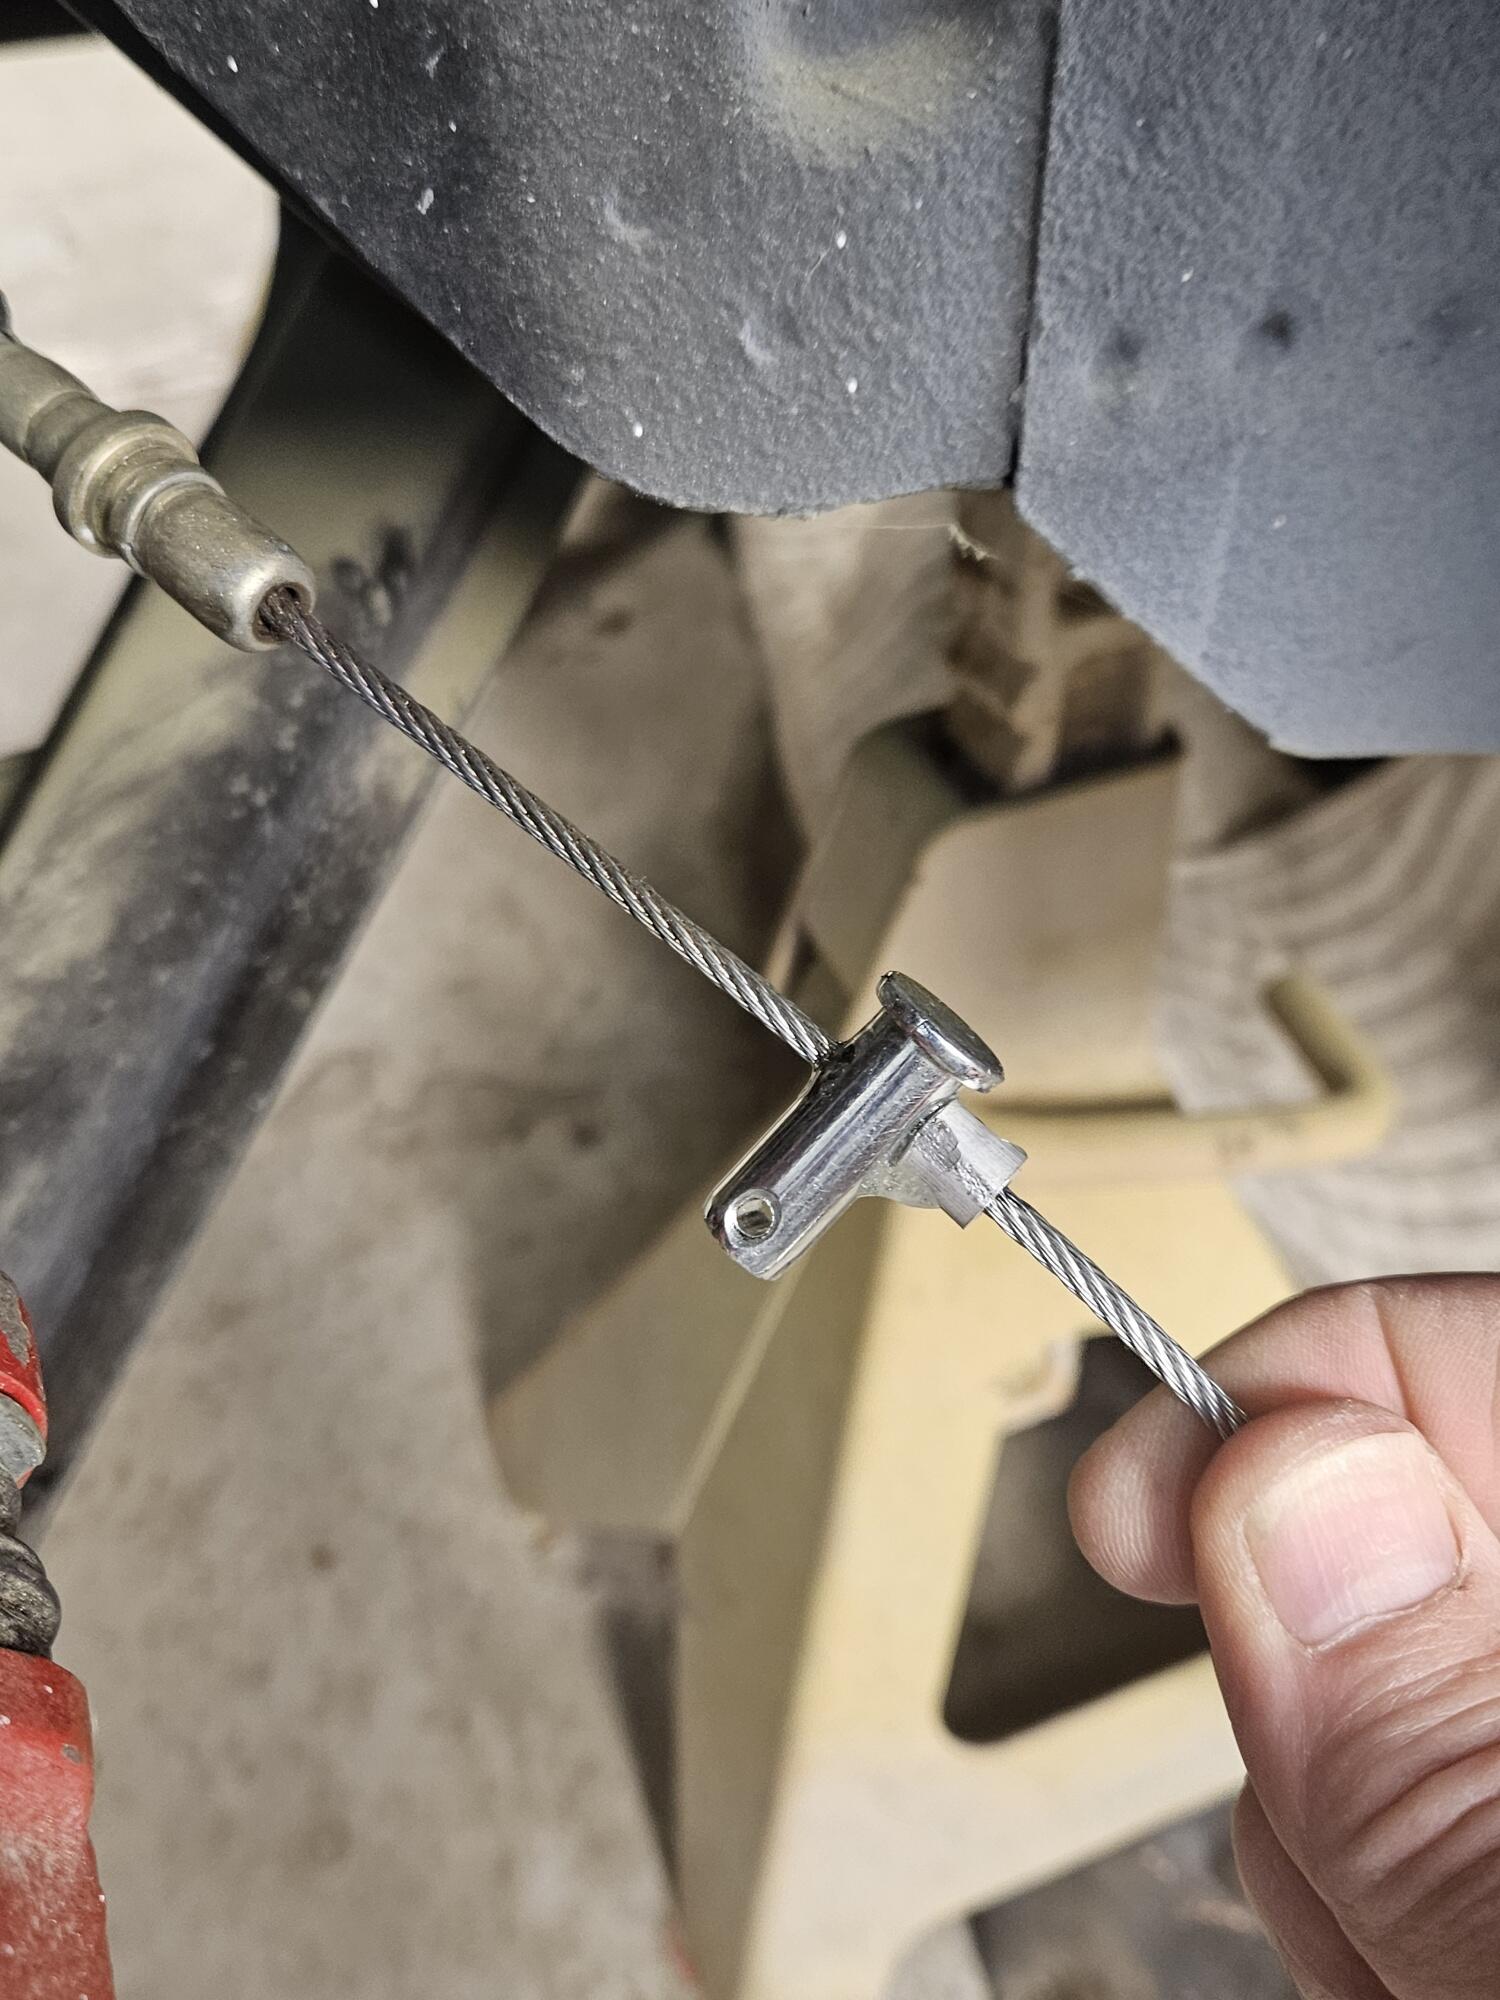
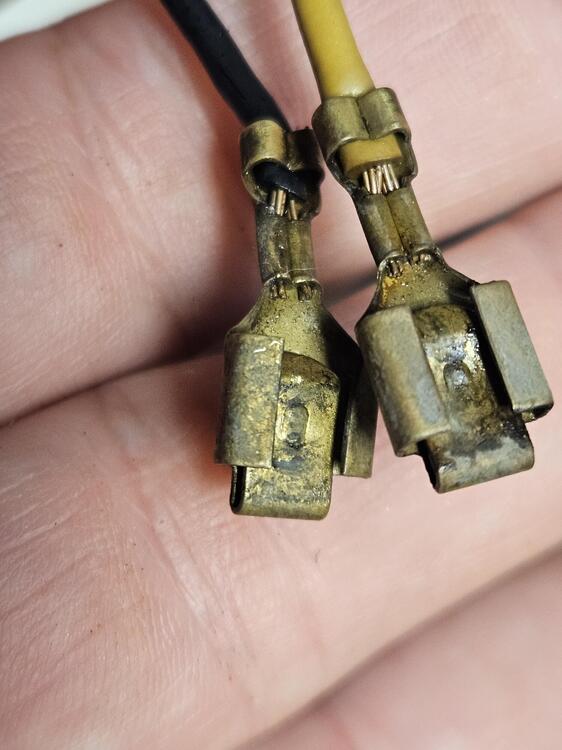
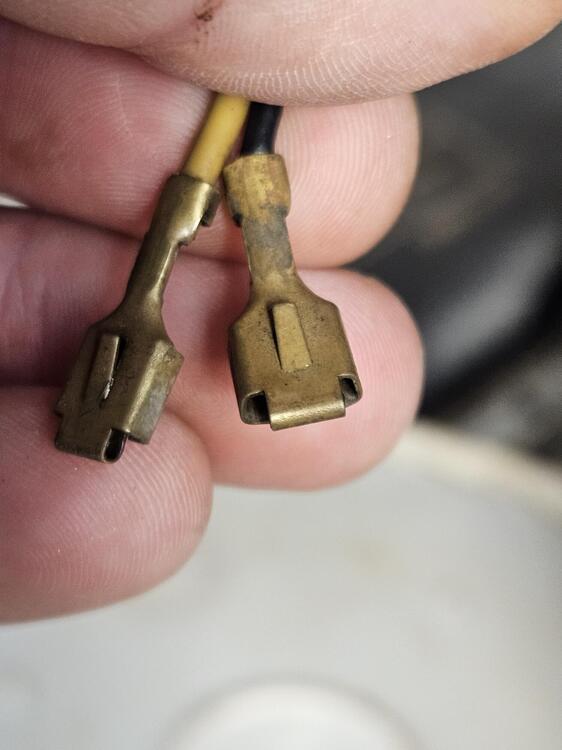
1 pointSo I made a little progress a couple of weeks ago and a little more today So two weeks ago I terminated the other end of the parking brake cable. I weld the first end but decided I would try something different on this end. So I epoxied the pin and added an aluminum crimp behind it I also got in an order from Eastern Beaver and finally got the fuel sender ends redone. I softened these a few years ago with wintergreen oil but it didn't last. I got new boots from 240zrubberparts and new ends from Eastern beaver. Cut the old off and re crimped new ends


 1 point
 -
I was really interested when it was cheaper, even though I don't really have funds to divert that way but it got out of reach about halfway through.1 point
-
1 pointYeah, they all have the original rubber grommets, I never removed them.1 point
-
I talked with https://www.ogdenchrome.com/ this week about re-choming my bumpers. Here is what I told them and what I found out: What I told them I wanted: Two front bumpers, one from a AZ car that has been straightened and has a lot of surface imperfections from doing so, and one that has some body filler and has been painted Two rear bumpers, one that is NOS and one that is from an AZ car and has been straightened somewhat but needs more One set of front bumper over riders One set of rear bumper over riders They said that straightening is easy for them. I think they use hydraulic presses based off what he said. He said 240z bumpers are thin, so they only do their "show chrome" option on them. From what he described, it sounds like they coat them with quite a bit of copper. Pricing: $1400 for each front bumper, $1600 for each rear bumper. No discounting the price for either the low rust, or the NOS bumper (no discount for good condition). $200 for each bumper over rider. Current wait time is 6-7 months. That is quite a bit more expensive than I was thinking and the wait time is way too long. So, I will be checking with https://www.pulidoplating.net/ next.0 points