Leaderboard
-
conedodger
Free Member5Points12,513Posts -
inline6
 Subscriber
 4Points1,282Posts
 -

Zed Head
Free Member3Points19,236Posts -
grannyknot
Free Member2Points5,158Posts


Popular Content
Showing content with the highest reputation on 02/12/2024 in all areas
-
1 pointPretty much, new struts will open a faster but will be harder to close. I think the general rule of thumb is, as long as the hatch doesn't close under its own weight then the struts are working normally.1 point
-
I guess if i had bought the cardboard one it would have been easier to bend and get it in that hole.1 point
-
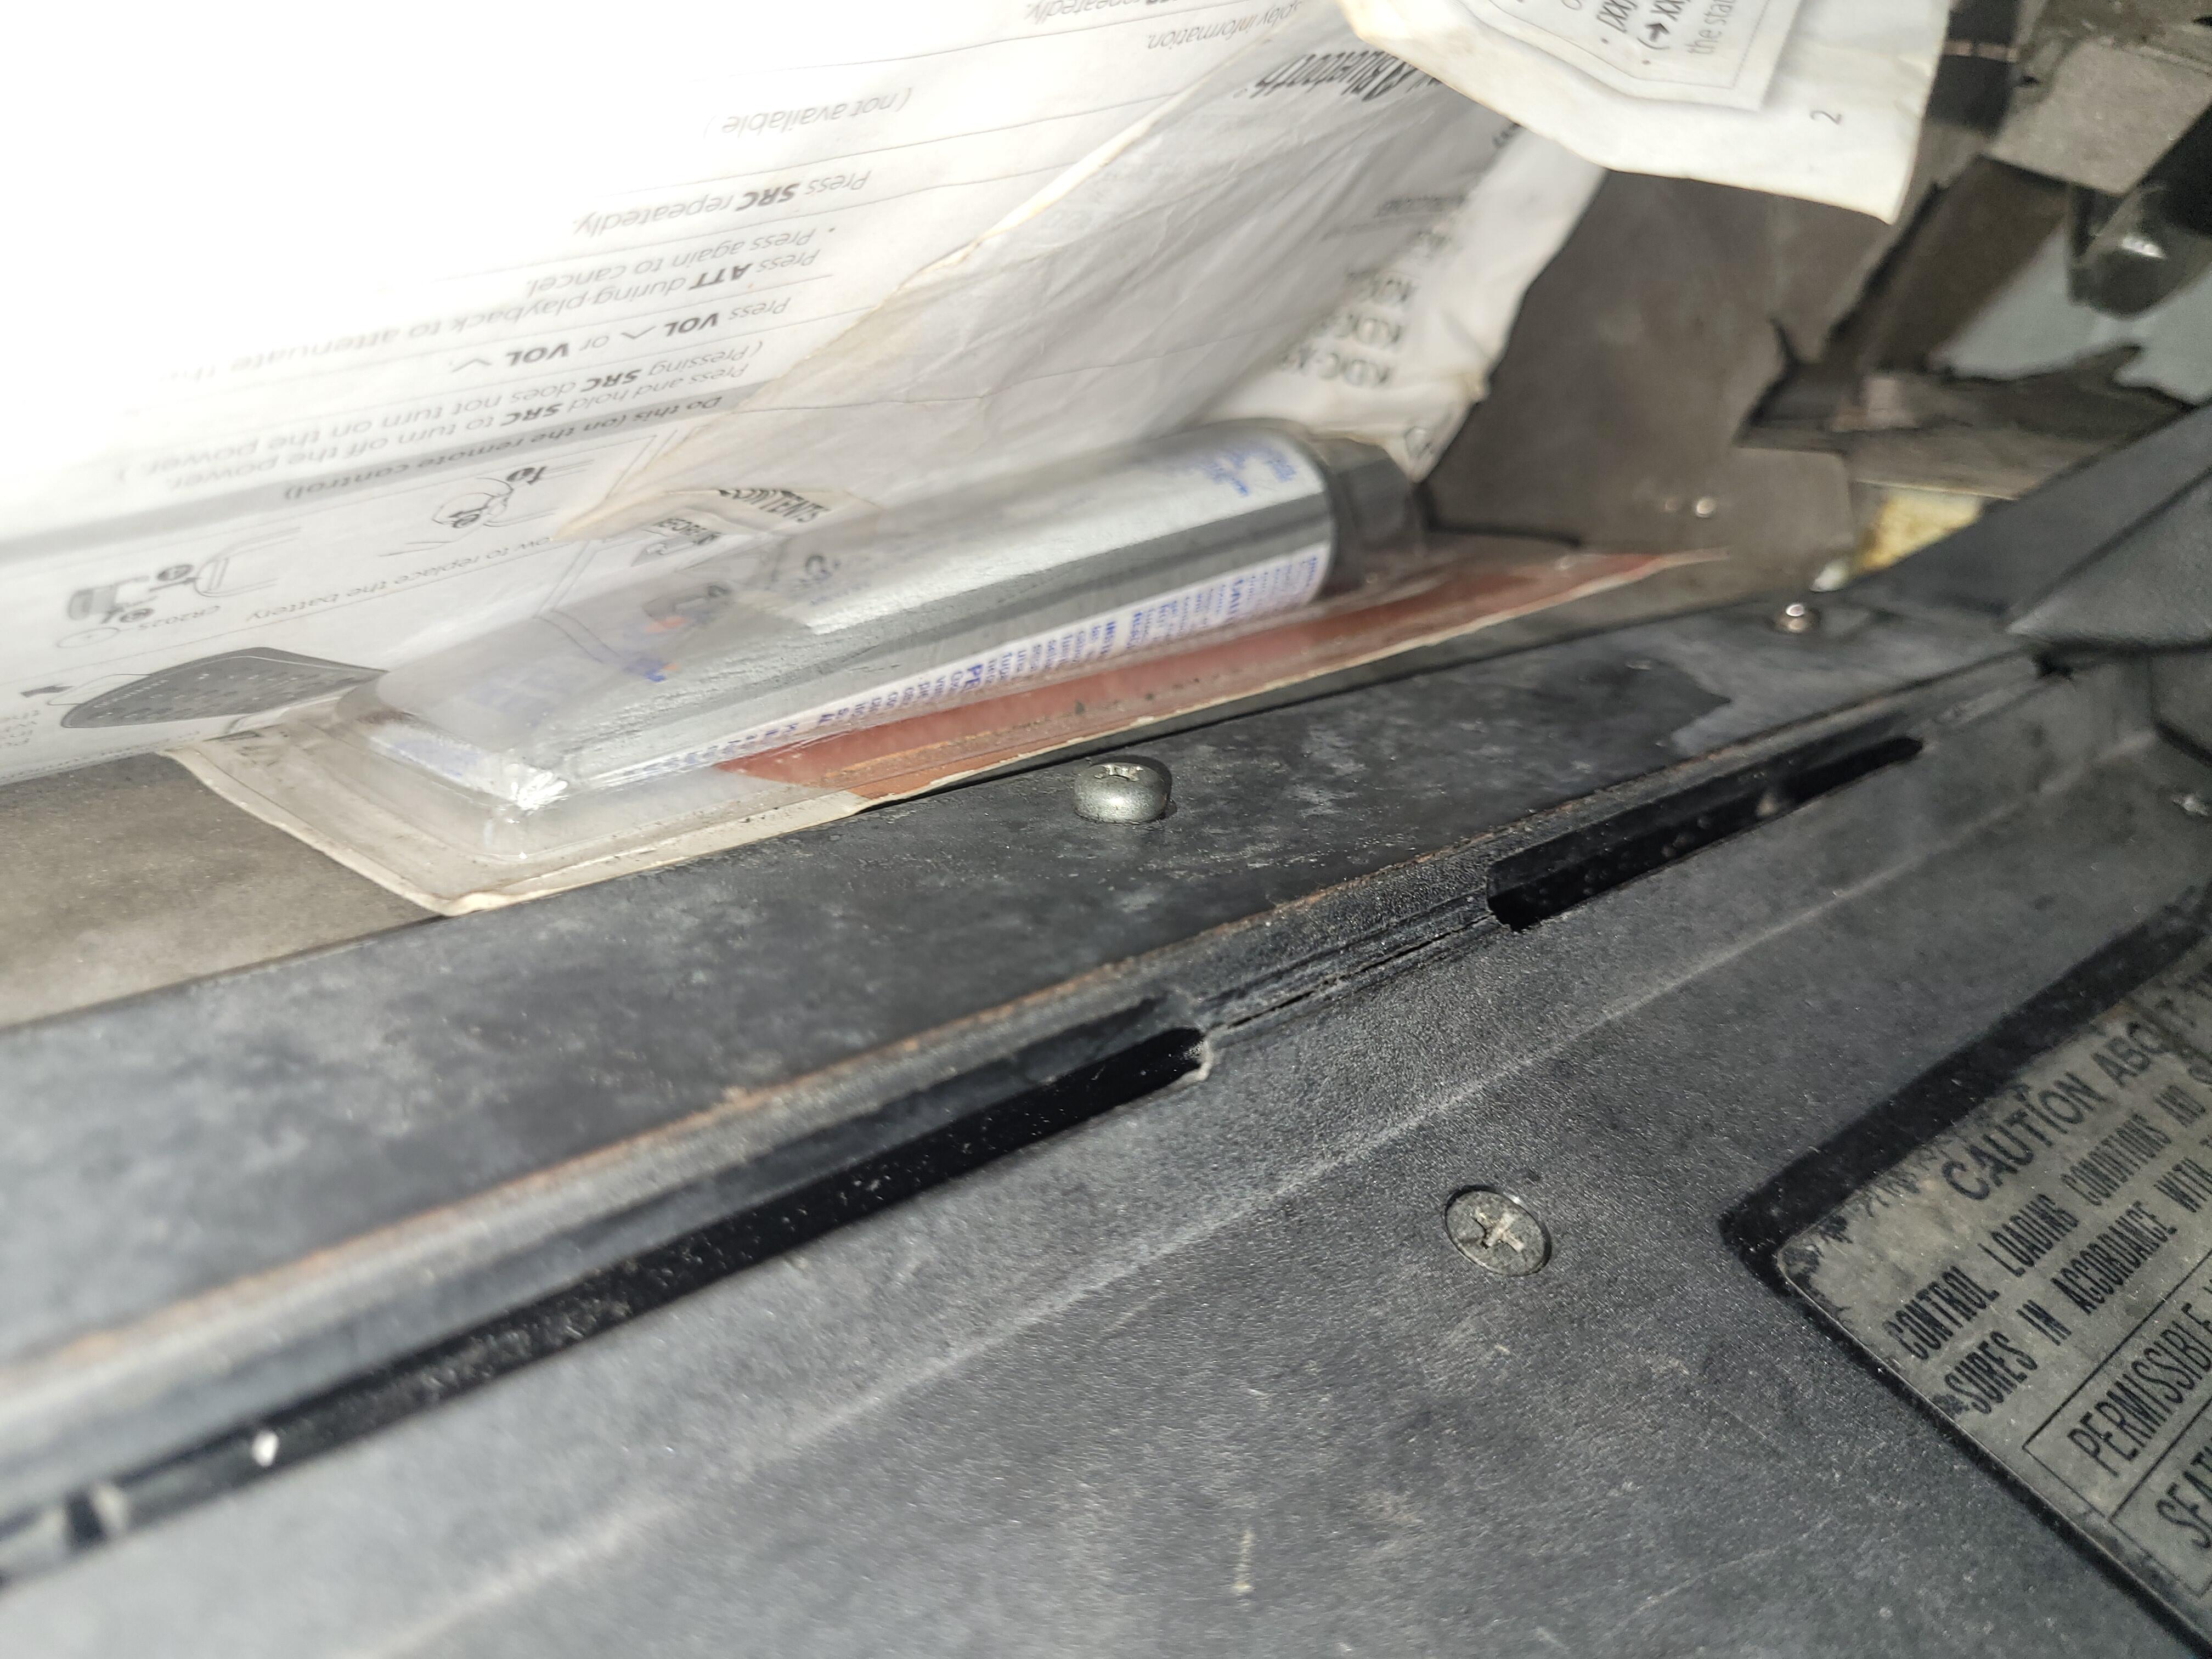
inline6, if the apron or header panel isn't covered yet, it's good to re tap the threads for the rear view mirror and sun visors. Quite often they get filled with paint and once the vinyl/foam is in place it's hard enough to find the holes let alone deal with fine threads that won't cooperate.1 point
-
Sometimes you have to adapt and fabricate when necessary. I understand this is not the solution you are looking for. Figure out where it’s binding and make an adjustment as needed. Once you move away from factory specs customization always seems to create problems such as what you’re running into now.1 point
-
I have found many things in your build thread to be helpful! I will look through again for that. Thanks.1 point
-
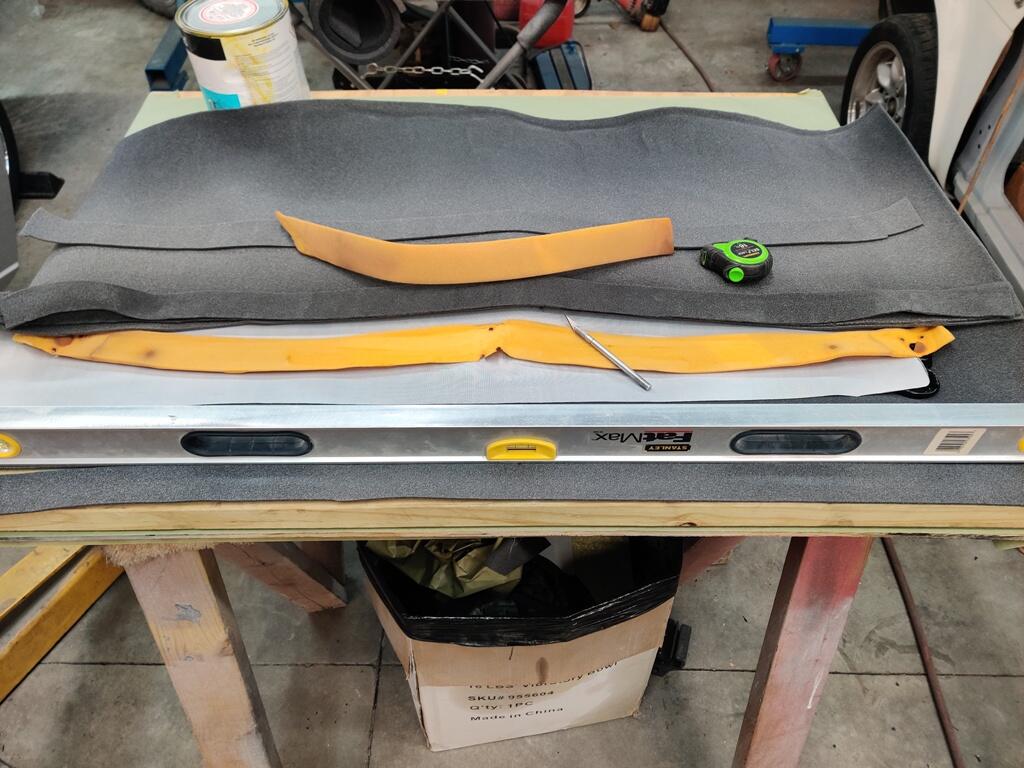
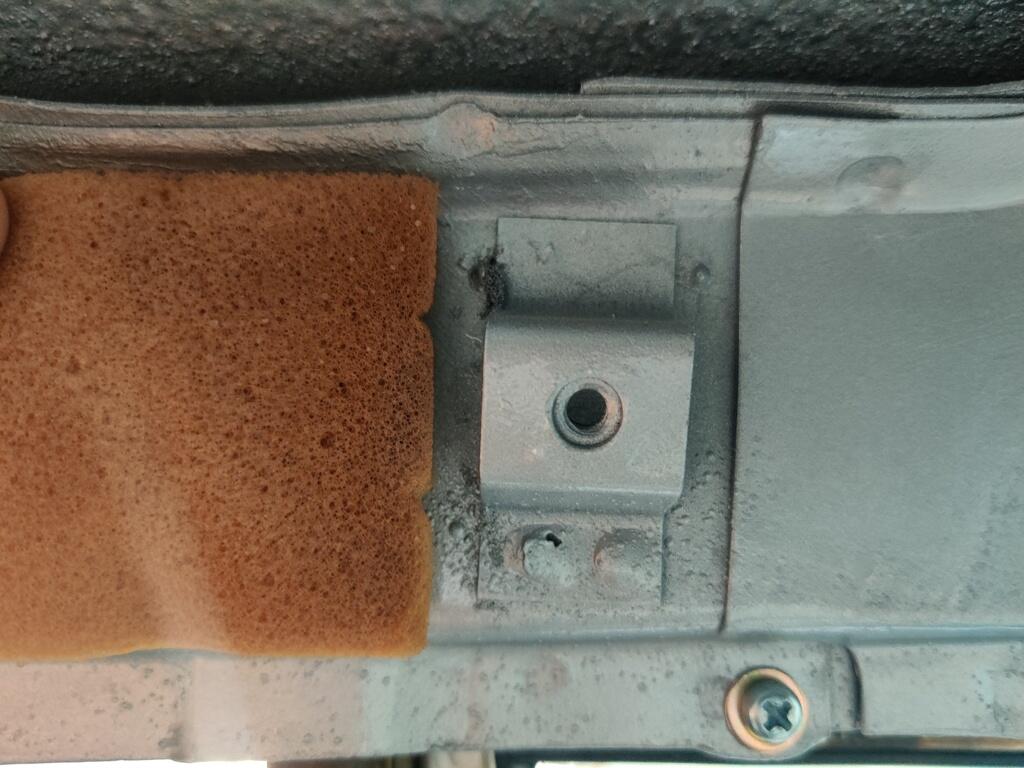
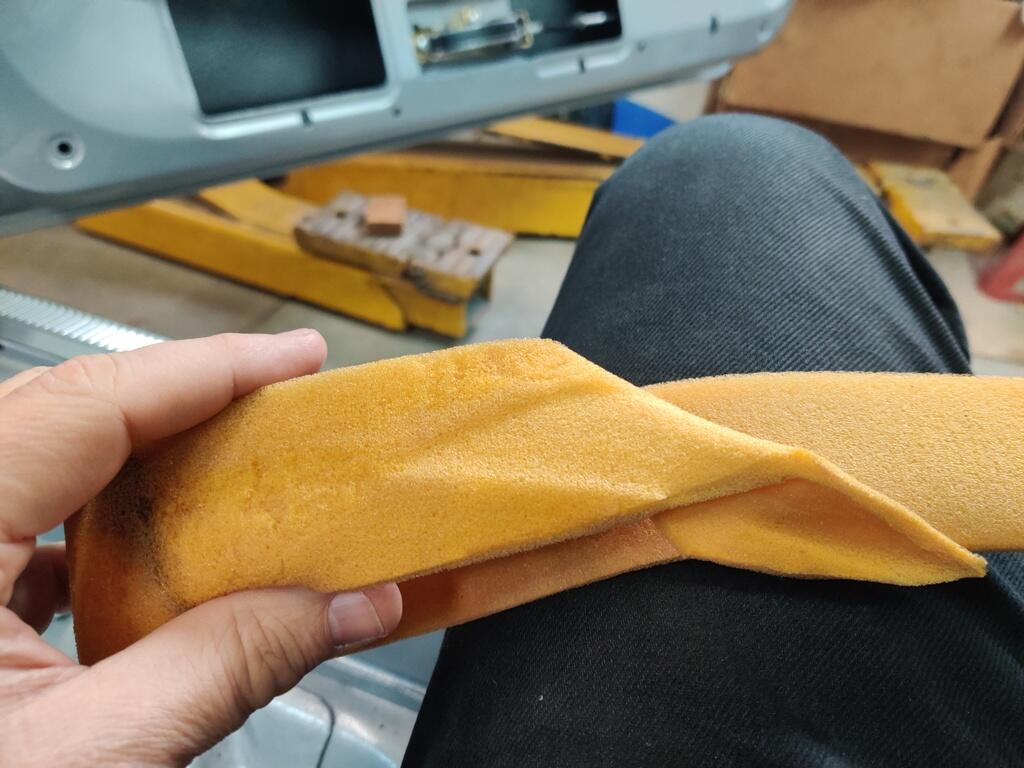
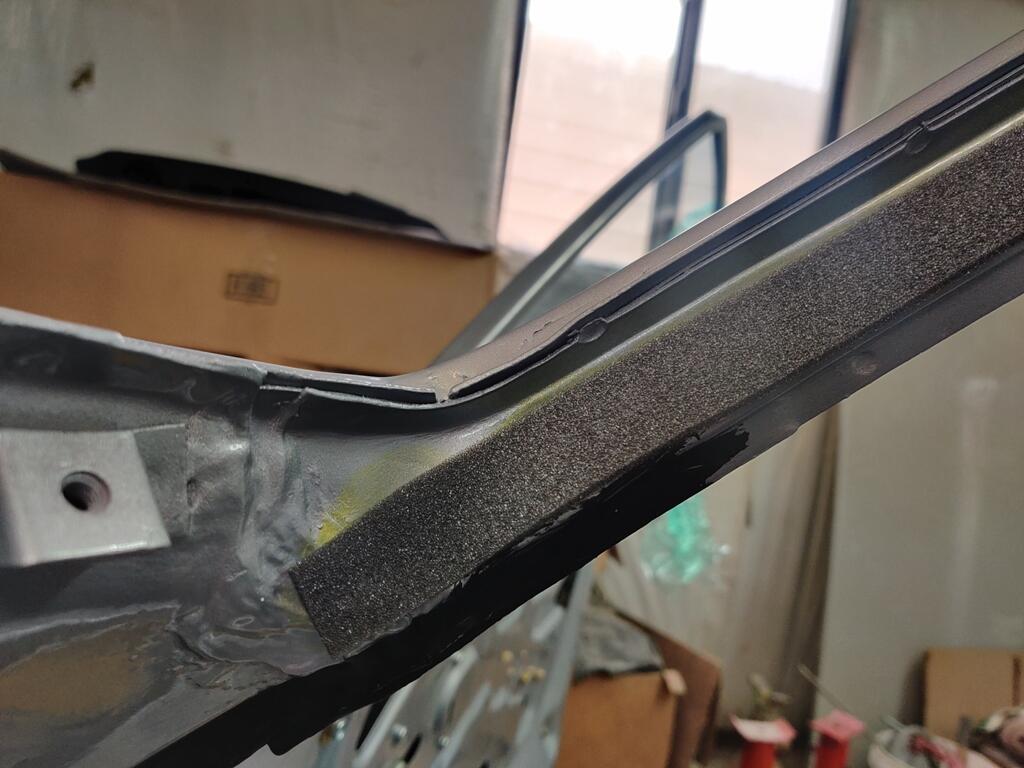
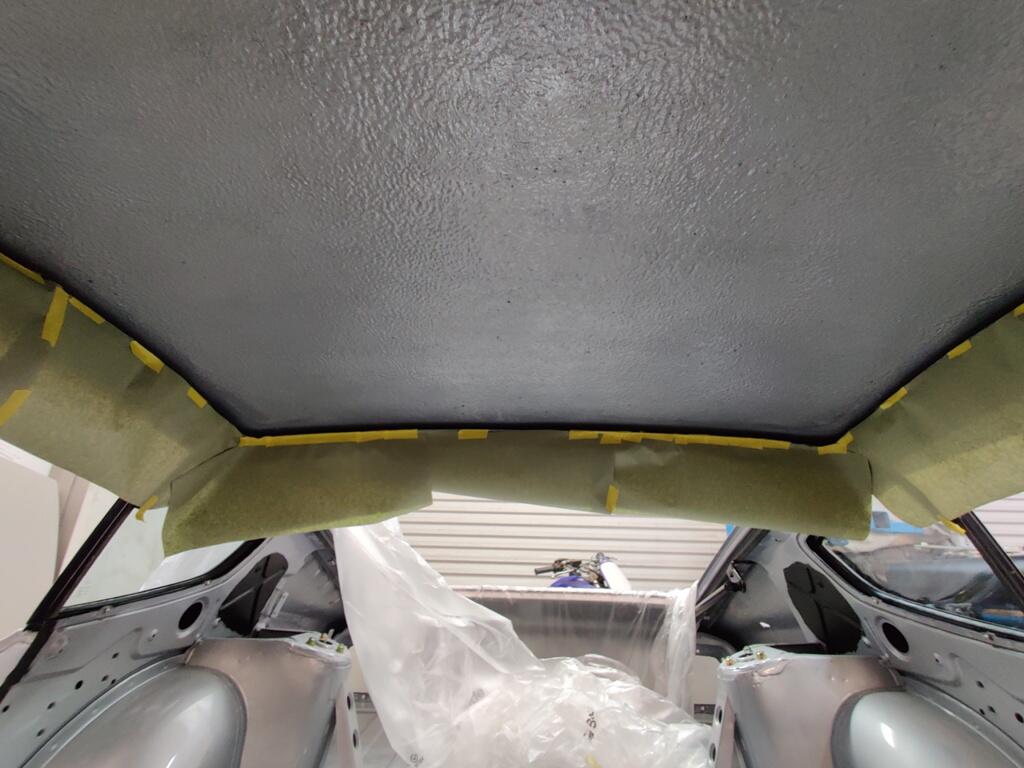
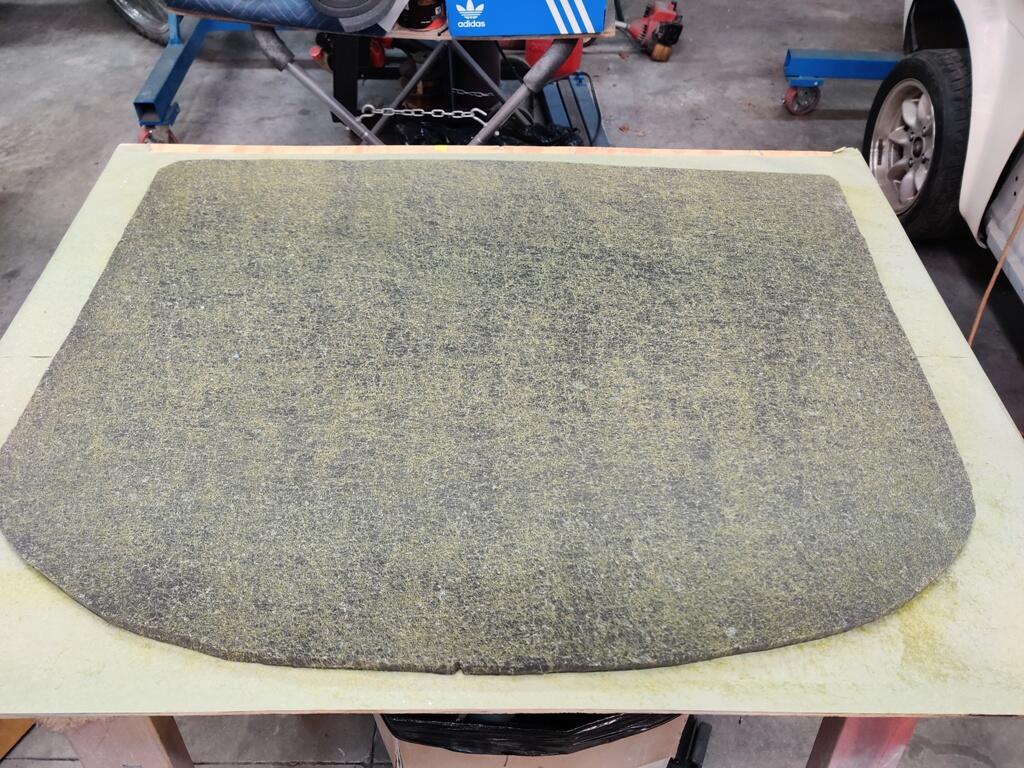
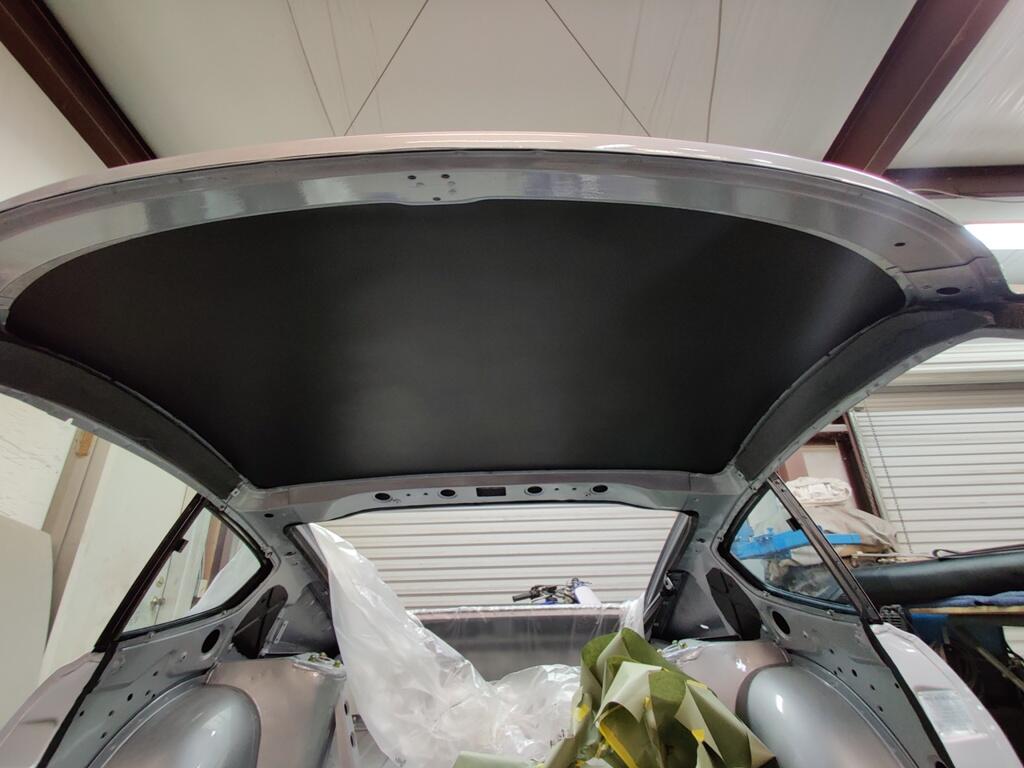
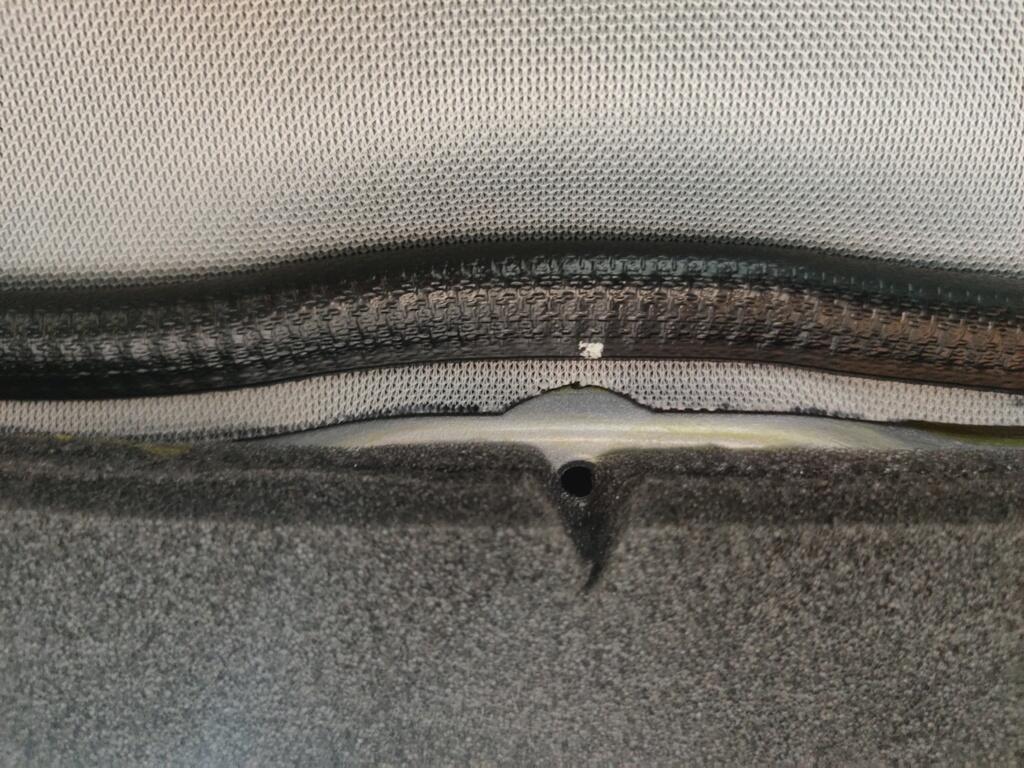
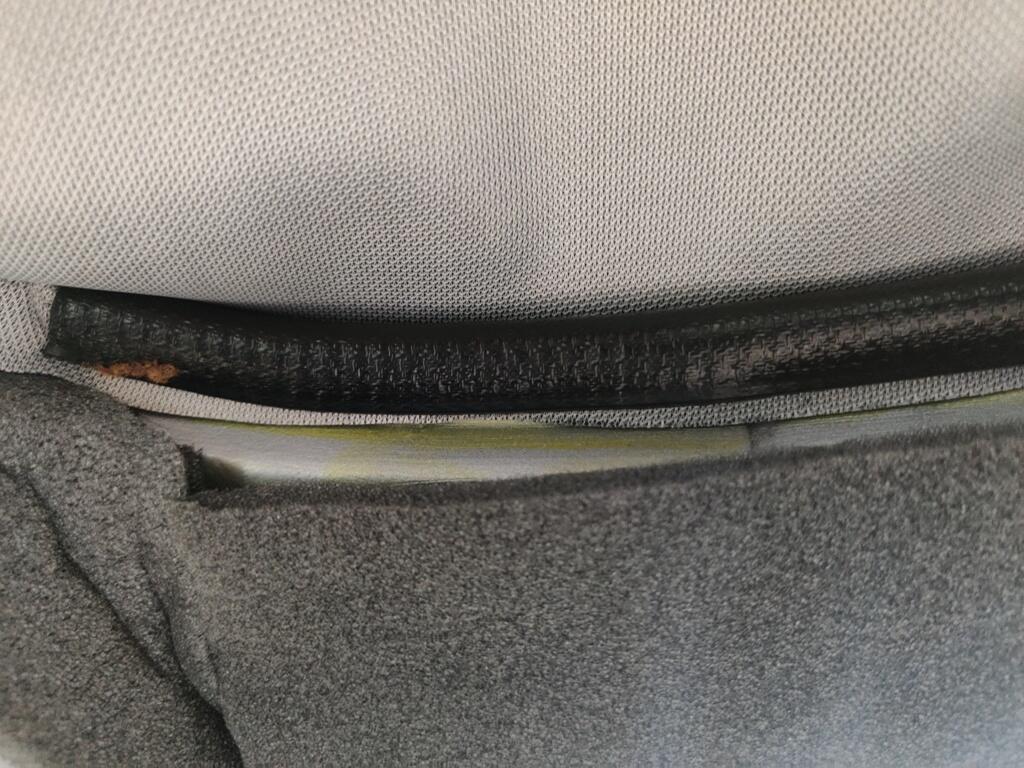
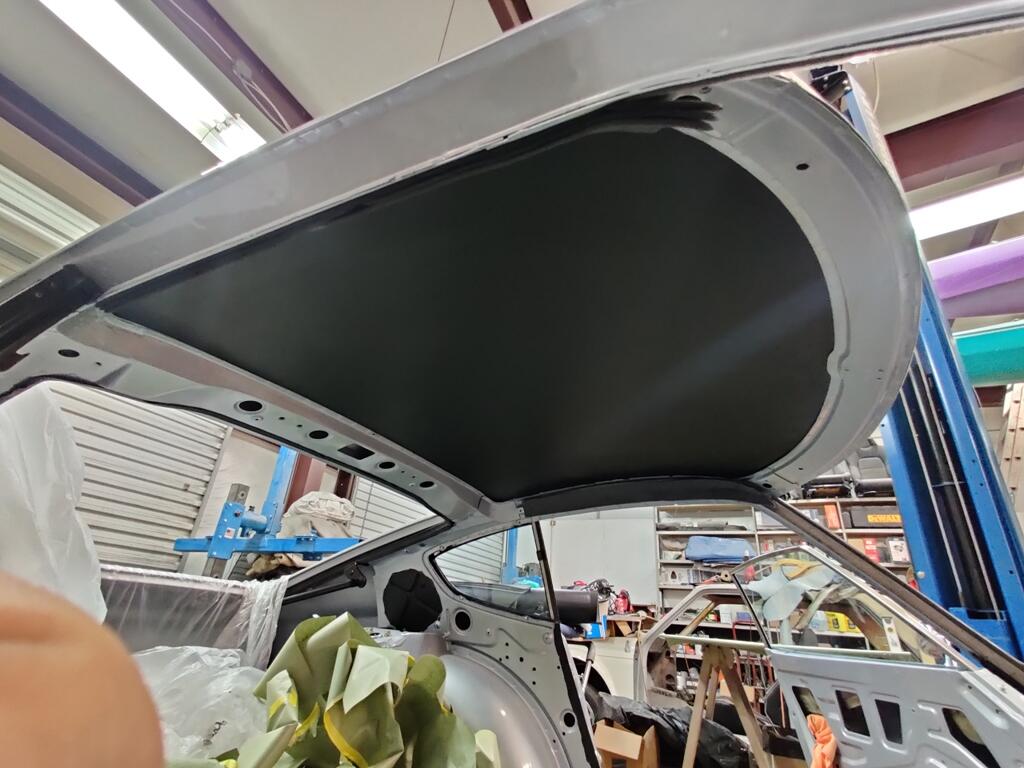
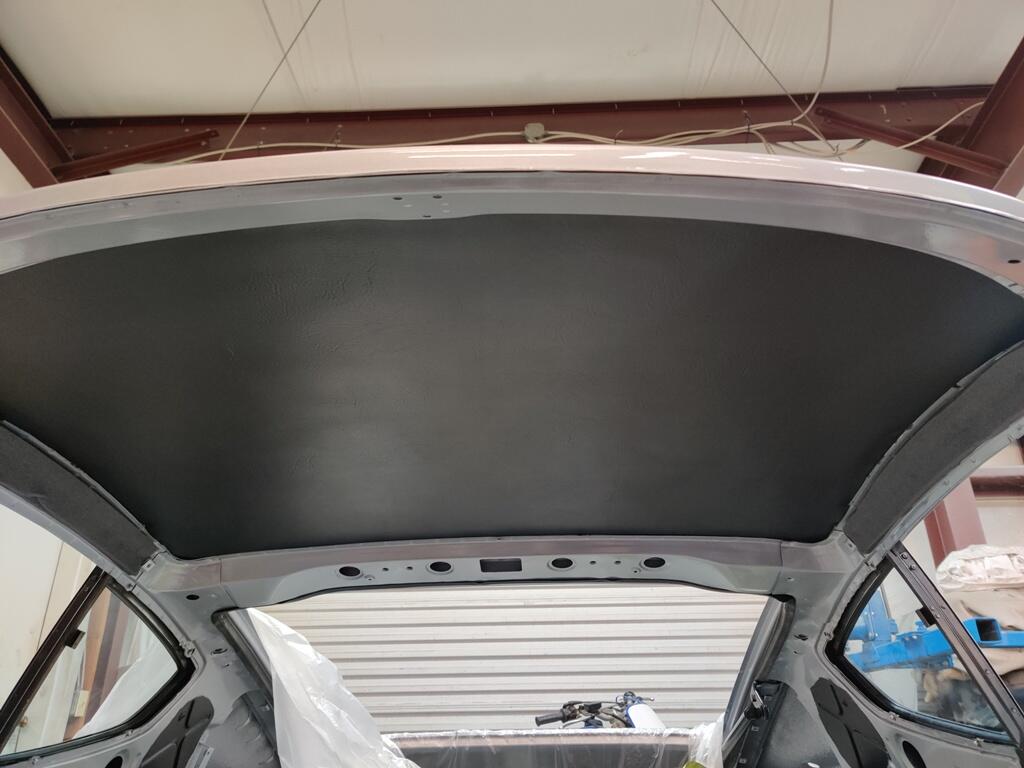
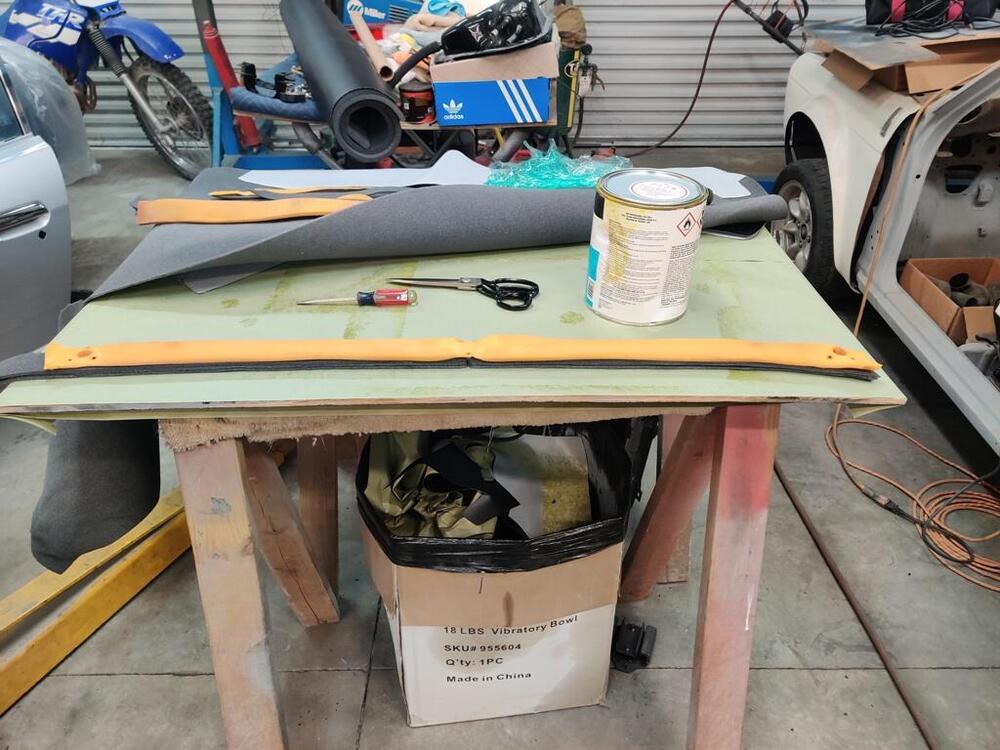
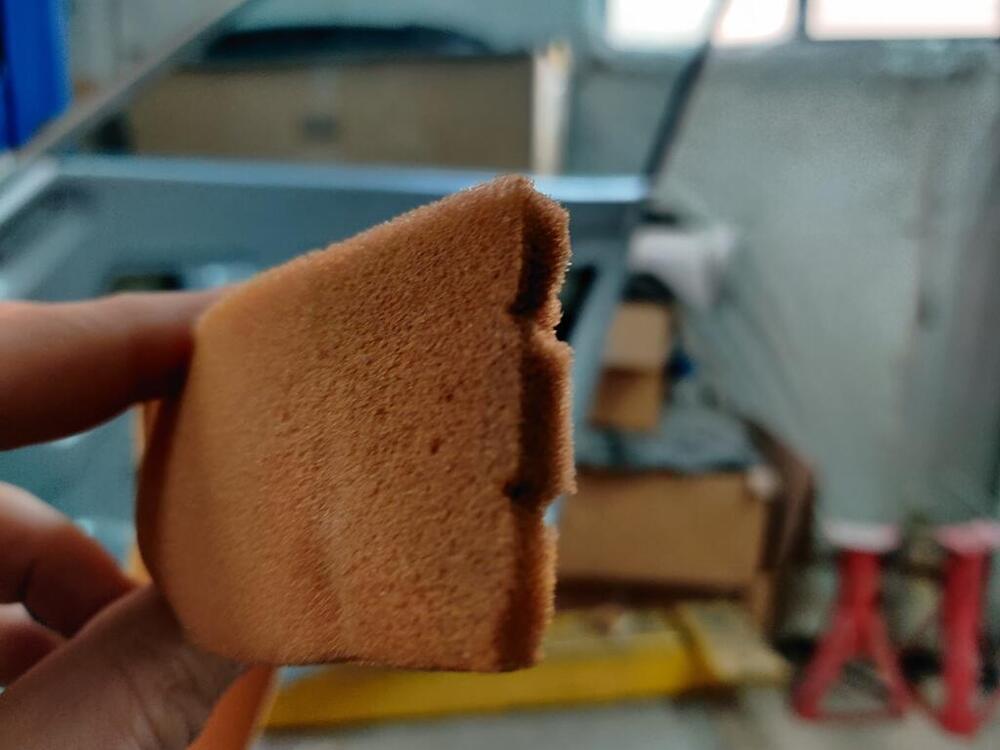
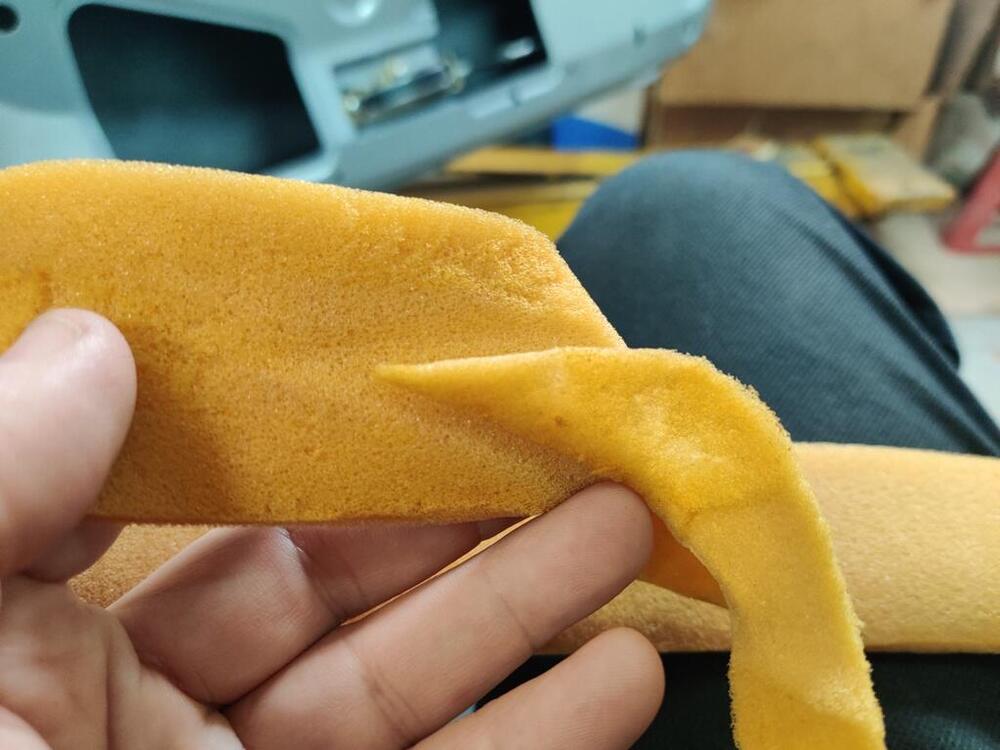
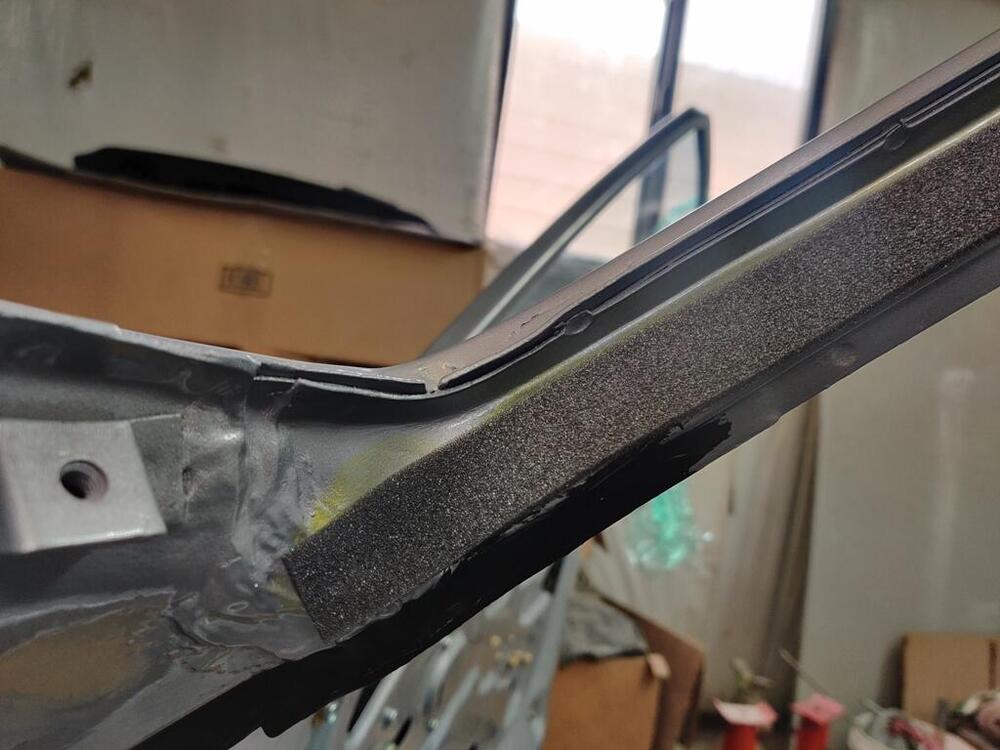
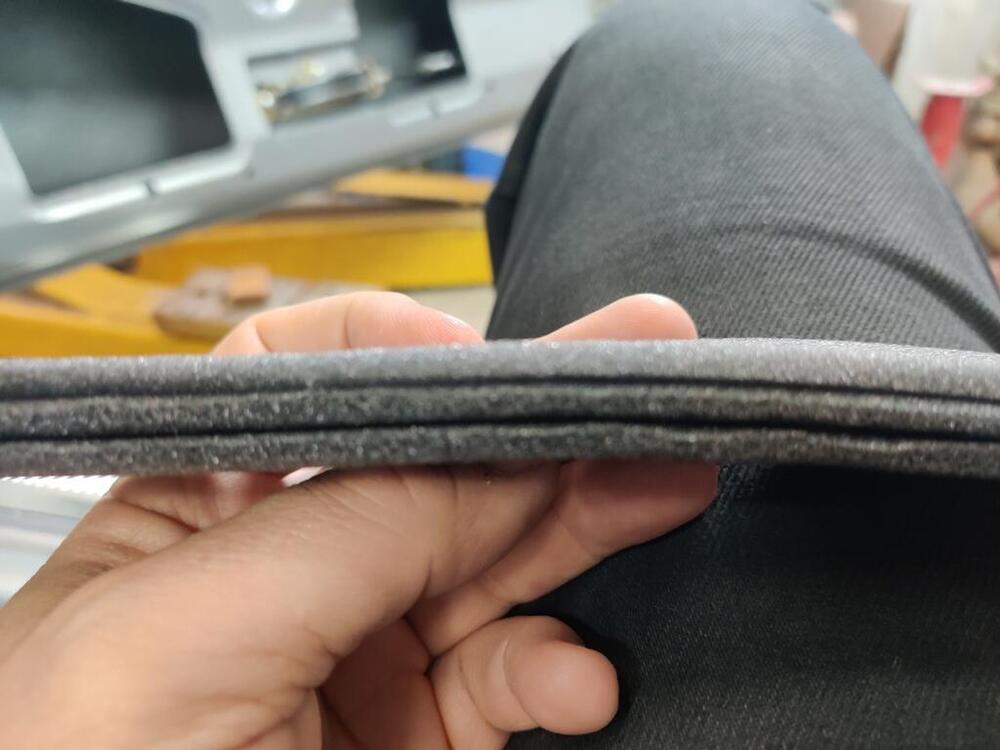
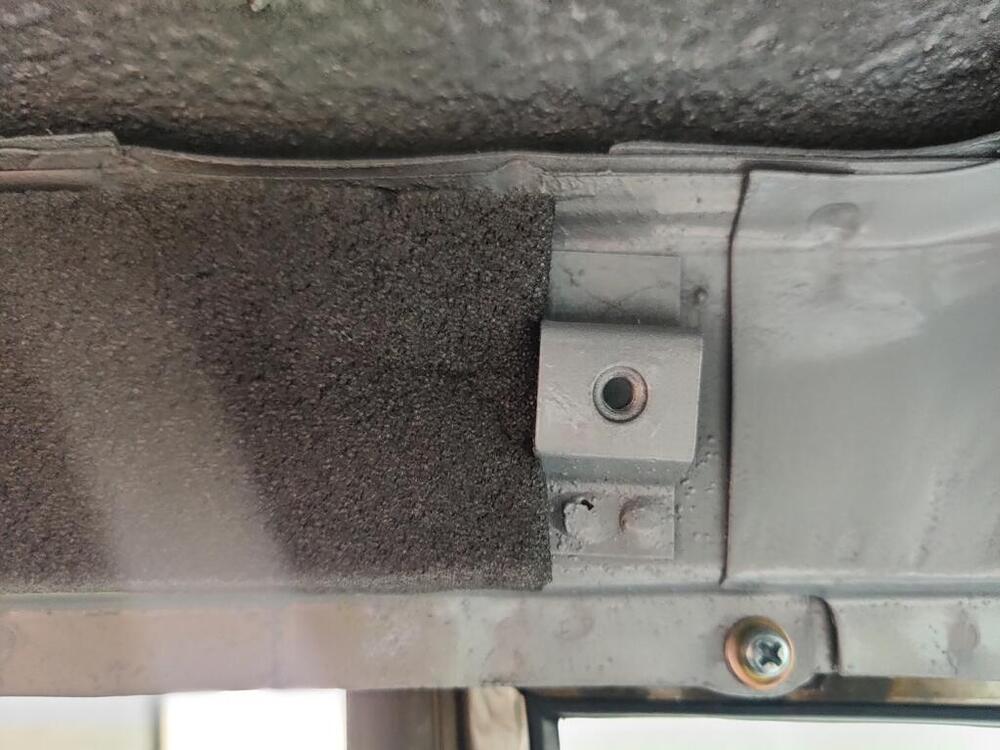
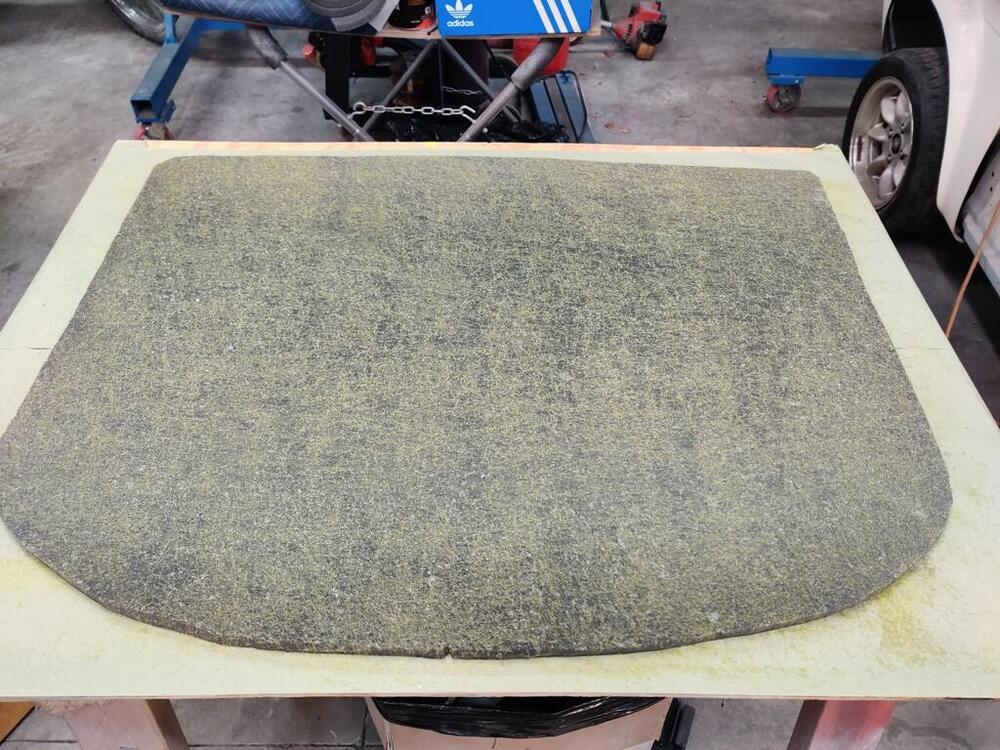
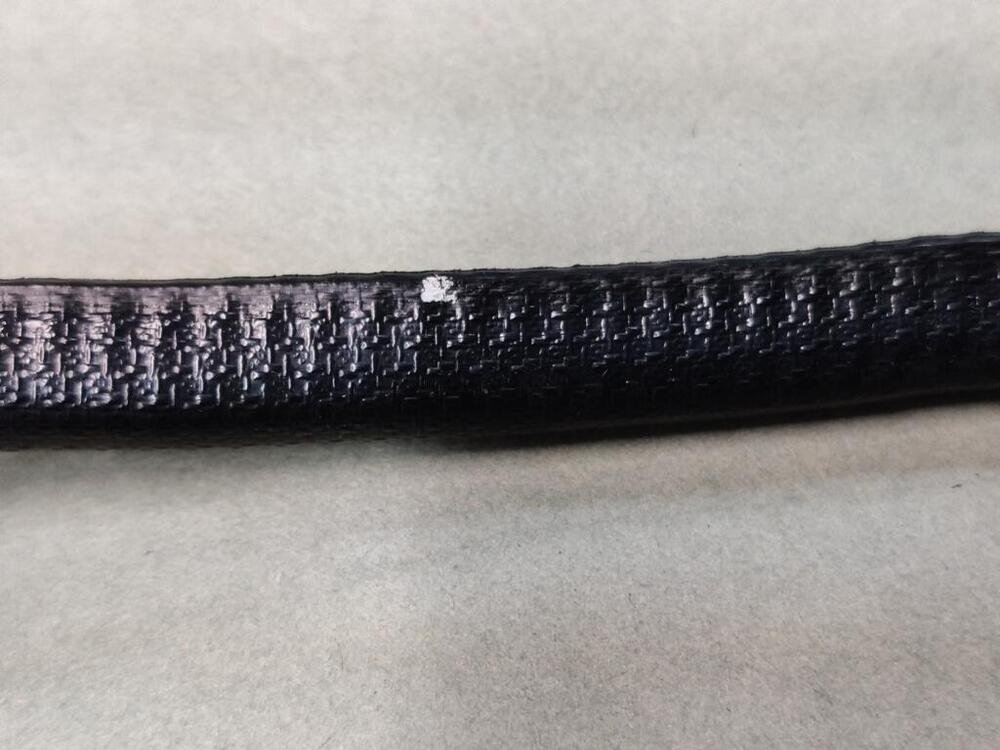
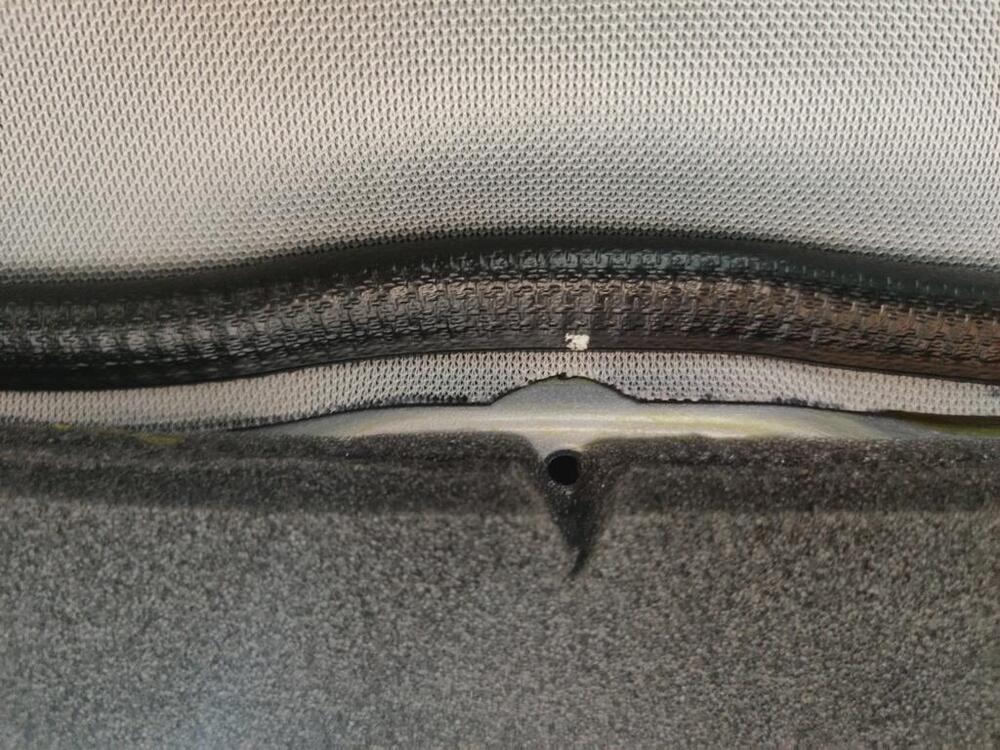
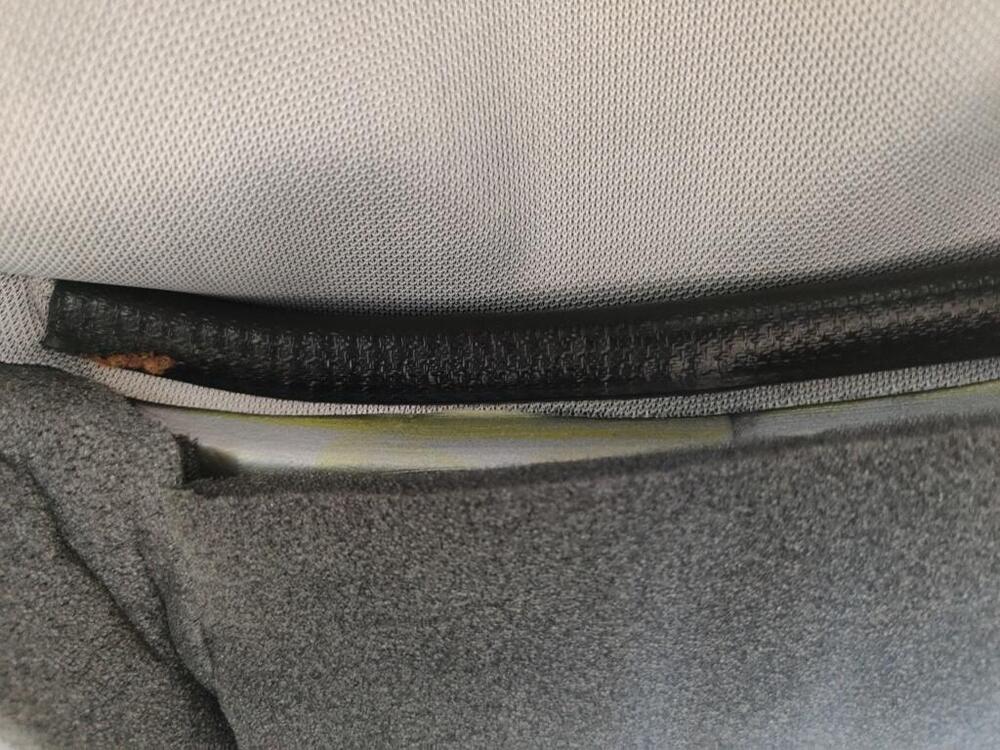
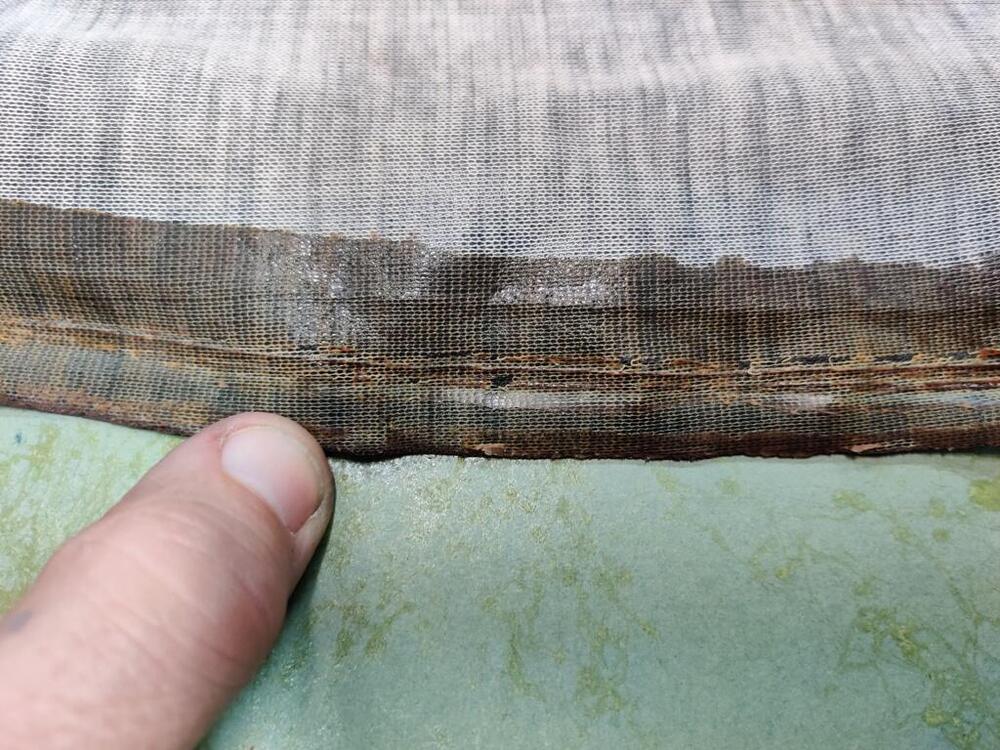
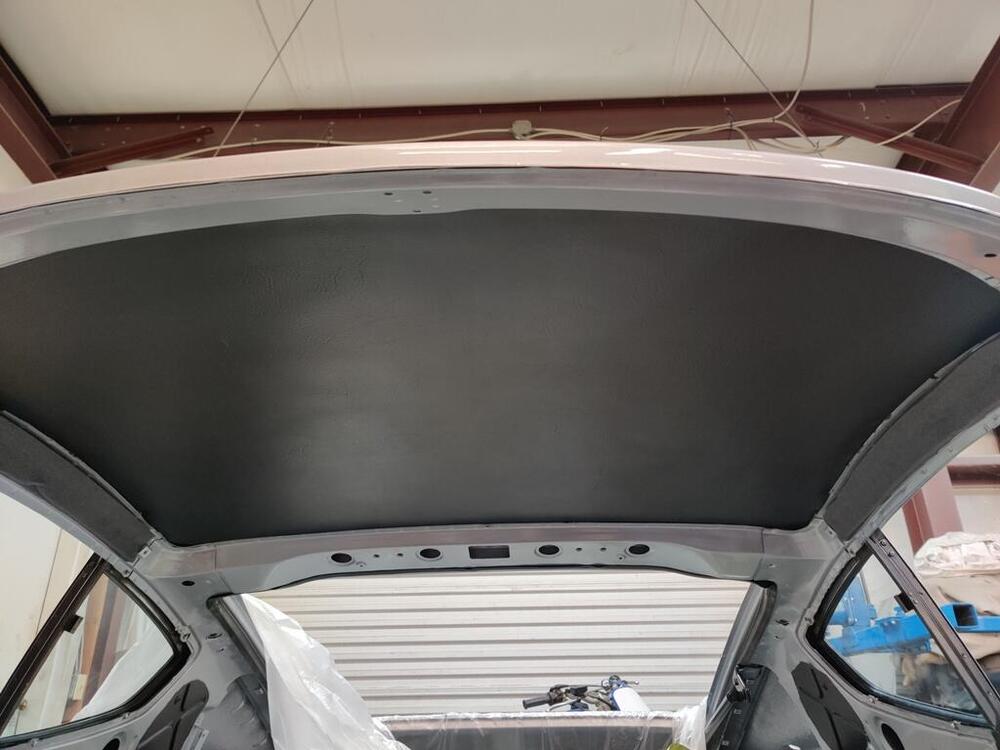
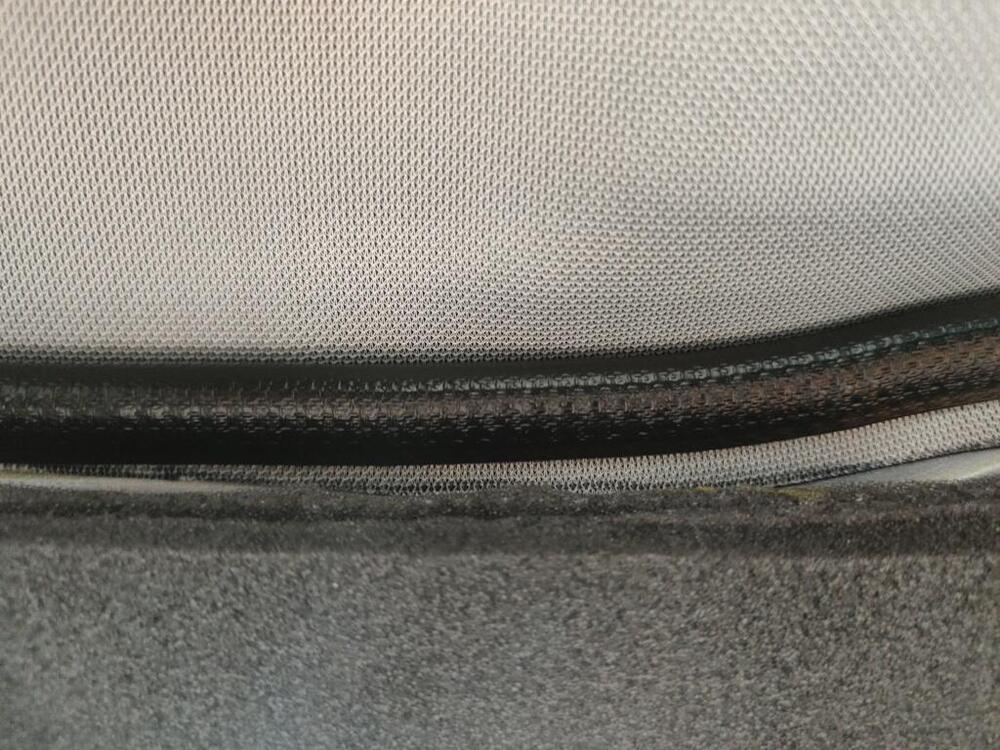
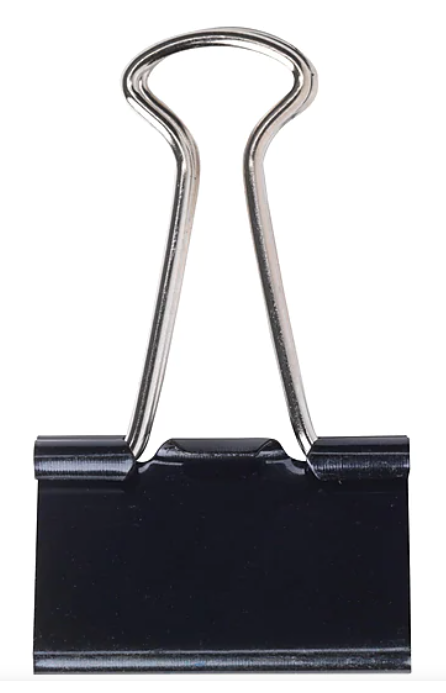
Thank you - very kind of you to say! Today, I picked back up with gluing interior pieces. Spraying glue is not something I have much experience with. So, I was nervous about installing the new headliner in the car. For example, I don't really know the right amount of glue to apply. Too little, and it might stick for a while, but fail later. Also, there is an amount of drying time that is important. Depending on the size of the piece being installed, you may have to wait a length of time, as the adhesive doesn't stick well when it is too wet. Or, if the piece is very large, you don't have to wait long at all, as it took some of that waiting time to apply the glue to the large surface area. There is a window of time where the glue transitions from wet... and a "tackiness" develops. After more time, the adhesive feels dry to the touch. And yet, if you put two pieces with seeming dry adhesive together, they can stick immediately... and not allow for pulling apart for "re-alignment". Over the past two days, I have found that waiting is necessary, but the pieces should be assembled when the glue is still at the "tacky" stage. At this stage, you can pull it apart and reposition a bit. If you wait until it is dry to the touch, then when you put the pieces together, they stick pretty strongly, and it is not going to go well if you try to reposition things. With all that weighing on my mind, I worked on cutting foam and vinyl pieces for the windshield header and side panels. I carefully examined the old foam and made new pieces that matched the thickness, width and length. Because some of the original pieces were only about 1/8th" thick, I bought that thickness of replacement foam. To match the thickness of the other original pieces, I stacked new strips of 1/8" thick foam, using just small amount of glue brushed down the center of the strips so they would stick together. From the old pieces, you can learn things, so you should keep them until your new pieces have been installed. For example, by looking at these indentations in the end of the old foam, I was able to eliminate any question about the correct location of the foam on the inside frame. I was also able to determine where there was overlap of original foam pieces. And that helped me locate the a-pillar piece of foam on the car in the same place as it was done by the factory. This foam compresses with very little pressure. While stacking 3 pieces high was a bit thicker than the original, it compresses easily, and will compress to the proper thickness when the vinyl is pulled and stretched over the foam. After getting the grey foam in place on all three sides, I masked off the frame area as described in the how to Restore you Datsun Z car book. Then, I took a moment to organize things so I could spray the inside of the roof of the car, and the back of the new headliner, and install the headliner in the car. When masking the rails, I made sure not any part of the rail surface was exposed to catching any adhesive. Even a tiny portion of the edge of the frame, if exposed, will subsequently collect some of the spray on adhesive. And it will become a problem when you go to position the adhesive covered back surface of the headliner in place. A touch of cement on the frame, if present, will touch the cement on the back of the headliner and "bite", causing difficulty with getting the headliner, up and over... and subsequently tucked behind the frame edge. Speaking of tucking behind the frame, I used a large plastic body filler spreader, which turned out to be a great tool for the job. There was a fair amount of force necessary to get the headliner to go from outside the frame to squished... and then, using the edge of the spreader... pushed inside the gap between the outer panel and the roof structure. The "extra" headliner material has to flatten out (behind the frame, hidden from view). Again, I was very happy when, like the gluing operation to adhere the vinyl to the foam to make the headliner, the installation of the headliner also went well. There were a couple of nerve racking moments, and 3/4 of the way through getting the edges tucked behind the frame, I was feeling some fatigue in my arms and soreness in my back from getting poked by various "not soft" parts of the transmission tunnel. From there, I started the next project: to install new vinyl onto the windshield header (front portion of the roof frame) and the side panels (side portions of the roof frame). I found it best to do things here different than Wick Humble's guidance. I was able to use a small brush and only apply adhesive to the underside of the back weld flange of the header. I let that dry a bit, and then positioned the header vinyl directly on that adhesive. I didn't use the welting at all, initially. The vinyl was simply hanging down from the back edge of the header, across the header's full width. Then, I aligned the white dot on the welting with the center of the header. I pushed the unglued portion of the header vinyl upwards and pushed the welting onto the back edge of the header, forcing the vinyl to tuck between the new headliner and the frame. The glued part of the header vinyl did not move as I did this. Only the non-glued part squeezed between the new head and the frame. At this point, the header vinyl is held captive by the welting, and it is ready to be pulled forward, and out through the windshield opening. It will need to be pulled with a good amount of force so as to compress the foam that is on the header, and create a tight, wrinkle free finished appearance across the entire header panel. And that has got me thinking... I don't know how in the world they did that at the factory - keep a lot of tension on the vinyl covering the header panel. The way the windshield goes in, the windshield gasket tends to push the vinyl on the header backwards. If the glue holding the front of the header vinyl were to not hold firm, the vinyl would be pushed back somewhat, allowing the header vinyl to relax... and be loose. If that happens, the finish look is not going to be nice, and who wants to pull a windshield BACK OUT, just to fix a loosely fitting header vinyl? I am not sure how I will proceed. But, I am thinking about buying a whole bunch of these, which I have seen other people use on other car restorations. I think I will need to apply the glue, and wait for it to dry... more than I have been, so that it will have the most strength possible. And then, I will pull the vinyl a good bit to the get material tight, and wrap it around the windshield weld flange, and clamp it in place very tightly to keep it from slipping back and causing a loose fit. And the glue will need to dry for at least 24 hours before I attempt to install the windshield. So, that is what I am thinking. Anyone else have luck using a particular technique?


 1 point
 -
Missed this yesterday. Thank you. I don't know what a drop sill is, however running 100's of those screws sounds like an exhausting time! Odds & ends today. Finished up the roof insulation , just have to add some foam to some seams where there is gappage. Put another 3/4 ply on the floor on the left Finished the sealing of the window exterior, and the sheathing up to the edge of the rough opening. We have 5-7" or maybe more snow coming Tuesday, so I need to stow the new siding, etc , tomorrow after school. Have to make sure the Fiat is not being left outside the bodyshop, if they are not finished tomorrow.1 point
-
1 point
-
Just remember to run the third terminal to ground.1 point
-
1 pointBut, just for fun, it also suggests that the monkey motion transmission was used up through 1976. Lots of confusion out there. https://www.carpartsmanual.com/datsun/Z-1969-1978/power-train/transmission-assembly1 point
-
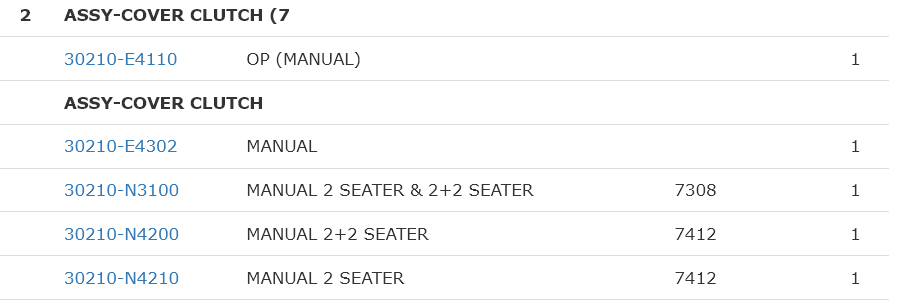
1 pointThe parts schematic suggests that there are really only three possible sleeves, and four or five pressure plates. The Exedy with the long sleeve sounds like the right combo. https://www.carpartsmanual.com/datsun/Z-1969-1978/power-train/clutch

 1 point
 -
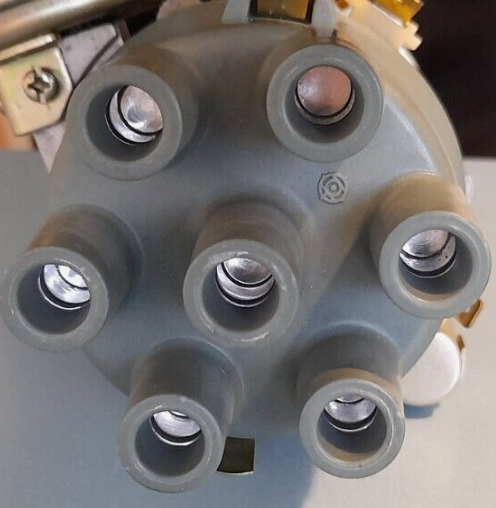
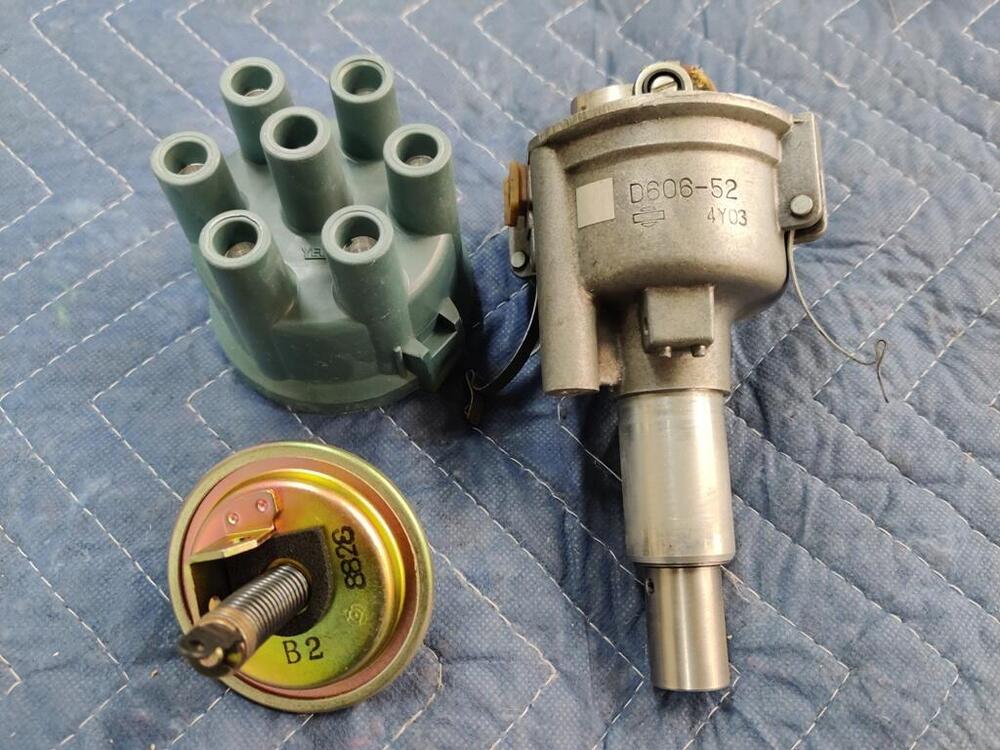
1 pointA while back, I heard that the original distributer cap was grey. Going off of that and a poor quality picture on BAT, I was able to find a grey YEC branded cap, but didn't know if it was close to the correct color. Today, I found a picture of an original Hitachi distributor cap: Putting that here for reference for others.
 1 point
 -
1 pointHi gang, So I pulled my injectors, put them all in individual cups and cranked the engine for a bit and all seem to have the exact same level and spray pattern (see video here). I did however notice cylinder 1's injector connector teeth had a pretty solid amount of green corrosion on it which is weird considering these are only a year or so old with brand new harness connectors. I did also notice small black particles in the gas coming out of the injectors - I'm not sure if that is just dirt from them resting on the head while waiting to be put in the cups or not. Long story short here is where we are: I filled up the injector's plug area with caig de-oxit and let it sit all night and ill remove the corrosion this morning I will get a new engine bay fuel filter just in case it's not just dirt sitting on the engine intake plenum while they were resting there Switch injector #3 with a different one to see if the darker plug on cylinder #3 darkens darkens on the cylinder with the moved injector or not
 1 point
 -
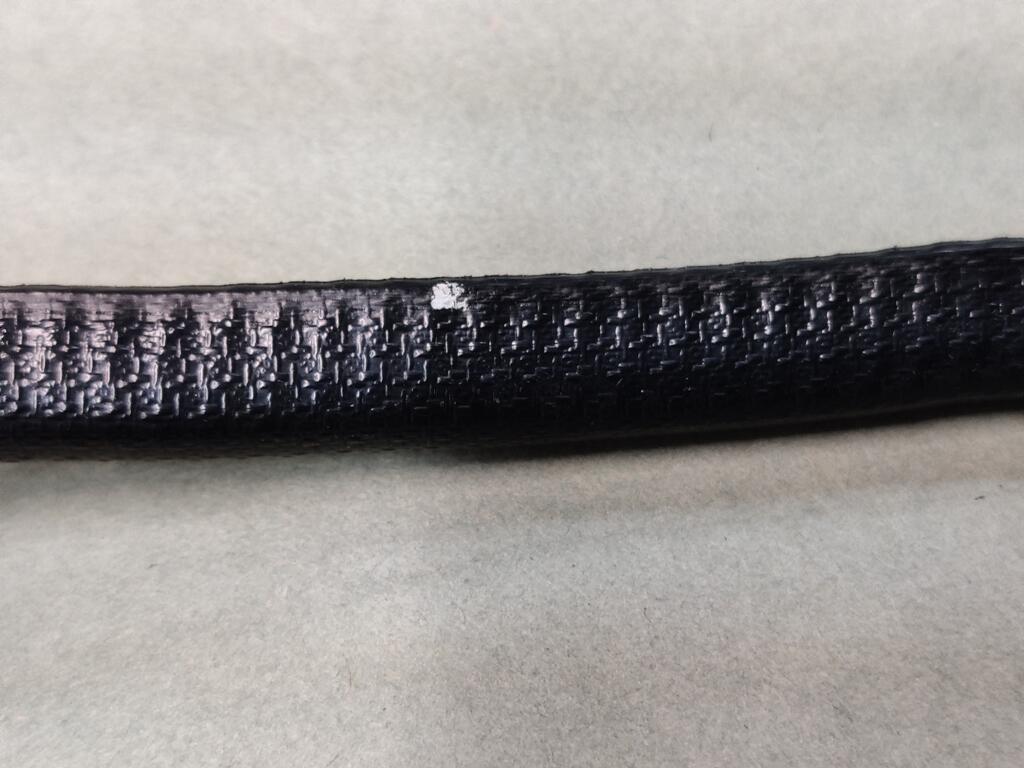
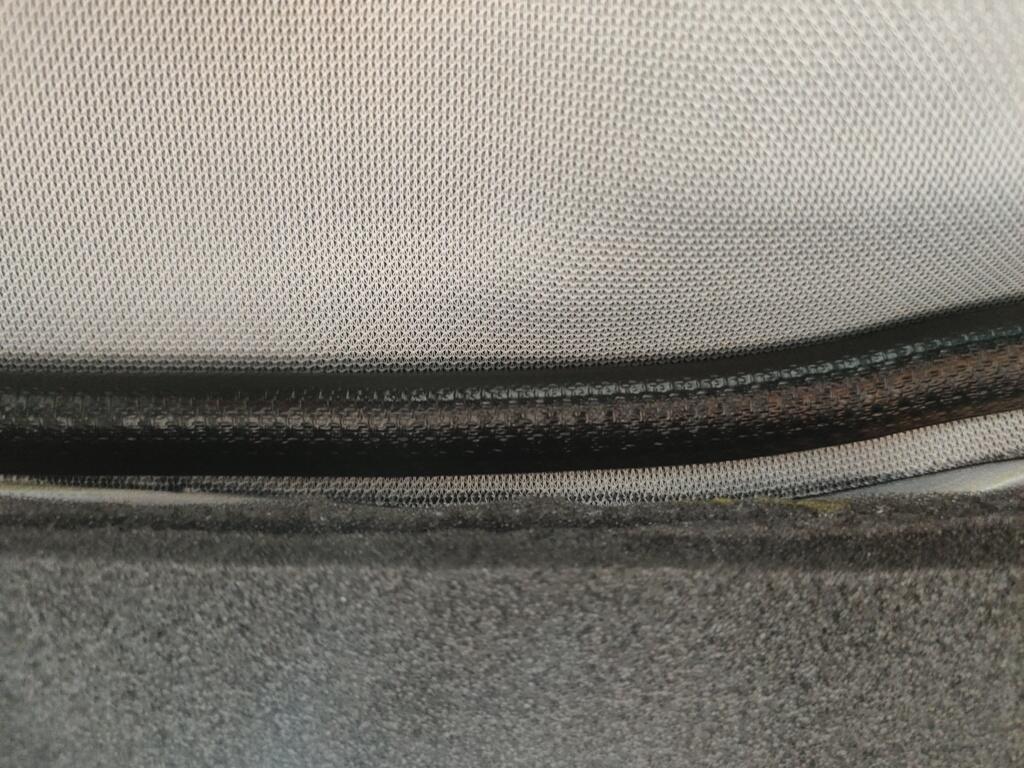
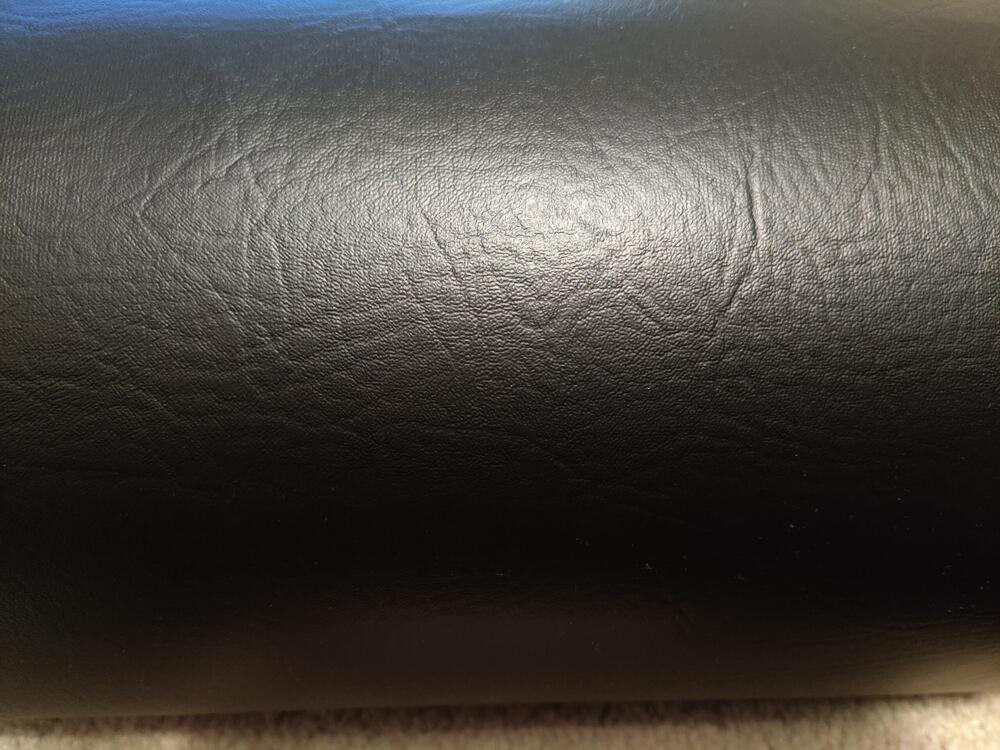
The vinyl is "Ottertex", and it is sold in a few places. I got mine from fabricwholesaledirect.com. It is 54" wide and sold by the running yard. I bought three running yards because it was so inexpensive - it was only $9.99 a running yard. To ship it, they folded over and over into a square. When I got it, I immediately unpacked it. The folds and creases were visible even after I spread it out on a floor. Then, I rolled it up onto and existing roll of foam material that I bought previously. This was a few days ago. Yesterday, when I unrolled it from the foam, the fold lines were still visible. So, before gluing it to the foam, I used a steamer to relax the vinyl in those areas. It helped, but they were still visible. I was concerned that they would be visible after gluing. I was glad to see and very relieved that they disappeared when I glued it to the foam. Hi res photo: I think I am going to switch to this vinyl for the A-pillars and windshield header because it looks more like the original than the vinyl I bought previously.
 1 point
 -
1 point
-
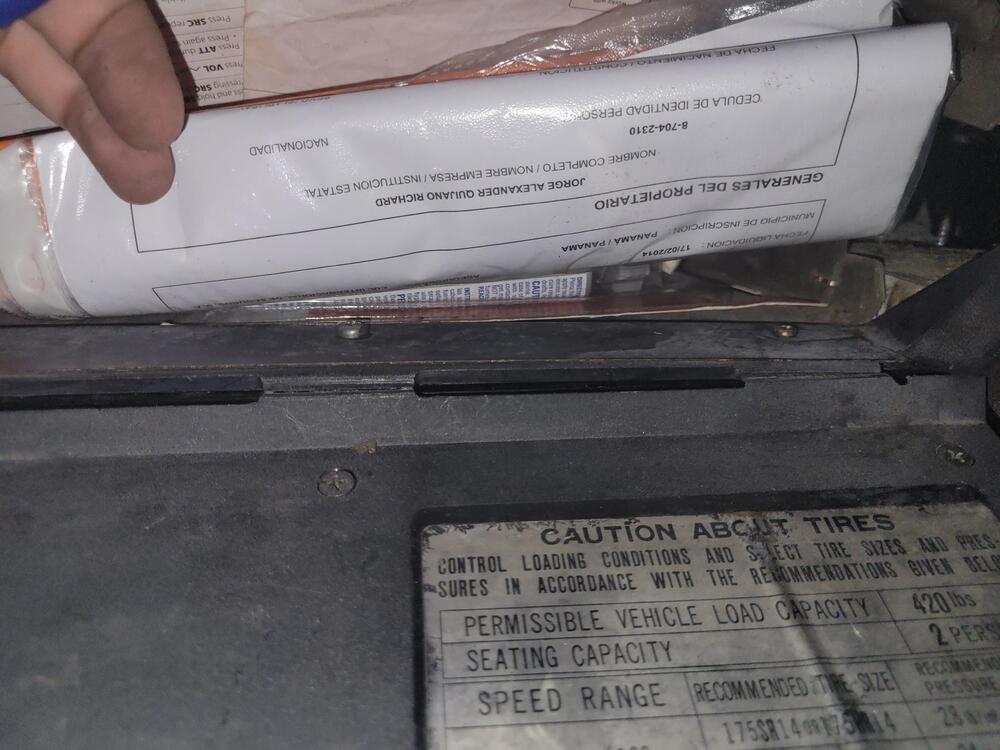
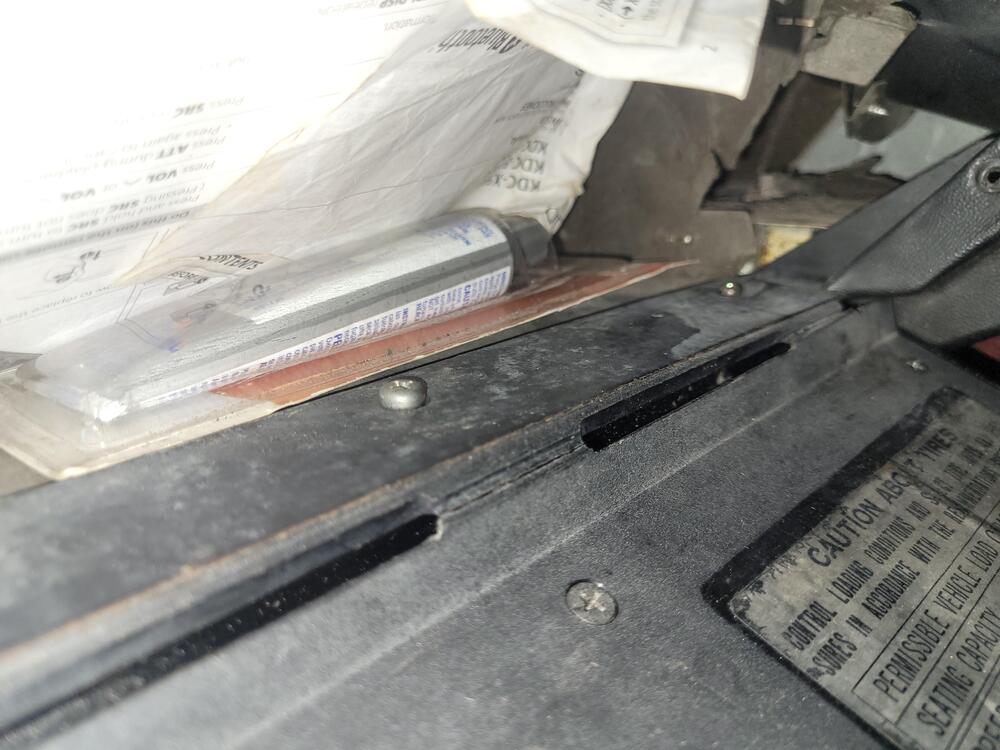
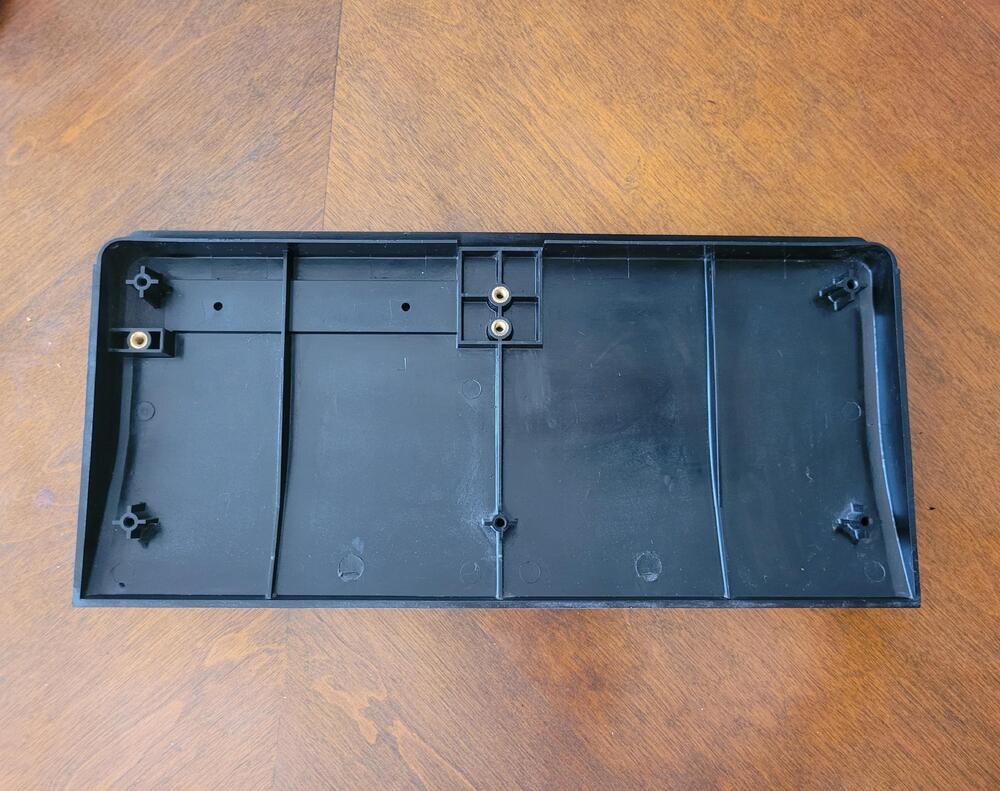
Already installed the emblem. However, while adjusting the height so the lid could close properly 2 of the plastic tabs broke. I decided to order the skillard aluminium glove box and rear lid.

 1 point
 -
1 pointAnother thing that really helps is, assuming you manage to get the fill plug out, replace it with a male plug rather than a female one. That way you can get a wrench in between the cross member and the diff cover. My car has nowhere near enough room for a 1/2" drive ratchet to fit in there.1 point