Leaderboard
-
inline6
 Subscriber
 7Points1,282Posts
 -
Patcon
Subscriber6Points11,142Posts -
grannyknot
Free Member4Points5,158Posts -
duffymahoney
Free Member2Points961Posts


Popular Content
Showing content with the highest reputation on 01/29/2024 in all areas
-
2 points
-
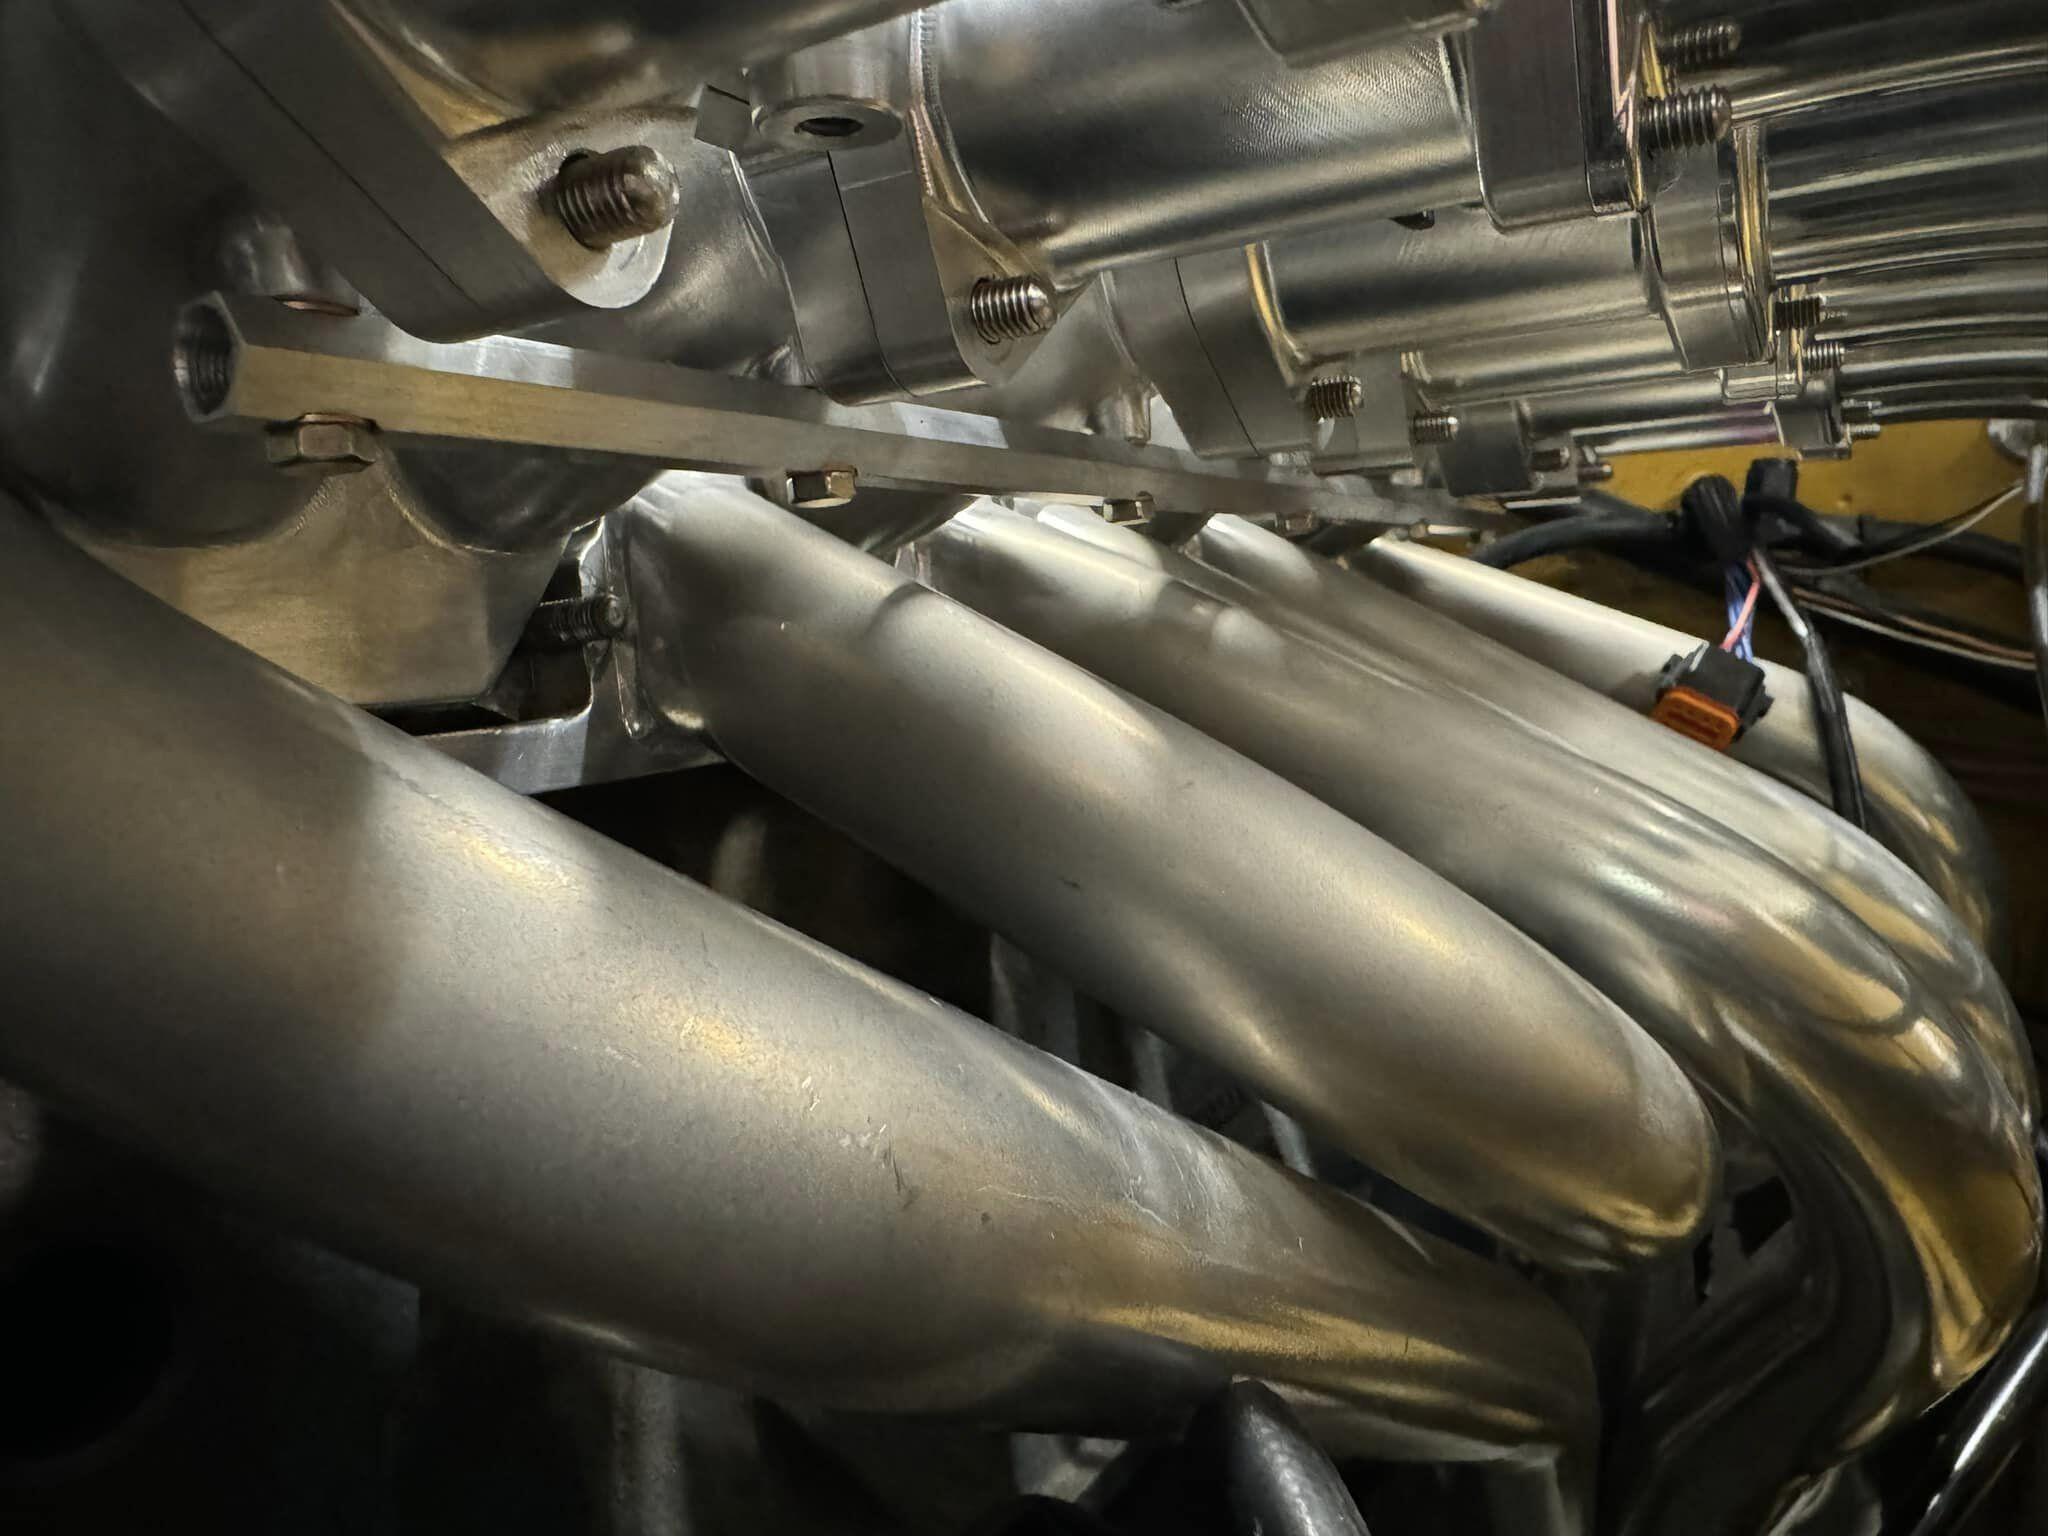
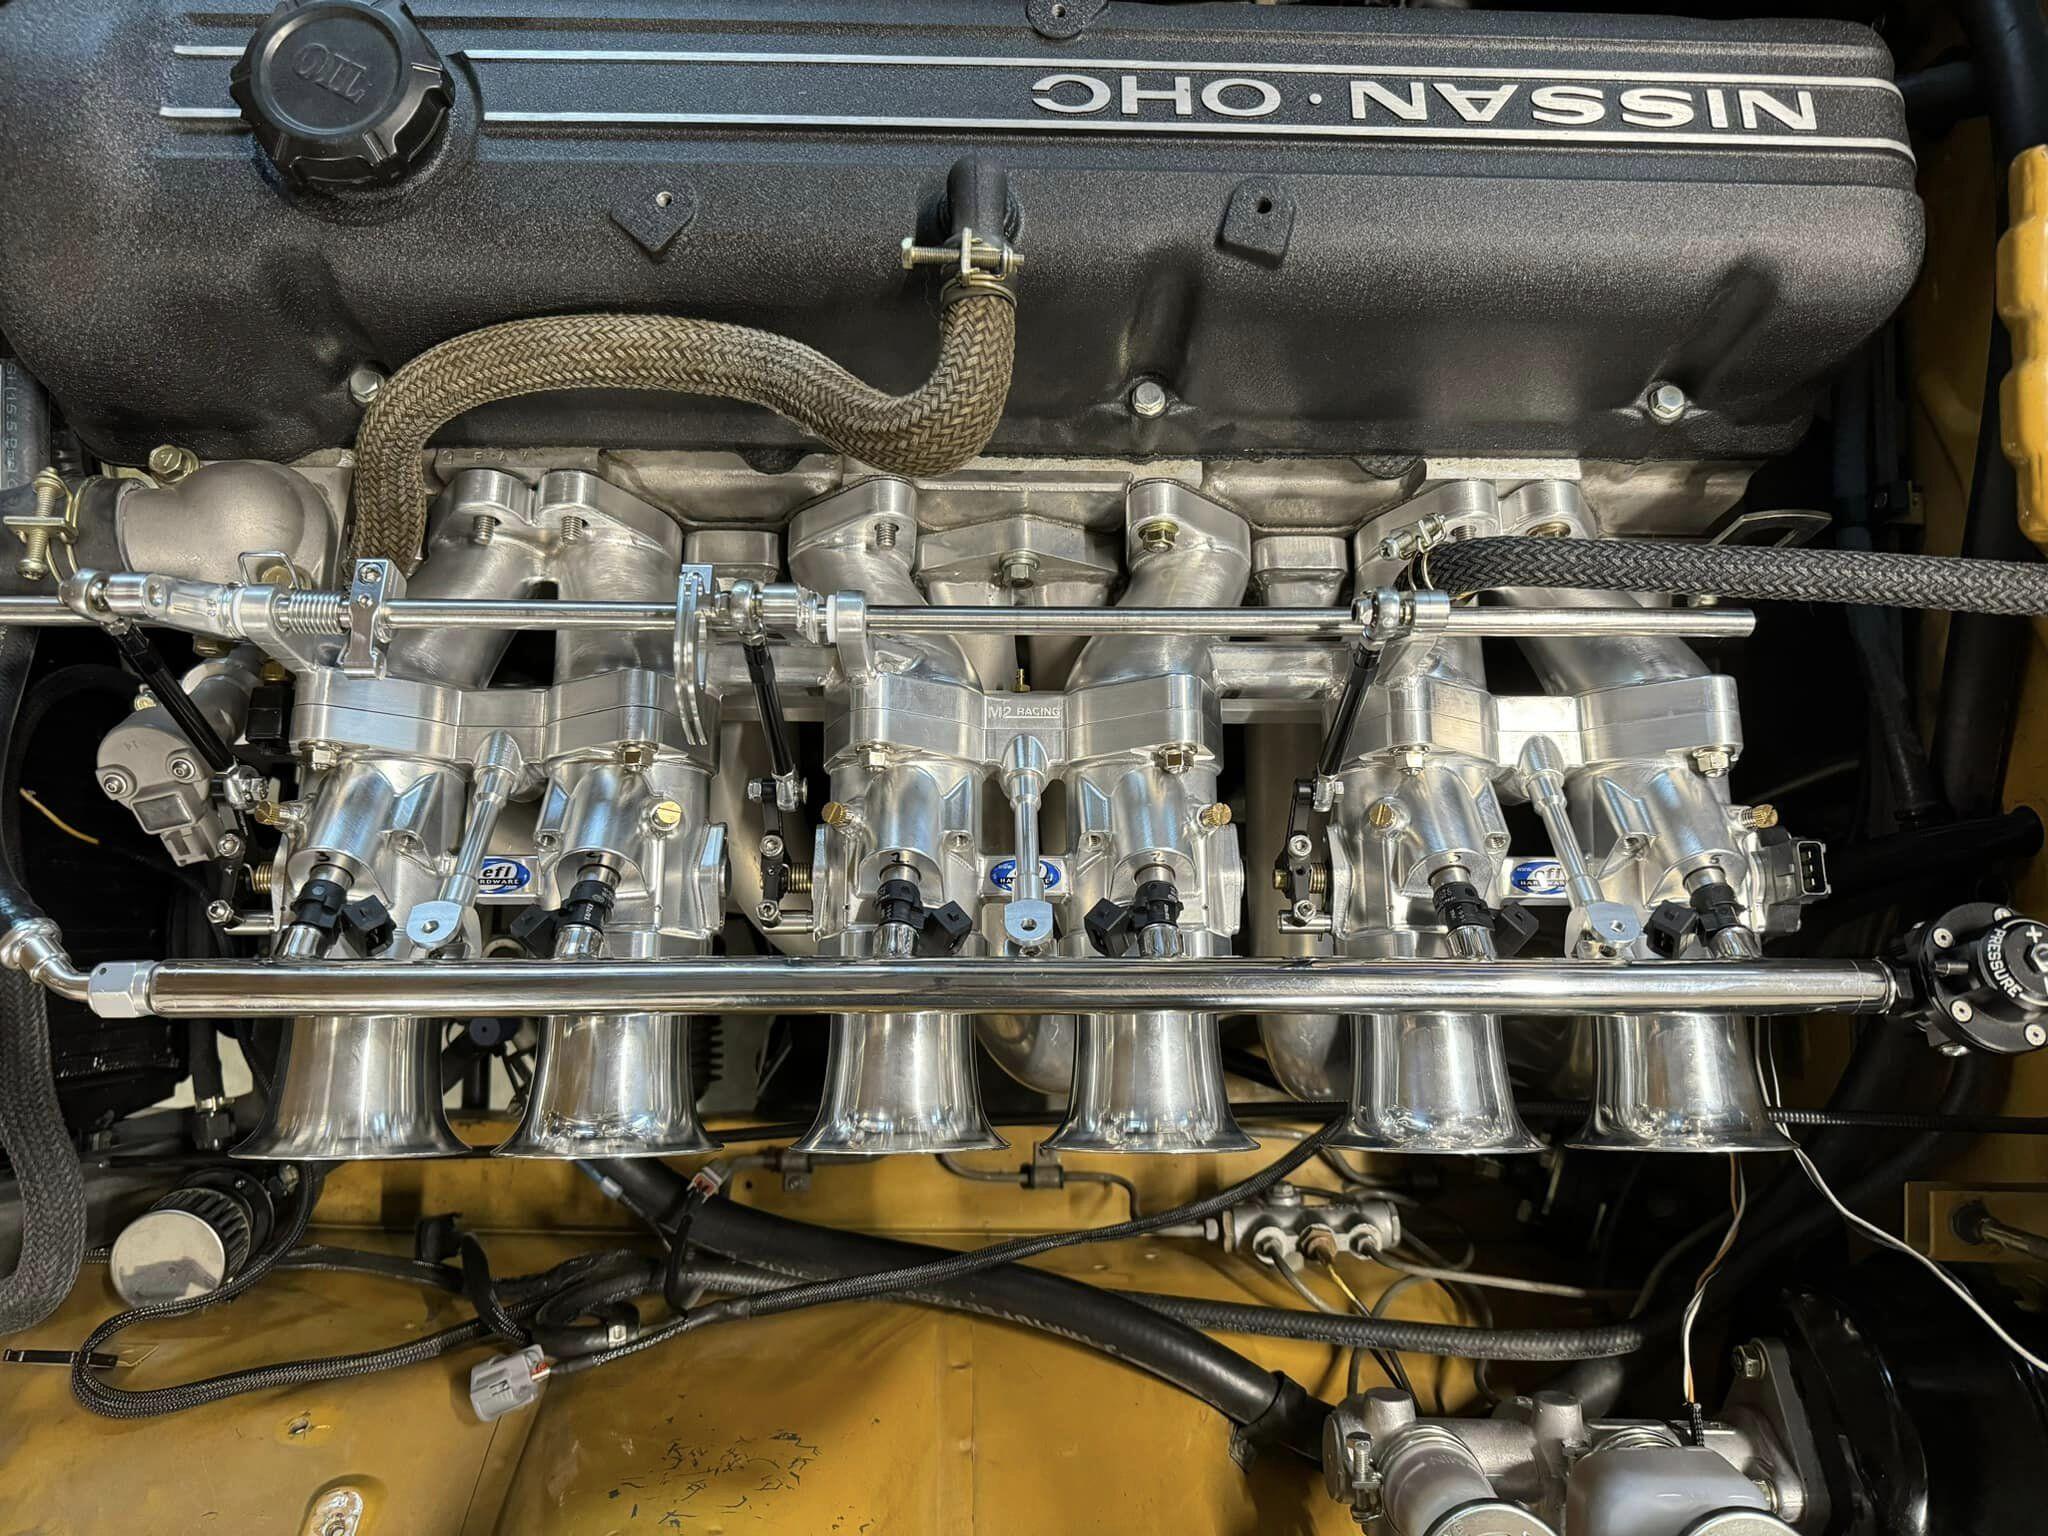
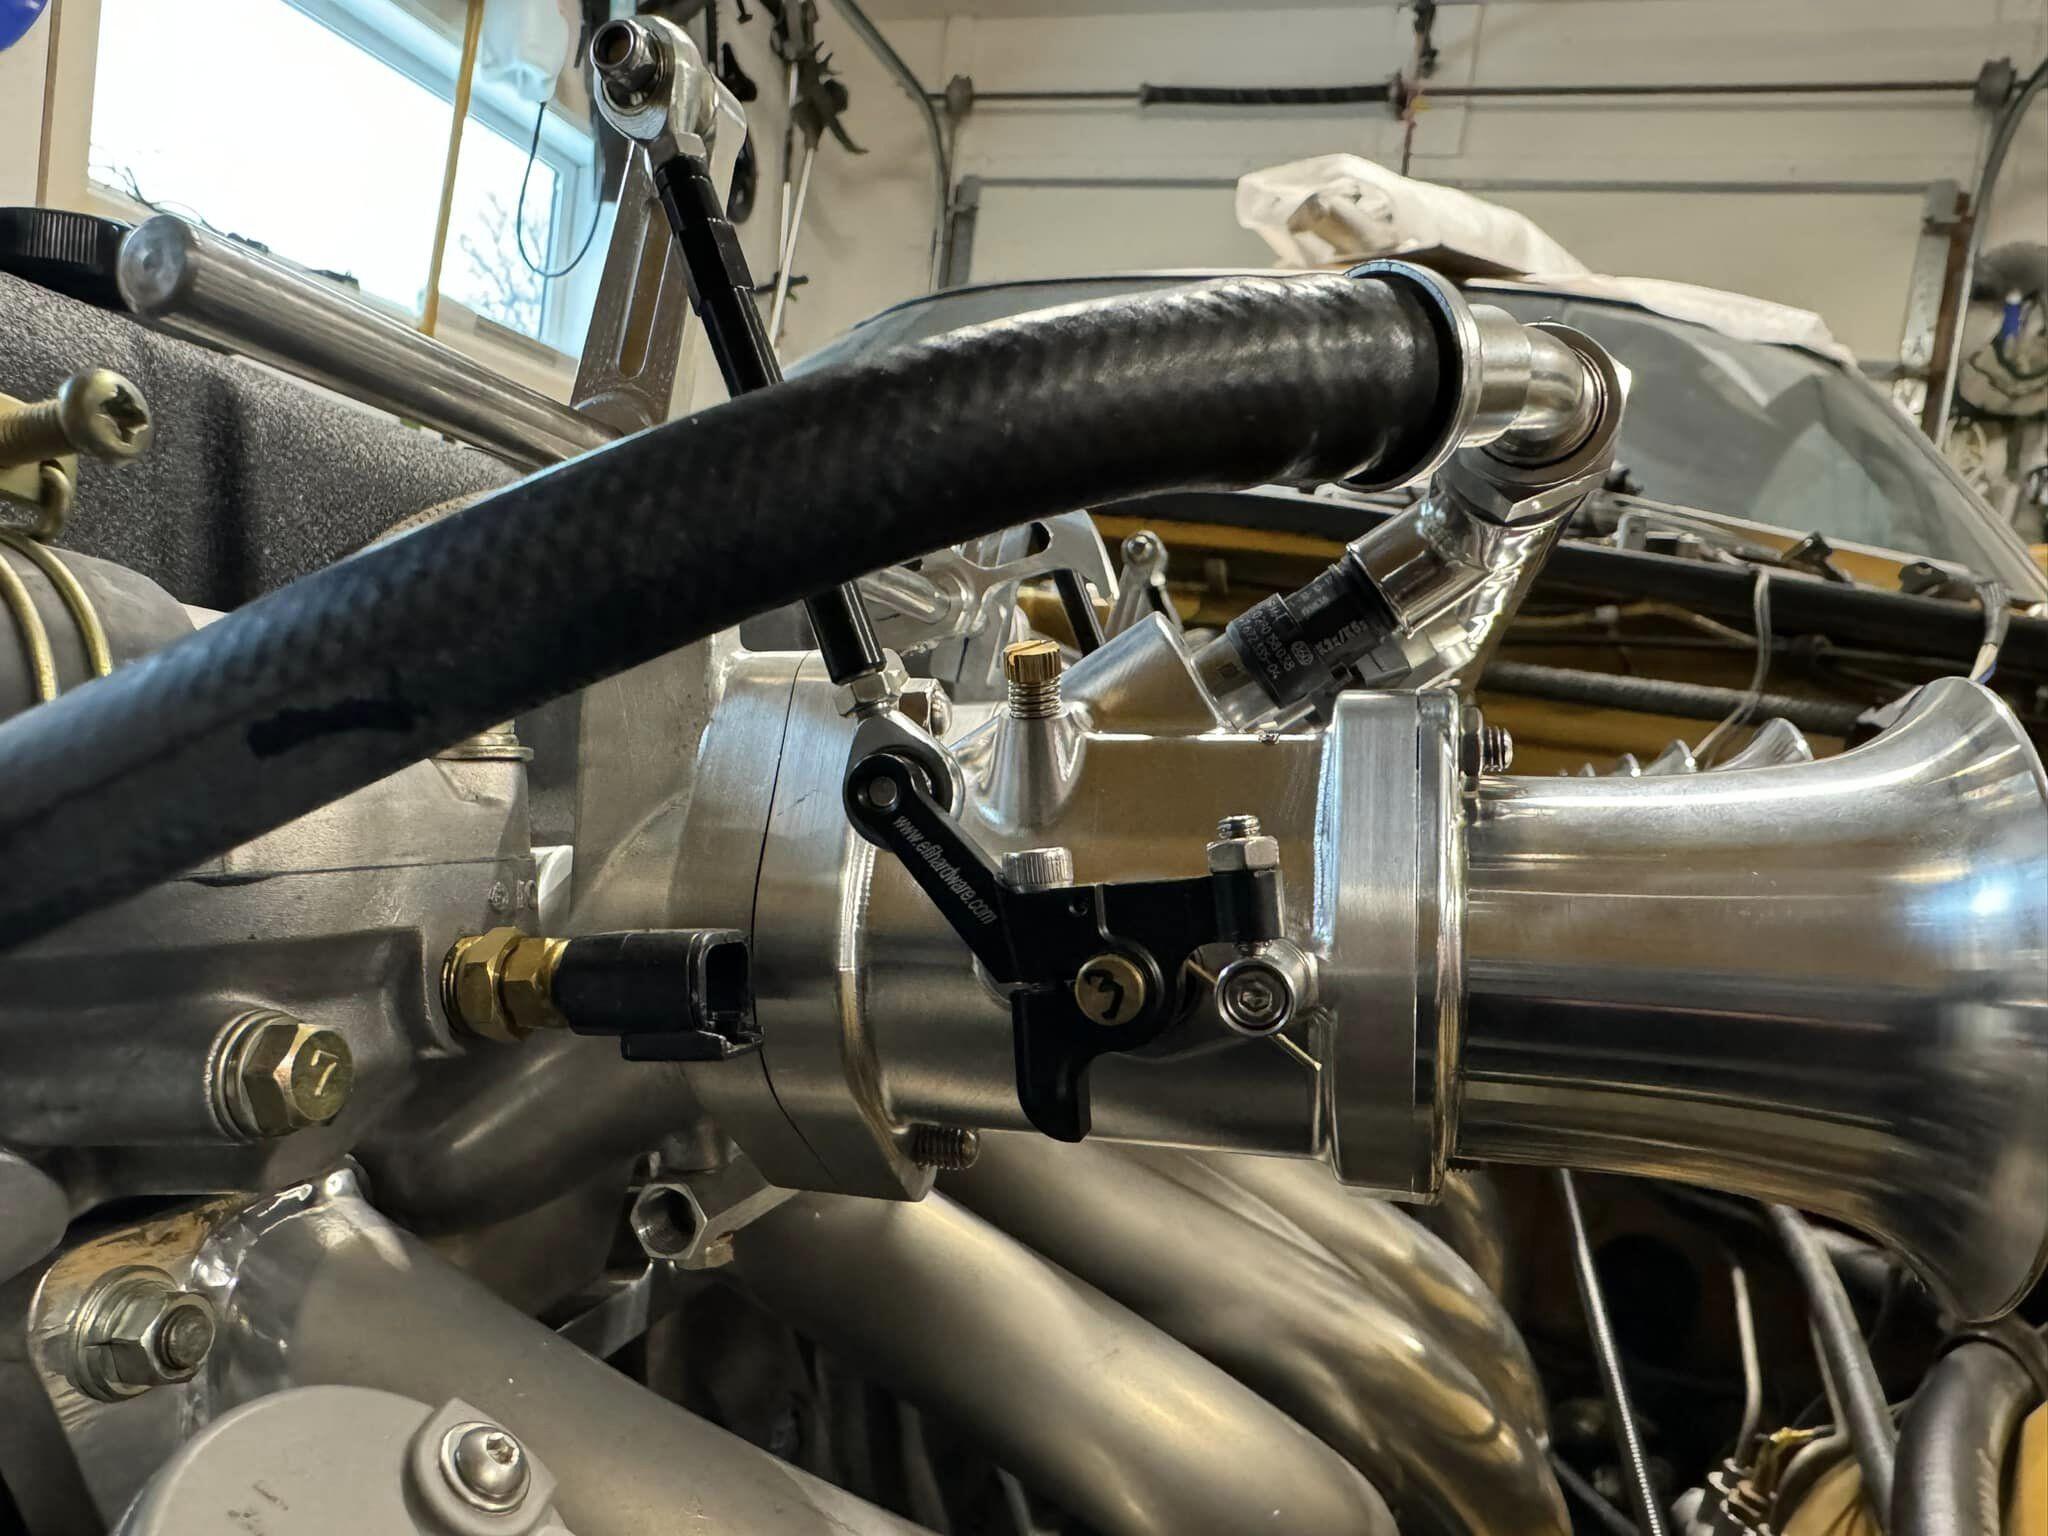
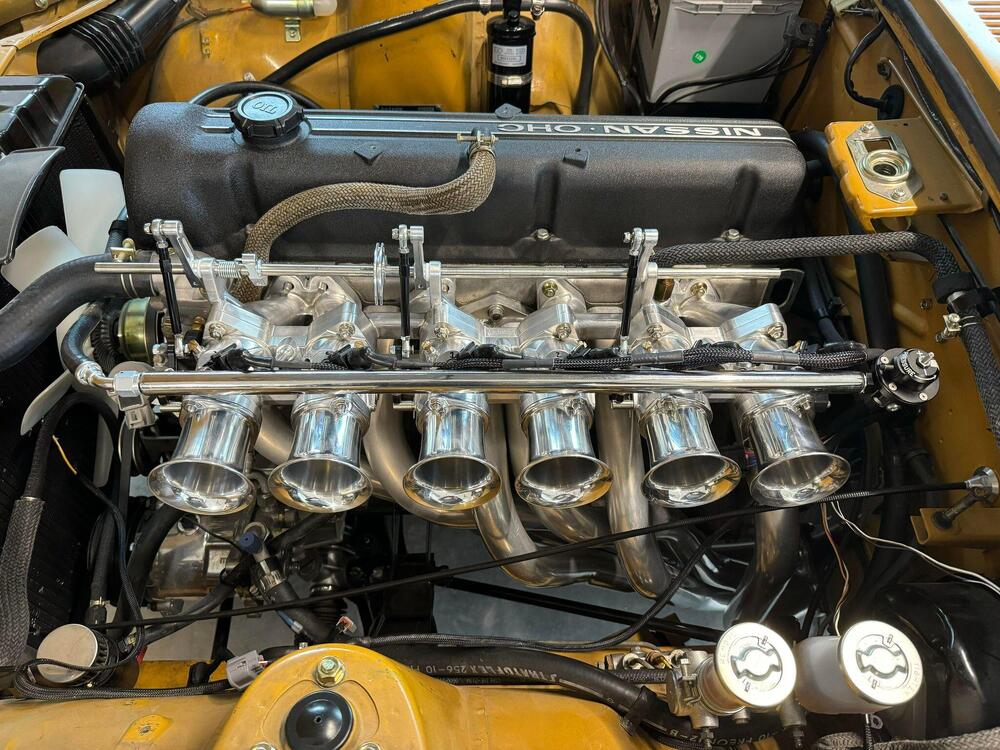
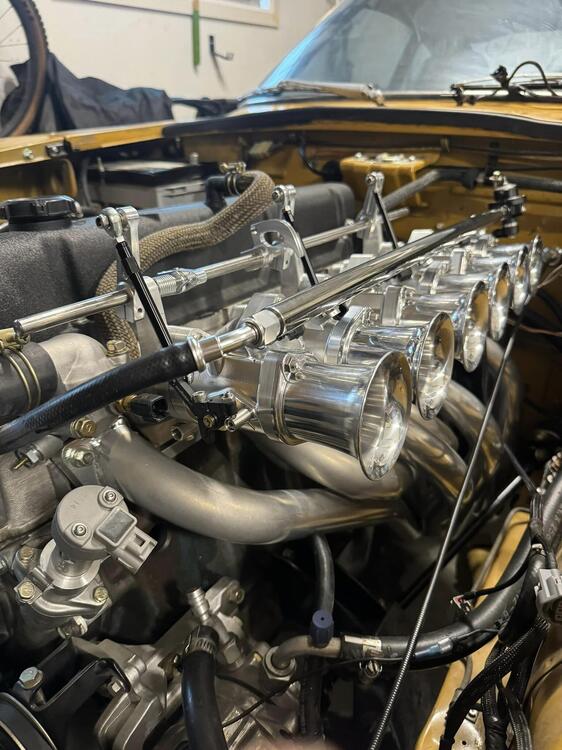
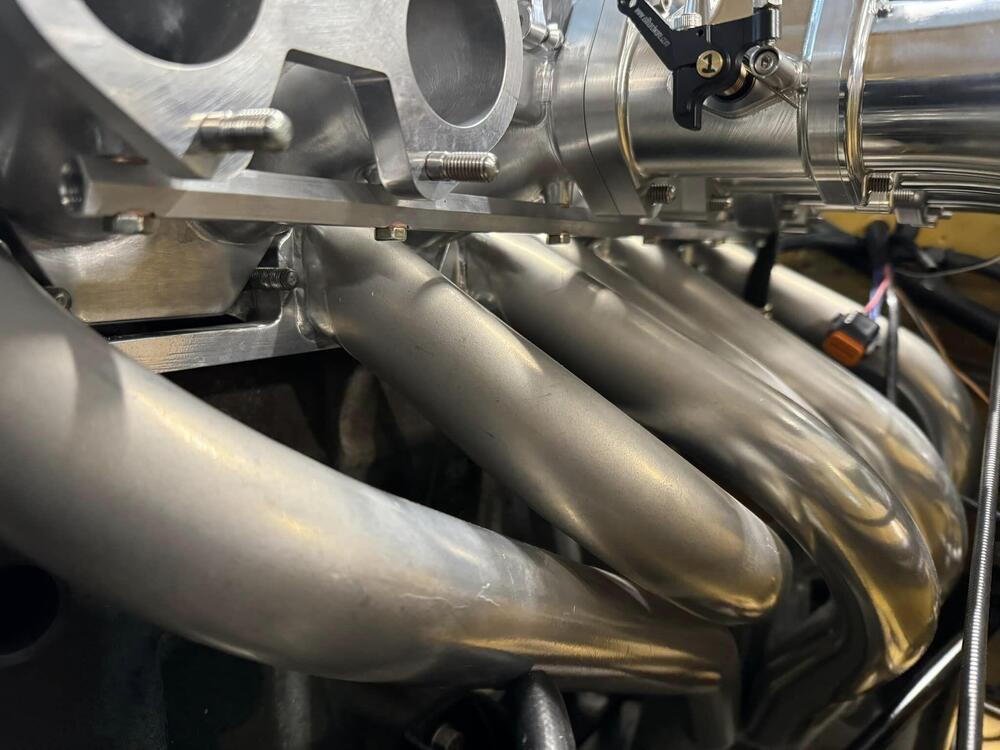
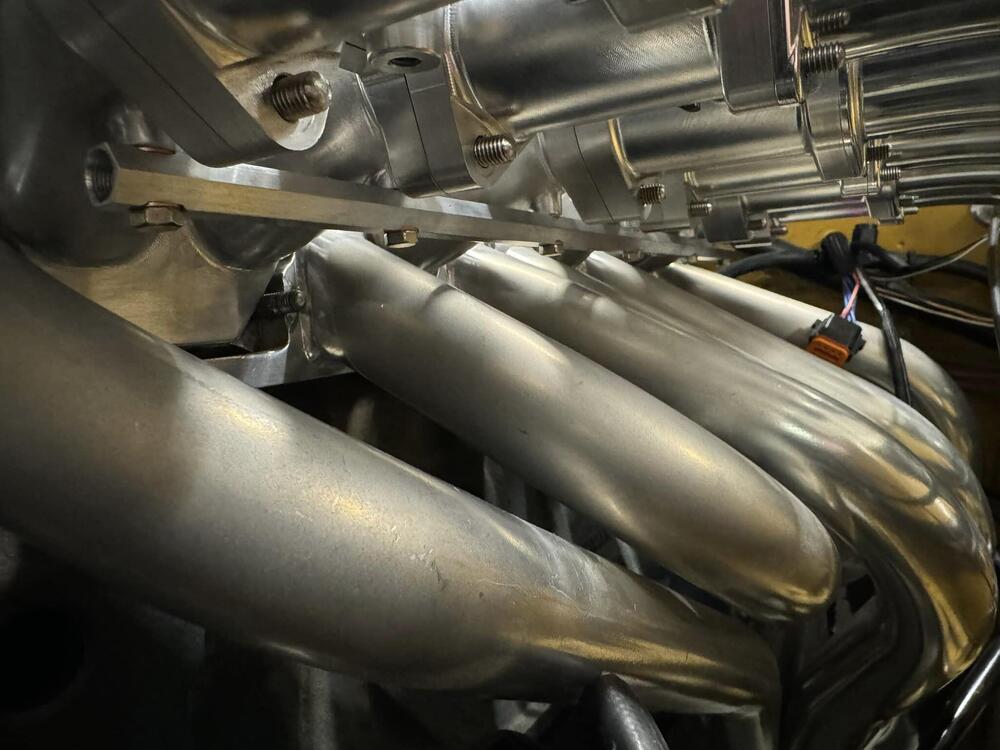
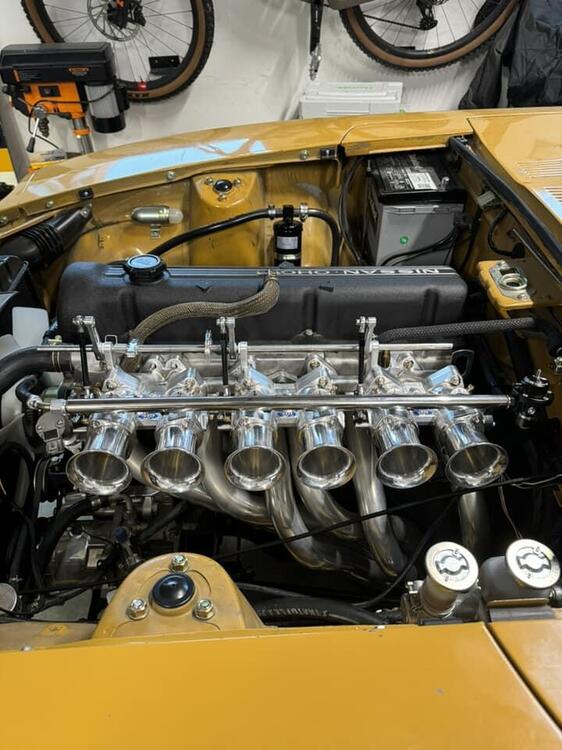
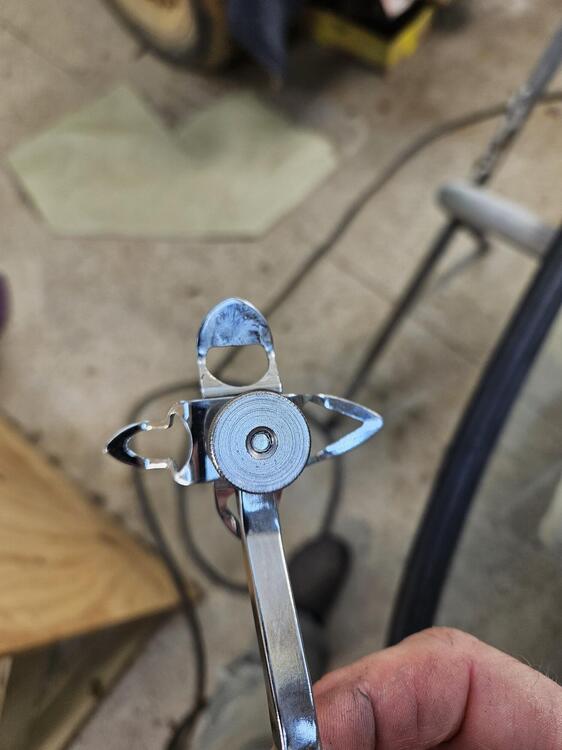
2 pointsWell I got my cnc intake! Honestly surface finish isn’t what I was hoping for. But will be nice with some effort. I think it’s almost too much bling. I might go satin glass bead on the intake. It has pretty heavy machine marks Balance bar bolted on exactly as I planned, with 6mm banjos. The injector angle looks spot on as well. Pretty happy with it overall. Next rods need to be shortened and I need to figure out a progressive throttle location on the overhead bar and a cable mount location. Then moving the ecu temp sensor.


 2 points
 -
I believe those are fittings are only on radiators for the 240z with automatic transmission. They seem to be more common than automatic 240z's, in my opinion. I think it's possible that for a number of years after production of the 240z ended, many, if not more than most of the replacement radiators were made with those fittings, as they are simply not used when the radiator is used in a manual transmission car. Easier to manufacture and/or stock one part vs. two is how I see it. They are for running tranmission fruid through the radiator - this functions as an "oil cooler".2 points
-
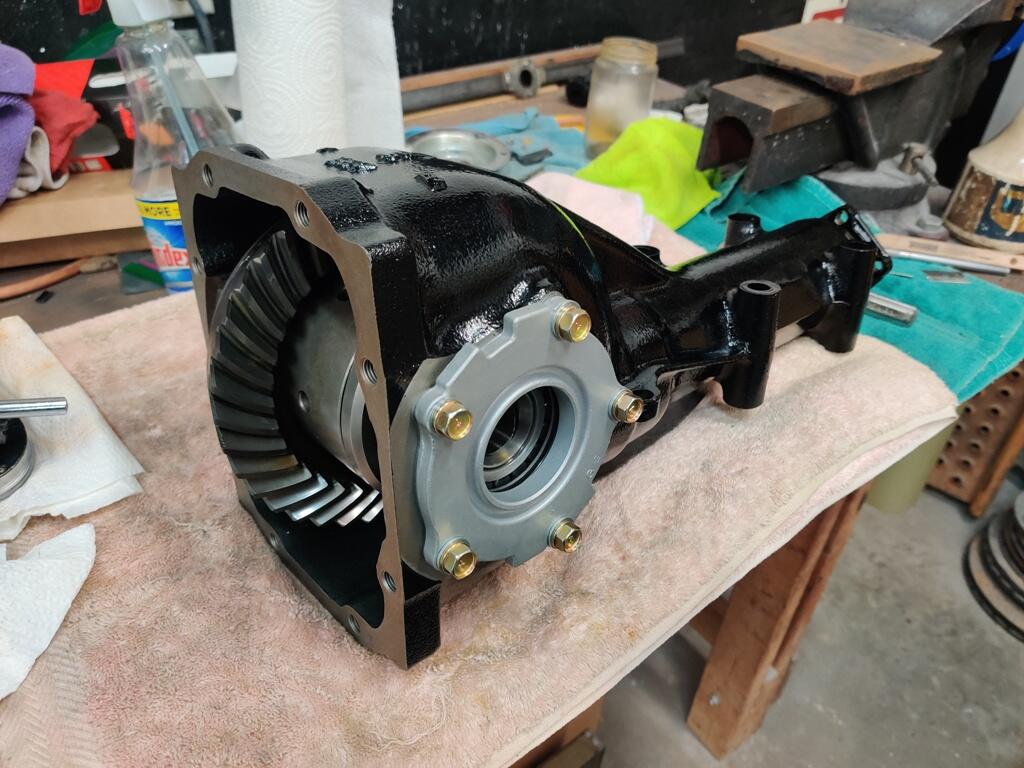
While it was apart, I cleaned all the yellow "paint" off of the gears. WD40 does a great job with removing it. But I didn't have time to reapply before quitting for the day. I'll reapply and check it out one day this week. As it sits now:
 2 points
 -
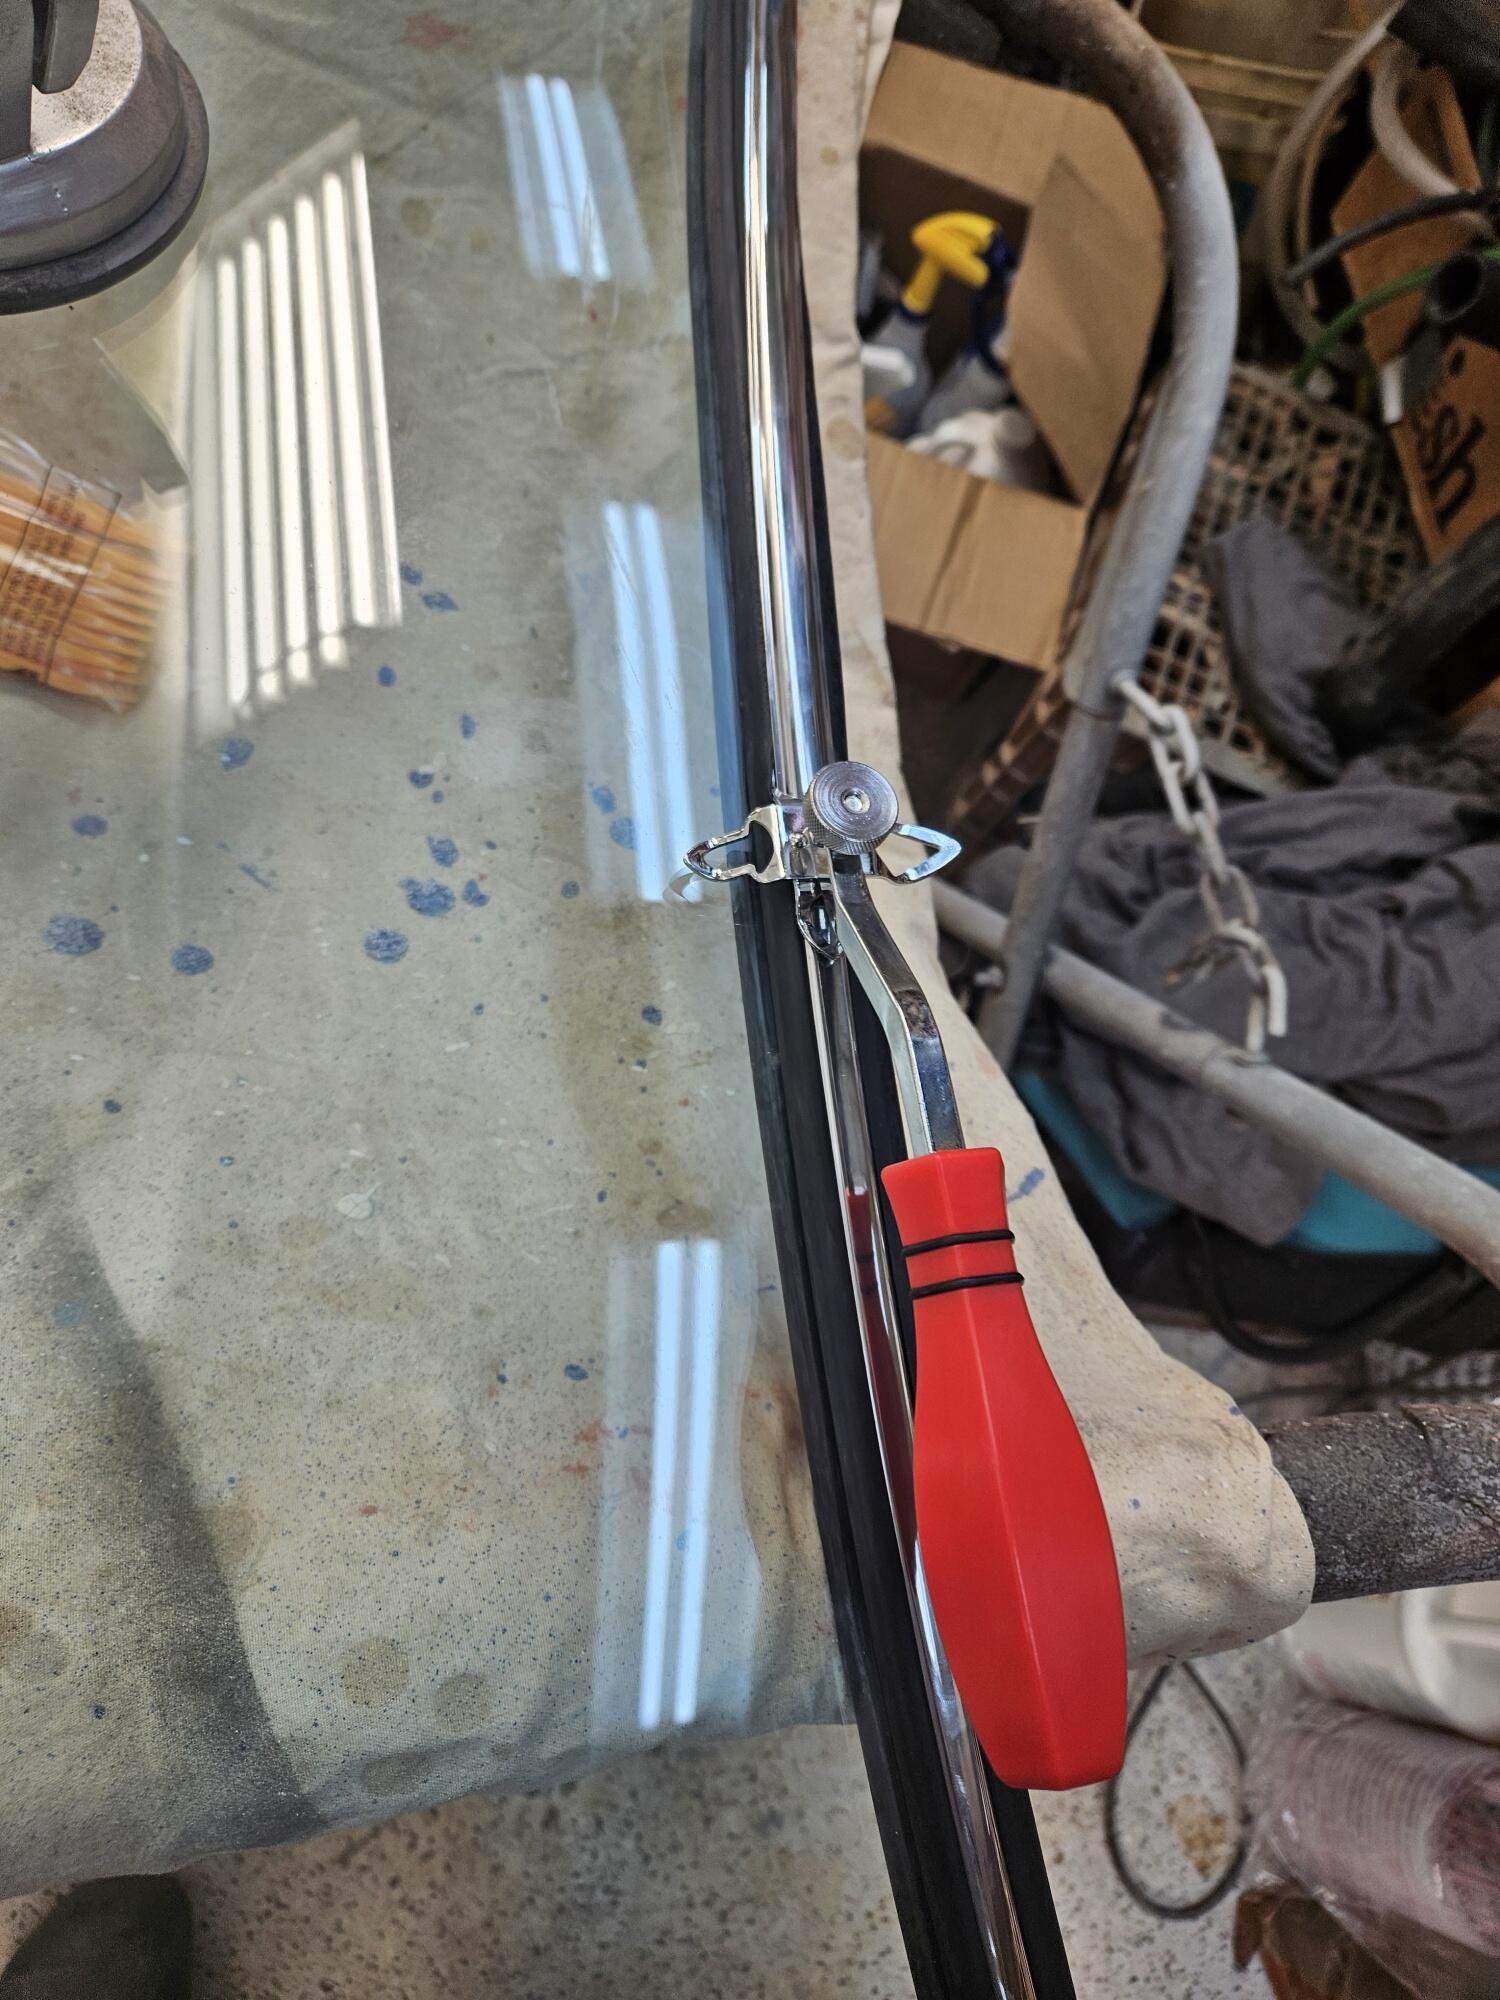
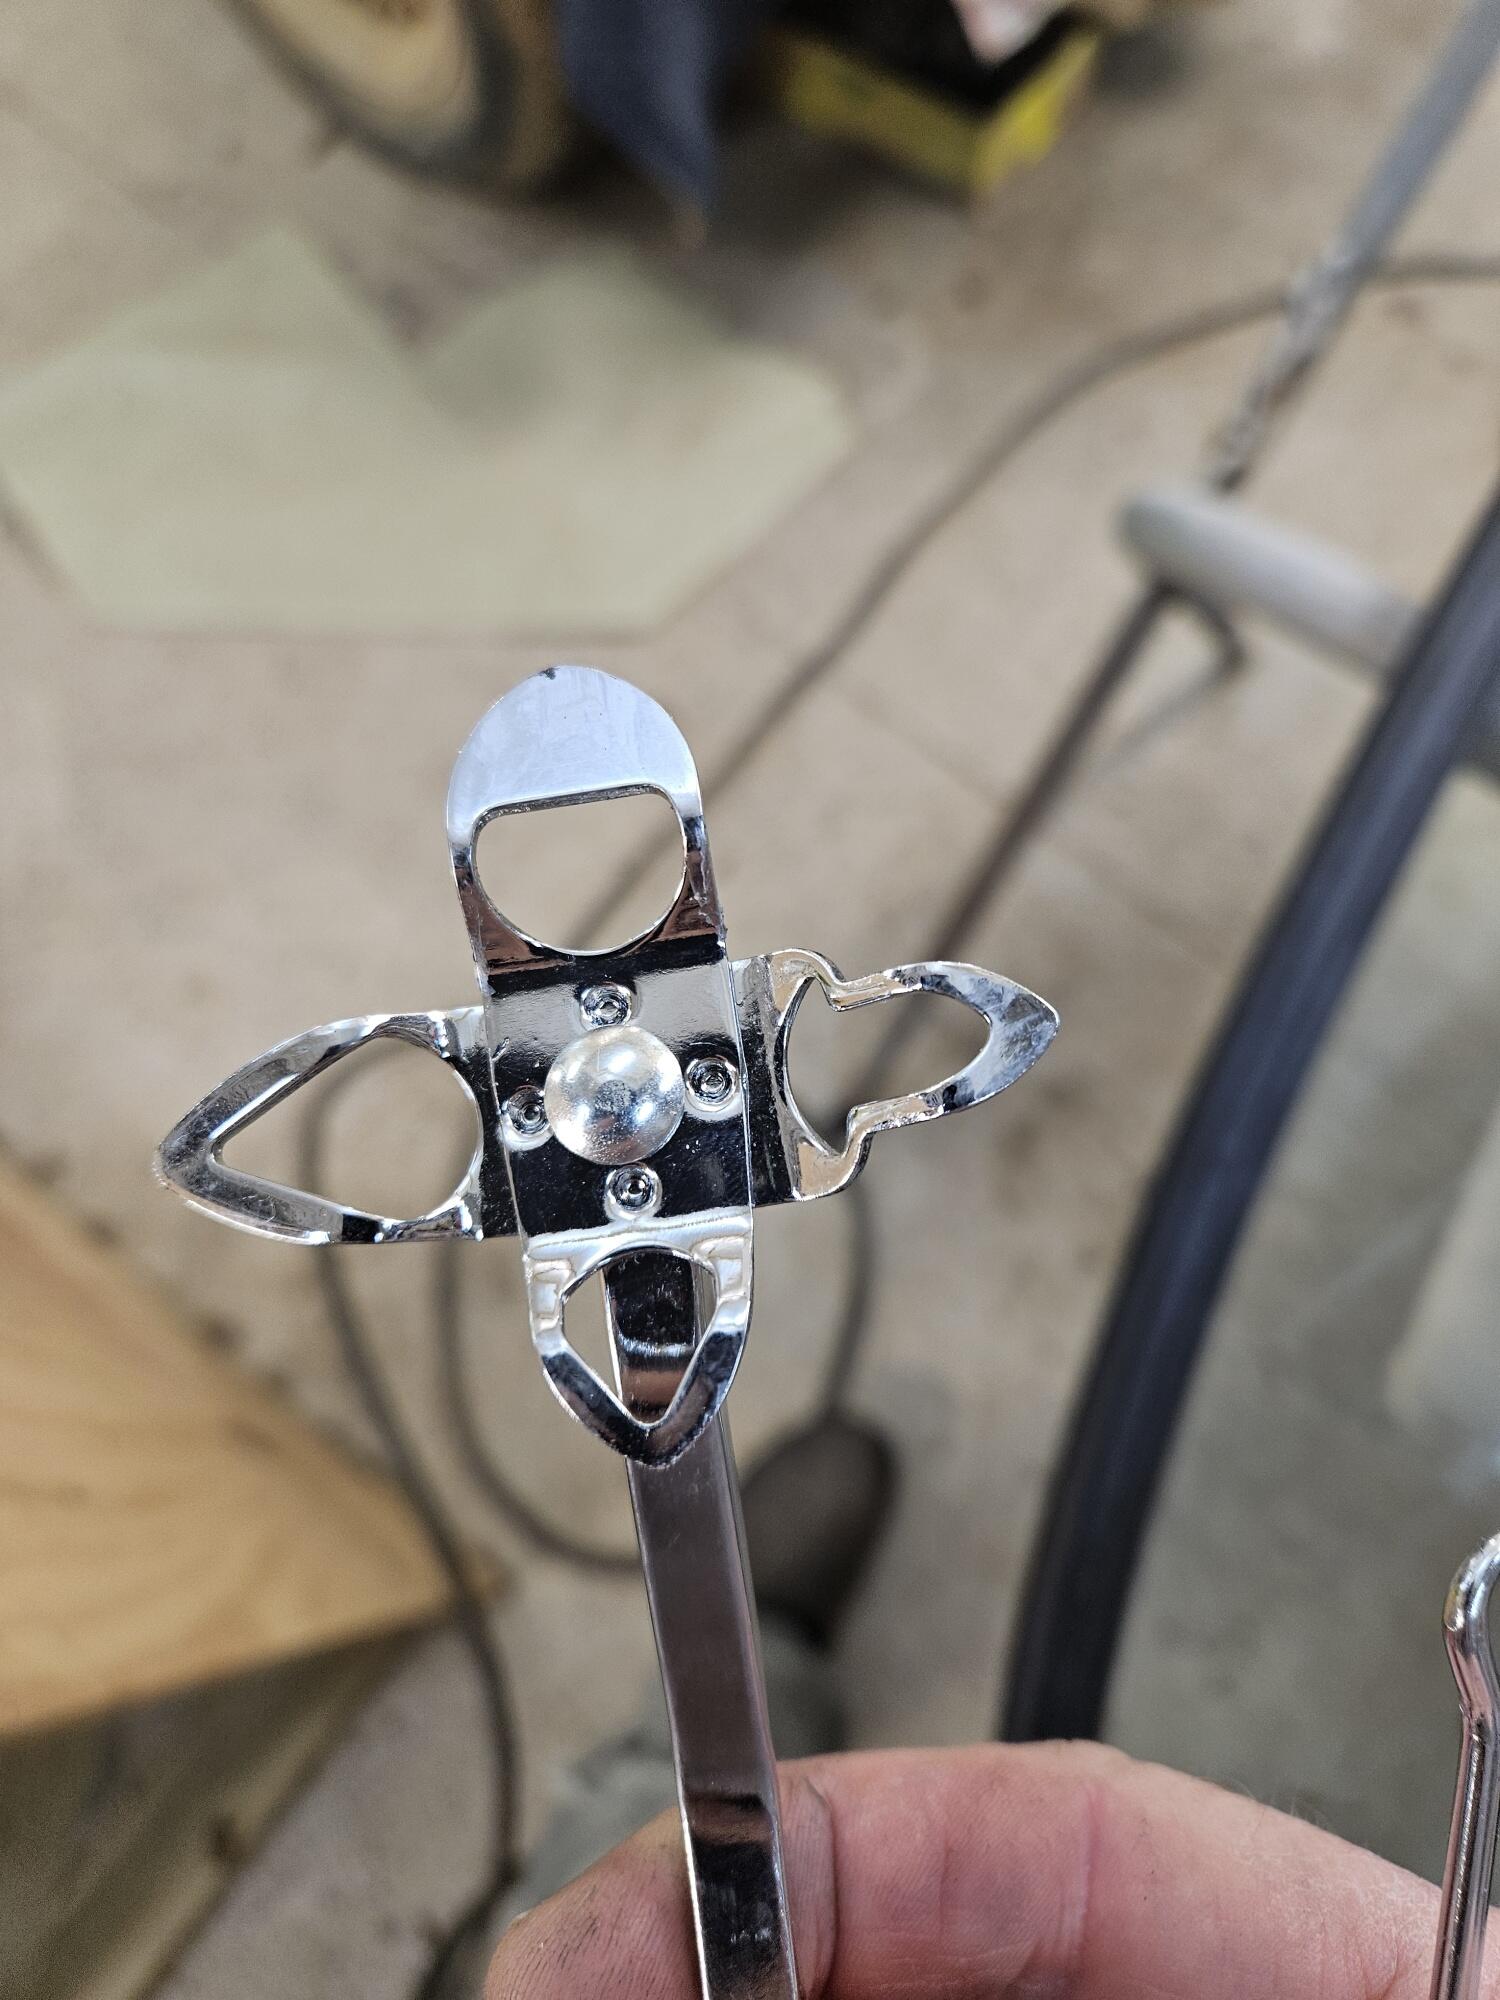
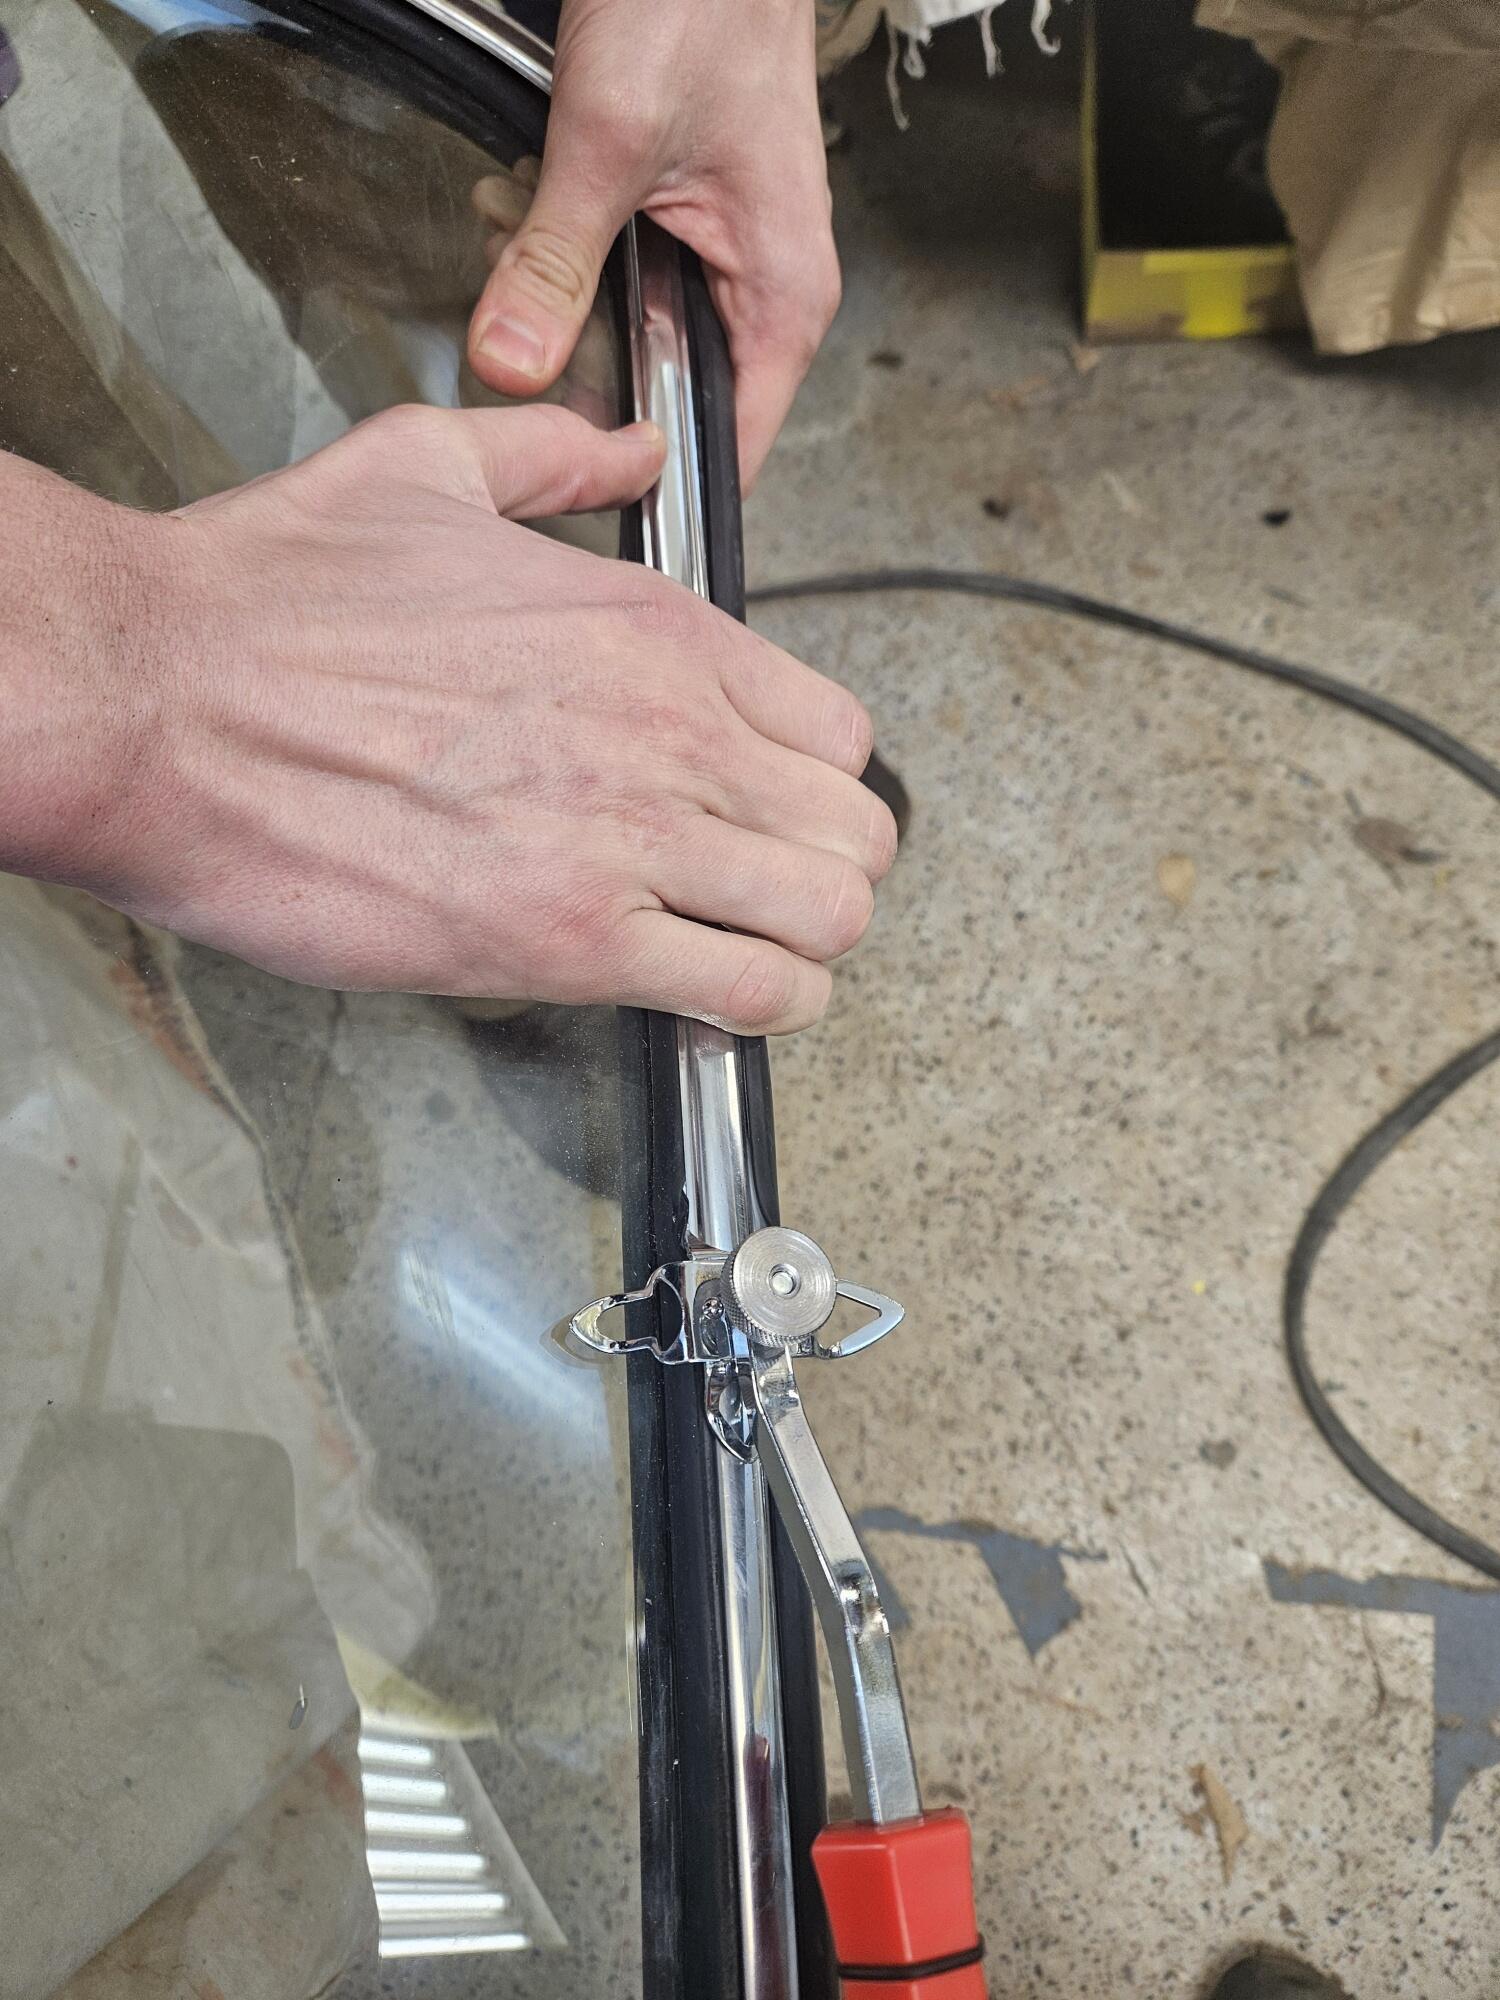
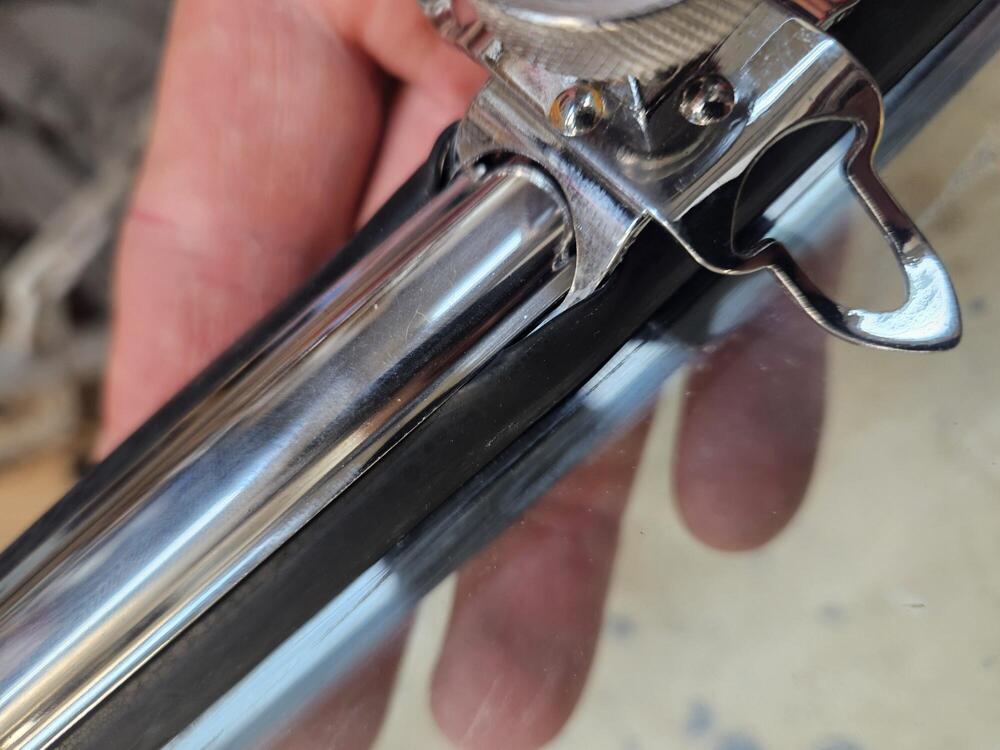
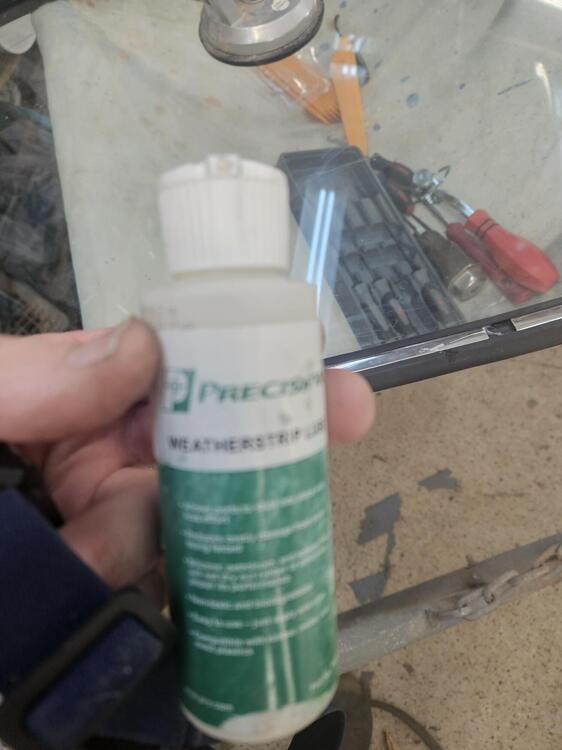
2 pointsYeah, I liked the tool. You have to be careful not to force it or pinch the rubber. If the rubber edges don't want to flow around you can just stay still and swing the handle left and right to get the rubber lips to pop out. I'm sure there are some more tricks to it. It might be the trim needs to be lifted a little to reduce pinching. It took Cody and I about 10-15 minutes to get the two lower pieces of trim in. I did the top by myself in about 5 minutes2 points
-
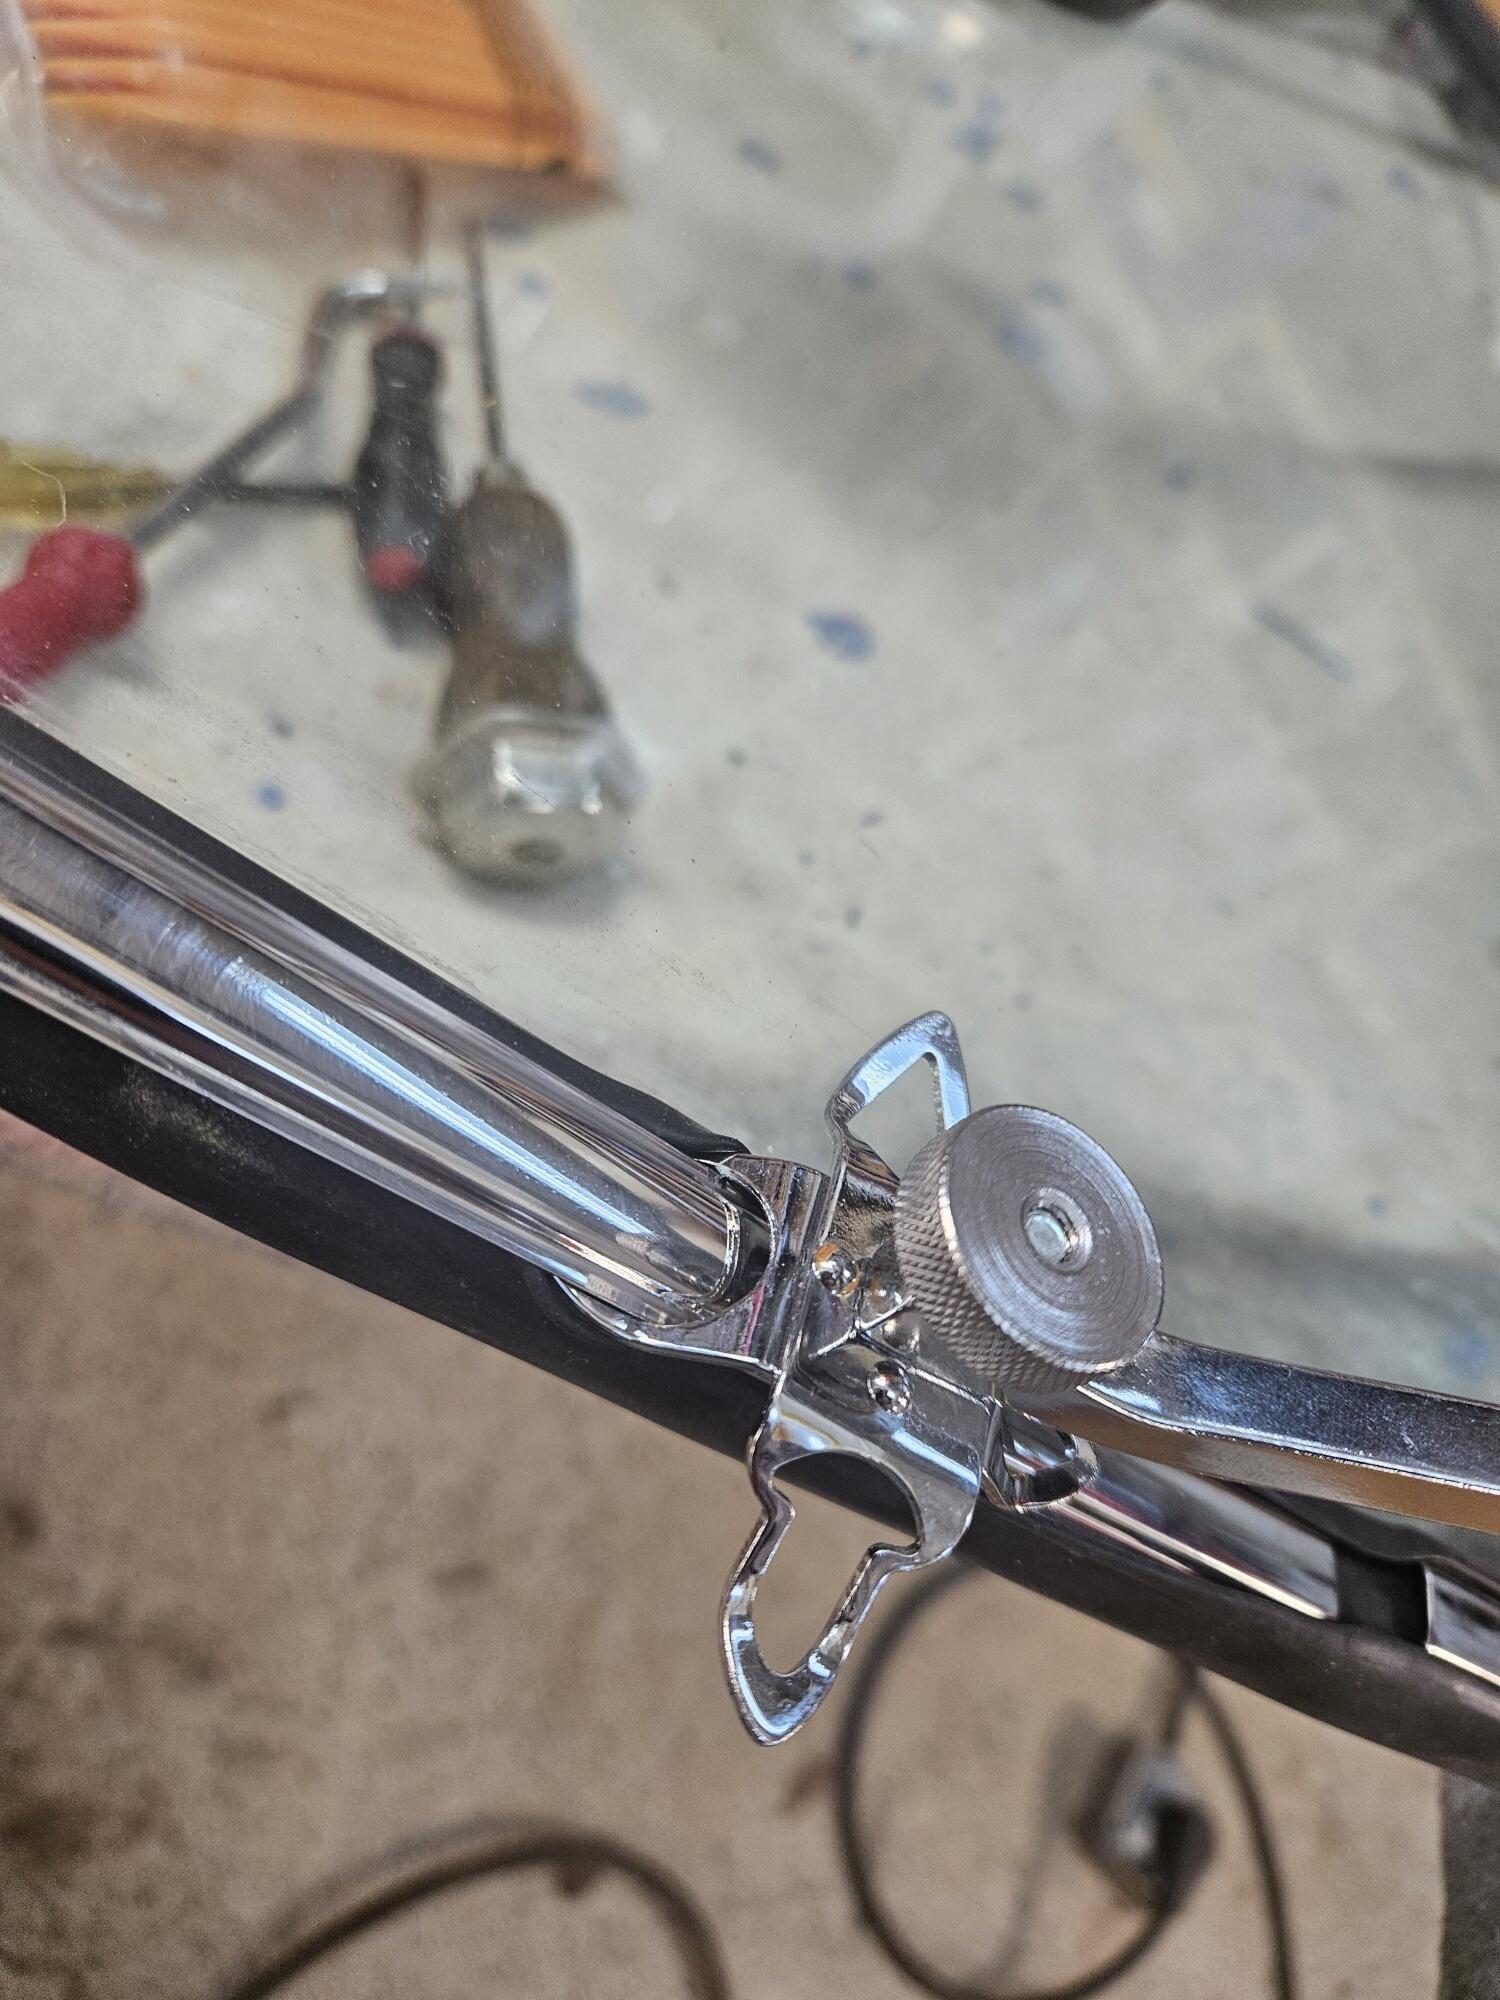
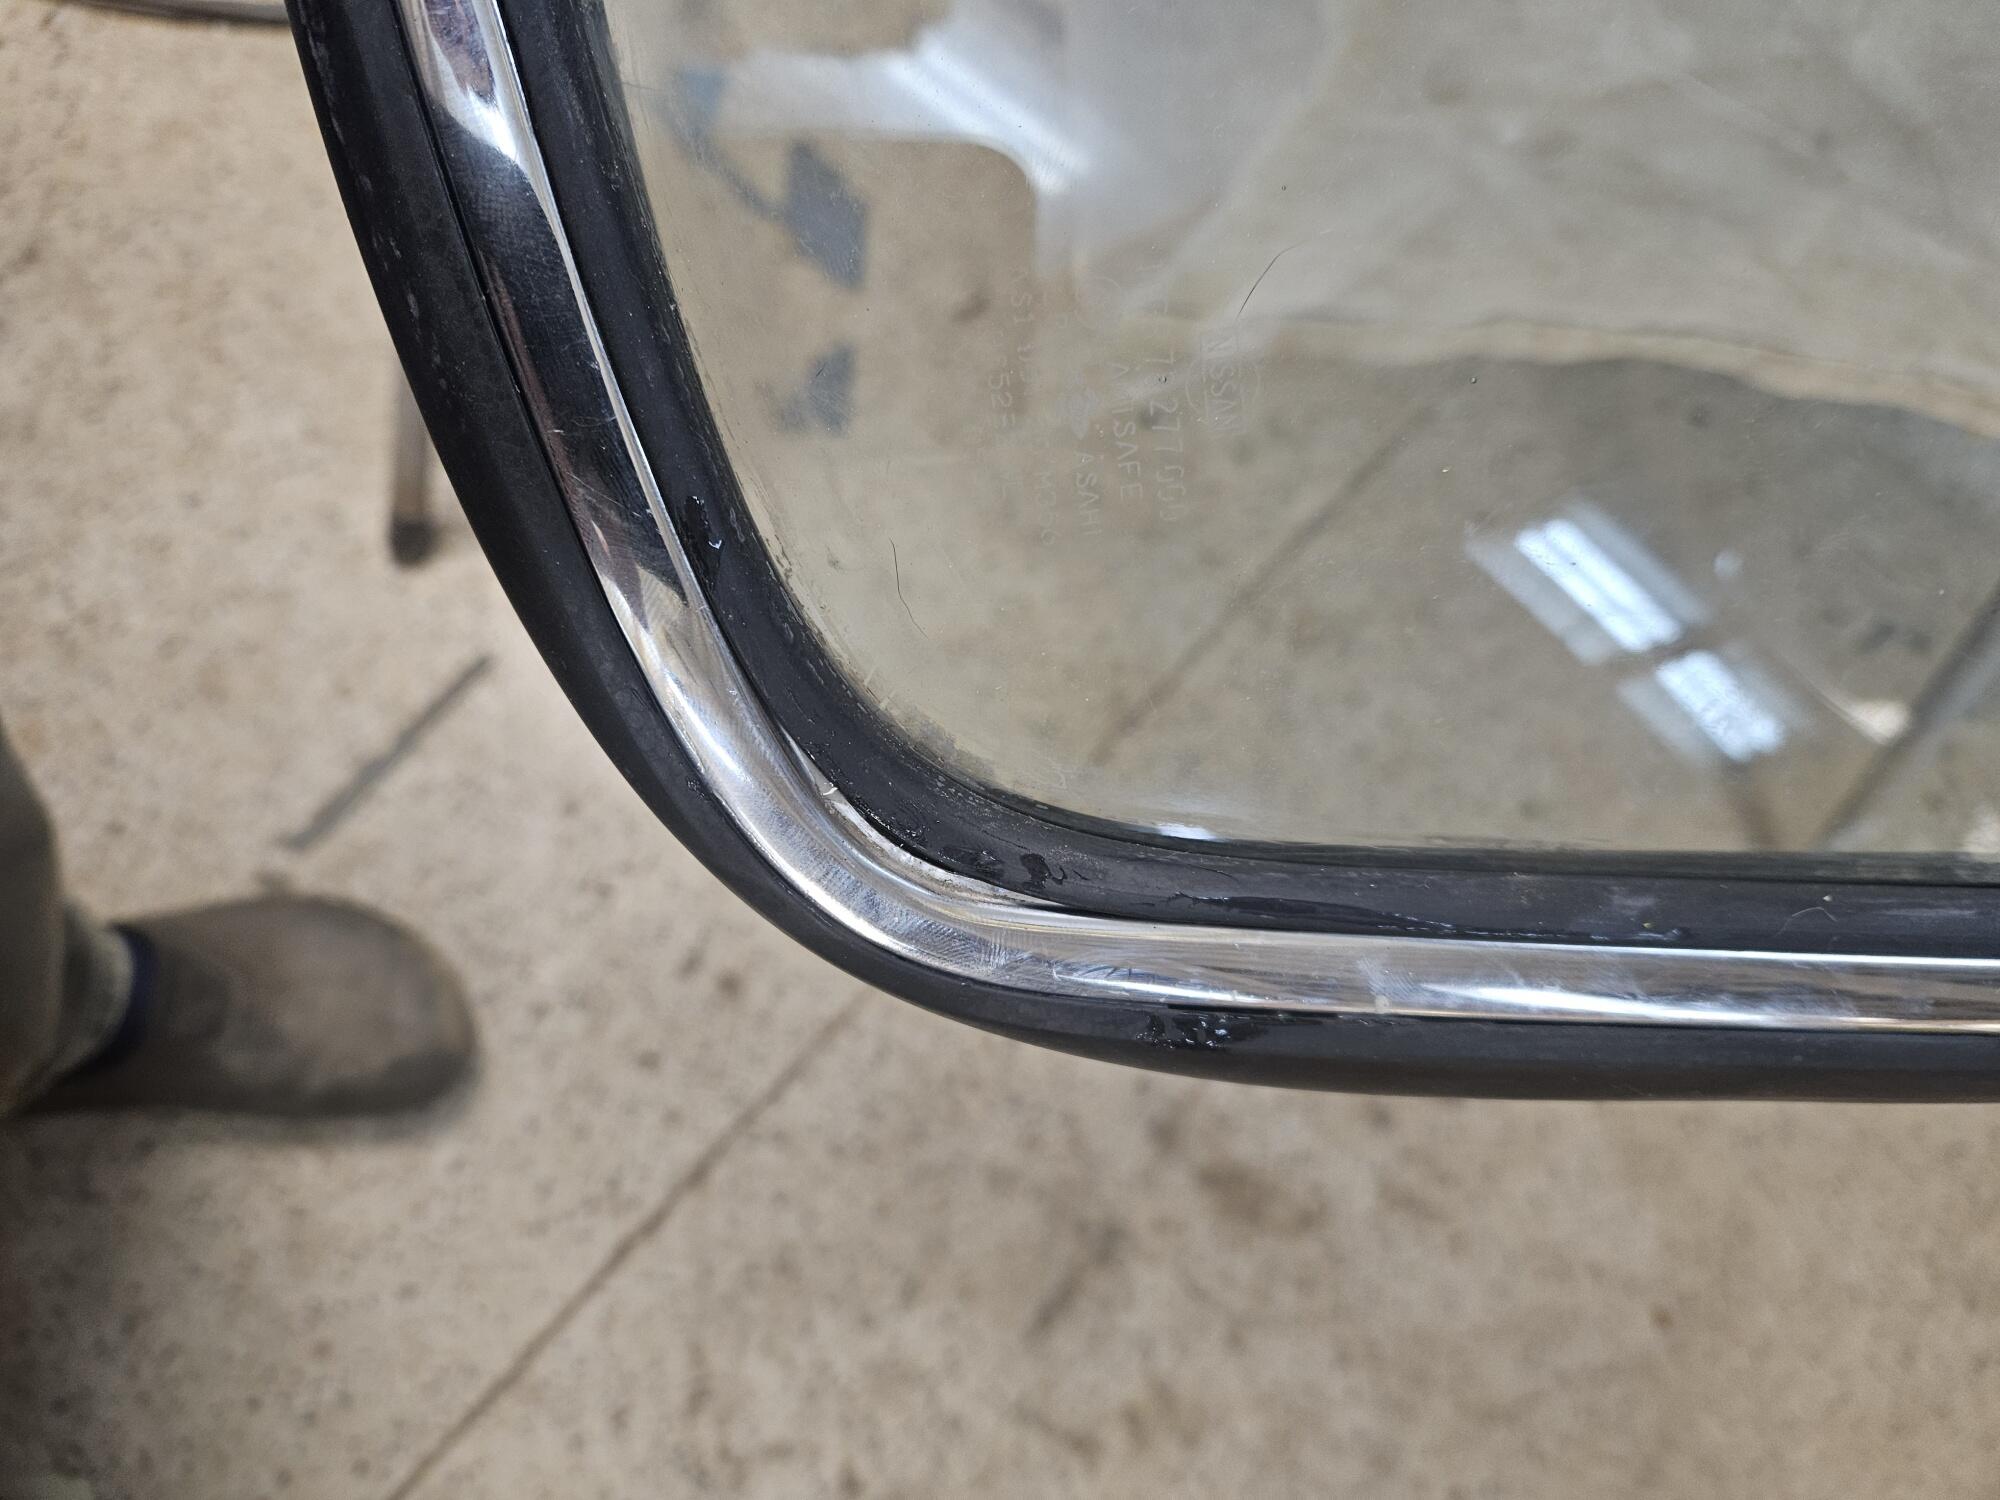
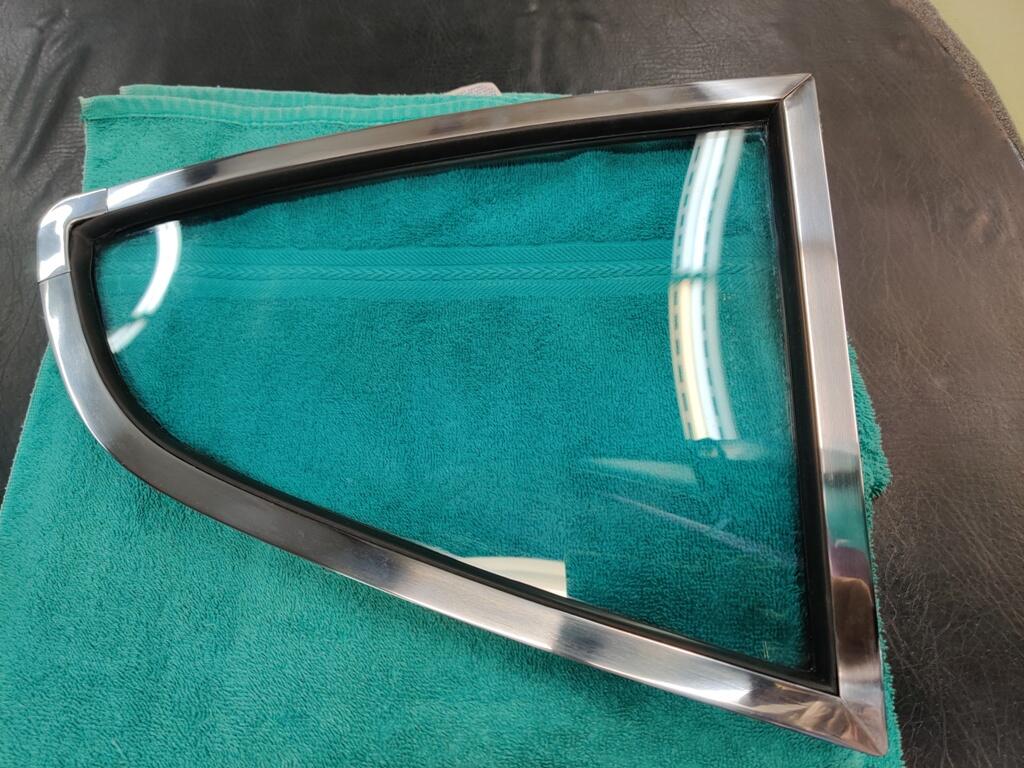
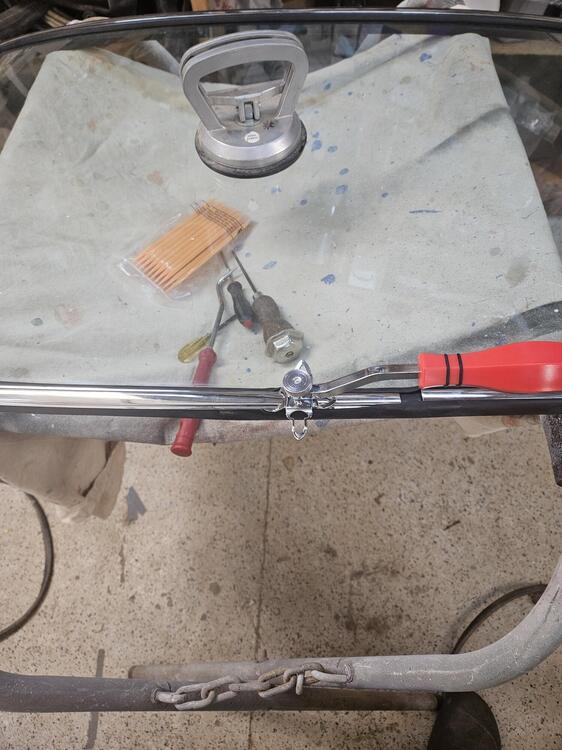
2 pointsSo I lied, I ordered a new windshield gasket from Zcardepot. It wasn't a lot of money and I could afford the little bit of lost time. The second one I got was not a "Precision" gasket. I actually like it better. It seems softer and possibly a little larger and the welded corners look really good. So I had a go at the stainless trim again. I bought some tools on Amazon, because who doesn't like new tools! 😉 So this is a windshield trim tool. There are some vintage windshield styles that use a rubber insert to log the glass in. I wasn't sure this tool would have a tip that was large enough for the stainless trim. Cody was helping me here hold the gasket to the glass and keep it in line with the trim I used the Precision gasket lube to make it easier for the edges of the rubber to move around the trim. The gasket isn't quite right in the lower corners yet, but I was thinking the car would force this corner into shape? We got the trim in with one really small nick. It's almost unnoticeable. So hopefully next weekend we will install the glass


 2 points
 -
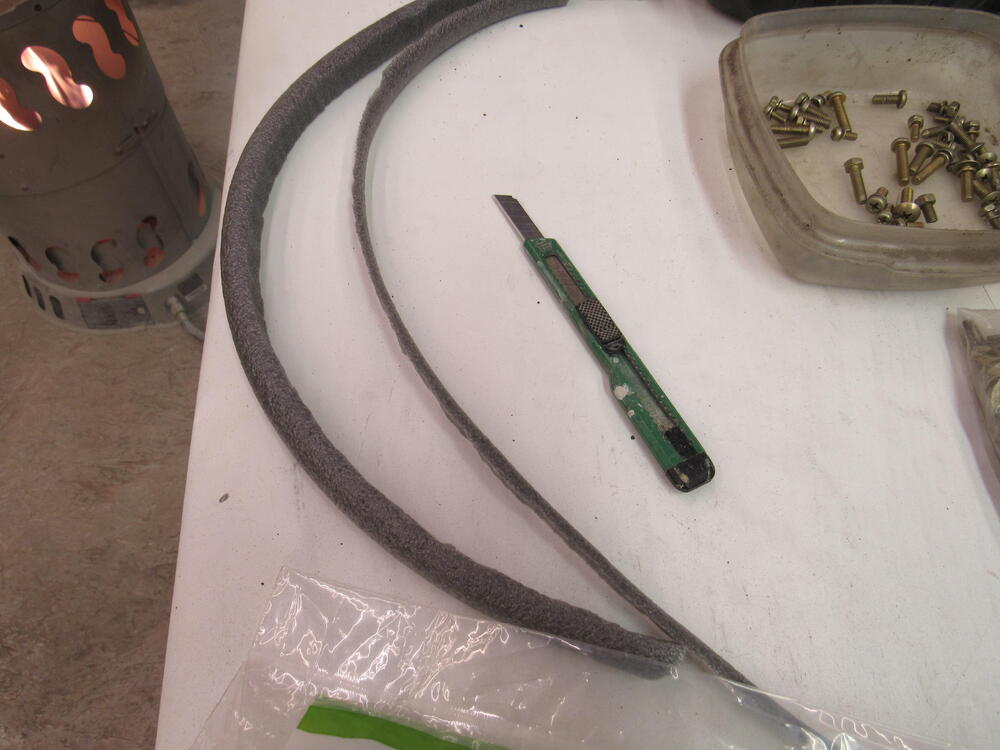
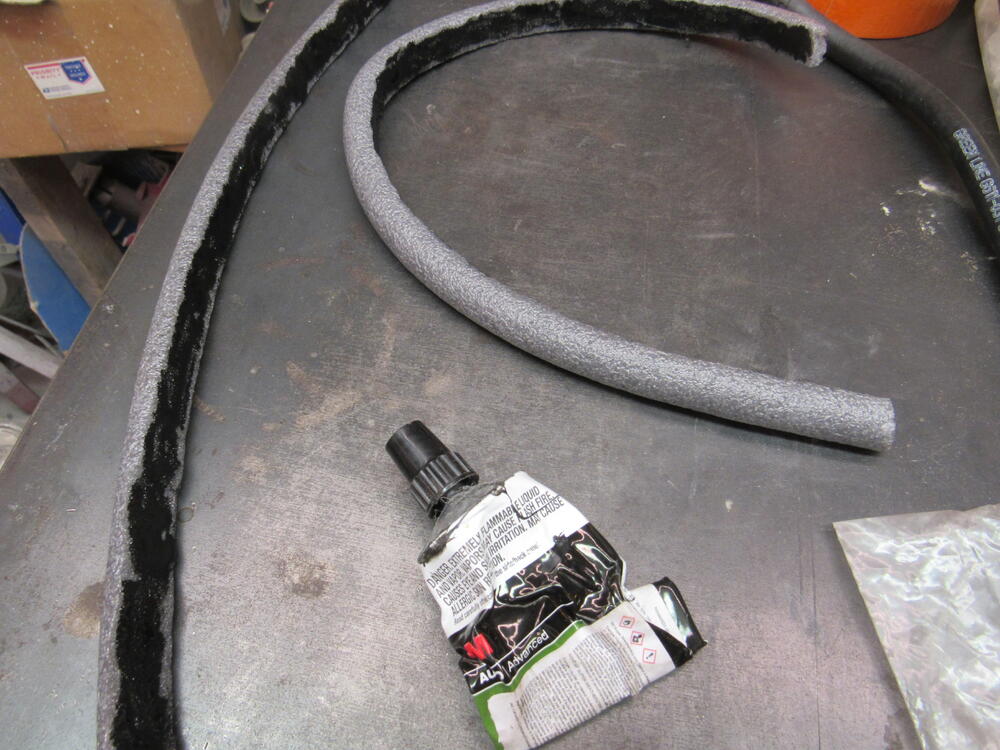
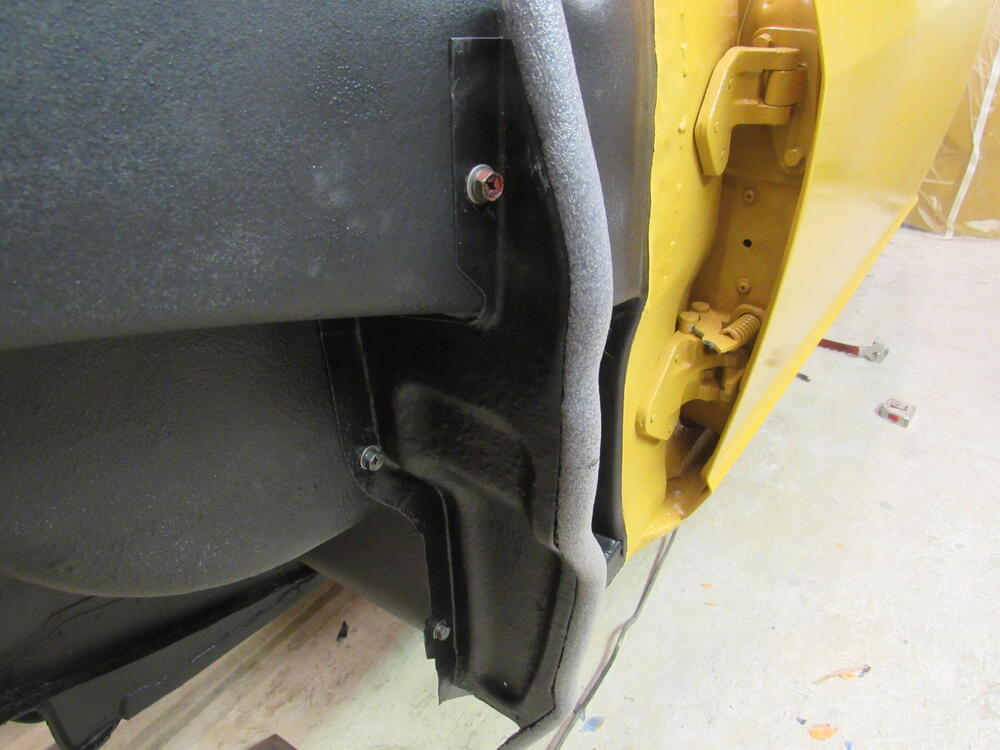
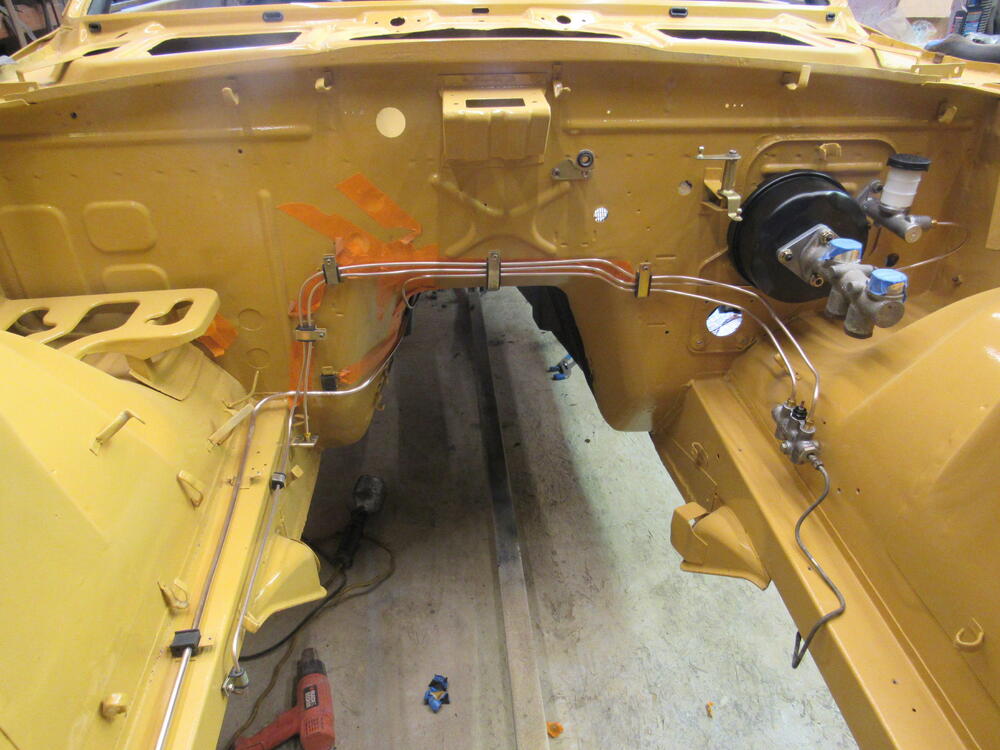
1 pointI got all the threads on the body chased yesterday, of course I broke one of the taps but I knew those broken dental picks would come handy one day. I have been asked a few times what I use to seal the mud guards to the inside of the fender, household weather strip closed cell foam rope, 3/4" in dia. then slice off a 1/3rd of it so you have a flat area to adhere to the edge of the mud guard. Sometimes you may have to shave off a little more of the outside curve to get a good fit. I have most of the clutch, fuel and brake lines roughed in now, still want to try and straighten them up a bit more.

 1 point
 -
1 point
-
Well based on the application (king pin shims), I would assume they are relatively hard and would be suitable for the differential application. You can get a quick and dirty idea of how hard they are using a small hand file to see it it will cut those new shims. The corner of a small file will a) cut like butter, b) completely skate across the shim without cutting, or c) somewhere in between. You want "in between". Another thing you could try is if you fold one of those shims in half... Does it fold easy and stay pretty much completely folded? Does it snap into two piece? Or does it fold but springs back a bunch when you let it go. I think you want the third option. I know this is all just subjective words, but from a distance, that's all I got. And I may have mentioned this already, but I can run a Rockwell hardness test on parts if necessary to determine the Rockwell rating. Although I'm not sure it will be accurate on something as thin as .005.1 point
-
Ah the oil cooler okay I saw mention of those. So because mine doesn't have them I would think it's safe to assume that it's original to the car or at least the correct version for a mid-71 240z manual1 point
-
What is the wipe pattern like?1 point
-
1 point
-
1 point
-
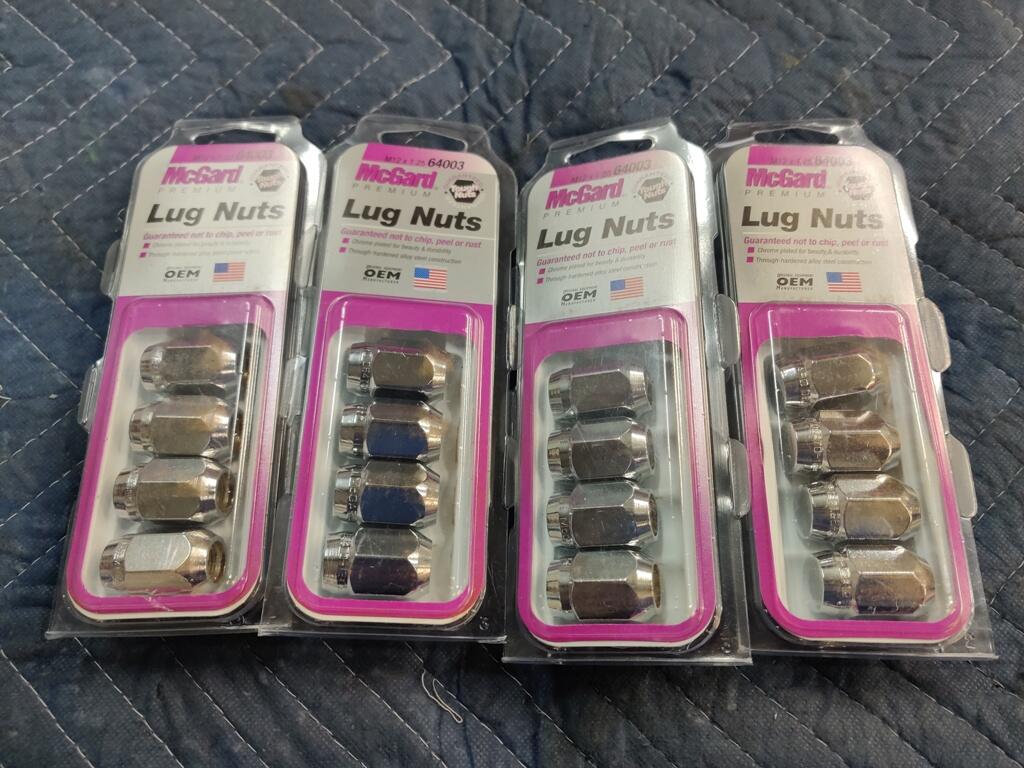
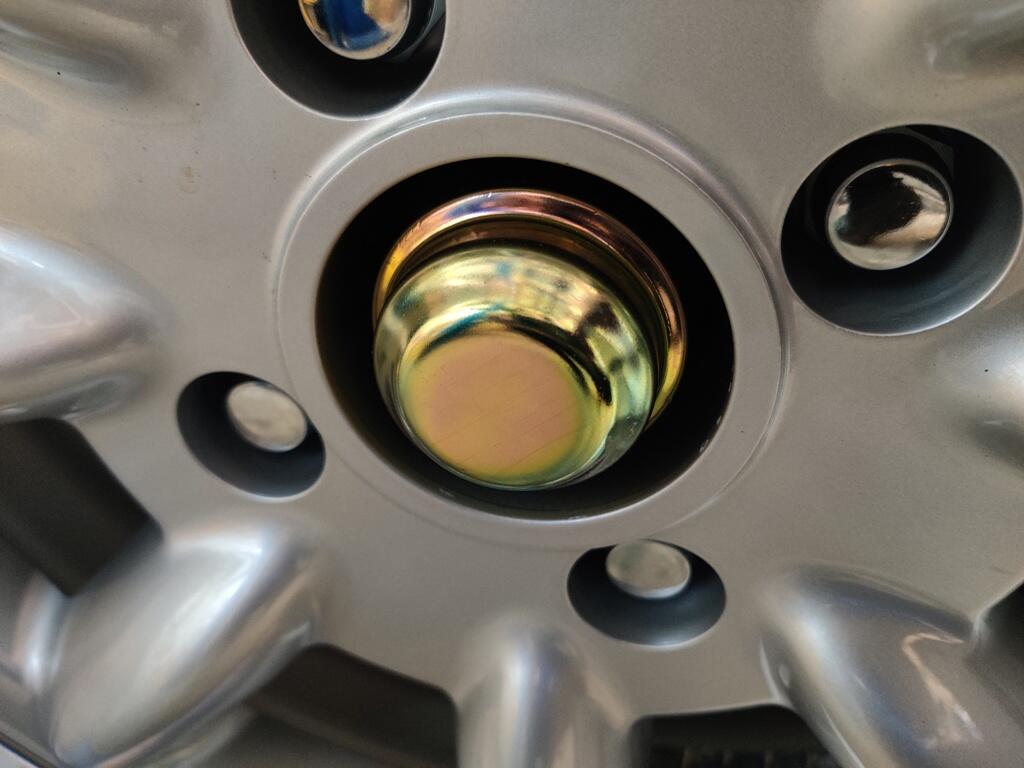
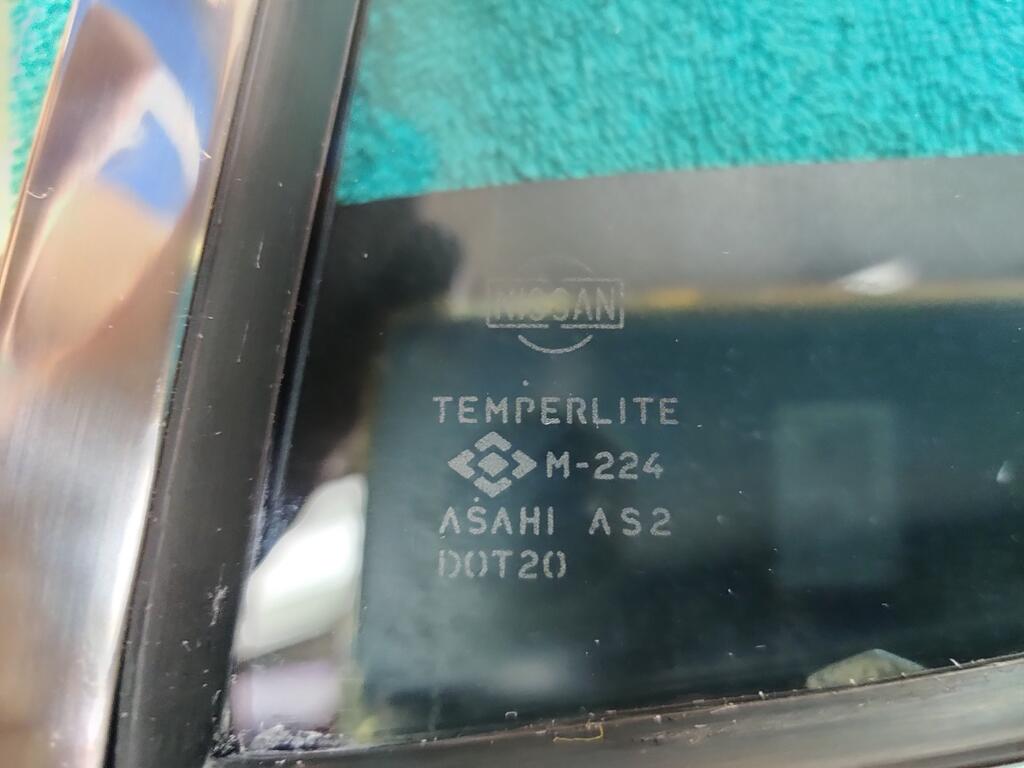
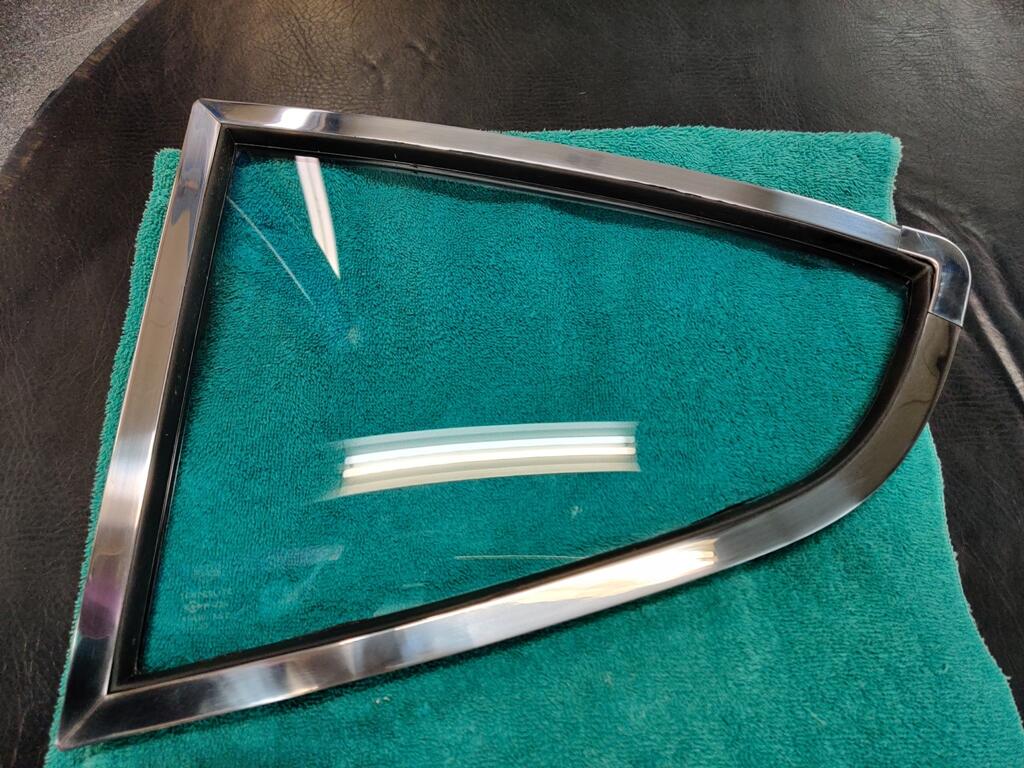
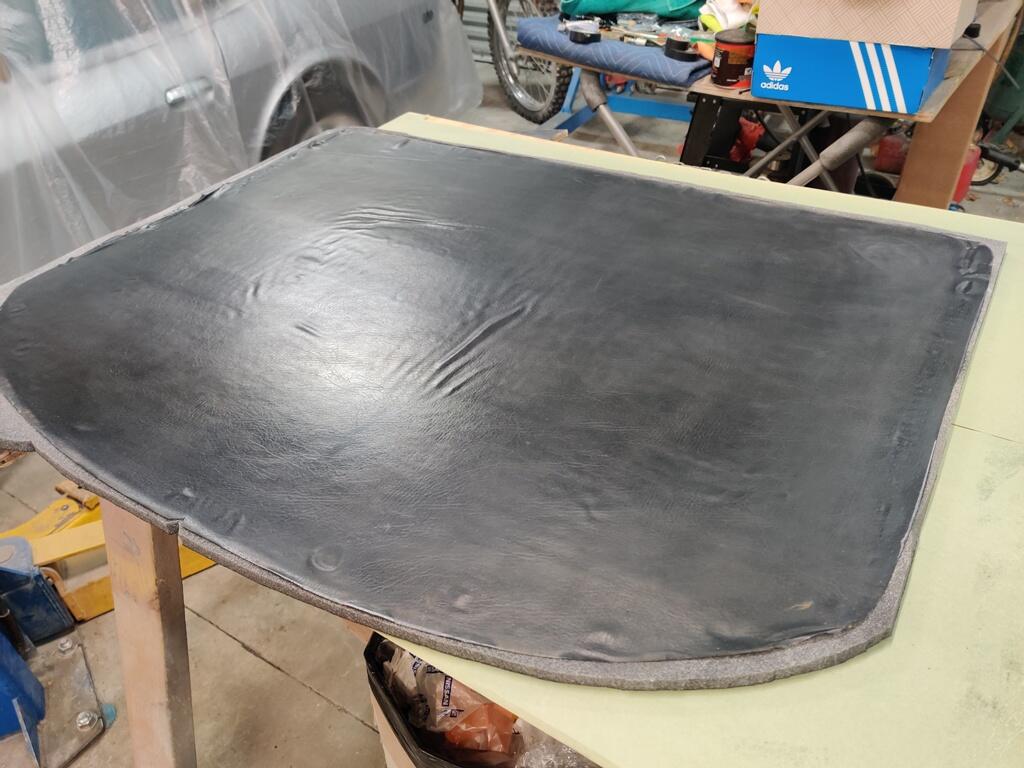
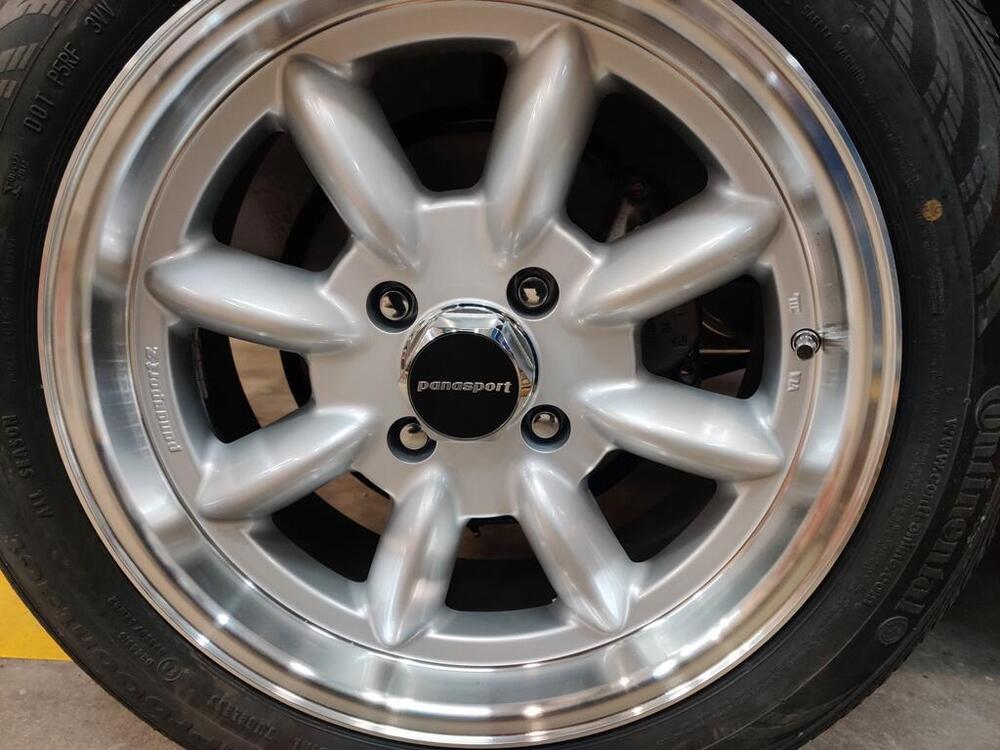
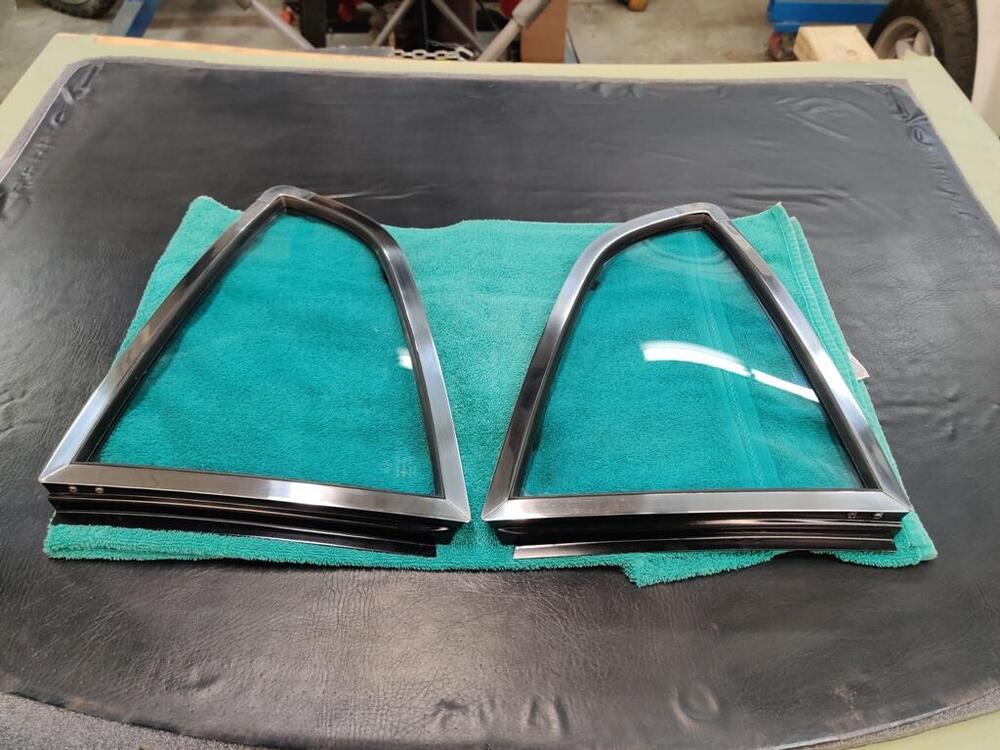
During the time I spent on the car this weekend, I assembled the quarter glass windows into Nissan NOS rubber and into the quarter window frames. It is a rather difficult job, especially when using urethane window adhesive. I set them aside after assembling to wait for the adhesive to dry. I think it is likely that I will install the quarter windows in the car this week. Interestingly, I see that the etchings on my quarter windows date them to May and June of 1971. Combined with the door glass, the car has glass which was manufactured from dates in April through June. New McGard lug nuts showed up on Saturday. They are very high quality. I have used them on my other 240z for 30 years and they still look pretty close to new. I put them on along with the Panasport center caps. While it finishes the look, I kind of like the look of the hub dust covers which I had specially plated in yellow chromate so they would look like those with the original finish. I also worked on the differential. I have a separate thread where I am reporting issues and progress. I think I am much closer to resolving the issue with excessive backlash, and am looking forward to installing it in the car. I also attempted to glue the old head liner vinyl to new foam. Unfortunately, I got a few wrinkles in it. I also discovered two very small slits in the original vinyl after gluing it to the foam. I suspect that when the headliner was manufactured, the vinyl was at a much higher temperature and was pressed against the foam while under some amount of tension. As such, wrinkles would not form like I experienced here. So, because of these issues, I will not be able to use it. At this point, I will need to source a piece of cloth backed vinyl and glue that to new foam. It won't be original, and that bothers me, but I really don't see that I have any other option. I have been looking for a new old stock headliner for years, but haven't found one to be available.


 1 point
 -
1 point
-
Over the past few weeks, i collected random parts from various sellers, which were up for sale cheap or which i was looking for specifically for my build. Let's have a closer look. First of all, Some nice parts for the airbox restauration (Stickers and SU-carb insulators): Then also got a bunch of OEM Bulbs for the dome light: Had to test if my restored dome light works nicely with the new bulb, which it does. Excellent. Found a set of Print "Cliches"- Those are basically negatives used in a print-press back in the days: Will also work nicely as stamps, if you want so 🙂 Also got this OEM NOS Brake repair kit. It only list Skylines and the Laurel C130 on the mark, but i double checked th enumber and it should also fit the S30: Then i got two steelies, which were almost for free. I probably won't use them on my car, but since i already had two, i have a full set now, which makes it easier to sell them, and or use them. The Production date also fits, so that's a pro. You can see the on ein the picture is slightly dented, but easy to repair. Then: Got this super-wobbly OEM front spoiler. It was only 20 bucks and not sure if it is salvageble. But i think a pro might maybe fix it with some warm temperature and bending, but let's see. The reason why i bought it, is because it's probably the only one which i've ever seen where the mounts are not Corroded (yet) inside the rubber and has bloated it up. I'm not sure yet what i've going to do with this, but i thought i better secure it, as those original lips have become rare. Even if i don't need it, it makes a funky looking moustache at my garage wall 🙂 Oh and also got these books. The left one from ebay (which cought my interest because of the euro spec Z on the cover), and the right one from my Mate Florian. While flipping through the book on the left (which came from america), had this photo inside from the previous owner of the book. On the back it was noted that it was taken at Christmas 1998 🙂1 point