Leaderboard

 Subscriber


Popular Content
Showing content with the highest reputation on 12/07/2023 in Posts
-
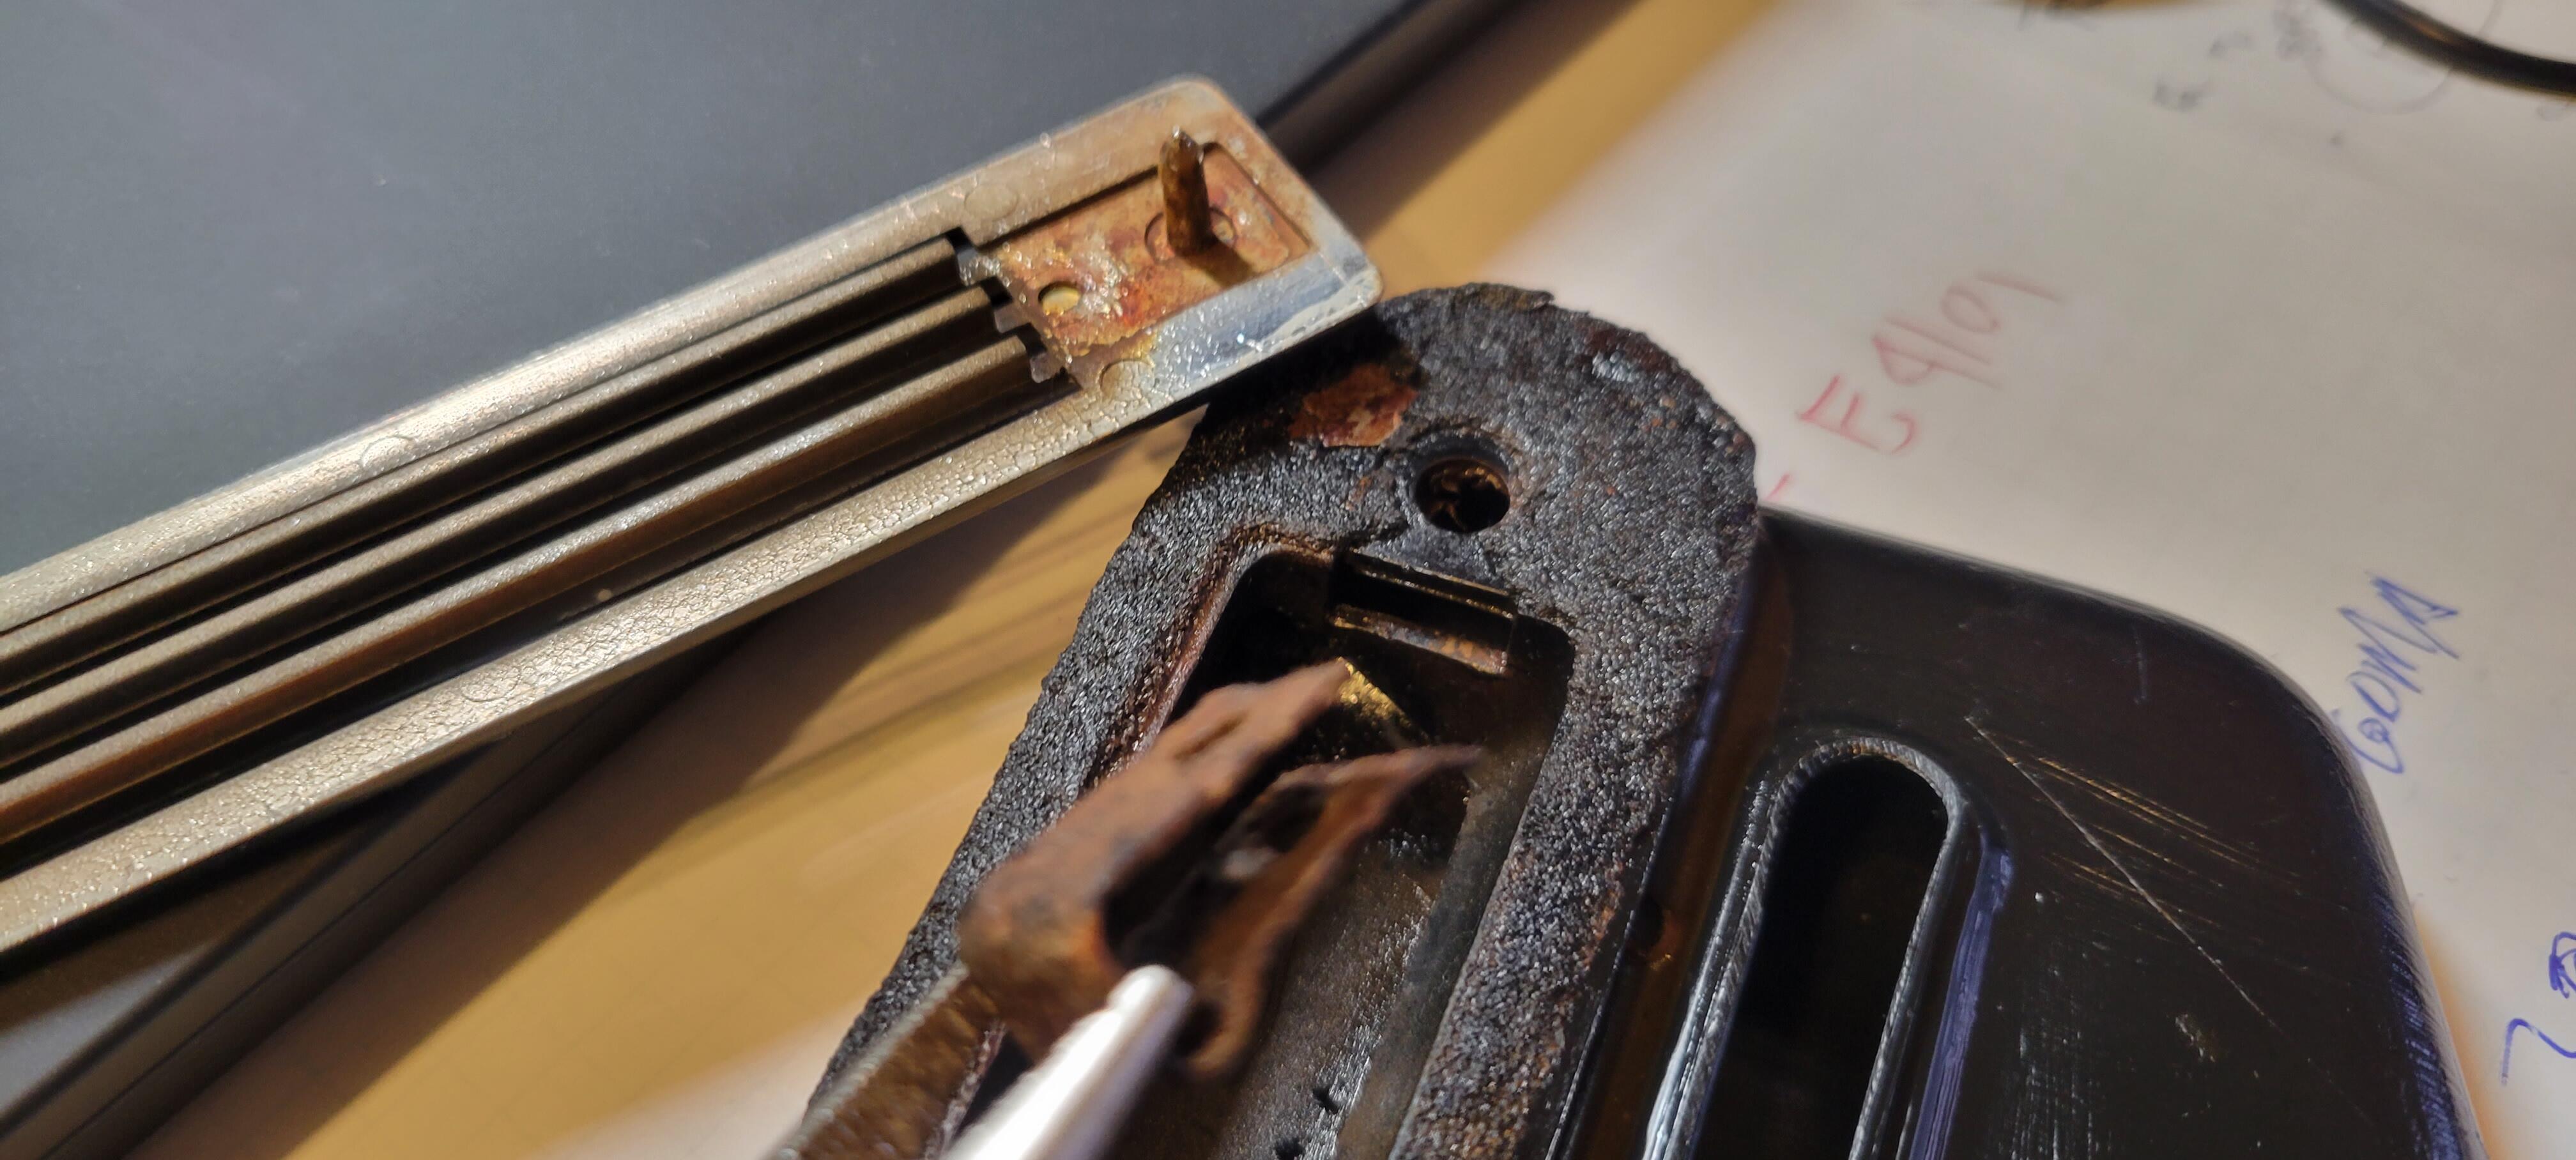
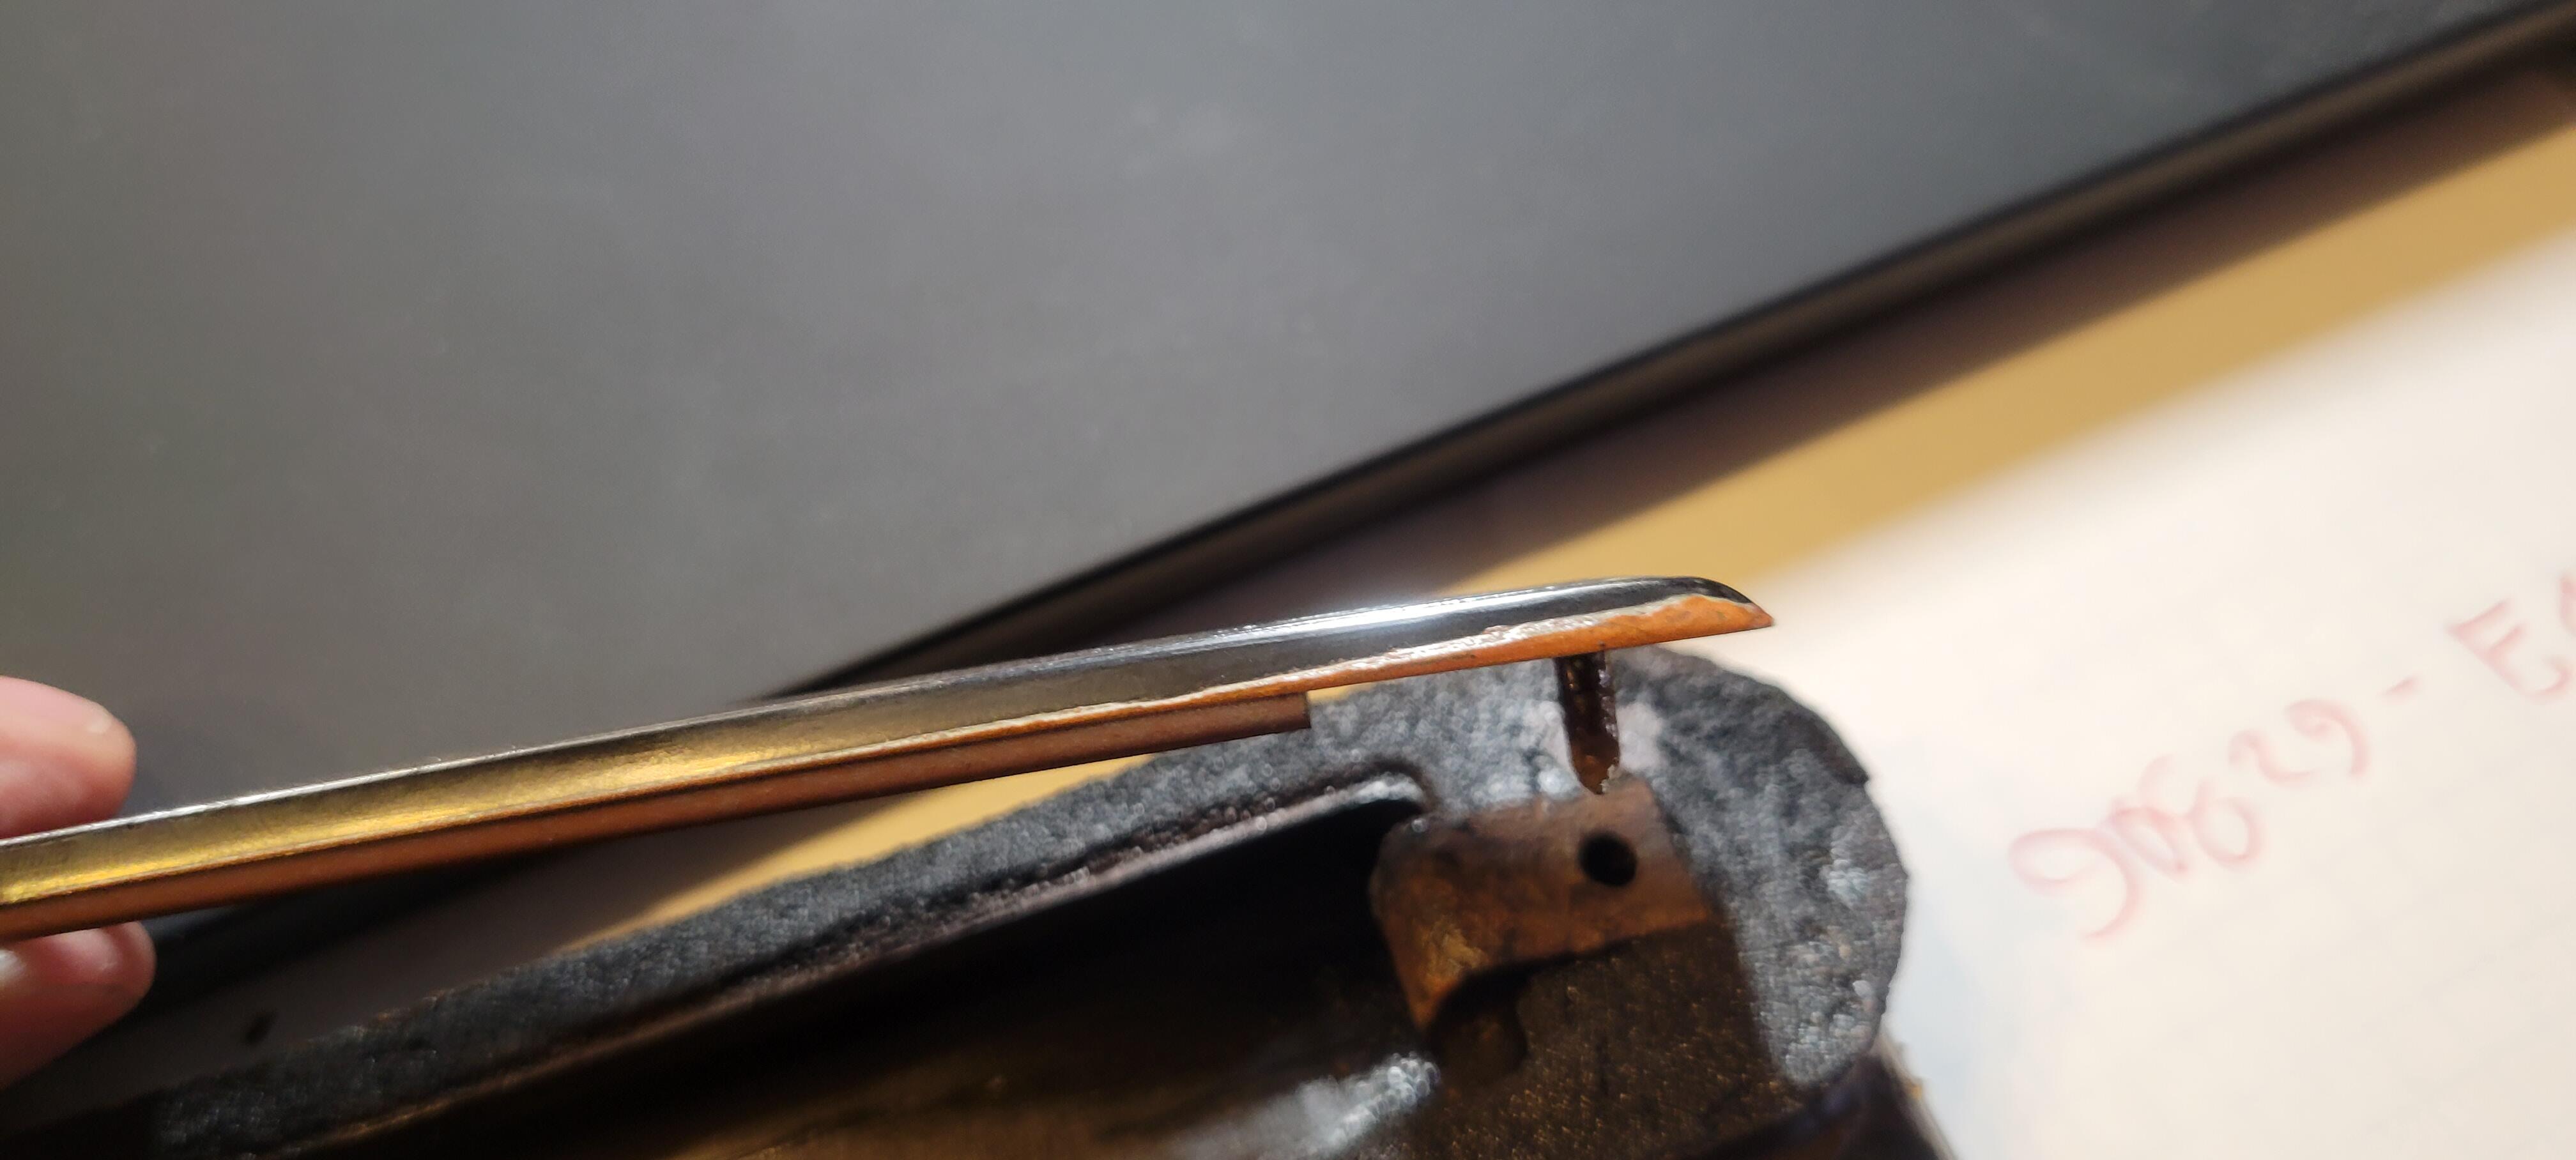
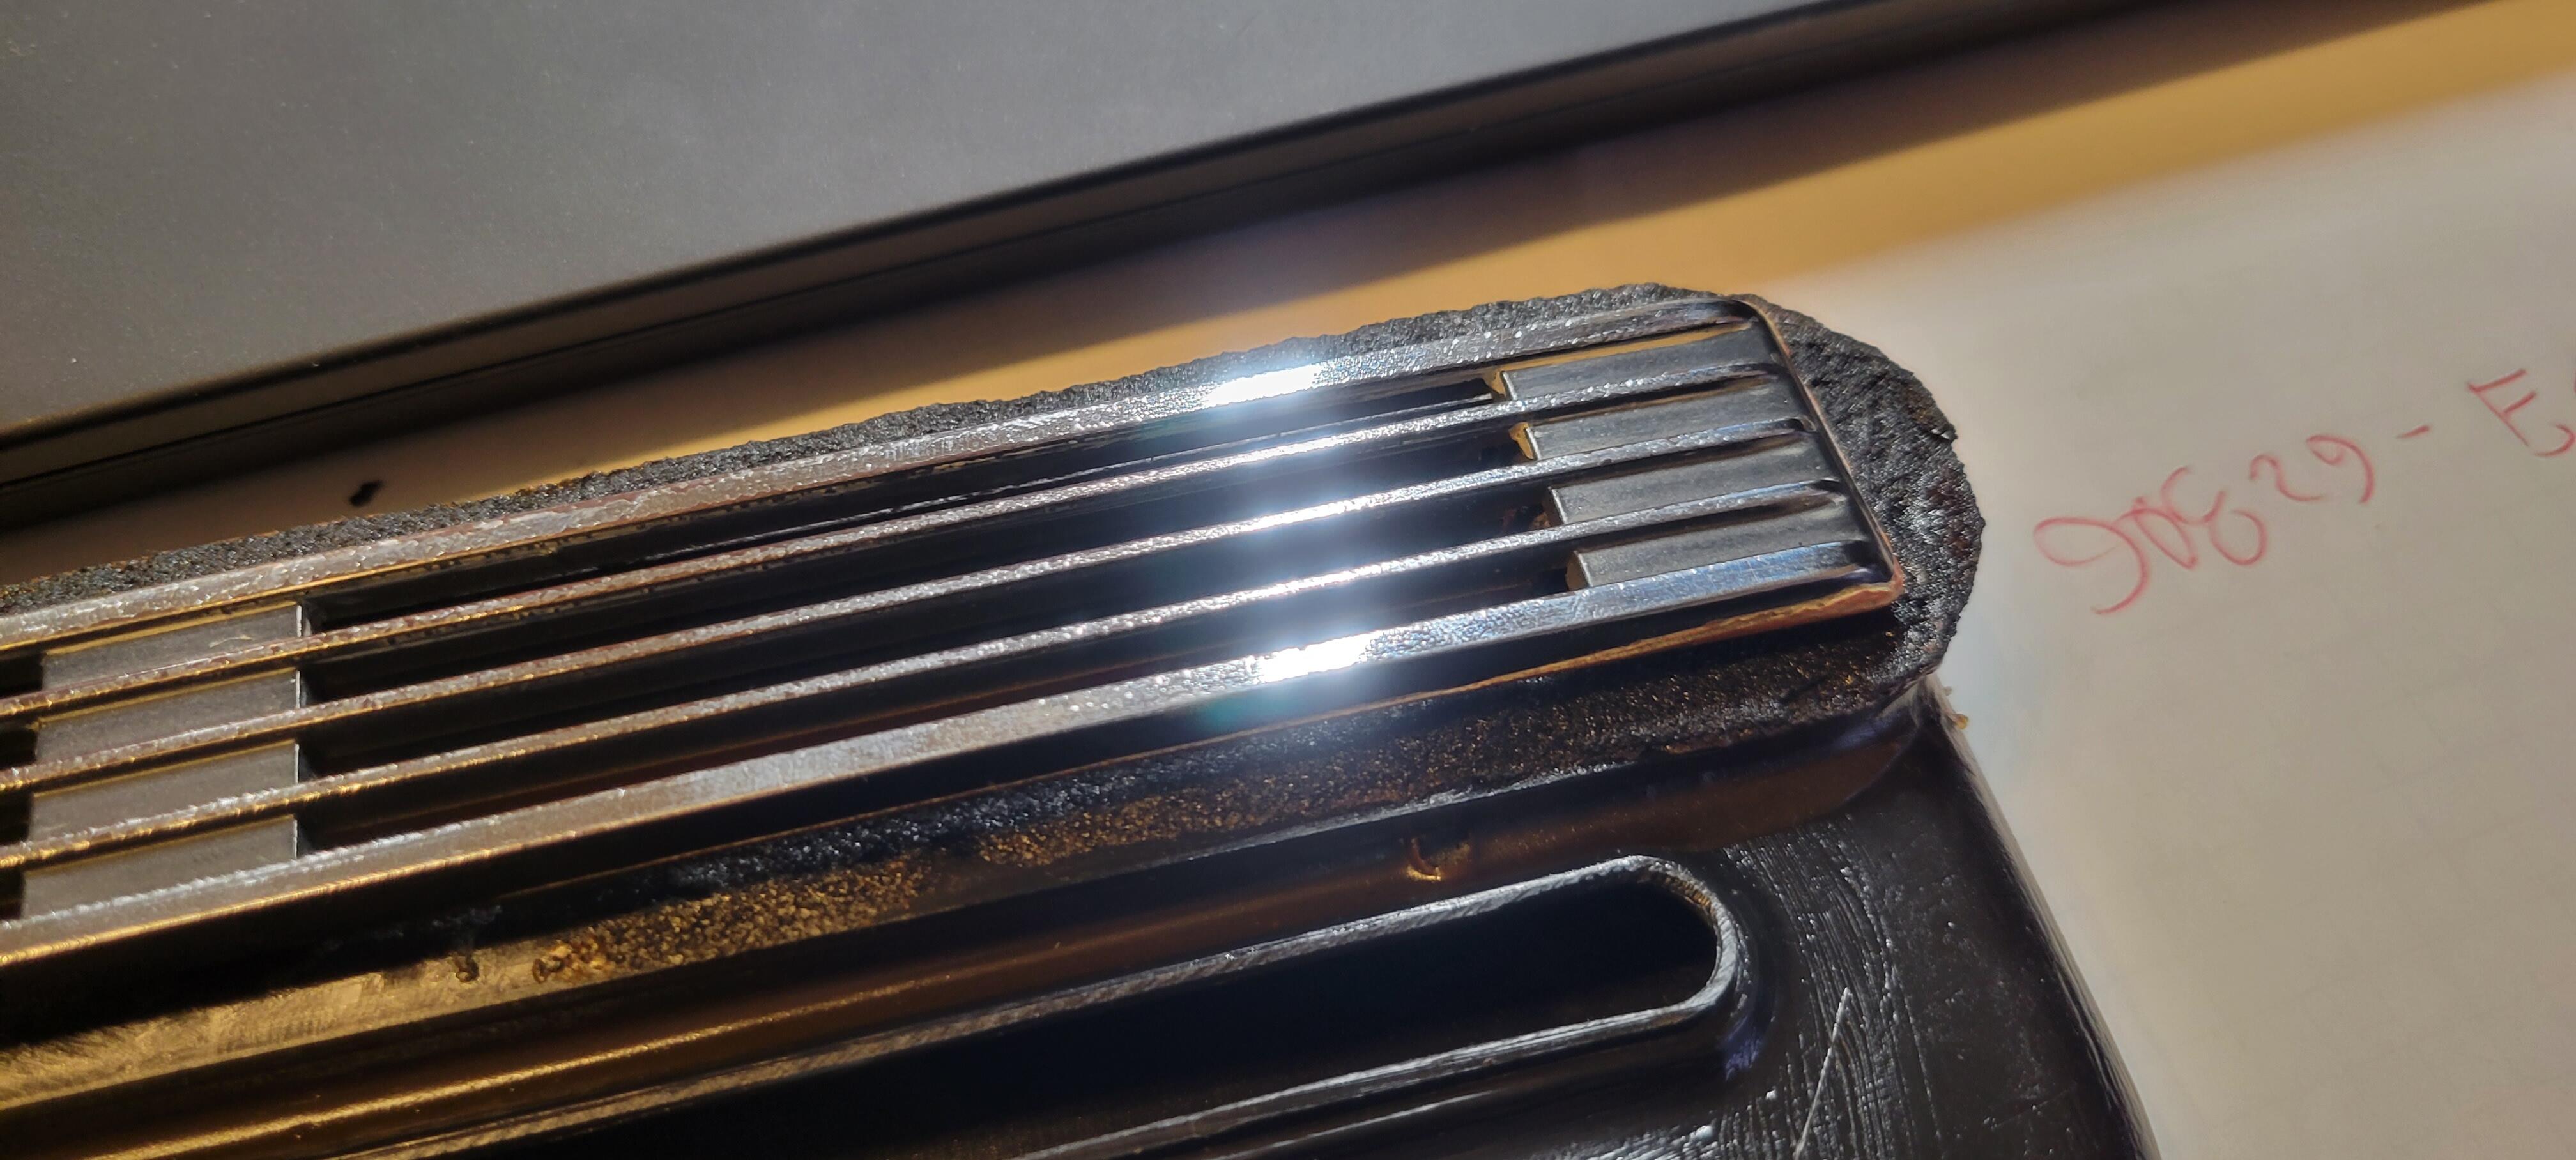
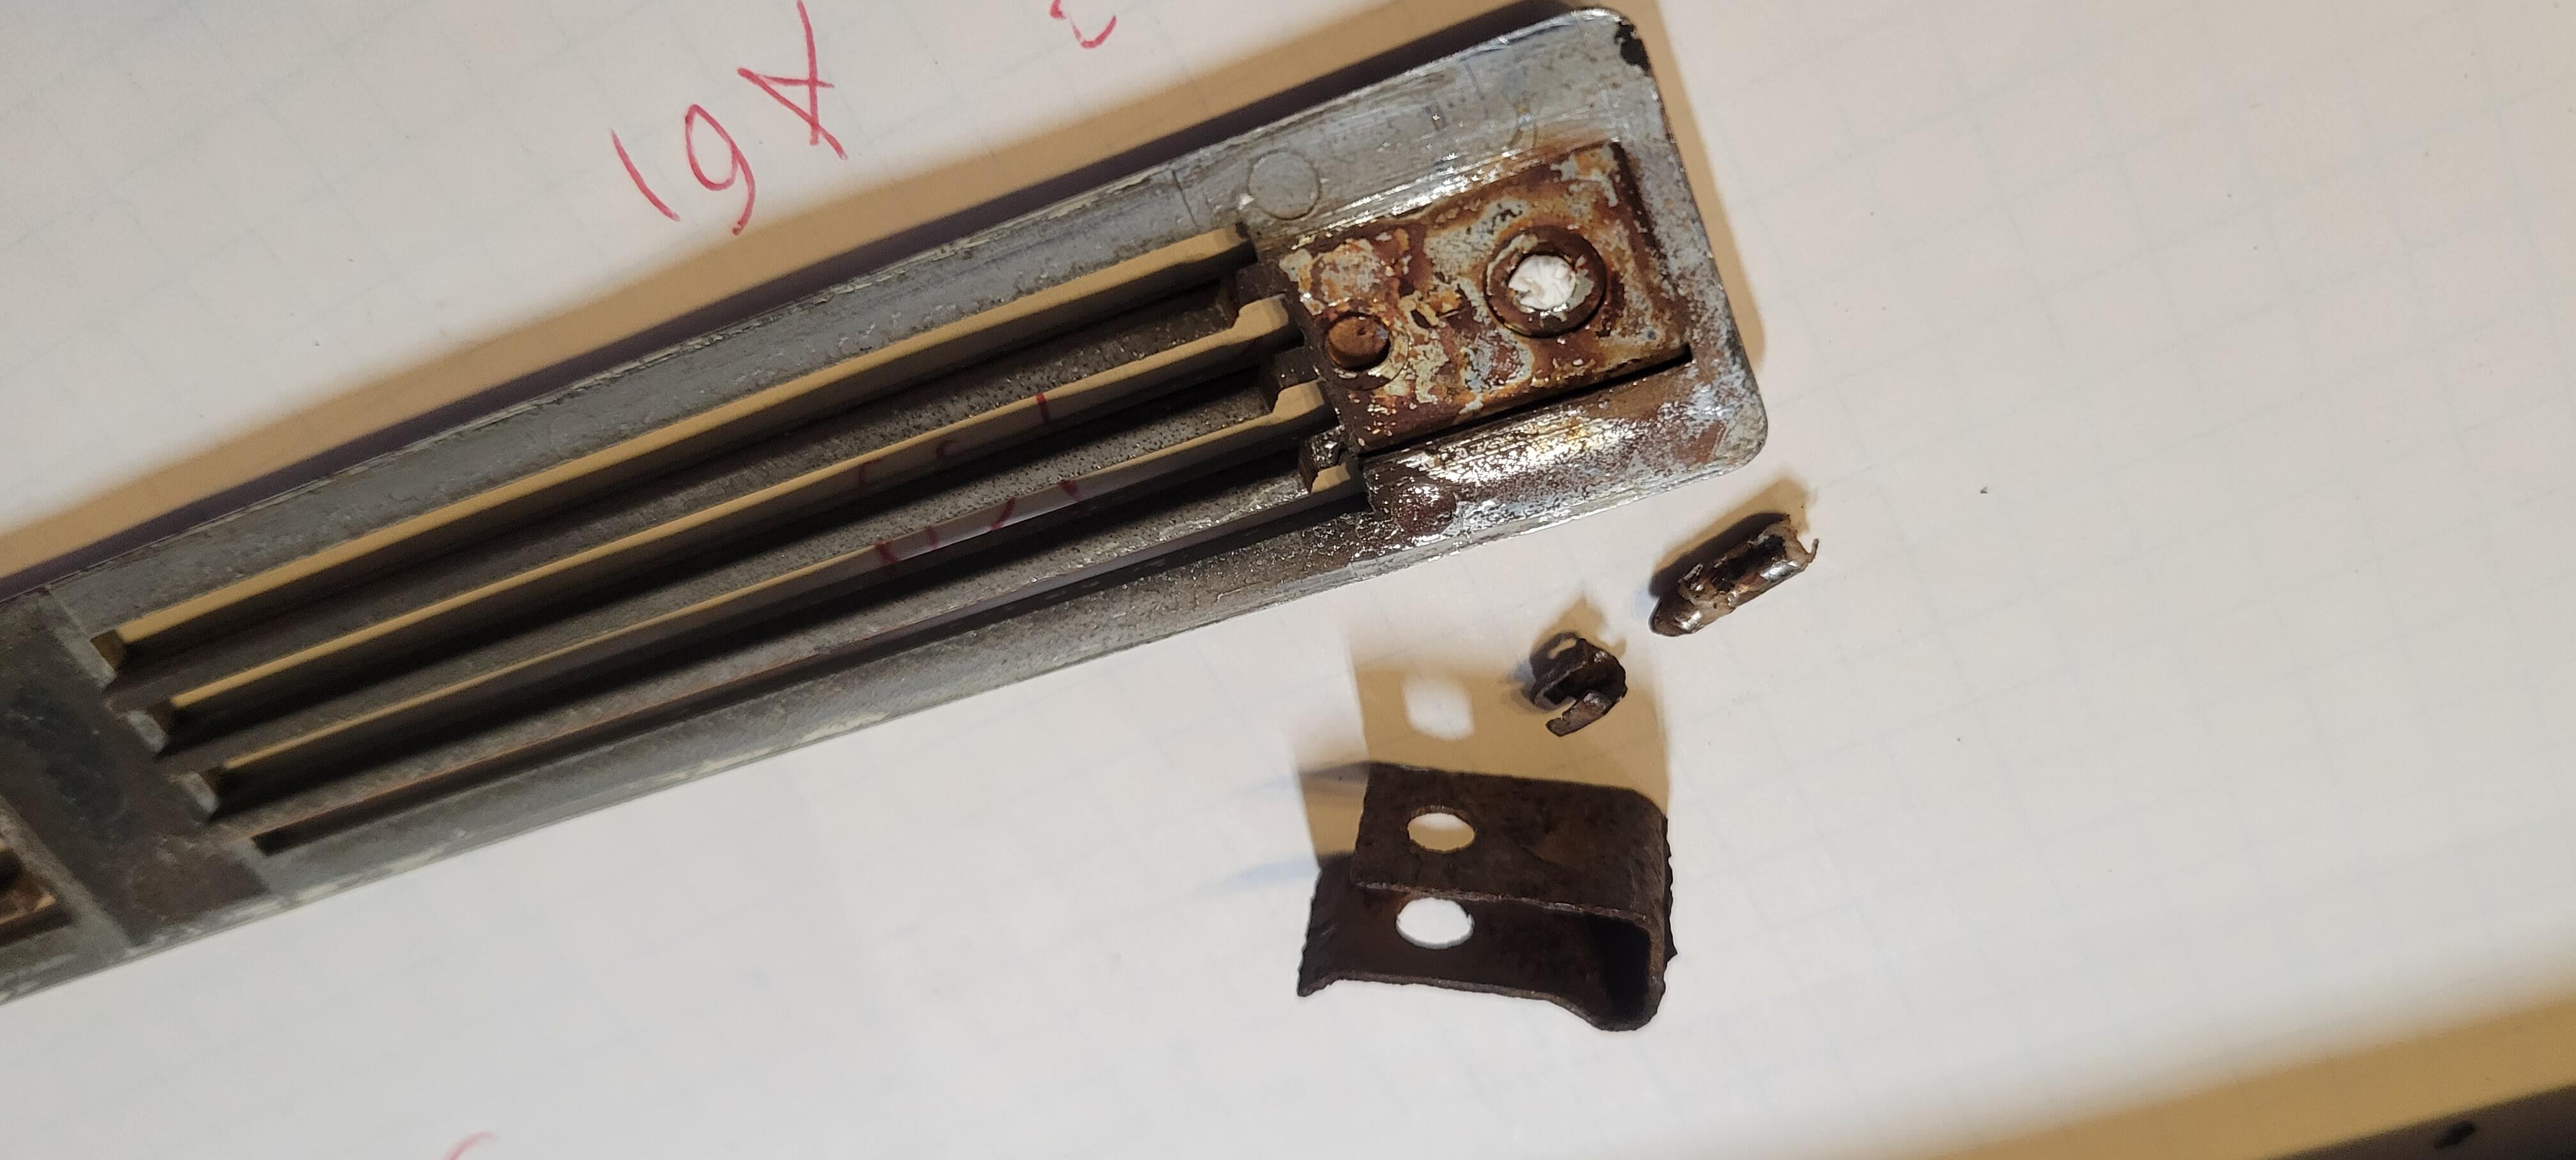
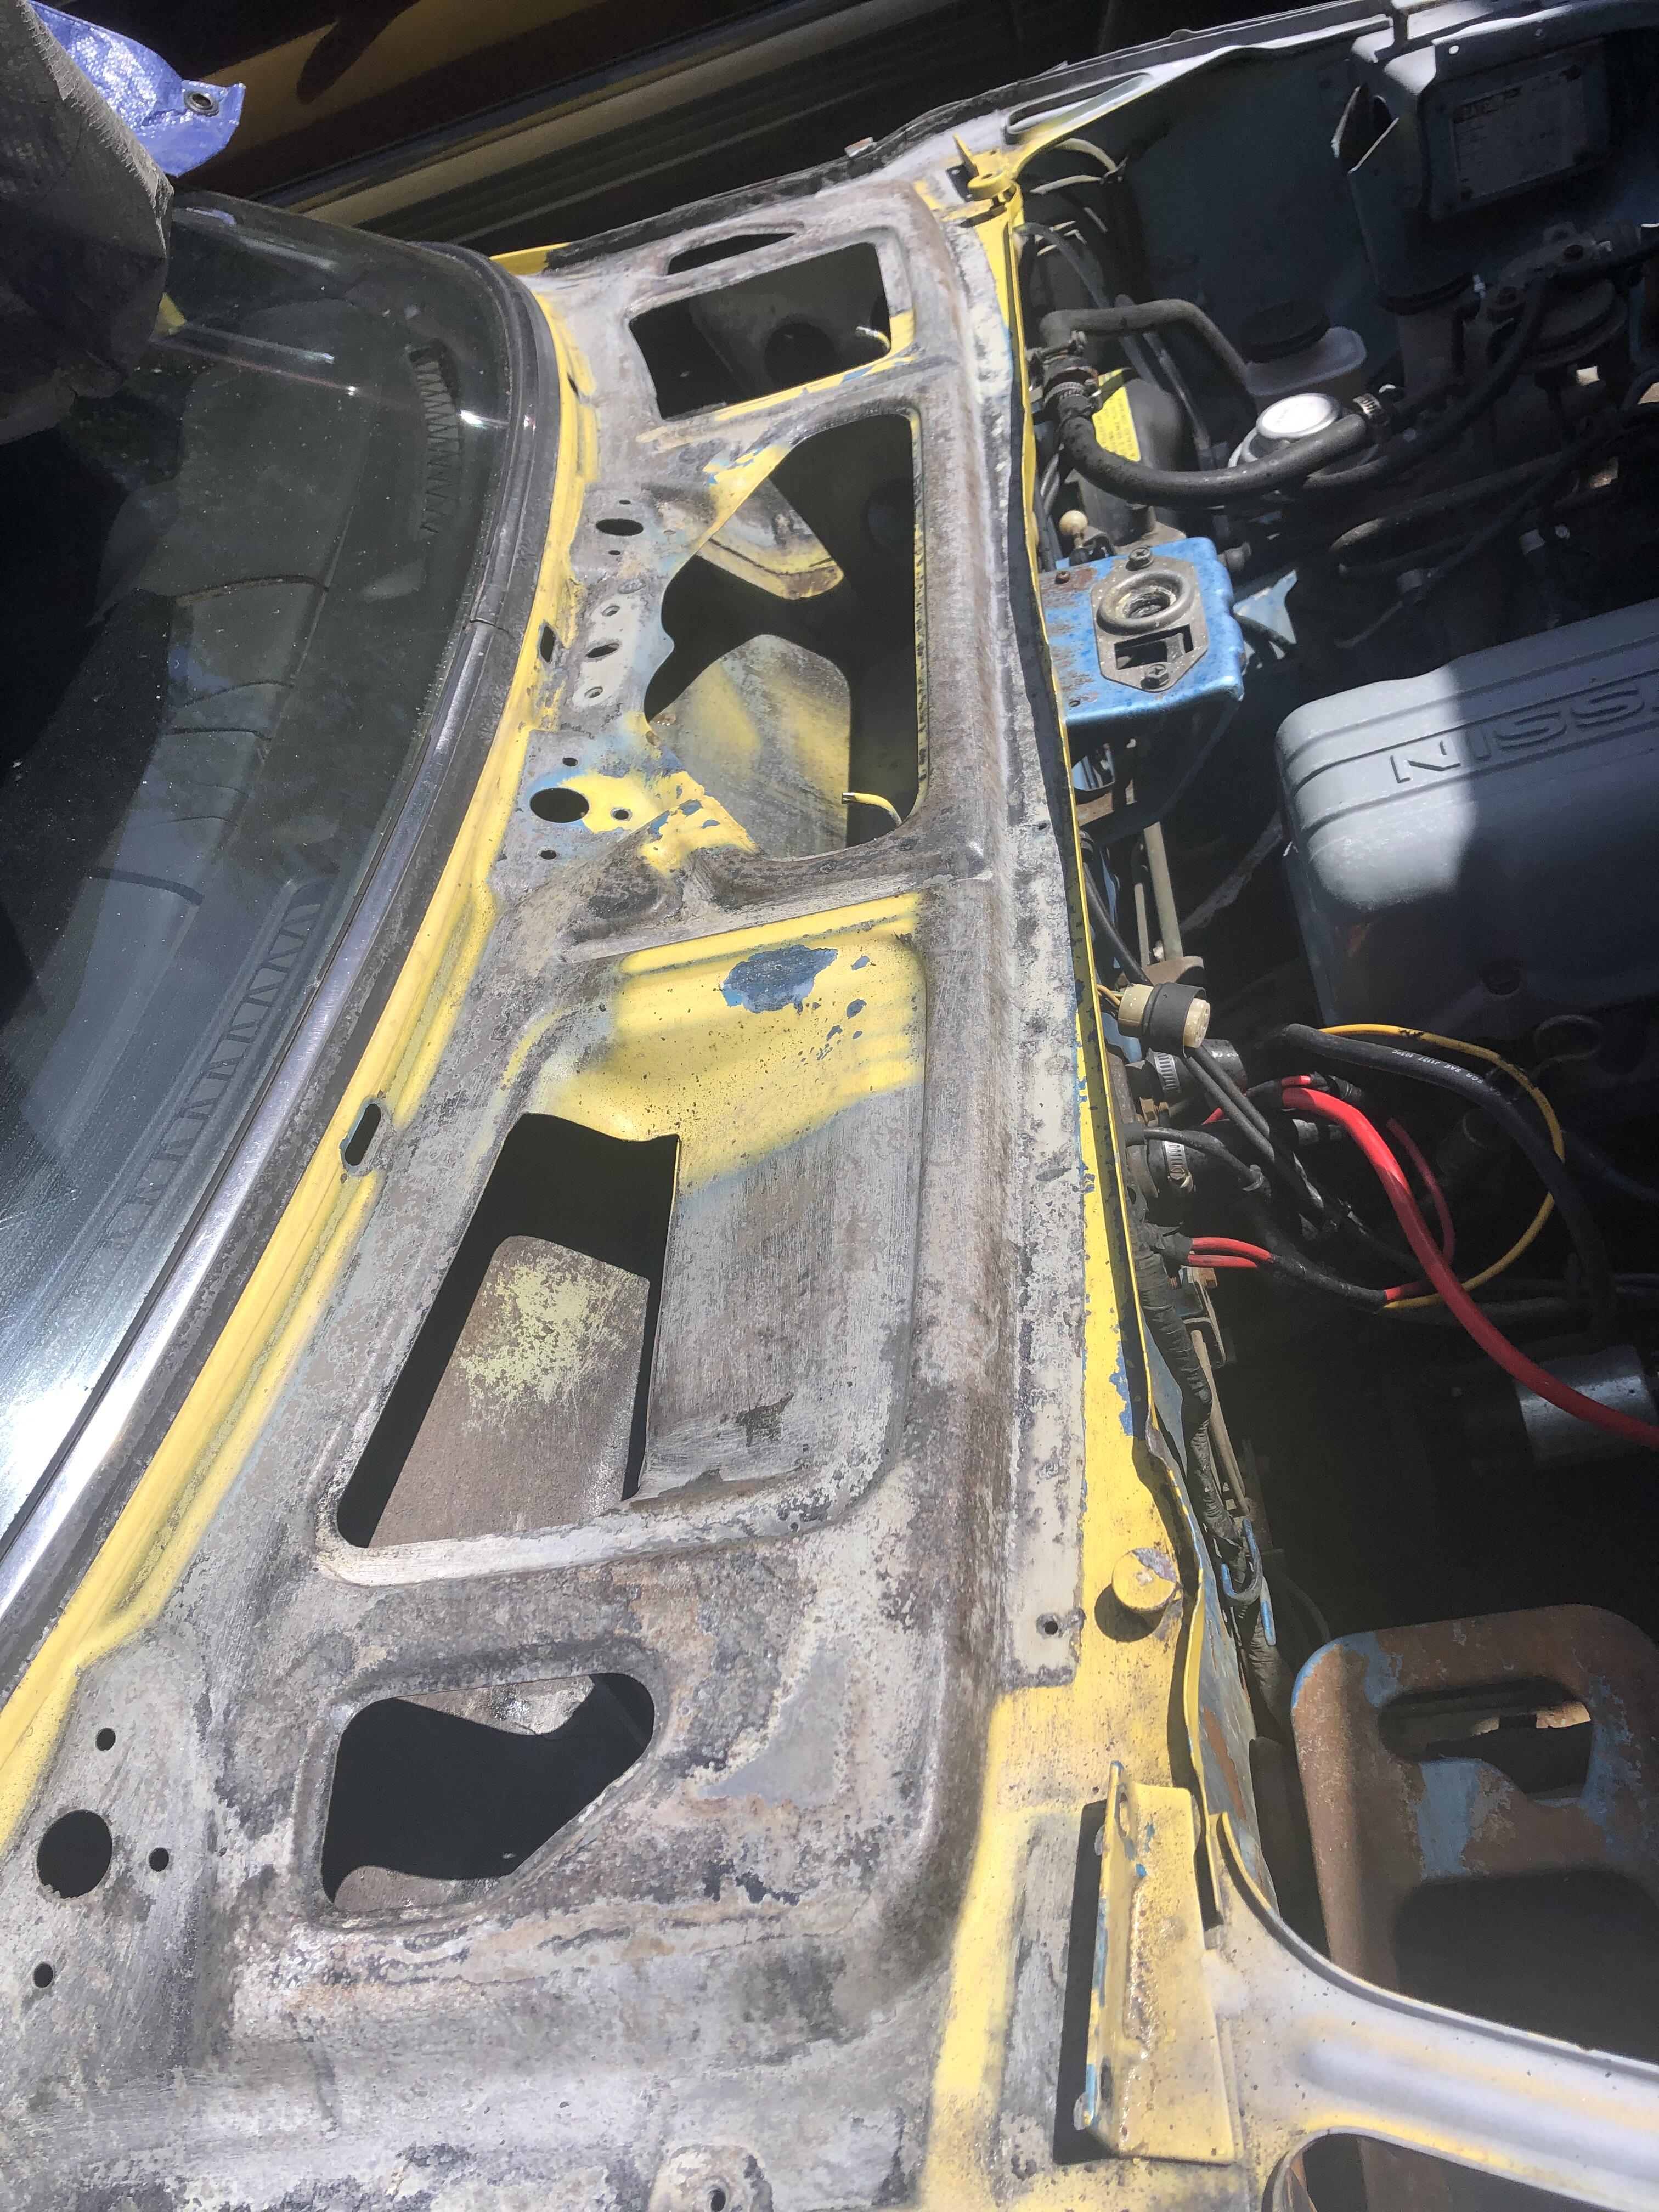
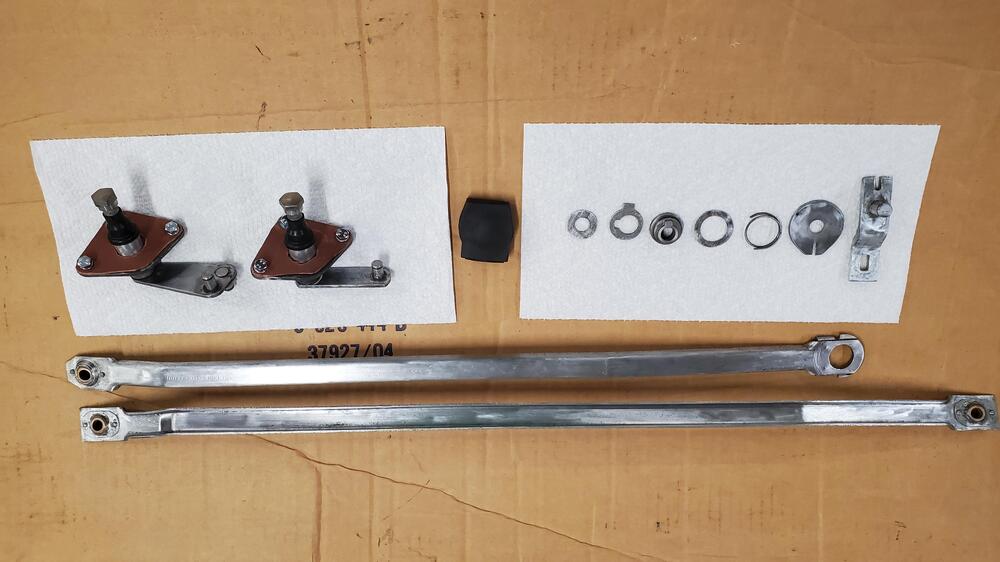
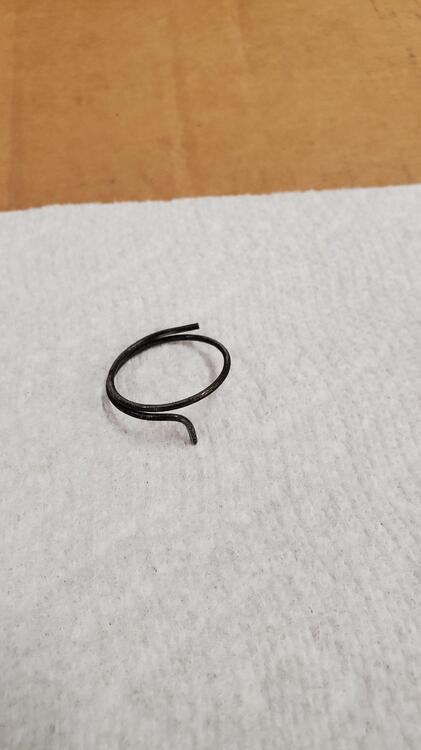
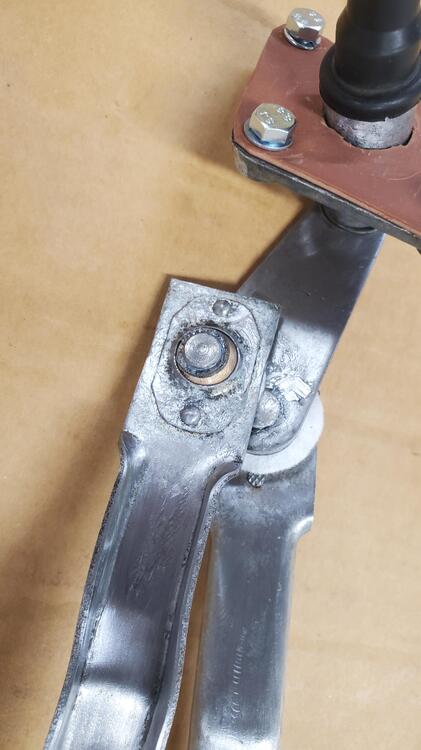
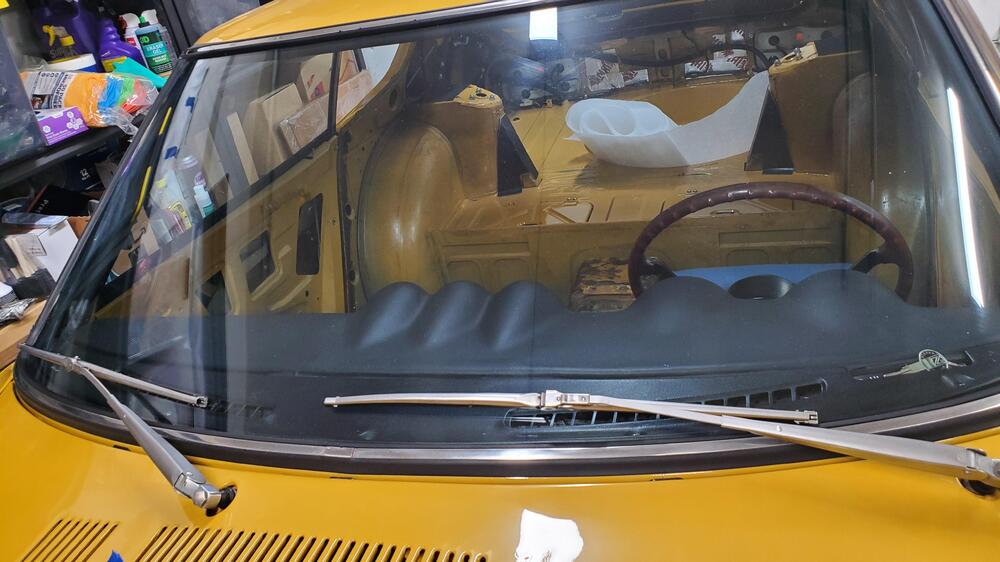
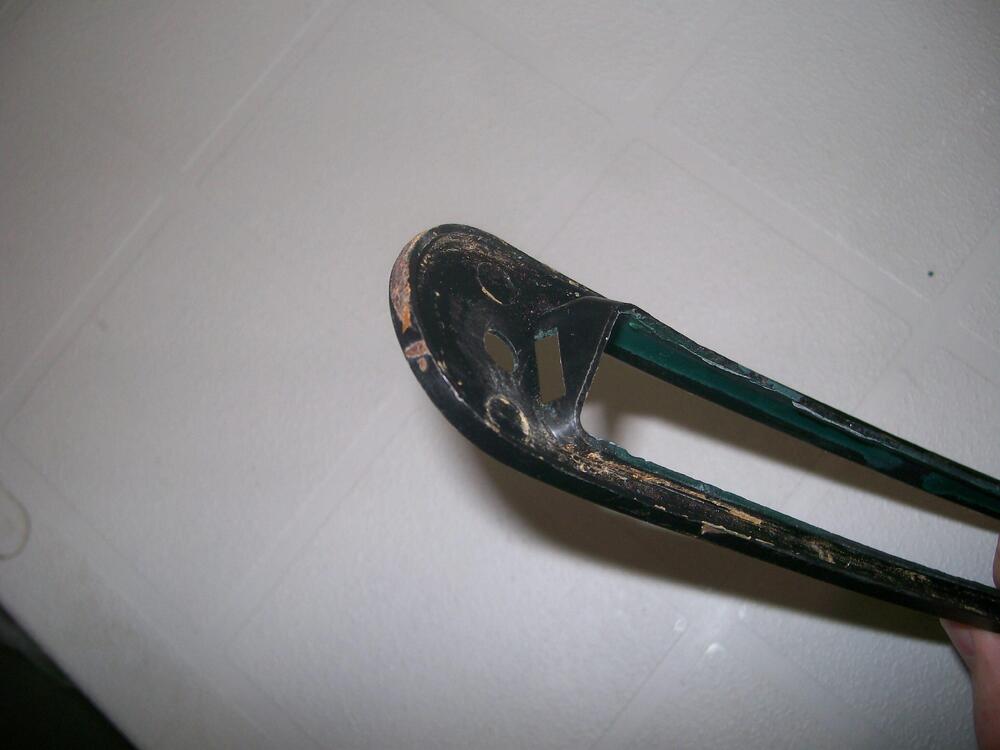
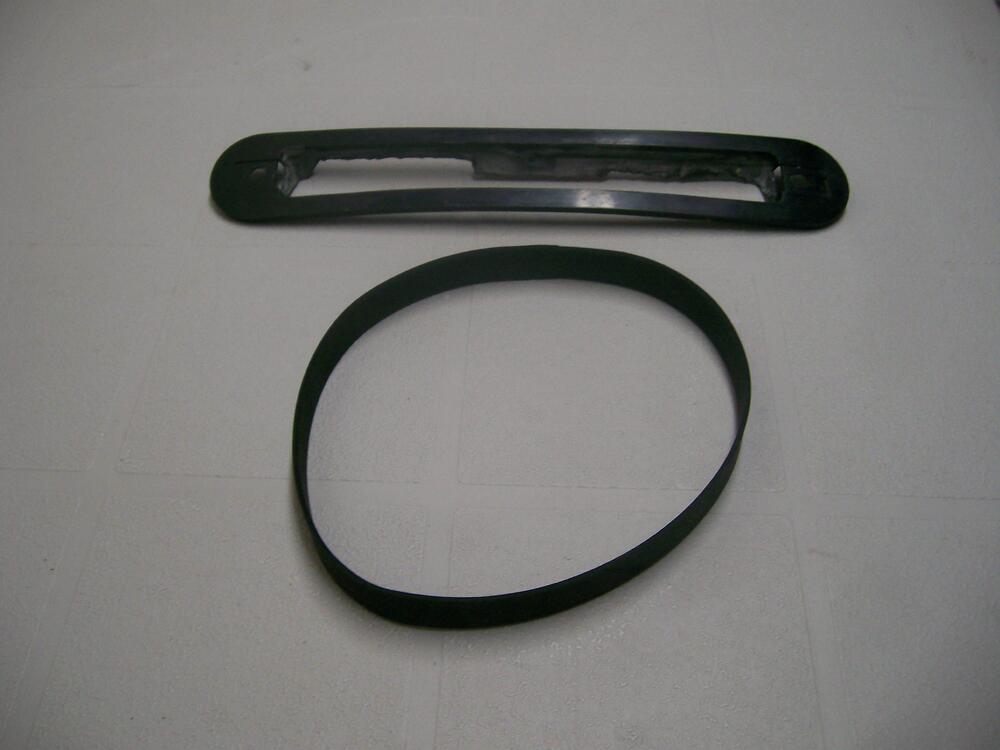
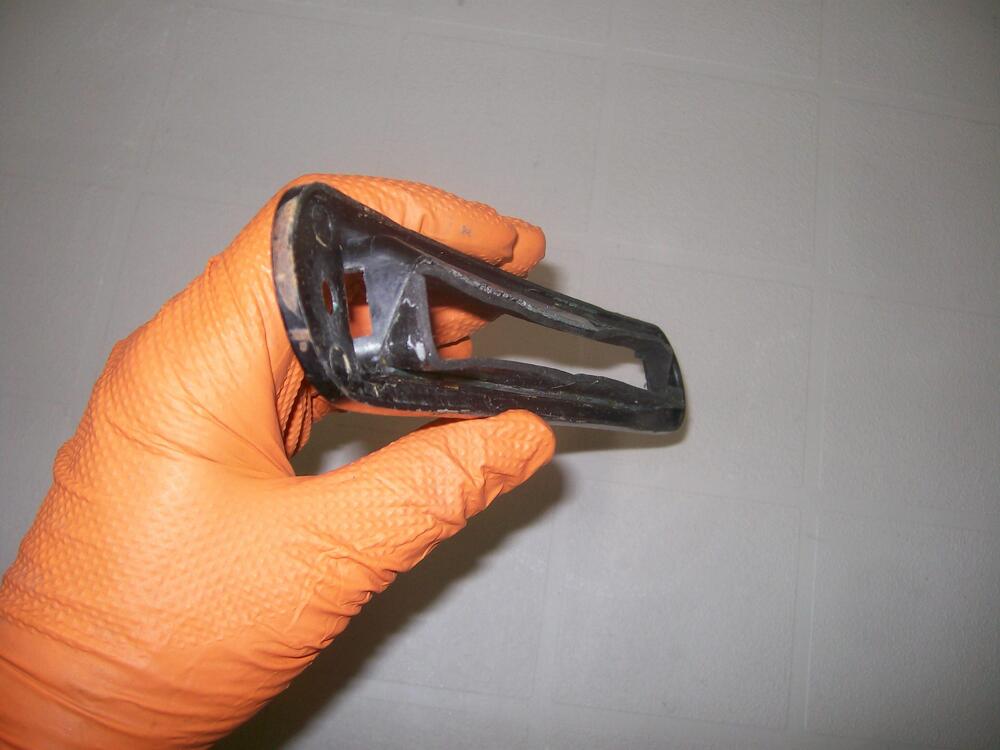
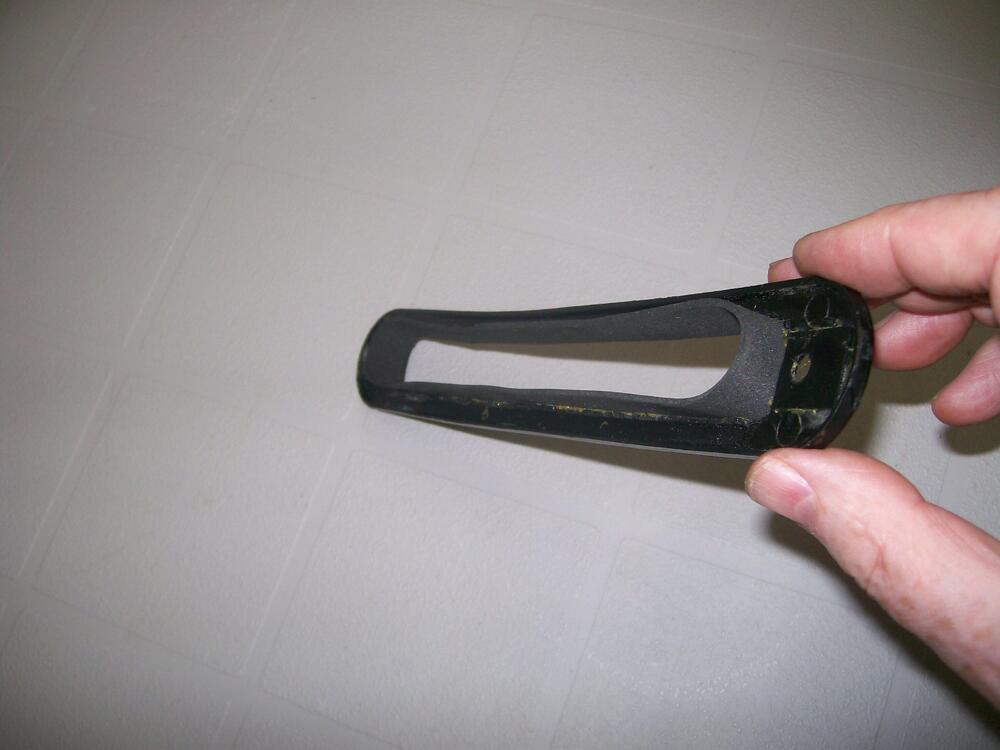
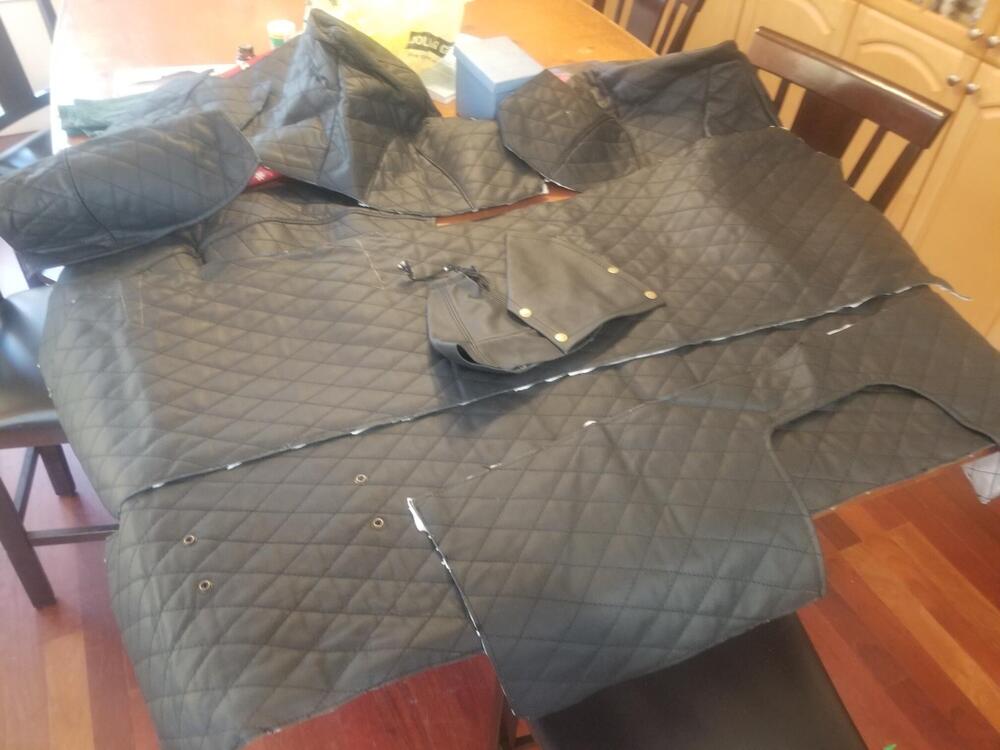
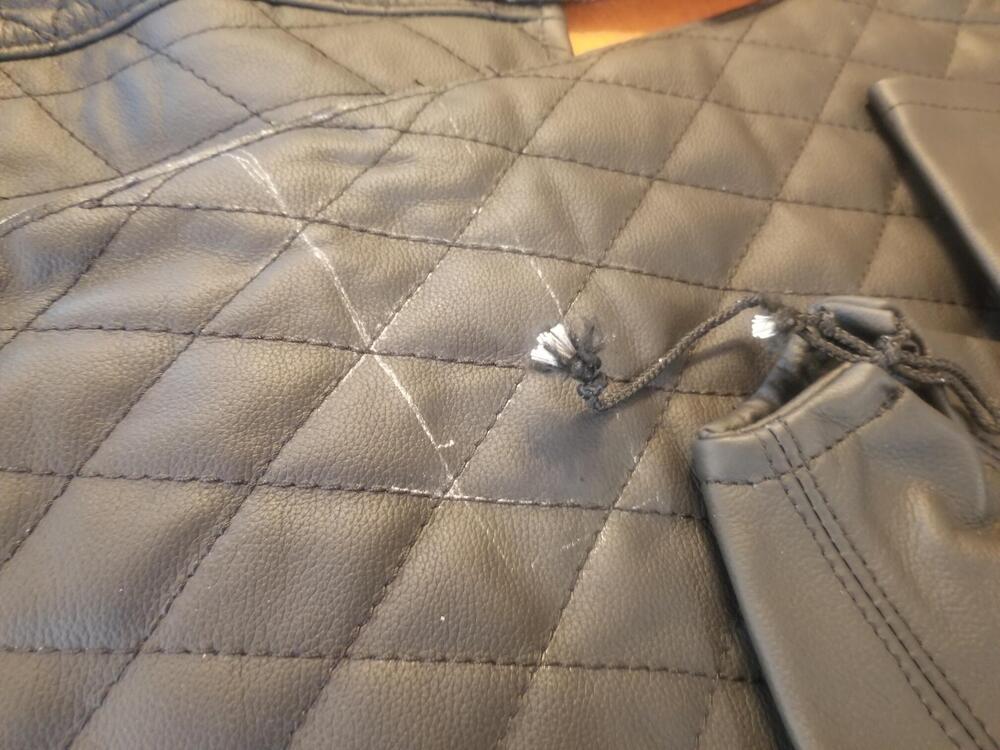
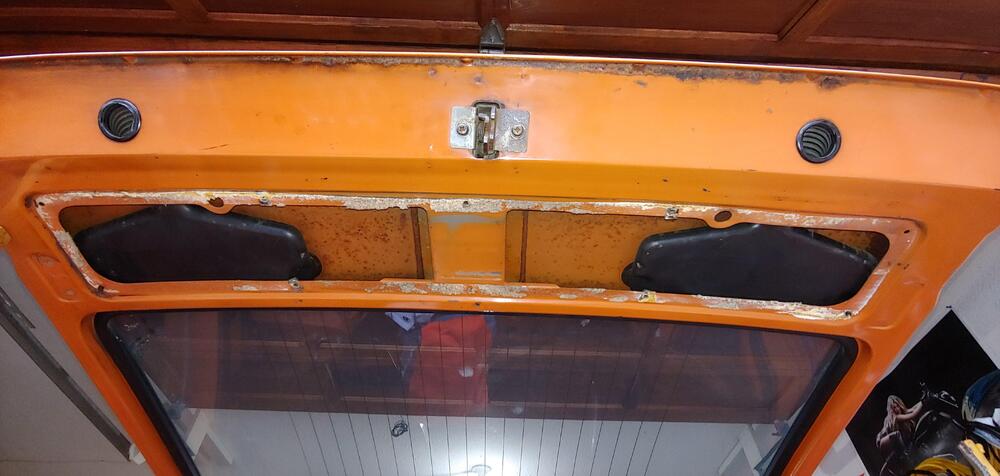
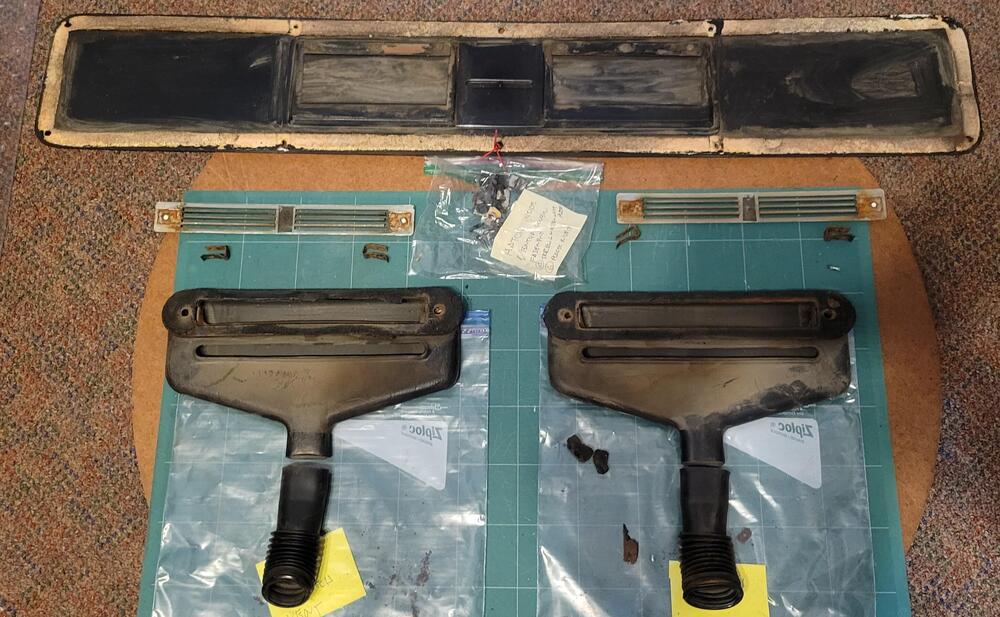
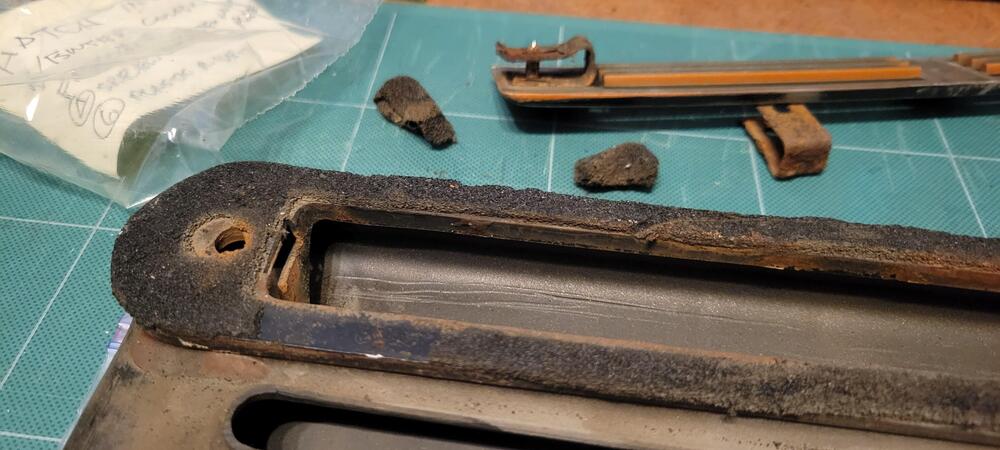
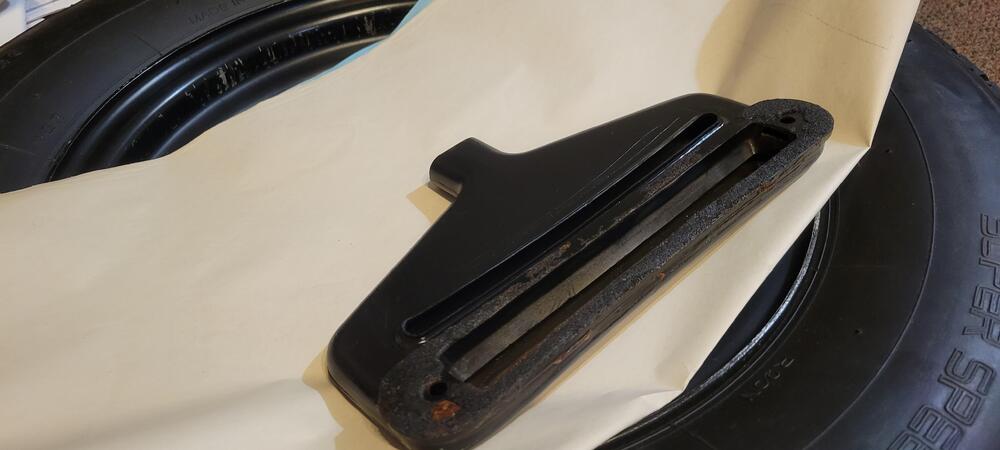
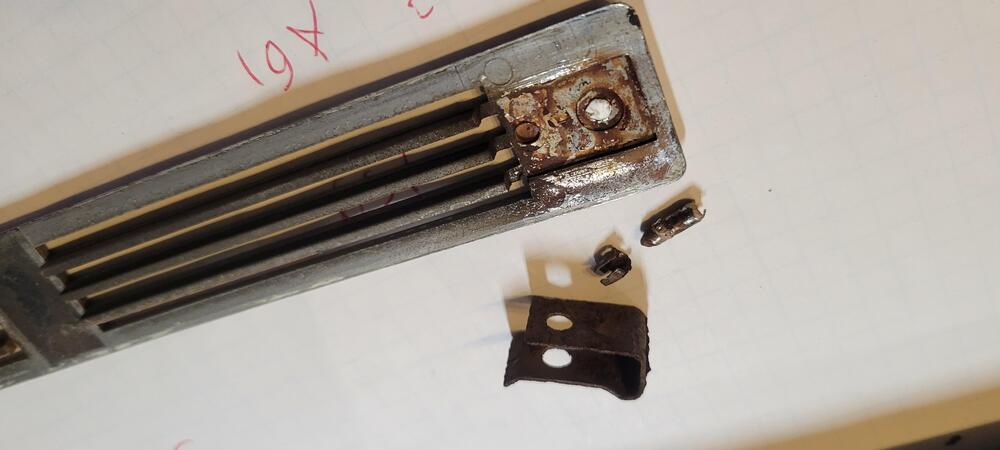
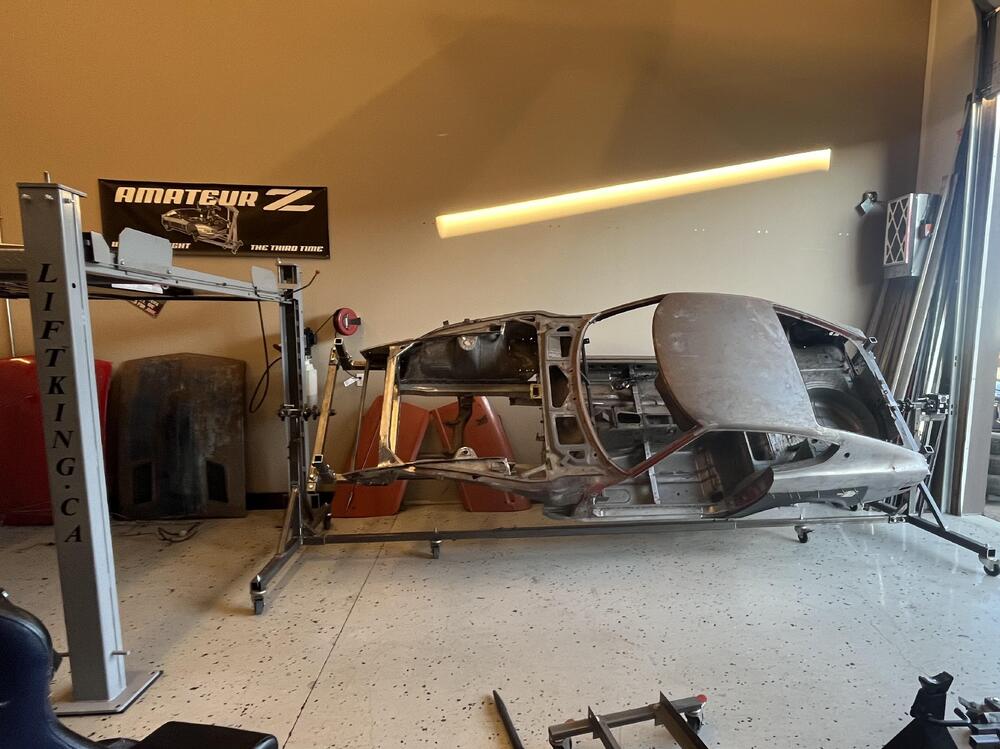
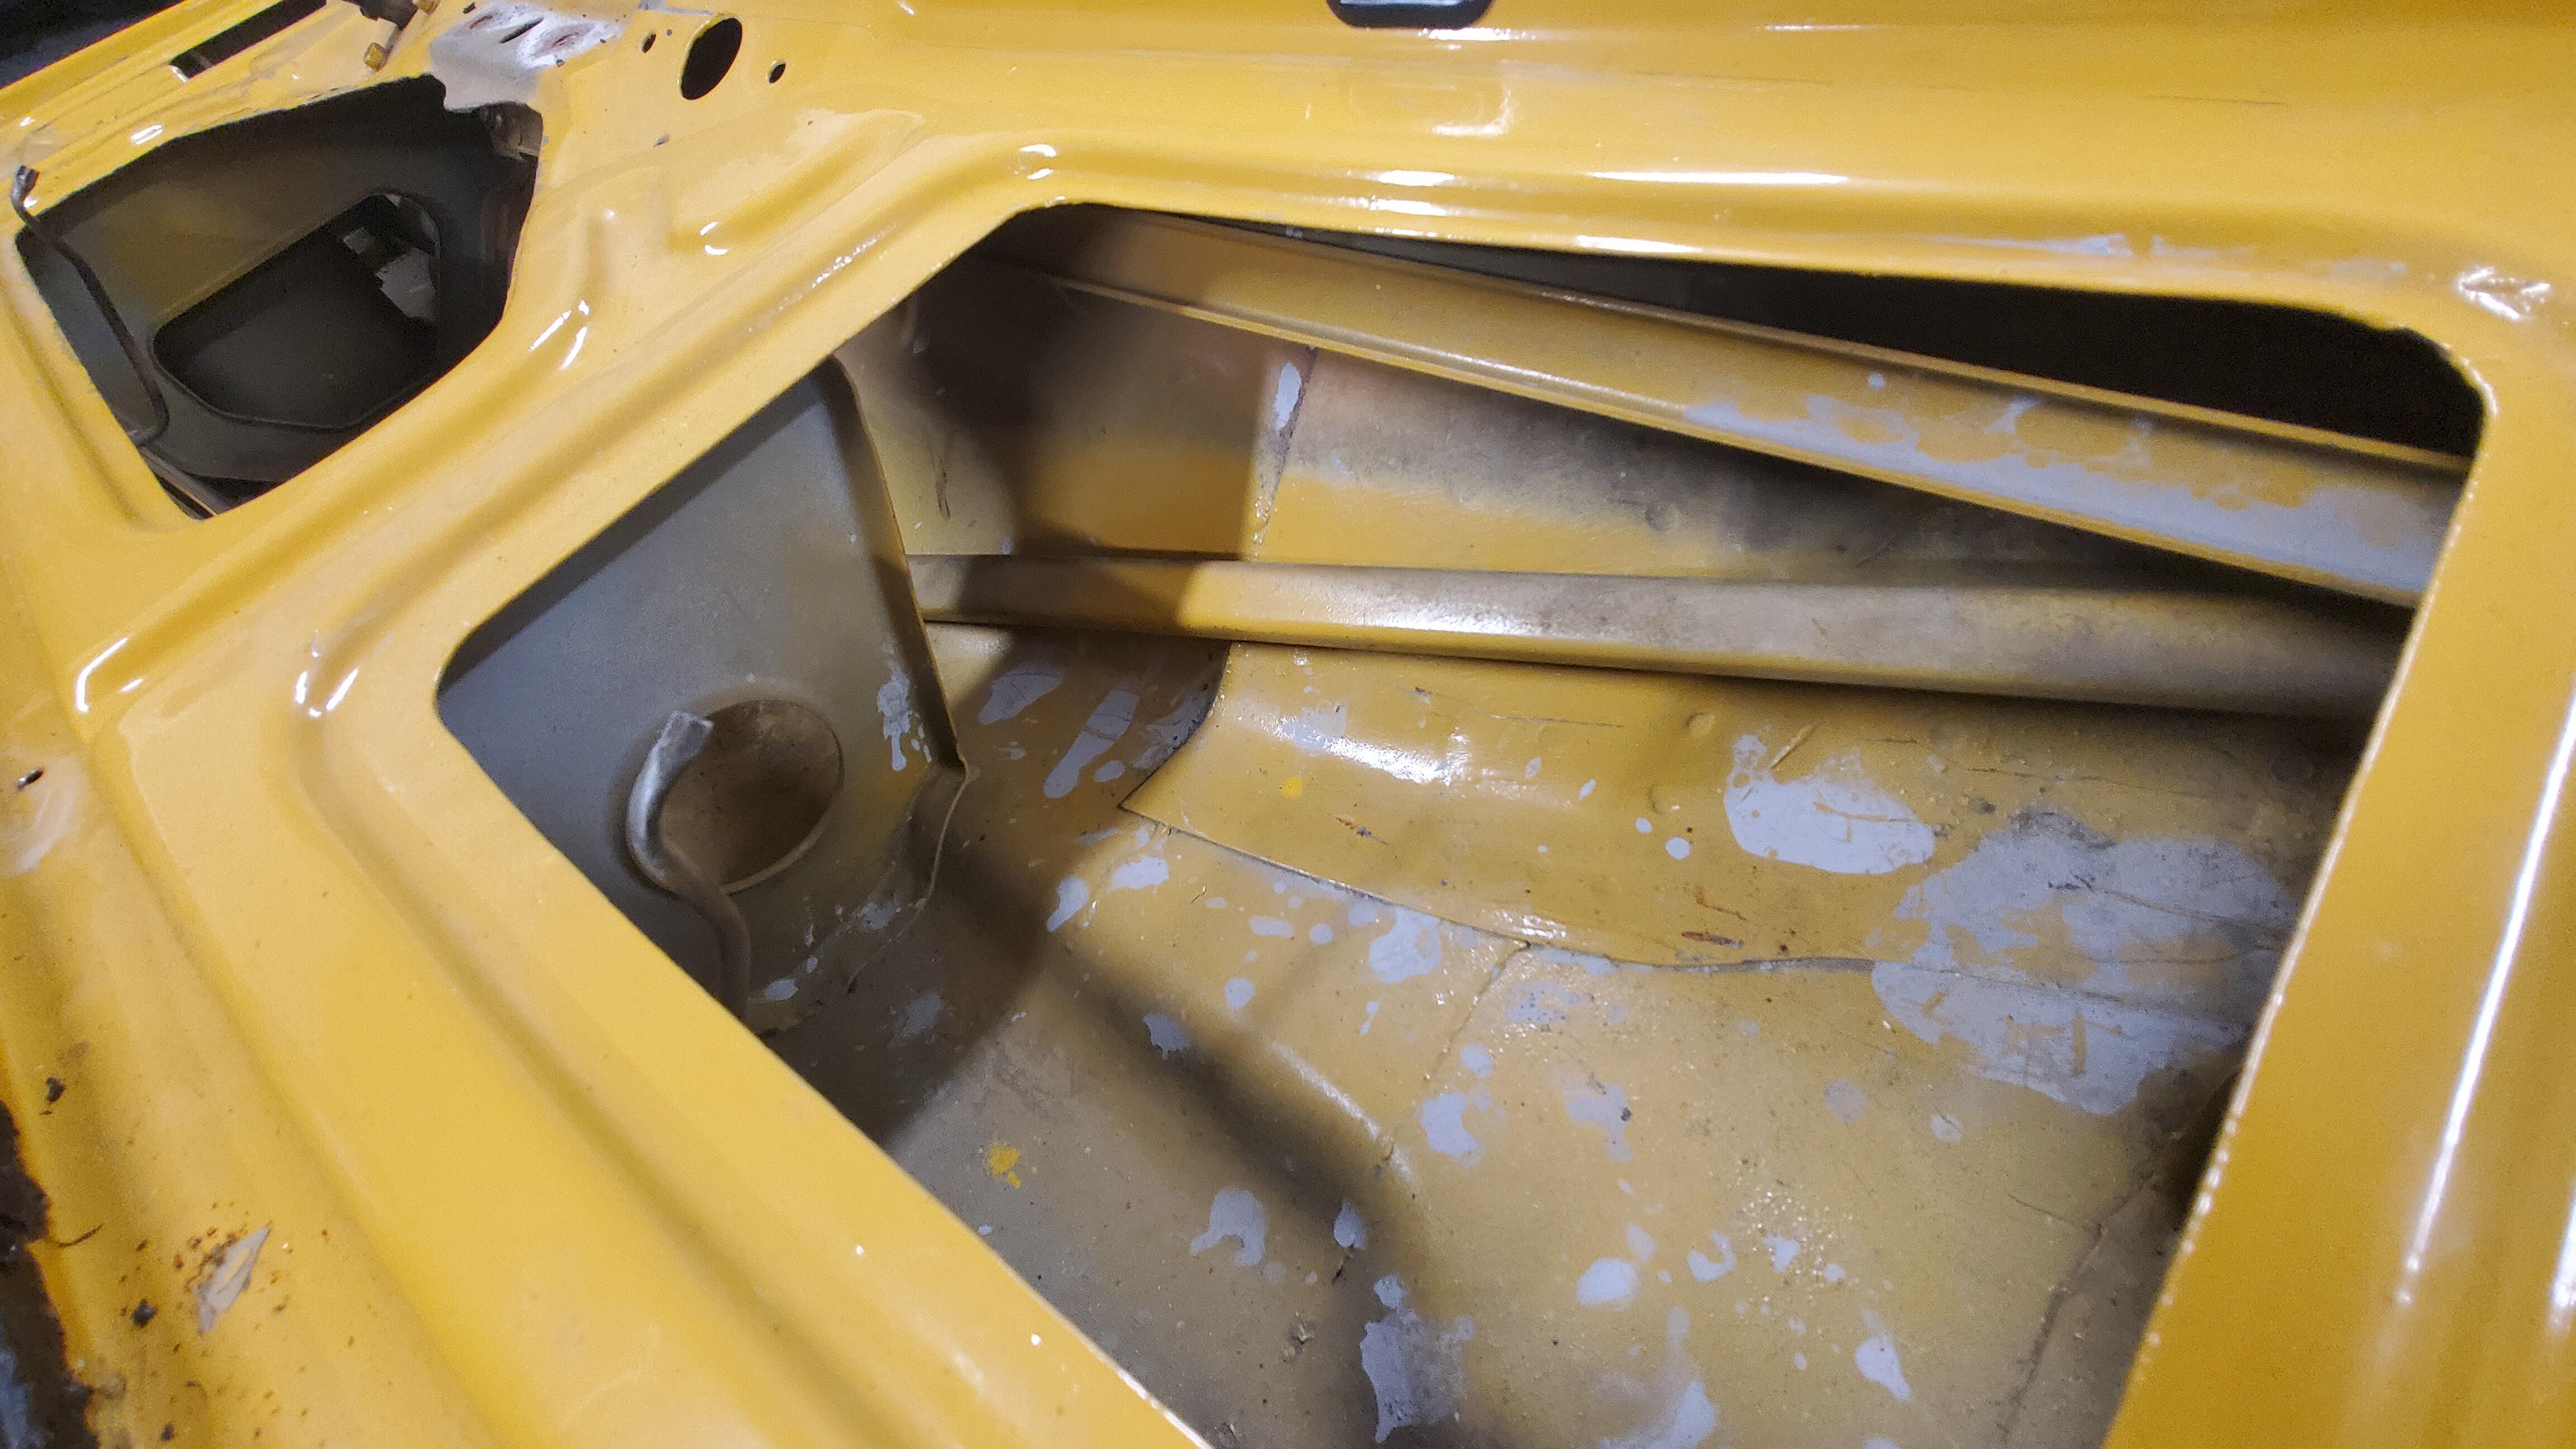
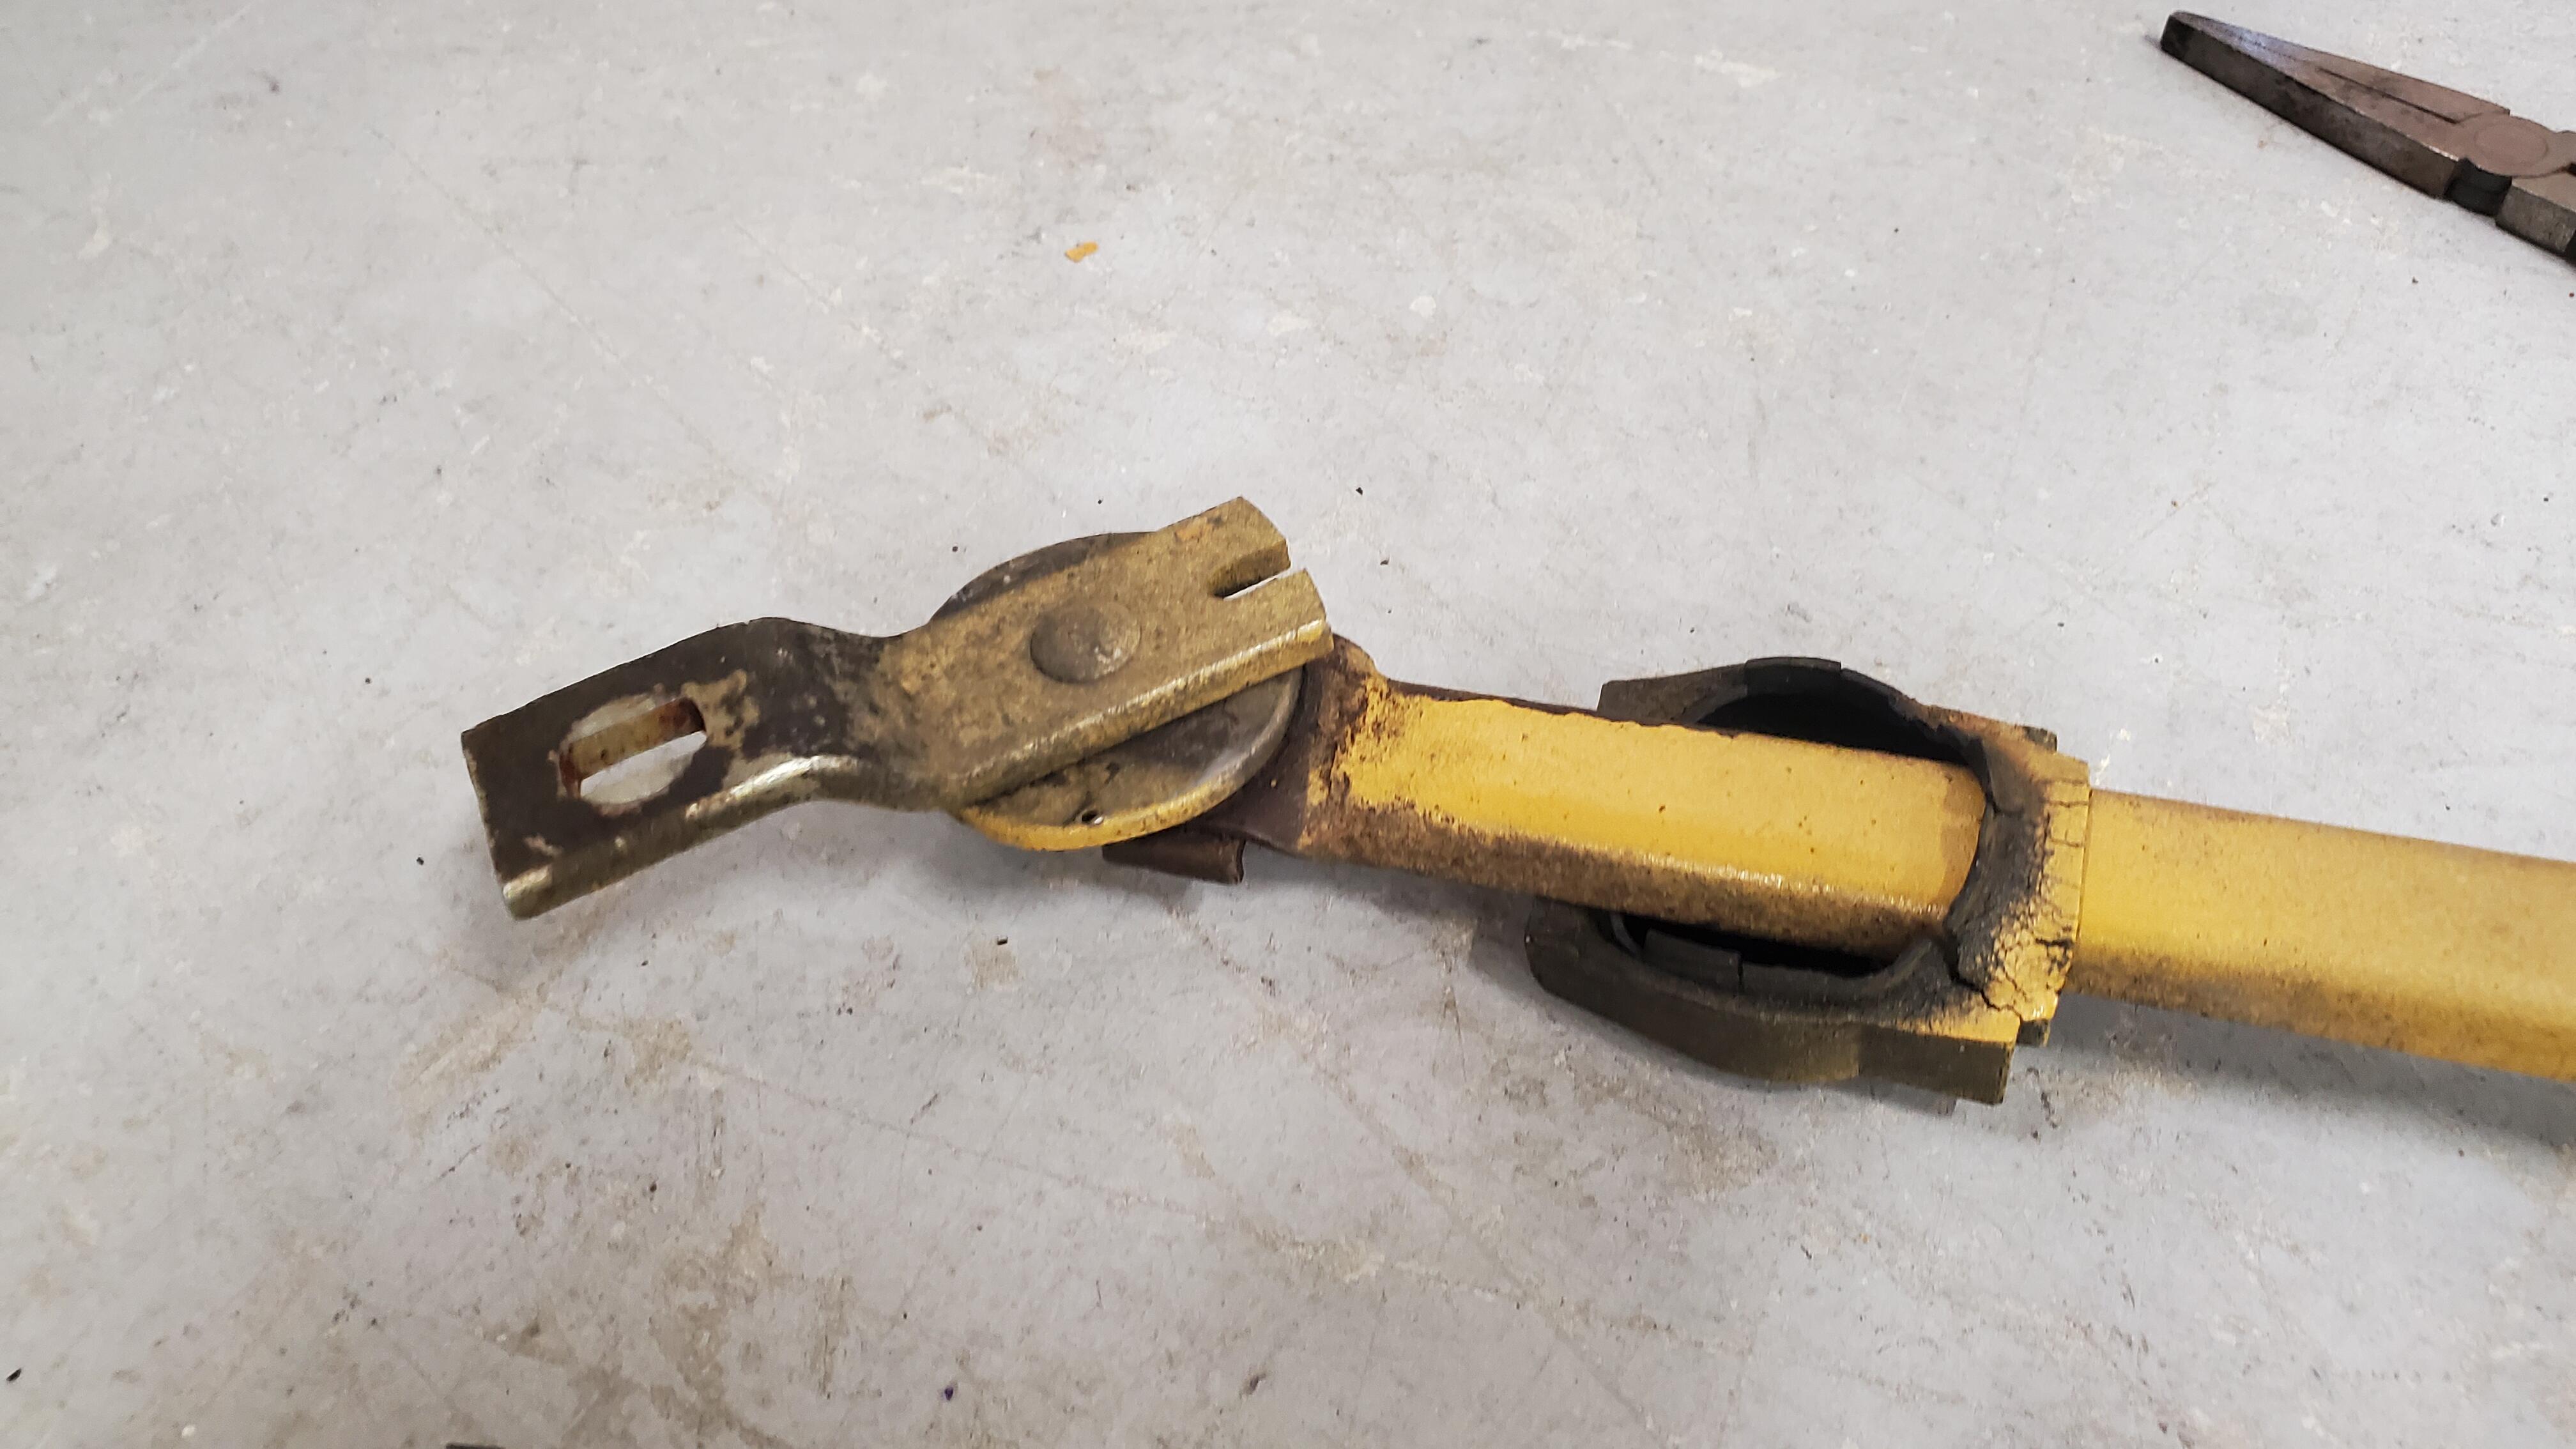
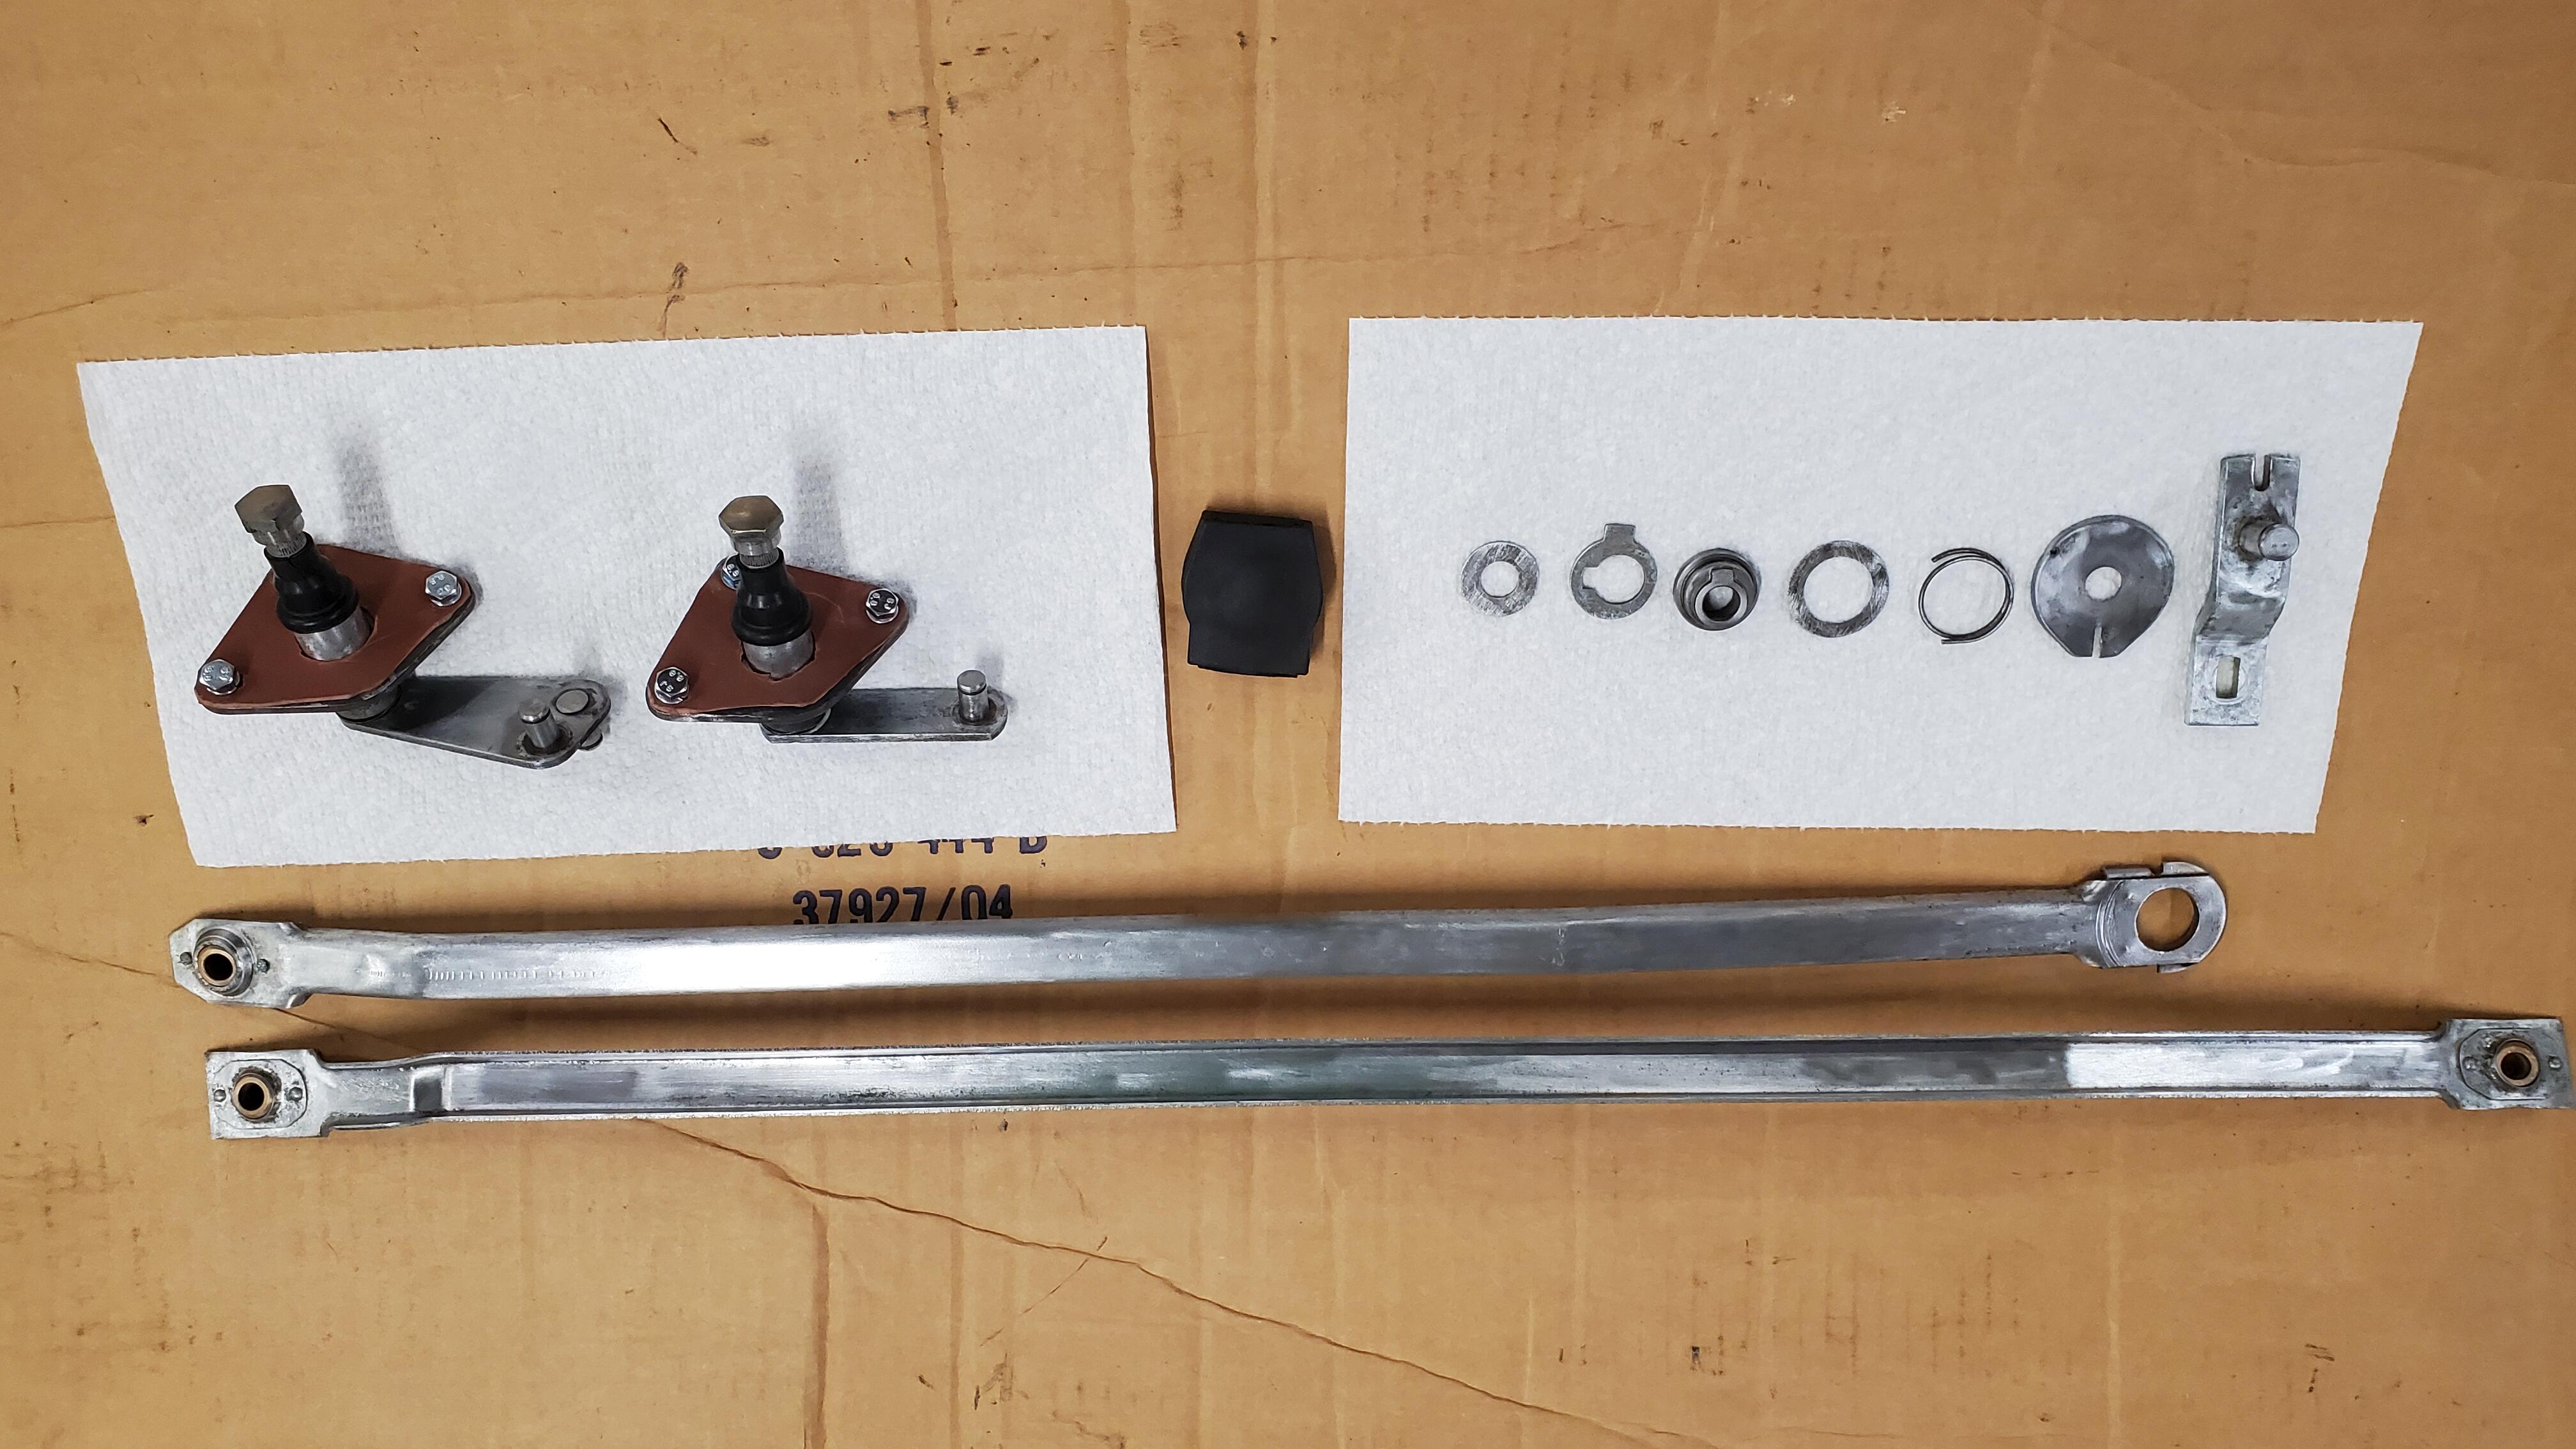
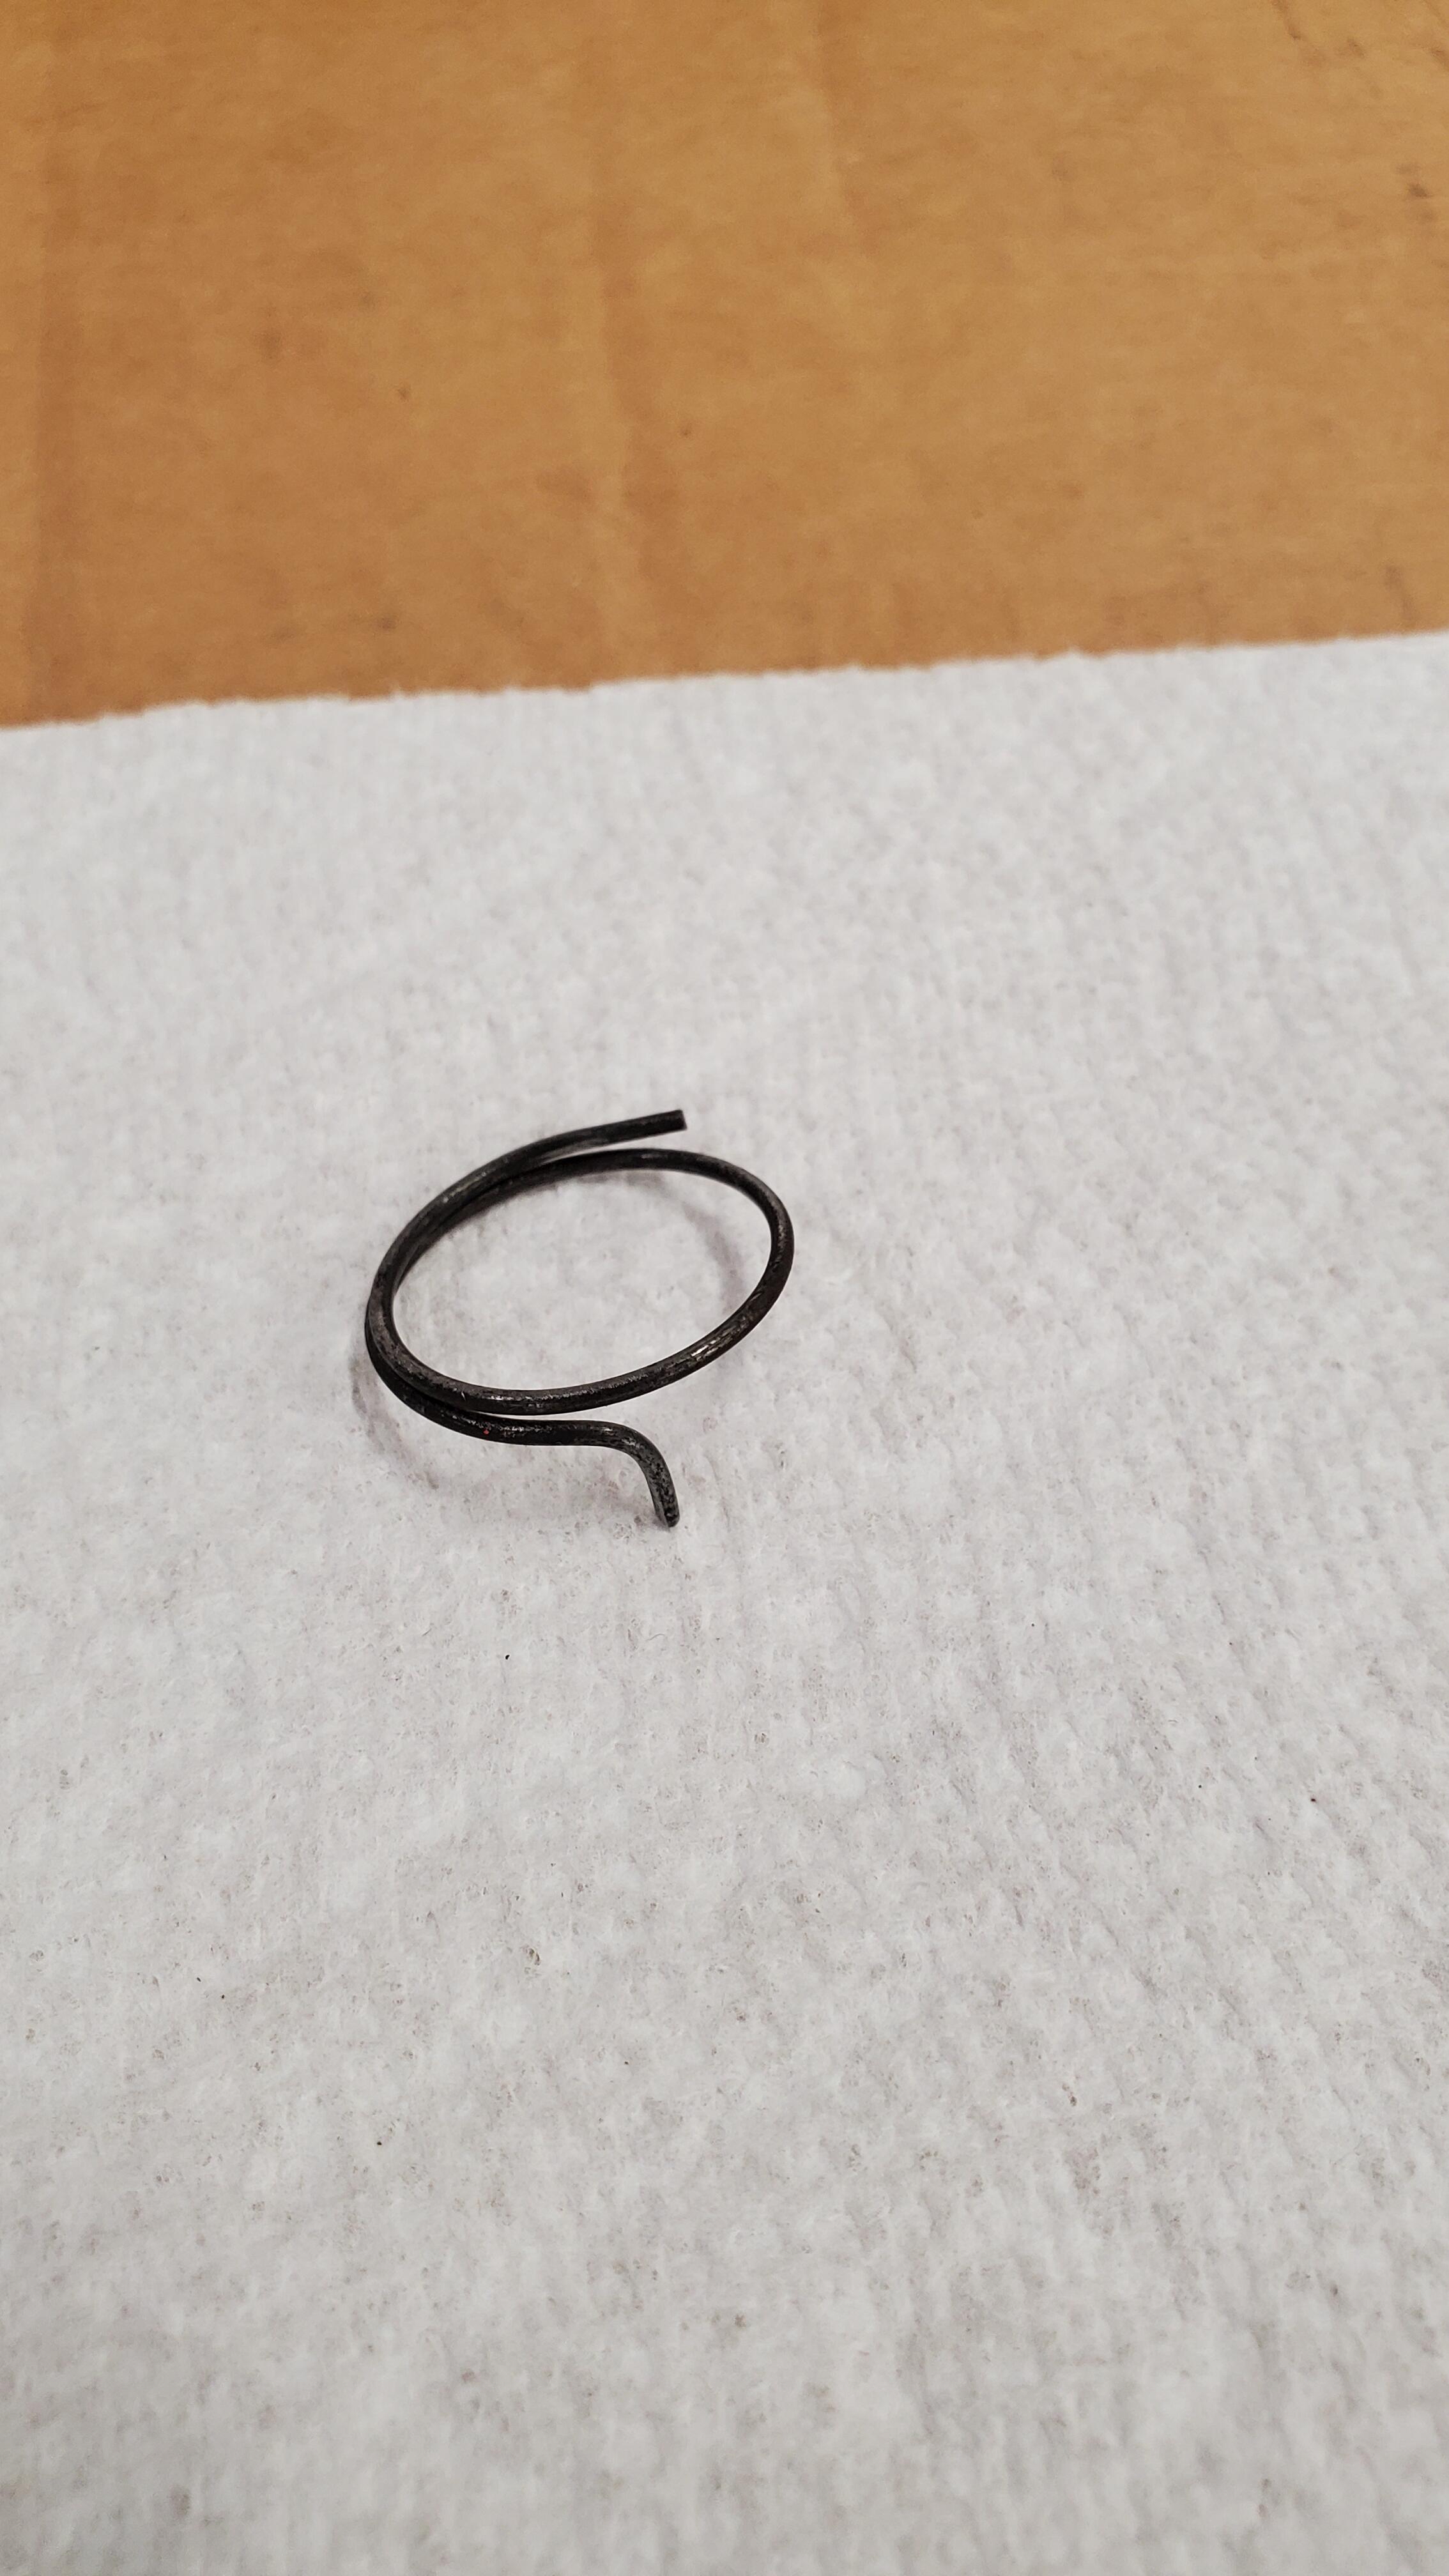
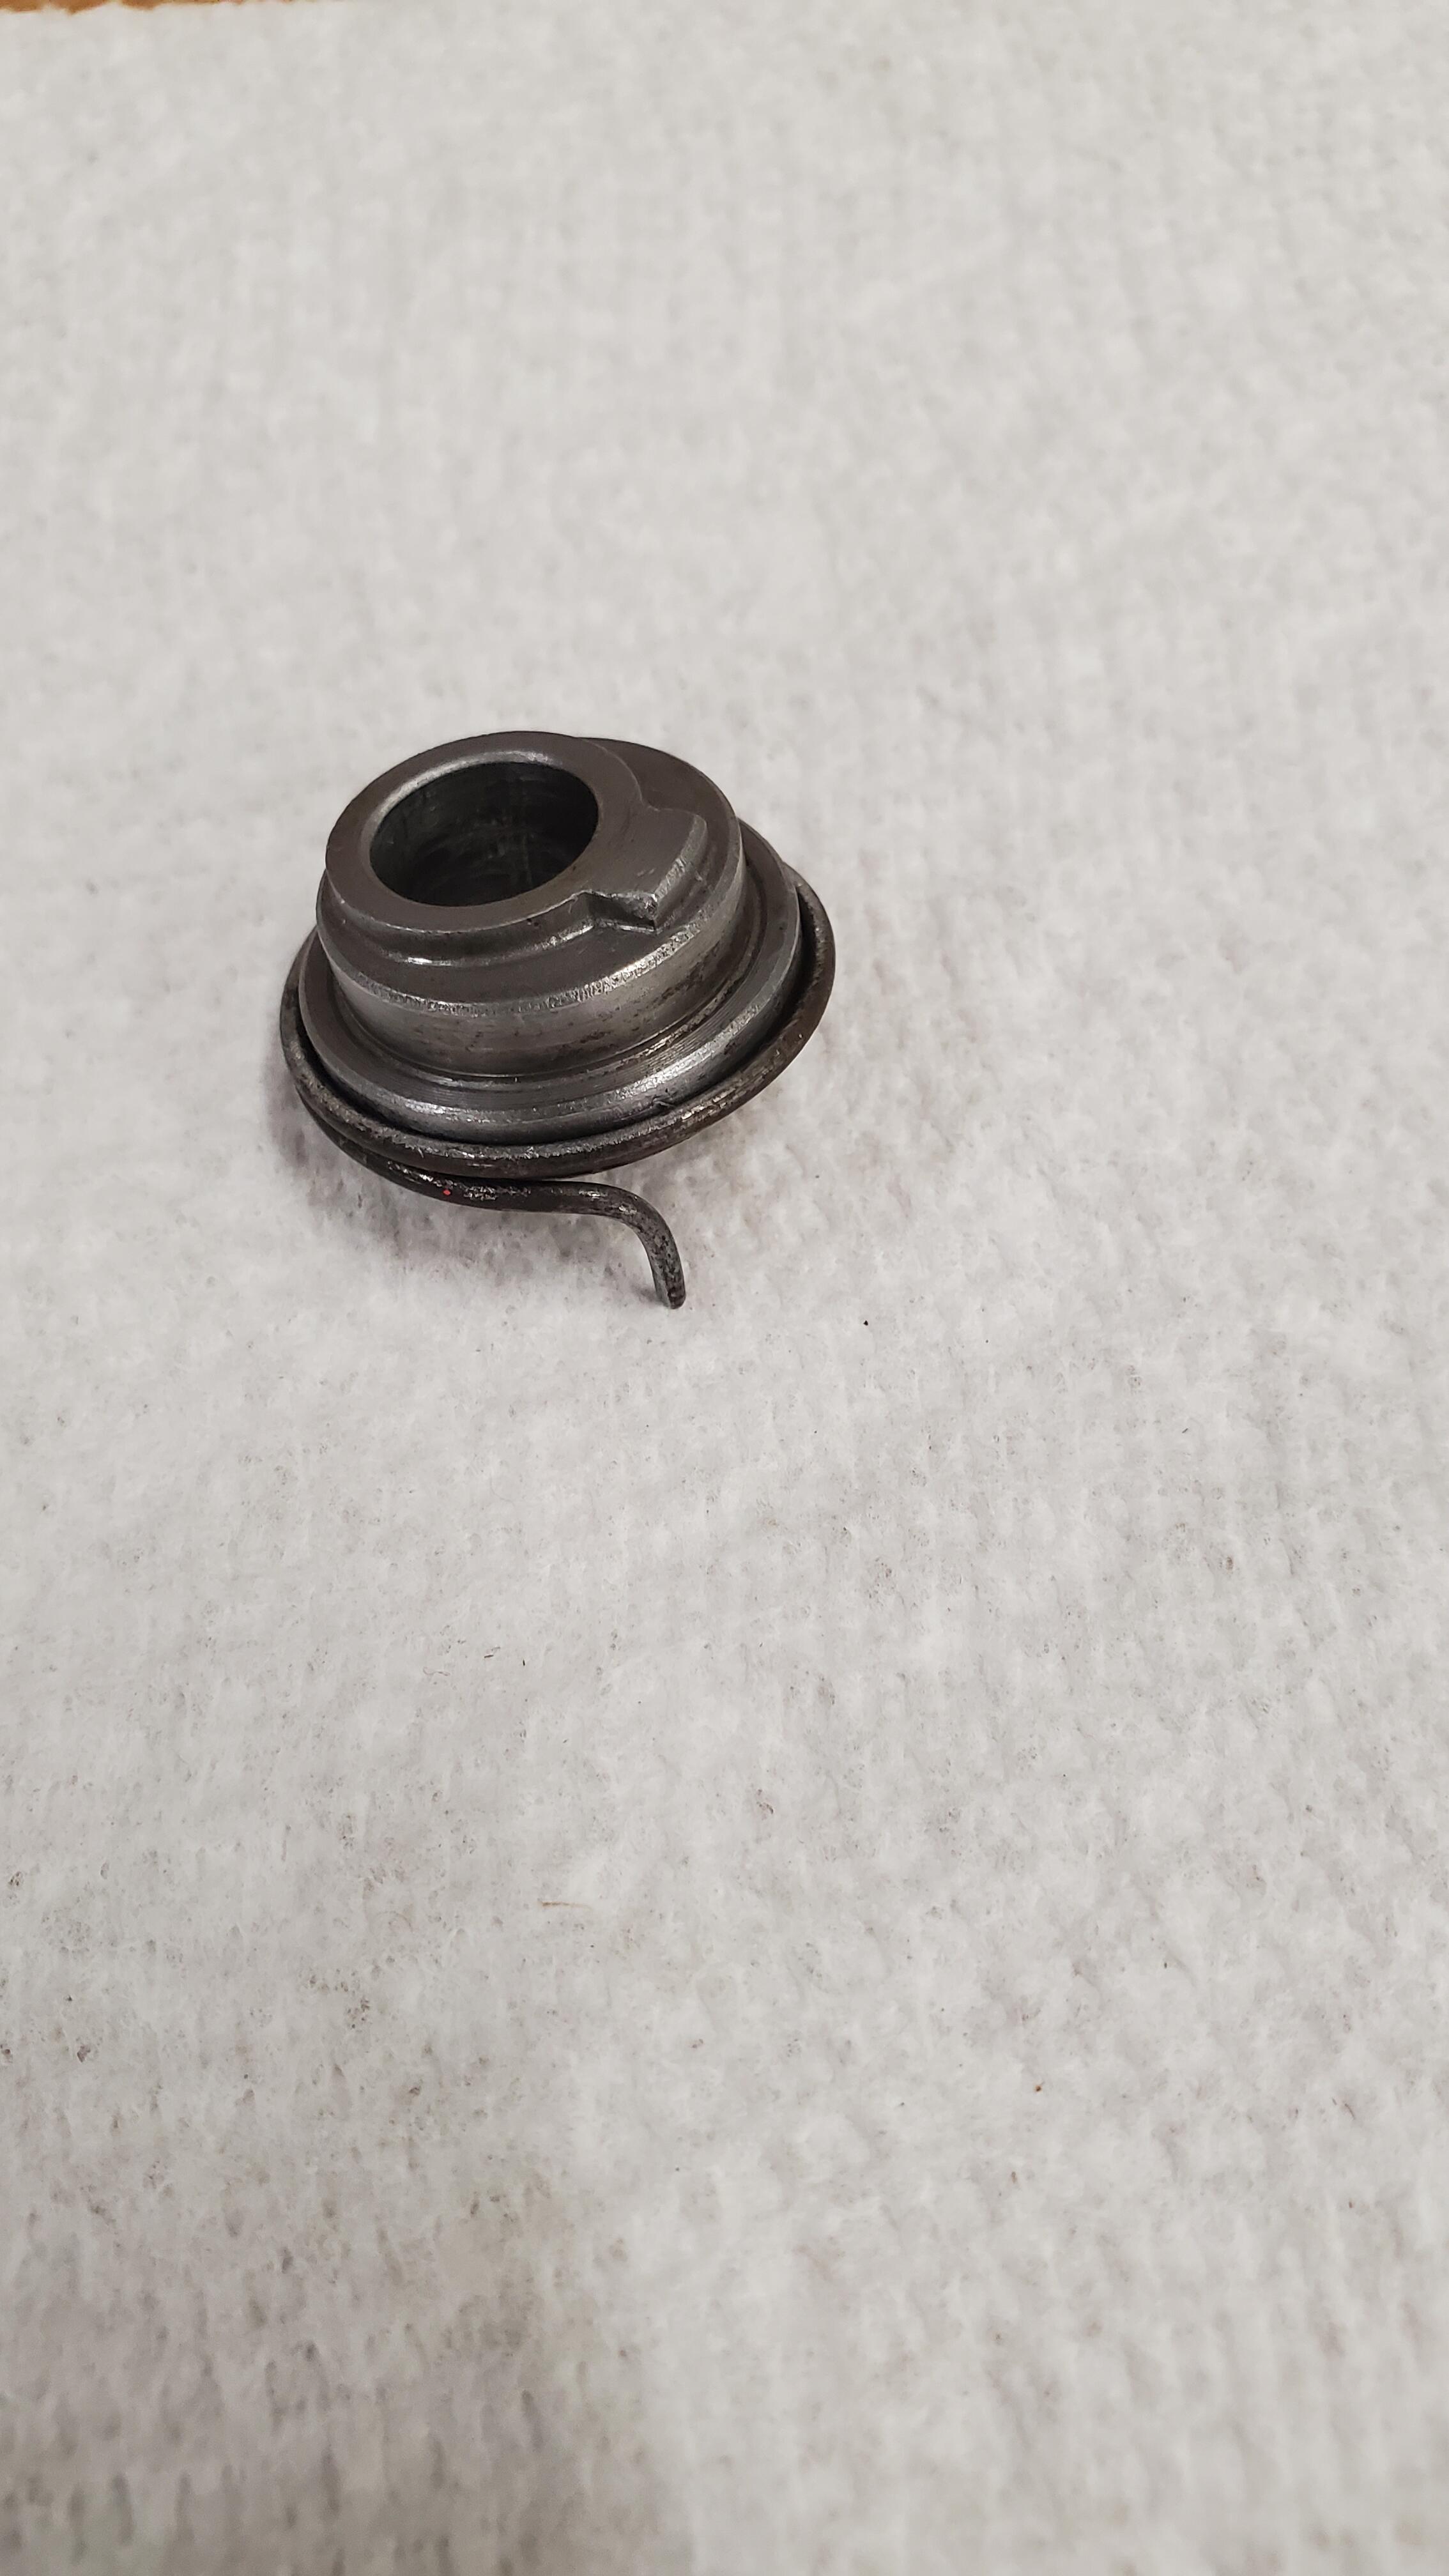
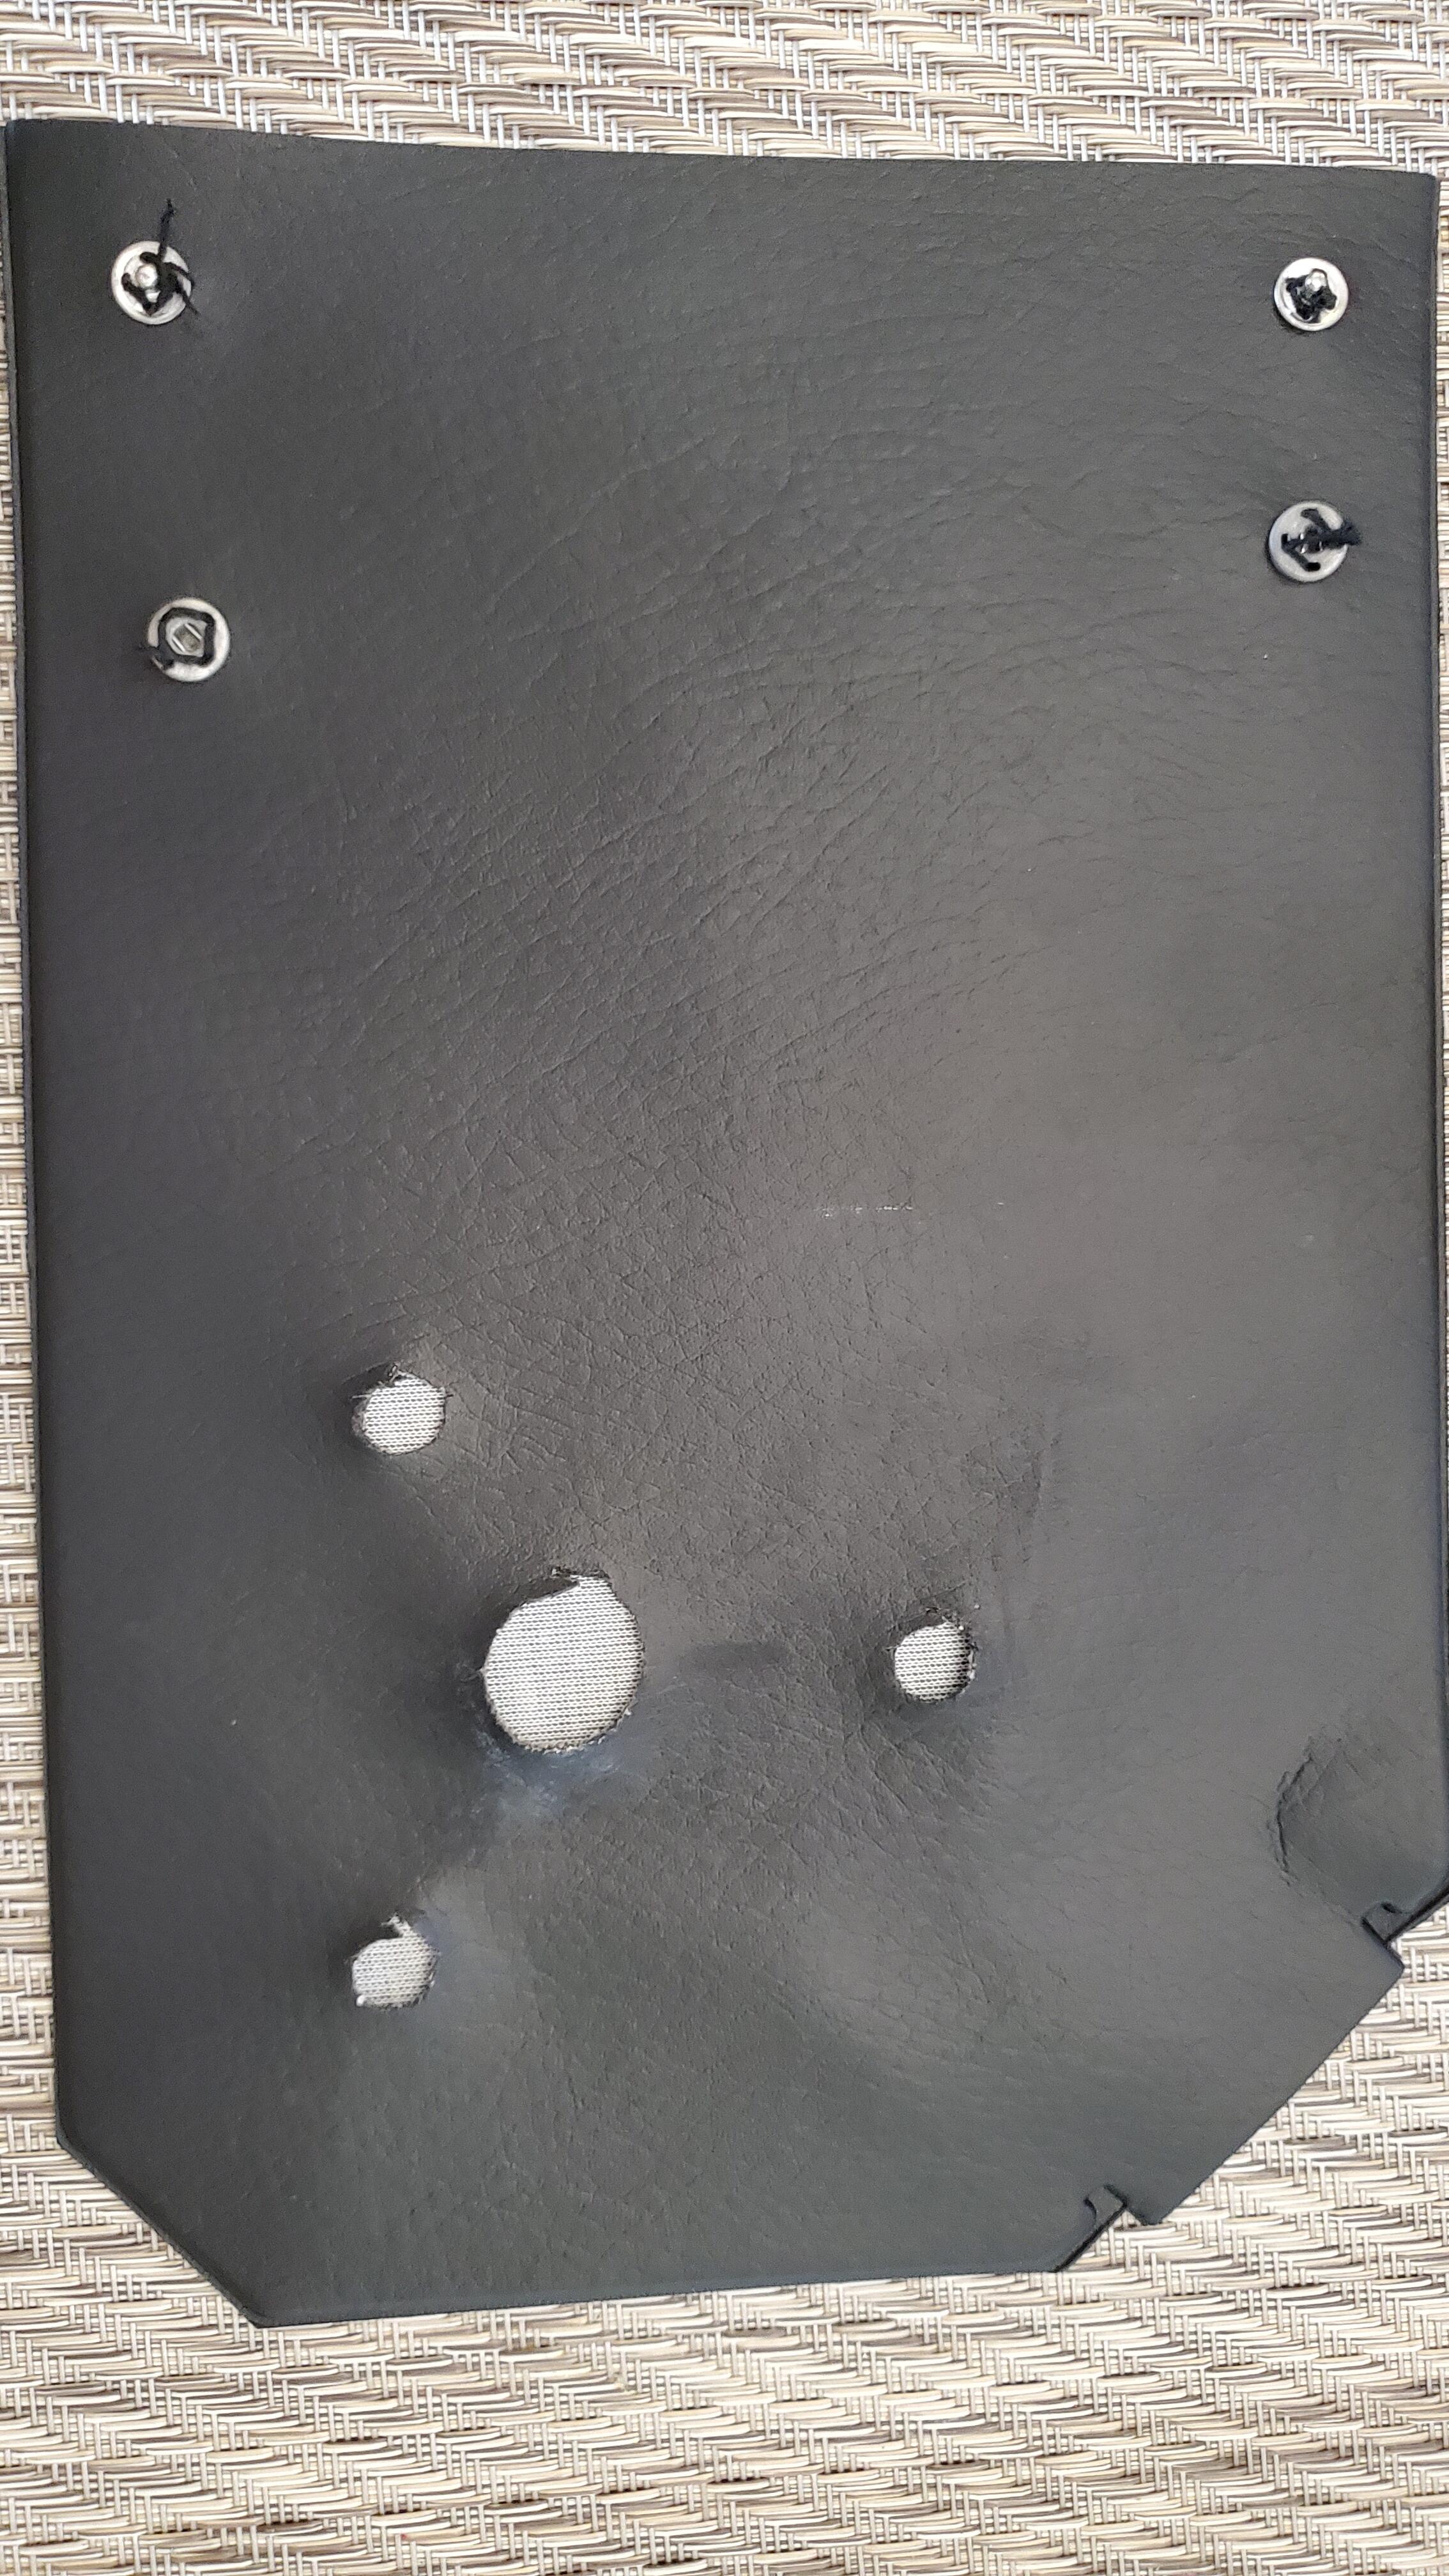
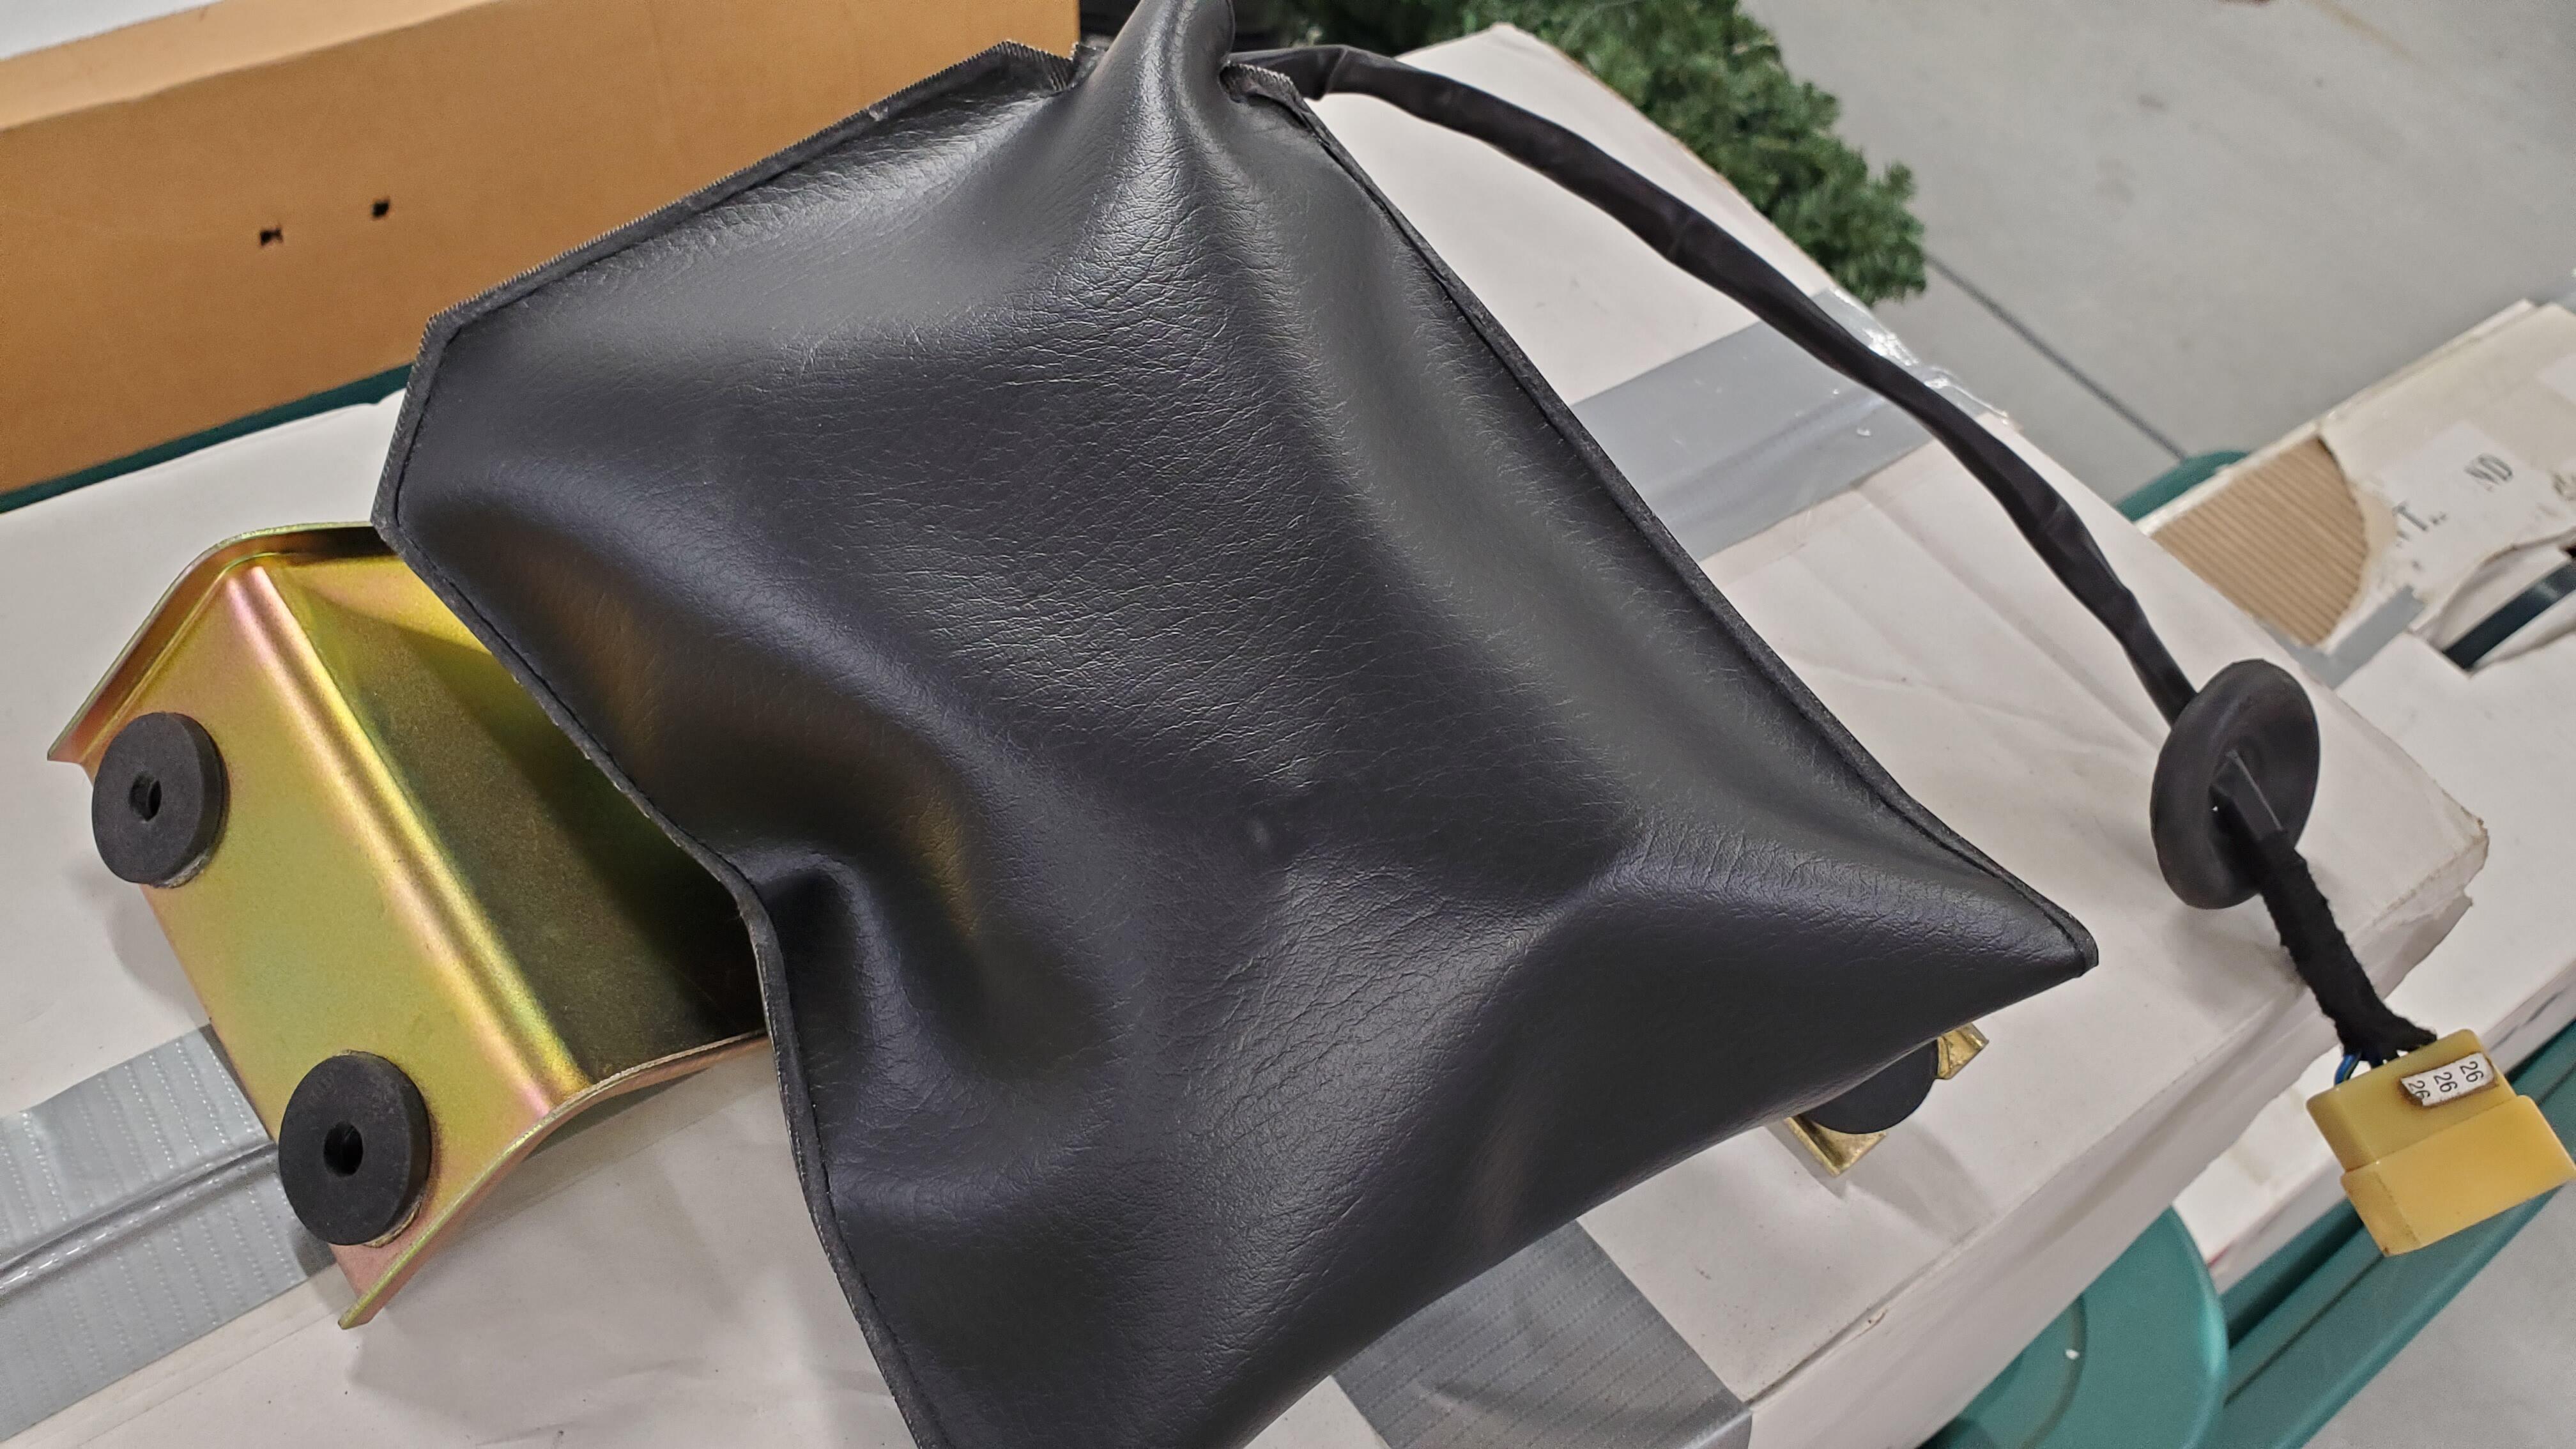
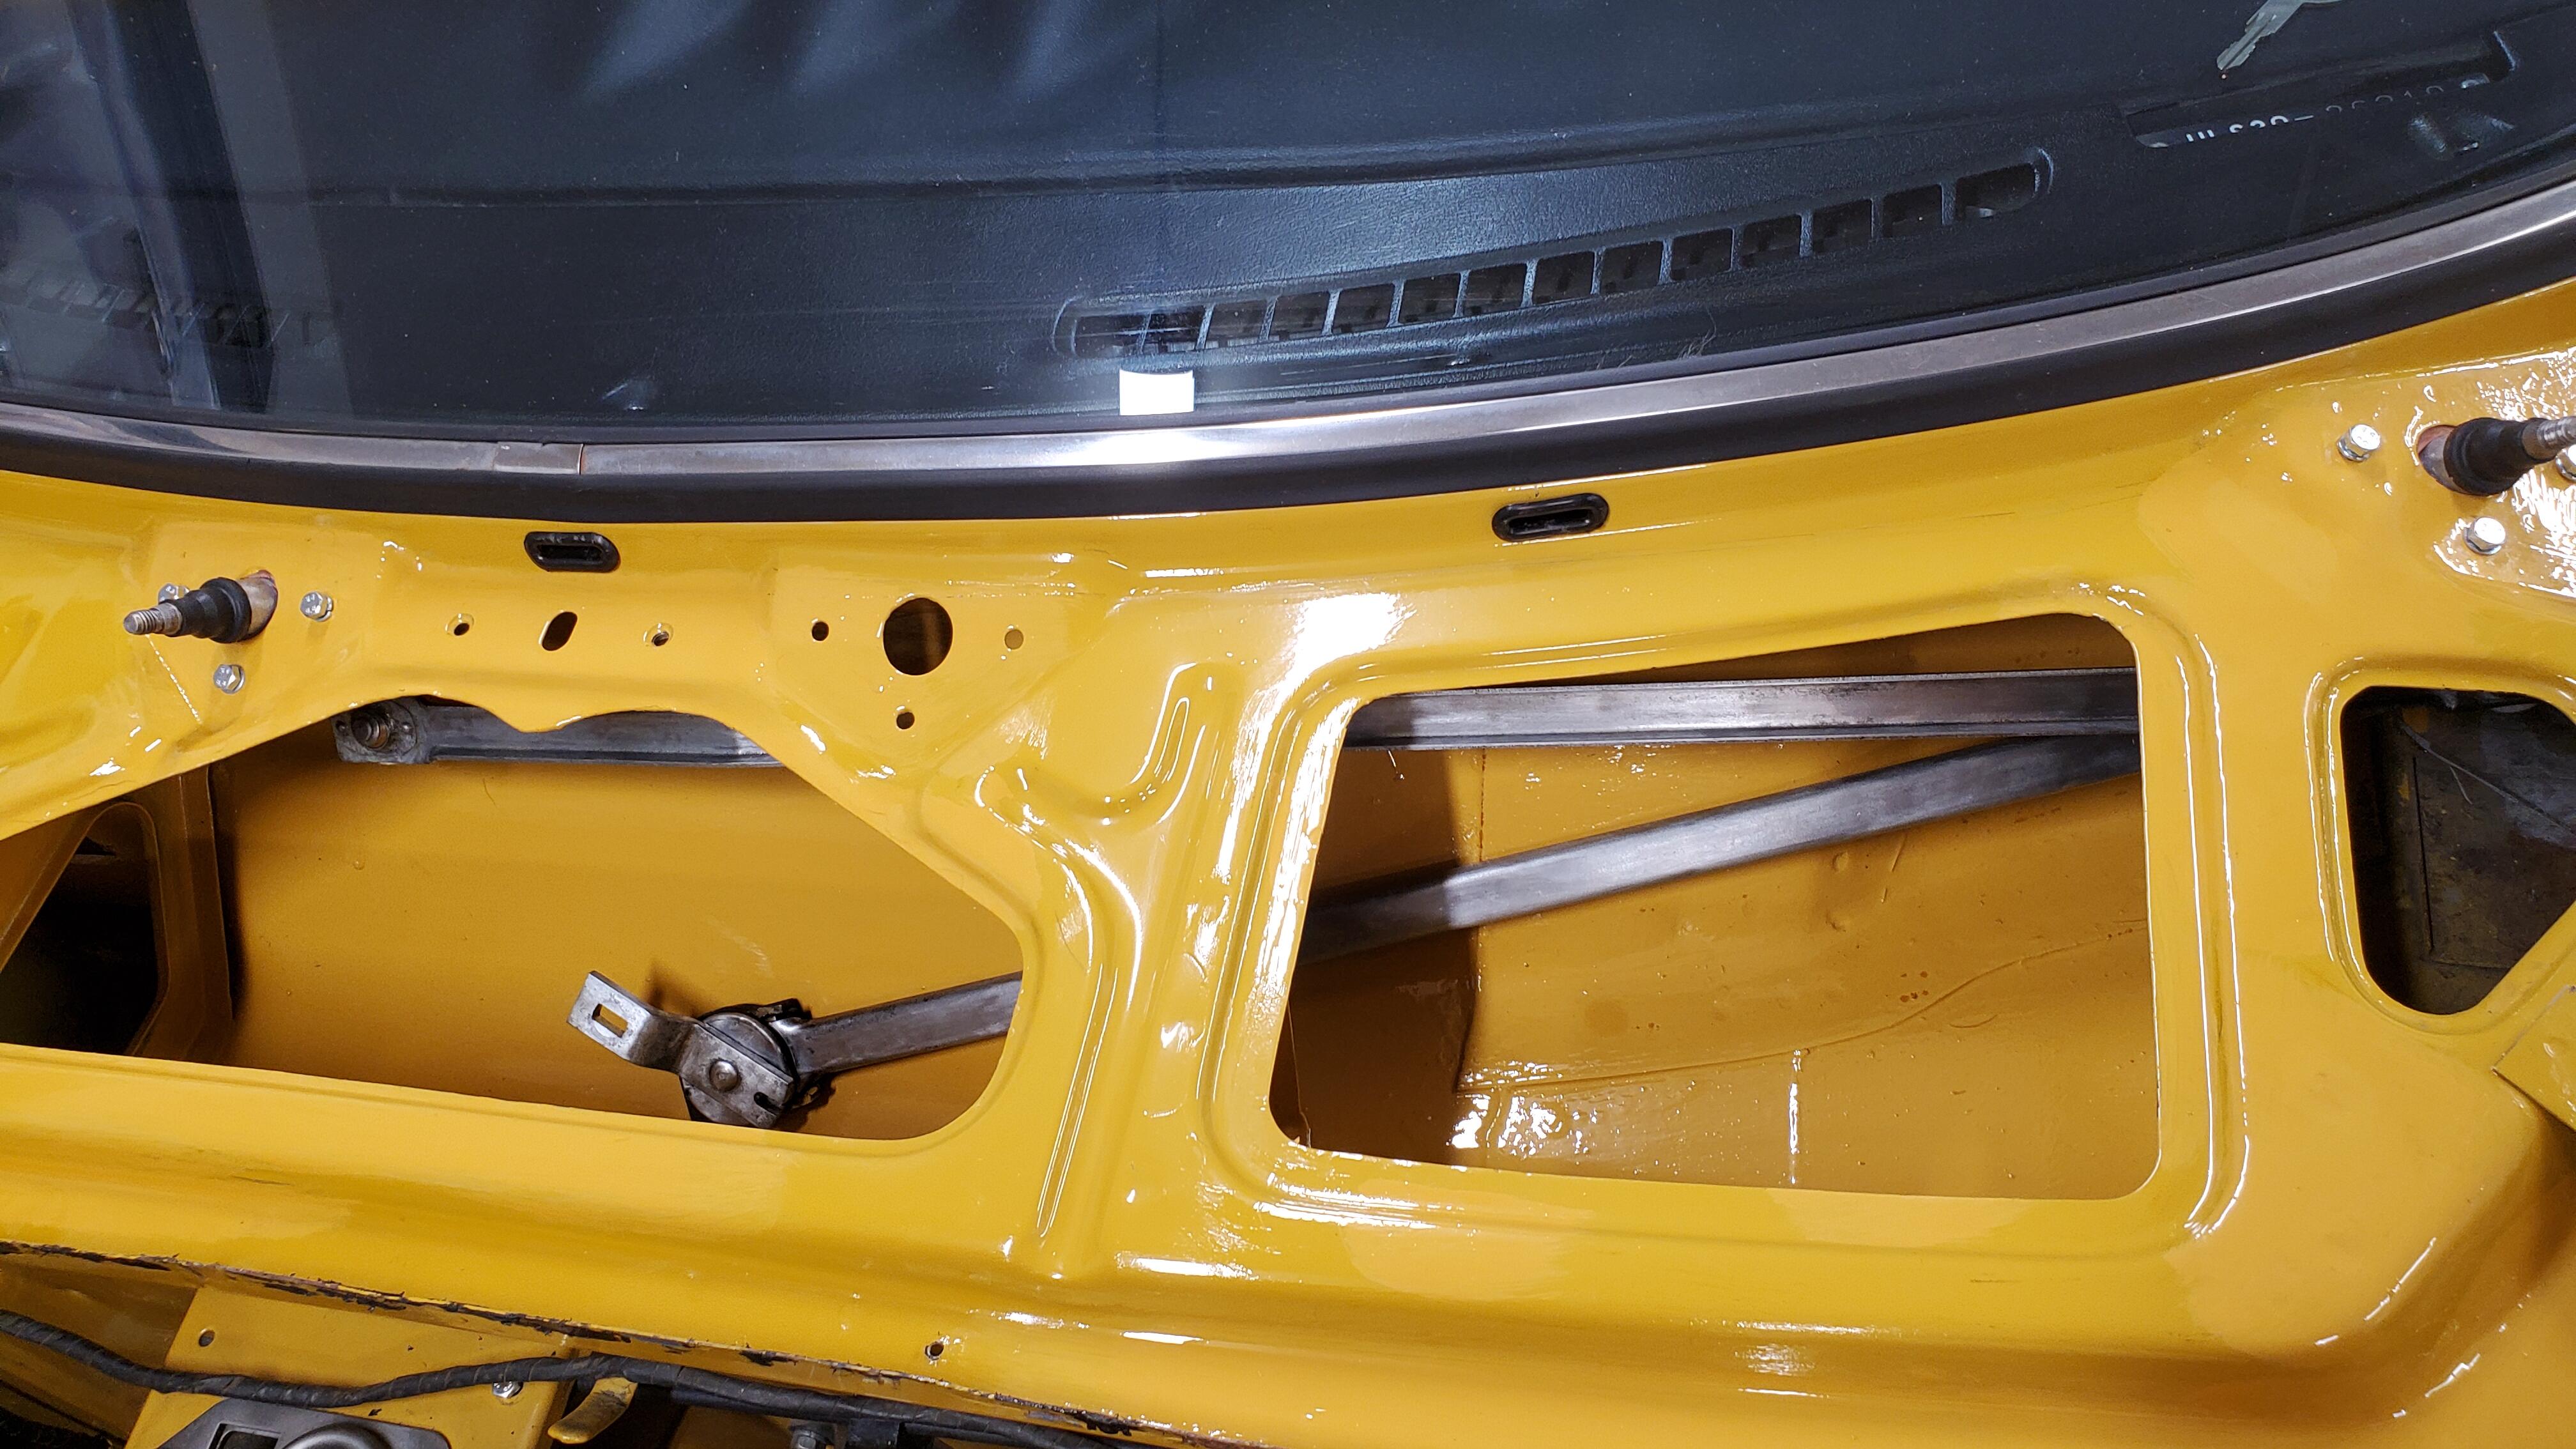
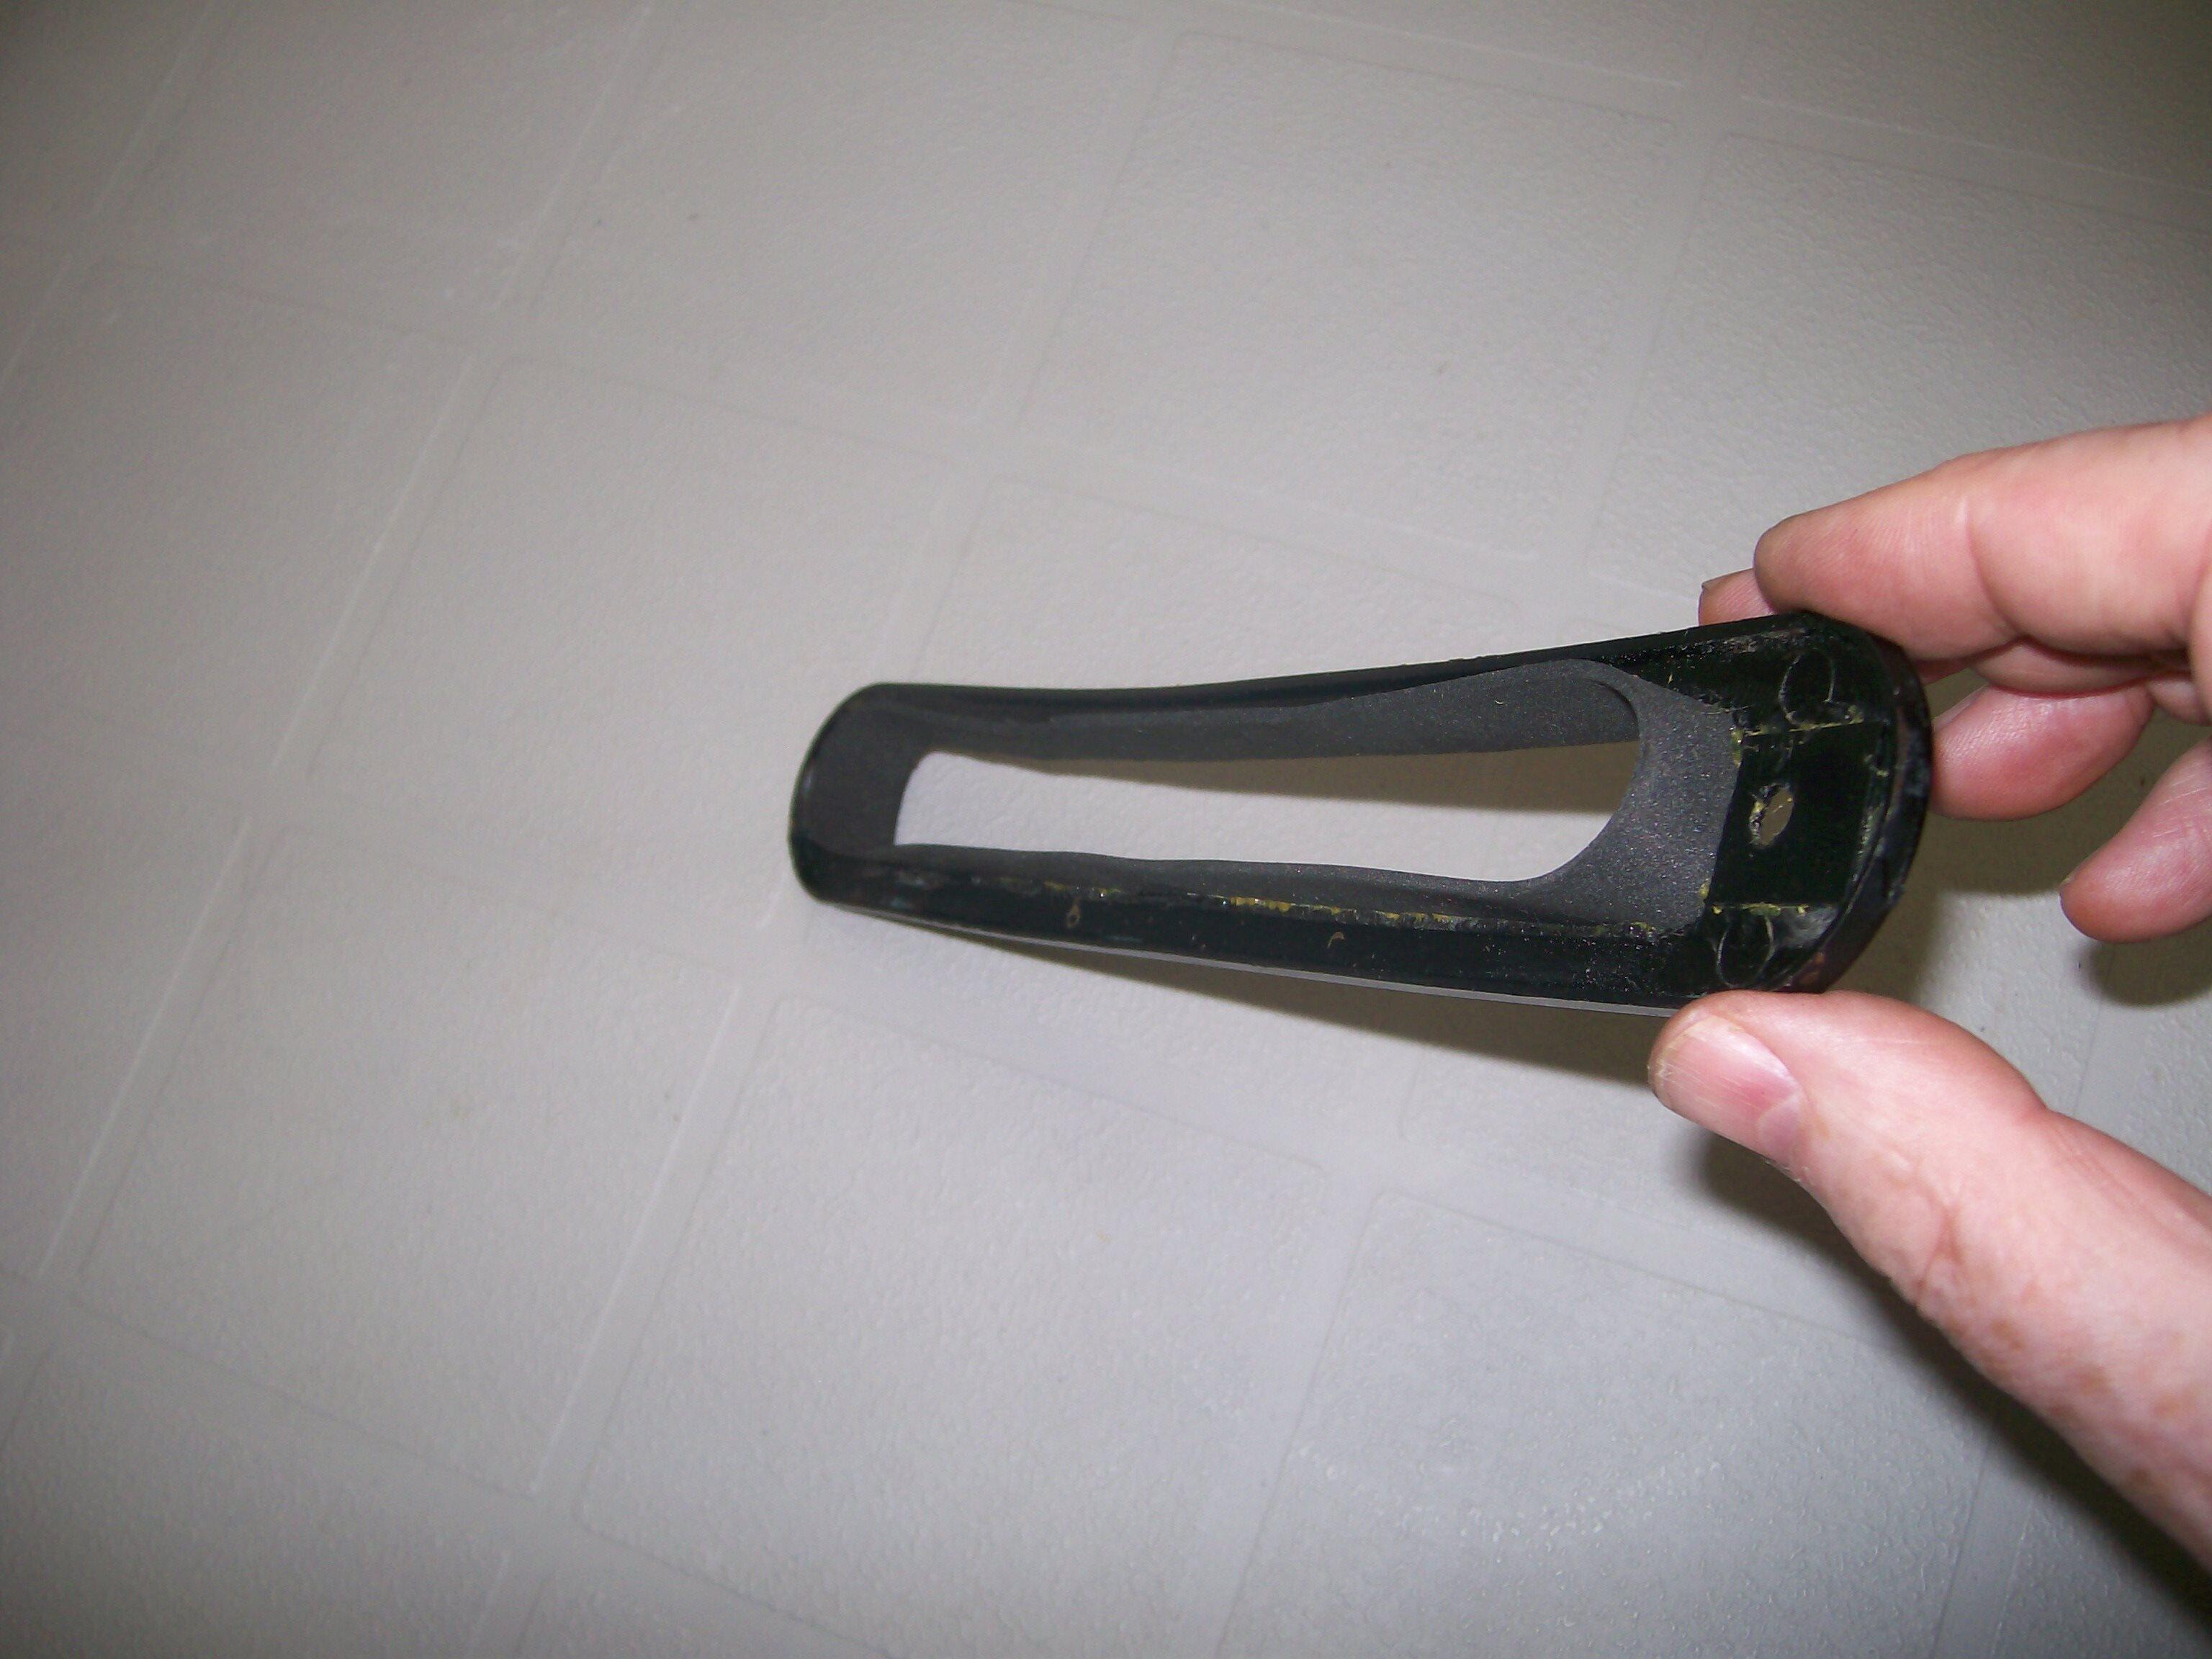
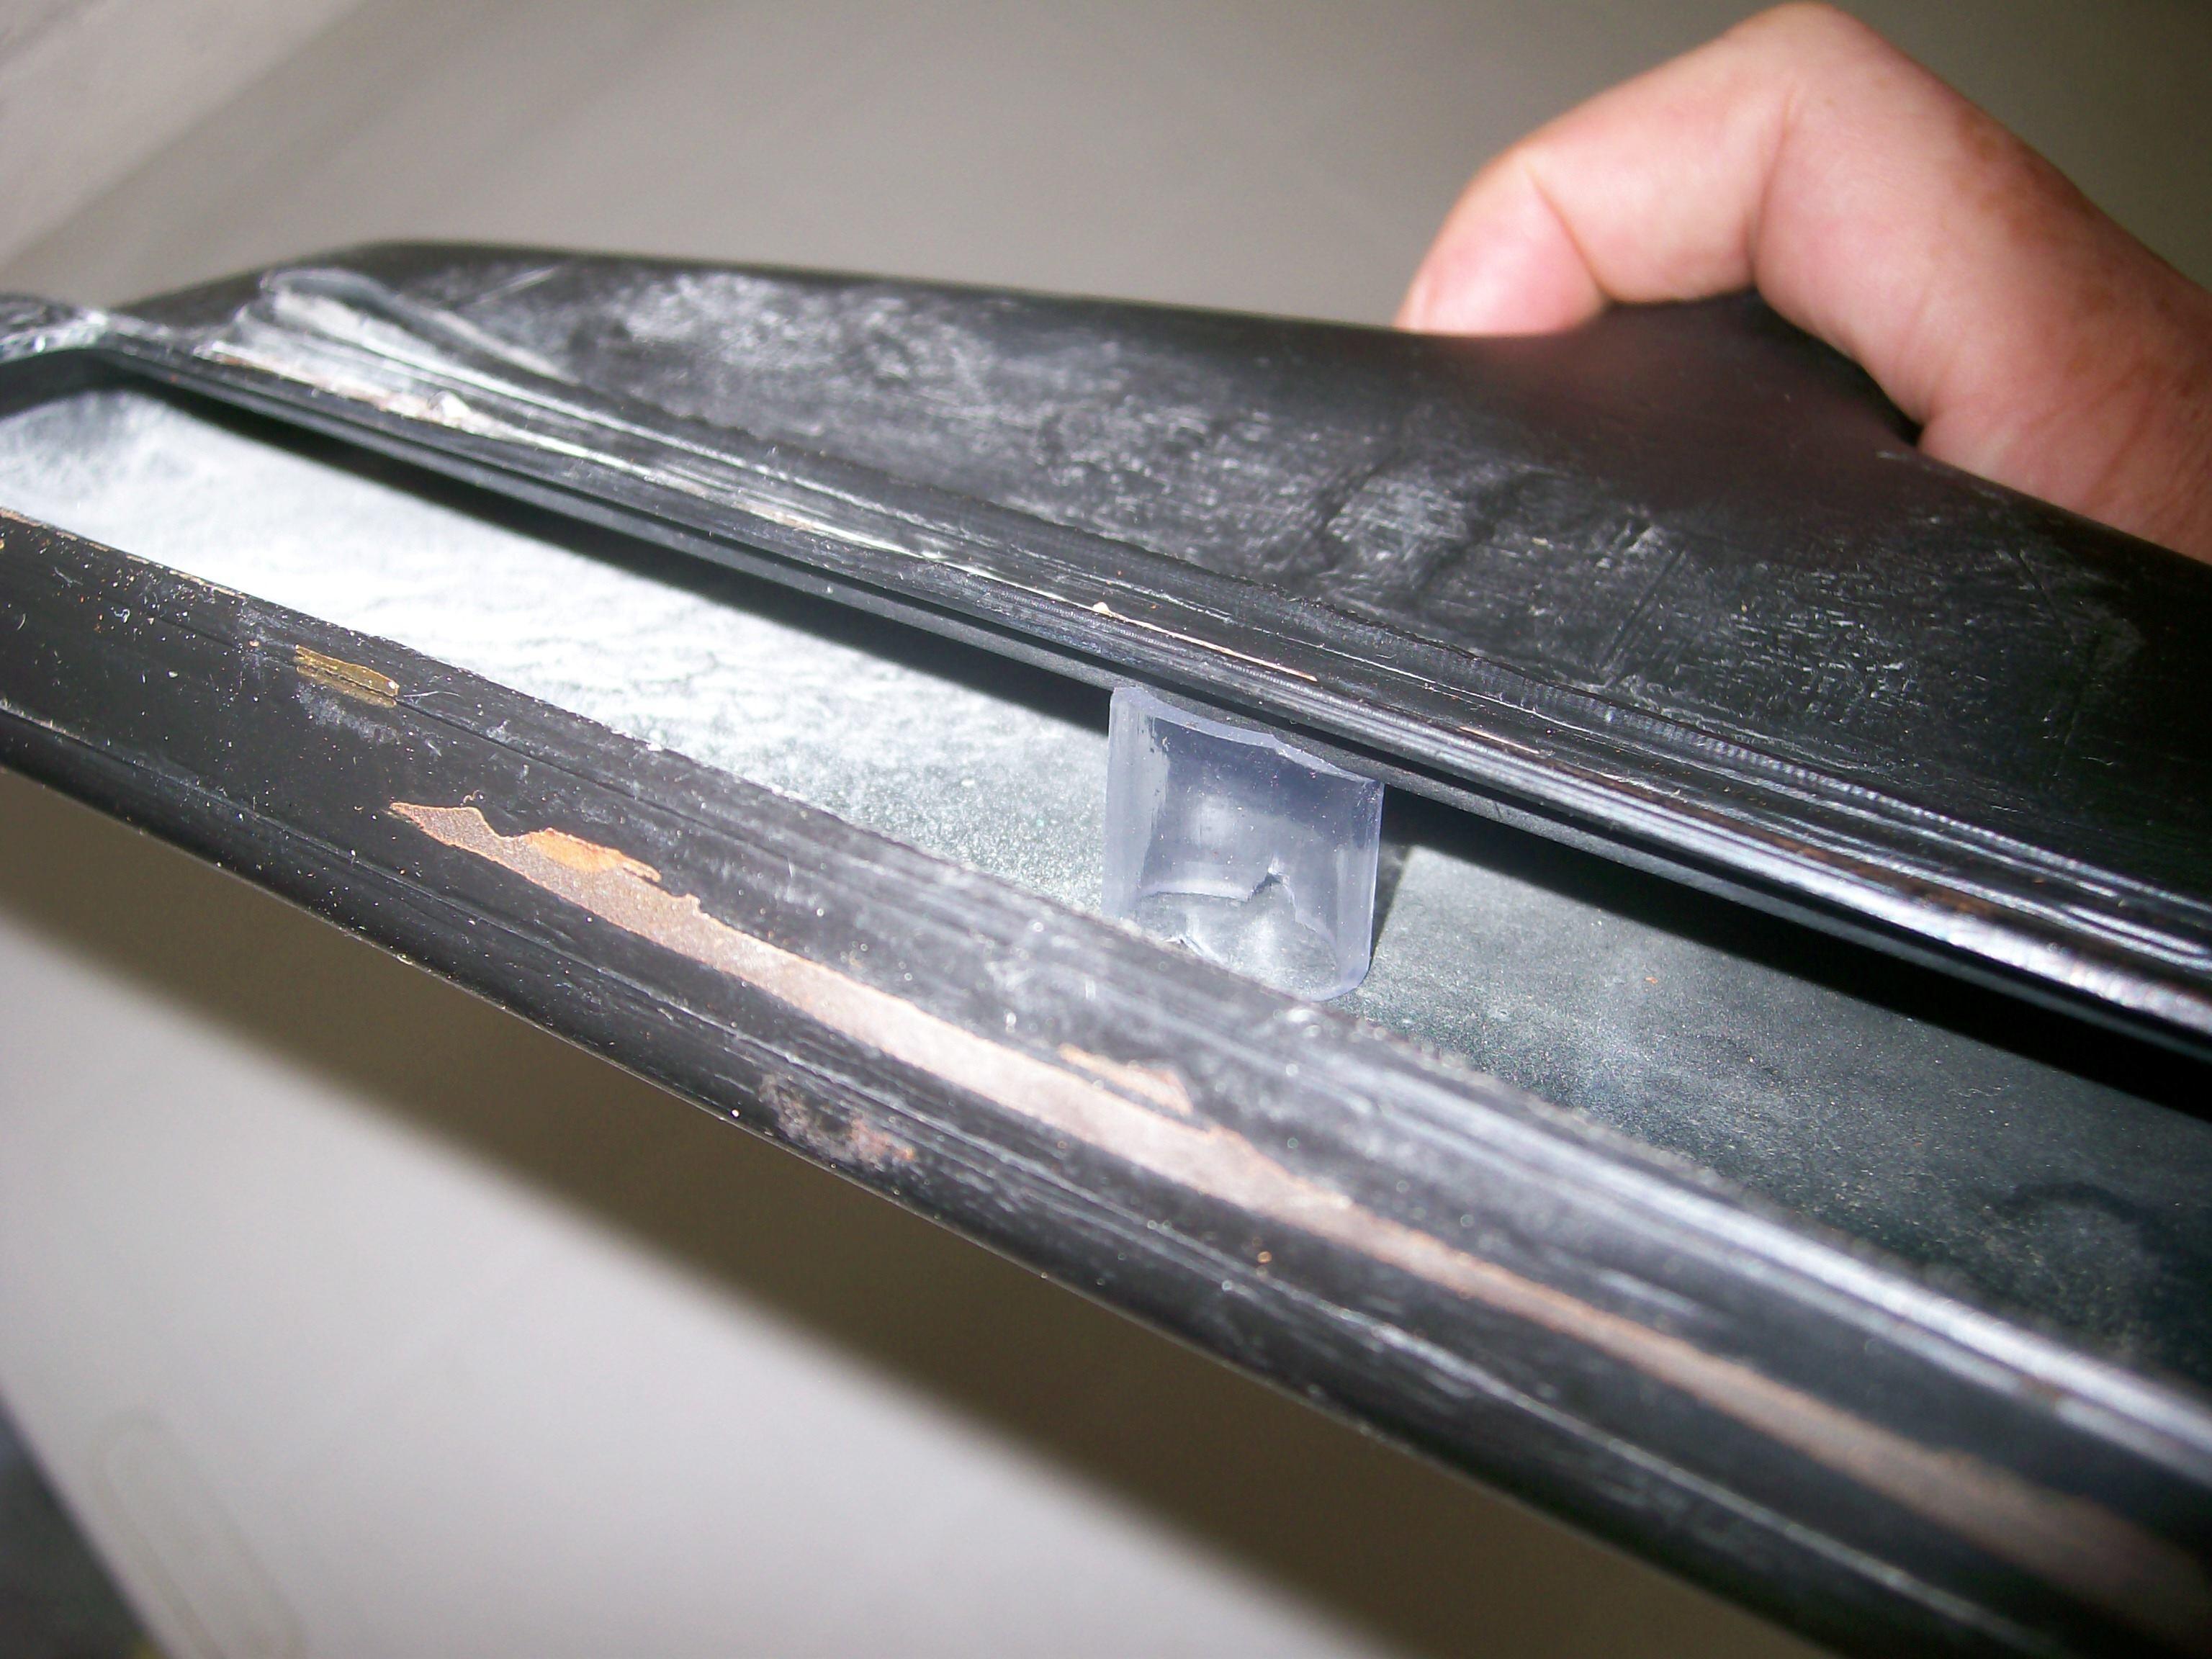
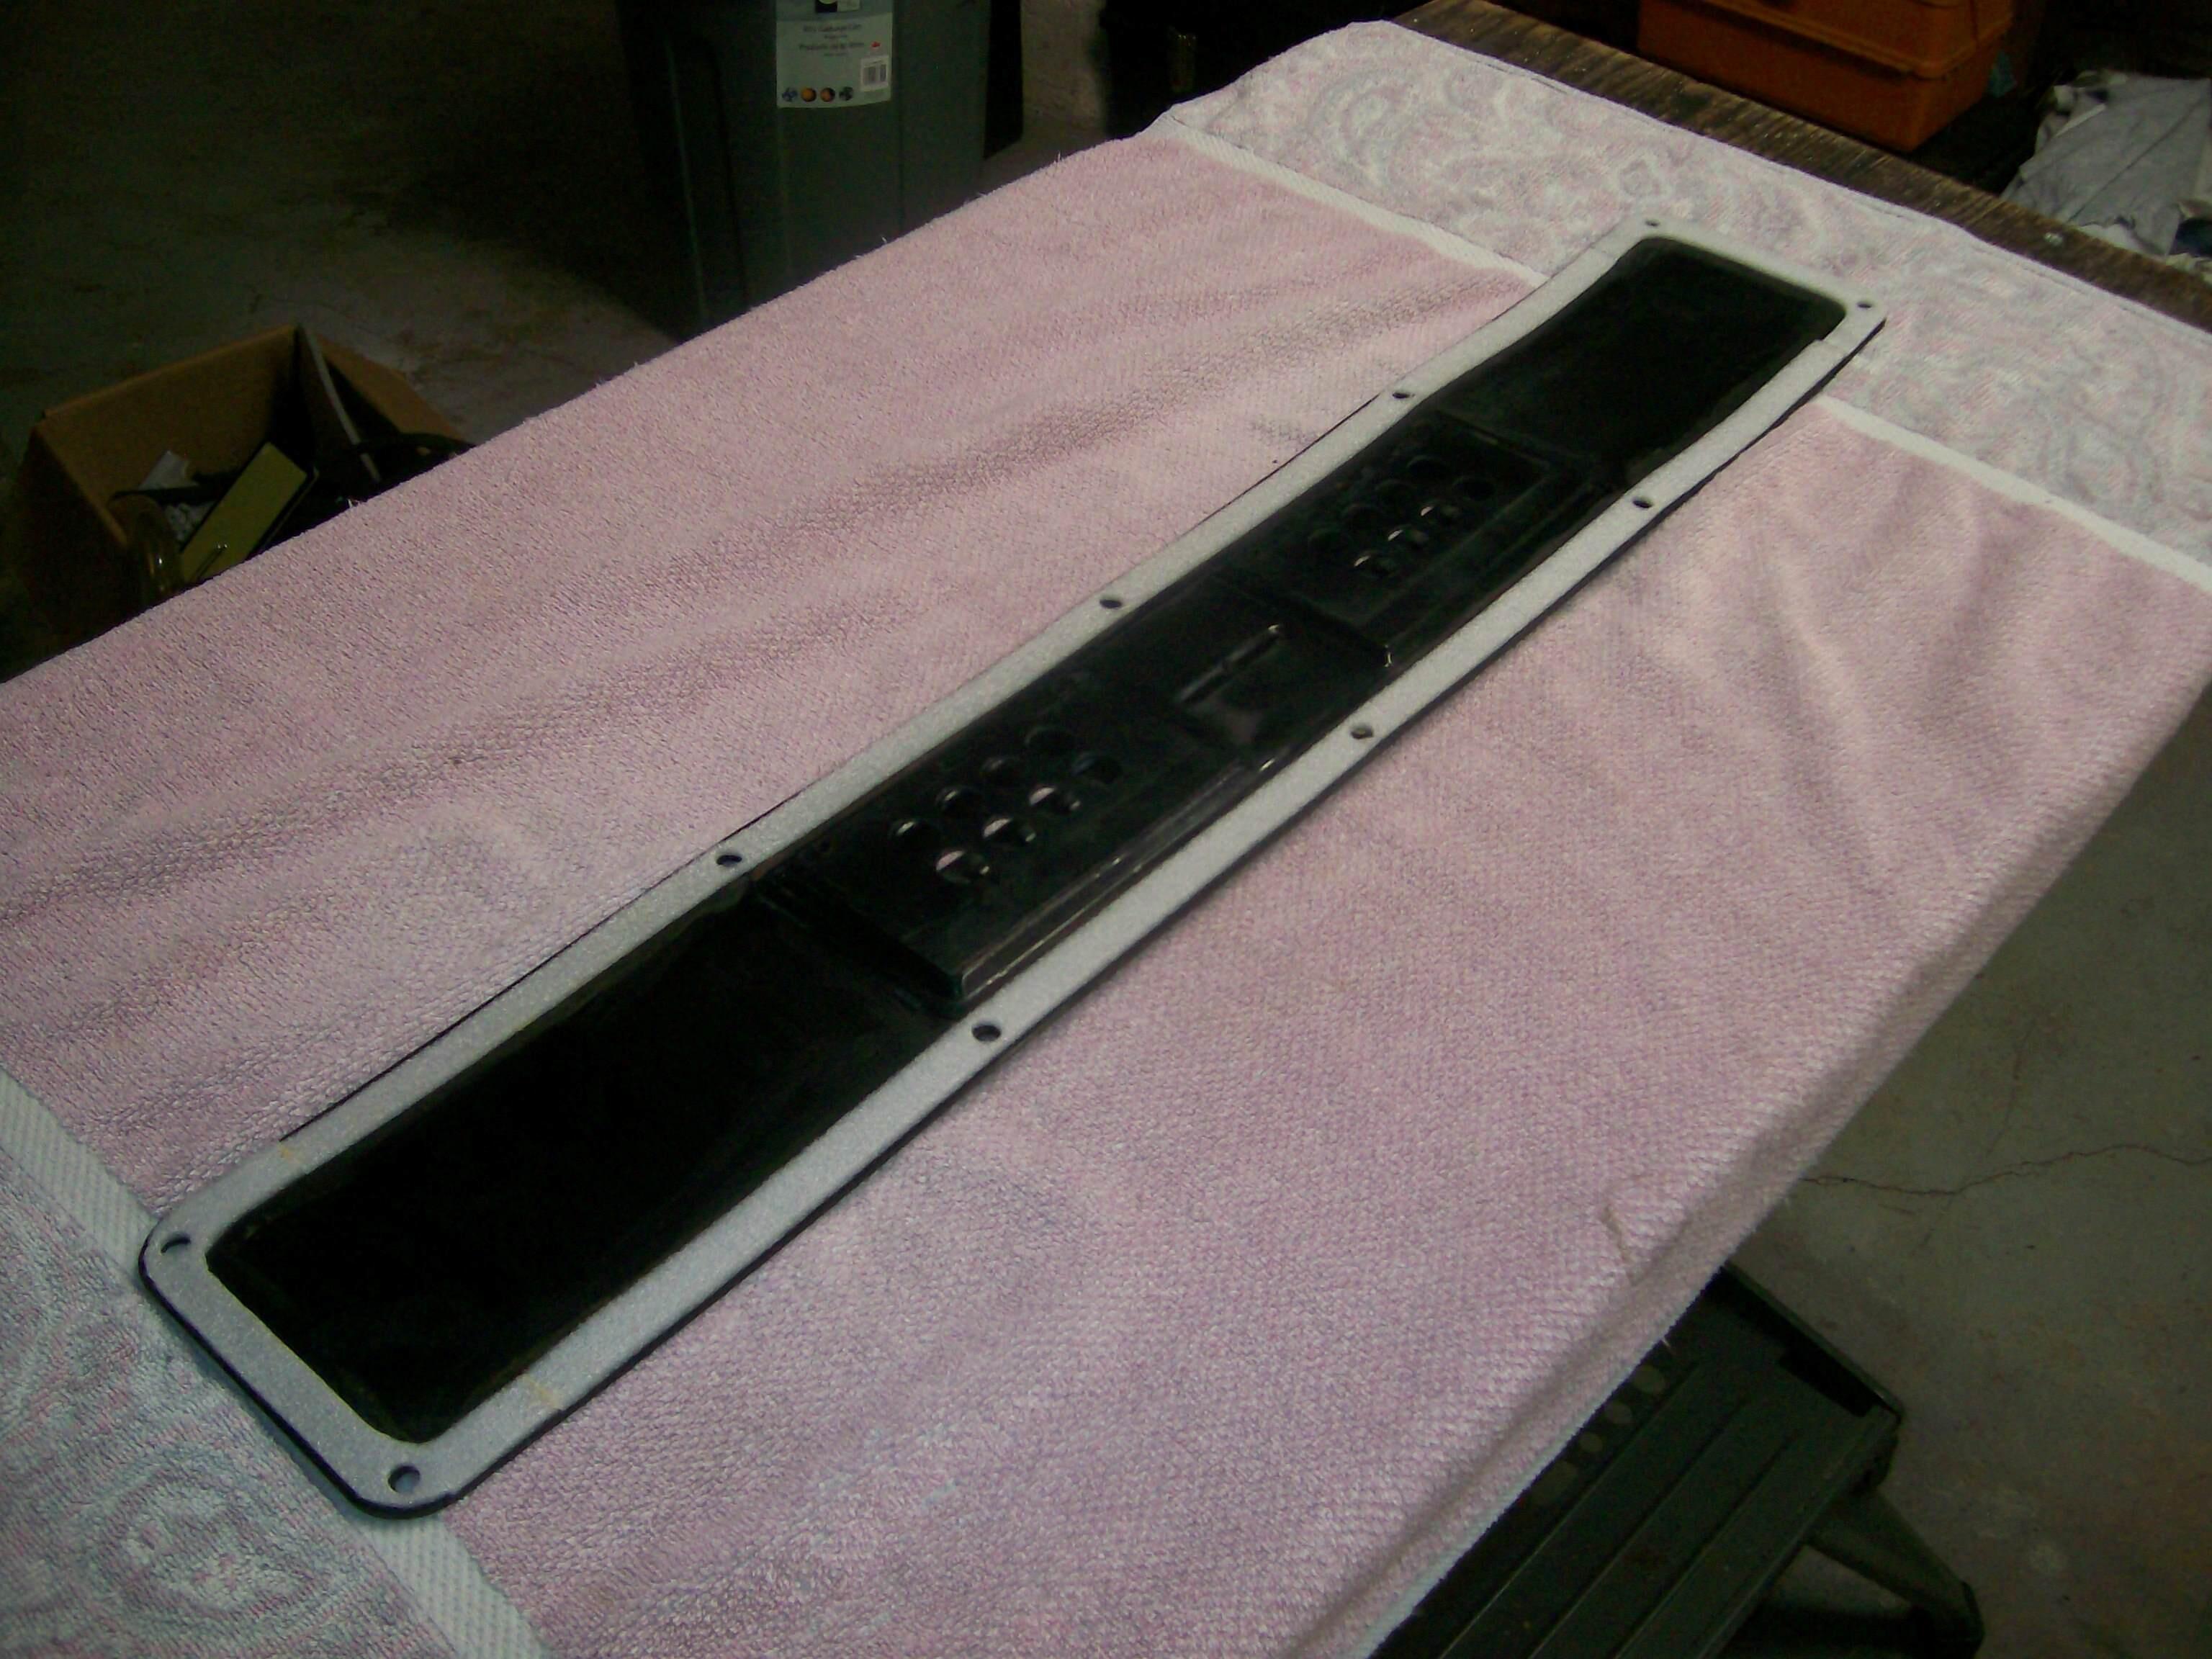
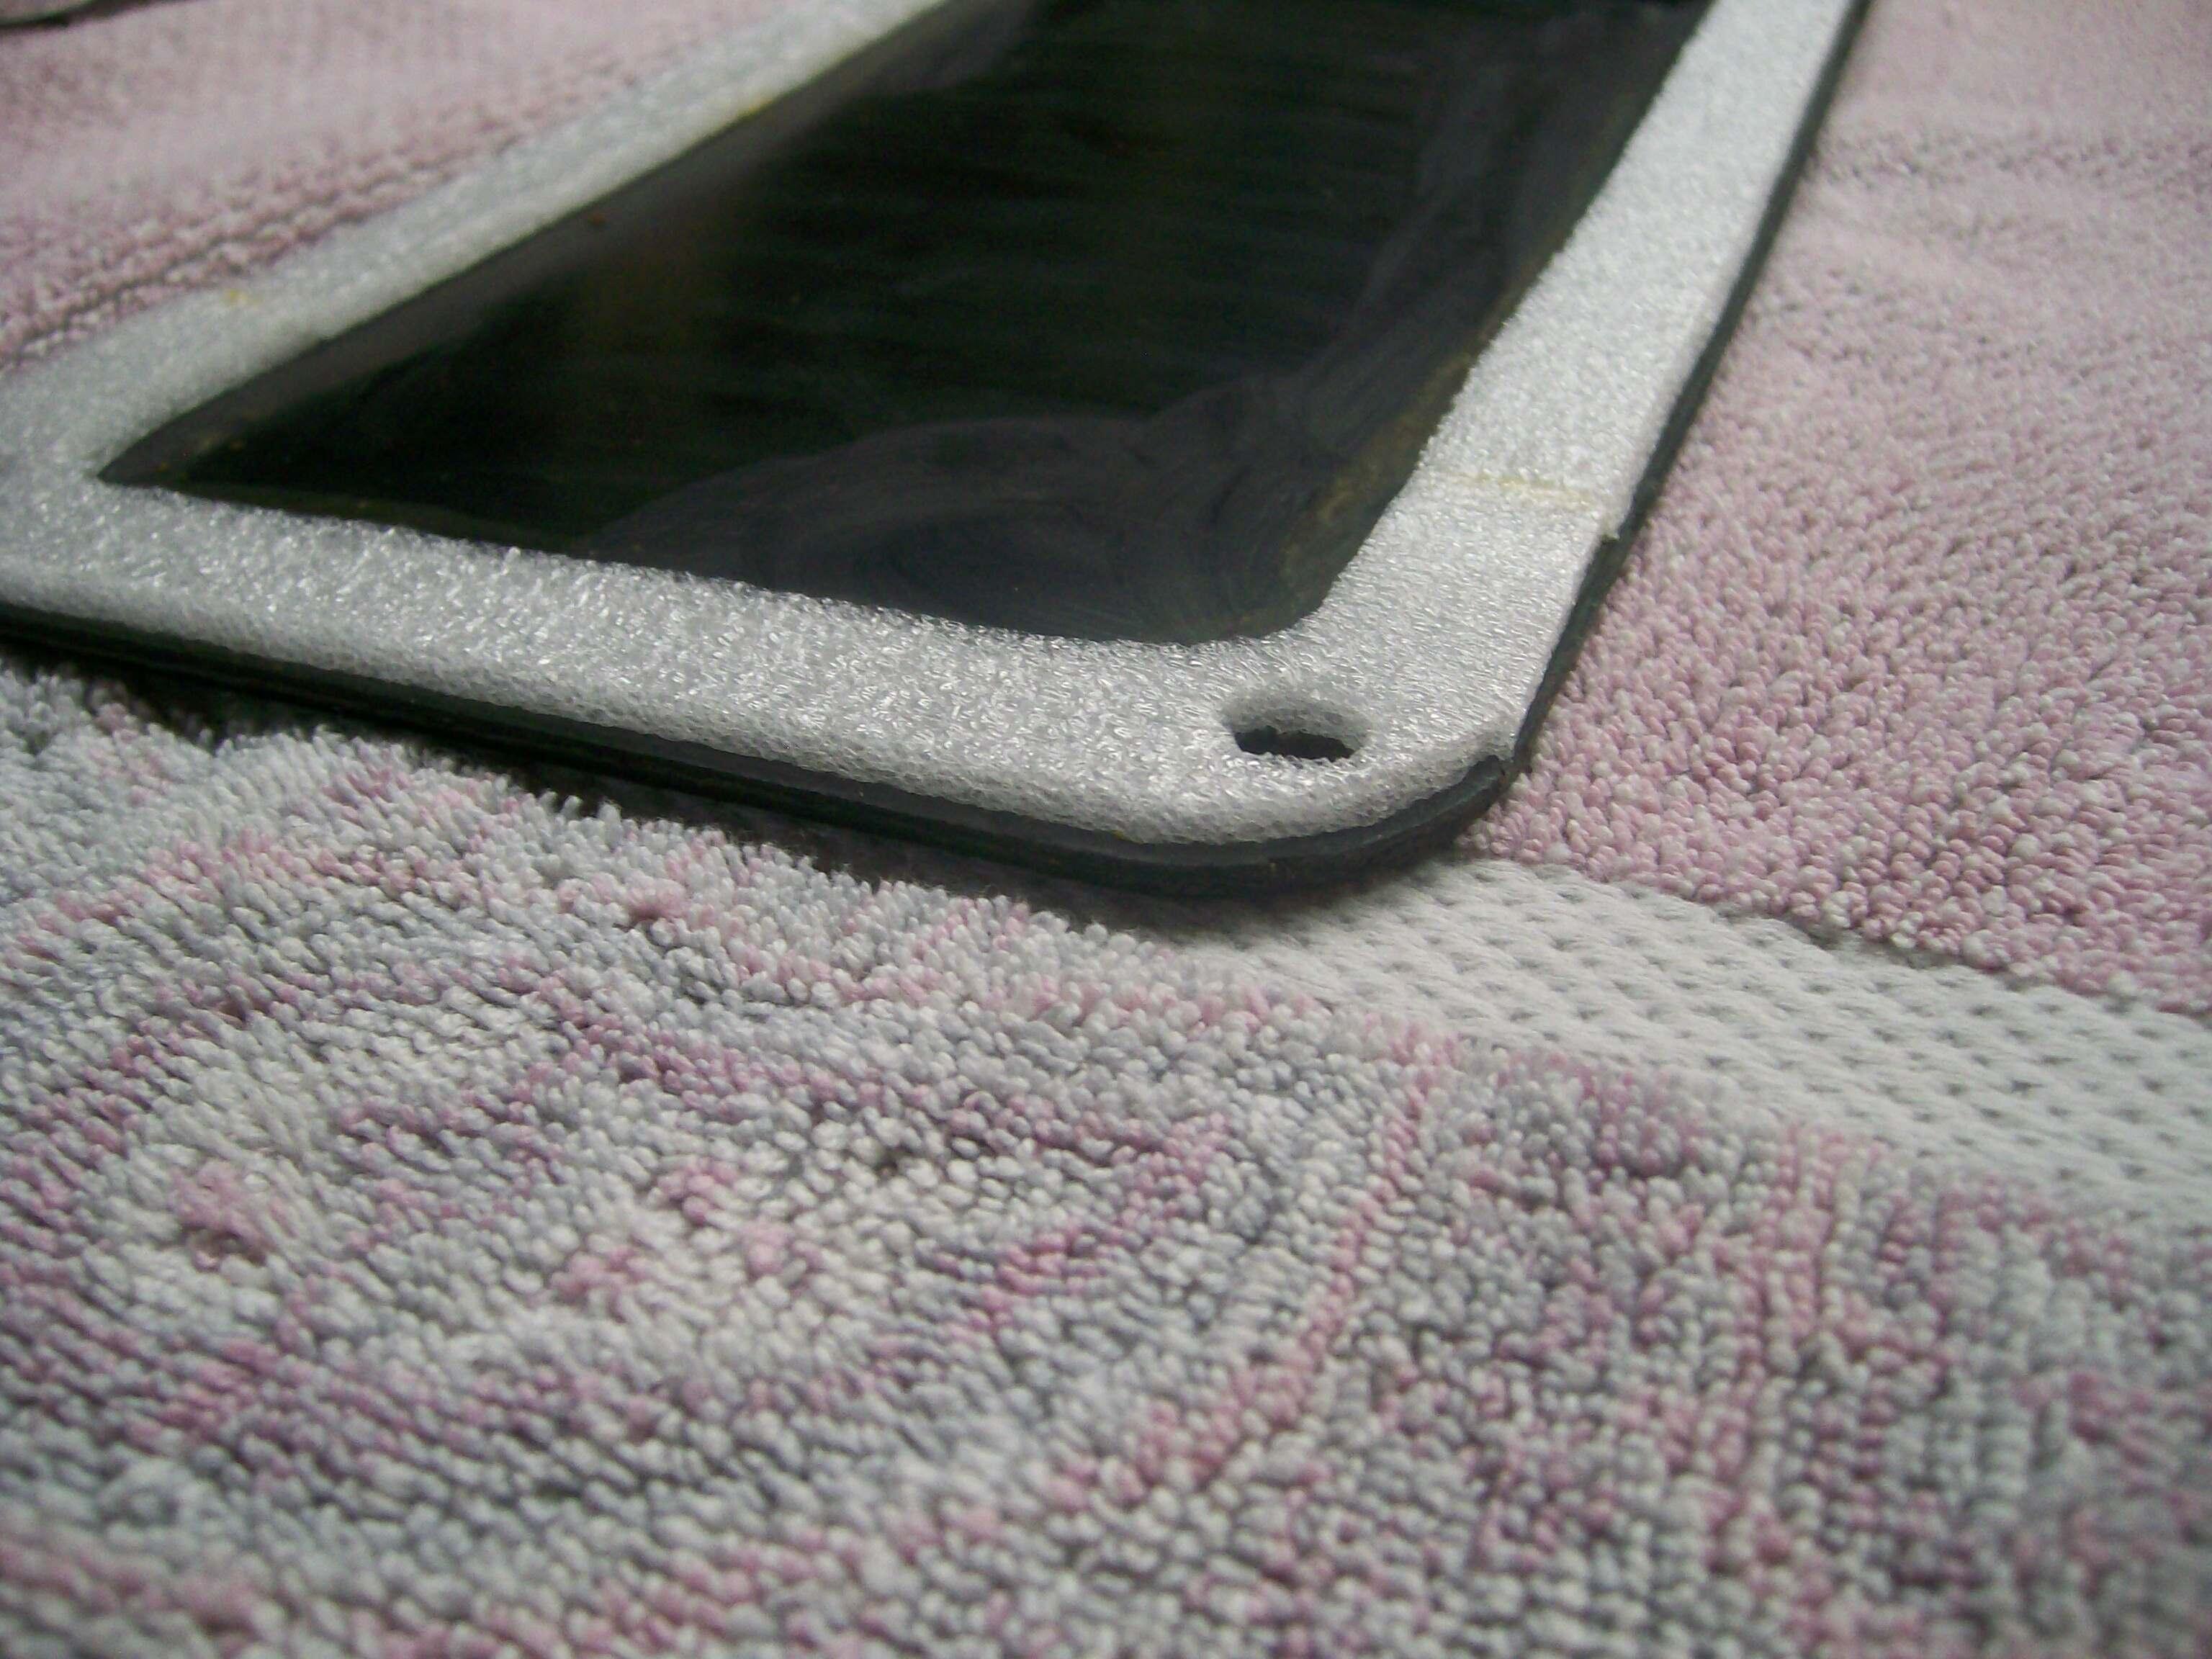
Wanted to come back and close this one out with what i found and then all the work it "inspired" me to do 🙂 @SteveJ I want to really thank you for all the extra effort you put in to guide me through this. What i ended up finding out was that the continuity was good on all wires from switch to firewall adapter so i looked into the motor itself. Had an opportunity to pickup a refurb original at a decent cost and that did the trick. So this started with removing the cowl and man what a mess in there. the PO in their attempt to paint must have just painted this car with the cowl in place because as you can see here he painted over the arms and the motor and bag (no pic). So lazy! So i went about tearing it all down, degreasing and striping the rust and paint, and ended up like this I had to make those rubber gaskets and sourced some new bolts but everything else came out real nice. You can see the original spring is still there but it was broken like pretty much every other one in the world. I found some pics from hybridZ i think that showed what it was supposed to look like and thought I might find a replacement at home depot to fiddle with. Well that didn't work out so well because if you look at one of these the wind is reversed from pretty much any generic compression or torsion spring i could have sourced. So i ended up recompressing it and bending the tip up and it came out pretty nice you'll notice its a little less than half a turn shy of complete but in the end it works great. The new vinyl bag finally arrived from Banzai (Distinctive Industries) but I noticed there was no way to really close the end of it unless you glued it or maybe sewn it over the motor. Didn't want to do that so i sewed on some simple buttons that can snap it shut to keep the bag nice and tucked under the motor Oh and one other thing I replaced was those felt washers. I have no idea their purpose but i put some back anyway lol I ended up repainting as best i could the interior of the cowl and addressed any surface rust that was present around the cowl frame and reinstalled the arms, what a freaking difference! Final product also took some time to address the cruddy old washer jets by soaking them in degreaser, then carefully threading some thin gauge wire through them to loosen the 50 years of rust, gunk and who knows what else. i now have a working hi/low set of wipers with actual washer spray hitting the windows! This refurb motor even parks perfectly but not sure if that's being aided by the spring i repaired or just getting lucky with it returning to the position it started. It does reverse the motor and end up dropping the wipers into their correct starting location no matter when you turn them off so that's what i would expect them to do. I am still waiting on replacement rubbers I've discussed in that wiper woe thread so will report back what model blade worked to add to a useable list for the next guy. again thanks to all that aided me along the way. As an aside, i did see the vast number of recommendations on the honda motor replacement but honestly for me now that the work was put in to degrease and clean up the arms, spindles, etc it works really well in both speeds. maybe some others aren't going to the extent I did and just grabbing the honda motor but in my opinion if you do it right you really don't need the upgrade unless maybe you want intermittent. This isn't a daily for me and I don't really plan on ever driving it in the rain so probably not a big deal for me as much as it might be for others.


 4 points
 -
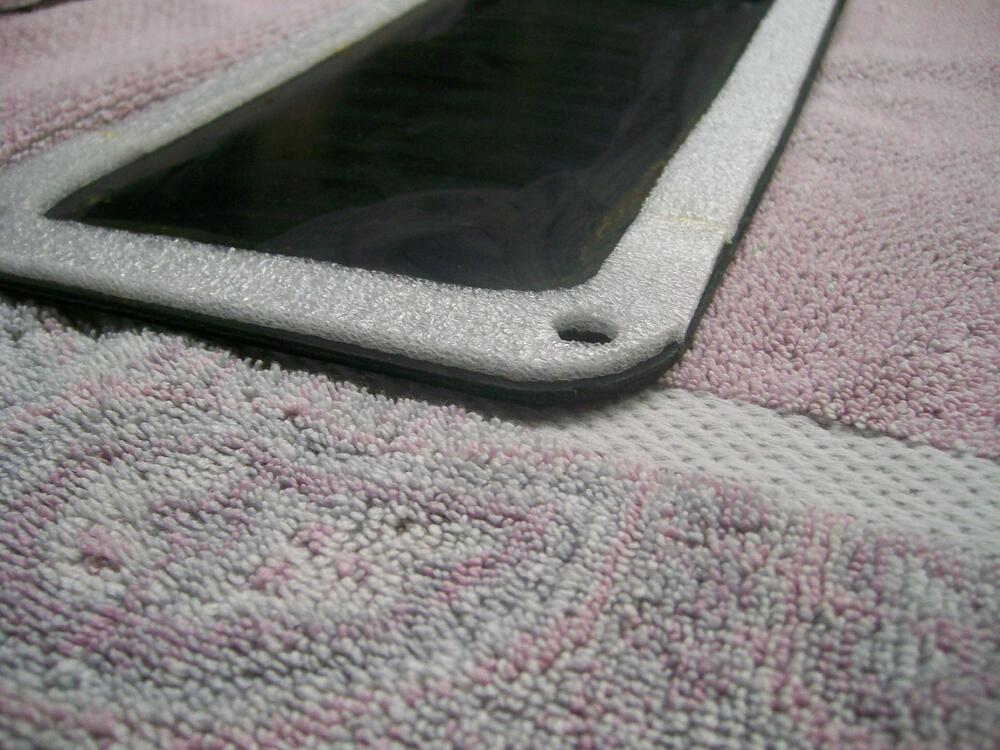
3 pointsHere are a few more pix to help illustrate the lip on the 'bumper'. In its OE form, the lip -- looked at from end view -- is actually beveled... lip on the top, no lip on the bottom. When coming up with fix for the disintegrated/nonexistent lips on my bumpers, I ignored that little detail. My replacement lips were cut as strips from a sheet of 1/8", closed-cell foam. After a trial fit, I cut them to length and then glued them into each bumper. Not all that pretty, but functional (and completely out of sight after everything's assembled). I should mention that attention to detail will pay off in this part of your restoration. More specifically, lack of attention to detail will probably result in exhaust leaks into the cabin once you get the car out on the road again (this part of the early Zs' design was, to be charitable, not very successful -- too many parts, hard to assemble, didn't work that well). As others have mentioned, several of the pieces tend to warp with age. In the case of my car, the plenum moldings had both caved in at the top, meaning that they weren't going to seal well against bumpers without a little help. I just cut a piece of plastic to the right length and glued it into the plenum as a wedge so that the plenum flange became reasonably flat again. Another place to watch out for warping is the hatch trim panel. For my car, both ends were dished by a quarter inch or more (clearly visible in this photo). This panel has to achieve an airtight seal against the hatch sheet metal. Otherwise, the ventilation ductwork, with its one-way airflow control flaps, gets bypassed and air/exhaust gets sucked into the cabin by way of the hatch cavity*. Here, once again, I resorted to my 'squishy' sill wall foam tape to make a new gasket. Even that wasn't enough to overcome the warpage in the trim panel. I had to create some new holes on the inner hatch sheet metal to accept a pair of additional plastic trim plugs on each side of the panel. In hindsight, I probably should have spent the bucks for a new trim panel. All of this just underscores the fact that the entire airpath from the ventilator grill to cabin entry has to be airtight and the one-way airflow control flaps have to be in good condition. If your air control flaps have settled into a permanent droop (mine had), try turning them over before reinstalling.


 3 points
 -
3 pointsYarb, here it is 😉 Package wasn't very big but it seems to all be there. I haven't looked to see if the patterns all run the same way the factory pieces do. Won't have time to check it this weekend. There are some white marks on the tunnel trim pieces. Some kind of pencil or grease marker. I will update once I get those off
 3 points
 -
2 points
-
2 pointsJust want to say a quick thank you everyone that contributed to this post. @Matthew Abate This is going to make my wiring project go so much smoother. I have been searching high and low for this information. There is just so much missing and incorrect information out there. Having everything in one place and documented with such detail is a lifesaver. The Z community Rocks!2 points
-
2 pointsGreat info, that for sharing that. Also good to hear that the parts from RC are good.2 points
-
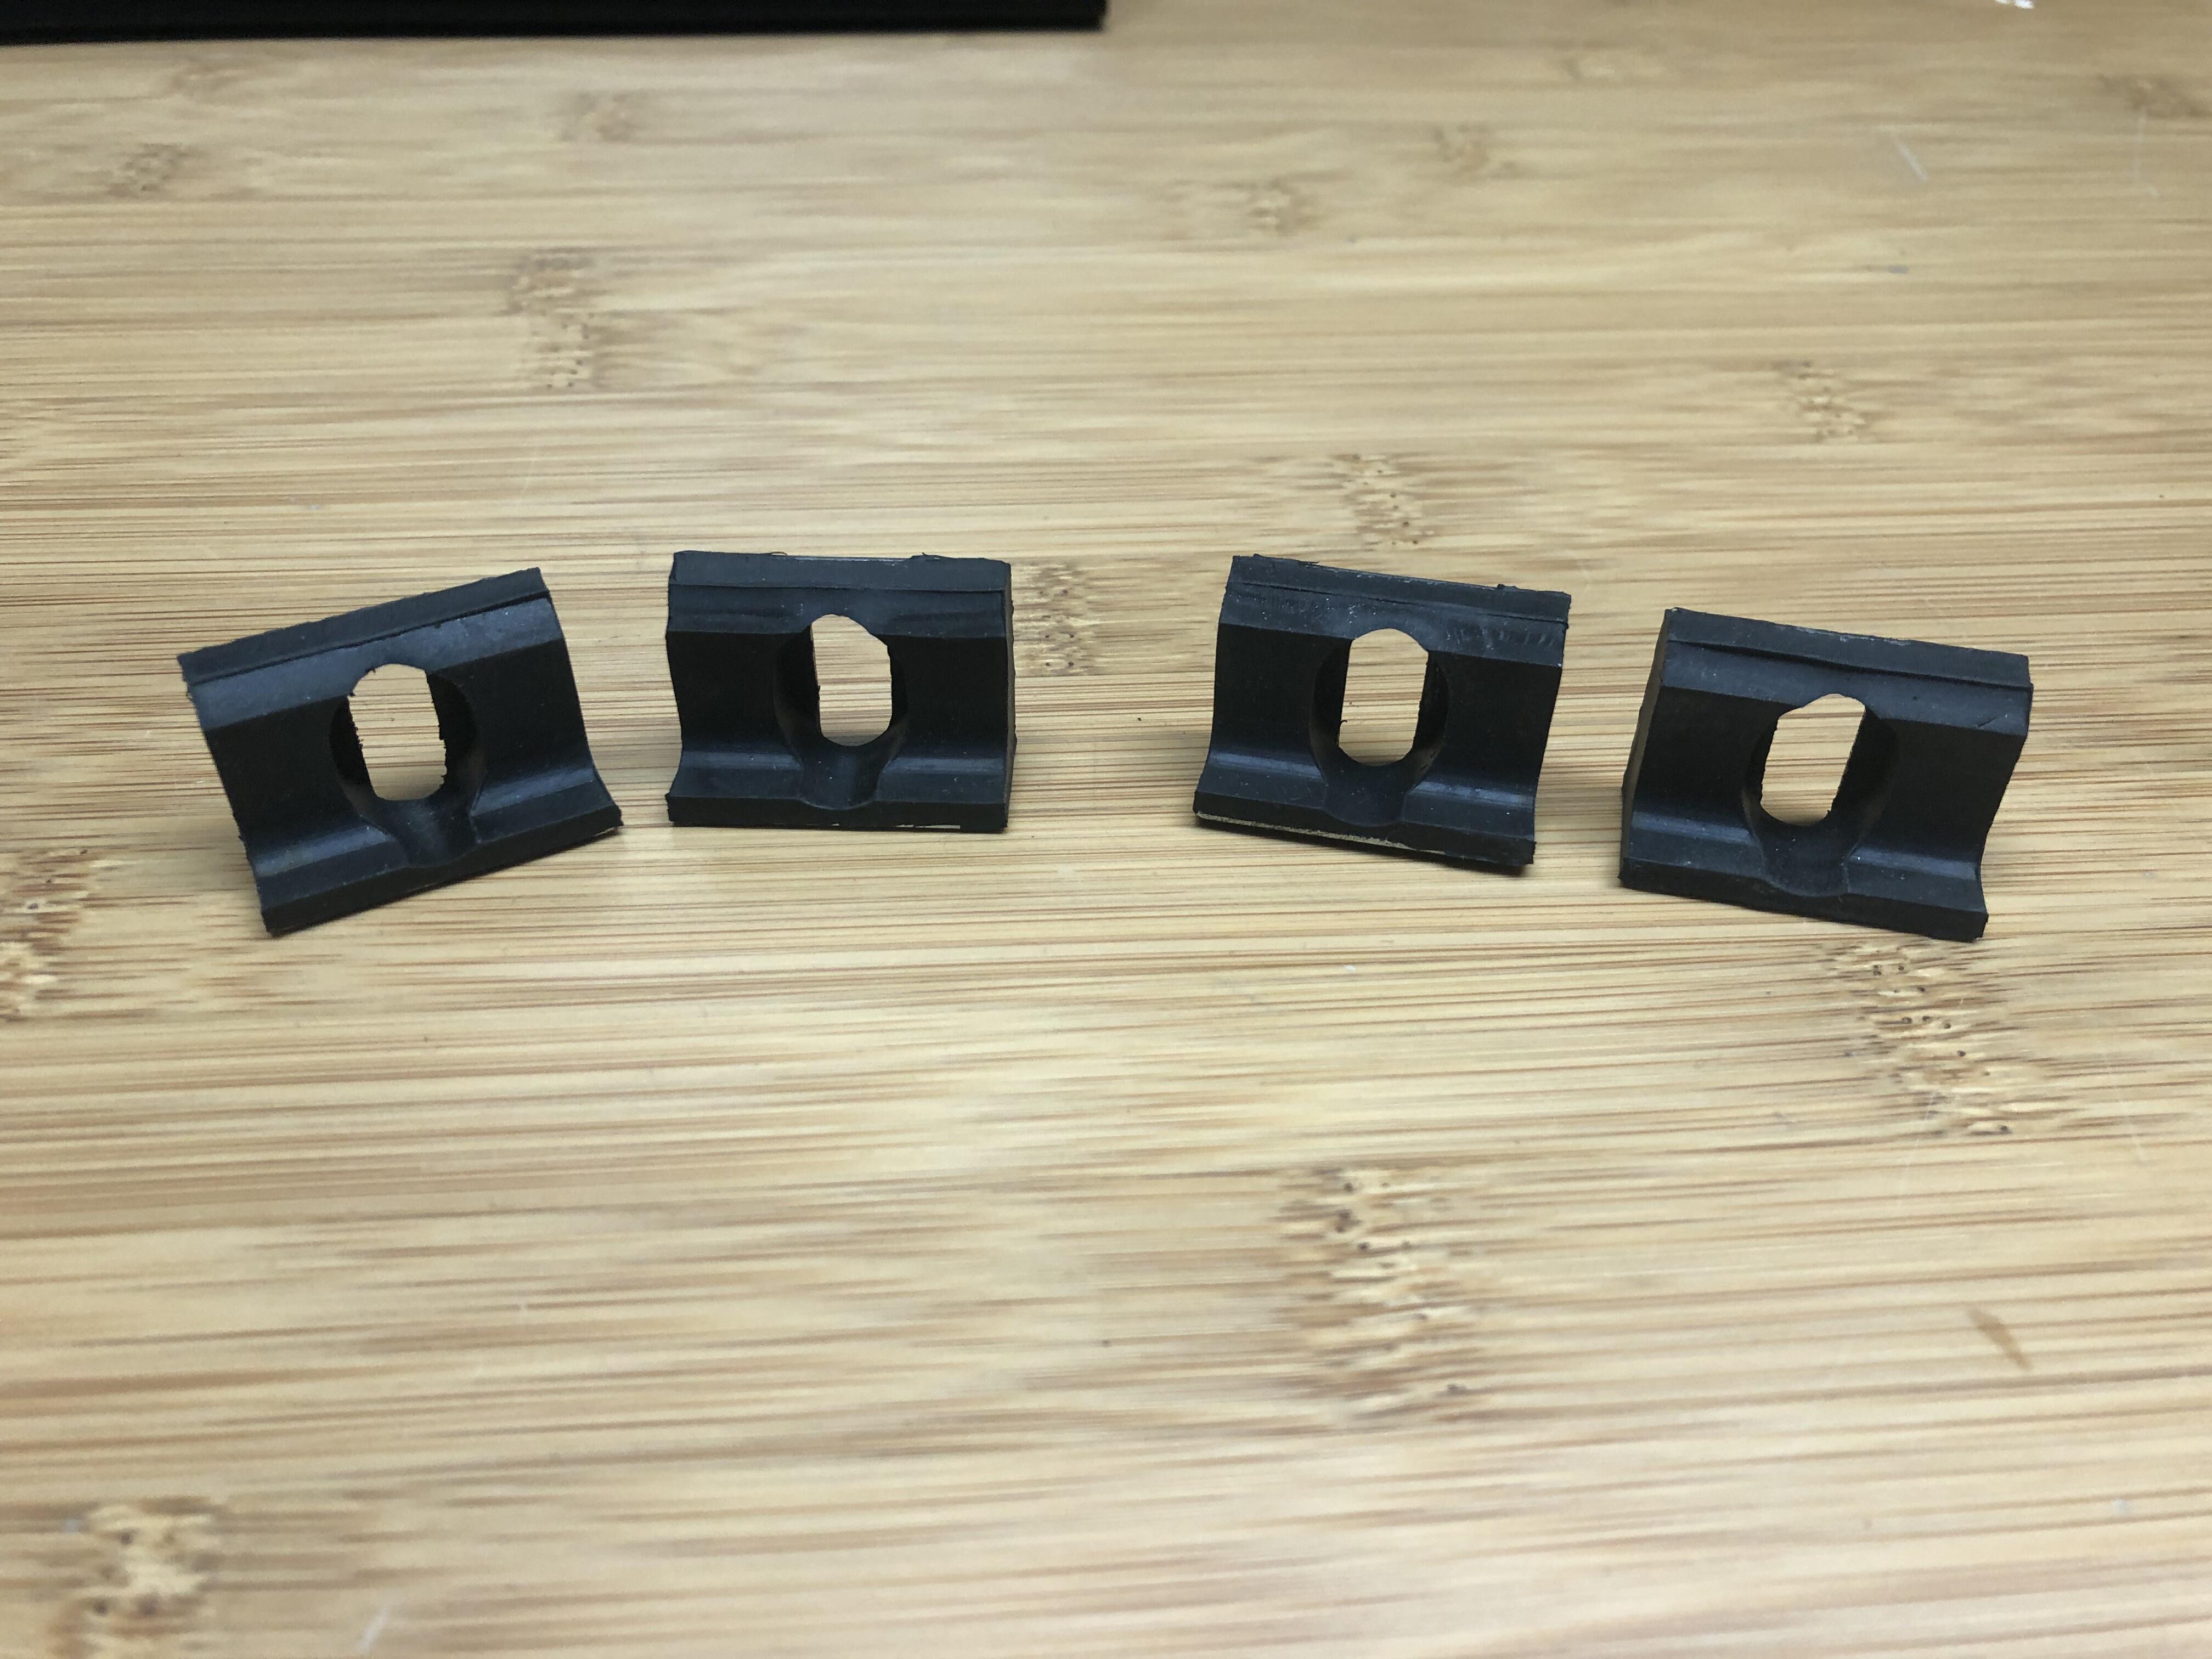
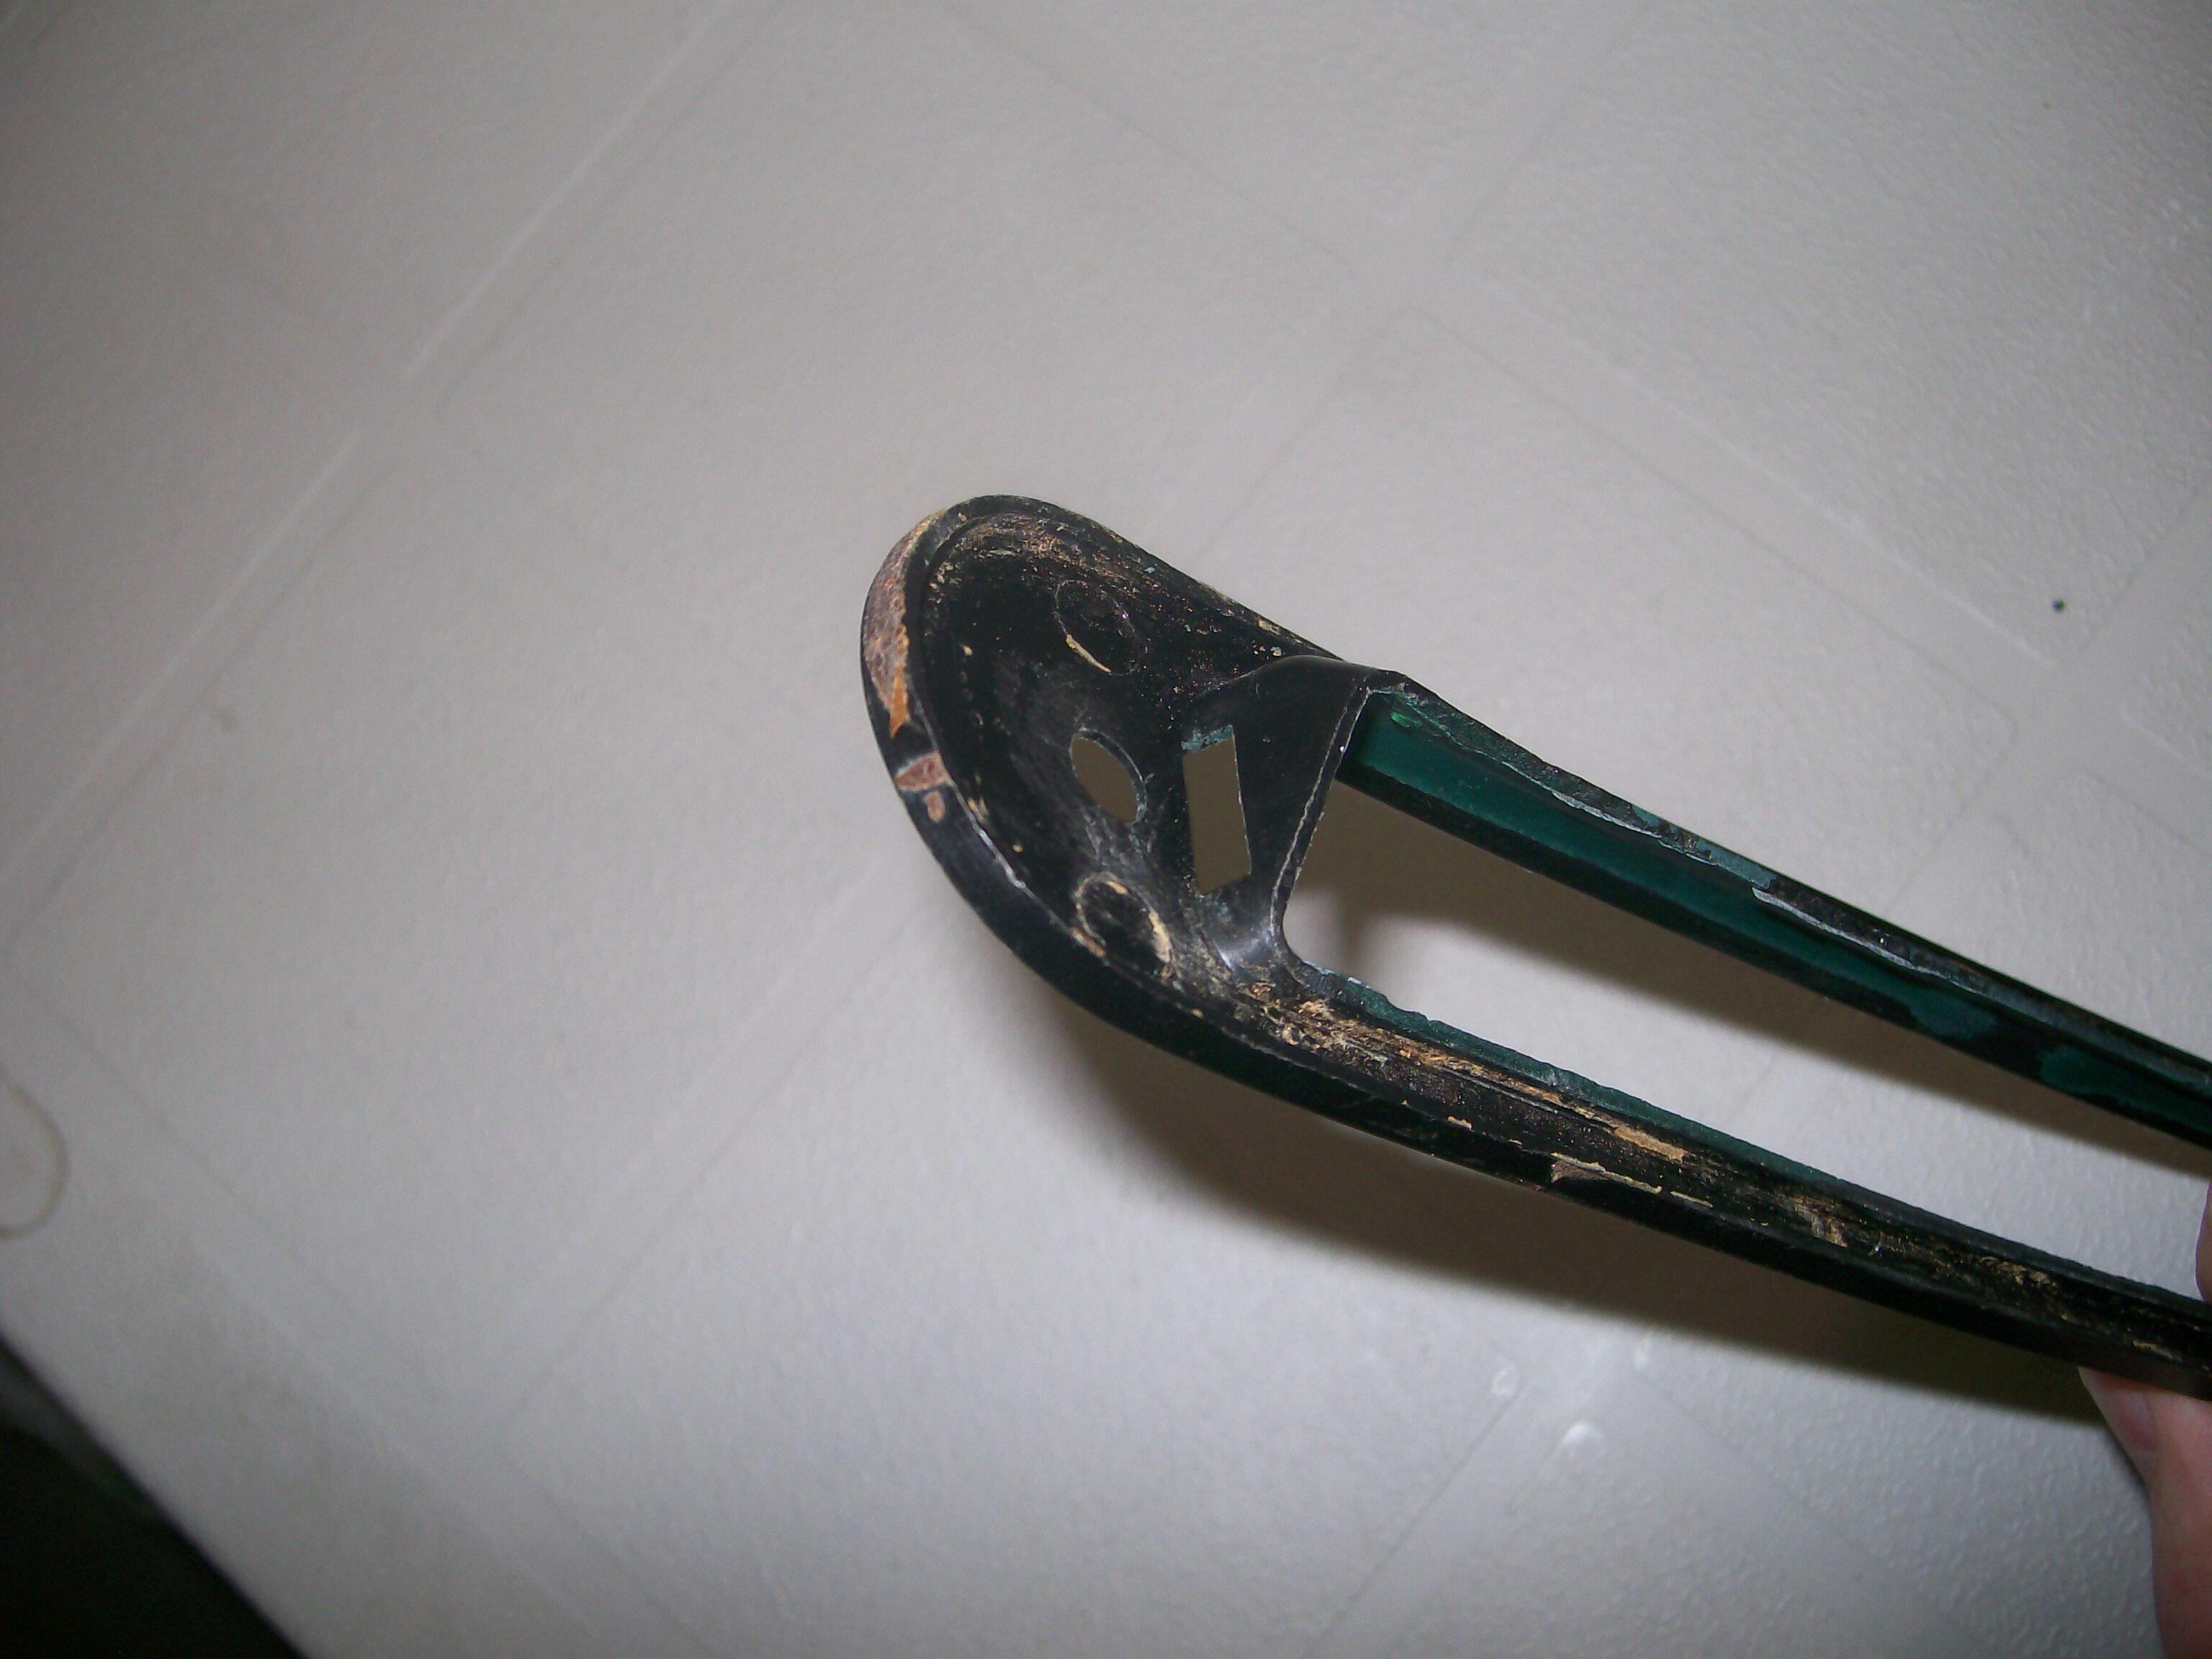
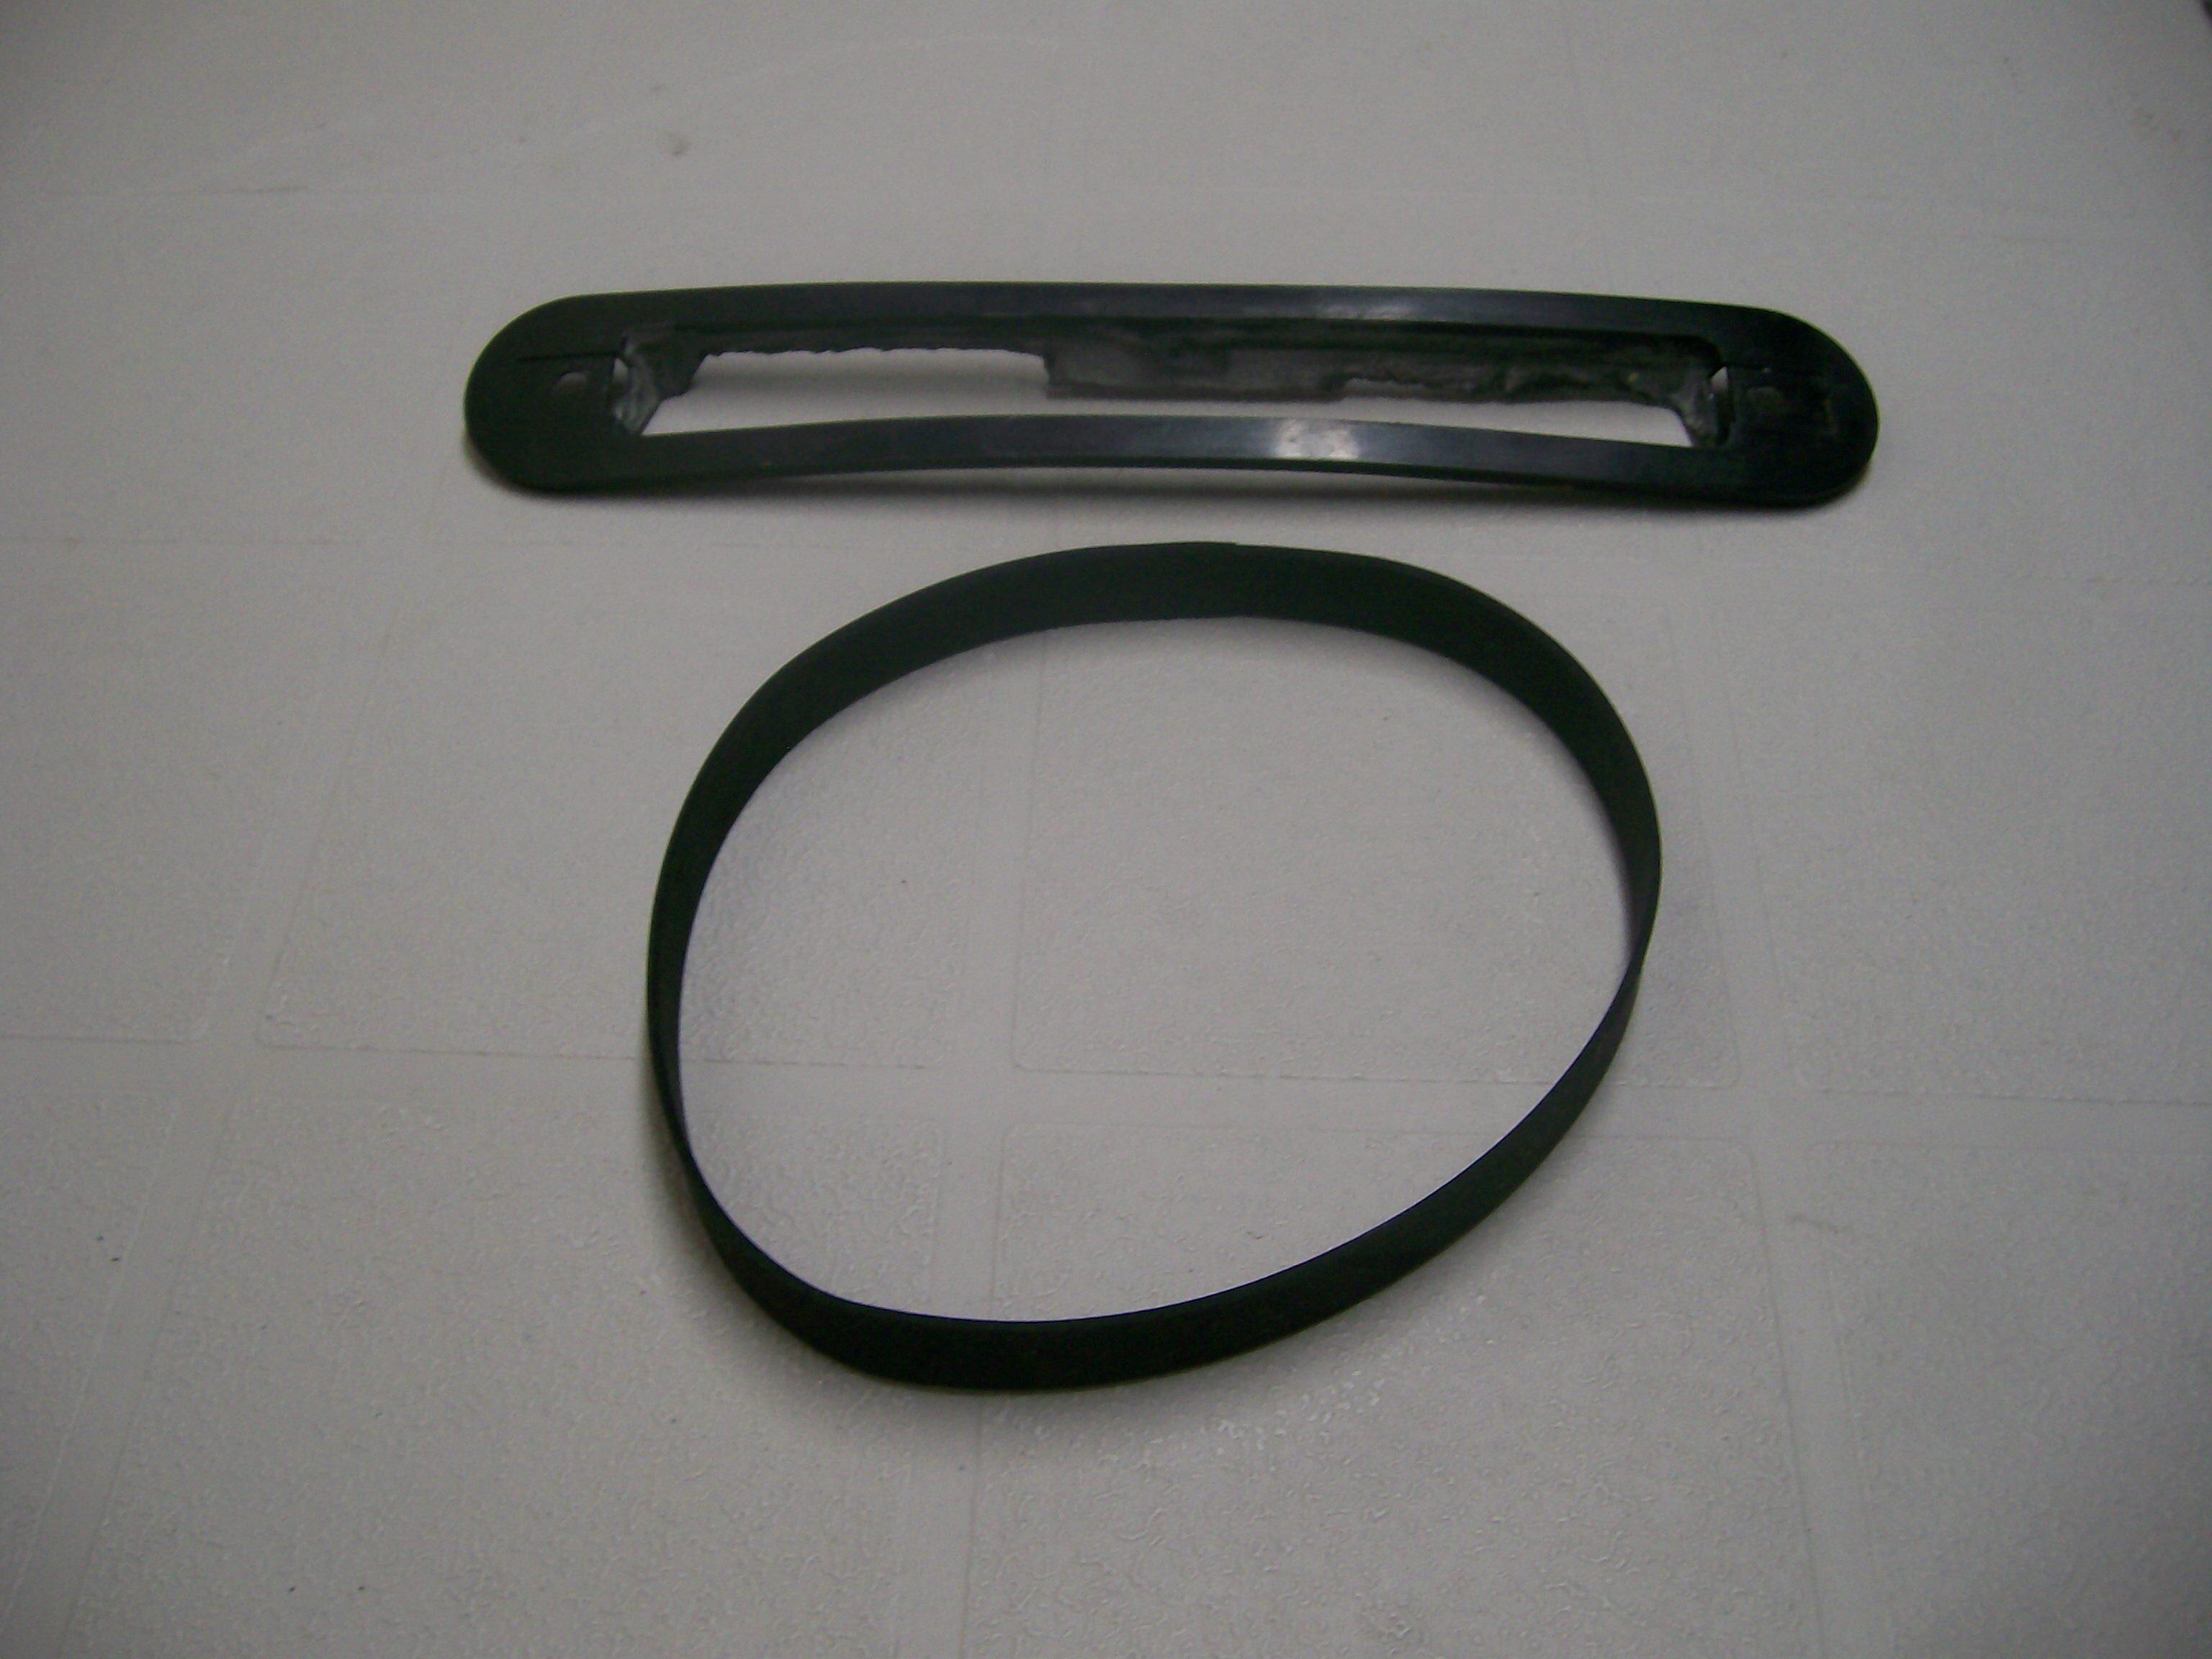
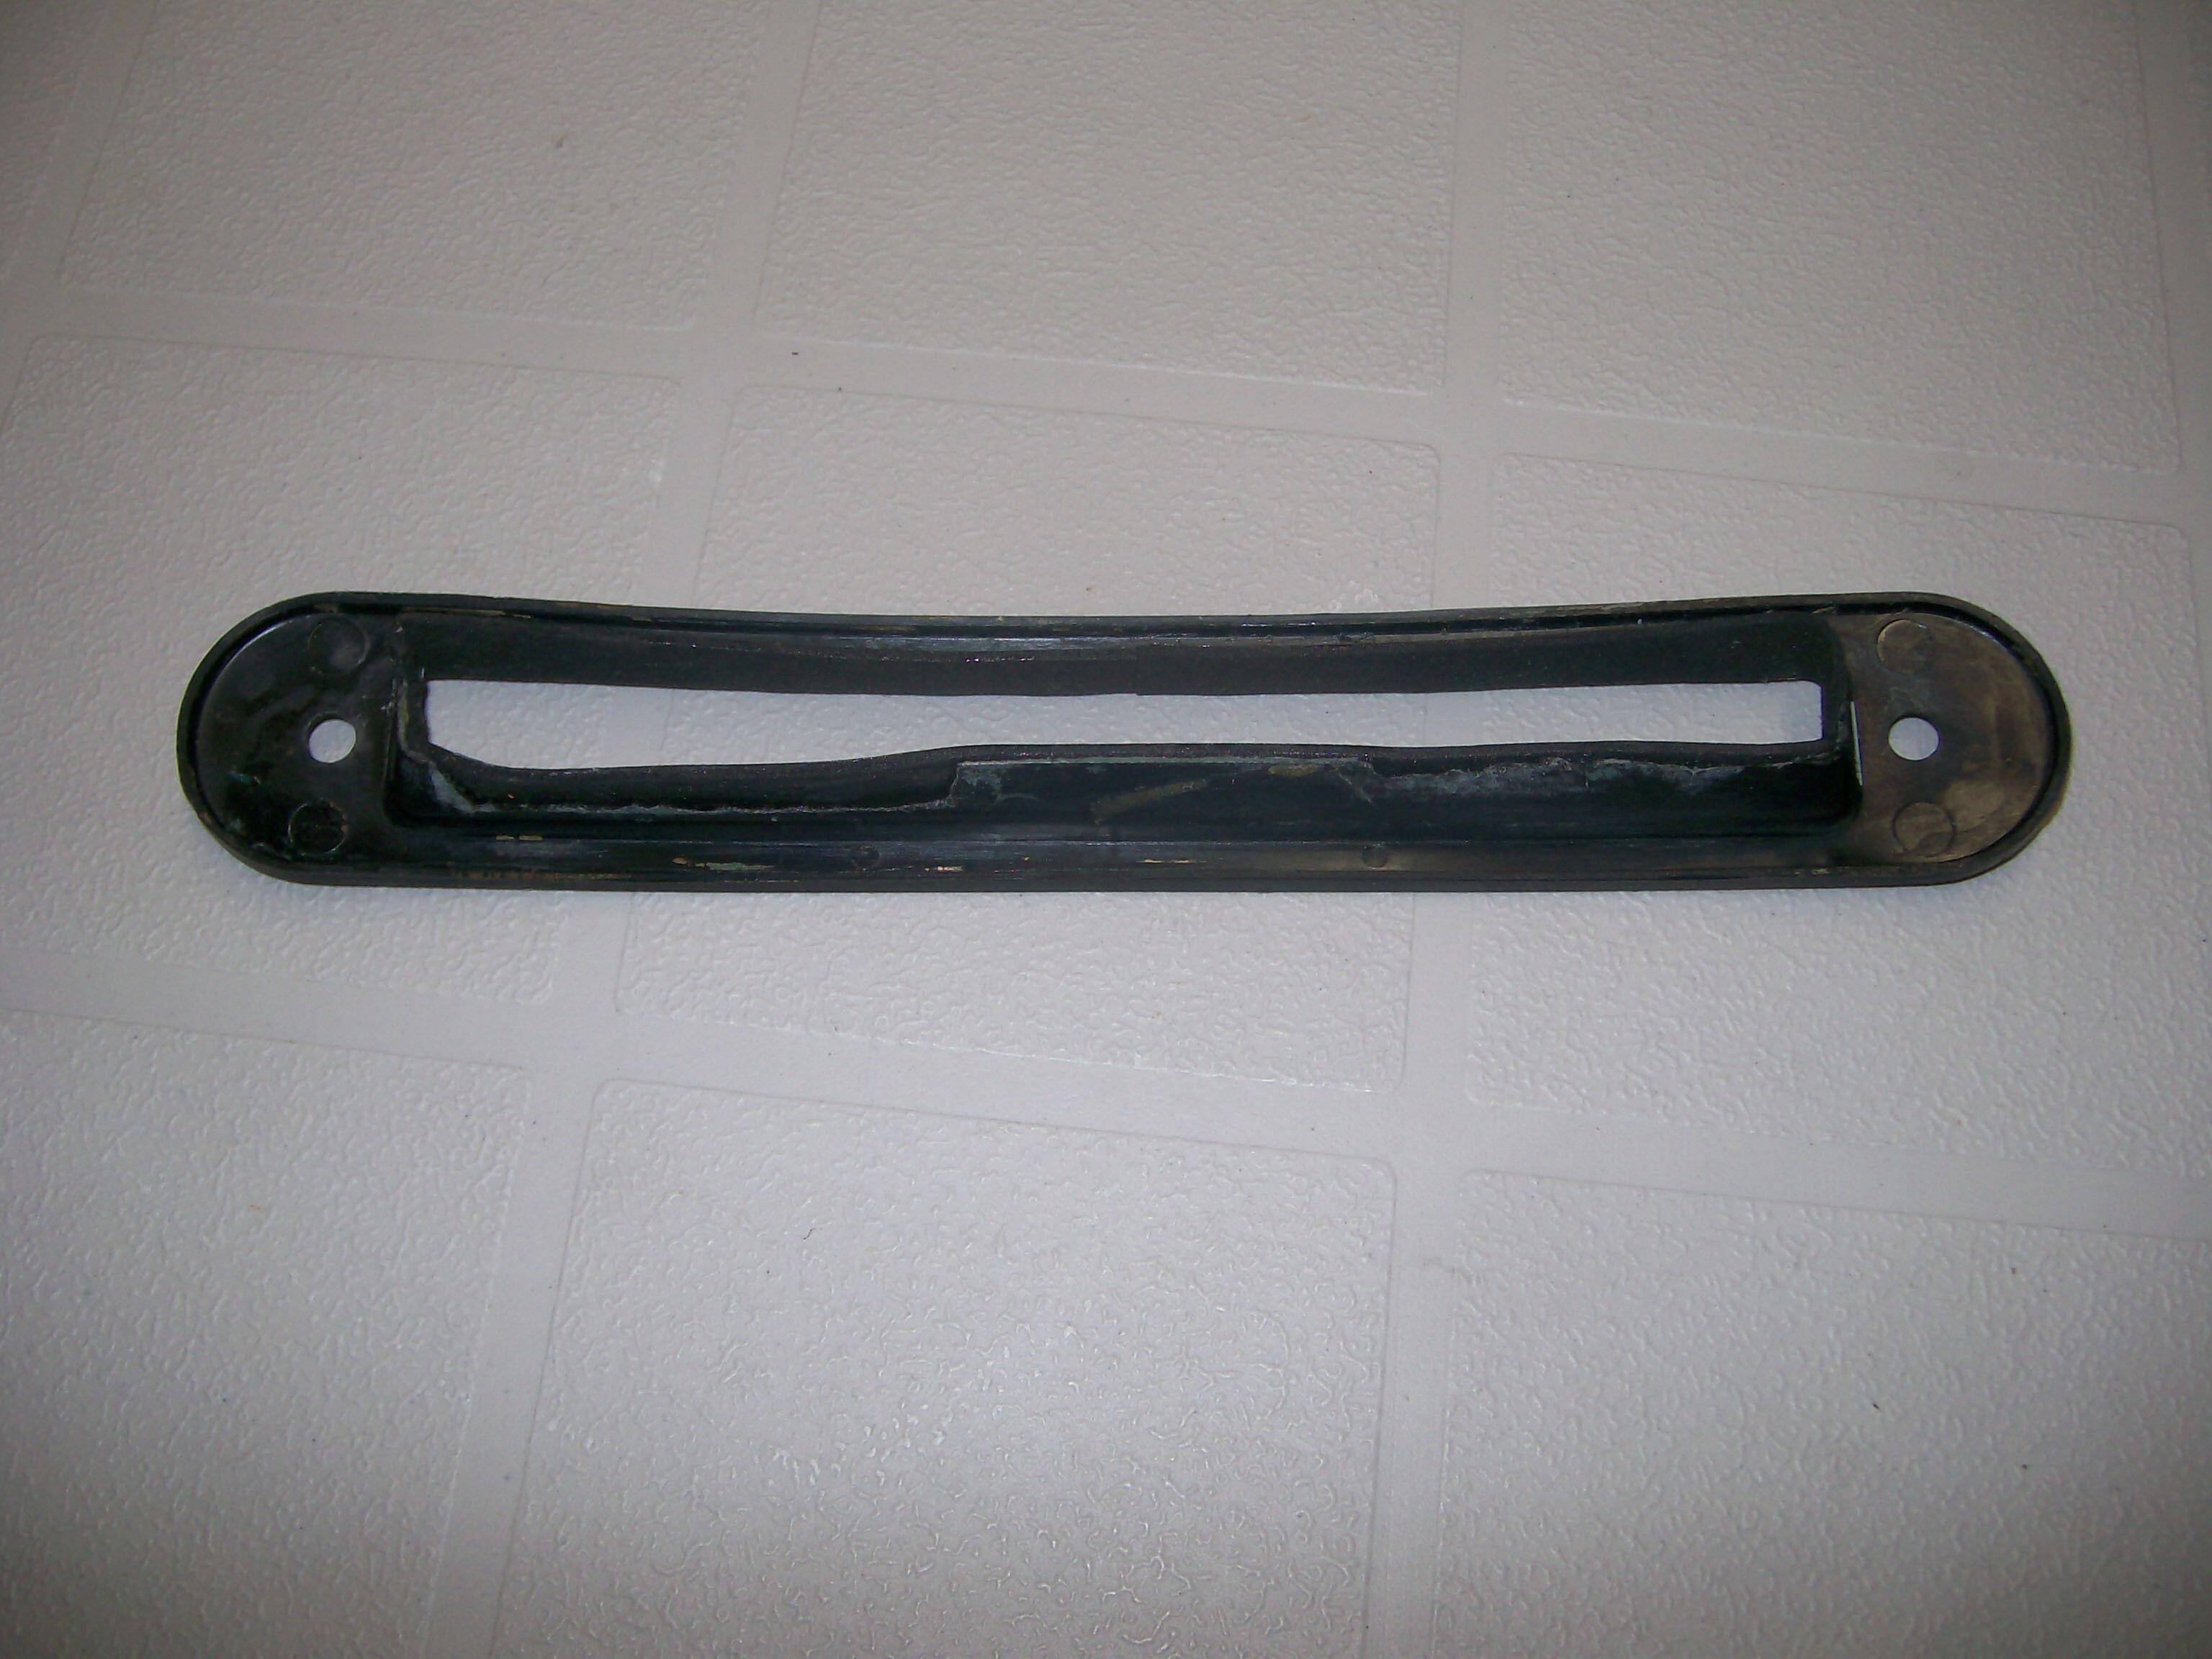
2 pointsHere are a few pics as I was taking my 7/70 apart for reference. The packing material is a dense foam, like used in other places, and was very dried out, basically crumbled during dis-assembly. Pulled these out of storage today and cleaned one them up, I lucked out and they seem to be in quite good shape for being 53 years old. Here are a few more pics of the clean one that you can use to compare to yours. You will note that when both parts are glued together a slot is formed to retain the clip that holds everything together. When I removed the chromed plastic grills from the top side 3 of the four pins broke off. I did find remnants of a barrel clip as well, but it might have been from a emblem.
.thumb.jpg.9da43a898001fdffa3f0c9a188f4d527.jpg)
.thumb.jpg.a52480a67eadd291b643781fc3afce67.jpg)


 2 points
 -
2 pointsI just read all eight pages of this thread. I had forgotten about... Lots of good info! It looks like Steve at 240zrubberparts might make those pieces although they don't show on his website. I will see what I receive from the ebay listing and then go from there I received new hatch vent finish grills from Resurrected Classics. They look very good and were reasonably priced. They also included barrel clips for locking them into the spring slips2 points
-
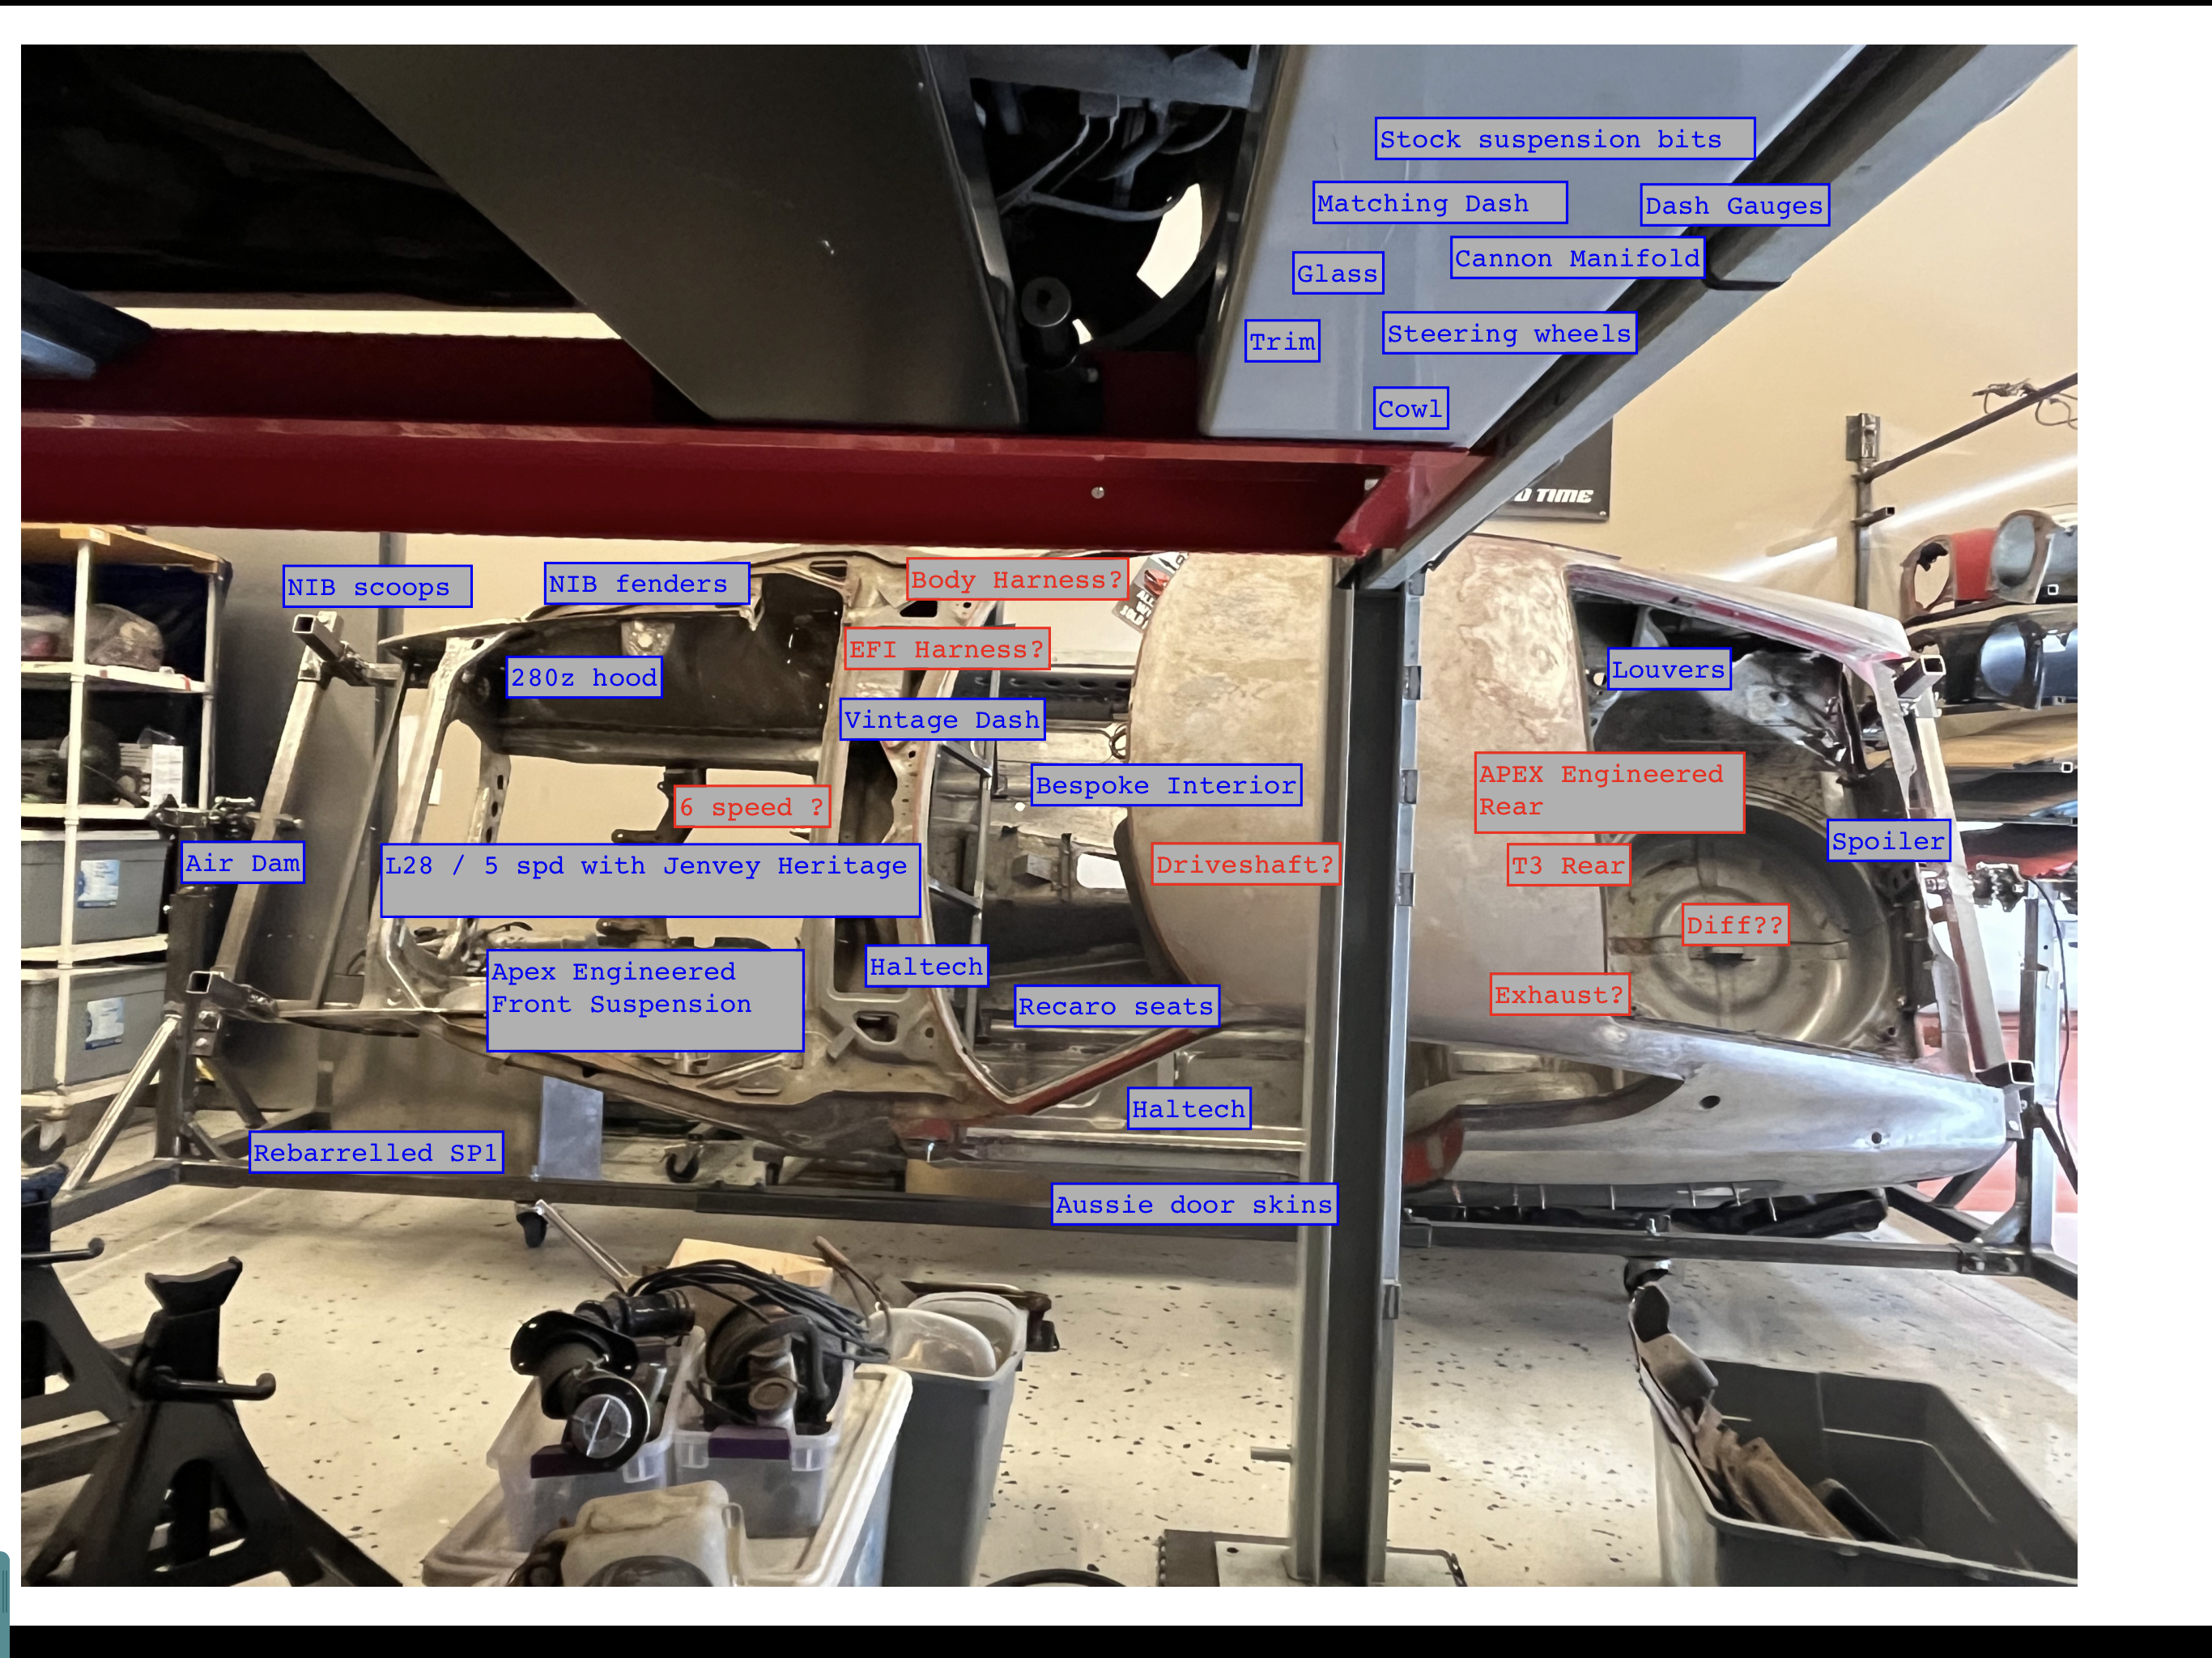
1 pointHey ConVerTT, welcome back, I thought we had lost you and you had moved on to some other project. Looking forward to you installing the Apex suspension, so much potential. I read a horror story about one of their kits a couple of years back but never heard how the problems were rectified.1 point
-
1 pointLong story short...massive garage sale and cleanup...kept enough good stuff to finish 1 car and back to work.... just need to a few things ...
 1 point
 -
That's good. They won't hold up well raw like that. Oiled might help but I hate to oil things I want to plate later. Knowing you will avoid rain will also help1 point
-
@Patcon Temporarily I coated them lightly in low temp grease just to keep water off. I have plans to plate them once I get to that with all the engine bay work that's needed.1 point
-
1 pointThat may very well be the case. Why not take a look and let us know what you find.1 point
-
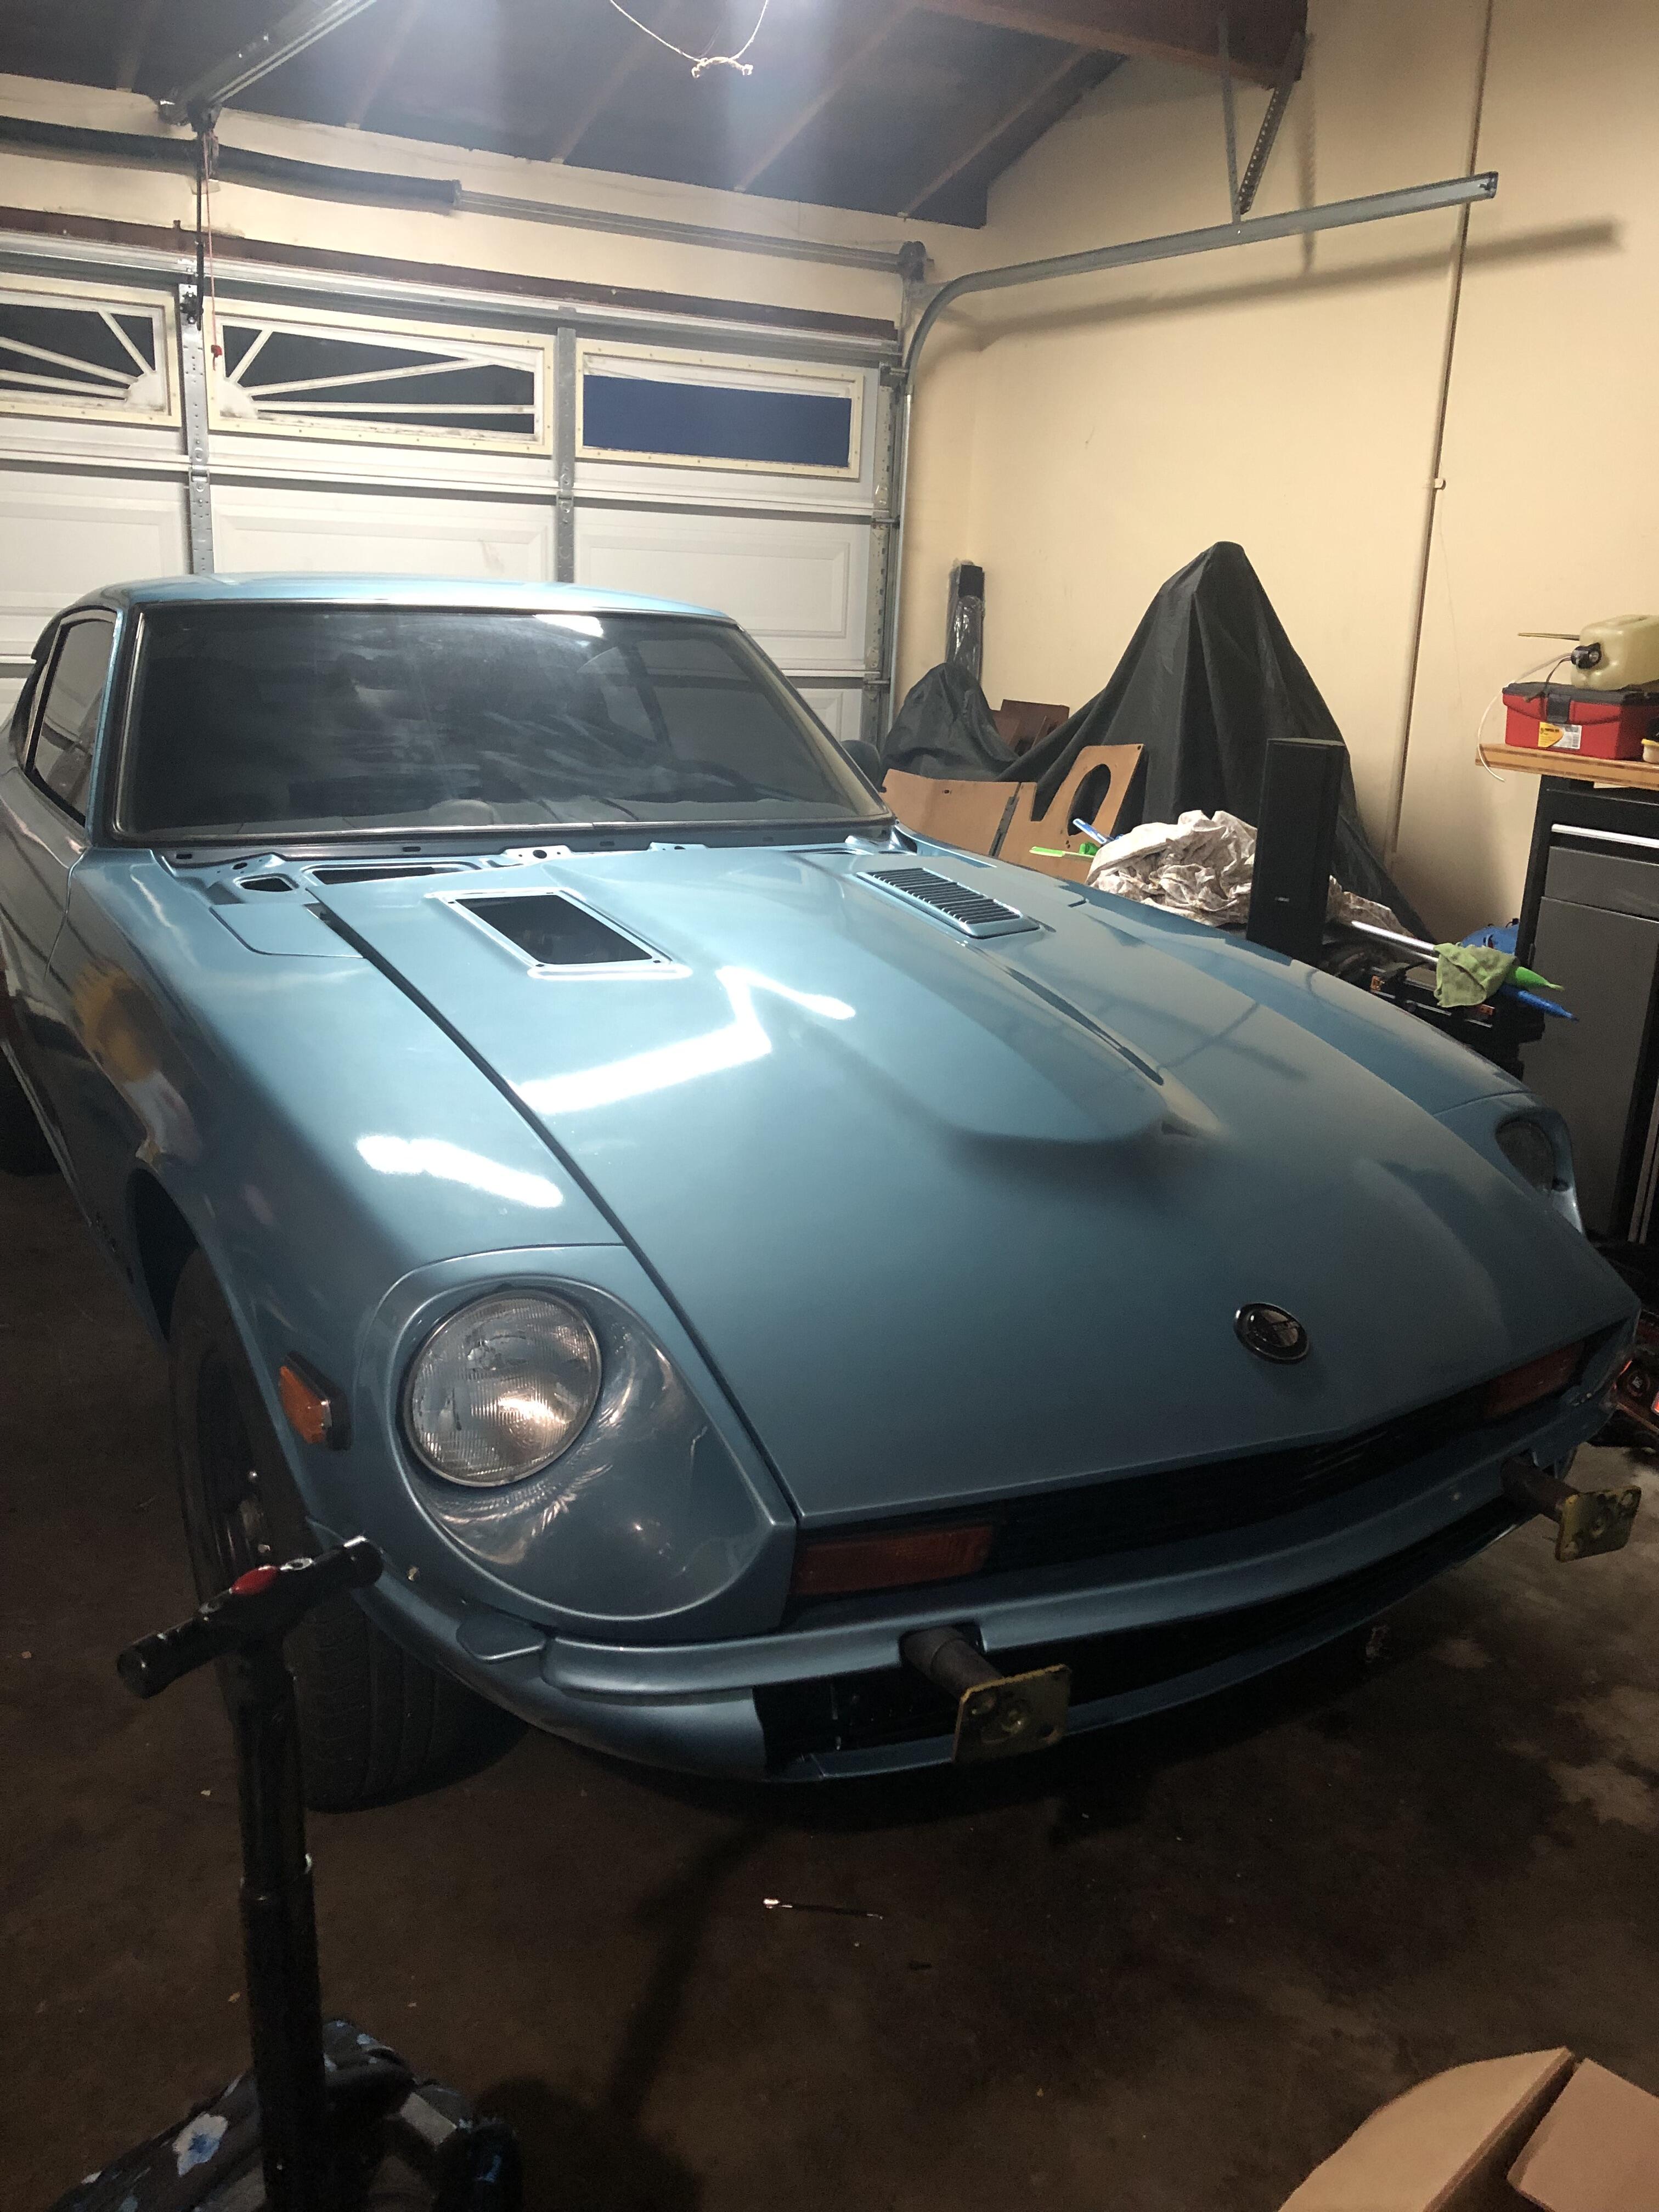
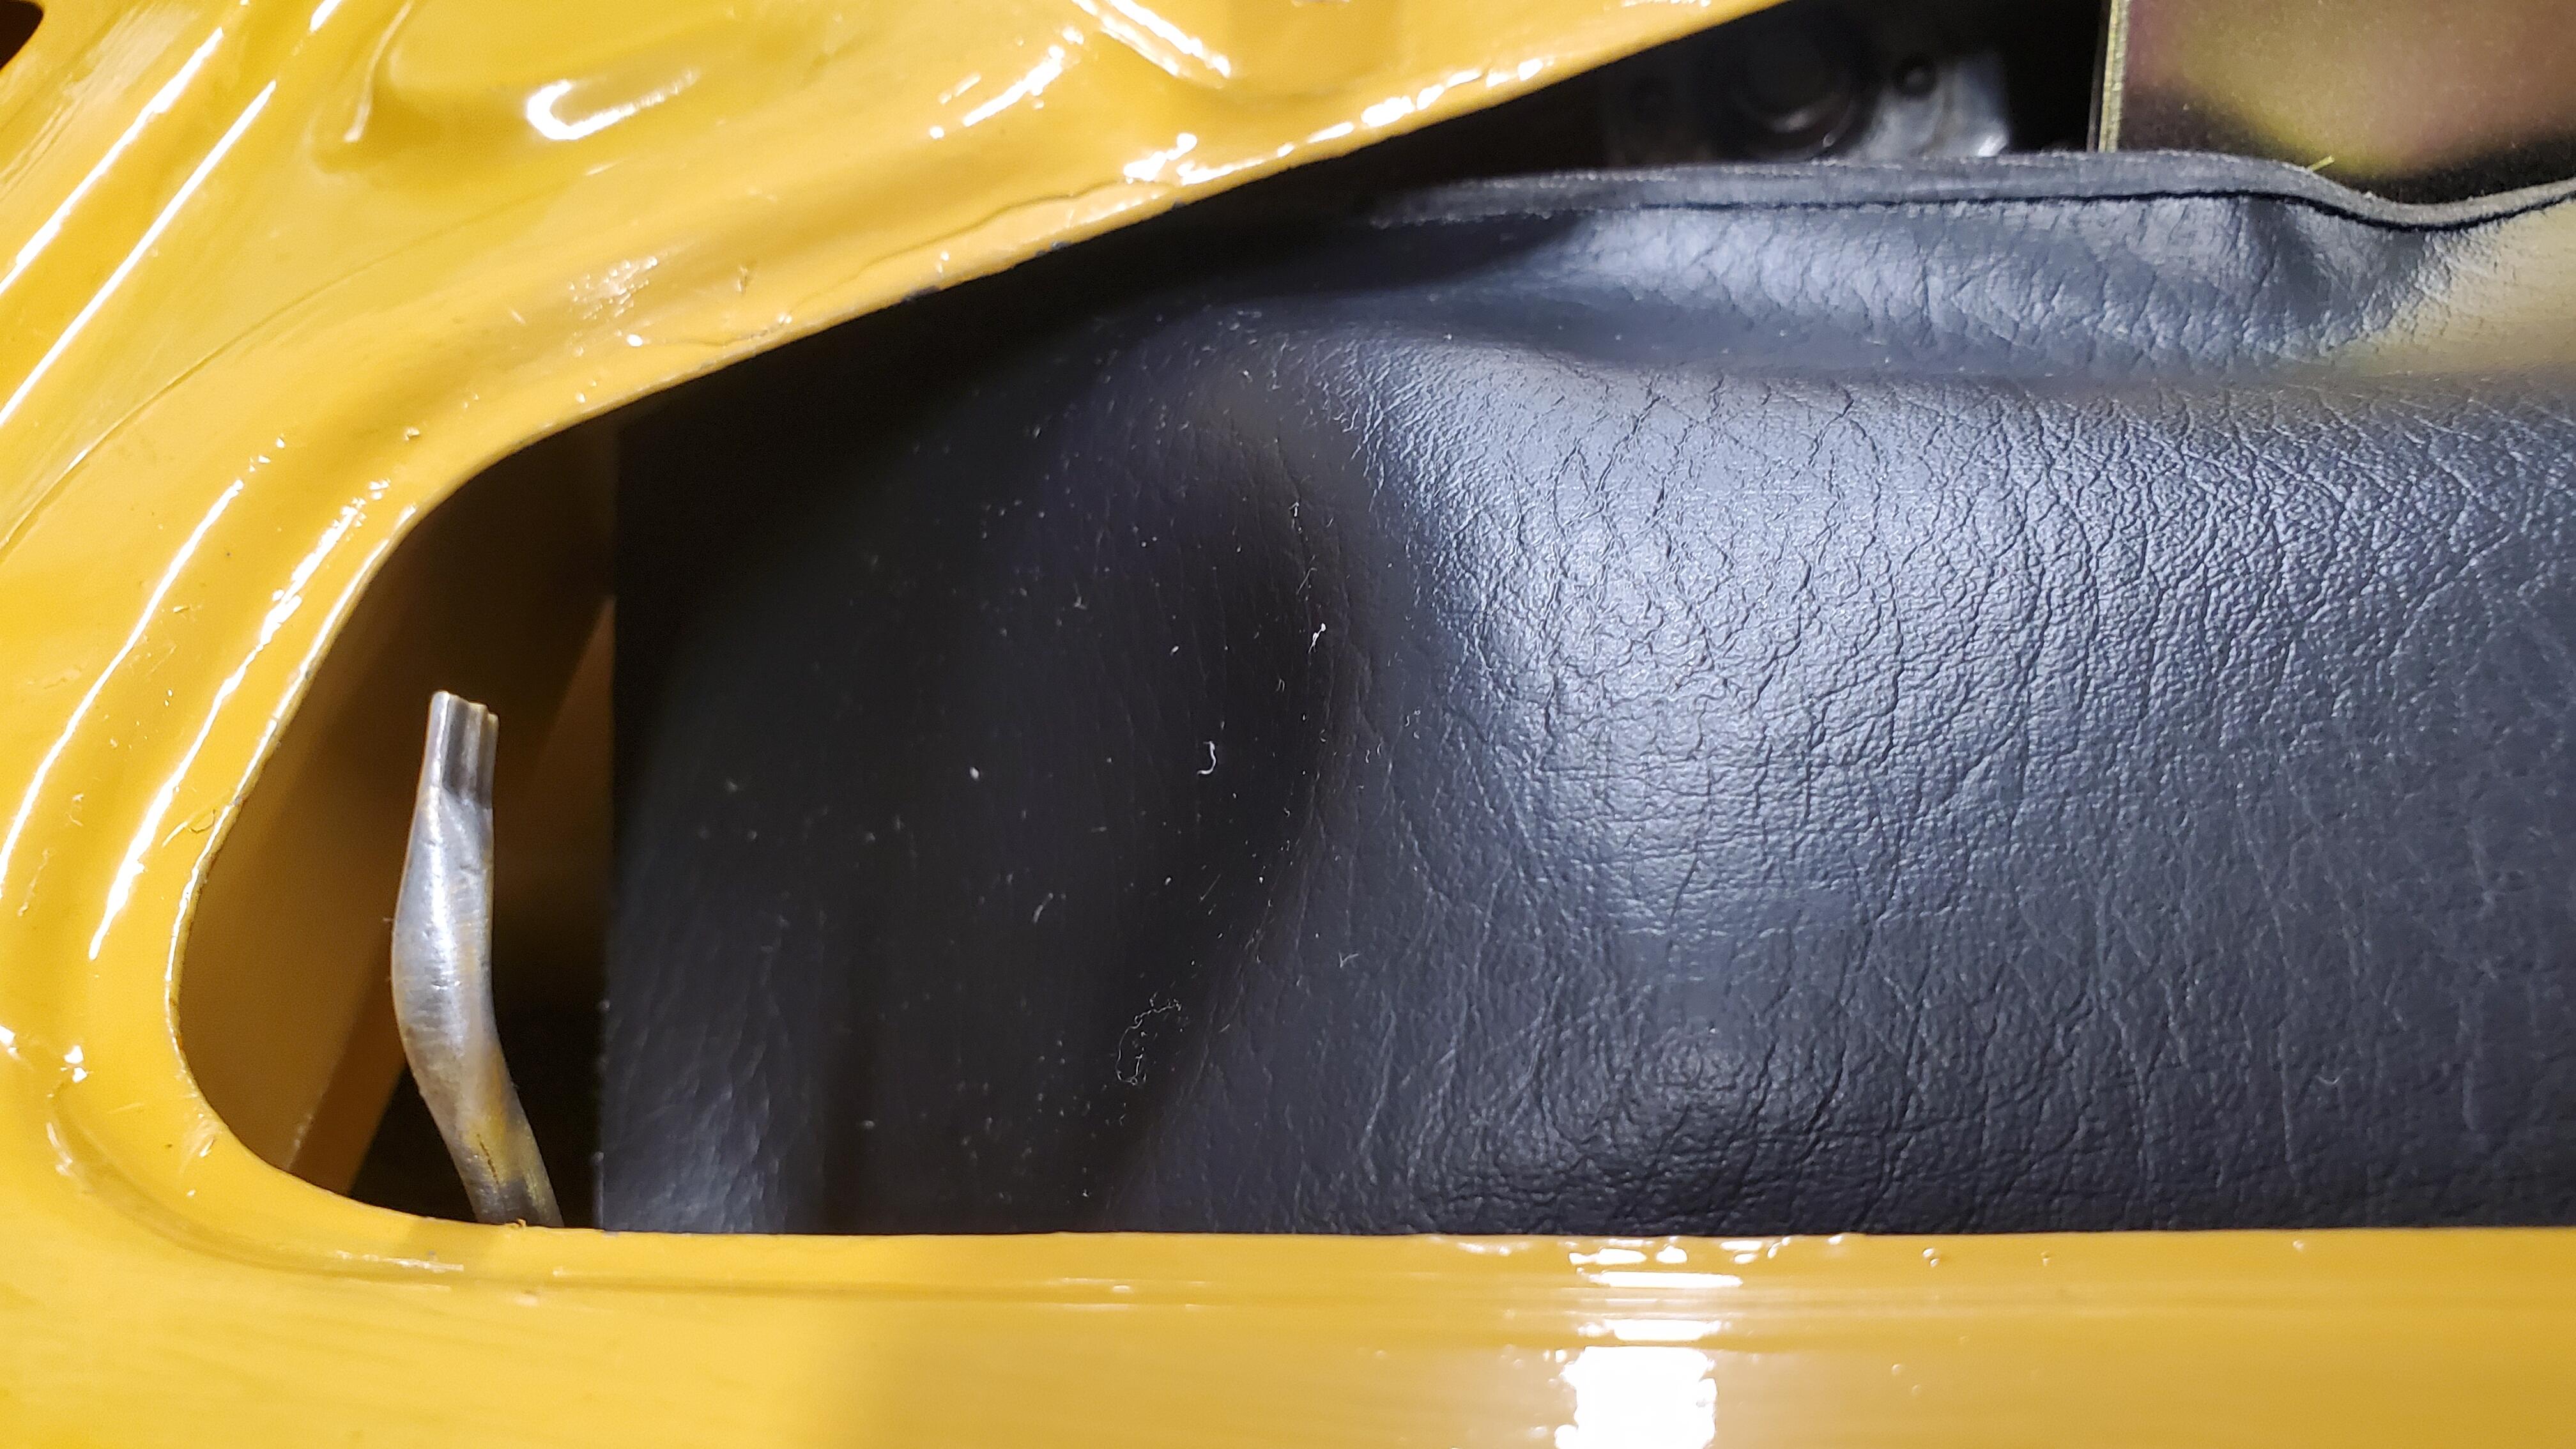
1 pointUpdate ... finally hood, fenders and front body panels on. I have yet to install the main door seal which goes around the main doors. One quick question on these hood to fender bumpers ... I have the front round ones near the firewall/cowl area and they are great and dont let the hood vibrate. I can bring the hood down and slowly push it in to lock. But when I put these 4 fender bumpers I cannot do that anymore, I had to bang the hood down fairly hard to latch. I am not liking that, so far I had removed these 4 and feeling ok. Thoughts?

 1 point
 -
1 pointSeamstress Chalk. Wipes right off. Never understood why they don’t clean it up. Seen it multiple times.1 point
-
1 point
-
One NOS new one on eBay right now $580 (your pic I believe) There were only two in the sold section, a lot more of the Temp gauges. I was thinking around $150 I saw a decent one sold for $130 ish. and a rusted one for $60.1 point
-
1 pointYes, came out pretty nice. The Rust Kutter was great plus i did plenty of sanding but the paint looks solid. I dont drive in rain or wet anyway so should be good.
 1 point
 -
Considering it's both headlights missing low beam, the most likely problem is with the switch.1 point
-
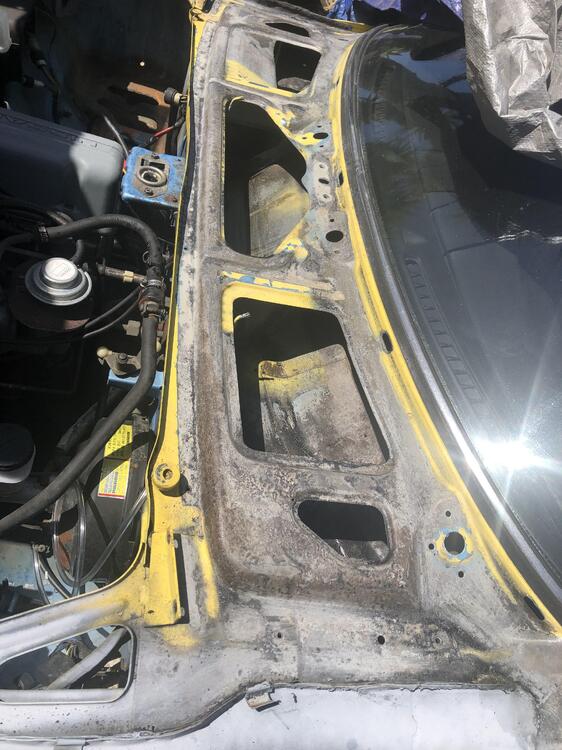
1 pointLooked a lot of reviews and this product Rust Kutter came up on top above OSPHO. Both are Phorphoric Acid based. https://www.amazon.com/dp/B001U1GW82?psc=1&ref=ppx_yo2ov_dt_b_product_details This thing works!!! my rust was pretty serious. Scrapped with a big wire brush and this is after first pass sitting for about 30 hours. Good thing is it creates a flaky black surface which I believe is the reaction residue which can be scrapped off with a wire brush. I think results are pretty good so far. I am planning to give it 3 rounds. Using the same treatment in the battery area which luckily dont have any pitting. Wanted to share the results and the product I used. Probably will also use that wet rag combination as well in harder areas. Slow and steady!!!

 1 point
 -
1 pointPost #60 in that thread provides a pretty good description of how to disassemble and reassemble. Is there any way you could rig up a brake hose from front or rear wheel cylinder line of an active vehicle to the appropriate port of the valve and then use hydraulic pressure (press on the brake pedal) to blow the piston out?1 point


.jpg.b2851d20f42f842a8afa963b4372ede4.jpg)
.jpg.a77de435a26bf781306db844d47088e2.jpg)