Leaderboard
-
sweatybetty
Free Member3Points1,119Posts -
Patcon
 Subscriber
 3Points11,142Posts
 -
jonbill
Free Member3Points458Posts -
Captain Obvious
Free Member2Points10,081Posts


Popular Content
Showing content with the highest reputation on 09/01/2023 in Posts
-
2 pointsThere's a long rambling thread here about the journey. Many of the "facts" I stated in it were my best guess at the time 😀 Post in thread 'Speeduino installation' https://zclub.net/community/index.php?threads/speeduino-installation.23302/post-3009982 points
-
2 pointsCool. With your stash, you're already well on your way! So is that tantalum cap polarized? I don't see a polarity marking on it, but the tantalum caps I've worked with were. And if it is polarized, make sure you get the polarization correct. Tantalum caps really don't like to see reverse polarity, especially at temperature. I'm wondering (thinking?) that might be a ceramic cap and not tantalum. And who doesn't have a bag of 5.1V Zeners laying around?2 points
-
1 pointOk, I couldn’t take it any longer without making a couple of comments. You can break out the test gear and spend most of the day looking for the bad part or just replace the caps and transistor. To start if you apply 12 vdc to the assembled clock and the balance wheel moves the coil is good. The wheel may move ever so slightly so look closely. If it doesn’t then the coil is bad and you need to find another board. De-soldering /soldering is the biggest problem because you can cook the insulation on the coil wire. Once that happens you destroy the coil. No joke you need to be uber careful soldering the 10uF cap next to the coil. Guess which cap usually goes bad? These are electrolytic caps and you need to replace all with the exact values. No subs. You can also have a bad transistor (C828) so why not replace it. Almost any general NPN low noise amplifier transistor will work. The zener diode rarely goes bad unless you’ve applied something like 24vdc to the board. I’ve seen it happen. These 4 parts cost around $5 and will last years longer that the originals. Last, but not least I don’t charge $351 to repair this board, that’s a completely refurbished clock converted to a Quartz unit. I do have this repaired 280z circuit board for $60. Good luck and let me know if you need help. Ron1 point
-
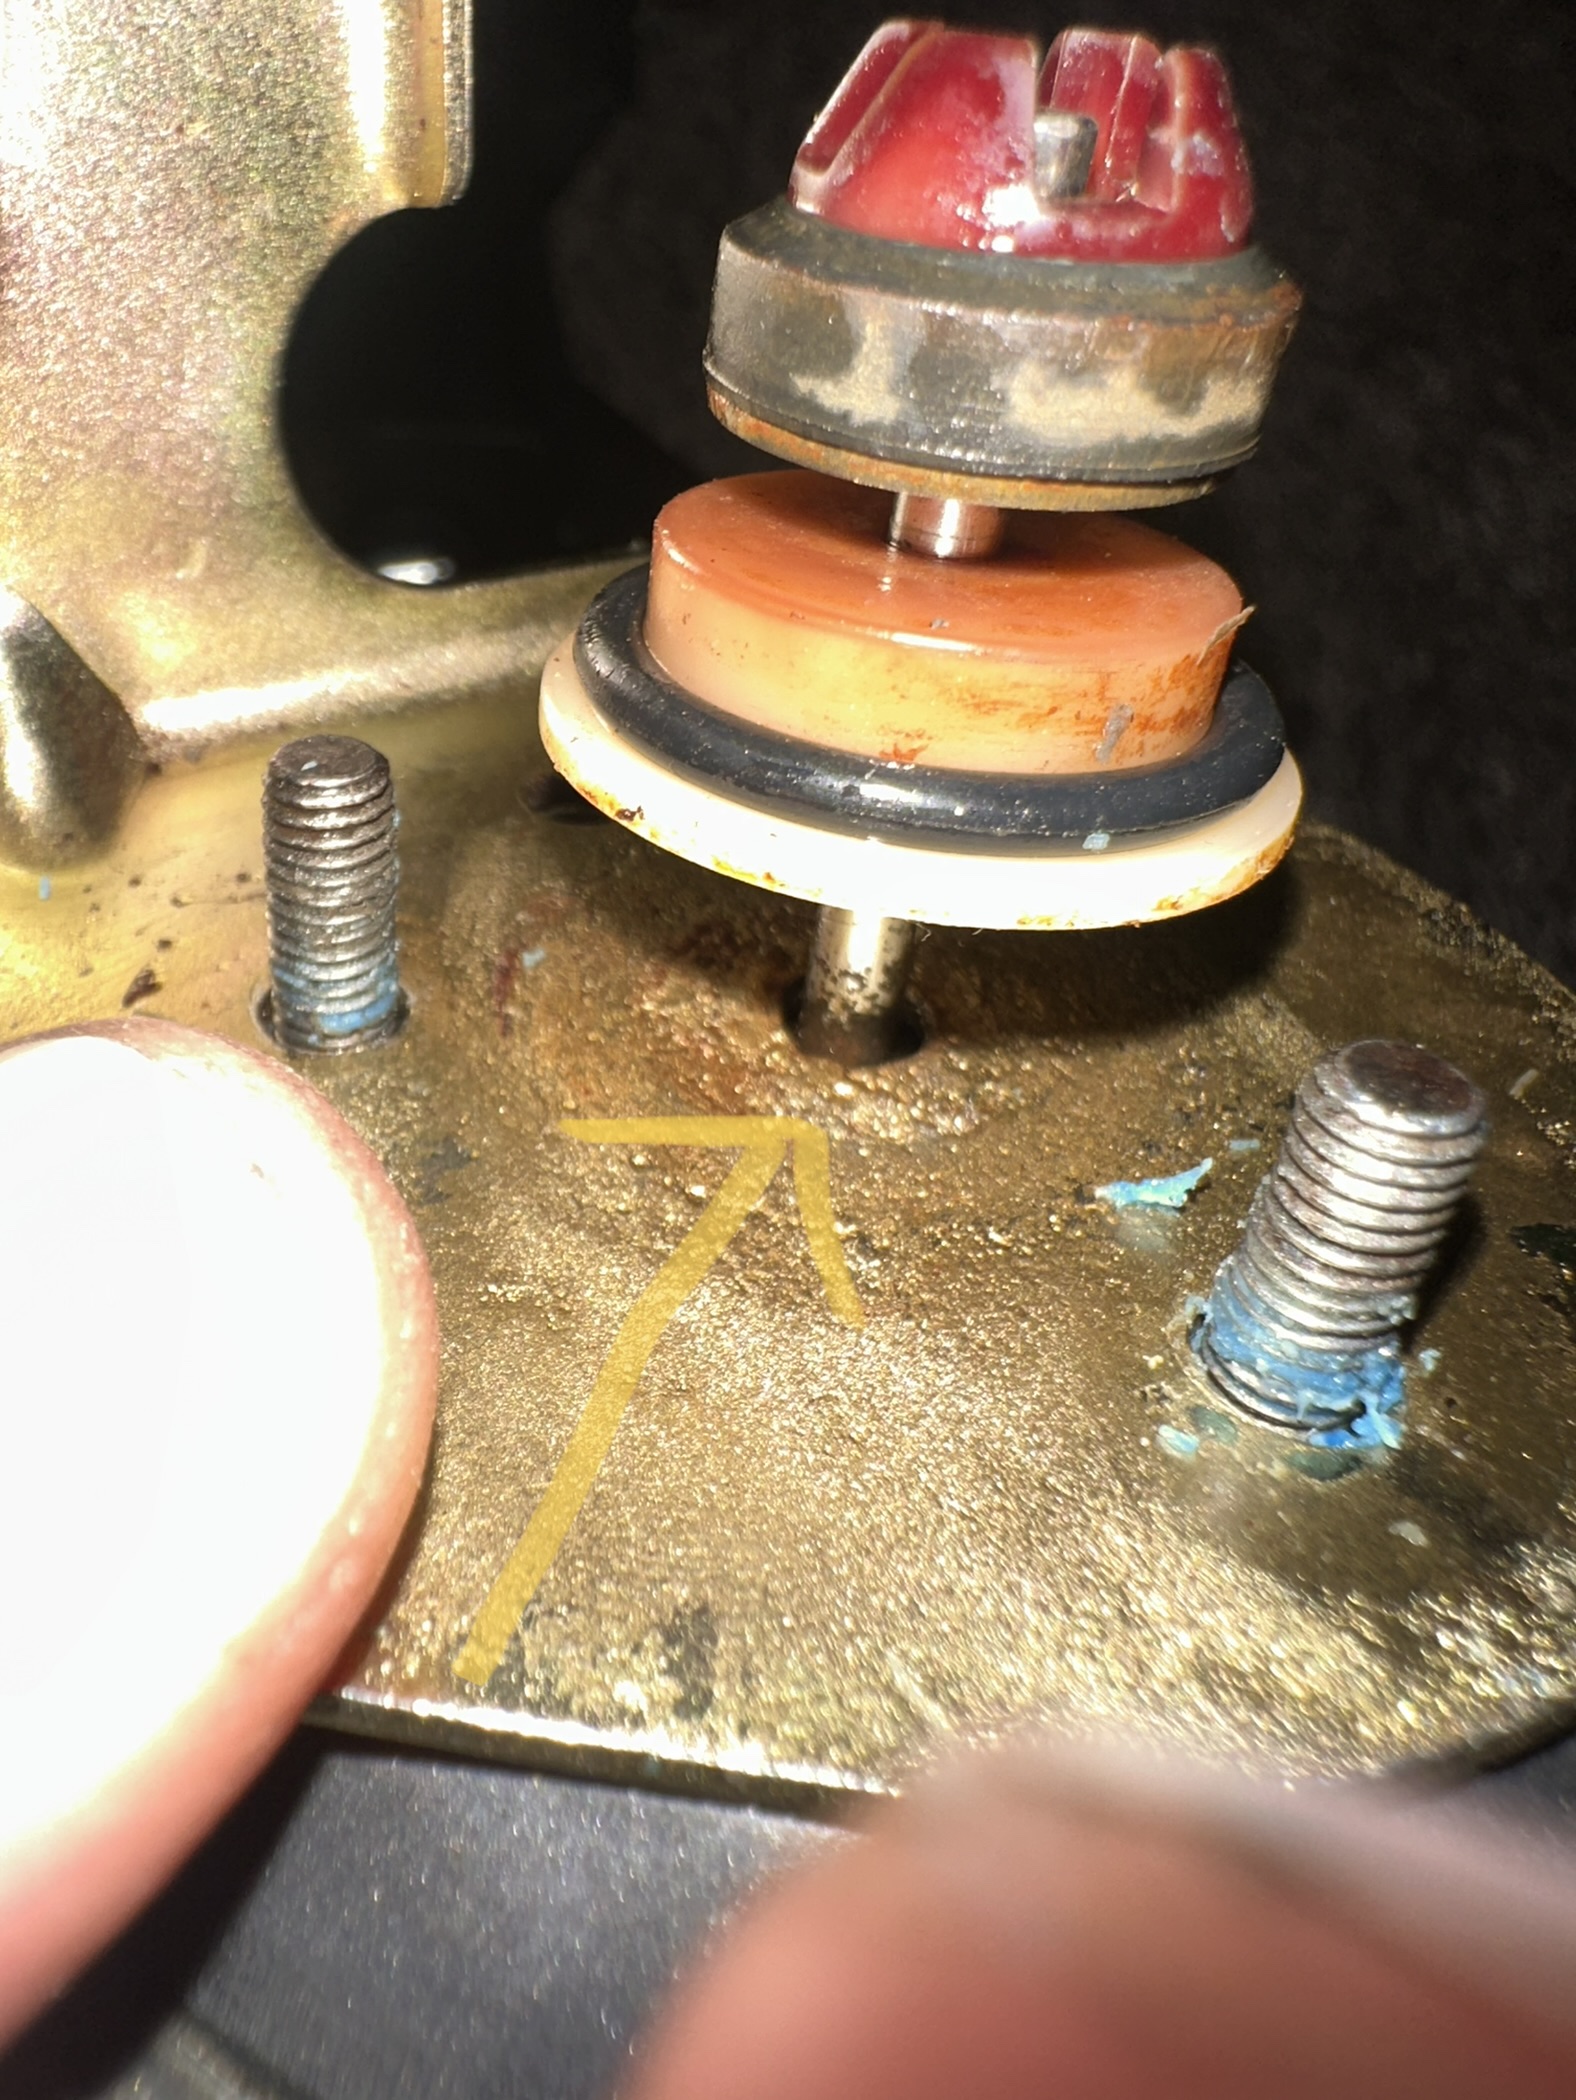
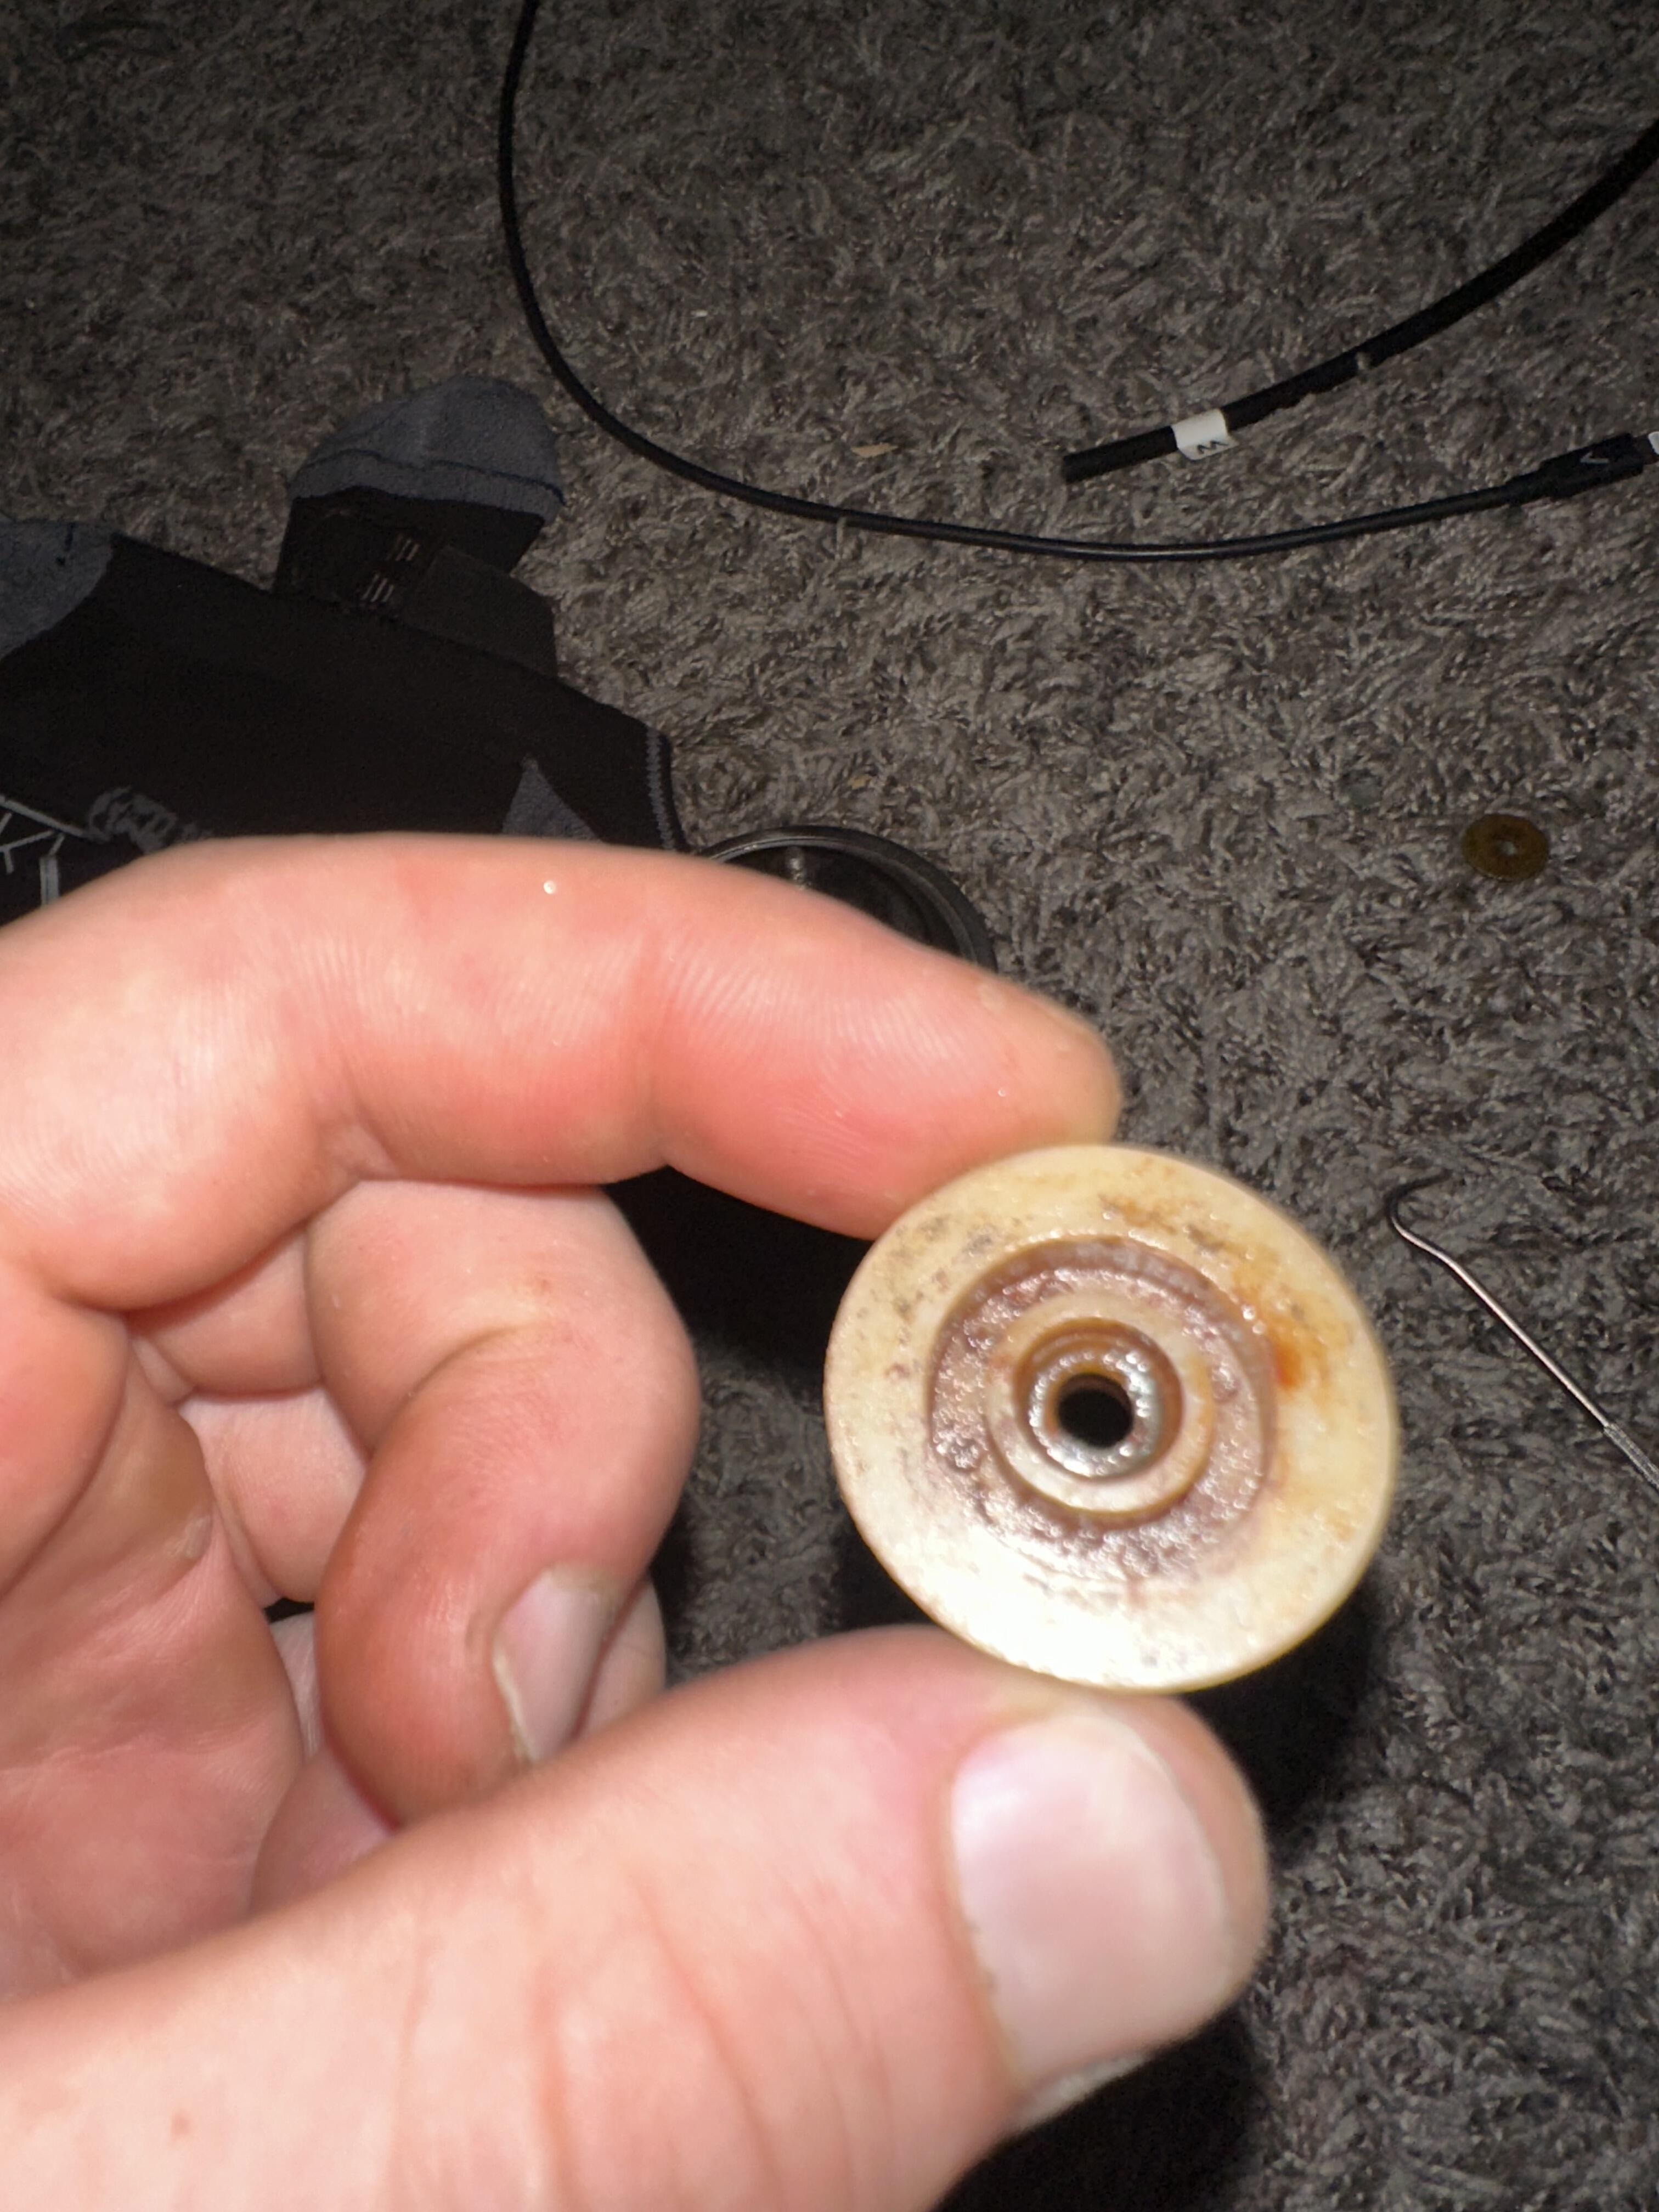
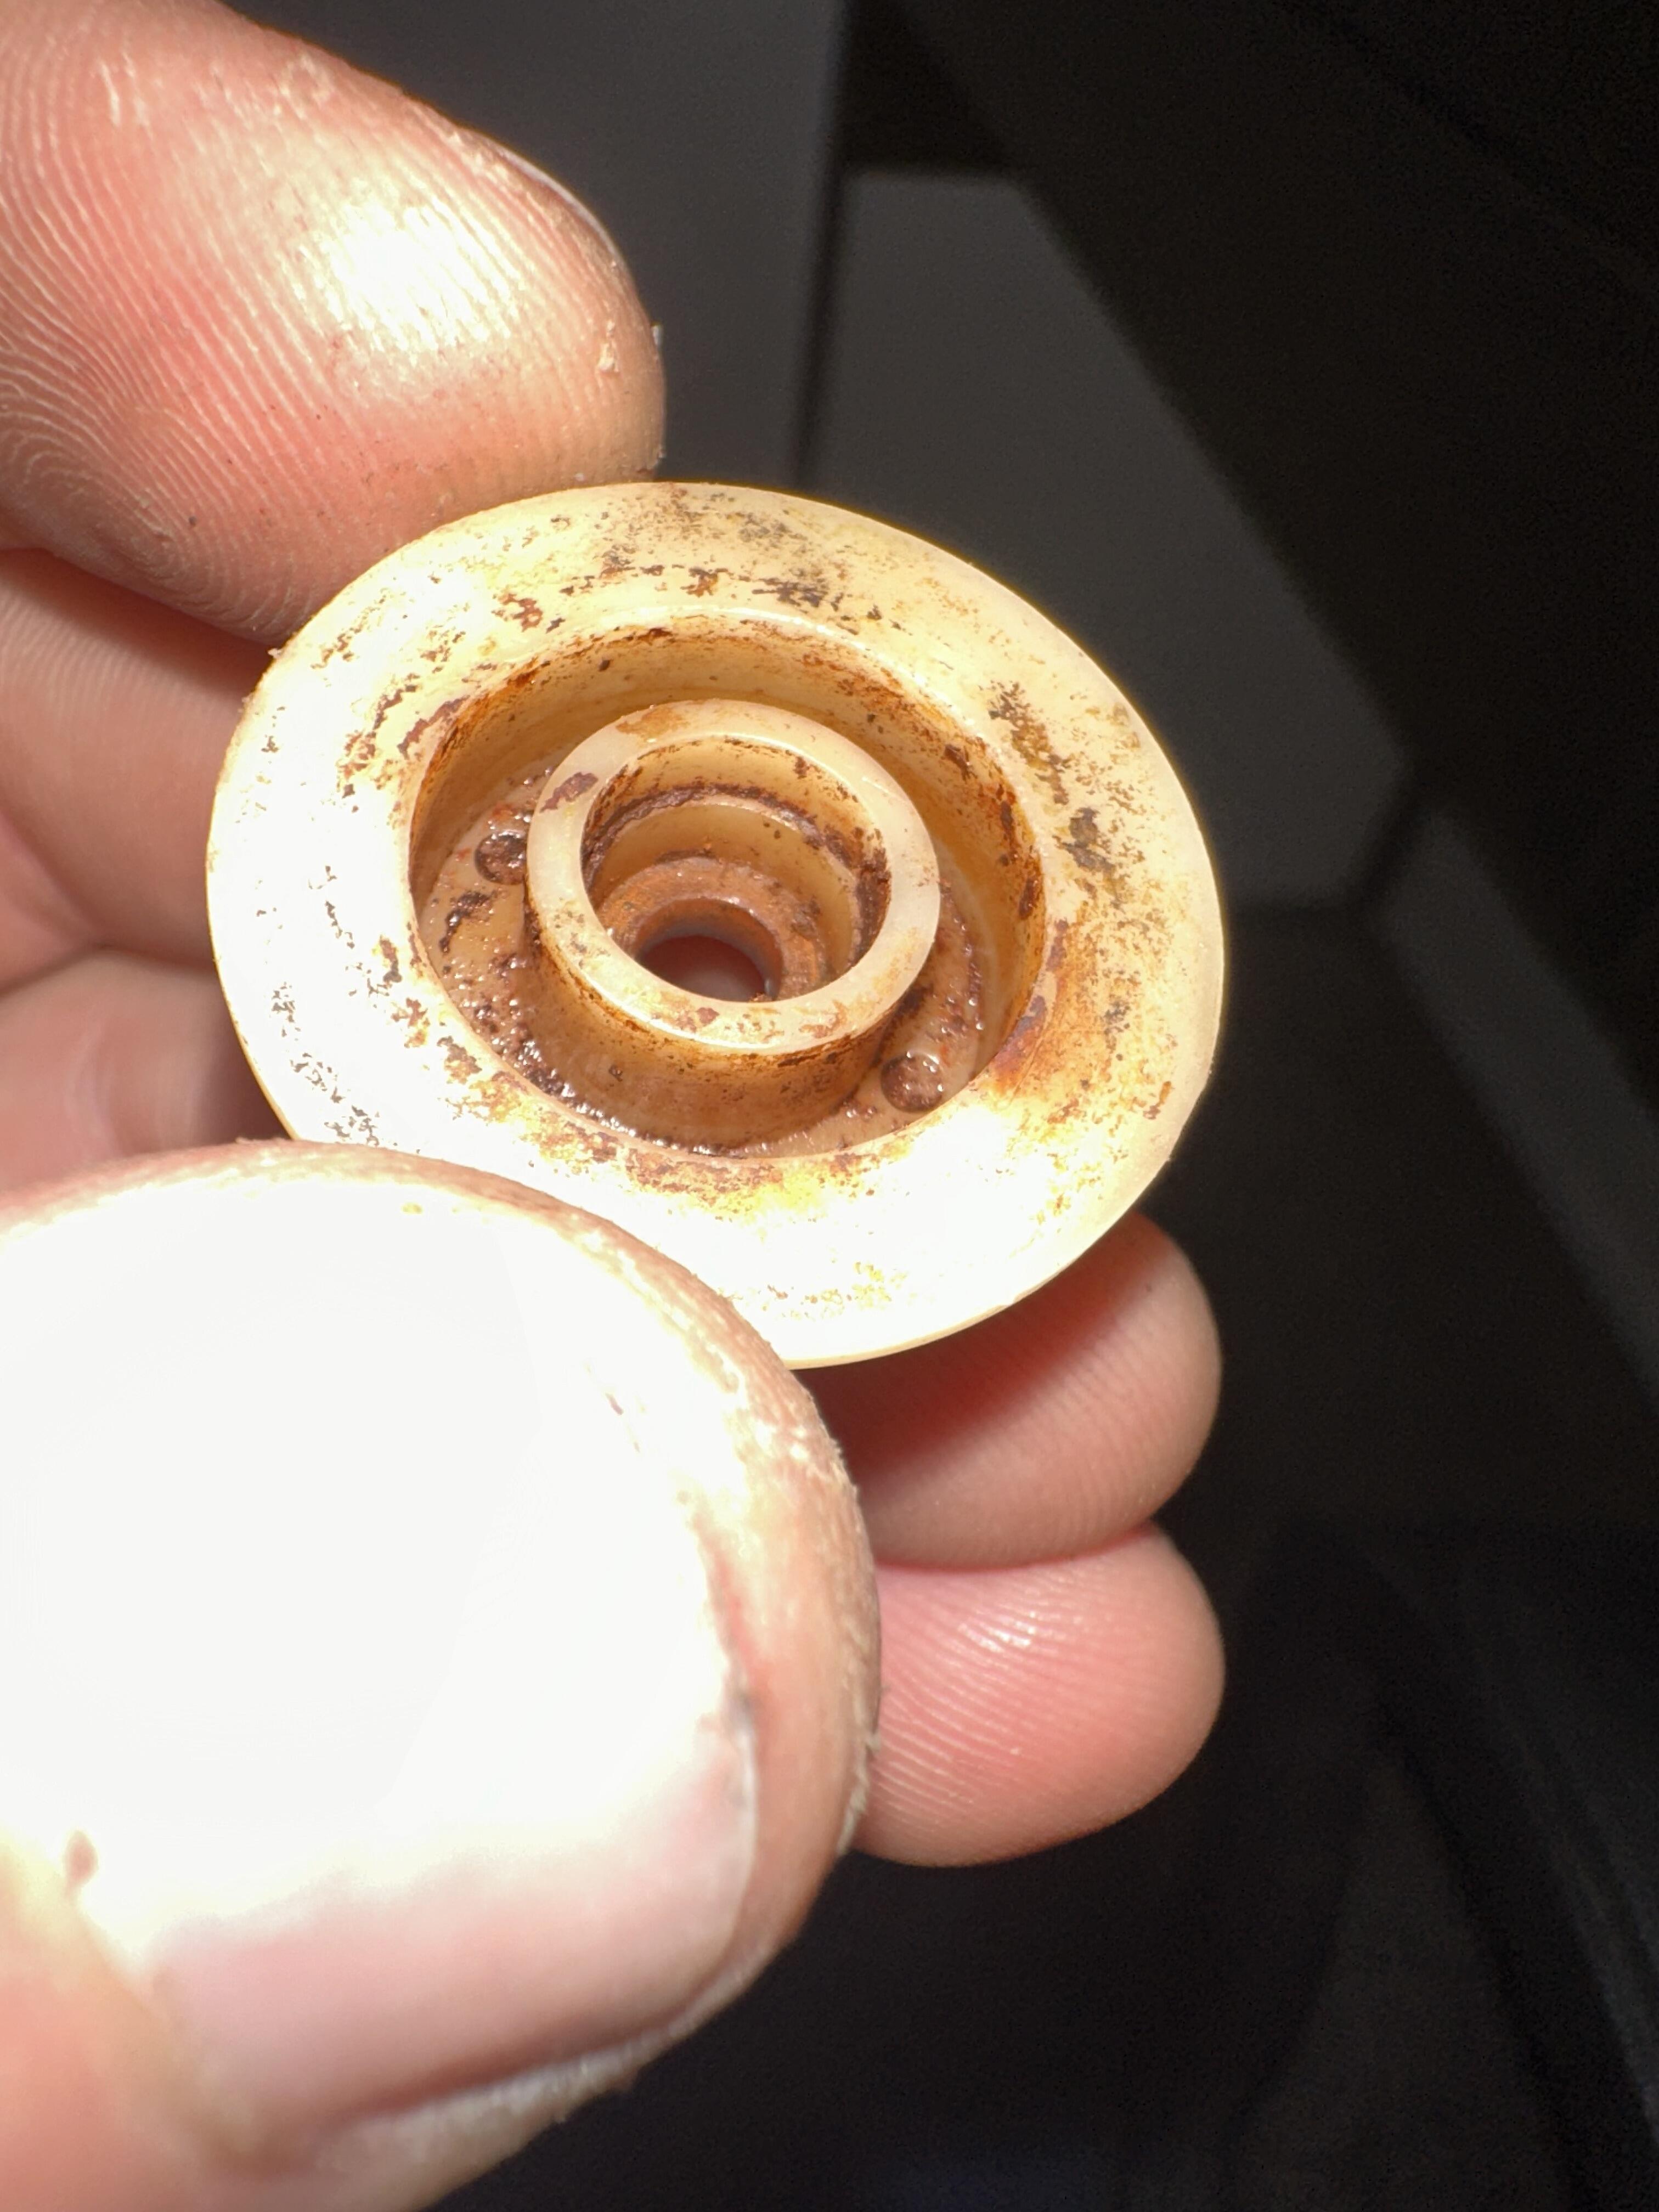
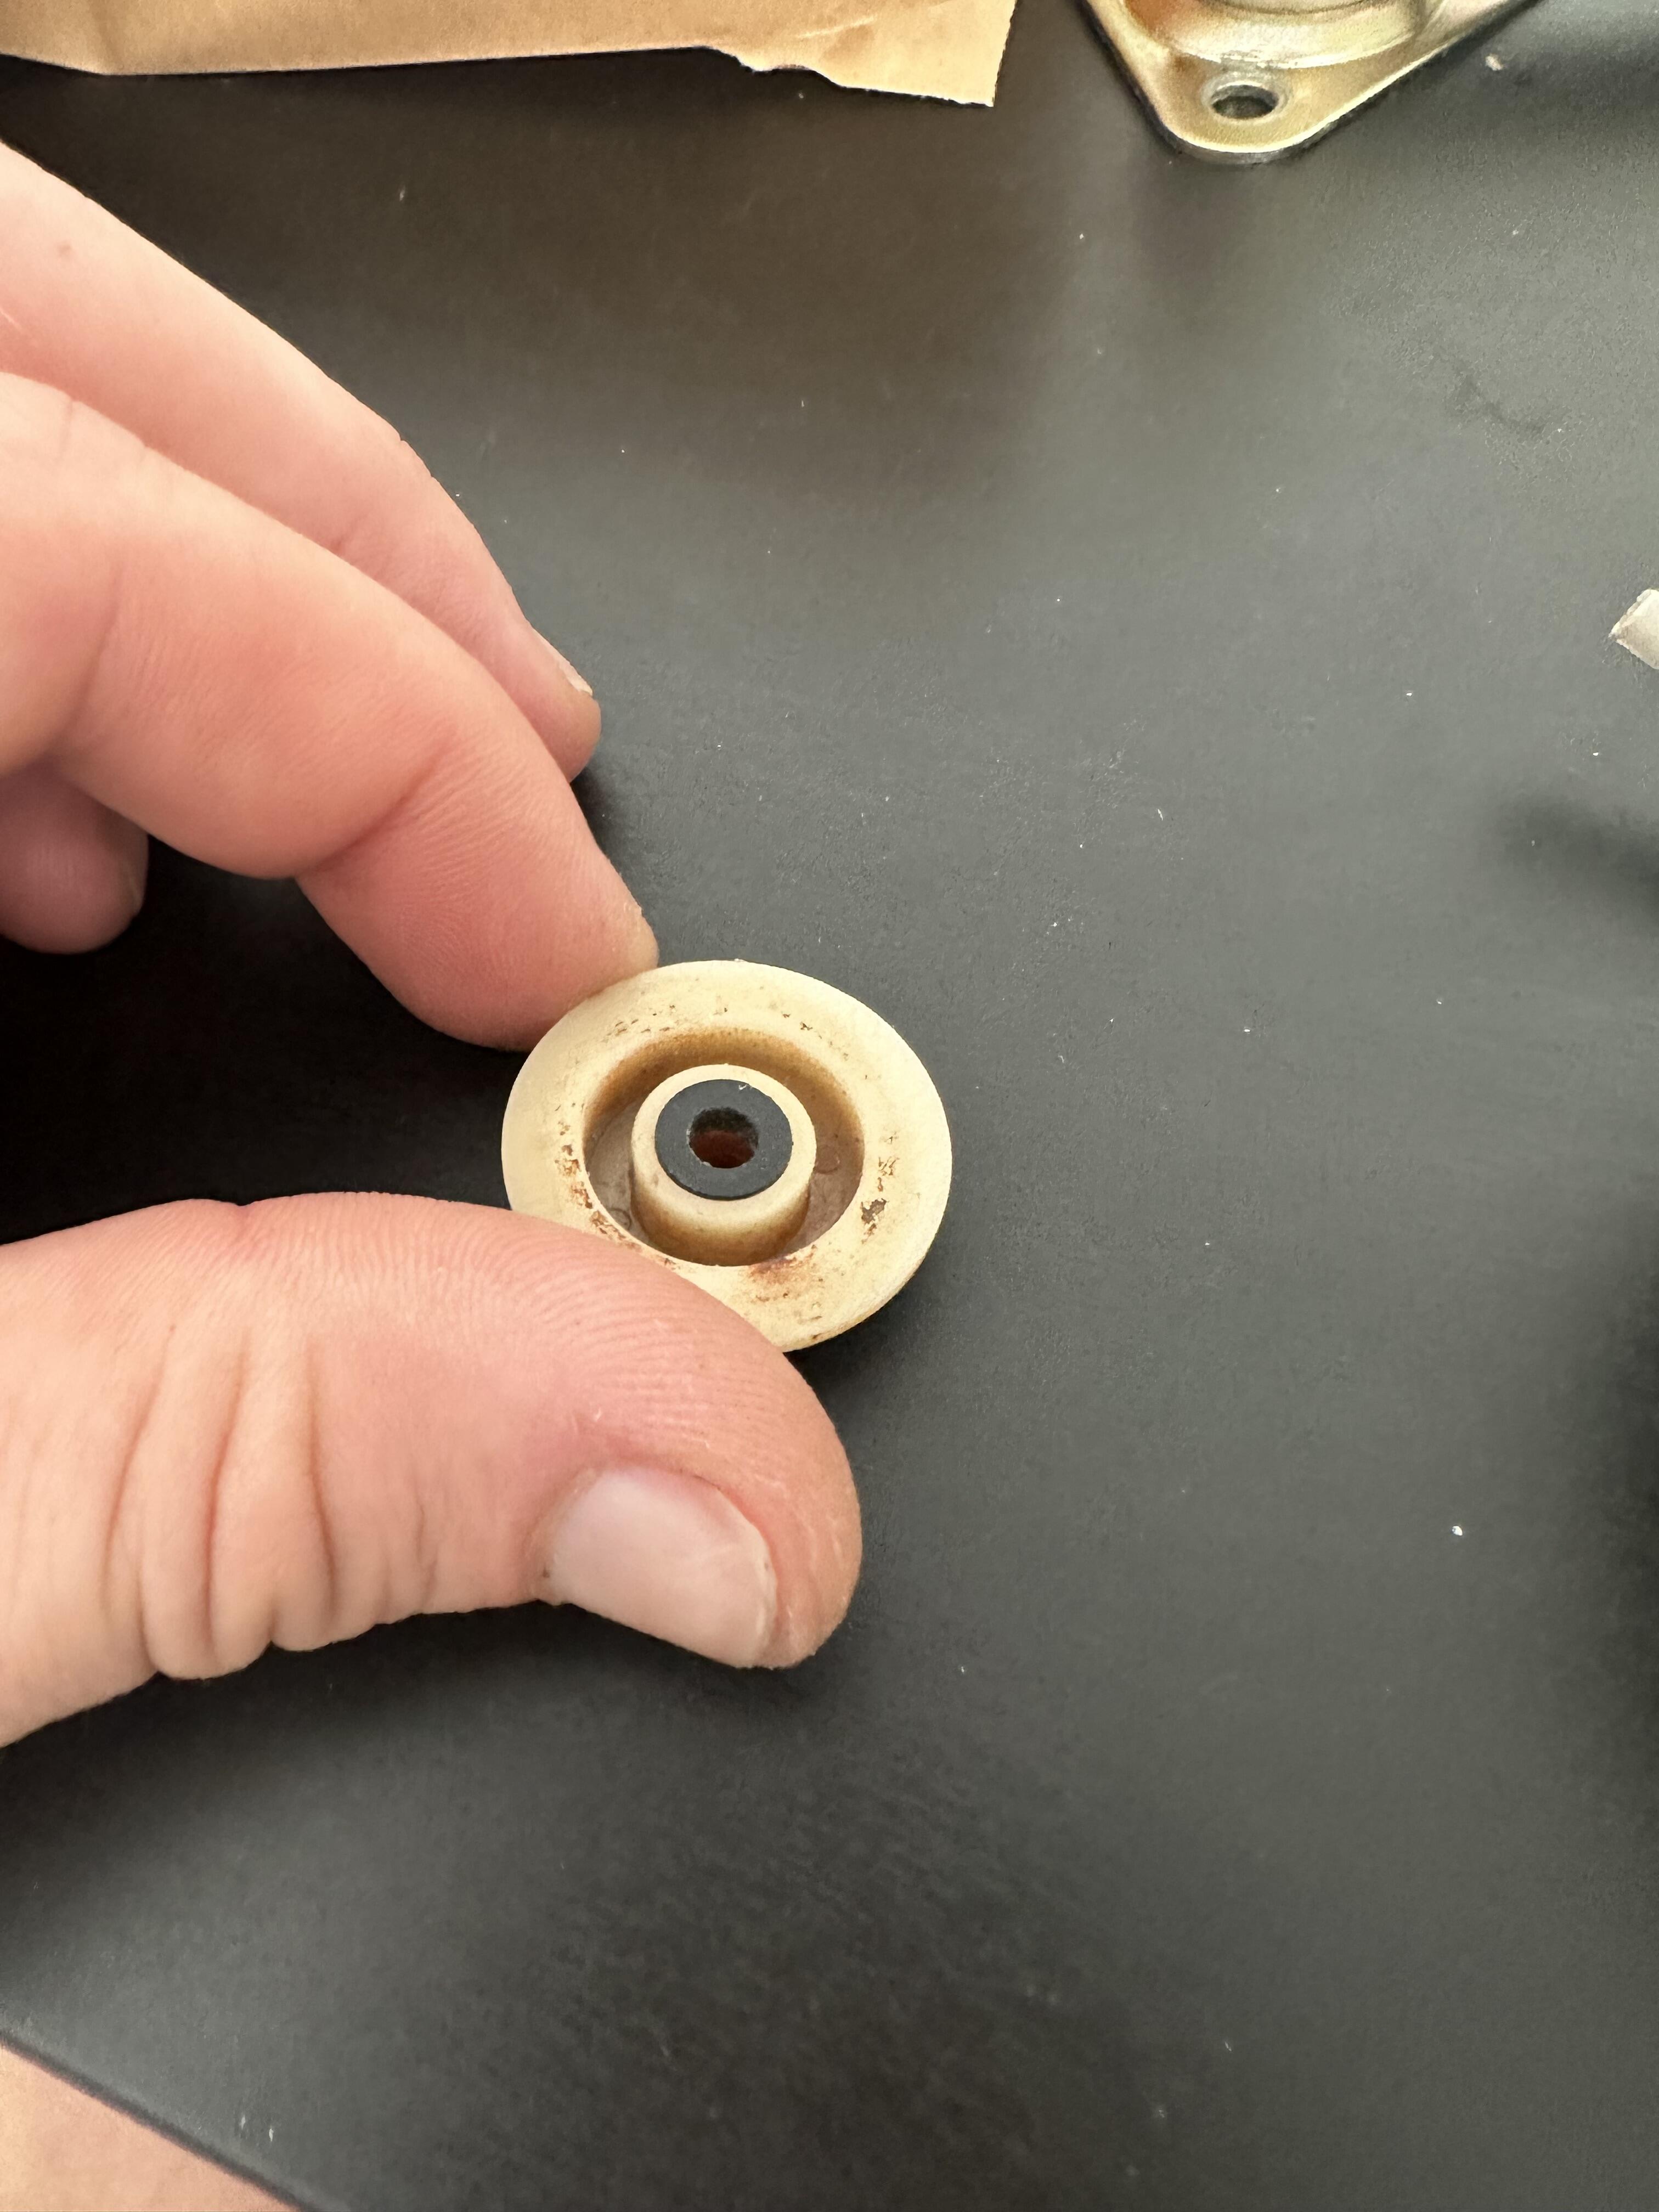
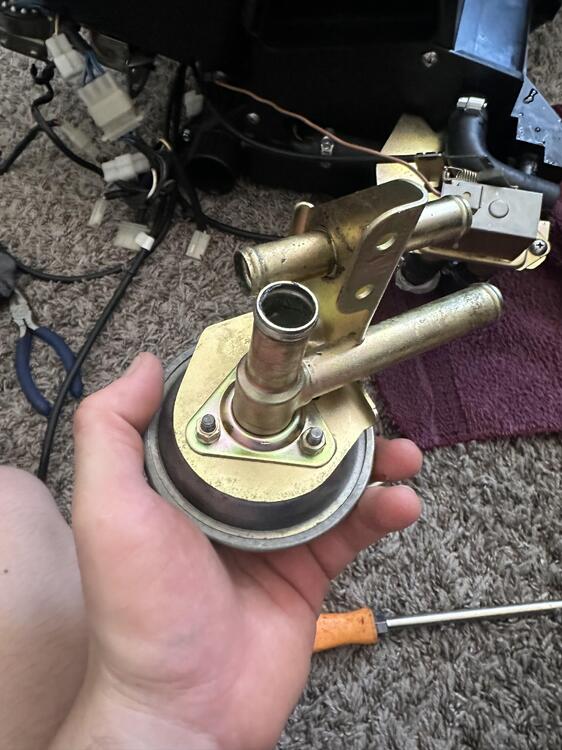
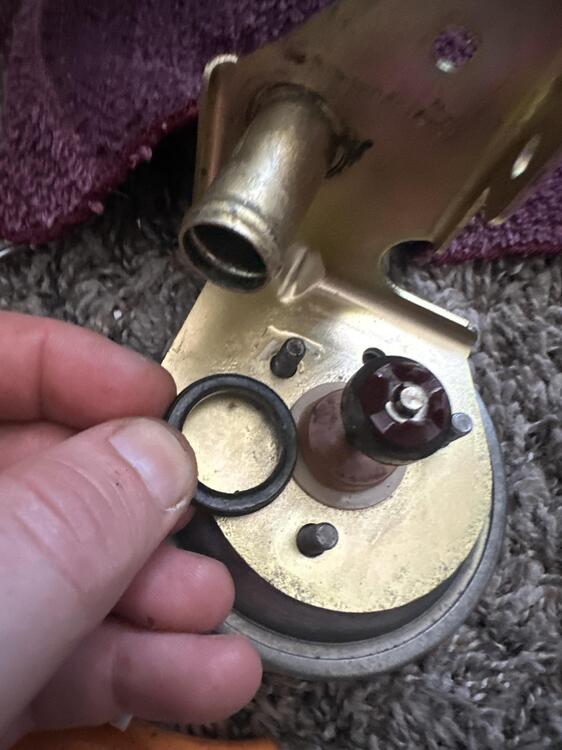
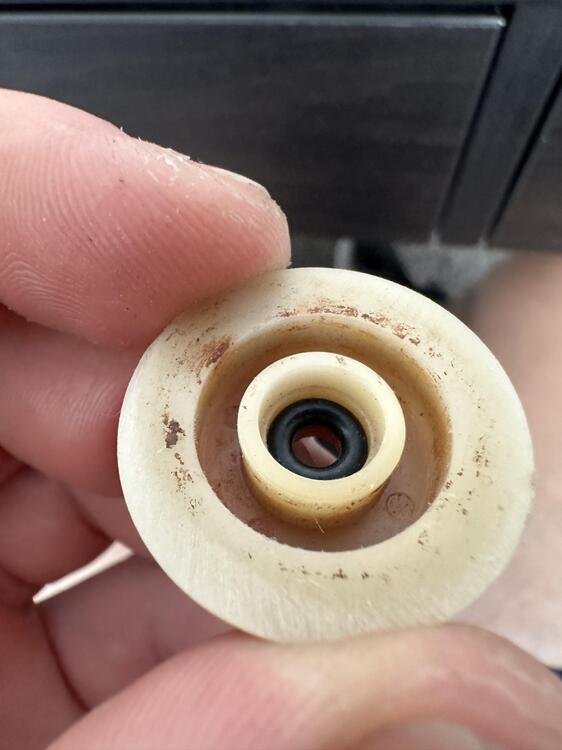
Hey guys, Just figured out how to rebuild the vacuum water valve on a 280z without having to send it off somewhere to be restored or buy a stupid expensive one online (If you can find it. I couldn't). This one is off a 1977 280z. The valve in question is the valve that is actuated when the climate control is put into the heat position and vacuum is sent to open the valve to allow coolant to flow to the mechanically operated coolant valve (That one is operated by the temperature setting). Anyways, mine was leaking super bad like a faucet. I did some research and came across this youtube video. Not sure why its age restricted. Here is the valve out of the car and off of the heater box. (I had it recently replated). Here is the outside seal the video explaned to remove/replace at the base of the valve. I replaced the seal with this O-ring. I found it at ACE hardware. Don't remember the size. Ignore the yellow arrow. I put back together the valve, put it back into the spagetti mess of hoses and vacuum lines on the HVAC unit, then put the whole HVAC unit back in the car. It honestly seemed to leak even more coolant. Wasn't stoked. Removed from the car again, tried a bigger o-ring, and then put everything back. I also torqued the three nuts down much more. Now it leaked even more. Took everthing out of the car again, and decided it must be leaking somewhere else. And then lightbulb, I realized it must be leaking through the center shaft, and not from that outside seal. There are two c-clips that hold the plunger together. Remove the bottom one first, slide the plunger down the shaft, then you can remove the top one. Everything slides off from then on. Sure enough, at the bottom of the plastic base peice at the shaft is another very small seal. Mine was rock hard. You can see that the seal just rides on the lower part of the plastic shaft. The o-ring has nothing to retain it, so I found that really odd. The o-ring in theory could just ride down with the metal rod and seal absolutely nothing when the vacuum is applied to the valve. To correct this flaw I went to ACE again and found an o-ring that fit the shaft tightly and fit inside the plastic peice snug as well. I also went into the hardware section and found a nylon bushing that I could file down to fit inside the plastic base. Thus, it would sandwich the o-ring in and not allow it to move down the shaft. Here is the nylon bushing placed over the oring. I put everything back together and it has sealed perfect so far. One thing I forgot to mention was that my shaft was slightly pitted where it had been leaking at the o-ring. As long as its not too bad it can be fixed. I lapped it with 600 grit, 1000grit, 2000grit, and then never dull. It smoothed the shaft out just fine. IF YOUR VACUUM POT DOESN'T WORK IT IS NOT FIXABLE. You will have to source a different one.


 1 point
 -
1 pointI forgot to include the hole spacing in my post, so although they are perfect visually, they are 2.5” spacing and I need 3-5/8”. And then I had a thought while typing the above. I wonder if they are measuring the “spacing” between each adjacent pair of holes, rather than the “bolt circle” diameter approach that I was using. So I rushed out and measured my cap, and sure enough, adjacent holes are 2.5” !!! So these likely work! Thank you!1 point
-
1 pointFwiw, I converted from distributor&carbs to EFI and wasted spark for about £2200 all in. Chinese ITBs, Speeduino ECU and lots of second hand ebay bits. It was quite a lot of work though.1 point
-
1 pointEiji and I try to hit Dinwiddie quarter mile track once a year. He almost always has more motor than me, but I did beat his 280ZX with triples in my stroker 240Z. Eiji generally runs in the low 14’s and I in the low 15’s.
 1 point
 -
1 pointNice cars but they're proud of their parts! Even doing the work myself they were more expensive than I could justify1 point
-
1 pointI used to have this little money pit and it had Turbo LAG! 1977 930 When I bought it the guy said "have it pointed in the direction you want to go before you put your foot in it, if you don't pay attention and skip this rule the back of the car will pass the front". It was a blast for a few years, but to rich for my blood.
 1 point
 -
1 point
-
1 pointFrom what I remember about ZX turbos it was all or none. I think I'd like the stroker motor best. 🙊1 point
-
1 pointI'm firmly in the stroker camp, boo turbo. Ztherapy SU's are great but you could go for a set OER triples or the fuel injected triples 😁1 point
-
1 pointI've heard they have therapy for this sort of thing, but so far I have resisted. 😉 I thought I would wait for some more replies before I started chiming in...1 point
-
Just for you Charles:) Well remember the part about the wearing your readers, I guess I need a new pair. The MS has tests that you can run in the software to make sure your wiring is correct and mine did NOT pass. In test mode you can actually test fire each coil and watch the spark to see if corresponds to the correct firing order. What I found was that my coil connects were flipped around backwards and I got 3&4 cylinder miss wired. Easy test that saves lots of guessing. The software is pretty used friendly if you have done your homework. Another words, don't expect to know what your trigger settings are if you don't know what you have. Good news is I got it running!!!!1 point