Leaderboard
-
240ZBUILTBYME
Free Member5Points237Posts -
HusseinHolland
Free Member4Points1,031Posts -
Captain Obvious
Free Member3Points10,081Posts -
1doobiefan
Free Member3Points4Posts


Popular Content
Showing content with the highest reputation on 03/20/2023 in all areas
-
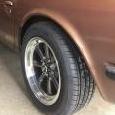
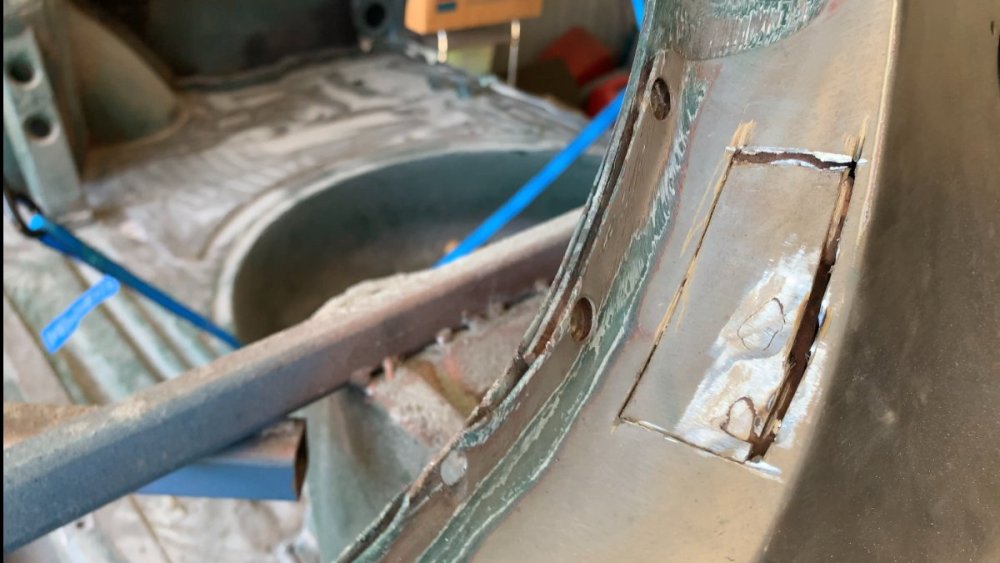
In all the video installs I looked at, they seem to have issues with the spoiler dropping/warping - the 280Z has a valance that the spoiler sits against, if you don't remove it.. Clamped the middle to secure it, marked & drilled the 4 outer end attachments. Instead of futzing with nuts & bolts, I just used M6 stainless rivnuts & M6 sems screws For the leading edges, I used plastic body clips instead of bolts Added two rivnuts to the center section to anchor it All together (for now). I have a tall Skillard grille coming, and chrome skinny bumpers to complete the look. Ultimately, the spoiler will be body color. Added tape to where the bumper trim bolts went, covers up the extra unneeded holes. I'll make some brake ducts, so those cutouts don't look out of place4 points
-
3 pointsThanks everyone. After taking in all suggestions, I just followed Robert Pirsig's advice: "Assembly of Japanese bicycle require great peace of mind." I eyeballed the stainless line and figured there's enough spare line length in the big curve to "stretch" it an enable the tight 90 degree turn, and I just futzed with it until it worked. Putting it on, taking it off, over and over until I mentally pictured how it should go. I used a sharpie to mark which axis to bend and when my tube bender wouldn't work, used imagination and problem solving to jerry-rig a tube bending jig until I got all the bends right. Like, I used the end of a crescent wrench, which was held fast on a 2x4, as something to carefully bend the line around. Sure, it would have been a snap to pay the exorbitant price for the 1972 cylinder, but I made $200 an hour adapting the line to the cheaper brake cylinder. Success!3 points
-
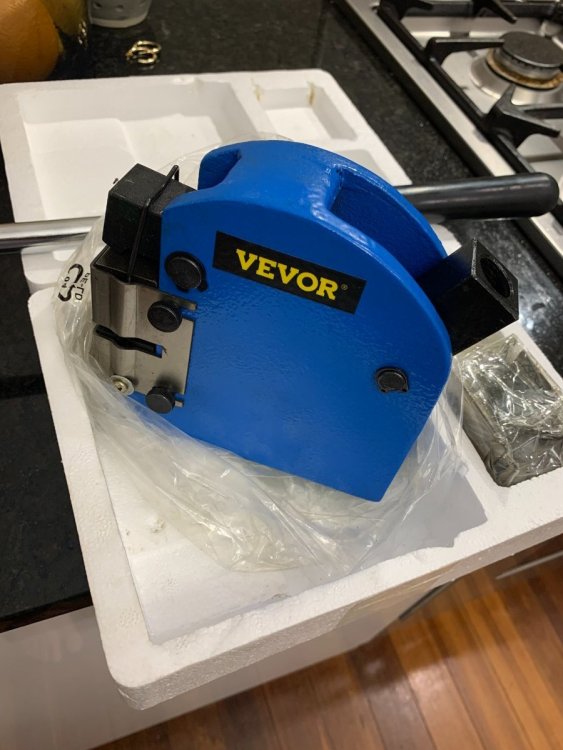
Its been a while since I've posted, I've been very slack on all platforms lately During the black friday sales I picked up a few goodies as i do each year got some new rear tail lights and OEM rubber seals, beautiful units. I recently got a new job based in Perth so no more Fly in FLy out! So i bought myself a present to celebrate. A few things from the lonely drivers club catalogue, have long been a fan of his work. Pedal covers, engine blank plates, door pulls, plug wire holders Also picked up the vintage connections 240z kit for when i refurb my wiring harness, probably not the most cost effective way to buy them but definitely the most convenient! got a shrinker stretcher for when the metal work starts


 3 points
 -
I used a vise, a socket, some fixturing, and a MAPP torch. I've always been surprised at how much effect heat has. Apply force, nothing, apply heat, movement, let cool, nothing, re-apply heat, keep going. It's been the same on broken off studs. And differential fill plugs. Heat is your friend. Even on the mustache bar bushings you can get the rubber out by heating the outer metal of the bar. A little bit of sizzling and it slides out. No need for flames and smoke.2 points
-
Unless you are planning to go with poly, then burning them out won't do you any good. You'll still have to get the outer shell out before you press the new bushings in. You could burn the rubber out and then use a hacksaw to cut through the outer shell to relieve the retaining force. You don't have to cut 100% of the way through... It'll start to cave in before you get all the way through. Even with a couple thousandths remaining and it will be a lot easier to press out. I did mine (whole without burning) on a hydraulic press, and like most operations on a press, it all comes down to having properly sized drifts and anvils. A square (normal) force applied in the correct location with the proper sized backup anvil should do it. How many tons is your press? I've got a 20T and had no problems.2 points
-
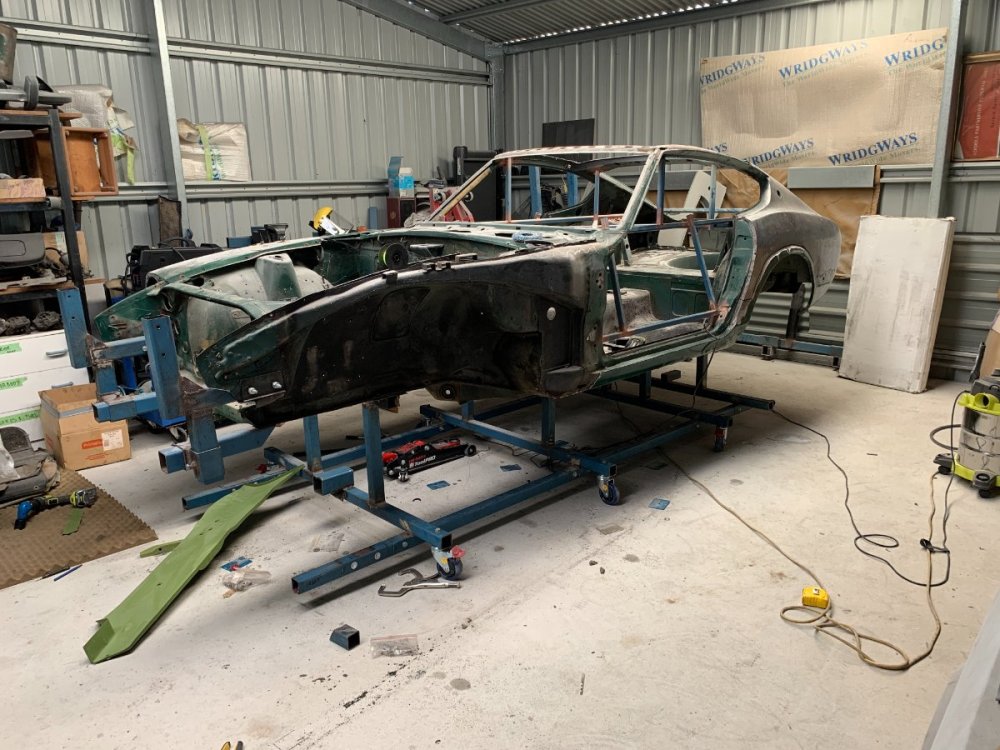
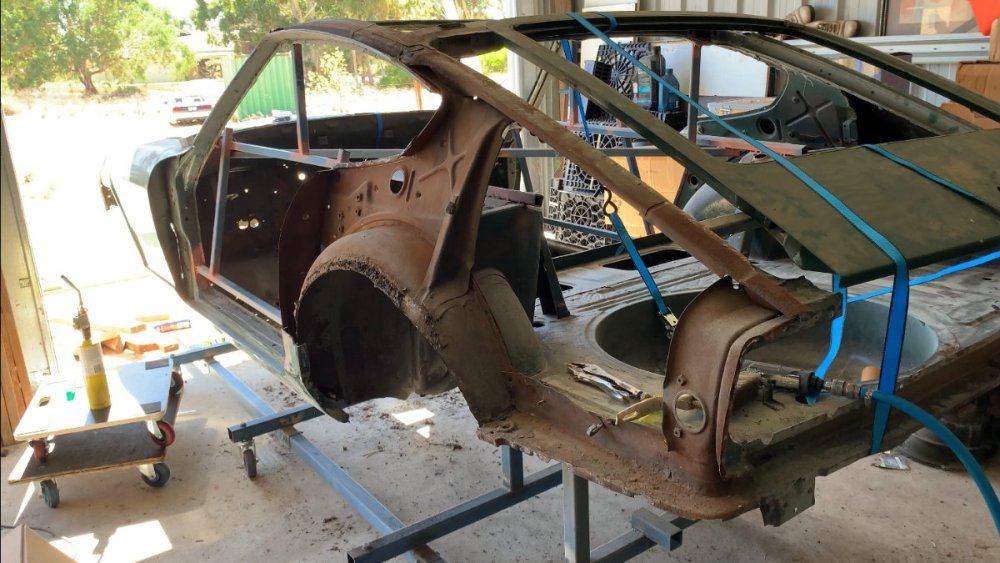
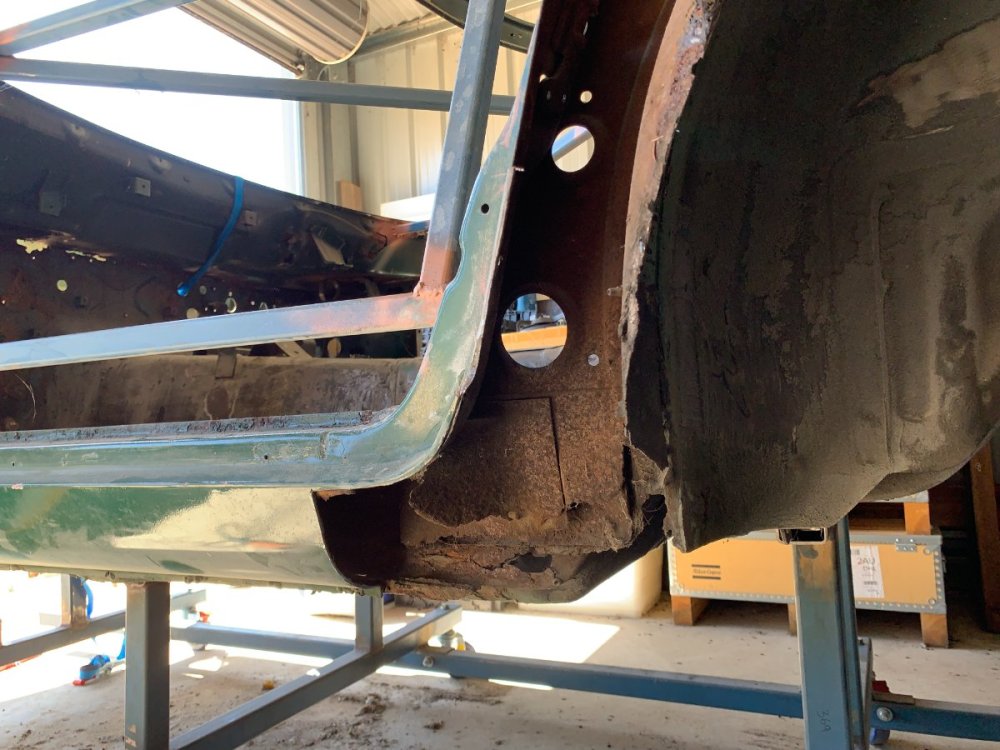
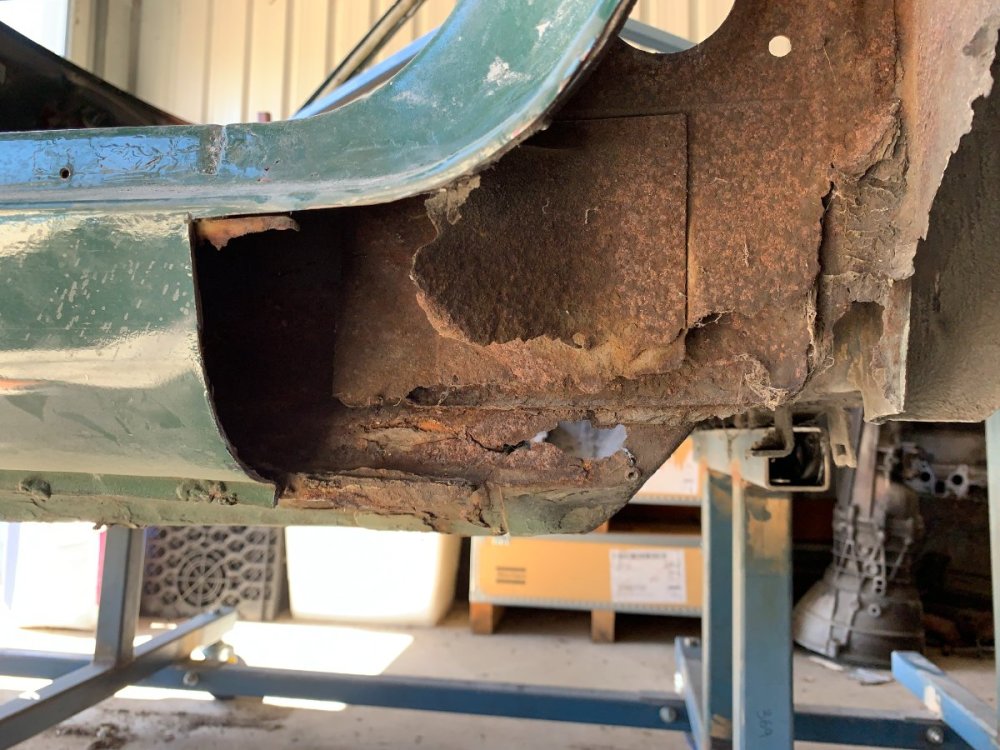
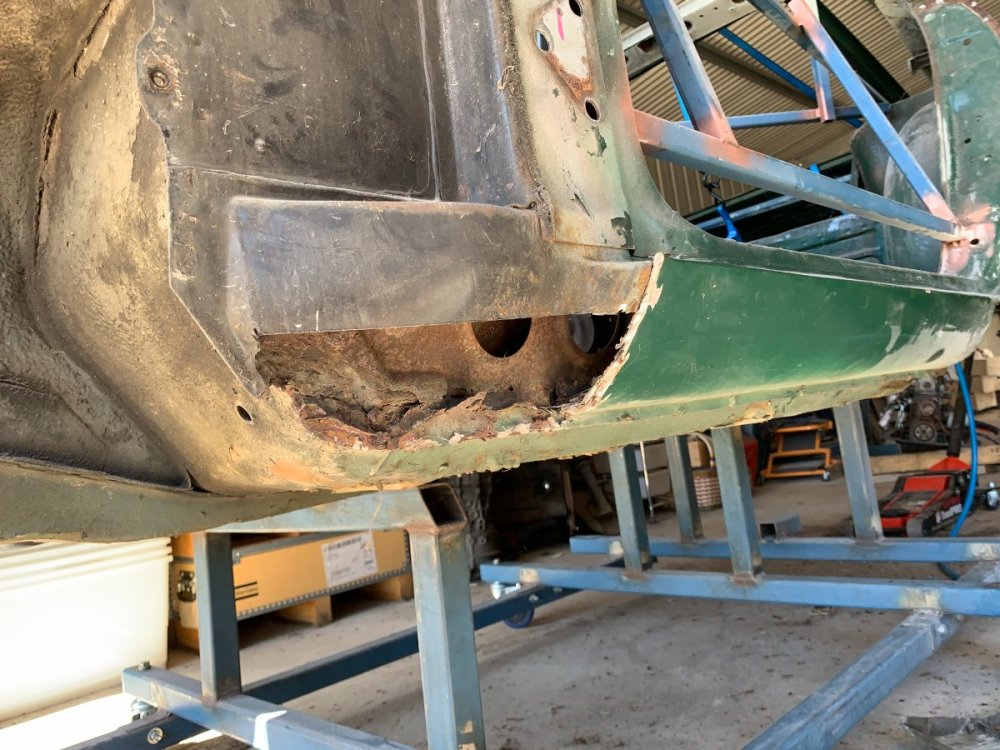
My car has been booked into the blasters for 6 months now I was supposed to get a few things done before sending it off, however my son recently started Kindy and the hours are much less conducive to working on the car. Resulting in me not quite finishing what I wanted to before it left. Castor wheels were installed LHS rear quarter was removed If you recall i had trouble finding the spot welds on the window sill, i didnt have any success in unccovering them so i cut around the area i knew they were and ill have to patch it later. I would like to get some new quarter panels from KFVJDM but the shipping to get it to Australia is extortion. I have heard fit is not the best as well. Some rust I didnt know about hiding behind the rear wheel well I ended up cutting out the dog leg and front of the outer rocker on the LHS to give more access to the blaster, as you can see theres not much left of it! I wanted to remove the RHS rear quarter as well but ran out of time unfortunately Car was loaded onto the truck and off at the blasters with no issues, Im both excited and nervous to see what comes back. Couple of weeks and it should be ready


 2 points
 -
1 pointI've been using a lot of seam sealer from underneith while my trans & diff are out. I can't believe how many cracks there are between the sheet metal and everywhere else.1 point
-
Then the car is not the problem. It's either a component (stereo or speaker) or wiring issue.1 point
-
Lucky, we also got the 5 speed 71A in the Fairlady Roadsters here, but the bell housing is different (starter motor on different sides). But as mentioned, many people moved away to 71B boxes and so 71A boxes were kind of discarded or put away. So they do come up for sale from time to time, just getting harder to find bit to service them etc..1 point
-
I have aftermarket belts from Wesco that are perfect for my car. I installed the Roadster Retractable belts years ago and am quite satisfied. The retractor is installed at the shoulder belt mount point above the quarter window. If you go with these, specify the 11" rigid sleeve for the buckle. No hardware kit is required and you can use your OE seatbelt bolts. https://www.wescoperformance.com1 point
-
1 pointDan sorry for the late response. This is the First Alert Brand for auto applications. I picked it up at my local hardware store ($25). I think both Lowes and HD have them. I used a piece of angle iron and mounting it to the existing seat bolts. I’ve purchased a different mount for the bottle itself . It comes in this week and I’ll post new pics. This current mount impedes the seat from moving forward.1 point
-
1 pointFrom my experience on my '72 there were some cheaper ones with the fitting angled in a different way. I ended up swapping the short brake lines from one side to the other and with some mild bending of those got them to finally line up. The ones that were like the OEs were like $200 each. The ones that I bent the lines to make them work were $40 maybe? Here's some threads on it. https://www.google.com/search?q=rear+240z+brake+cylinders+classiczcars.com+&client=ms-android-americamovil-us-revc&source=android-home&source=hp&ei=sXBsY4mXMbCgqtsP3dalqAM&oq=rear+240z+brake+cylinders+classiczcars.com+&gs_lcp=ChFtb2JpbGUtZ3dzLXdpei1ocBADMgUIIRCgAToFCAAQgAQ6CAguELEDEIMBOg4ILhCDARDUAhCxAxCABDoLCC4QgAQQxwEQ0QM6CAgAELEDEIMBOhEILhCABBCxAxCDARDHARDRAzoRCC4QgwEQxwEQsQMQ0QMQgAQ6EQguEIAEELEDEMcBENEDEIsDOgsIABCxAxCDARCLAzoOCAAQgAQQsQMQgwEQiwM6DgguELEDEIMBEMcBENEDOgsIABCABBCxAxCDAToOCC4QgAQQsQMQgwEQ1AI6CAgAEIAEELEDOgsILhCABBCxAxDUAjoKCAAQgAQQChCLAzoHCAAQgAQQCjoGCAAQFhAeOggIABAWEB4QDzoFCAAQhgM6BQghEKsCOggIIRAWEB4QHToKCCEQFhAeEA8QHToFCAAQogQ6BwgAEB4QogRQzA1Ypp4BYPmnAWgBcAB4AIAB7wGIAdEekgEGMC4yMy4ymAEAoAEBsAEAuAEC&sclient=mobile-gws-wiz-hp1 point
-
And another option, if you are a little crazy. Remember that (probably rusty) feed through assembly to pass through the firewall? You could do something like this... Make up a template based on the original and get yourself some stainless sheet and stainless tubing: Form the stainless sheet like the original: Build yourself a cheap-o bead roller to use on the lathe and use it to but the beads on the ends of the stainless tubing: Braze the tubes into the bracket: Clean it up. I really like this shot with the rusty crusty original in the background: And once you've gone through all that, you can use two simple generic 90 degree bend hoses on the interior. And since it's all stainless, it should last pretty much forever:1 point