Leaderboard
-
zKars
 Subscriber
 5Points3,770Posts
 -
240ZBUILTBYME
Free Member4Points237Posts -
Terrapin Z
Subscriber2Points1,333Posts -

siteunseen
Free Member2Points15,115Posts


Popular Content
Showing content with the highest reputation on 07/21/2022 in Posts
-
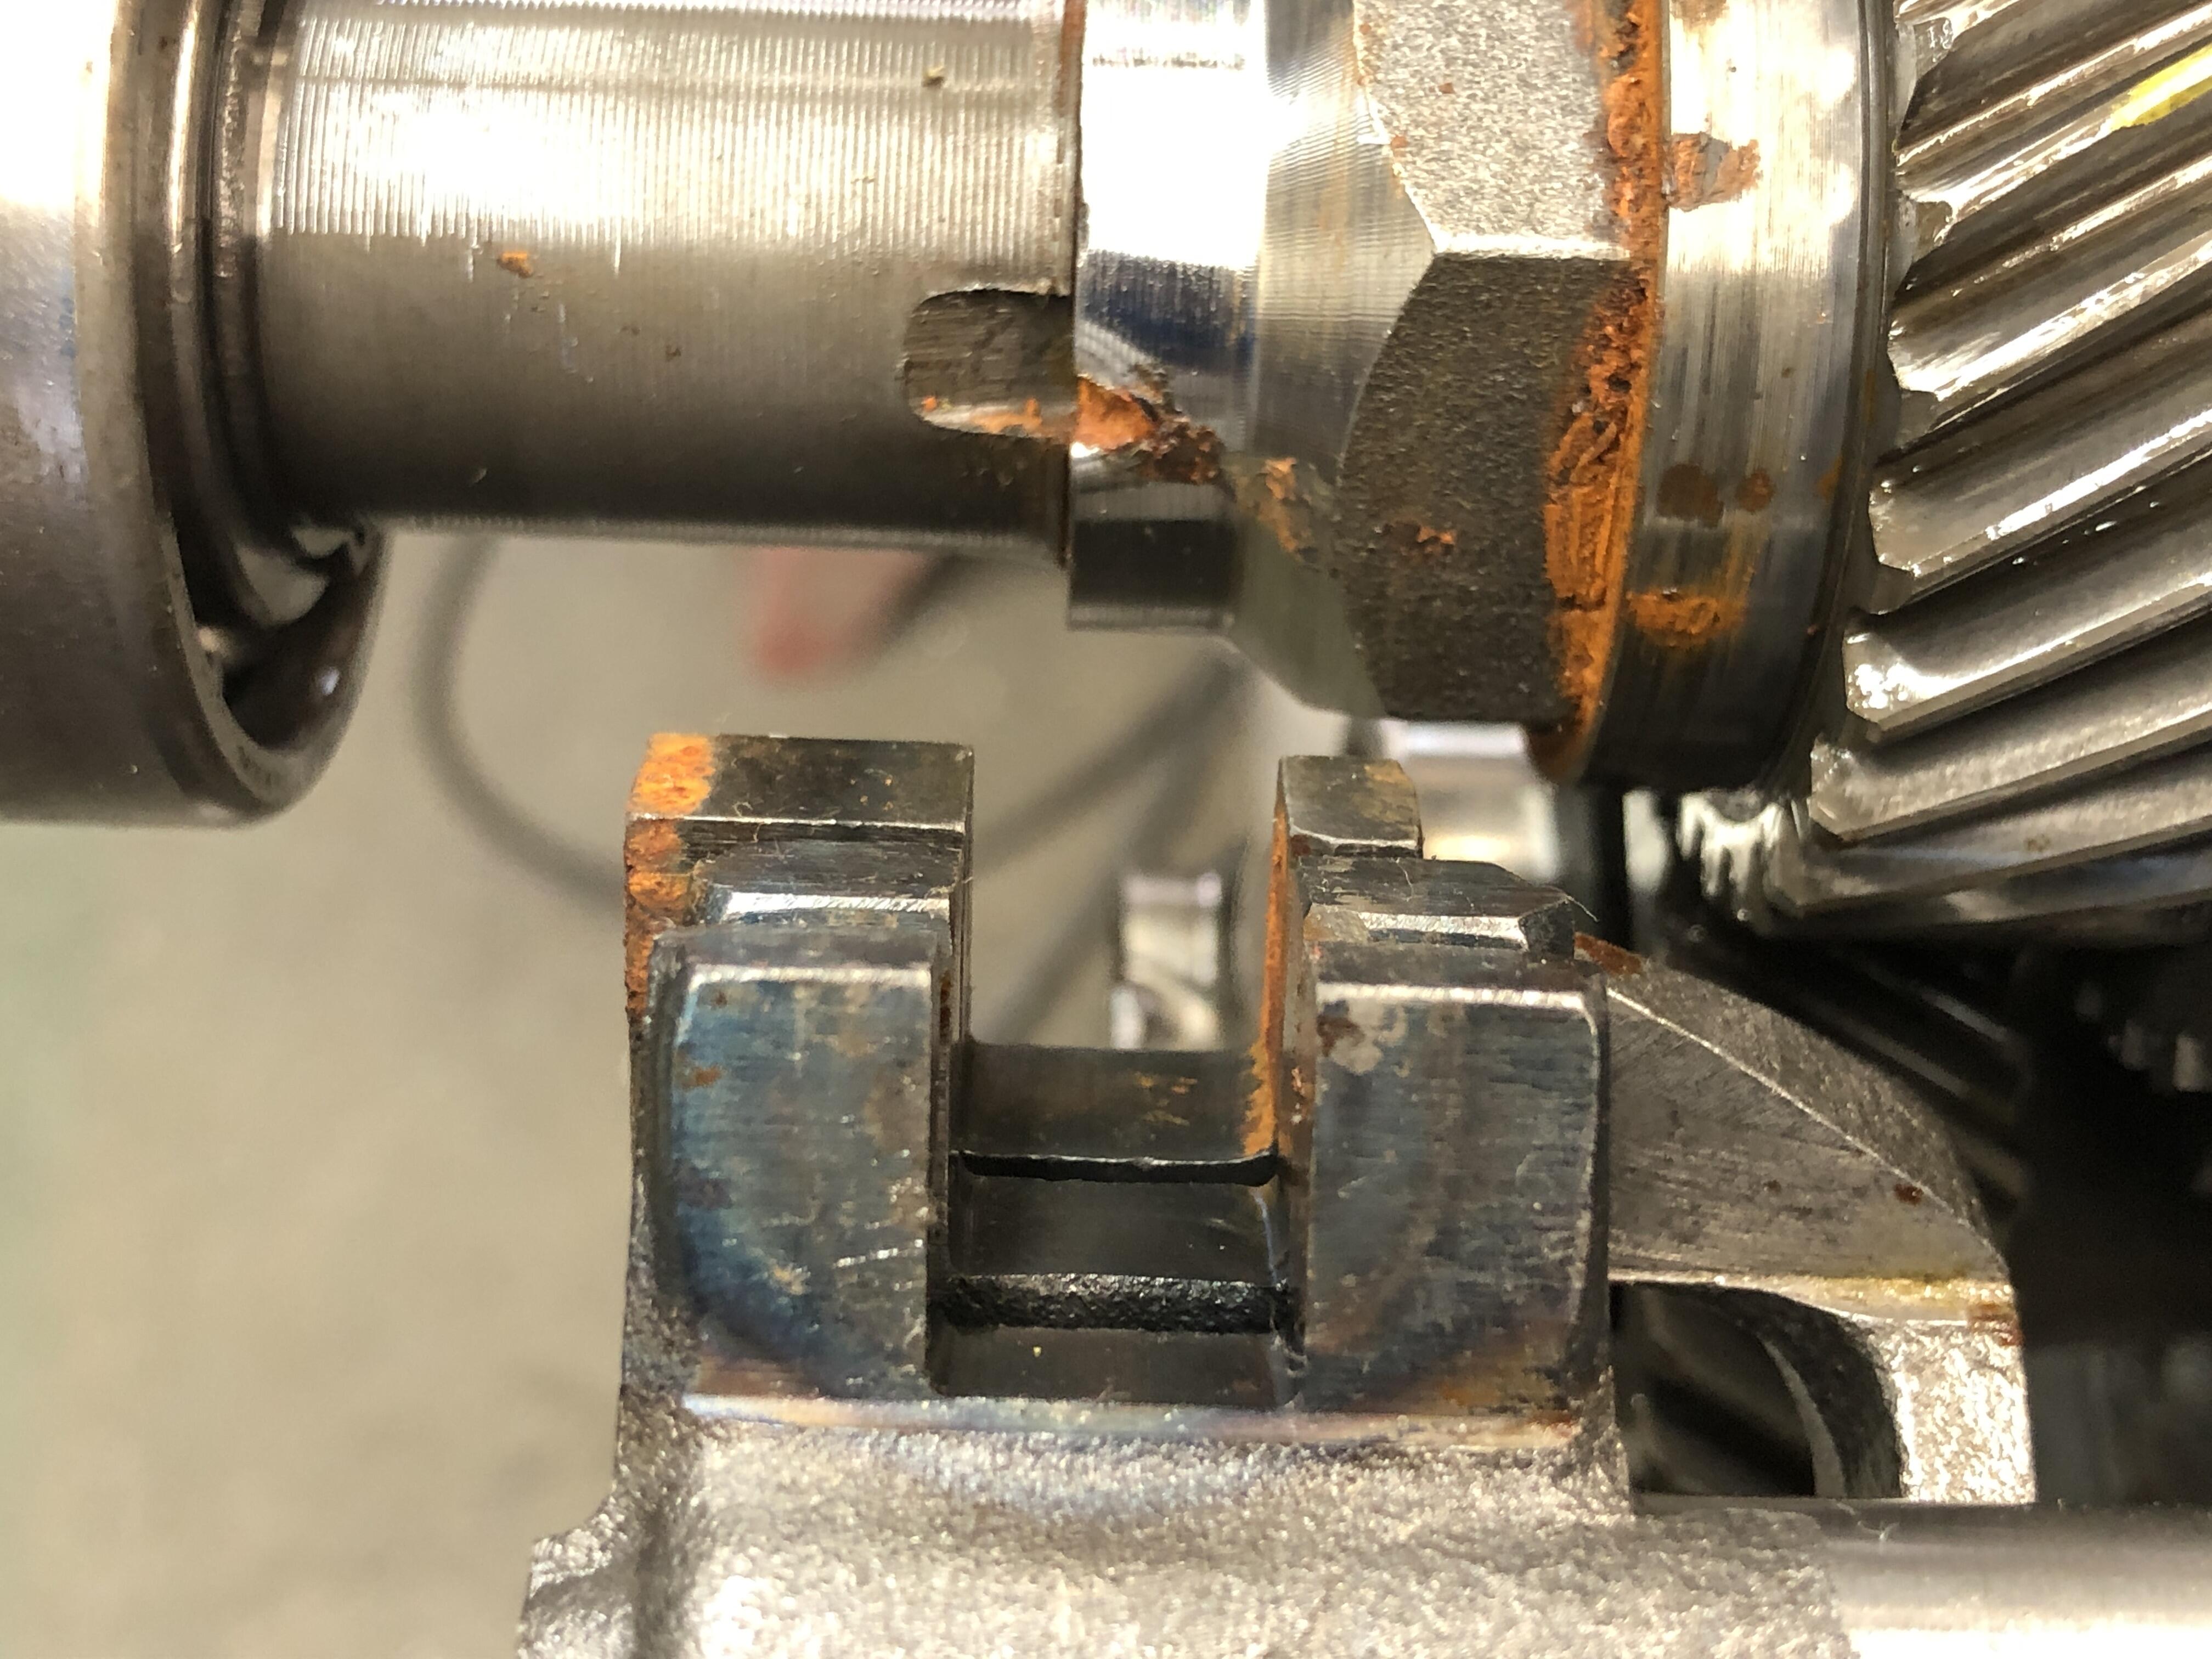
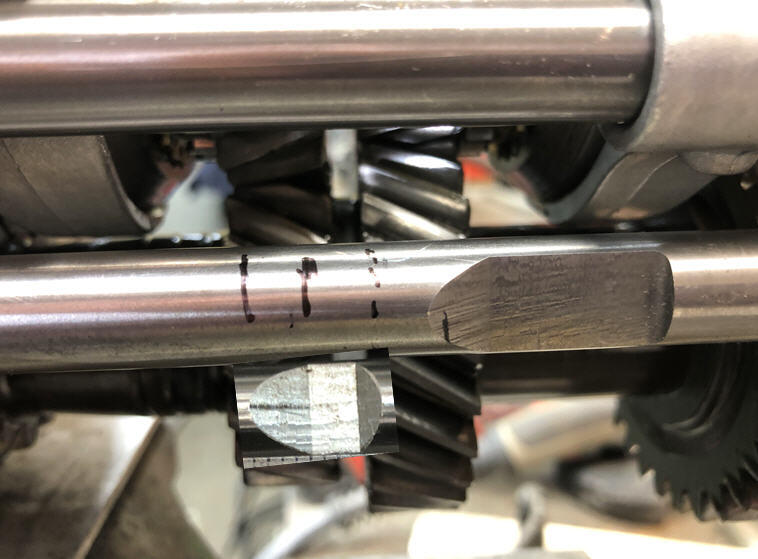
So what do we have to do to modify the shift rod? Simple. Here I have sharpied-in the location of the depressed/ramp area on the 4 speed shift rod, onto the 5 speed shift rod. And cleverly spliced and sized a little picture of the 4 speed slot so can visualize how it has to look. If you just duplicated the 4 speed slot you'd leave an untouch area between the two where the rev lights would be turned on for a second as you shifted into 5th. Would give following drivers pause no doubt "did he just shift into reverse for a second there!?!?!?!" so So what you need to do, is recreate the "ramp" end where shown, and grind the rest of the meat to the right of that, to be just flat to meet the existing flat area. To say another, just keep grinding the existing ramp away until you have moved it to the left to the left most sharpie line, ie where it is on the 4 speed. Get your dremel, or your angle grinder, or your carbide tipped grinding burr, and get removing material. I'd start by cutting down at the far left edge of where my new extended flat is going to be (right most sharpy line) and then remove material to the right to create the new extended flat area. Then cut my new ramp. Clearly you will want to thoroughly wrap the entire guts of the transmission with something like saran wrap or palette wrap or tons of shop towels so that nothing but that short area of the rod is exposed. Chips in here would spell disaster. You can take the rod out of the transmission of course and remove all that "shavings everywhere" risk, but it means removing the 1-2 and 3-4 rods first, seven little balls and three springs to loose, three cotter pins to punch out and put back, so do what you're comfortable with. I'm going to go do this work and report back with a picture of the finished modified shift rod. Precision is not important. The flat part does not have to really flat, the ramp can be smooth or lumpy, it just has to END (get back to un-reduced OD) 2-15/16 ( 2.9375) 74.5mm in front of the center plate with the transmission in neutral. And the flat has to start at 3-3/16" from the center plate so the switch is fully extended (off) when the trans is neutral. How do you know you are neutral? All three shift fork channels are lined up with each other perfectly.
 2 points
 -
Very excited about this one… so stumbled upon some rare as rocking horse $^!# NOS 240z door cards i couldn’t say no. I was going to do some fancy upholstery work on my current door cards but these are too cool.2 points
-
2 points
-
Today's little task is to choose a 5 speed to add to my latest 510 project. Decided on one that is a bit of an un-known. It "looks" like the 82-83 ZX close ratio trans case, long ears, one exhaust hanger, reverse lock out blah blah blah EXCEPT it has a front case that has the rotated clocking for an L motor that would be mounted vertically rather than at our 12 degrees CW slant. Big deal, I've been hoarding 4 speed bell housings for various swaps, so I'll just go get one of those. Quickly it reminded me that while it bolts right on, the 4 speed housing reverse switch is in different spot than on the 5 speed housing. Well the only difference is that it is pretty much 7/8" farther to the rear. What to do. There are only these options: 1. Do without reverse lights. 2. Drill a new hole in the 4 speed case 7/8" further forward, plug the old hole. 3. Modify the shift rod to move the indent where it needs to be to activate the reverse switch in it's current location. 4. Go choose a 5 speed with the right bell housing to begin with, dipstick.... Enny meany miney moh...1 point
-
1 pointYou only need the adapter plate to attach a starter to an engine. A simple test short of actual running it would be to remove the plugs and while its on an engine stand (not a test run stand just the normal engine stand), bar it over by hand as quickly as you can and get a single bump compression reading. I was able to generate about 75psi this way. OR you could attach the starter with the plate that mount between the engine and the trans (what I called the adapter plate, its really not adapting anything) and spin it with a starter. I would just set the engine in an old tire for this test. while you are at it check the oil pressure with a manual gage. this would allow you to get some idea of the overall condition (should build even compression of about 150 psi or more, and should get some reading on the oil pressure, maybe in the 20psi range with just the starter and no spark plugs IIRC. I have some old videos showing turning and engine over for compression and oil pressure test, I did it with the trans on before I realized just the plate alone was enough.1 point
-
1 point
-
Let's review pro's and con's: 1. Do without reverse lights. Well if you left the switch in and hooked up you'd have reverse lights all the time. No. 2. Drill a new hole in the 4 speed case 7/8" further forward, plug the old hole. Sounds simple enough, you have to have the right size tap and drill bit, and if you look closely, that dang thing is not 90deg to the case, it's kinda angled. The nose of the switch has to be in the JUST the right spot. And you'd have to experiment with spacers since there is no raised area on the case like the stock one, and it might leak, and ..... No. 3. Modify the shift rod to move the indent where it needs to be to activate the reverse switch in it's current 4 speed location. This is my choice. The rest of the thread is about how to do this easily. 4. Go choose a 5 speed with the right bell housing to begin with, dipstick.... No fun just doing the simple thing is there?1 point
-
I have a blaster coming to look at the car this week that was recommended by a restoration shop. He’s going to assess the undercoating and if he can remove it with blasting, otherwise I will have to strip it. he has said he can blast the car while it’s on the chassis frame which is awesome. He can lift the whole thing with chain blocks to access underneath. Downside is he’s booked till march next year….. This whole time I have just been trying to work towards just getting this damn thing blasted and in epoxy! and with the severity of the rust and lack of structural integrity I wasn’t confident putting it on a rotisserie until some of the more structural rust was repaired. I have decided to pull all the panels off to expose all the interior sections that I know will be rusty as hell. I’ll remove the entire rear valance, rear quarter panels, roof skin. I have a few other panels I’m considering too like the front panel of the tool compartment and top wiper cowl panel. There’s a lot of rust in both those sections. I started experimenting with a few mechanical ways of removing undercoating used a oscillating multi tool with a scraper attachment on my undercoating it was not overly effective. First photo was just the tool and second was tool followed by a knotted wire wheel. most effective way proved to be a strip it disc, makes quick work of it. the oscillating multi tool and scraper worked well on some of the sound proofing sections. but not so well on other parts yay more rust…. while I had the strip disc out I wanted to see what was under the paint on the rear quarters……there were lots of layers and much bog (bondo for you guys), I dared not do more…. started stripping the rear slam panel as I will need to unpick it, some quality repairs from previous owners. Just a couple of tacks and she’ll be right…. Also managed to knock off the rest of the second rotisserie frame. Now just need to finish the rear mounting assembly and the rotisserie will be done and ready to use when the time comes…1 point
-
Back in business. my shitty cigweld 135 would not weld properly anymore, after several sessions of trying to get it to work I bit the bullet and upgraded to a unimig 185. I think for my budget it seemed the most sound choice, online reviews were all very positive. Every single component of the unimig is far higher quality than the cigweld and it welds amazingly in comparison. Runs much hotter welds than the 135. got a few hours in today and finished up the base of the rear rotisserie stand. still getting used to the welder, some welds were good some were bad… I’m keen to use up the last of this gasless wire….1 point
-
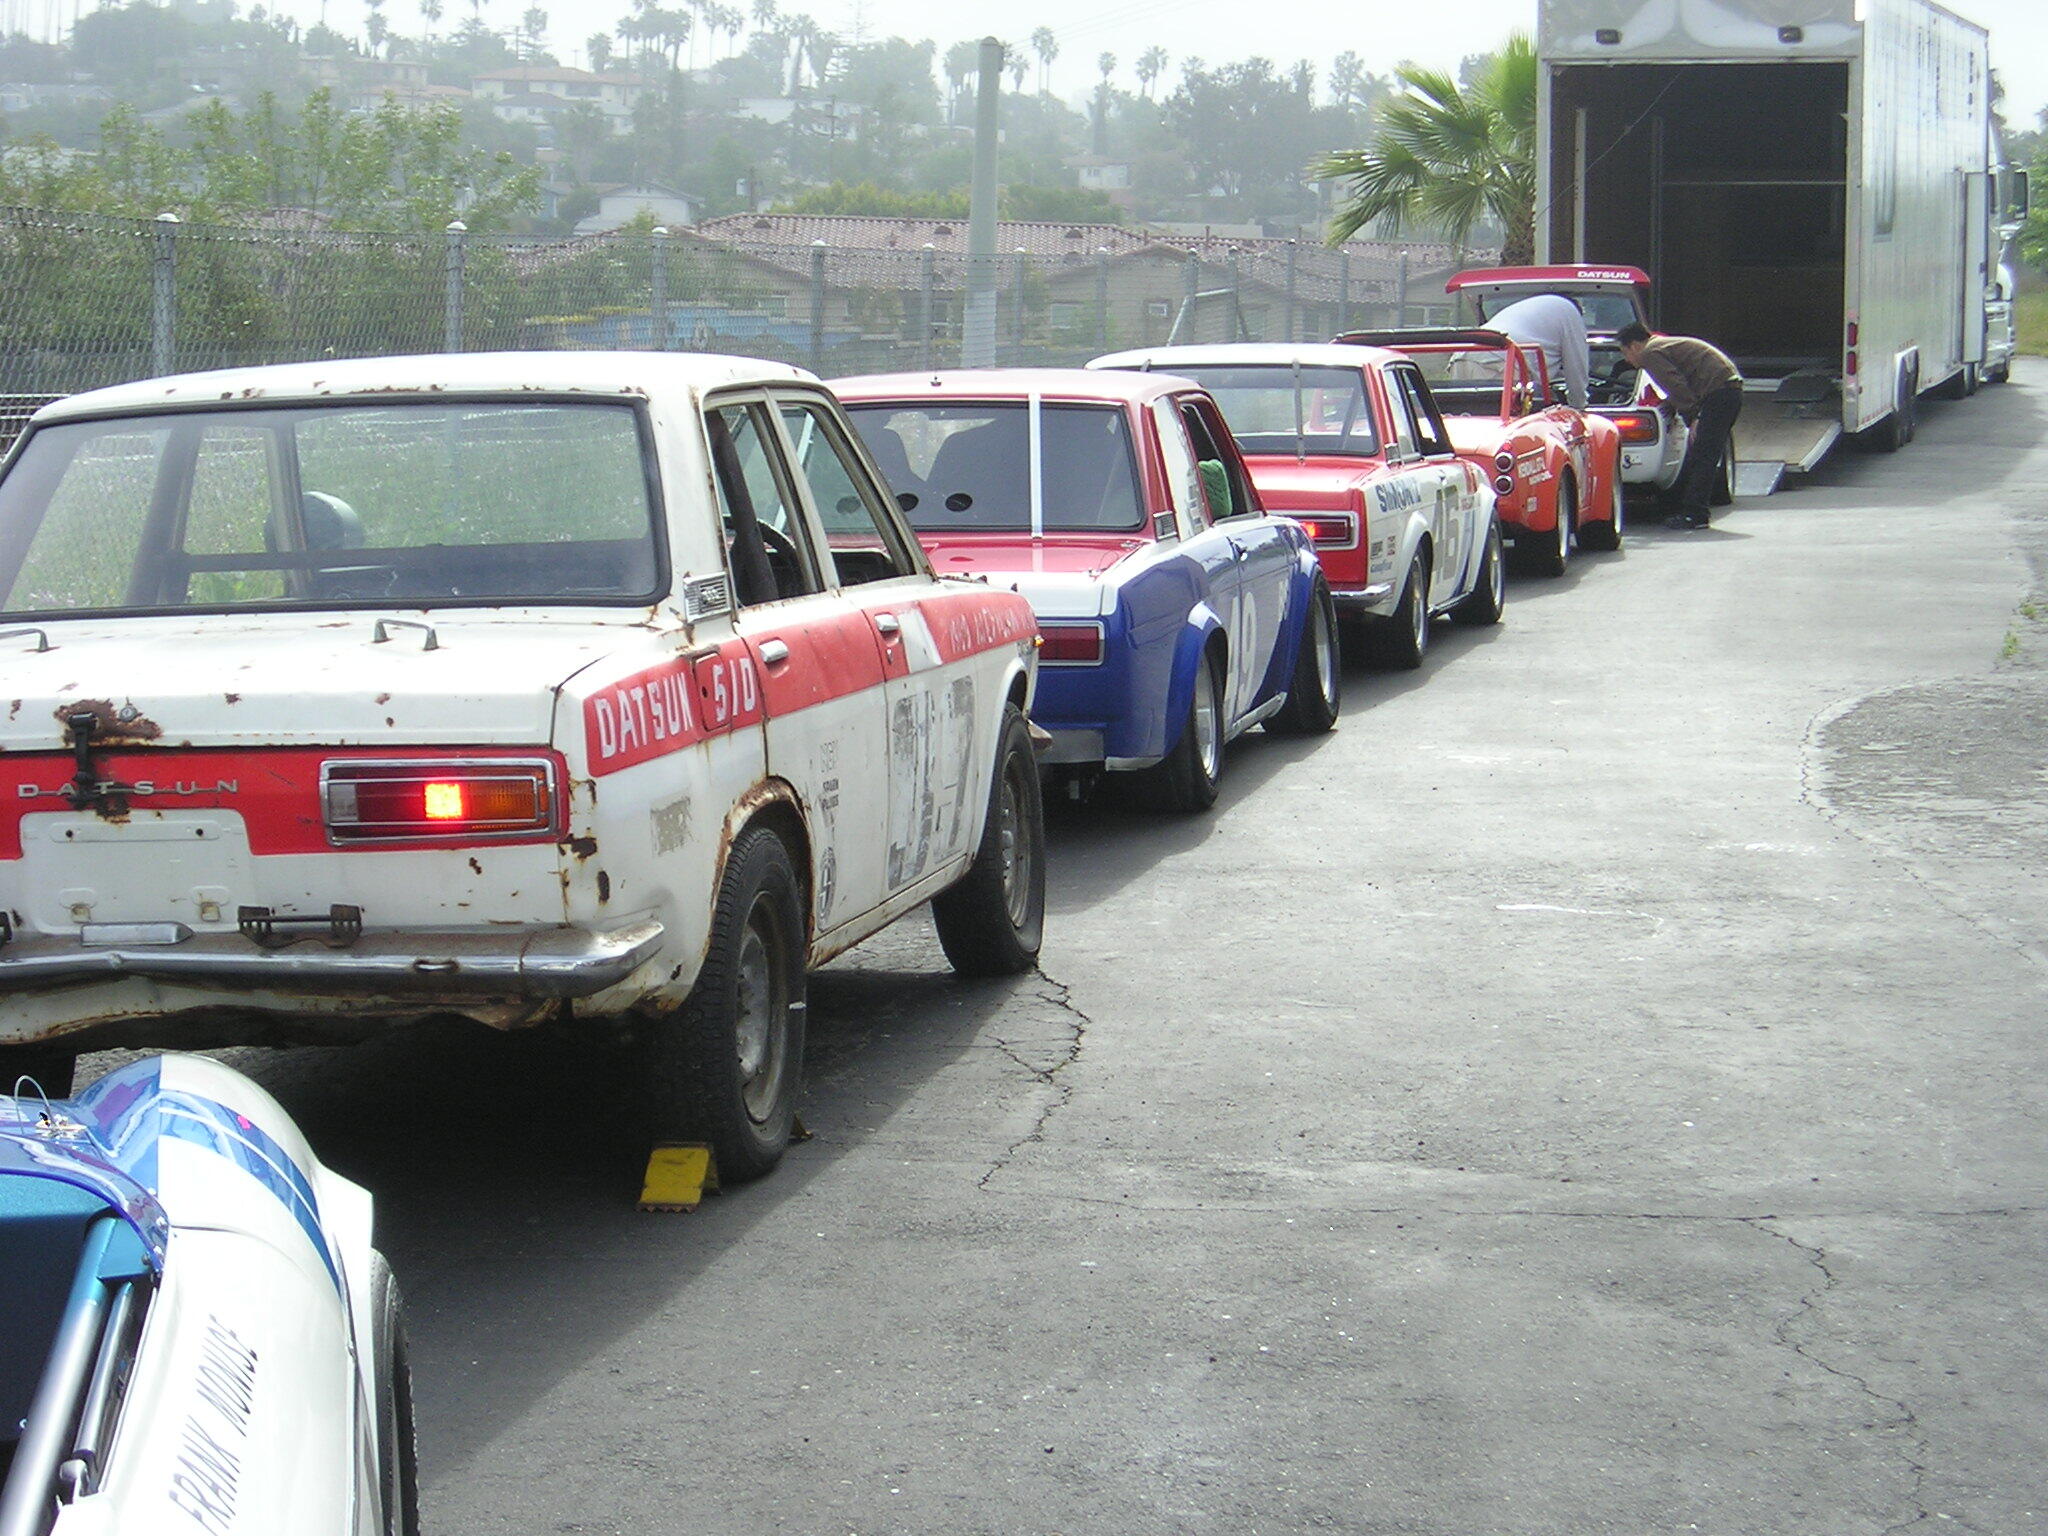
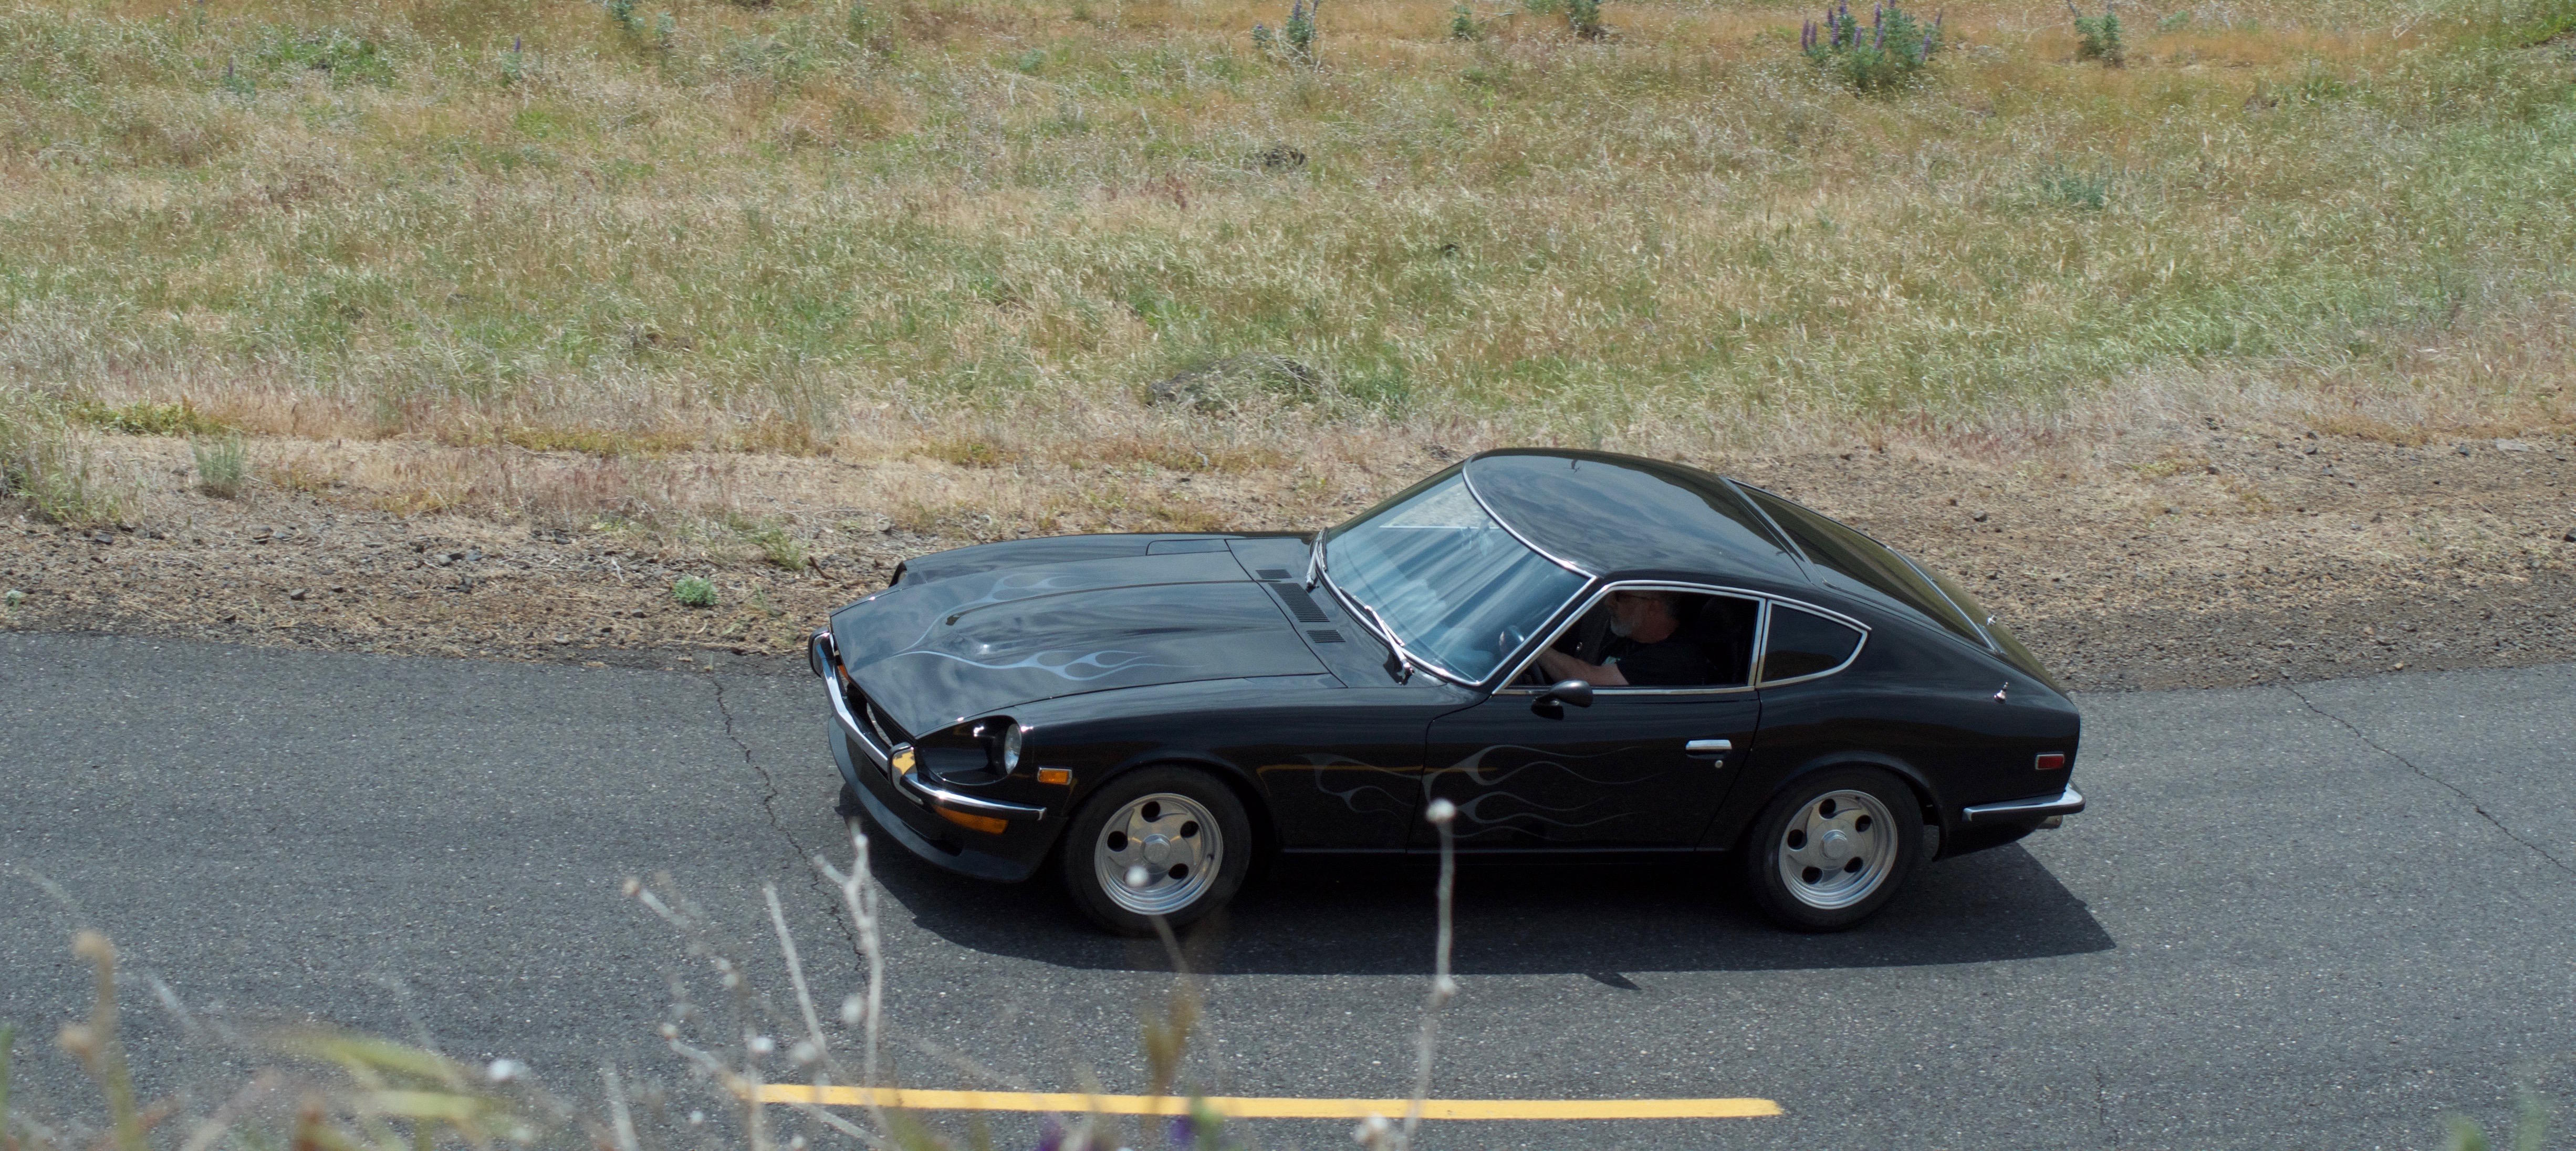
Not sure where this is from either, but thought it was cool. At least the Z is up front. lol
 1 point
 -
Looking at the online catalog: http://www.carpartsmanual.com/datsun/Z-1969-1978/engine-240z-260z/accelerator-choke-throttle The one on the right is possibly from a automatic transmission car due to the metal tab on the rod below the pivot ball. That tab is shown in the catalog image. The one on the left is the early model for the throttle cable as @Terrapin Zmentioned. The online catalog shows an end date 7001 for item #20, the throttle cable.1 point
-
Others will have more detail on dates for when these started and stopped etc. The one with the with the extra tab on top (left on last pic)is for the early 69-70 cars. That tab is where the hand throttle cable hooks up. The one on the right is the replacement for that, after the hand throttle was recalled and omitted.1 point
-
1 pointI reached out to Z Car Depot about it and they pointed me to the OEM seal as well. It’s a Nissan part, so I am wondering if that is the best option. Pissed I have to drop another pile of cash on this. BTW, that seal is cheaper on Courtesy’s website than in their eBay auctions.1 point
-
I've never had anything rub with the set-up. Once, I got some of those after-market rear shock mounts that had an adjustable camber option (the product is here: https://www.thezstore.com/page/TZS/PROD/classic20d/23-4189) but they disintegrated on the track from use as they're mostly made out of plastic. At that point, I had some rubbing on the driver's side. But, once I replaced them with the stock steel mounts, it's been fine. I don't have the specs on the rims that you're after, the PO acquired them (and I like them so I kept them), but they're not a rare combination for 240s. Someone else here might know or recognize them and be able to give you the specs.1 point
-
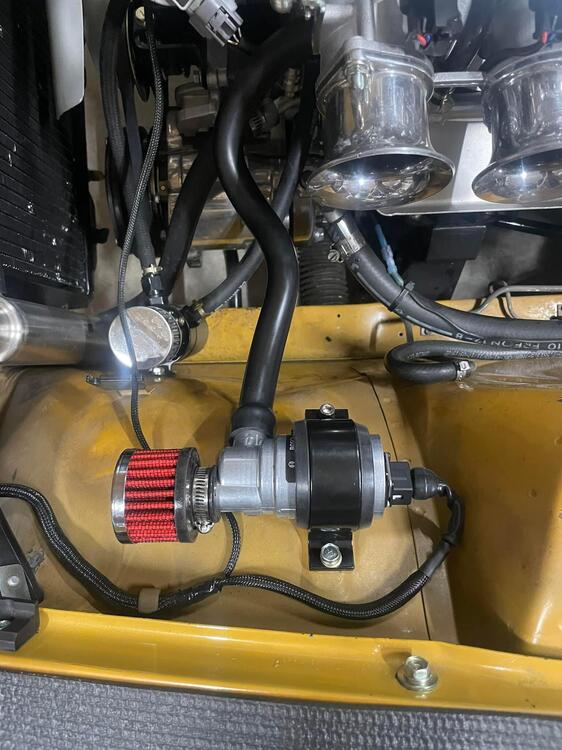
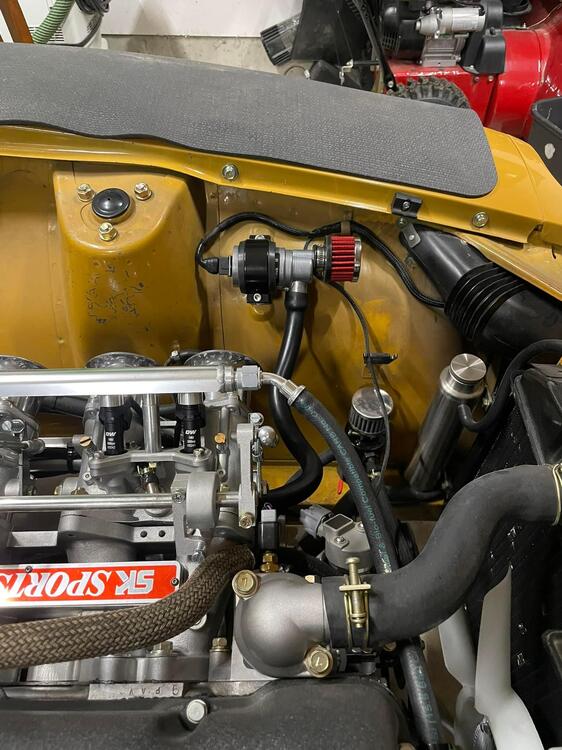
1 pointITB with IAC take 3. My last bmw IAC wouldn’t play nice with my haltech (basically it’s the opposite of how haltech controls it). This one let’s by a tiny bit of air at full closed. I plan to see if I can set the butterfly’s and it to play nicely and not idle too high when the engine is warmed up. Fingers crossed.
 1 point
 -
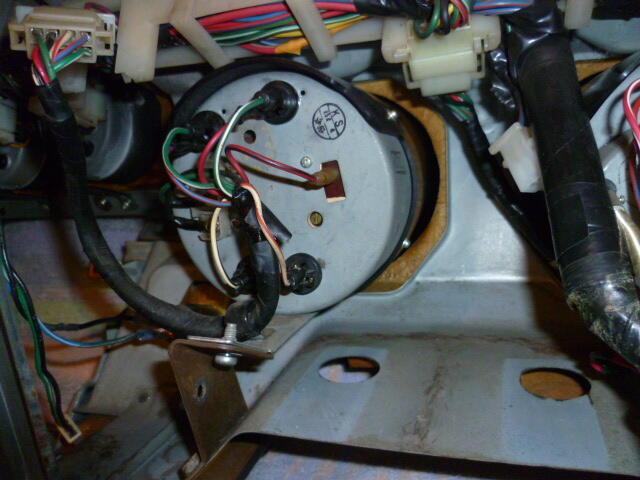
1 pointI found a pic of the back of the tach installed. It looks to me like they are grounding the turn signal indicators through the tach body and not through the harness? I don't have a tach here loose to verify, but it looks like that to me. That opens up the possibility for some other ideas. You can also see that they changed a bunch the wire colors on the little stub harness on the back of the tach. So you have to be careful about referencing wire colors since some of them changed at the tach connector:
 1 point
 -
1 pointI know you can’t have anything in backwards, the seal has molded corners at the top and you just make it fit around the lower corners, which is why it doesn’t worth a good gal darn….. That is one nasty seal for sure. Does that seal have four molded corners? I just pulled three precision rear window gaskets, all are top corner molded only. The OEM gasket has 4 moulded corners, which I feel you absolutely need to get those bottom corners to fit right. You might have to glue those corners into the curve of the hatch somehow. I’ve had this issue too but never this bad. BTW. Corn starch is now my absolute favorite rubber lube for window seal installs. And it works on putting the trim in the groove afterward too. So slick, so dry, so easy to clean up, so cheap.1 point
-
1 point