Leaderboard


Popular Content
Showing content with the highest reputation on 04/04/2021 in Posts
-
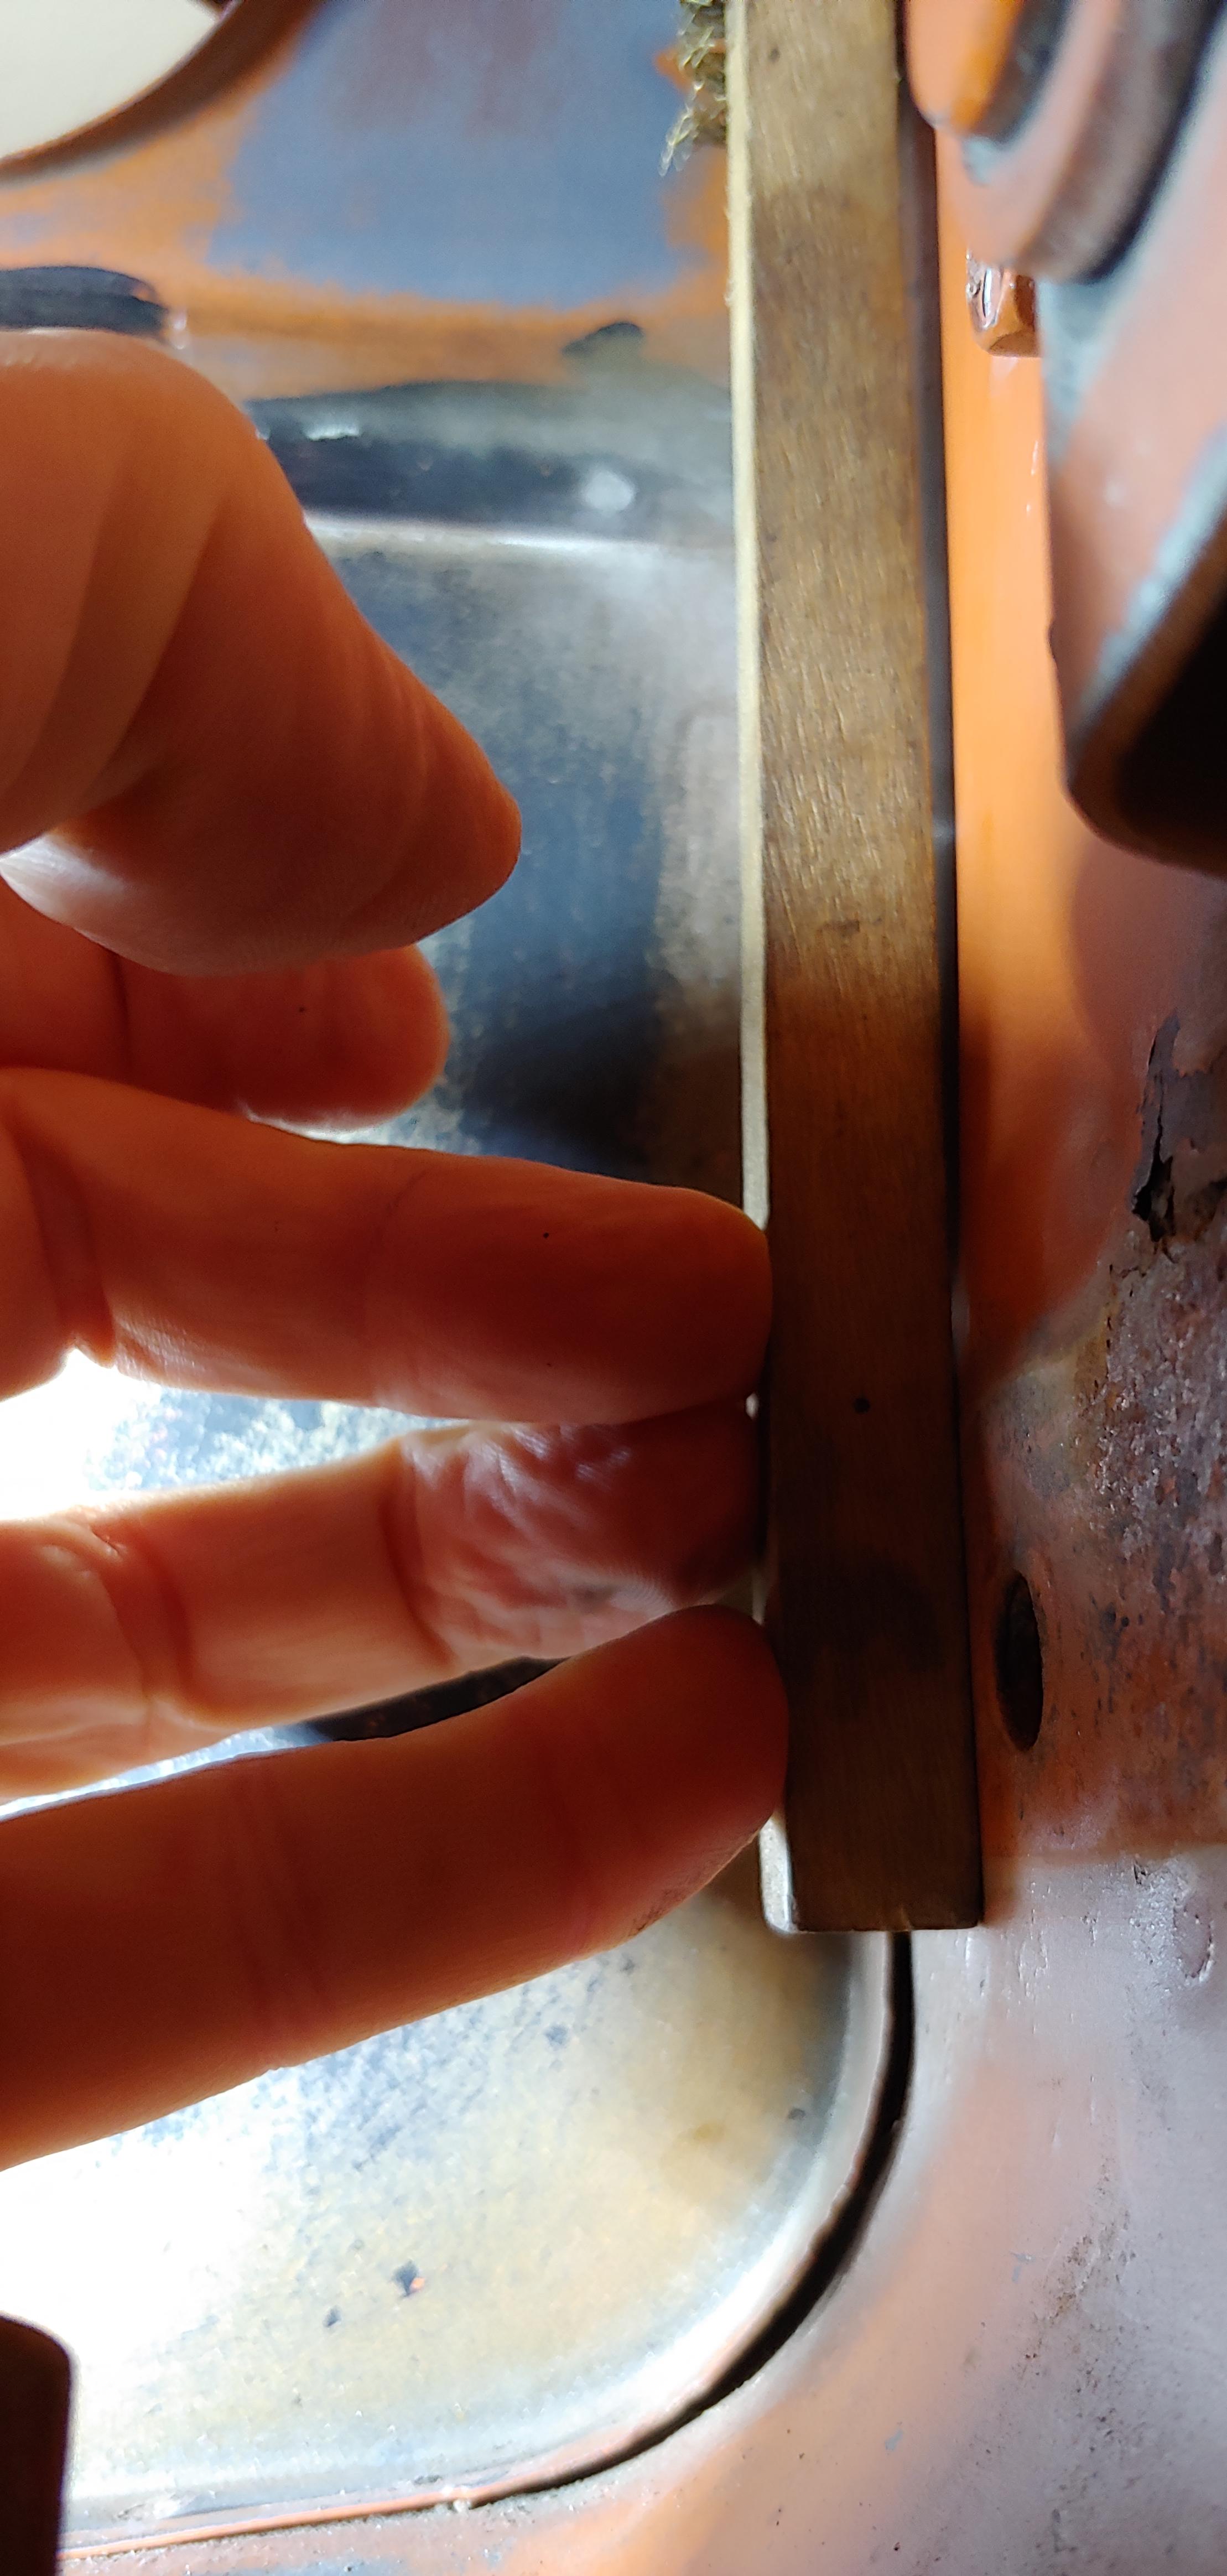
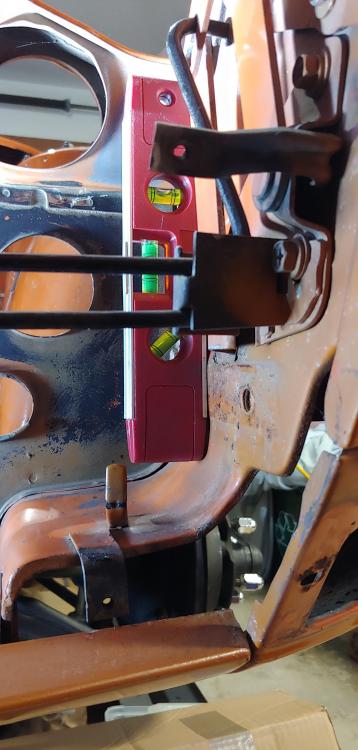
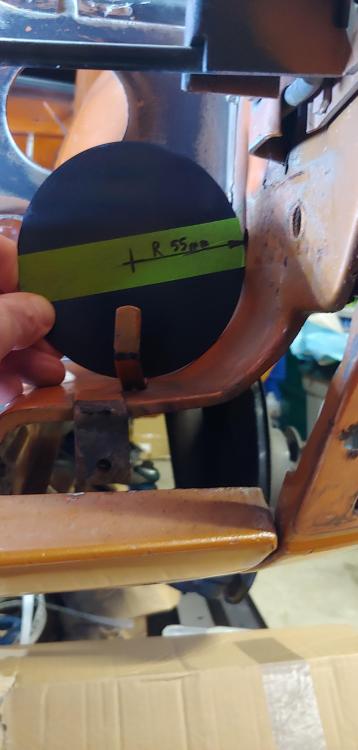
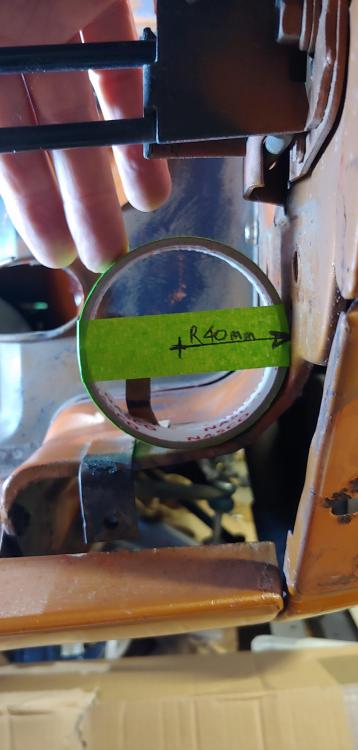
2 pointsHere are a few measurements from my '70. The area where the bumper mounting bracket mates, is vertical. Please note that the vertical steel section above the surface where the bracket mates, is parallel with an offset of about 2-3mm. The radius you wanted varies, I measured about 55mm in line with the back bracket hole and reduces to a radius of about 40mm at the leading edge. Hope this helps Mike

 2 points
 -
2 pointsFunny how the less defined the question is the more discussion it generates. "wondered thoughts on "best" head" >>>> go!2 points
-
2 pointsThe fact that the noid light is pulsing is a good sign on its own. Levels of brightness can vary depending on several factors, but I wouldn’t focus too much on that. Remember it will also be dimmer while cranking as you essentially drop from 12 to 9-10v. I’m assuming from your original post that you can physically see the injectors are not spraying fuel while cranking, but they are spraying when you jump each one over with the battery, correct? If so, I would verify the integrity of all grounds running to the ecu. It wouldn’t be a bad idea to verify harness integrity as well. Remember, even just one good strand of copper in a wire will pass the resistance test, but may not be able to carry a load. But we can worry about that later. First, rule out if it’s lack of power or lack of ground preventing the injectors from firing. You can try this by turning the key to on to supply the power and then manually temporarily grounding the injector on the appropriate pin. If you’re concerned about damaging the ecu while doing this test (hasn’t happened to me yet), you can de-pin the ecu connector of the wires that drive (ground) the injectors, then plug it back in. If they work when you manually ground them, I would be leaning towards a grounding issue. If they don’t, then I would be trying to figure out why there’s power being lost. Maybe just a weak battery? Dirty contacts in a relay that supplies power to the injectors? Weak fusible link? Have you tried cranking it while the battery is on a charger? Lastly, is the fuel good? Does the engine run on supplemental fuel (like starting fluid)? The good news is these are about the most simplistic efi setup to troubleshoot and work on, so just take your time going through the fsm and enjoy.2 points
-
I'm Japanese. The first letter looks like "キ” pronounce "ki" in Katakana.2 points
-
2 pointsI don't think the Catholic Church cared much for this when it came out, but I thought this covered the Easter story fairly well.
 2 points
 -
That was a much better looking car then this ugly silvia! My first car was a datsun (sunny) 140Y coupe.. looks alot like your B210 coupe! 😉 That silvia.. what a design... i find it ugly .. seen from any angle..2 points
-
I inserted an endoscope into the hole I drilled and realized that the striker was just short of engaging. I switch to another striker and this time it engaged and I was able to go through the gears. I could see the ends of the fork rods in the bell housing moving in and out as I shifted through the gears and the input shaft turned freely. Unfortunately, I need to disassemble the case since I didn't apply RTV to the adaptor plate yet but If it work once, it should work again. I've attached a photo from the endoscope showing the non-engaged striker. I knew that endoscope would come in handy some day. Sorry for the poor resolution.
 2 points
 -
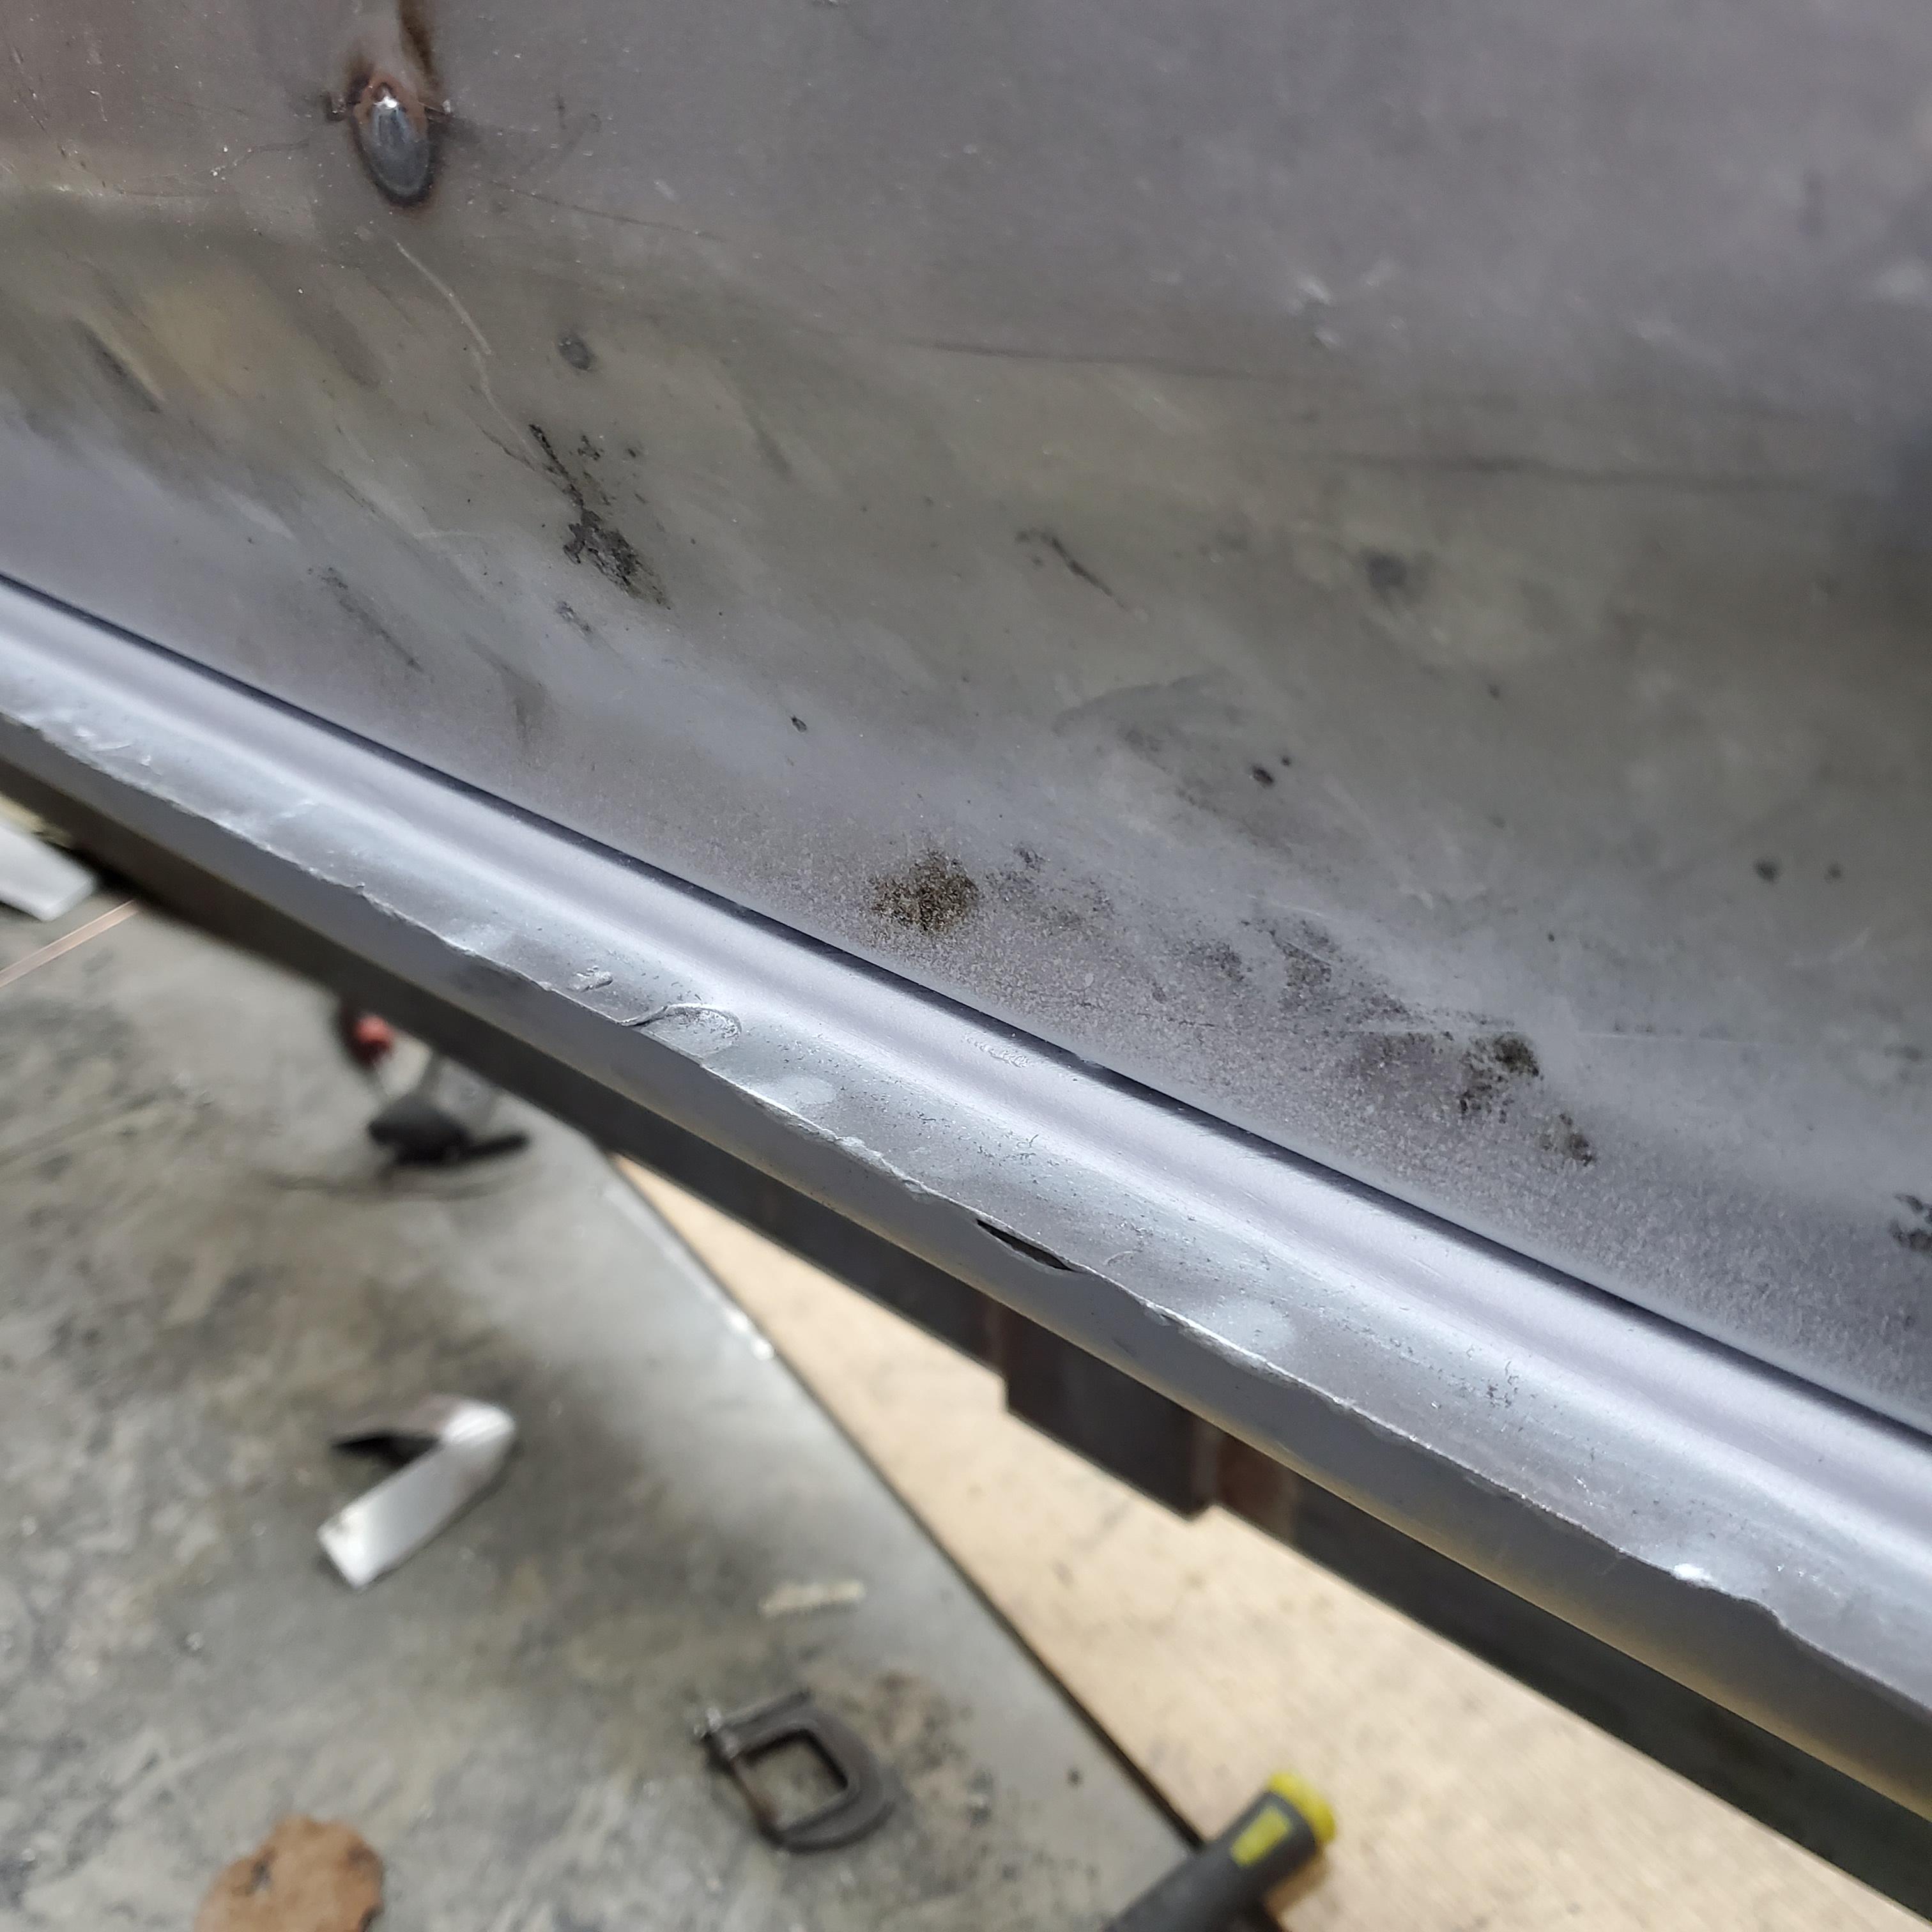
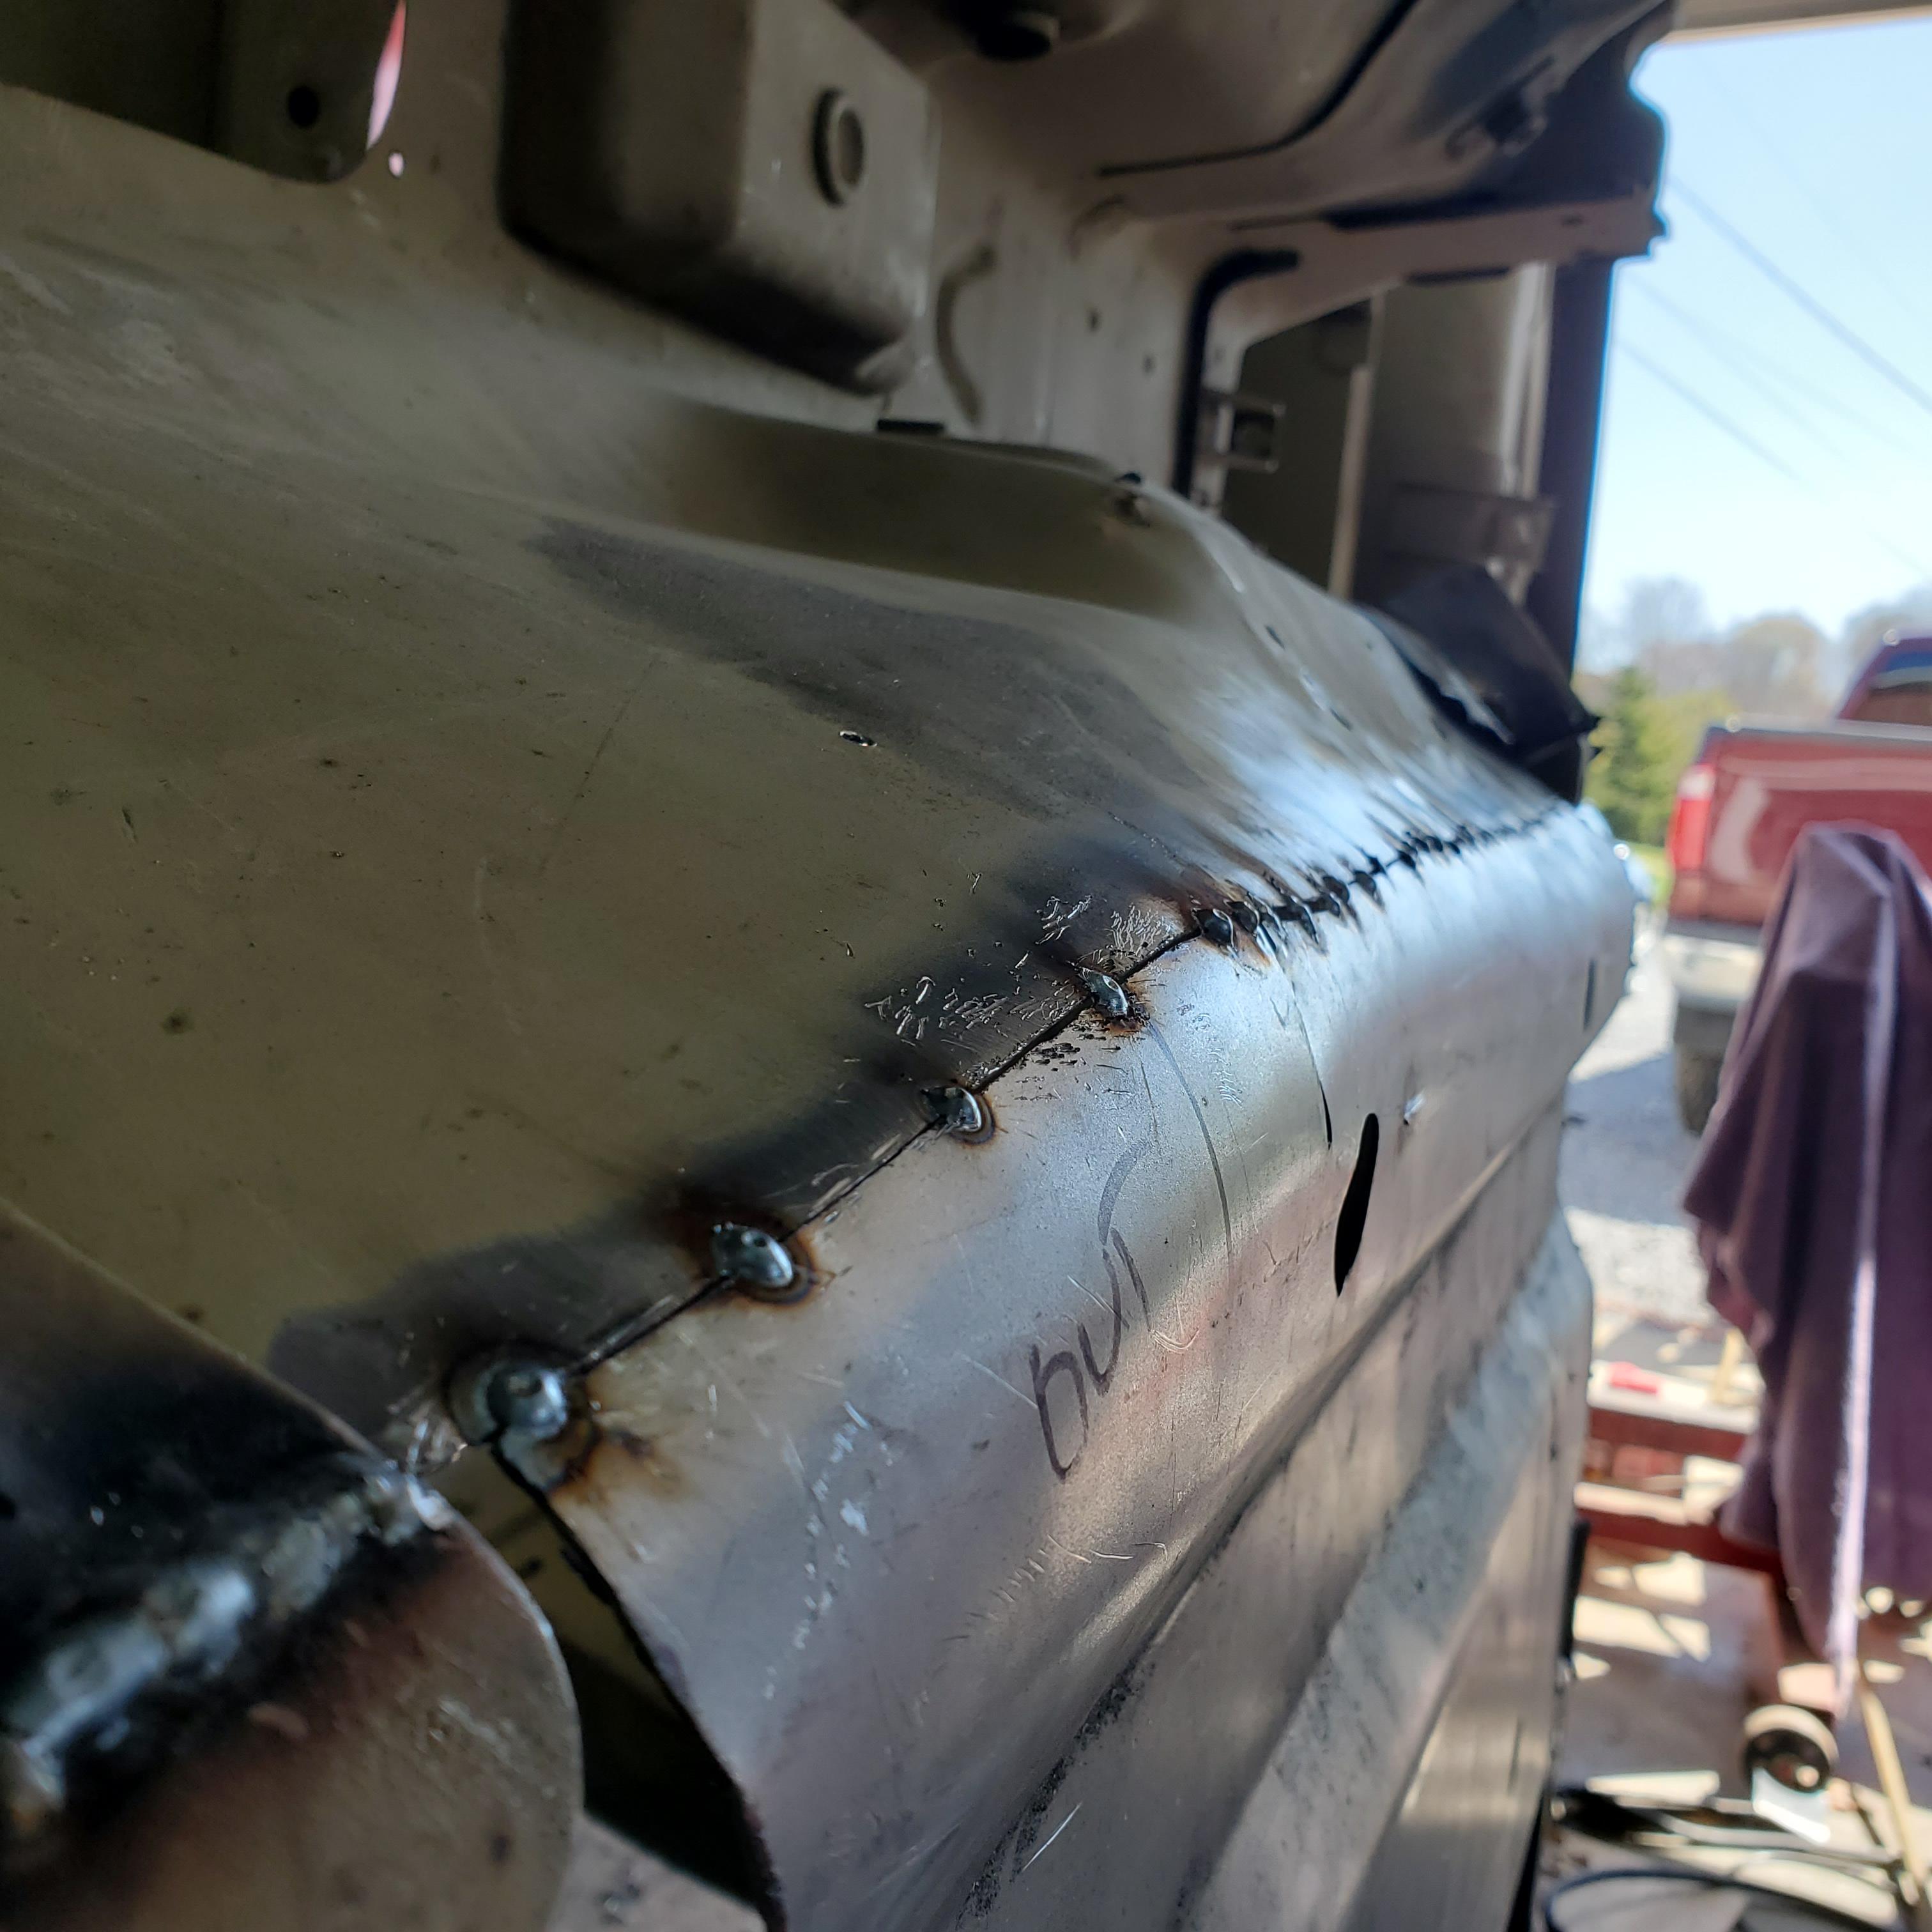
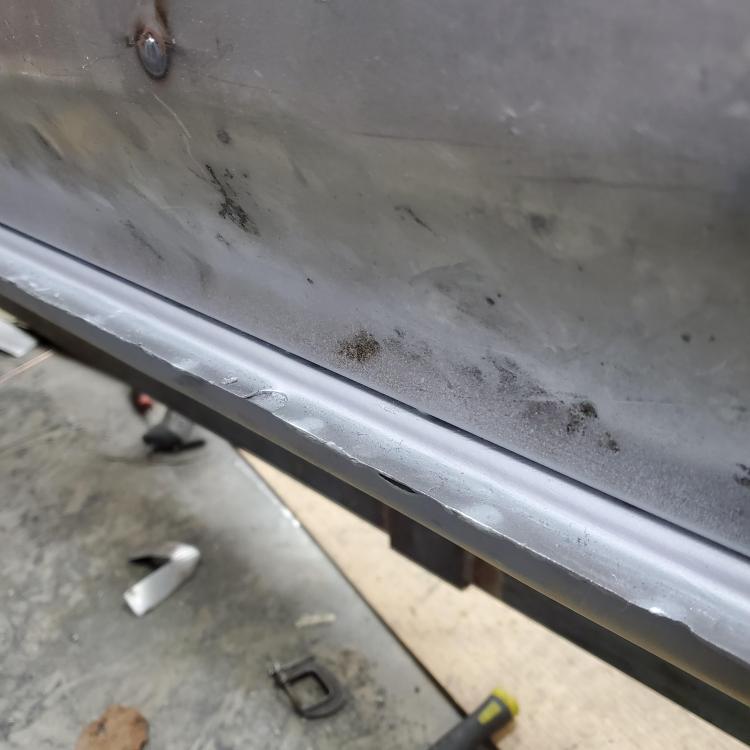
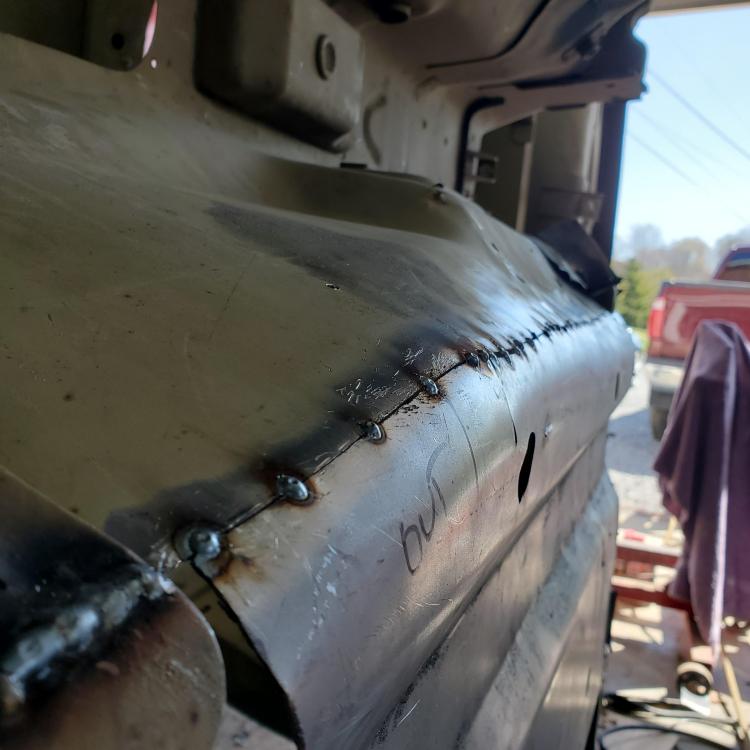
Hope the weather was as gorgeous for you as we enjoyed here in VA. It's great you got to go out and do something fun. I spent the day tacking in a new floor pan on the passenger side (driver side next). It's on a rotisserie and that makes it easier, but I'll swear I made 1,043 trips around that car making damn sure every tack location was perfect. Wore me out. I think if the car had been on its wheels, it would have killed me.
 1 point
 -
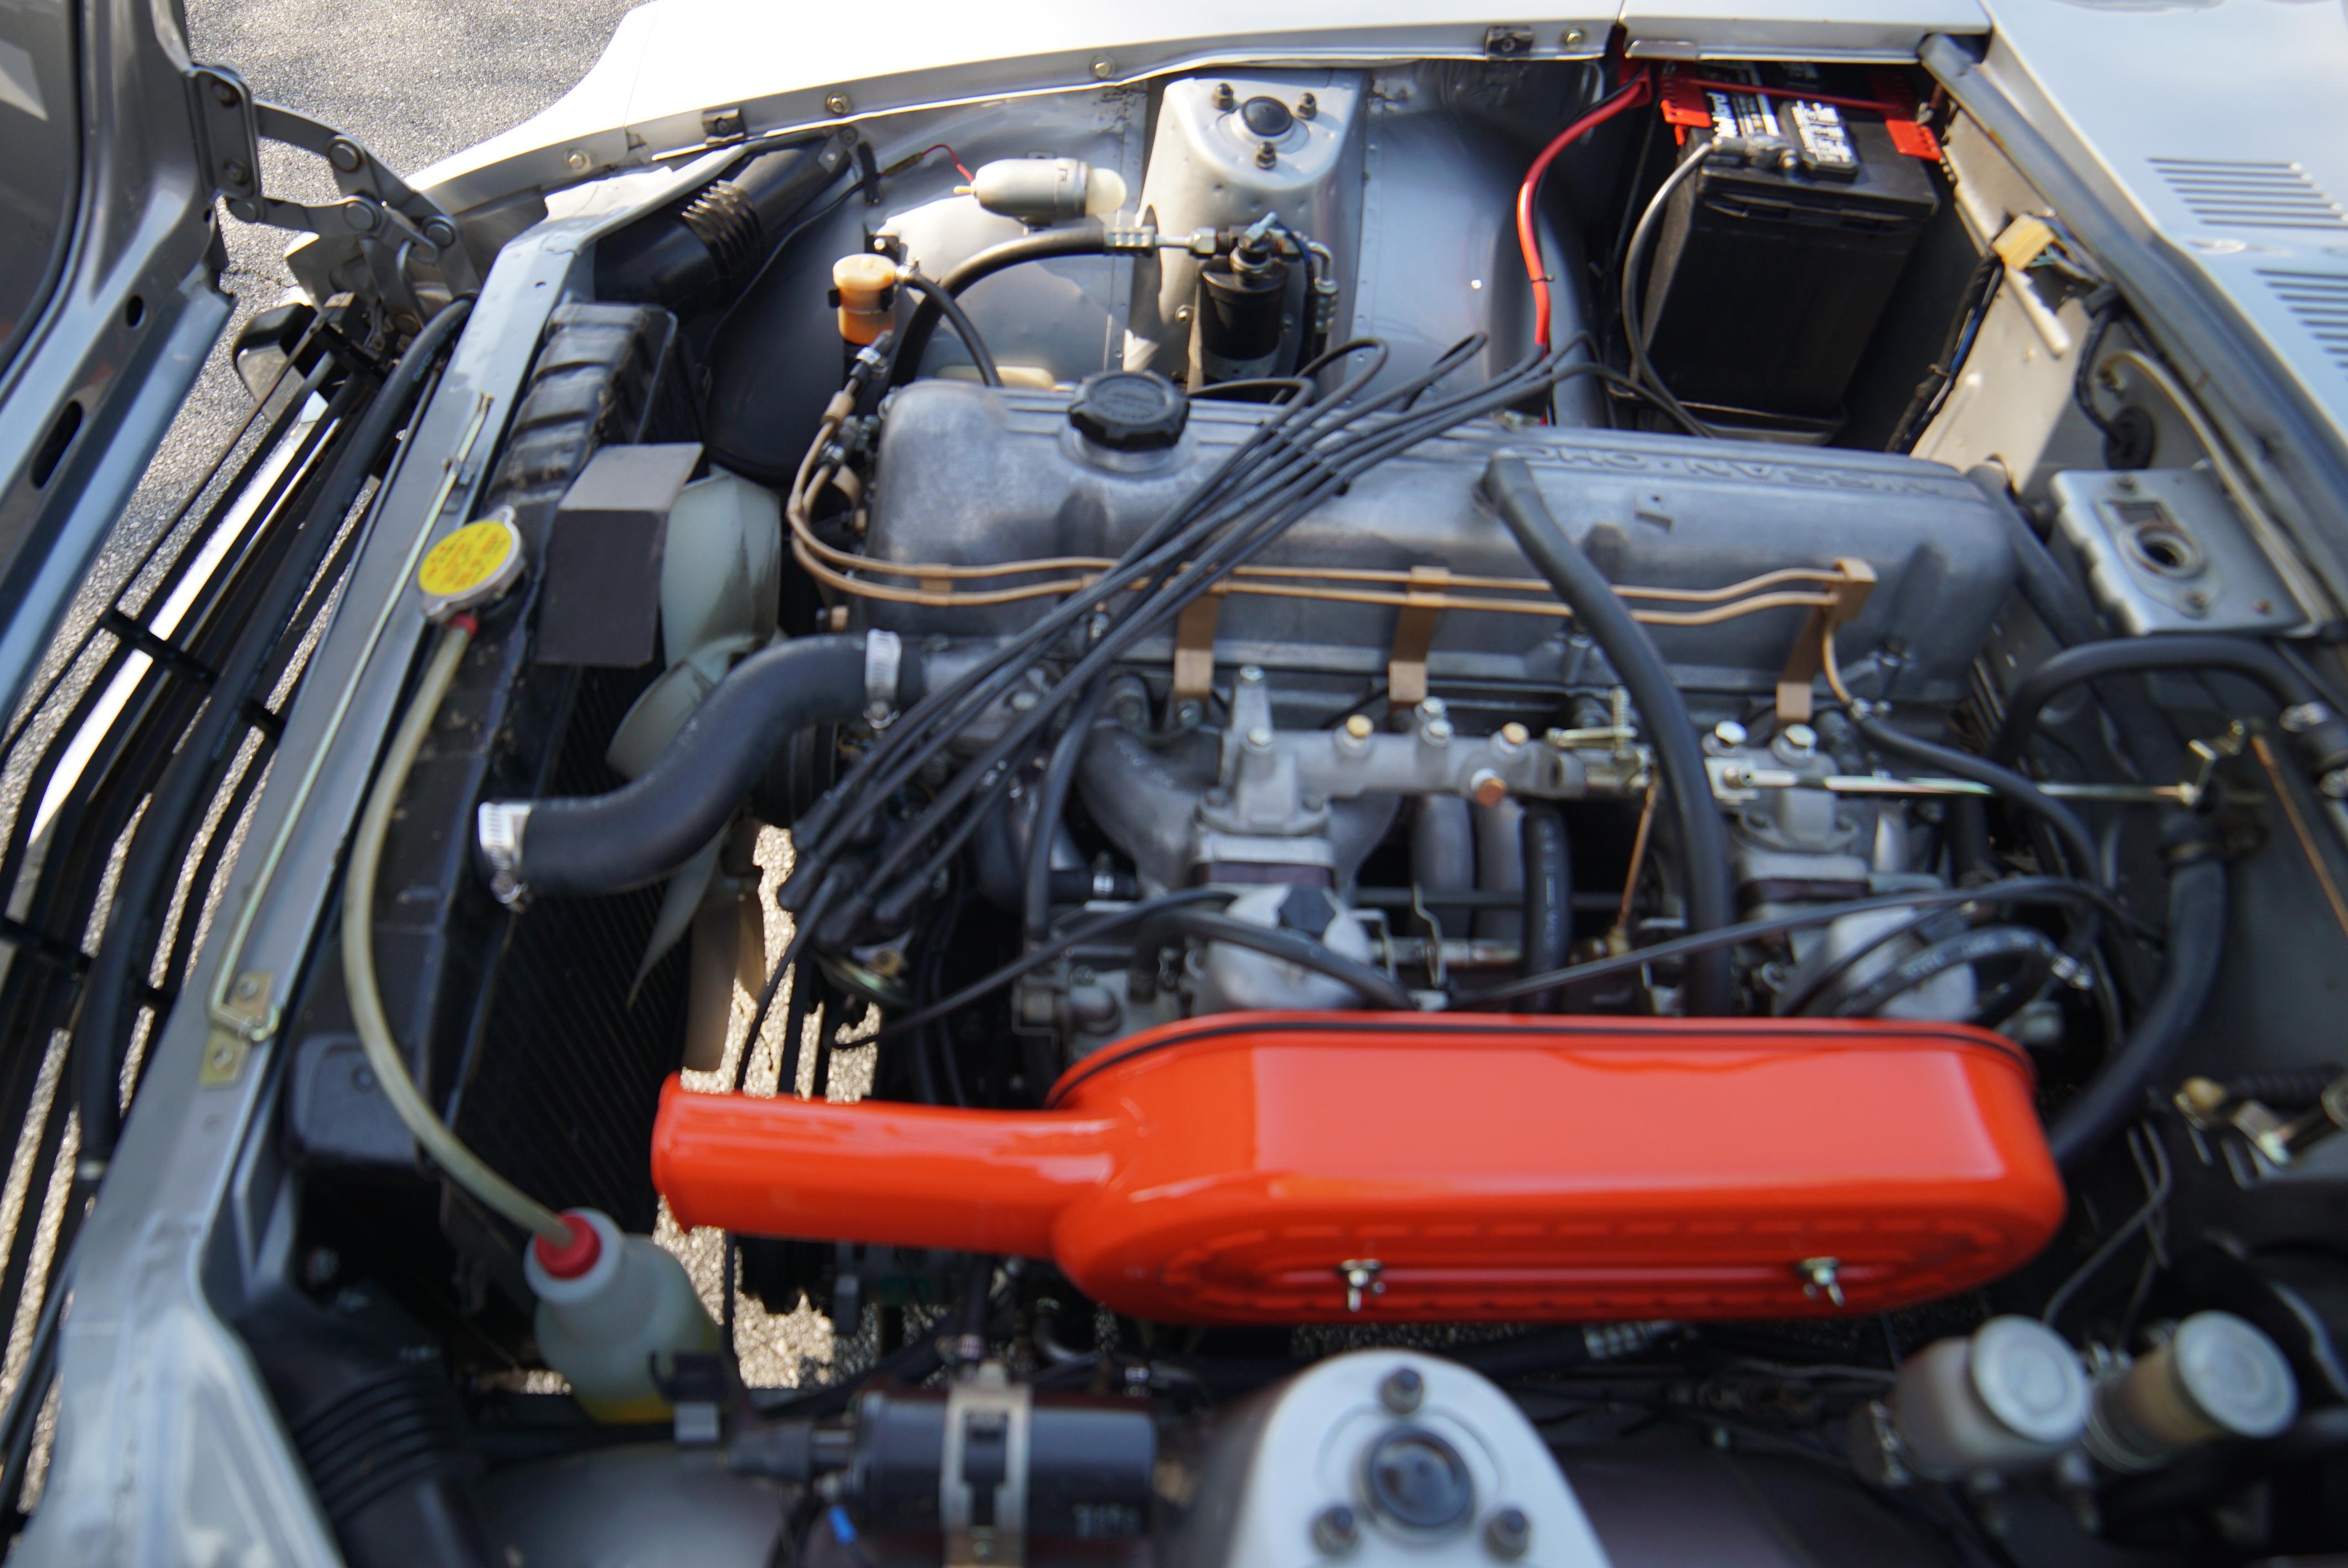
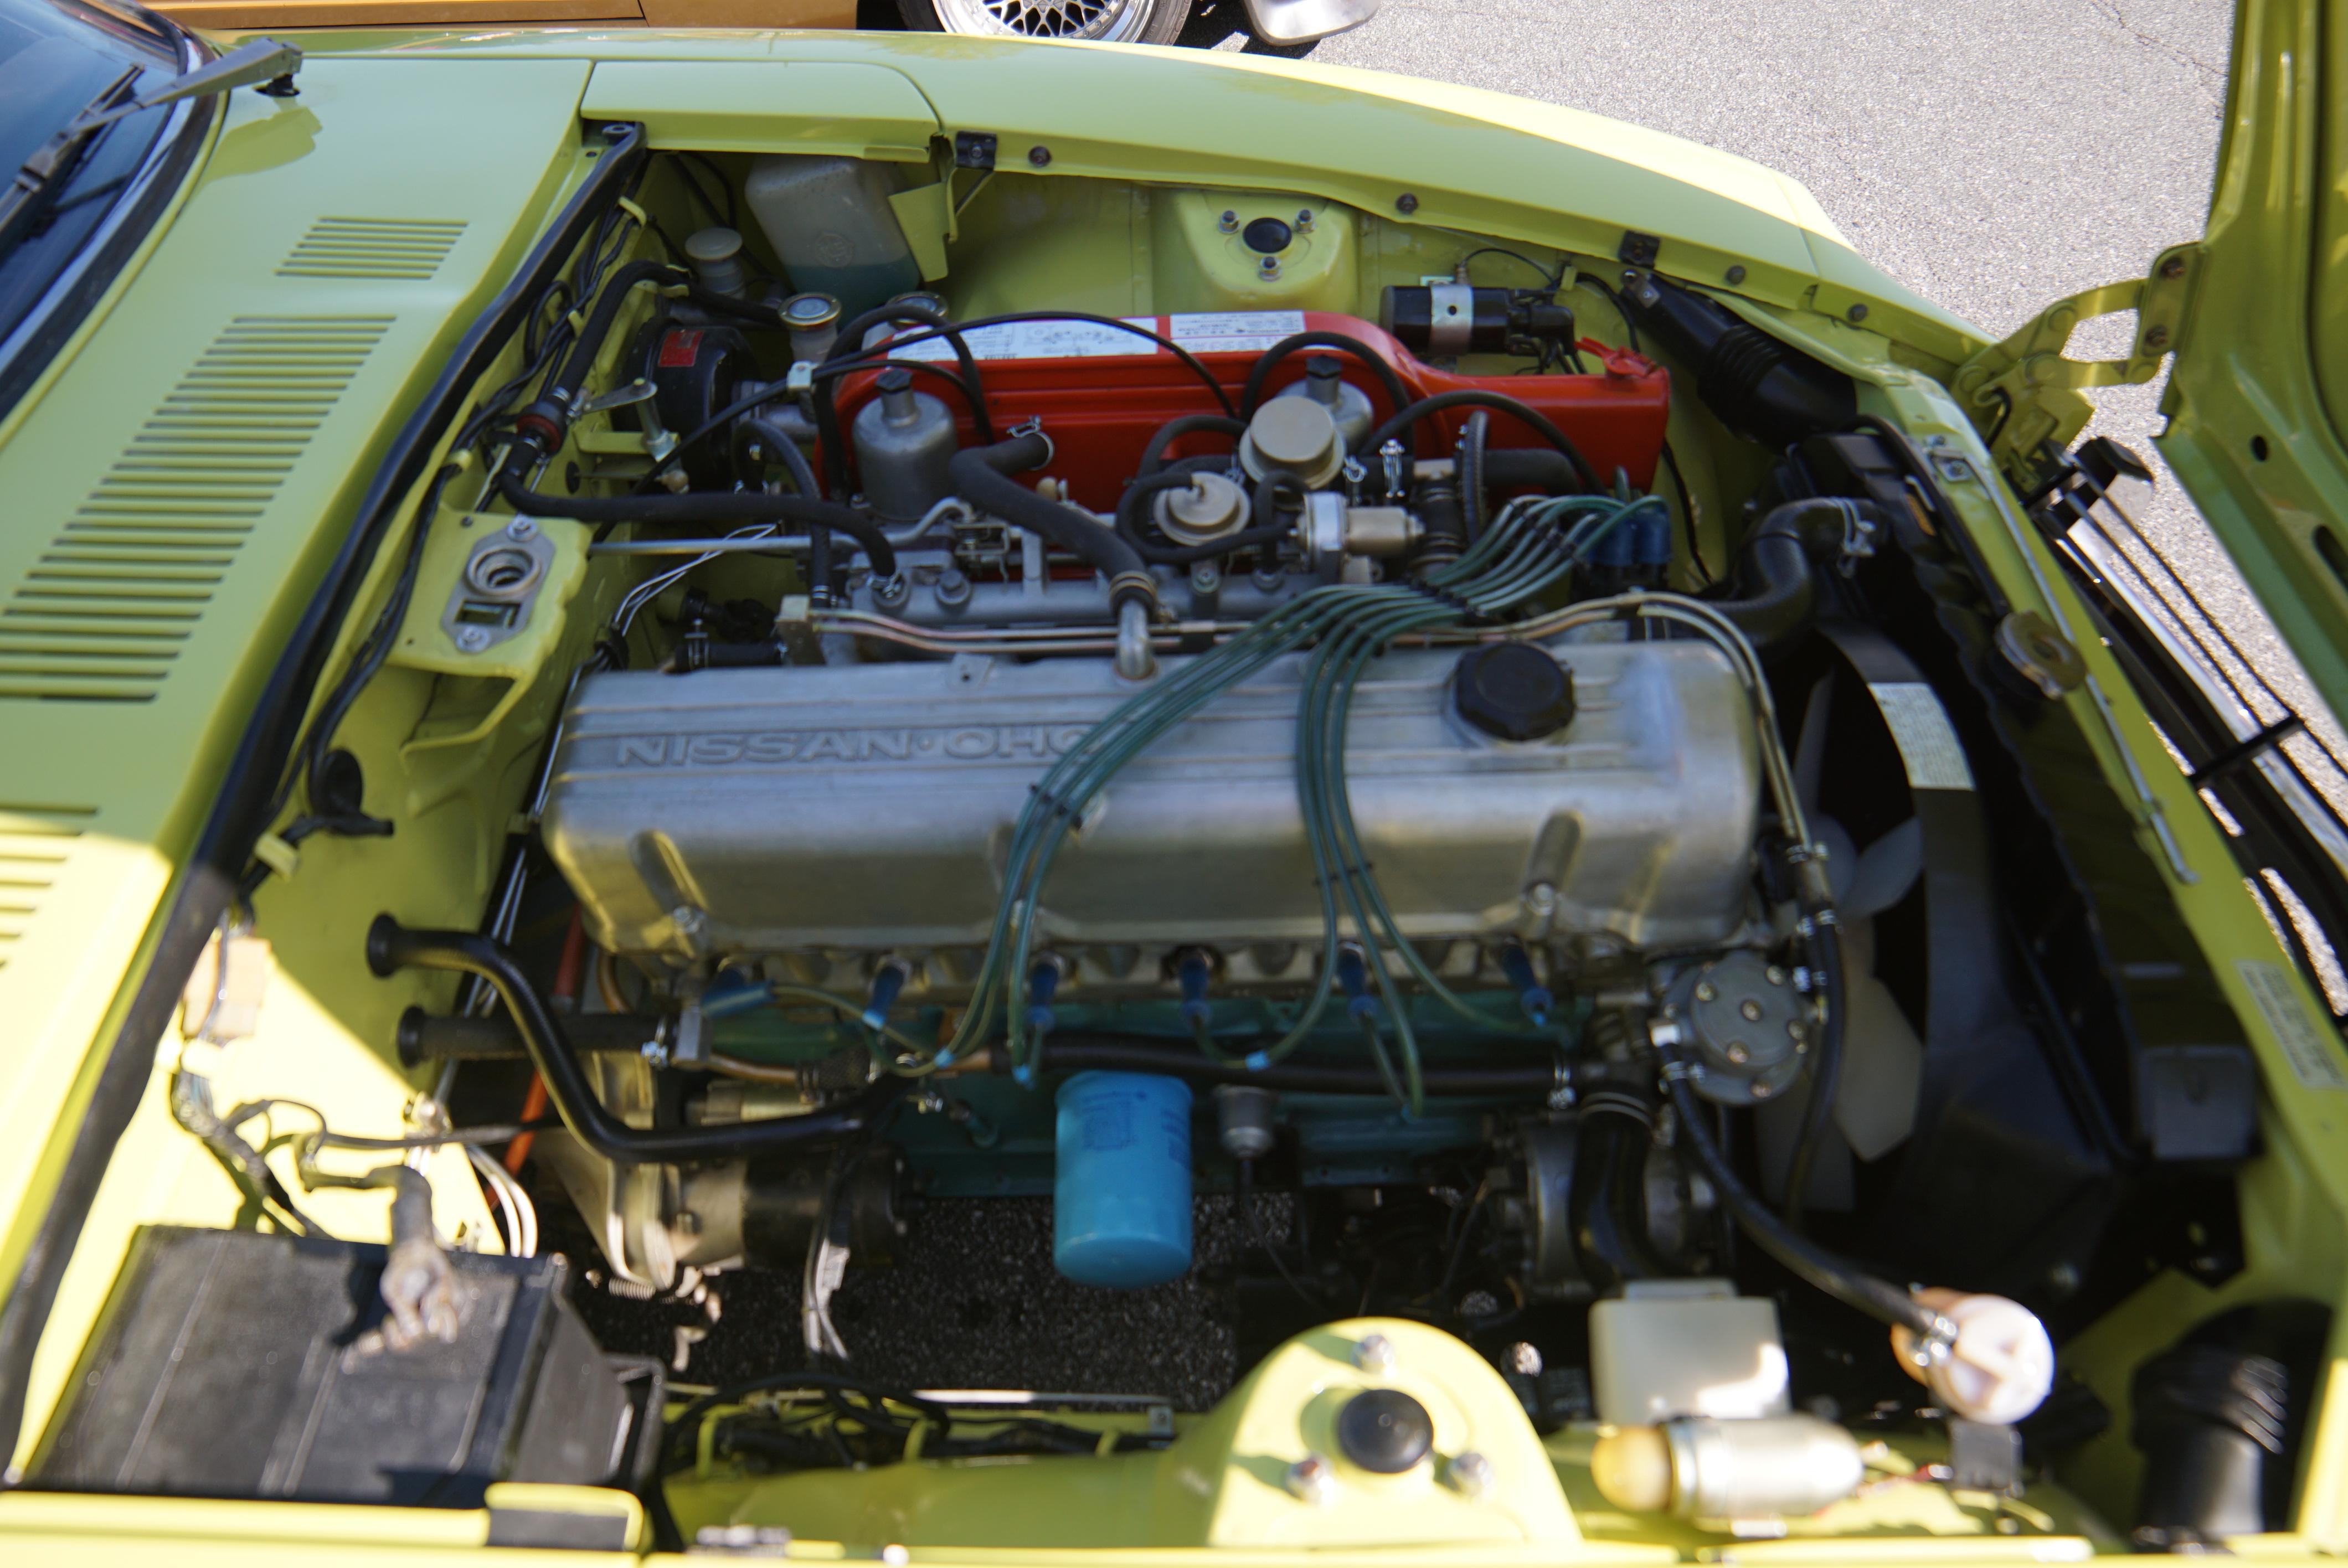
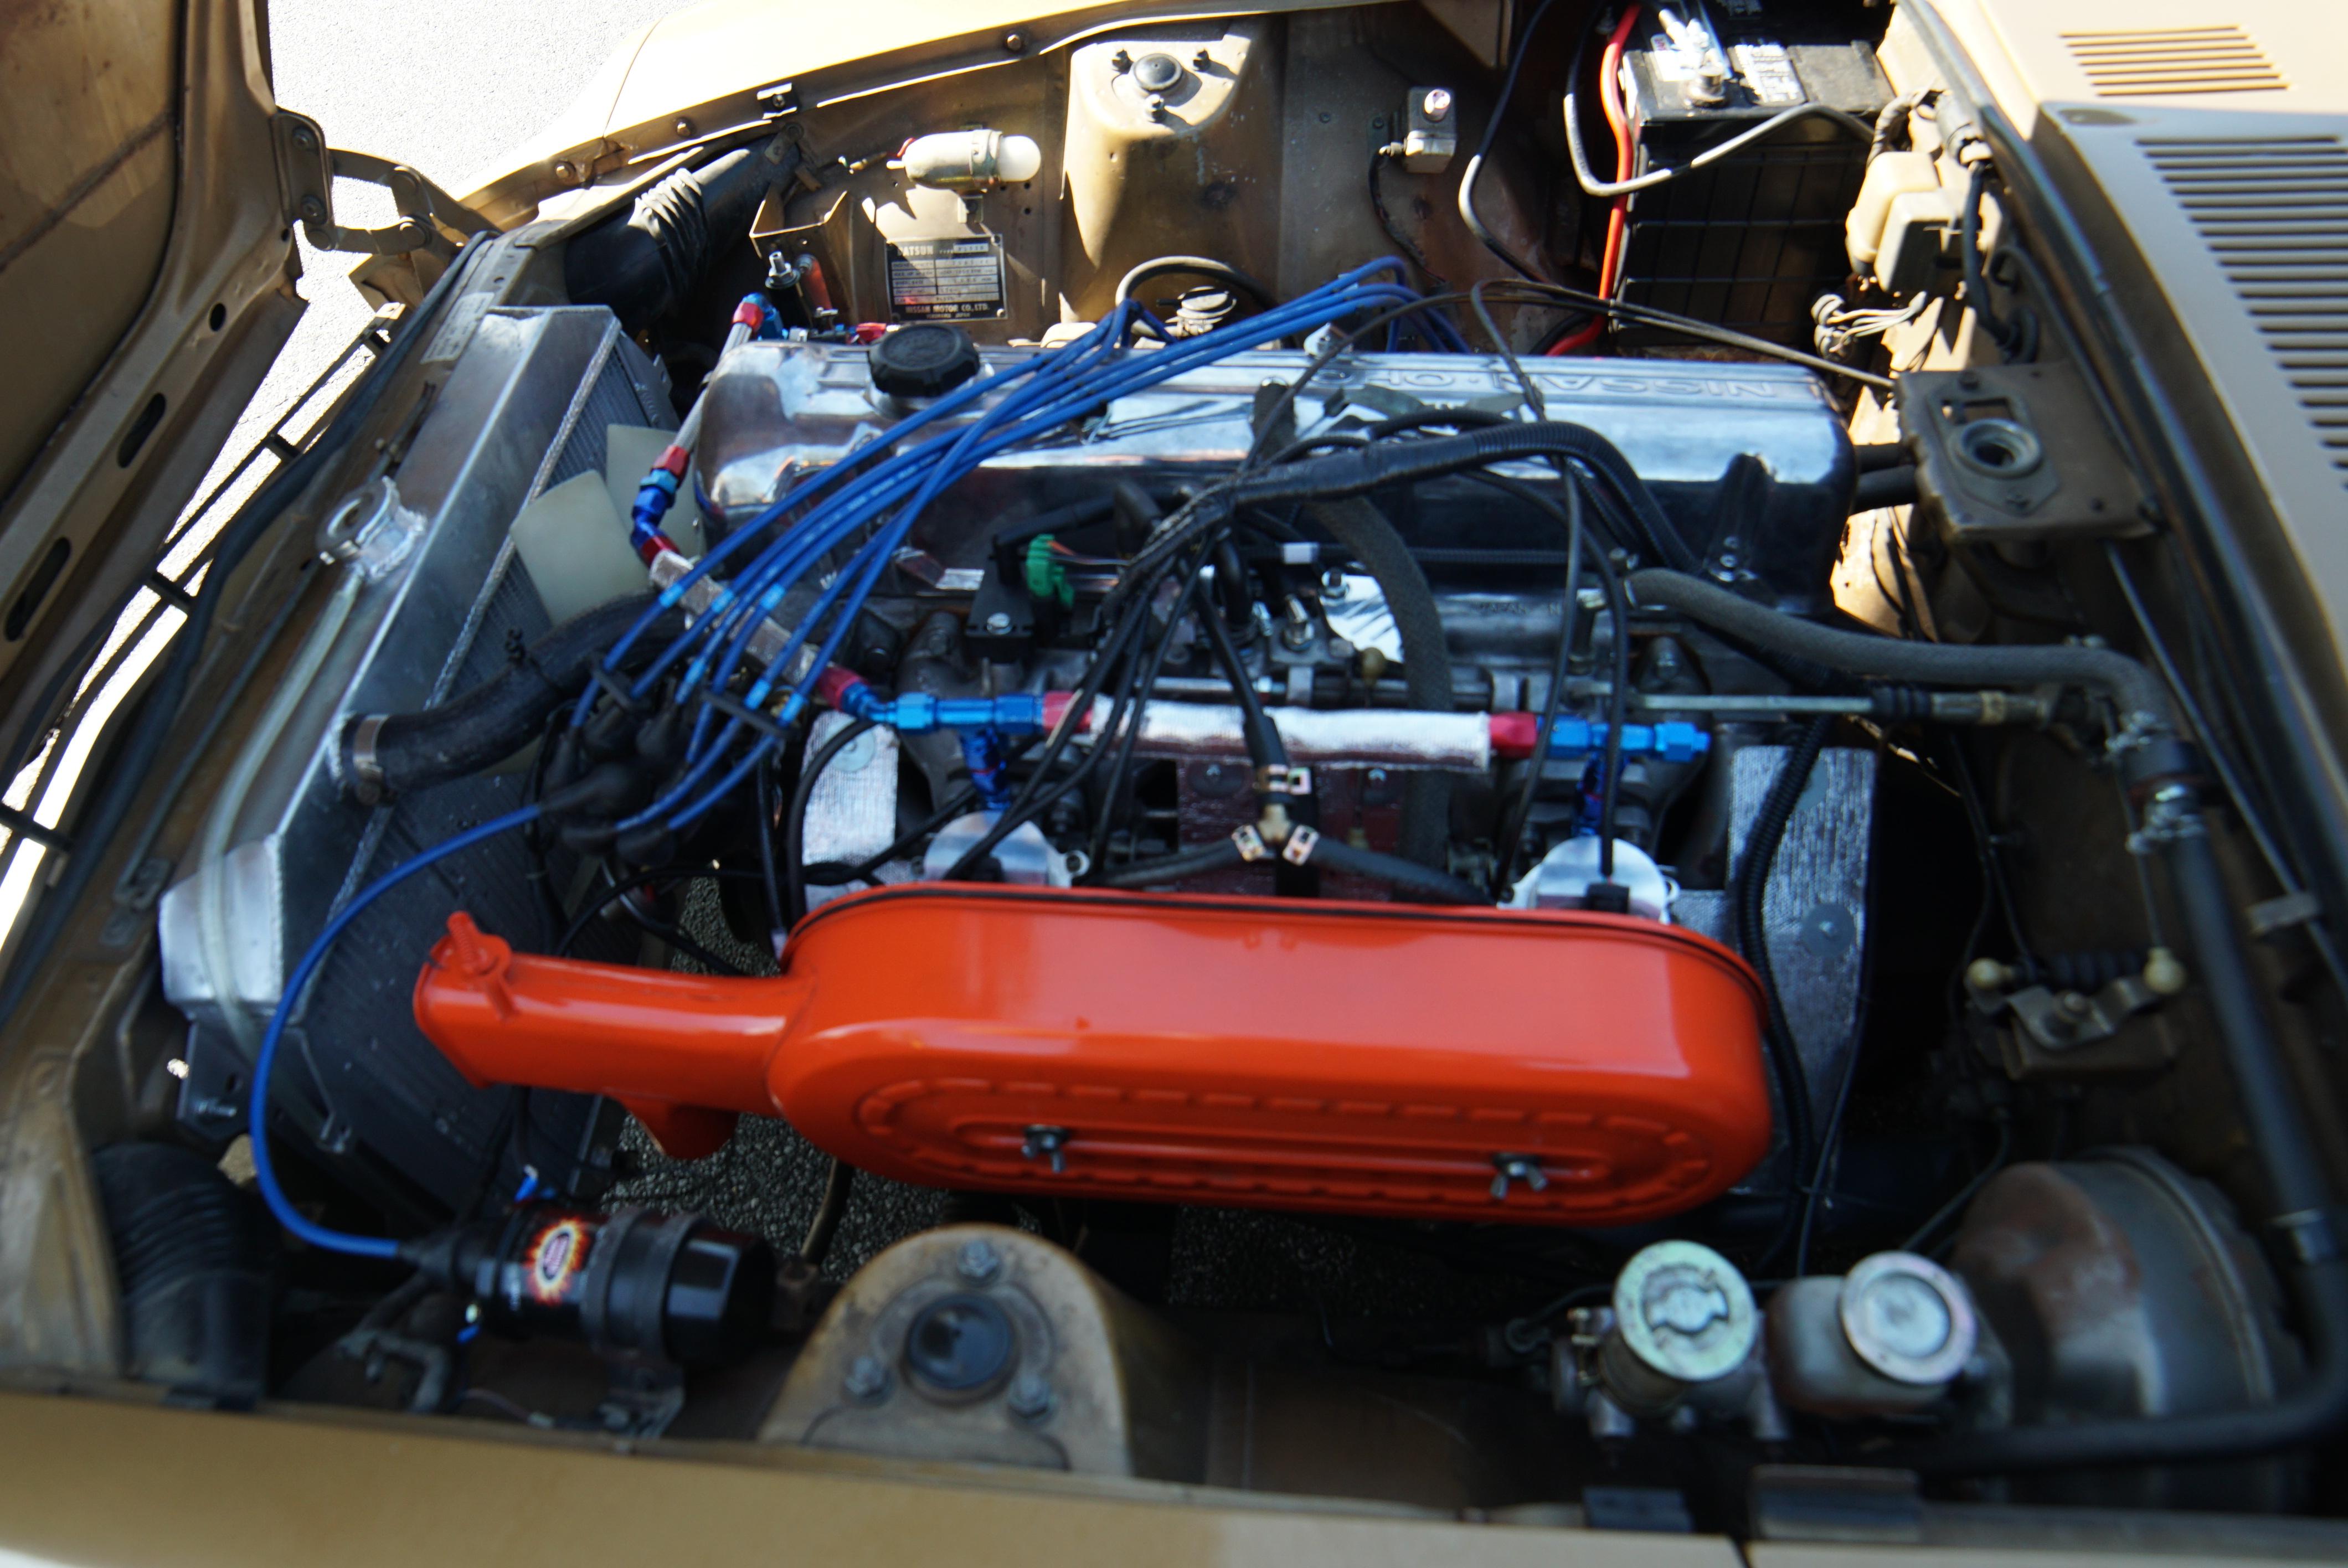
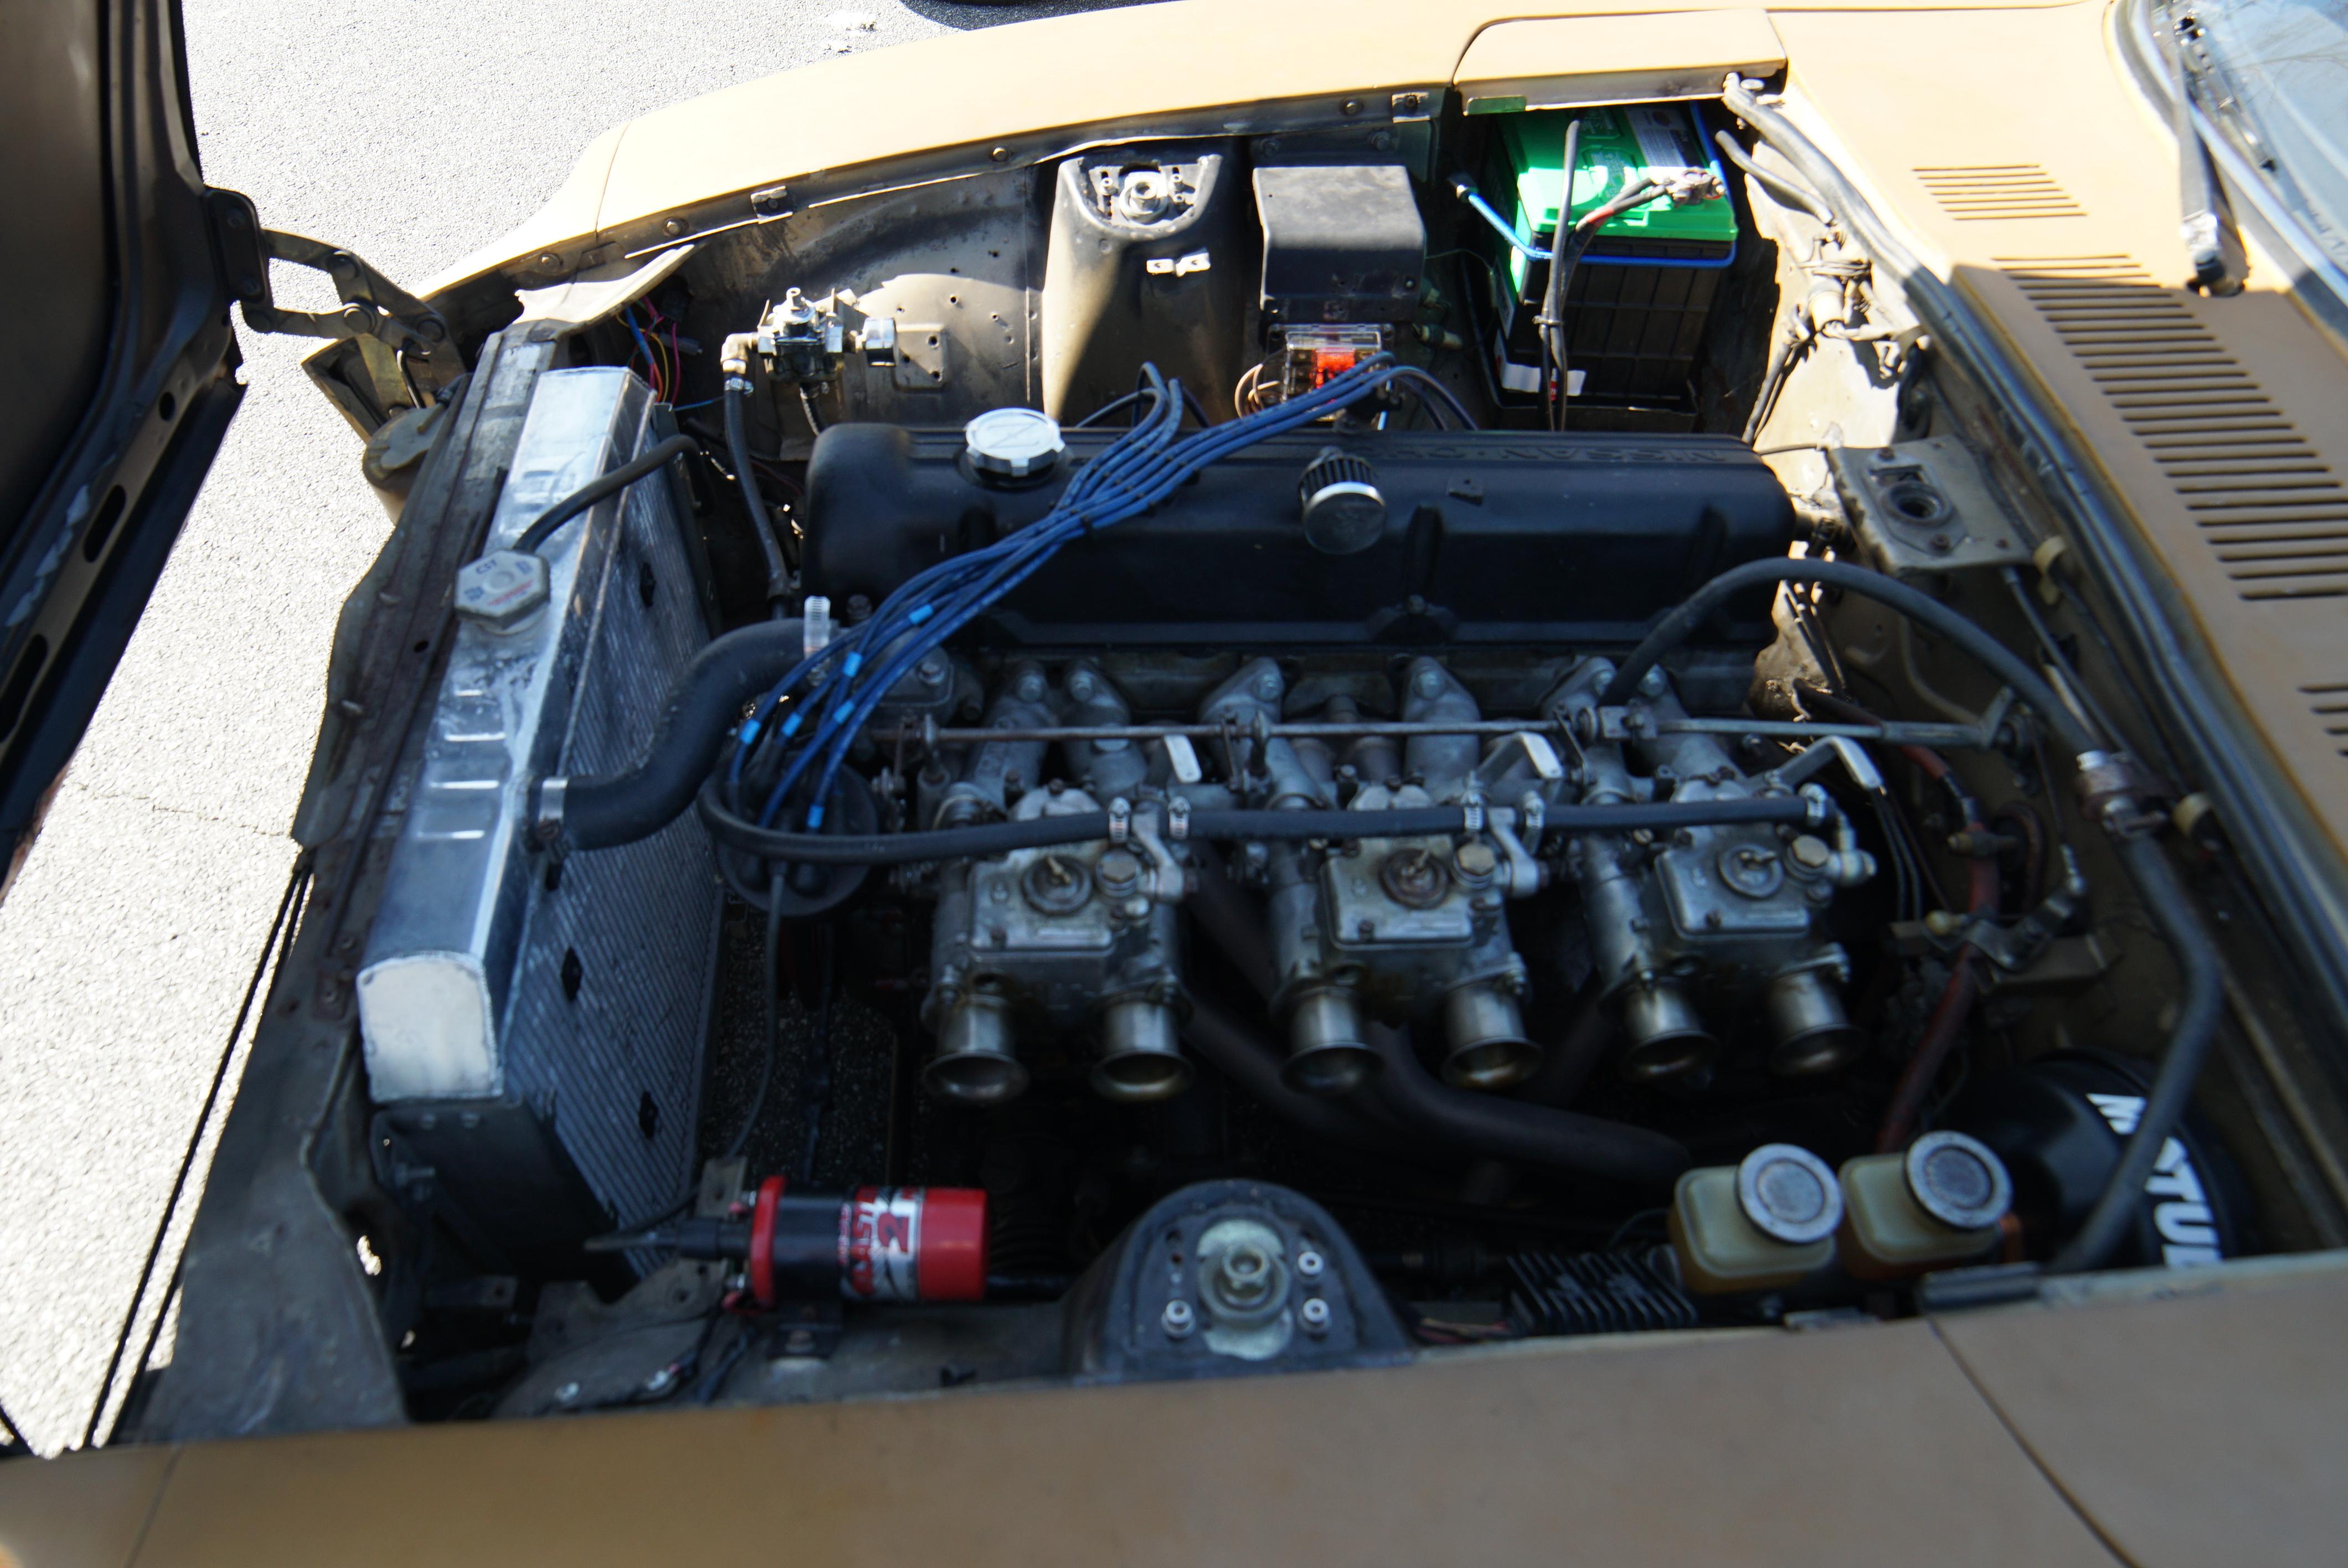
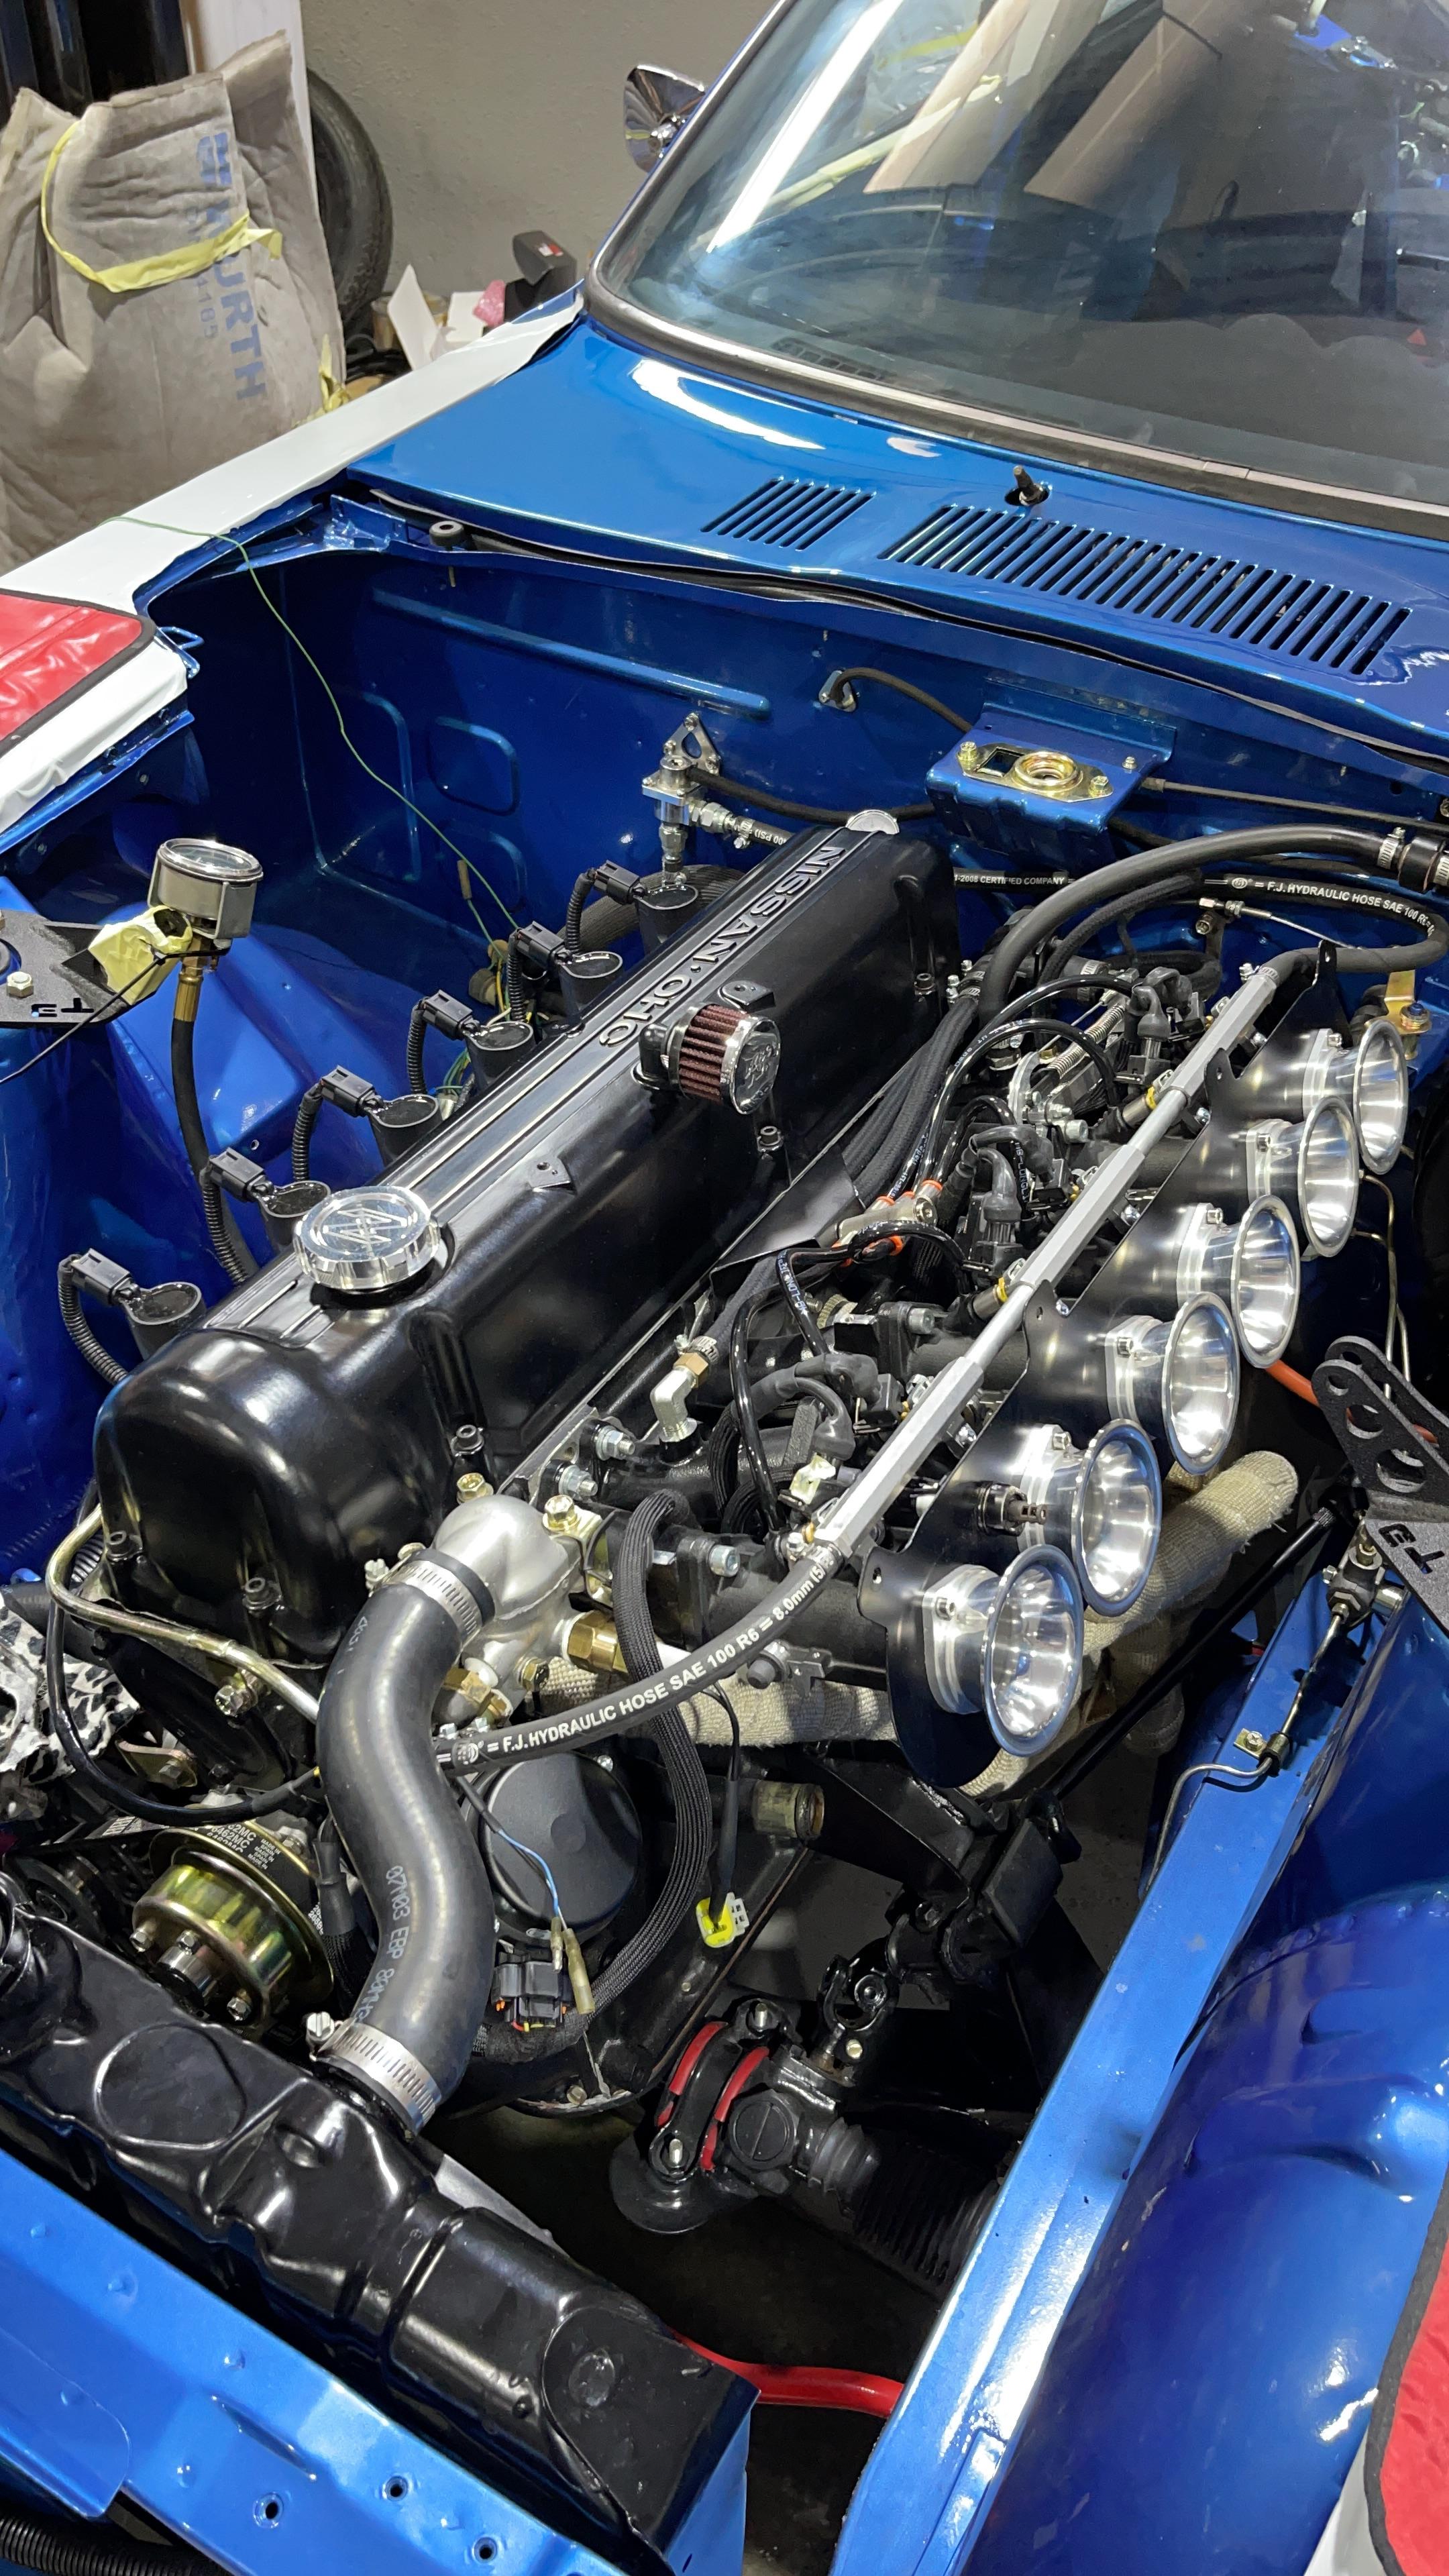
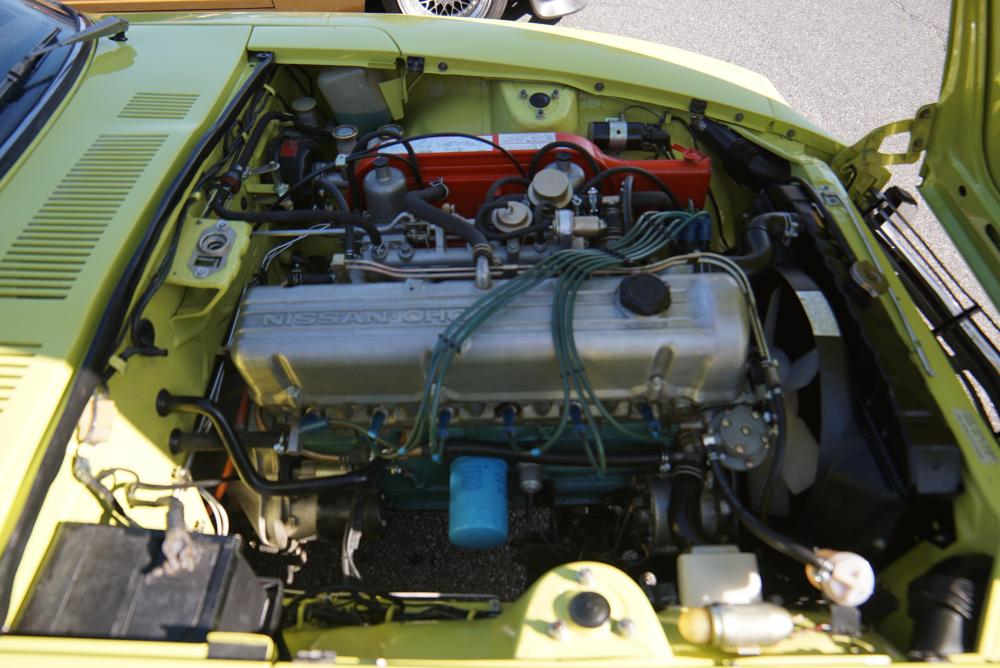
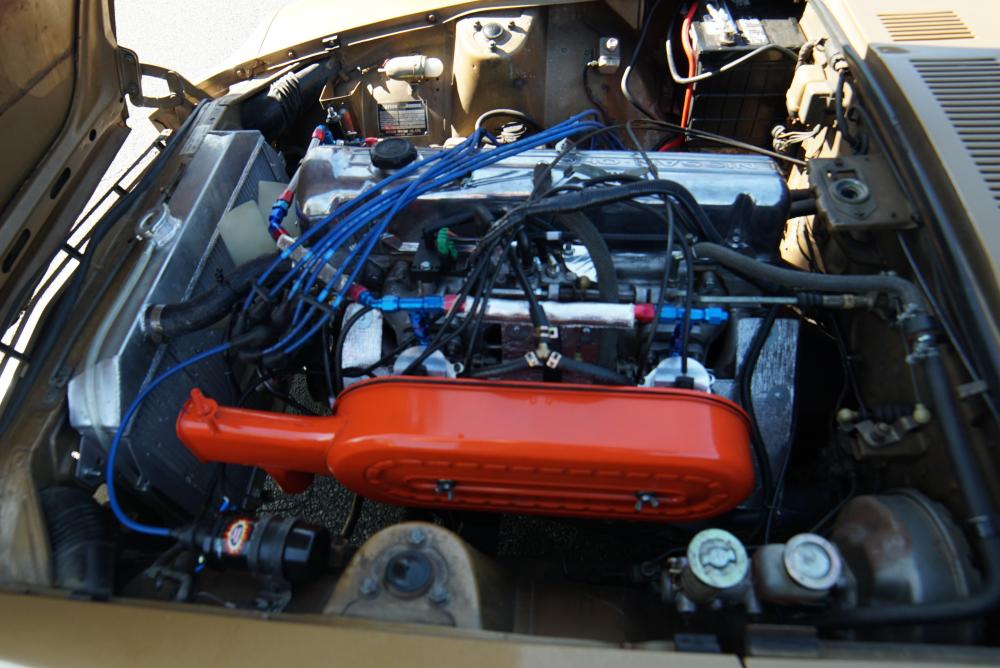
Wow. Not much posted here, yet. I went to a monthly car meet today. Easter/Spring Break kept attendance down, but there were 4 S30s (including mine), a Z32, and a Z33. One of my S30 friends, Edmond, mentioned that his hazard light switch was broken, and he lost his turn signals. After the meet, we tried to visit another friend, when I realized that Edmond didn't have brake lights. We then drove up to my house where I made a jumper to bypass the hazard switch in order for me to work on the hazard switch. The jumper fixed the turn signals, but the brake lights were still out. I took off the clam shell from the steering column to make sure there was voltage on the brake light circuit. I unplugged the connector, saw voltage, and plugged it back in. I checked for voltage at the switch body next. I noticed it was a little low with the brake pedal depressed, but it was higher when the turn signal was on (only one brake light lit). Edmond checked the brake lights with no turn signals on, and the brake lights were lit up. I guess it was the mechanical contact at the connector. Anyway, after we were done, my wife stuffed our bellies with Easter dinner. I'm still feeling drowsy from that. She friggin' spoils me. So here are some engine bay photos from the car meet to keep you interested.

 1 point
 -
1 point
-
1 pointYes, agree p79 also very good. Being pedantic, you don't *have* to skim it and shim it. There are better (if more expensive) alternatives.1 point
-
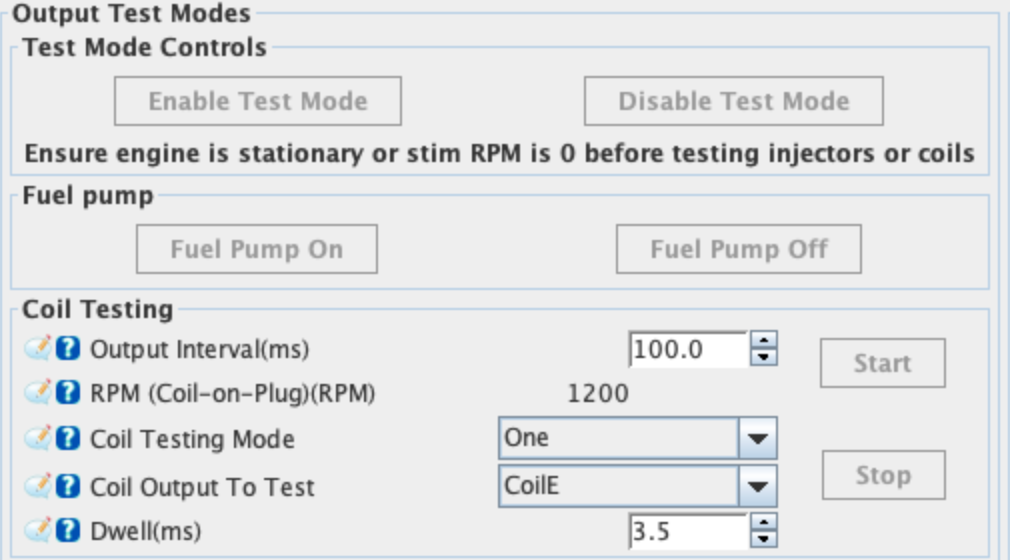
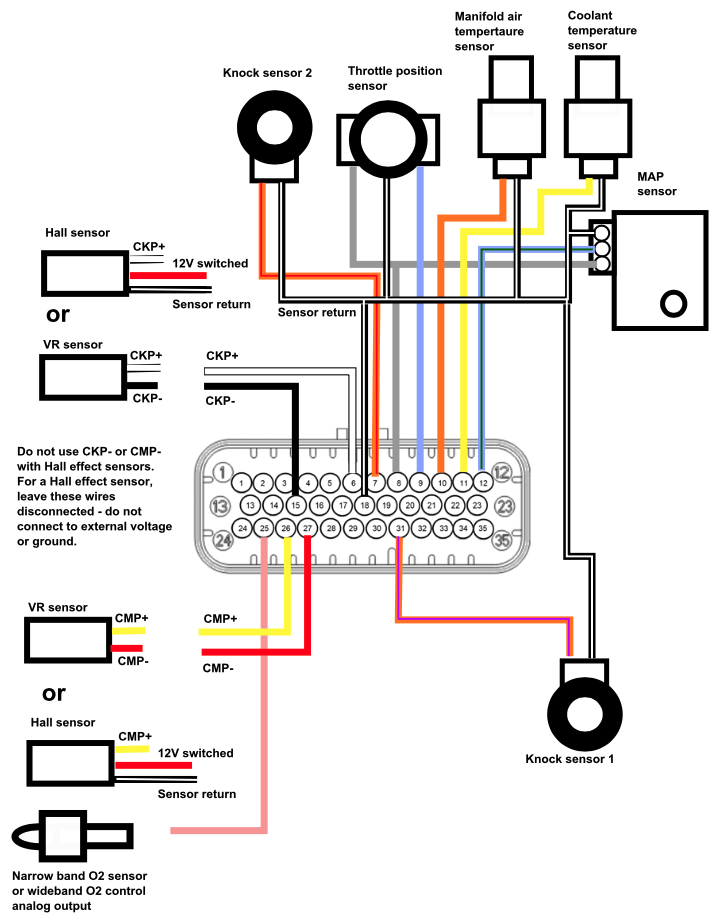
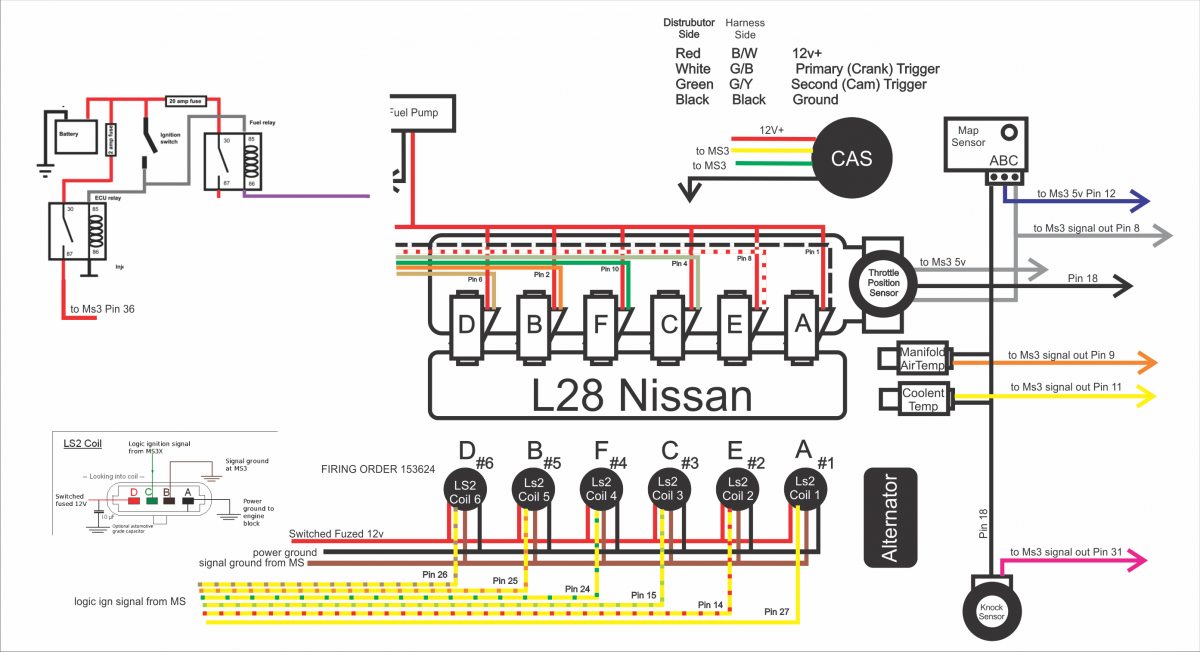
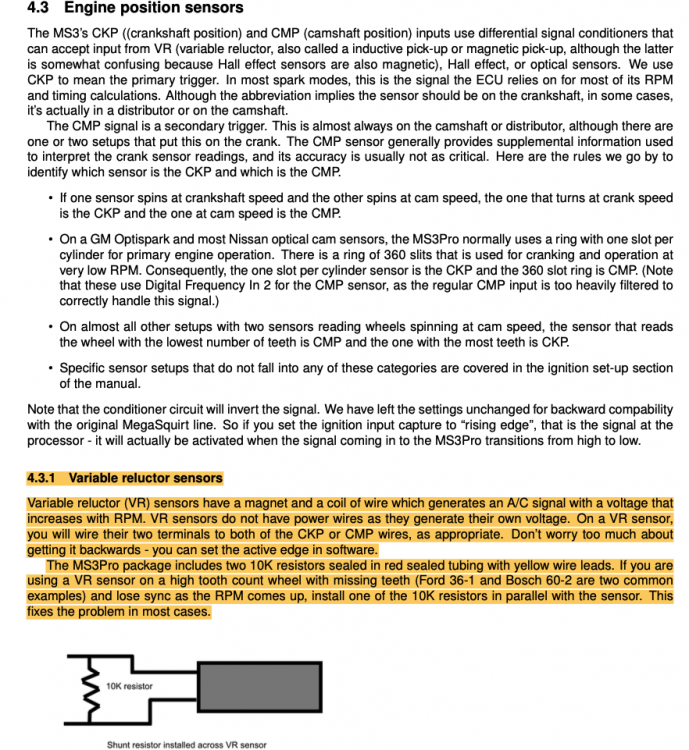
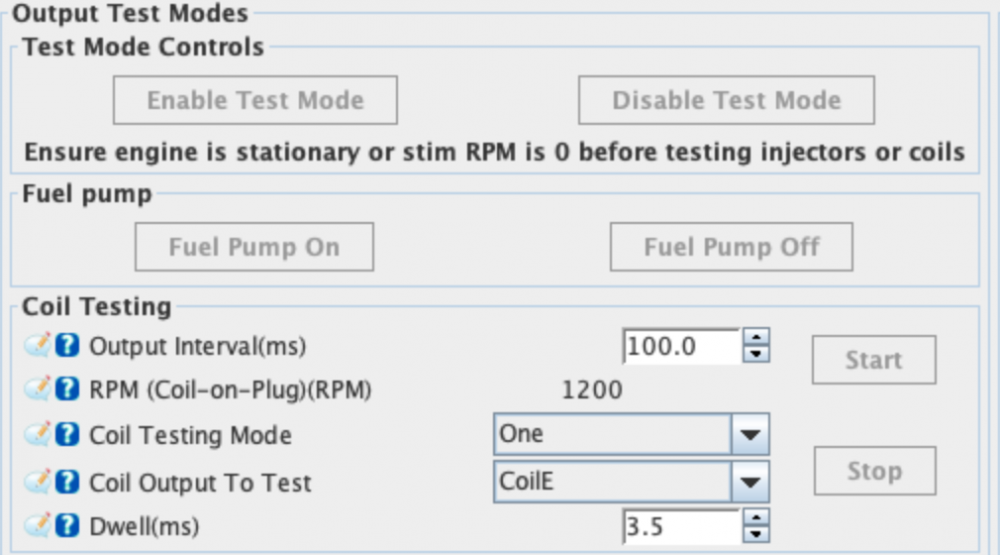
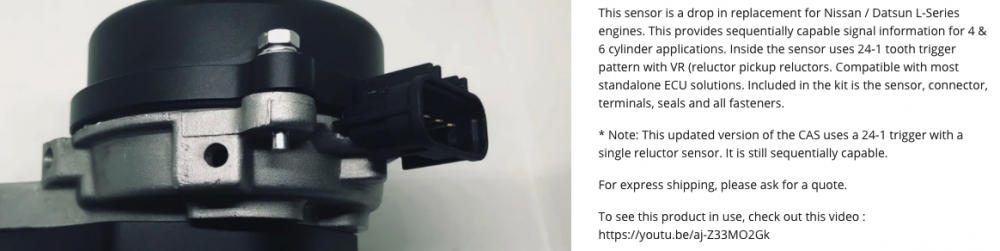
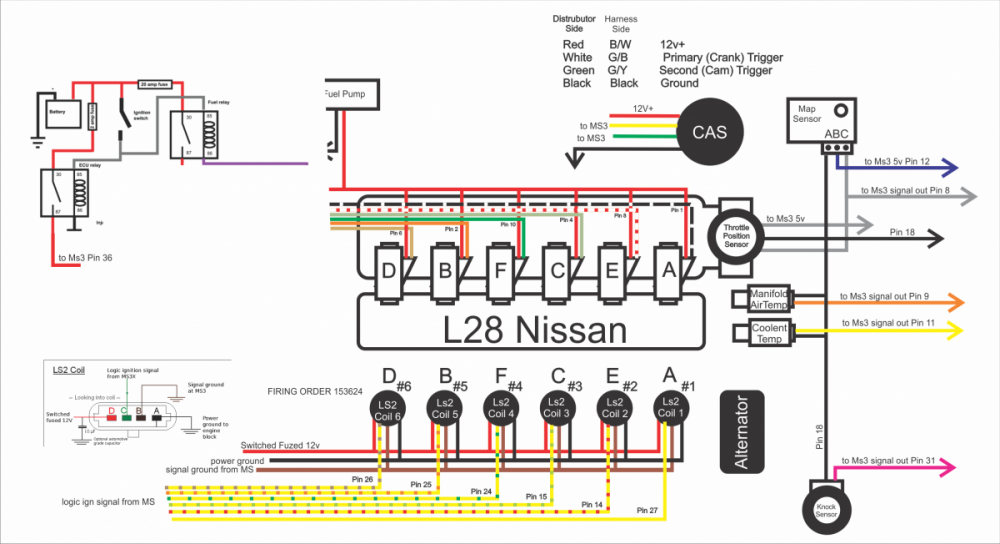
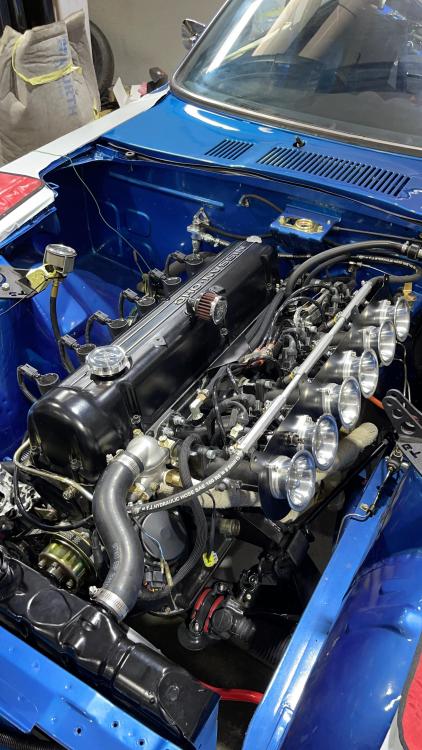
1 pointHi guys, Hope you are well and safe from COVID. Been a while since my last activity on this thread, been busy on the car wiring/ECU setup and obviously bumping in some issues 😁 not a surprise as my curriculum is mechanical engineering... Stupid question 1: From the MS3pro manual below, VR sensors should be wired to the 4 wires CMP+/CMP- (camshaft) and CKP+/CKP- (crankshaft) from the MS3Pro (4 shielded wires from the white connectors) and don't need power or ground wire as they generate themself the power. This is what I have done so far... but I still don't have RPM sync in tunerstudio... Also, the onesixindustries CAS (4 pins connector) is considered as a single VR sensor (as per onesixindustries info), on the Crankshaft? (because crank angle sensor...?). So should I remove the CMP+/- (camshaft) and put power/ground instead ? or remove CMP- and CKP- and put power/ground instead ? I found a wiring diagram for L28 that shows this latest option, but I don't know if thats correct and would rather not burn the CAS. The wiring diagram below shows a CAS with CMP+, CKP+, 12V power and Ground... Should I follow that ? Stupid question 2: I have a set of DG508 coils on plugs with 2 pins connectors (not like the LS2 above setup above with 4 wires), so the wiring should be 1 power source from the fuel pump relay (as mentioned in the MS3 manual) and 1 signal source the MS3 ignition signal (A-1,E-2,C-3, F-4,B-5,D-6), I don,t need anything else correct ? The 12V power comes from the fuel pump relay all the time, and is only "released" when the signal from the MS3Pro is sent to each particular coil, then the coil itself generates the huge voltage for the spark ?! Or am I wrong here as well ? Respecting this setup, when running my coil test (on the connector only, disconnected from the coil, and using a small light and wires) I have power all the time (light is ON), independently from the coil output to test (obviously Fuel pump is On), meaning if I test coilA in tunerstudio, connector to coil A gives light, and if I change for test coilE, connectors to coil A still gives light... Am I wrong on the wiring ? or on the software part... I was told by AMPEFI to setup as below: On the bright side my injectors tested correctly, my IAC valve seems to be responding too, the TPS is calibrated and the IAT (I don't have MAT with the ITBs) is a GM type from Protunerz, so all is good and clear. Also, having an IAC valve (came with the ITBs kit from Jenvey - link), a built in MAP sensor in the Ms3Pro, and running itbs naturally aspirated, I don't need a MAF correct ? I have a weird temperature reading on the CLT oscillating between -20 C and +80 C (its a VDO sensor that was on the car, cannot find any info for its calibration), I will probably have to do the old school way with water, even-though i found these online: Please help me, because its a real frustration to be looking at this without having the sound...


 1 point
 -
I was a Japanese minor in college. They have 3 different writings Hiragana Katakana Kanji This is clearly Katakana which are not words in the traditional Japanese language (typically western words like “baseball”). This is translates to “Switzerland” like stated above. Sent from my iPhone using Tapatalk1 point
-
You can call me Racer. Aw, shucks, yer makin' me blush. The variance comes from production tolerances, or the difference in size from one part to the next, for each of the thousands of parts that make the whole airplane. Production is carried out inside of buildings sheltered from weather. Although not all buildings are insulated with climate control, the heat generated from the manufacturing activities keeps them at a reasonably consistent temperature day by day. Also, some manufacturing environments are carried out in smaller, insulated and climate controlled buildings to prevent expansion or contraction of parts, such as wing spars, which are over 100 feet long, and could change in length a great deal even under only a small change in temperature. So a 747-800 (the current model) is about 250 feet long. The fuselage is assembled from a few dozen exterior panel assemblies each made from a few hundred components (skin panels, frames, stringers), hundreds of floor beams and longitudinal beams, the longest being around 25 feet long. Also. when the bolts and rivets are installed, the metal around the holes is displaced, causing some deformation, and elongation, of the parts (this is accounted for in the engineering design). Although the size of the holes are always the same, there are still tolerances, and no two holes are exactly the same size. Additionally, the fasteners vary a bit in size. And when a rivet is driven, or a bolt tightened, again, no two are exactly the same. So add up a few thousandths of an inch over 250 feet and all the many parts, and 18" isn't much. ~~~~~~~~~~~~~~~~~~~~~~~~~~~~~~~~~~~~~~~~~~~~~~~~~~~~~~~~ By the way, if you ever find yourself riding in a 747, go to the very last seat at the back, on an aisle. While the plane is taxiing, lean out and look towards the front of it. And during takeoff and flight, do it again. Observe the floor. It will twist, ripple, undulate, and curve up and down, so much so one might wonder how it can move this much and not break. A similar thing can be observed while sitting at a window near the main wings, watching the tips rise and fall, and if one looks closely enough they can be seen to flutter or twist. Relax, they are suppose to be flexible.1 point
-
Disclaimer: Nothing in this post is for sale - Do not ask me, thanks! What qualifies something as a "barn find" has been discussed previously. But nevertheless, i found these parts covered in dust in an old shed. They were not exactly "forgotten about", but stored there in many years. The story behind them unfortunately includes a bit of human tragedy. After many years, i was the lucky one to buy the whole lot. Well sort of. Since i'm not exactly a hoarder and did not want to have many more parts of those i already own, i made an agreement with a Friend who basically bought the whole lot and i was the one to handle it. In return i got some rare, free and much-needed parts from the lot. So let's start: A while ago i learned from a nice gentleman and z-owner who had some small parts for sale. After some first talks, it turned out we had the same interests, and then he told me about what he had in storage - and it was much more than i had expected. Since his z-restauration is completed now, he doesn't need the parts anymore and was willing to sell them. Talk about good timing! After some first parts viewing, assessment, calculations and negotiation with all of the stakeholders, i was able to make a deal. This is the little shed in some swiss countryside.... Most of the parts where stored in the upper level and only accessible via an unstdeady ladder. But hey - who cares if there are NOS genuine datsun parts? I was initially only interested in the sheetmetal parts, mostly the datsun original parts. But they were only for sale as a lot. Well and then we agreed on buying the whole parts Lot including all the used and aftermarket parts too, so he could clear out the whole stock at once. Last weekend, i was finally able to pick up the parts. First we had to get everything down from the roof-level and outside. And then put it all into two transporter-cars and an additional trailer: So the last days i spent in my garage sorting through all the parts. I made three piles. Left is used original Parts, Center are aftermarket parts and right are NOS genuine Datsun / Nissan parts. On the wall to the right you can see some additional big items... Which includes some funky window louvres, a used hatch glass and a new aftermarket Windshield: Additionally a set of Doors, hood and hatch from a donor-car: The "holy grail" is definitive the NOS parts lot which includes air-channels, complete front inner fenders, a set of front valances, frame-rails, hubcaps, weather strip, trim pieces and many small bits. These are some of the parts that will end up on my build, if required. I've been looking for those for many years now, so i'm quite happy i finally found them! The used parts lot included everything from an uncracked dashboard to original steelies, radiator frame, Headlight covers, an A-type 5-speed transmission, Euro-spec front spoiler, Euro turn signals and much, much more... The aftermarket-lot included a lot of older, but unused parts from all kind of sources. A complete Hood, 3 front fenders, inner and outer rocker panels, rear lower corners, door repair panels, rear arch repair panels, a set of vintage Koni dampers, Aisin-seiki clutch cover, brake shoes and much more... It has been an exhausting but also very fun and satisfying journey to get all those parts. They're now safely in storage and will end up on some pretty nice restauration projects, which deserve such nice parts! So again, none of the parts are for sale. All of them have either been sold already or are for my own build. Sorry..1 point