Leaderboard
-
Hardway
Free Member3Points1,332Posts -

Jaymanbikes
Free Member3Points333Posts -
drpchuynh
Free Member3Points90Posts -
Patcon
 Subscriber
 3Points11,142Posts


Popular Content
Showing content with the highest reputation on 07/29/2018 in Posts
-
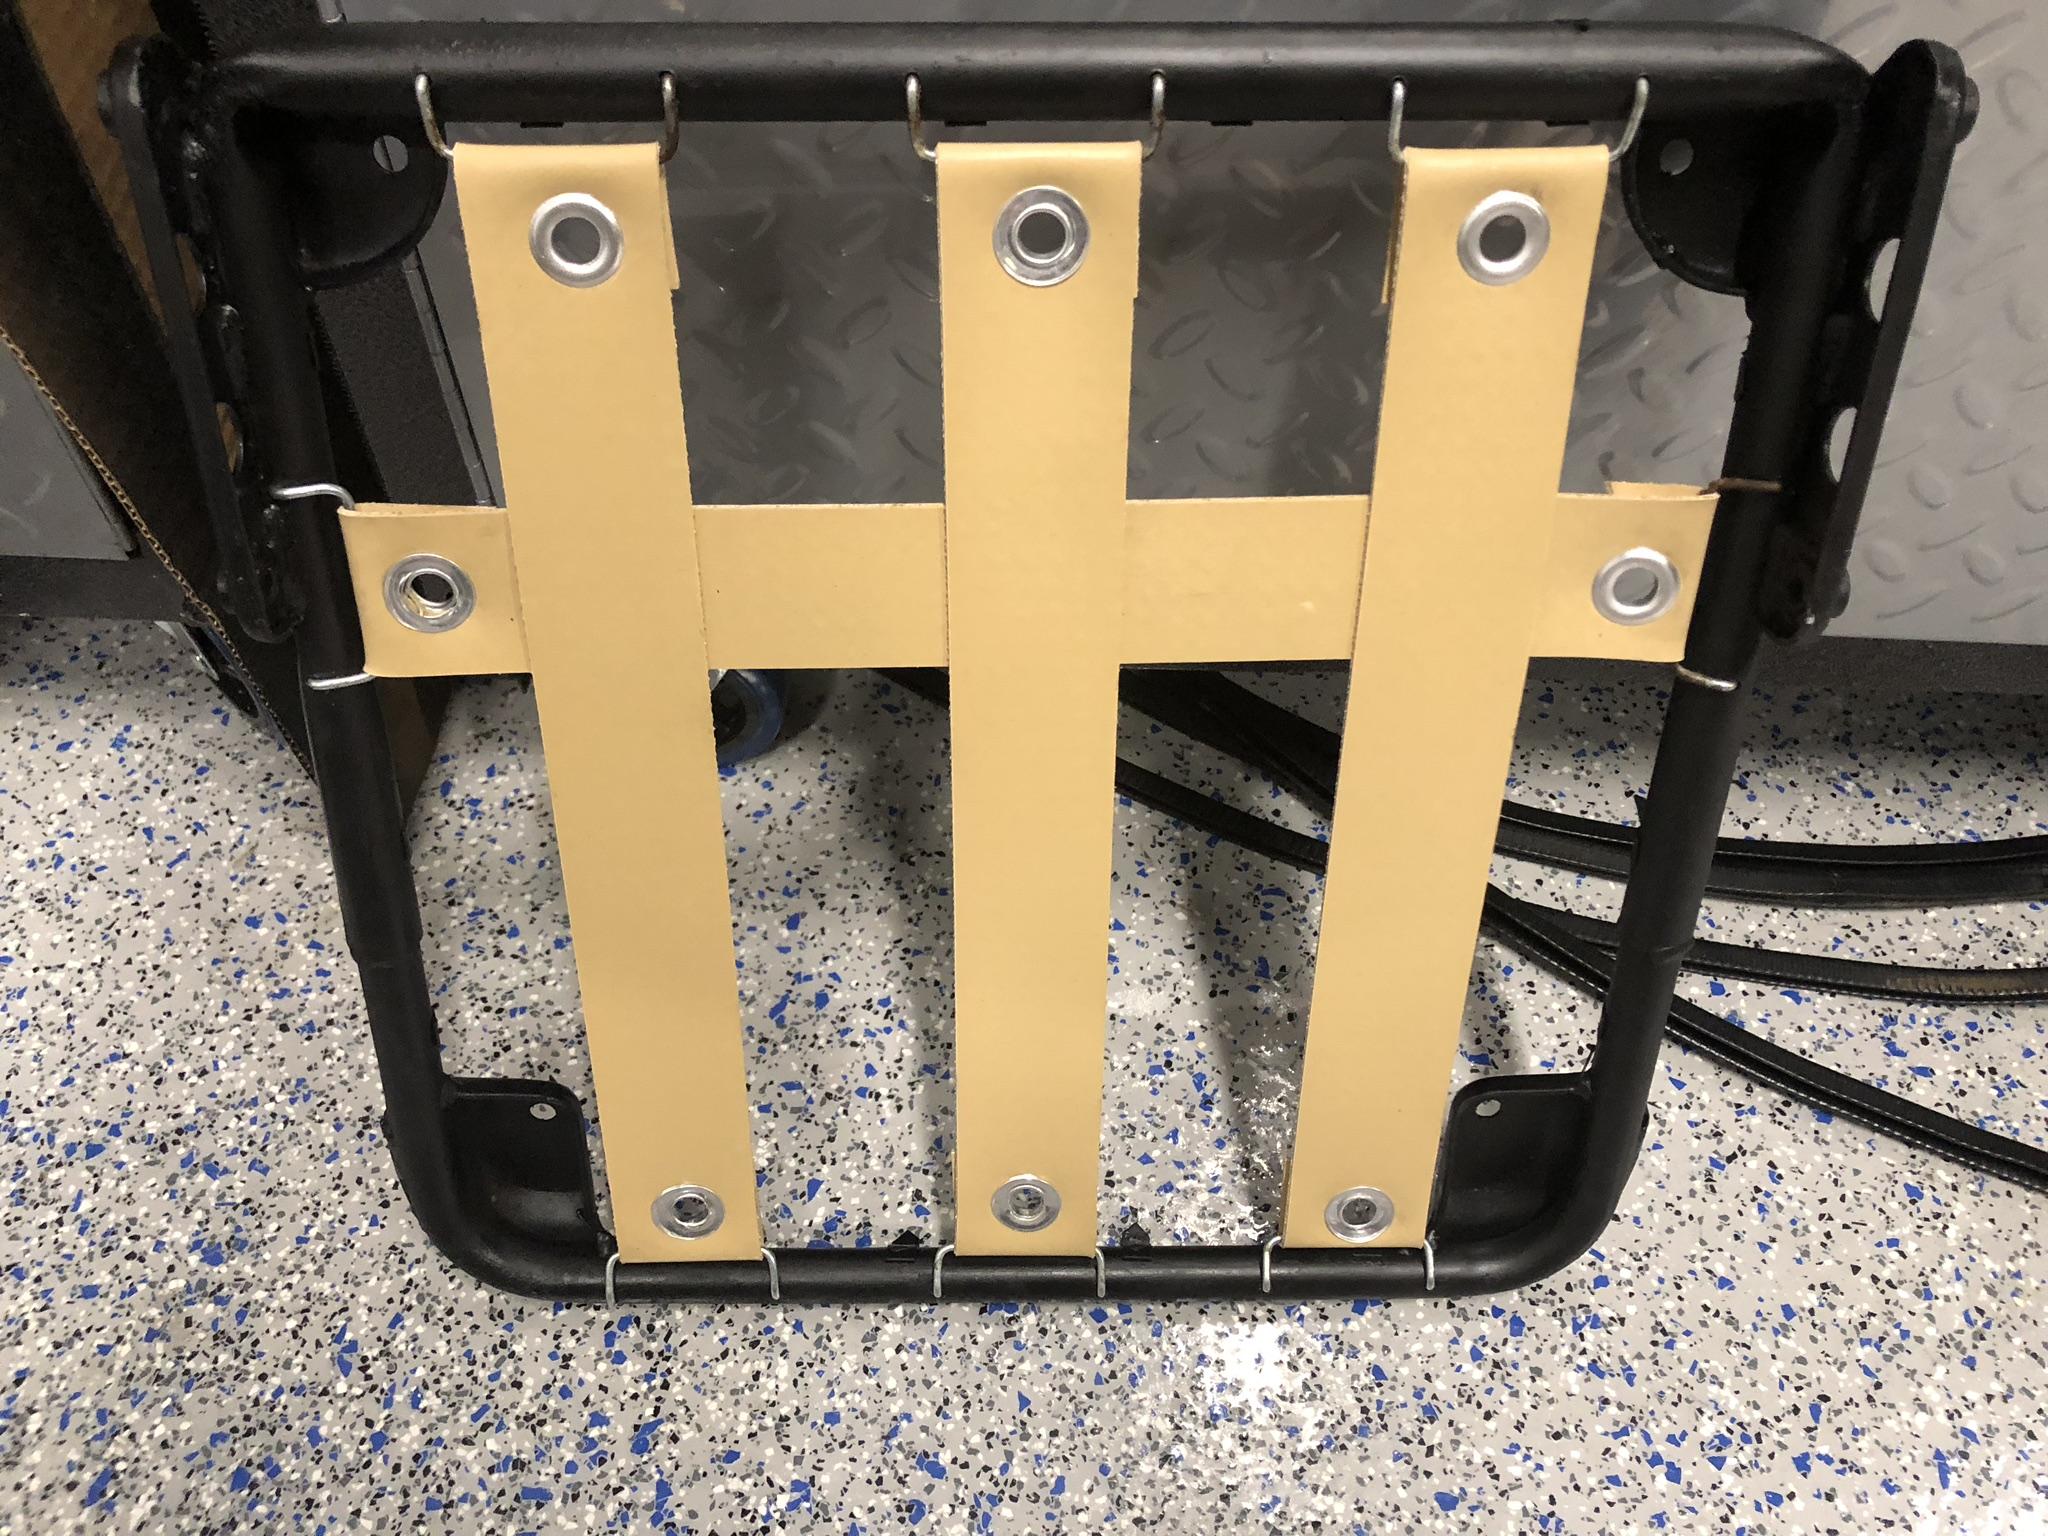
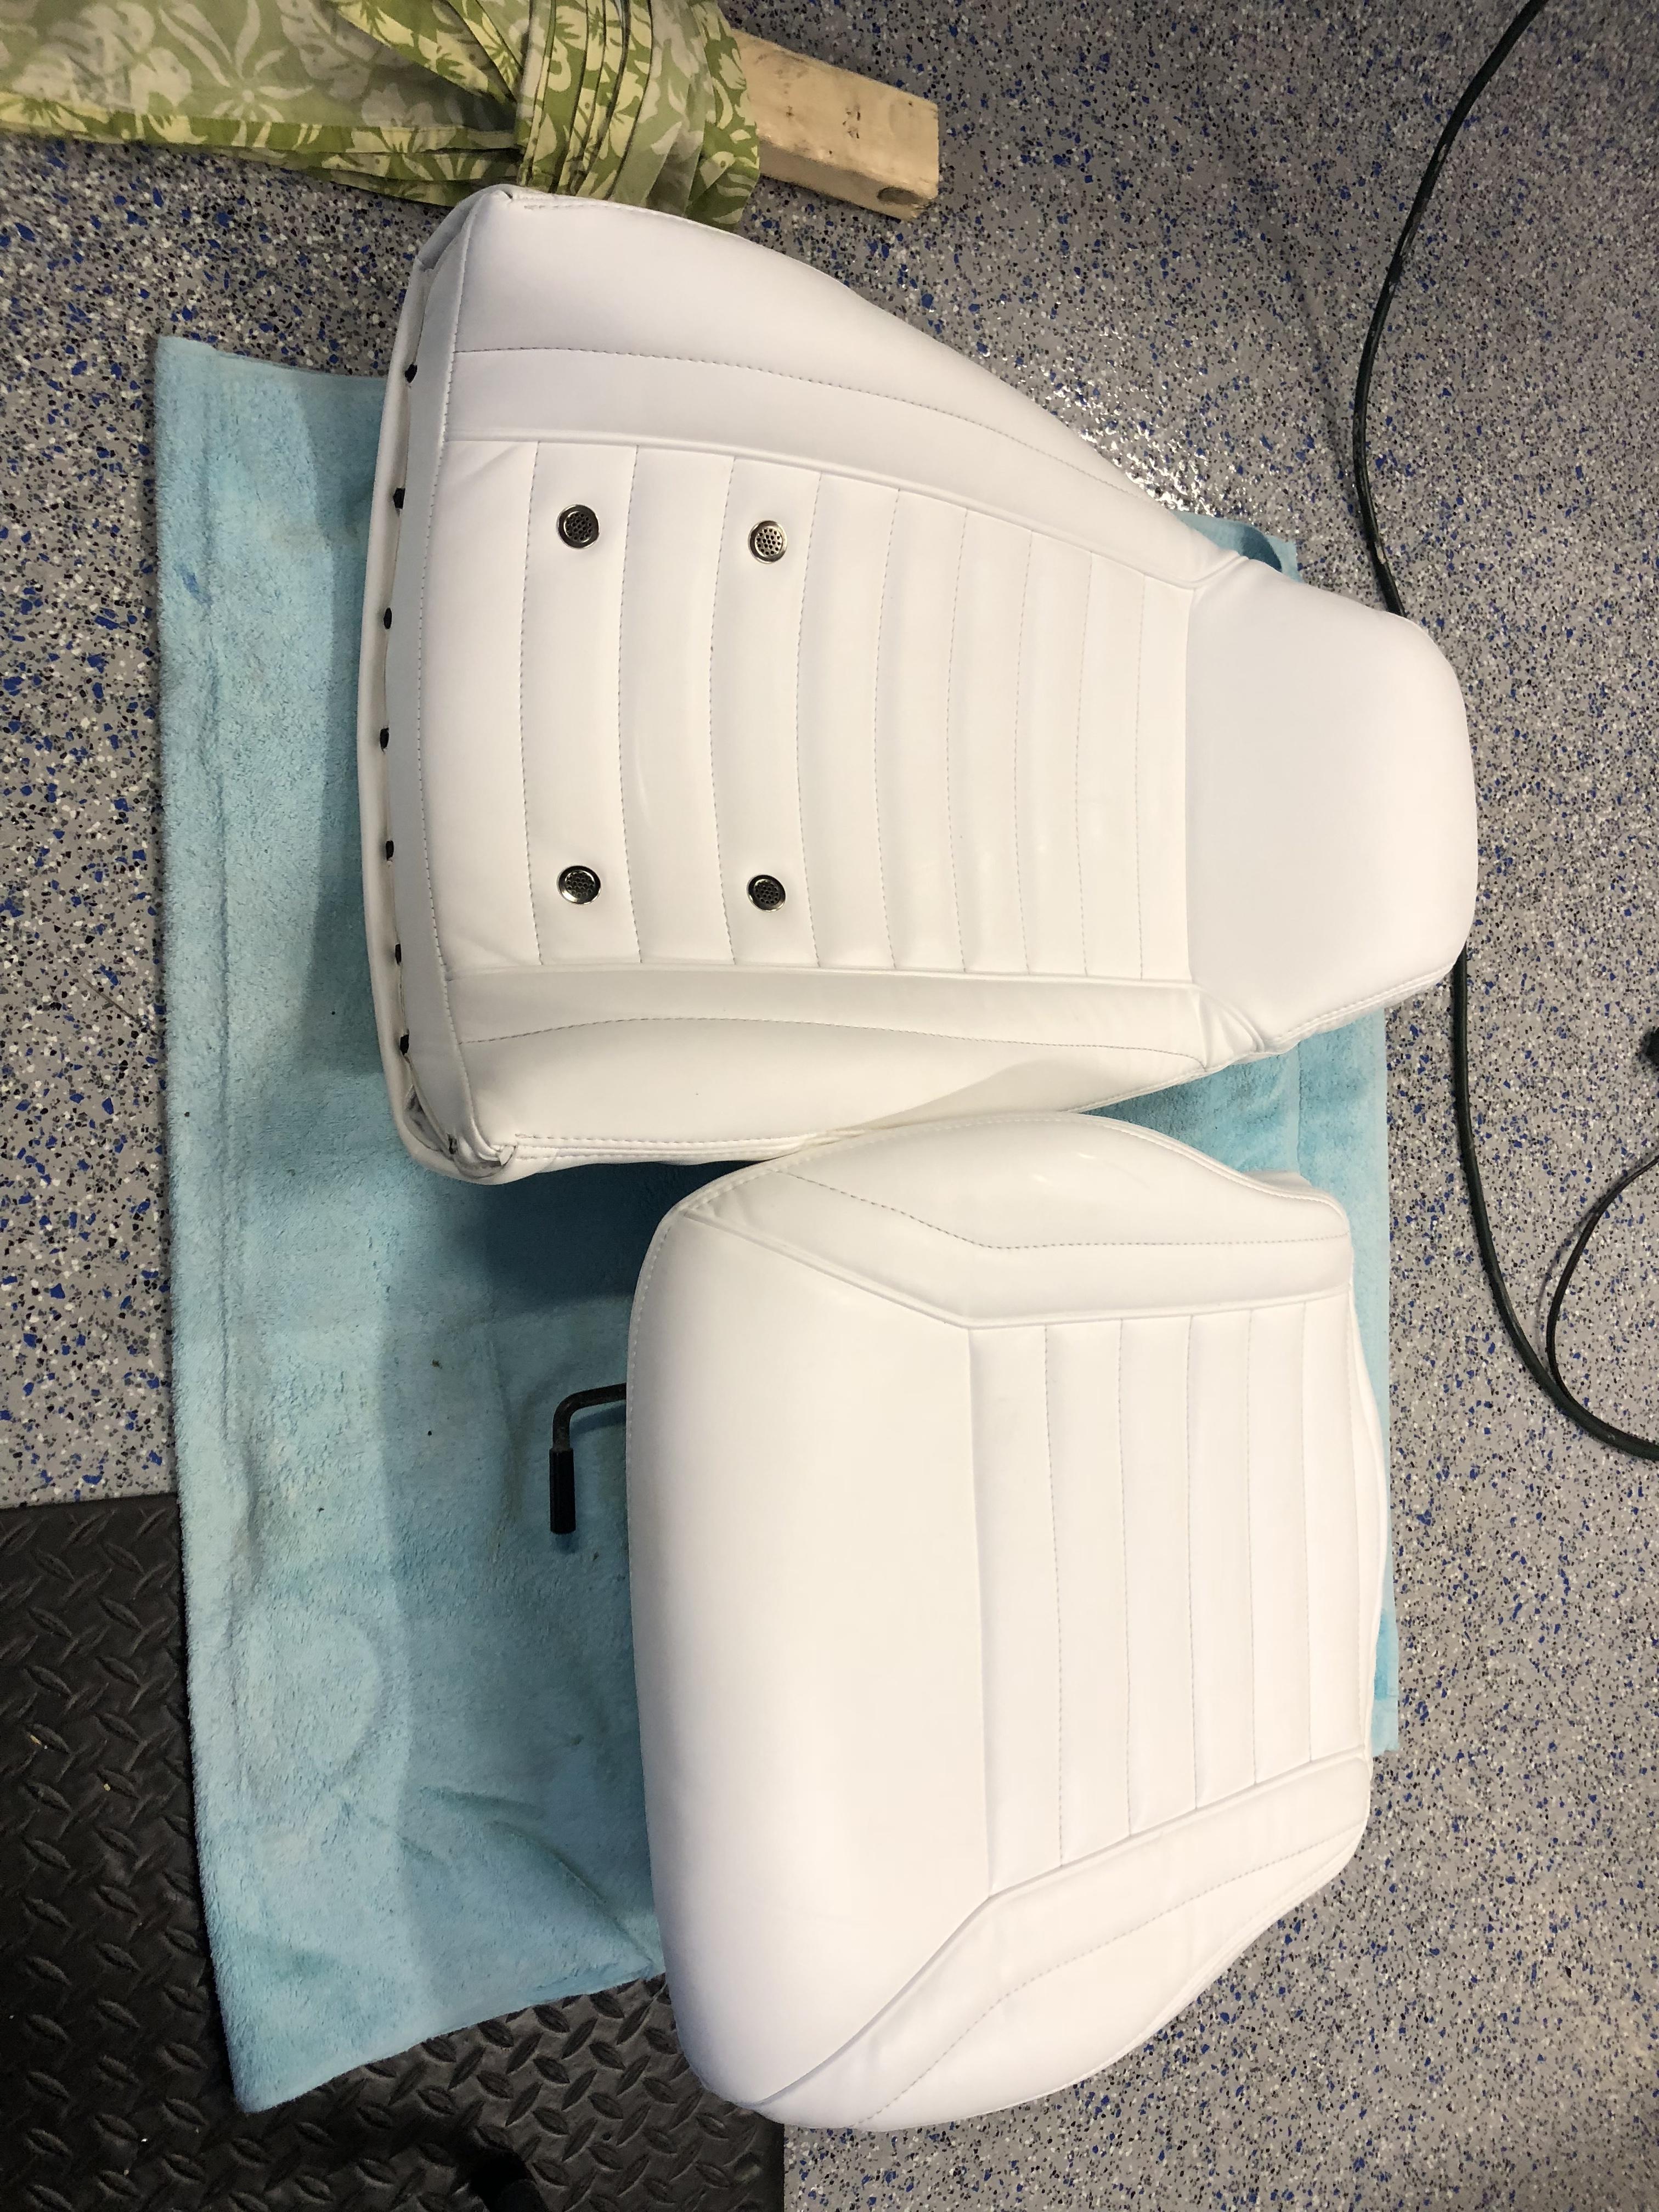
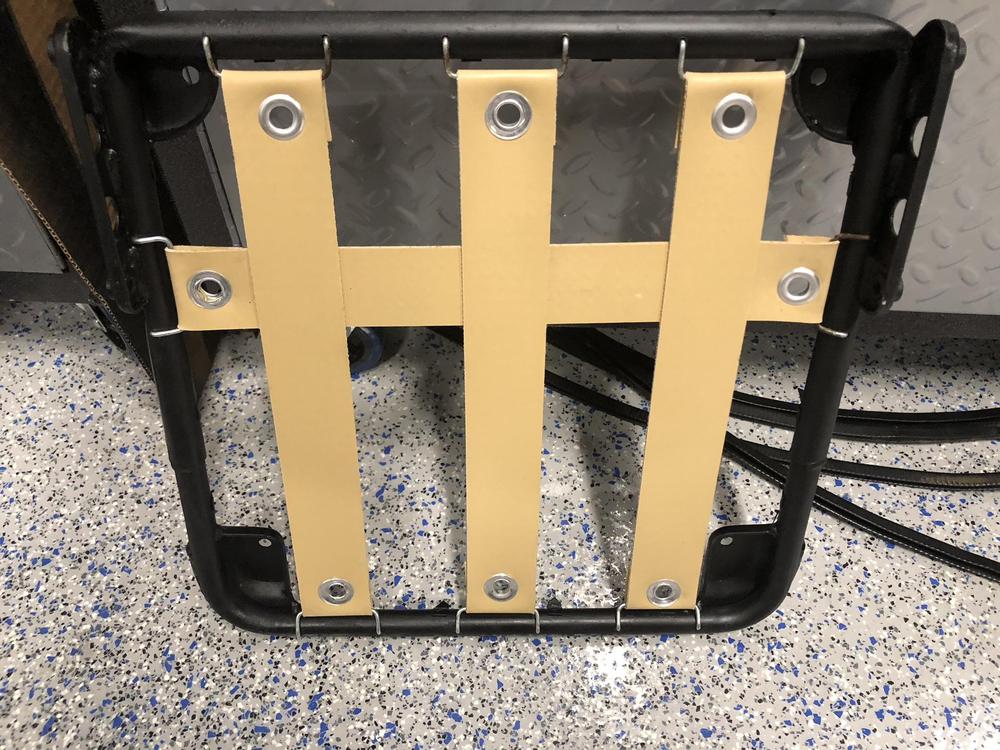
Prepped and painted seat frame, reinstalled rubber strapping and installed new foam and seat cover.
 3 points
 -
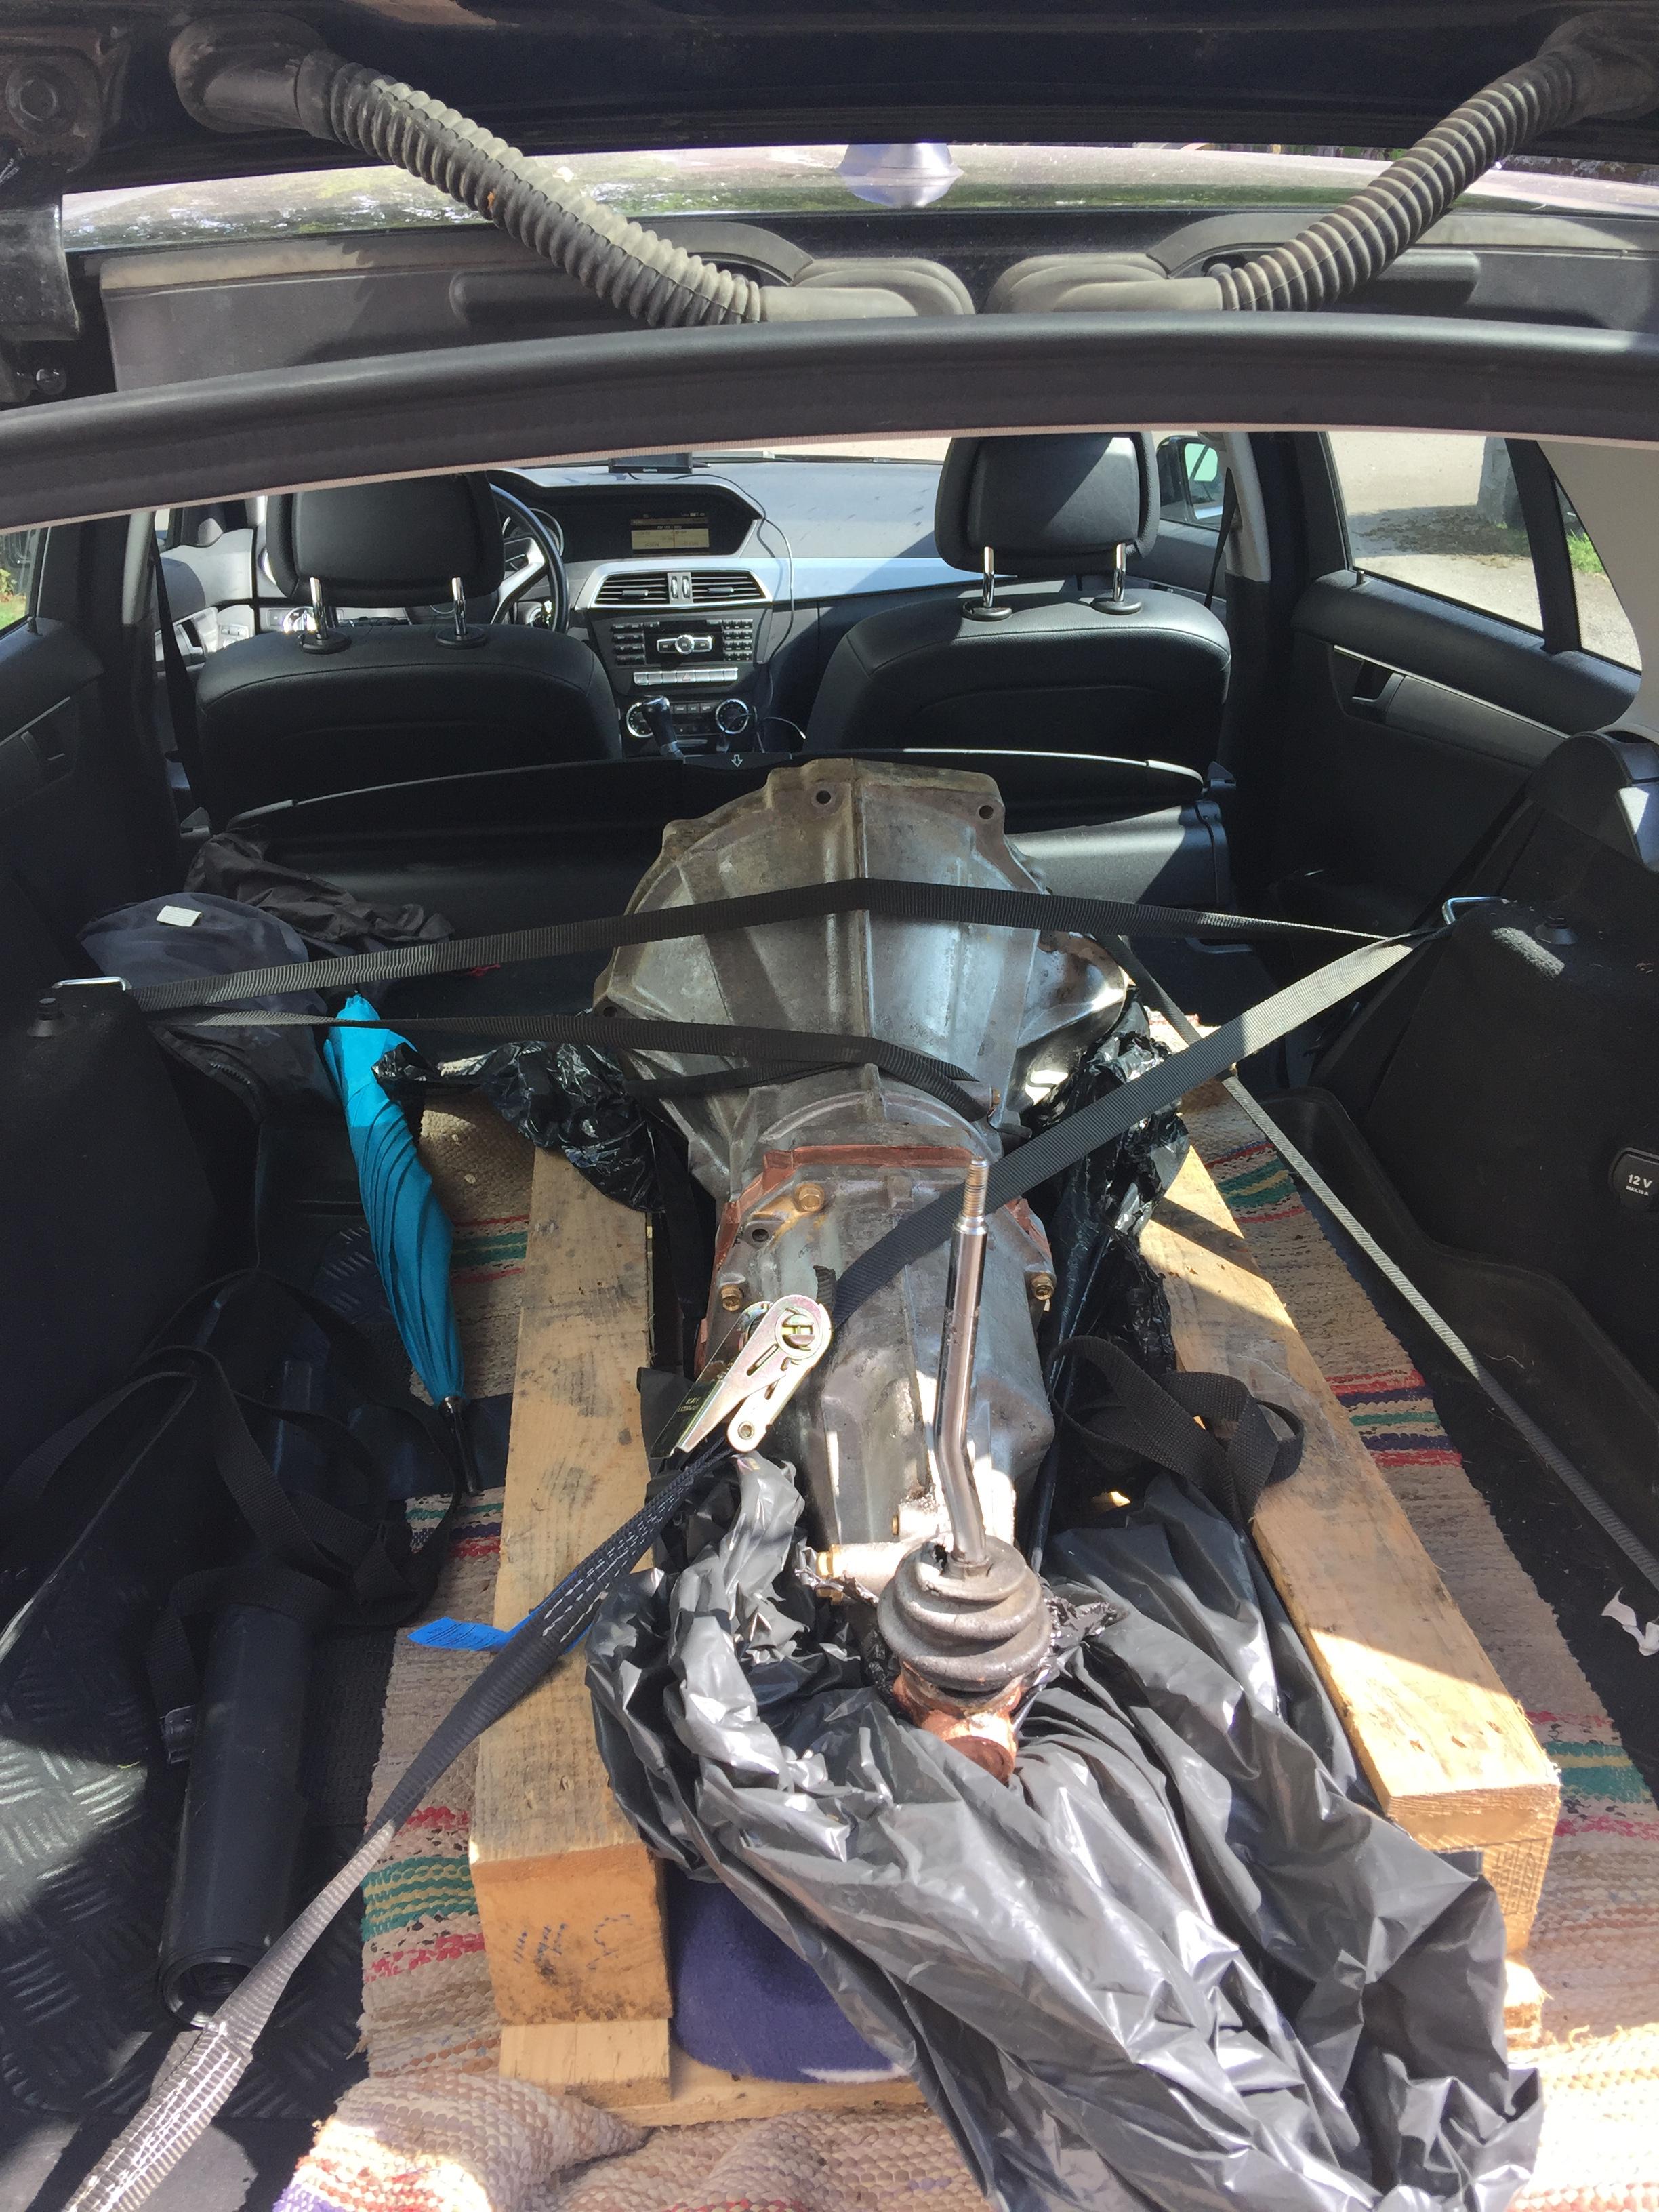
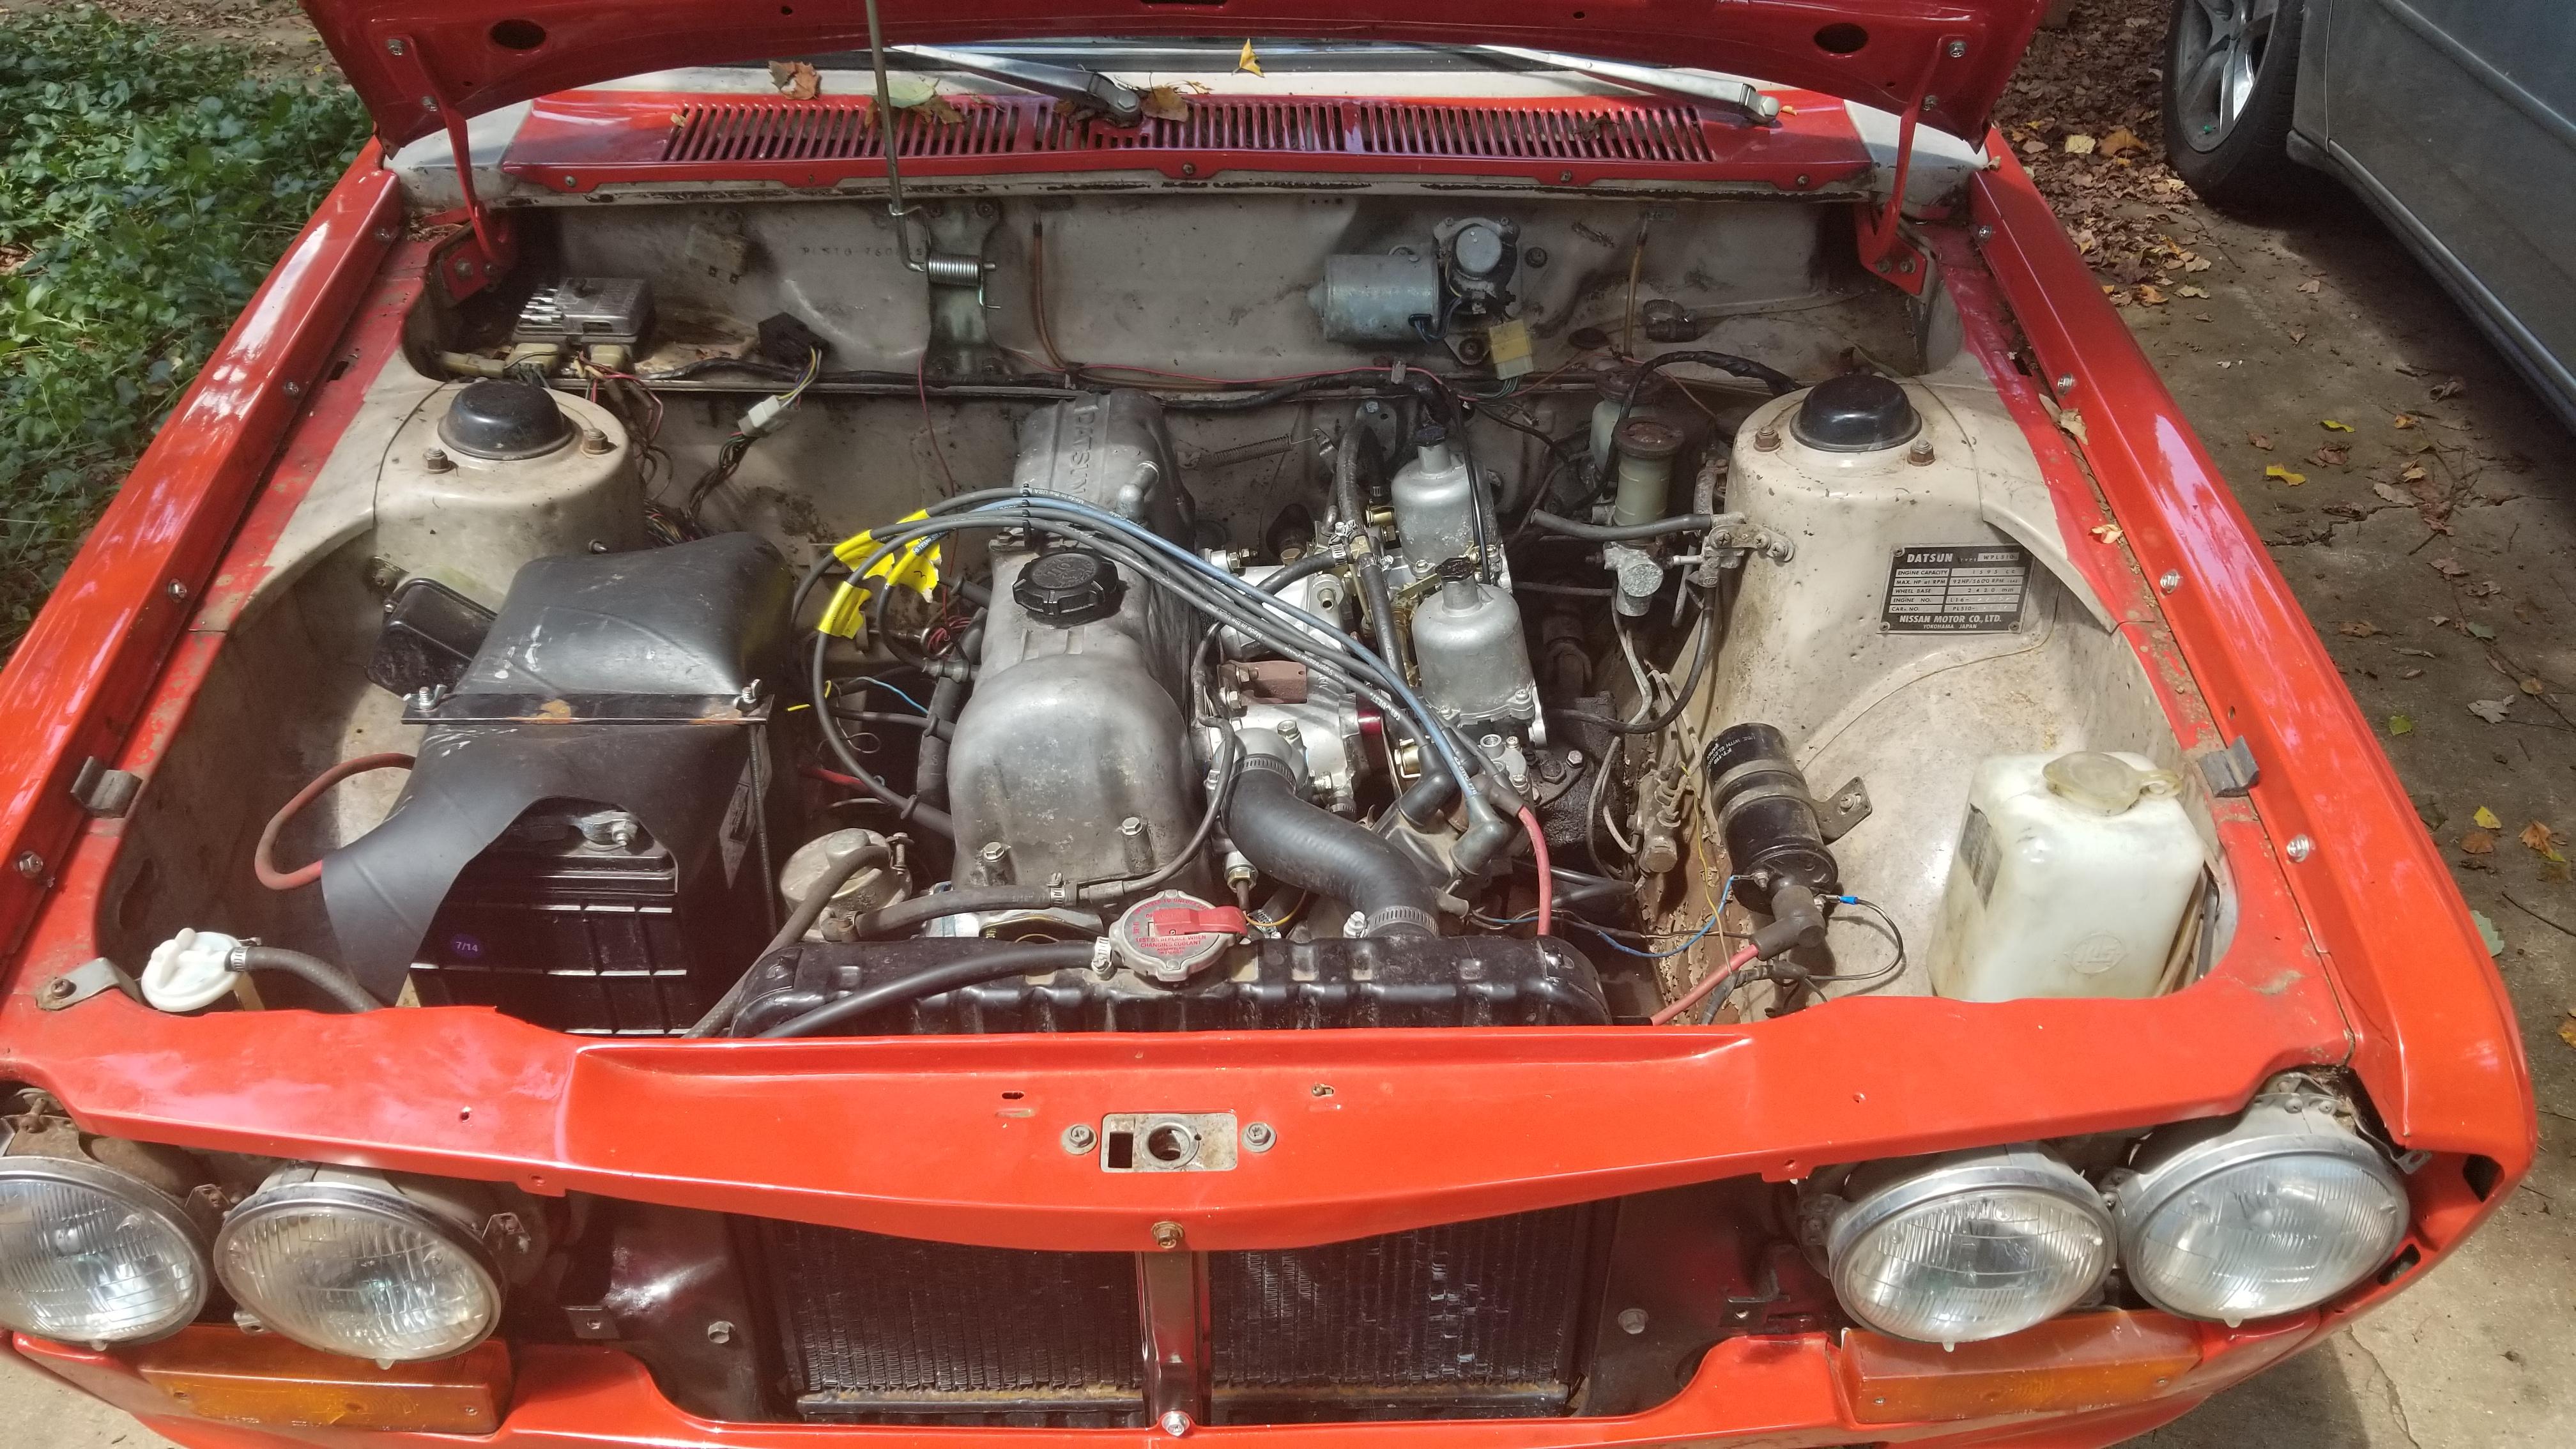
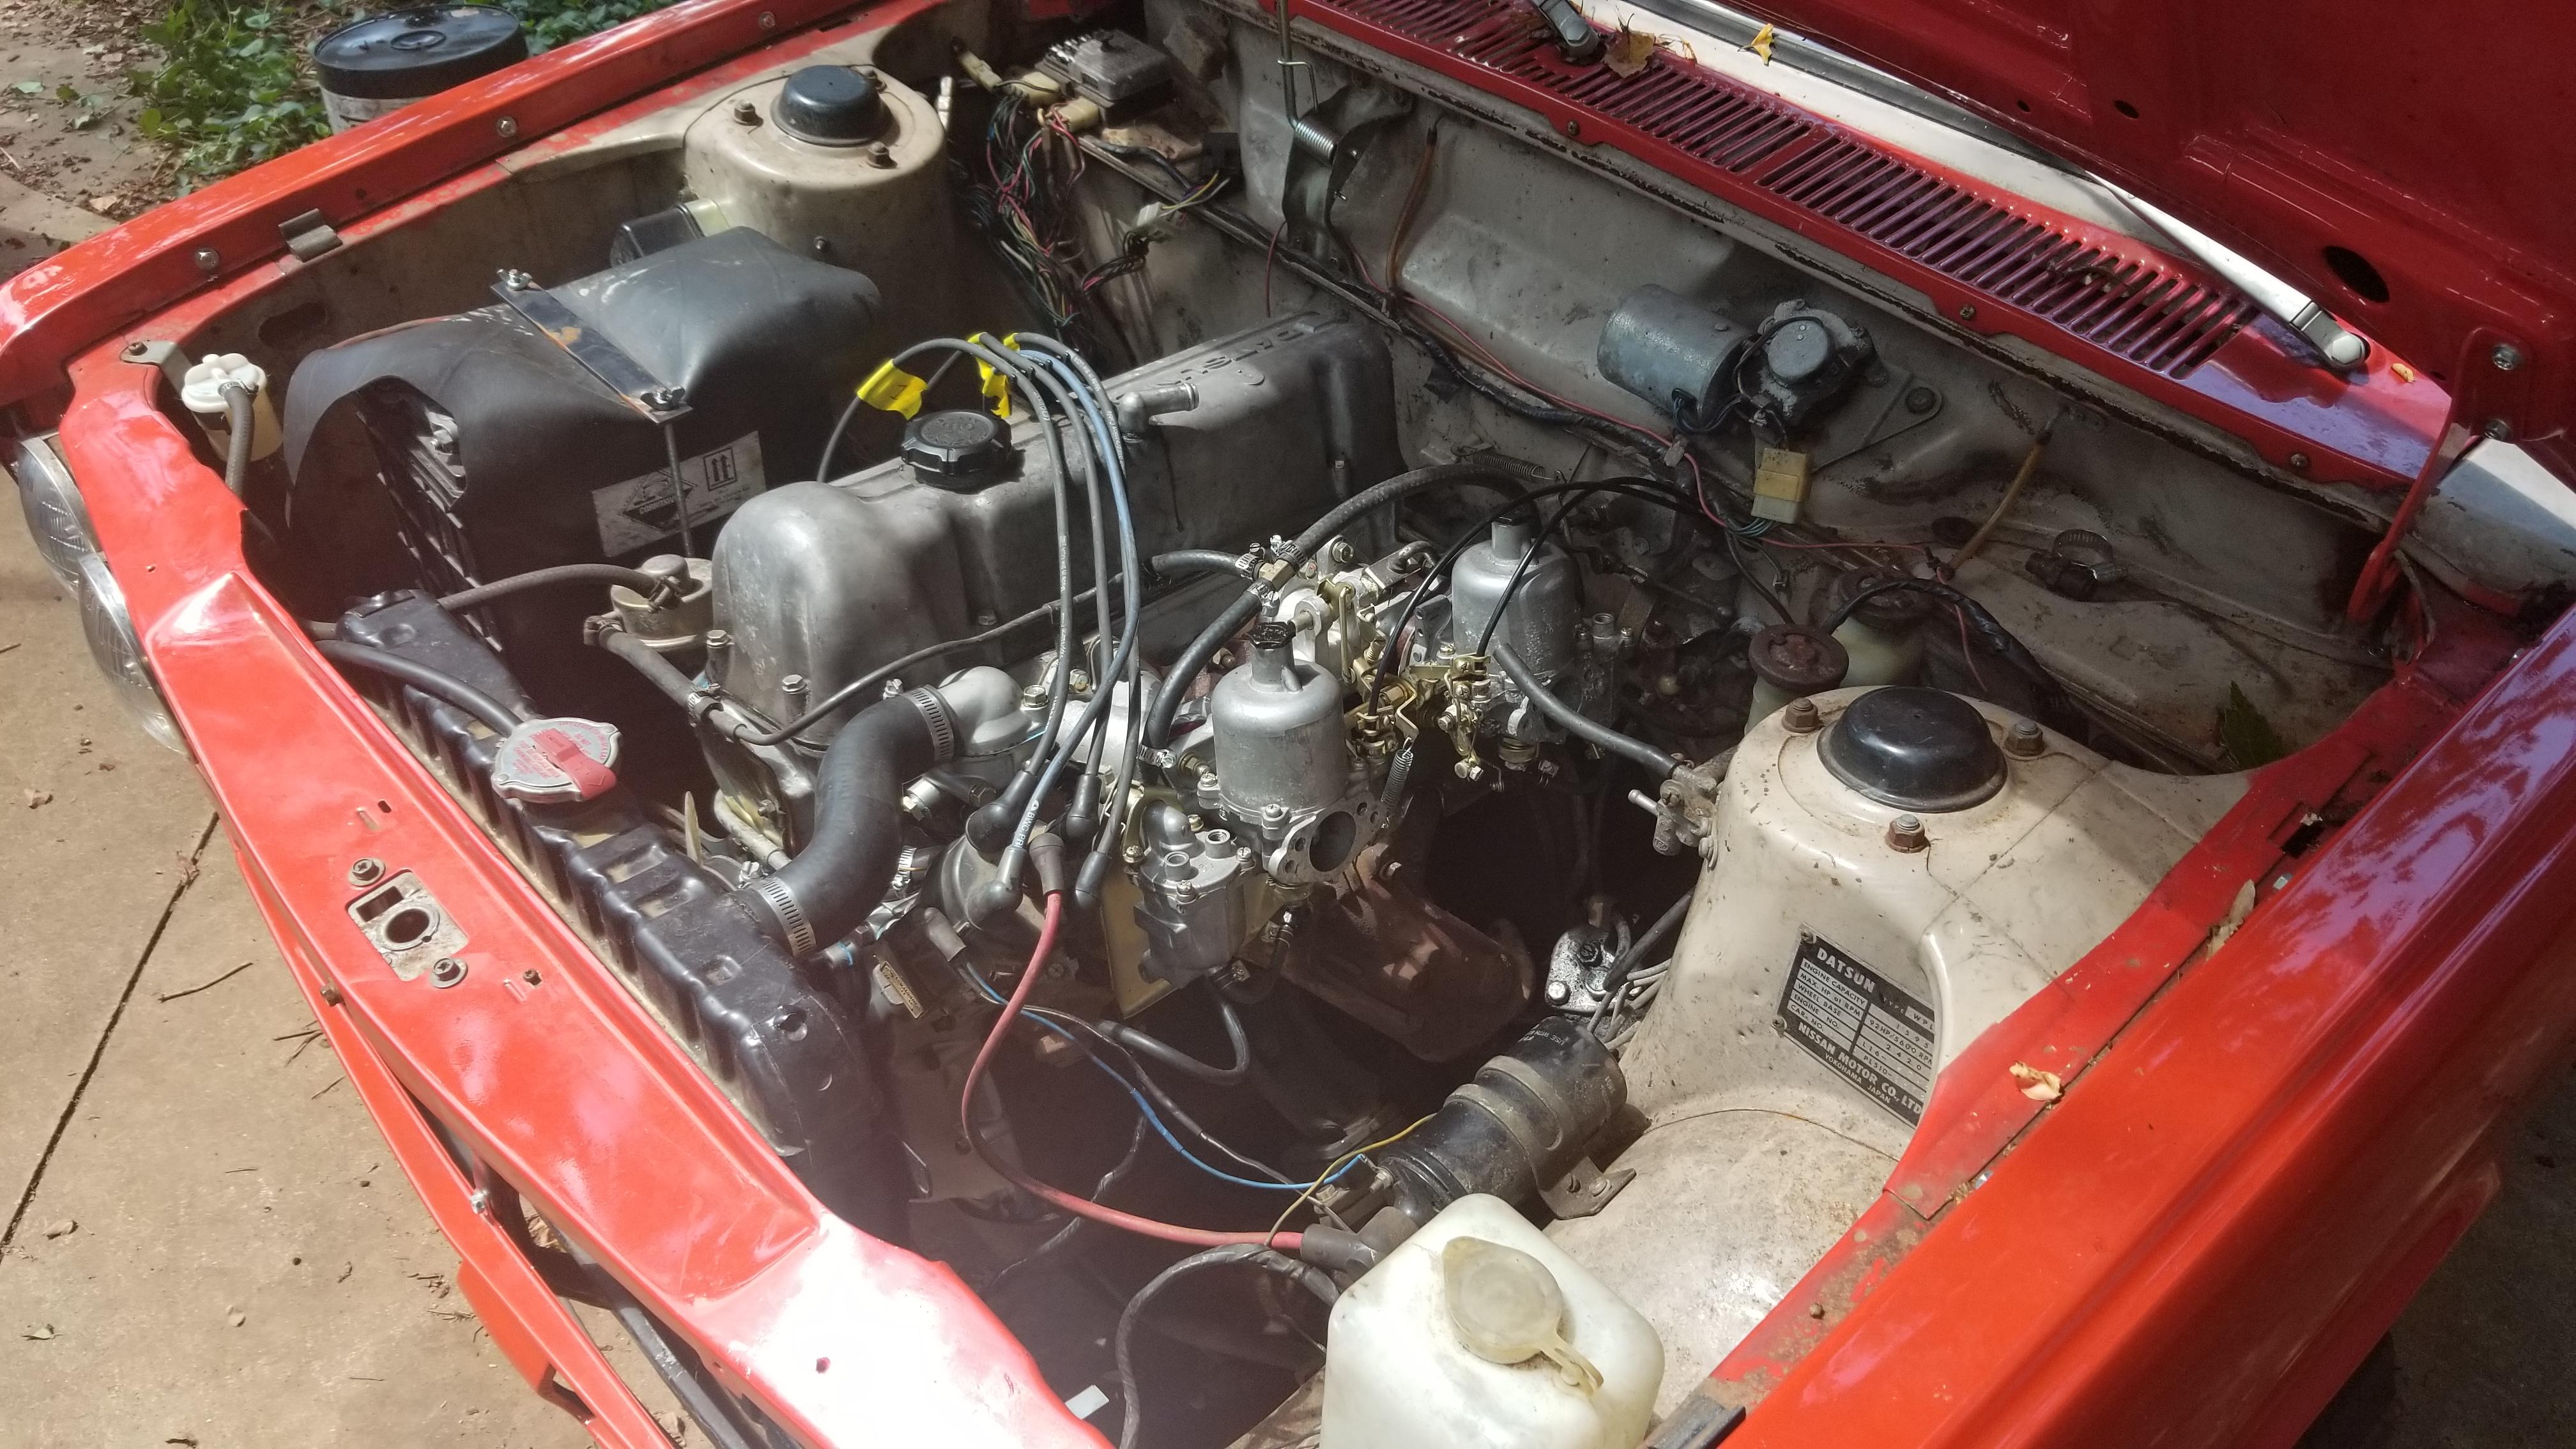
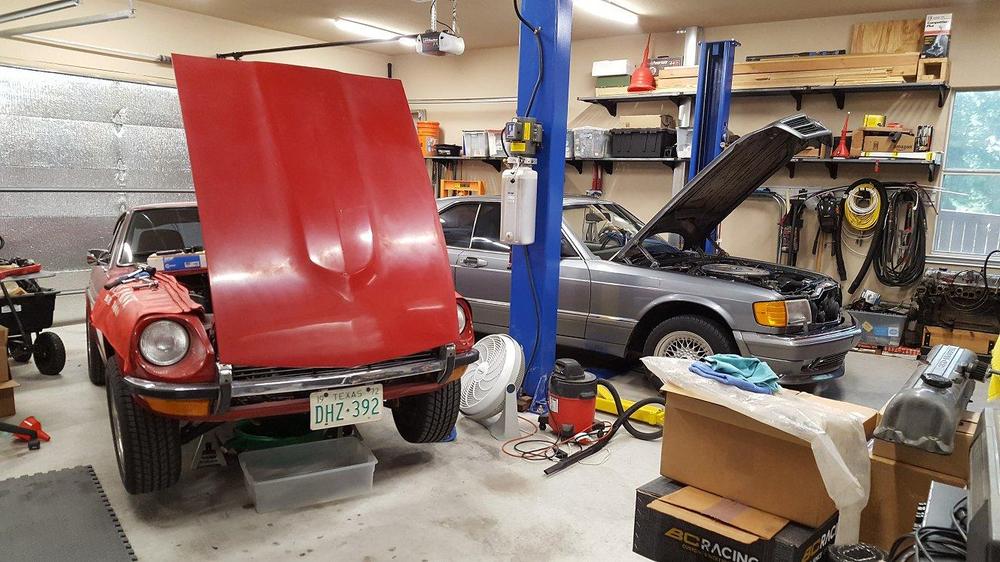
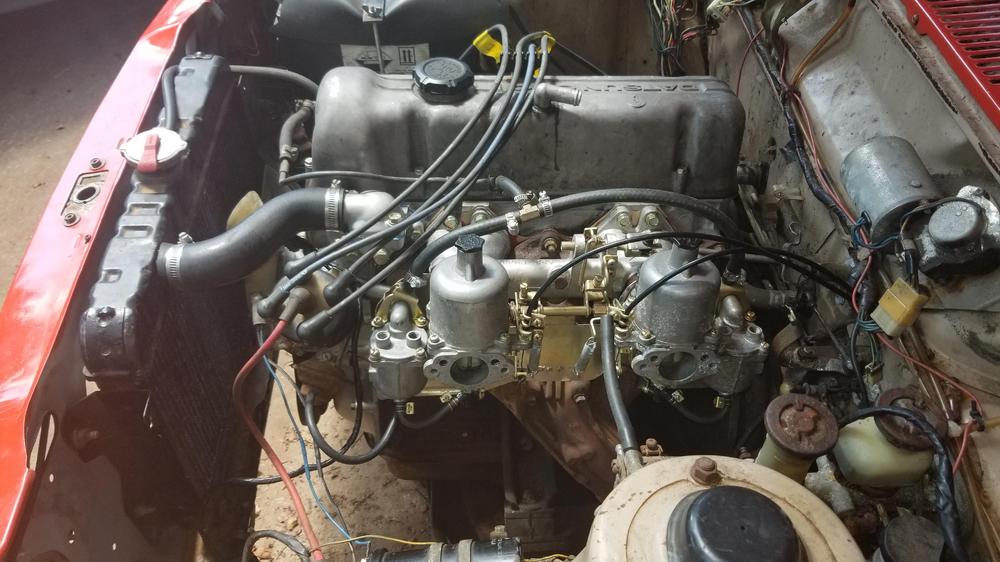
2 pointsAnd it's finally assembled with the fuel lines! Sent from my [device_name] using http://Classic Zcar Club mobile


 2 points
 -
2 points
-
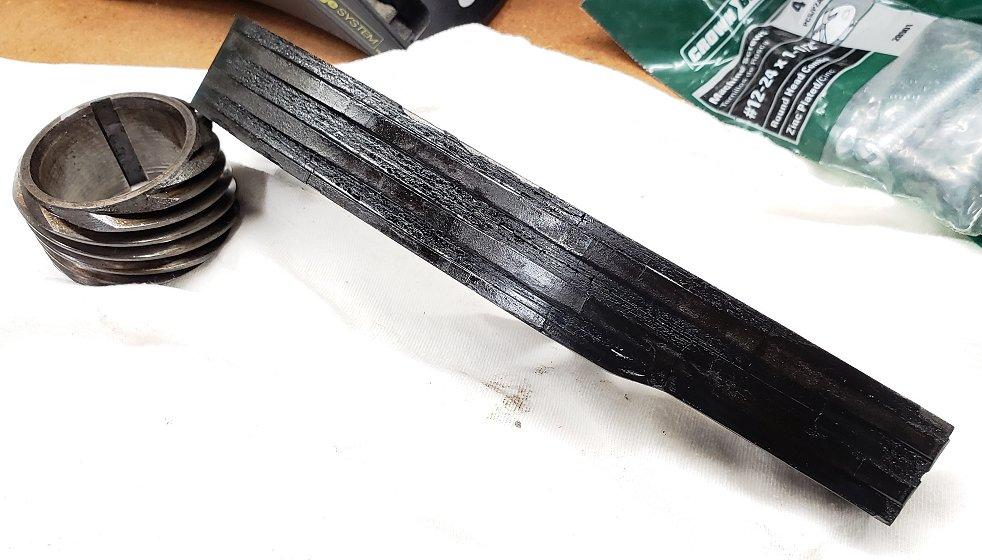
2 pointsGood news, I got it off. Just as Namerow predicted, once it was started it came off with just some medium effort. I used a pry bar to gently push on it and I could see the shininess of the crank in the gap between the balancer and the timing cover widen. Once it was 1/3 away from the timing cover I was able to work it off by hand. I tried a M6x1.0 bolt and tap and it would be quite a bit of material to overcome. I was happy to get it off as everything else came apart as planned with no surprises.2 points
-
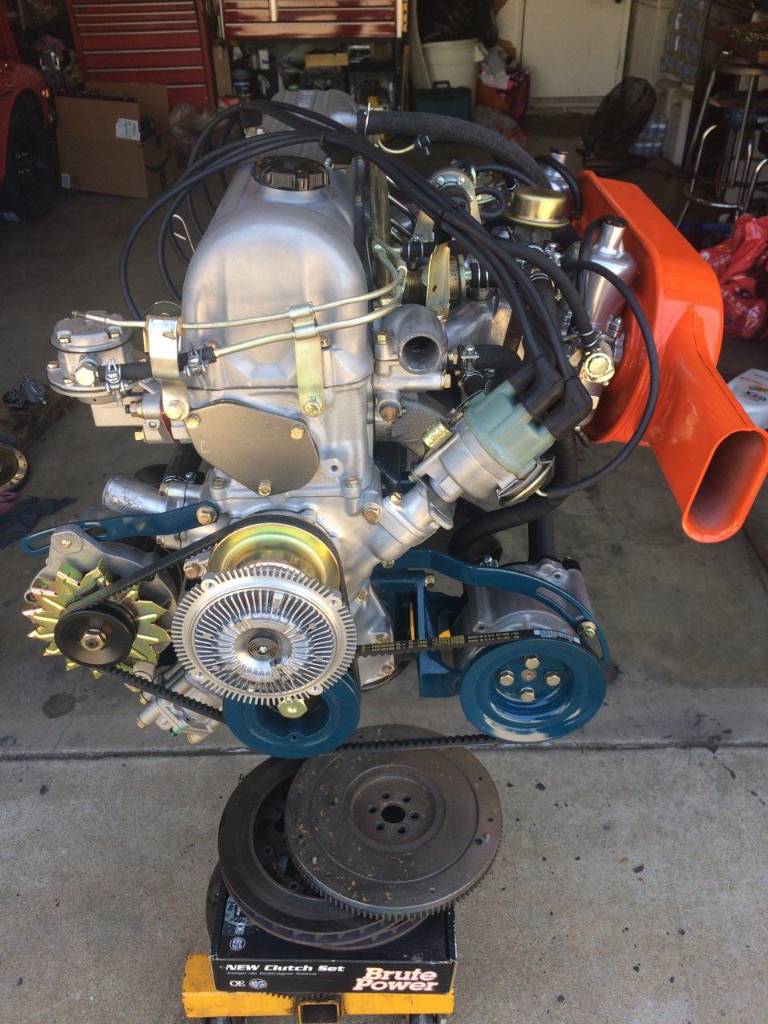
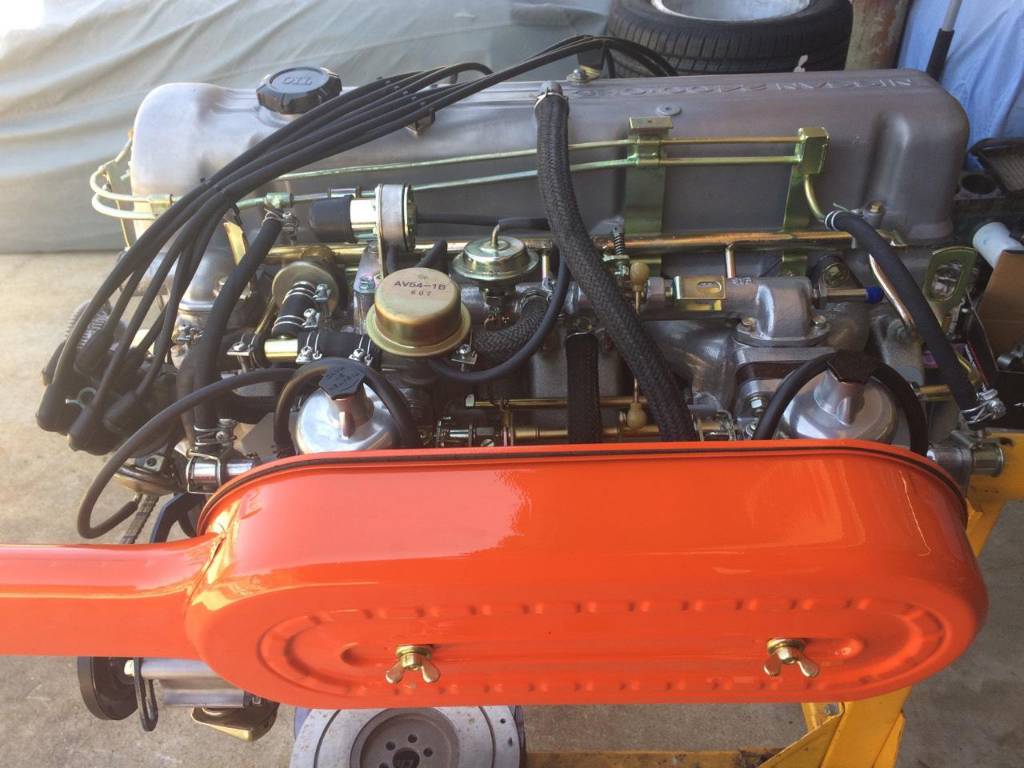
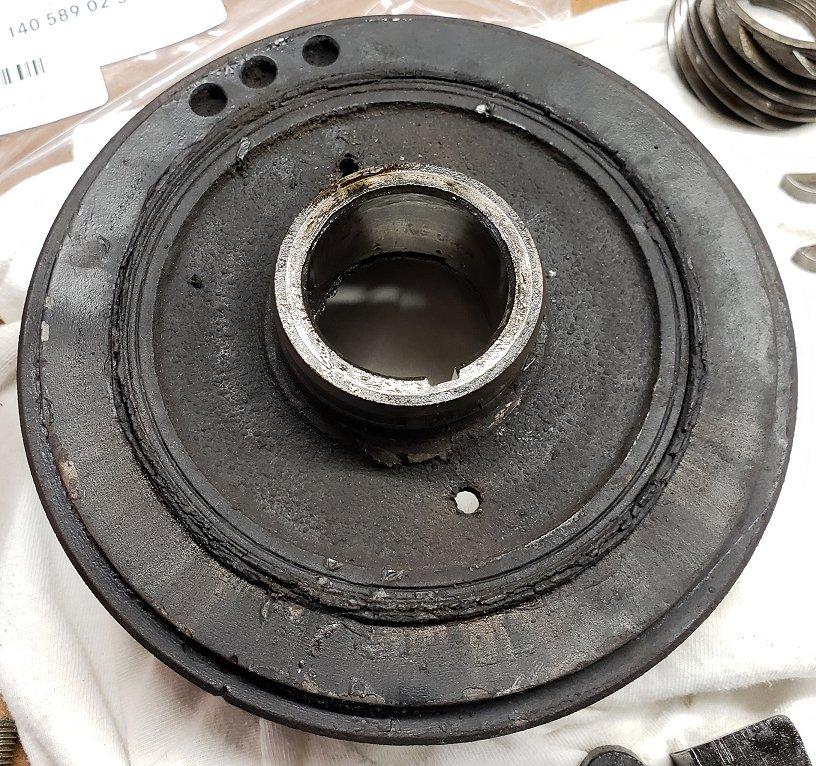
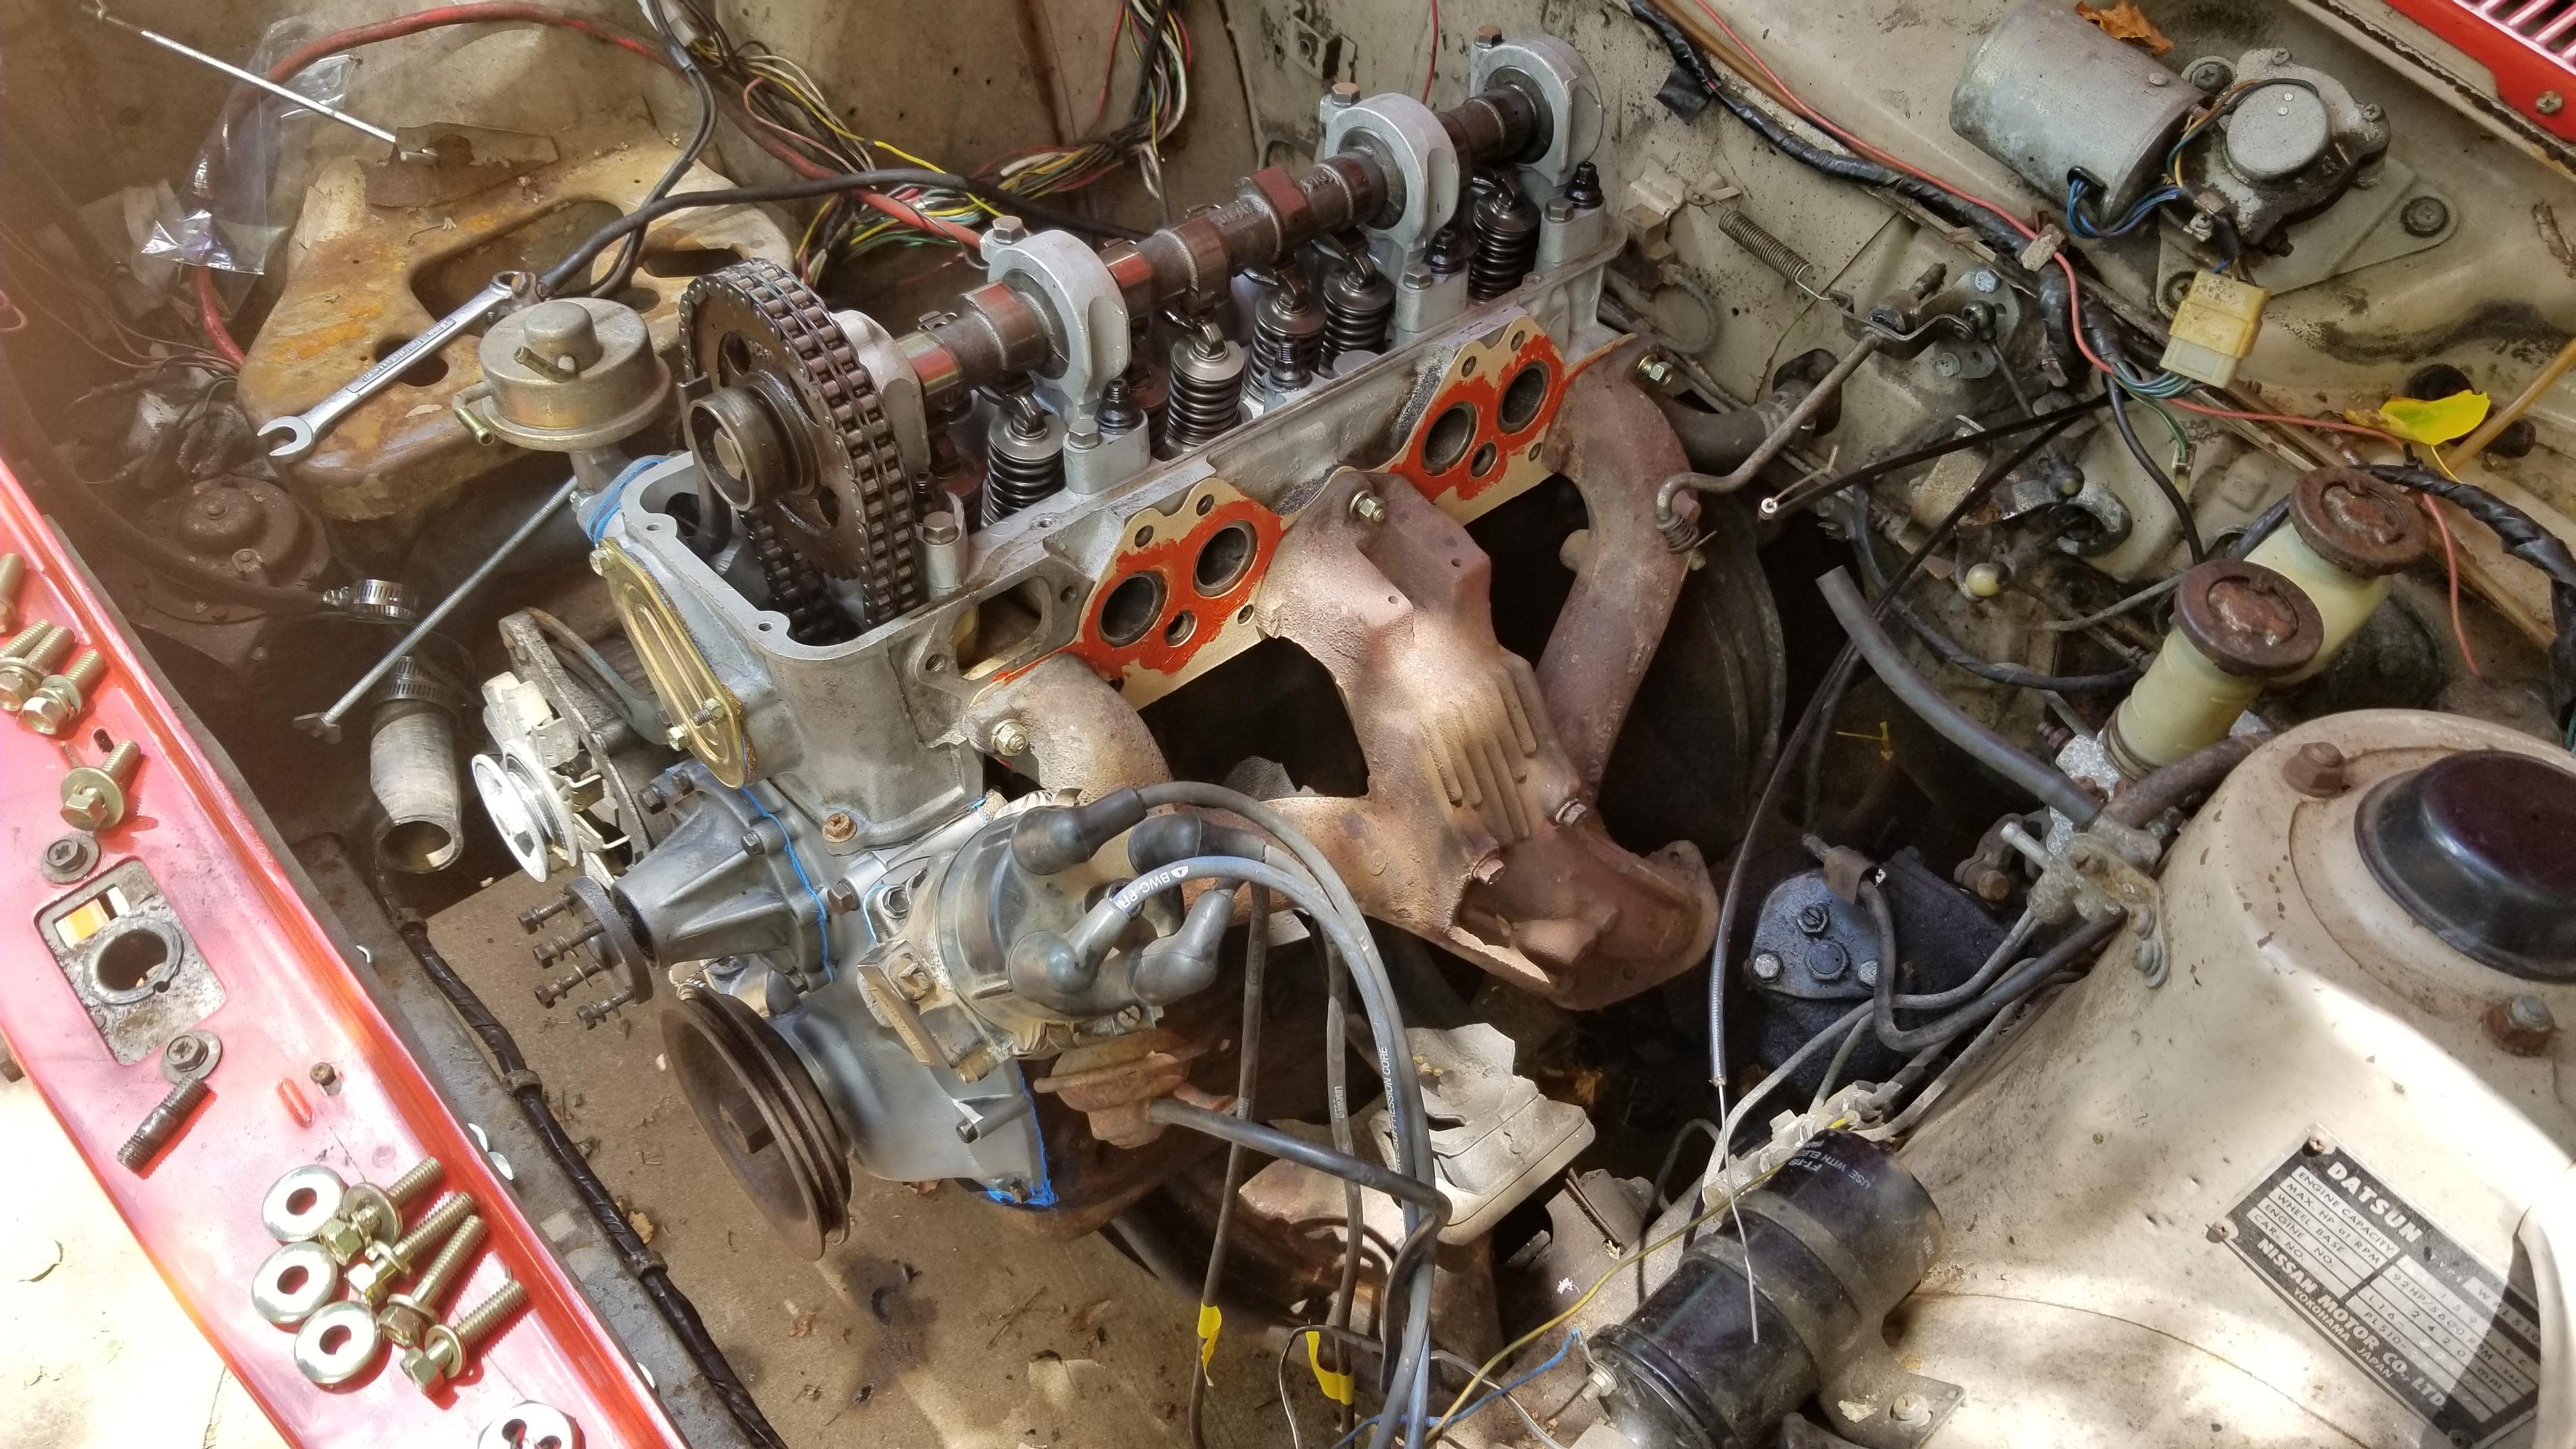
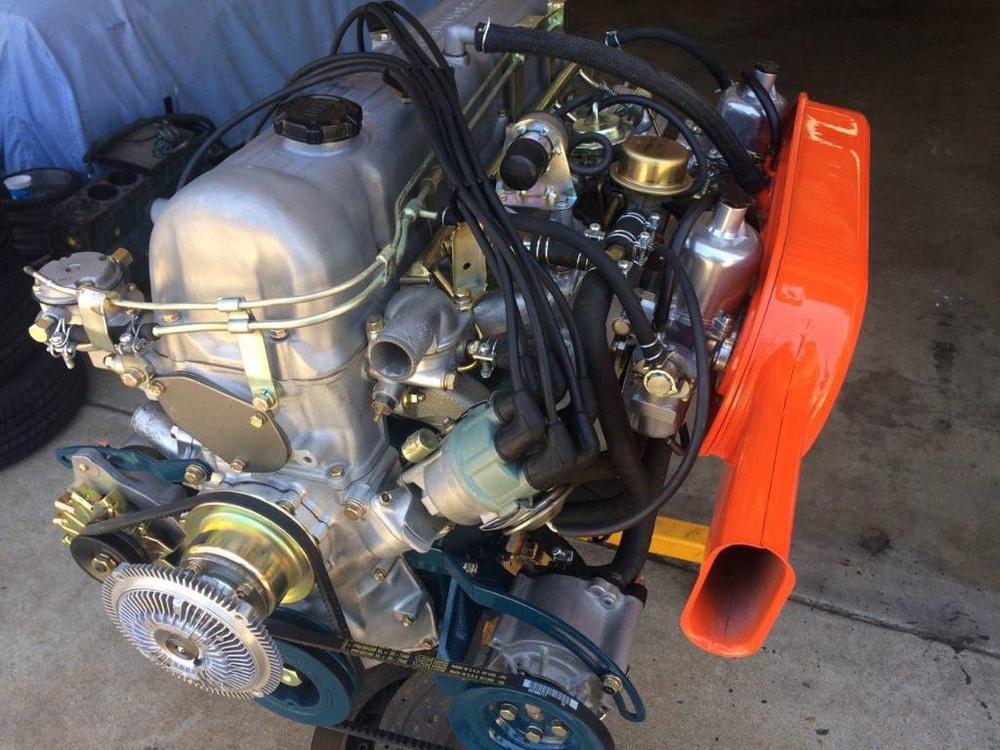
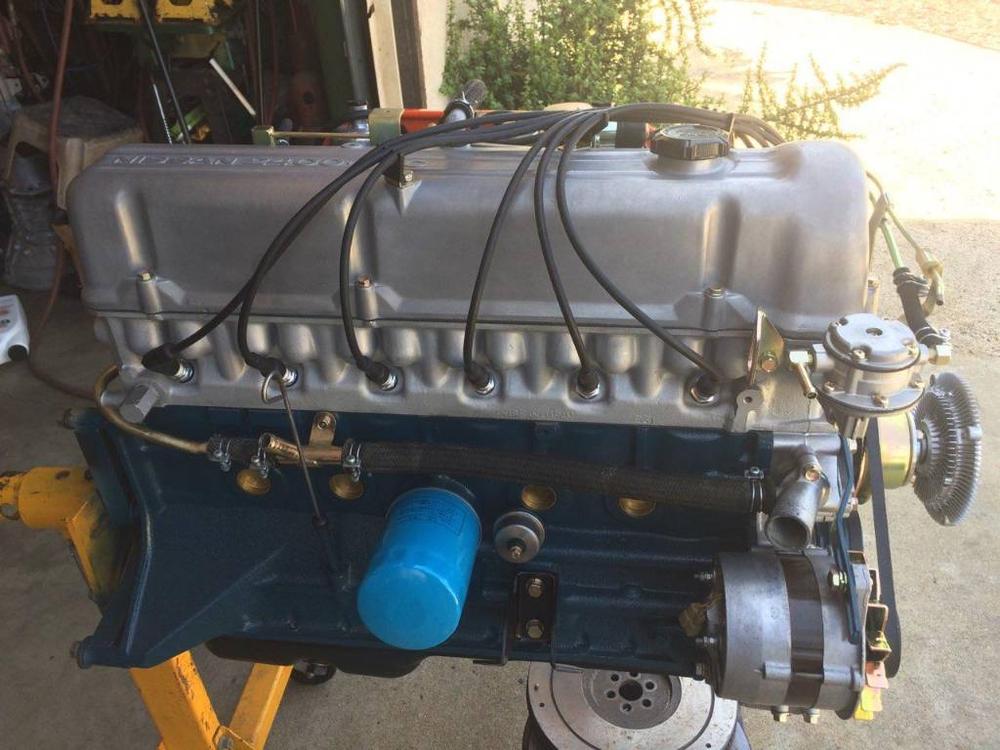
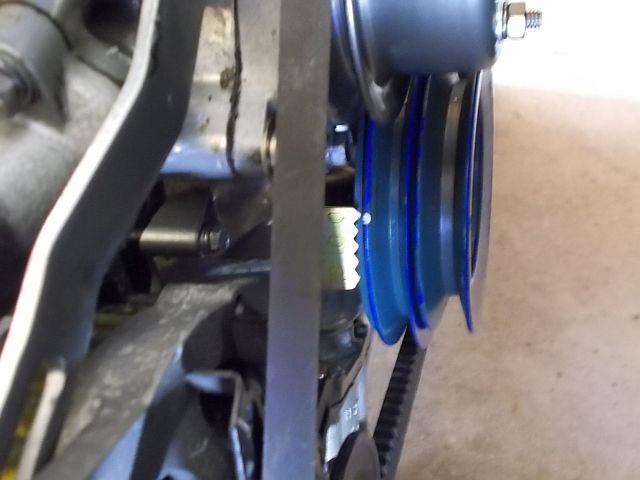
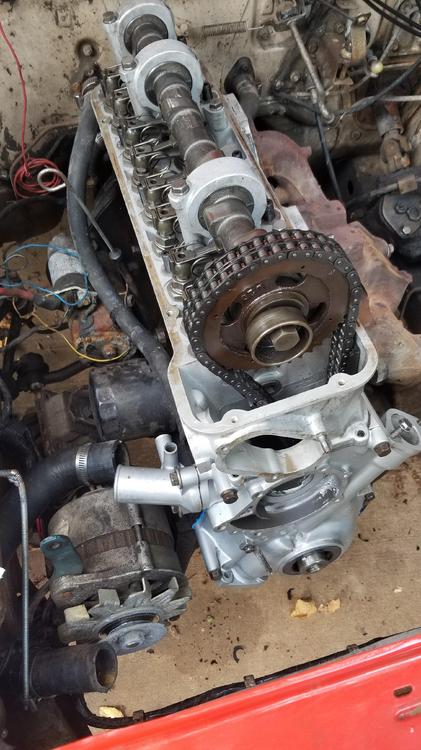
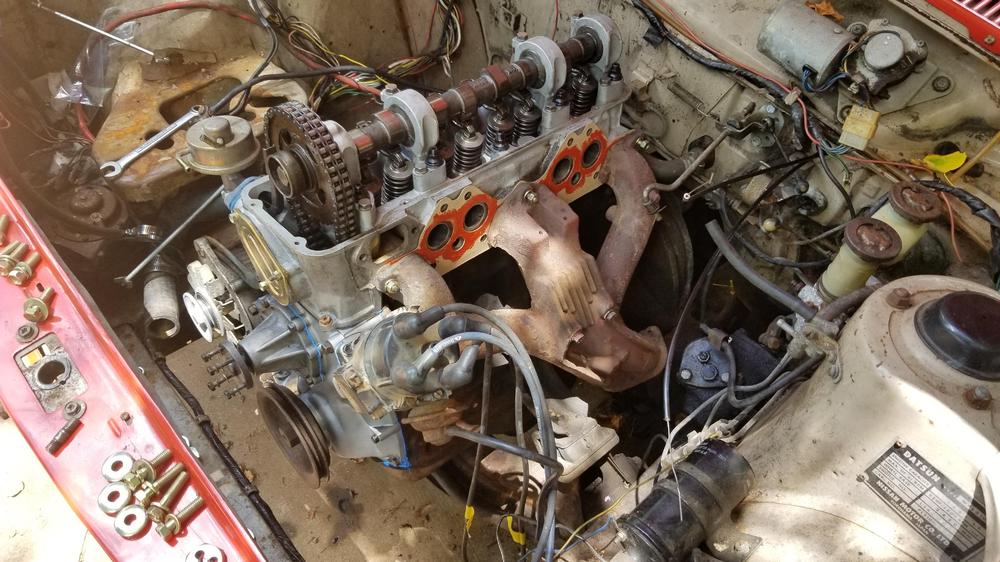
Got the new rebuilt head installed on my L28 along with front cover. Rebuild Mikuni's go on next. Won't be too long now. Also scored a new L28 crank pulley that was stored 35 years. Now the belt sits flush in groove with other pulleys. 240Z pulley fits but belt groove is smaller. That is what I had been using.
 2 points
 -
Glad the explanation helps. The color is Nissan 920 - Safari Gold, used in 1970-71. it was also used on Datsun vehicles other than Z's.
 2 points
 -
1 point
-
1 pointSo our oil slinger did away with that? Interesting... Car's coming along nicely Charles.1 point
-
1 pointDone. Good call Chas. Mike or another Mod will have to approve it to make it active I believe1 point
-
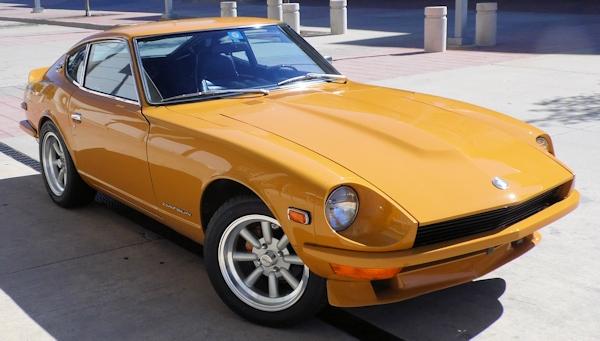
The bumpers are my OE units that I had shaved and painted body color during my resto some years ago, swapped out recently as @Patcon says. The front dam is a 1st generation BRE Spook used by BRE only in 1970 before being replaced by the design now commonly seen. This one was installed by my selling dealer before I bought the car and I've been told it may be the last in existence. I've heard the color being described in several different ways but 918 Orange is a first. Tweak your monitor settings to get the car to look more like a butterscotch candy and you'll be close. Good luck with your project.1 point
-
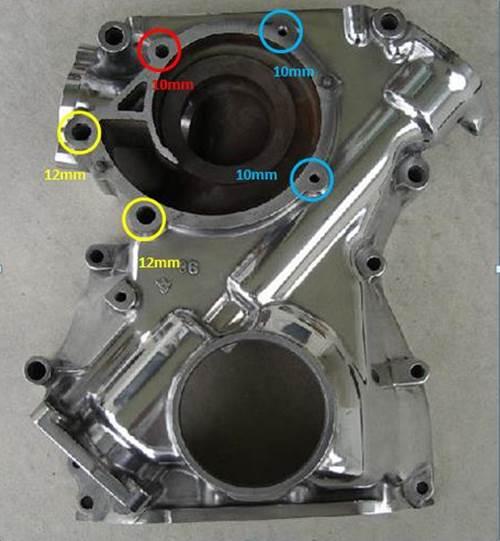
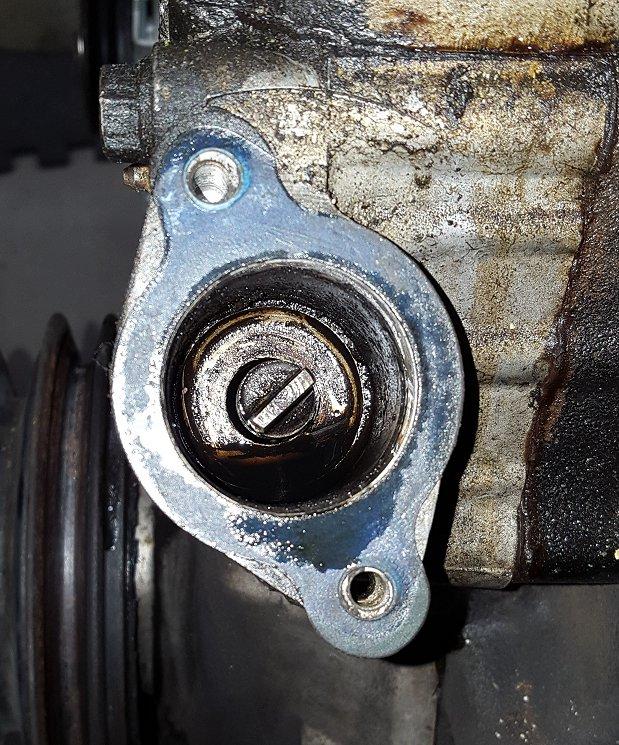
I wonder how many thousands of Z's suffered from this particular affliction. The problem bolt is the 10mm (M6) item located at the 10:30 position... x I think that innocent-looking bolt head probably fools a lot of first-timers because it conceals the fact that the hole in the timing cover is just a pass-through, with the bolt actually threading into the front face of the engine block. That means there's an inch or so of freestanding length sitting proud of the block face -- permitting just enough wind-up under wrenching torque to trick you into thinking that the threaded part is starting to move. And then.... 'SNAP'. Just for fun, I simulated the set-up by locking a 10mm bolt (6mm shank) in my bench vise and then using an old-style torque wrench to see how much torque it would take to snap the bolt. I located the start of the threaded section right at the face of the vise jaws, with the 1-1/2" unthreaded length sitting about the jaws. IIRC, the bolt broke at under 10 lb-ft! . I was just using a hardware store bolt, but I don't expect that the Nissan OE bolt would offer much more than double the strength. So the threshold between, 'I think it's moving' and 'uh-oh' is about 15 to 20 lb-ft. If the bolt was infinitely strong, I'll bet it would take 30 - 40 lb-ft to break the frozen threads free. So it looks like a losing proposition if your only solution consists of leaning on the wrench just a little harder. Just for comparison's sake, the bolt torque reference chart for ISO fasteners that's included in Wick Humble's 'How to Restore Your Datsun Z-Car' indicates that the recommended tightening torque for a Grade 4 (per the OE Nissan item) M6 bolt is just 2.5 lb-ft! (and only 6 - 8 lb-ft for the heavy-duty, Gr. 9 version). The L-Series FSM is notably silent on recommended tightening torques for these types of secondary fasteners. What a contrast! Install = finger-tight. Remove = beyond snapping point.. The two other 10mm bolts have their own problems. Just like certain other bolts on the L-Series engine, you have a steel bolt threaded into an aluminum casting, so internal corrosion sets up because of the dissimilar metals. I've had good luck with these timing cover bolts on two different engines by using a small, handheld impact driver and a medium-size mechanic's hammer. Just takes a bit of patience (along with removing the radiator).
 1 point
 -
1 pointEVAPO-RUST has been a great product in this project. In fact I just purchased a new gallon the other day as my old jug of magic seemed to be losing it's potency a bit after about 3 years of use. The gel dissolver seems to work well on bigger pieces that will not fit my varied size containers used to soak parts with the liquid EVAPO-RUST. Still trying to figure out how the door is attached to the hinge pin. I am sensing a tedious fabrication project or a search for a good used part for that section of the blower housing. Keep the helpful tips coming. Wish I had a whole tank load of EVAPO-RUST to fit the whole car into. Thanks, John-Lugoff, SC.1 point
-
1 pointThanks man, Although i have a lot of parts it's Always possible i need something.. As you may know i'm restoring a 280zx first year in the Netherlands and when that one is ready (next year..) i'm thinking of restoring my 240z for the 2nd time haha after 20 years driving it! Have'nt made a list yet!1 point
-
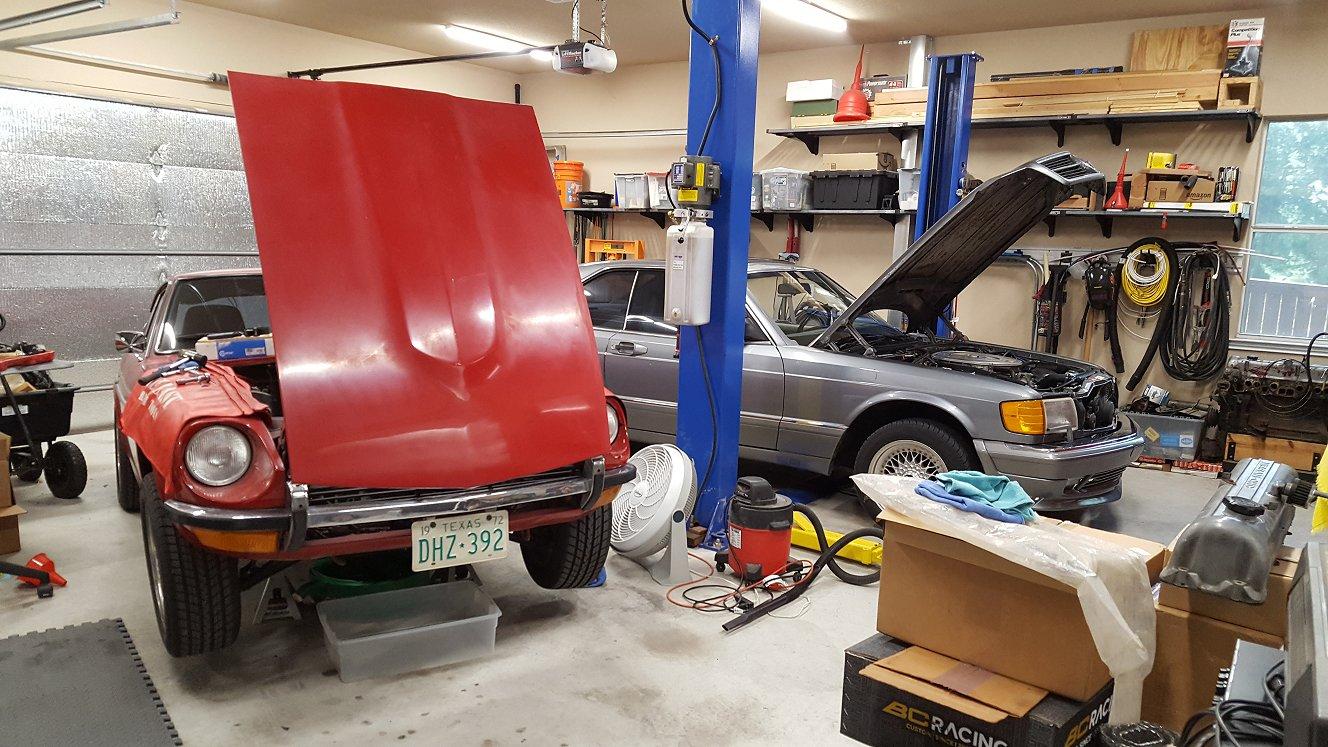
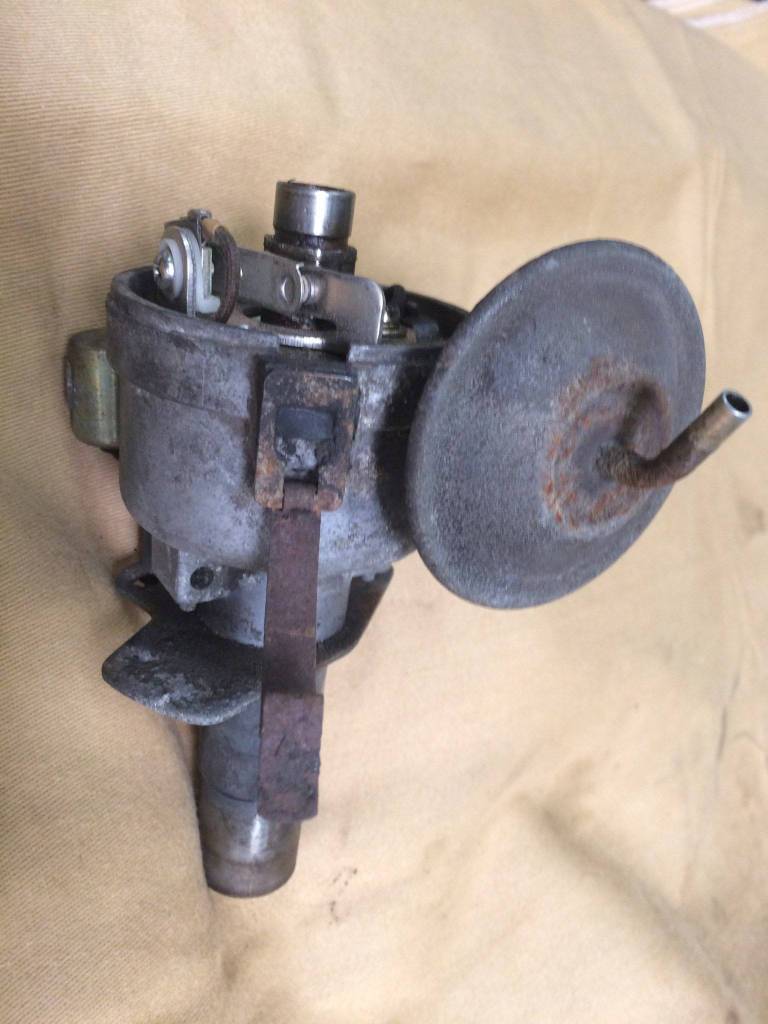
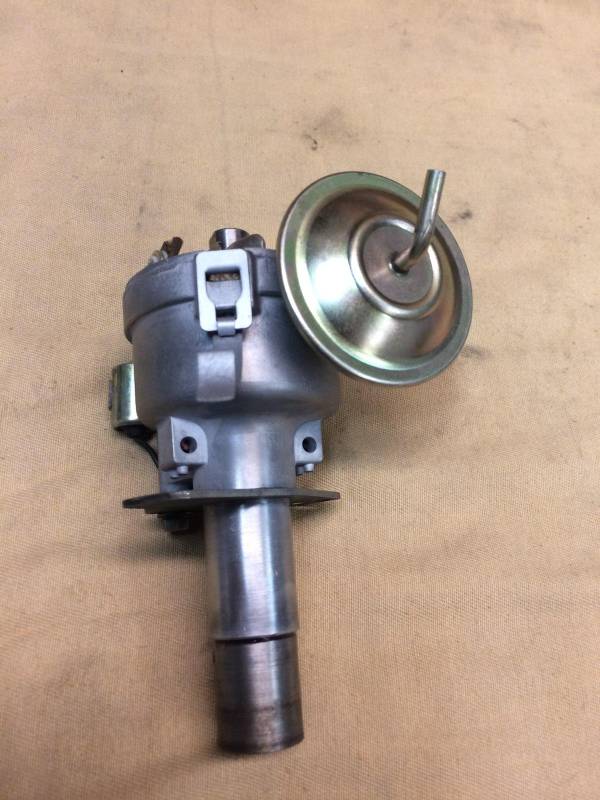
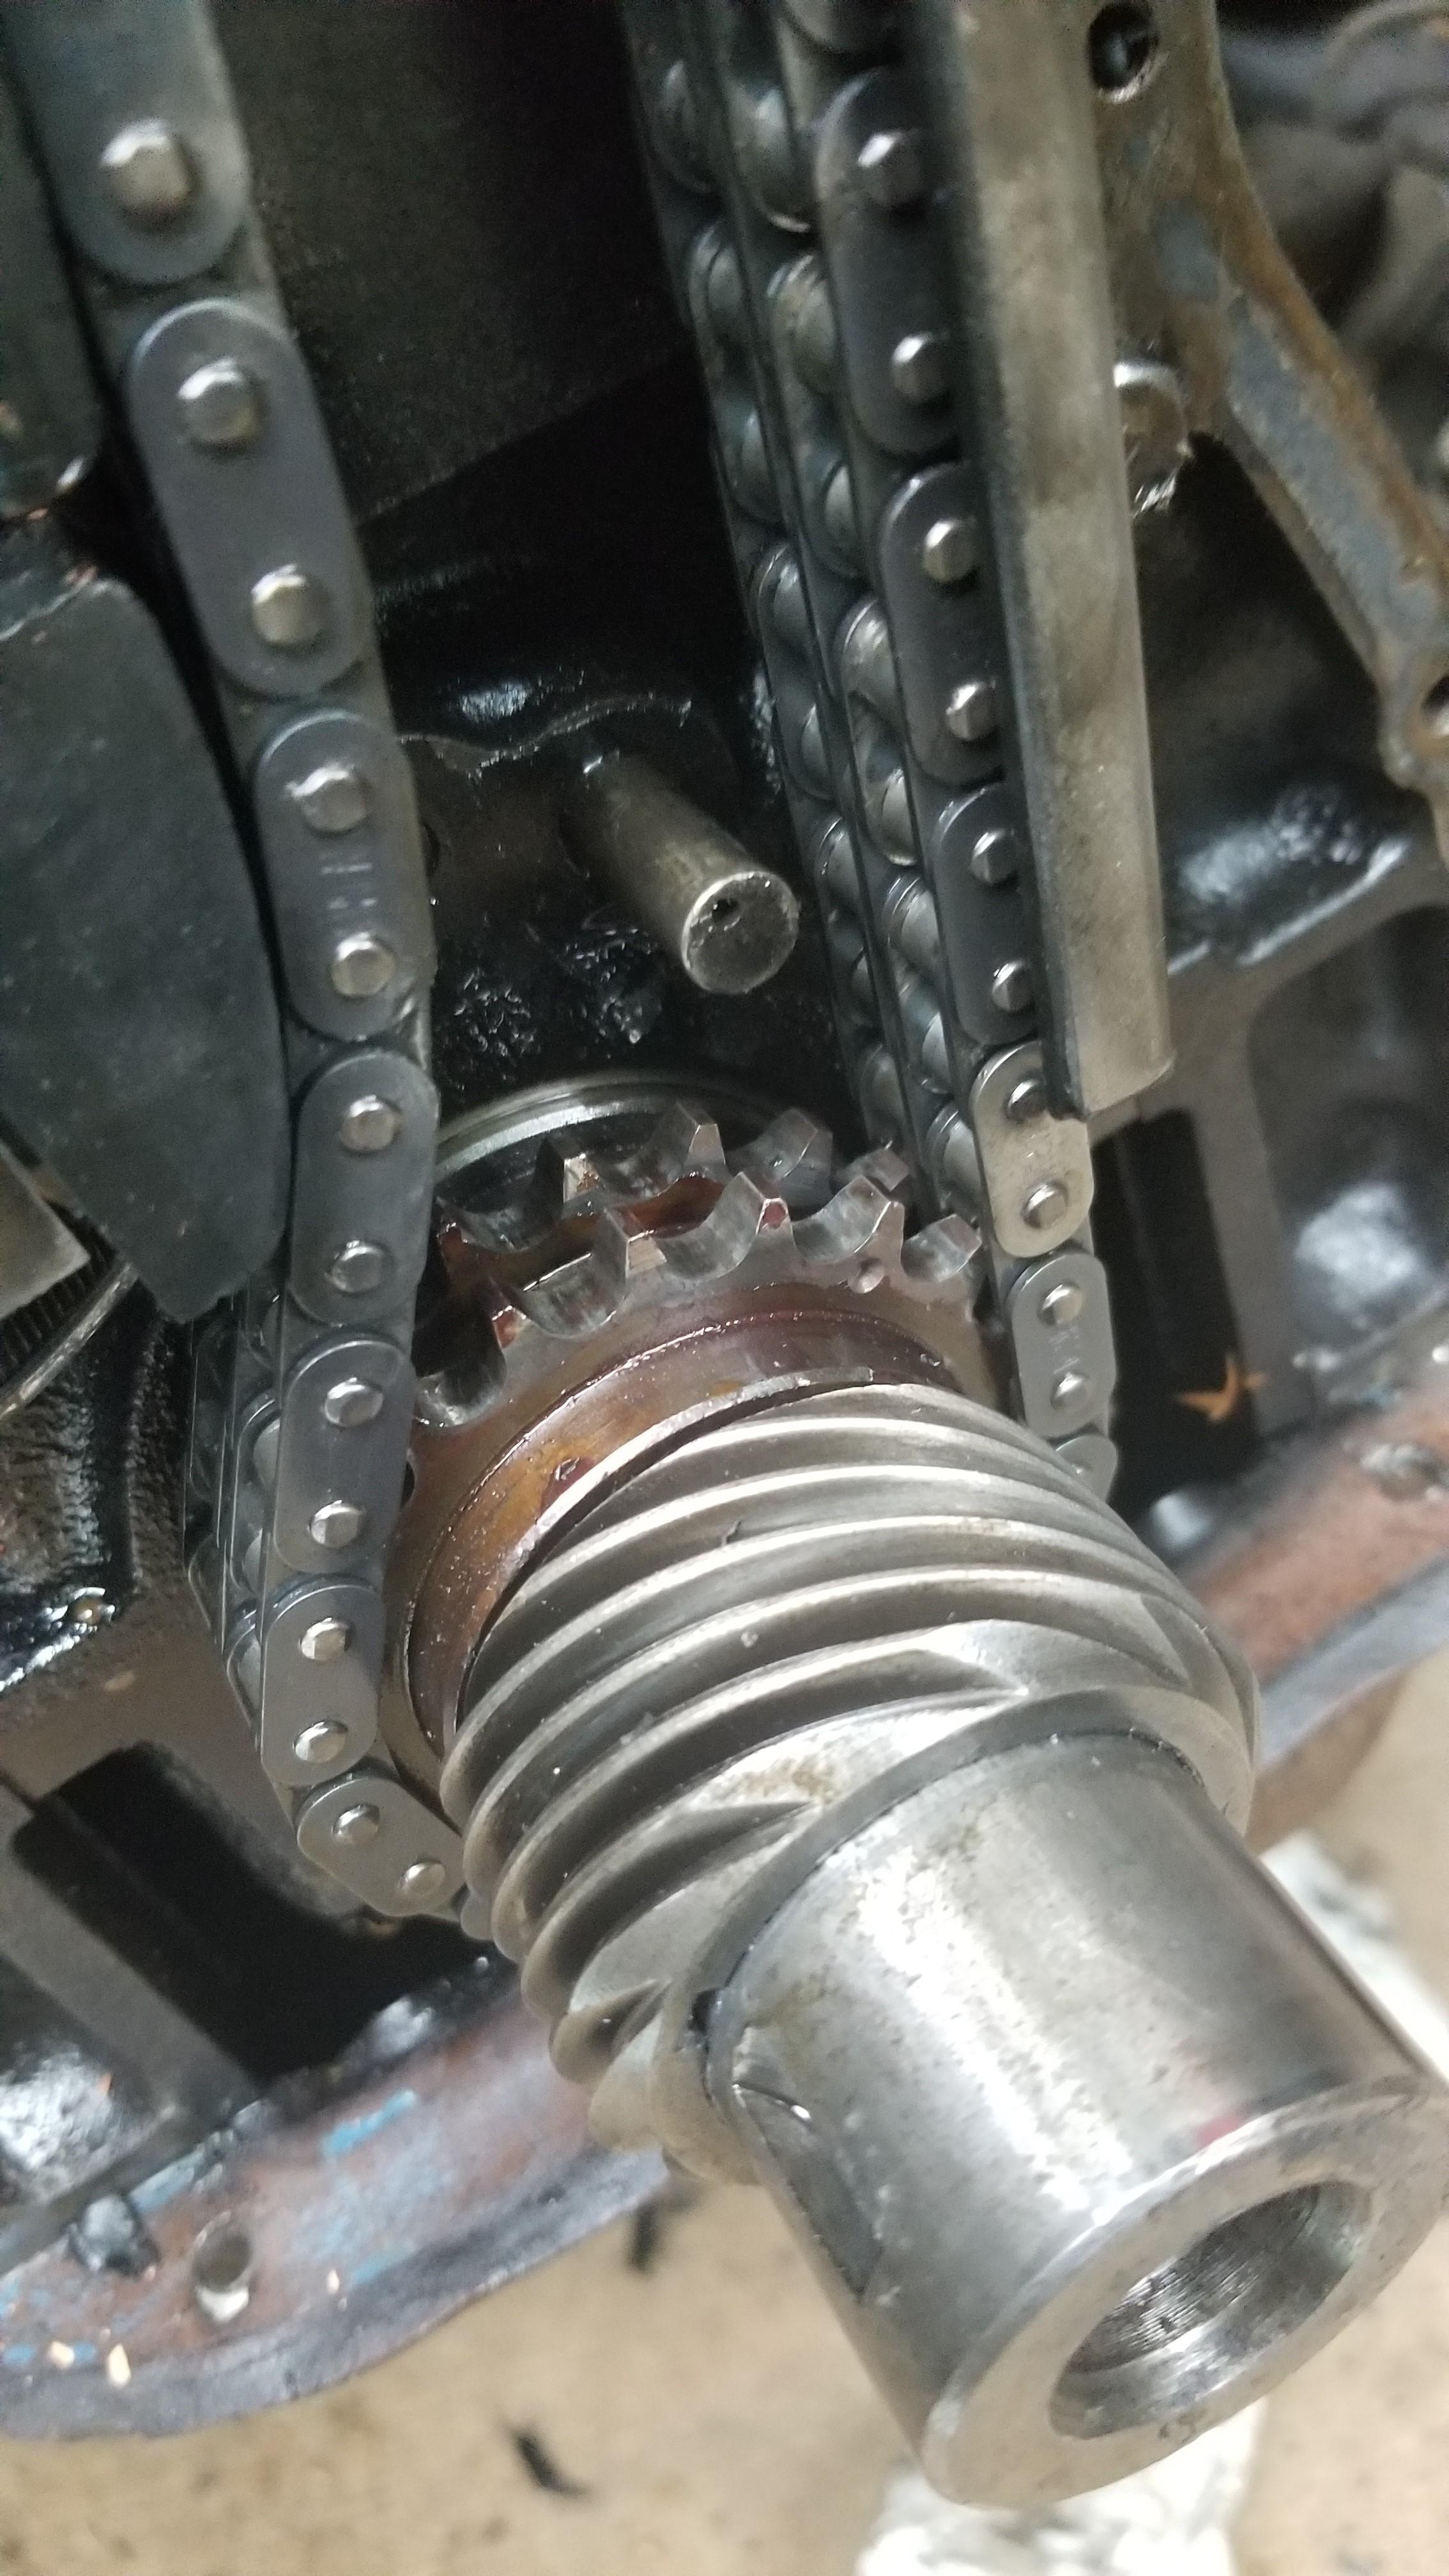
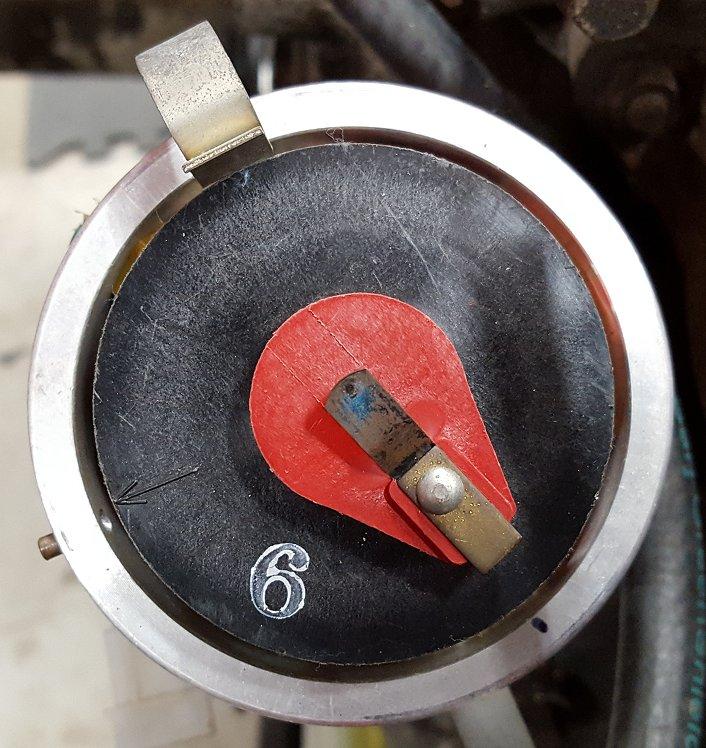
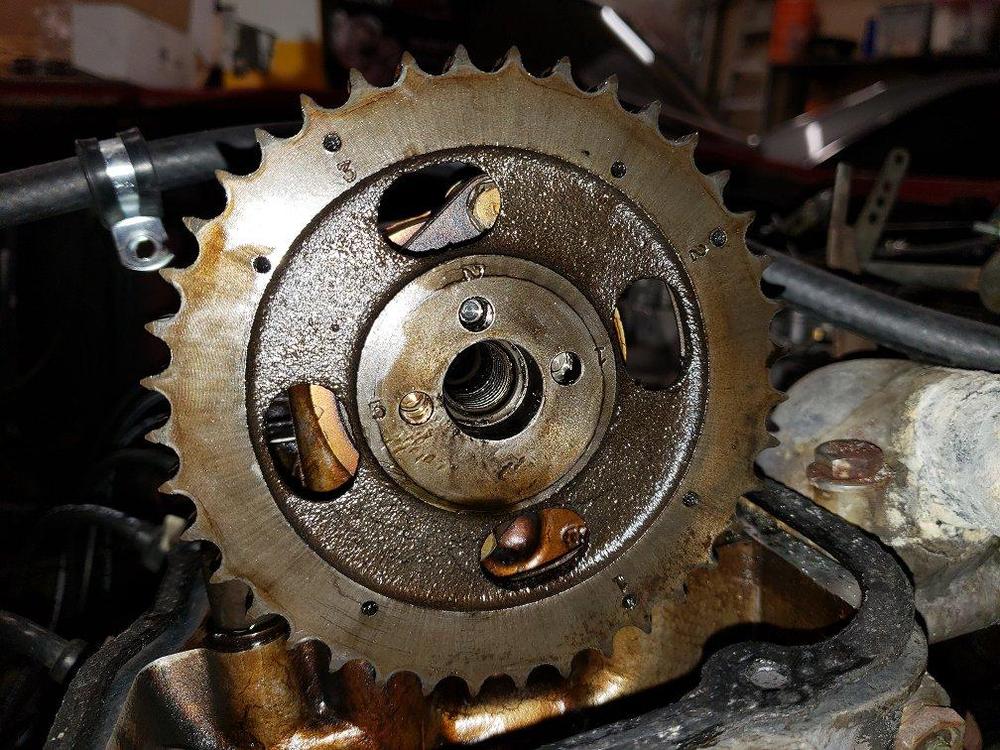
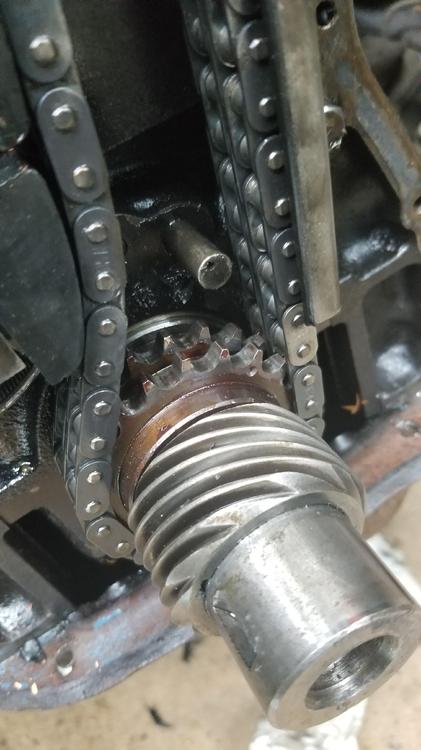
The Red Rocket Z is finally getting some attention after many months of my 1988 560SEC (the German Mistress) getting all of my time and money. Last weekend I started digging into the engine to replace the timing chain. I had originally thought about pulling the engine to do this but I knew that once I did my case of "while I am at it-itis" would kick in and the car would be torn down for a complete restoration. As I started removing components it became evident someone has been here before as two water pump bolts were missing. Further investigation revealed that one was truly missing and the other is broken off in the timing cover. A few questions have also come up around the position of the oil pump distributor rod. I know the position of this is critical but the car ran with it at this position so I will likely re-install it at this position too. The engine is a 280z block and I am running a Mallory distributor. The engine is at TDC and the rotor is pointing to plug #1. The sprocket is pictured the way I found it and the silver chain link is no where to be found. The original chain has diamonds on every link. My new Cloyes timing chain is blank. With everything apart I compared the old timing chain to the new and they are the exact same length so the chain was not stretched like I thought. The plunger was intact but with everything removed I could see the rails are toast. When I re-assemble everything, should I move the sprocket so the alignment dowel is in the #1 hole? From what I have read, the different holes are utilized to correct the timing due to timing stretch. I took Phil's advise and bought a new timing cover bolt kit and have also discovered I need to buy a new harmonic balancer. The rubber seal on my is starting to show its age and needs to be replaced.

 1 point
 -
I thought that closing the valves sooner moved the power peaks to lower RPM. Which is what happens if you move to the 2 or 3 hole. There's a method for checking valve timing. The notch and groove, shown in the Engine Mechanical chapter if you want to check yours. Your exhaust pipe wouldn't have much effect on power peaks. Found a good reference - http://www.compcams.com/Pages/413/cam-timing-lobe-separation-angle.aspx1 point
-
Jim is the original owner of that car. It is immaculate and has the trophy to prove it! It now has new shiny bumpers in lieu of the painted ones.1 point
-
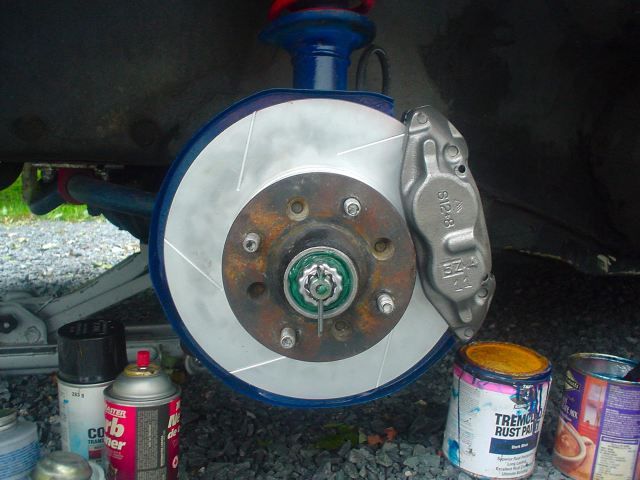
1 pointI gave them the ones from blue (below) that were rusted with stuck pistons. I think most shops don't care if the cores are an exact match. The brembo rotors survived the 12 year sleep very well.
 1 point
 -
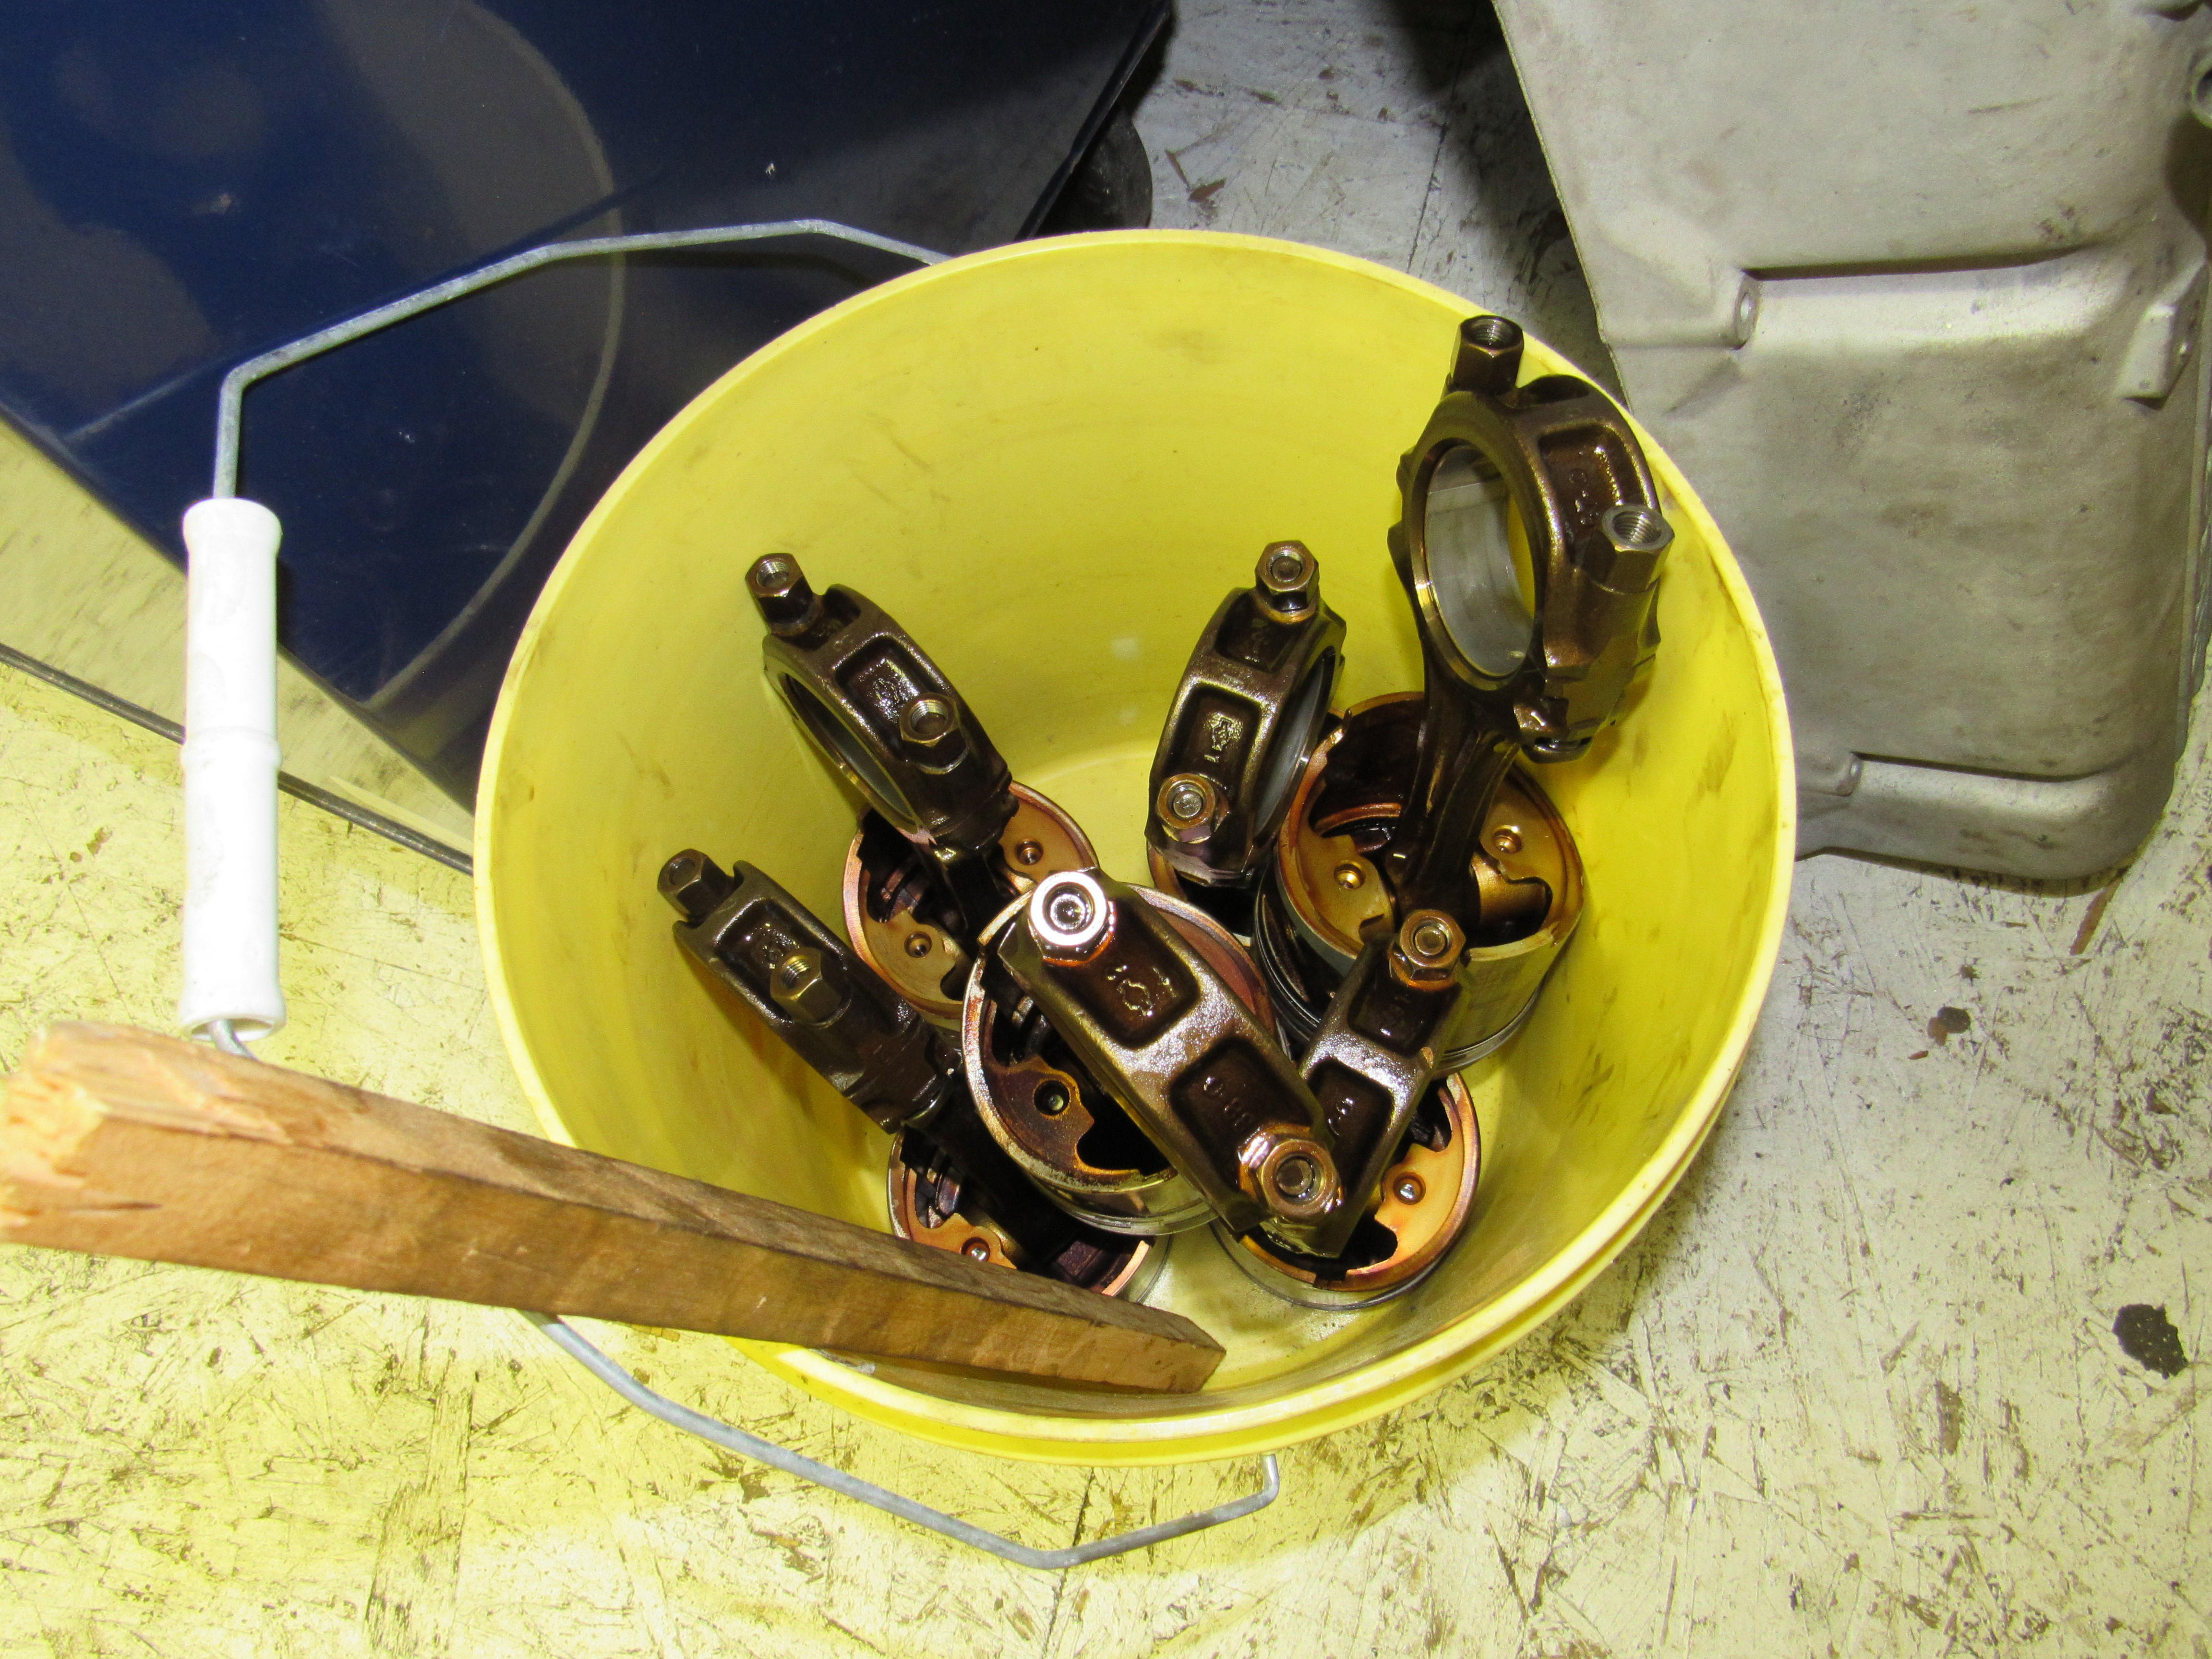
No not on this engine but it's a habit I picked up on other engines where the valves are the same size. But it doesn't need new parts, everything is within spec, besides if I install new bearings that means I have to take the crank in to be polished which means I don't get the crank back for 3 months with un assembled engine parts all over the place. No thanks.1 point
-
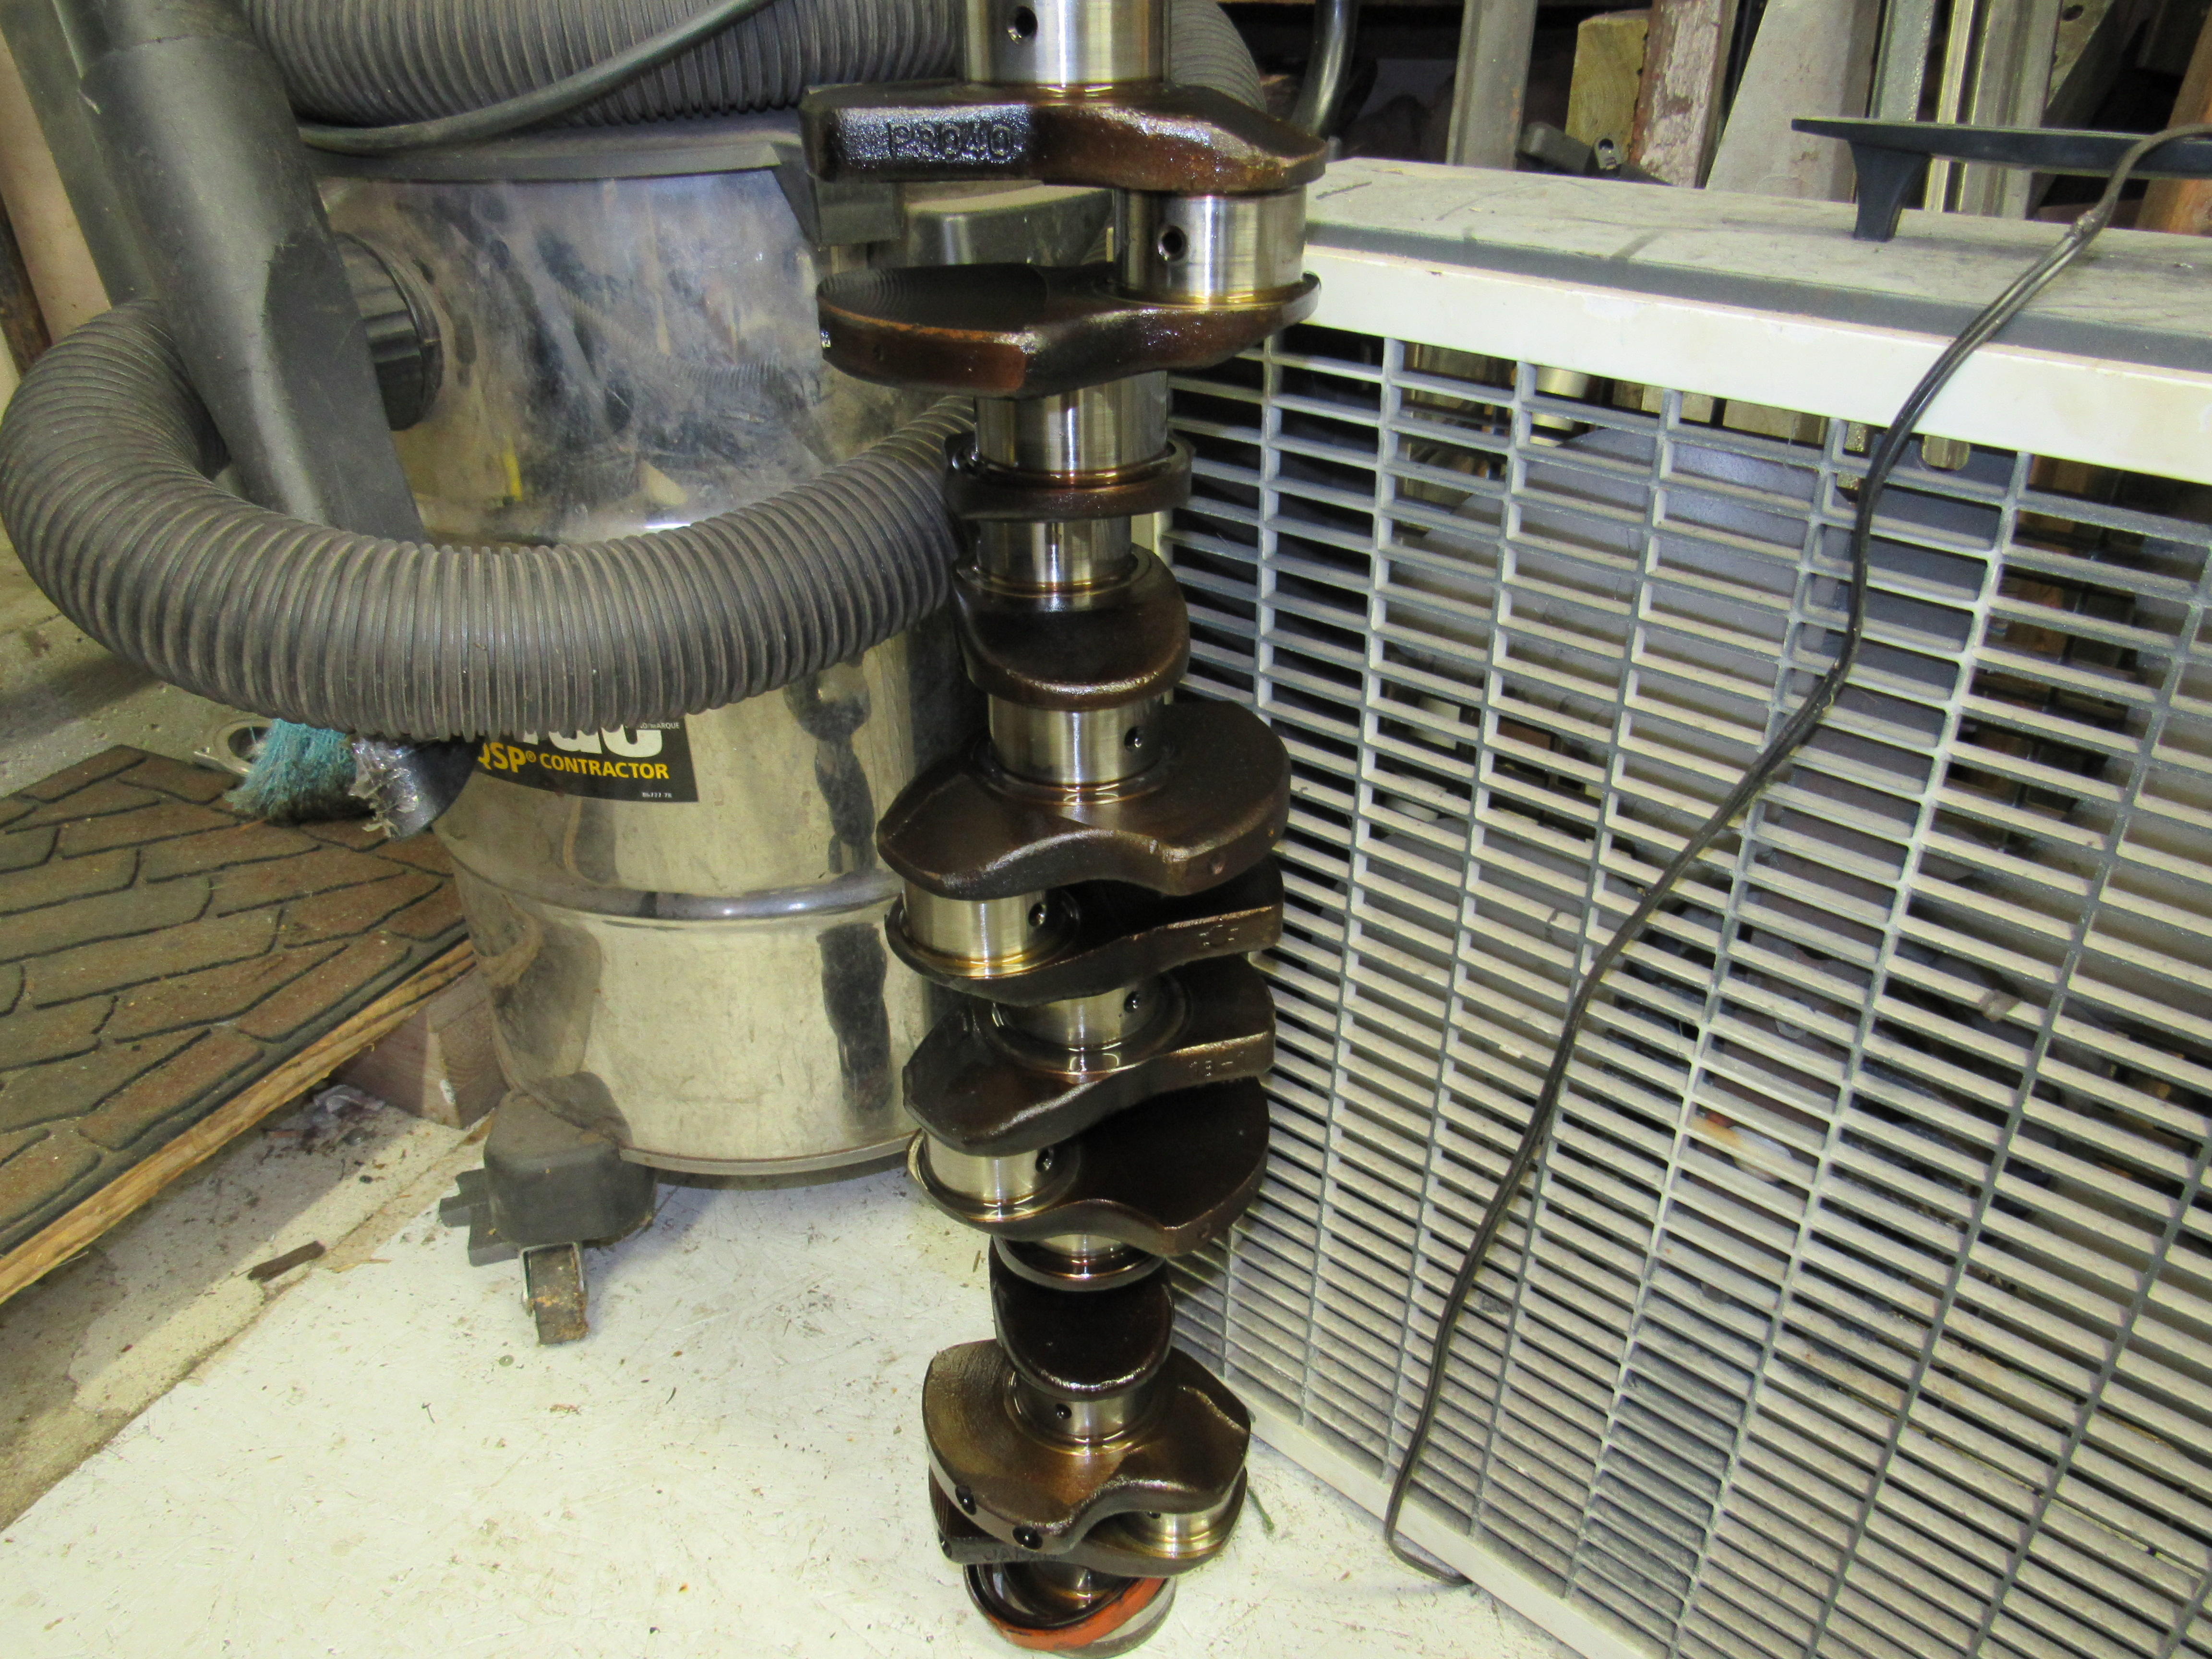
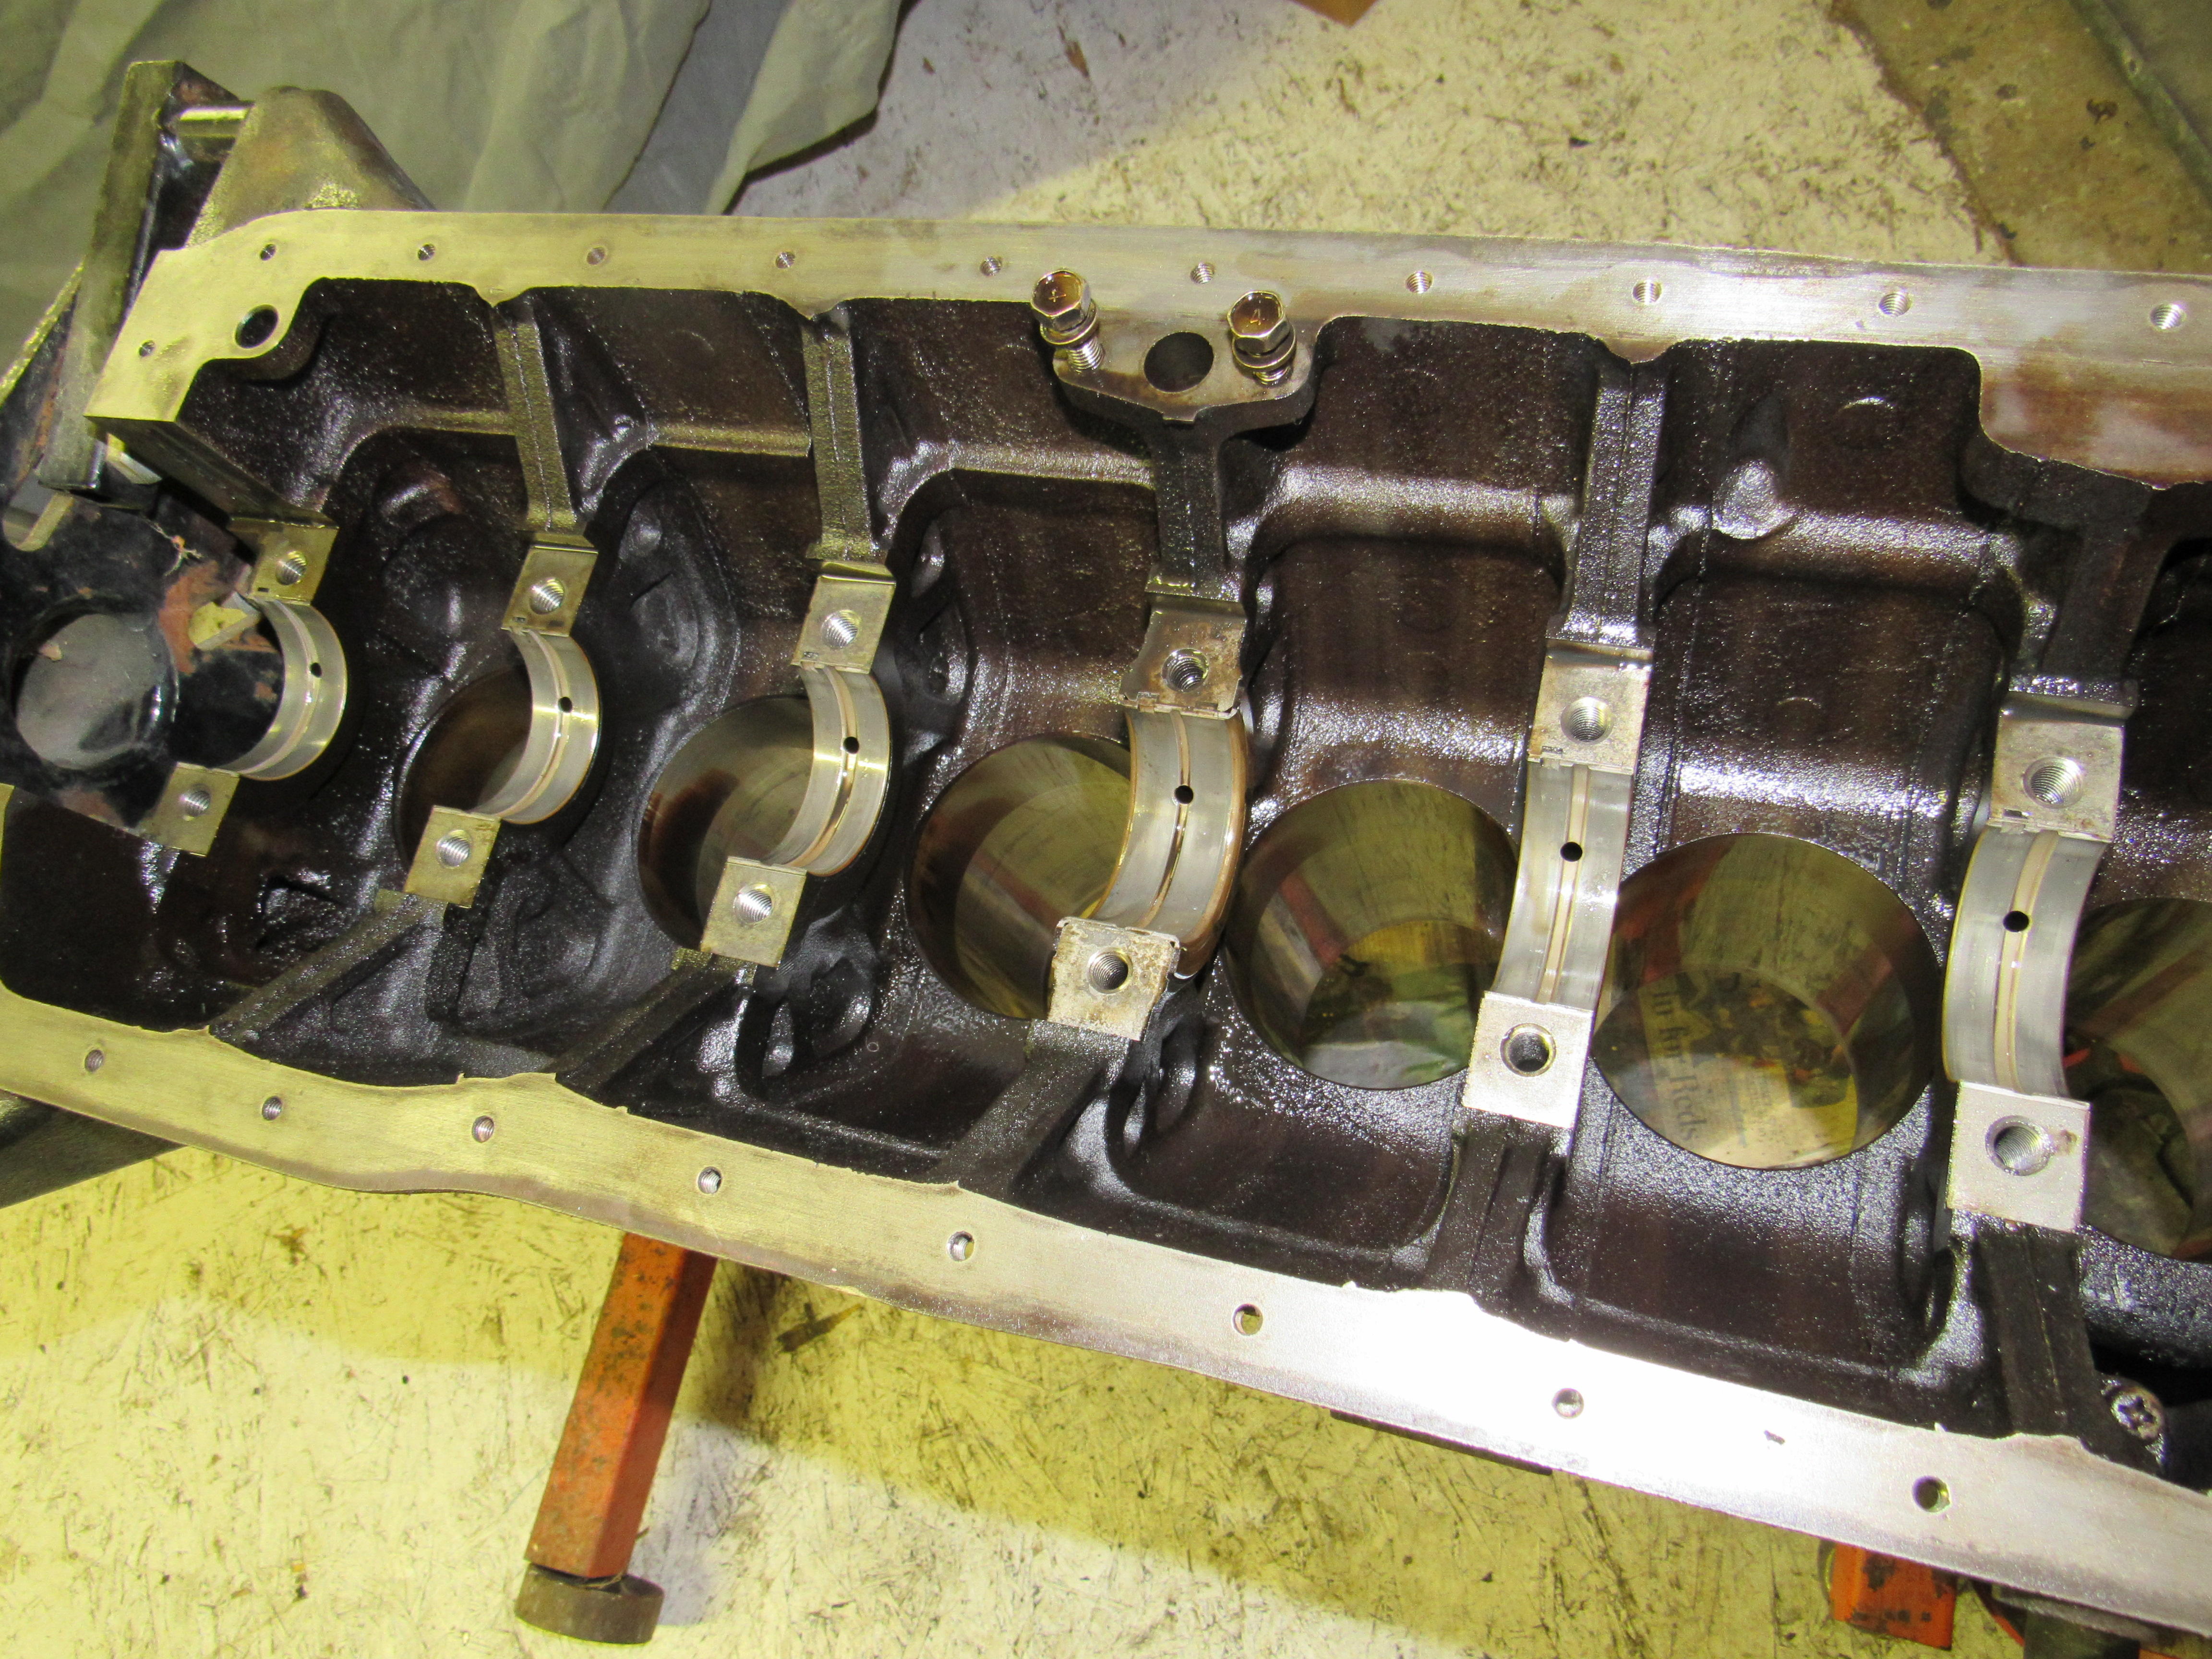
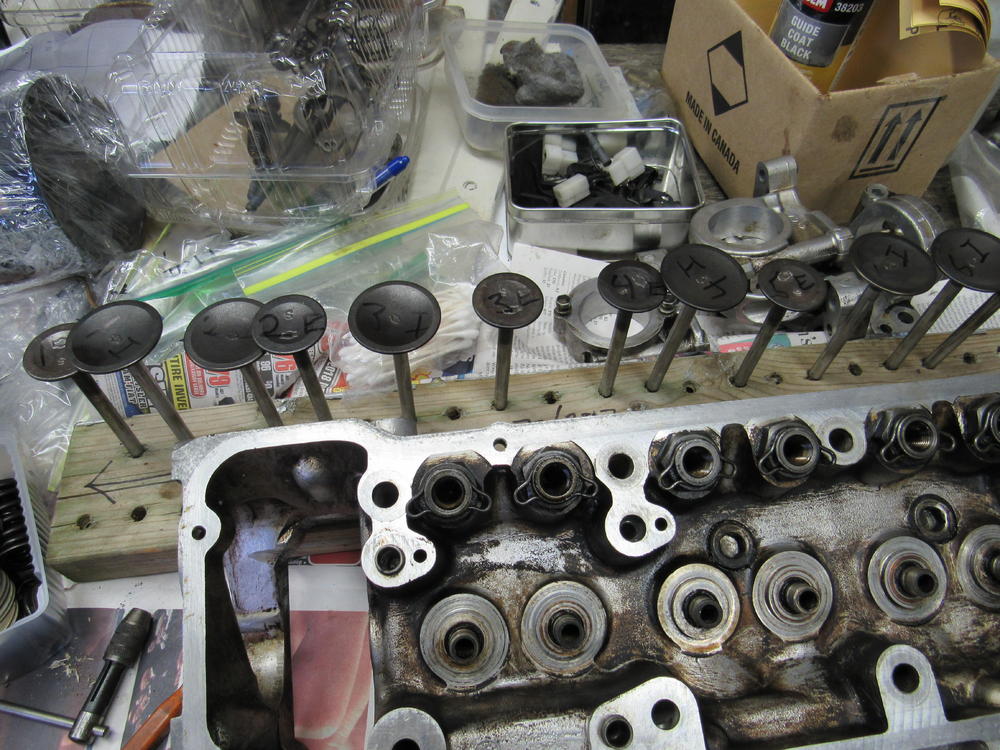
My set up is one I bought at a garage sale years ago, 3ft Acetylene tank, 3 1/2Ft Oxygen tank. Considering all I use it for is burning out rubber bushing and heating stubborn bolts they should last forever. Tore down the rest of the engine today, valve seats and guides are in good shape and so are the conrod and main bearings, only have to clean things up paint the block and reassemble


 1 point
 -
And more excellent work from Rod! Thanks again for the fuel line recommendation Rich! Per Rod, "That's good info on the fuel lines. That's why I haven't put any on yet. I couldn't find any fuel lines that would fit the clamps. So I'm ordering that tonight. Right now I'm cleaning out your engine bay while the engine is out. I'm going to change the steering rack bushings the steering coupler and the strut rod bushings. One of your strut rod bushings is missing." He informed me that the fuel lines arrived and will have it all assembled by this weekend. Sent from my [device_name] using http://Classic Zcar Club mobile


 1 point
 -
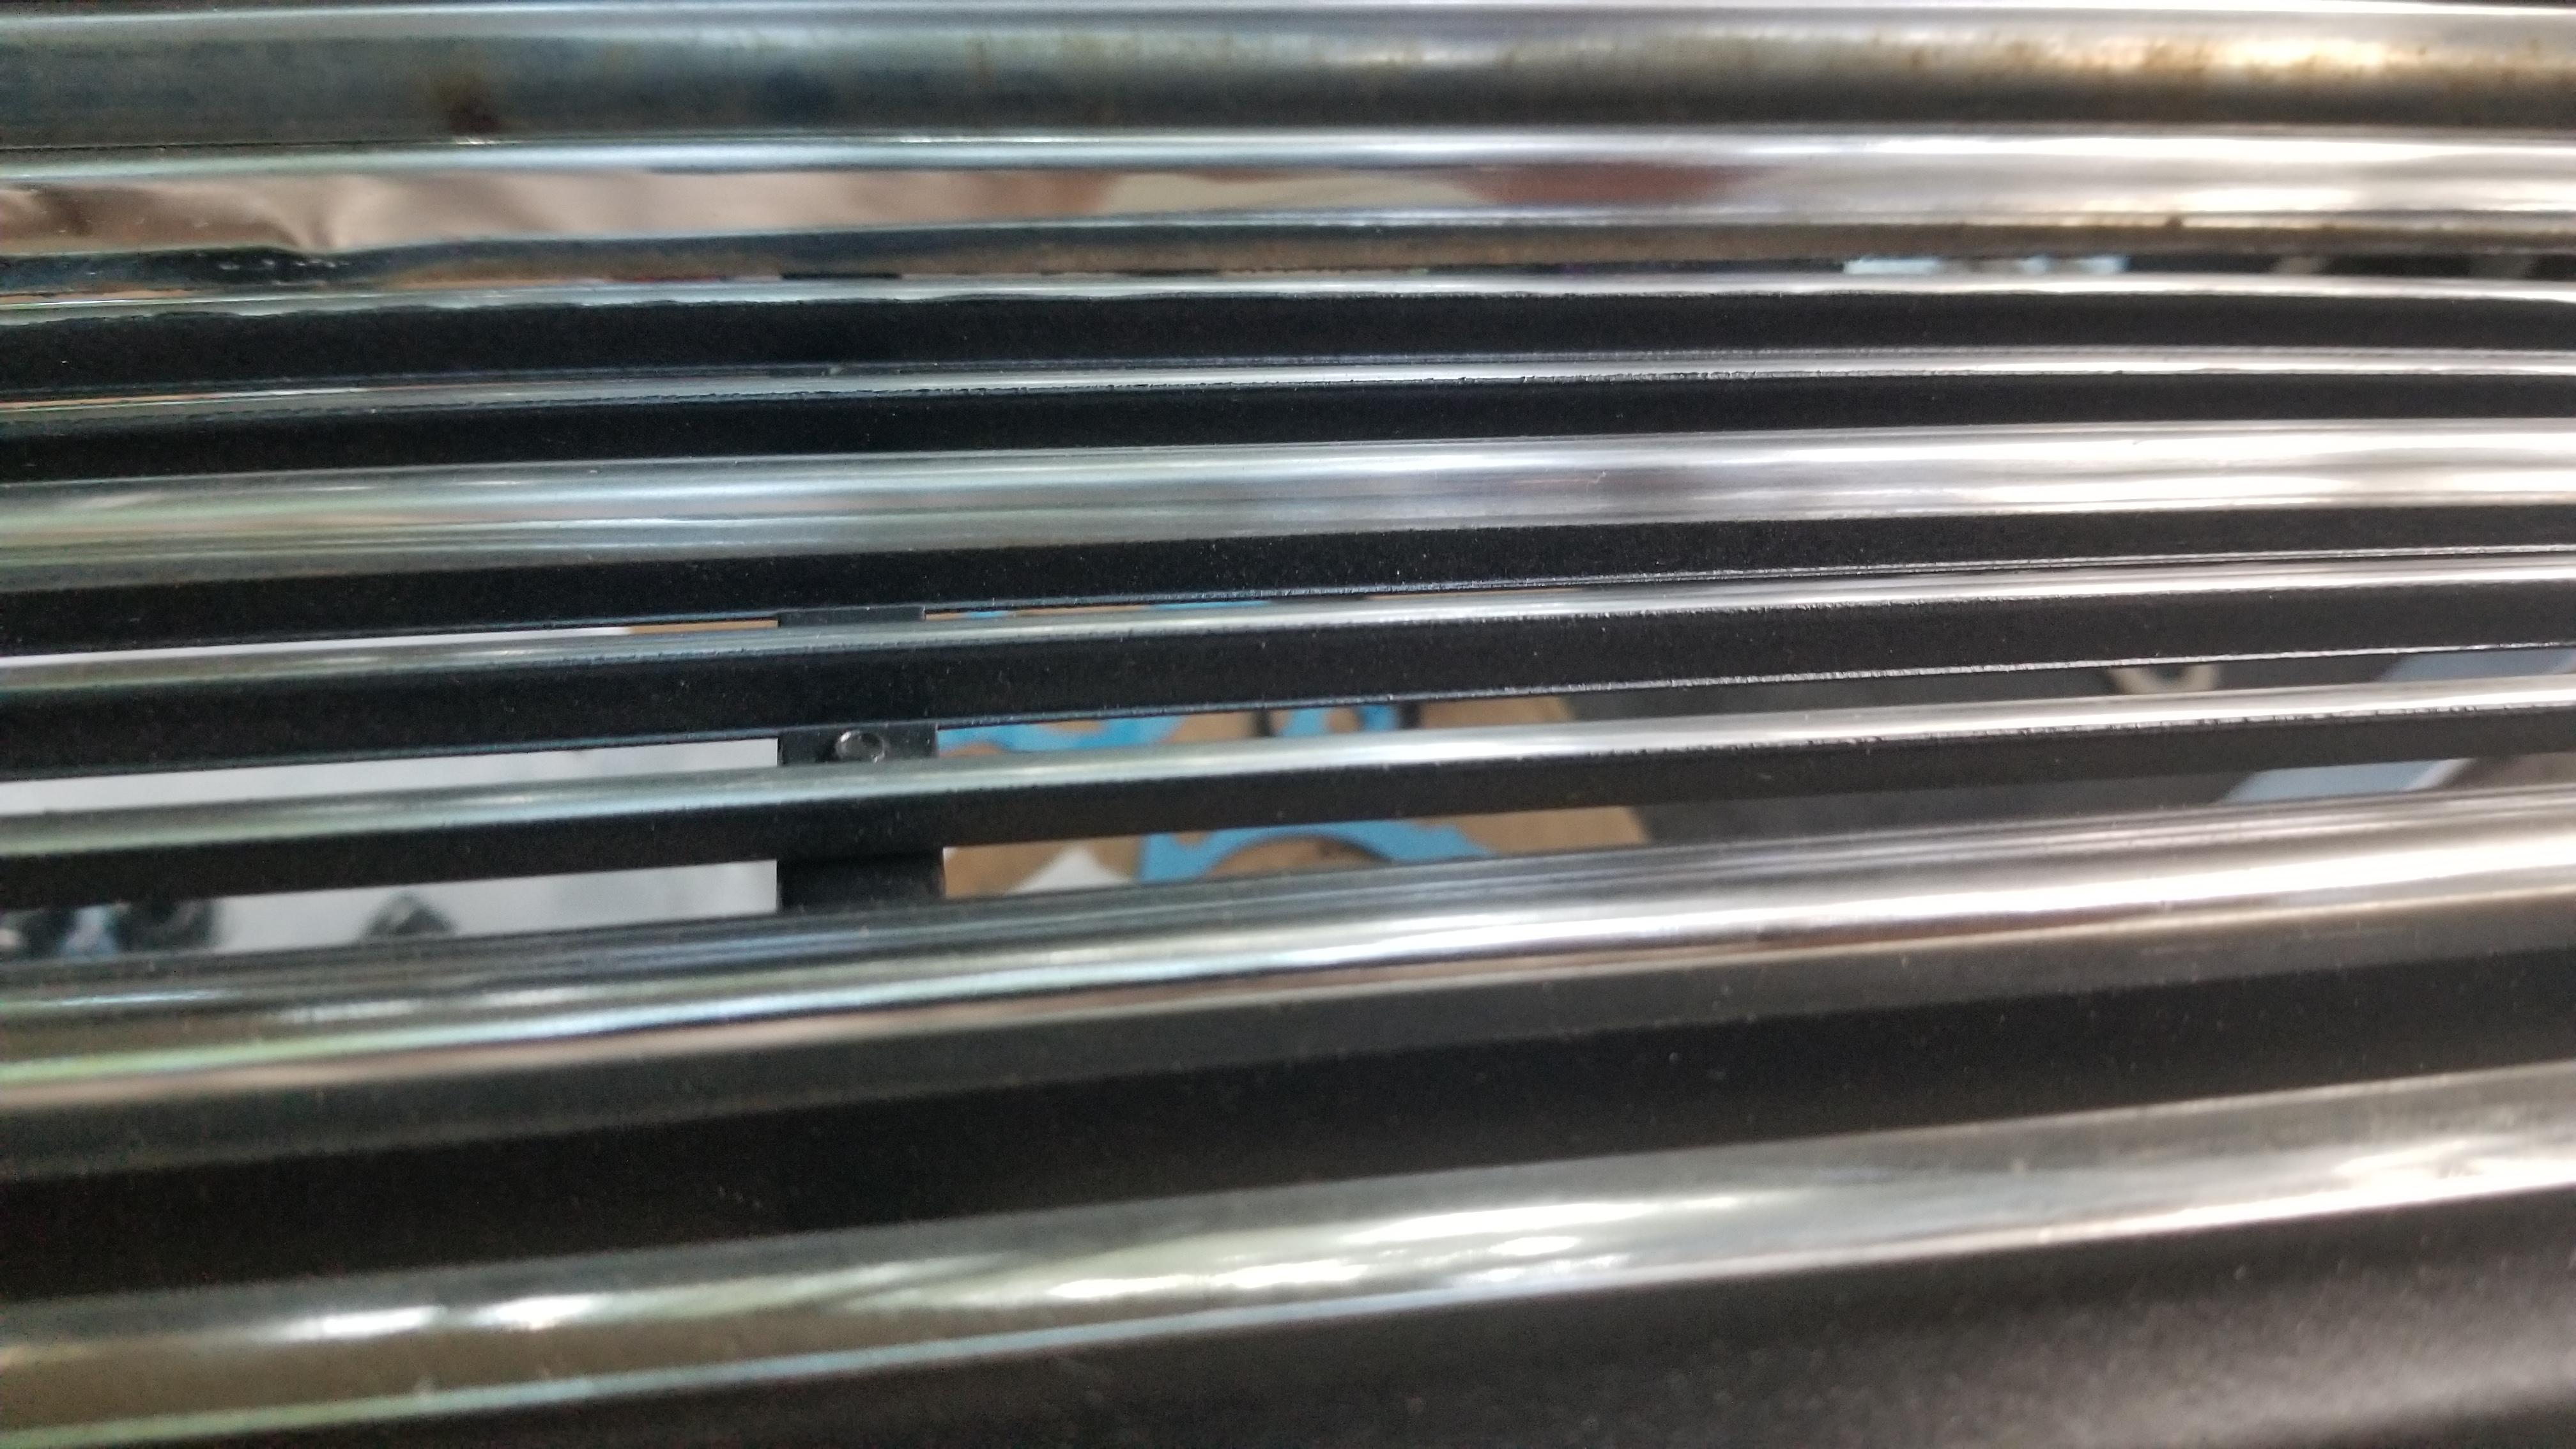
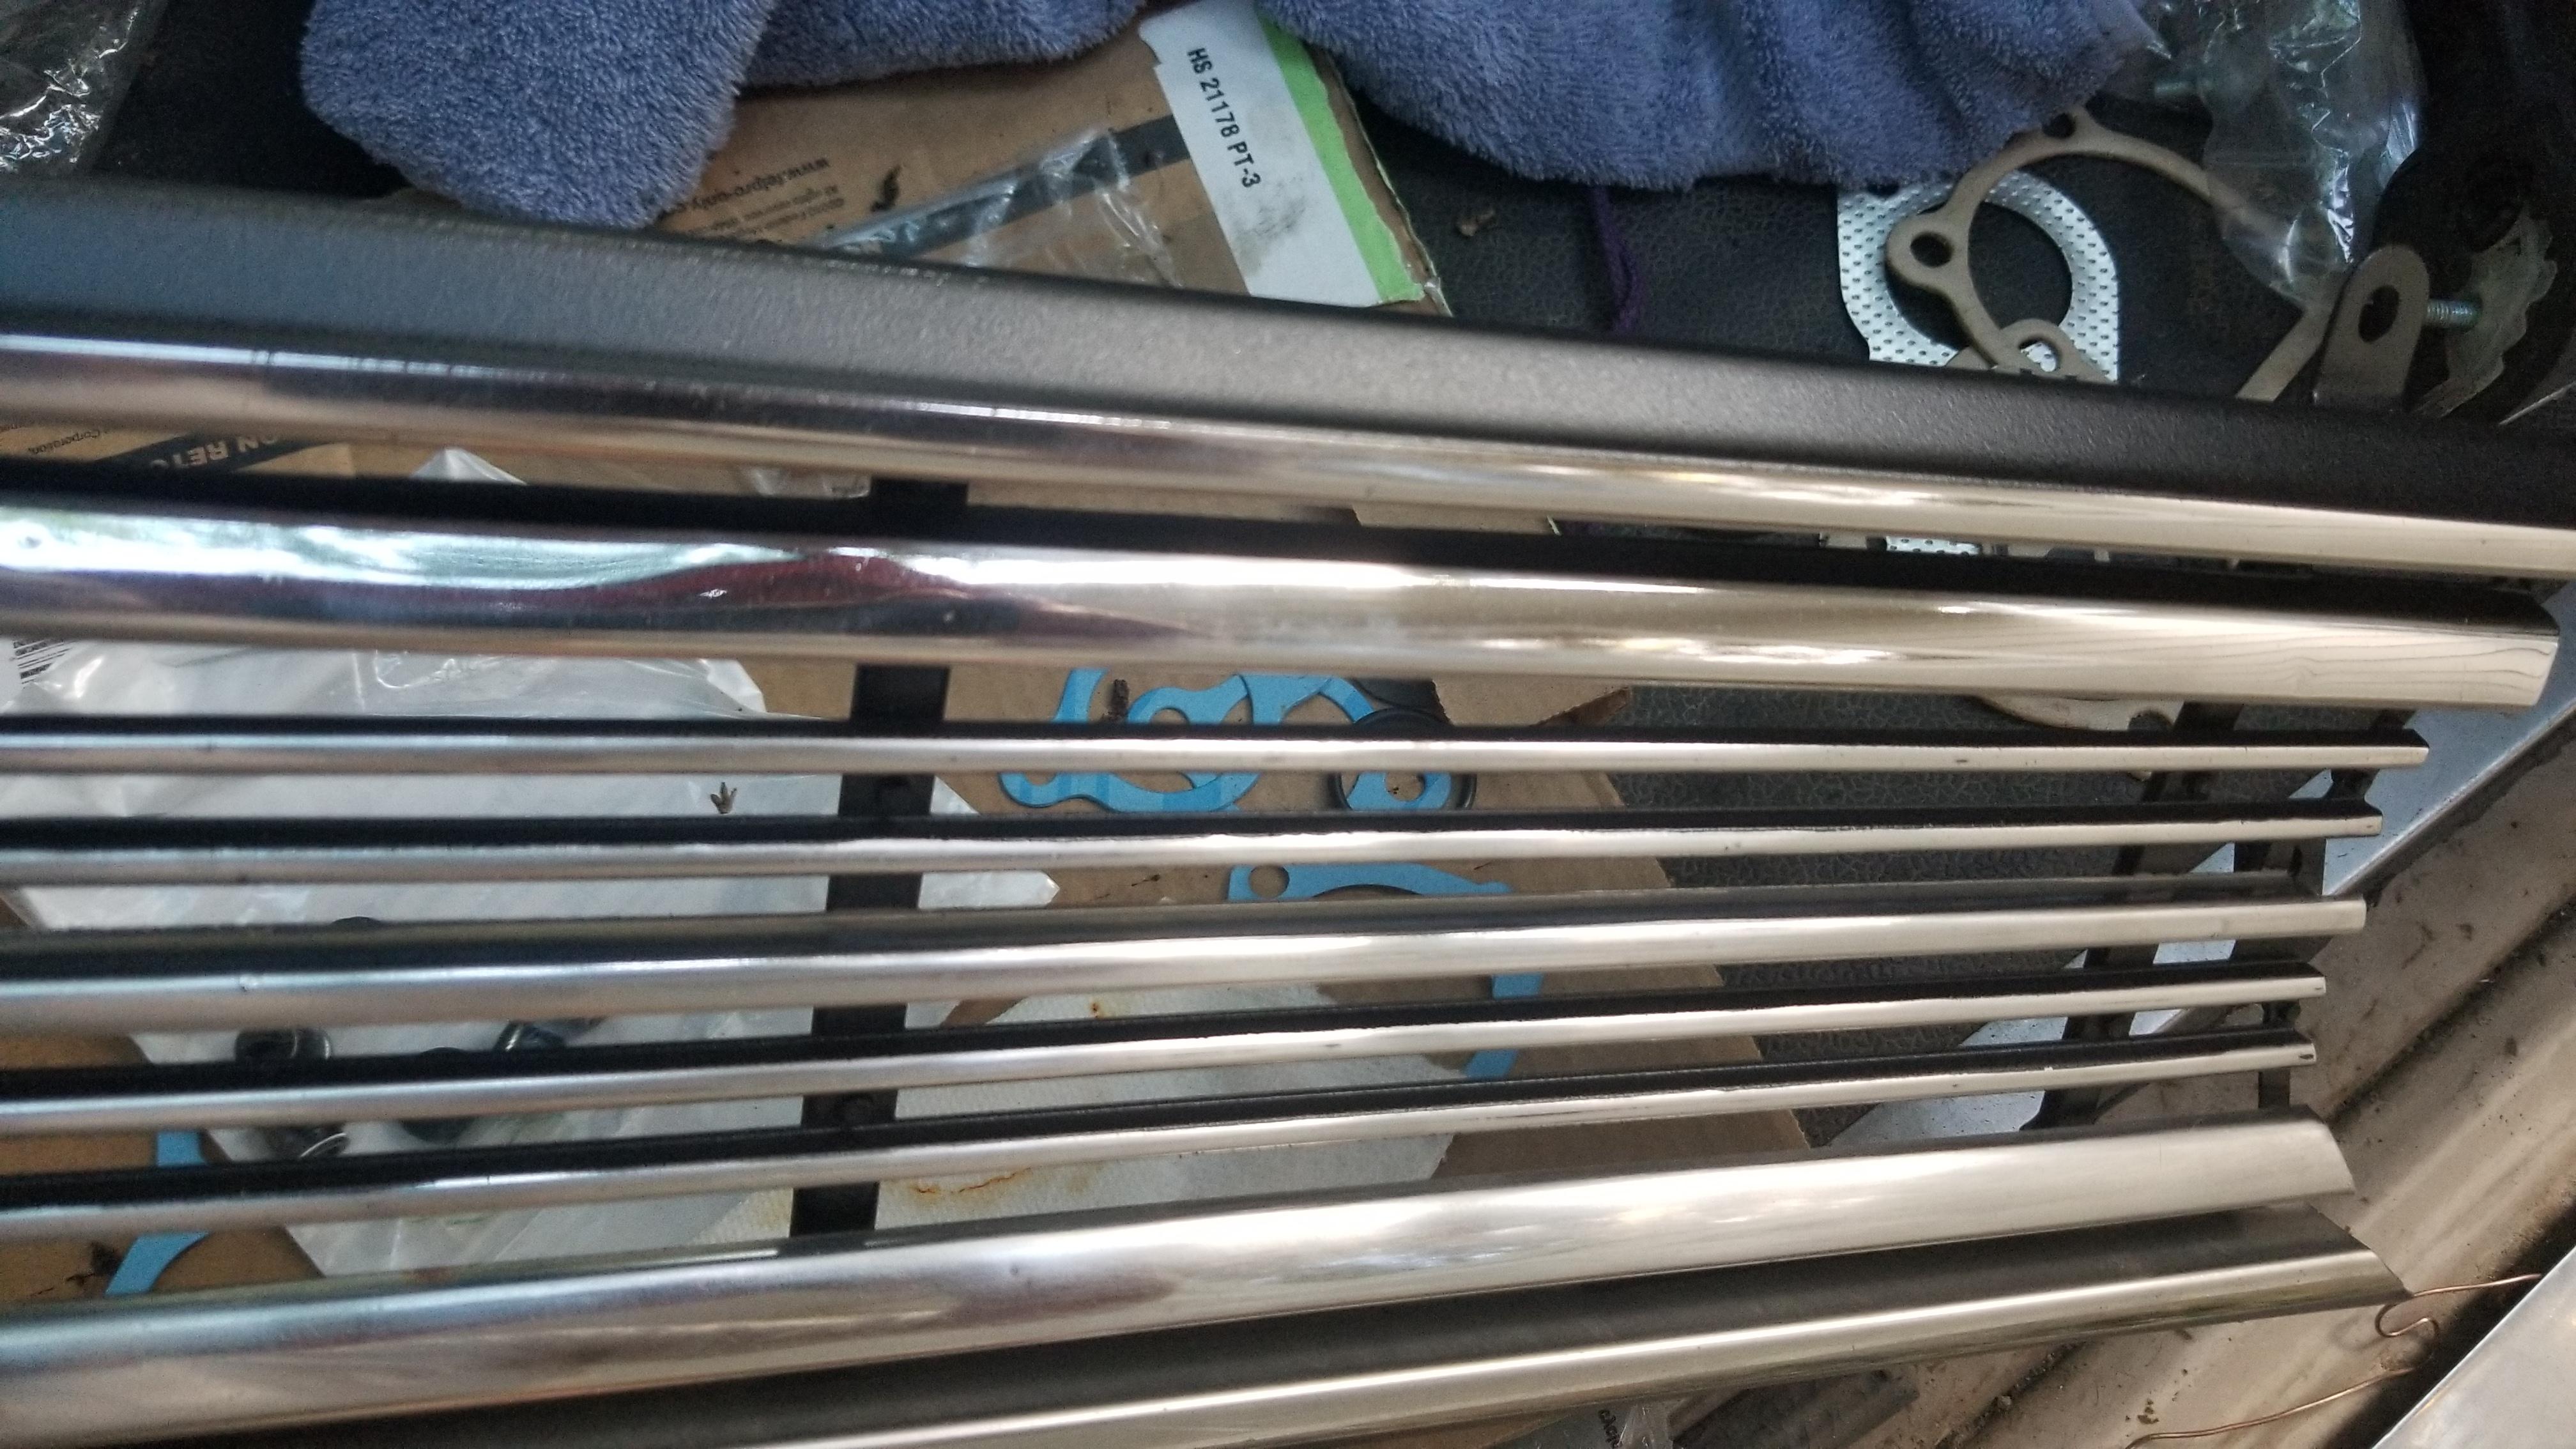
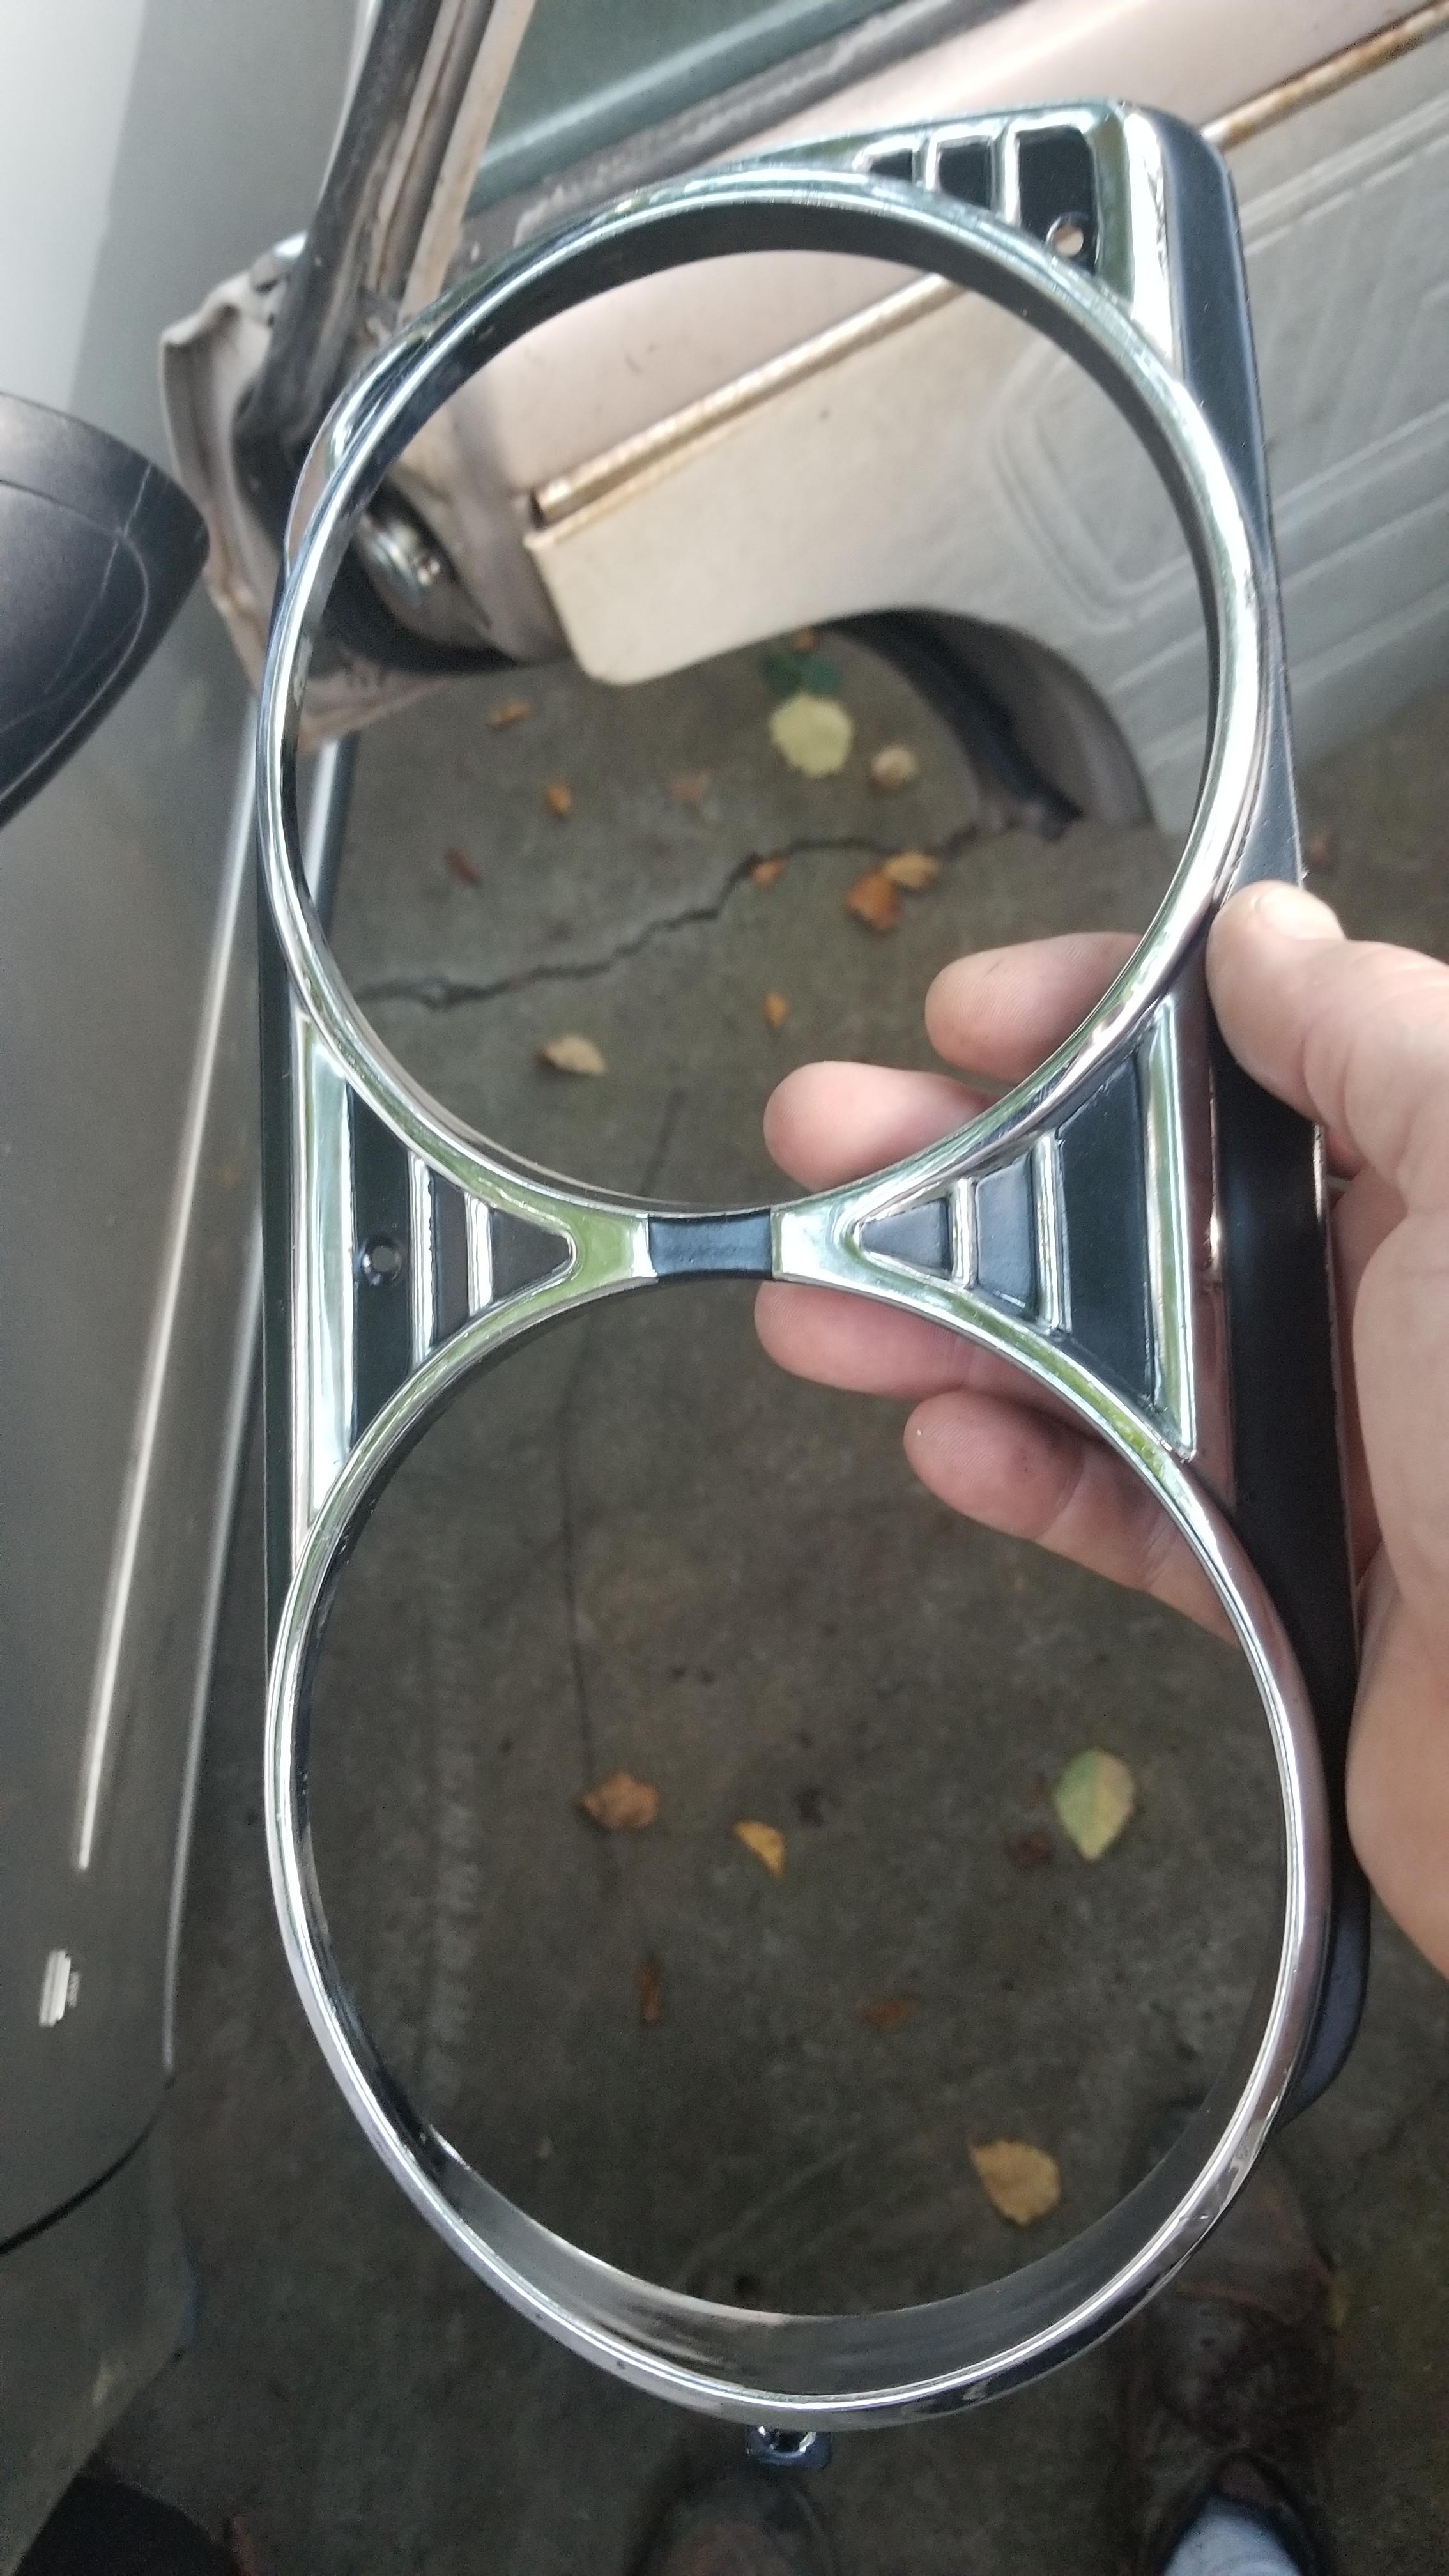
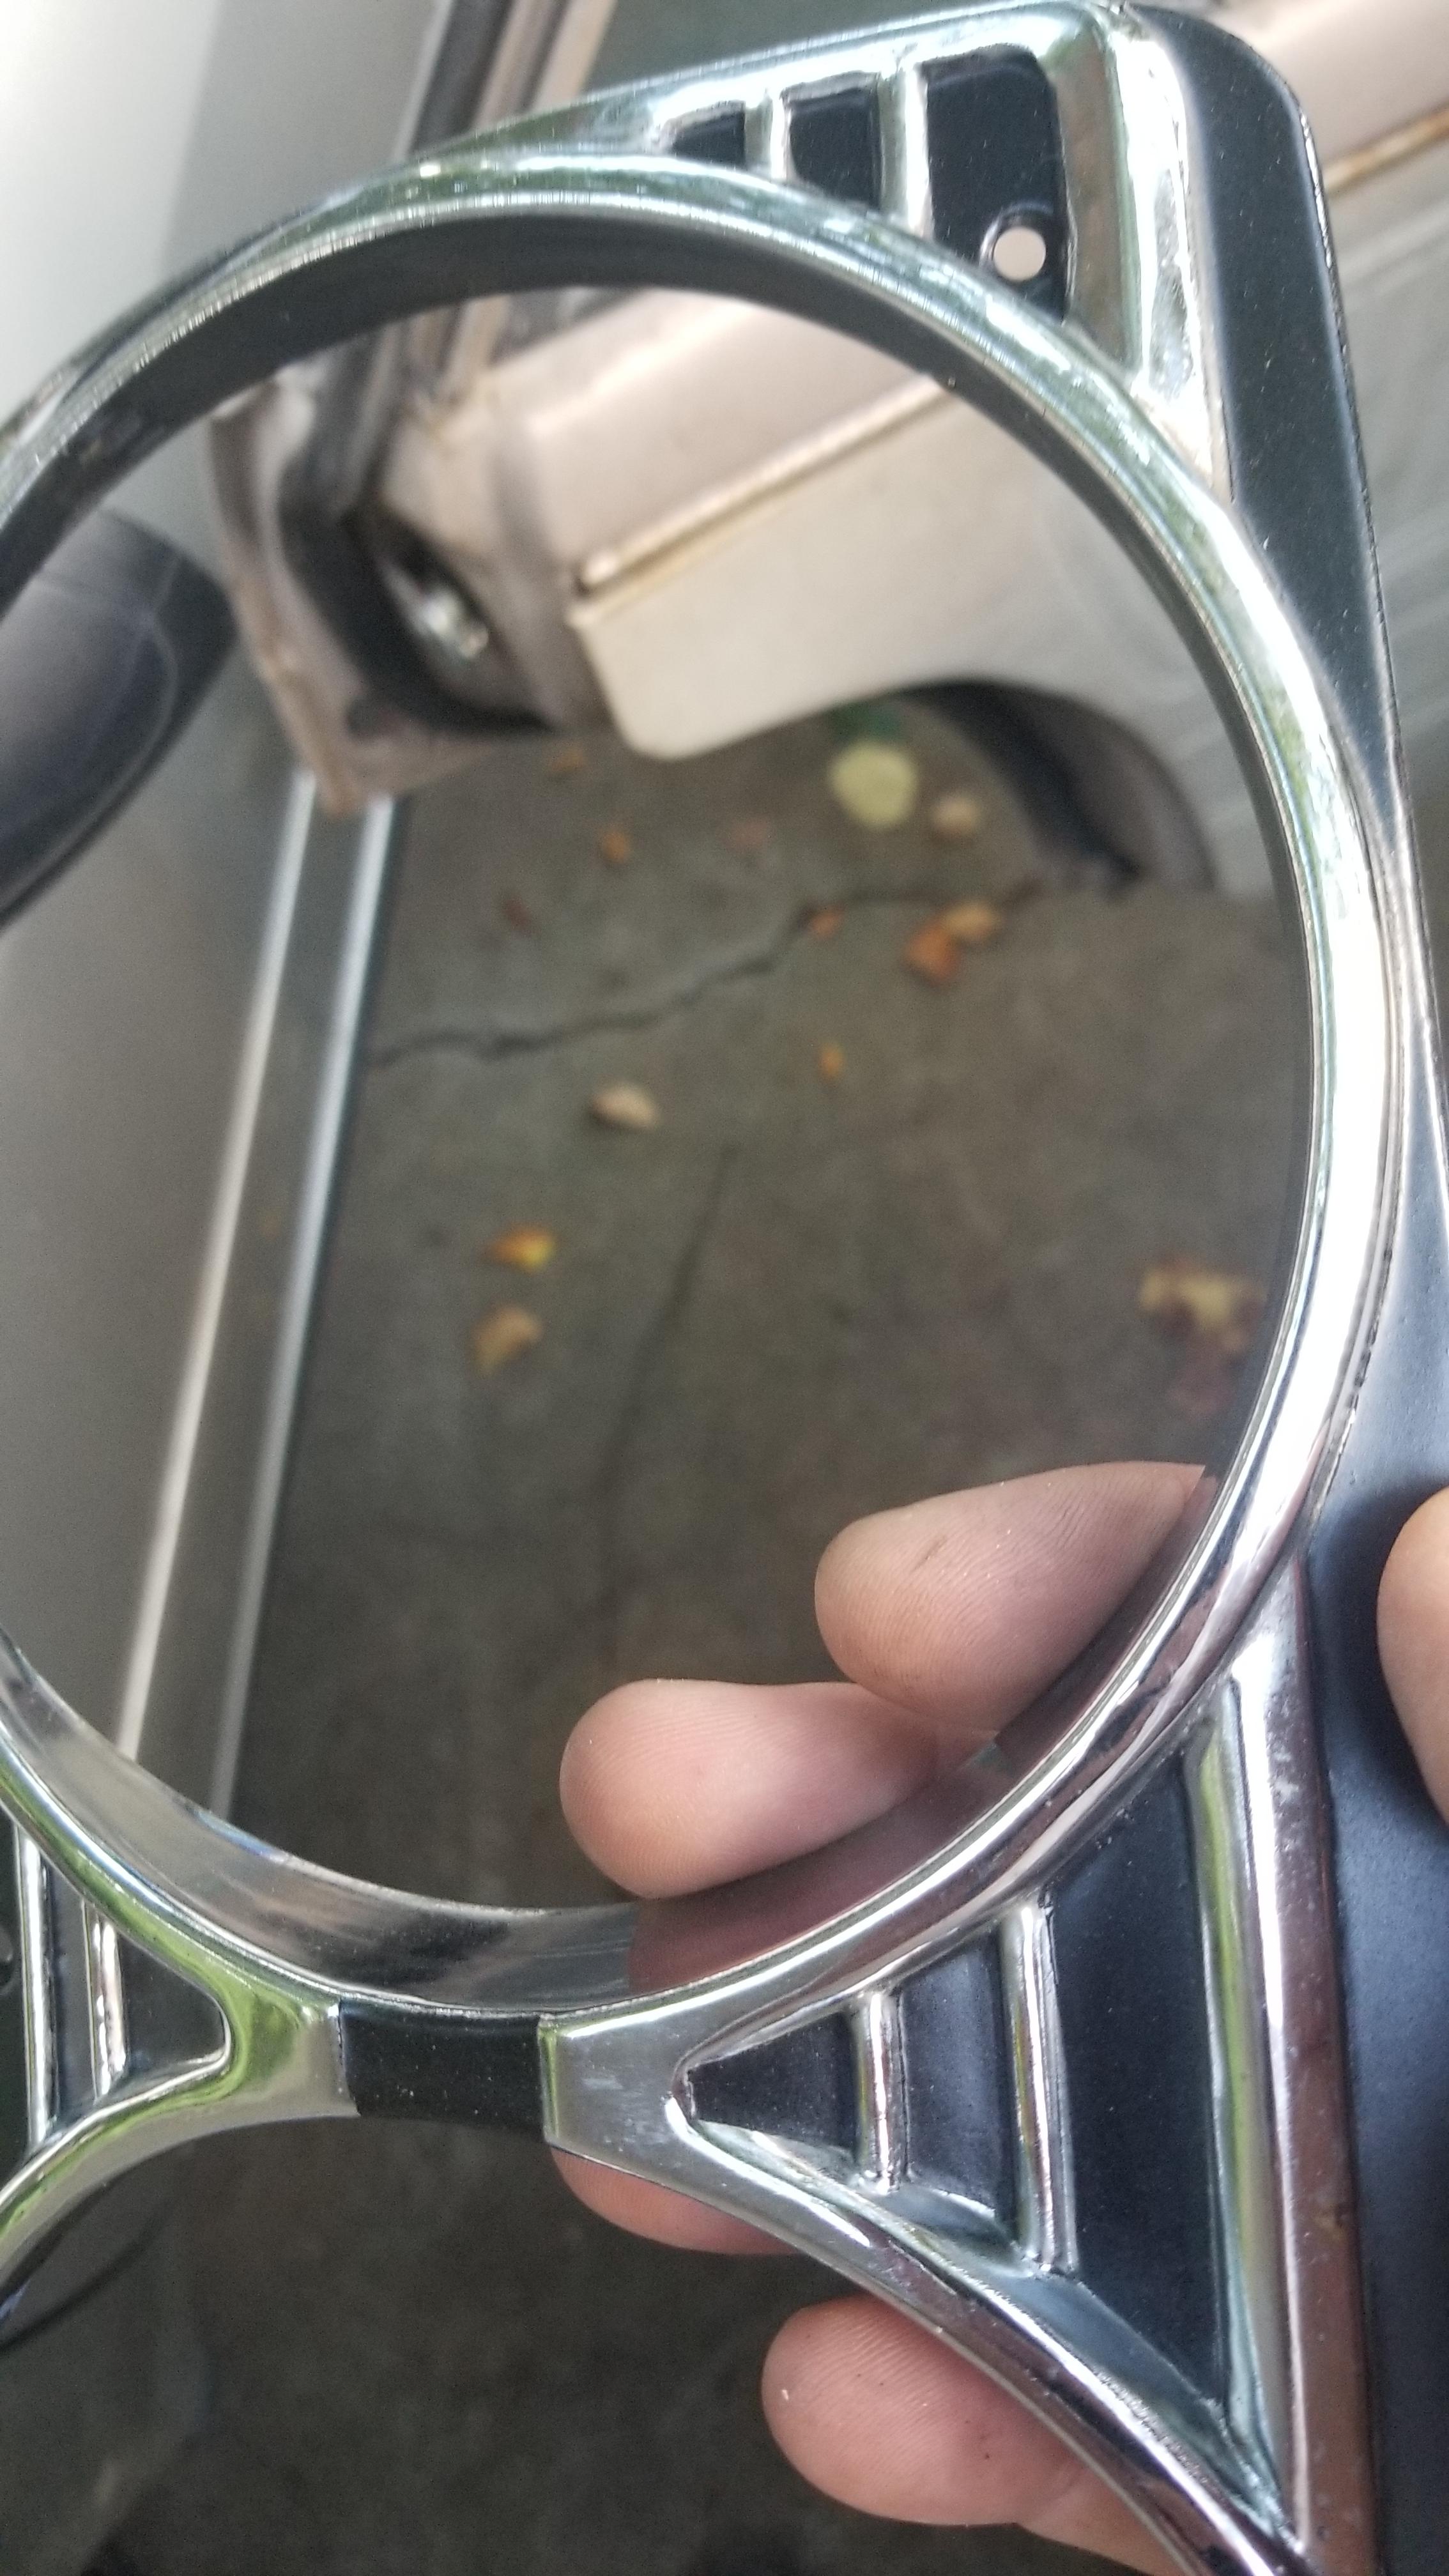
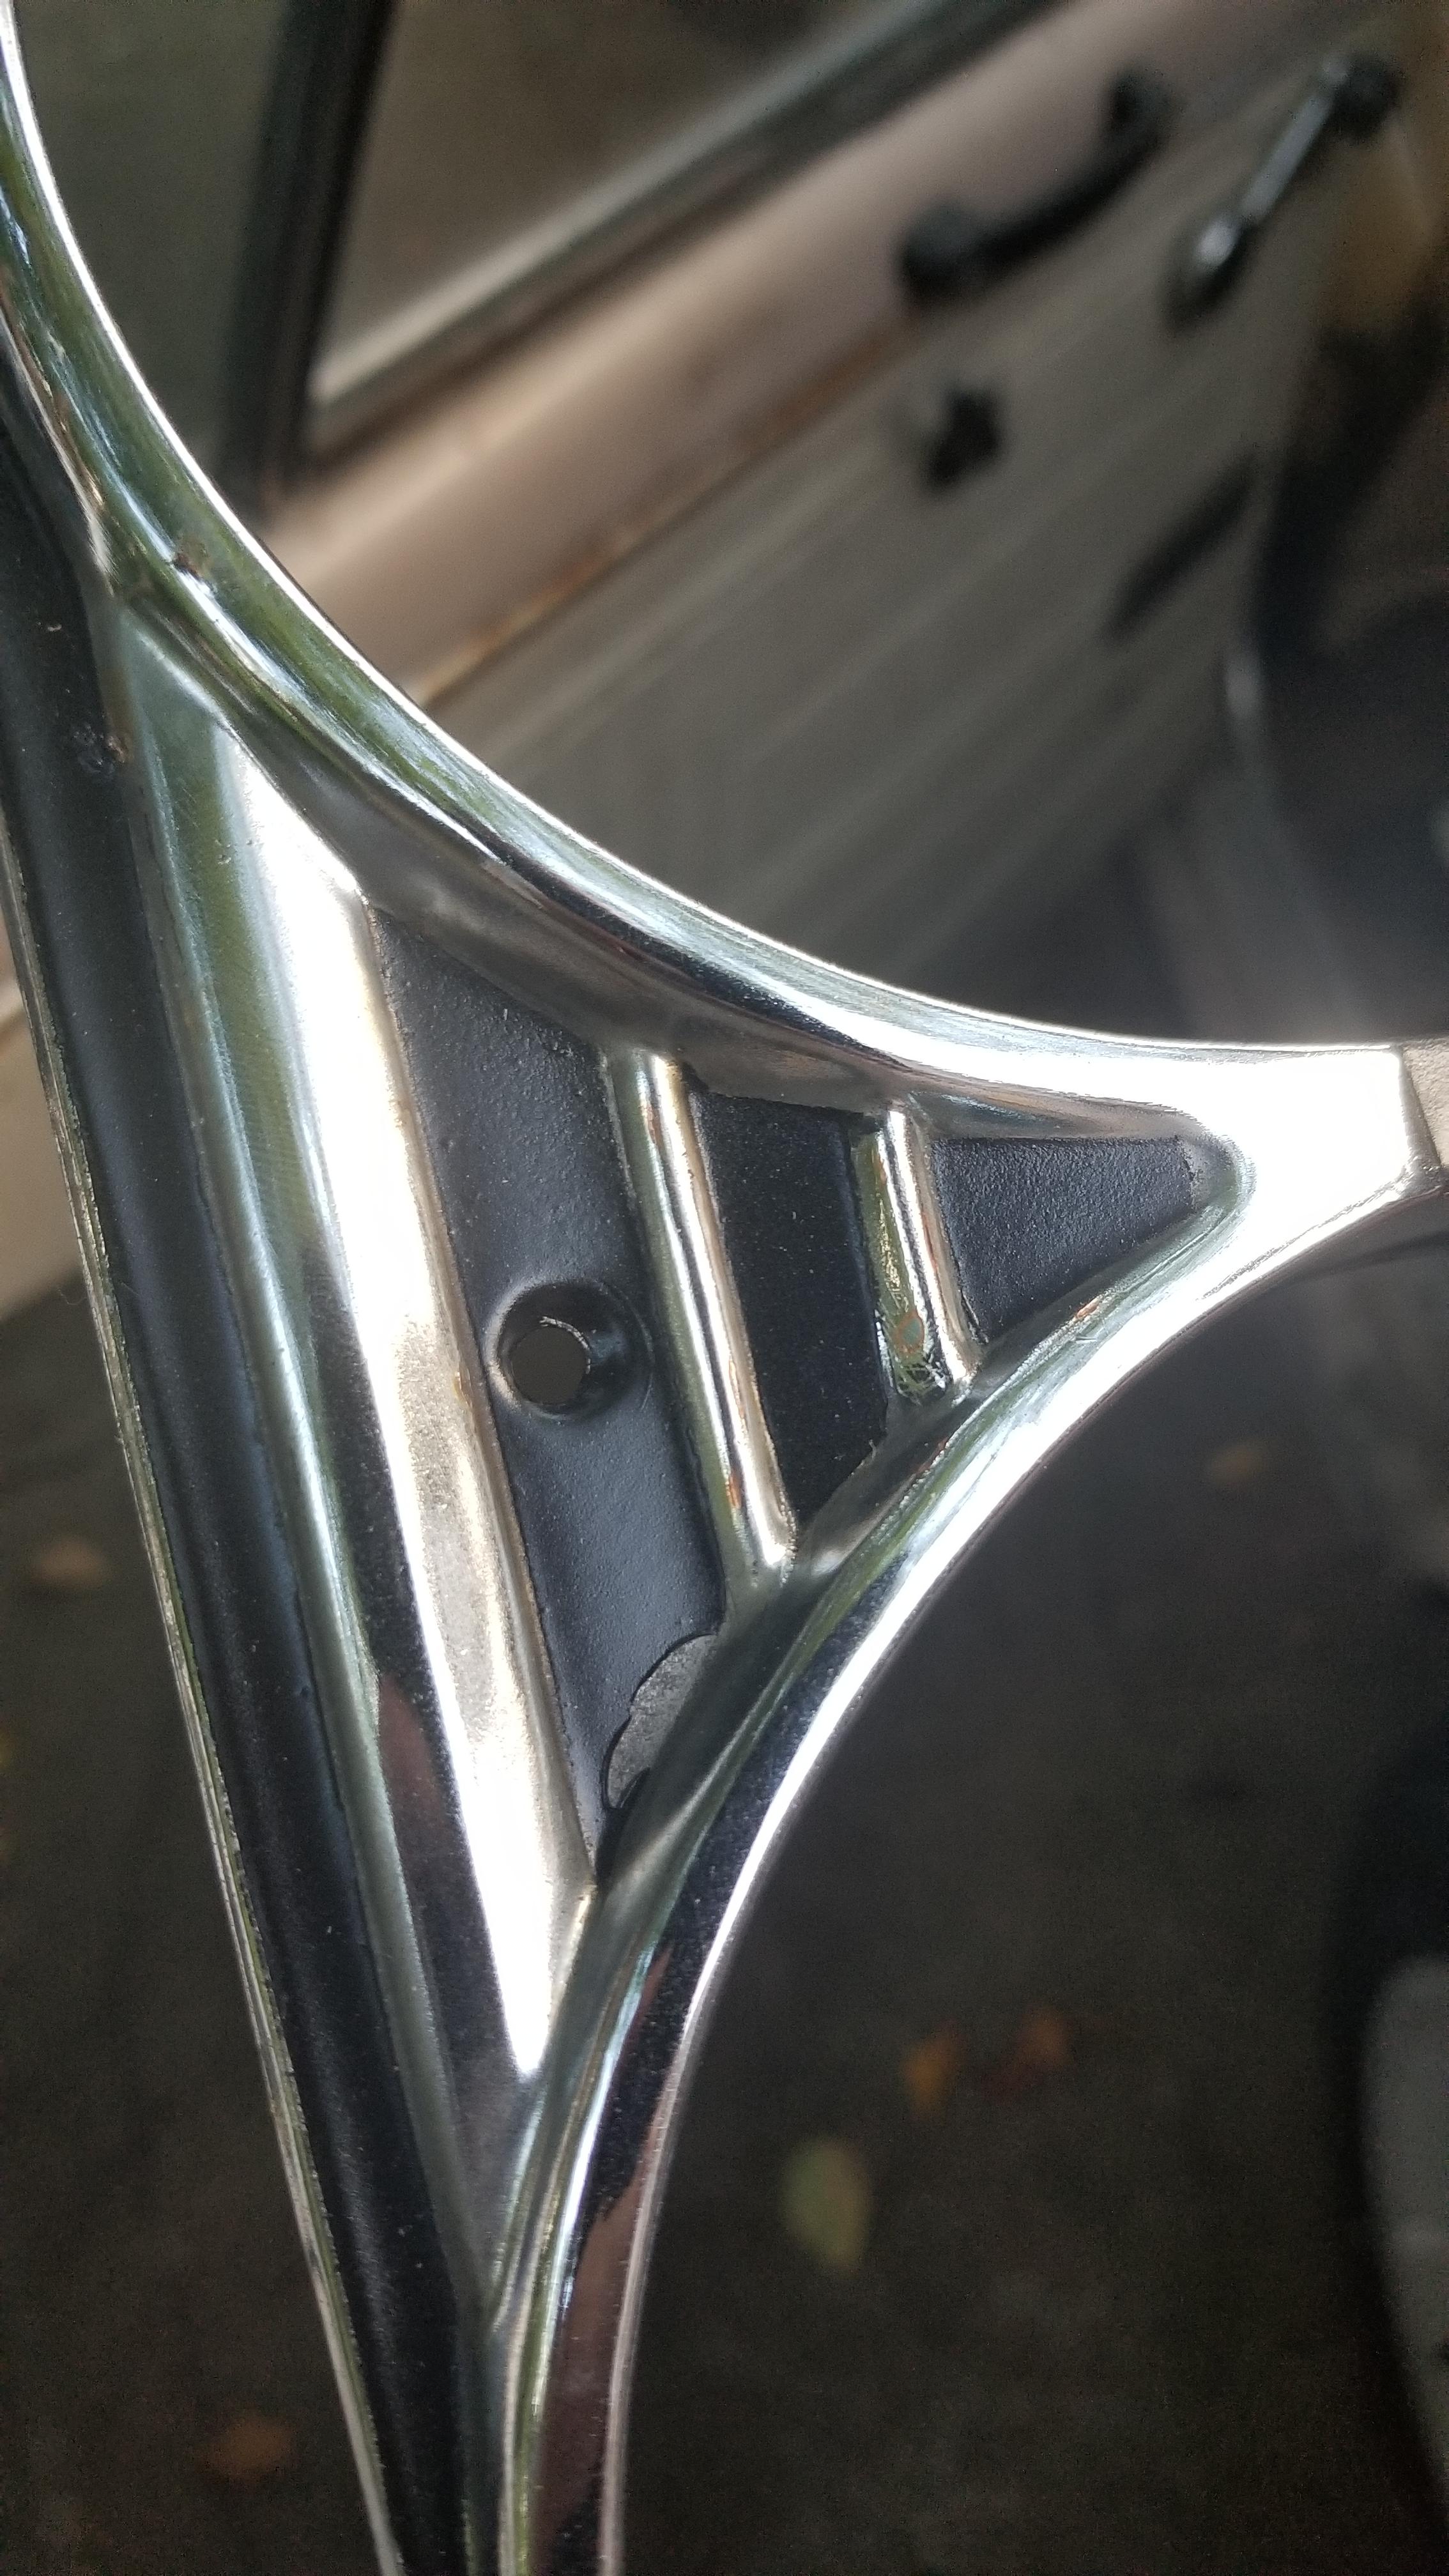
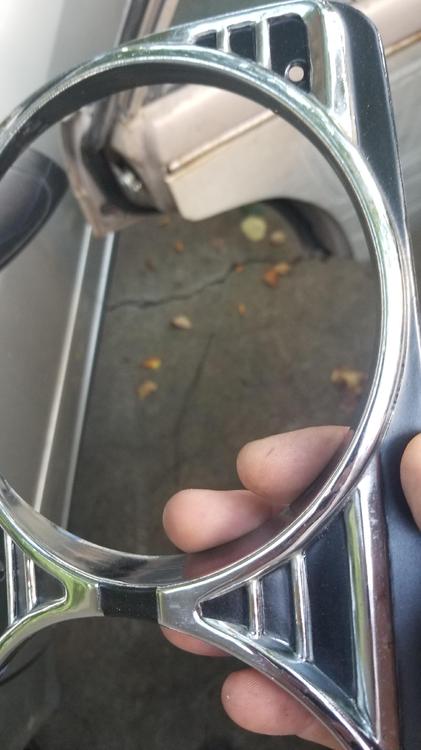
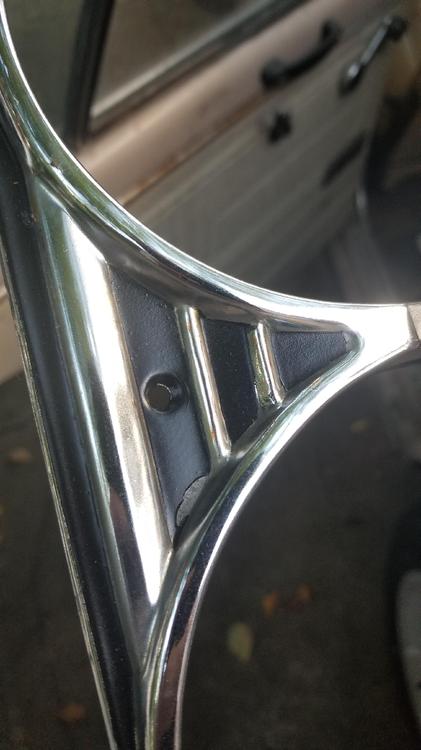
1 pointWell we got Cody's car running a few weekends ago. We got the timing cover off and redid all those seals and reset the plunger. It has fixed the water consumption issue. We also found he was losing the rear brake circuit due to leaks. So we rebuilt all of the rear brakes. New shoes, wheel cylinders and hardware. I had Cody do most of it. He did good with it! We also put some new tires on it to prevent scrubbing in the wheel wells. It's a lot better but the right side that got hit still scrubs a little bit. He is happy to have his car back. A while back I worked on the grill and headlight buckets. I had Cody buff all of them. You have to buff them on a lower speed if possible. They are easily damaged if the wheel takes them away from you. Then I taped them all up so I could spray the black. I used the Eastwood satin black 2K. It looks good. We'll see how it holds up. It had mixed reviews, but so far I have gotten good results with it. I should have taken some pictures of them all taped up. I always get going and forget to do it. Here are some finished pictures: I bought some 1/4" pin striping tape which helped a lot on taping off the fine lines This last one peeled a little when the tape was removed. I think it did that because we didn't get all the buffing compound off before spraying them. Next on the list are some suspension repairs. the front struts seem shot, sway bar links are shot and the sway bar bushings will get redone too


 1 point