Leaderboard
-

Diseazd
Free Member3Points3,362Posts -
cbuczesk
Free Member3Points1,024Posts -
JDMjunkies.ch
Free Member3Points637Posts -

wheee!
Free Member3Points4,607Posts


Popular Content
Showing content with the highest reputation on 12/21/2017 in Posts
-
2 points
-
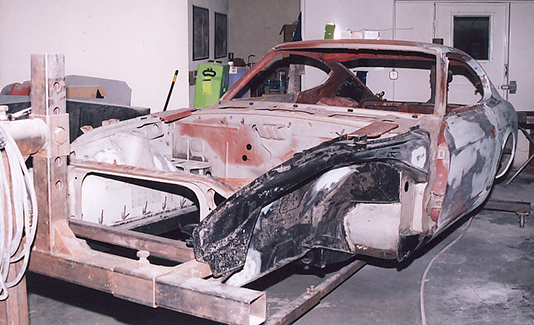
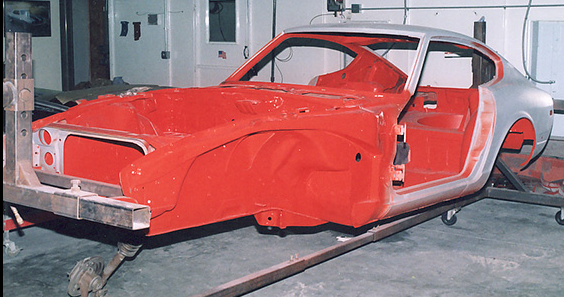
2 pointsYou can do all kinds of swaps.....been there done that. You’ll need a good frame shop ( and $$$$$$) to make sure everything lines up.


 2 points
 -
2 pointsSquirrel!.... Finished the gas tank so went into the shop to play with the custom valve cover. Here’s the lineage and finished product....2 points
-
Today i was finally able to complete a little project on which i've been working over the past few weeks. I completely reworked the Inspection Lamp. Remember a few weeks ago when i posted this pic? This is how it all started. Rusty, Painted over a few times, and in bad shape. didn't even work: Of course started to disassembly everything first Then had the housing tubmlered to remove old paint, dirt and rust (picture has other parts included as well, which don't belong to the inspection lamp): And got it zinc-replated and yellow passivated to get back the origina look. Then started to source the missing parts. Even if i'm in the business i failed to find an original green twin-wire with the original thickness. but since the original wire was still in good shape i decided to just clean and keep it. The bulb was a bit of a headscratcher too. but after i figured out the Keyword was "BA9s" (9mm bajonett-socket with single base connector) it was easy to find a fitting bulb, 12V, 8W as the manual states. Nowadays you even could replace it with a lot of less-power consuming LED bulbs, but i decided to keep it oldschool in this case The switch was the most tricky part. the original was toasted (see left). It could be saved and restored but then you still have a completely brittly 40 year old piece of plastic in an outdated electronic design, so i decided to replace it with a newer style switch. The first generation of inspection lamps had a metal switch too, so it's not a completey wrong look. The switch needs a 12mm thread, but must be small enough to fit inside the housing (most 12mm threaded switches are too big) and it should have the little notch in the thread to secure it properly in correct position. After trying various options i figoured out this one would fit perfectly (Available at farnell) http://www.atakel.com/urun/apem-5000-series-miniature-toggle-switches/EN/ While the original one is an ON-OFF switch, this one is an ON-ON switch, but if you remove one of the outer pins you have an ON-OFF function again: First the little nipple has to minimized by 0.5mm or so to fit the slightly smaller notch in the new switch: Then prepared all the cables. Cleaned them first with a rough side of a dish cleaning sponge, cut off the ends, removed insulation ca 1mm at each end with a special tool and then pre-soldered the ends to make it easier to solder it later. It probably helps if you have a full high-end soldering workstation like i have at my office and 20+ years of daily soldering routine skills All parts ready? Here we go. The fun part begins - assembly (got a new replica lens and rubber insulator from ebay, plus additionally a piece of black heat-shrinking tube and some red electronic wrapping tape). First i installed a new rubber insulator grommet on the bottom of the back housing. the original one was falling apart by just looking at it. New ones can be found easy in any electronis speciality shop. The removed the old wire-end from the connecting plate and cleaned it. resoldered the new wire-end to it and cleaned it with flux remover (removes flux from the soldering, which may decrease the electric connectivity! see bottle in the back) Soldered the other wire back to the hook and attached some black heat-shrinking tube like it was in the factory setup: Next was soldering the wires to the switch and protect the solderings with some black heat-shrinking tube: Also added the red electrical tape as it was in my factory setup (it goes inside where the clamp is to protect wires): Soldered the wire back to the little Clamp And installed the clamp back to the bottom and secured the cables inside with it. Done Apply 12V DC to it (ground to the housing, plus to the red wire, switch on - YAY! assembled it to gether and still everything works as it should: So here's the result. Quite the difference when compared to the first pictures, which was the same item! Spent quite a few hours sourcing parts and getting everything cleaned and so on, but honestly it was totally worth the work2 points
-
If it were mine, i'd be cleaning & brightening up that important ground on the intake manifold. In the pix, looks like it has not been touched.1 point
-
This guy can fix it. He's a member on here too. @Zs-ondabrain https://www.datsun-240z-upgrades.net/ Click on "services"1 point
-
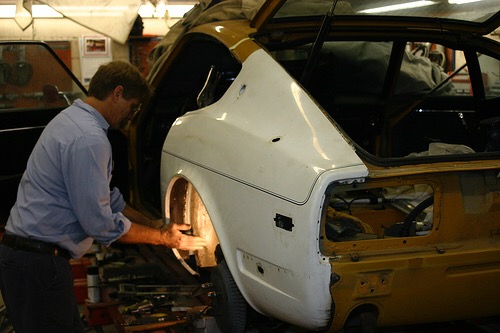
1 pointYou can see the difference in how the bumpers mount. Red is a 72 and green is a 74. There's a gusset on the inner fender by the radiator support on the green 74. The green car is a 72 with a 74 nose spliced in at the front of the shock towers. Chuck Sent from my [device_name] using http://Classic Zcar Club mobile1 point
-
The 5th picture down is the infield at RA at the bottom of turn 5. I was there with my first '73Z a couple of times. Marty1 point
-
1 pointThe lower inner fender is rusted away on the left side. Even with new frame rails you'd still have to make that area. If it were my 240Z I'd fix the rust or replace the nose with another 70-72 240Z nose rather than use a later nose. If I remember and have time tonight I'll get some pictures of the early and late inner fenders so you can see the differences. Chuck1 point
-
1 pointMy other 1972 240Z race car has a new nose on it. I think it's from a 260Z. The issues I think you'll have are with the front bumper mounts and radiator. You might have to drill a few holes to mount some things but nothing major. There might be some mounts that you'll want to remove from the new nose. If you're that concerned about keeping things correct and original then you should get the same year donor nose. Being a 2+2 should make no difference up front. Chuck1 point
-
1 point
-
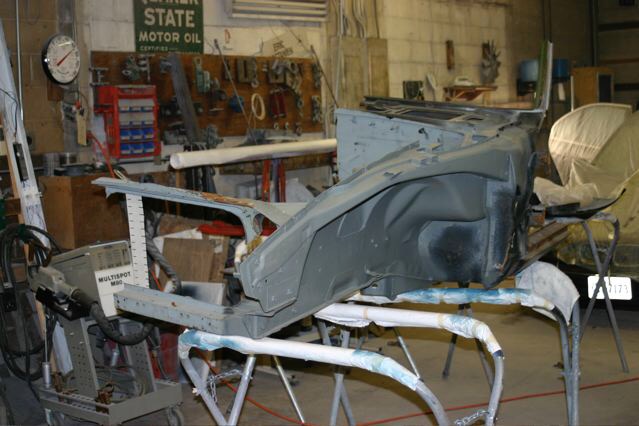
1 pointYou do have to very careful to graft the clip on in the right place. A frame rack would be best, like shown in Diseazed's pictures. Also there is a pdf somewhere that has all the frame dimensions so you can verify rail locations. There is a plan view and a side view. You can probably find it with Google images1 point
-
1 pointYou are the man! Went back down there and took the nozzle out and piston slides as it should. 19mm wrench to loose the nozzle holder. Put a philips down in the piston to hold it to the bottom. Thread the mixture nut all the way up. Center everything up and tighten the nozzle holder lock nut. Works like champ now!!! Got a beer waiting on you in Atlanta!!! You are correct and the links are great! I already put some possibilities in my watch list. May actually go with the TR6 choke cable because it's reasonably priced. As a side note where exactly is the choke cable supposed to mount?1 point
-
Nice work. Of all the parts that I tried to re-plate using my D-I-Y plating set-up, this one was the most problematic (many heavily 'shaded' areas, along with a difficult-to-plate interior surface. Your results illustrate one the important superiorities of commercial plating.1 point
-
1 point.... and finally sealed. Will let the sealant cure for a few days and then start work on the outside of the tank!1 point
-
1 point
-
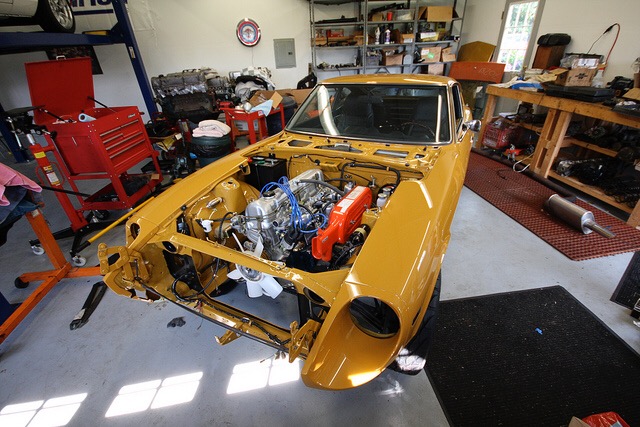
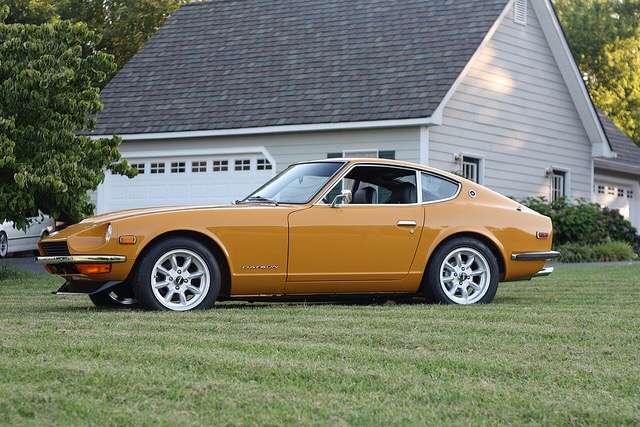
1 pointhttp://datsunspirit.com/project-pumpkin-patch/ I think I get a little excited when I think about this new technology. This Z is basically a restomod already. Camber plates, coil overs, Wilwoods front and rear. I’ve got another 72 (orange) that remains fairly stock.....I think I’m going FI ITB's and I can’t wait!
 1 point
 -
So yesterday i got the box with parts back from the plating company. Everything got cleaned, zinc plated and yellow passivated. The colour is slightly different then last time (more redish). Probably due to the changed regulations for the mix of chemicals used for this procedure. Still quite happy with the result. Took me a while to sort through all the parts, but mostly figoured it out by now Started with the re-assembly of some parts. From this... To this (Hose brackets) From this... To this (hood closing mechanism..) This (the other part of the hood closing mechanism... (x2) And then finally got all the parts ready to re-assemble the shifter with the new bushings and some bushing grease. Before... After. And because fun, i decided to test-fit the Kameari Z-Shift knob as well. Thiss will be a perfect match once it's in the car Still have some parts to sort through and a lot to assemble. but need some pre-work on some parts first...1 point
-
1 pointI know of a gentleman who has over 50 Zs just sitting outside rotting away. There are 3 large building stuffed with parts and a dozen or so running cars parked on asphalt. I asked if he had any ZX 5-spds - "nope". I counted 12 cars with them. How about gas tanks? "nope". There was a pile over 20 feet high behind one of the buildings. How about side marker lights? "nope". We were standing next to a 5-gal bucket filled with them. One of the cars was a ZXR. A small tree was growing out of the hatch. No doubt all of this treasure will be lost to the Z community.1 point