Leaderboard
-
motorman7
 Subscriber
 2Points2,226Posts
 -

Zed Head
Free Member2Points19,228Posts -
gwri8
Free Member1Points1,385Posts -

heyitsrama
Free Member1Points1,185Posts


Popular Content
Showing content with the highest reputation on 05/30/2016 in all areas
-
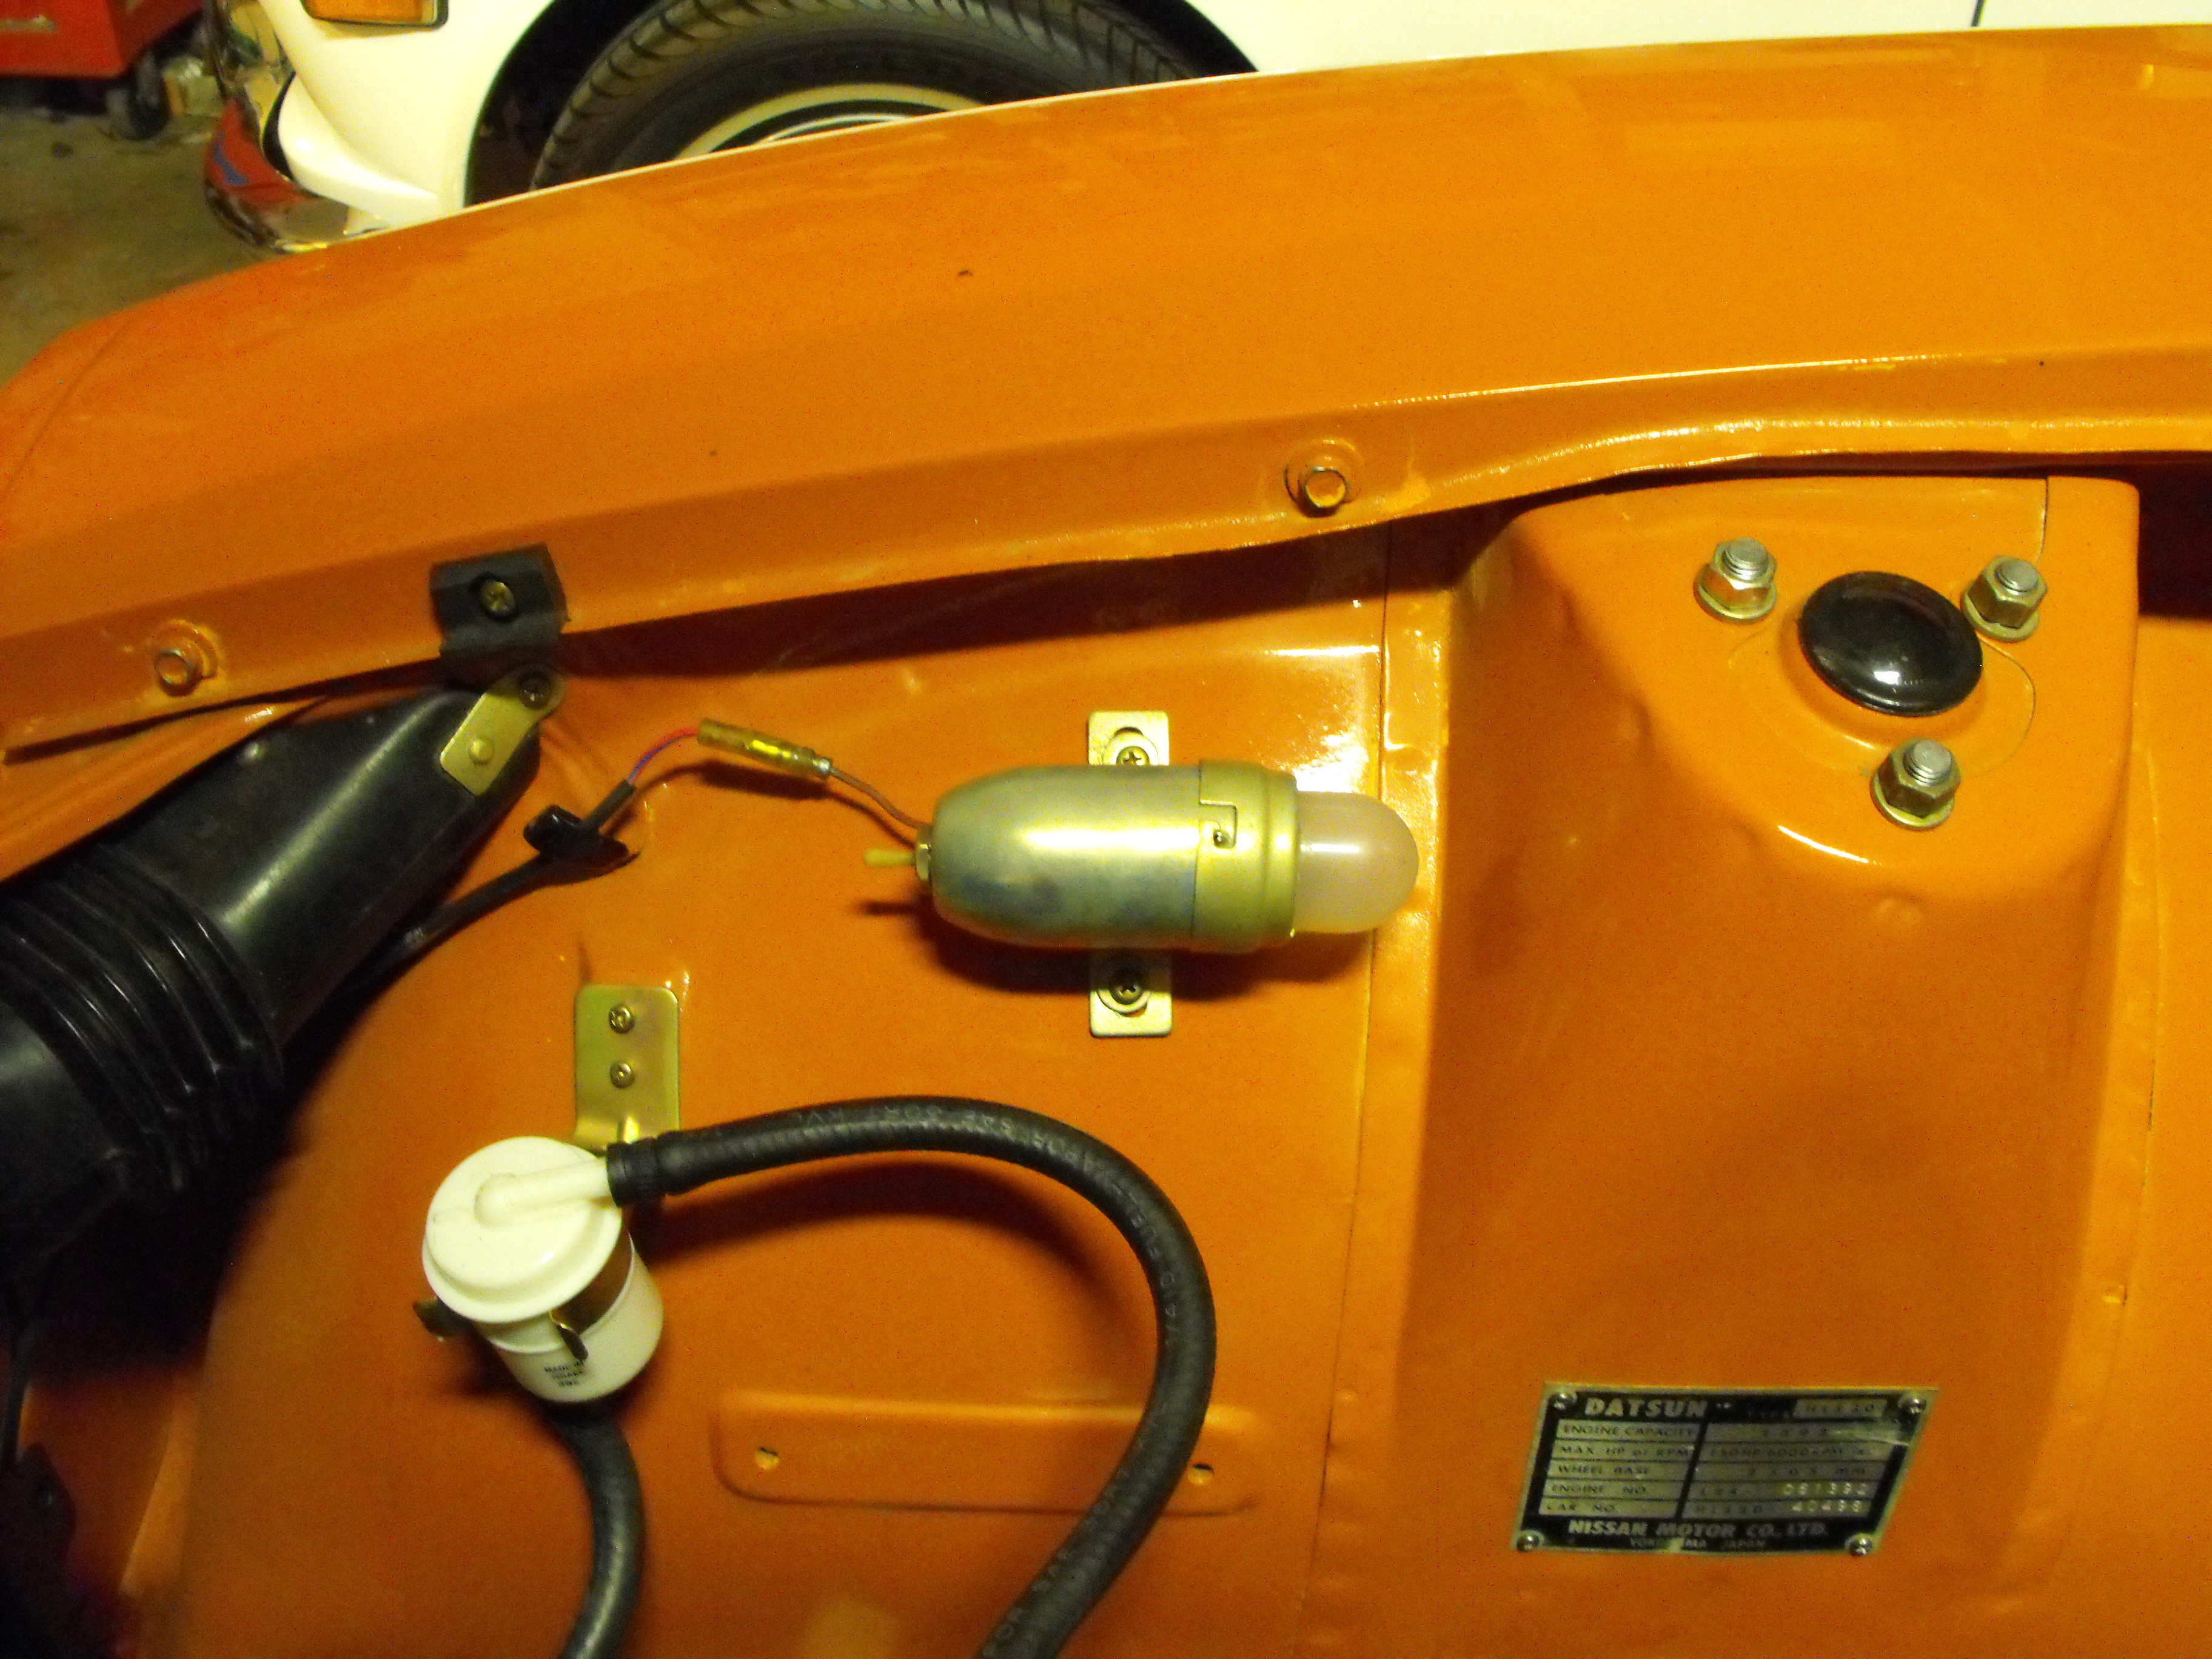
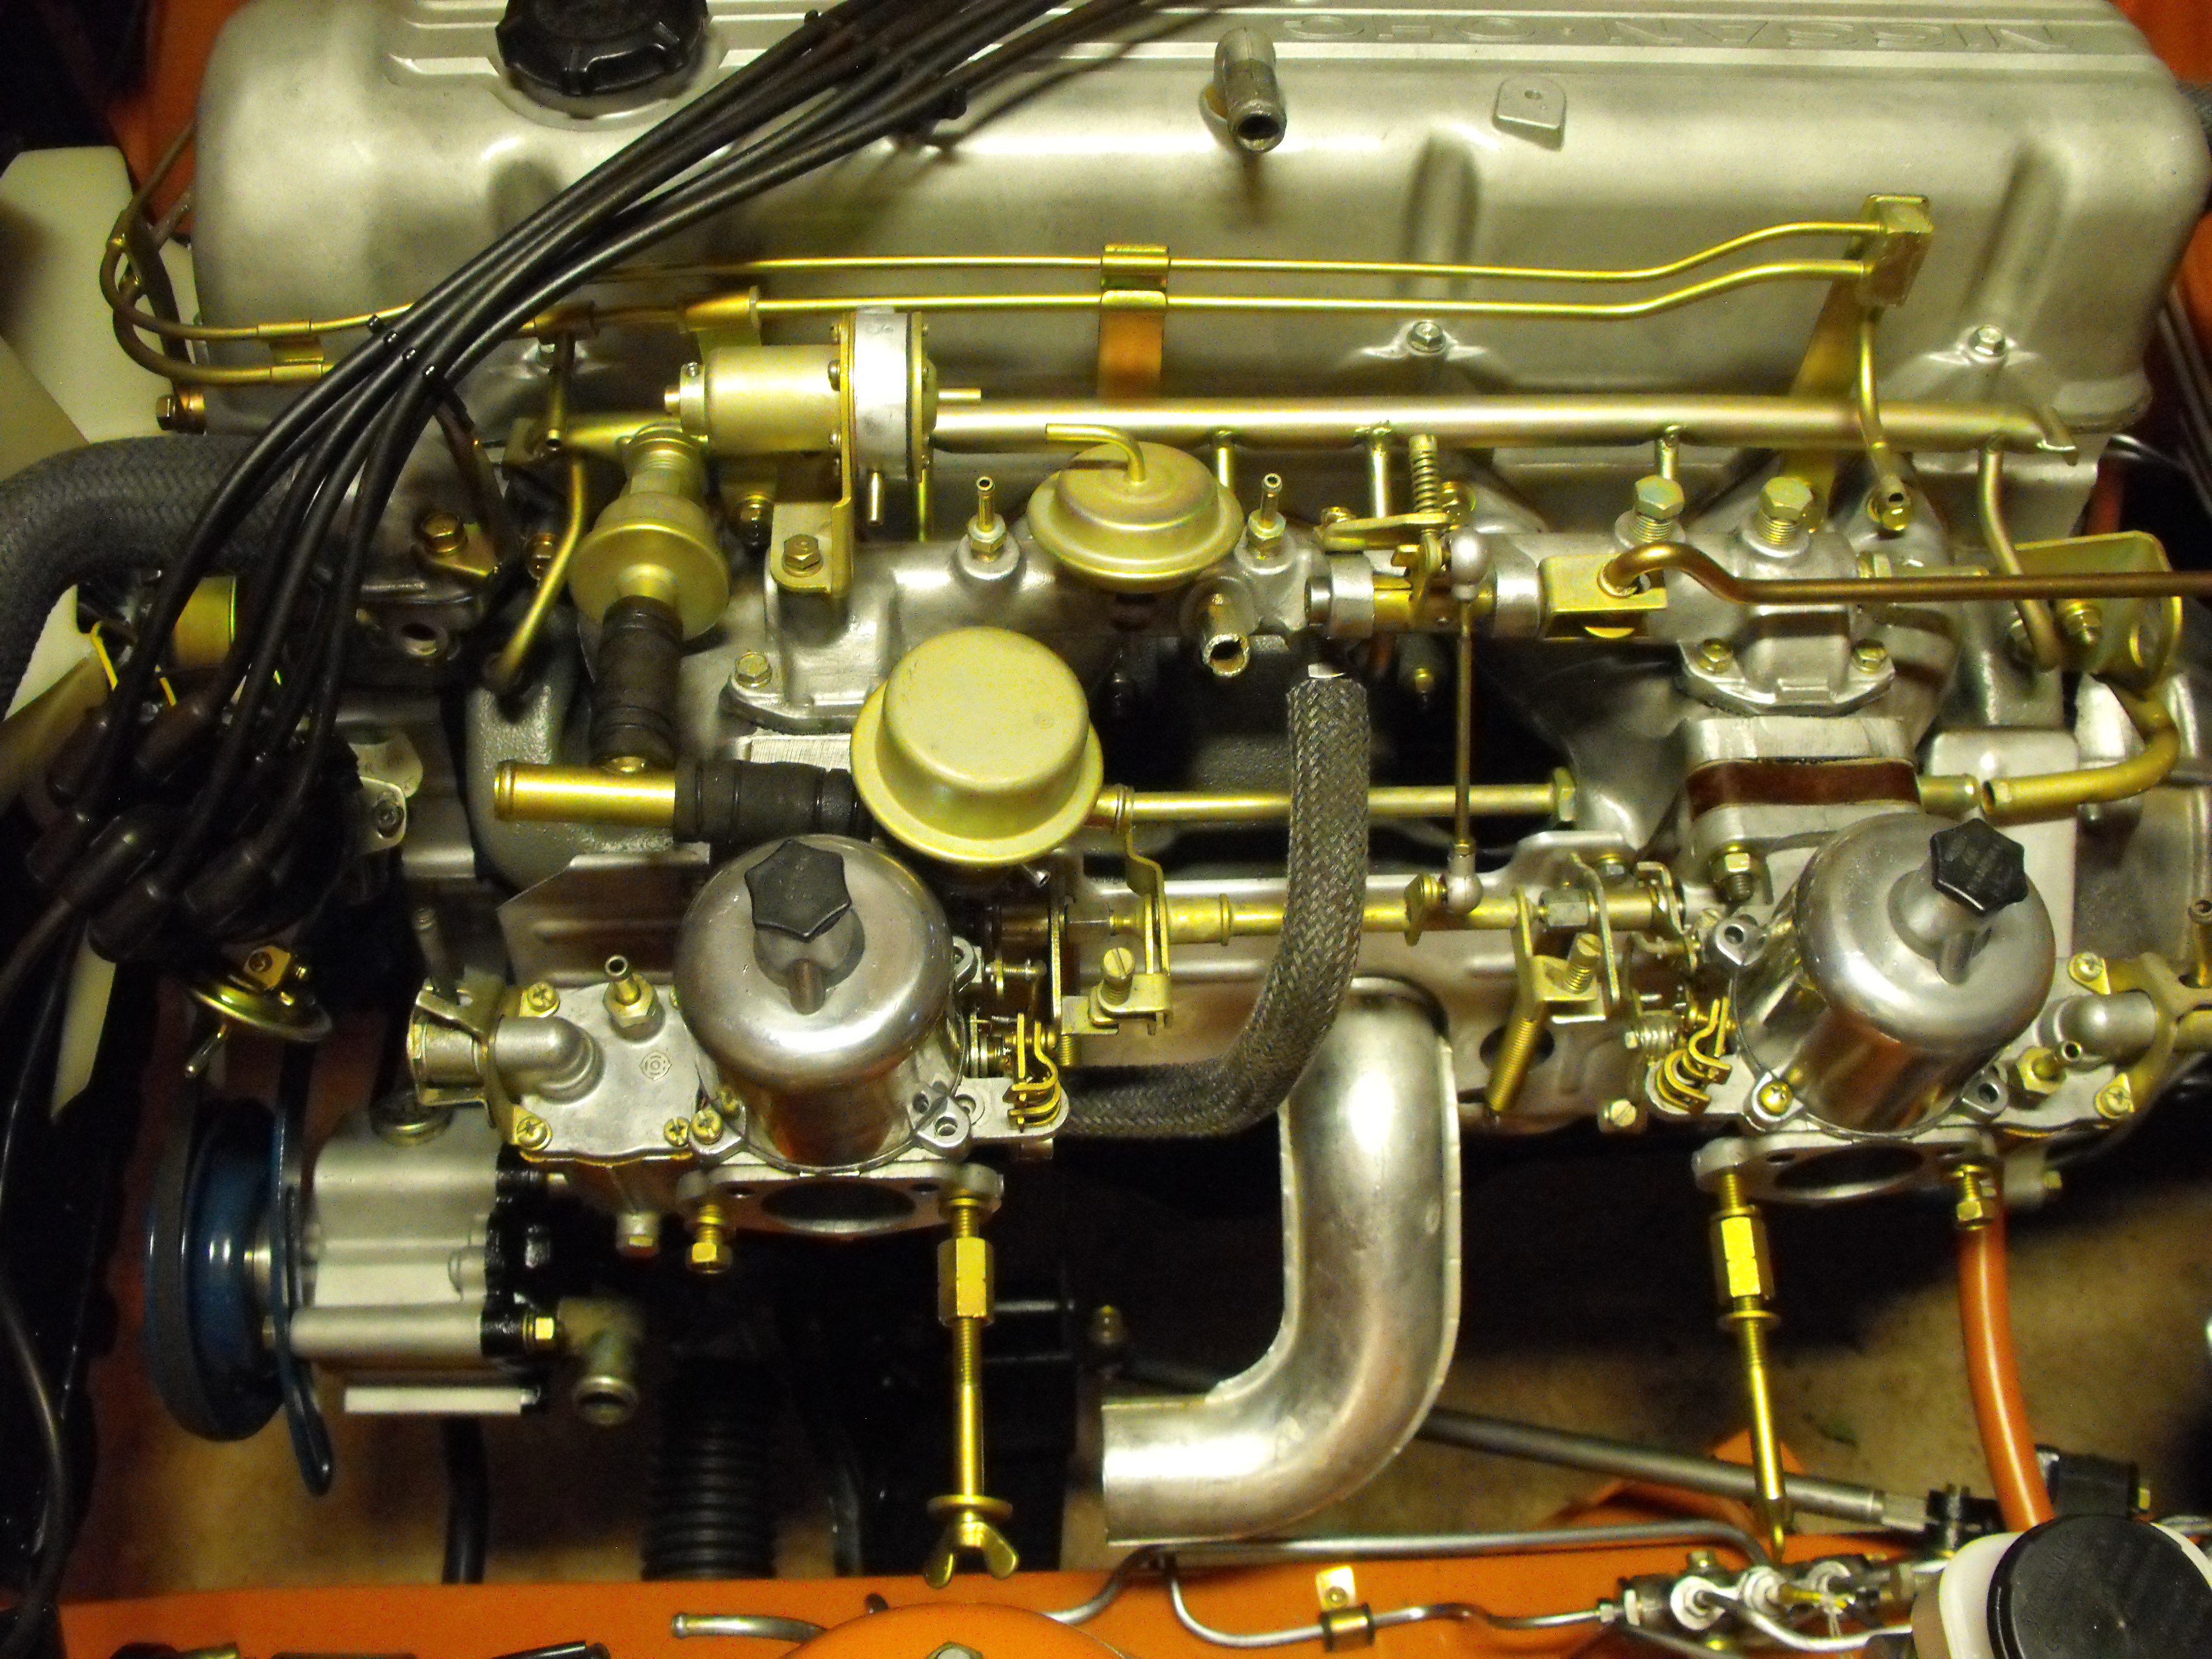
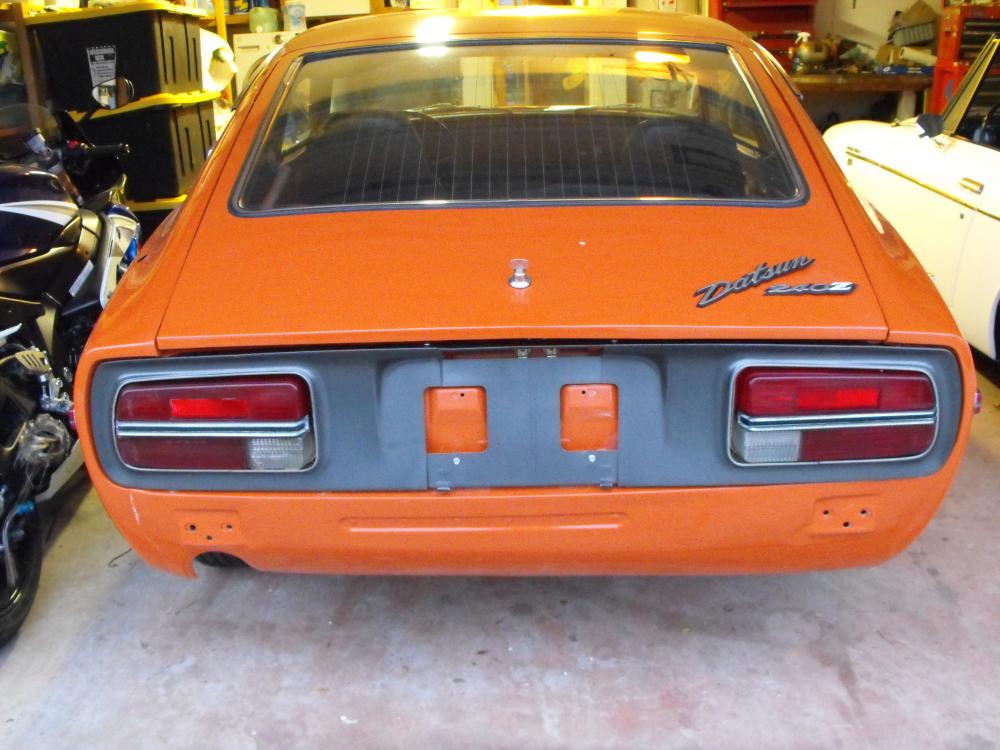
2 pointsThanks everyone for the nice comments. Finally able to work on the car again here. Work was super busy the last two weeks so was not able to do as much as I wanted. I did get the emergency brake cable in sans retaining clips. Next time I will install this before the drive shaft goes in. I had to drop the shaft in order to get the cable into the hand brake mechanism. Got a passenger side taillight from 'Montezuma'. Thanks Dave, looks great. Now I am waiting for the bumpers to come back from the chrome shop to finish out the back end. Should get those back in a week or two. Got the smog parts that sit on the balance tube zinced today. That went well. Also got the inspection light zinced today. I was thinking of just buying a light, but the price for the lights has gotten insane. It was smarter just to plate the old one that I had laying around. It came out pretty well. Also got the air warmer tube in. Here are the latest pic If all goes well, I will have the exhaust system put in tomorrow.

 2 points
 -
1 pointDash recover . I’ve been thinking about doing this for a couple of years. I put it off until I had my Speedhut gauges. Well I no longer had any excuses. This is not a cheap way to fix your dash but a lot cheaper than sending it out for recovering. It is destructive to the original dash so if you plan on having it recovered in the future this is not an appropriate mod. The basic premise is this. Bond the cap to the existing dash. Fill any gaps between the cap and dash with expanding foam. Fill and blend all the seams and gaps. Paint entire dash. I had done the “fill the cracks and texture paint” kludge to my dash years ago. It worked for a little while, but soon a new crack started and then the old ones opened up again. I decided that I wasn’t going to fix the cracks again and opted for a full cap instead. Most of the installed caps I’ve seen were warping and generally ill fitting because of it. I knew from the start that I was going to get the thickest cover I could find and then float it on the existing dash. What I mean by float is let the cap stay as close to its original shape as possible. I had made a couple of posts looking for thicknesses on different caps but didn’t get much data. I called Palco Industries which makes the Dashtop cover. I was told the base material started out at 1/8”. This is the same thickness I use for my speaker panels so I was pretty optimistic that it would have a decent thickness in even the deeper draw sections like the gauge pods. Unfortunately when it arrived it was pretty obvious that the base material was a lot thinner. Most likely 1/6” I decided to stick with it as the overall look was really nice. The hair cell texture was your standard ABS so it isn’t an exact match to the factory but it wasn’t too bad either. You have to pull the dash for this and it is not hard to do so no matter what, don’t convince yourself you can do it in the car. I pulled the dash and did a test fit of the cap. It was immediately apparent that it wasn’t going to just slip on. You could wrench it into position but in doing so it put huge stress on it. Over time that stress would lead to warpage and de-lamination from the pad. I knew it wouldn’t be perfect but I was surprised at how far off it was. The plastic in the gauge pockets is extremely thin so be really careful you don’t tear it during fitting. In order for the cap to sit in it’s natural position I had to do a fair amount of grinding to the pad. Mostly to the tops of the gauge pods and the outer corners. Even then I had to throw in the towel and accept a small amount of stress. I took a DA sander to the entire dash surface with 80 grit to improve adhesion. In reality something even rougher like a 50 grit sander would be better. Speaking of adhesion I decided to use SEM 2 part plastic repair #39847. It’s made for repairing plastic bumpers and is sand-able like bondo with almost no shrinkage. I already have the dual mix gun but if you don’t have one you will need to get one. By the time it was all said and done I used the entire 7 oz tube and 6 mixing tubes. The next part is how I should have done it not exactly how I did it. Slip the cap over the dash and hold it as best you can in position. Four hands would be helpful. Press the dash cap in different areas looking for low spots. Make a mental note of where they are. I was mostly concerned with the top surface. Take a drill and a 3/8” drill bit and drill through the dash pad all the way out the back through the metal frame. Make sure you don’t hit anything important. These are the holes you will use to inject the foam. I can’t tell you how many you need but for every injection hole I figured one or two vent holes. You don’t want the foam to build up pressure so a 2:1 ratio is probably pretty safe. Now you are going to glue down the cap. I did mine in multiple steps. I wiped the inside of the cap with lacquer thinner. This will clean it but also etch the surface a bit. First area to glue was the top and a small amount down the front. This helped me create a stable base so that as I pulled the rest of the cap into position it wouldn’t effect the top. I concentrated the glue around the edges and the high spots that I knew were contacting the cap. After that I put a few dabs in the shallow in between the foam holes so that it would help keep it from distorting. I slid the cap down over the dash. I only needed a couple of clamps to hold it since I sanded the pad to fit. I pushed the cap down in the low spots so it would make contact with the glue. When it springs back it will hopefully have a ribbon of glue between the dash pad and cap. The glue has a 7 minute work time so you need to have everything well rehearsed. After about an hour to dry I then methodically worked my way around the rest of the cap glueing things in position. I masked off areas of the dash that weren’t covered. Pay careful attention to the glove box area. I didn’t and my glove box door is now a very tight fit. No problem as it’s non functional but if I wanted it to work I would have had issues. You need to pull the cap outward as far as you can to have enough clearance. So now you have the basic adhesion done. Now you are going to glue ALL the edges. This is where you decide how well you want it to look. I was really nervous about the gauge pod areas warping over time and ending up in the sight line of the gauges. I took a heat gun and a pair of heavy gloves. I heated the plastic that fit poorly and then shaped it against the dash pad with my gloved hand. This is really tricky. You go from not hot enough to disaster in the blink of an eye. After I was done shaping I went around and glued most of the edges. More on that later. So now that all your edges and high spots are glued you have a dash cap that is theoretically under little or no internal stress and held in position with the old dash. The problem is that you now have hollow areas that have little or no adhesion, plus there will be a temperature differential between the bonded areas and the hollow areas. Can you say “air gap”. Time for the foam. I used low expansion window foam. It seems to be the right choice. It stays soft like the original pad. It also has a bit of adhesion going for it. Not much shear strength but every little bit helps. Position the dash with the gauges facing up so that extra foam falls away. Gravity is your friend. I would shoot the foam in one hole and watch for it to appear in one of the vent holes. I moved from section to section. Don’t over do it as even the low expansion foam expands quite a bit. If it has no place to go then it may distort the dash. I found that if you kept the fill holes clear of foam then it allowed the still expanding foam a place to go. That may just be a guess though. After the foam dried I noticed a huge improvement in the feel of the dash. It felt solid with almost no discernible hollow spots. This is why you seal every edge. Time to finish. I took the remaining glue and used it as filler to build up the areas I wanted to feather in. I sanded them with 80 grit. Most of the areas I was working get covered so I wasn’t too worried abut it being perfect. If I was trying to do a flawless job I would fill the areas and then use the SEM texture spray. That stuff really works well. I cleaned off the dash and sprayed it with SEM trim black out of a rattle can. Looks great. Do’s, and don’ts. When working with the glue and foam where multiple disposable gloves. This way you can use them like tear-offs. Make sure you mask off areas that you don’t want glue on. It’s much quicker to mask stuff off than it is to try and sand it later. Be careful with the gauge areas of the cap. They are thin and fragile. Remember to drill the foam holes before you mount the dash cap. I didn’t think about foaming the dash until after I had bonded the cap. It limited me to only being able to drill a few holes. You can scrape extra glue off with a thumbnail for about 20 minutes. Also sand the glue as soon as you can. It’s soft and will cut like buttah. Be really careful with the foam. It can get out of control really quickly. Don’t foam it and go to lunch. I thought it was done expanding and I looked over and I had a new area growing. The SEM trim spray is lacquer and really susceptible to moisture. It will blush really badly if it’s too humid. Ounce it blushes it can be a real PIA to get it right. Here is the finished product installed in the car. I’m really happy with the results. It’s the hot season in Florida so I’ll update the thread in the fall. I daily drive the car and it’s parked outside in the sun. I do use a window shade most of the time. Hopefully this will last a lot longer that the crack repair. It was a lot of work but as long as the ABS stays stable it should last a long time. Derek1 point
-
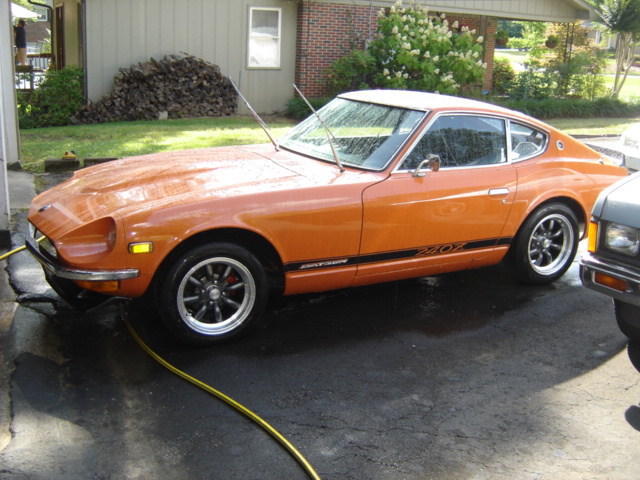
I'm following your footsteps, only behind your's by 7 months and a day. I washed and put some moisturizer on mine today after being down for over a year. After the Bellagio squirter, Wiped off
 1 point
 -
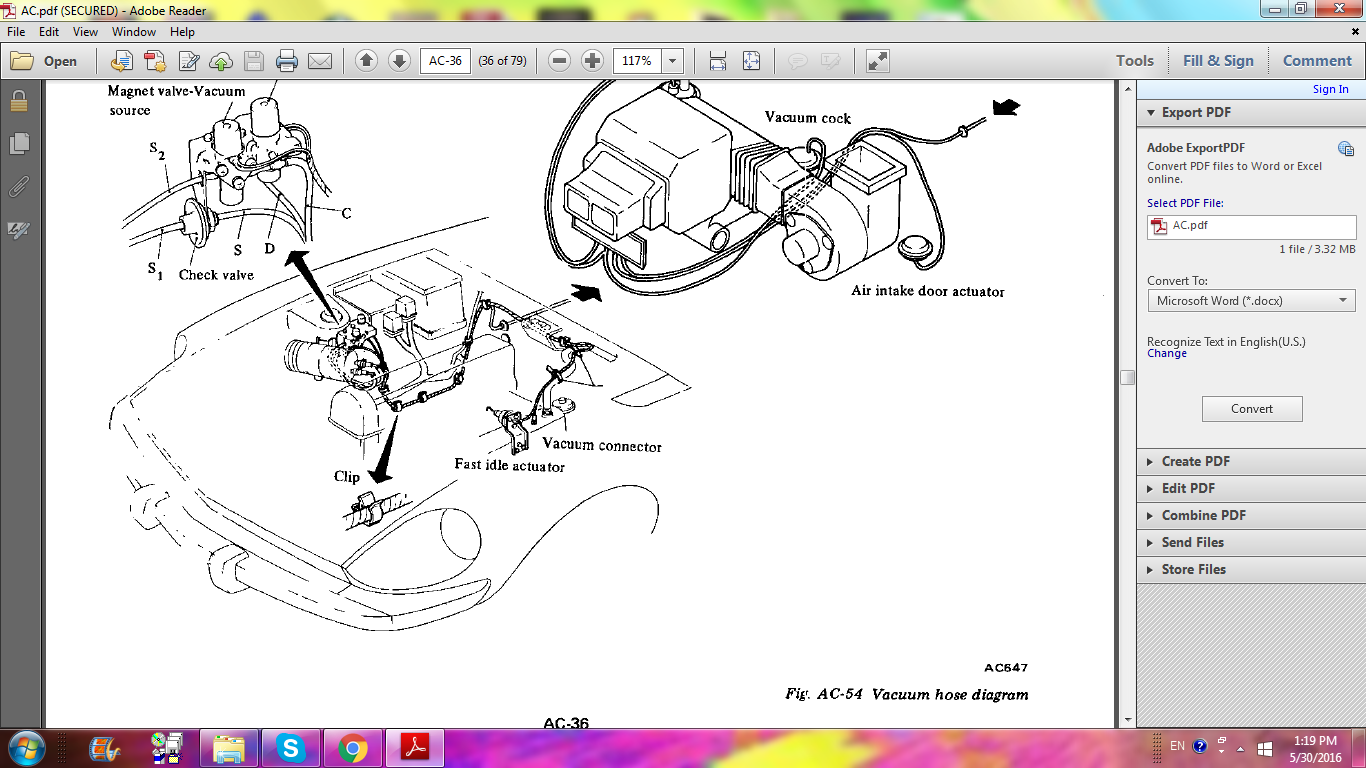
Found this the FSM today... some vacuum routing. It was in the "AC" Air Conditioner section. HTH
 1 point
 -
Pretty sure the E12-80 has the modern current-limiting (dwell control) so the Blaster 2 coil should work fine. He has all of the parts, I'm betting that the distributor needs a little work. Whenever I find a ZX or Maxima distributor in the wrecking yard they're always mis-adjusted and have broken magnets. I don't think that they're very durable. Rockauto sells a replacement bushing for the shaft. " The distributor came off a 280zx "1 point
-
Or disconnect the E12-80 module and do the same test you just did over again. If the module is shorted internally you'll get a stronger spark.1 point
-
1 pointOh I've been reading this thread for a while, I'm impressed with the way that the copper slag handles the accessories that were treated, it looks great. I'm about to start on one of my chassis, so I'm attempting to absorb as much information that i can, i appreciate the advice. Have a safe return!1 point
-
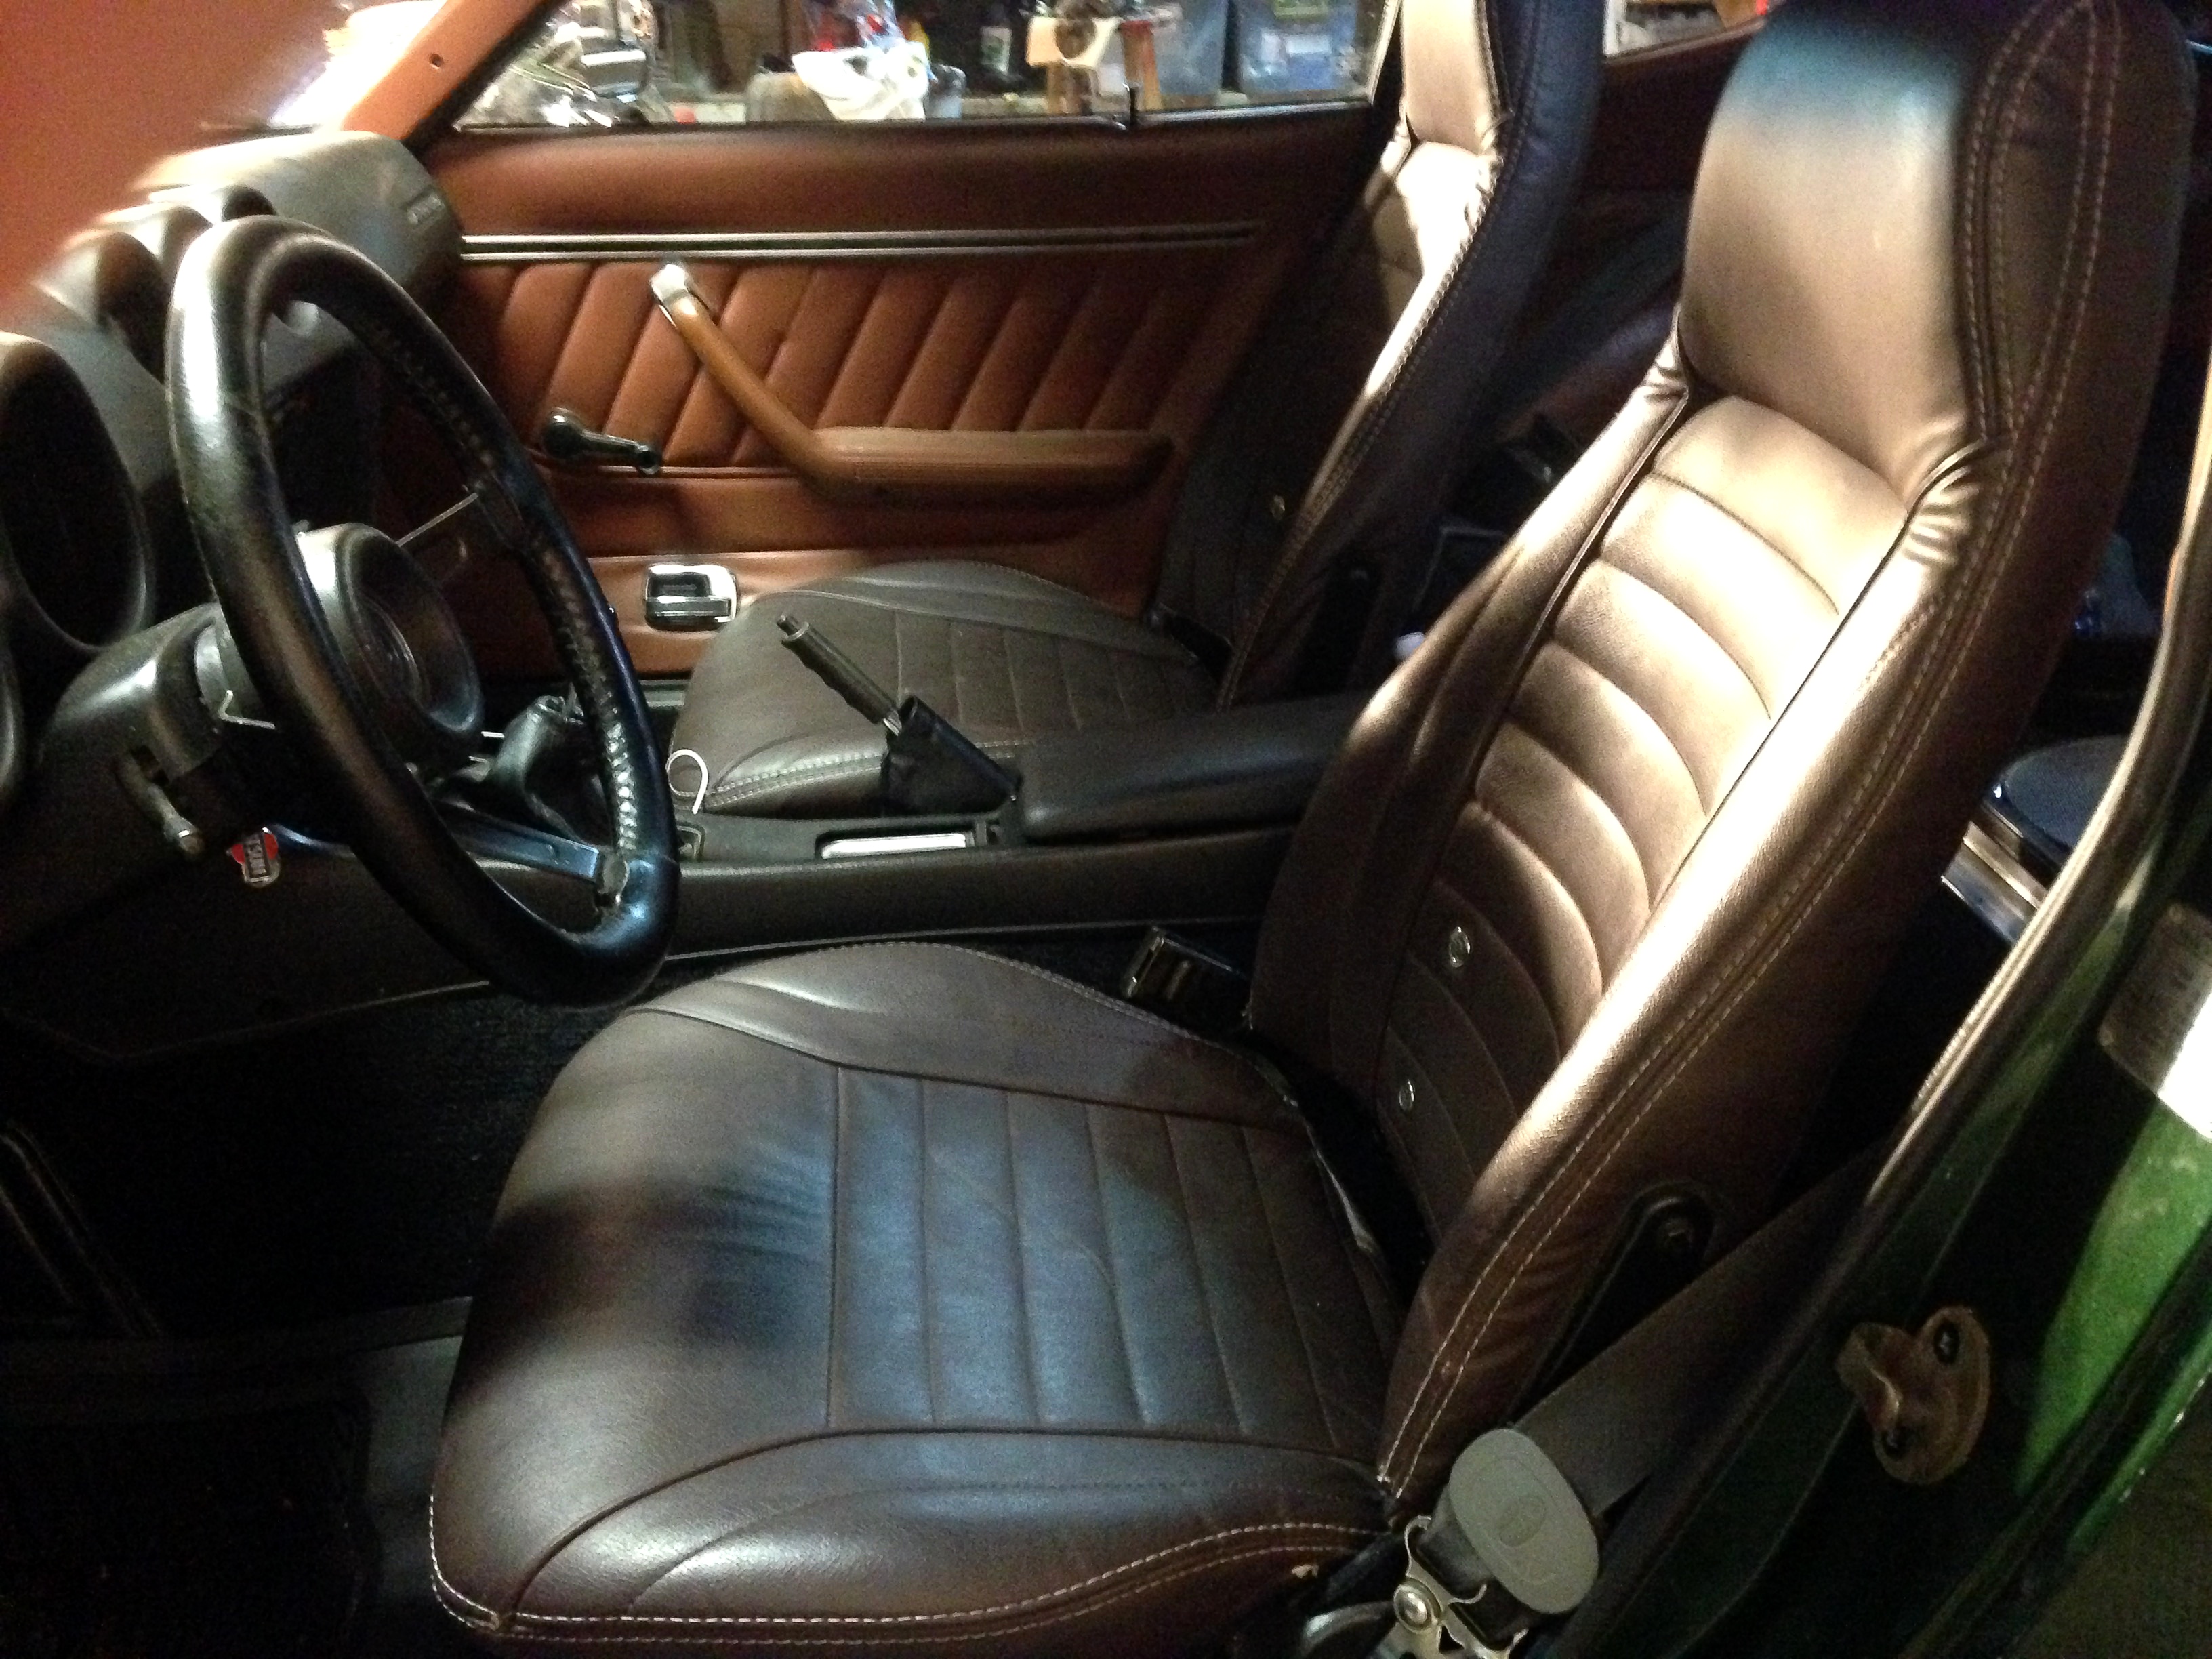
1 pointLots of info about steering wheels here. I did mine last year. It wasn't too difficult, took less than day and it did not cost a whole lot. I can't seem to find the before and after pics but here is a view of it inside the cabin
 1 point
 -
1 point