Leaderboard
-
S30Driver
Free Member5Points1,580Posts -
grannyknot
Free Member3Points5,158Posts -
Patcon
 Subscriber
 2Points11,136Posts
 -
Mr Camouflage
Free Member2Points3,573Posts


Popular Content
Showing content with the highest reputation on 04/30/2016 in all areas
-
3 points12 hrs to go, I'm pumped! Seems like it is down to 2 guys now, I have communicated with both several times and they are both good guys with no fooling around, either one would be an excellent new owner. If the car doesn't go up one more penny I'll be fine with it, I've made back my costs,(that's a first) and I'll have enough now for the next Z build.3 points
-
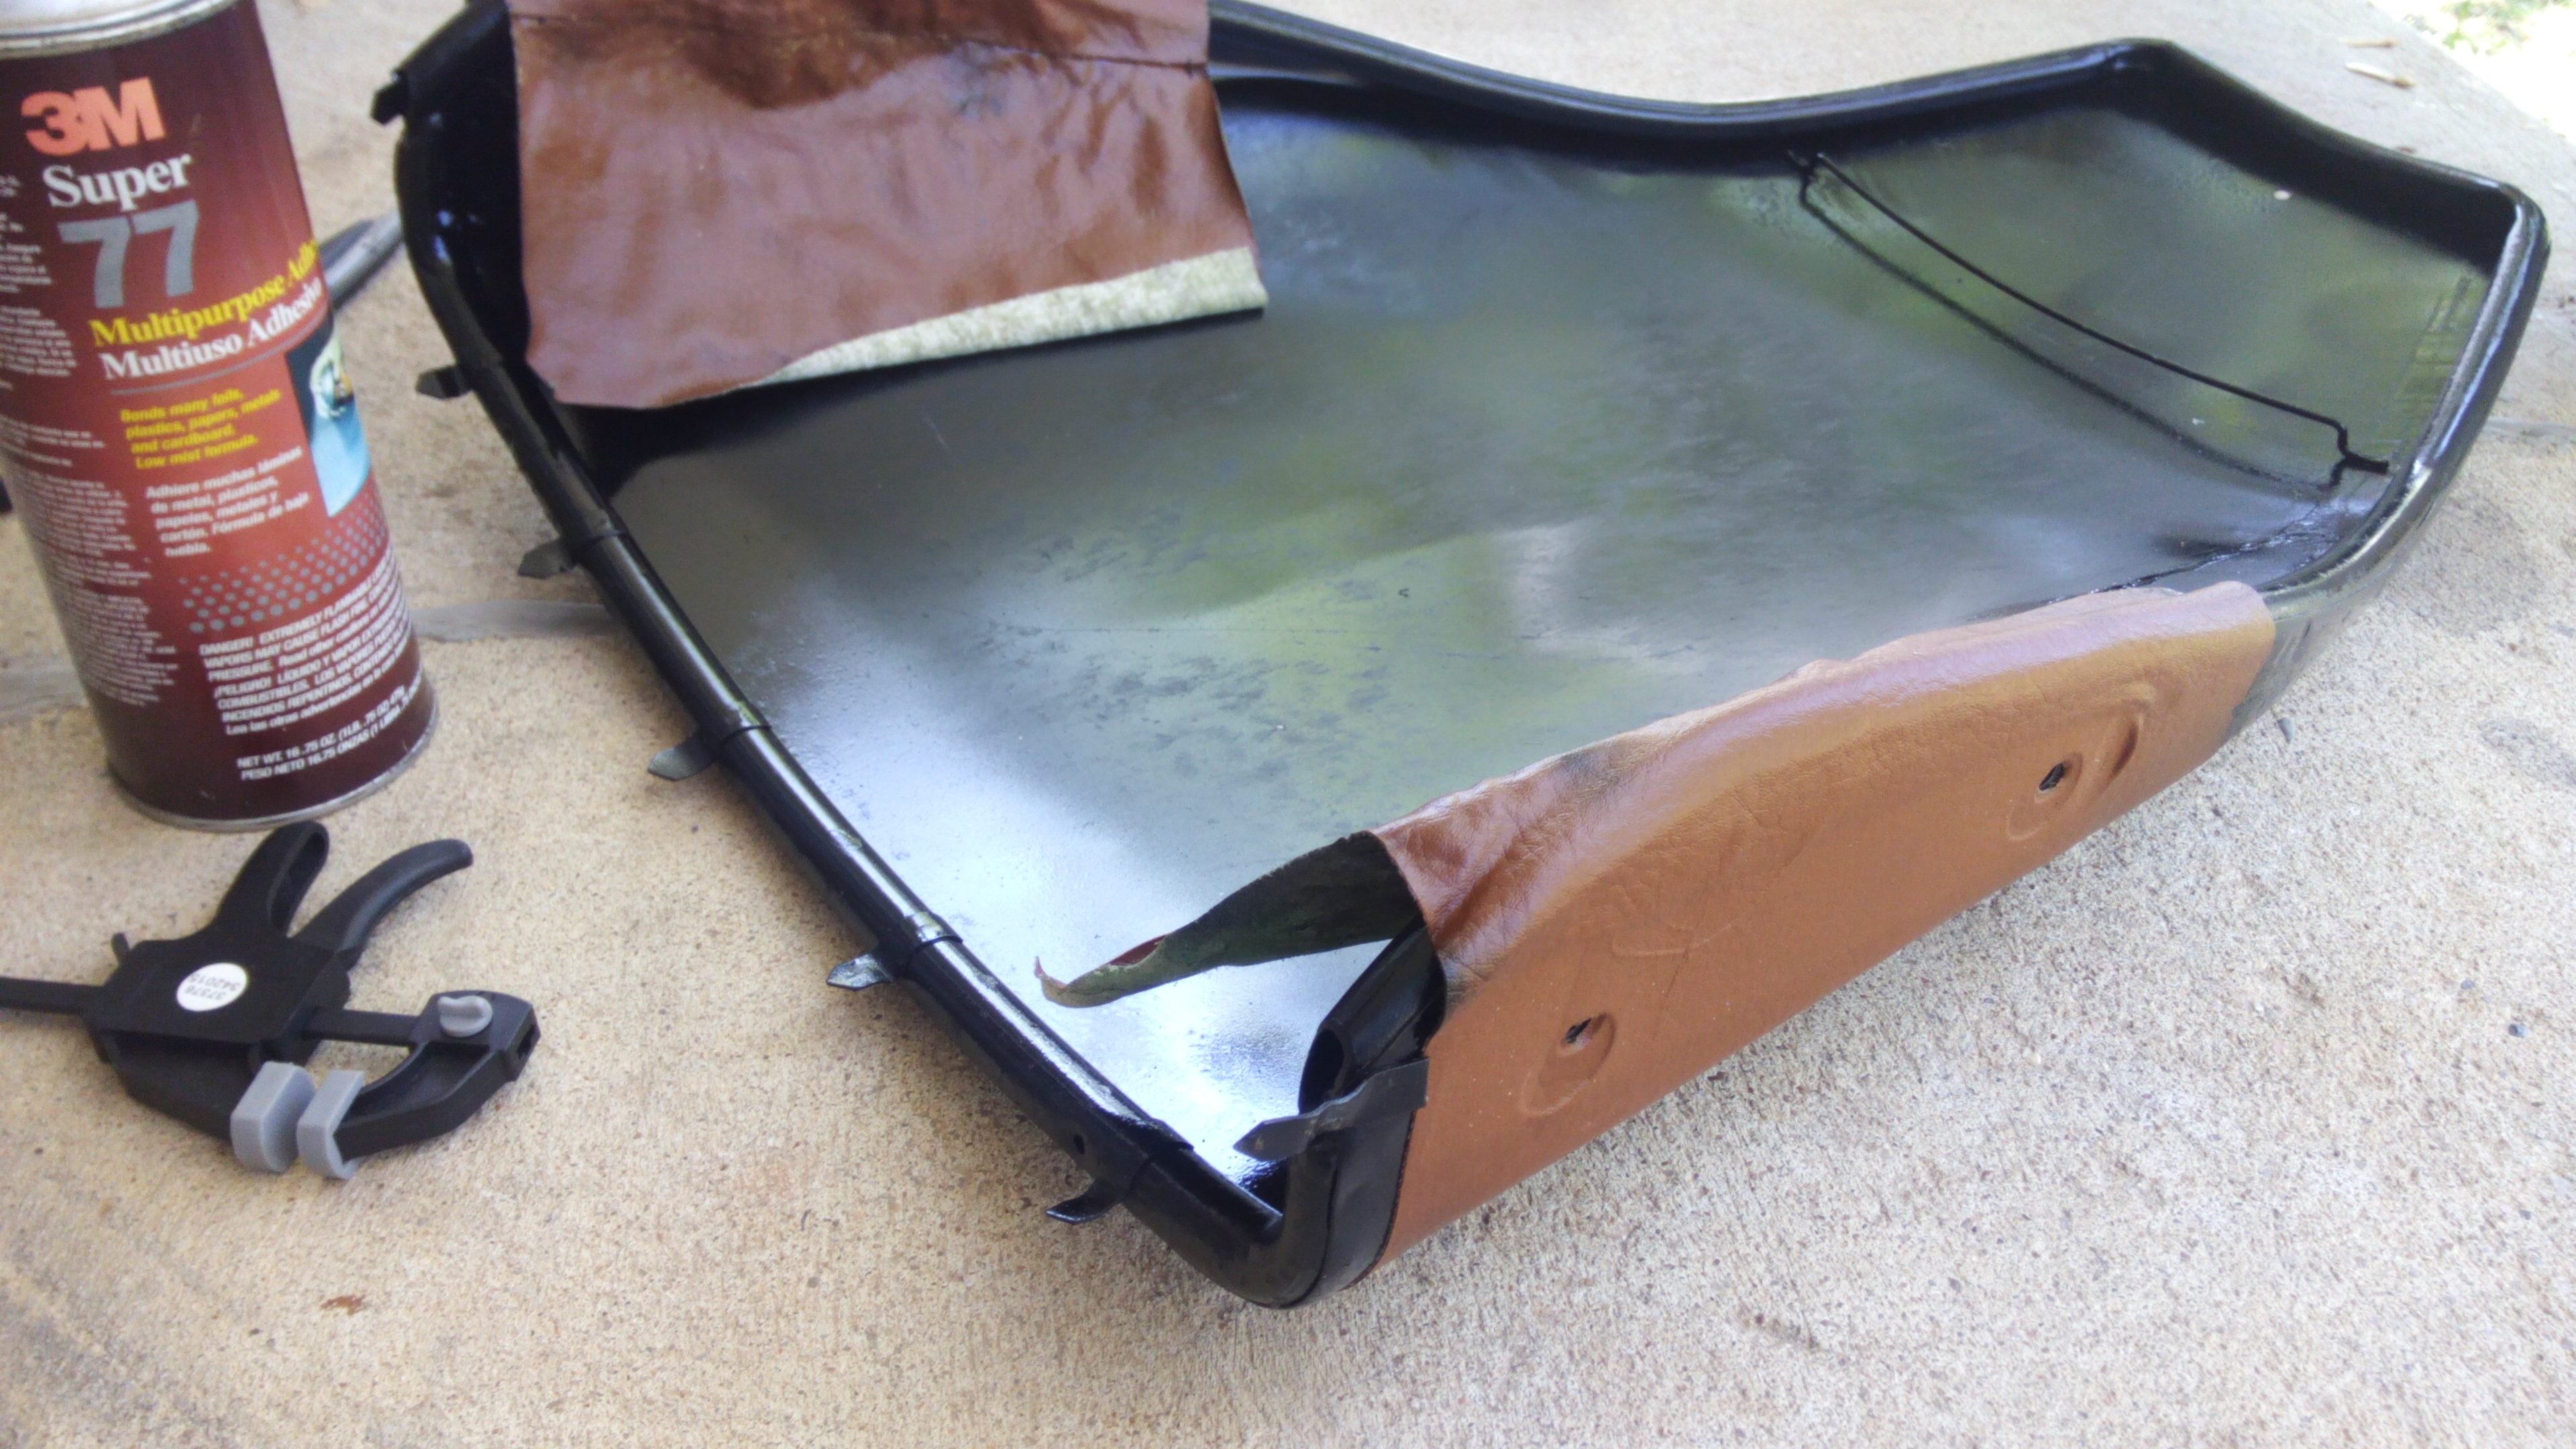
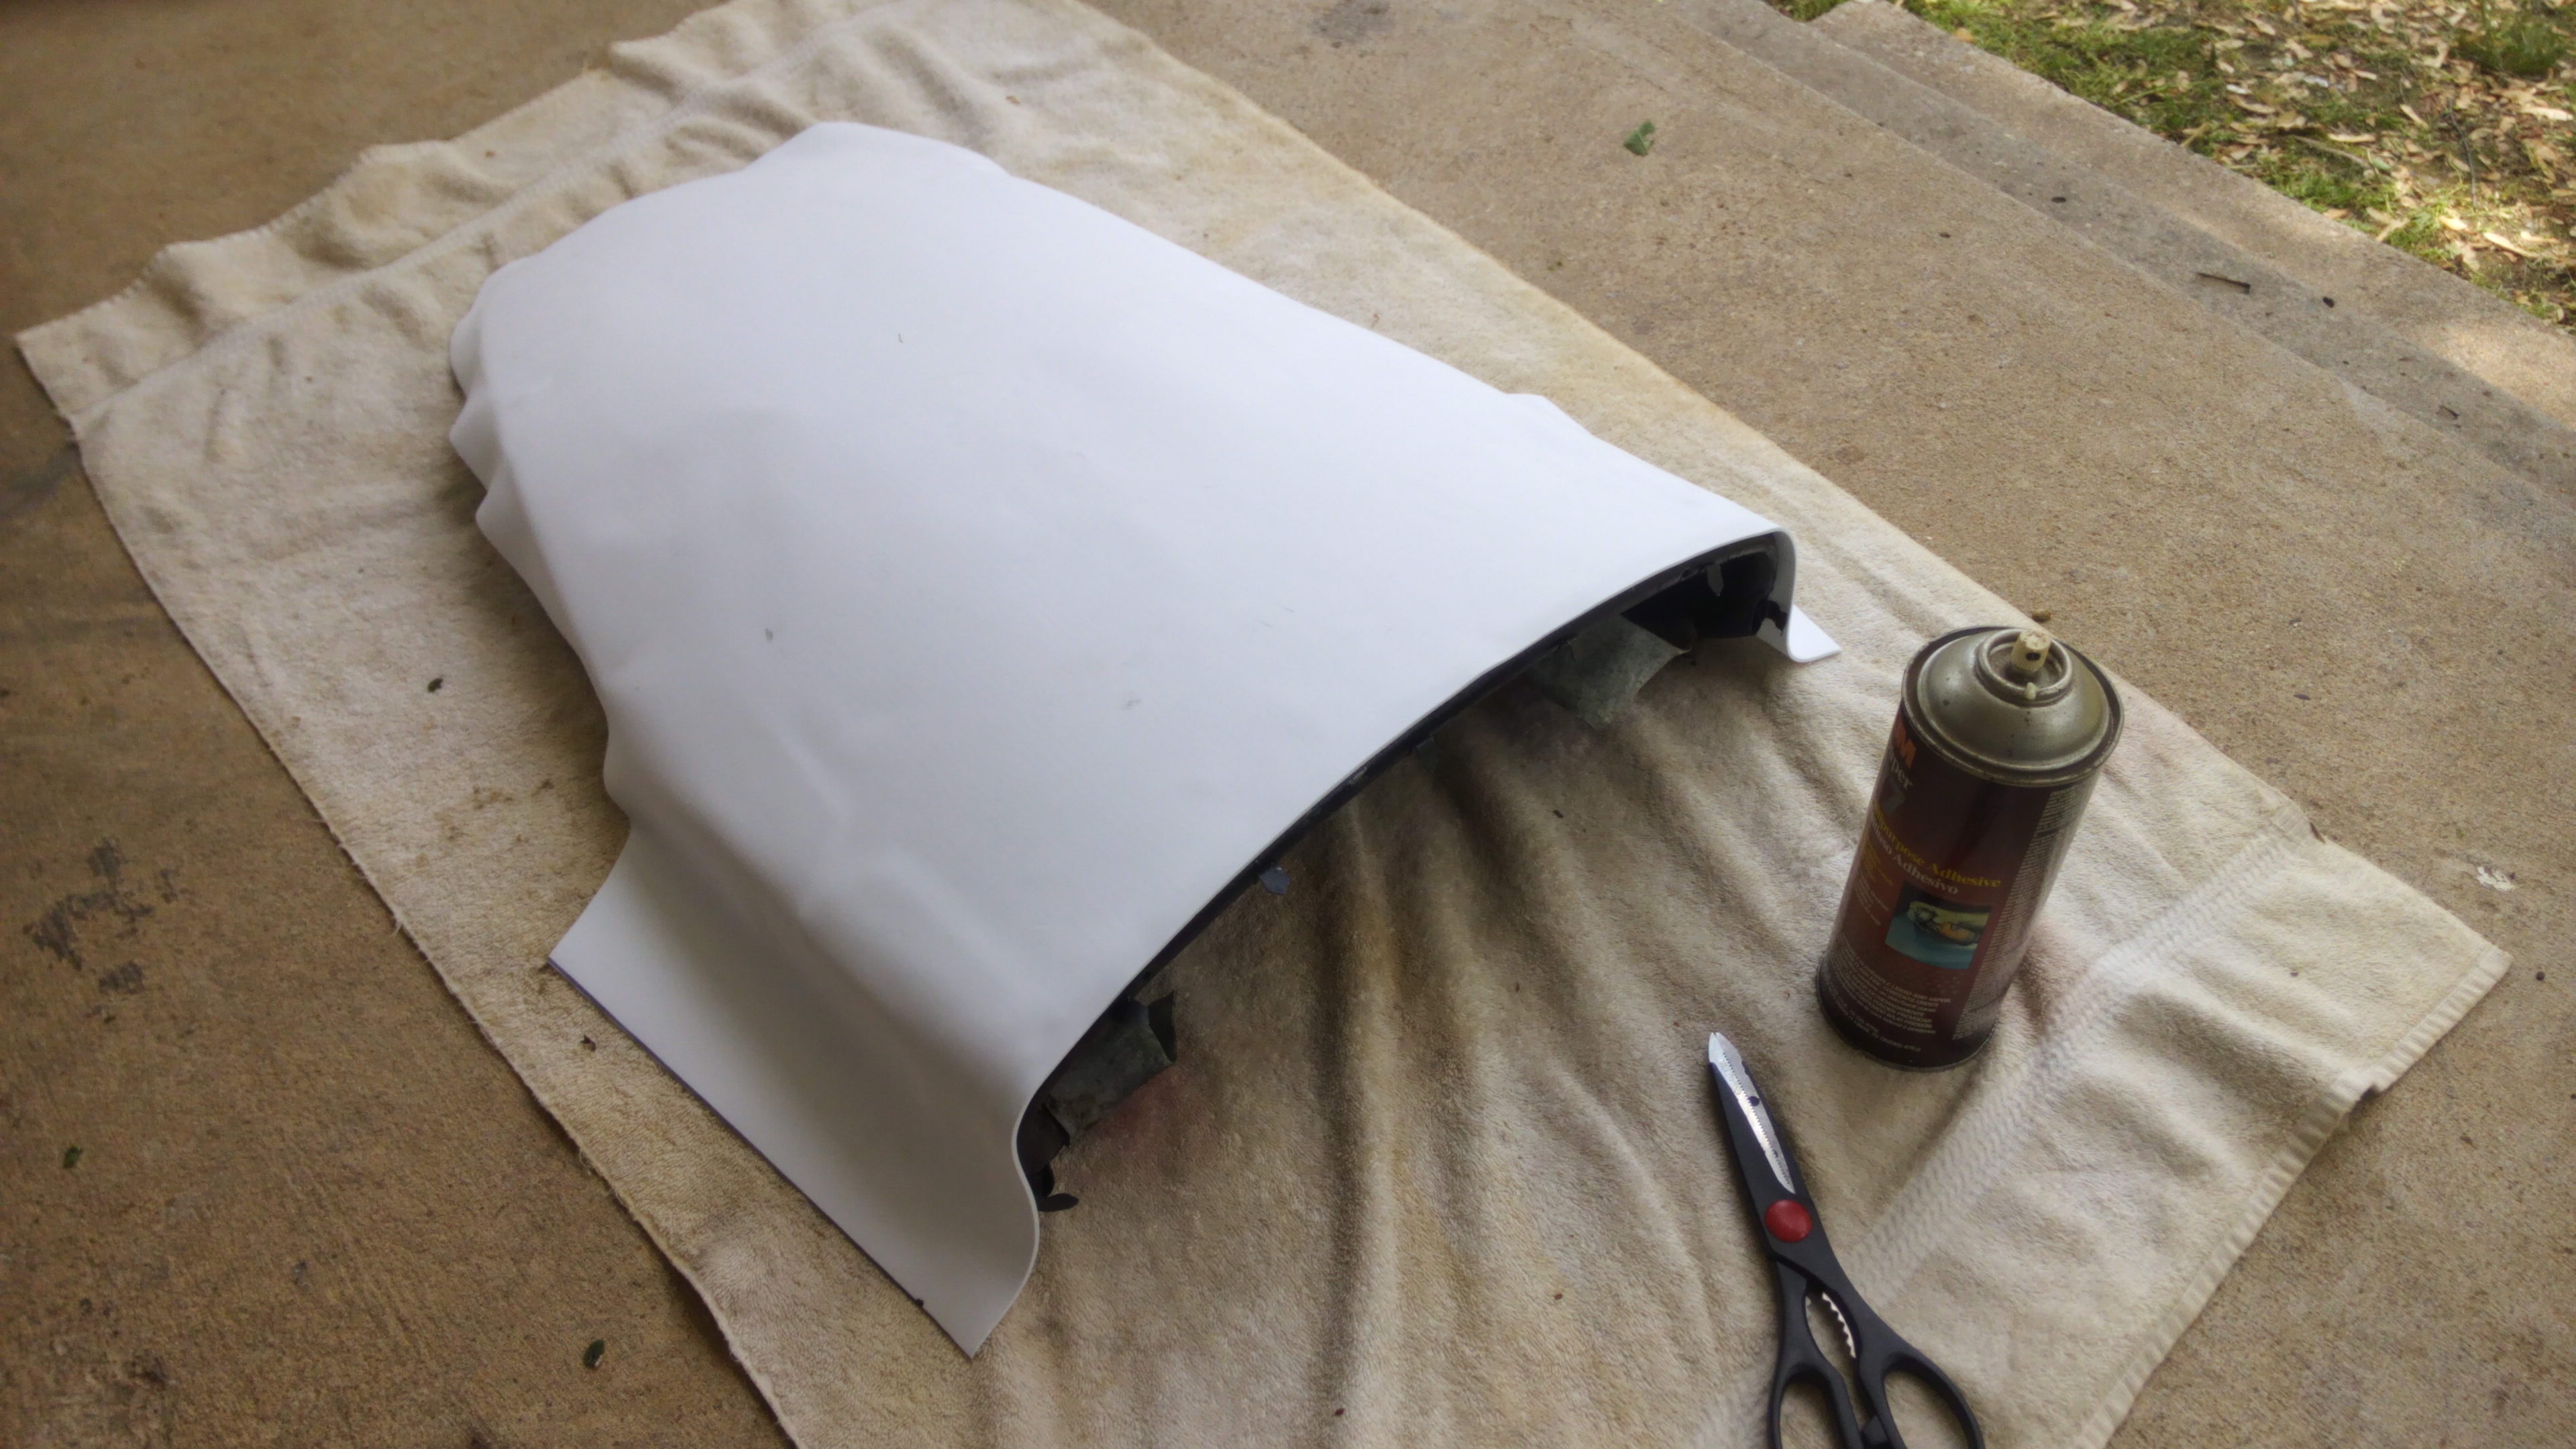
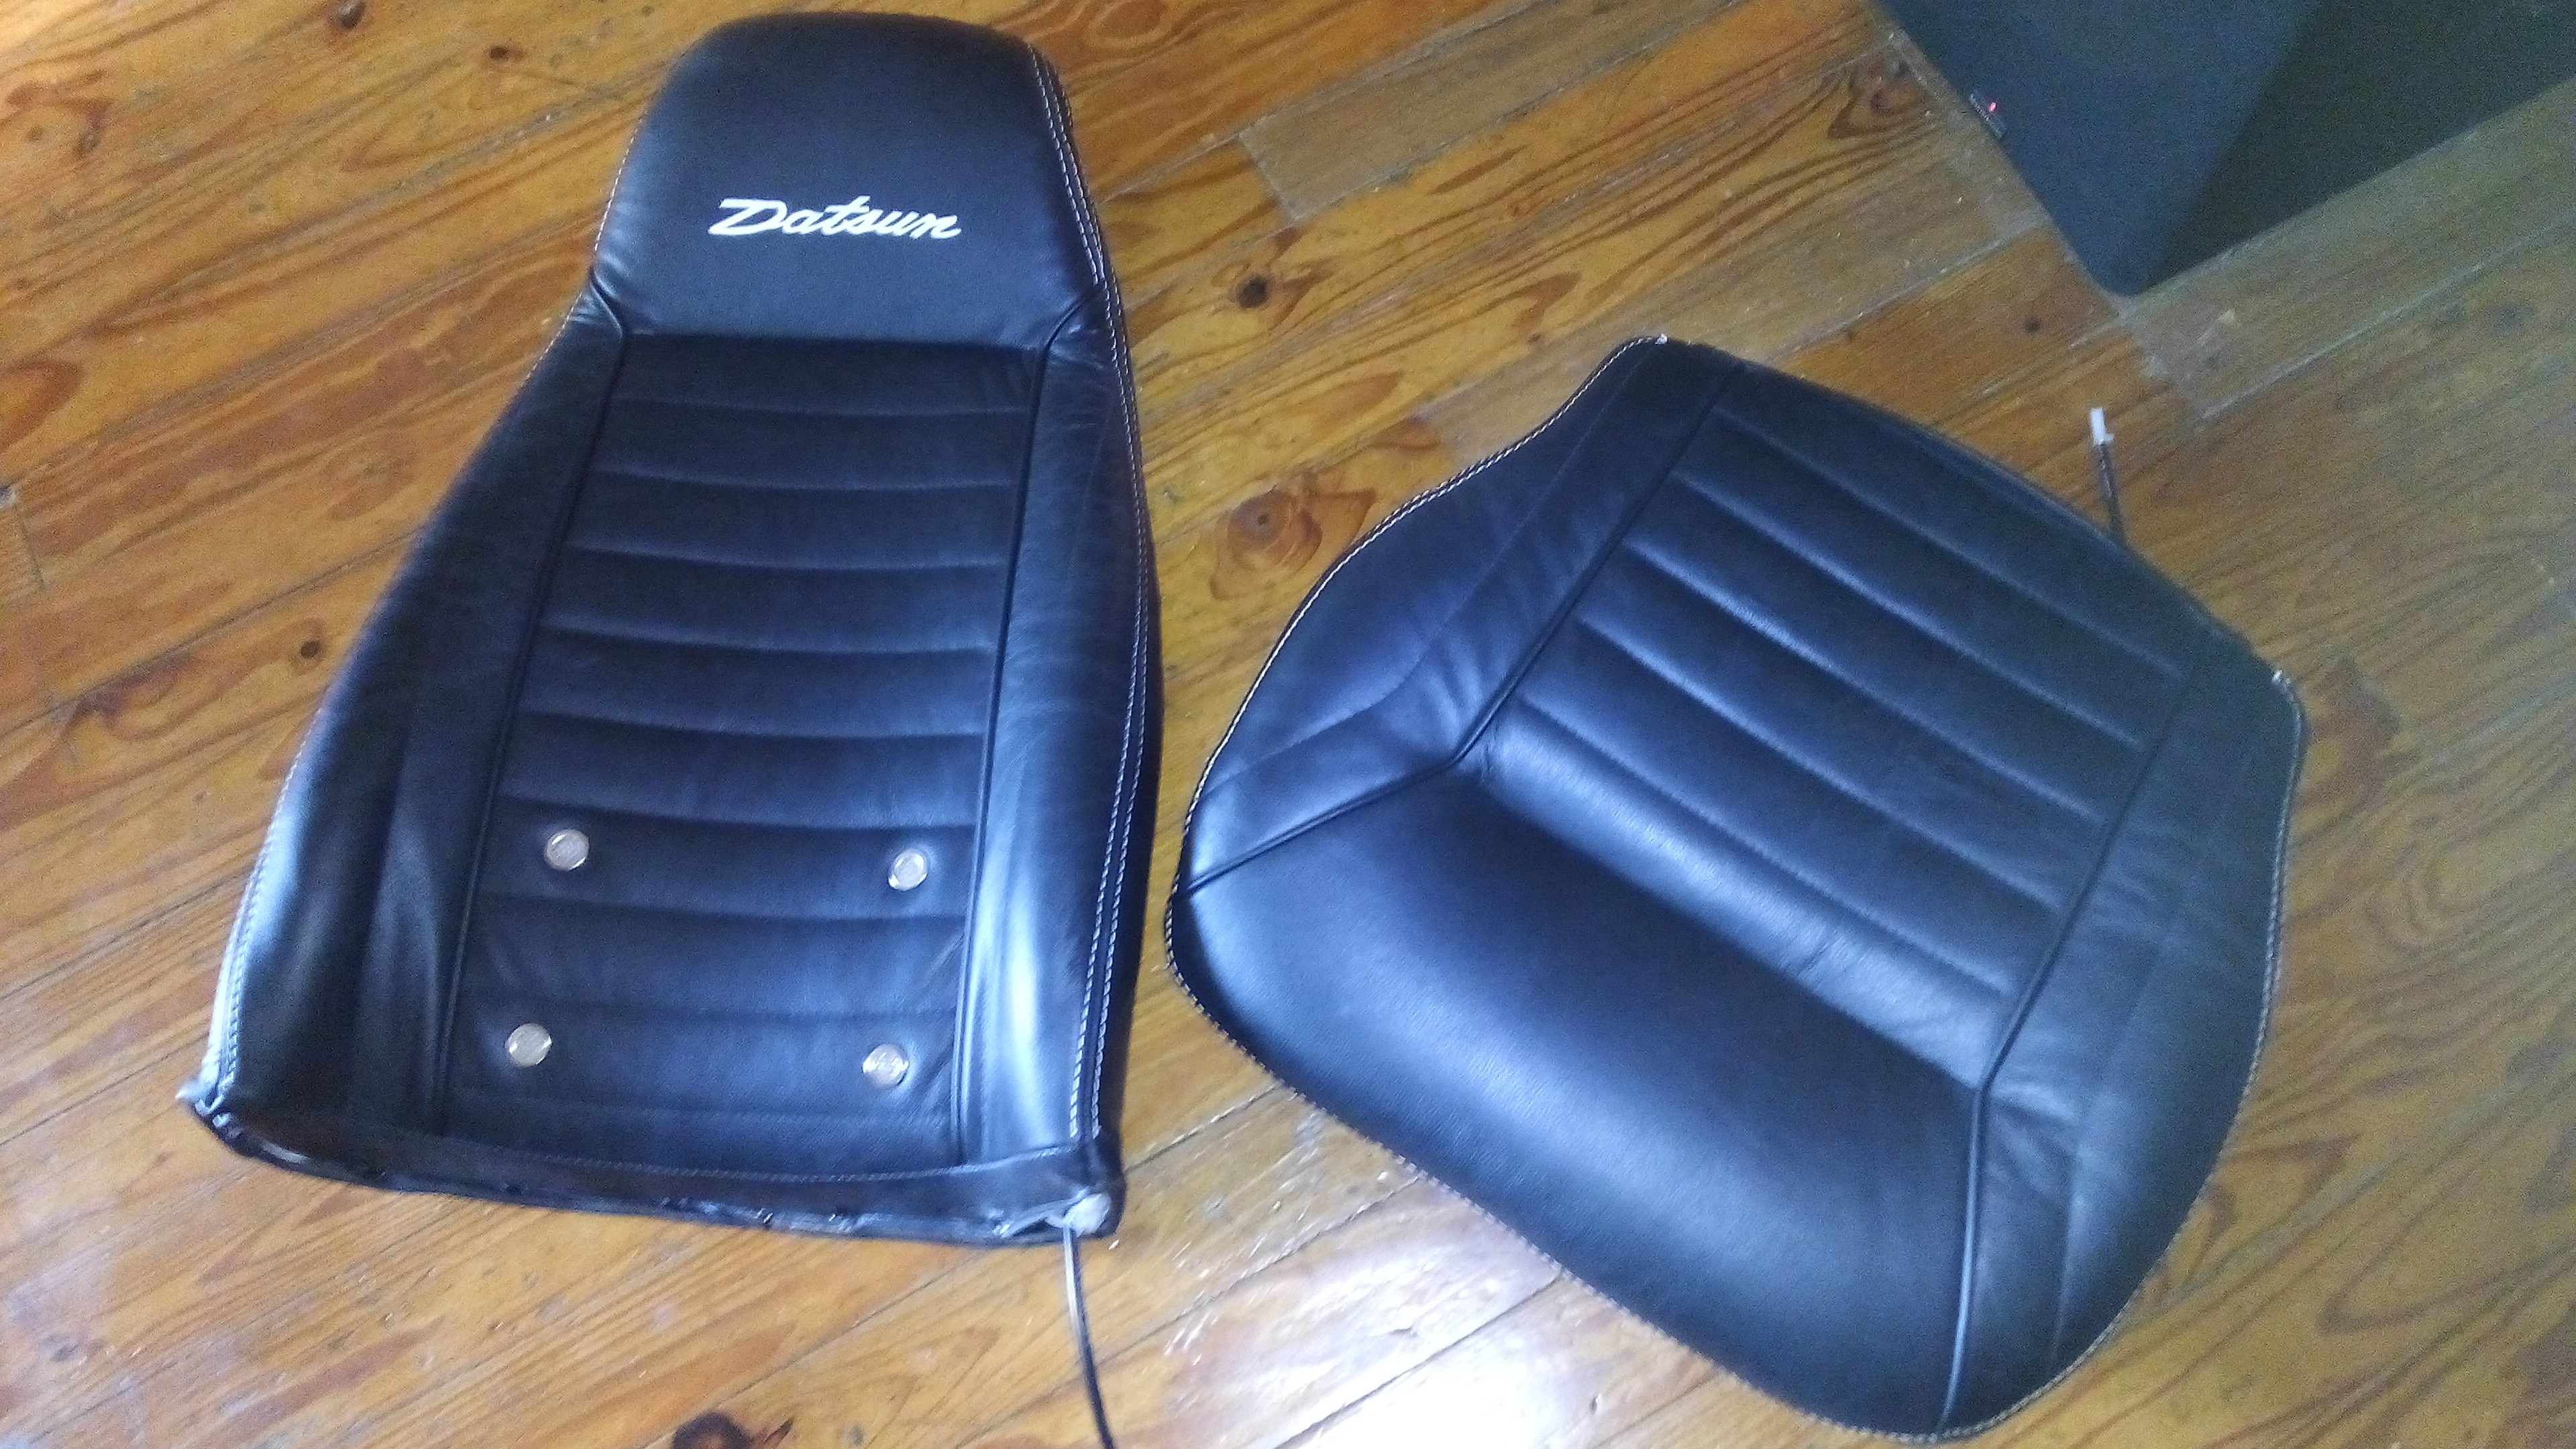
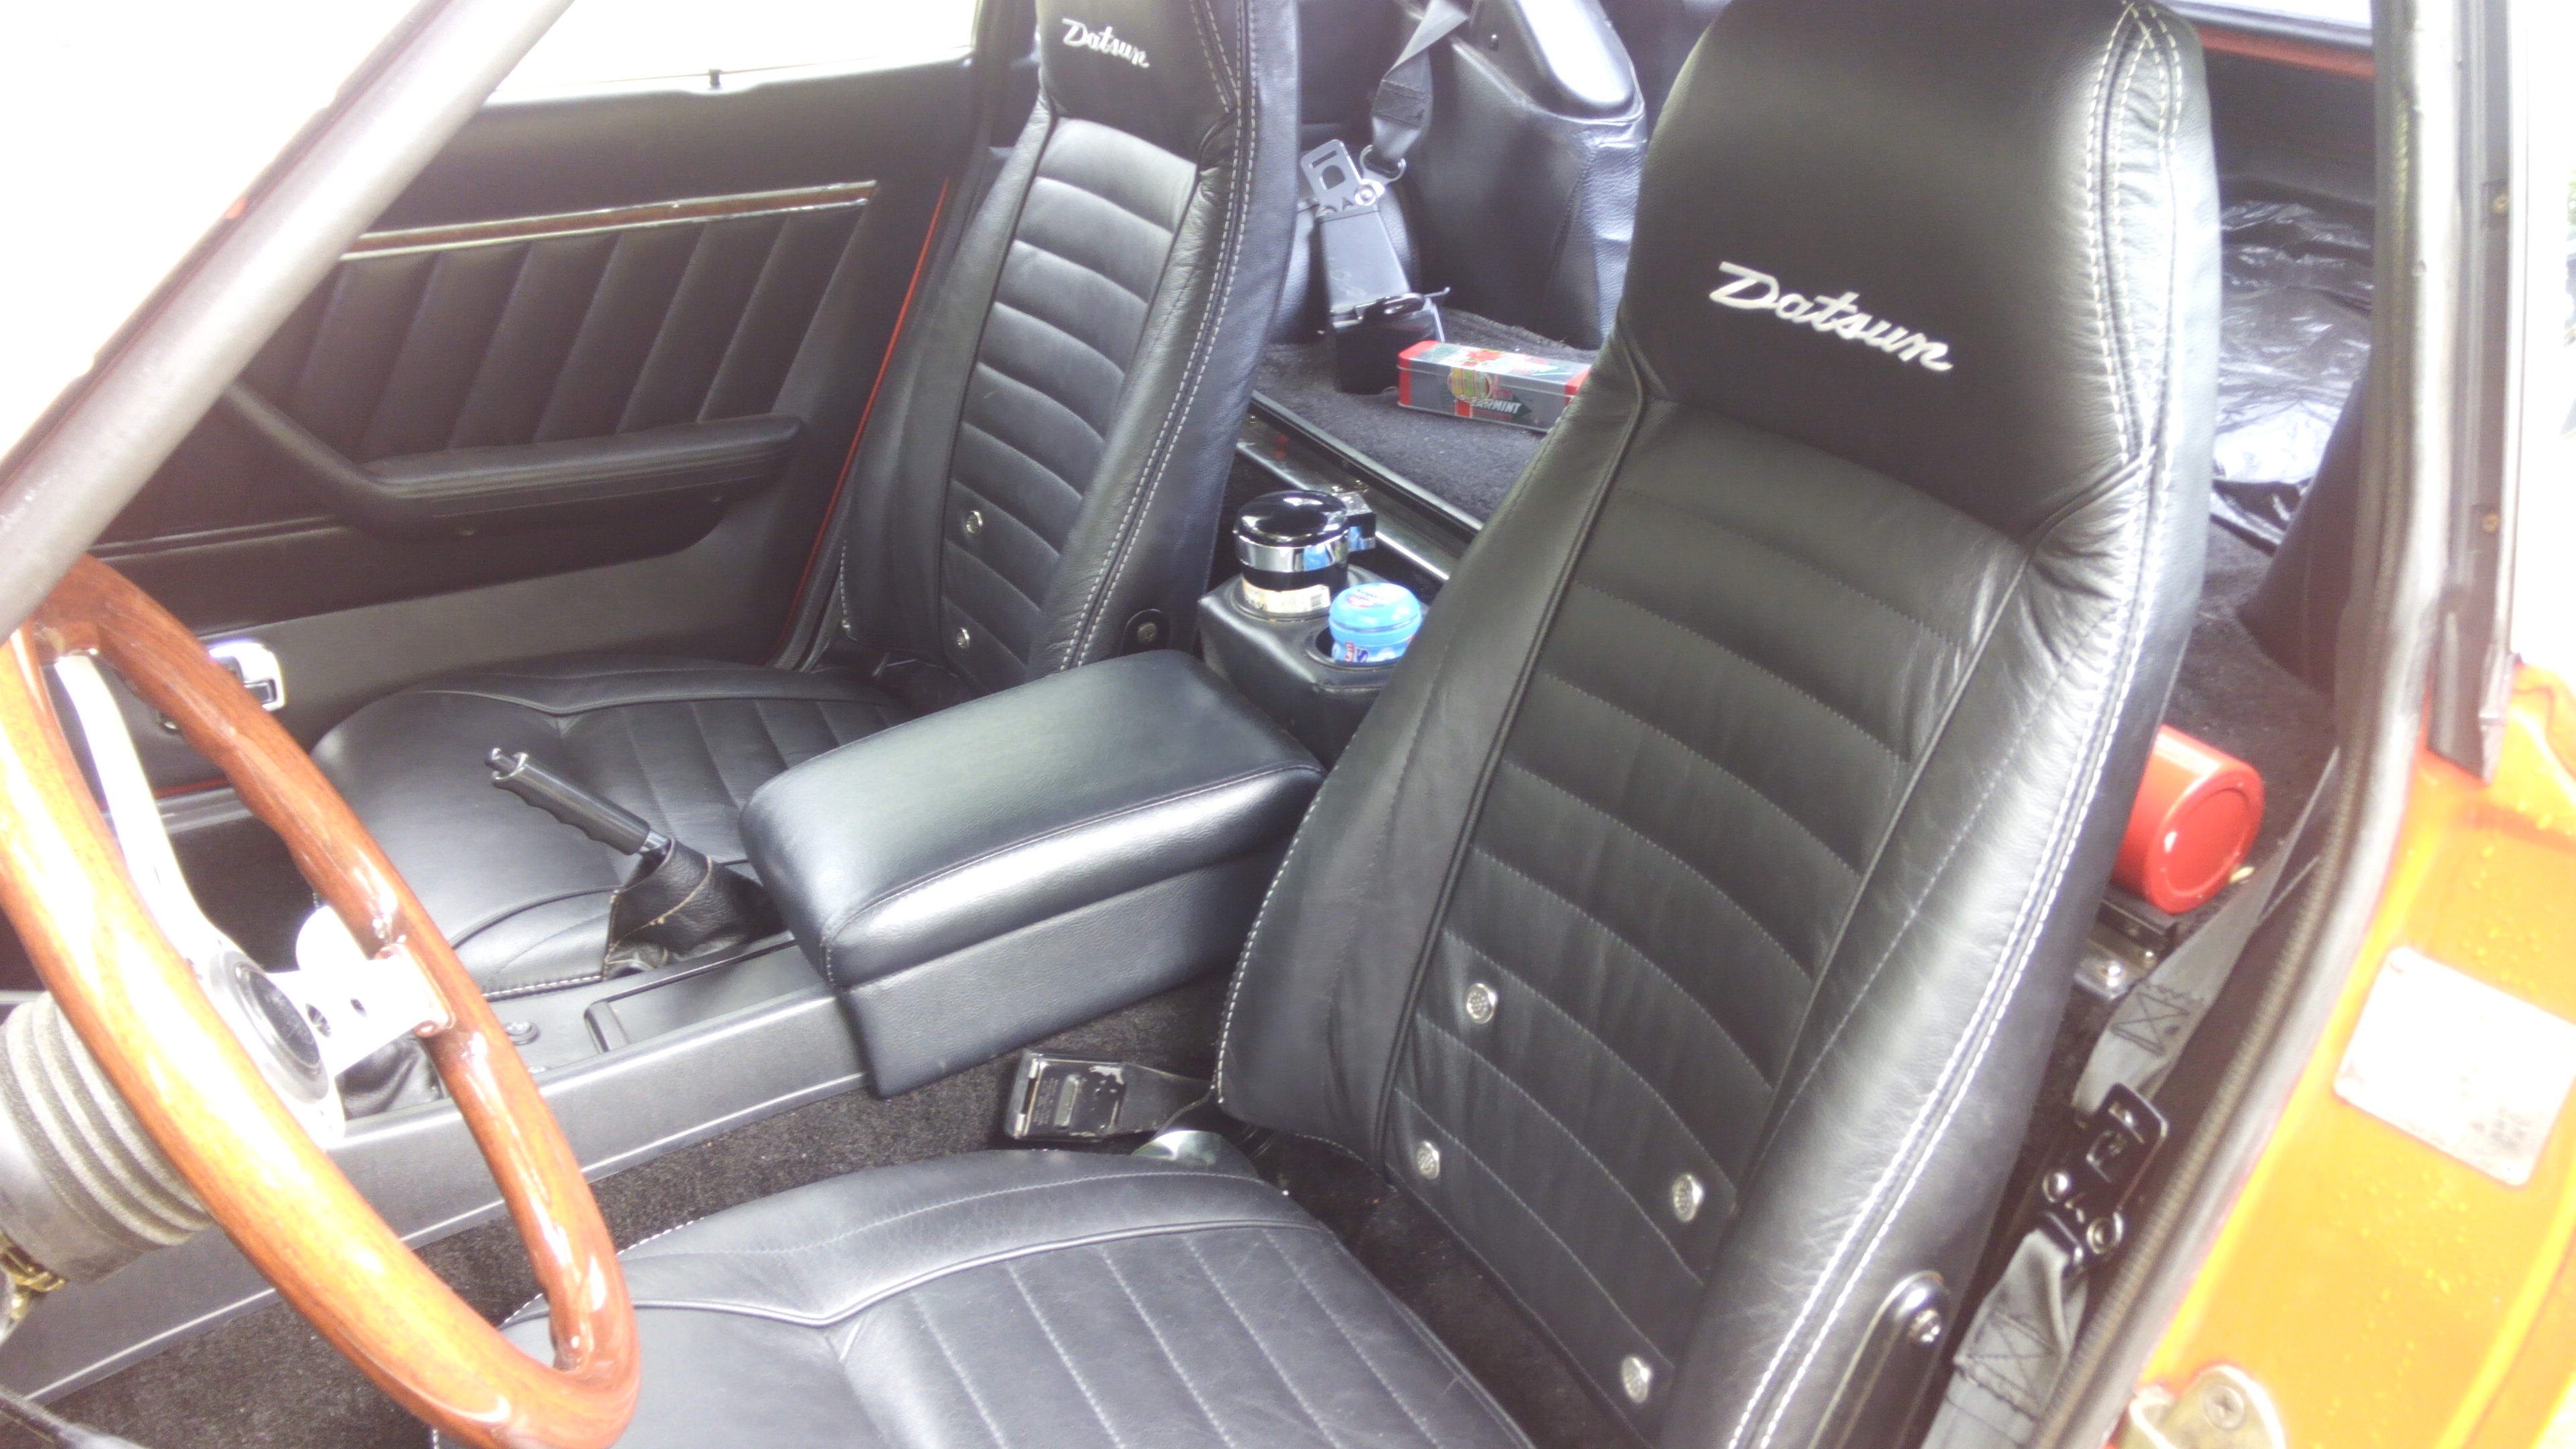
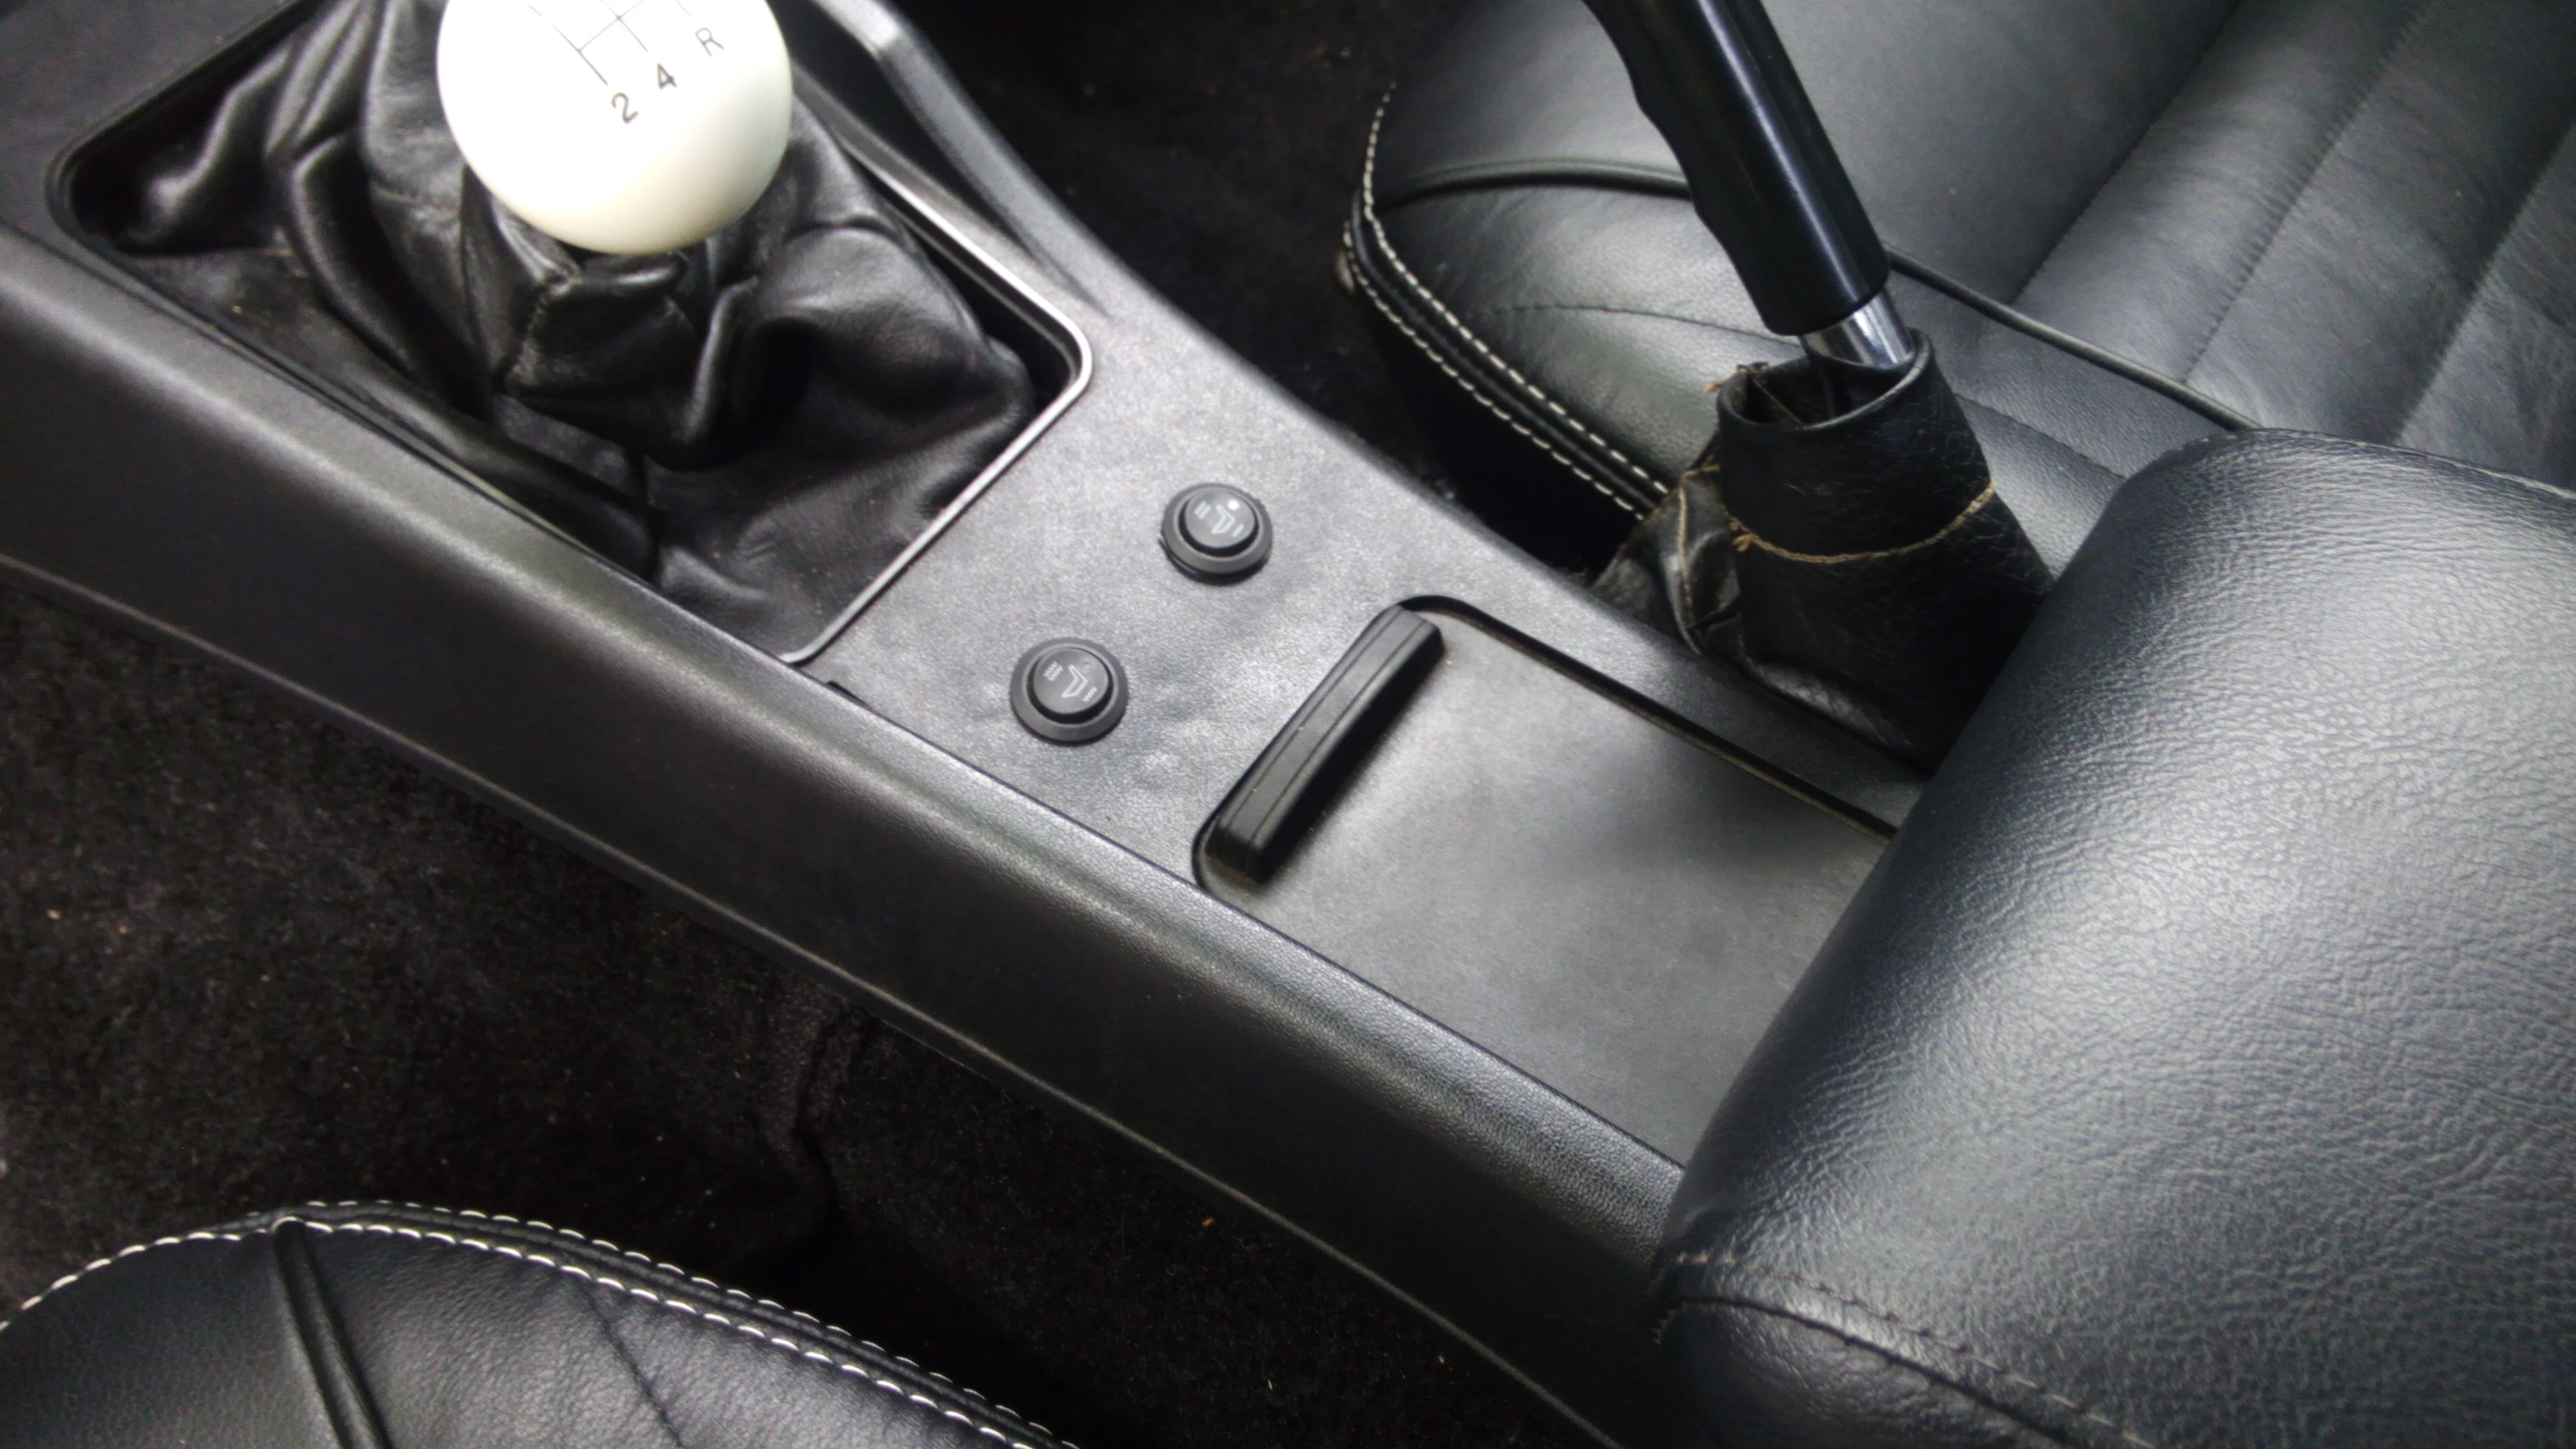
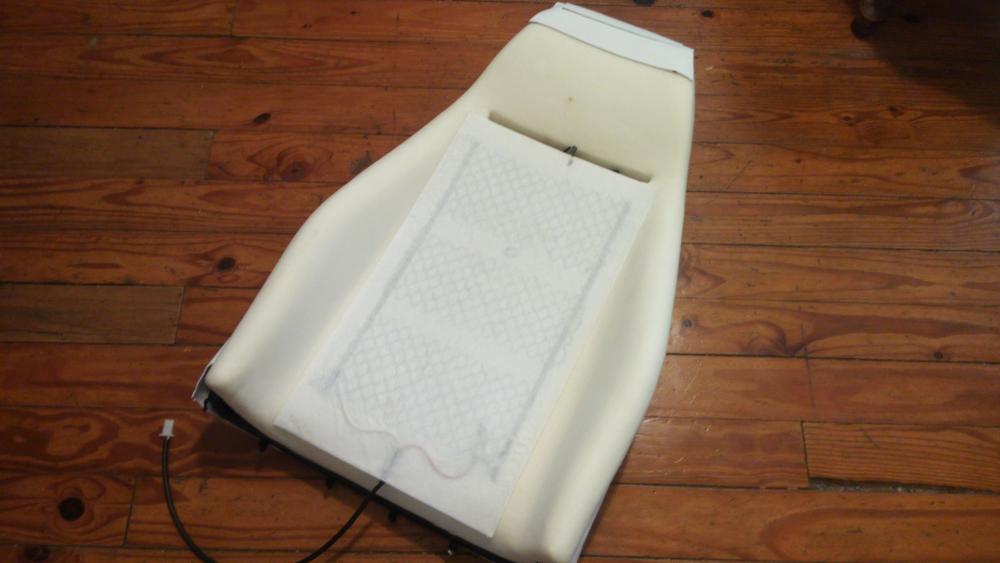
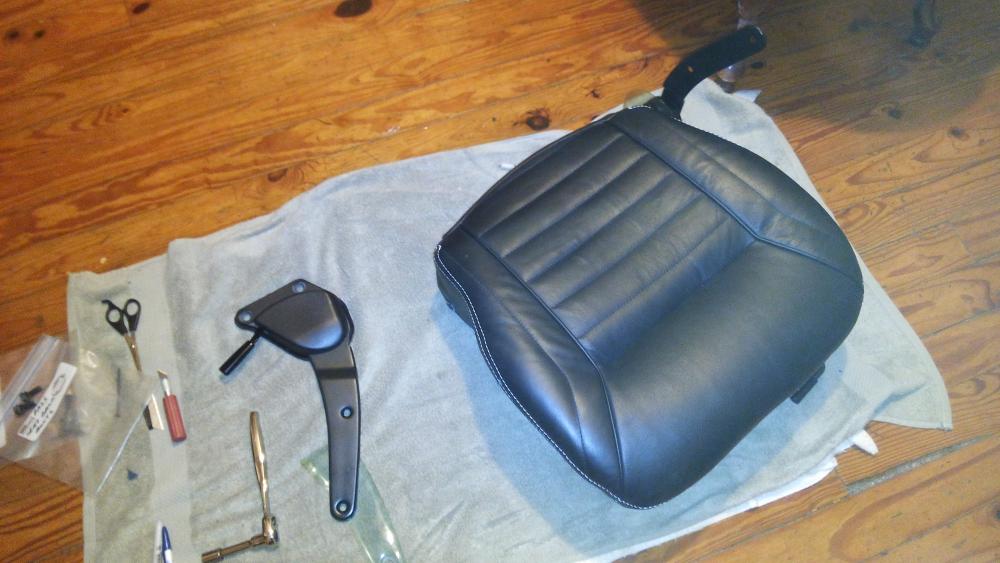
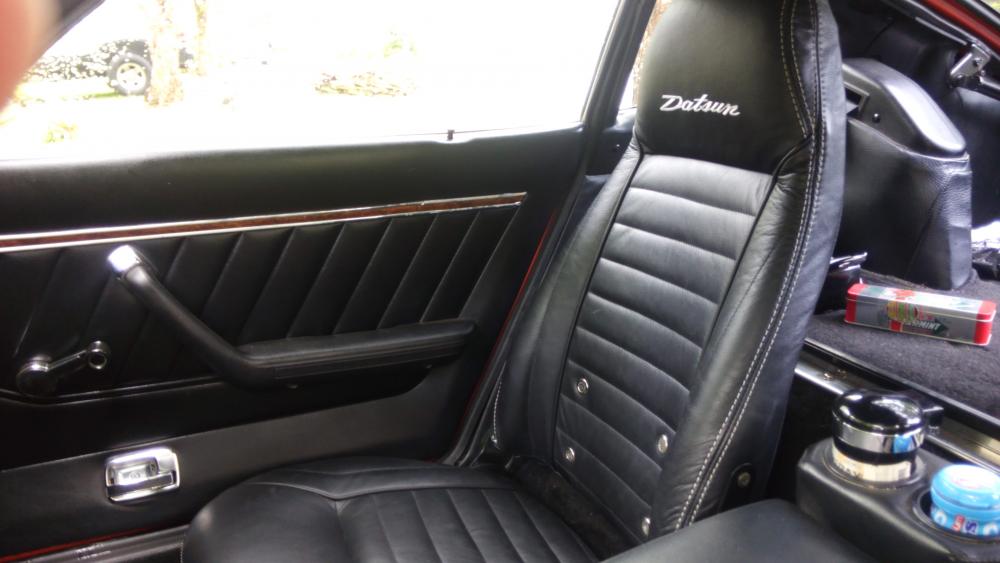
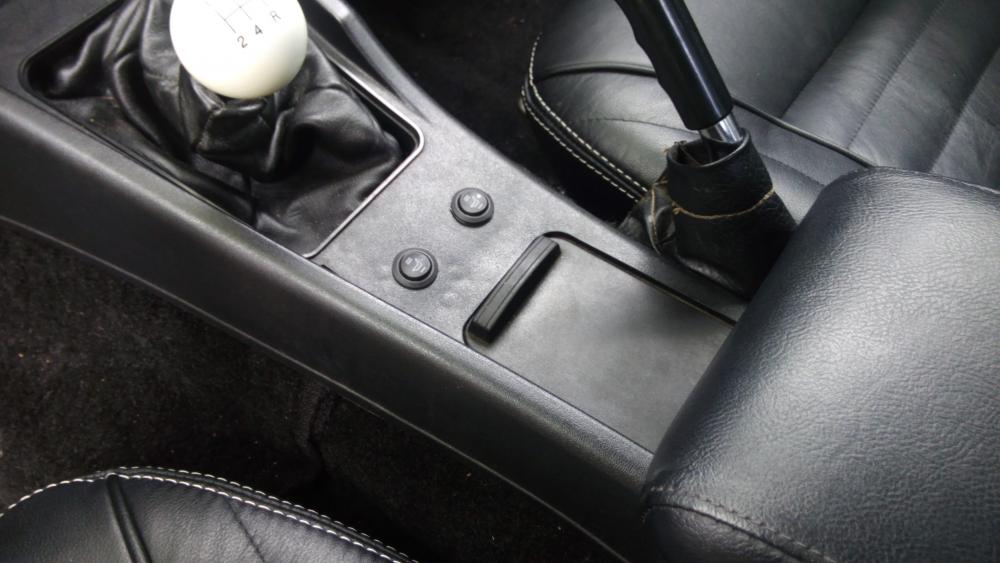
3 pointsAfter a big delay this winter, and with the help of warmer weather, I finally have almost completed the interior refresh. Just some minor things left such as the door panel wood accent strips. The seats were the big project, worked on them on and off over the last couple of months. Tried working with the seat leather over the winter but it was difficult when cold and I did not want to use a heat gun on it. The warmth of the sun on my porch made it more pliable and less chance of damage. I used Hardway's excellent DIY seat restoration as a guide. It's very comprehensive and gave me the confidence to attempt the seats myself. His suggestion to use tie wraps to pull the flap up thru the foam where you can hog ring it to the springs works great. Many thanks Sir. For the seat covers I used Interior Innovations leather seat kit. The quality is superb, all leather including the non-seating surfaces, they let me customize the embroidery on the headrest, (I sent them some high res pictures of my Datsun deck emblem) and the buying experience was one of the best I have ever experienced. They are made overseas and I was notified of their status every step of the way, including a call from DHL asking if I would be home the next day for their scheduled delivery. The seat foams were purchased from Banzai Motorworks, also very nice quality, and a super smooth transaction. Thanks Mike. From Amazon, I purchased the foam for the back of the seats. it is 2 or 3mm thickness & a roll is 36" x 60" which was perfect for both seats. It is a nice density closed cell foam, about $8 . Also used a small amount of it to fill out the top of the head rests. Also from Amazon, I sourced a seat heater kit, very nice and about $60 . For the integration of the switches into the console, I took a page from Rossiz's interior book & mounted them in the flat area ahead of the ashtray. They look like they belong there. Thanks Geoff. One thing for sure, this is not a trivial job. At least not for me. I probably took 5 times longer than the average person - I am so paranoid about the fit & symmetry, stitching straight, etc. It would bug me forever if they did not look right. Hardway was right... check your work as you go. This was one of his best tips in his guide. It's a real workout to stretch and hold the covers on the frame while you hog ring it or fit the covers over the tabs. i found the seat back to be a degree of difficulty more than the seat bottom. I probably deviated from Hardway's write up in two places. I inserted stiff coat hanger wire in the edge pockets where the seats get hog ringed as I did not totally trust the cotton cord sewn in for reinforcement. The factory covers have wire in those pockets, some of which I re-used. Probably a little over kill. Also, I purchased a single hole punch to make clean round holes in the two flaps behind the reinforcing wire to allow big tie wraps to pass thru and pull the headrest cover tight to the frame. This allowed me to fasten the headrest flap from the top of the foam as opposed to under it which risks bending the seat back foam and breaking it. i used three heavy tie wraps and added some hog rings as well. I used three big tie wraps on the seat bottom flap to the springs as well, and added more hog rings. All in all, I think the seats look good. I have about 80 miles on them - they feel great! Let me know what you think. Before I forget, now that the new sound deadening, carpet, and seats are in, Patcon asked about improvement in cabin noise. I would say it has made around a 50 to 60% reduction in cabin road noise and still have some of the deck area to complete. With windows up, it's a dramatic drop. the


 3 points
 -
1 pointA little PB blaster and bigger vise grips. the needle nose vise grips flex too much to really grip tightly1 point
-
1 pointIf I was the successful winning bidder (and I wish I were) I would pay to store the car in Toronto until August 2nd, then roll on over to Zcon & collect a trophy. Come home with both.1 point
-
1 pointThe voltage rating for the fuse must be at least equal or grater than the maximum voltage of the circuit it's protecting. The current rating is of course the most important factor. The 250v fuse rating will be fine for our cars.1 point
-
1 pointWell I got lucky for a change! After reading about Dave Irwin's plug for the ZX alternator upgrade I found what I'd done. Dipstick of the day award for me. I put an alternator for my '77 280 on my 240, as Steve J said "that's bad mojo". 240s have external regulators, 280s have internal. DON'T DO THIS Ignition feedback burnt the fuse and killed my gauges. " The ZXP does all the required connecting in a clean, simple plug. The ZXP introduces a Jumper and a Diode that must be installed to prevent ignition feedback, which will power the ignition with the key in the off position." I unhooked the new alternator and replaced the IGN fuse and my gauges twitched when I turned the key, fuel gauge came up and the voltage gauge moved. Now I'm plugging all the coolant lines that go to the carbs. Fingers crossed and salt thrown over my back, looking for a rabbit too_ I'm gonna put him in a wheelchair. I may start it again in the morning and try to get through the 20 minute run in. So far I've only gotten to 5.1 point
-
1 pointGood luck selling. Sad to see her go after all the work you put into it. Chris, you might not know it, but you have John's last word of advice on this site. Post#31.1 point
-
1 point
 A couple of T Shirt designs I had made up. http://www.redbubble.com/people/garage72/collections/454681-datsun-designs1 point
 -
1 pointStill alive. Still have the 240z. It's still in pieces. It's a problem of time, money and motivation.1 point
-
1 point
-
1 pointBefore Chris bought it from me, the car had sat (stationary) in three different driveways across Ontario: Burlington (3 yrs), Cobourg (3 yrs) and Oshawa (unknown, but probably at least another 3 yrs). Not sure when the mice came on board .1 point
-
1 pointMine has rubber bumpers between the louver slats and the glass. The only time I get any kind of noise is when I turn the amp to full sub and crank the volume. It makes kind of a dull 'buzz' at that point but I don't listen to the radio at that high of a volume.1 point