All Activity
- Past hour
-
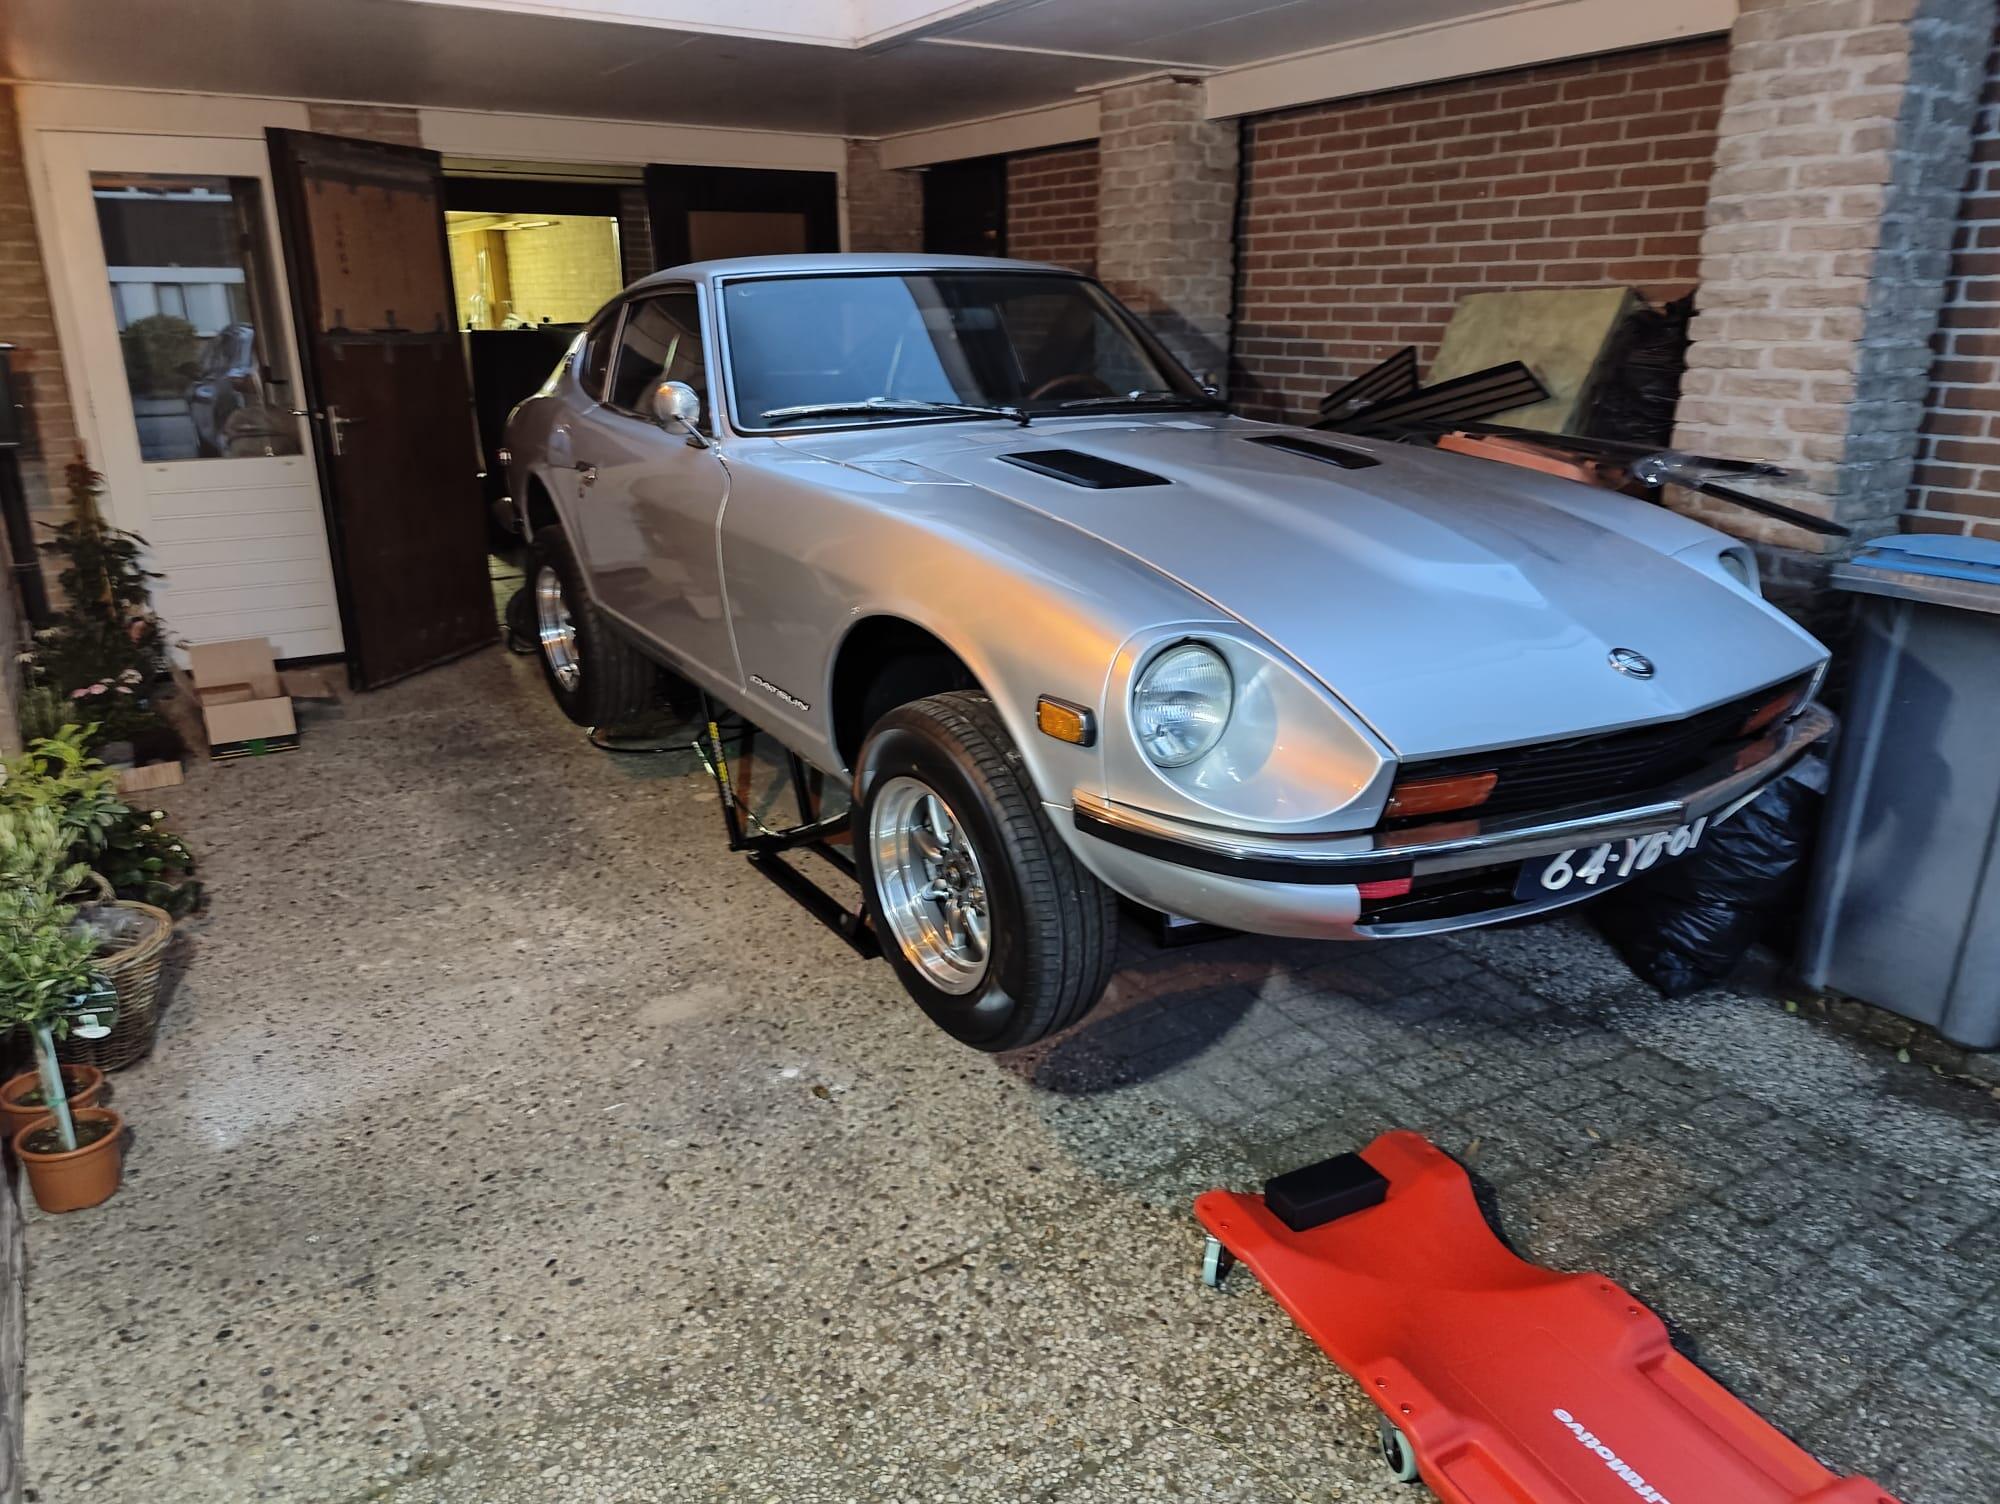
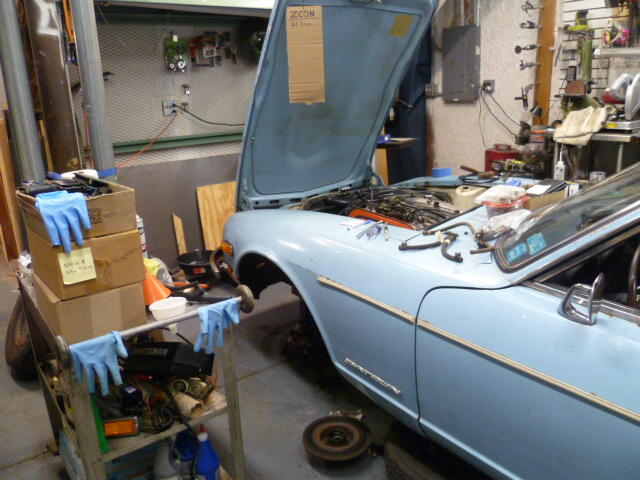
 Over the last few days, I was busy in my workshop, getting some small tasks completed on my Z project. Time for a little update. After installing the partial gearbox to test fit the brackets and stuff, I realized that the gear lever is too much in the front of the hole: A quick look into the manual made it clear: I had mounted the lever the wrong way. So, gear box rear-end out, gear lever corrected: And back in, this time, correctly: Then I spent a lot of time at the rear end of the car. I had to clean the holes for the three taillight panels, so that the plastic rivets would lock properly. After that i re-installed the taillights, and ensured the sealing rubbers were set correctly, using my "string-trick": Next i have to finish the slightly worn chrome / metal trim around the taillight panels and get them back on: While working at the rear, i decided to install all those fasteners, stoppers, alignment pieces, guides, etc. Like those rubber spacers: And trunk dampers. I have a NOS set of everything, so the installed ones are only temporary, to not mess up the new ones: And the last bit at the rear end was to align the trunk / hatch. The body shop had installed some spacers to get it straight, but after all the parts got installed, I had to remove them again and massage a few areas lightly to have it all aligned: Next? Seat rails. I had those Bride seat rails from my Histrix lying around for a while and wanted to test-fit them. I'm most probably going to use something different setup in the end, but I wanted to ensure that the distance and position of the seat mounting brackets was right after all the bodywork. I thought the best way was to use the original seat rail mounting studs and spacers. Since I had several highly-damaged OEM seats, I hammered out the fasteners and used the plastic spacers after grinding away the factory spot-welds on the bolts. This worked unexpectedly well, so now I can do some trials with different seats, rails and setups - to figure out what will go into the car in the end. Next: I realized that I didn't have any upper rear number plate light in my part collection. Luckily, Florian from Datsun-Autowerk was kind enough to send me one of his broken ones including some other parts (more on that in a following post), for trials. After puzzling and glueing all the parts together... I could mock it up all together and drill the required holes. Fun-fact: I always thought that slight "dent" in the gray metal piece was a production fault of the reproduction panel, but it's actually there to make space for the number plate lighting bolt. After the holes were done and cleaned, I got the upper plastic part installed. And then the whole thing with the lens. Note all bolts and the light itself are temporary units for the mock-up only, final parts will be correct and fresh. Looks good if you ask me! Special thanks to the person who gave me the hint with the holes (I wasn't able to find the mail anymore, but you know who you are!) And then? Spoiler-Alert. Again. After i realized that the currently installed spoiler is beyond repair, I remembered that I had another one lying around. But it was bent in all directions and super wobbly: But all the brackets were still in good shape, so I gave them a little wire wheel brush and corrosion protection: I placed them on our terrace, which tends to get quite hot now in summer And let it take the heat every day. My thought was that the Polyurethane gets weak and goes either back in its natural shape by itself, or can be massaged. At the end, some areas turned out to be pretty stiff, even with heat and required some proper bending over my special bending bench :-) It didn't really work out. It's way better than in the beginning, but still super wobbly. I thought if i'd install it on the car, it might straighten itself a bit. Let's see. I have my doubts. The good thing is, there seems to be another spoiler on the horizon :-) I've seen worse ones, but yeah. Not good enough for me: I also went through my plated fasteners and sorted them a bit. I got various boxes over the years from various collectors and Z-specialists, so it was about time to ensure I find what I'm looking for :-) The to-do list gets smaller by the week. And there's not much left from my side, but some tricky bits. I guess I've earned my favorite Japanese "Hitachino Nest" beer for today.
 - Today
-
 In Nissan's 240Z Restoration Program Quality Control Checklist they specifically call out "Cad plating", it was commonly used in California to recondition automobile parts and fasteners at the time. It's banned there now but available in other states. I use it for replating all my parts on Aston Martin restorations. They also mention "Zinc Chromate Tank Slushing" for the fuel tank, so they obviously knew the difference between Cad and Zinc processes. Additionally Nissan mention "Paint semi-gloss black" for suspension components. If you look closely at the photos of the Vintage Z that have been on BAT it is easy to discern between Cad and Zinc, Paint and powder coat.
 -
 Do you have a reference regarding the ban, and its details? I cannot find anything on the internet besides a single statement that Boeing developed new plating methods because of the ban in Japan, in 1969. But the source did not have a citation. A typical industrial chemical ban has a phaseout period. Large corporations have great influence on regulations. https://www.sifcoasc.com/cadmium-replacements "Boeing began their research into cadmium alternatives in the early 1970’s as a response to Japan’s ban of the use of cadmium in 1969." There is quite a bit out there about Itai-itai disease though. Interesting digression. https://www.int-res.com/articles/esep2012/12/e012p099.pdf Role of experts and public participation in pollution control: the case of Itai-itai disease in Japan1 Masanori Kaji Graduate School of Decision Science and Technology, Group of History of Science and Technology, Tokyo Institute of Technology, W9-79, 2-12-1 Ookayama, Meguro-ku, Tokyo 152-8552, Japan
 -
We'd also need to know more about the people Carl Beck knew at Honeywell. I'd write more if I was here to argue. But I'm just here to learn more. I really hope that you were being self-referential here, in an attempt at humor.
-
 What science are you referring to? The "science" in Carl's story is of the 'Trust Me Bro' variety at this point. 'Maybe' doing a lot of heavy lifting there. There can be any number of maybes once we decide to take an anecdote as empirical truth over the written evidence of a manufacturer. The data in the Nissan literature isn't conjecture, nor is the Japanese ban on Cadmium use in commercial automotive manufacturing. My money's on the likelihood that people got used to calling yellow gold coatings on auto parts 'Cad plating' and it simply stuck. A habit. Understandable, and not without precedent. Contortions performed to justify it - even to make it somehow true - will tie us all up in knots. ISWYDT 😉
 -
The science shows the reality and the literature represents the image of desired reality. You'd have to know more about the methods used by the Honeywell people to know why they said cadmium was present. Maybe the parts were old stock hardware, produced before the cadmium ban. Old hardware is still out there if somebody wants to pay or knows some insiders at a good lab. Without more information it's just more conjecture. One of many web sites from one of many typical analytical labs, which could do that type of analysis. Triclinic Labs, LLC.Leaders in Solid-State Development and Materials Characterization
-
 I have one of the one piece ones now, to install. Just have to find the thread where the Z member documents the best way to do the install
 -
 Correct……Always do one carb at a time….piston and dome are precision matched. One more thing, make sure the needles haven’t been bent.
 -
 Nice ad. If they did it thoughtfully, there might also be promotional value in highlighting two other successful Datsun models from the early 1970's: the 510 sedan (contrast with Rogue), and the 520 pickup (contrast with Titan). Not too many buyers in 2025 realize that the pecking order for Japanese imports back then was Datsun-Honda-Toyota, rather than today's Toyota-Honda-Mazda/Subaru. The decision to re-brand from 'Datsun' to 'Nissan' (1977?) was such an unnecessary a disaster. The bland-mobile 1980's models didn't help either.
 -
Nissan themselves told us - it's LITERALLY written in their technical literature for 'our' cars - that the electroplated finish on the non-chrome components was Zinc, either 'clear' or with other passivated top finishes. Cadmium plating was already banned for commercial automotive use in Japan before 'our' cars were made, so - naturally - there's no mention of Cadmium in the technical literature. People have talked about 'Cad' plating on cars for decades - especially in North America - and it simply became part of the vernacular. Just like 'Mag' wheels that weren't actually Magnesium anymore. Old habits die hard. Did the VZ Program cars receive actual Cadmium plating on specified components when they were rebuilt, or was that too an example of vernacular use? If they did receive Cadmium plated components then we can chalk it up as yet another non-original finish on cars which were never claimed to be such. I will continue to call out people who cite processes and specifications on the VZ Program cars as somehow being evidence of what Nissan and its various suppliers did when the cars were originally made. Hardly logical, let alone scientific. I've had to deal with 50+ year old fasteners on these cars too, and the single biggest factor involved is the environment that the 50+ year old fastener lived in during its use. Fasteners on a car that spent those 50+ years in southern California may well be happy to cooperate, but a fastener that has spent the same period in regularly cold, wet and often salty conditions will look - and behave - very differently. Pretty much any electroplating with a sacrificial coating will succumb under such conditions. I'm sure Honeywell Space and Strategic Systems should rightly command our respect, but far from "putting men on the moon and probes on other planets" we are dealing with a question that can be answered simply by looking at the technical literature that the manufacturer published when the cars were made. To coin a phrase, that's not rocket science.
-
.thumb.png.057015c13bef9a47315a71428b1471f9.png) BuyFullCode joined the community
BuyFullCode joined the community -
 You say: switched tops but maybe you must switch top and piston on the other bottom part.. btw always keep the parts of 2 carbs ALWAYS apart.. they look the same but are very fine tuned parts..
 -
 If they fall down can you still get them back up into position? I saw a guy on youtube that unbolted the hinge on the door side first and after the got the car side with a wrench and swivel sockets. I might try to go that route as the car doesn’t fit in the garage (and still work on it, only 2m wide for the first 4 meters). I do have a lager carport where I park the car under to work on it so the car is still dry. That does mean I’ll have to cover the car if I take the doors off but I had to do that anyway.
-
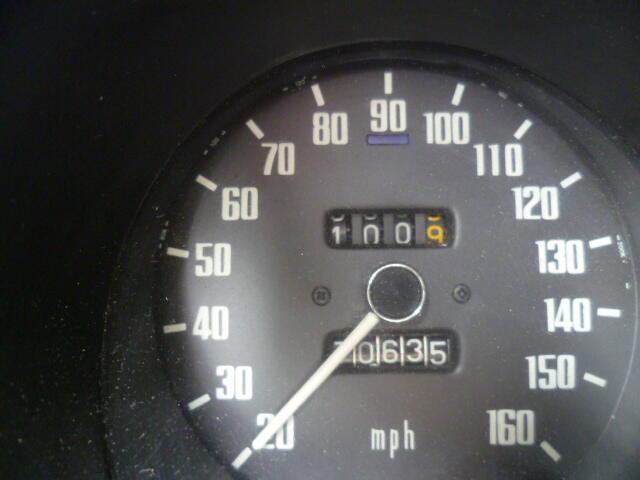
 Countdown!! I got 100 miles on it: And those 100 test miles made it clear that I need front struts:
-
 Vintage is where I bought my complete kit and they recommend not to use the 3 piece kit. They did offer it and it came along with the one piece.
 -
 https://www.youtube.com/watch?v=MP7R_FUHI9E
 -
Thank you! The only thing I have to do on the Z soon, is the outer lip hatch seal - the 3 piece one I put on back when I did all the seals has peeled off along the top. I need to remove the hatch & redo it. If I recall correctly, the best way is the glue it with the 3M black snot & then tape it tight & let it harden in place for several days. I didn't wait with mine.
-
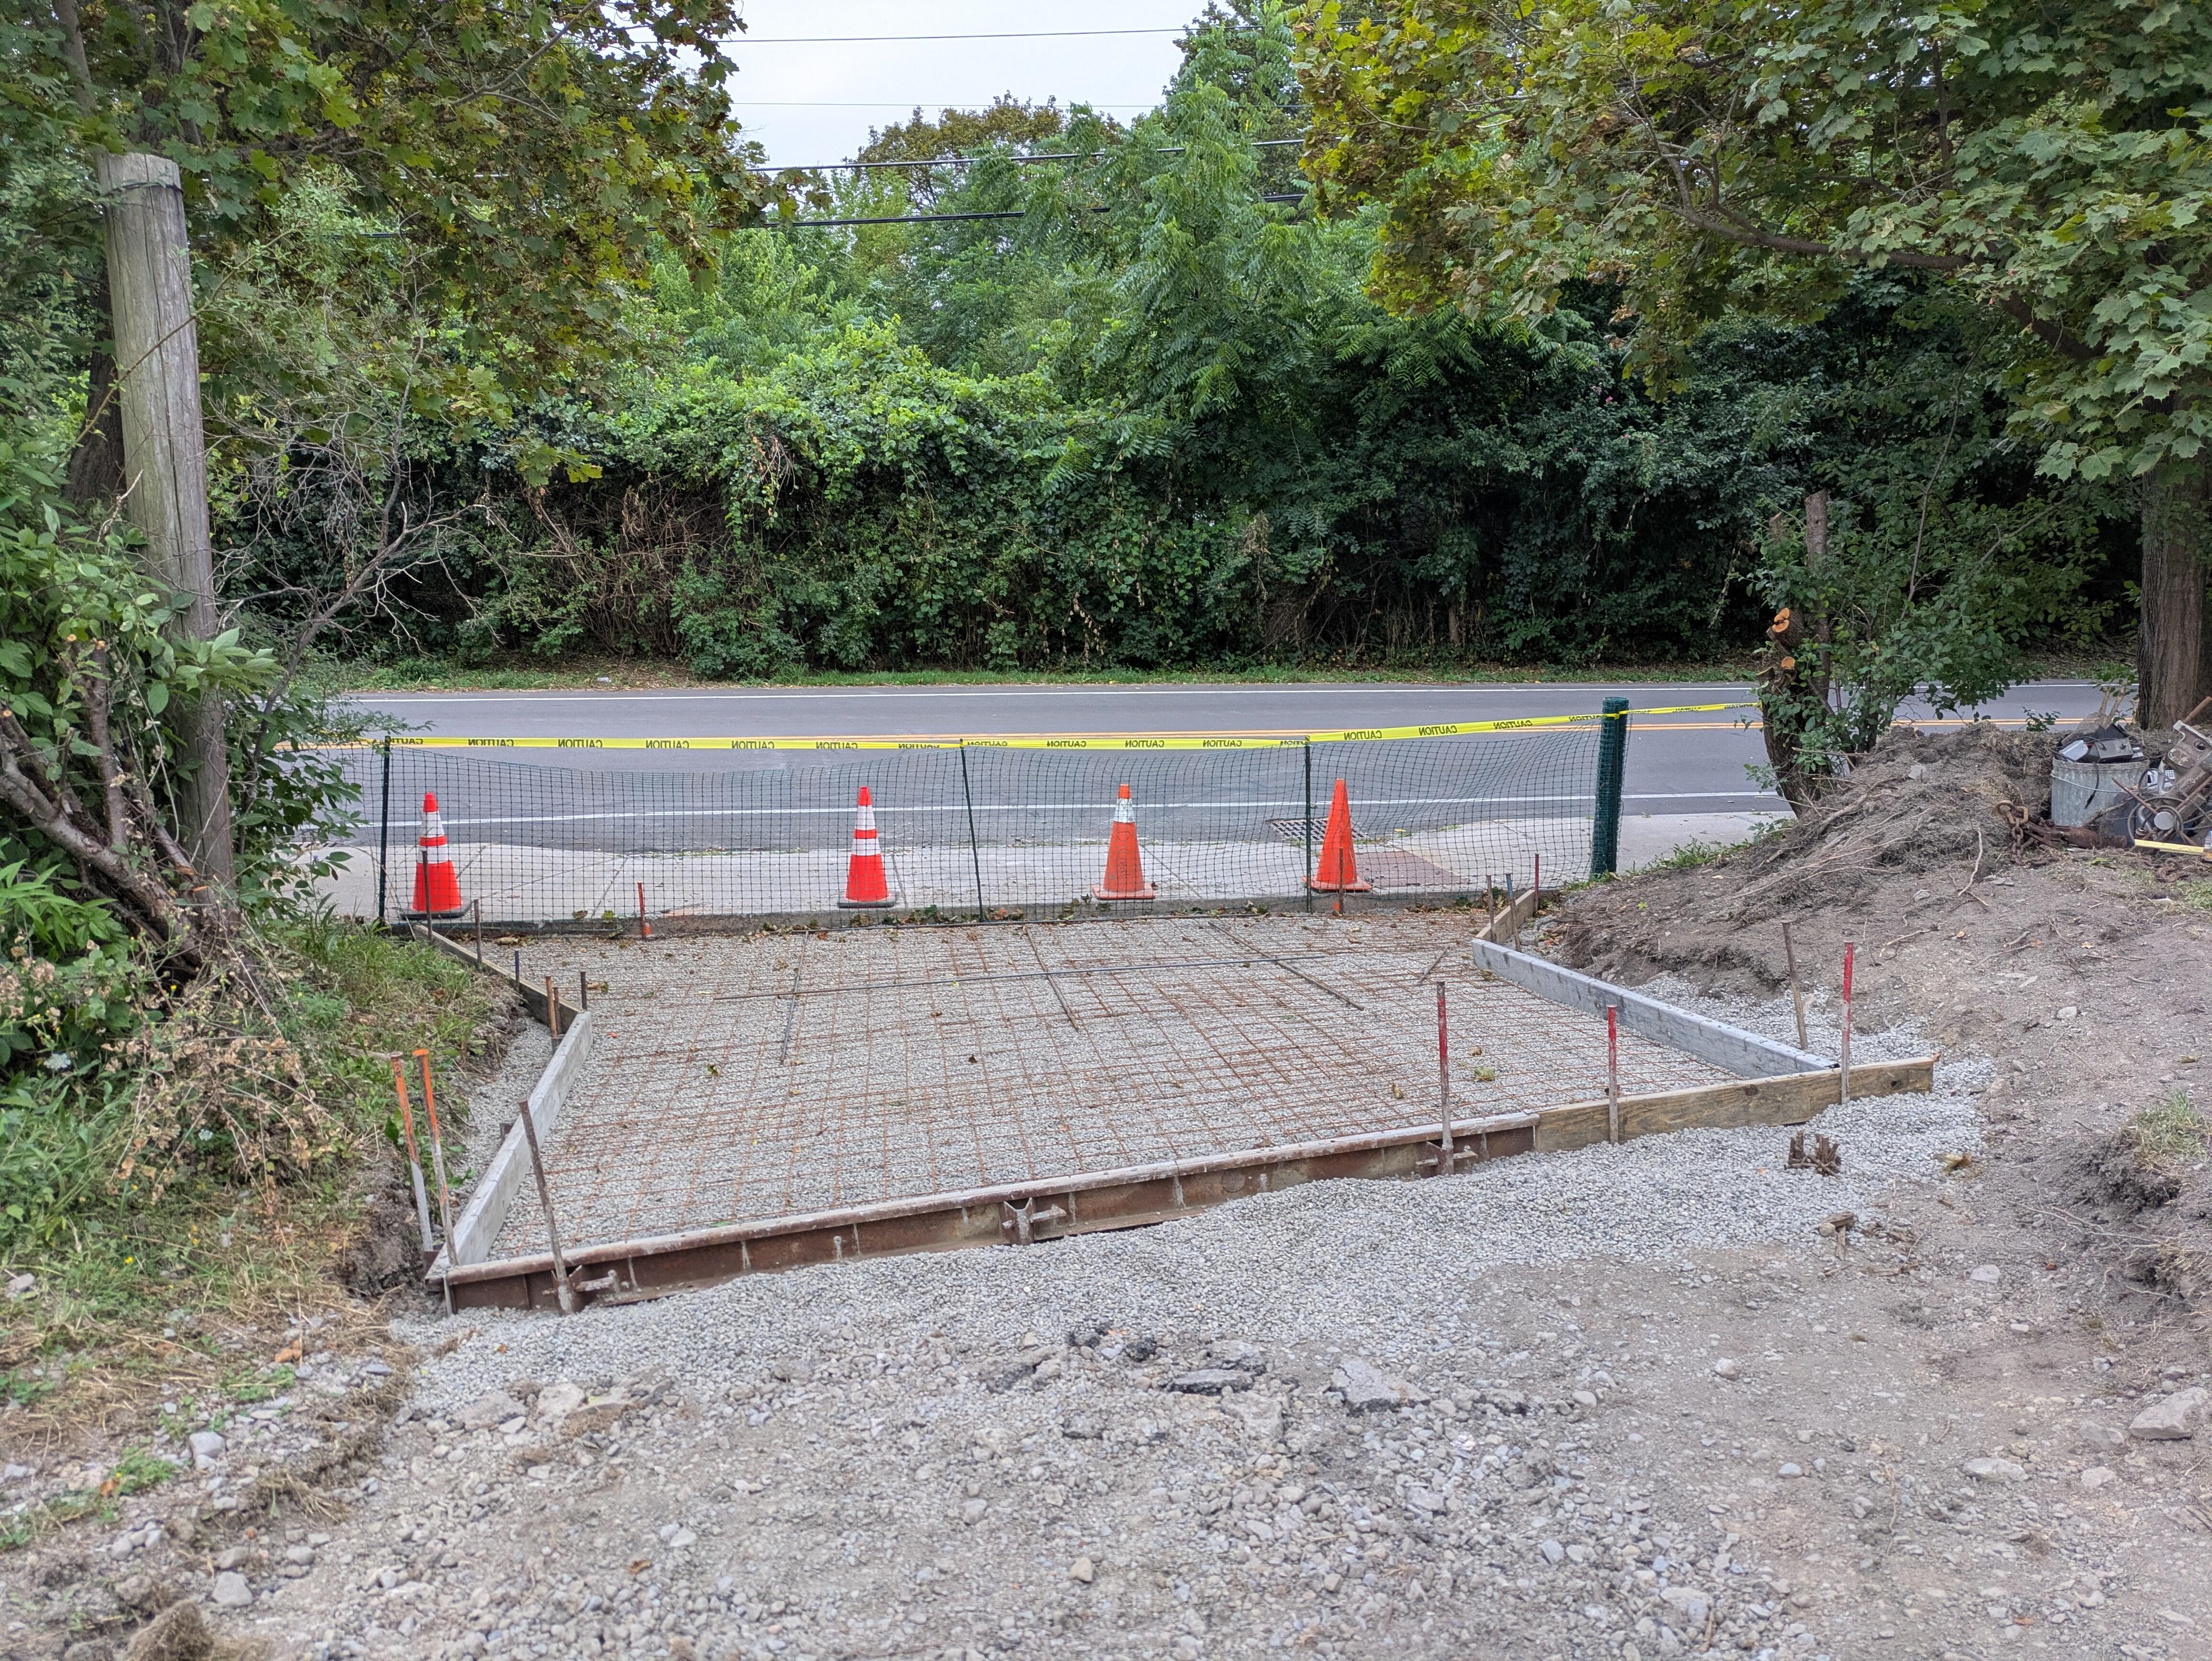
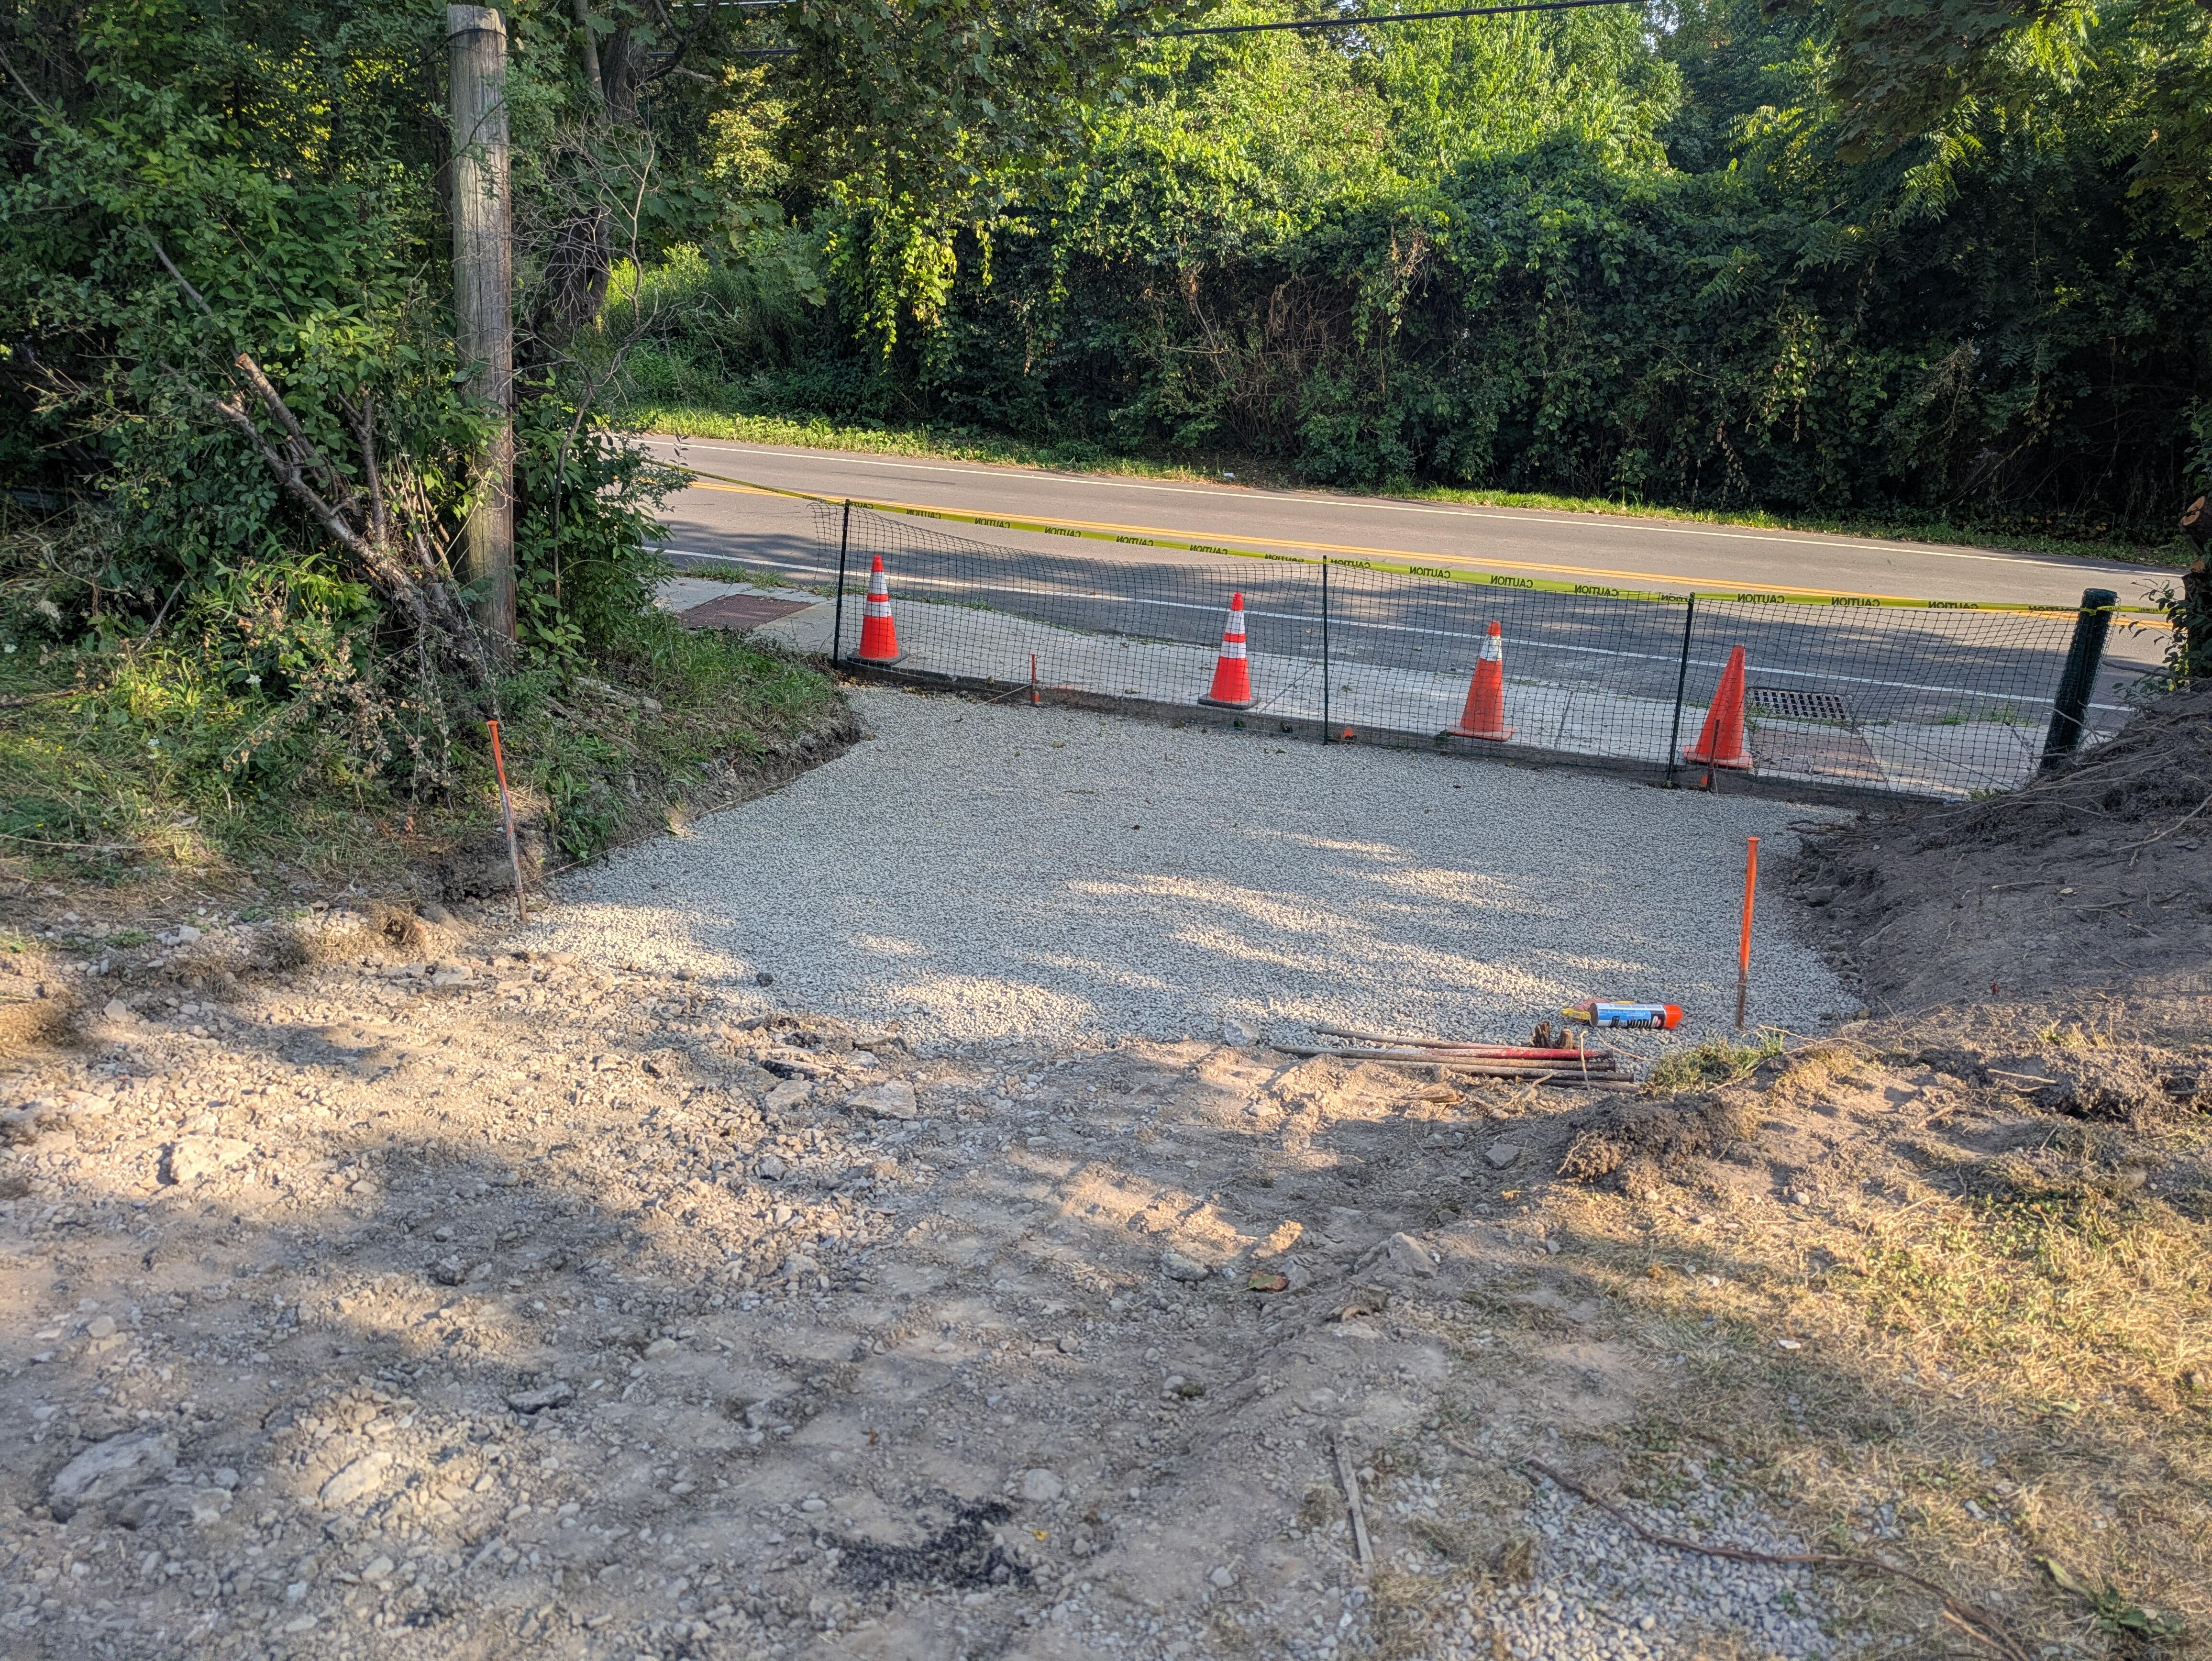
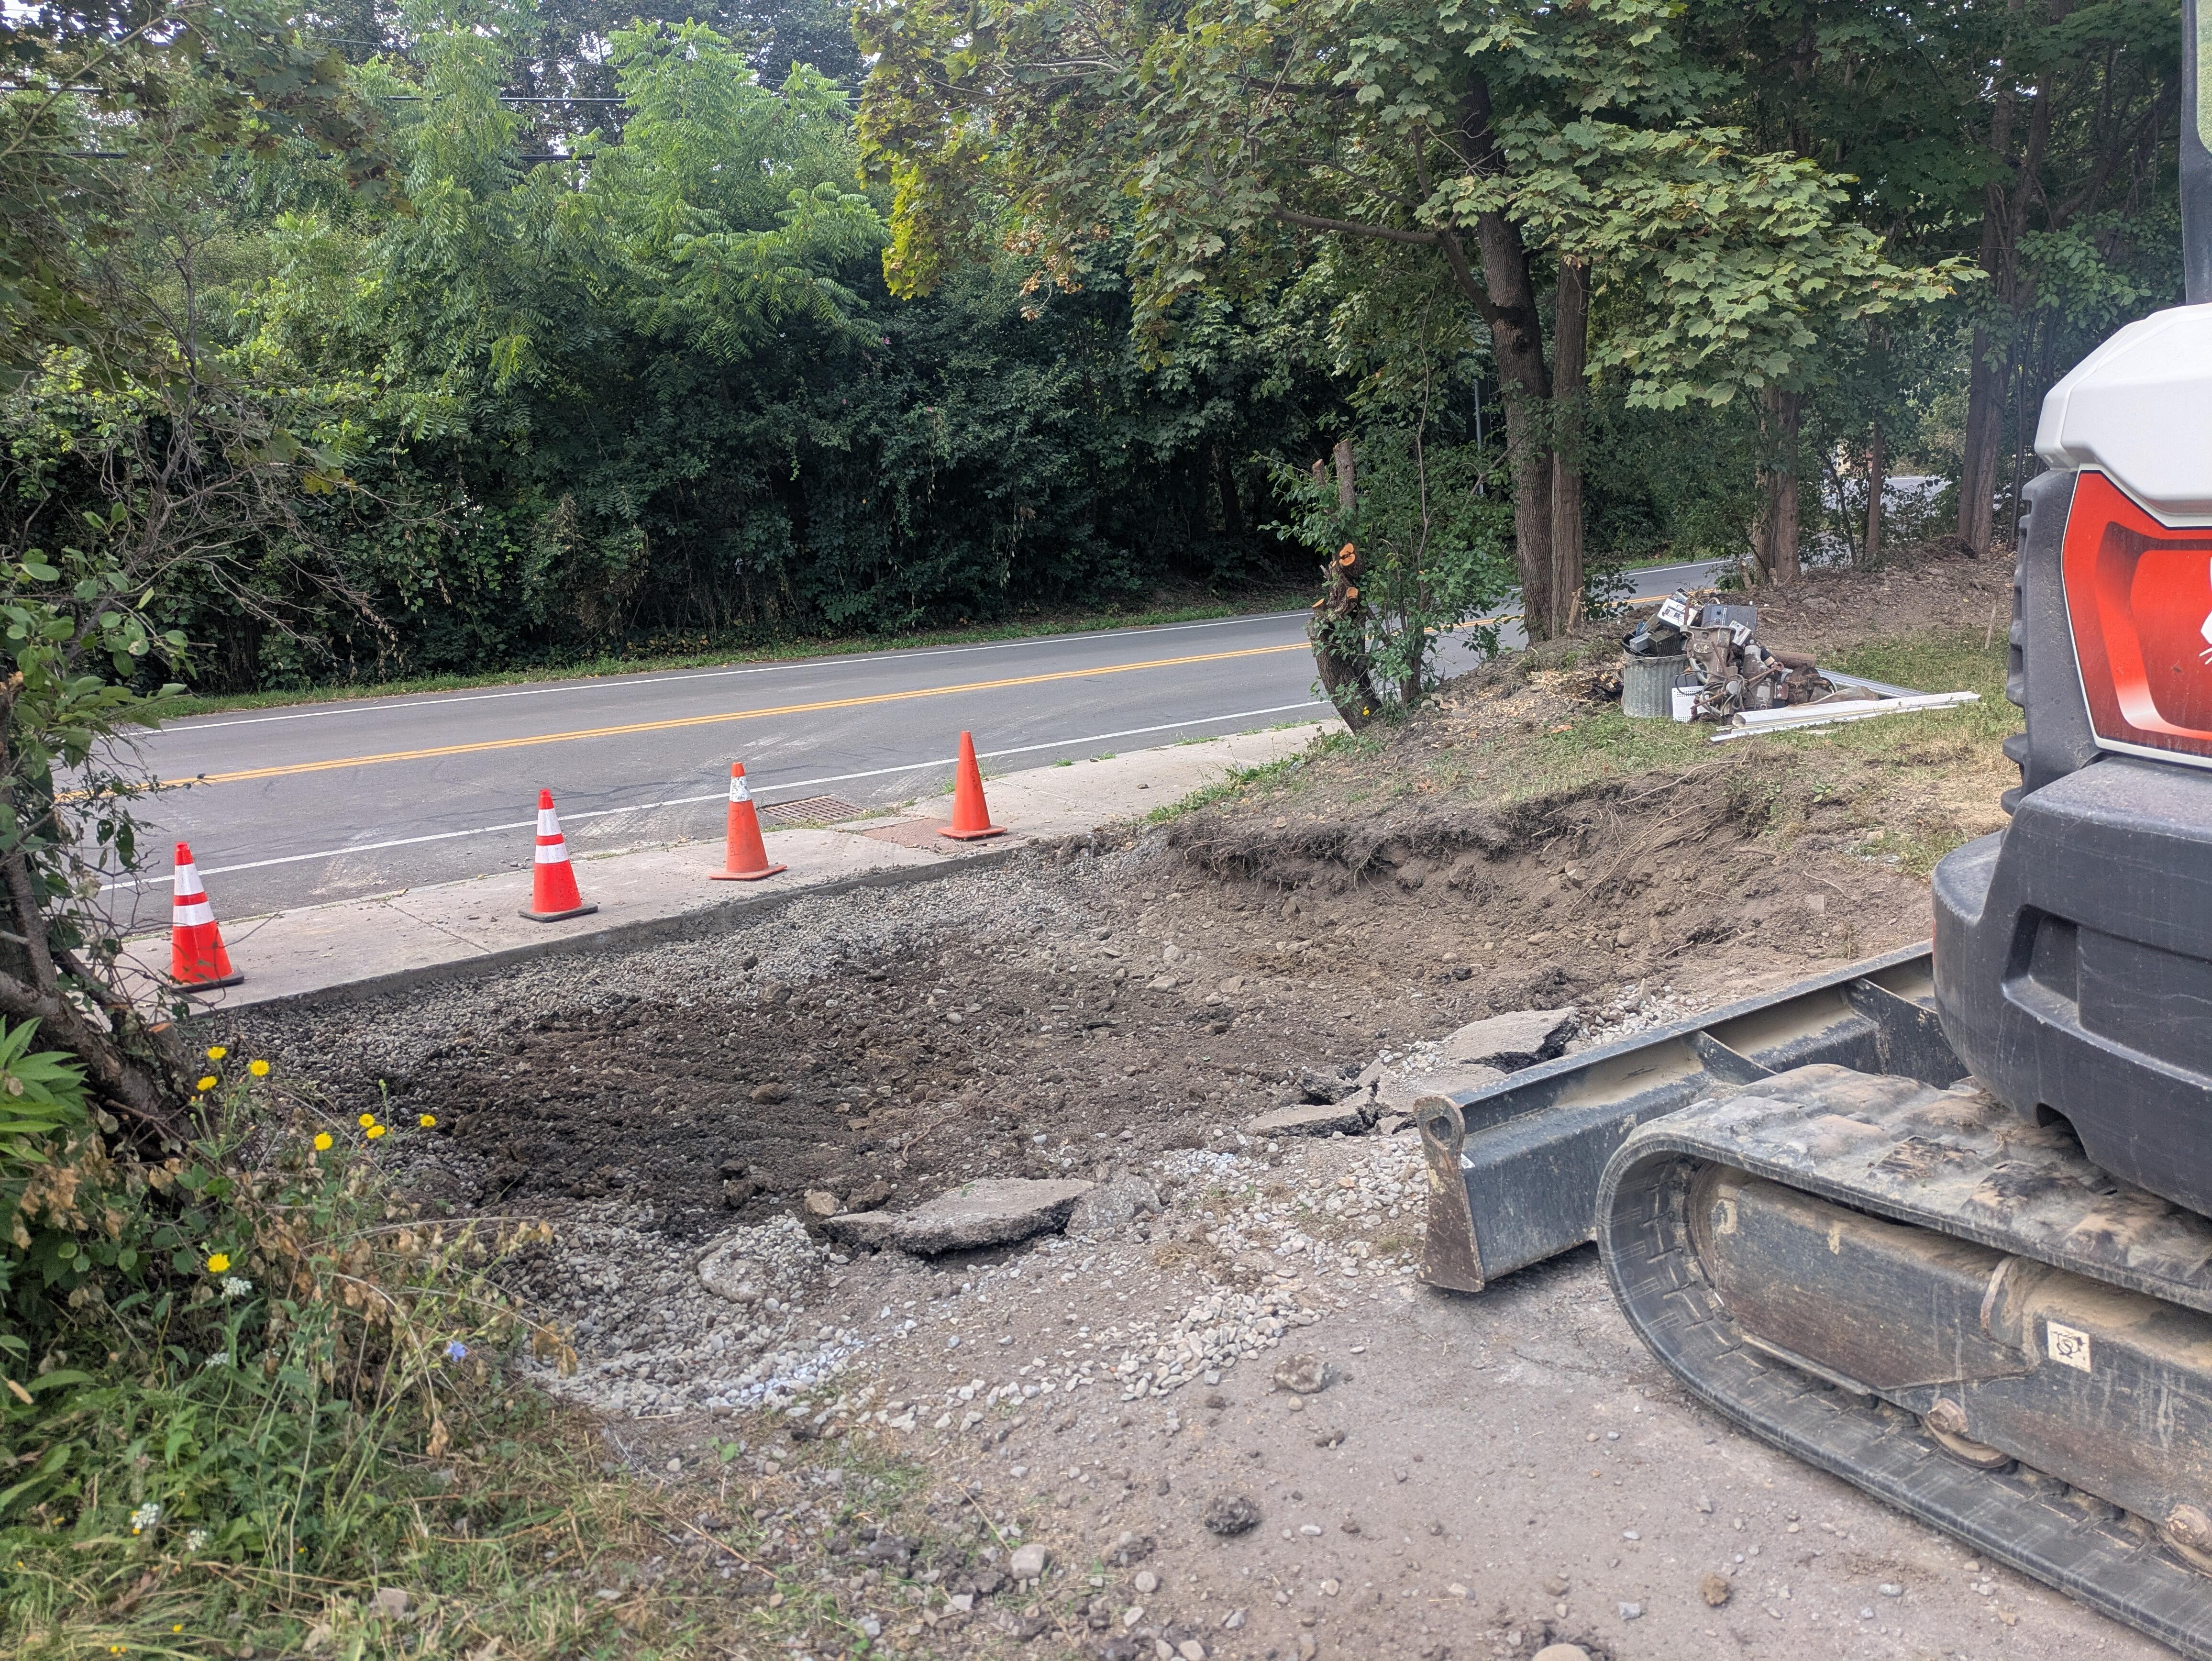
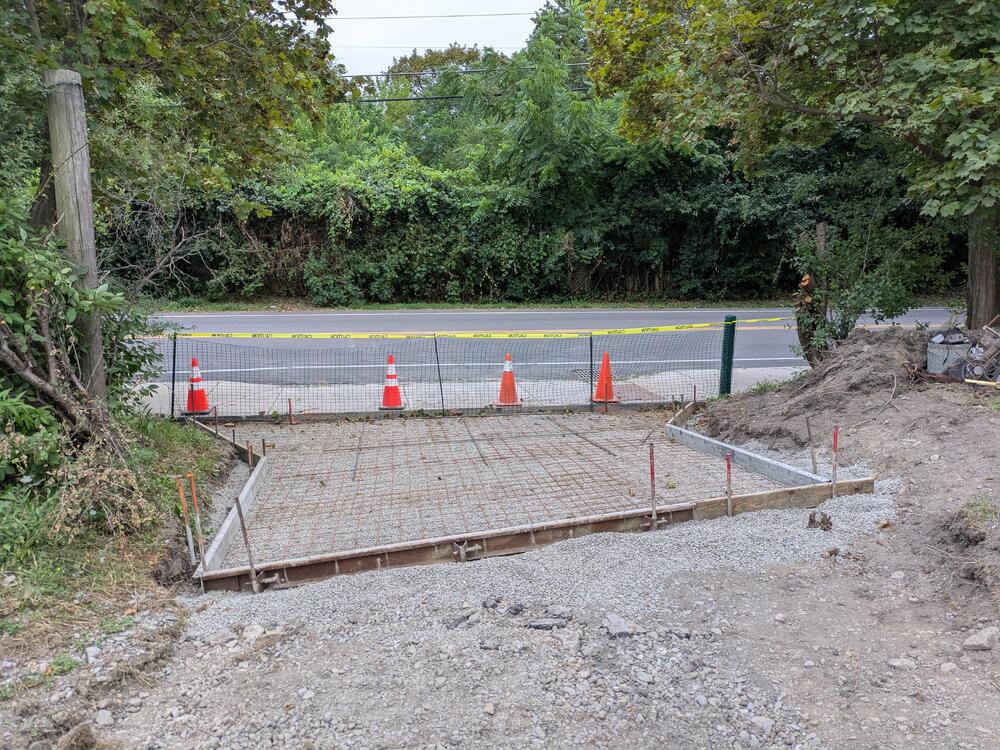
Indeed! We have almost an acre now, corner lot, with a driveway that loops around to the side road. That end I'm having concrete poured, it's been gravel over the beat up asphalt, and that keeps washing into the street, I've had enough of that in the short time we've been here. Concrete is scheduled to be poured tomorrow.


- Yesterday
-
 I like to use a wooden shim. Find one that is the right thickness and mark it with a sharpy. Works really well...
 -
 Thankyou gents for your replies. I've mounted the car. Sat down after two days of endless measuring, laser levels. 3 spirit levels...... absolutly perfect. Had to pry the shock towers in....they seemed to be out by about 8mm. Yeah its crash damage I think. So I sit down in the heat. Crack a beer. And celebrate my days of handy work...... Then.... I read what is written above.....that the towers will be 7mm out if you meausre it wrong........ Ok so tomorrow I'll pull that strut mount off and redo it. Some awsome tips. Thanks again! I put the doors on yesterday and gapped them.....a tip for you all. Im a woodworker too and the best gapping tool on the market is a good set of playing cards......


-
 A little late jumping into this conversation. I have been "out of contact" on holiday which I do every so often going internet dark for a few days in my effort to get away from it all. Often, I travel to Europe but I just returned from several days in coastal Maine and that northern wilderness. We were hiking and boating. Reading up on this discussion, I thought I would chime in on some of the issues mentioned. Nissan contracted with four private restoration shops during the Vintage Z program. Pierre Z in Hawthorn, California completed by far the most restorations, however Classic Datsun Motorsports of Vista, California, Datsun Ally of Signal Hill, and Old Car Service of Huntington Beach were also involved. Datsun Ally and Classic Datsun Motorsports prepared two cars each. I don't know how many Old Car Service prepared. Engines were rebuilt and provided by AER Manufacturing in Arington, Texas as transmissions came from Williams Technology of Summerville, South Carolina. Pierre Z rebuilt the units for the first restoration only as Nissan contracted thereon. They were assembled units, crate shipped, including everything except carburetors, generators, cooling fan and hoses, and exhaust manifold to the best of my knowledge. Part management was coordinated through Pete Evanow of Nissan N.A. and there were documents related to car assessment, part orders, and quality control however these were internal project documents related to the management of the project cars and not released with any of the cars. I actually have part order documents for cars that were never restored. Concerning CAD plating: The yellow / gold coloring that we associate with "CAD" is a chromate conversion coating applied over the plated metal, yielding the familiar gold color. A similar appearance can be achieved with a similar chromate conversion over silver zinc which is far less toxic and not easily discernible from a cadmium base electroplate. Cadmium electroplating on its own is not yellow. I believe that what we see on cars today is yellow chromate zinc. True cadmium electroplating is not easily found or inexpensive. We all seem to call it "CAD" but that's probably a term we use for the color and not AS 9100 certified or ASTM A165, SAE AMS 2400 specification. Finally, Nissan N.A. didn't just decide to restore a bunch of 240Zs; they schemed up an ad campaign to keep the Z legend in North America alive while Nissan discontinued their current model Z with only the promise to deliver a new design some time in the future. The goal was not to create 'restorations' but deliver complete, running examples of the original car with 12,000 mile warranties. They had to rely on private repair businesses to accomplish their goal with a parts inventory that could not sustain the project. But they pulled it off! Cudos to the businesses and people who contributed to the effort. The cars are quite valuable now, and it is always exciting to see one because the story behind it is one of the best automotive sales campaign stories. Especially after the blunder of dropping the Datsun brand, I opine. So, I did the research project / compendium in 2005. I have a huge digital file of stuff as well as a fairly good library of literature. I have a vhs video that Pierre gave me in 200? that has Mr. K's visit during the restoration program. I don't have any printed , bound copies at the moment. I hear some interest for copies of stuff I have. I'm going to get some copies of the compendium made. Stay tuned.
 -
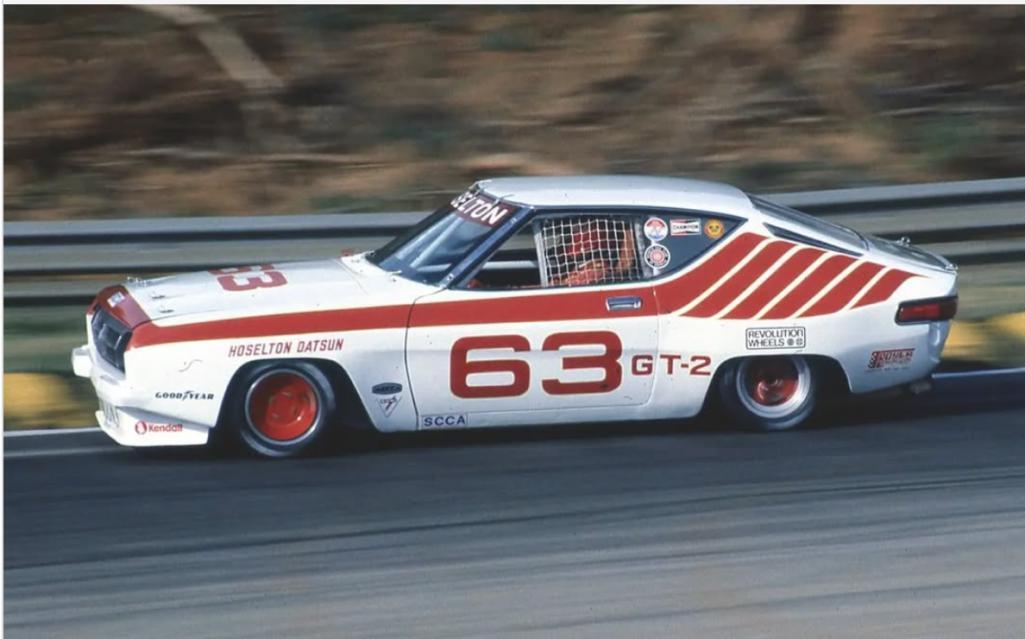
 Sedan racing
-
Sticky pistons on 4-screw round tops. Not ideal. About the only things that would account for that would be a) severely misaligned nozzles underneath or b) mismatched domes/pistons. You can check for the mismatching between the domes and pistons by taking the domes off, pulling the pistons out of the carbs and then sliding the pistons into the domes and see if they move smooth and free (while the dome and piston are in your hand, not mounted to the carb body). And you can check for misaligned nozzles/needles by either removing the needles out of the pistons, or by loosening up the nozzle alignment nuts on the under sides the carbs and seeing if the pistons move free while the nozzles are way loose.
-
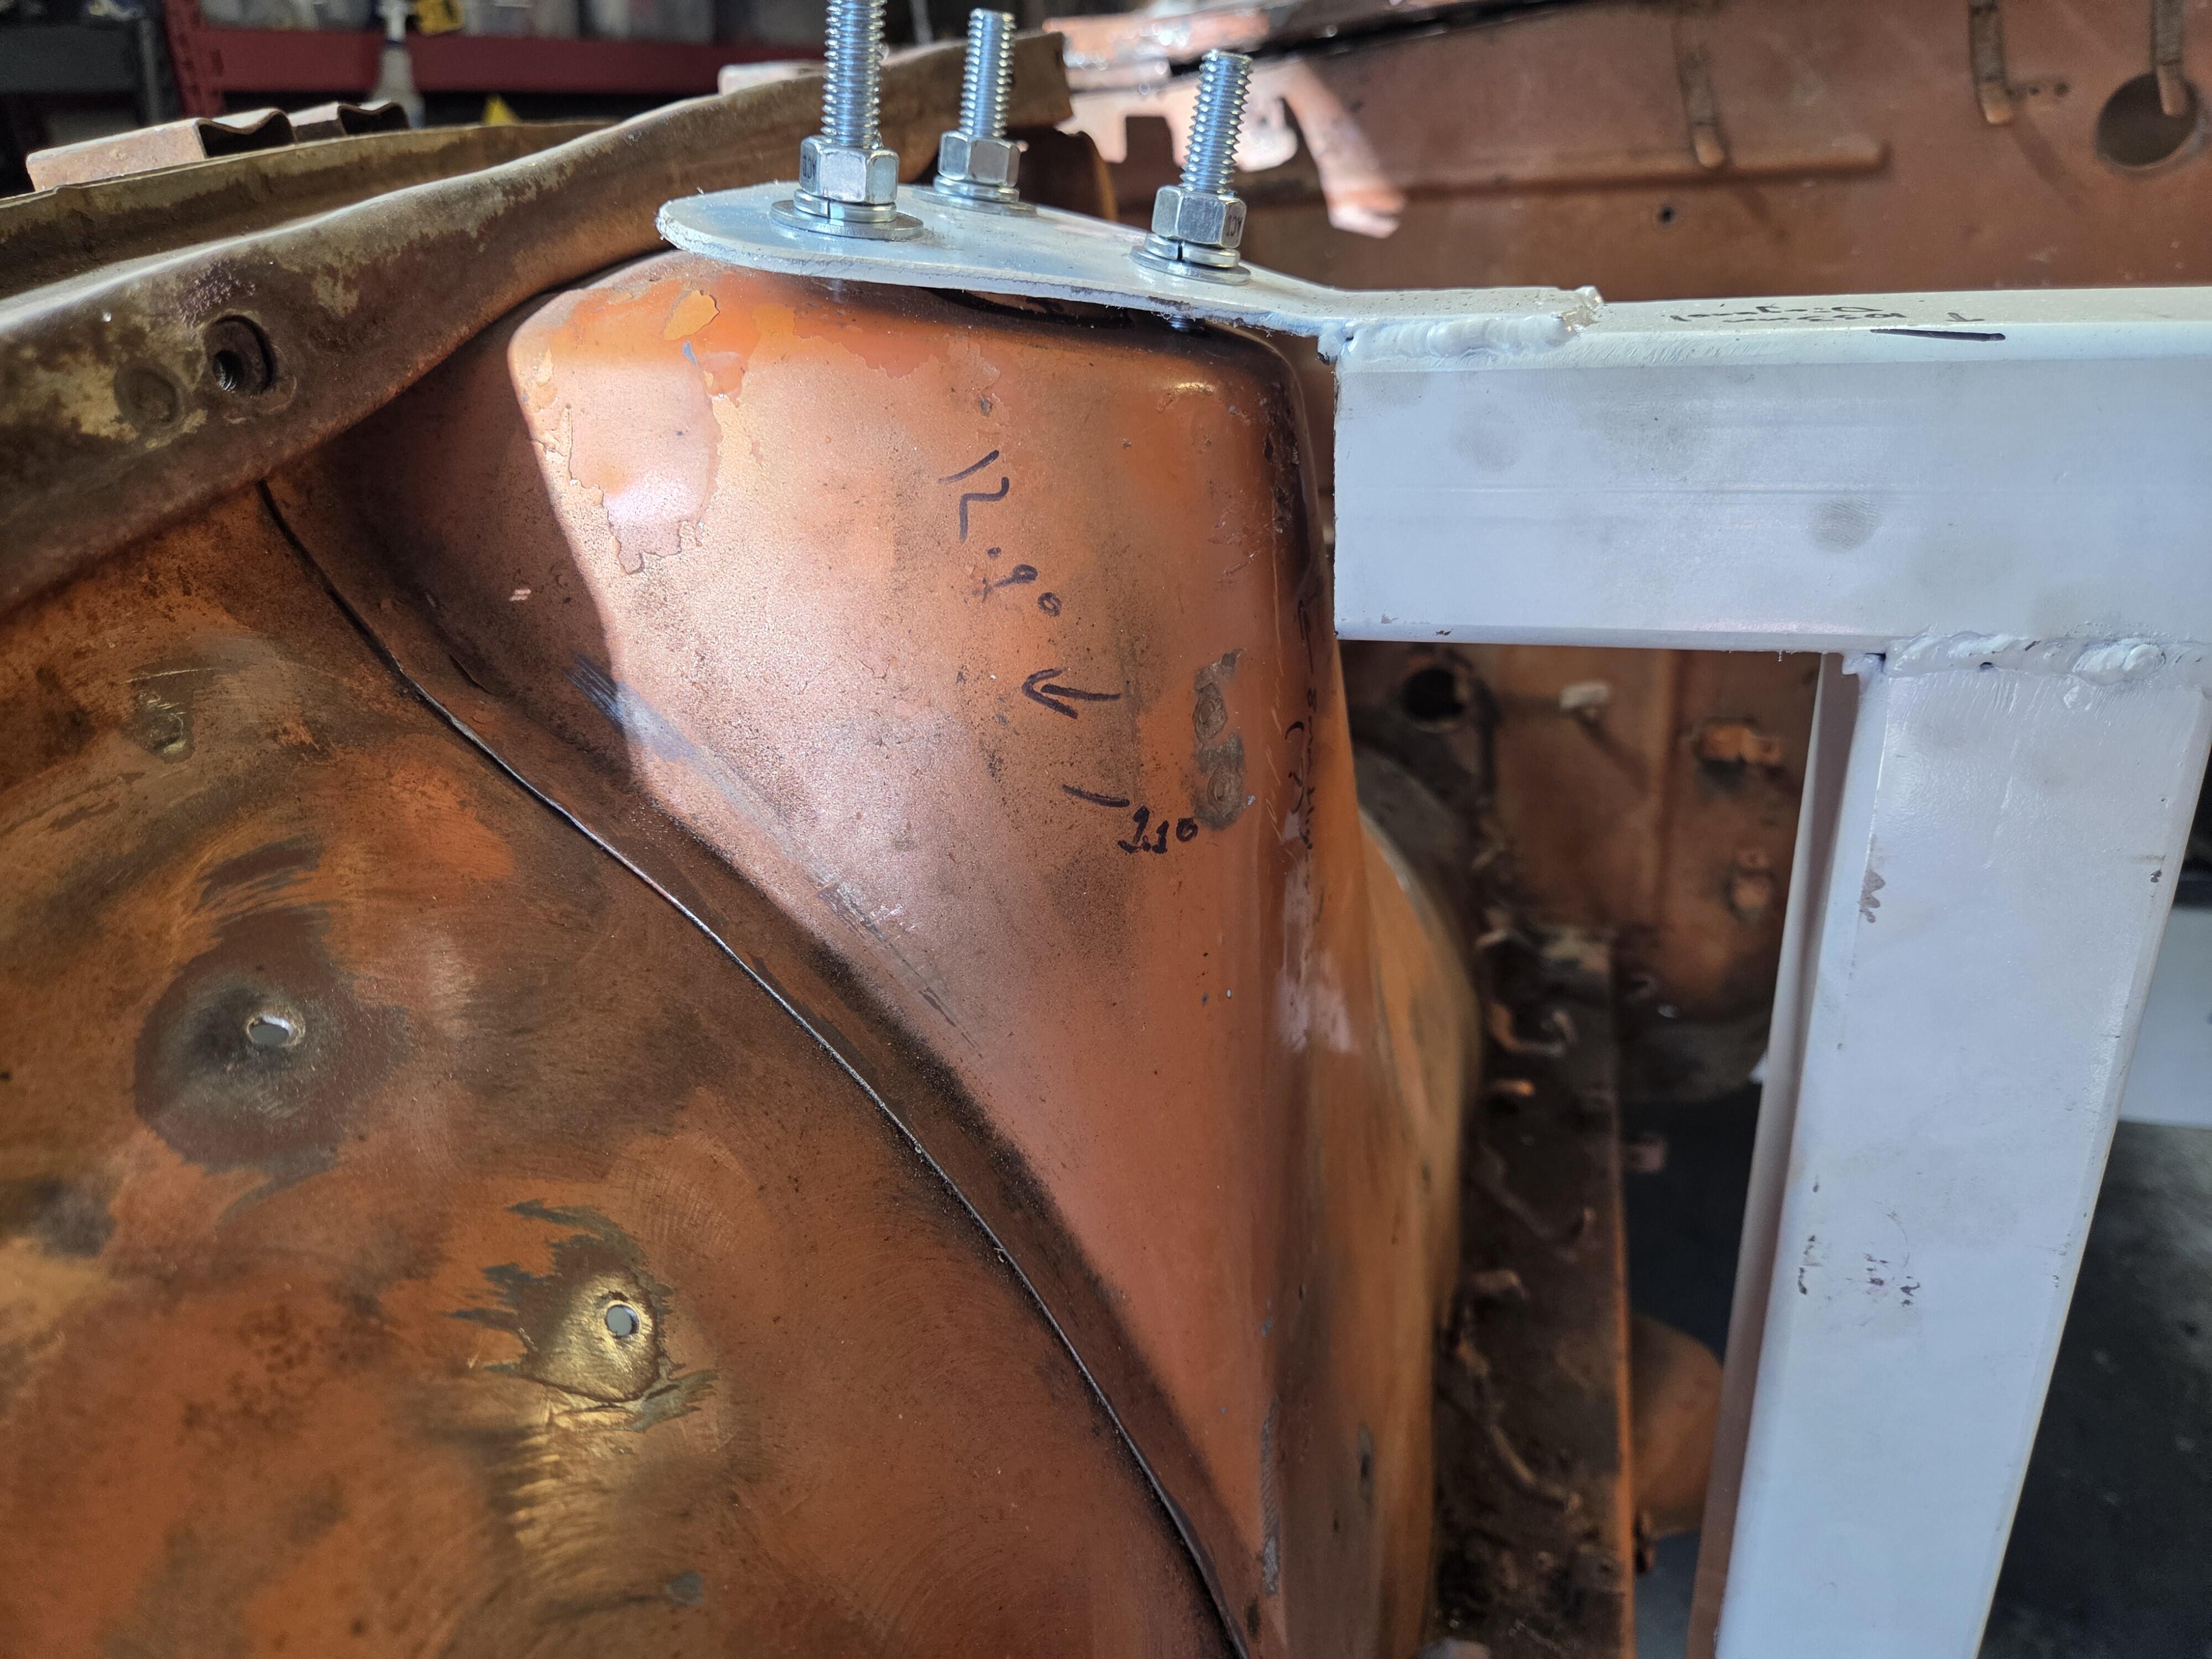
I have also used a plumb laser to do frame measurements on my Z. I began by taping together a bunch of poster board sheets to form a single big rectangular sheet that was long enough to go from bumper to bumper and wide enough to just fit between the inner sidewalls of the tires. Once I had it in position under the car, I taped it to the garage floor so that it wouldn't shift while I was lying on top of it taking sightings on the various targets. Once I got the laser aligned with a target, I used a Sharpee to make an 'X' mark on the sheet (along with a little note to record what target it was for). After I had marks for all of the targets, I pulled the sheet from under the car and laid it out on my workshop floor so that I could make the various target-to-target measurements with a tape measure. This system works pretty well for most the undercar measurements. The car can be sitting on its tires, but it needs to be elevated a bit (I used wheel dollies) so that you'll have enough room to slide underneath. However, it won't help you with the fore-aft locations of the shock towers unless you remove the struts and sight the laser down through the hole in the centre of each shock tower cap (the procedure for this is to put a piece of wide masking tape across the hole, trace the hole outline with a pencil, mark two intersecting centrelines, and then poke a small hole at the centre point for the laser to shine through). You'll also need to set up some kind of the platform above the shock towers (I used a length of 1 x 6 lumber) to give you a perch for the laser to sit on. Additional requirements: You'll need to get the car up on axle stands. Don't do any of your measurements until the car is up on the axle stands. You'll need to get the lower control arms out of the way b/c they'll block the laser beam from reaching the floor. This isn't too hard to do at the front (the LCA's can be folded up to a near-vertical position after the struts have been removed). I'm not sure whether this can be accomplished quite so conveniently at the rear (I didn't try). It might be necessary to actually remove the lower control arm from the car ☹️.
-
 I’m rebuilding my round top SU carbs on my 1971 240z and after everything was cleaned and put back together one of the pistons keeps binding in the dash pot when the top is screwed down. I’ve switched tops and the same thing happens. The jet and needle don’t bind at all and the piston slides freely with the top not screwed down. I’ve tried tightening the screws gradually and making sure the piston slides freely as I go but every time the screws are fully tightened the piston gets stuck and won’t fully drop. Any suggestions? Do the screws need to be fully tightened for the carb to function or can they be snug without causing issue? The carbs are 4 screw tops.
 - Last week
-
 Hi cgsheen1! Thanks for the recommendations. I am running the latest version of Microsquirt, 440cc Bosch injectors, Spartan 3 v2, crank 36-1 wheel with HALL sensor, LM7 truck coils with batch firing, AZC oil pan. I will try making Microsquirt work with the turbo (no sequential ignition). I have only one output left (relay) which I can use for an electric fan, for ex. I was aiming for 8-10 lbs of boost to play it safe and keeping my stock rear diff/half-shafts alive. I looked up some parts from rockauto and here is a list if it works? EXEDY 06030 clutch kit, 1975 2+2 Flywheel: AMS AUTOMOTIVE / RHINOPAC 167304, for 2+2 model Throwout bearing, WJB / INMOTION PARTS WRDNE01576C (any manufacturer preference?) Hopefully, if the car parts are for 2+2 model, I am not going to run into any issues with the fitment/clutch fork throw. I just installed a brand new master and slave clutch cylinders (for my 280z 1976 model). Will this create a problem? (I checked the part numbers, they are the same for 76 and 75, I think I should be good here). I started a thread here on hybridz dealing with my project: https://forums.hybridz.org/topic/136053-76-280z-microsquirt-project/ Thanks! Den