


All Activity
- Past hour
-

 My early wiring diagram shows a red wire coming off the accessory relay connected to that blue wire. So I'm thinking they might have changed colors at the bullet connector. They did some weird stuff like that on the early cars. Next time I have my HVAC panel off, I'll take a look, but it might be a couple days.
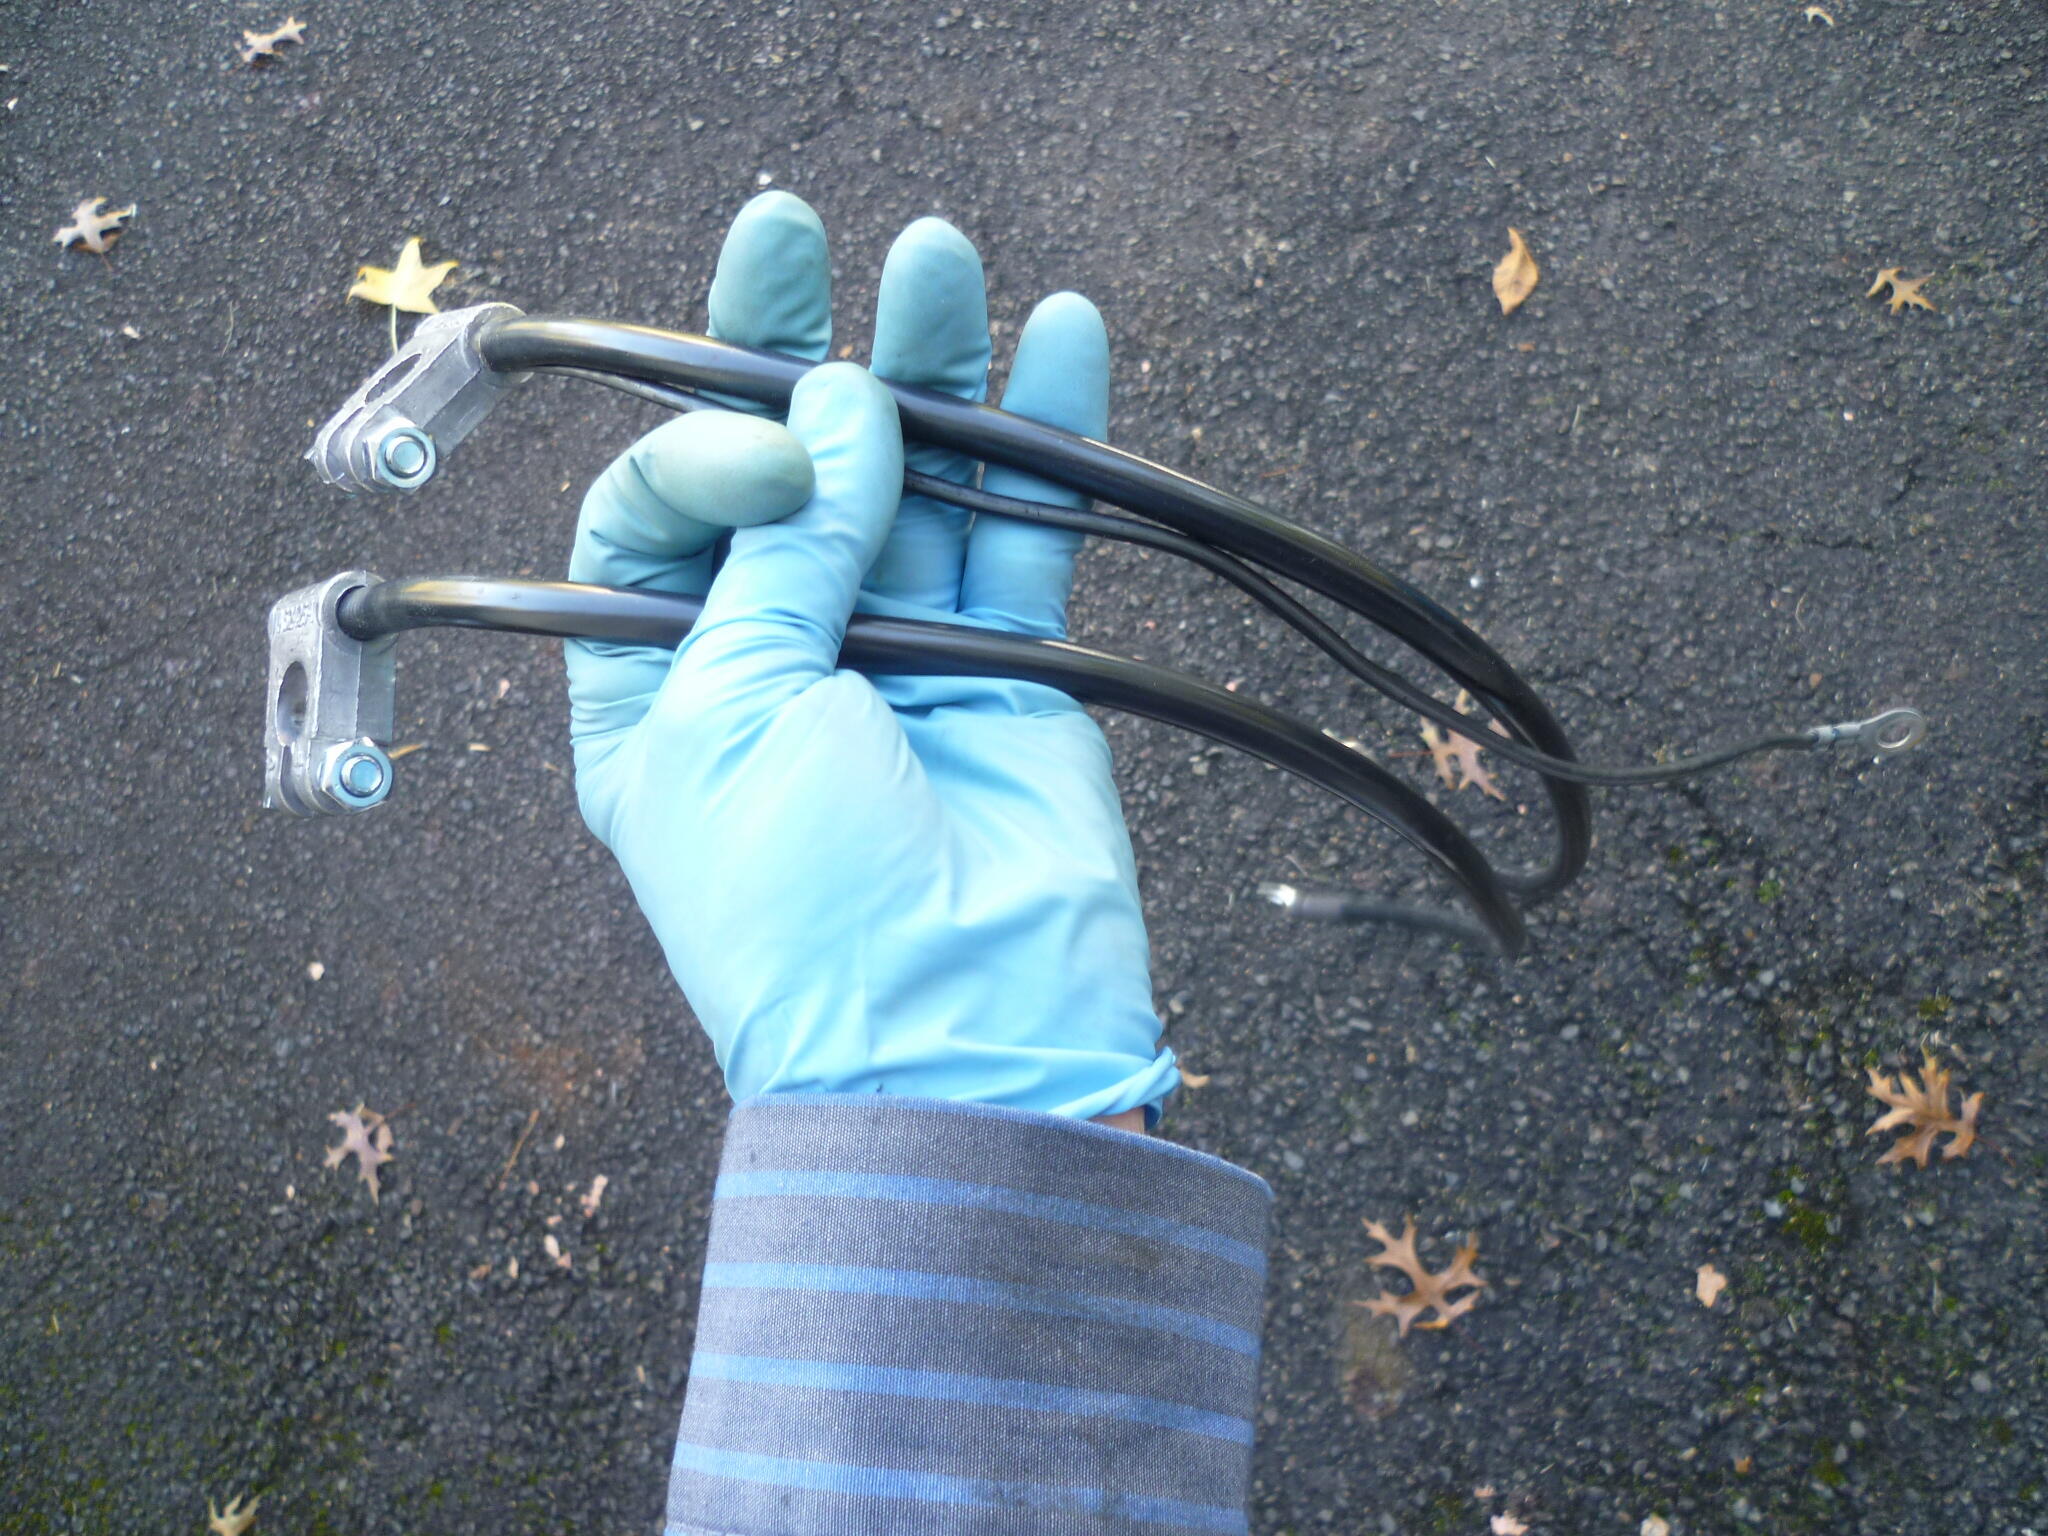
I used #4 gauge cable. Bought a 60 inch length off ebay with 5/16 lug on one end and 3/8 on the other. Cut it in half* to make two cables. Was cheapest that way. I don't know if this is the exact vendor I used or not, but here's an example: https://www.ebay.com/itm/141679228250 Today's price for the cable(s) is about $16, and the military lugs were $10. So my out of pocket for my two original-ish looking cables was $26 for the pair. *After having been through this once, I would skew the cut point maybe two inches towards the positive side. In other words, I would steal two inches of cable from the negative and add that length to the positive making the positive four inches longer than the negative.
My early wiring diagram shows a red wire coming off the accessory relay connected to that blue wire. So I'm thinking they might have changed colors at the bullet connector. They did some weird stuff like that on the early cars. Next time I have my HVAC panel off, I'll take a look, but it might be a couple days.
I used #4 gauge cable. Bought a 60 inch length off ebay with 5/16 lug on one end and 3/8 on the other. Cut it in half* to make two cables. Was cheapest that way. I don't know if this is the exact vendor I used or not, but here's an example: https://www.ebay.com/itm/141679228250 Today's price for the cable(s) is about $16, and the military lugs were $10. So my out of pocket for my two original-ish looking cables was $26 for the pair. *After having been through this once, I would skew the cut point maybe two inches towards the positive side. In other words, I would steal two inches of cable from the negative and add that length to the positive making the positive four inches longer than the negative.- Today
 It may well be, but this is a homemade example. The correct tool follows the same rough design, the "cut-out" on the board show the shape and has provision to fit a 3/8 or 1/2 socket drive. The was one on Yahoo auctions a week or two ago...
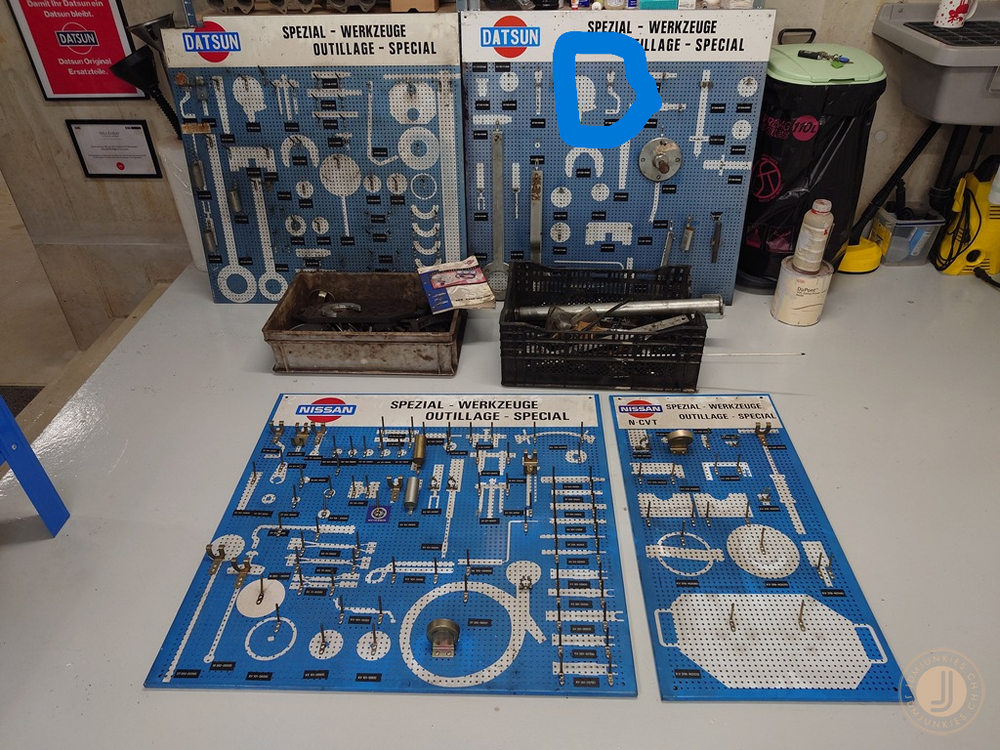
 LuxeGlass joined the community
 It should be a wire coming off the Accessory Relay. In the 73, it's a blue wire. YMMV according to discussions I've seen on this board in the past. Look at where the Accessory Relay plugs into the wiring harness. One of those wires should be going to the center stack with a bullet connector.
 It sounds like it. What head, compression ratio, fuel and ignition advance.
 Found out last week the previous owner of my 280z lied and both frame rails are rusted out, also the rear suspension sits crooked under the car. The rust can be easily repaired but costs a lot of money but the suspension issue is likely a twisted or bent body. All in all the wife isn’t happy with the extra costs but she knows I won’t sell the car.
 Im experiencing a ratting noise when accelerating in 3rd gear on my 72 240z. Is my timing too advance?
 Lol.. that's a good one
 Yes, a very near solution! More lathe envy...
 I’ve seen this mentioned here before on the cable length. Reverse left to right will give you more cable length. You will have to do some engineering on the hangers.
@captainobvious Nice work Bruce, What gauge cable did you use?
@SteveJ
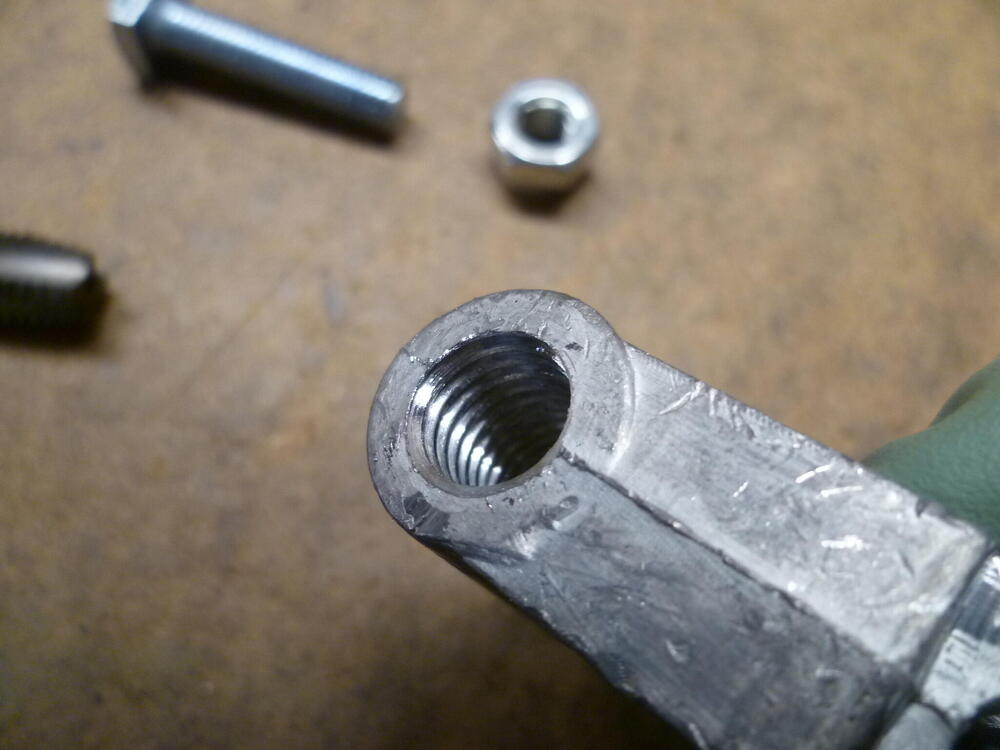
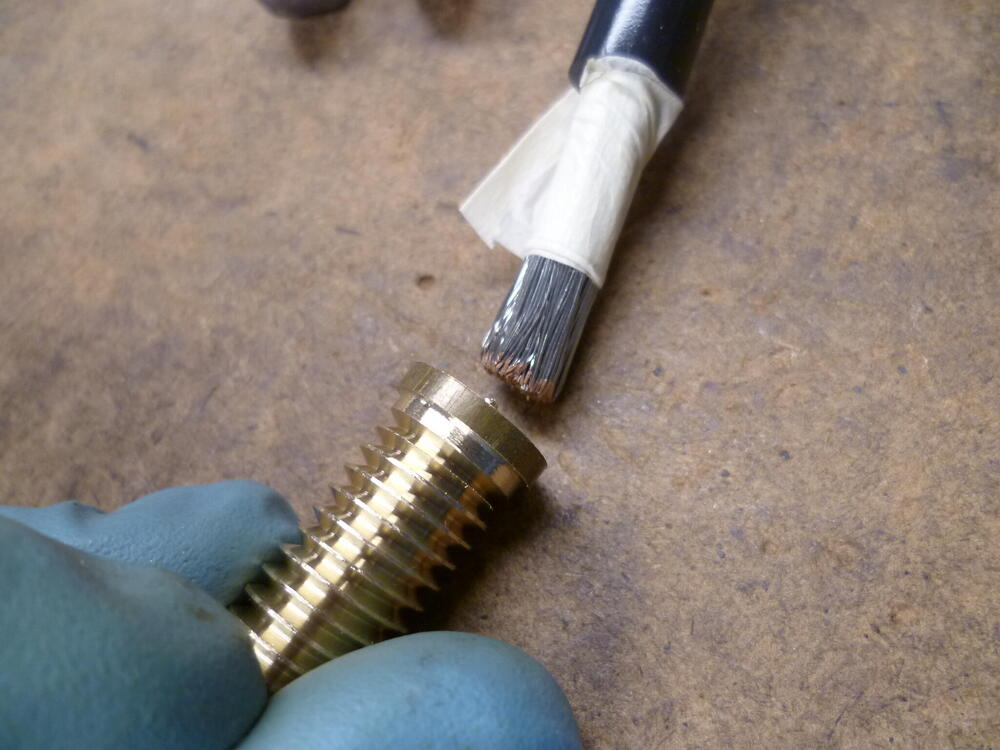
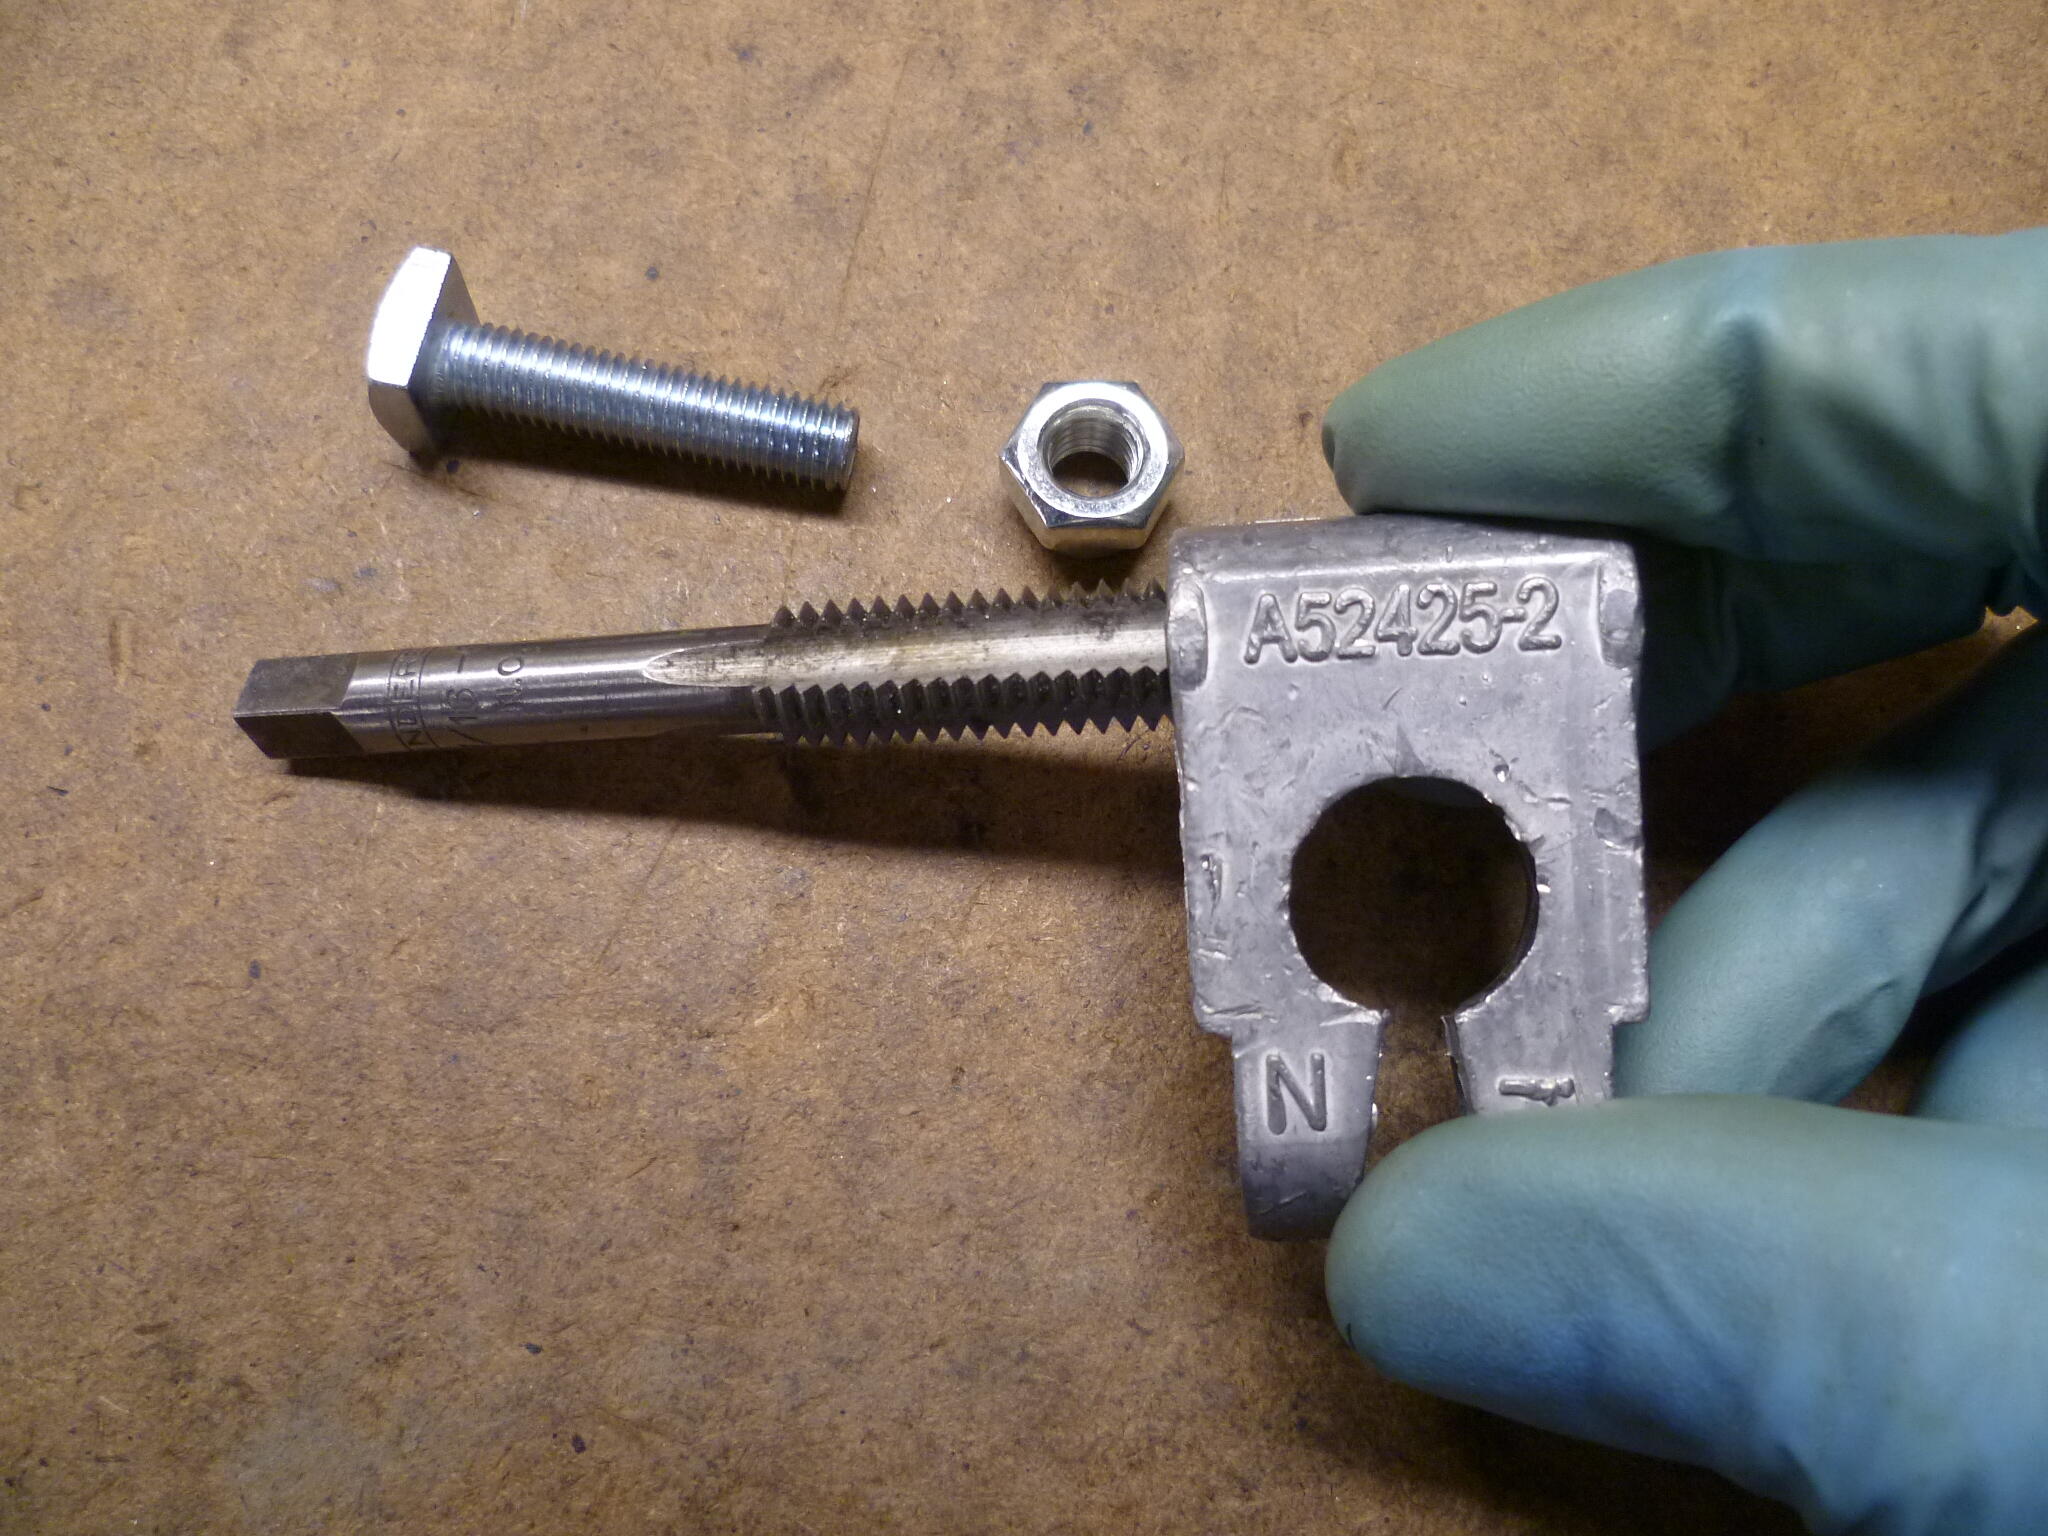
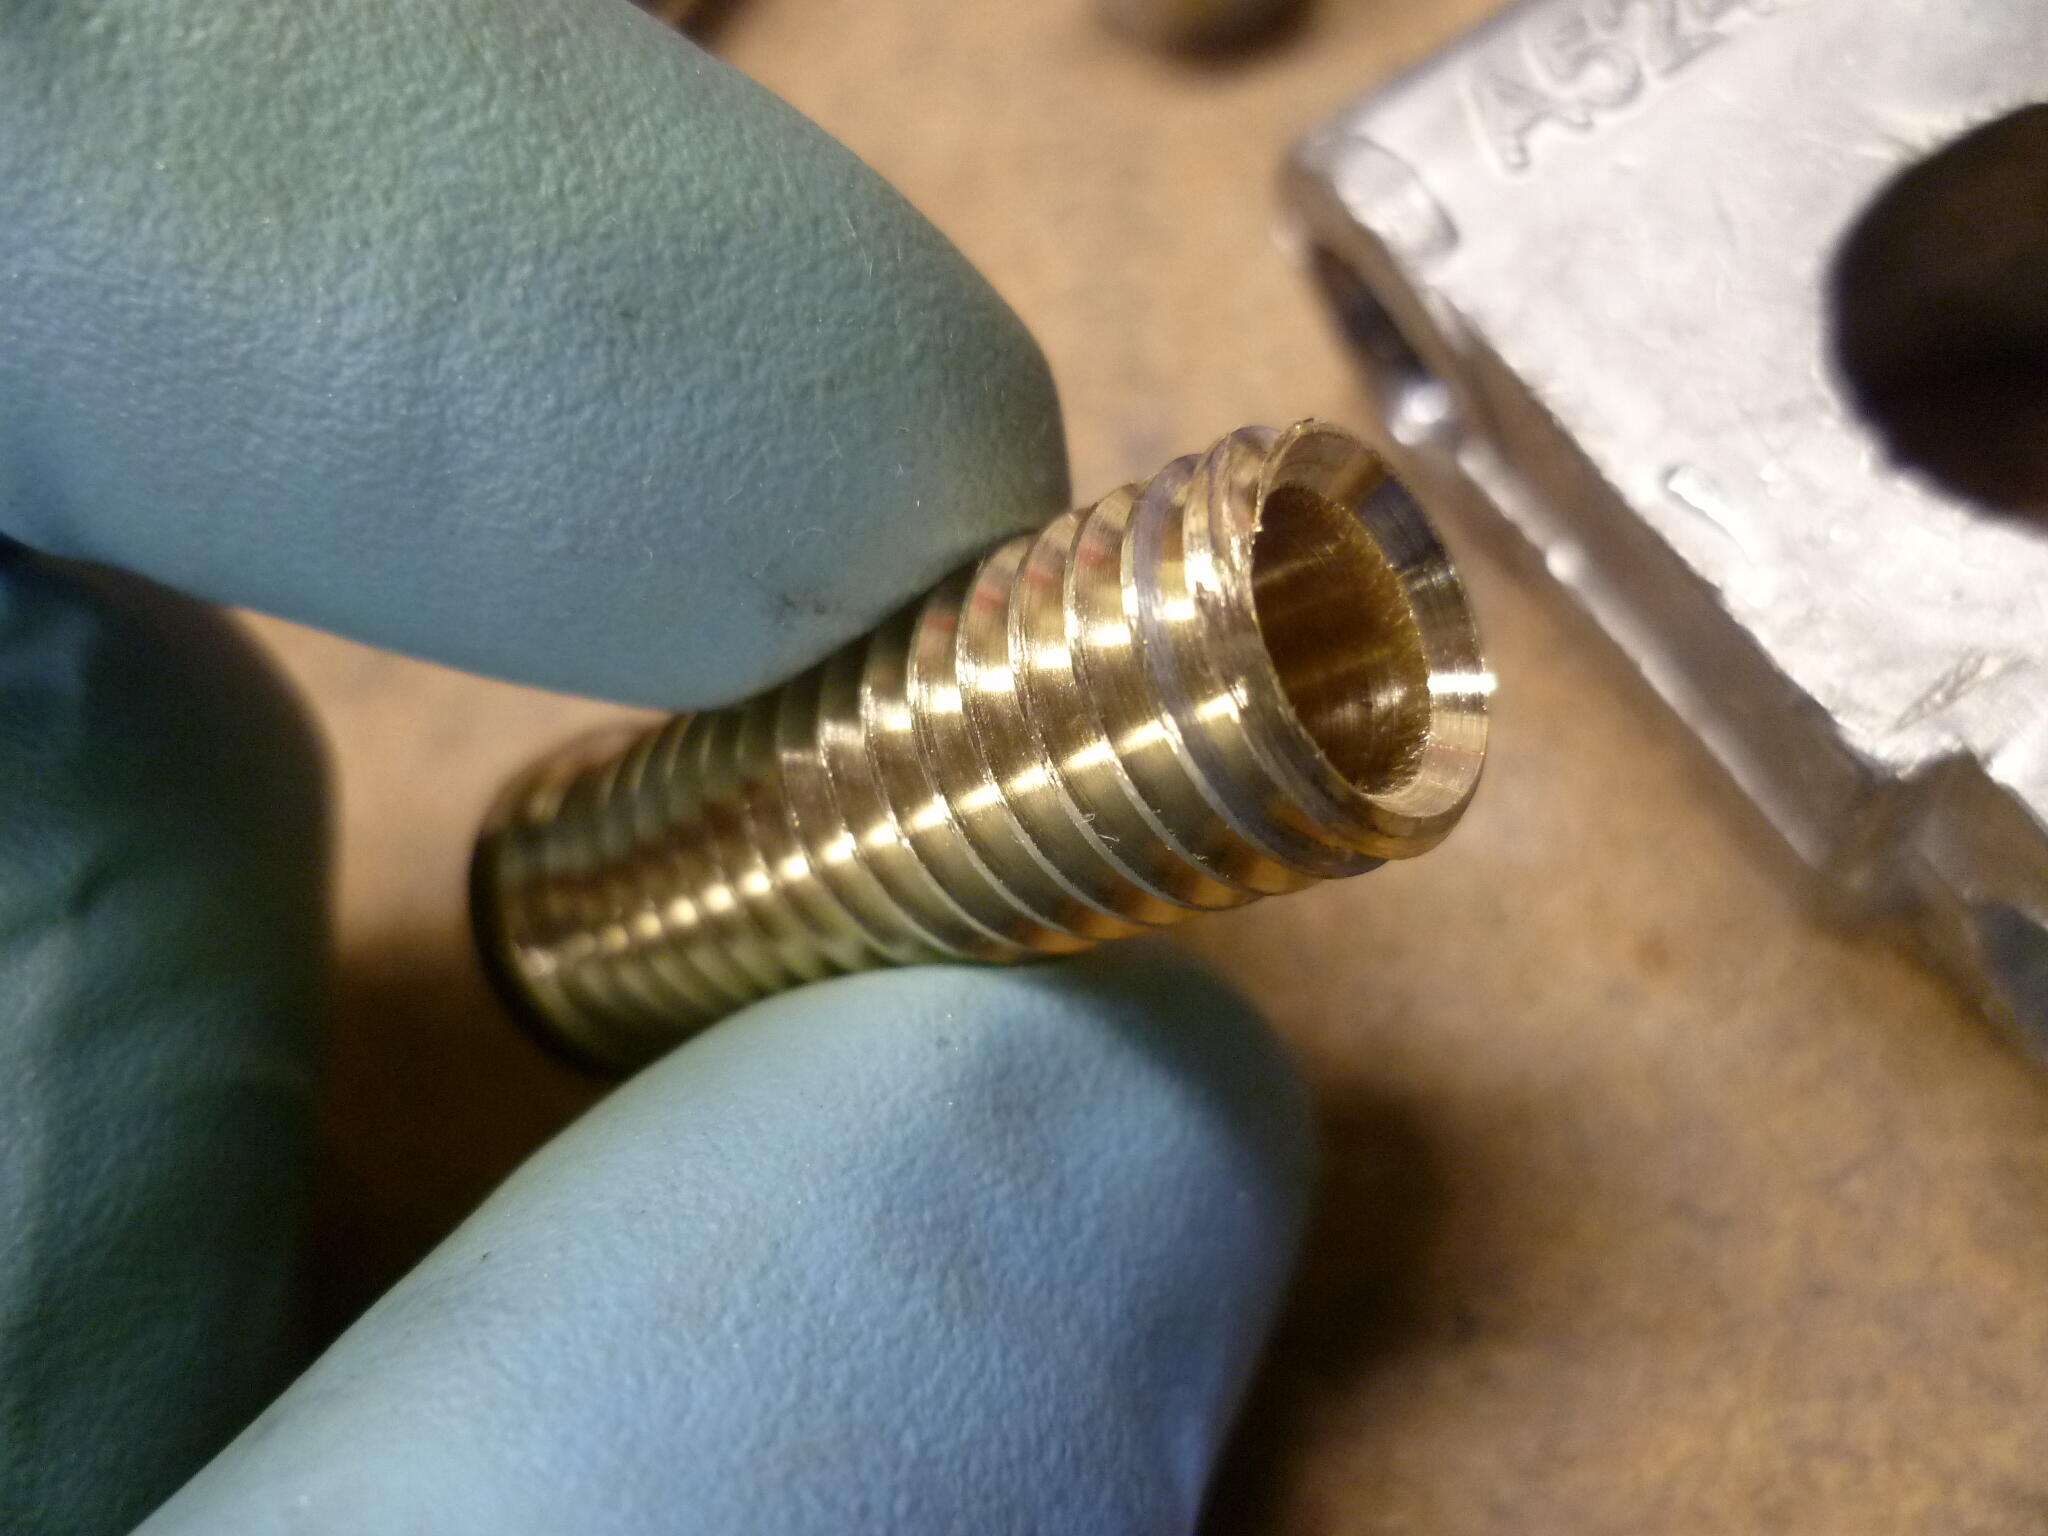
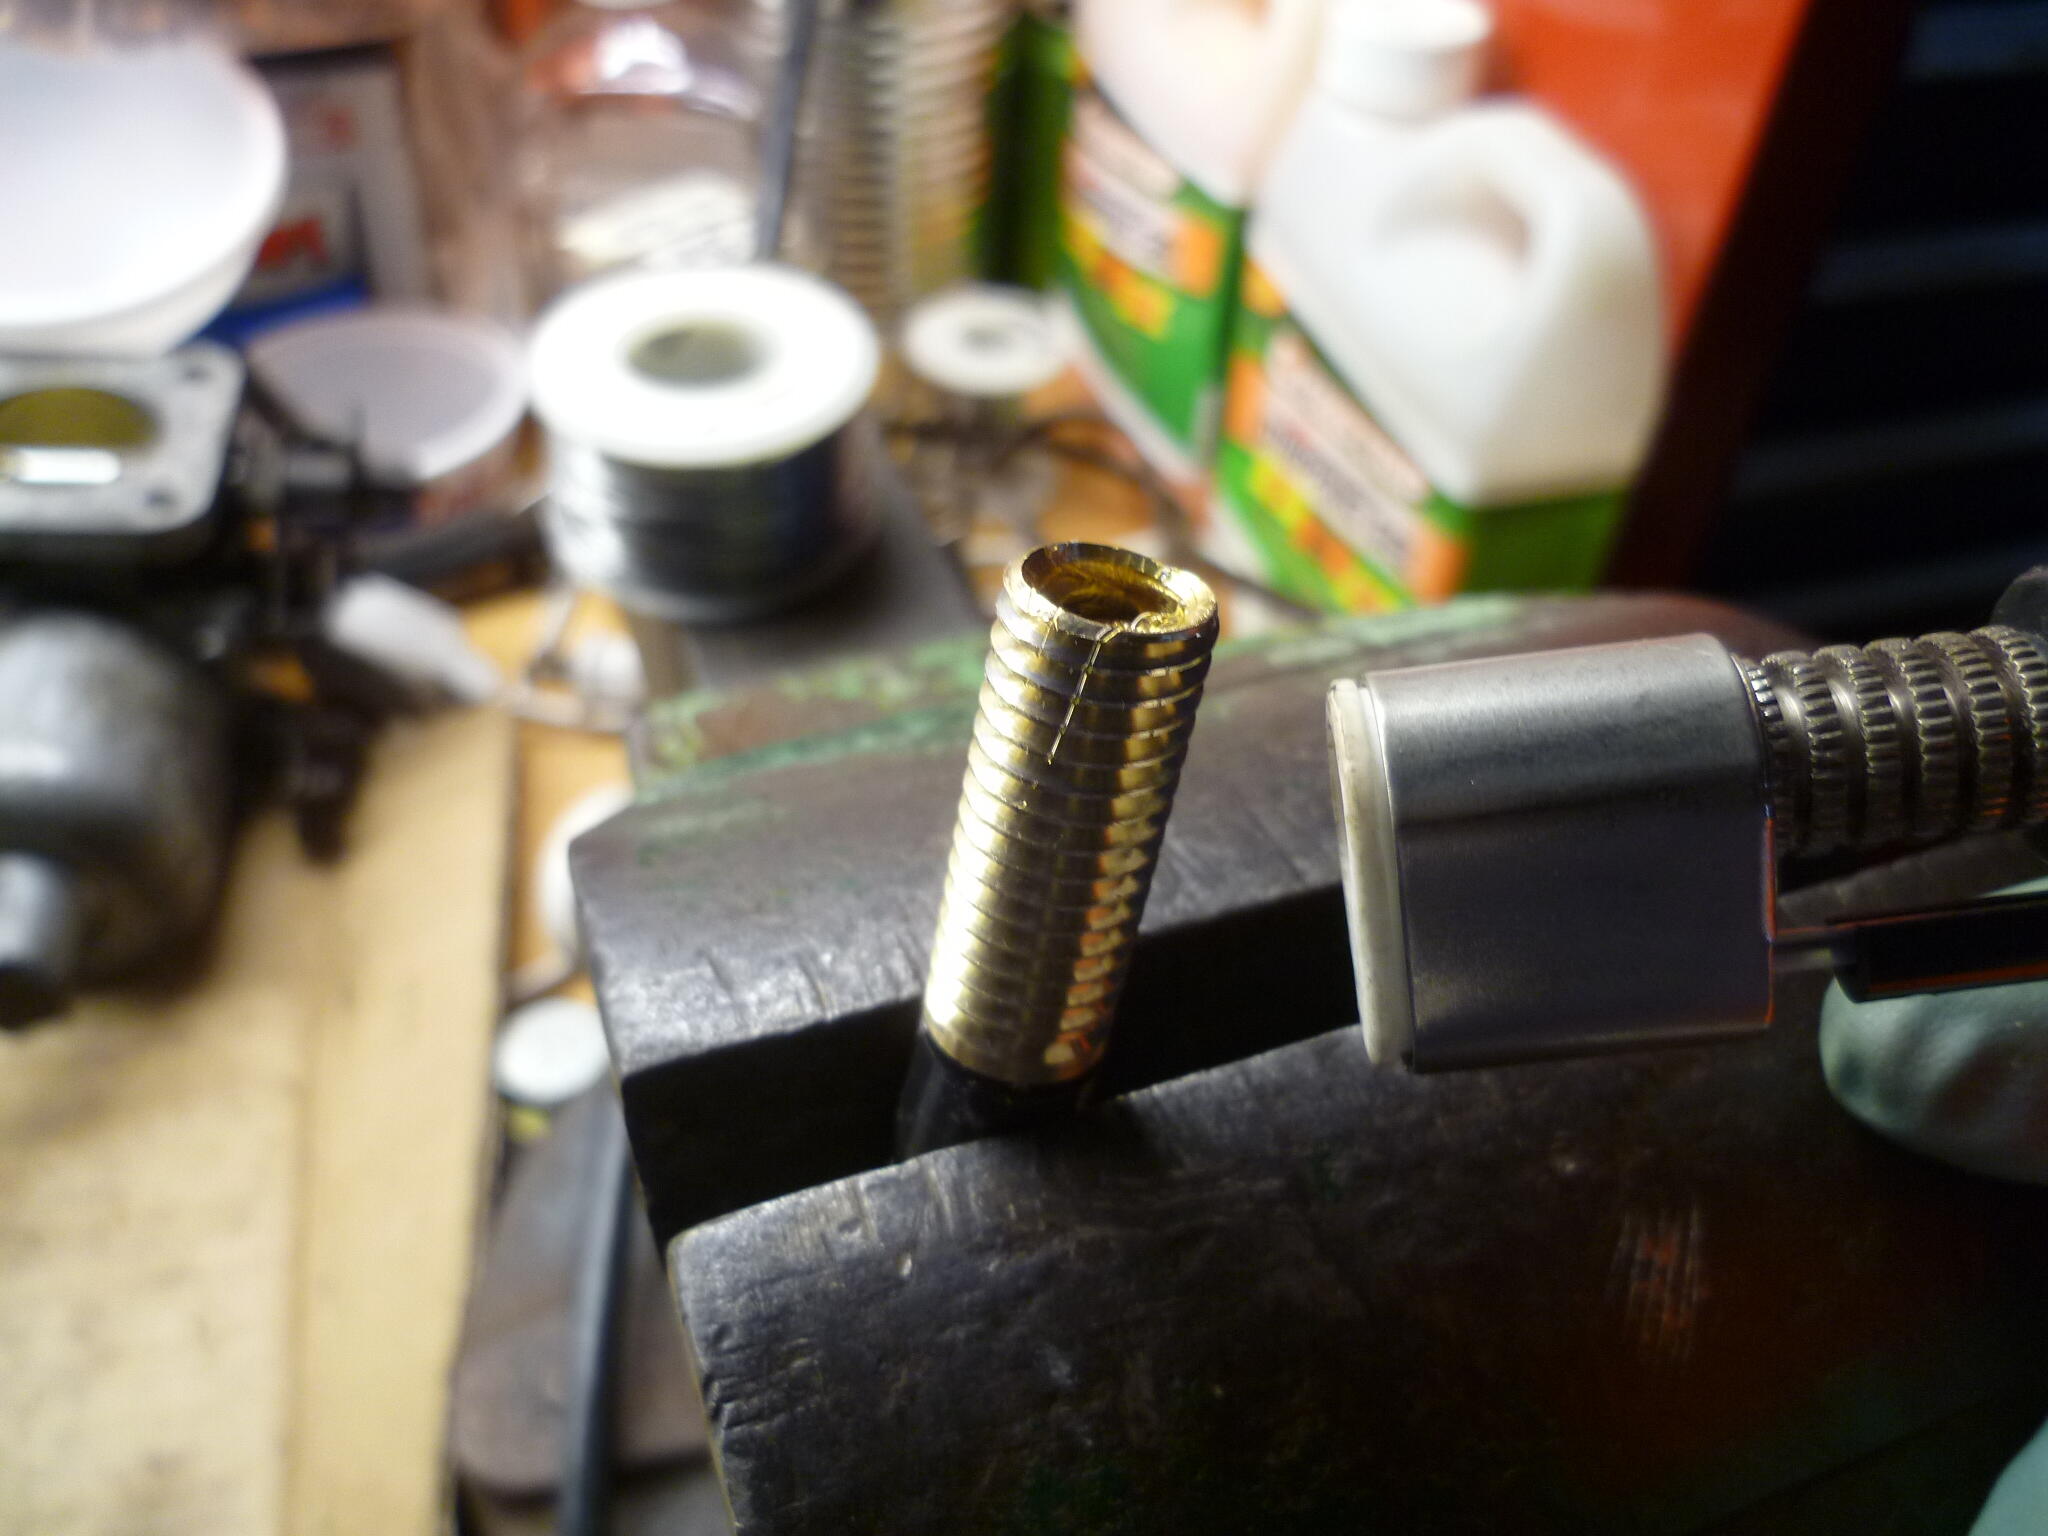
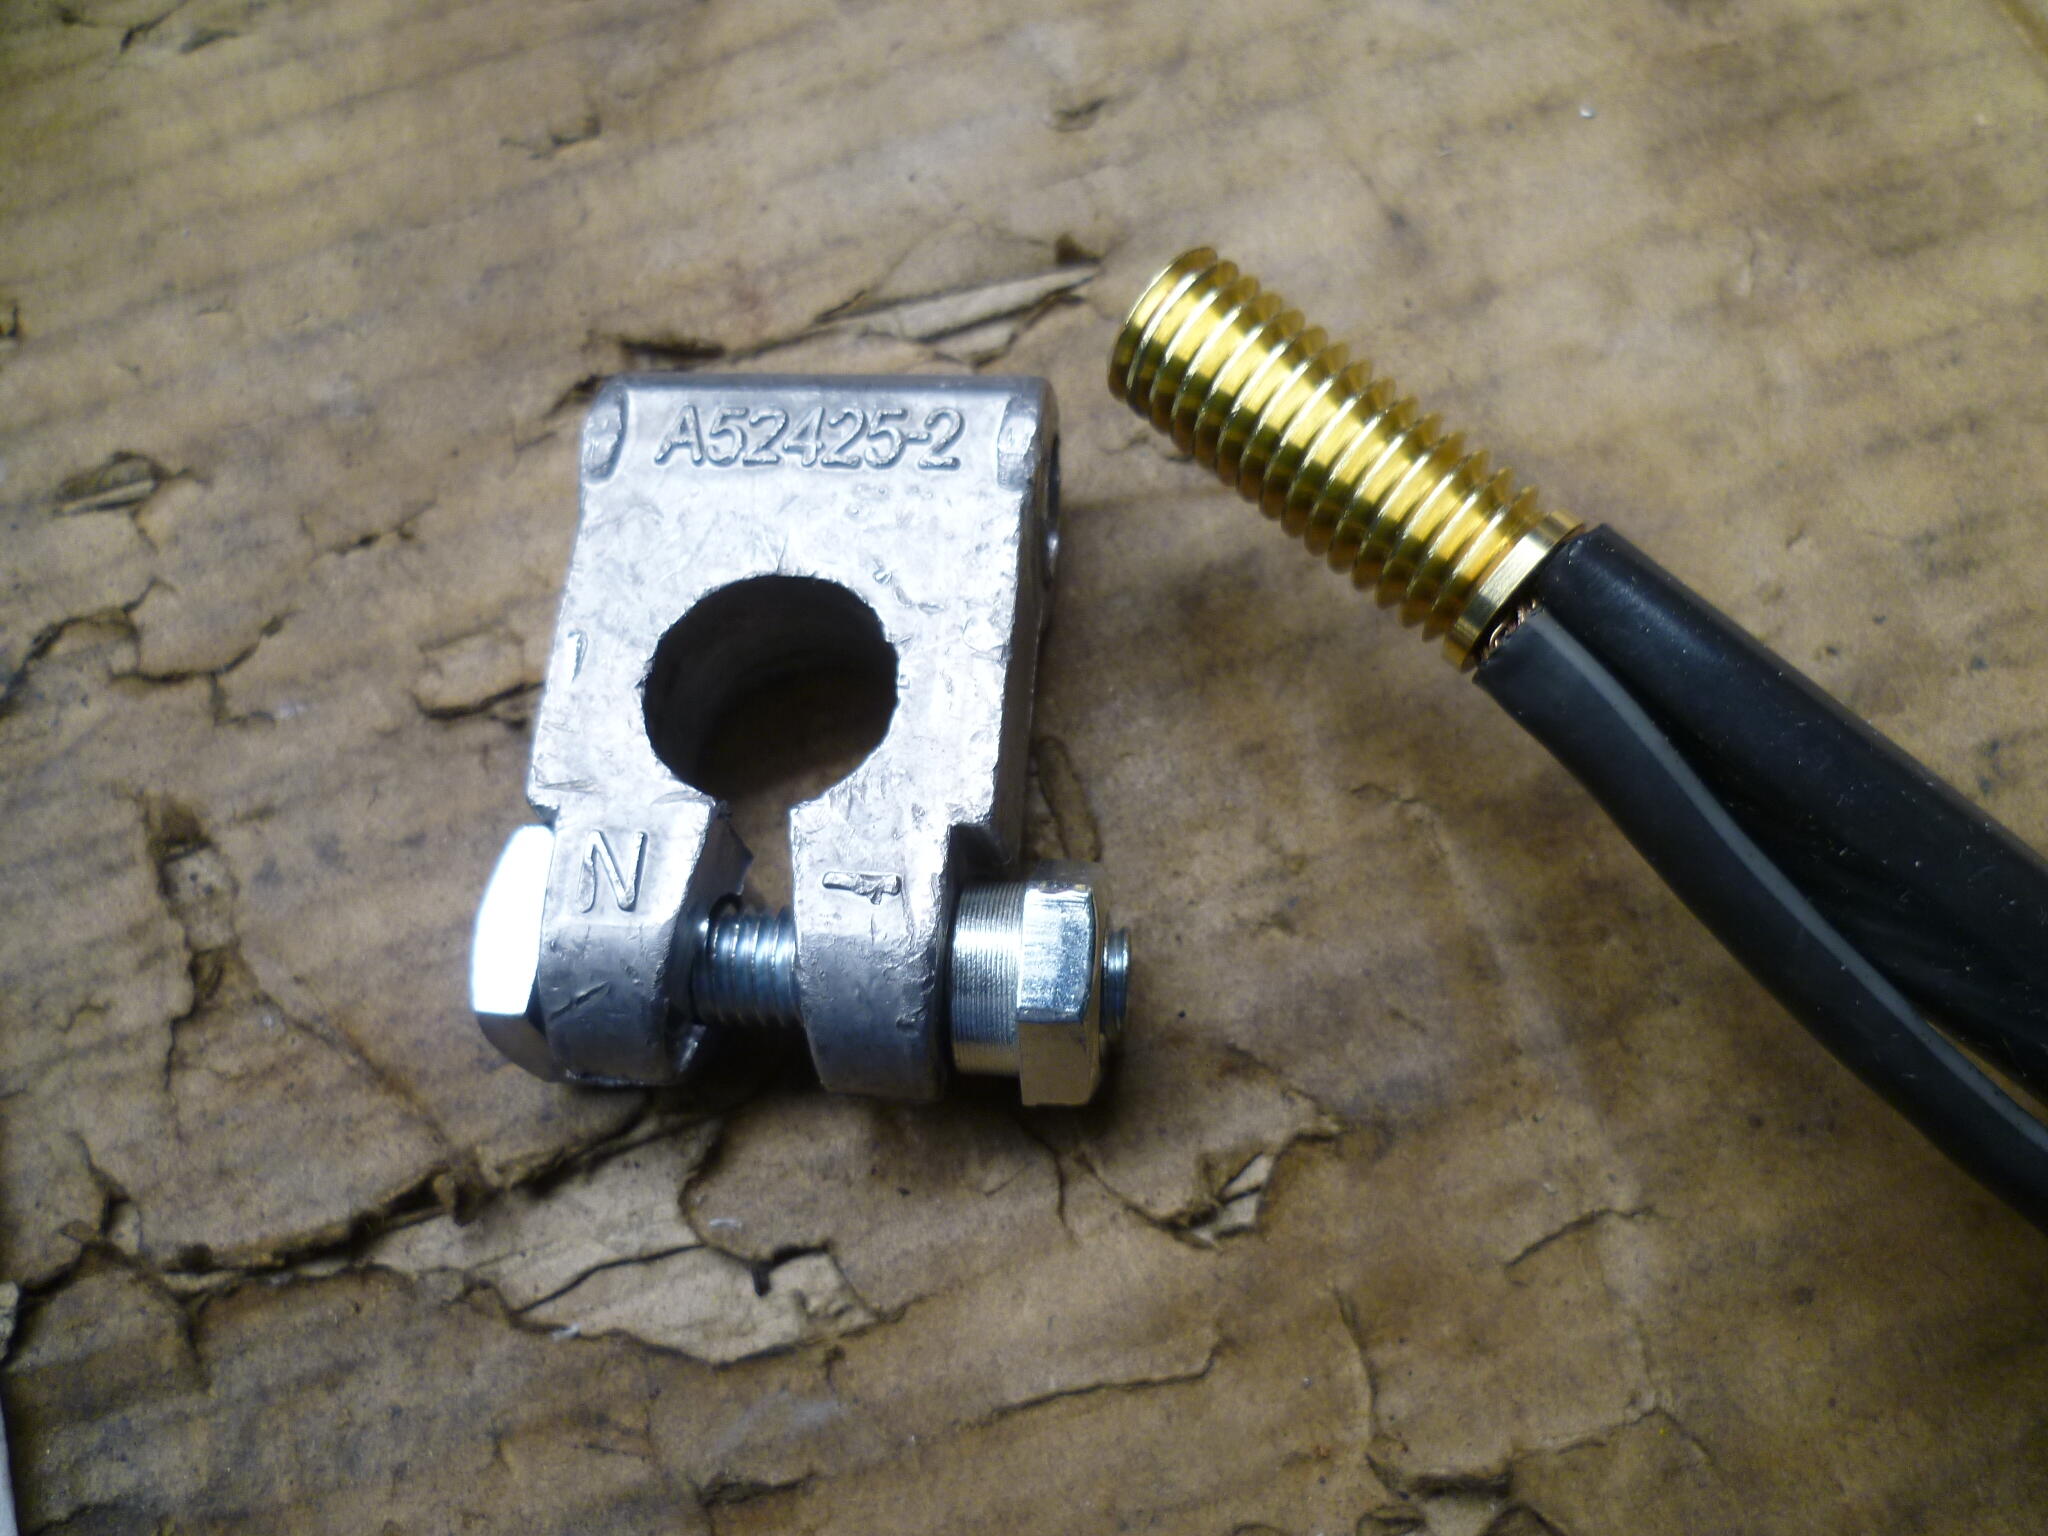
My battery cables? I was poking around online and discovered these things called "military battery terminals". Sometimes also called "Marine". The neat part is the basic shape is similar to the OEM lugs, so on a whim, I bought a cheap set off Amazon. So the shape is similar to OEM, but they use a bolt/nut to hold a cable onto the lug. They look like this: Then I removed the original bolt and threaded the hole that the bolt goes through. My first experience tapping lead. Went OK and I learned some about the process. 1) Easiest if you don't have to reverse the tap, and if you DO reverse the tap, do it often, like every half turn or so. 2) It's much easier on a (shallow) through hole because you don't have to reverse the tap, just run the tap all the way through. If the part you're tapping isn't shallow enough to do in one pass without packing the flutes and binding, then you're going to have to reverse the tap, which is a PITA because you have to do it so often. So, all that said... I took the bolt out and tapped the hole: Then I made a brass threaded insert on the lathe: I bought a length of battery wire off ebay. Came with lugs crimped on both ends. I got 5/16 hole on one end and 3/8 on the other. Cut that piece of wire in half (so now I have two lengths with different holes on the ends. Larger for the starter mounting bolt, and smaller for the starter solenoid connection. Stripped back the insulation on the ends, and inserted the cable strands into the brass piece I made: I used a small torch to solder the cable into the threaded insert: Looks like this after sodering: Screwed the threaded brass into the lead lug, and a completely unprofitable amount of time later, I have this: It's not OEM or one of the aftermarket replicas, but it cost a grand total of maybe thirty bucks in parts*. *And at least six hundred dollars in unrealized labor cost. Hahahaha!!!
I’ve seen this mentioned here before on the cable length. Reverse left to right will give you more cable length. You will have to do some engineering on the hangers.
@captainobvious Nice work Bruce, What gauge cable did you use?
@SteveJ
My battery cables? I was poking around online and discovered these things called "military battery terminals". Sometimes also called "Marine". The neat part is the basic shape is similar to the OEM lugs, so on a whim, I bought a cheap set off Amazon. So the shape is similar to OEM, but they use a bolt/nut to hold a cable onto the lug. They look like this: Then I removed the original bolt and threaded the hole that the bolt goes through. My first experience tapping lead. Went OK and I learned some about the process. 1) Easiest if you don't have to reverse the tap, and if you DO reverse the tap, do it often, like every half turn or so. 2) It's much easier on a (shallow) through hole because you don't have to reverse the tap, just run the tap all the way through. If the part you're tapping isn't shallow enough to do in one pass without packing the flutes and binding, then you're going to have to reverse the tap, which is a PITA because you have to do it so often. So, all that said... I took the bolt out and tapped the hole: Then I made a brass threaded insert on the lathe: I bought a length of battery wire off ebay. Came with lugs crimped on both ends. I got 5/16 hole on one end and 3/8 on the other. Cut that piece of wire in half (so now I have two lengths with different holes on the ends. Larger for the starter mounting bolt, and smaller for the starter solenoid connection. Stripped back the insulation on the ends, and inserted the cable strands into the brass piece I made: I used a small torch to solder the cable into the threaded insert: Looks like this after sodering: Screwed the threaded brass into the lead lug, and a completely unprofitable amount of time later, I have this: It's not OEM or one of the aftermarket replicas, but it cost a grand total of maybe thirty bucks in parts*. *And at least six hundred dollars in unrealized labor cost. Hahahaha!!!


 Looks like it may just be taped off and not used
Looked hard through my pictures and I saw the wire but no shot of where it went.
Looks like it may just be taped off and not used
Looked hard through my pictures and I saw the wire but no shot of where it went. Yes on the White/Red. Through the hole in the back, attach to the screw lug in the middle right.
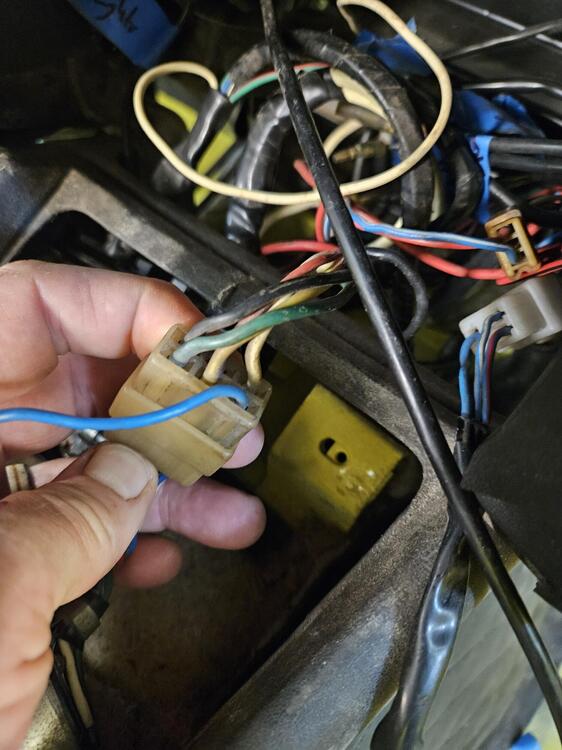
Cody fixed the blower motor today. The cage was binding on the back of the heater box What does the blue wire from the blower fan plug go to? Cody didn't find it on the wiring diagram
Yes on the White/Red. Through the hole in the back, attach to the screw lug in the middle right.
Cody fixed the blower motor today. The cage was binding on the back of the heater box What does the blue wire from the blower fan plug go to? Cody didn't find it on the wiring diagram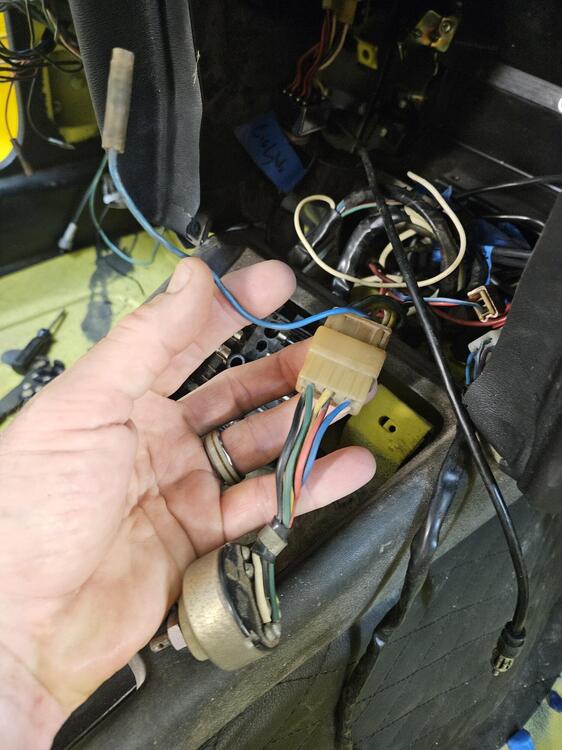
 320 In the tunnel there is a threaded rod that attaches the cable yoke to the handle. There are actually two threaded connections if you need it. You need to thread it out to get enough slack. Then you can adjust it to where it holds in about 5 or 6 clicks Datsun Z Hand Brake & Hand Brake Cable#20 and #11 both have threads and locknuts
- Yesterday
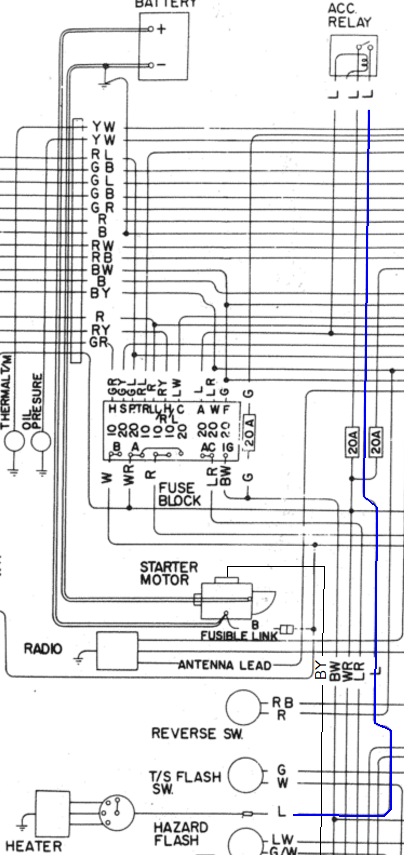
 I have these two wires hanging in close proximity to the connectors that attach to the 6-lead plugs coming out of the fuse box - a thick white/red and a "normal" white (that had been covered by a black sleeve. Because of the proximity, I'm confident that the white wire connects with the white wire coming out of the left side bundle from the fuse box and services the horn circuit. I think I have a good idea of where the white/red wire goes but want confirmation from one of our electrical gurus. Because it is finished with a lug, it is supposed to be held on somewhere with a screw or bolt and I think that place is the metal block located around 3 o'clock on the MSA fuse box. On my other '72 that has the OEM fuse box, the white/red wire disappears underneath the box and I haven't torn things apart to see exactly where it attaches. Can someone verify that this white/red wire does indeed go on the screw mount inside the MSA fuse box?
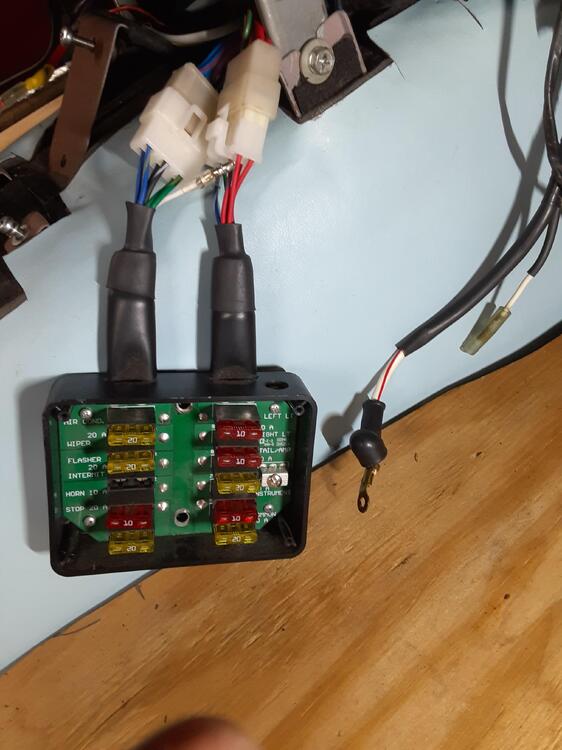
 Two things: 1) Is there a place to get a replacement mechanism? I can only find the cable. And when you buy a brake kit it doesnt include the parking brake hardware. 2)I used to have to pull the hand brake almost all the way up to the ceiling to get it to hold, so I replaced the cable. Now I can’t get both parking brake cables connected at the same time — it’s always one side or the other. If I force it to connect, the tension is so high that the brake stays engaged constantly. I must be missing something, because no matter what I try, I can’t close the gap enough to attach both sides. I figured the new cable might just need to stretch a little, so I tried pulling on it, but nothing gives me the clearance I need to make it work. Any ideas what I’m doing wrong?
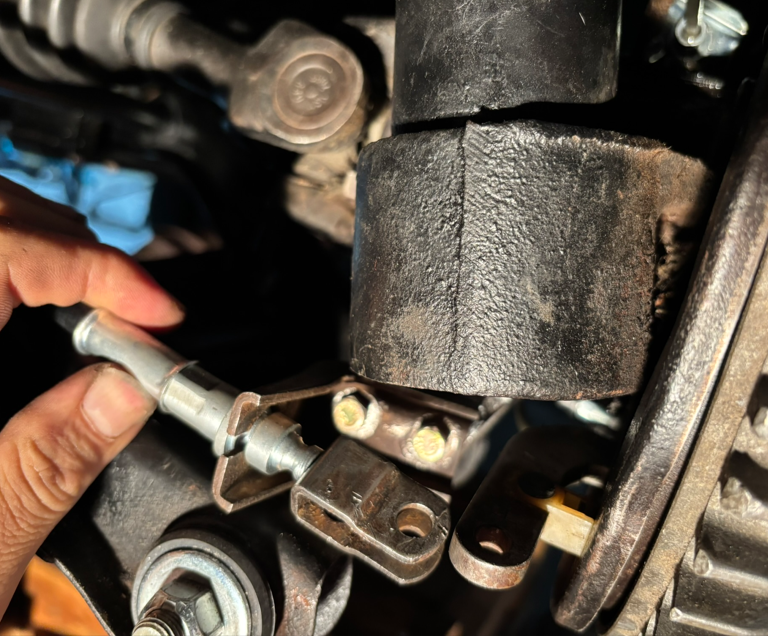 I believe, the unusual shaped wrench about halfway down on the right side is for valve adjustment to tighten and loosen the lock nuts. The other below it may be for holding the adjusting nut while tightening
 I checked JDM Car Parts and Bonzi for reproductions and did not see this one. Anyone have a reproduction of this tag? Maybe good pictures of both sides? The correct green string? I found this pic on a Mecum auction for a Black Pearl.
 TomTak joined the community
 You might remember that recently, I picked up another vintage Datsun tool Board, to the one I already had. Soon after that, a friend wrote me that he found some more. So naturally, I negotiated and was able to pick them up last week. This time, luckily, including some tools: First, I had to clean everything and sort through the boxes of tools: It included quite a funky set of homegrown tools. I wonder what purpose they were made for: Then I also spent a bit of time to remove rust and put some protective clear coat primer on the walls, to ensure they don't corrode any longer. Thanks to @Mymechanics for your support and inputs! So totally i have now 5 tool walls. That one from Germany, which is already completed and hanging in my garage, plus these four. Two Datsun ones: And two more modern ones with a Nissan branding: As you can see in the photos, many tools are there, but also many are missing. So the next step is to make an inventory of what I have and what is missing. And what the tools are for, which do not belong to these specific tool boards. Luckily, I have a lot of original Datsun / Nissan / Kent-Moore / SPX documentation about those tools, and what cars / Engines / transmissions they are intended for. And my latest acquisition also included a more modern Nissan / SPX / Kent-Moore booklet, which is nice for the Nissan branded boards: I was lucky to already find some of the missing tools. But that's only a fraction. Some of the tools will be tricky to find and might take me a few months / years to come accross. Overall, I'm quite happy. I have to find a nice place for the Datsun branded walls, and with the Nissan ones I yet have to decide if I keep them as decoration or if I sell them, if the right person comes along. Either way, it was a great find, but still some homework ahead to figure out what all these tools are used for, which car models they fit and what is missing.
@Captain Obvious How did you make your cables??
You might remember that recently, I picked up another vintage Datsun tool Board, to the one I already had. Soon after that, a friend wrote me that he found some more. So naturally, I negotiated and was able to pick them up last week. This time, luckily, including some tools: First, I had to clean everything and sort through the boxes of tools: It included quite a funky set of homegrown tools. I wonder what purpose they were made for: Then I also spent a bit of time to remove rust and put some protective clear coat primer on the walls, to ensure they don't corrode any longer. Thanks to @Mymechanics for your support and inputs! So totally i have now 5 tool walls. That one from Germany, which is already completed and hanging in my garage, plus these four. Two Datsun ones: And two more modern ones with a Nissan branding: As you can see in the photos, many tools are there, but also many are missing. So the next step is to make an inventory of what I have and what is missing. And what the tools are for, which do not belong to these specific tool boards. Luckily, I have a lot of original Datsun / Nissan / Kent-Moore / SPX documentation about those tools, and what cars / Engines / transmissions they are intended for. And my latest acquisition also included a more modern Nissan / SPX / Kent-Moore booklet, which is nice for the Nissan branded boards: I was lucky to already find some of the missing tools. But that's only a fraction. Some of the tools will be tricky to find and might take me a few months / years to come accross. Overall, I'm quite happy. I have to find a nice place for the Datsun branded walls, and with the Nissan ones I yet have to decide if I keep them as decoration or if I sell them, if the right person comes along. Either way, it was a great find, but still some homework ahead to figure out what all these tools are used for, which car models they fit and what is missing.
@Captain Obvious How did you make your cables??


Important Information
By using this site, you agree to our Privacy Policy and Guidelines. We have placed cookies on your device to help make this website better. You can adjust your cookie settings, otherwise we'll assume you're okay to continue.