All Activity
- Past hour
-
 Walter Moore is the one that did the work. Distributor advance curves revision 1-2.xls
 -
Everything looks good. I just need to start over with the basic tune up. The dizzy I have says 17 and 34 with full advance. I used that excel spreadsheet someone made for all the distributors. My markings show it to be a '79 dizzy. It's ran great until I pulled the plugs and "cleaned them". The car has sat since my knee surgery almost a year now. I haven't done anything since but trying to get back to normal but I admit my priorities have changed. I'm going to get a set of bpr6es and leave that big ZX gap out of it. I read a pretty sensible thread on keeping the gap to the head not the distributor. So I'll try .035 to start then see what that does. I know carbs need protruding tips so I'll go with that. Thank you for the help!
- Today
-
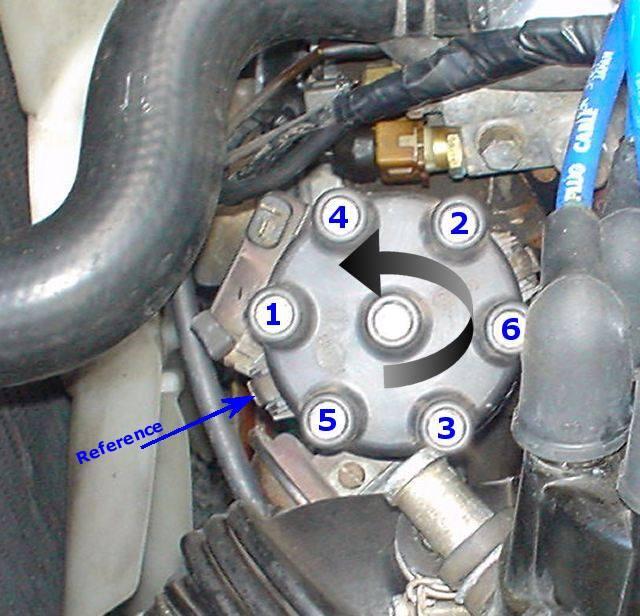
You can check fire at each plug with a 12v light but before that you should make sure the firing order is right. 153624 which is not the same as a straight 6 Ford or Chevy.
-
 What's the tach needle doing when it's missing? Those E12-80's are all old, or if they're not they're probably aftermarket. Maybe it's failing.
 -
 Here's one I do not recall seeing posted yet. https://www.hagerty.com/marketplace/auction/1970-datsun-240z/6GCpSGa9ml7BRIZZCDBmQ3
 -
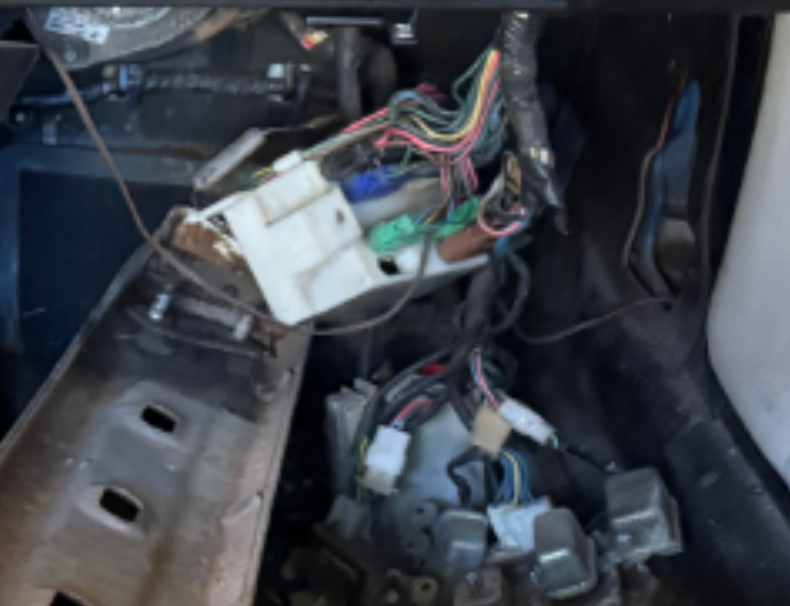
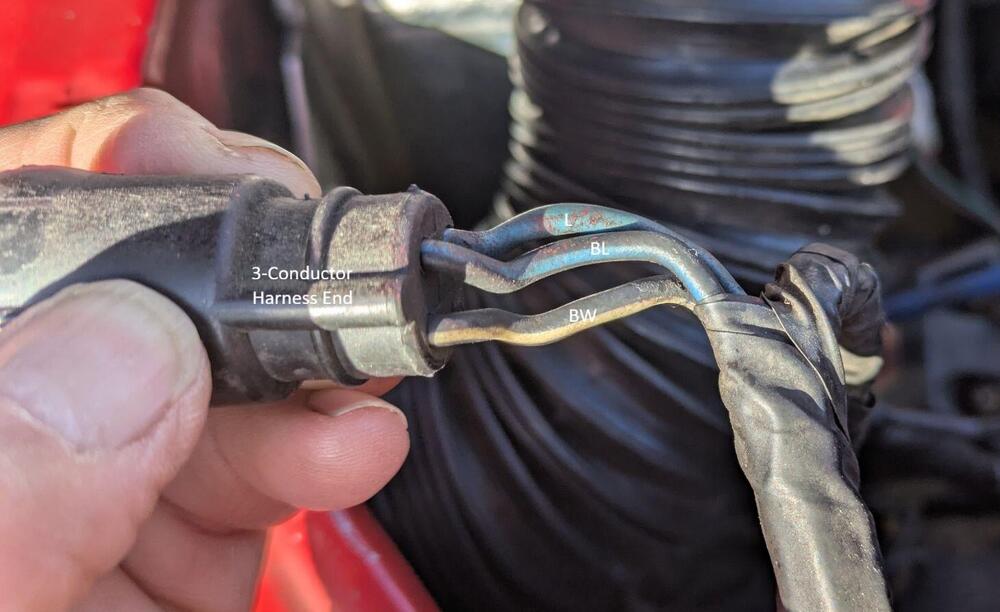
You have quite a bit of work ahead of you still. Before you put a battery in it and connect it up take a meter and check for resistance between the negative and positive posts. If you have a short there will be very little resistance. Get the wiring sorted out before even installing a battery. Also, just a seed for future thought, be very careful that you know which cable is positive and which is negative. Nissan used black for both. Not uncommon to fry electronics on these old EFI Z's with a backward hookup. Looking at this mess it looks like the PO was trying to solve a problem or was getting ready to part things out. .
-
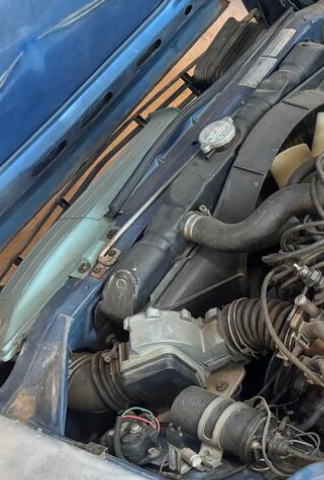
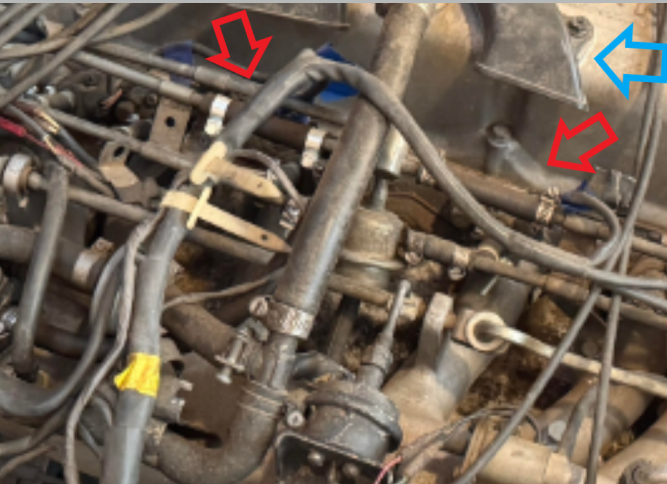
Probably want to check all of the air intake ductwork up to the throttle blade for mouse habitation before using the starter to spin the engine. The air filter box opens with the wing nuts. The AFM hoses need to have the clamps loosened. The hoses can be pretty stuck, you might want a thin screwdrive or a pick to work between the rubber and metal to break them free. Probably need to remove the AFM if you want to get the hoses off completely. The wire clip on the connector can be difficult. Also, check those fuel hoses. Looks like a PO has already fixed one. And the hoses to the injectors. Once you crank up the fuel pressure you'll know more. Might as well get a gauge also to check pressure and pressure dropoff. It will tell you if the regulator is blown out or the injectors are leaking or the check valve in the pump is shot. All common issues after sitting. That pump is probably shot just based on its appearance. The engine looks about ready to go. You'll want to check power to the coil and verify that the original 1975 electronic ignition module is intact, by the fuse box. They fail often. Open up the distributor and see if the bushings are shot. See if the vacuum advance and mechanical advance mechanisms are free. If they're not, don't force them, they can be saved with careful lubrication and disassembly but if you force a rusty mechanism the plastic ball brearing frame will break. I'd check the distributor before starting the engine, even the normal forces can probably break a stuck distributor. Ignore the blue arrow. I was going to mention the ZX fan but already did.
-
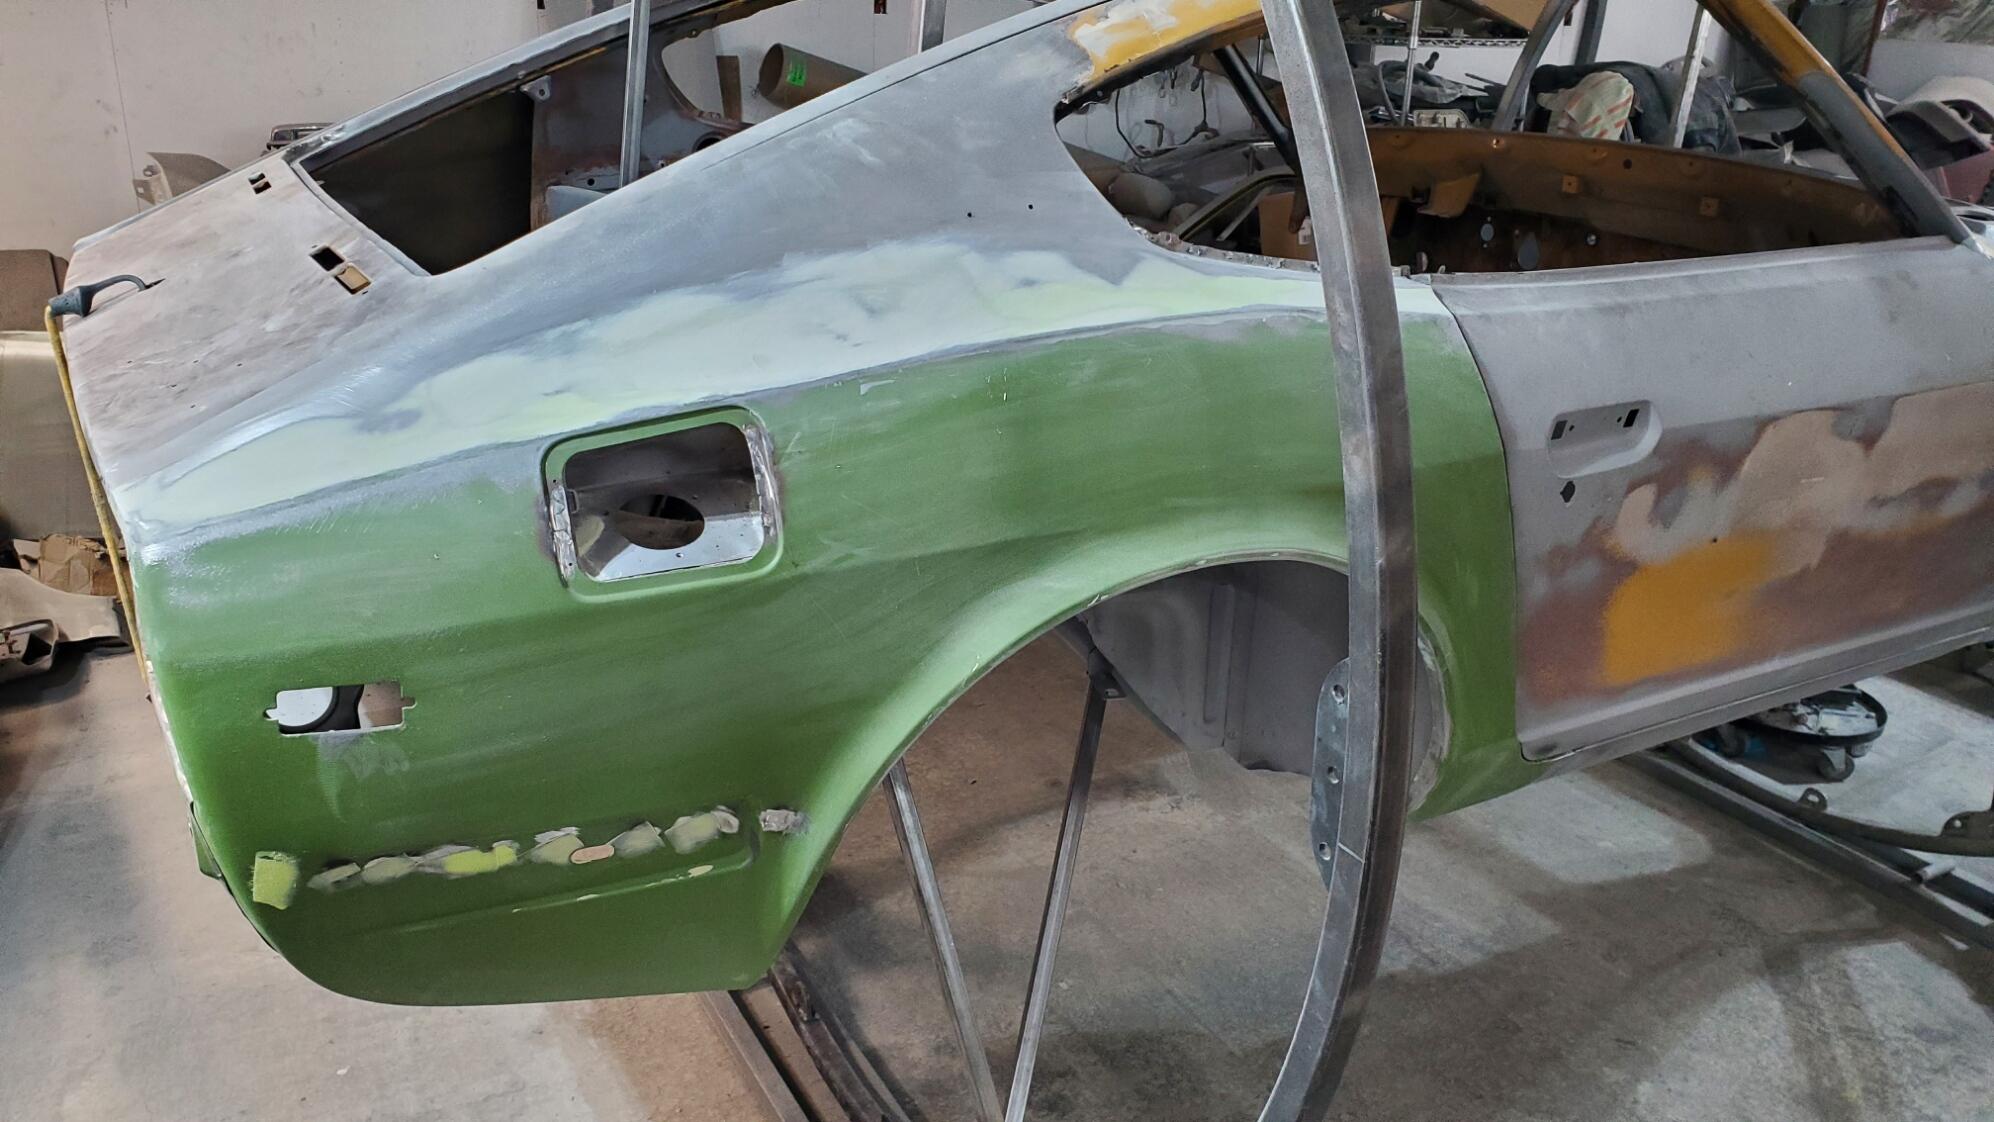
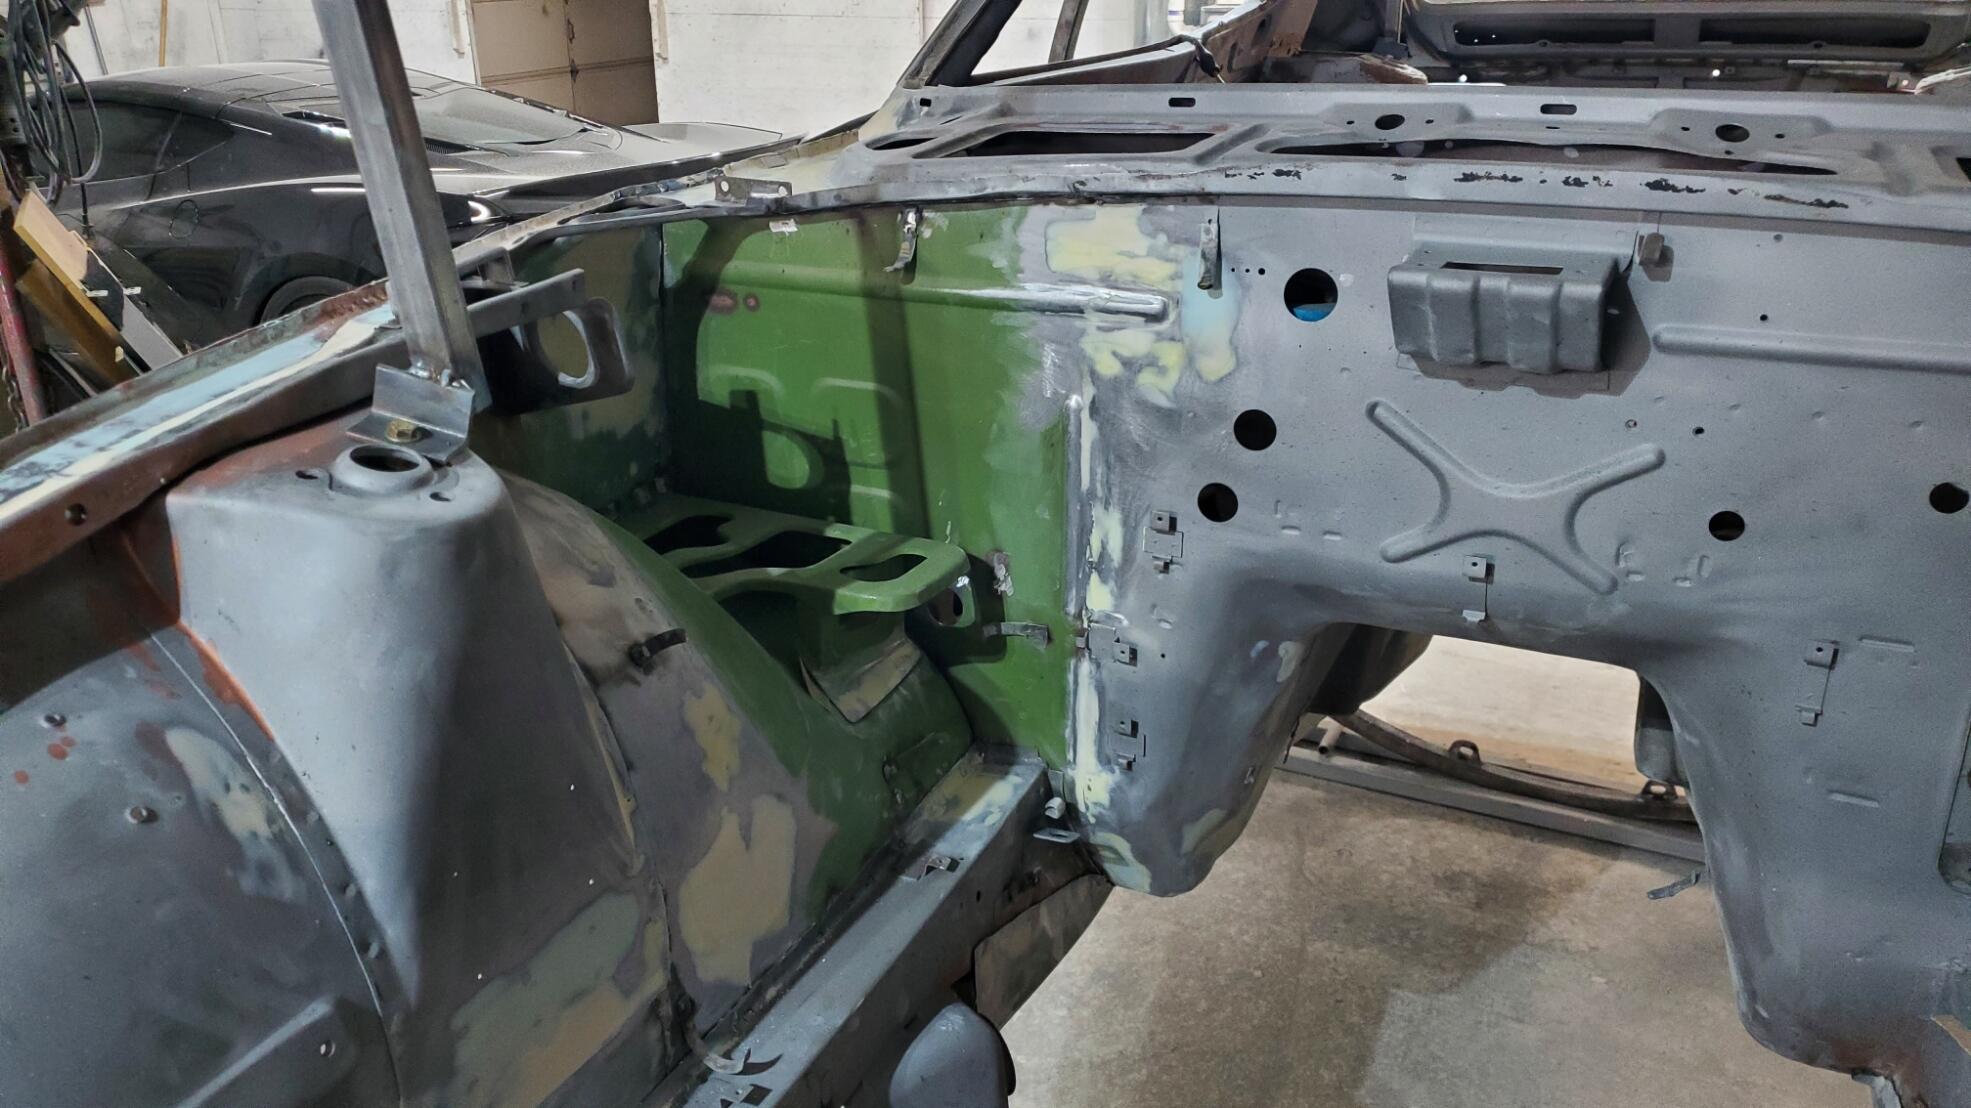
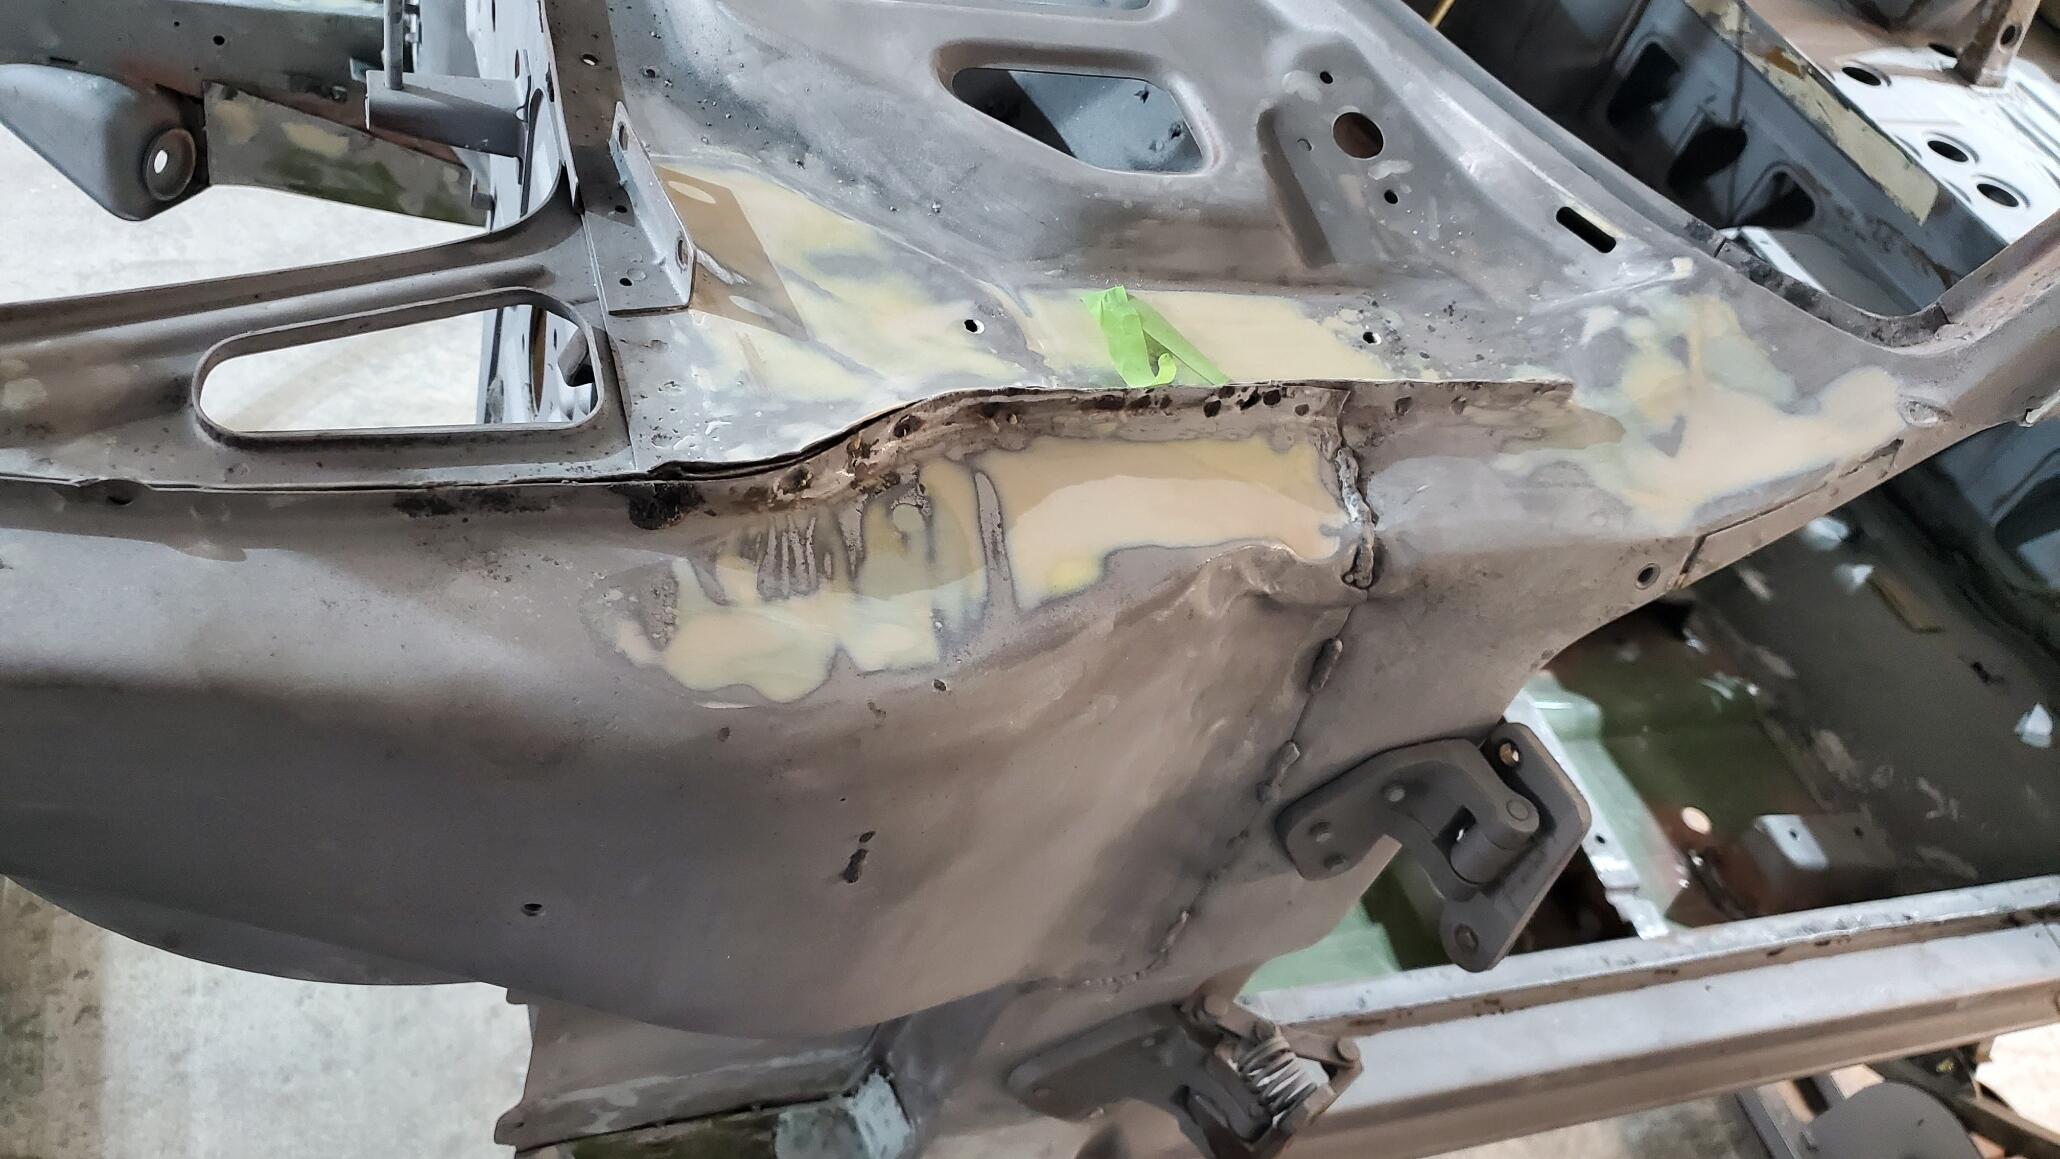
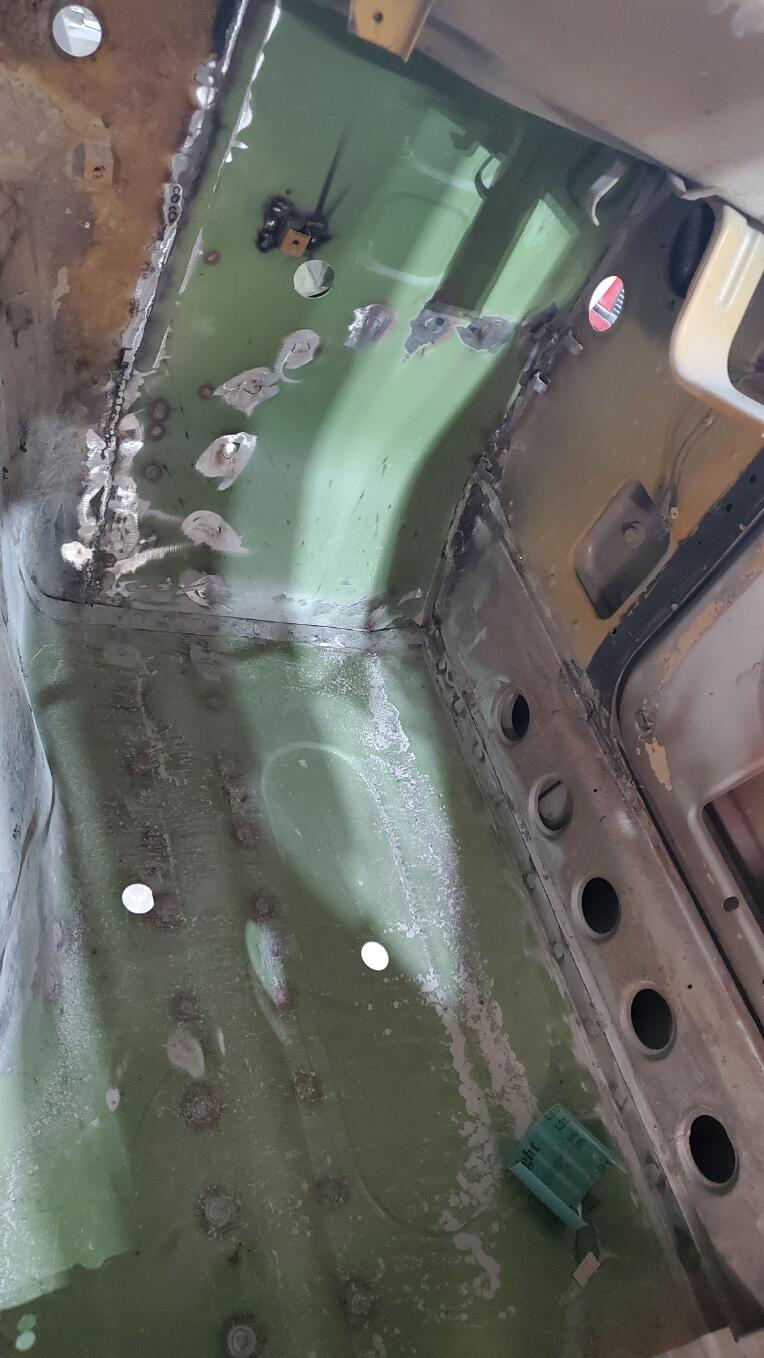
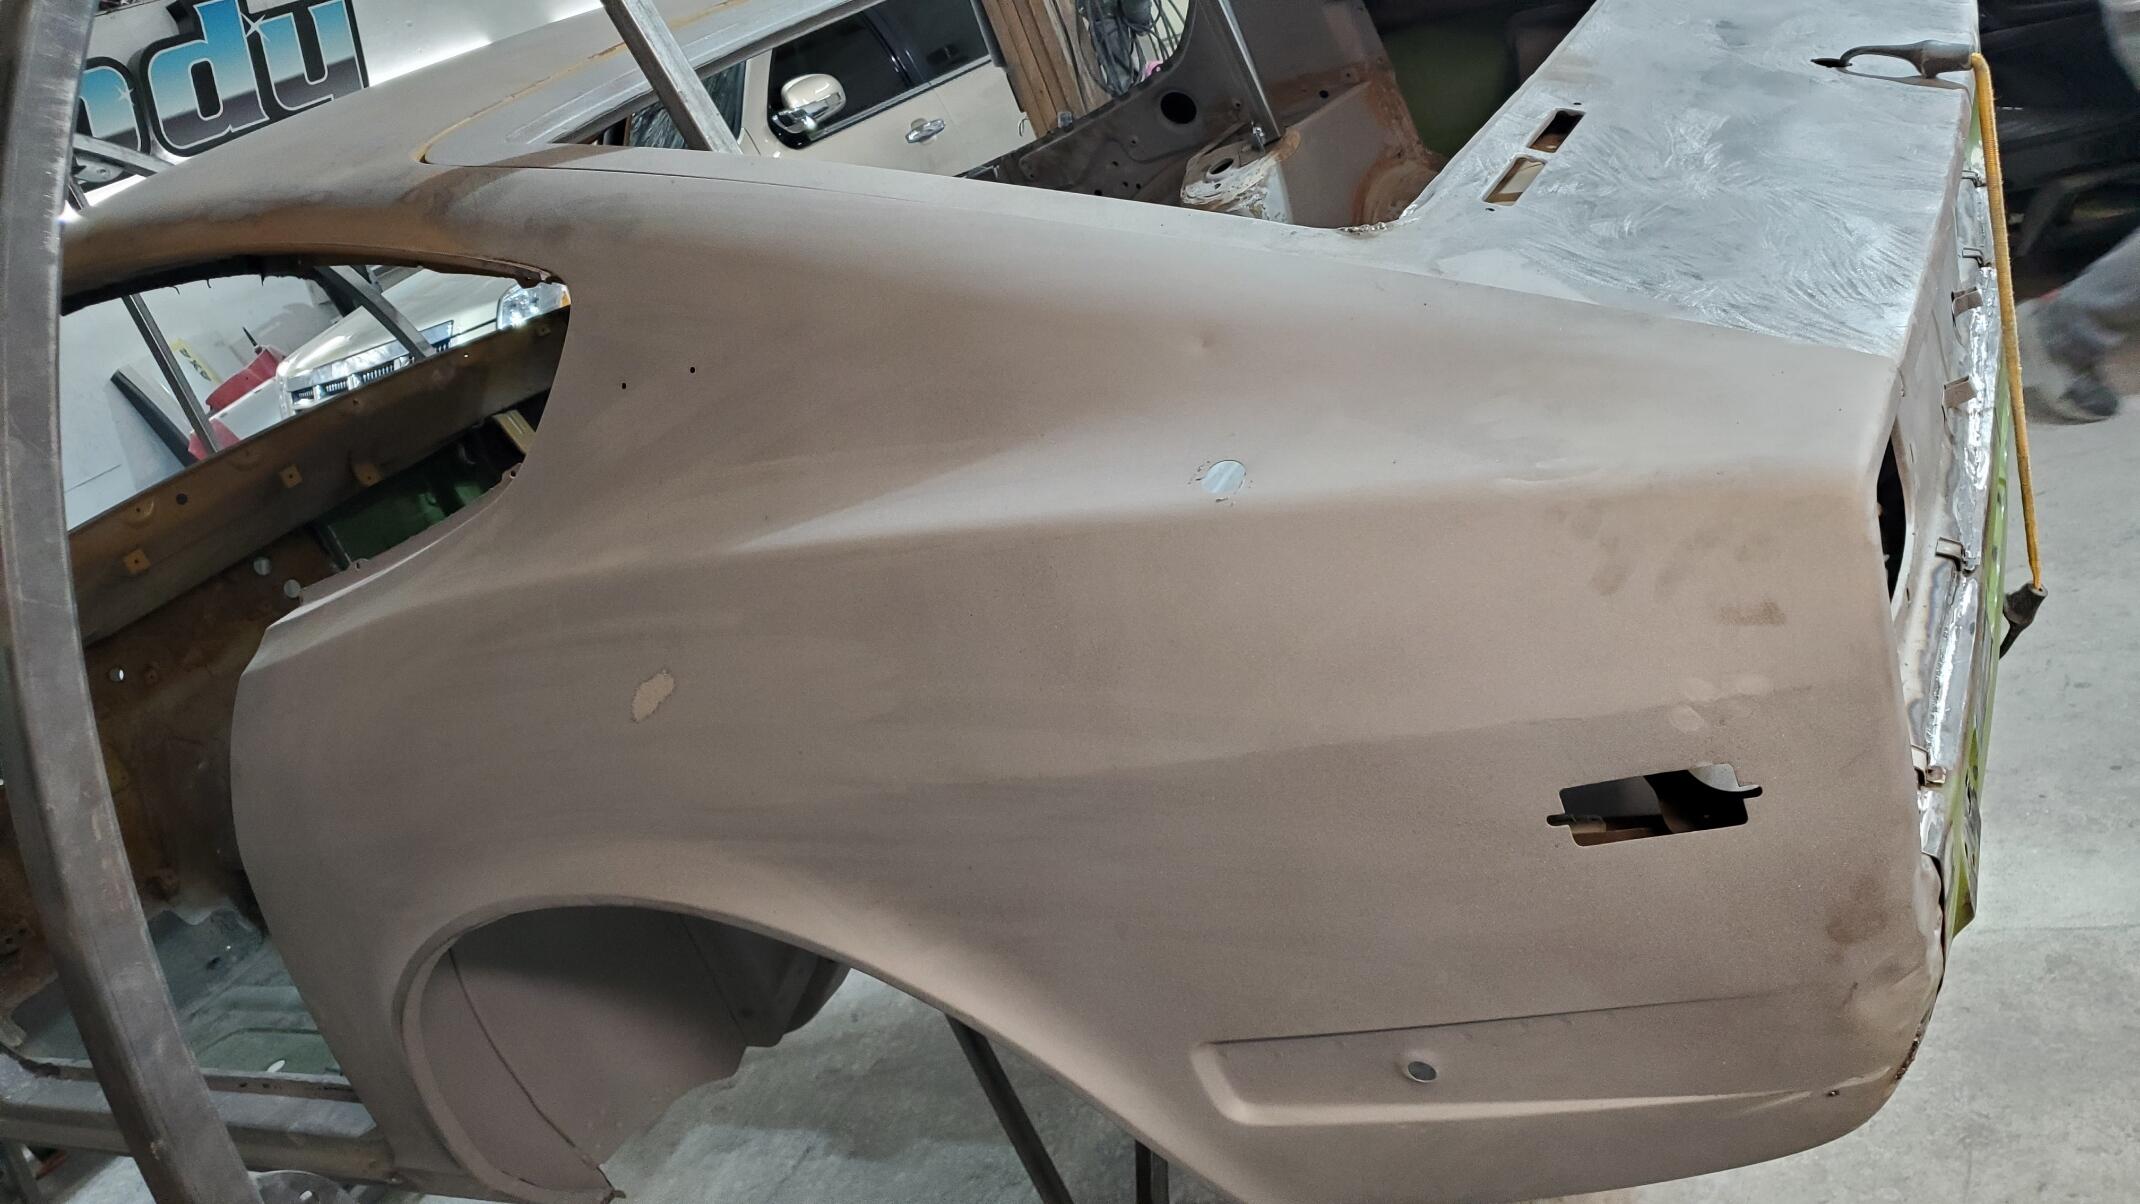
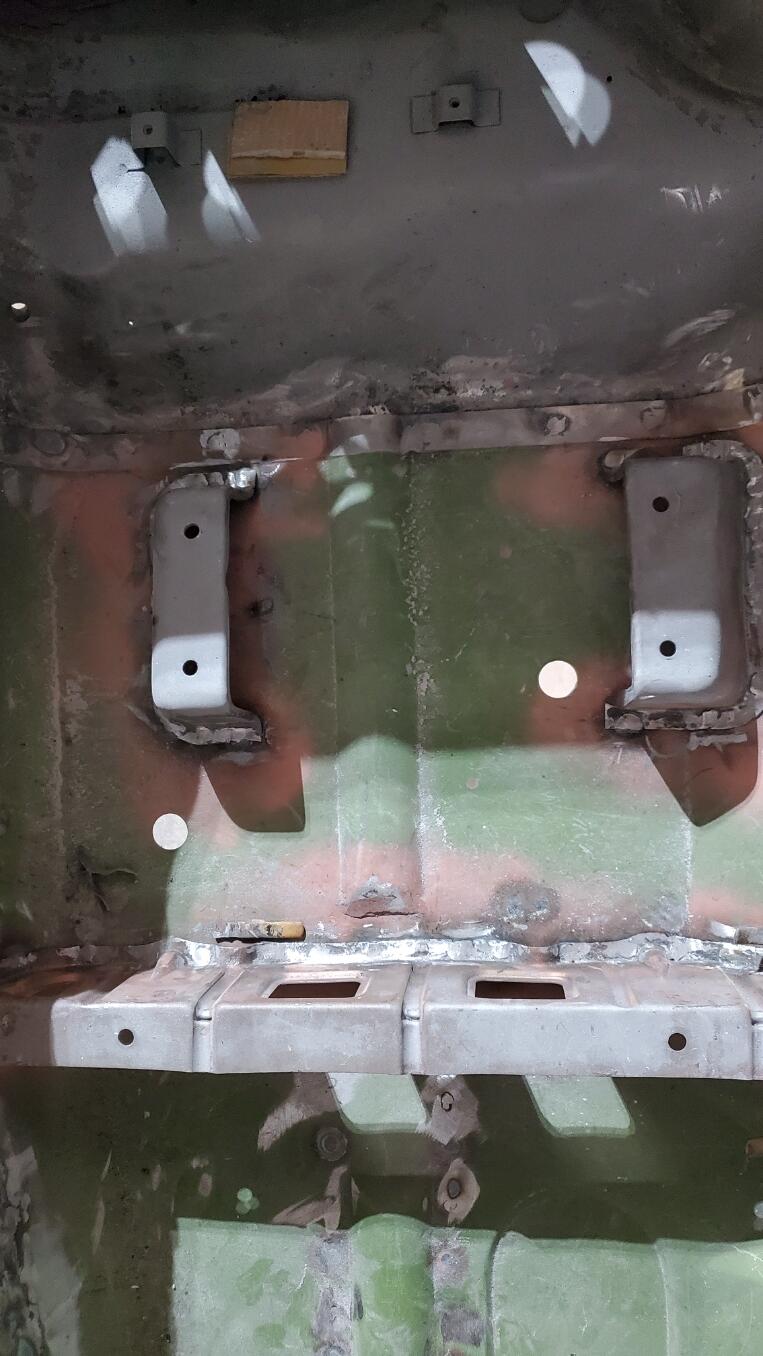
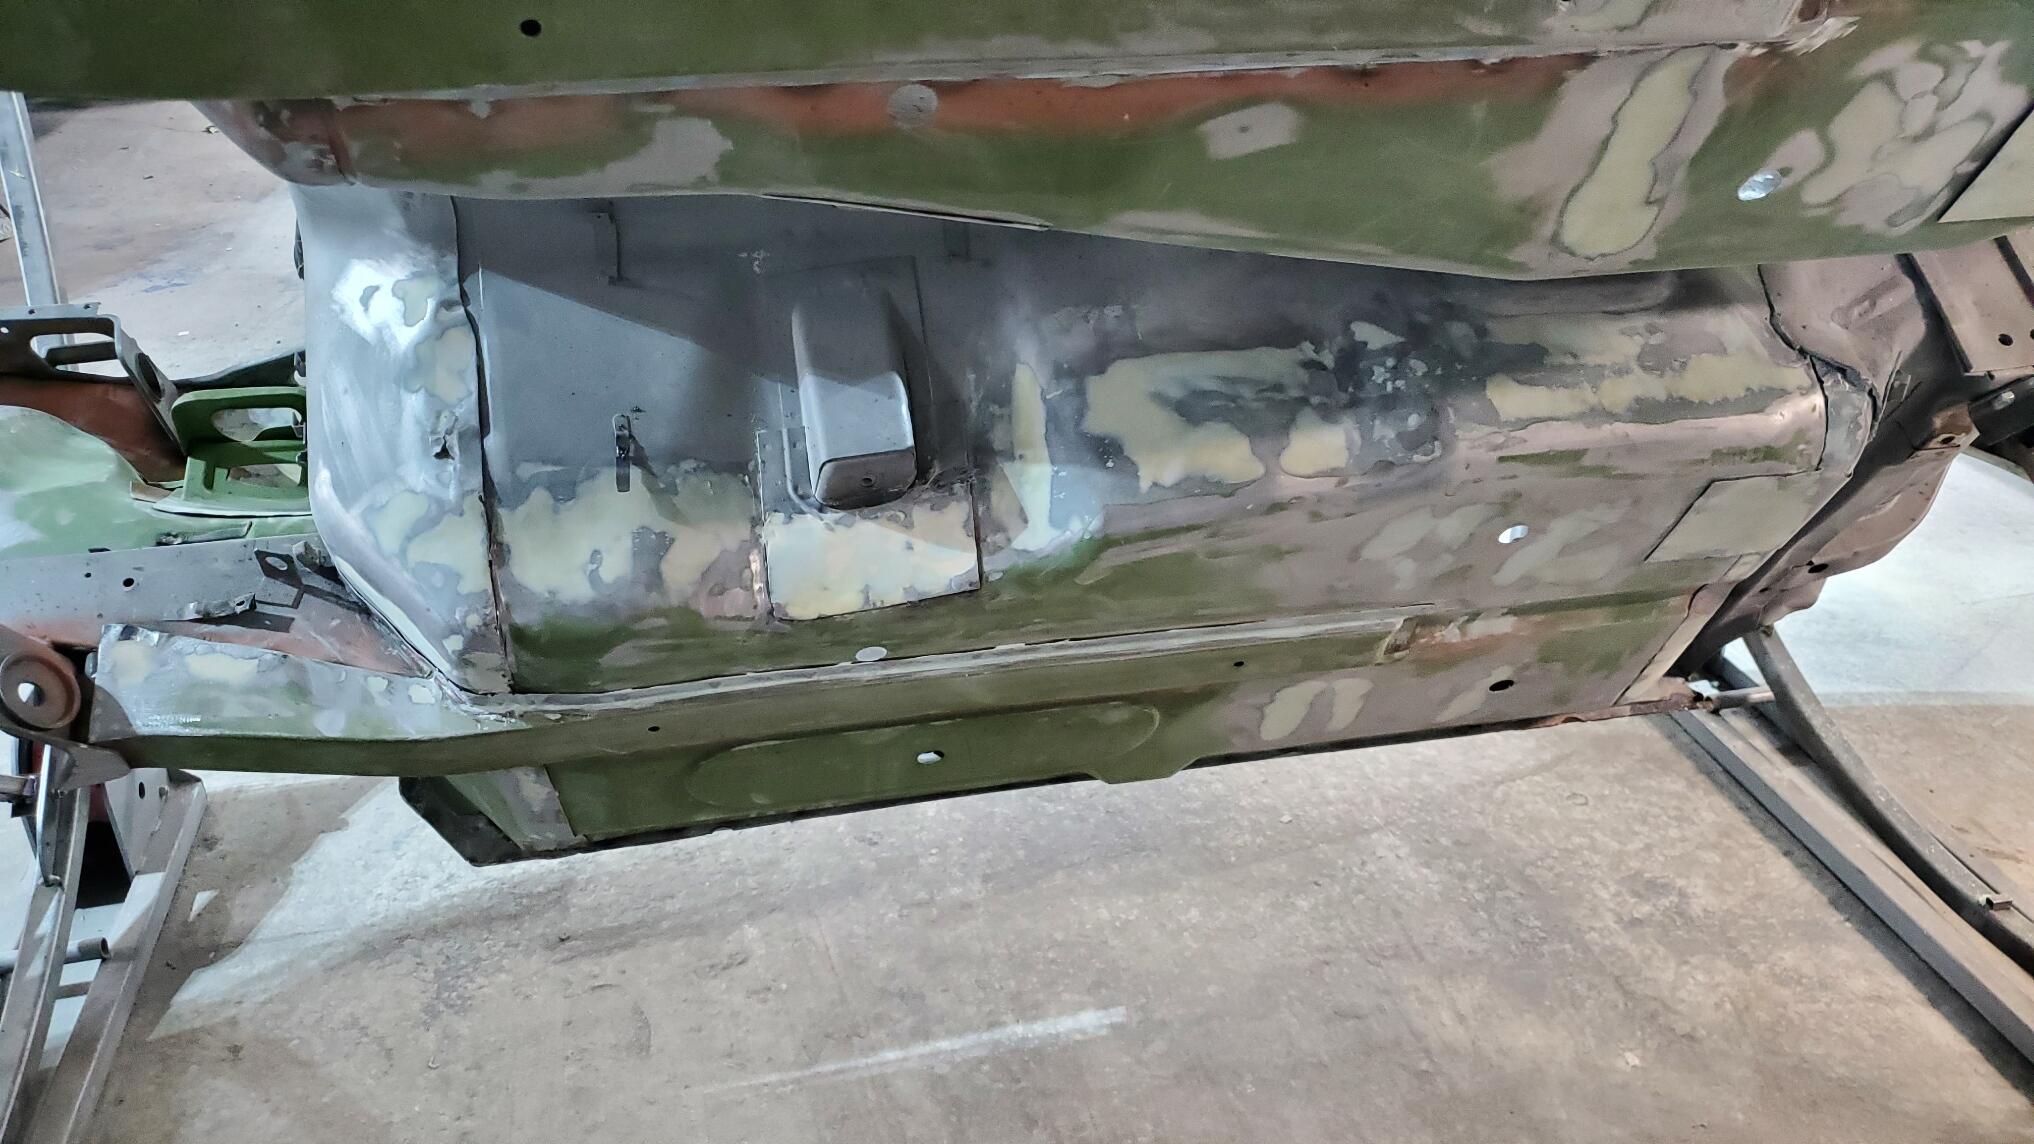
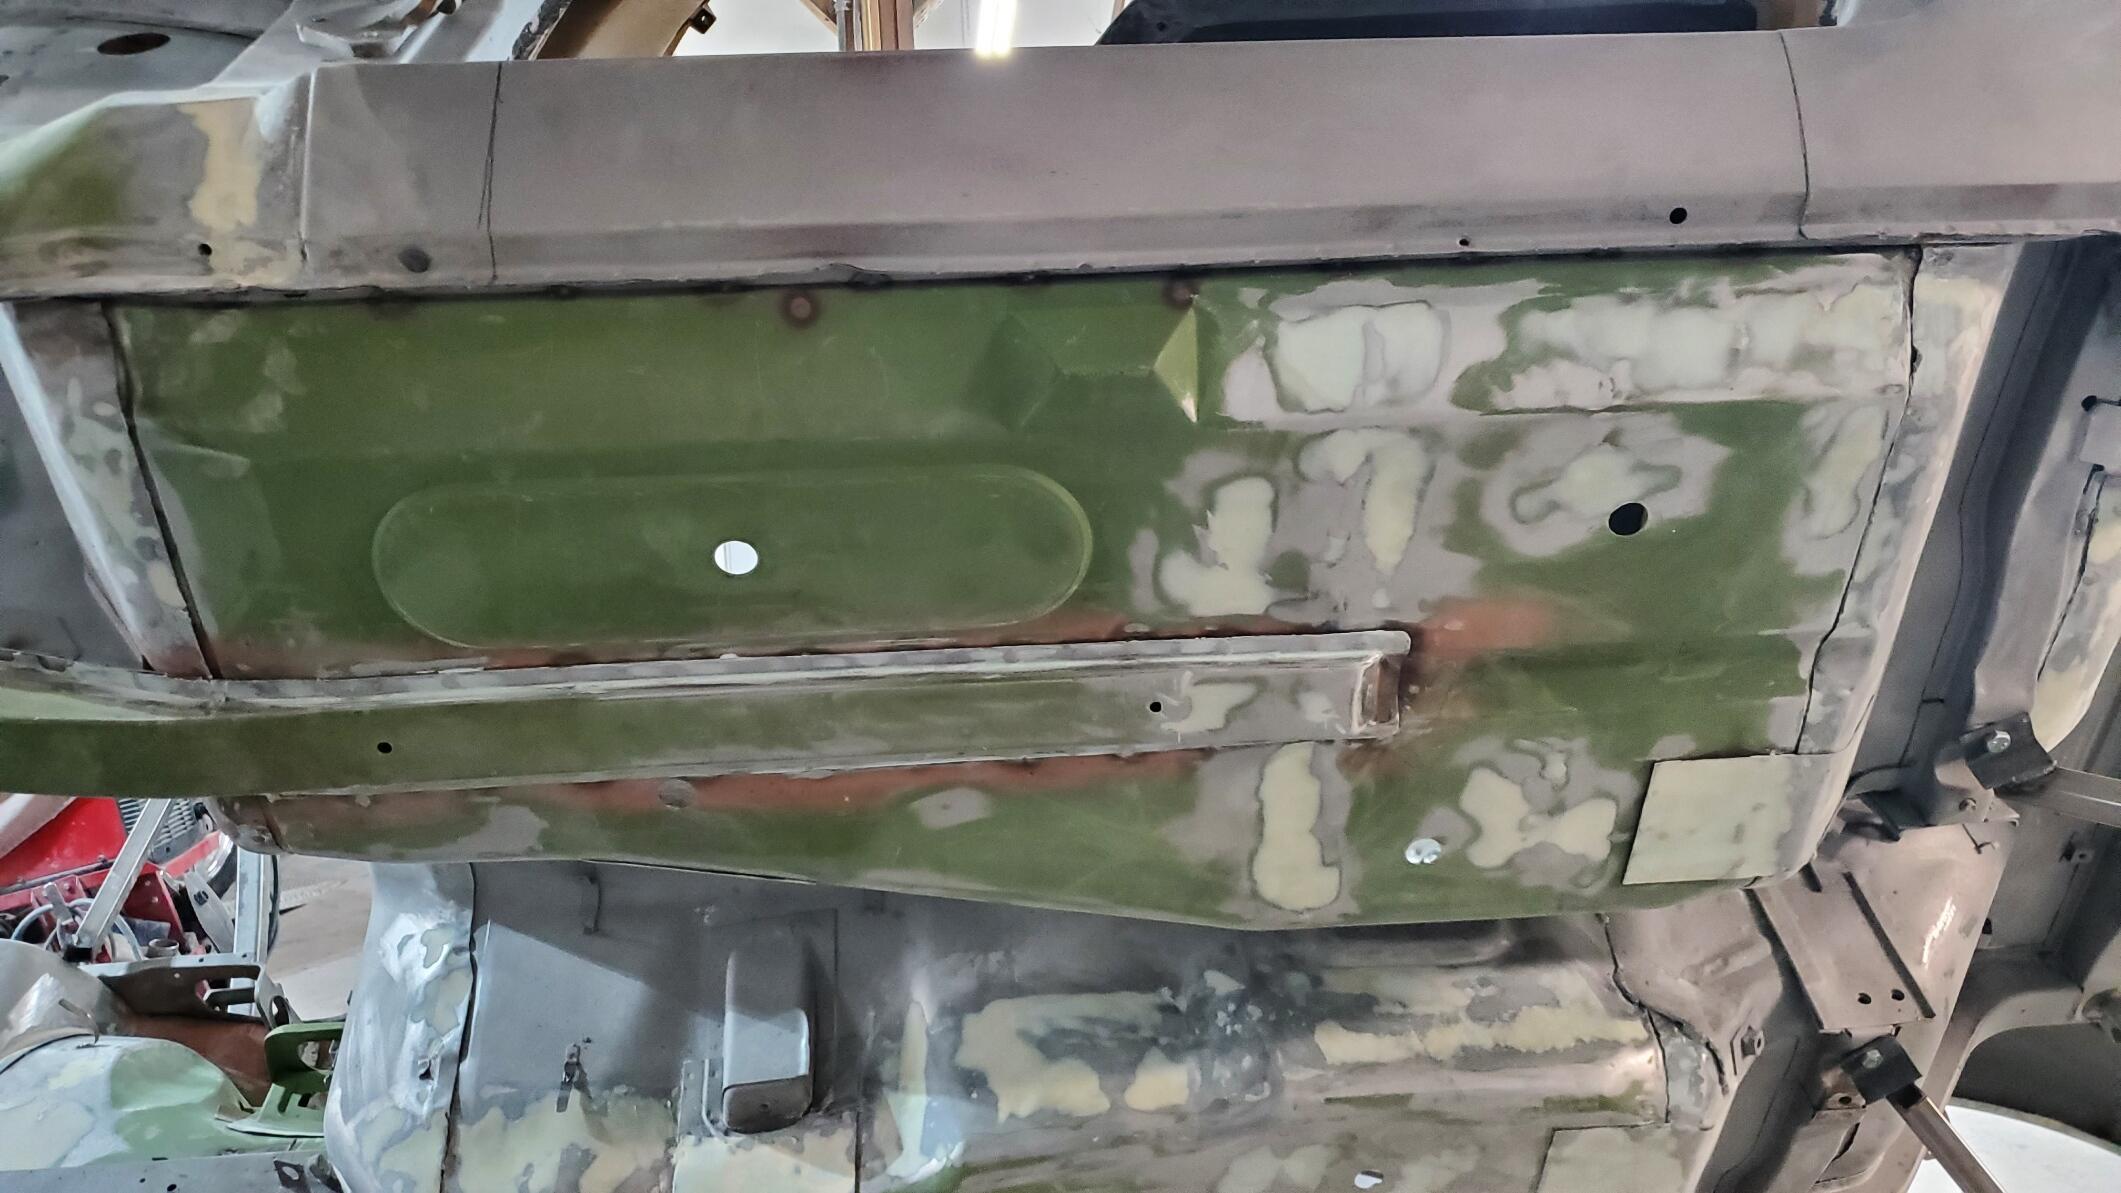
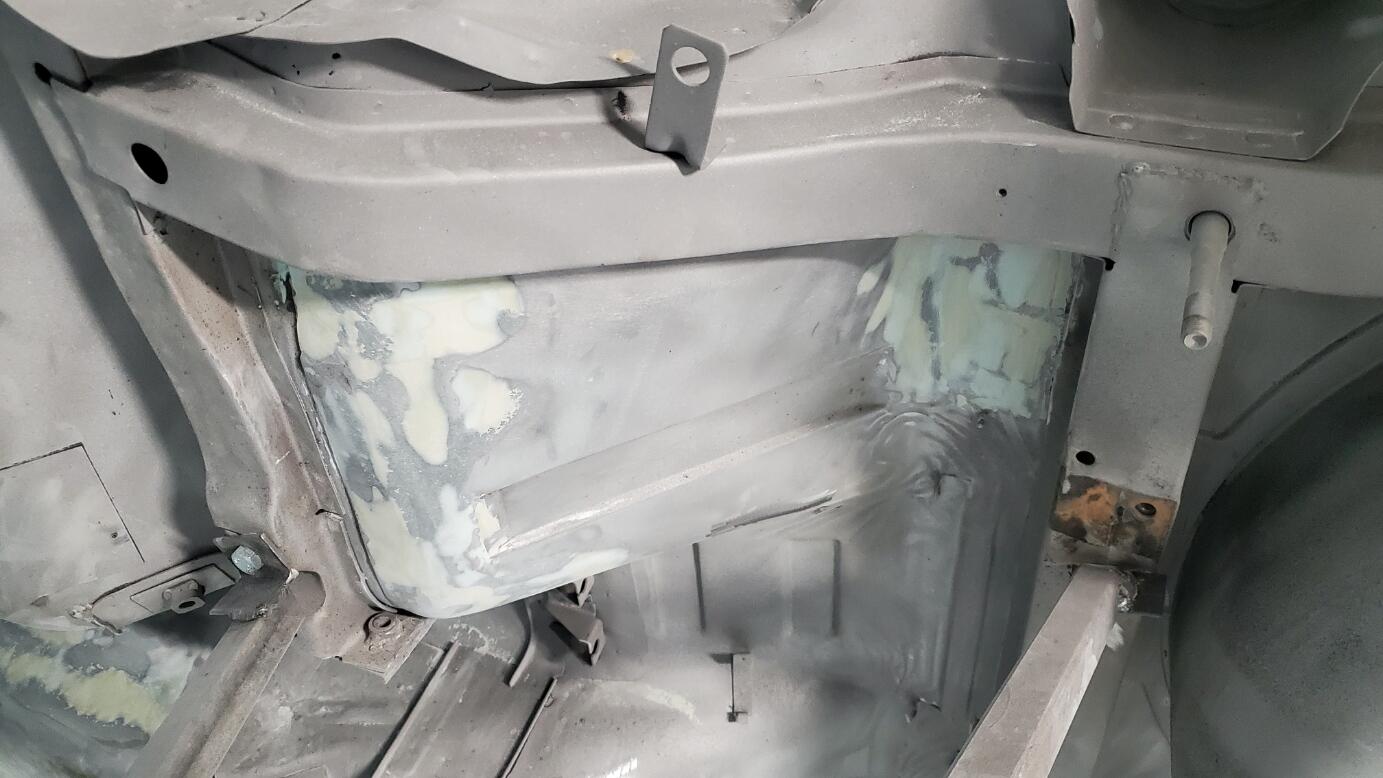
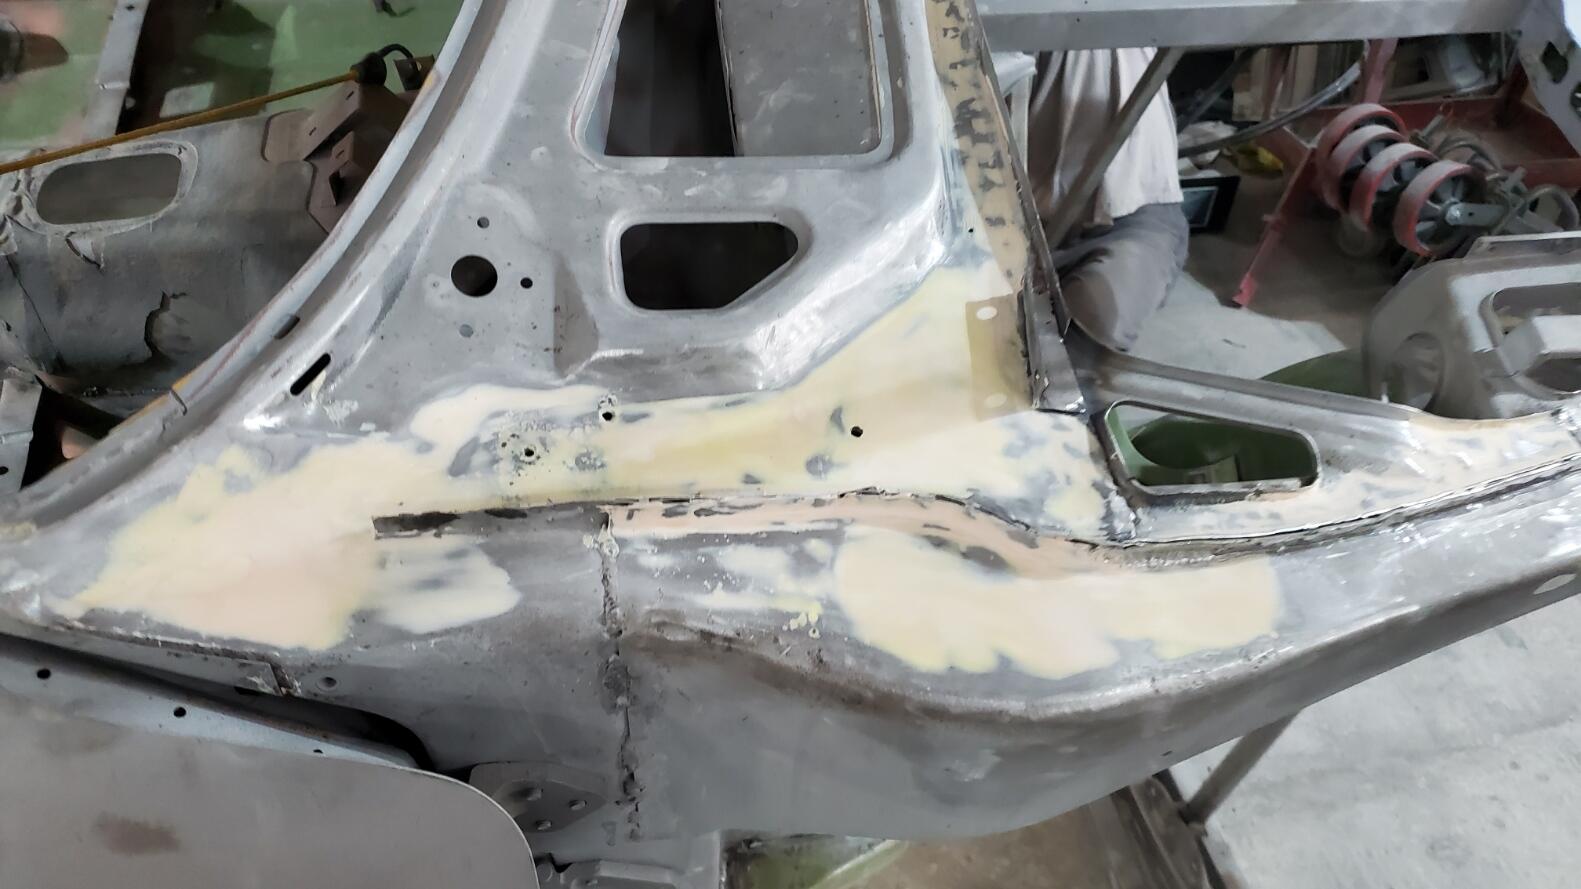
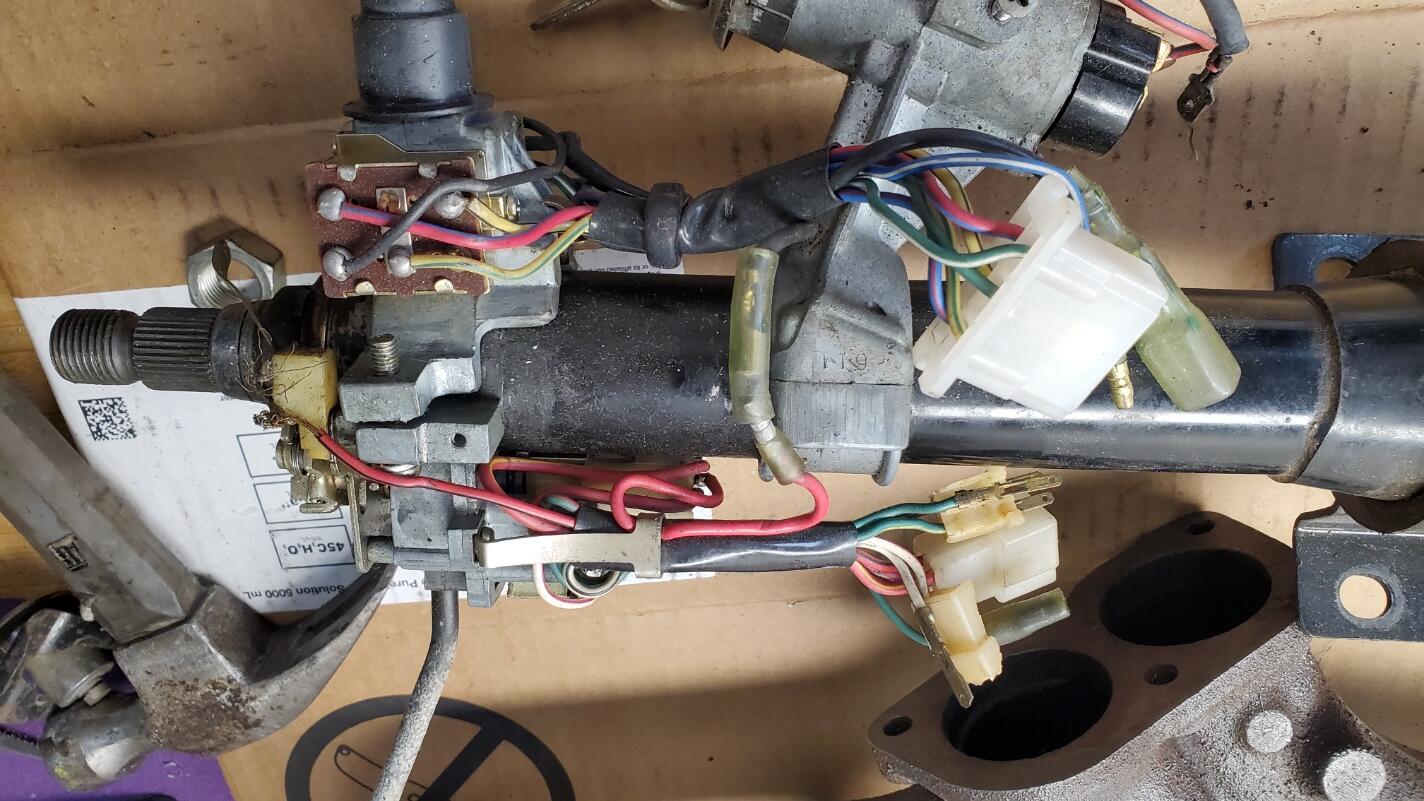
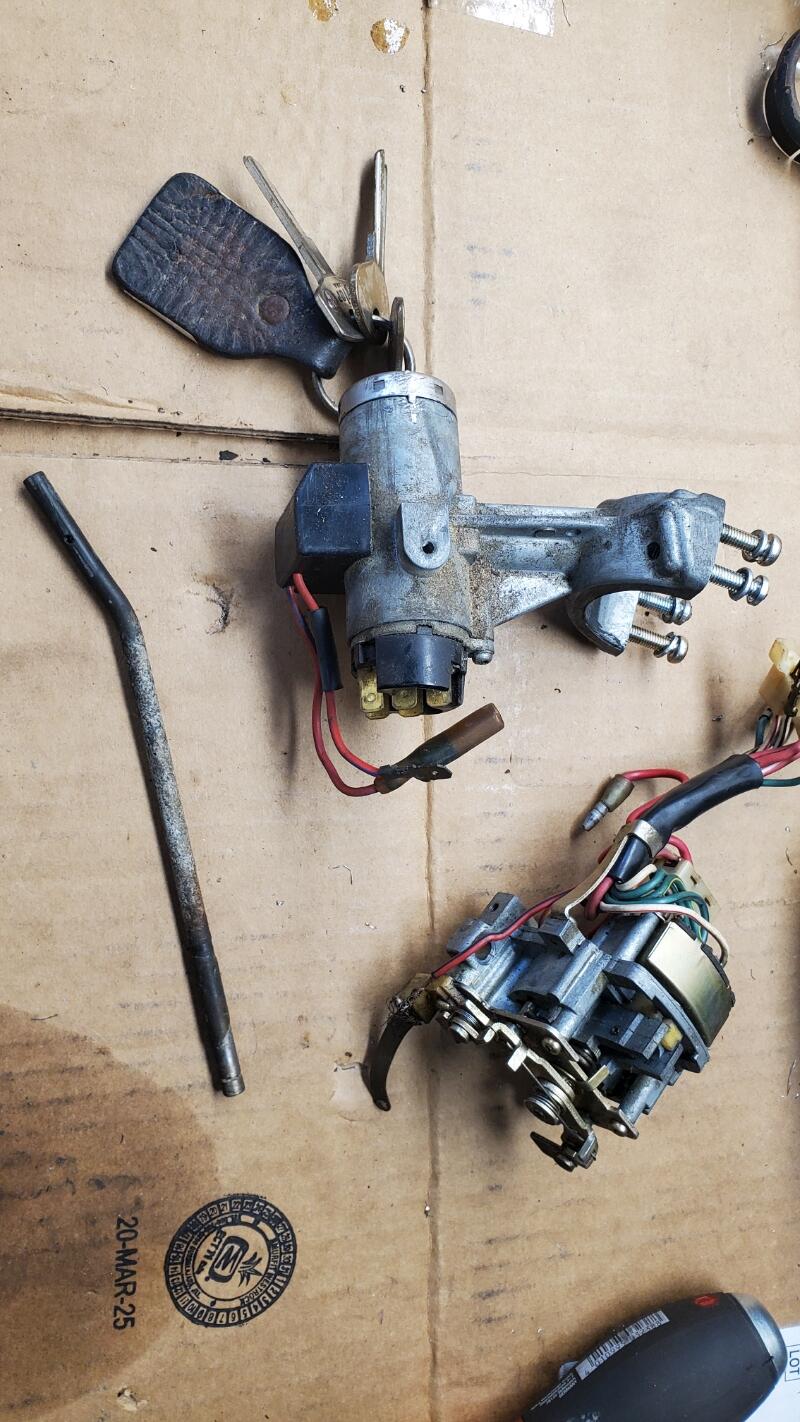
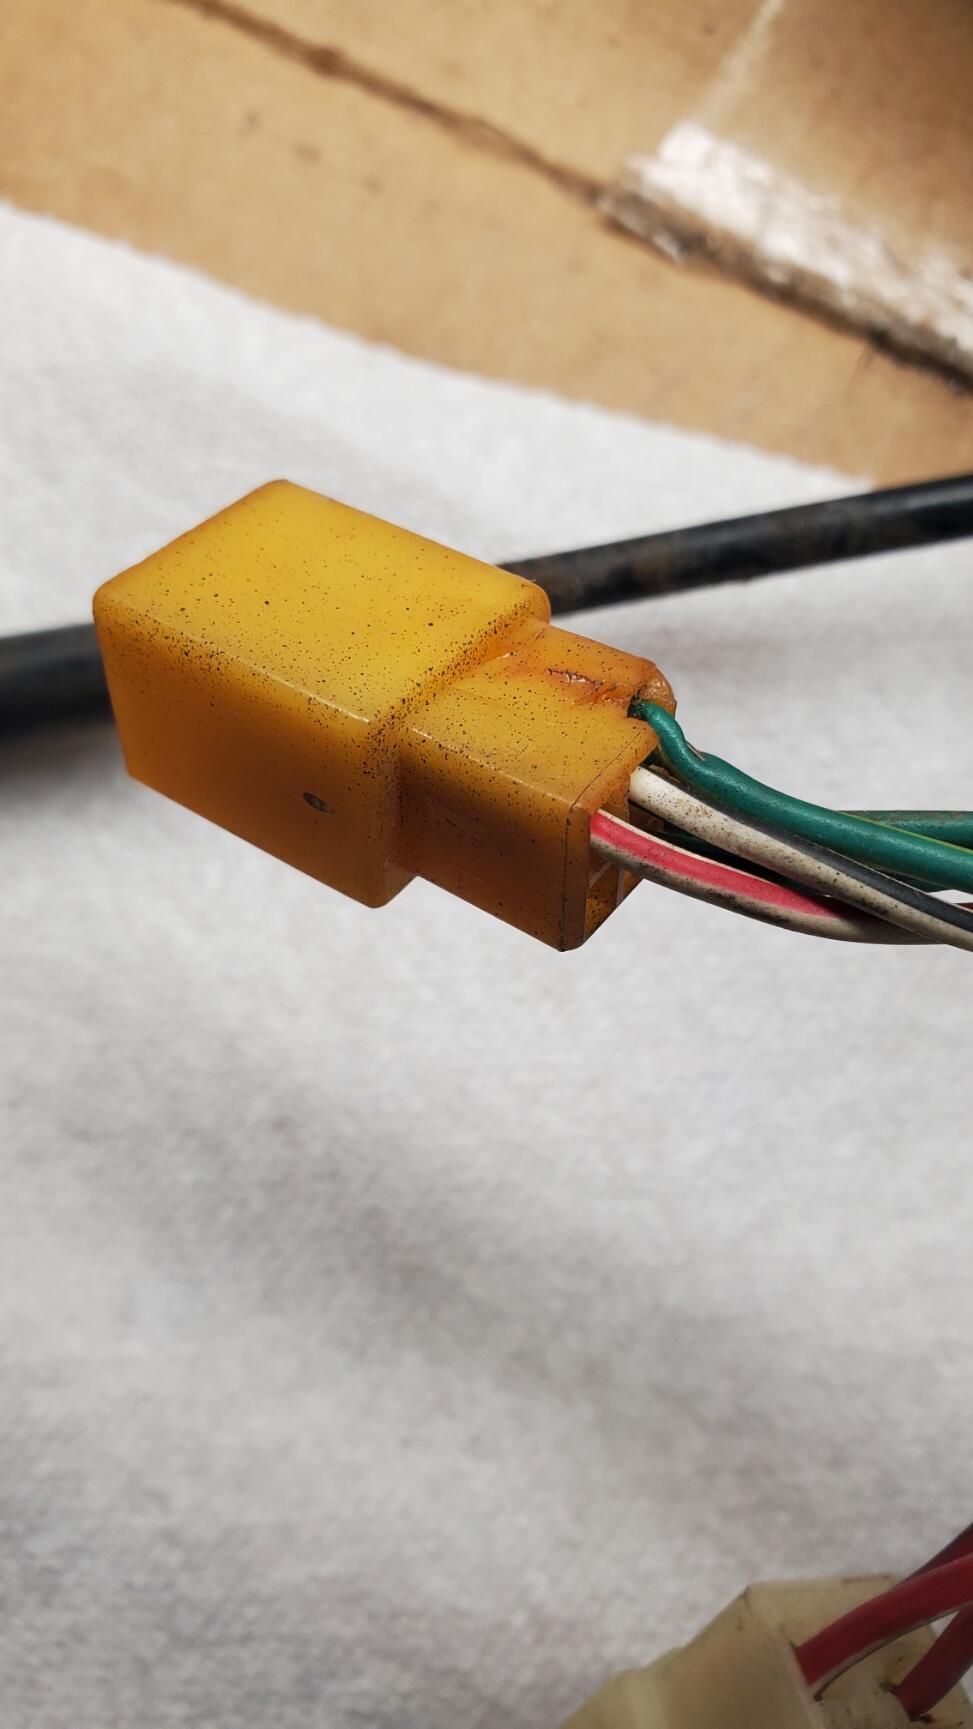
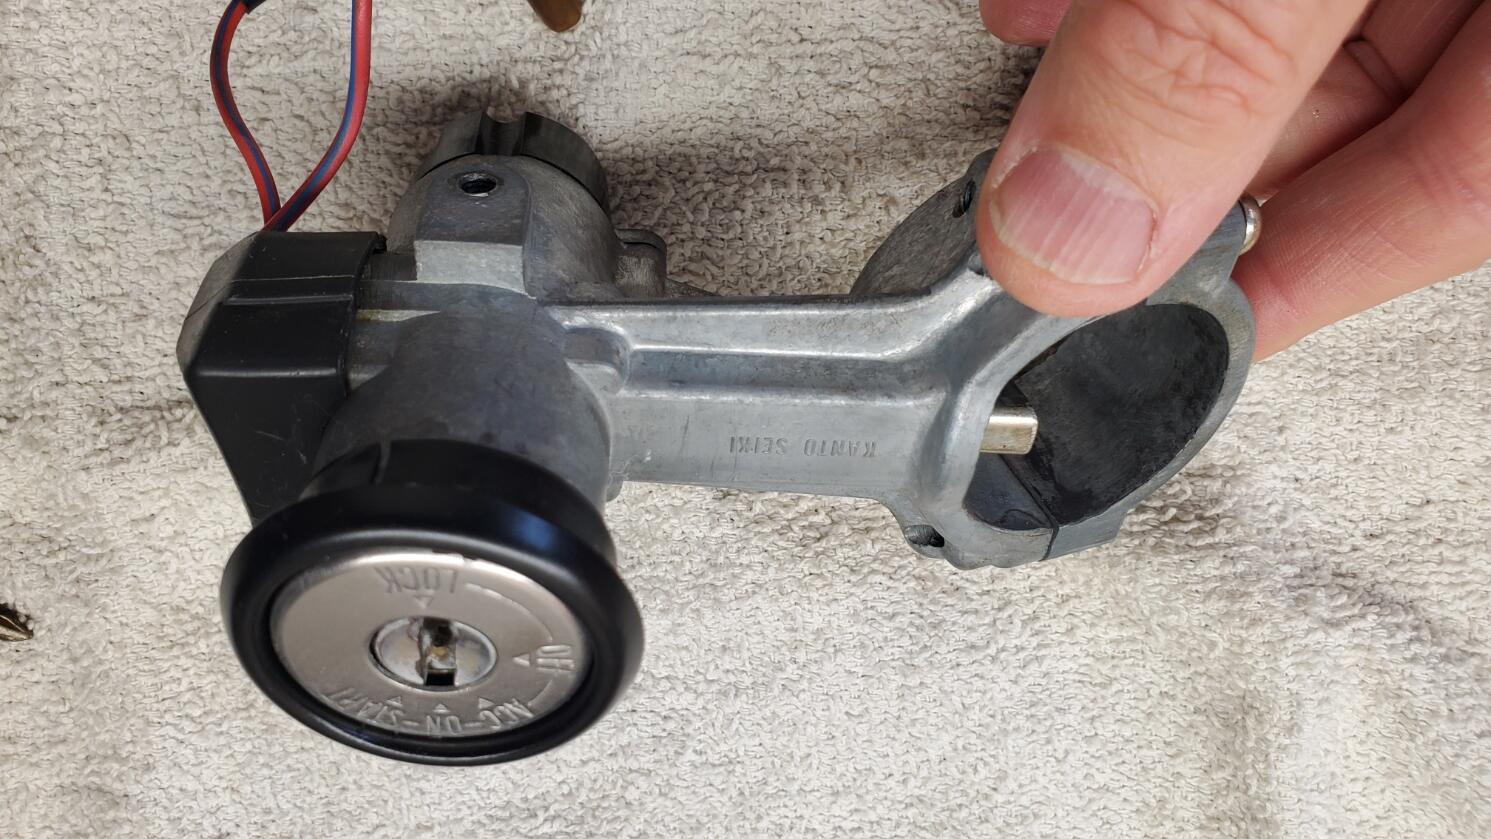
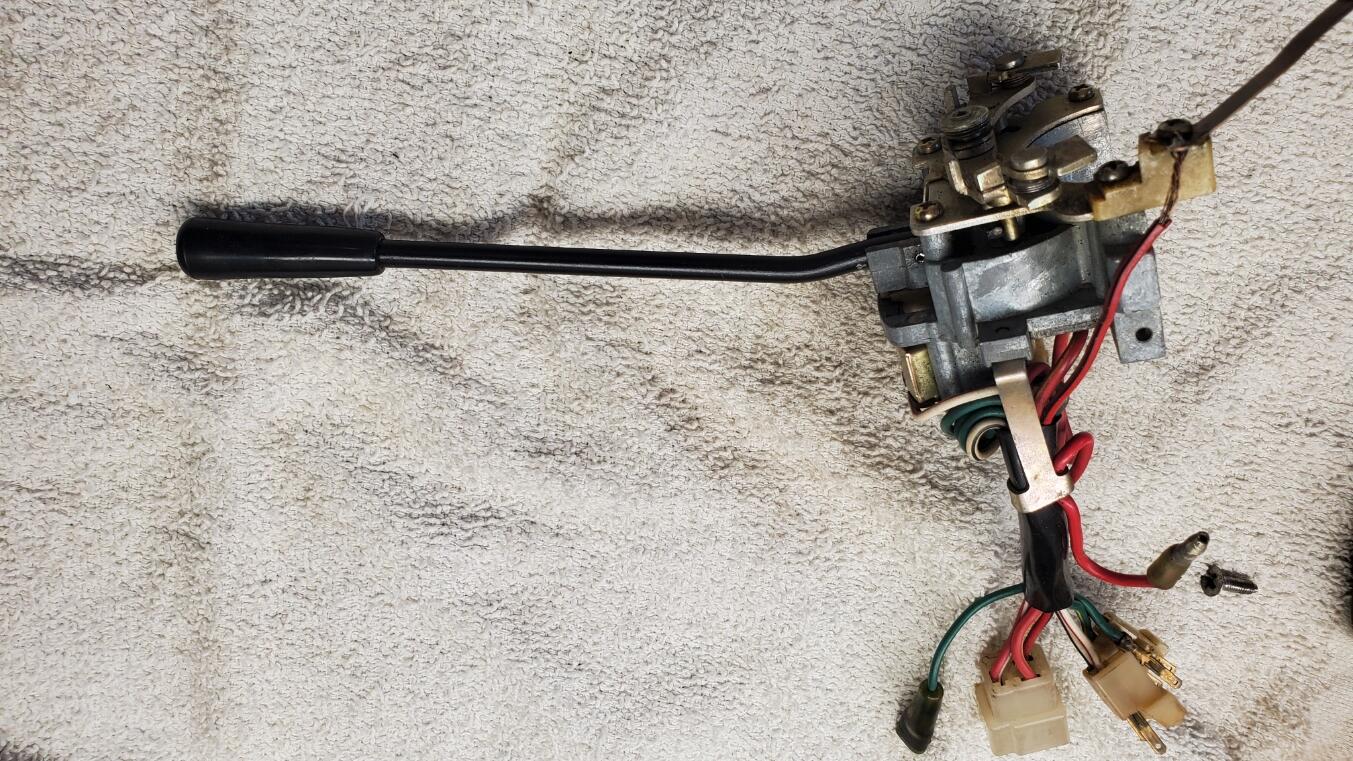
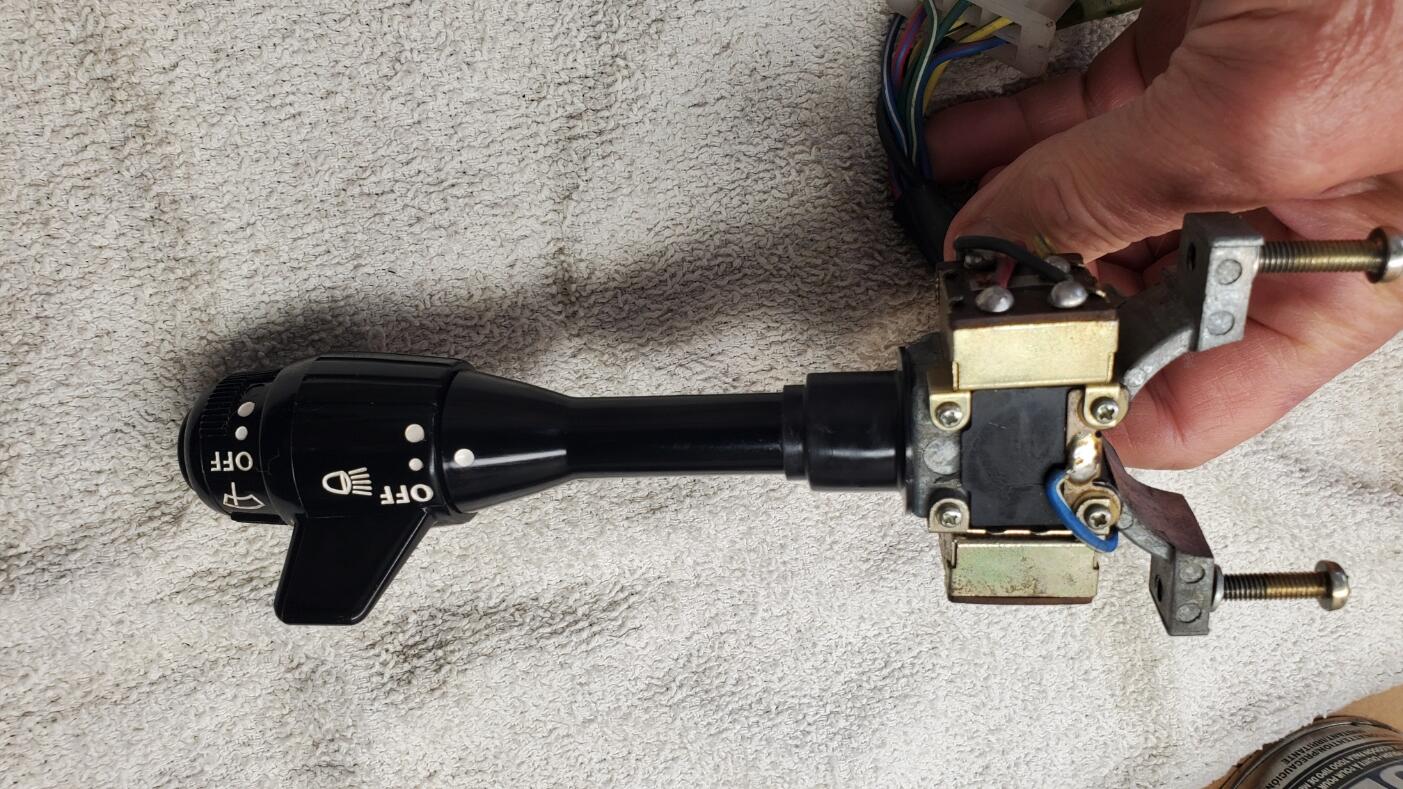
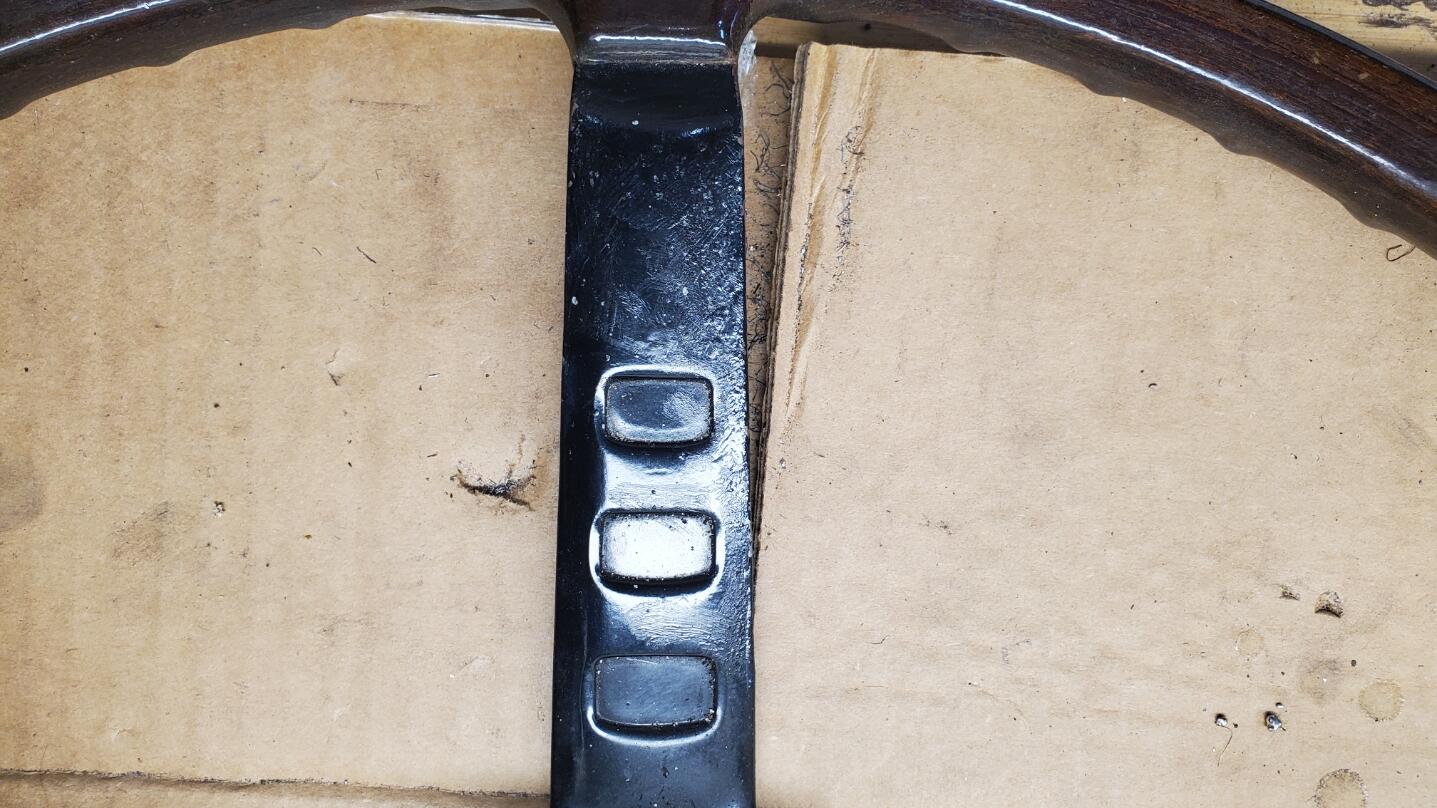
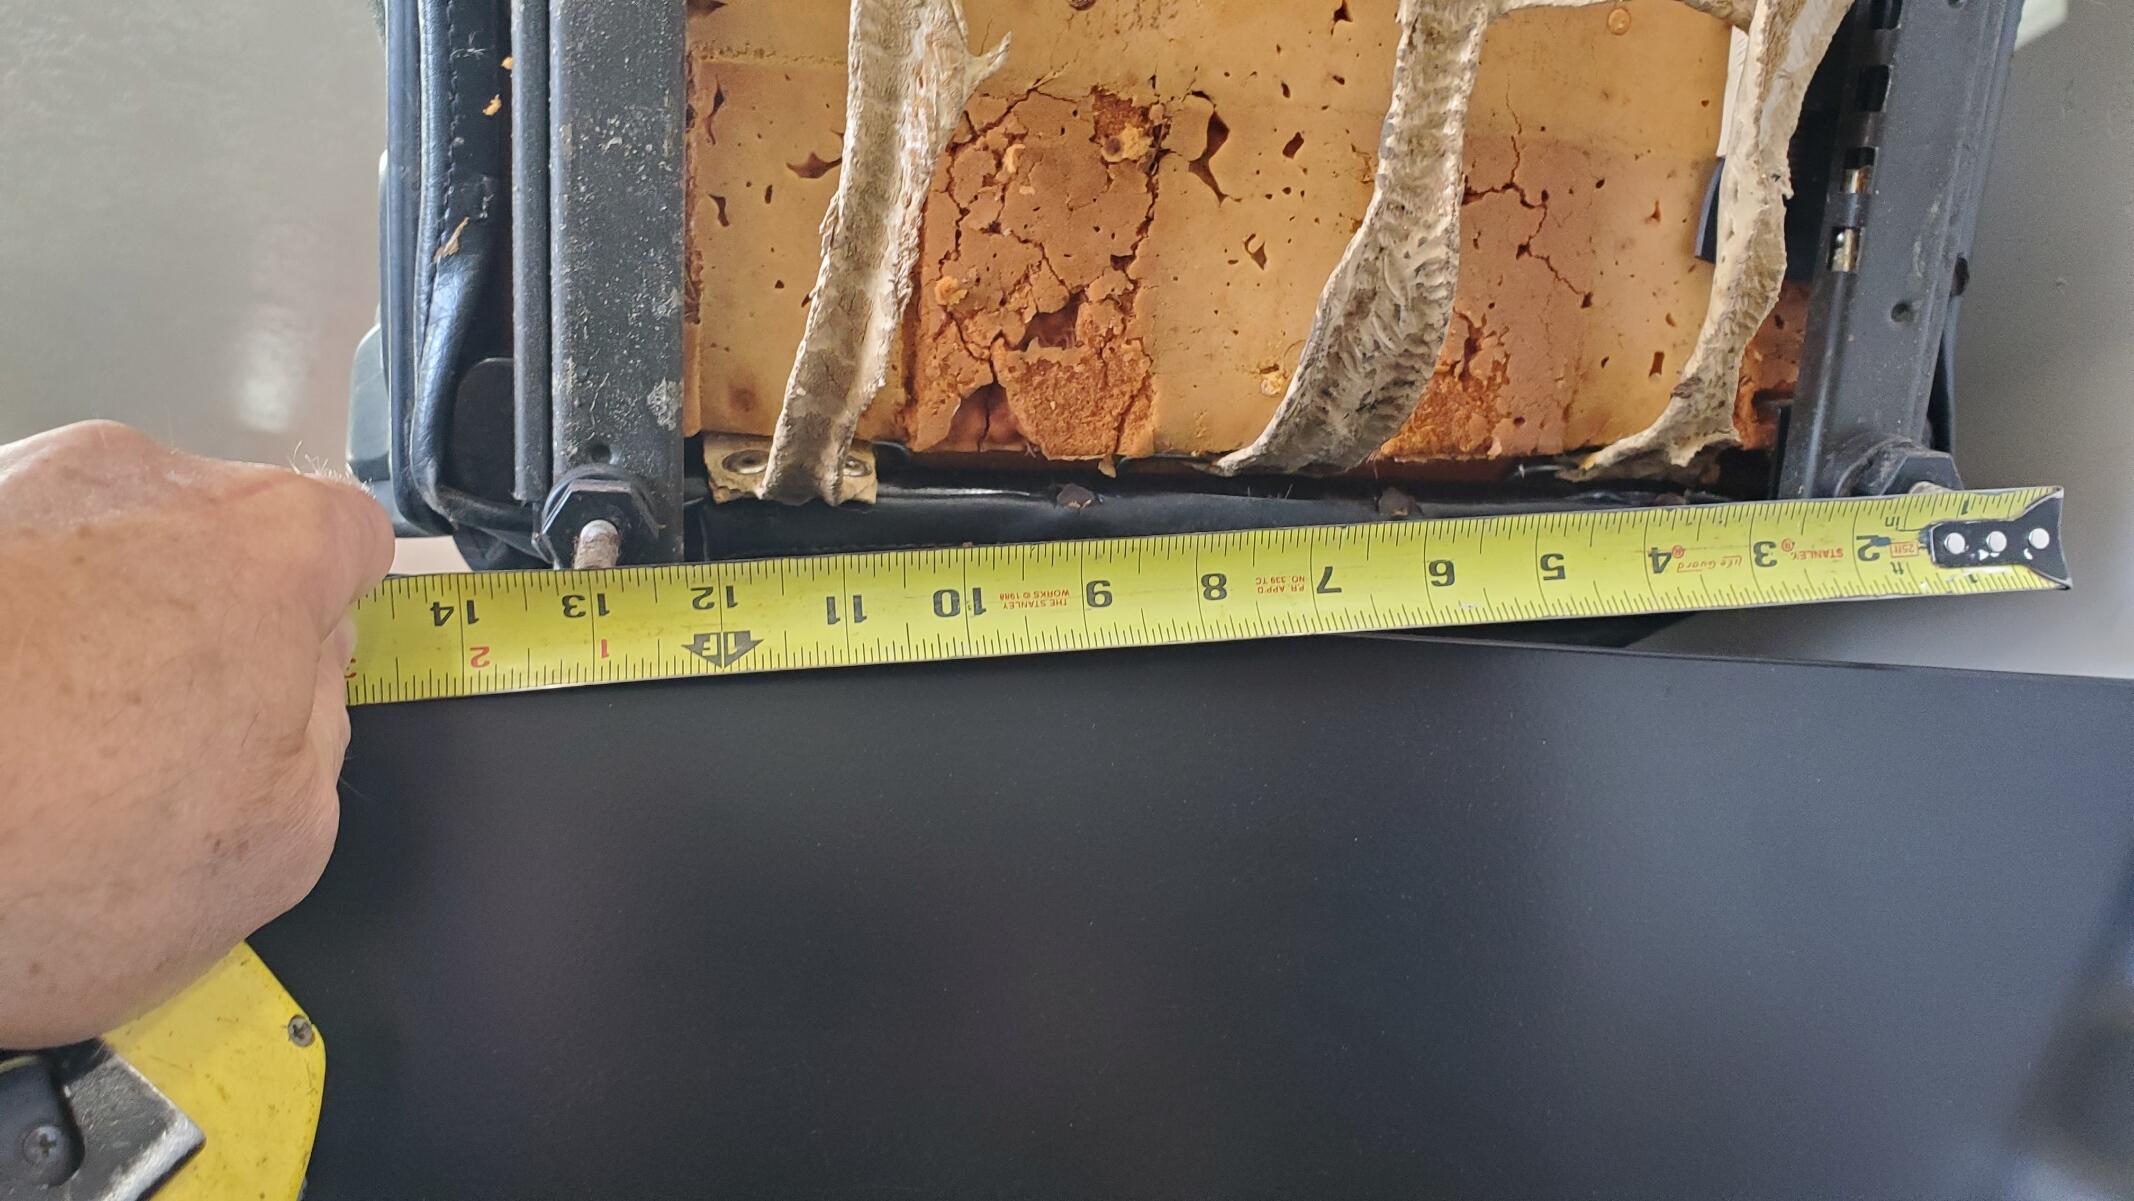
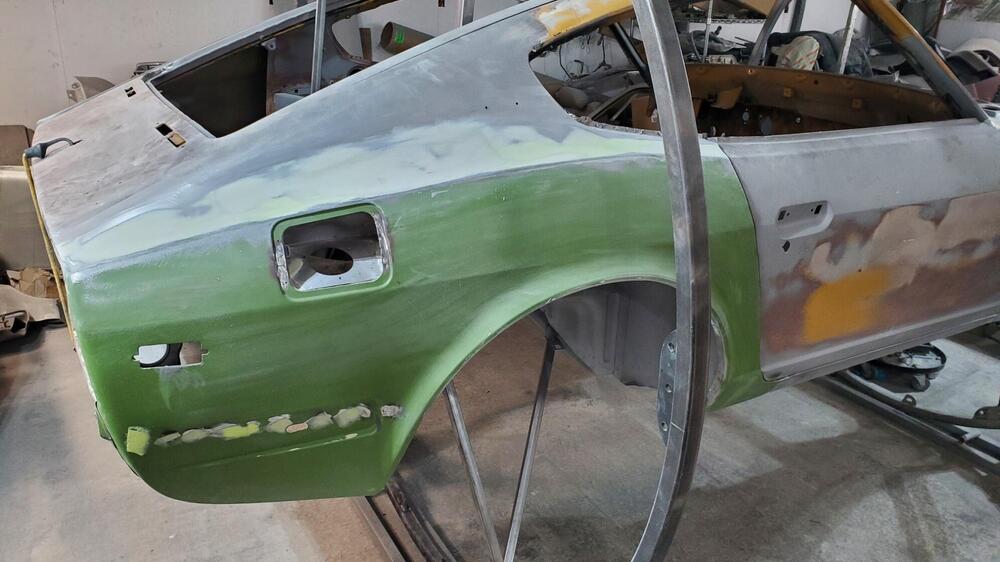
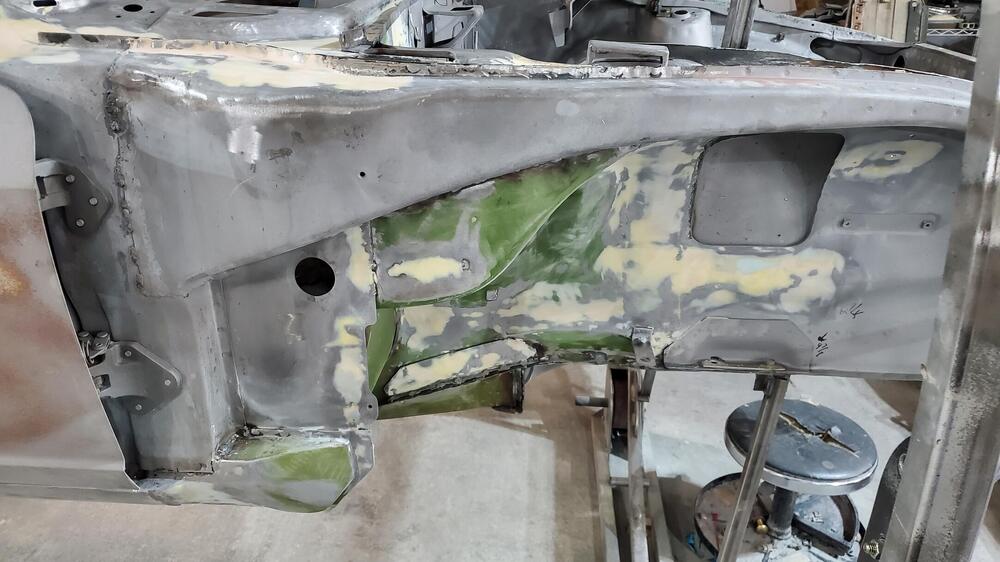
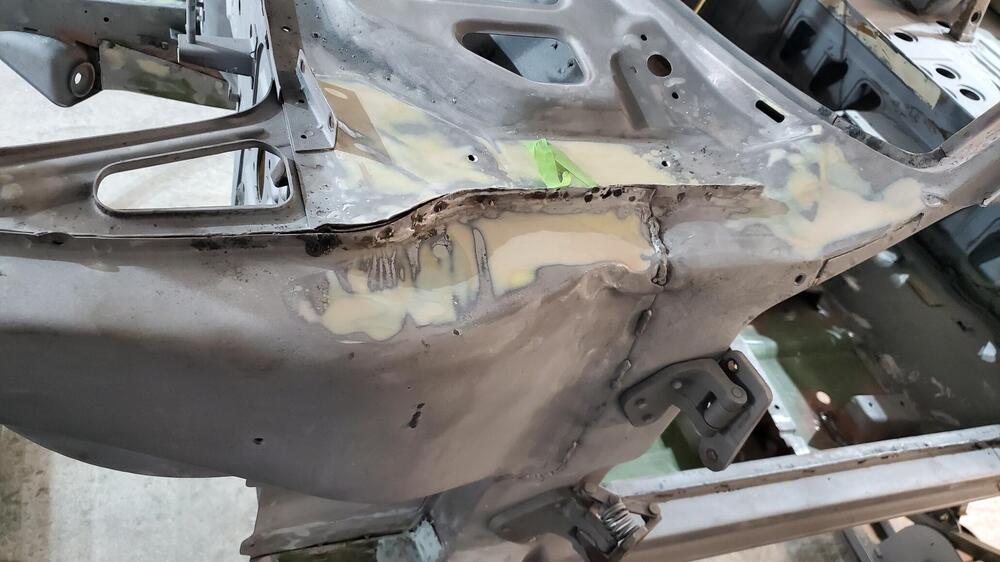
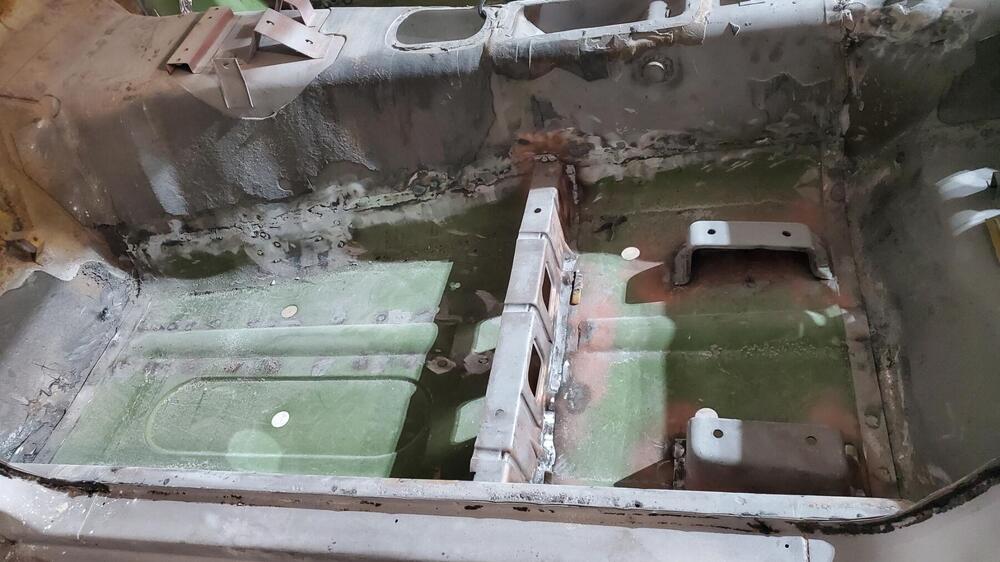
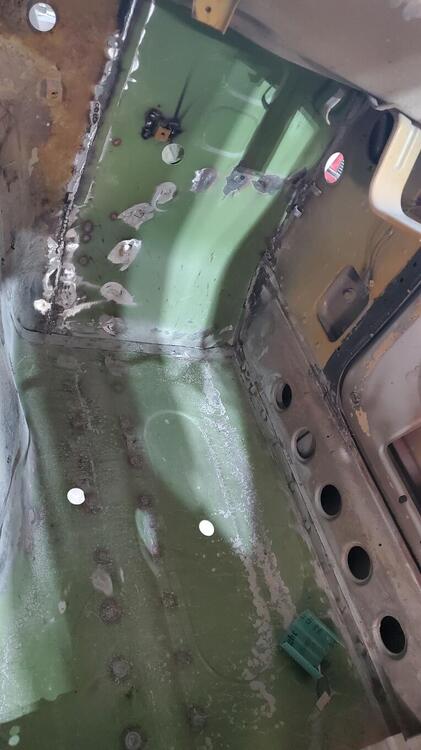
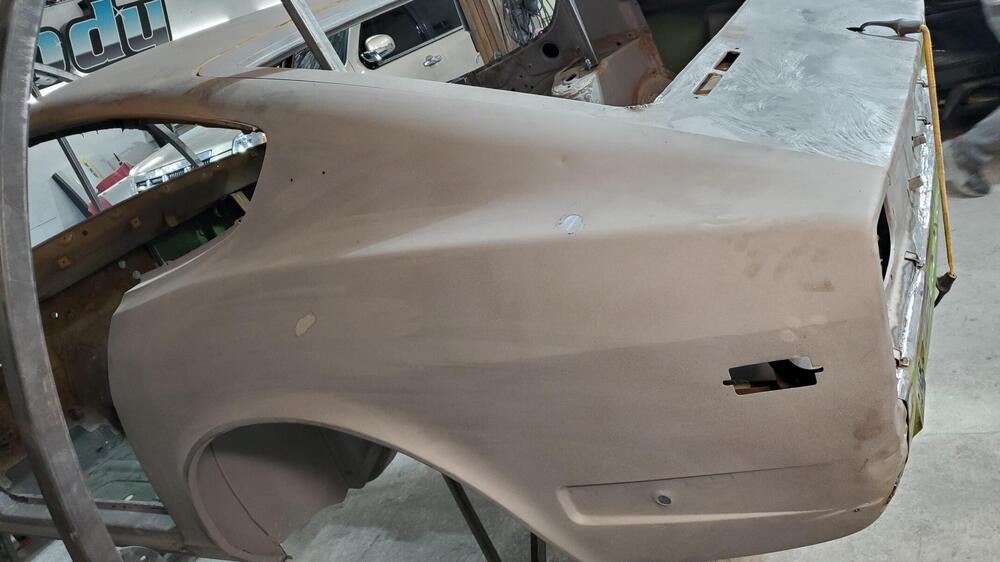
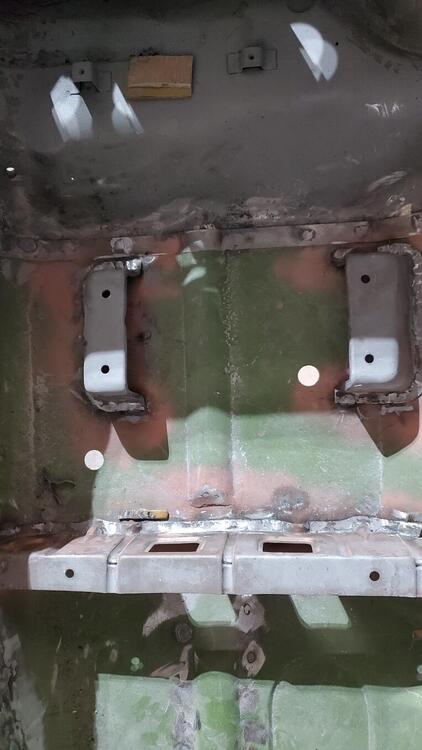
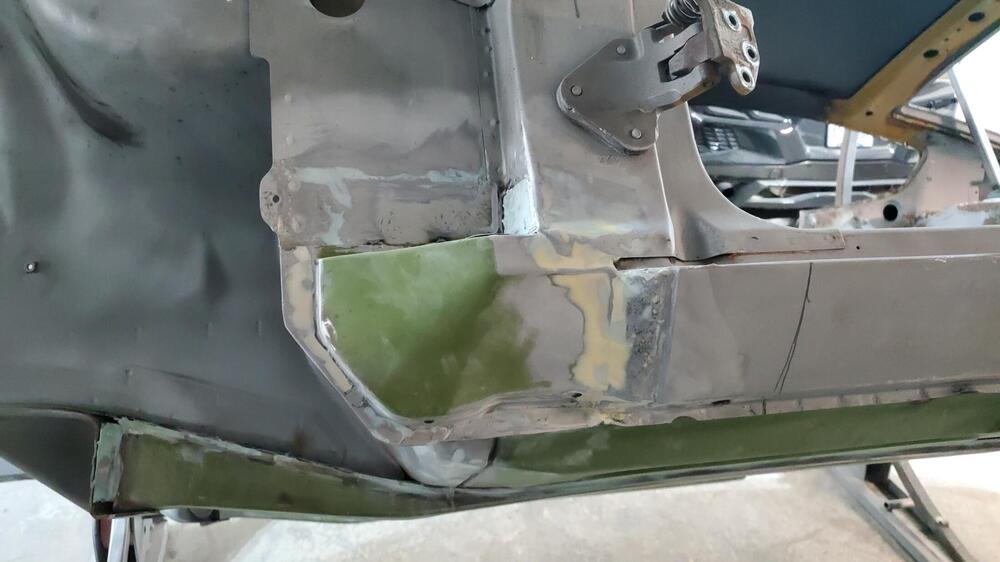
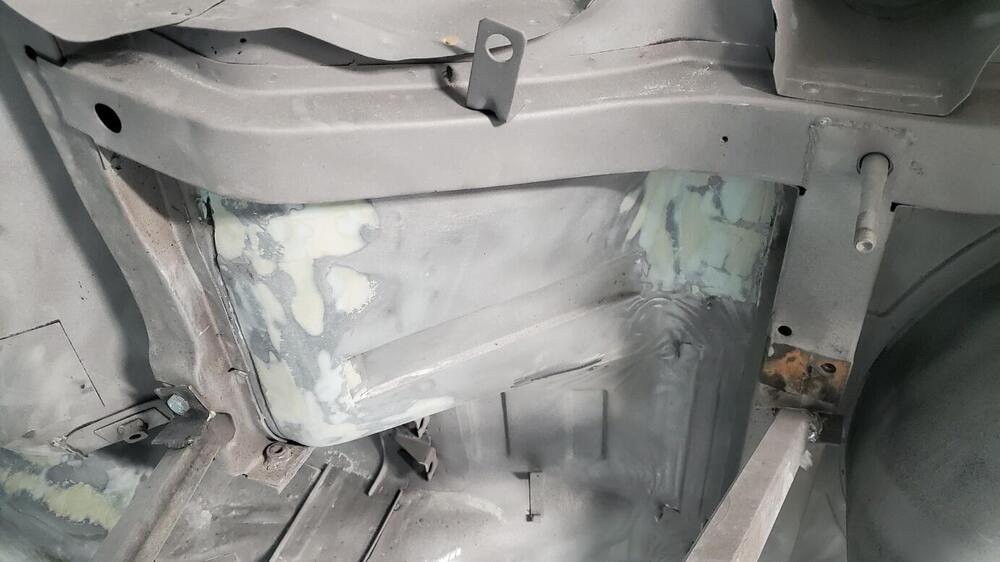
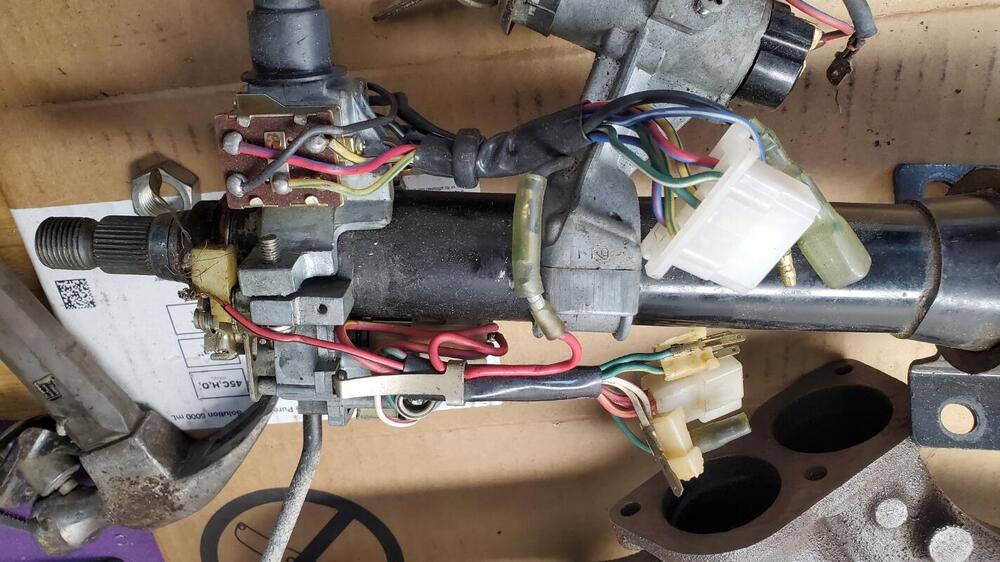
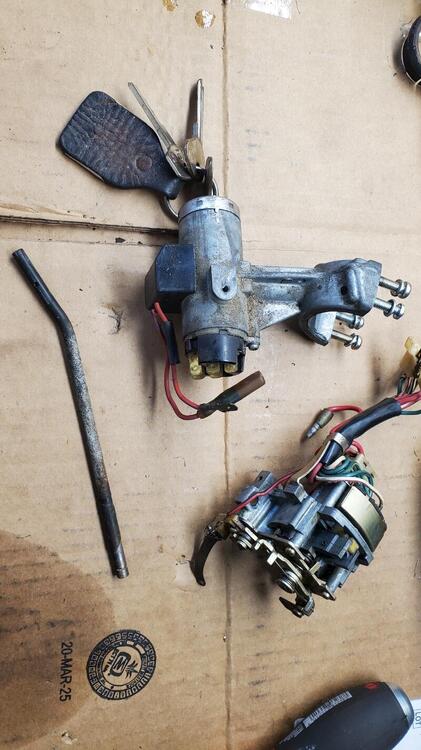
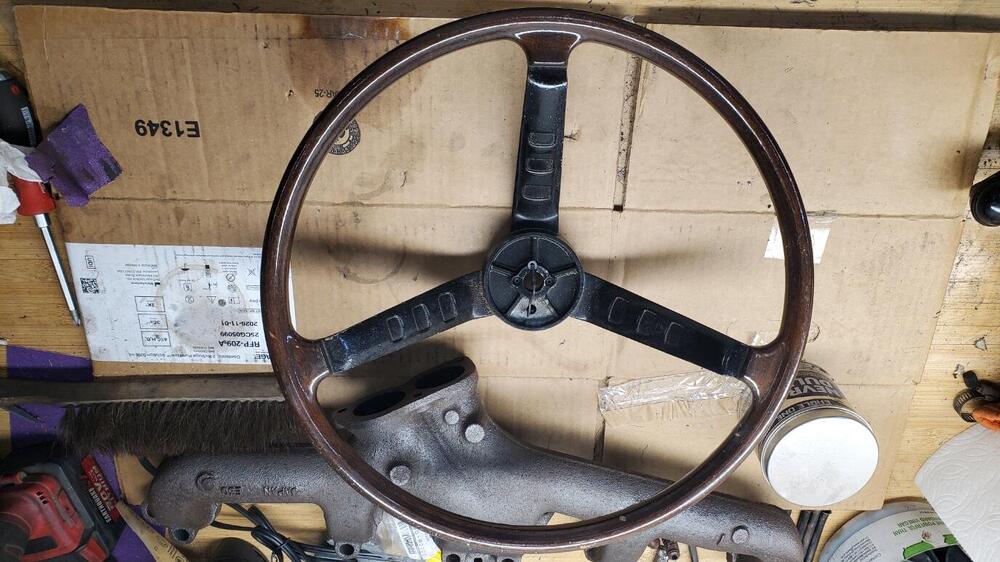
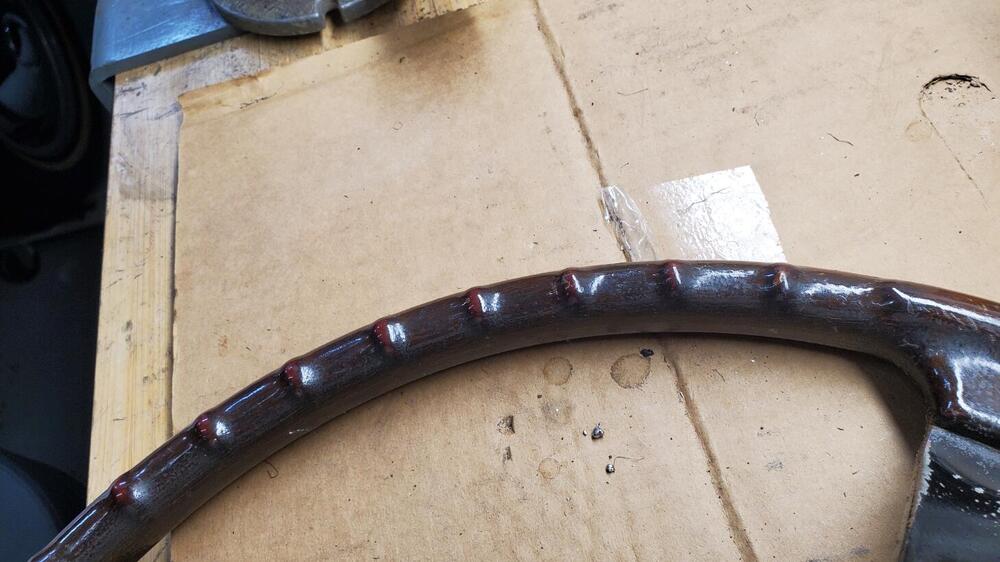
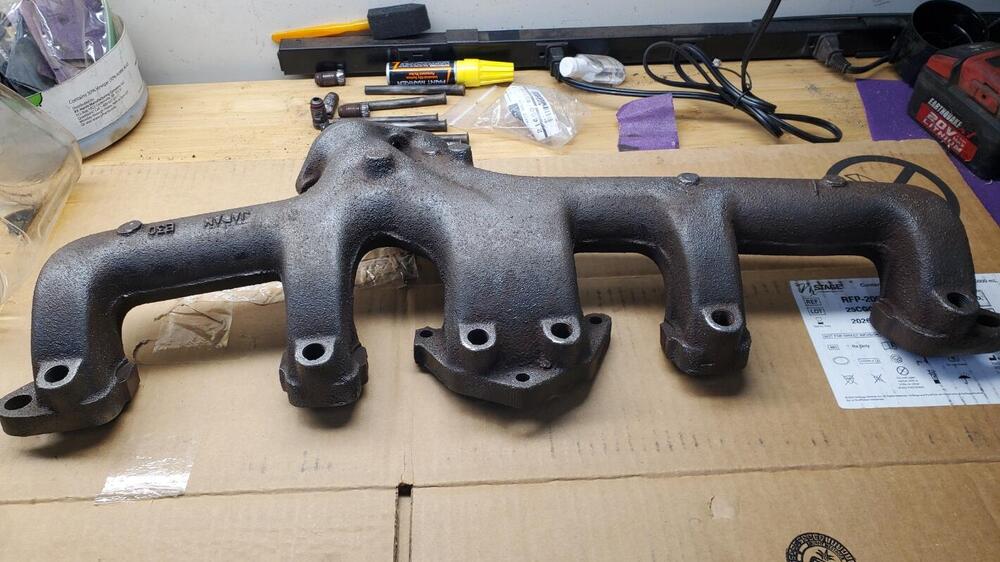
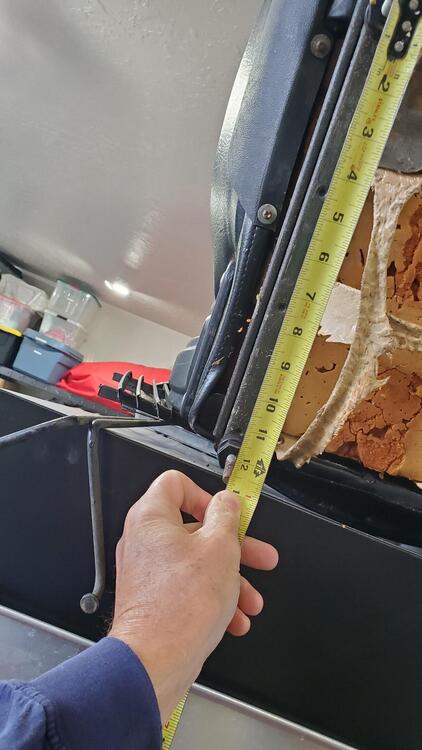
 The body shop work continues and looks like things are moving along nicely. I am happy to see that they are being very thorough and even cleaning up areas that no one will ever see. I did check the seat mount locations. The rear inboard bracket on both the drivers and passengers side is off by about 2 inches (both are too far outboard). Carlos has a welder and will do the re-mounting of the bracket. I did contact Larry, the original metal work guy, to point out the error. Looks like we will get that re-mounted for no additional cost. I also sent pics of the dimesnions from the seat rails. The dimensions that I measure are 13.0" wide (330mm) and 12.75" deep (324mm). I removed the air galley from the exhaust manifold, but was not able to salvage it. After repeated heating, cooling and lube applications, I was only able to get 2 of the fittings out. By this time, the hex portion of the remaining fittings were starting to get pretty trashed, so I ended up cutting the tubes on the remaining 4. Fortunately, I did not have to do any re-tapping of the four difficult fittings. I was able to drill away most of the metal in the center of the fittings and sort of peel the threads off of the manifold. This made is easy to save the extension tubes that are secured by the fittings. On all of the previous cars that I have restored, I have always used a gray powder coat finish on the exhaust manifold that Les Cannady at Classic Datsun Motorsports always uses. Since we want to be very exact on the reproduction, I was considering a high temp cast iron paint which would be closer to the original color. However, it was noted that those typically peel even with the best prep and application. POR 15 was recommended, but again, this ends up being a colored paint and softens the texture of the original cast iron and doesn't really replicate the original color. I eventually phoned Rod Schmitt of Rod's Garage (Restorer of the 2025 JCCS Best of Show Red 240Z and John Morton's 1st place Green 240Z in the 240Z category) to find out what he uses for the final finish on the exhaust manifold. Rod says he cleans the manifold well with wire wheel and then uses a couple light coats of graphite spray for the final finish. He says this comes the closest to the original color and finish. It also handles the high temps well. So, this is the current plan for the exhaust manifold finish. I have started cleaning up some of the steering column parts. Some before and after pics are attached. It looks like these components have been accessed previously as the turn signal mechanism had a wire that was just twisted together with an extension on the horn circuit, so I removed the extension and soldered the wire in place. It has a broken connector which I thought I could replace with another signal mechanism that I have but that replacement was just as brittle as the broken coneector, so I just ordered a new one. Also, the headlight mechanism looks surprisingly good, so I am thinking that may have been replaced as it looks virtually brand new. Typically, these are pretty gummed up and the white parts are yellowed and/or dirty. This one looks untouched. I will re-restore the steering wheel as the previous restoration is poor. The black paint is thick and uneven and should be a satin finish, not gloss. The 'wood grain' portion has a heavy gloss finish, should be light satin or semi-gloss, and the back side with the 'nubs' was over sanded so the wood grain appearance is missing on the nubs.
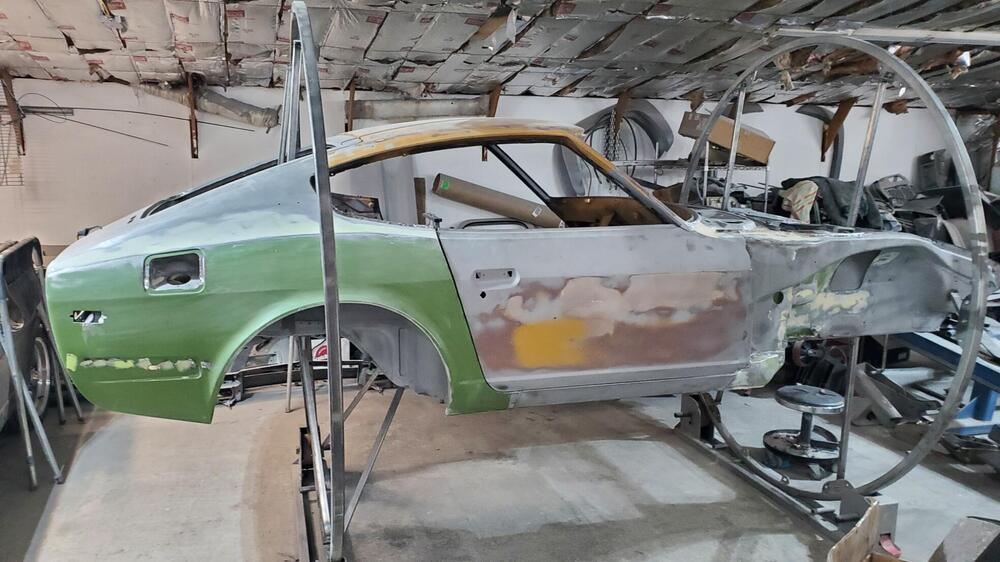


-
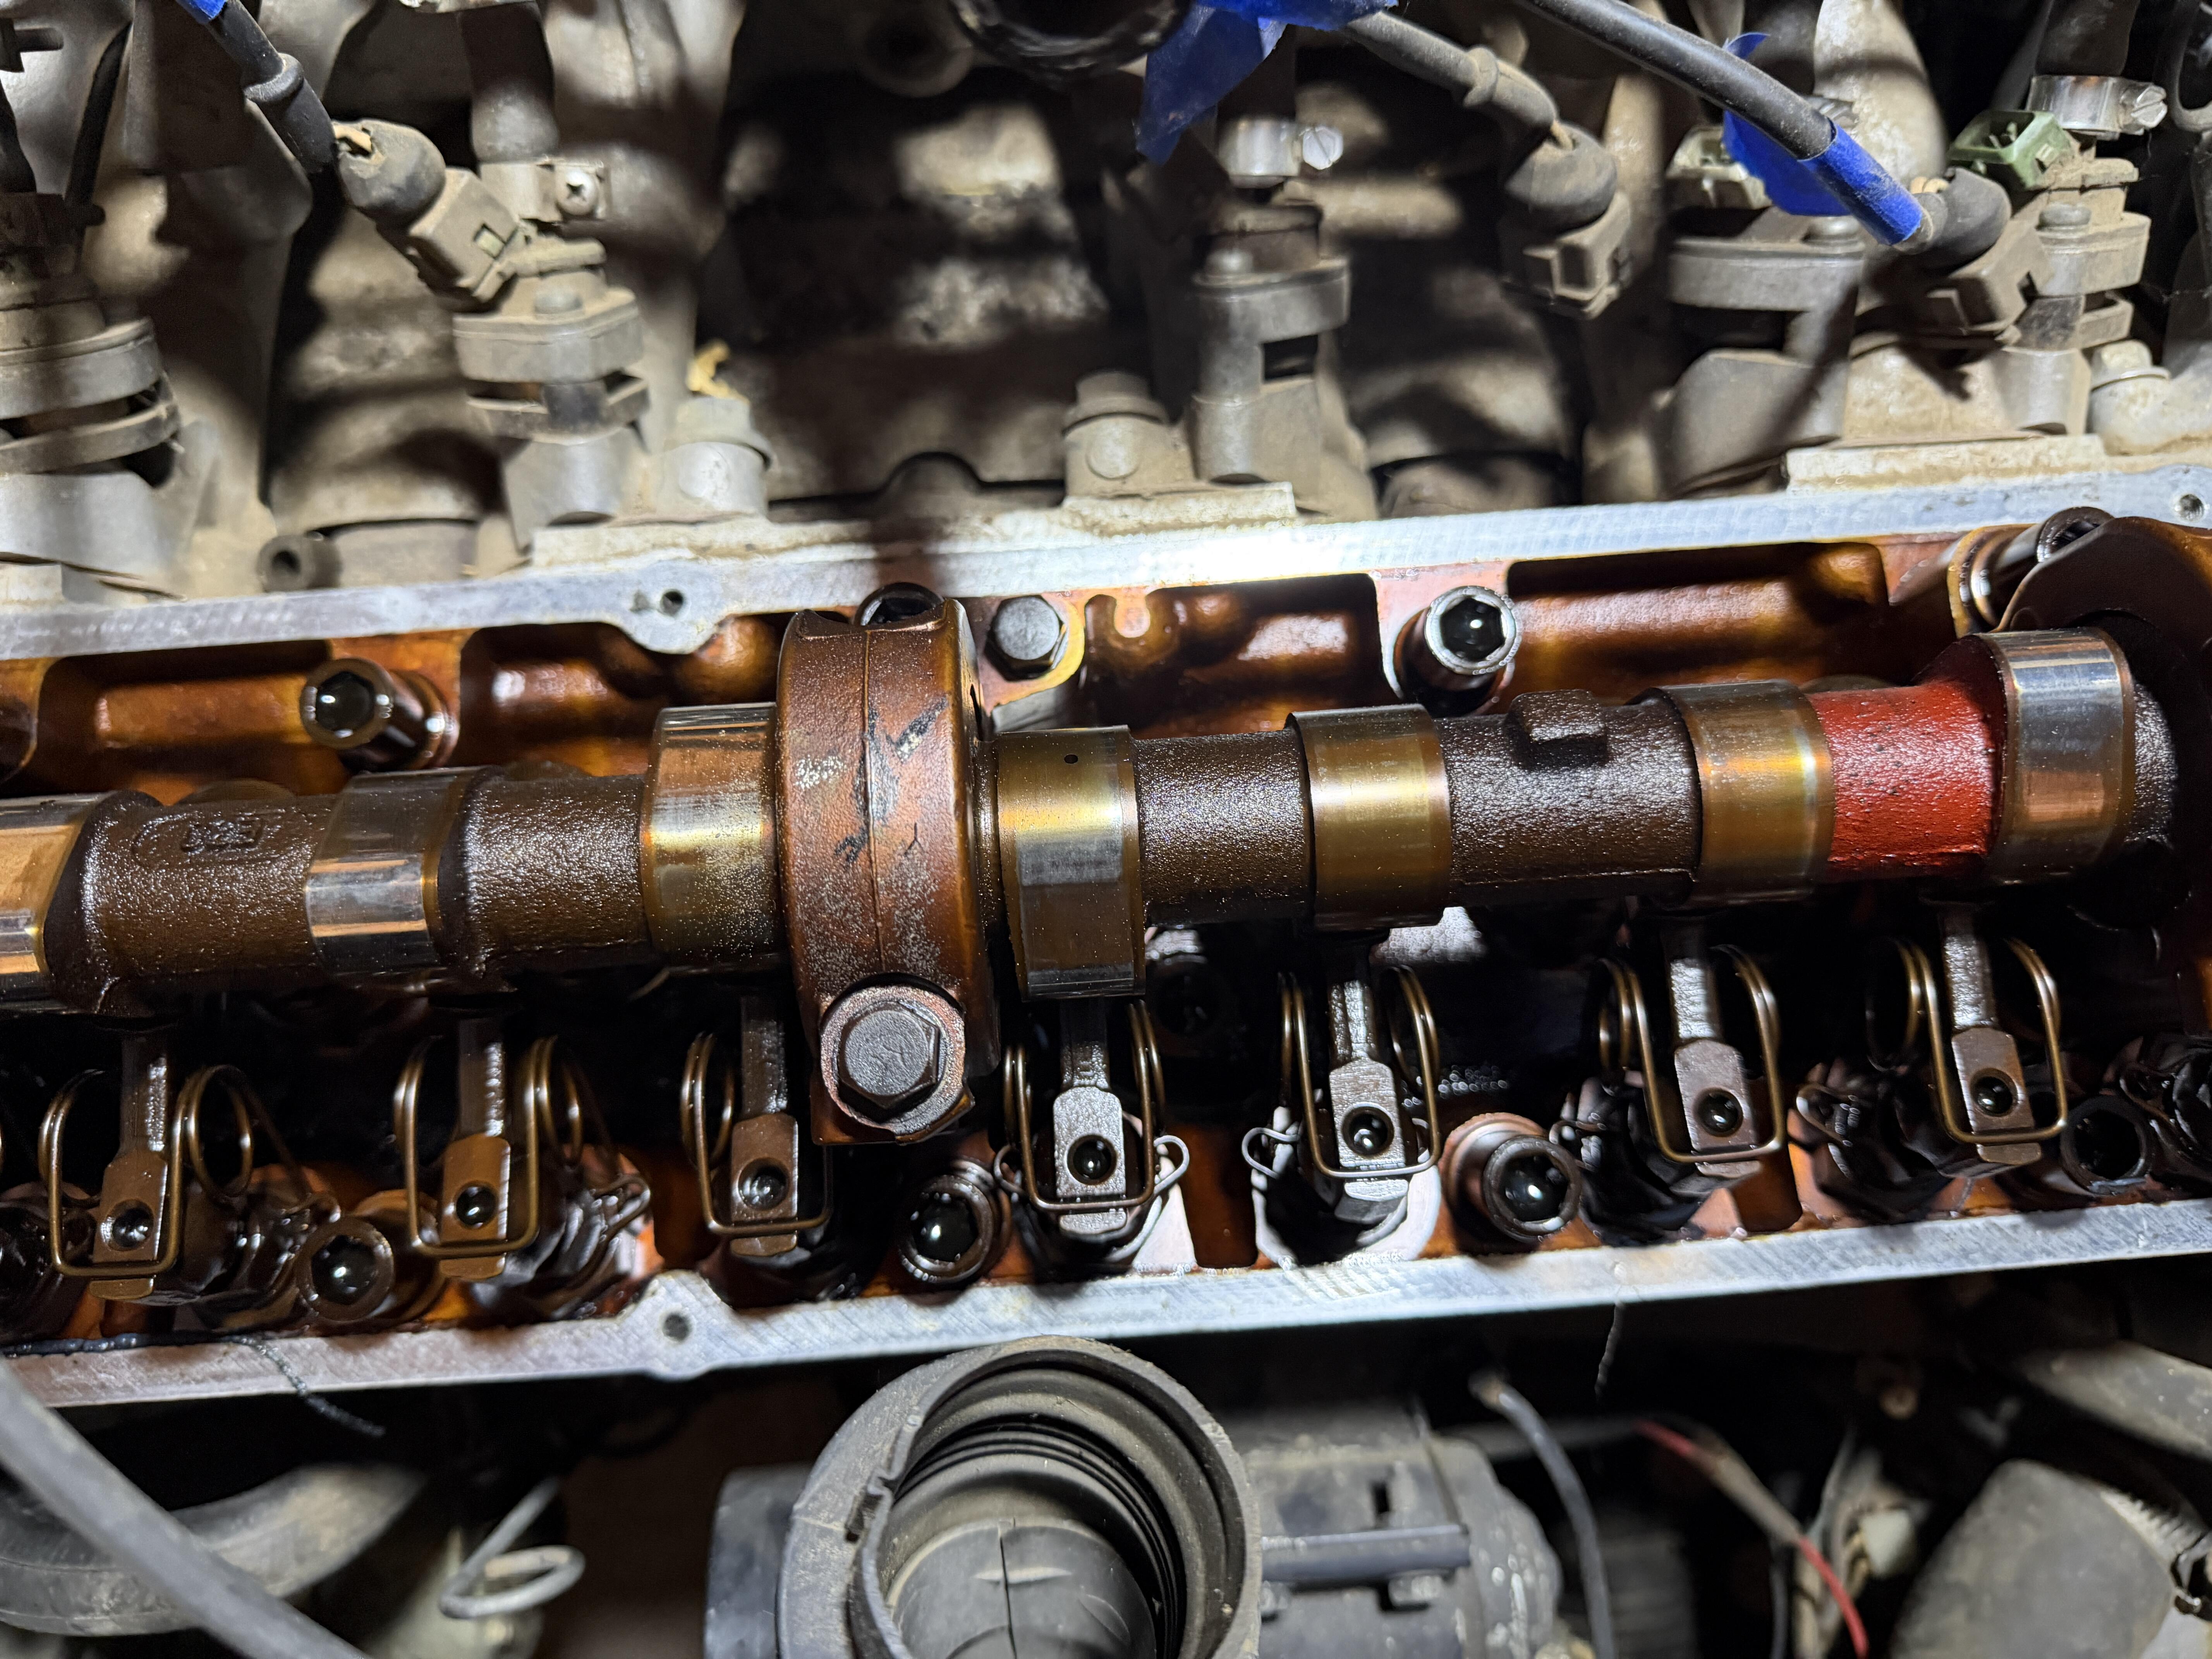
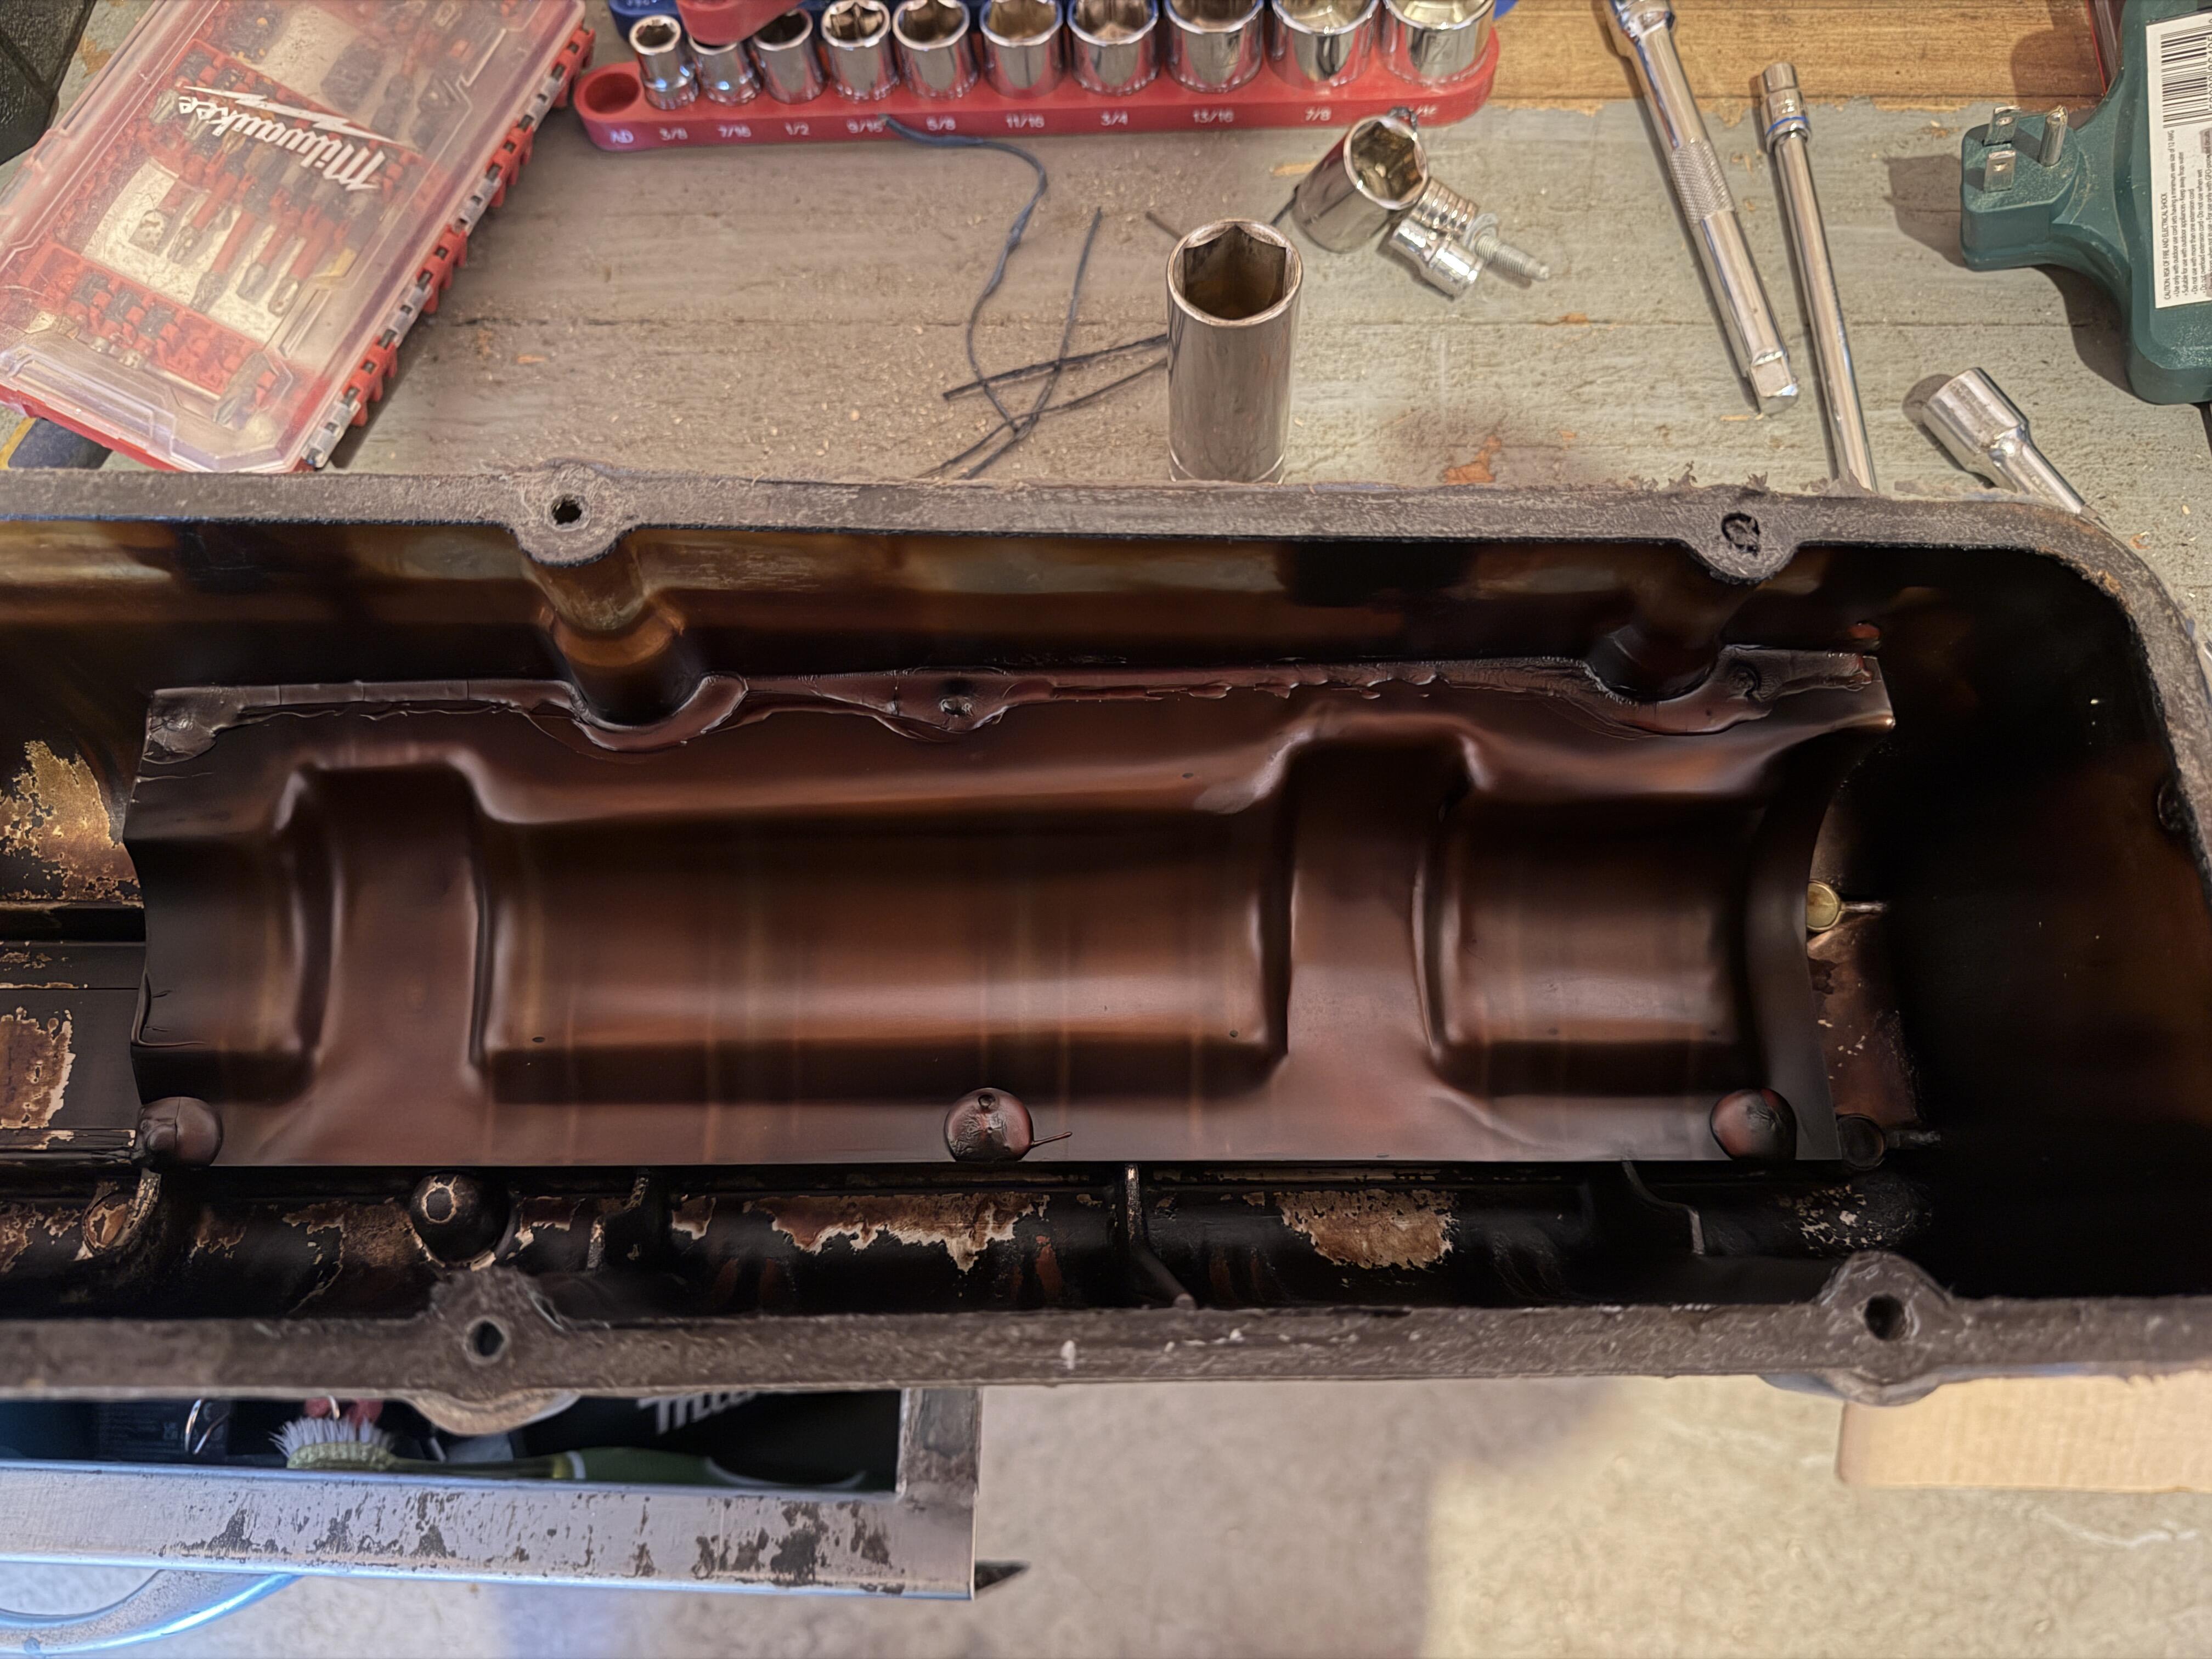
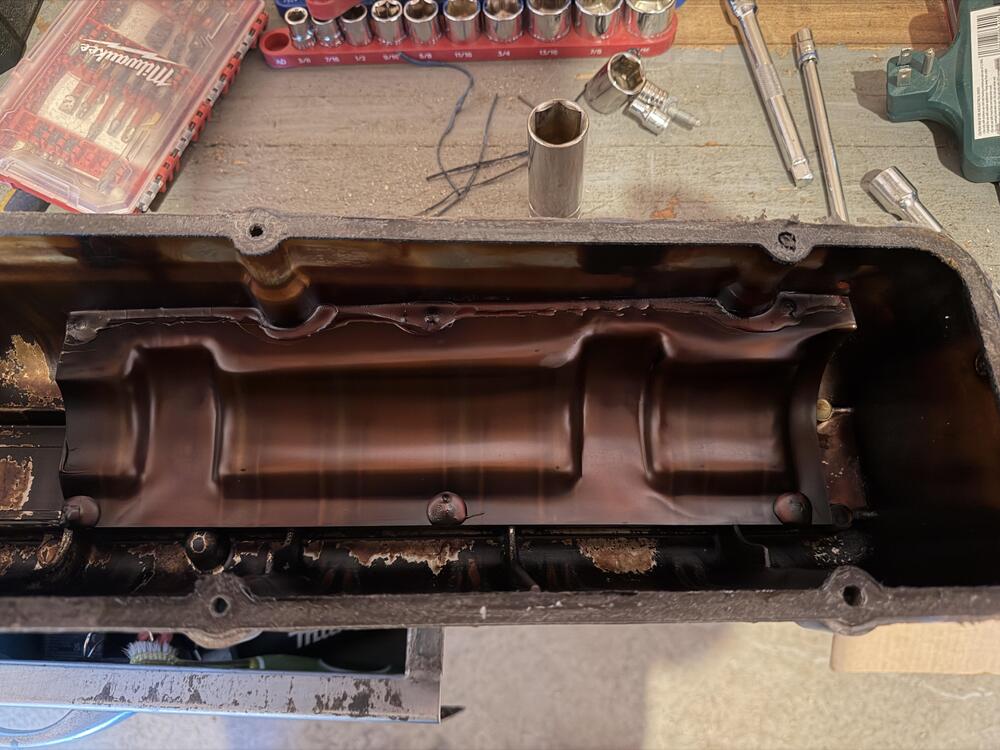
 So got out there yesterday and today for a little bit. Pulled the valve cover and dumped some oil everywhere. Also decided to pull the cooling fan and shroud so I could have access to the front of the engine a little better. I cranked the engine over by hand and felt really smooth. I decided to try the video function of the bore scope and see if I could post it. Mainly wanted to see what the cylinder was doing while I was cranking. I chose cylinder 3 since it was the worst looking. Actually doesnt look that bad. Edit* Appartley this video has to be downloaded, so im uploading to youtube. And lastly, here is a video of the engine cranking over. Sounds like it moves nicely, I hear a little bit of clattering at the end of the cycle. IMG_0026.MOV The borescope is just a cheap Amazon peice. I'm pretty happy with it. I wasnt expecting to use it a lot so I didnt want an expensive one. If I had to do over again, I might look into a four way articulating. The two way is fine, just have to twist the spine to get it where i want. Amazon Teslong Bore-scope While I was at it, I also checked for spark. I have none. Something about this was mentioned when I bought it, but I thought it was just one cylinder. The fuel line was diconnected 'just in case' I know the fuel is bad and the car also came with a new fuel pump. I need to rewatch one of the new 'roadkill' episodes they put out recently to test a coil. I think they are trying to revive the roadkill format via their respective youtube channels. They put out a 4h long episode on Rotsun between the two of them. I could totally just google, but where is the fun in that. Shameless promo, cause this is the car and show format that made me want to get a project. I really enjoy the problem solving.
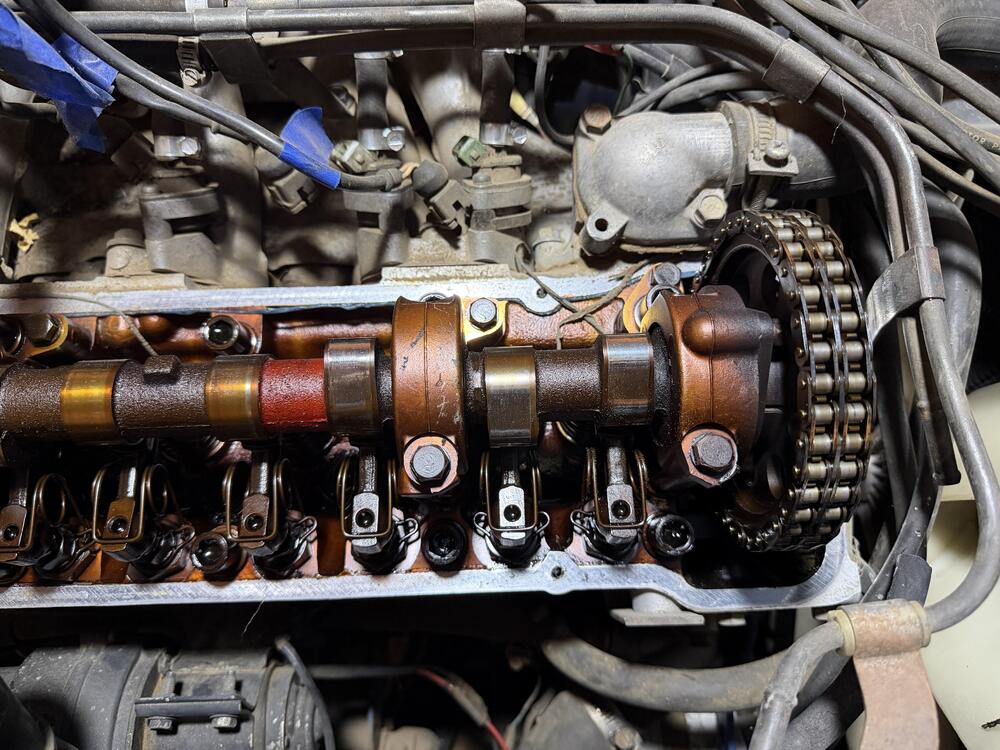

-
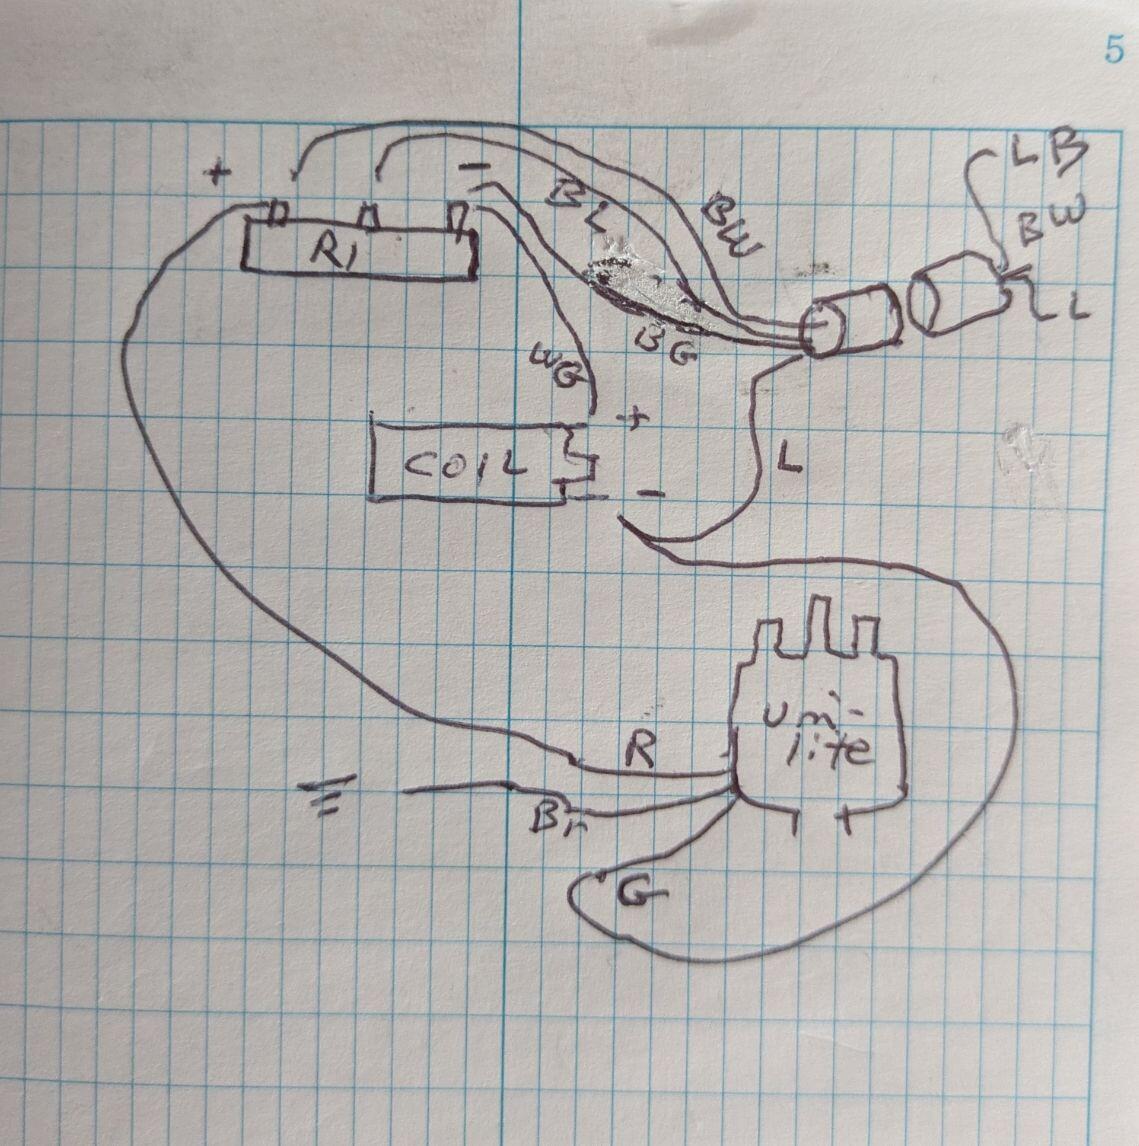
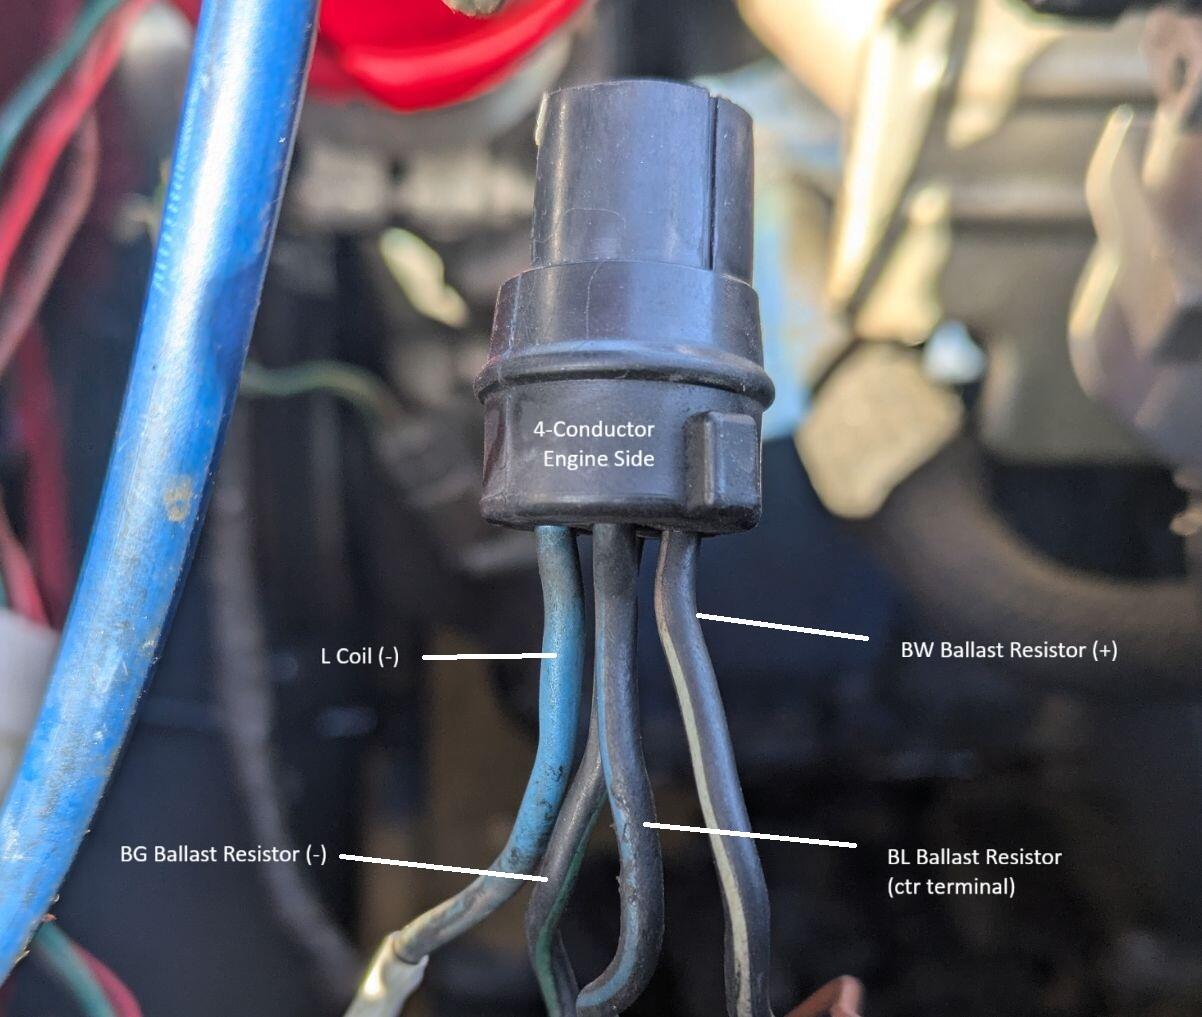
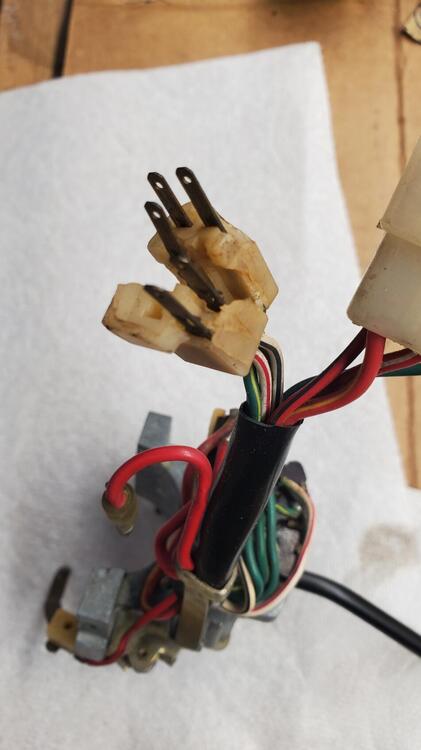
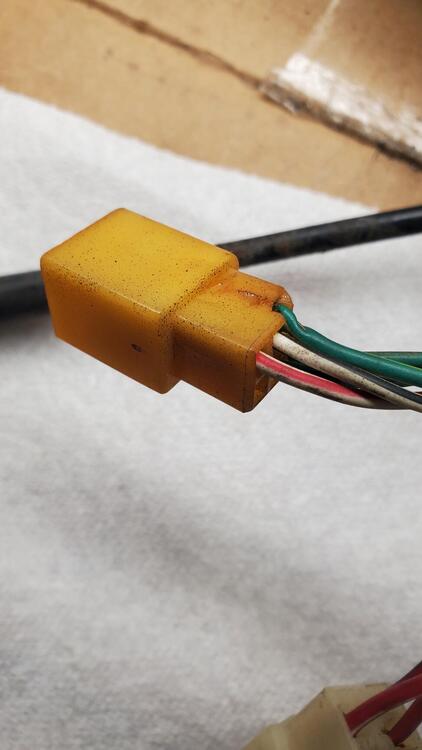
 Sorry for the delay in getting back to this. I'm working out of town and only have weekends to visit my car. I think the problem may of been resolved or at least I can drive the car for more than 1/2 hour without the ignition failing. It must of been that extra ballast resistor or a high resistance from the taped splice. The car has been working for 7-8 years and only periodically had ignition issues so I'm assuming one or more weak links in the ignition began to fail. Here's the wiring as it stands now. Some of the colors were hard to see until I cleaned the wires off with solvent.
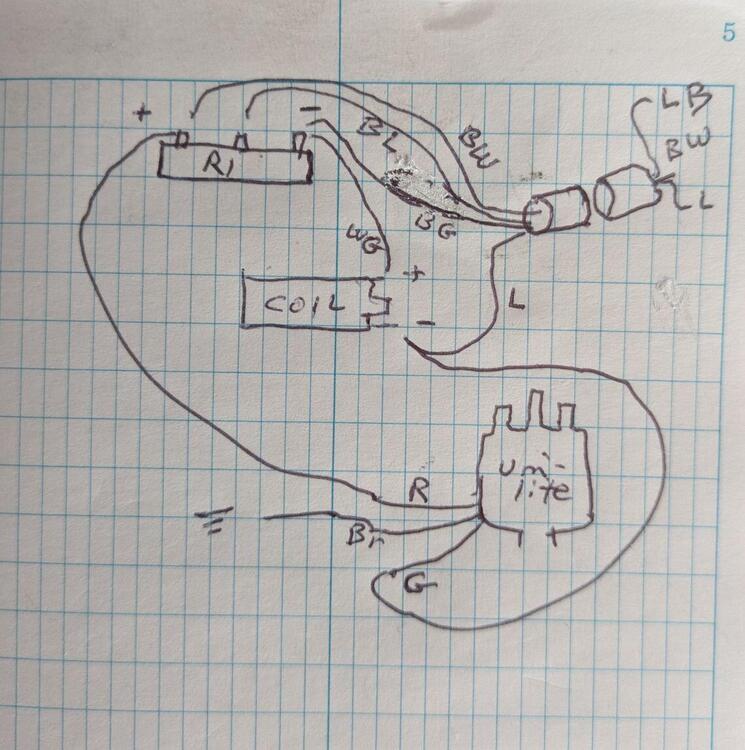

-
 This is a nice car and you can see it's well taken care of. I wonder if the dad was a member of this club.
 -
I'm using a Crane/Fast PS20 Fireball with 1.4 OHM coil, no ballast resistor. I wanted all that old stuff gone, I've never fooled with points except file down the contact point on my go-kart. Cool little file too. It starts missing with the wider gap up high but from what I remember I've always ran the wider gap? Grasping at straws, the easy ones.
-
 Hi, I always use the standard BPR6es-11 on my standard ignition with nos contact points. I think it will depend on what ignition coil your using i would go with the bpr6es-11 sparkplugs when you have a orig. coil. Btw, the 280zx i got has that orig dizzy, and uses also the same plugs runs great with -11 plugs. (1,1 mm Gap.) You could buy those 0,9mm plugs and if it does not run right open them up to 1 mm or so.. (If you have the 123 ignition coil.. my opinion? throw it in the BIN! and get yourself a orig. coil.. ;-) )
 -
 Yeah, i don't know about 40k or not. The extensive modifications are breaking my heart. He needs to put it on BaT to know the current value IMO.
 -
 Peedogg joined the community
 - Yesterday
-
I have an later e88 with SUs and ZX dizzy, e12-80 on my 240. I've read a lot of different stuff on the plug gap. Half say go with the motor and the other half say go with the ignition. Motor says protruding with .035ish gap. Ignition for '79 says non protruding .044ish gap. I like to think it has the strong spark at .035 protruding for carbs. I opened them up to .042 on bpr6es-11 and it didn't run too good. What do you all think? I also read that a closer gap on the 1.1mm would angle the tip downward too much and you don't want that. I think I should buy these instead of the 1.1mm https://shop.advanceautoparts.com/p/ngk-standard-nickel-spark-plug-bpr6es-reliable-oe-performance-4008/18090163-p?product_channel=local&store=6668&adtype=pla&product_channel=local&store_code=6668&&&&&gclsrc=aw.ds&gad_source=1&gad_campaignid=16396150477&gclid=CjwKCAjw6vHHBhBwEiwAq4zvA_2SIcXPfpN8WAkuS9dMgo6W_K-pa5oGWg56uecTiat8BKKgmfmKTRoCxtAQAvD_BwE Thank you for any input.
-
 It is buy it now for $40k. I told him to emphasize that the original mileage is 51k and to add some pics of his documentation... pics of the various VIN plates and VIN on the firewall, and pics of the engine number on the block and the E31 on the head. I see he has added the documentation and the engine compartment tag already. I know the market is a lot softer now for these than it was, but I think it will sell for the $40k.
 -
 davidtownsend joined the community
 -
 The only change I would make to the excellent info above would be to use Marvel Mystery Oil. It contains mineral oil and a solvent that dissolves anything sticky or gummy.
 -
 What are they asking for it?
 -
I have been watching this one for a few weeks. Couldn't get it out of my head, as it has an extremely clean and mostly original interior. Miles claimed at ~51k. Since it is only an hour a way, I went to look at it. The current owner is a son - this was his father's car. He has some documentation going back to 1972 which does have mileage on it. He has two or three documents - enough to support that the mileage is accurate. Also not clear in the listing is that it is a matching numbers car - original engine and head, as well as the original 4 speed. The original spot welds are present even in the rear fender wells at the bottom (rocker). The car has never had any rust through. He also said he has the original hardware (replaced with stainless) and the original front, lower panels (left, center, right). The paint is daily driver grade. In my opinion, to take this car to the next level, it would need a full exterior and "door jamb" repaint. Floors and hatch area and engine compartment still have the original silver paint. eBay1971 Datsun Z-Series | eBayFind many great new & used options and get the best deals for 1971 Datsun Z-Series at the best online prices at eBay! Free shipping for many products!
-
I'd take a test light or meter and see if the wire to the small spade connection on the solenoid is getting power when you turn the key to Start. You might have a cylinder full of coolant. Who knows. If you're getting power to the solenoid but it doesn't do its thing then you might have a bad starter/starter solenoid. Hit it with a hammer.
-
Those cylinders look great. What brand of camera/borescope? Four pages is a lot to review. Might help to summarize where you're at in the process. Cylinders look like they're ready for fuel, air, and spark.
-
 That's the old skool way. A friend of mine years ago gave me a push button switch with two long wires attached and alligator clips on each end. One clip gets attached to the battery POSITIVE and the other gets clipped to the spade on the starter solenoid (remove the wire from the solenoid first). With the transmission in neutral, a push of the button should engage the starter motor. They call them "Remote Starter Switch" on Amazon... This problem is a common one on Z cars and has prompted many owners (including me) to install a STARTER RELAY. The start signal comes from the Ignition Switch and gets diluted by the interlock system and years of wire/connector oxidation. It's easier on that circuit if it just "sets" a relay - which then delivers power straight from the battery to the starter solenoid. (I also removed the overly complicated interlock system on my 260Z - just sayin' - personal choice...)
 - Last week
-
I would think the motor oil you're using squirted down the spark plugs holes would be good and take the valve cover off add soak the cam and valve train. Then turn it slowly clockwise from the the front and notice any hang ups or anything but smoothe rotation over and over. Leave the plugs out and use the starter but don't crank too long, short burst as to not burn the starter up. You will need a battery charger and don't rush the process, feel the starter and if it gets too hot to touch call it a day. The coolant should be all the way up to the top of the radiator fill hole. Let it run until you see the coolant flowing. I would add some water to your coolant, it looks to be straight antifreeze. That's not bad but 50/50 is what most people do.
-
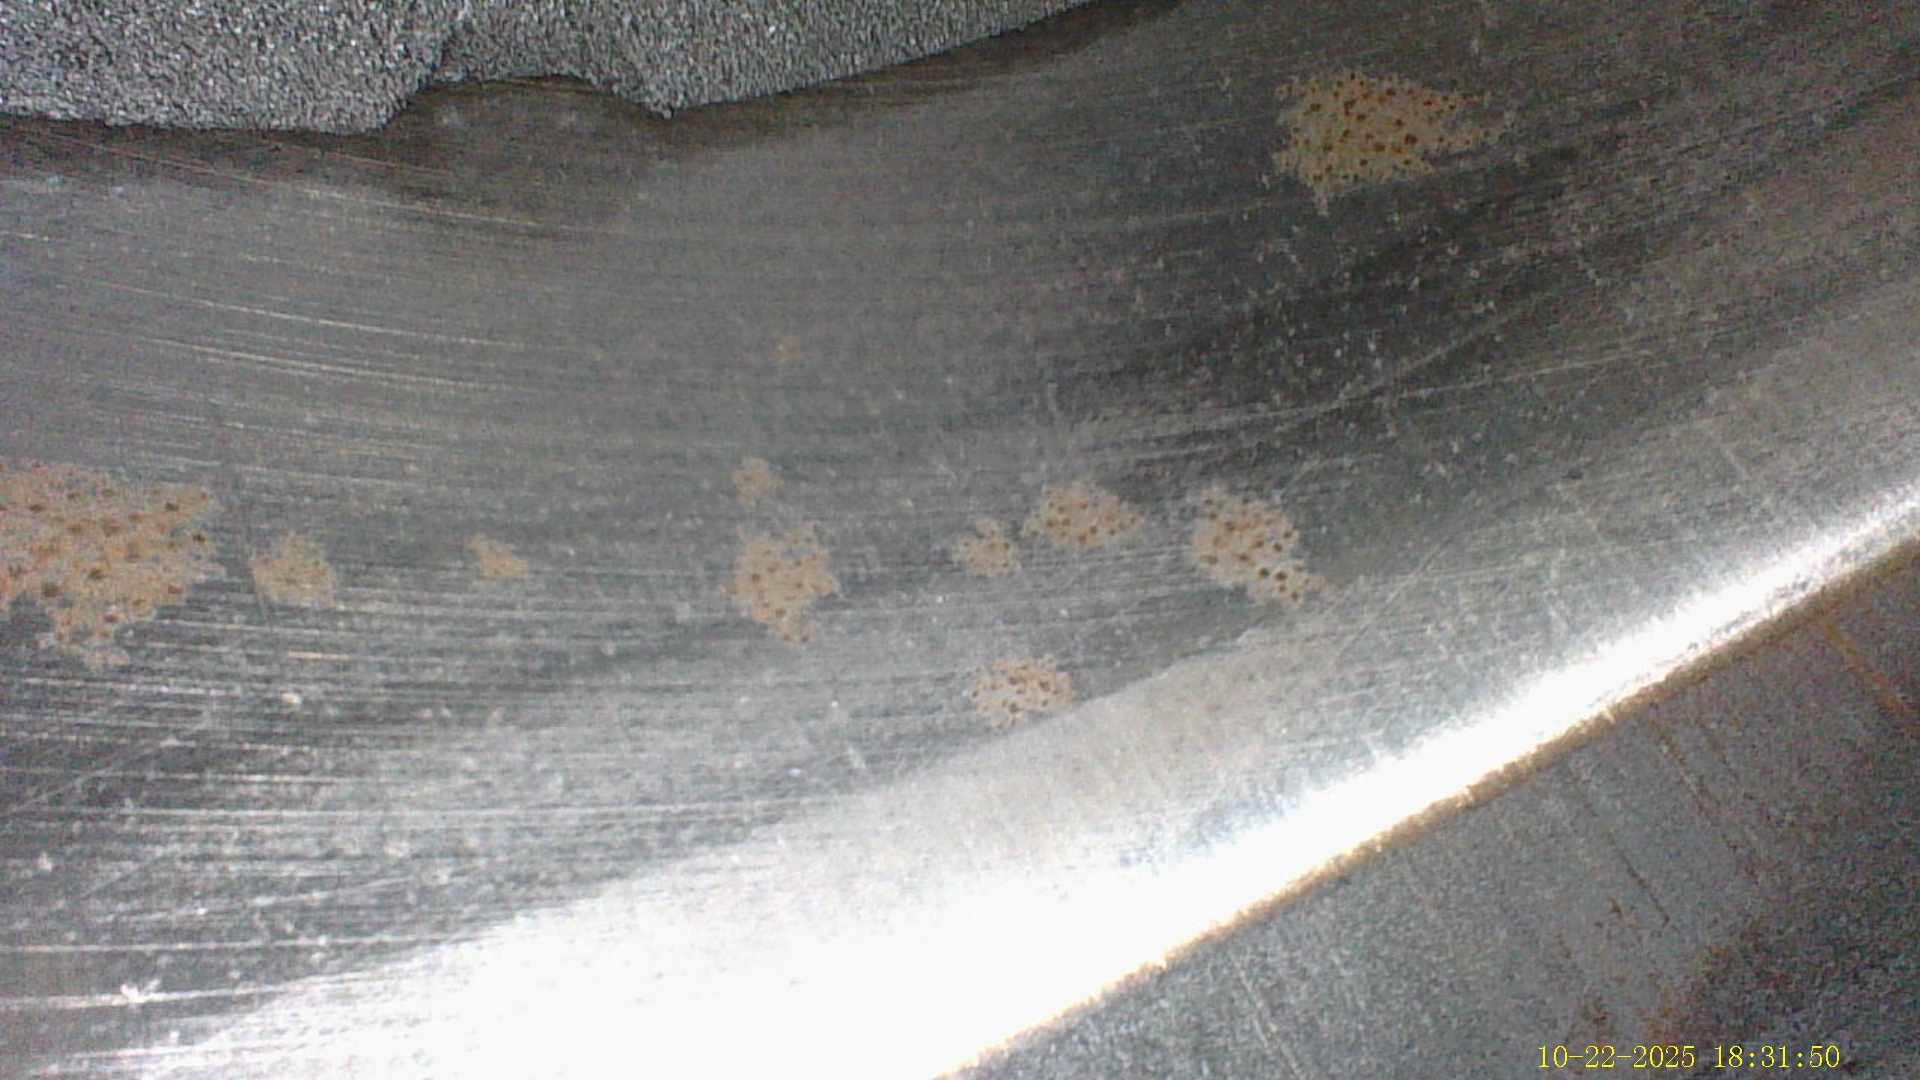
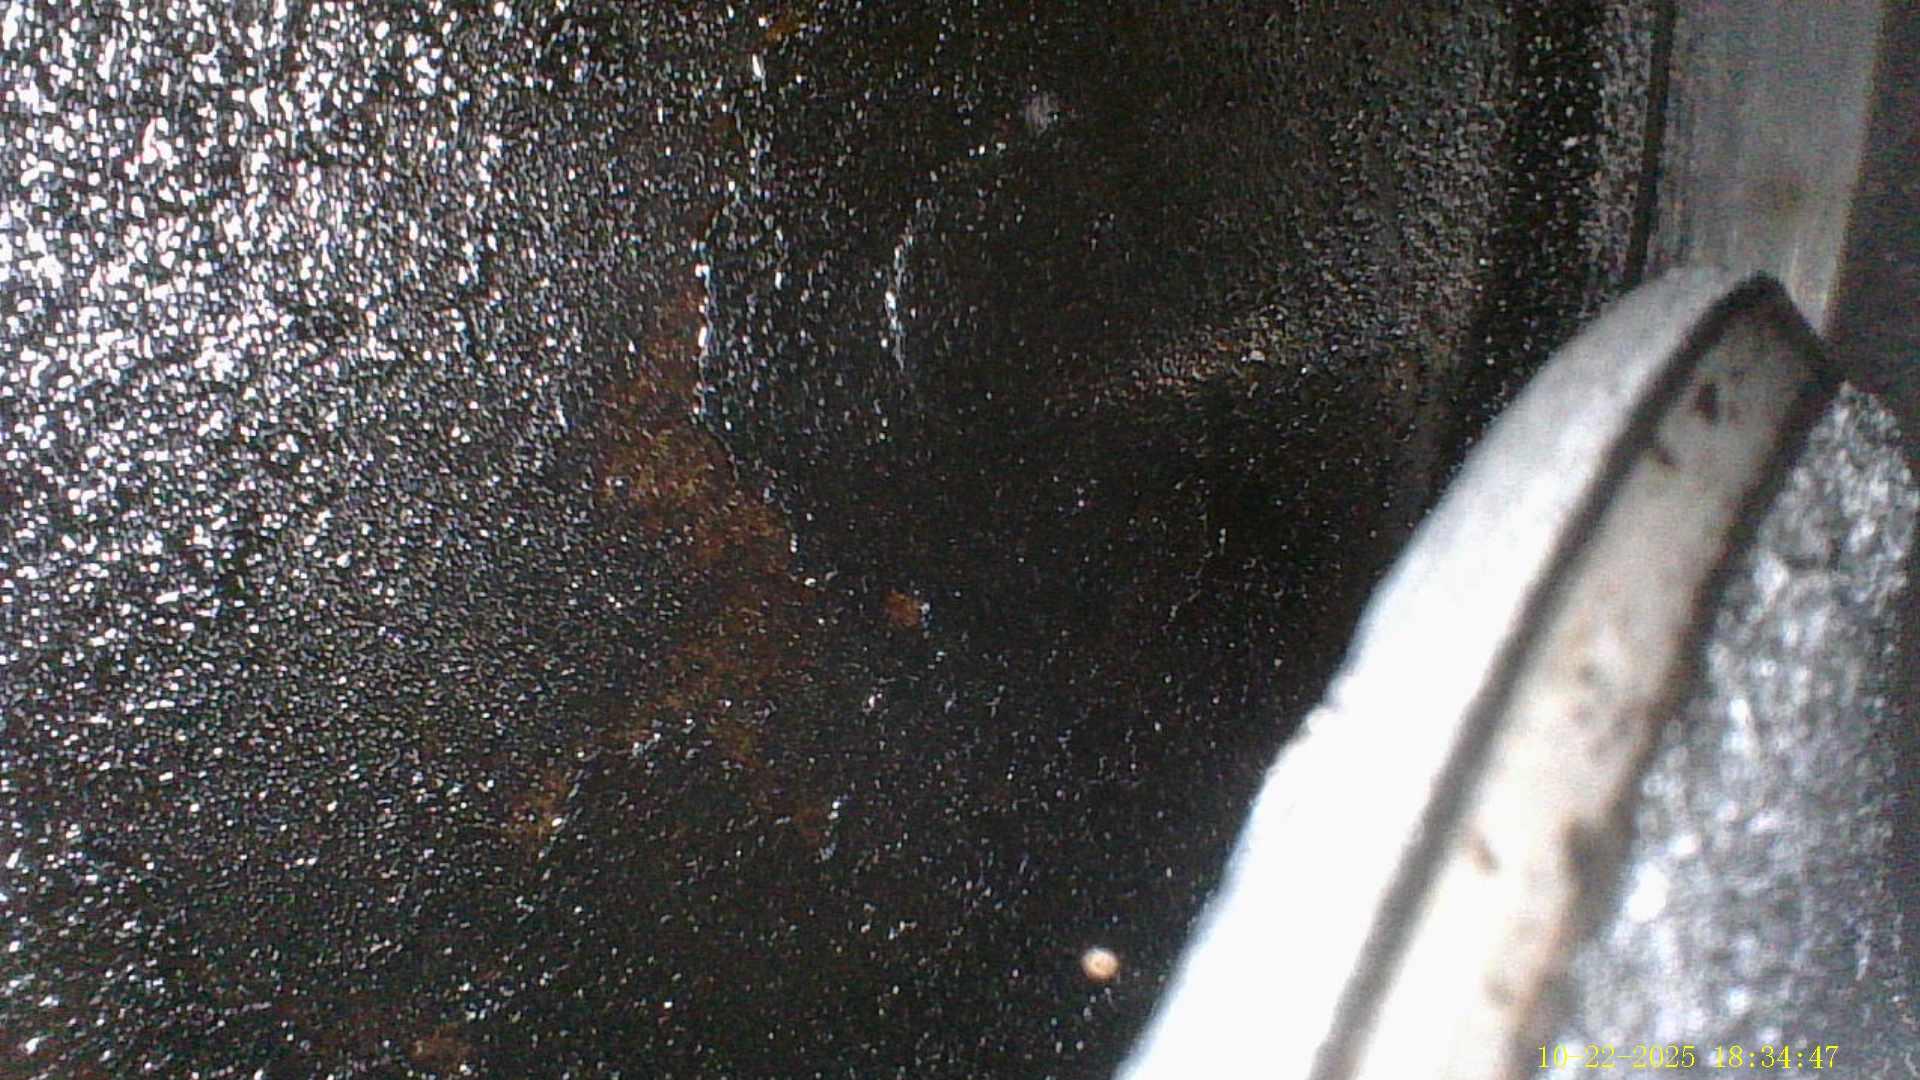
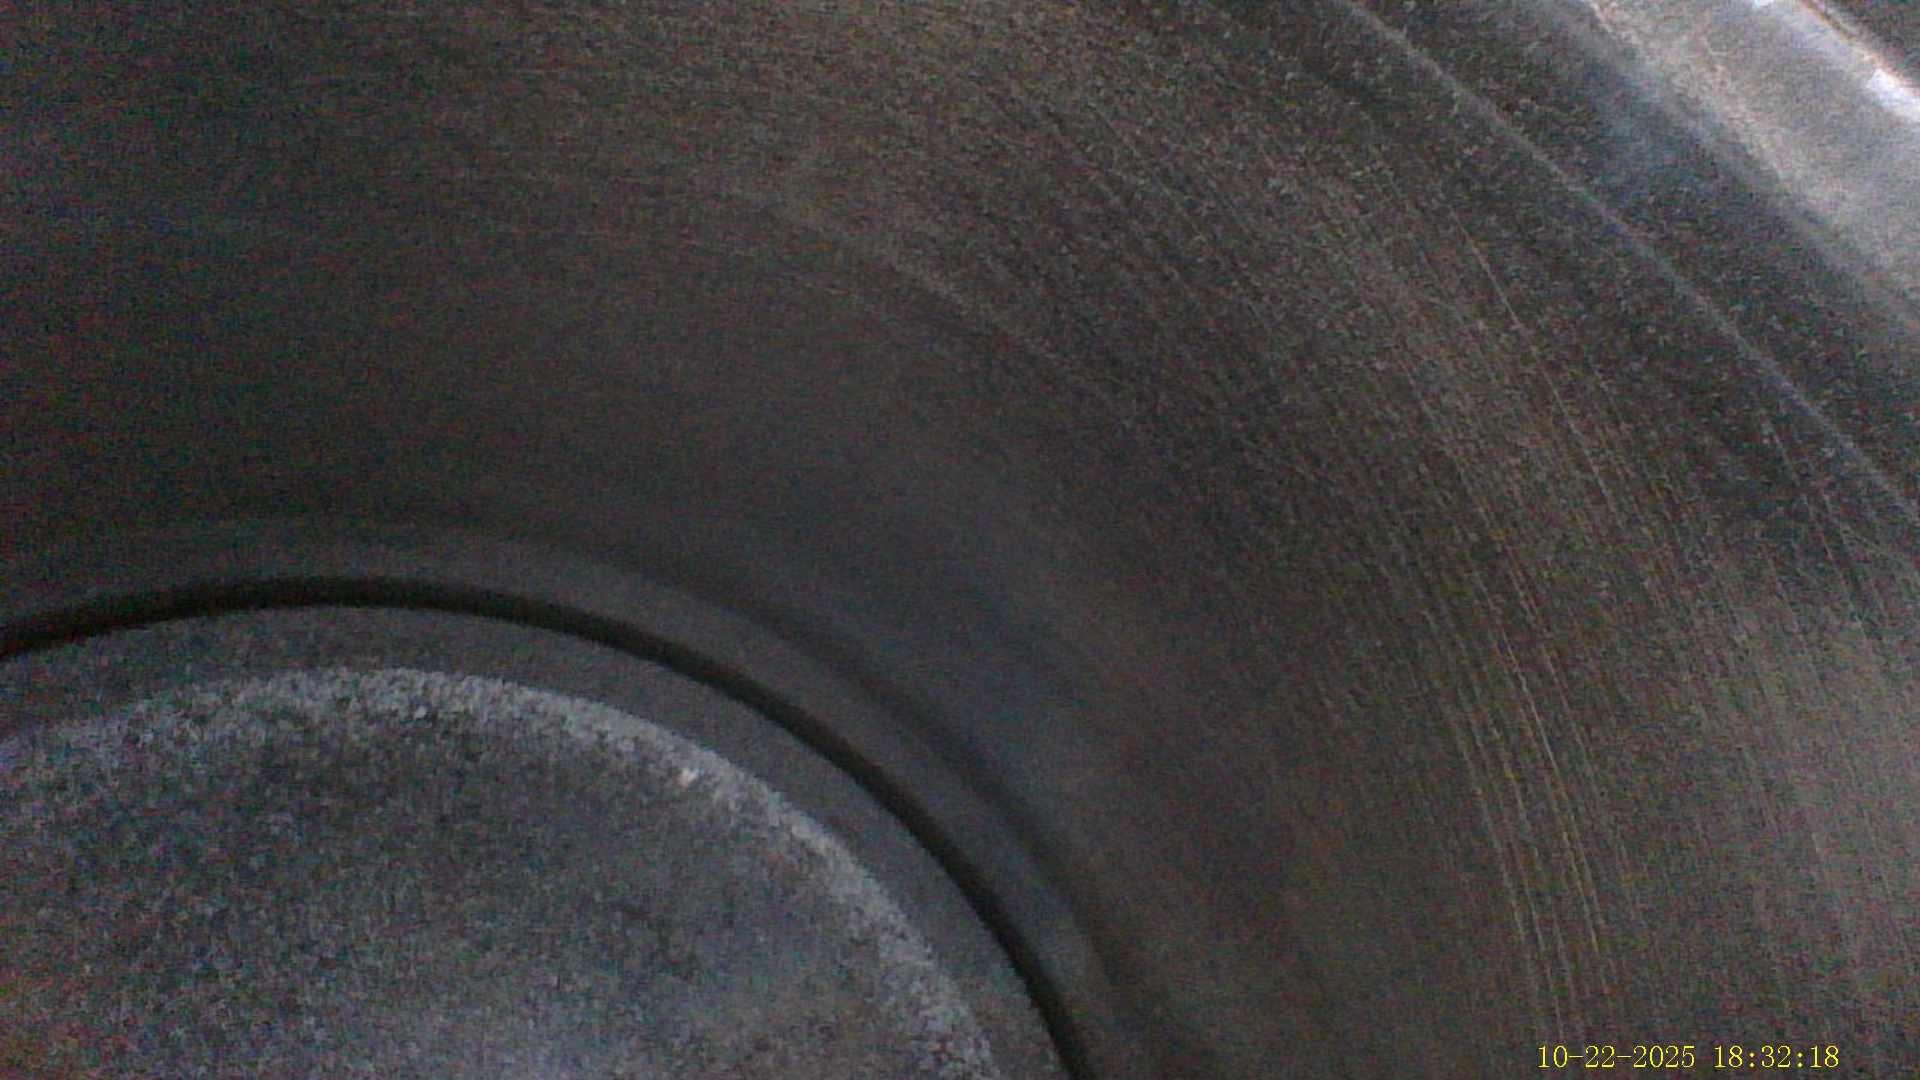
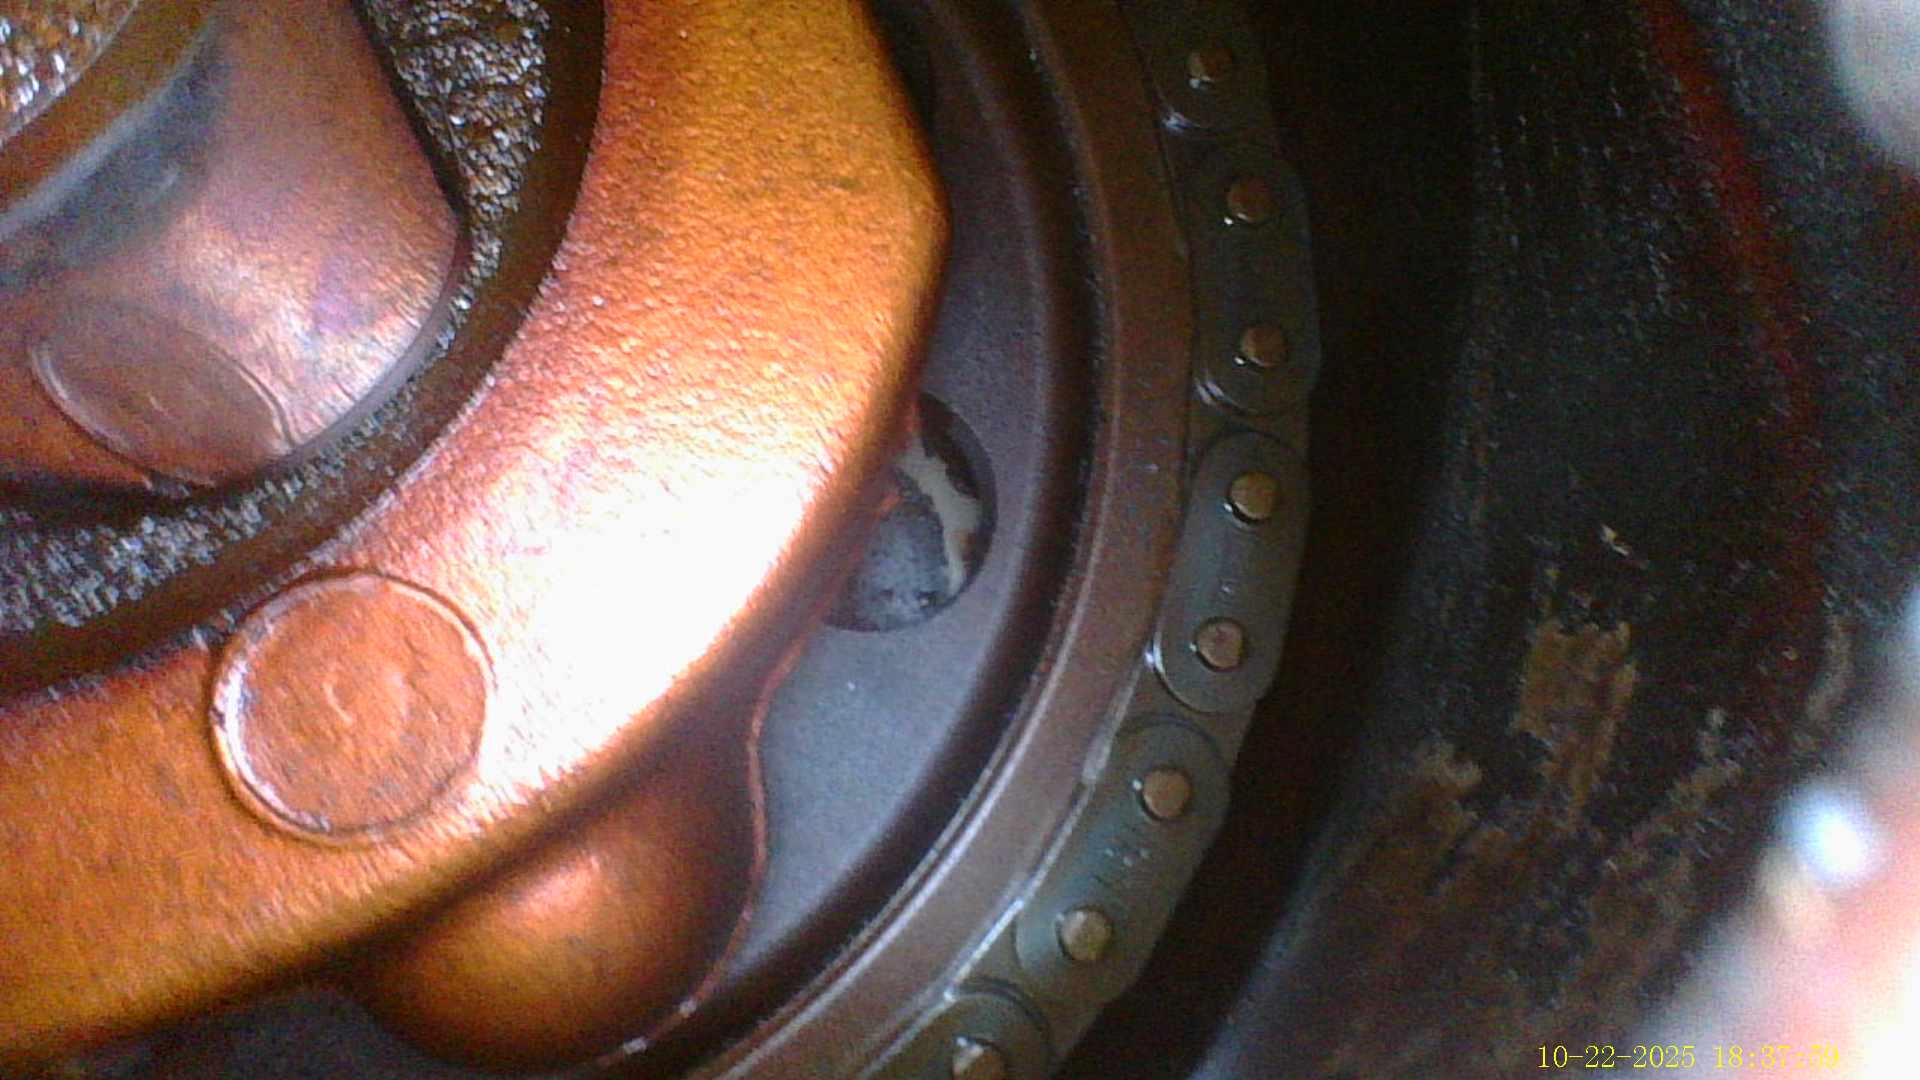
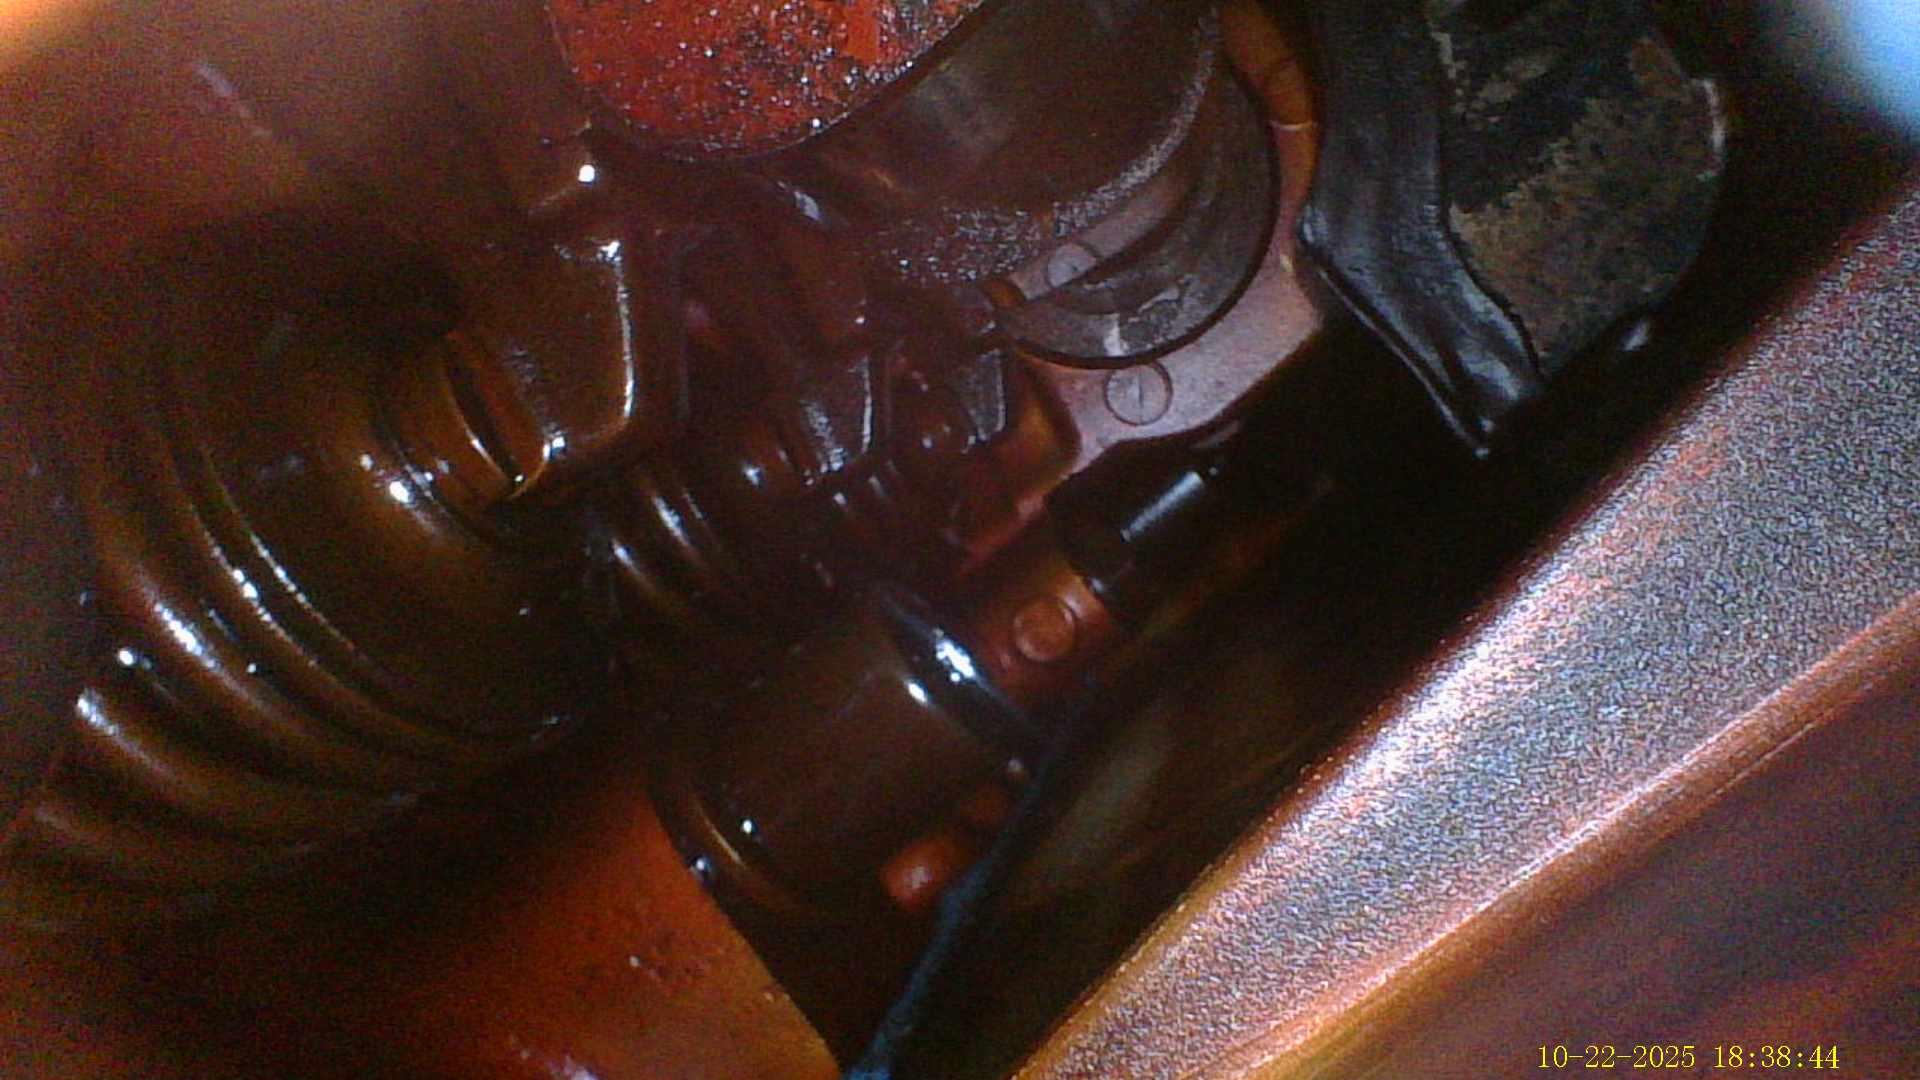
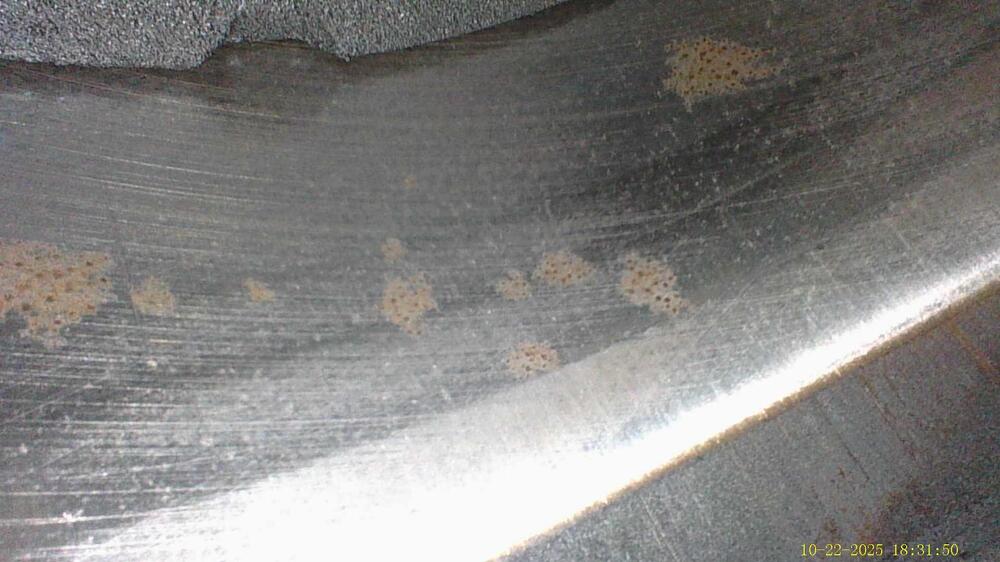
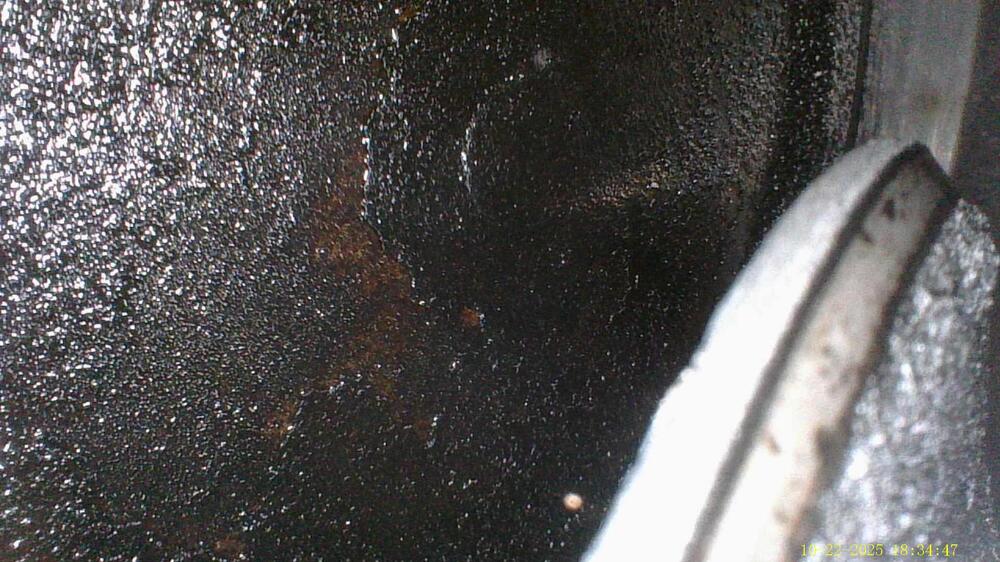
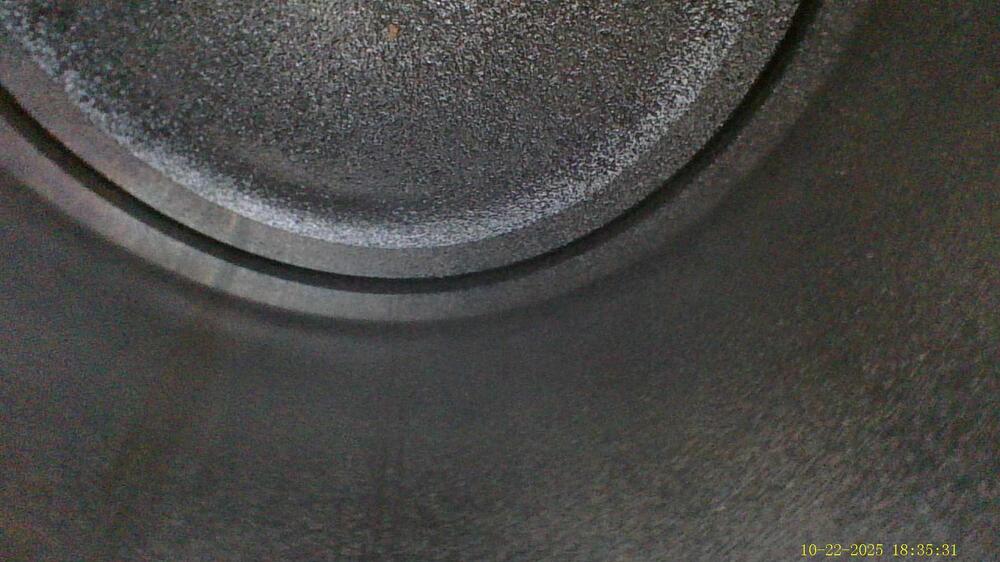
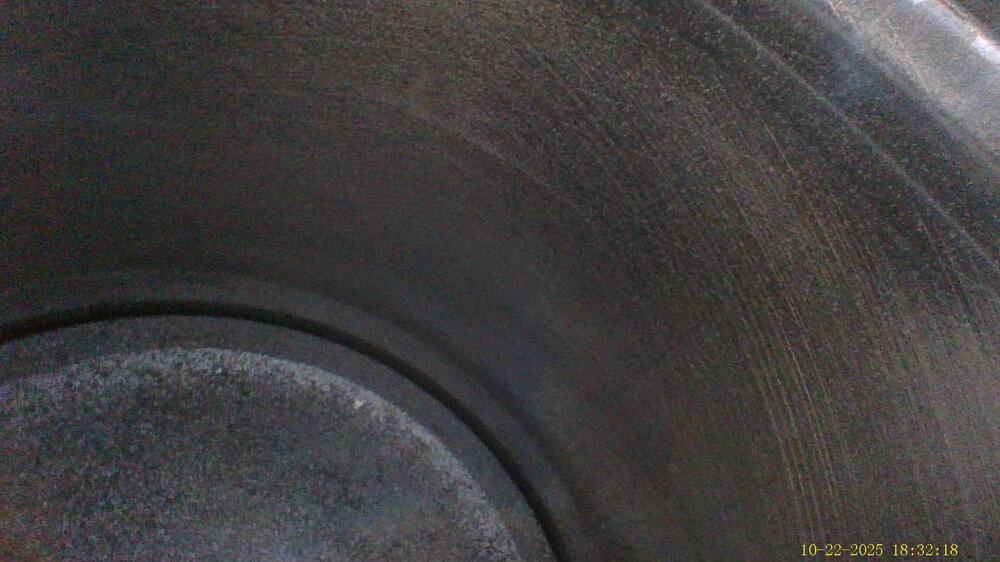
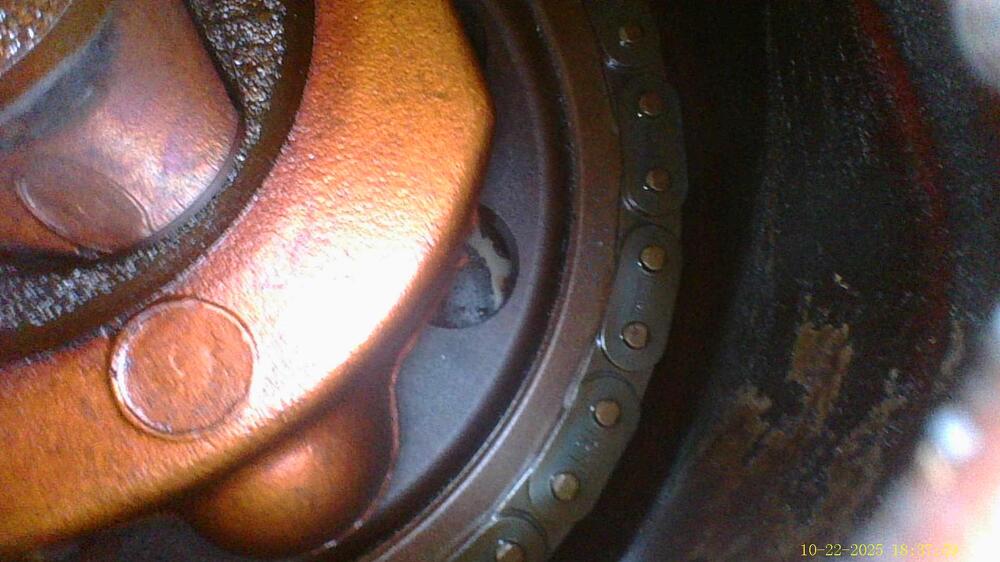
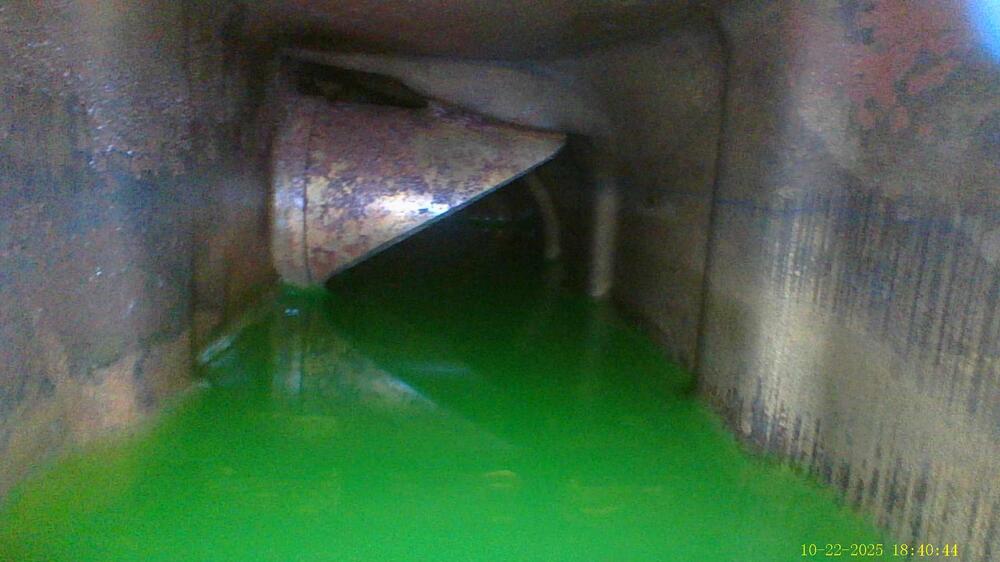
Wow! Look how time flies! Its been a while since my last post. Things have been busy. I wasn't happy with my work space. Since I am at an apartment complex my garage was facing the apartments and I dont want to bother people with any noise that I make. I finally managed to switch to a garage on the back side of the lot that's a lot more appropriate. Right after I switched I went back to Montana for the summer and I just got back a few weeks ago. I got to use my shiny new bore scope to check out the cylinders and I'm pretty happy with it so far. You tell me. Here are some highlights. I started with cylinder 6. The one valve I could see had no carbon buildup on the top of the valve and this was the worse rust I could find so far. This is cylinder 5. Cross hatch is perfect. Cylinder 4 was at the top of the stroke, nothing much to see This is cylinder 3, not looking to great, but at least there is oil. Cylinder 2 was clean and 1 was clean with a few small specs of rust. I managed to snake my way down the oil cap and took some pics Obviously in the radiator. This was the fluid level when I got the car. I cant complain too much. That was as far as I got today. I think my plan next is to figure out a way to spritz the cylinders with some fluid and rotate the engine by hand. I don't want to dump a bunch of fluid in there, I highly doubt it is seized.

-
 Sorry to resurrect this old of a thread (it's been informative in my research regarding luggage straps) but how cool is that?! The S30 with the VIN HLS30 00240. That's a keeper!