240260280z
Community Member
-
Joined
-
Last visited
Everything posted by 240260280z
-
Scotia Speed World Temp ~ 10C TRACK LENGTH: 3/10-mile D-oval. 410 ft. front straight + 410 ft. back straight + corners. SURFACE: Asphalt with concrete in lower groove on corners. TRACK WIDTH: 50 feet on corners and front straight, 65 feet on back stretch. BANKING: 10 degrees in corners. Two degrees in straights. 510 set up for oval. Naps Z motor. Did some 19.1 sec laps in the 510 ~ 100hp with the Naps Z motor. It was fun for first time out. Did ~30 laps total. My experienced driver friend/owner did 18.7 as best time so I was happy with 19.1 maybe I'll push harder next time . The Legend 125hp 1100lb cars do ~16 sec/lap The 500 hp Pro-stock do 14.5 sec laps We also have a club member who races Karts there: Club Fun!
-
eureka! way to go sleuth
-
First time on an oval track... had a blast in a 510 that only turned left.
-
I think there should be U clamps that mount on the rear differential hangers that hold it on an early Z. Like this
-
I always liked this style:
-
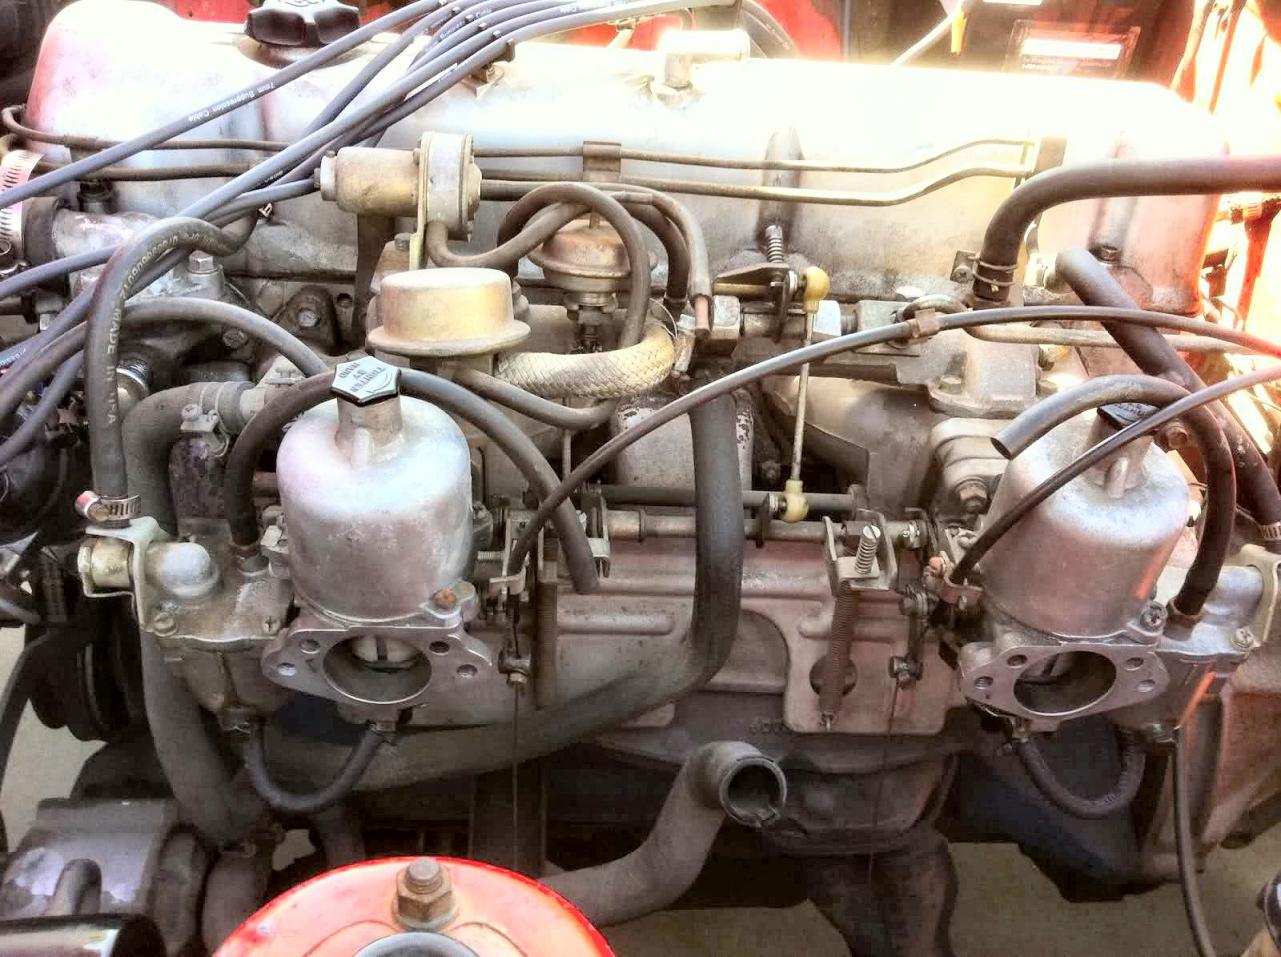
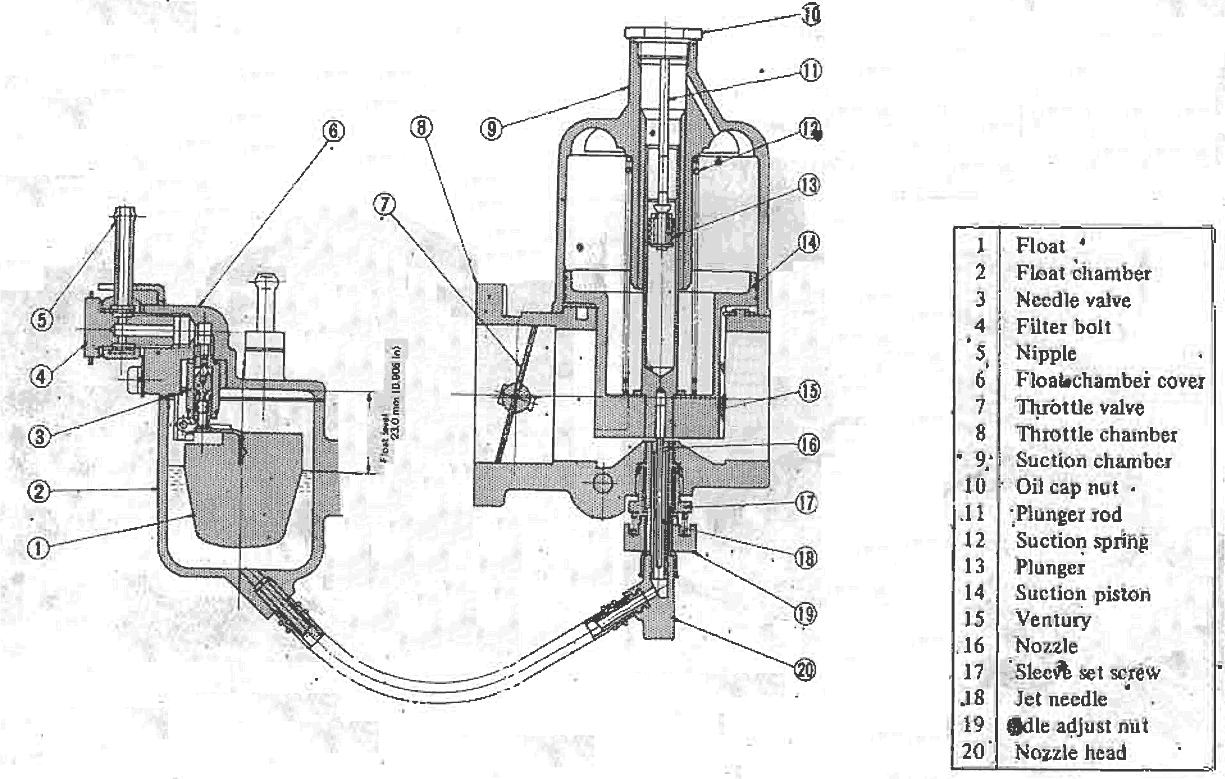
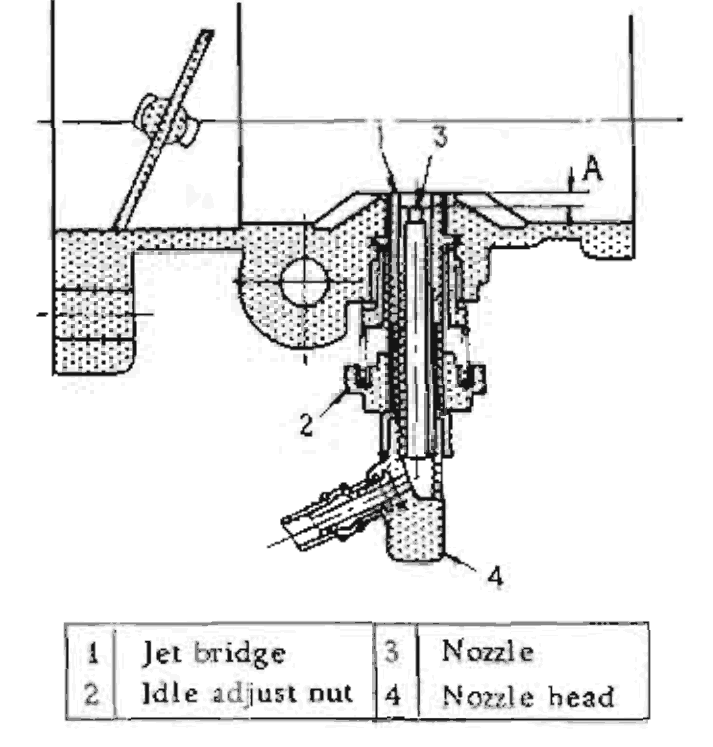
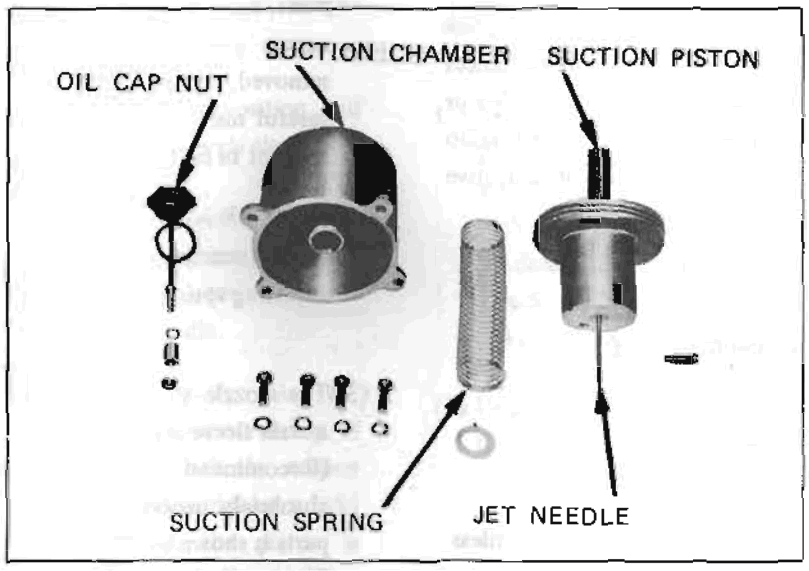
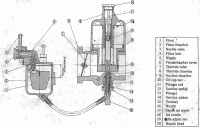
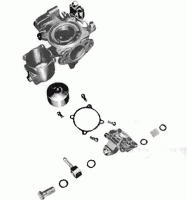
more pictures and diagrams

-
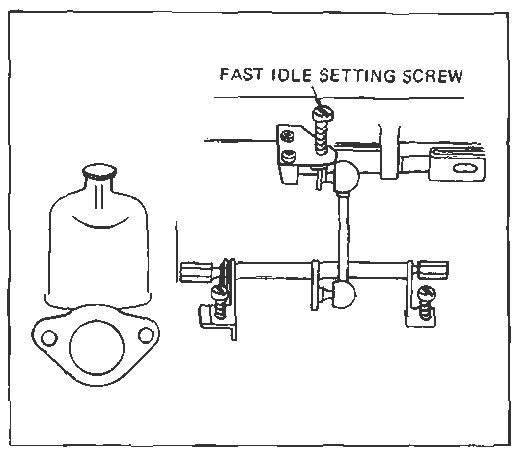
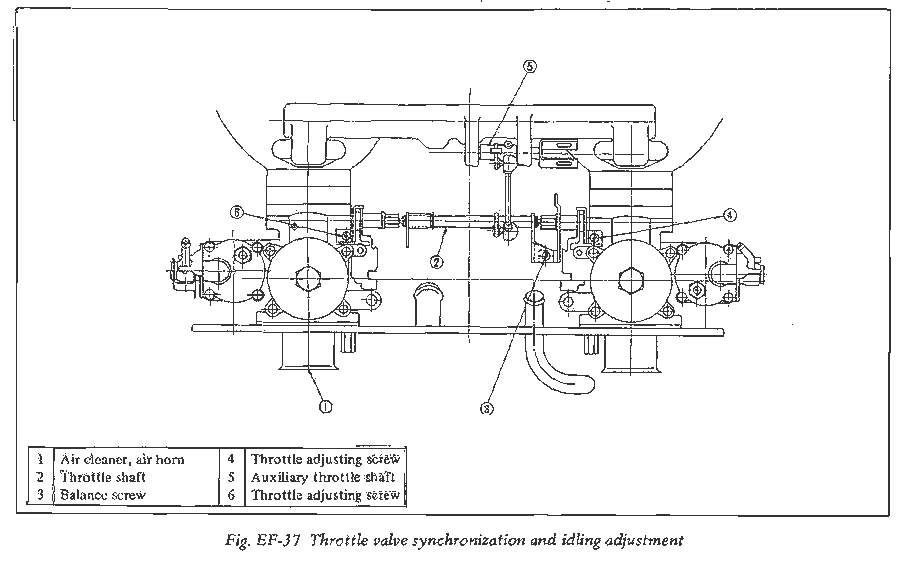
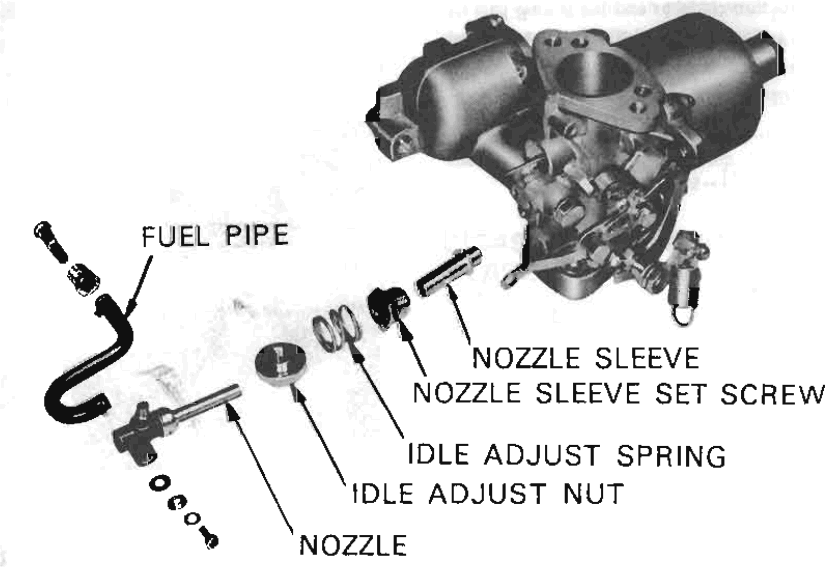
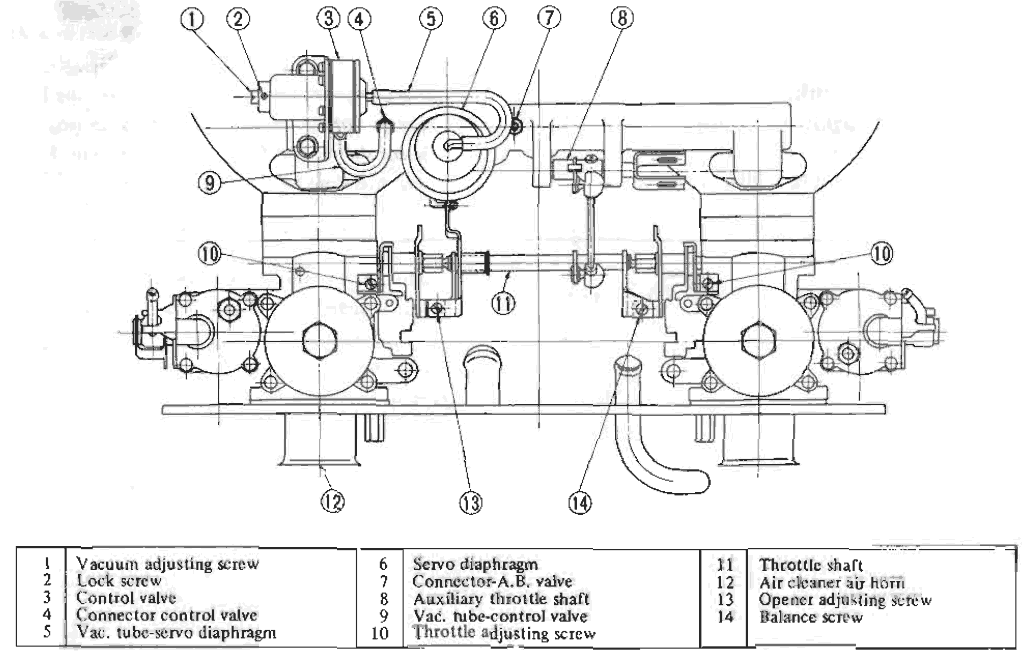
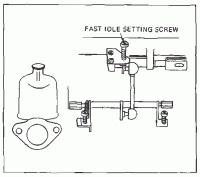
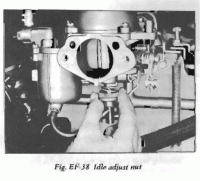
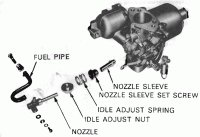
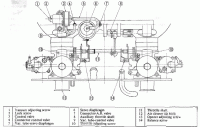
I just added some drawings to the quick and dirty thread. Here is one that will help: Screws 4 & 6 are idle set screws for each carb. (adjust these with the "Auxillary throttle shaft" disconnected) Screw 3 balances the two carbs at higher rpms.
-
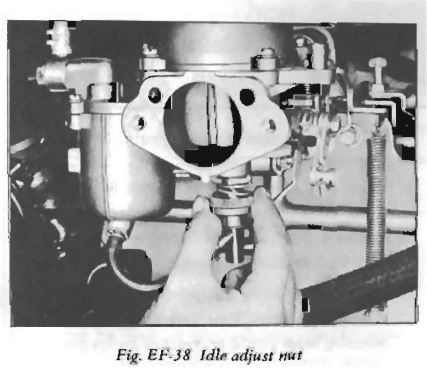
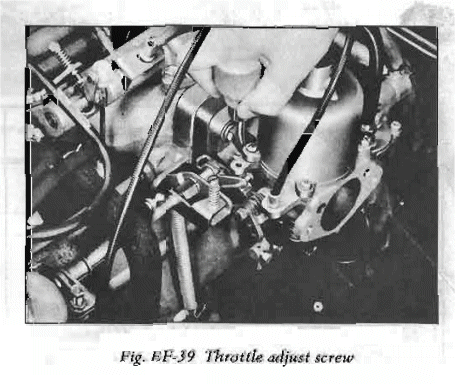
Some drawings.


-
Measure a battery in the morning with a volt meter: 12.0V dead 12.8V fully charged yep 0.8V range. Next start your car and let it idle then measure the voltage on the battery. It should be ~ 13.5V to 14.5V. This is a charging voltage from the alternator. If the voltage is lower then this then your alternator/voltage regulator may have a problem or the fan belt is loose.
-
parallel processing.
-
Just a guess but be safe and check crank damper pulley, the symptom seems linked to motor/transmission rpms, not the rear end rotational rpms. It may just be that the vibration is now coupled better to the body with the new part.
-
For track you may wish to get slicks and custom wheels from this supplier: http://www.diamondracingwheels.com/
-
Here are tips: http://www.turbododge.com/forums/f4/f19/114924-oil-galley-plug-install.html I like this method: http://www.zcar.com/70-83_tech_discussion_forum/oil_gallery_plug_removal_883240.0.html
-
The great Tony D recommended using Ajax to rough up paint and remove oils prior to a re-spray. I tried it on two cars and it worked great!
-
if tsa caught the box cutters none of this would have happened
-
-
-
yeah it looks like 903 spitz
-
307 or 115 blue metallic? http://zhome.com/History/ZColorGallary/index.html
-
http://spokane.craigslist.org/pts/2275466460.html
-
Just about to do a full brake line installation on a 71 restoration and I checked the net for some useful tips prior to the job: 0. Take time 1. Cut the line with a saw instead of a tubing cutter (tube cutter can harden the metal). 90 degree is ideal. To be sure, stick the tube in a bushing and hand file to 90. 2. Use emery paper to the end of the line to rough it up a bit (helps the clamp to hold it) 3. Set the correct height for the tube 4. Lube the threads of the clamp to improve the tools functioning 5. Tighten the clamp evenly to hold the brake tube. (One tip suggests tightening asymmetrically with the nearest side being tightened first however others say that symmetrical tightening is the key to a perpendicular brake line alignment) 6. Make sure the tube is perpendicular to the clamp 7. Ream the inside end of the tube and deburr 8. Chamfer the outside at 45 degrees 9. Put a drop of brake fluid on the tool and dip the end of the brake line in a water bottle cap filled with brake fluid 10. Do not over-tighten the flares. 11. As the tool starts to take up the pressure on the brake line end, wiggle/adjust the tool so that the pressing part is vertical. Tightening then backing off the pressure and adjusting slightly helps at this point. 11. Seamless tubing is better as stress cracks occur at the seams 12. Blow out tube to remove fillings/debris. Brake cleaner will do the trick. Some pictures and a guide here: http://www.carcraft.com/howto/50919/index.html http://classicbroncos.com/brake_line_flaring.shtml Interesting $70 double flare tool: http://www.sporttruck.com/techarticles/0912st_double_flaring_tool_of_the_month/index.html http://www.classicperform.com/Store/Tools/CPDFTD.htm
-
Just got some clay bars from craft store.. different suppliers. I will test this week. btw I thought of a good tip... When clay barring your car, put news paper around the perimeter because you will drop the clay bar.
-
guitar strings as mentioned above for poking. Pumping vinegar will clean out the calcium hard water build up. My car did this all the time in Ireland...land of hard water.
-
Some here: http://www.hammondsplains.com/fsm/ and here: http://www.xenons30.com/reference.html
-
Some items to check: - low voltage Wires to the distributor and grounds to distributor - bullet connectors ~ 1' of wire into the harness downstream from the temp sensor - ignition unit in passenger kick panel over heating (transistors) - bad condenser/cap shorting Watch the tach when the car dies. If it drops to 0 then the problem is electrical. Also check for spark immediately after the car dies... no spark means elecrtical