Seppi72
Supporting Member
-
Joined
-
Last visited
Everything posted by Seppi72
-
I had 205/60-15 Yokohamas on Mitsubishi wheels on my Eibach-equipped '72 and there were no problems. This year, I changed to 225/50-15 Yokos and had to install 15 mm spacers and longer studs on the front hubs to gain strut clearance. The same wheel/tires show no problem on the rear (disc brake conversion there). There were and are no fender rubbing issues. Clearly, a lot will depend upon the wheel offset. I would be nice for one of our CAD-loving members to put up some representations of various wheel/tire/spring/camber combos. I also expect that if one knows the various parameters, a calculator could be devised to tell how much clearance one might expect - at least in a static mode.
-
It has always been my desire to take all the exploded drawings on the L6 and S30 chassis from the FSM and/or the parts CD and label each bolt, nut, screw, etc. with both the size and torque value (if any) so that it would be easy to come by this info. I've toyed with the idea of this being a project for when I retire. However, after last year's 401K slaughter, it doesn't look as though retirement is a near-term option for me. Better yet, does anyone know of some other fool who's already gone to the trouble of doing this? If so, I can plan to squander my golden years on something else. Golf, anyone? Nah, just shoot me...:stupid:
-
This is exactly what I ended up doing, Will, finishing the install last evening. I shortened the ARP studs by 10 mm (they have about 3" of thread) so that my wheel nuts could actually make contact with the wheel and force it against the spacer. I don't know what ARP uses in making those things but they are extremely hard. I went through four blades on my Tiger saw to trim just eight studs - even with 8% cobalt blades. Sparks galore. But they did grind pretty easily after that and dressed up quite nicely. I am now officially a happy camper.
-
Pizzaman: Those spacers solve one problem but exchange it for another. Now, you have to machine pockets or a channel into the backside of your wheel to accept the portion of your original stud that extends past the spacer. I had to do that years ago when I put some aluminum wheels on a Honda Accord. It was a royal PITA. The other option is to cut down the original studs so they don't protrude past the spacer. I would think with a 1/2" (12.7 mm) thick spacer, I'd then be violating Arne's rule that engagement = stud diameter. And I'd still have machining work to do to make sure everything was equal. Looks like I'll be buying two packs of the 1.5 pitch ARP studs from my local JEGS store tomorrow. And I just bought some really nice 1.25 pitch tuner nuts last weekend.:stupid: At least AutoZone had the same nuts in 1.5 pitch IIRC. What's another $30?:pirate:
-
I want to run the widest 15" tire I can on my 240 and I've settled upon Yokohama AVS ES100 225/50-15 rubber. However, because of my wheel offset, I need to use a 1/2" spacer to avoid rubbing on the front strut and/or spring. There's no problem with the rear. However, when I put the spacer on the hub, I only have about 5.5 threads left exposed to engage the nuts. The only reason I have this much is because, as I have found out during the course of trying to resolve this issue, a PO swapped out the OEM front studs with some of the longer rear studs. See the discussion from 2005 at http://www.classiczcars.com/forums/showthread.php?t=18276 in order to understand what's up with that. My question is how many threads do I need to have engaged to provide for my safety? I typically torque my wheels to 65 ft-lb. I asked a mechanical engineer with whom I work about this but he was only able to tell me the minimum torque needed to prevent the nut backing off (about 28 ft-lb). As the 2005 thread mentions, I could get longer studs from ARP, but they would have a 1.5 pitch instead of the 1.25 that the OEM studs have. I would probably opt for the Nissan Quest stud that was said to be about 9 mm longer than the OEM 240 front stud, but that's only 3 mm more than what the rear 240 studs have to offer. That would give me about 2.5 more threads to engage, for a total of about 8 threads. Would this (8) be enough threads to provide a safe mount considering the forces that the studs see in spirited driving (not racing)?
-
Yeah, as Weasel said, it doesn't look too bad as long as you can find good metal to weld onto. Plus, with it being a floor, the looks of your welding can be covered up with undercoating on the one side and insulating mat on the other. Then again, this opinion is coming from a guy who's spent $10K fixing up his sentimental rust bucket Z over the past year with perhaps another $10K to go before he's done. I never expected baby ostrich leather seats to be so expensive.
-
My recollection of pulling the liner from my '72 last summer was that it was glued in "spots" to the inner roof panel, but not uniformly. I found a free edge and started pulling carefully. When I ran into a glued region, I used a sharpened 1" putty knife to break the bond as I lightly tugged the headliner. I only lost a tiny bit of the foam backing and plan to reinstall the liner when the car goes back together later this year or early next year.
-
Acetone is such a small molecule - at 58 Daltons, it has about the same molecular weight as rubbing alcohol (isopropanol, 60 Daltons) and is just a little heavier than ethanol (46 Daltons). Because it doesn't have the capacity to hydrogen bond in bulk like the alcohols or water do, it has a very high vapor pressure. Acetone is also very polar. The polarity will allow it to penetrate into paint - even crosslinked clearcoat - and cause the polymeric structure to swell, at the very least. However, if you do not mechanically disturb (touch) the swollen region, the acetone will gradually evaporate and the coating "should" return to something close to its initial condition. Acetone's flash point is only 15 F. This is the lowest temperature at which an open flame will ignite a pool of the liquid. Its explosive limit in air is the range from 2.6 to 12.8%. With its high vapor pressure, it is not difficult to reach that lower explosive limit in stagnant air in a closed room or garage. ATF, on the other hand, is usually composed predominantly of hydrocarbons similar to those found in kerosene or diesel, along with numerous and various additives. The good thing is that the vapor pressure of the solution resulting from mixing acetone with ATF will be lower than that of acetone by itself, but almost all the vapors coming off the mixture will be acetone molecules and so the flammability issue is still there - just somewhat reduced. I suspect that the acetone/ATF mix is very low in viscosity and that allows it to perform its reported penetrating action on rusted materials. That's pretty much the same principle on which Kroil and PB Blaster rely except that they also have rust-dissolving additives to help things along. Besides, Kroil actually smells OK. I think it smells "sweet", if such a thing were possible. It's one of the few automotive chemicals that my wife won't complain about if i'm using it in our attached garage. Motor oil and windshield washer fluid are the others. Anything else and I'd better be using it in my outbuilding workshop.
-
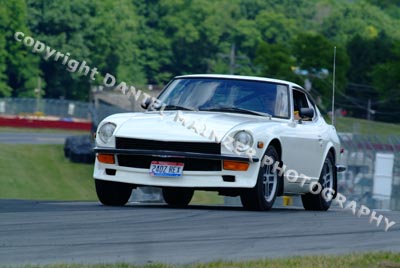
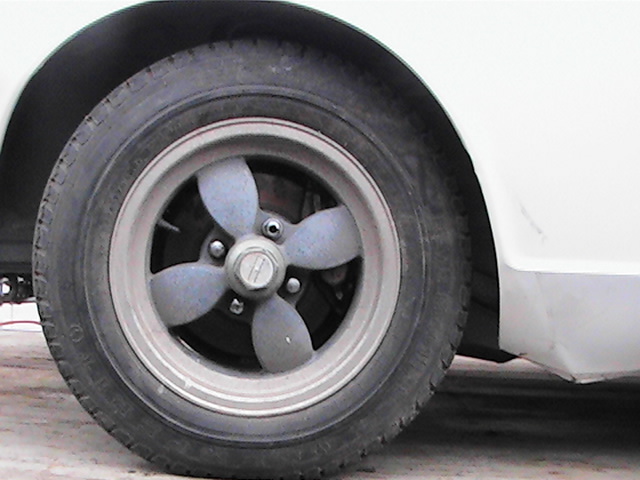
I want to "max out" the tire width on my '72 and with the 15" Mitsubishi wheels that I intend to use (see best photo I have at work from a Vintage GP parade lap at Mid-Ohio - coming off the loop leading into the Keyhole), that sends me to 225/50-15 tires. However, the offset of the wheels means that I need to use a 1/2" spacer on the front hubs to keep the inside wall from rubbing on the strut. Doing so leaves only about 5 threads for the wheel nuts to grip on and that isn't enough to make me comfortable. Is there a general rule about that? I torque my wheel nuts to 65 ft-lb. Are there longer M12x1.25 studs available that would work in the 240Z front hub? I figure that I need about 1/4 - 1/2" more than what the OEM ones have. Also, these are splined and press fit into the hub, are they not? I assume they can be pressed out?

-
Thanks guys. I'm going to go with the T3 adjustable rods. At "only" $200, they're a pretty good deal. I was planning to seriously consider a number of adjustable suspension parts for my original owner '72 now in rebuild and this will give me an opportunity to assess T3's fabrication competence - which looks pretty good on the computer screen. And, JonM, thanks for that advice on the caster setting and the caveat about the threads showing. I'll discuss that with T3 when they call me back.
-
When I treated the nooks and crannies (like the frame reinforcing channels that run under the rear half of the chassis) of my other '72 with Ospho last year, this is what I used. I took the aluminum spray head from a device that is intended to shoot undercoating in a sideways pattern (it's just an aluminum end cap with 1/4" internal pipe threads that a narrow slot cut into it about halfway up perpendicular to the axis) and mounted it on a brass fitting that was 1/4" outer NPT on one end and a hose barb on the other. I hooked this up to a flexible PVC tubing of an appropriate length and the other end of the tubing was hose clamped onto the pressure pot outlet (straight metal tubing). I also hose clamped a length of flexible, stiff wire (like metal coat hanger wire) to the PVC tubing at the hose barb end and taped the tubing to the wire every few inches so the geometry was locked in. I could use the stiff wire to push the spray head to the desired location. I then had a friend trigger the pressure pot (determine beforehand the pressure that gives a decent spray) while I twisted the assembly clockwise and then counterclockwise and slowly withdrew it from the cavity. I did this a couple of times to ensure complete coverage. I don't believe that PVC would be compatible with the solvents in POR-15 so you might have to use polyethylene (PE) tubing. This could be even better as PE tubing is stiff to start with and the metal wire might be unnecessary.
-
There's a good article in the August 2009 issue of Grassroots Motorsports (page 101) regarding how best to treat rust. This is the issue with Pete Brock and Datzilla on the cover and a great article on 240Zs from stock to wild on page 40.
-
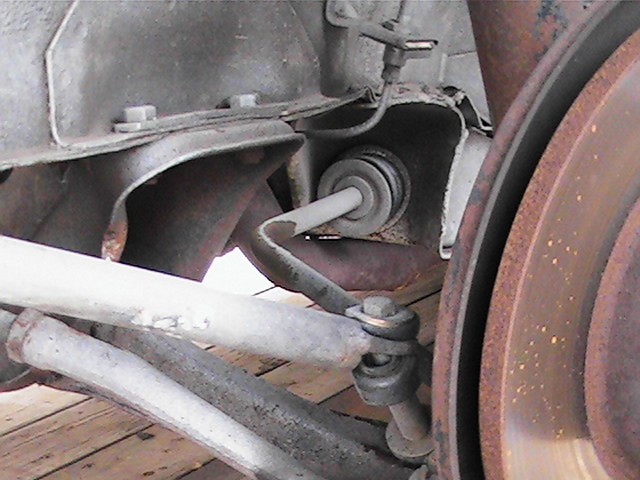
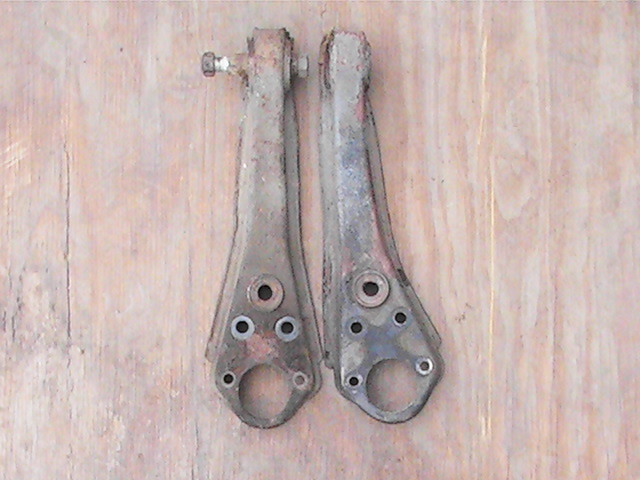
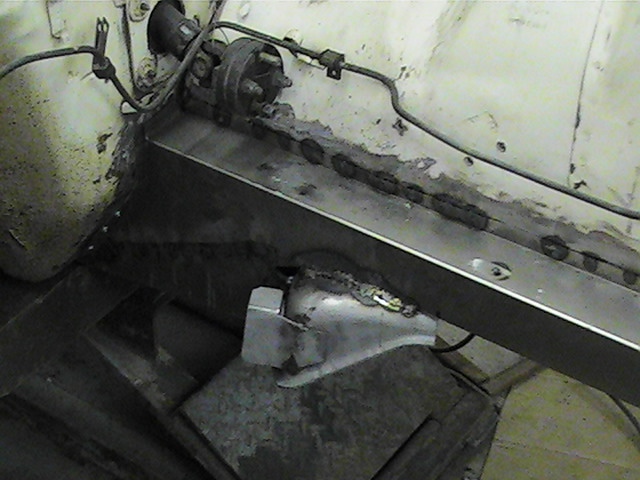
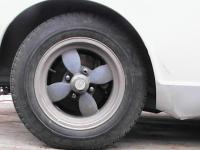
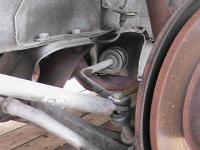
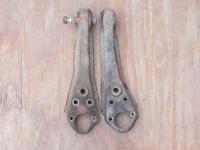
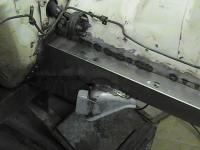
Folks may remember that I crashed my '72 last fall and bent the left front frame rail (see photos). Over the winter, we replaced that frame rail with a new one from Zedd Findings. There was a bunch of other work done too: new paint, exhaust upgrade, refurbish the entire suspension (with camber bushings in the front), etc. The car was on the road for the first time this year yesterday and that was to head to the alignment bay at NTB. Fortunately, the technician who did the work is a local SCCA autocrosser (Honda Civic Si) so we hit it off quite well, he took his time and involved me in making decisions. Once he did the best he could, we ran across a problem in the caster values. The right side unloaded value is 2.9 degrees (factory spec is 2.92 ± 0.50) but the left was only 1.3 degrees. I had noticed a pull to the left when driving to the shop, but because the toe and camber were just guesstimates from when I reassembled the front end, I couldn’t be sure of the cause. We went for a short hop on I-71 and still felt the leftward pull, which the technician called "caster steer". Obviously, even though we measured a number of times, we didn't get the T/C bracket installed exactly equivalent to the right side location.:stupid: So, how do I rectify the left side caster value and get it close to 3 degrees? In reading old threads, I saw where Kevin Mack had a similar problem and thought about using washers to push the T/C rod forward. I figure that I could do the same thing and want to get the opinion of members who are far more knowledgeable on the subject. Also, how would I go about roughly measuring caster in my garage - :bulb:an inclinometer pressed against the trailing edge of the spring coil stack maybe? For the record, the T/C rods currently have the aluminum/delrin ball and socket kit in front of the frame bracket and a urethane rod bushing and large washer behind it. (What should I have on the back side?) I could convert to urethane bushings front and back if needed. I am also running Eibach progressive springs with 225/50-15 tires (if that helps anyone) and my control arm geometry is darn near parallel to the ground (as near as I could eyeball it on the alignment lift). Is any other info needed?
-
You will most likely have a similar area on the other side of the car to deal with too. Check the soundness of that metal with a pick. IF that's all the rust you have on the car, congratulations. It will not be hard for someone with even modest metal fab skills to make a patch for you. Plus, this entire region can be covered with undercoating when you're done so no one will see whatever kind of welding and grinding butcher job you might produce making the repair. One other thing to check for are perforations in the firewall where the inner fender meets up with it along that little flange line. Pull away the firewall insulation in the footwell and then shine a bright light from the seat area towards the firewall. In a darkened garage, look at the panel from the fender side. If you have perforations, you'll see little speckles of light shining through. Perforations are best sealed with brazing.
-
When I got my second '72 with a Rebello L28 and Pertronix, it didn't even have a resistor and the car runs just fine, thank you. For years, I've wondered why that was. Obviously, I must have one of those "bypassable" coils too.
-
My speedo only starts fluctuating when I get above 85 MPH. Unfortunately, that doesn't happen too often (often enough?) as I have a ride-along rev limiter; i.e., wife.
-
For some reason unknown to me, I've come into possession of somewhere around 5 door sets over the past year and have taken each one apart. I've seen "grease" that runs the gamut from your JB Weld look-alike, to wheel bearing grease, to white lithium grease. I suspect the FSM calls out some sort of grease that is probably NLA after 30+ years. When I reassemble the doors for my rebuilt '72, I'm planning to go with white lithium grease on the nylon slide.
-
I can only assume that you want the original engine S/N so that a new plate can be created. The VIN is on the plate on the driver's door frame as well as stamped onto the top of the firewall above the brake M/C.
-
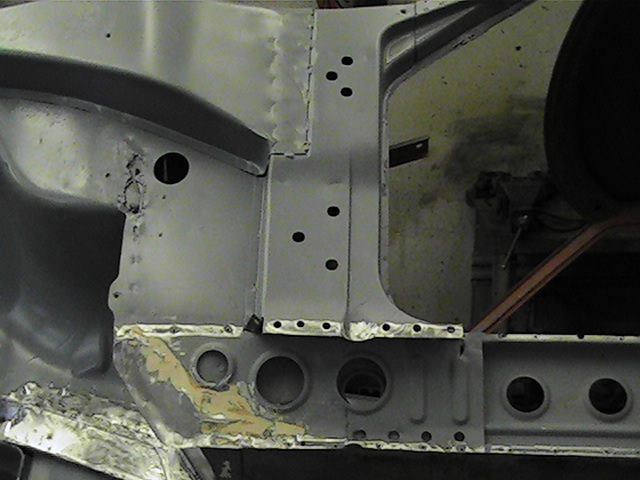
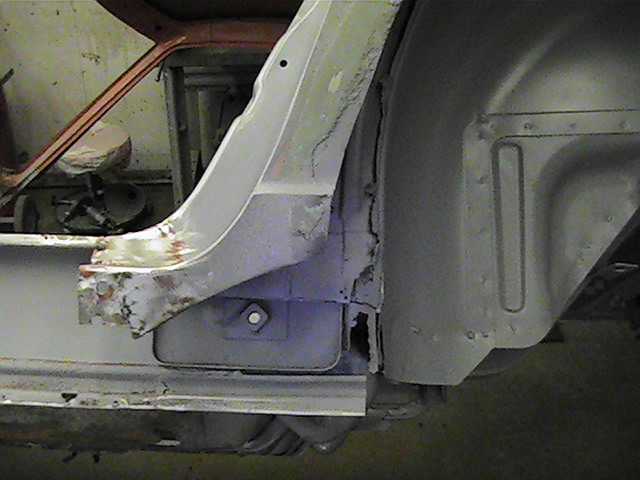
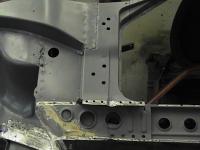
Here are two pix of the structural steel on the inside of the rocker panels. One of the front end and one of the rear. I hope they help you. However, you must know that there is undoubtedly at least surface rust on all these bits. If I were you, I'd figure out a way to bathe these parts in Ospho to convert the rust and then apply a two-part epoxy or polyurethane coating to them. You'll have to remove the seats, dogleg finisher panels, sill plates, and pull up the vinyl covering to expose all those lovely access portholes. It's a bit of work, but surely worth the effort in the end.

-
Because the foam is cross-linked polyurethane (PUR), solvents will, at best, only be able to swell it; at which point you could try scraping it off with a chisel if you have the leverage to do so. The only other option is to burn it out with a torch. You'll get a lot of char because the PUR is based on aromatic ring structures and that's what aromatics do in the initial stages of oxidation (burning). However, that char will eventually oxidize or, when it's cooled, you can scrape or wire brush it off. Ideally, such burn outs should be done outdoors. If that isn't possible, have good ventilation going; such as a box fan blowing fresh air at your face and another one blowing fumes out the door. If you can smell the burning PUR, your ventilation is inadequate. Stop and fix things. Also, have an ABC-rated fire extinguisher (or two) handy - just in case. Because the foam is inside a metal structure, I don't believe that burning would be located anywhere other than on the exposed surface because enough oxygen would not be able to get to the hot zone from any other direction. But never say never.:stupid: Also, be sure that combustible materials (grease, oil, plastics, etc.) are not in contact with the other side of any metal surface that's being heated. Of course, any paint on the metal will be "toast". BTW, I am nearing the end of rust repair work on my original owner '72, which was every bit as big a rust bucket as what you're facing after being a daily driver from late '71 to early '79 in, in order, upstate NY, central Iowa, northern WV, and western PA. Oh, the salt, the salt... It's taken the better part of a year and many thousands of dollars to get to this point (mostly because I am not a welder - that's a BIG plus in your favor). However, I do not regret one moment of this adventure and I am in the "happy phase" of the project now where I'm choosing my paint color ("Arrest Me, Officer Orange") and getting ready to build a stroker L6.
-
Back when my '72 (currently undergoing rebuild) was new, I too was afflicted by this infrequent gremlin. My recollection is that it would happen mostly after driving in rain, which makes me think it is electrical in origin, but it also happened in dry conditions. This happened in both freeway as well as in-town driving. The symptoms were that I would lose what felt like one cylinder. Then, perhaps 10 seconds later, I'd feel another one cut out. When the third one would go away, I'd pull over and shut it down.:stupid: The car would crank, but it would have to sit for 10-30 minutes before it would fire up again. There was no after-effect upon firing; e.g, black smoke. I was never able to identify the source of the problem. It just became something I learned to live with - like the ignition key locking up. I have not had this problem in the 6 years that I've owned my second '72 with the Rebello L28 and Pertronix ignition. But, the ignition key thing - oh yeah...
-
you need to prioritize things. Fix the holes in the car first then start wondering about other stuff. Your muffler sound isn't going to mean anything if your car is sitting there with its back broken because you didn't restore its factory integrity.:stupid:
-
My body guru has always told me to weld in a patch and use brazing to seal up any small holes or preferations. Of course, he is an expert with MIG, stick and gas and that's why I have him do the heavy lifting. Me, I just say thank goodness for grinders when I take off the helmet.
-
I am taking my complete suspension off to clean up and repaint the bits and pieces prior to putting the car back on the road now that all the crash damage from last fall is fixed. My '72 has Illumina shocks and Eibach springs. On the front springs (15.25" uncompressed length) there is a slightly tighter "wind" at one end and, I believe, that will be the case for the rears too when I get them off. My question is, when I reinstall them, which end should go up? Because the springs will be loaded the same regardless of which end is up, I think it shouldn't make any difference to the ride. But it will certainly look different depending on how I reistall them. At the moment, I'm leaning towards having the tighter end up. Just checking for folks who might know.
-
Ok, Jon, I'll give it a try later today or tomorrow. I figure there has to be a way or MSA and Black Dragon wouldn't be selling the kits.