Seppi72
 Subscriber
-
Joined
-
Last visited
Everything posted by Seppi72
-
 Now that it's back to the workweek grind, I've asked both manufacturers the same questions. We'll see what the answers are.
 -
I don't mind the harsher ride of urethane so rubber wasn't on my agenda. If I had a LOT more disposable income, I'd consider kitting out my car so I could actually quantify the difference between rubber and urethane and find the major contributors. Another $10,000 would do. Maybe a GoFundMe campaign? And now that I no longer have access to the wonderful analytical instrumentation that made my career so much fun (sold state NMR, reflectance IR, thermal analysis, mechanical analysis, etc.) I finally have a topic that actually interests me personally. Arrgh.
-
Every time someone starts a topic on modifying their suspension, there always seems to be a difference of opinion regarding whether they should use polyurethane or rubber bushings. I don't want that discussion here. My interest is whether anyone knows of the technical differences between Prothane and Hyperflex bushings. Prothane is manufactured by Dee Engineering of Ontario, CA and Hyperflex by Energy Suspension of San Clemente, CA. I'll mention that I'm a retired research chemist who worked with polyurethane materials for a good portion of my career. I know the materials that can be used to make these items -- and there are many -- and how each one affects the final product's mechanical and aging properties. The primary properties affecting bushing performance include durometer as well as modulus and hysteresis. What prompts me to ask the question, however, is that, no matter where I look, Prothane parts are predominantly, but not always, a little bit less expensive than the same Hyperflex parts. I wonder if this is just marketing or whether it has something to do with the materials of construction. I know I can ask the two manufacturers such questions directly but I would never expect them to give me detailed, factual answers. So I turn to you, my fellow Z-heads. Does anyone have knowledge about material differences between the two product lines?
-
I had been talking to Todd prior to his passing and have always wondered who might take up the Mikuni support baton in the U.S. I've dealt with FutoFab in the past so it seems what my next step needs to be. Thanks.
-
jitenshakun: What a sweet calculator you've identified. And, as one might suspect, it tells me 40 DCOE for flexibility and 45 DCOE for power.
-
Patcon: It isn't that I think the Cannon manifold is insufficient. Heaven knows enough guys have used them over the years. It's just that it may be too long for me to also fit an air box onto the carbs. It's 252 mm from the manifold/head surface to the outside carb flange where an airbox would be mounted for the Cannon/Webers whereas it's 190 mm for the Mikuni/Mikuni combo.
-
I am in a bit of a quandry. I have a set of Mikuni PHH 44 carbs on a Mikuni manifold AND a set of Weber 40 carbs on a Cannon manifold. Either set will need to be refurbished. I'm trying to decide which ones to put on my stroker motor. I'm not going to ever race the car but I do intend to drive it in a spirited manner every now and then. Years ago, I talked with John Coffey about this choice and he gave me his advice as a racer who spends hours near redline - which is something I shall very rarely, if ever, do. His advice was to use the 44s, but, then again, he was a racer. I know quite a few members have carbed strokers. So what have you guys experienced? And, if I do go with the Webers, what manifold do you recommend to replace the Cannon?
-
I'll give EuroDat's heat and tap procedure a try. And, I don't know where he got those O-ring specifications, but thanks.
-
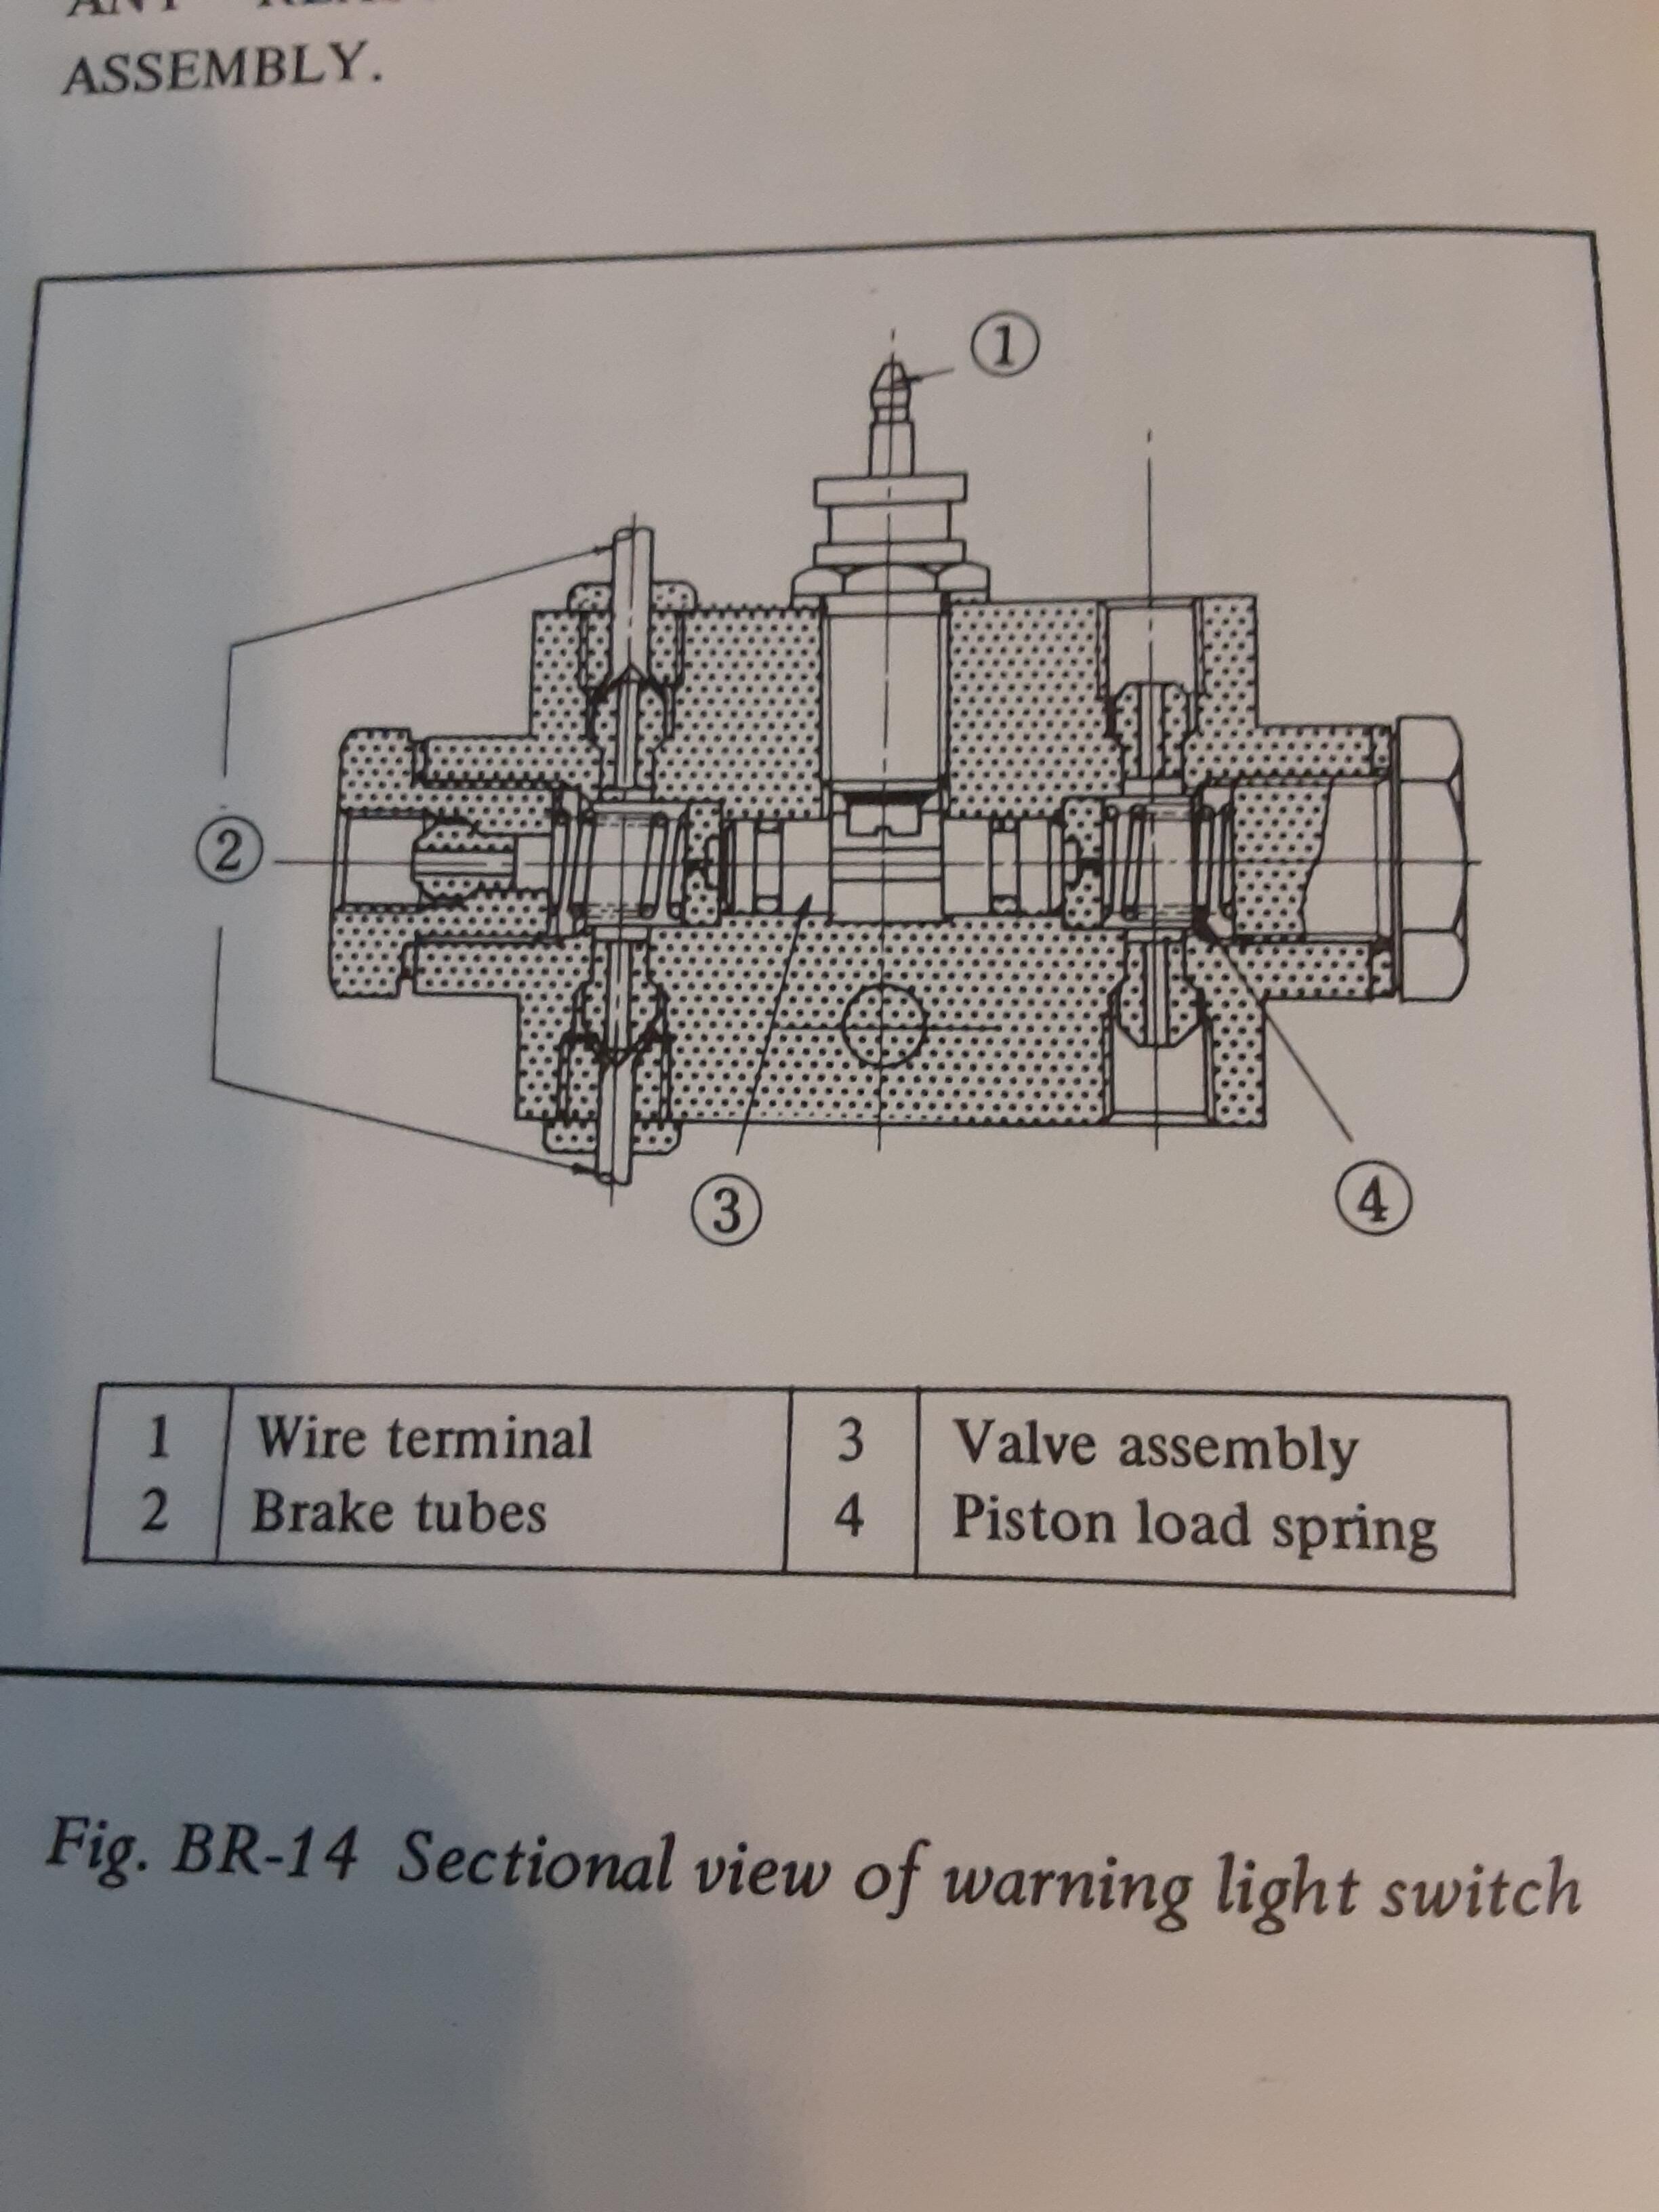
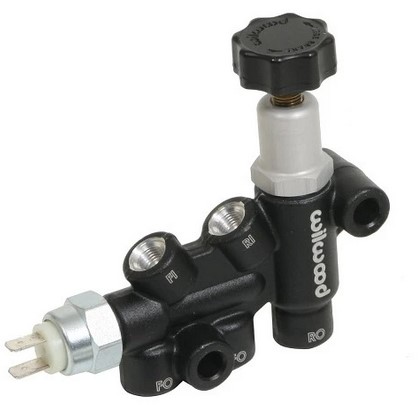
Thanks to all who have contributed so far to this topic. To reply to Patcon: It seems to me that the switch on my car - and I'm the original owner - is not meant to be serviceable. At least it seems that way to me as I have no idea how to "dig out" the male flare fitting buried at the open end of the main chamber. I've never had to do such and extraction BUT it would be a good talent to have, I think. I wonder if anyone here can shed some light on such a procedure? I'm leaning more and more towards getting that Wilwood unit and then finding the "sweet spot" so that my front and rear discs lock up simultaneously. I was initially concerned about the proportioning valve on the rear brake line by the gas tank, but have since been convinced from other threads that it is simply a rear brake engagement delay device and not a pressure regulator per se and so, with a Wilwood unit up front, can be deactivated by removing its guts so it functions only as a T-connector. Is that how you interpret its function? To reply to Zed Head: Thanks for the Fordification link. From the cutaway of the Ford unit, it appears to have something akin to a set screw at the back end so one could insert a rod to mechanically reset the piston should it ever get seriously displaced. As several threads on this topic have mentioned, without springs at both ends there is nothing to reset the piston once any significant differential pressure issue gets resolved.
-
Thanks for that reserach. Yeah, I did see and read that thread before I posted this one. Kind of hoping that someone had already worked out how to address the stuck piston issue as I'm fairly confident that is my problem. The part is soaking in Kroil right now and I'll see in a couple of days if that has any effect. Unfortunately, if the piston is stuck, it's stuck at the end of the bore where I can't break it free with the tap of a drift pin. That's why I'm looking at the Wilwood valve.
-
Maybe my car was just ahead of the curve then.🙄 I'll have to see if a "76 FSM has the appropriate cutaway illustration. But as of now I have no idea on how to extricate the piston if it's stuck.
-
I have two '72 cars: numbers 46372 (9/71 build) and 81416 (5/72 build). The former has this device and the latter has the double gland nut device you referenced. I think my older car was made with a lot of leftovers from the '71 model year as it must have been on the cusp of the switchover. There's this device and then the rear window glass has the '71 defroster grid.
-
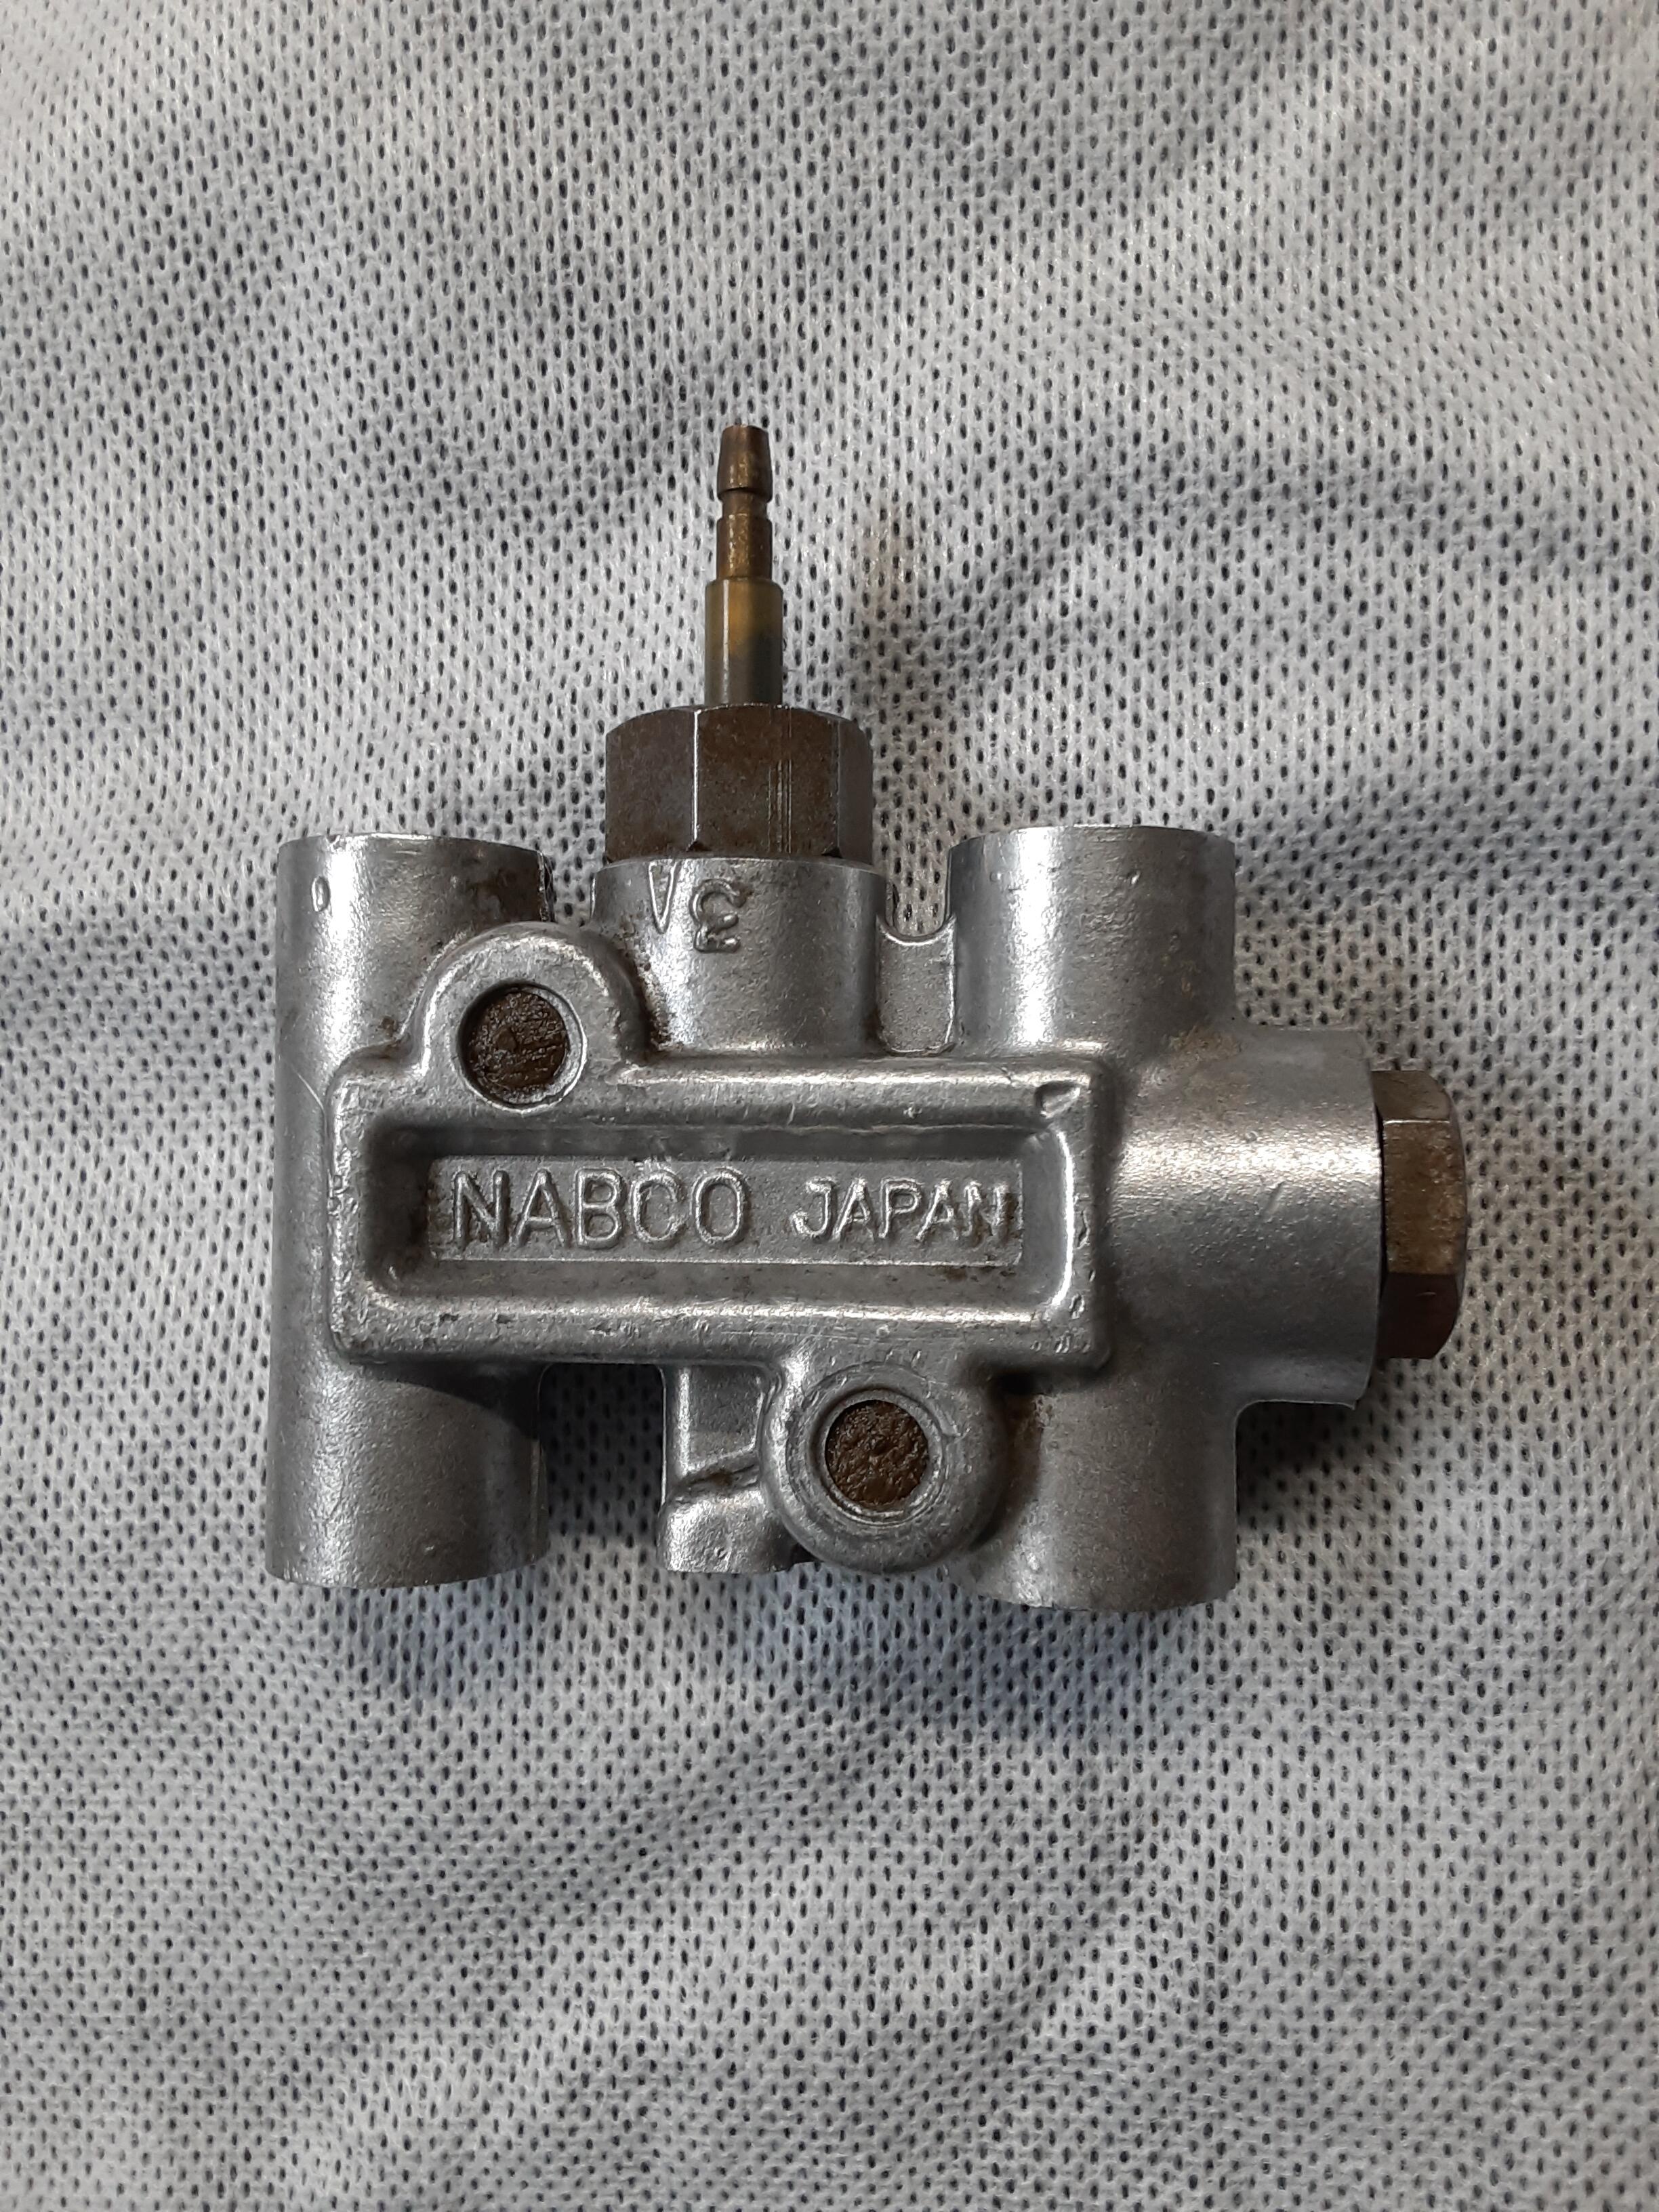
In reassembling my, now, 50-year-old, early '72, HLS30-46372, build date 9/71, I've run across an issue with this device, which is supposed to warn if there is a significant pressure differential between the front and rear brakes. I cleaned up the part and noted that while I can see daylight looking into the front brake line inlet (air will easily flow in that port and then out the other two front brake line ports), I cannot see daylight looking into the rear inlet port. I don’t know if there’s simply gunk clogging the channel or whether there’s something more substantial blocking it (the piston?). To compound my problem, my device looks nothing like the illustration shown in my 1972 FSM. I am able to remove the electrical switch as well as the nut gland on the forward portion of the cast aluminum body. I am, however, reluctant to start picking and prodding the internals until I get whatever guidance you more learned folks might have to offer. Heck, a cutaway of the actual device that I have in my hands would be helpful at this point. Frankly, because my car has rear disc brakes, I’m inclined to get a Wilwood proportioning valve to replace the whole thing. I’m a little leery of how much reworking of the existing hard brake lines that will necessitate. I don’t mind fabricating new lines from the master cylinder to the Wilwood, but what all would I have to do to the “out” lines? And what do I do about the "valve" in the rear of the car? TIA for any and all experiences and opinions you folks can provide on both items: (1) existing assembly issue and (2) a Wilwood conversion.


-
Your life is usually what you make it. Sounds like you've made yours a whole lot better. Retirement did that for me.
-
Those small butane torches are good for applying heat in tight areas. I don't have any experience with flare nut A/C fittings, but one thing you might need to put on your to-do list is to get new O-rings compatible with R-134a for the fittings (I think they are usually green colored) as I'm sure the ones in there now are way distorted and, if you apply heat to break the fittings loose, they will certainly be "toast." You will need them in three sizes: -6 for the fittings running from the condenser (radiator) bottom to the evaporator (in the cabin), which would also include the drier, -8 for the two fittings from the compressor to the condenser top, and -10 for the fittings from the cabin evaporator to the compressor. At least, that's how it should be. Depending on who did the initial installation, your mileage may vary.
-
Thanks for that info. I'm Installing a Vintage Air Mini into my '72 and just completed the cabin connections today using E-Z-Clip fittings and a JEGS bulkhead for the A/C lines. As member qz16 noted when he did the same install a few years ago, making those interior connections is a royal PITA. But now they're done. I'm using the generic Vintage Air brackets for mounting the Sanden compressor to the block so I have some cutting and welding to do. Already cut and drilled a piece of 1/4" steel plate that will get bolted to the block and am now trying to determine how much to cut off the back of the brackets so that the compressor has its fittings in the optimum, almost-upright configuration and yet have enough travel left in the slotted portion of the brackets to easily change belts if and when needed. My problem is that the engine is not in the car so I need to do some mock-ups to make sure the fit is correct. I plan to document the dimensions and cuts so future Sanden installers will have an easier time of it.
-
A really nice install. Can you determine how much of a gap you have from the outside of the compressor to the frame rail?
-
My intention is to have the trinary switch on my Vintage Air system operate the main electric fan on the car's radiator ahead of the engine. Thus, this fan, a 2450 CFM 14" standard fan from Perma-Cool, will be controlled in puller mode by both the A/C trinary switch as well as the main thermo switch on the engine block. The other option is to mount a pusher fan ahead of the A/C condenser and have that controlled by the trinary switch. But having two fans on the car seems unnecessary. Has anyone else done a similar "double controller" set-up on their car? Or, are there issues with my proposed set-up that I have not foreseen?
-
I need the angle to help me determine how to cut the ends of the universal brackets that Vintage Air sells for mounting a Sanden compressor as part of an A/C installation.
-
Well, the picture was nice but I needed a number. I have two issues: (1) my engine is out of the car and (2) it's hard to know whether parts of the block that appear to be parallel to the cylinder bore actually are parallel. To resolve the first issue, I rotated the engine stand until the lowest points of the two engine mount brackets were the same distance from the floor. I'm assuming that the pillars on the engine cross member have a vertical plane of symmetry between them and are nominally equidistant from the ground. Then, I took my $37 Pittsburgh digital angle gauge from Harbor Freight and applied it to several locations on the engine. The results varied a bit but I'd say the general value is between 11 and 12 degrees. So, now I know.
-
Does anyone know how far from vertical an L24 or L28 engine block is tilted to the vehicle's right side? It's not something I can find in my FSM.
-
Very nice documentation and good pix of the A/C installation. Too bad that portion couldn't be lifted in total and pasted into this forum topic group.
-
I'm in the process of installing a Vintage Air GEN II Mini into my '72 S30. I've read many threads on both this and the HybridZ websites and gleaned quite a lot of useful information. However, one thing which has pretty much NOT been covered in any of those threads is how folks have routed the lines to the condenser and then on to the drier. Drier mounting locations are also variable. Mounting the Vintage Air 12" x 24" condenser, you can have the ports on either the driver or passenger side. One of the hoses (from the compressor or to the drier) then has to go across the bulkhead. BTW, I'd imagine the drier always has to be on the passenger side somewhere -- either mounted of the front bulkhead or somewhere forward on the inner fender wall. And then, there's the question of where to locate the high- and low-pressure ports. So, what I'm asking is for you who have a Vintage Air system to take some pix of your hose routings between the compressor and the drier so that I, and others who might do this in future, can see the various ways it has been successfully (?) done and use them as guides.
-
View Advert E-Z Clip crimper tool Does anyone have an old E-Z Clip crimper tool from when you did your A/C installation? I figure this is a one-and-done tool and because it costs $78 new I might be able to save both me and the current owner some money. I would say that around $40 would be a fair price and I pay the shipping. But, you let me know. Advertiser Seppi72 Date 07/28/2021 Price Category Parts Wanted Year 1972 Model 240Z
-
I own two S30s and am an original owner of one of them, for which I have been in the process of doing a restomod for several years. I am also a retired R&D chemist with a background in plastics and rubber chemistry and processing. I have been frustrated several times regarding the various small rubber bits that go into my S30 as, I'm sure, are many other owners of old Datsuns. Many rubber parts are simply "no longer available," at least through the Nissan parts system. With the closure of Black Dragon a few years ago, the situation got worse. And, some of these NLA parts, especially those approaching 50 years in service, are simply "tuckered out" due to the heat cycles and oxidation they have seen over the years. I have tried casting my own urethane parts with limited success but without the expensive injection molding machinery and matched metal molds used by OEMs, my results have been mostly unsatisfactory. This is especially true of parts that have significant 3-D shapes. However, over the past several years, a new process has arisen to aid folks in this situation. It is commonly called "3-D printing" but is more properly termed "additive manufacturing." It is now widely used in many industrial R&D settings and produces parts by "printing" an object layer upon layer from a computer file. Really high-powered operations -- like Formula 1 constructors -- can produce both plastic and metal parts. My first question is whether any of you know of vendors who make NLA rubber parts for our cars? I would certainly like to get in touch with these folks. My second question is if there are no such vendors, would having one make your lives a bit easier? I ask that second question because now that I am fully retired, I have been toying with the idea of acquiring a good 3-D printer to make the parts that I need and, at the same time, help out my fellow S30 (and, eventually, other old car) owners. I would not be not looking to compete with anyone who is currently supplying NLA rubber parts. In fact, if there is such a vendor, I'd welcome the opportunity to become one of its suppliers so it can expand its business and take care of the marketing and sales end of things. While I've had my own business in the past, I prefer to simply be a technical resource at this stage of my life. Please let me know what you folks think of this possibility for supporting our hobby and passion.