EuroDat
Free Member
-
Joined
-
Last visited
Everything posted by EuroDat
-
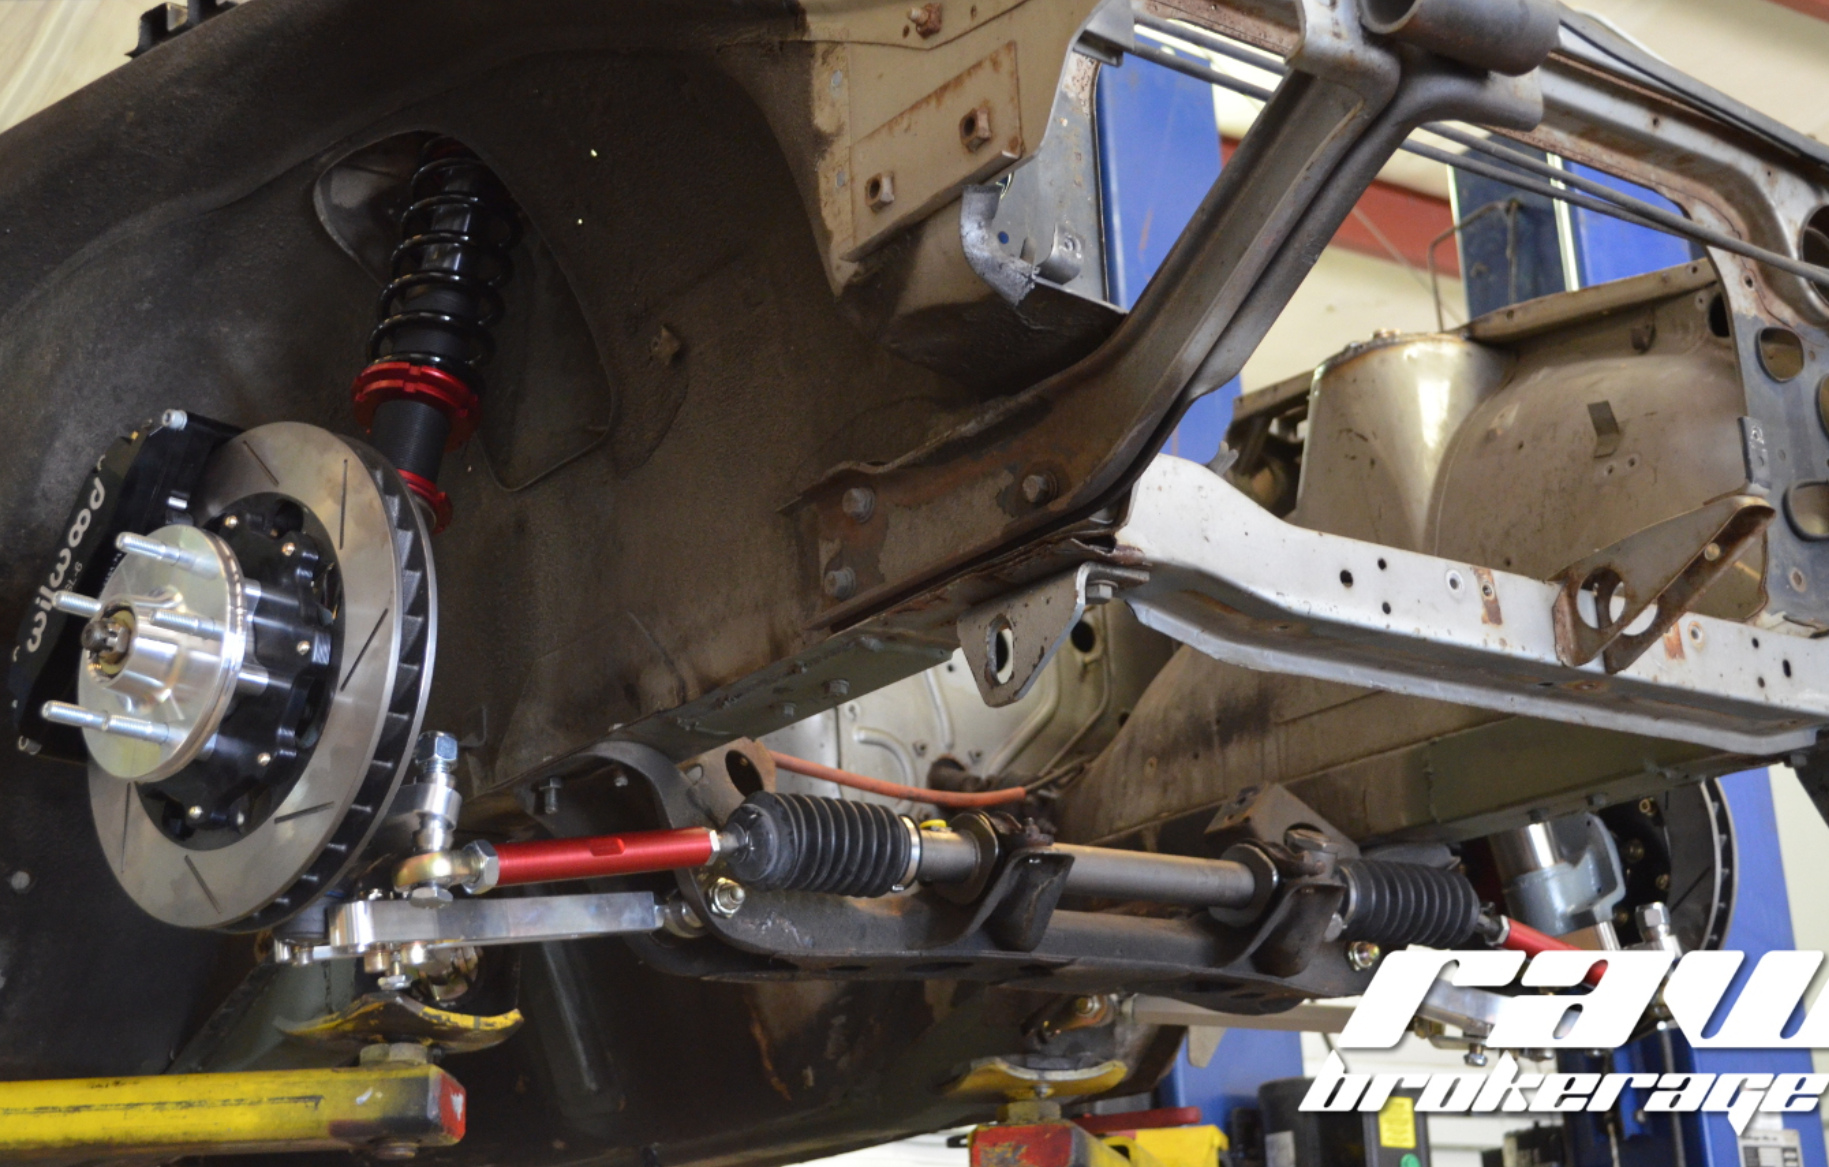
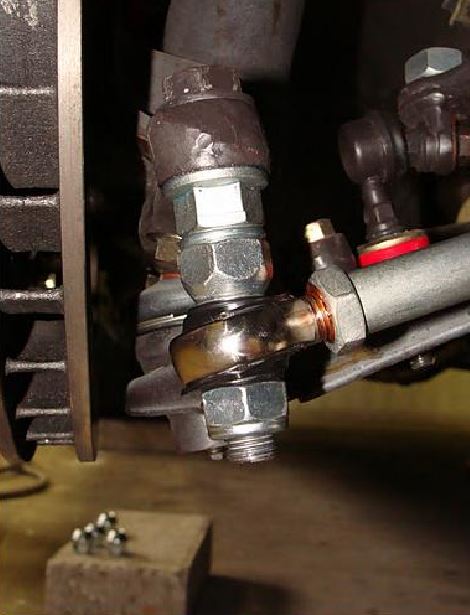
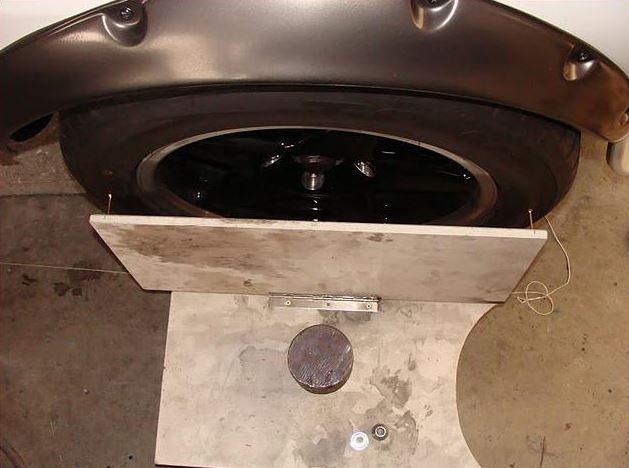
 I found the photo's and a brief description of what was done in dutch. The car is lowered about 1-1/2" and the lower control arm anchor point was raised to bring it back to hroizontal. The distance between the steering arm and the ball joint on the tie-rod is 36mm. The bolt is an M14x1.5mm high tensile grade 10.9. Bump steer and toe was checked using a wooden panel in the last photo. The car had coil overs and they were screwed all the way down to get free travel. If you look in the first photo, you can see the lower control arm pivot point in the crossmember is higher. Its about 30mm higher. The reason for the 6mm difference (36 spacer in tie-rod end and 30mm in control arm pivot) is because the new arm is straight compared to the original has a slight bent just after where it connects to the rack. Like Namerow said, you can find plenty to read about this one the internet. Enough to drive you nutters. If you experiment a bit and test like in photo 3 you will get there. I have faith
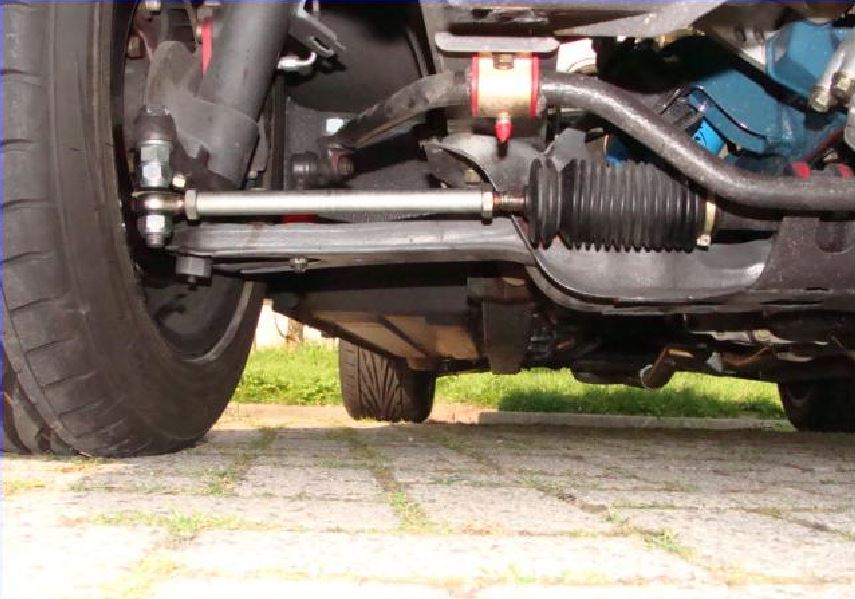
-
Chris, I have some photos on an external hard drive. Ill dig it up tomorrow and post what I have. Unfortunatly the car (260Z) is no more. The owners son spun off the road and rolled it into a ditch. The important thing is keeping the tie-rod parallel with the control arm and the same length as the original. I think Techno Toys make such a kit. Its been a while since Ive seen one. I found this by googling "bump steer tie rod kit datsun". You need the type with the adjustable pivot bolt on the end so you have vertical adjustment.

-
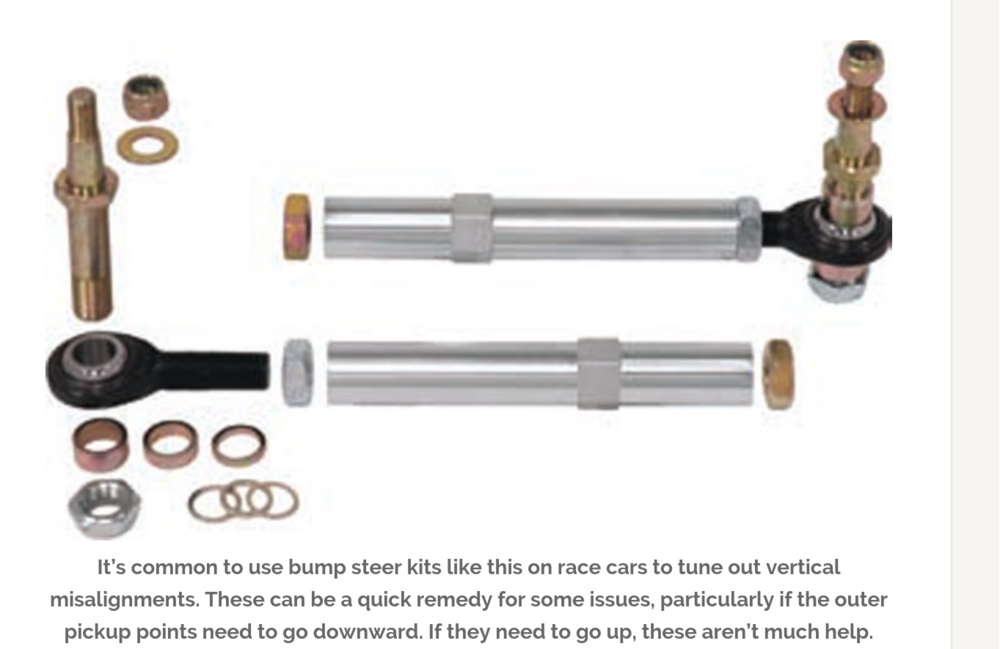
You could lower the steering rack and correct the geometry by replacing the tie-rods ends with straight ones. The originals are bent downwards. That would give you some room. I have some photos of the straight type. Not original datsun of course. Anyway, the tie-rod should be parralel with the lower control arm and the same length, othrwise they work on a diferent radius and your toe-in goes all over the place when the suspension moves up and down.
-
Blue knows about it. Thee is anothrr thread about it and Blue mentioned moving the site to another server. Maybe work out something with Mike.
-
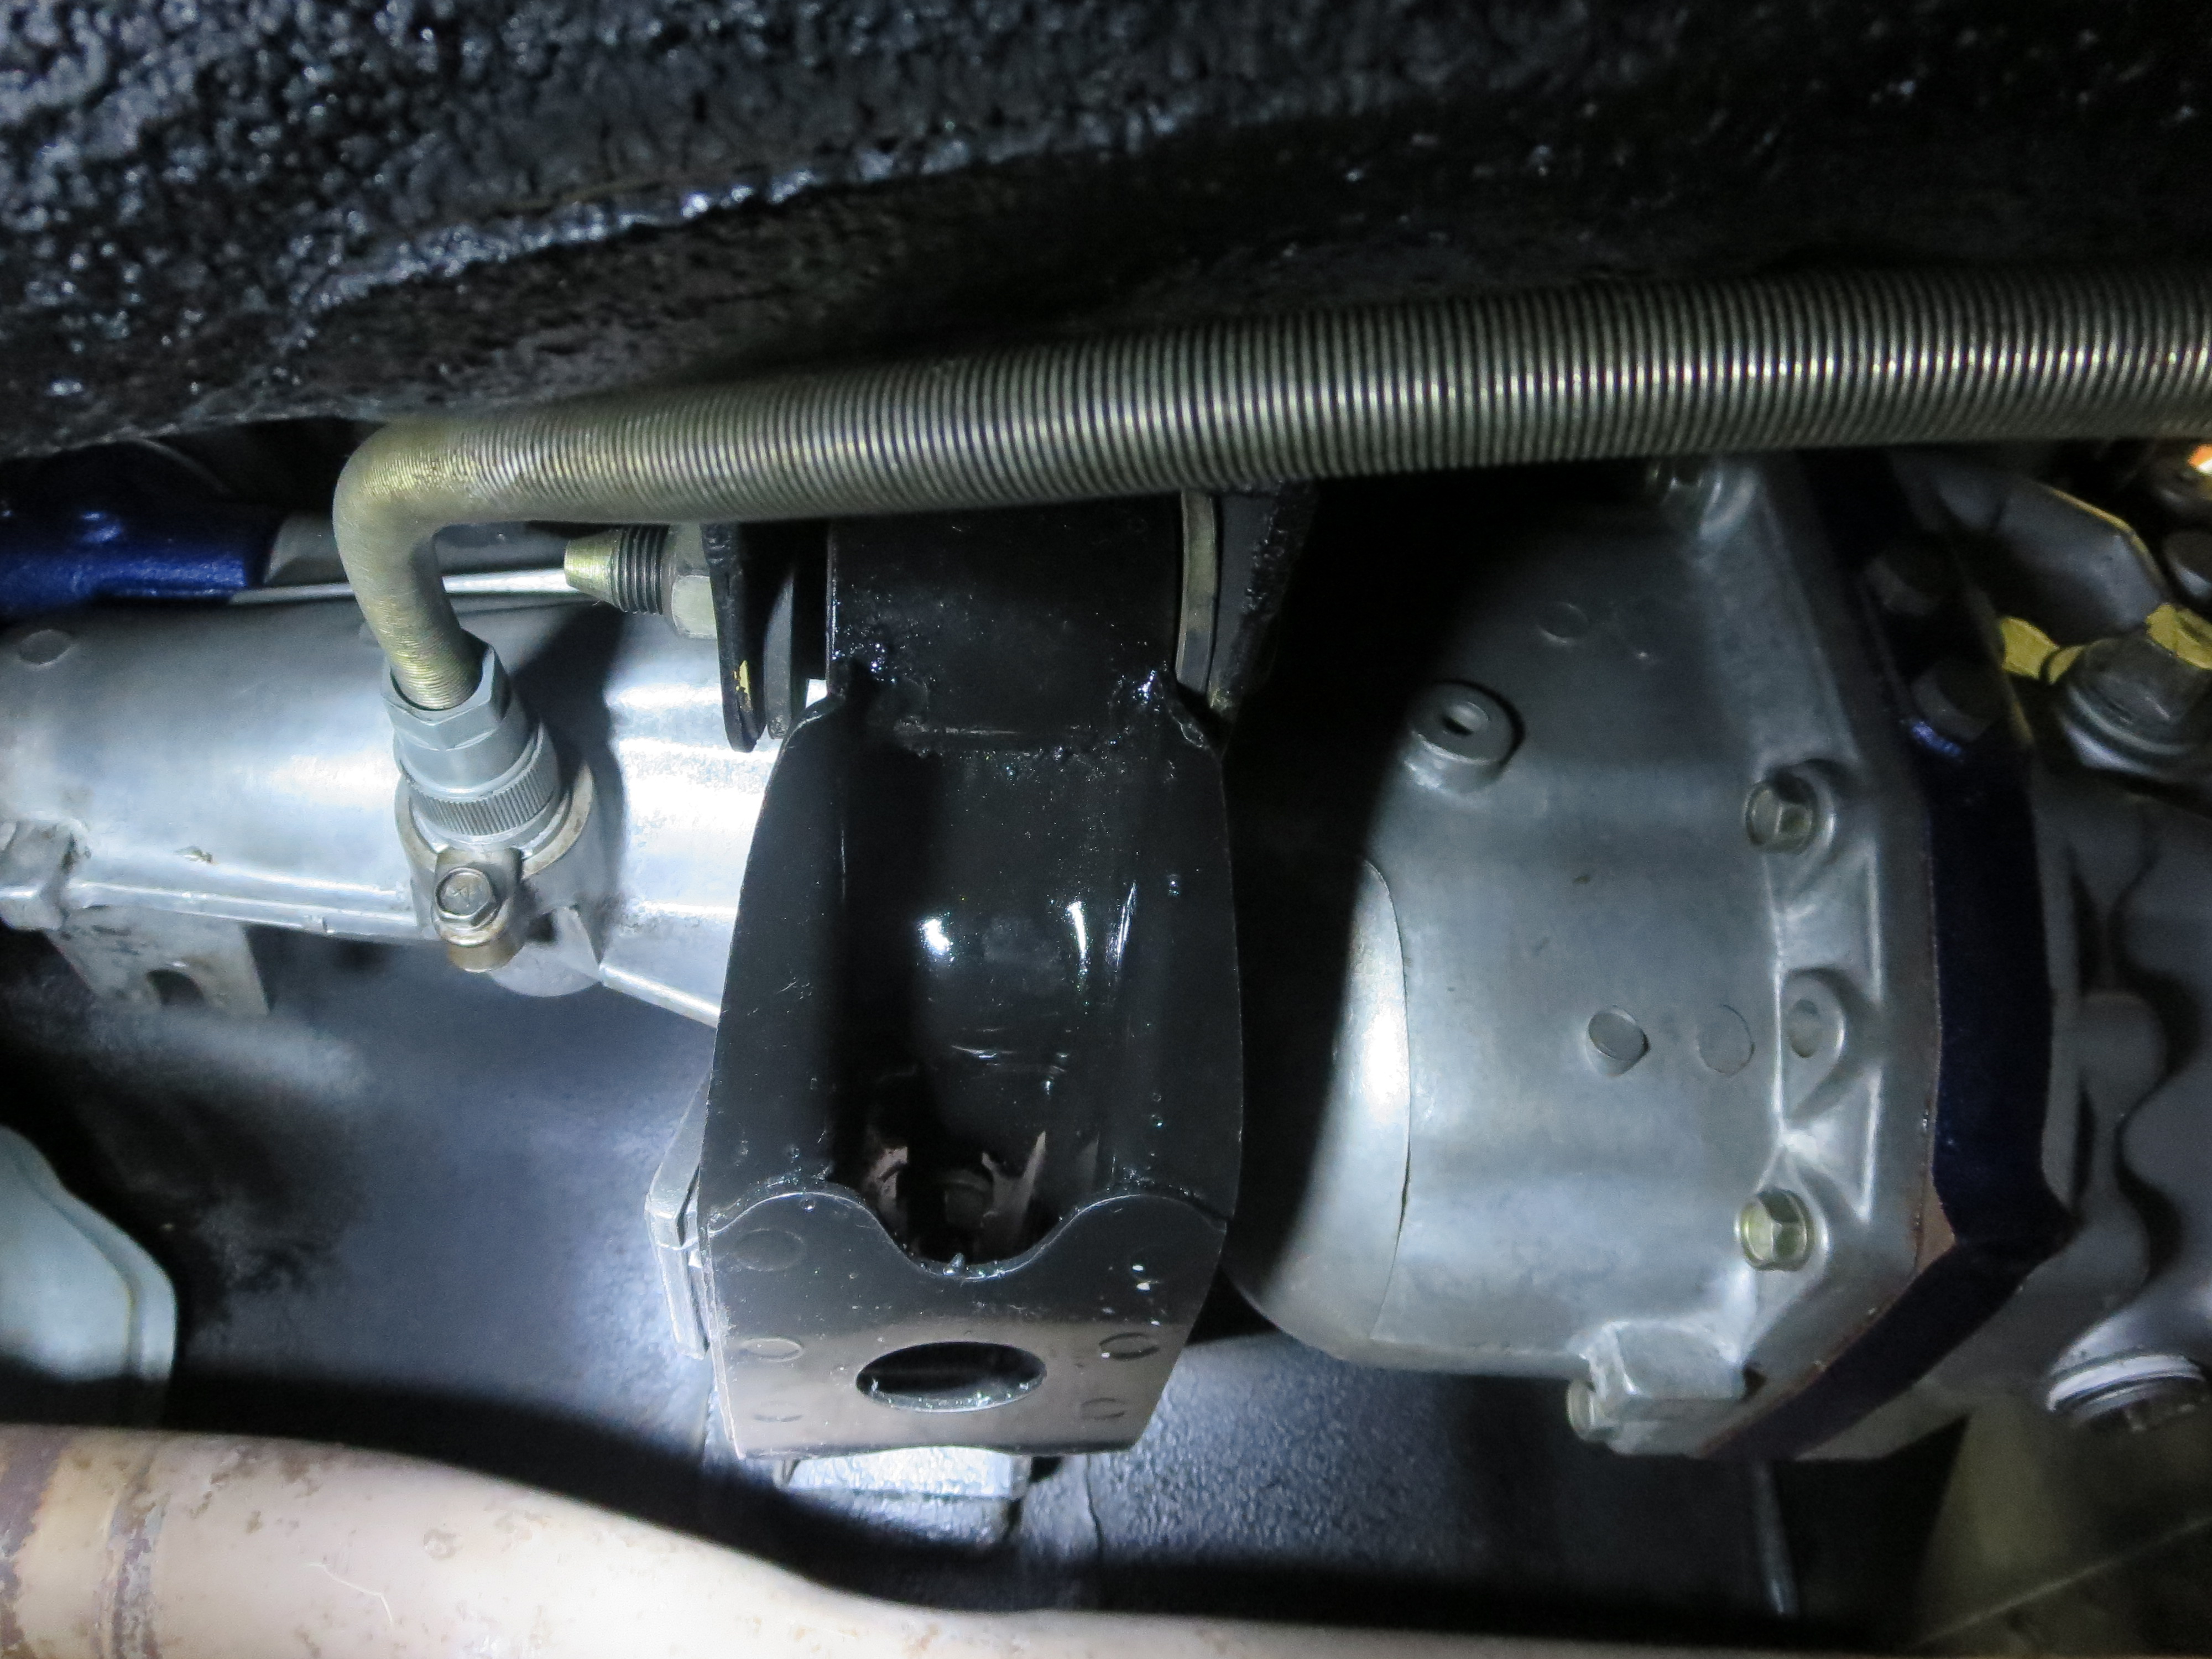
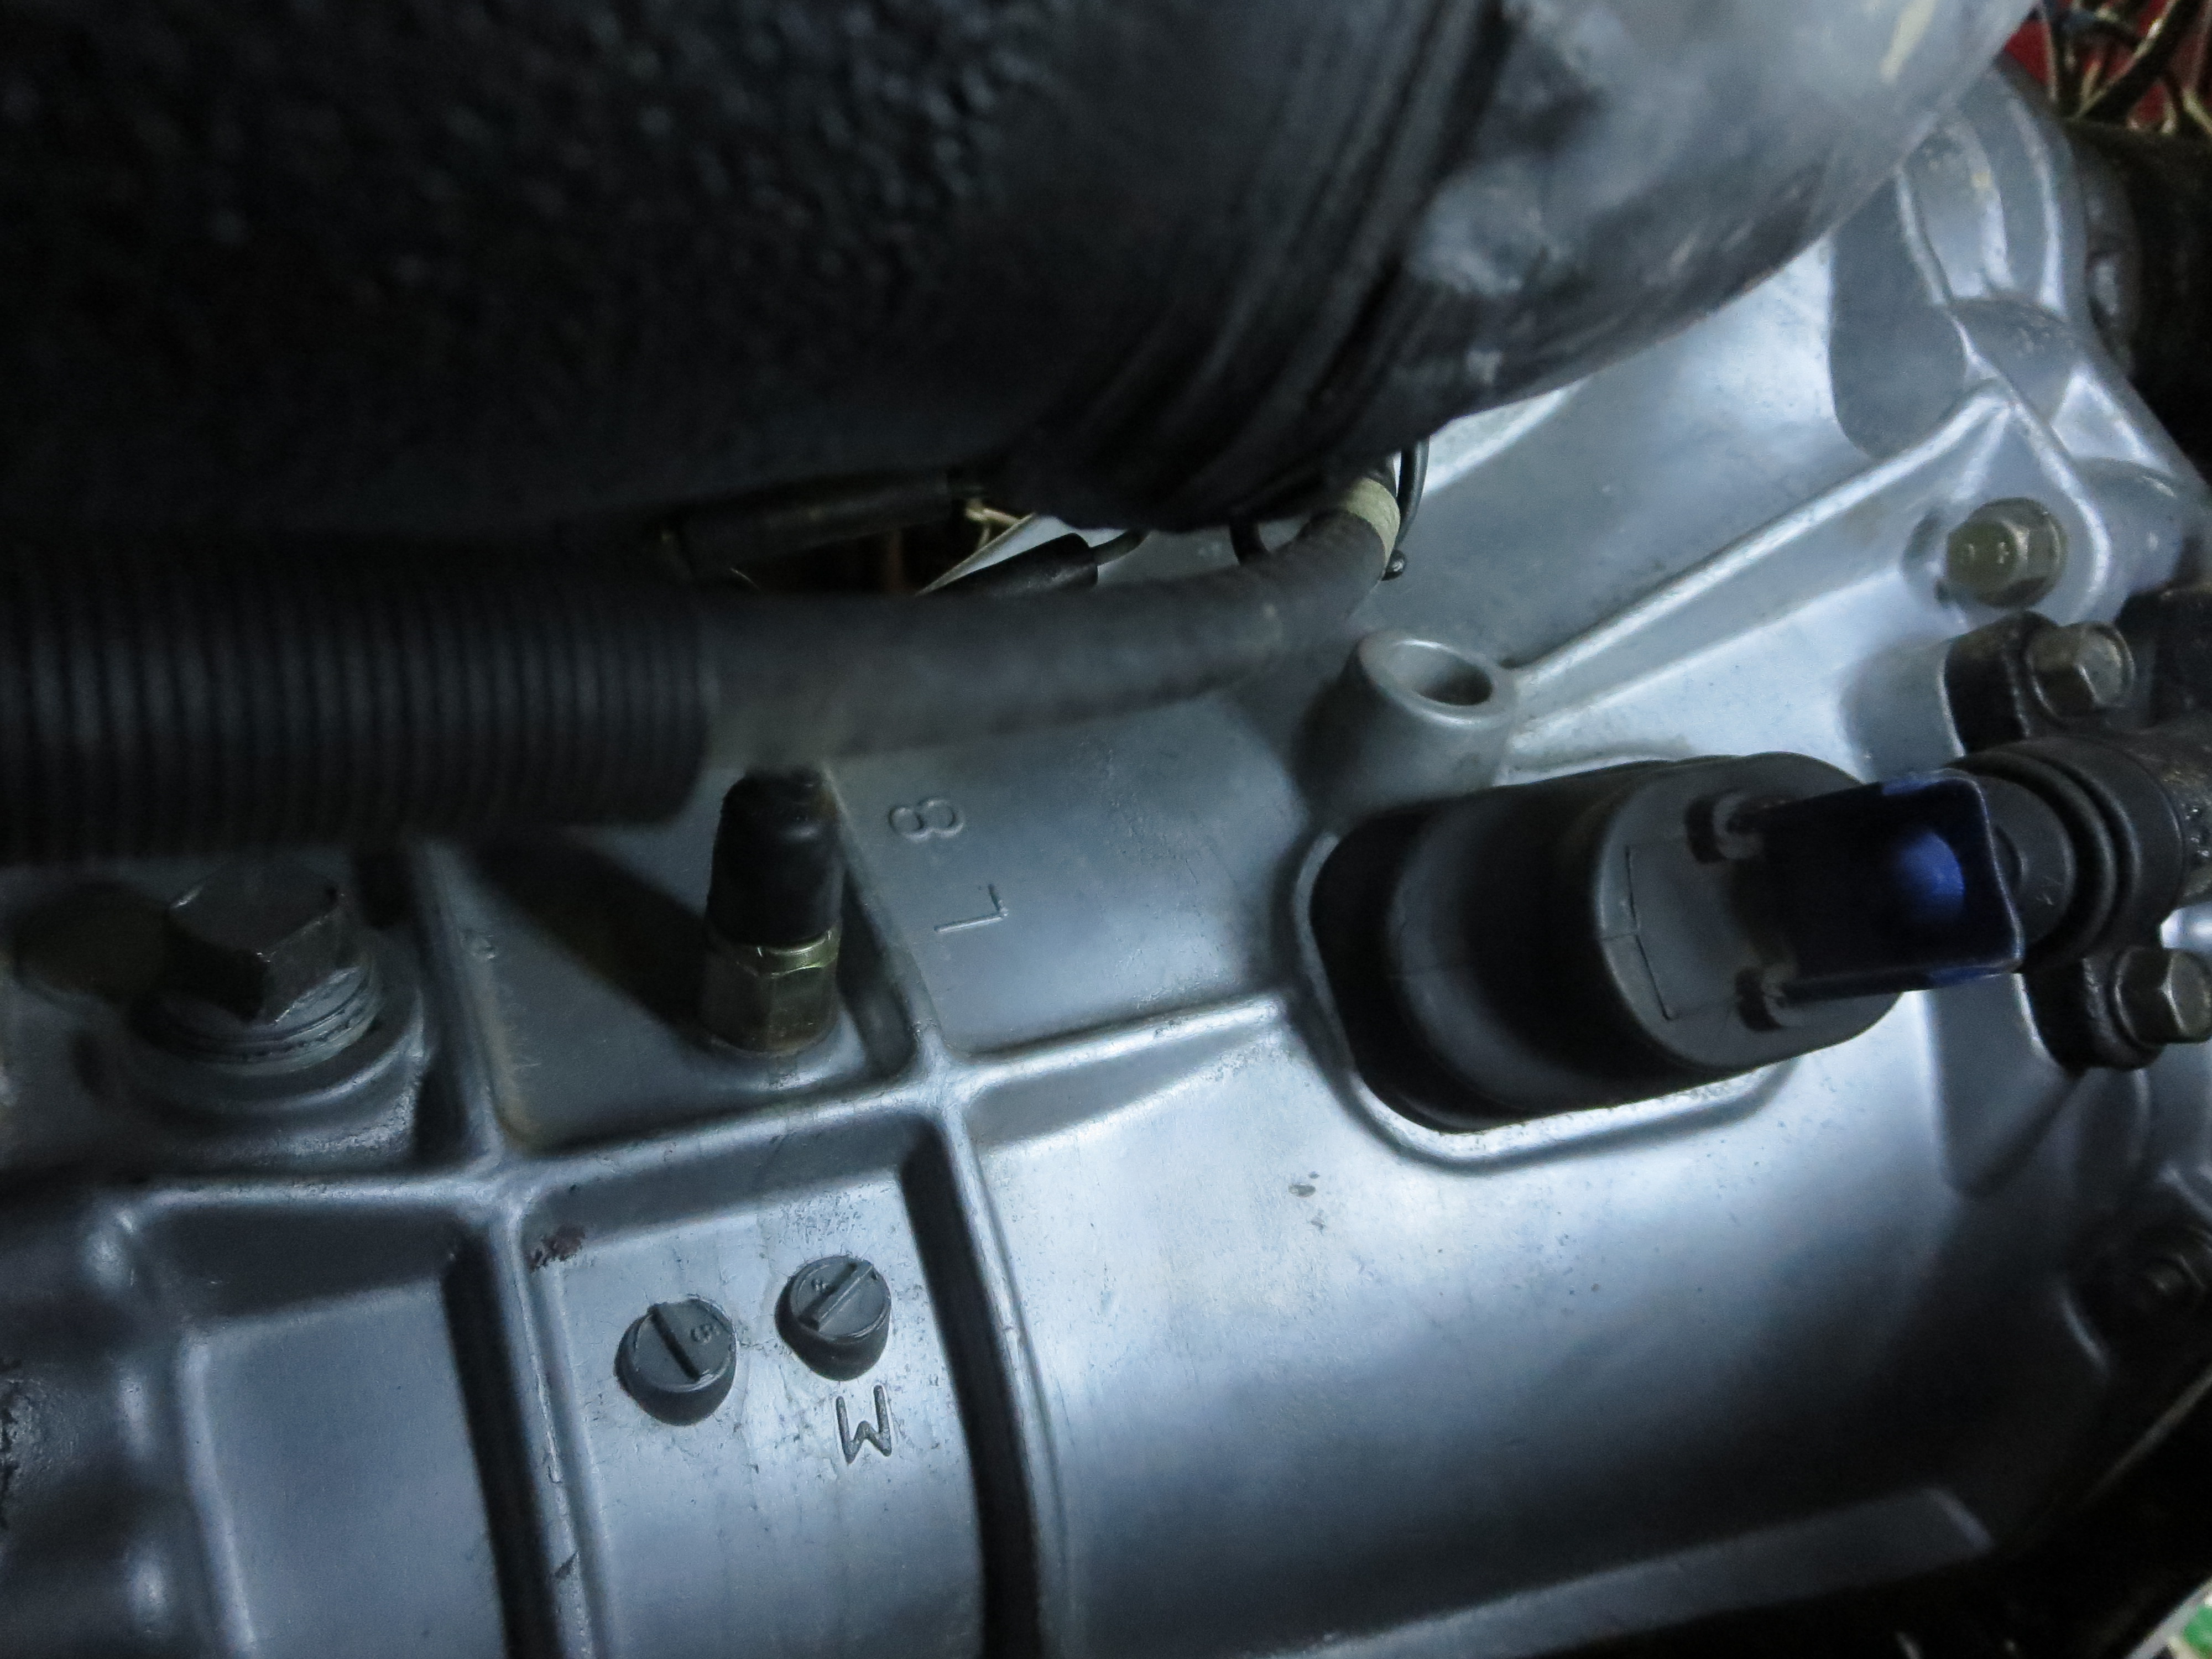
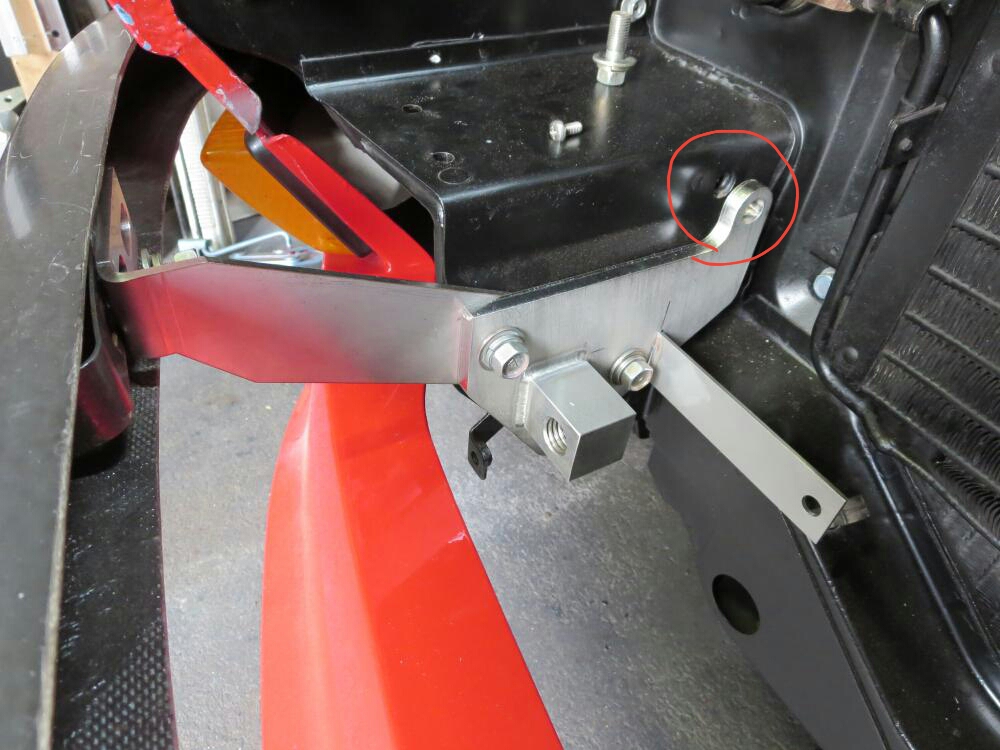
Nissan do this a lot with brakes. They don't like spliting calipers either. The reason for replacing the switch instead of repairing it, is in the way the end fiting is designed. The end port has a fitting that is (lightly) press fitted into the end. See grwi8 post ID: 15, the red circle in the diagram shows the fitting. It can be hard to remove and get to seal again. You will need to remove it to get acces to the plunger. Mine has not leaked in 4 years. I used the shank of a drill bit to fit in the hole and wobble it around and the fitting came loose. You might need heat to get it to come free. A simple hair dryer or heat gun should be enough. Heat the outside aluminium, not the steel fitting. Once that is out, its as simple as tapping the end on a block of wood until the plunger comes out. Don't forget to remove the switch first. The o-rings are listed in post ID: 10. Make sure you use EPDM rubber.
-
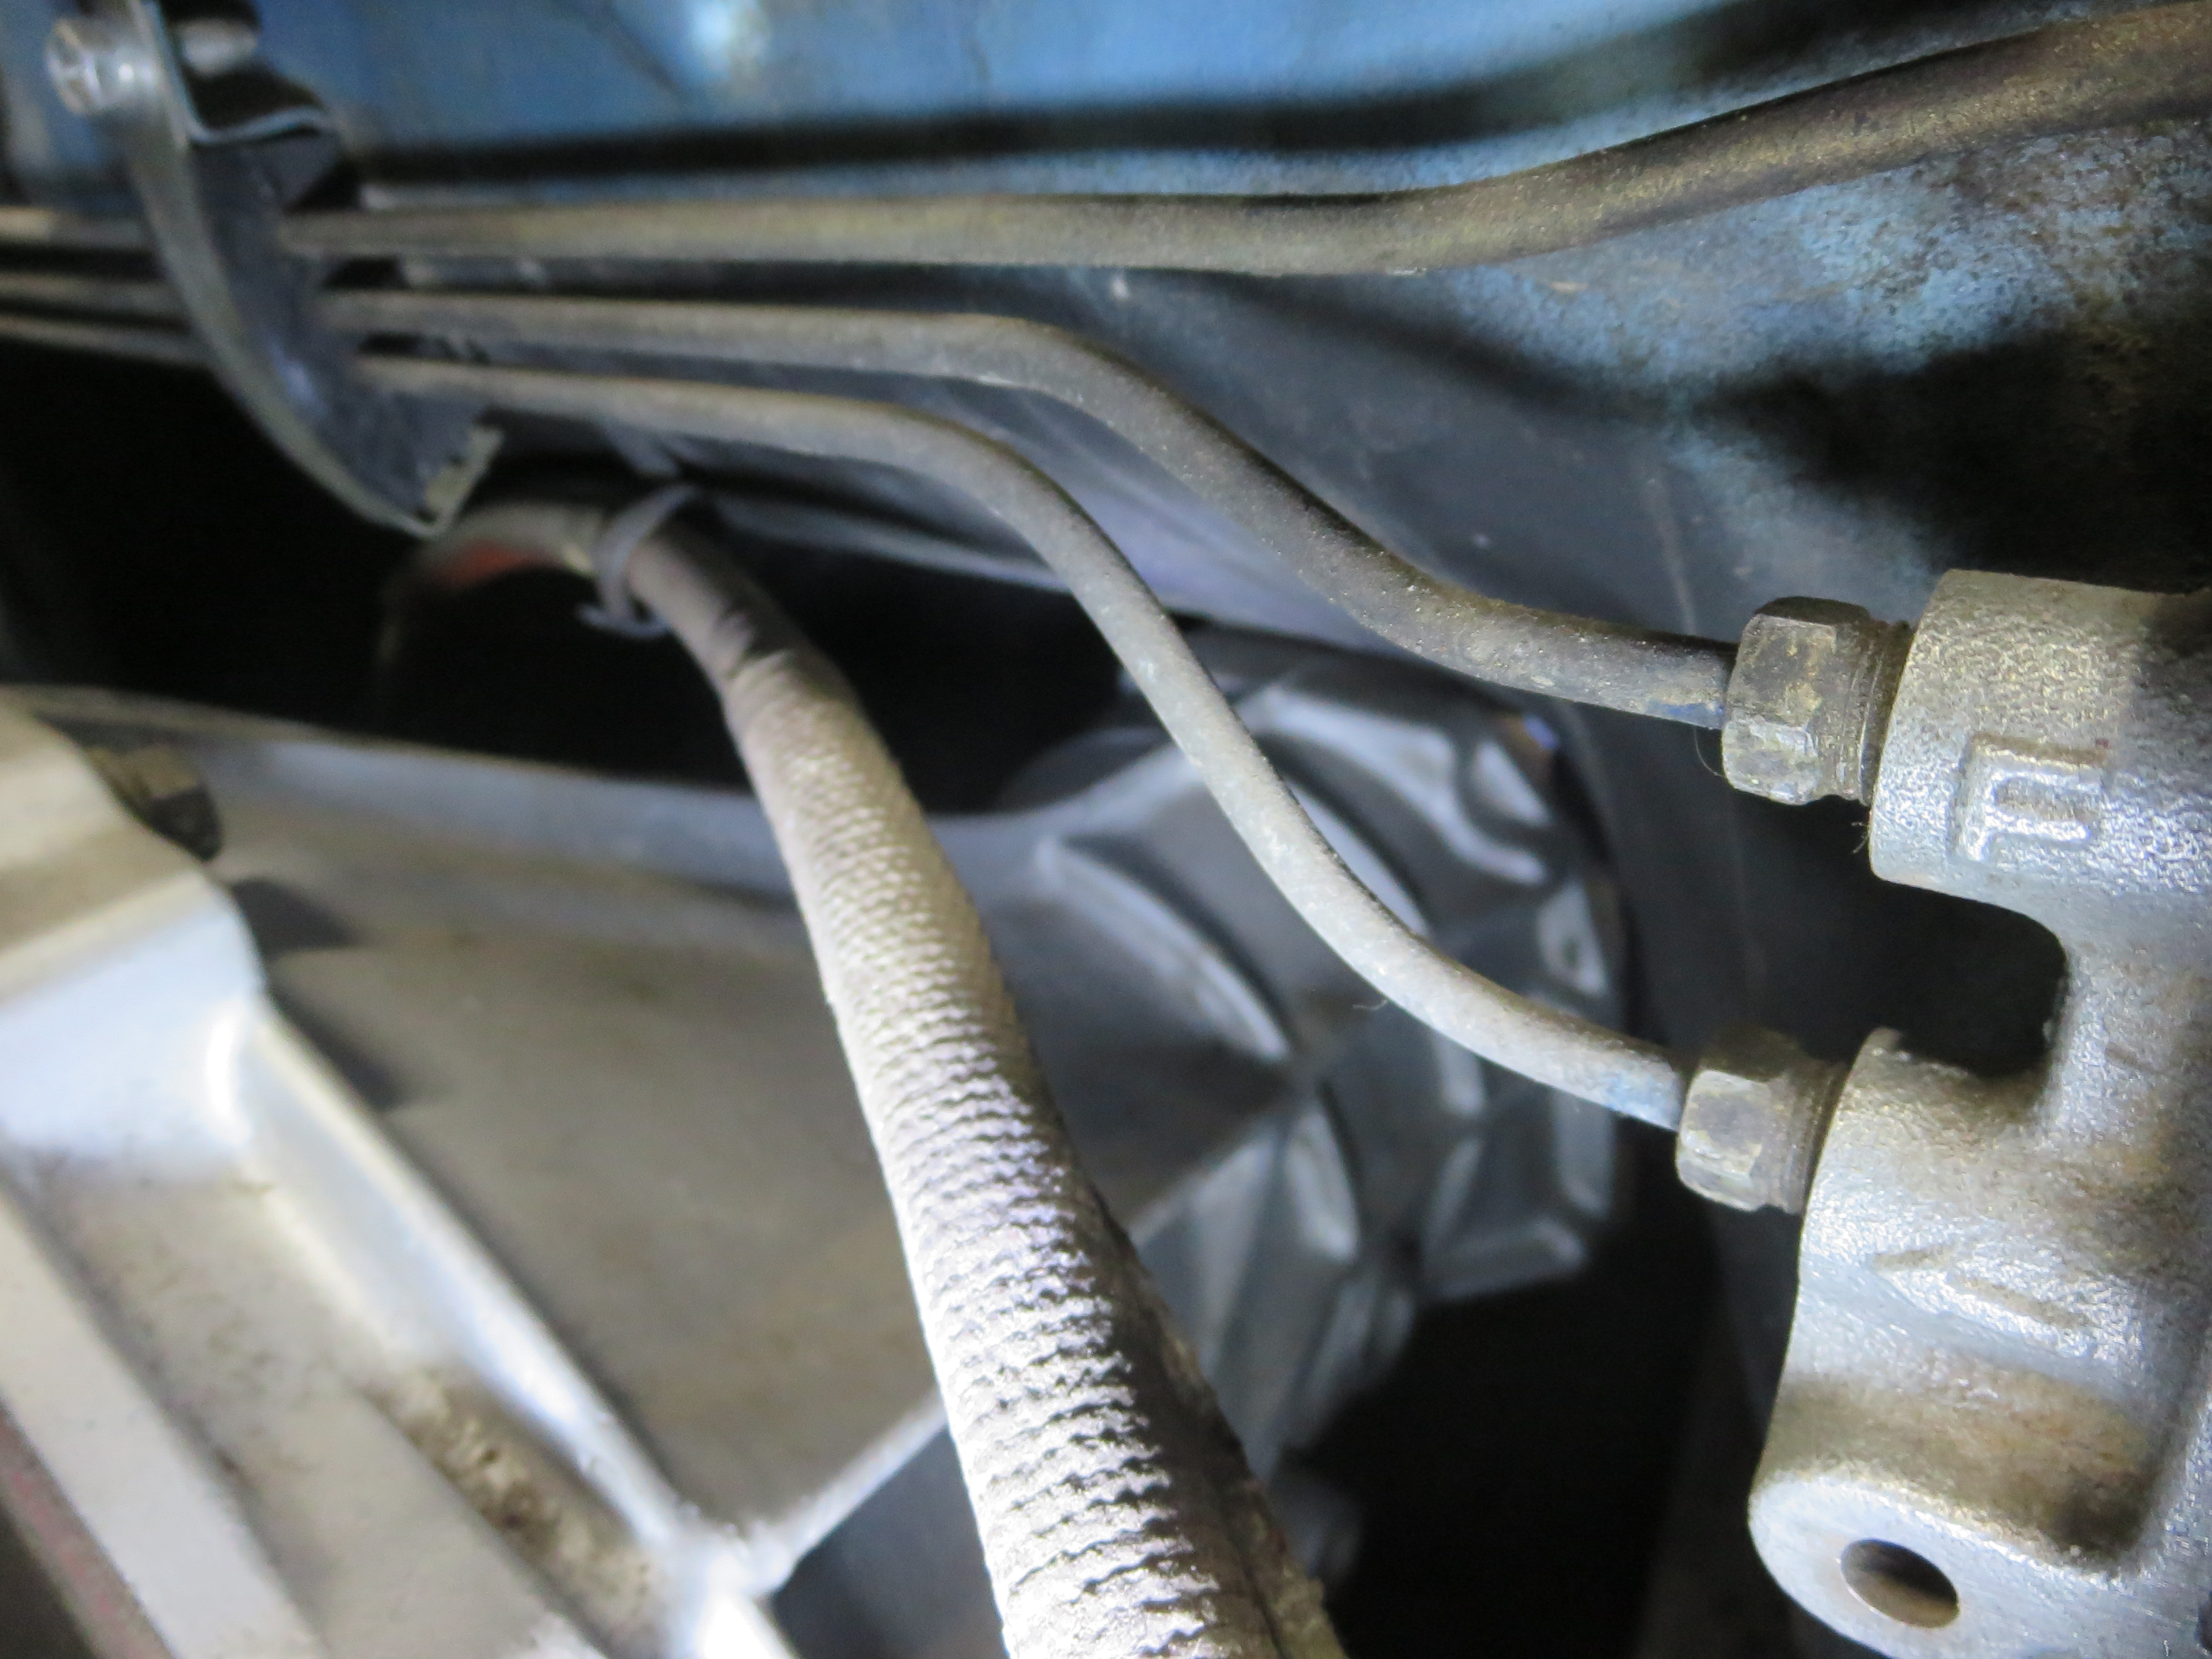
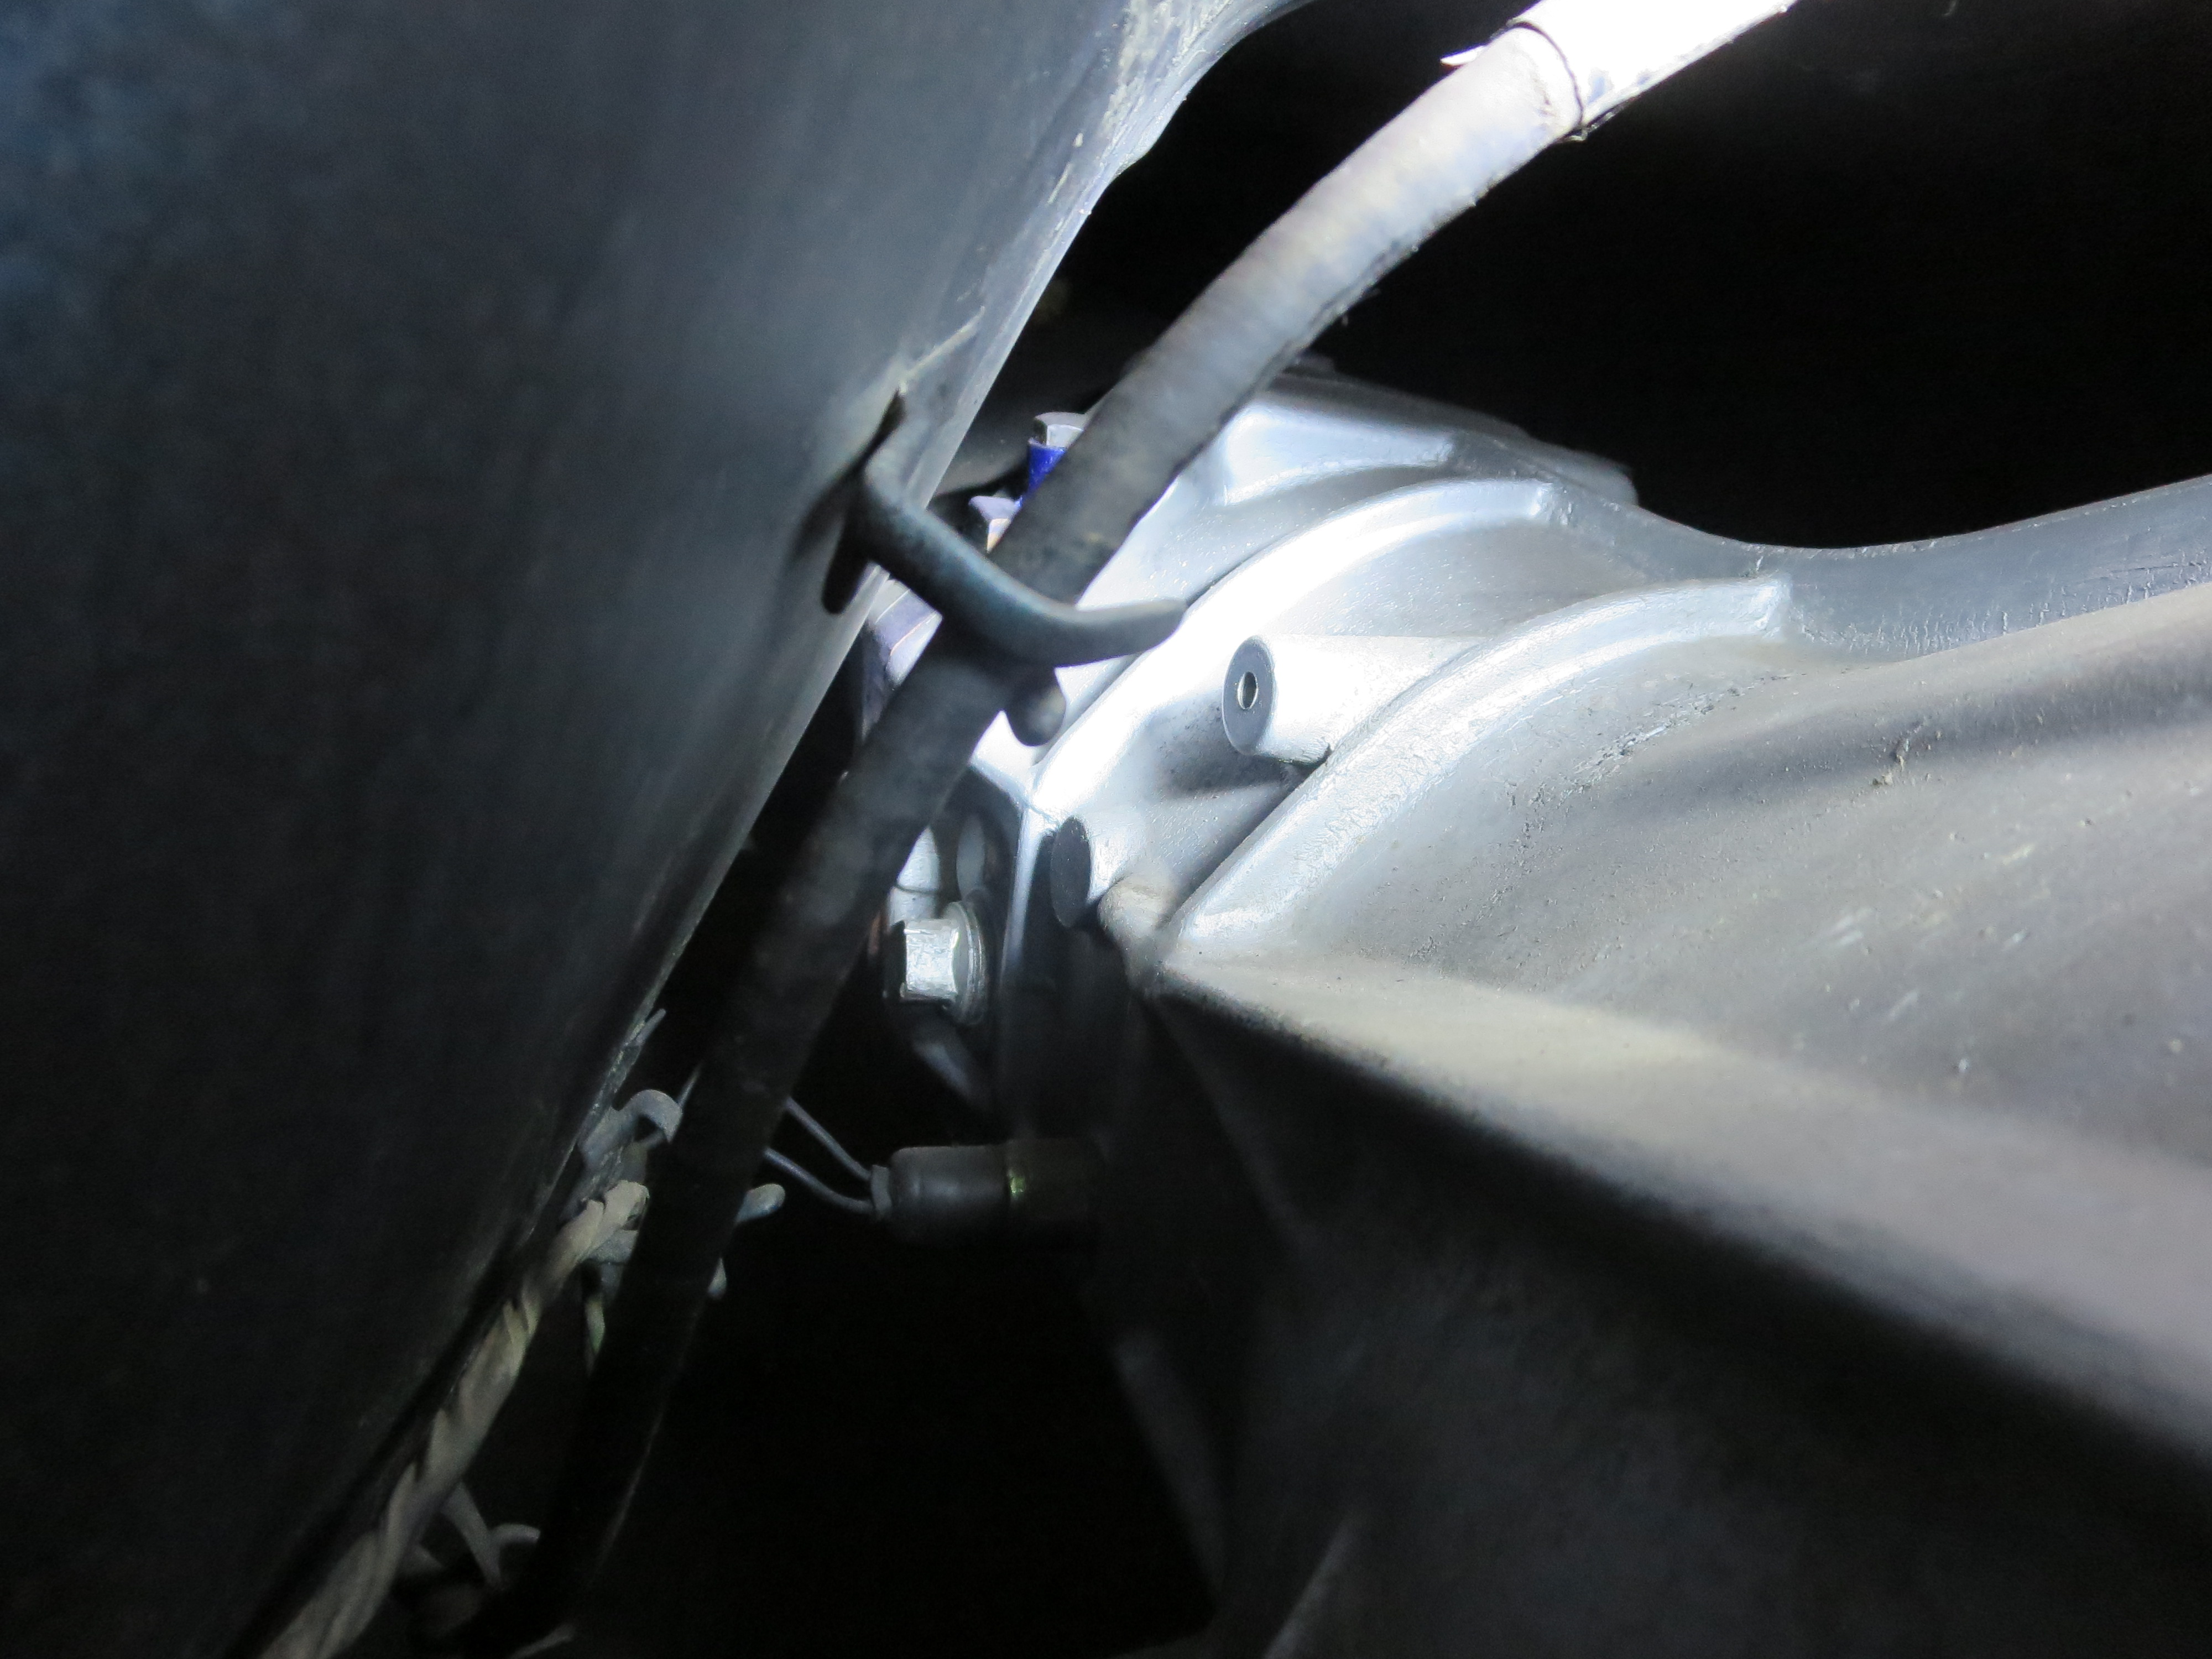
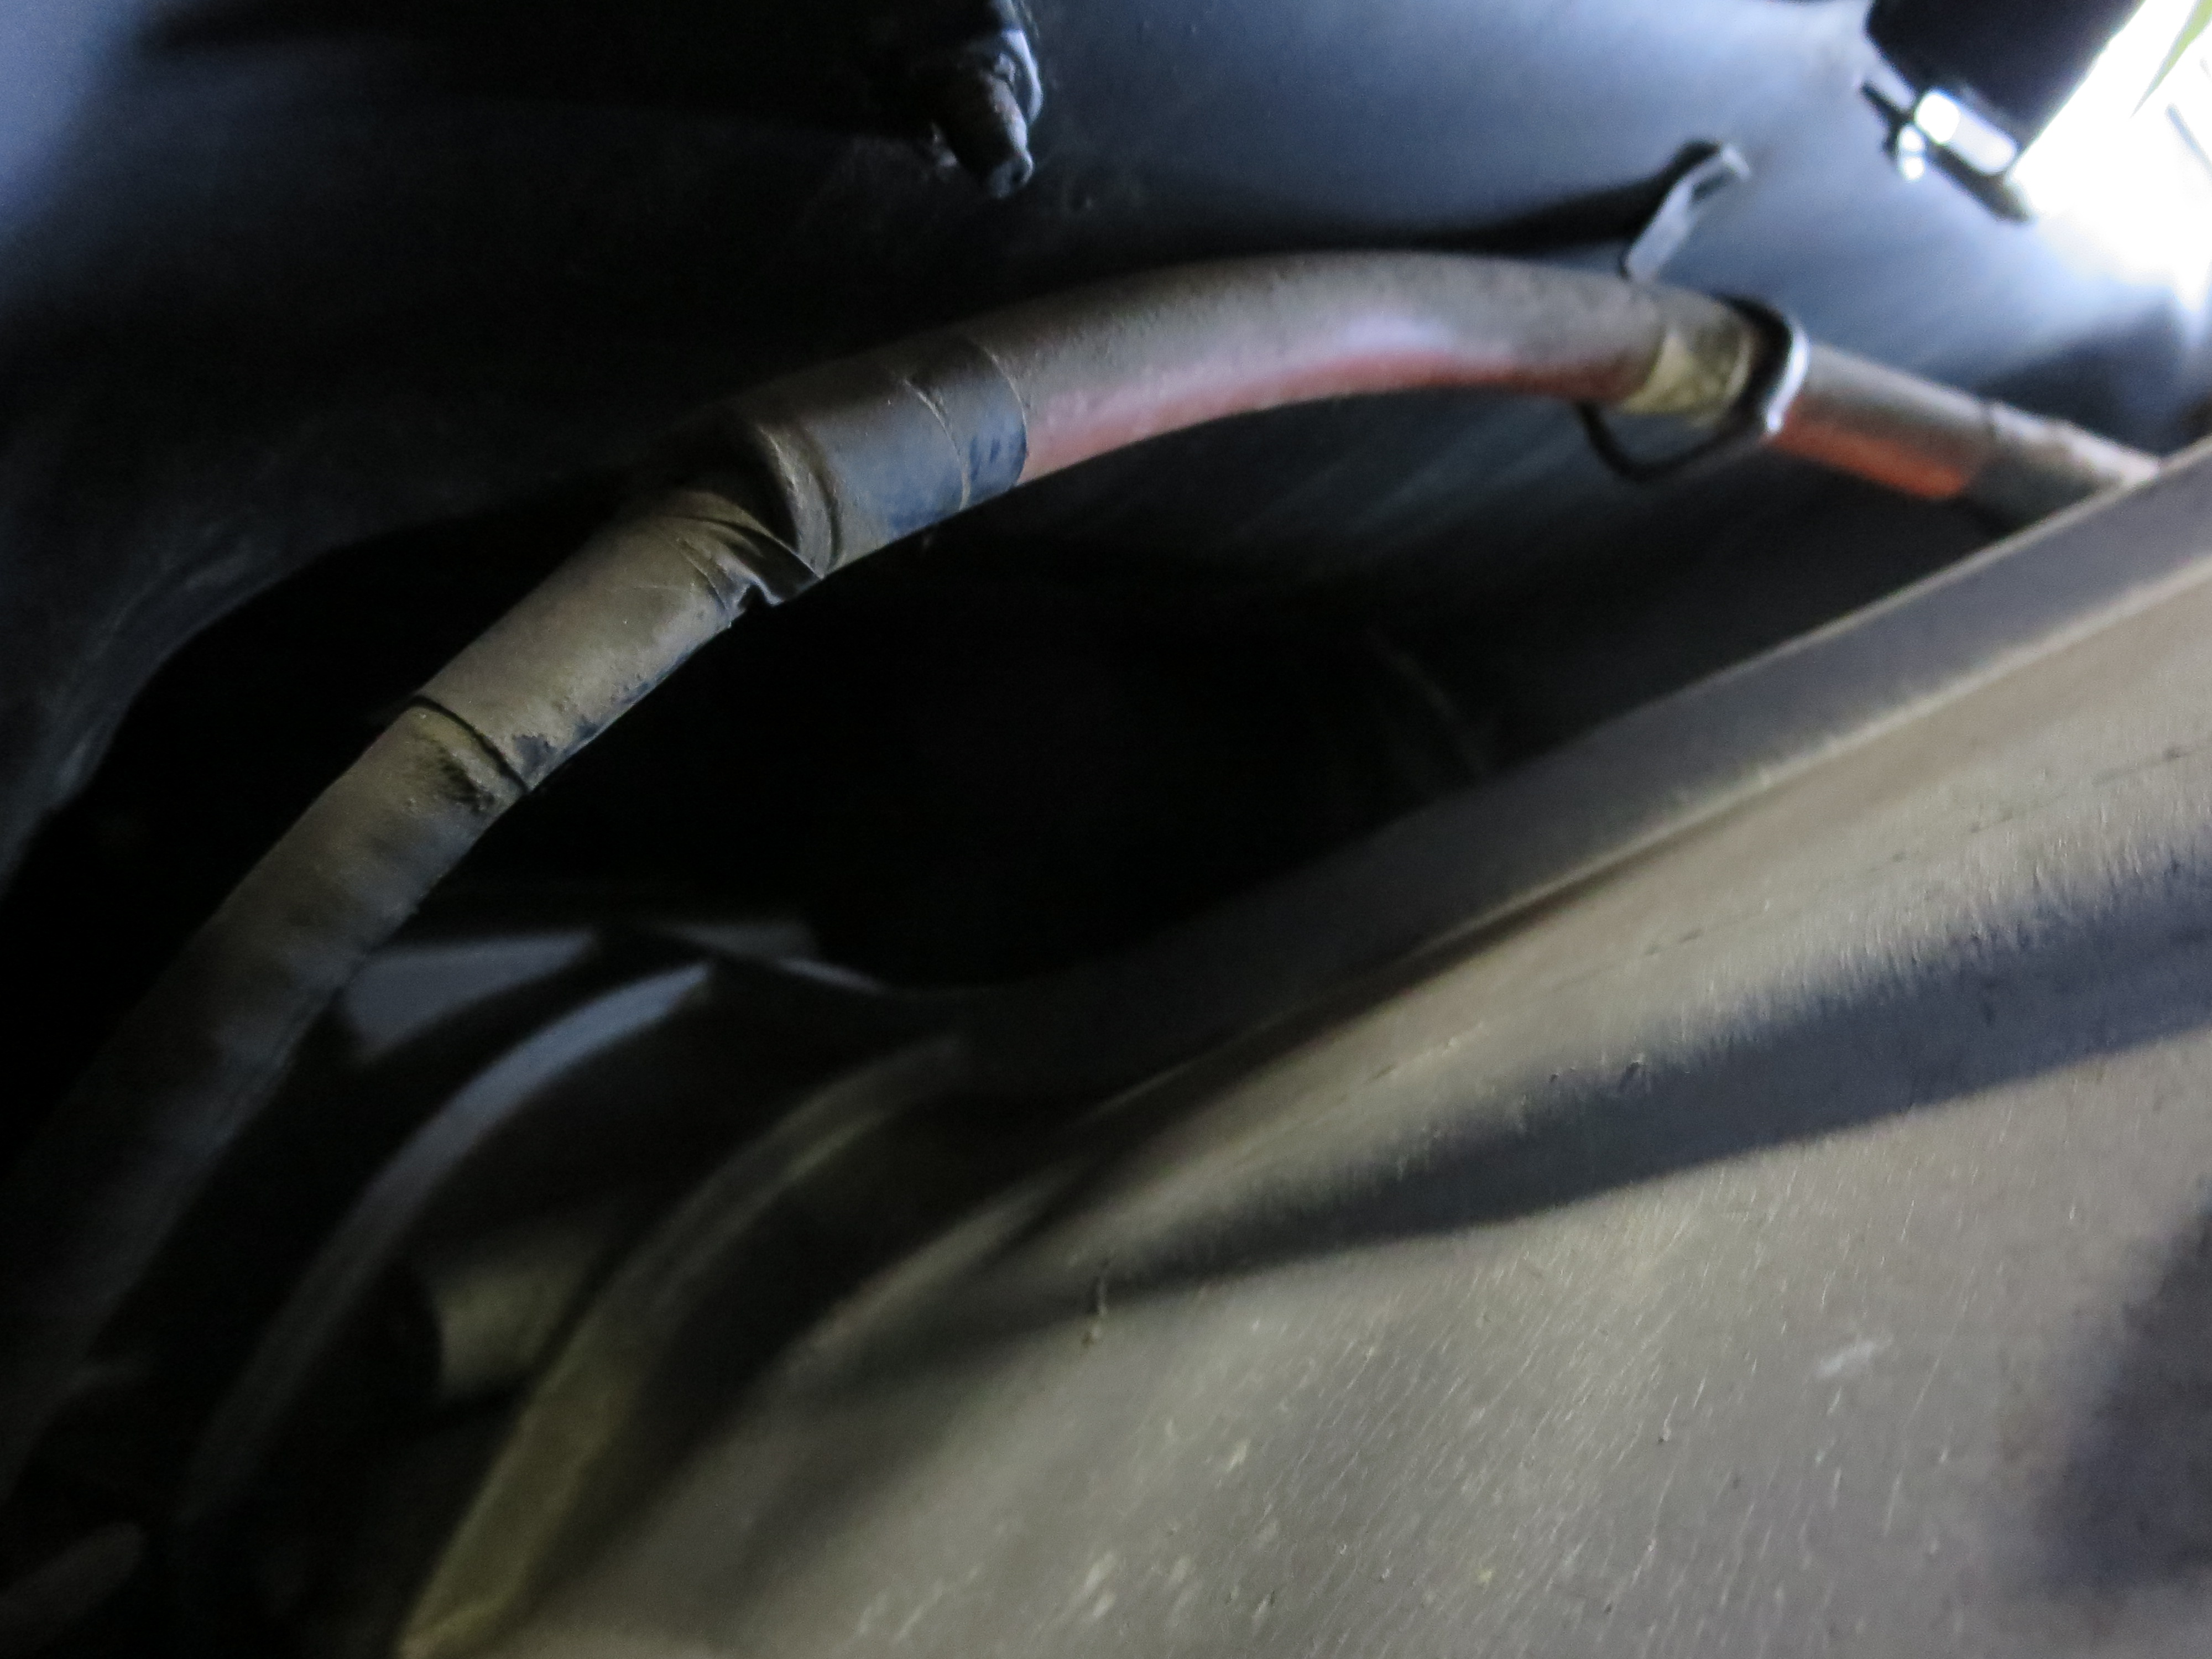
As far s I can tell, its heat protection for the section near the exhaust. It is not the original cable, but it is a genuine nissan cable I managed to get in 2012. The cable follows the route of the old one I replaced. Im regreting not replacing the grommet when I did. It fell apart shortly after fitting the cable.
-
I just took these. Let me know if you need anymore. They are from a 280Z 77 model, but the routing should be close for the 240/260Z.


-
I can take some photo's. Do you want the section behind the engine or somewhere else?
-
If he tiks "gift" you won't have to pay any import taxes or duties. I have done that quiet a lot and haven't paid anything ... yet. Btw: MSA is not that bad actually. A boostrr is heavy and if packed well will probably go over the 5kg mark. You should try Dlackdragon. They use UPS and quoted me $160 to ship a front windscreen rubber seal, a set of pedal pads and a rear brake small parts kit (kit is not shoes, drums or wheel cylinders). Total weight in quote was 1.87kg. USPS would have cost $35.
-
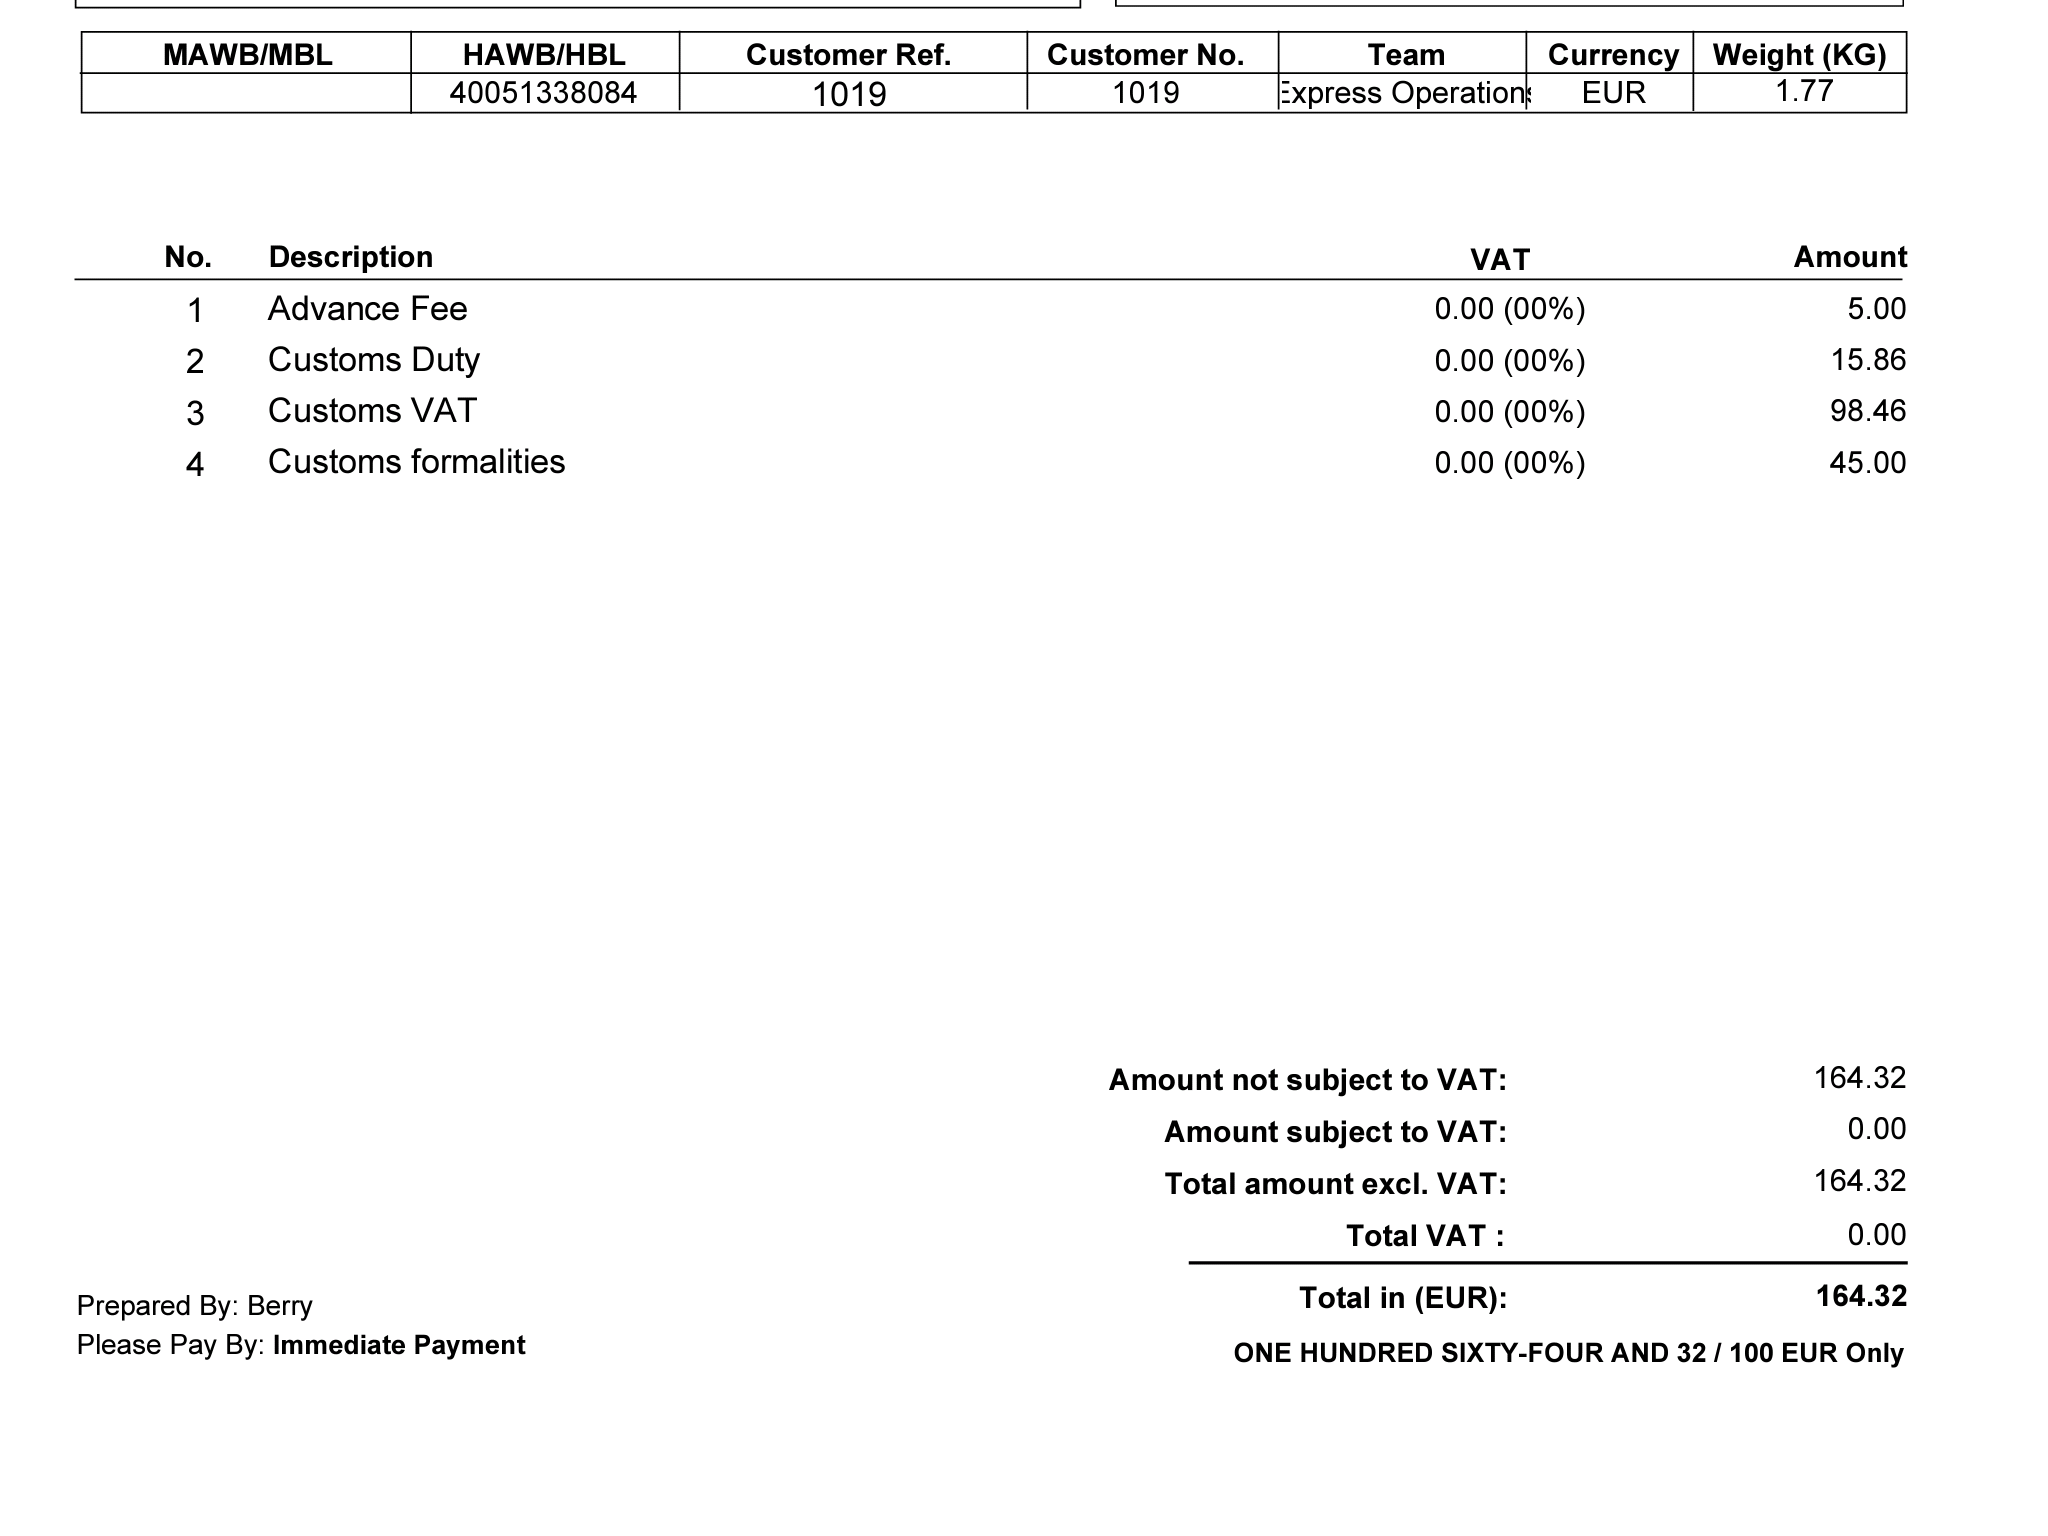
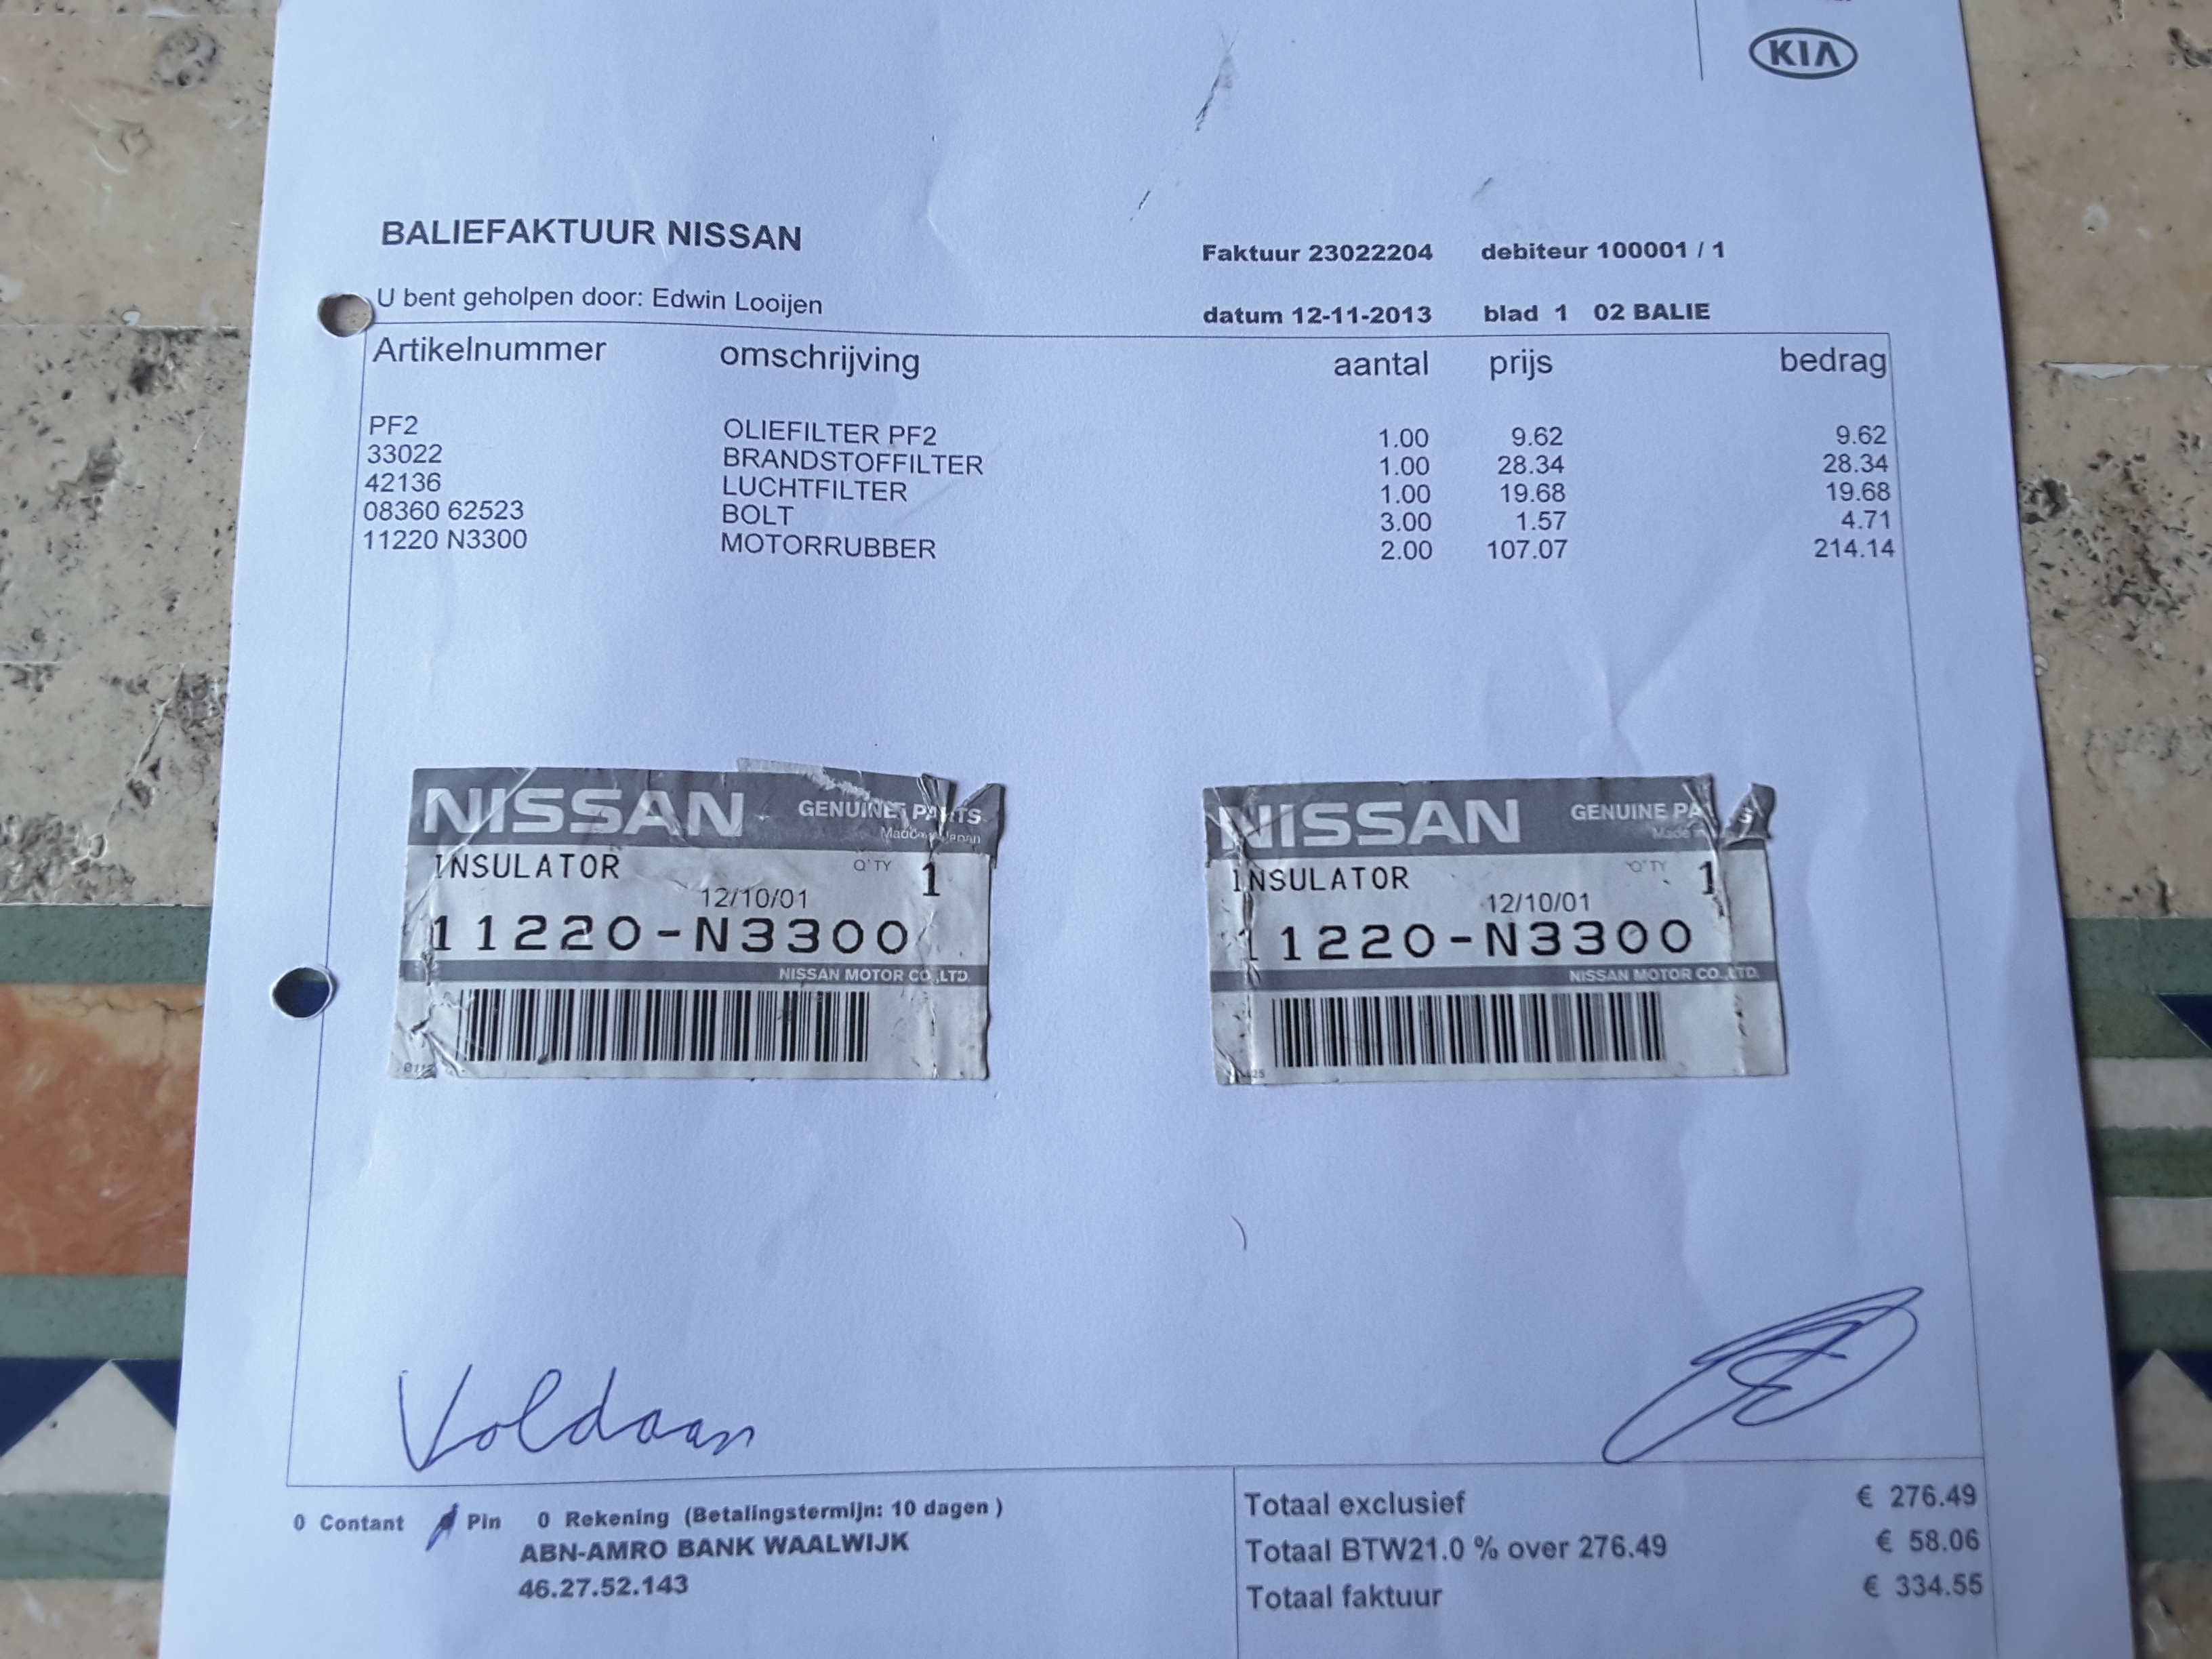
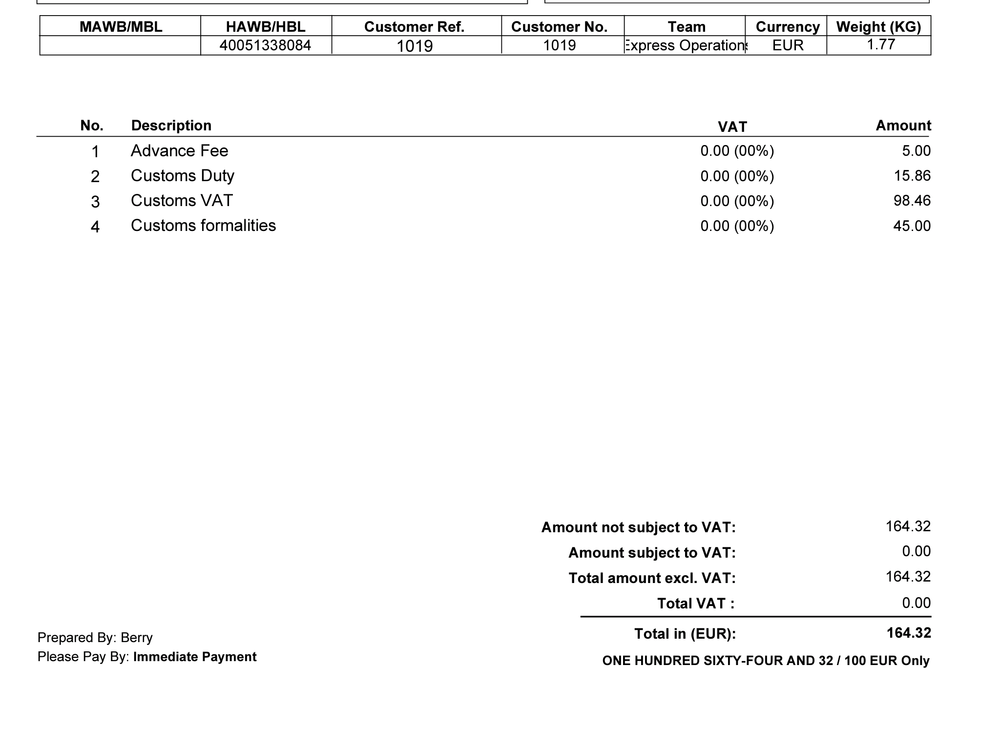
Hi all, Been buzy with family issues. My experience on the shipping. USPS is by far the cheapest. FedEx, UPS, DHL, Aramex etc are all much more expansive. They all charge admin fees and customs charges where USPS doesn't. I find shipping is often more than the parts and I have to pay 21% on parts, shipping and fees. See screenshot. Those prices are only fees and taxes. Cost of parts and shipping are mentioned. Rockauto is great. They have been fast, easy to make purchase/payment and answered my questions when asked. I have used them a lot, but can be a problem when ordering more parts in one order. Parts can come from different warehouses and then the shipping, fees and taxes really take off. To get around it, I have ordered parts and sent them to a forum member (both of them have not been online for a while now) and they send it through to me using USPS.
-
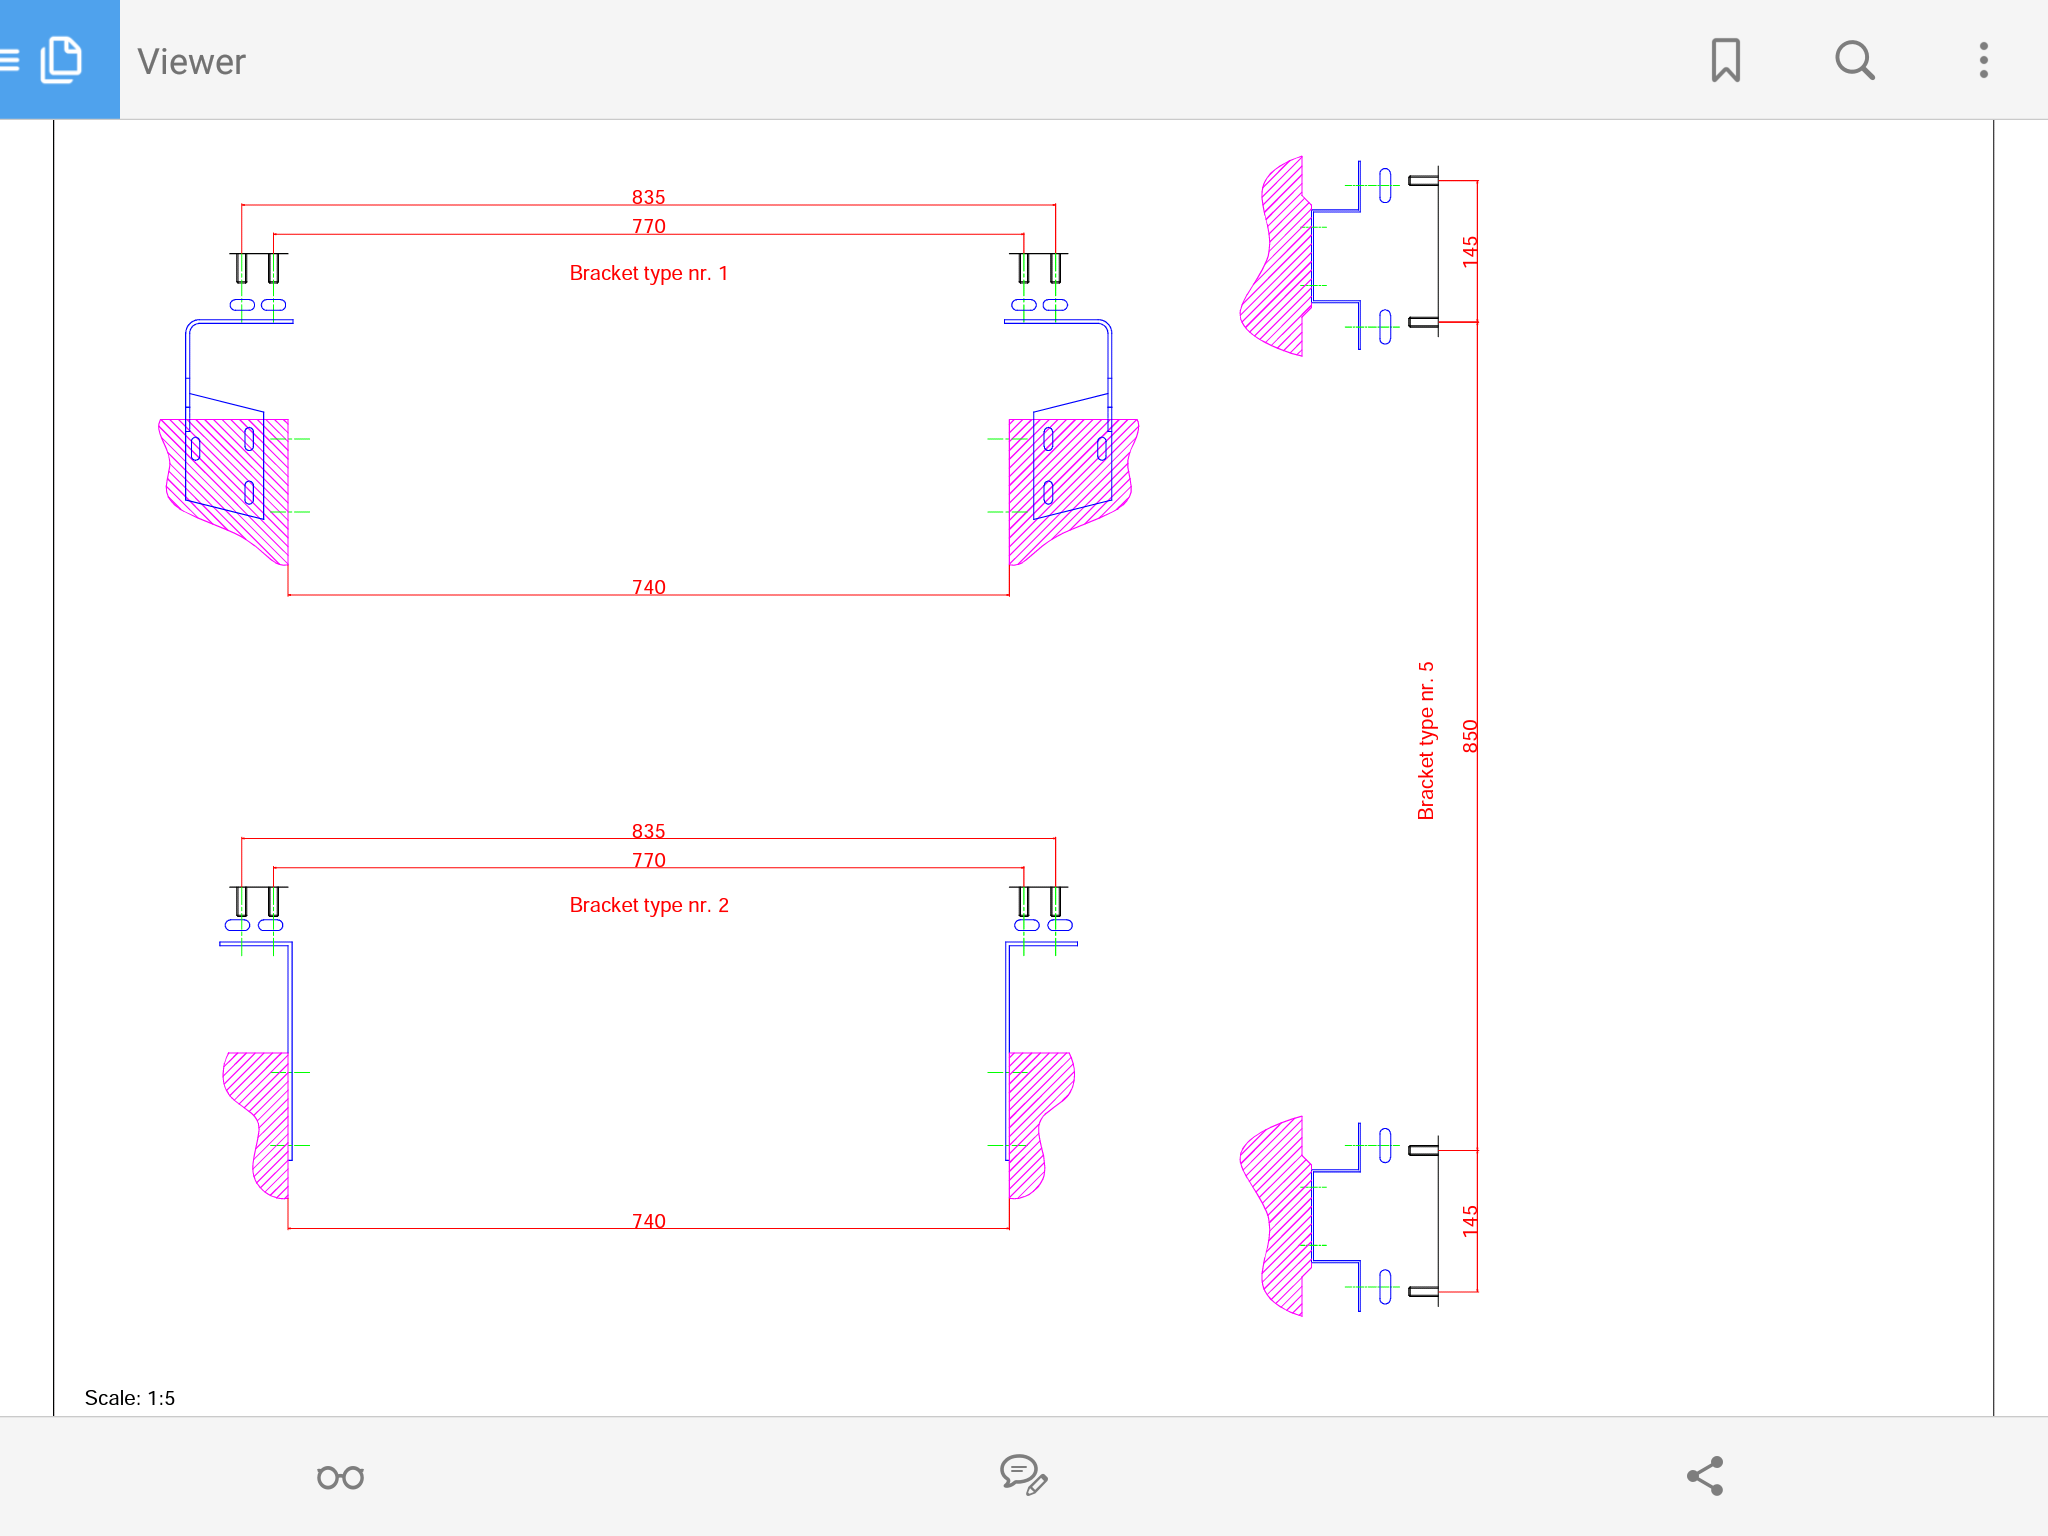
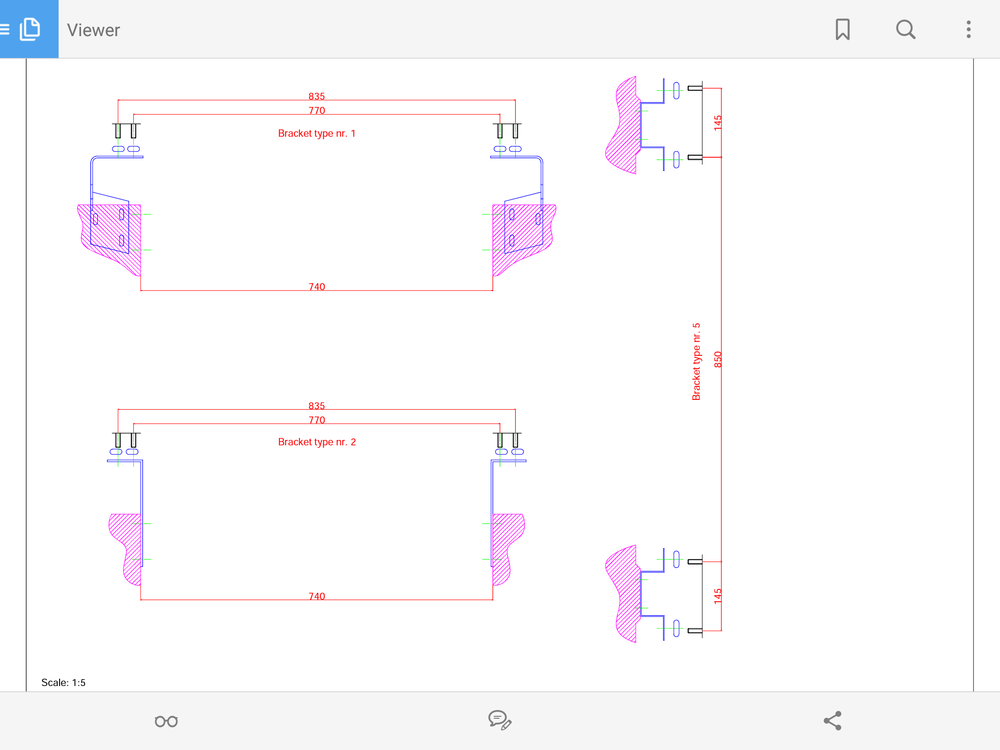
I know what you mean by tolerances. I have measured 3 280Z's first hand and the distance between both sub-frames ranged from 736 to 748mm. Now I know why Datsun used slots in the brackets. I don't think the tolerances wrer that big when new because the shocks have small slots to compensate for tolerences, but not that much. I ended up asking a coulle others on the forum here and they pm or postd the info here. Then I usd my sub-frame measurements (742mm) and madd the slots to fit. BumperBoltSpacings.pdf
-
If you source an o-ring from local, make suee its viton or at least nbr. EPDM is for brake systems, but no good where fuel is involved. It can be a pita getting it passed those notches. They are like a lock washer and prevent it coming loose. Not that mine would rattle loose. It was hard all the way. I ended up making a tool out of tube similar to exhaust pipe and used it like a tube socket with a screwdriver through it for a handle. Like Bart already mentioned, if its leaking through the terminals, time for a new one.
-
Hi Chris. You are going to learn a lot about mapping sensors and tuning. You will get it running easy, but running right err, umm. Bad fuel economy, pinging, rough idle, won't idle when cold are all part of the experience of tuning. Ask the guys on the BMW forums. Someone might give you his maps and make the hole operation a lot easier. That is my exprience with LinkECU http://www.linkecu.com You have moved from "getting an efi system designed for the engine running again" to "tuning a new efi system to match the engine" Don't get me wrong. I think the MS system will be much better in the end. It gives you much more tuning capabilities over Motronic 1.0. To do anything with the Mo you need to change the chip and then what you can do is limited. Welcome to EFI
-
Nicly done. Like I mentioned in our mailings, didn't think my brackets would work on a 260Z. You proved me wrong I'd like to see a photo of the 6mm washer you needed. The 260Z shocks must have a different profile where they bolt to the frame. I needed a 6mm washer for the rear mount (see photo, washer not fitted yet) on the towing attachment. Ps: Like your garage. Clean and plenty of room. Not like mine.....
-
Nice to see you back at it. Looks really nice in that colour.
-
You could try one of those spiral cable pullers, don't know the correct name for it in english. Here they call them trekveer and the steel variety cost about €20. Theg go around bends very easily and you can force them through. https://www.google.nl/search?q=trekveer+kabel+trekken&client=tablet-android-samsung&biw=1024&bih=768&prmd=isvn&source=lnms&tbm=isch&sa=X&ved=0ahUKEwj06uPC8P_NAhWLuhQKHdh1CNcQ_AUIBygB#imgrc=MxTne-QRaNRZqM%3A https://www.google.nl/imgres?imgurl=https%3A%2F%2Fwww.klusspullen.nl%2Fproductimages%2Fcatalog%2F265680_wymefa_speciaal_trekv_10m_spec.jpg&imgrefurl=http%3A%2F%2Fwww.tiptopkado.nl%2Fwymefa-trekveer-30mtr-metaal.html&docid=Q5nakjsO8DdTMM&tbnid=aZ8vUkQ_Zhtl6M%3A&w=513&h=513&itg=1&client=tablet-android-samsung&bih=768&biw=1024&ved=0ahUKEwjr8MvP8__NAhXMLcAKHRuTCIYQMwhxKEswSw&iact=mrc&uact=8 Here you can see how they work. Forget the gadget, its the spiral cable you want. Look at about 23 seconds into the clip. You should be able the clean it with the tank still in the car. Chas
-
EV6 injectors are a lot beter than the old EV1's. They can give better torque en fuel economy. They atomise fuel a lot better than the single pintle nozzle, but you read a lot of different opinions about that being better or not. They are quieter then the EV1's.
-
Im with chickenman. Im running a set of porterfield AP114 R4-S front pads and porterfield SHOE480 R4-S rear shoes. They work really good on standard discs and drums. Good price for me. The front pads are the same as the early Saab 900 series, so I could pick them up locally. Had to special order the rears from the states. They don't produce brake dust like the old ones did. Very little dust actually. Very happy with them.
-
-
That is a shame. You are fortunate to walk away with just a concussion and whiplash. Recovery can take a while, but looking at where the door is, it could have been a lot worse. Hope the structual damage is repairable. It would be sad indeed to let her go. I wish you a speedy recovery and good fortune with the insurance company negotiations.
-
-
They are Toyota 1989 4 runner V6 turbo calipers commonly known as the S12-W caliper and the rotor is from the 1984 300ZX N/A with a spacer kit. I think you can order those kits from silvermine motor sport. Google "datsun 240Z brake upgrade s12-w" and you will find info on it. I think this kit is stage 3 or maybe 4. The other common upgrade is the 1979-84 Toyota 4 runner S12-8 calipers on standard rotors. 1984 Maxima disc brake rear with adapter plate.
-
Nice sound. You need a set of bumpers/brackets:D
-
I used that stuff in the tank. Emptied the tin in the tank, plugged all the holes and rolled it around the backyard for 15minutes. Then tried to drain as much as possible out of it and use compressed air to blow all the tubes clean so they wouldn't block up. Never thought of using that stuff on the outside of the tank. I just coated mine with black rustoleum. Neat mod btw.
-
If you want to change the bulbs, here is a thread on changing the gauges, but it also covers the bulbs. They are clear btw. The green color comes from a green plastic filter. You could buy blue or green bulbs and remove the filter.