siteunseen
Free Member
-
Joined
-
Last visited
Everything posted by siteunseen
-
 I don't think I could take the anxiety of driving mine daily. I always wonder before I turn it off is it going to crank again? They're old. Buy a 10 year old Camry and a fixer upper Z car for the weekends. That's what I would tell a friend.
 -
Those look great. What do you think your price per seat was? Tools and material?
-
The front pops up crazy after the motor's gone. On mine it's worn out struts.
-
Alright! Something Z related around my house. I hope I can go.
-
I have a friend that was welding on an exhaust system, car was on a lift, wearing safety glasses not a hood or even goggles. A hot spark got under his glasses and burned his eyelid. He had to go to a plastic surgeon after the swelling went down and he couldn't open his eye. The doctor explained the procedure to correct it. Said he would take some skin from his penis as it was pliable and soft like the eyelid. Then graft it over the burnt skin. My buddy asked if there would be any complications from all this and the doctor says "you may be ****-eyed for awhile".
-
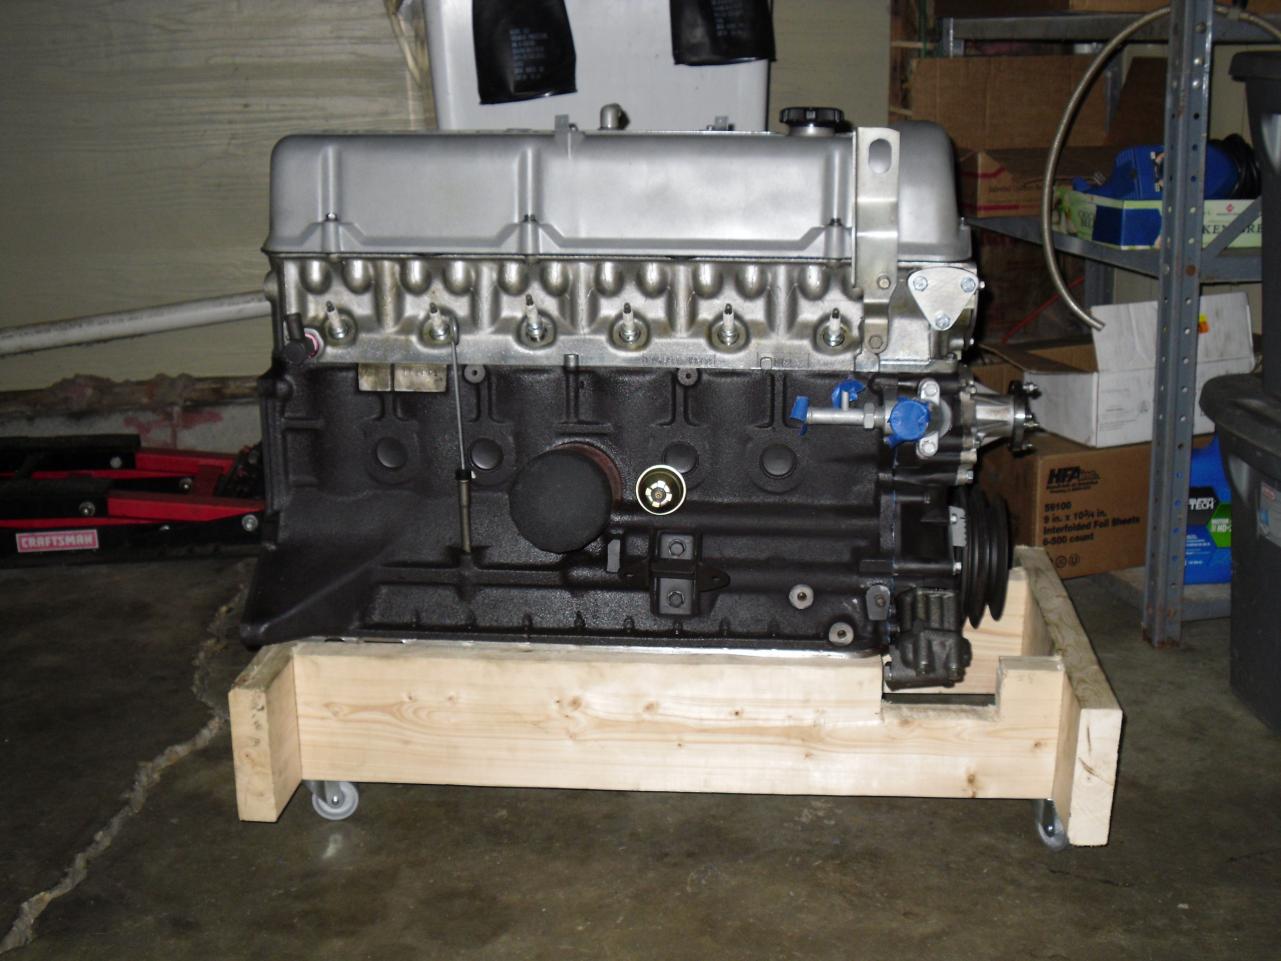
Looking good! I see your keeping your rebuild book close by, I carried mine around for 2 months. It's all marked up with high-lighter ink and greasy hands. That knob on the leveler got in the way for me too. I bent it horizontally and used a socket on the other end. Keep up the good work, your doing something now.
-
Go ahead and buy a battery. You'll need one.
-
The day you crank it for the first time you'll be the happiest and the most anxious person in Georgia. "Layla, you've got me on my knees. Layla, I'm begging, darling please. Layla, darling won't you ease my worried mind."
-
-
1 Afternoon. It's spray size is adjustable.
-
Maybe sale them to a hybrid z, a split window. They put Corvette style motors in Japanese cars why not Corvette glass style.
-
I bought an gravity fed airbrush spray gun from TCP Global Paint off E-bay for $20. Acrylic enamel, a pint did the bay and then some, car color. Worked good and no taping off everything. I could dial it down to the size of a drinking straw hole.
-
Blue you sly rascal, the fingering of the counter weight made a difference. I'll be moving it 4 gear teeth to the left this Saturday. Dadgum mechanic friends don't want to do things the right way. Thanks again.
-
Aren't you the one that bought Standard FJ707's? I got those and agree with you completely. It's like having a new car. And my gauge also bled down after awhile but I still get sprayed with gas taking off a fuel line. I took my gauge off and did away with the restrictive "T" I had made out of brass brake line fittings. Now it sits in my drawer of test equipment for when I might need it. I put a clear glass filter right before the fuel rail.
-
What about a coil wire cap? Just thinking out loud. Or the distributor end of an old plug wire?
-
It might just need some fluid. Redline MT90 at amazon.com. Or just don't go backwards.
-
That's something to remember because it hasn't happened on mine YET. Thanks for the post.
-
My '77 with MSA's 2.5 with Dynomax muffler hangs diagonally. It's the most out of the way position on my car.
-
Good to hear. Do you still use your dash pot? I took mine off for a short trip and didn't like the clunky feel while changing gears so I put it back on and found a small screw under the white cap for adjusting. It was holding my RPM's up about 300 more than idle so I had to pull the pedal up with my foot to bring it back down. Now it barely touches the linkage stop at idle. I've just about de-bugged everything finally.
-
I used my cordless fingers to bend the WOT vane a little and it helped a lot. And I've been thinking about adjustment on the AFM. I'm flowing so much more air with the header and 2.5" exhaust, also opened up my intake to match the N42 head intake ports, I believe that it needs tweaking a bit. I've put the 500 miles on and am going to change the oil and plugs and let my mechanic friend with all the tools fine tune it. He's got one of those high dollar timing lights and a CO measuring device and knows how use a OHM meter, which I can't. Thanks for all your help.
-
My car ran bad before I rebuilt the motor so I did a bunch of stuff trying to make it better like messing with the TVS. So now it runs almost perfect, it's like I'm in a dream or something, but at 2800 to 3000 it is like a power band kicks in. I've adjusted the TVS up and down for the past week and still can't get it right, I'm close right now so I'm asking, at that RPM the WOT contact is closed I suppose, so does the width between IDLE and WOT need to be farther apart? In my mind since it runs so much better when WOT is closed they should be closer together. Almost as soon as it's off idle contact it should be on the WOT contact. But I've learned to do right the opposite of what I think is best. So somebody that's closer to normal thinking help me please. On another exhaust note I'm at 467mi. on my way to 500mi. break in, WHUPEE!
-
I stumble also. Can anybody help?
-
I've thought of another good return for my money spent on my rebuild, polyurethane bushings from Energy Suspension. There are cheaper ones on ebay but people complain about them for some reason or another. I got the Energy Suspension in black for around $165 and with the motor out you can install most of them a whole lot easier. Go through your rack and pinion steering also while the motor's out.
-
Take a bunch of pictures before you tear into it. Go to your local building supply and get some lacquer thinner and some small wire brushes, brass for the pistons, they're in the welding section and look like a toothbrush. You'll need a roll of painters tape and a Sharpie for labeling things as well as a box of zip-lock baggies for small parts. I left the bolts in the part and put a small wire on the backside to hold them in place or a paperclip. Put your stuff in boxes and write what's in the box on the boxes, you can keep them in the hatch. Clean and clean then clean some more, you'll be glad you did. Zedyones thread on his rebuild has the dimensions for a wooden crate you can build for your motors. I built one out of 2x6's but I think 1x6 would do and put wheels on the bottoms. I had never built one of these engines and Tom Monroe's "How to rebuild your L series" book from amazon.com was the best $20 I spent. Step by step instructions with lots of pictures.

-
What I've Learned: Sam Cabiglio Mechanic, 66, Monterey, California Cabiglio, who has been rebuilding Porsches and street-racing cars since the 1960s, manages Jerry Seinfeld's vast collection of classic Porsches. Italian cars have always been beautifully designed, beautifully sculpted, wonderful to drive, emotional — but not always reliable. It's kind of like how a really, really attractive female may be a delight, but she may also be a little bit of a pain. You could add maybe 20 percent more power to a VW, but I needed way more power. So to the horror of my father, I removed the engine from my brand-new '64 Beetle and installed one from a Porsche 356. It was not a 100 percent bolt-in, but it was relatively easy to do if you knew what you were doing. I'll visually massage a car with my eyes. A good car has been built with the desires of an engineer and a designer to be the best that it could be. Your eyes tell you that. It's more fun to drive a slow car fast than a fast car slow. Luxury and convenience and lane-departure warnings and double-backflip auto-this: All this other stuff keeps adding weight and weight and weight and complexity and cost. And ultimately causes more stuff to go wrong down the line. And everybody does it. And everybody does it because everybody thinks, If we don't do it, we're not going to be competitive. Many of the cars that people will malign until hell freezes over, they had personality. Open the glove-box door. Feel how it shuts. Feel how the latch engages. These are the things that convey quality. Luxury equals isolation. When you put a car together, and you turn the key, and it lights up, and you hear that heart beating, it's a drug. I'm a drug addict, and this is it.