siteunseen
Free Member
-
Joined
-
Last visited
Everything posted by siteunseen
-
 I wanted to wait before getting mine buffed until I was through tinkering, then I realized I'll always be doing something to it so I went ahead and had the buff done. I lost my incognito, now I'm driving an OSHA orange warning sign but I like it.
 -
Mitch....Cliff will be sleeping right outside of your car.
-
I put rubber washers on the studs to keep mine off the paint and not trap water. Getting the nuts on those studs in the far corners was almost impossible for me. Many beers that night, it was very frustrating. Thank goodness I have these skinny arms that fit through the access panel hole on the hatch.
-
-
-
Have you read this? http://www.datsunzgarage.com/engine/ This is better, http://datsunzgarage.com/
-
-
You need to disconnect the gas pedal linkage from the carbs linkage that way they are individual instead of working together as one. It's the bent one in your photos, from the top linkage to the bottom linkage. Yes you turn #10s to get the air flow equal. Do you have a way of measuring air flow? An Empi from amazon.com was a big help for me. here's something else that helped me a lot
-
Someday I'd like to get this one from zcardepot.com https://zcardepot.com/disc-brake-conversion-rear-disk-240z-260z-280z-1331.html here's some conversations you could read https://www.google.com/search?rlz=1C1BOFA_enUS494US494&ei=cWklWoaSNofx_AbOkKWwBA&q=zcardepot+rear+disc+conversion+classiczcars.com&oq=zcardepot+rear+disc+conversion+classiczcars.com&gs_l=psy-ab.3...7908.13226.0.13699.17.17.0.0.0.0.169.2075.1j16.17.0....0...1c.1.64.psy-ab..0.16.1967...33i160k1j33i21k1j33i13i21k1.0.5CSX_hdkky0
-
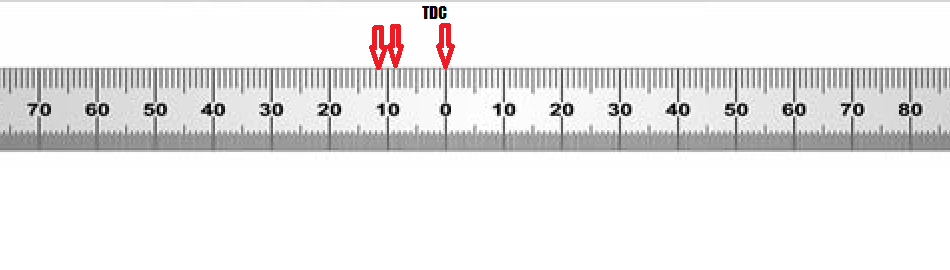
Well sort of kidding but hoping to learn something as well. If your cam card says open at 8 degrees before TDC and it's opening at 11 degrees before TDC I was thinking that's 3 degrees too soon? If each higher hole on the cam sprocket is 4 degrees advance and you put it on #2 wouldn't that get you opening at 7 degrees before TDC? I'm trying to take in all I can before I put my E31 together with the .490 cam kit. After reading madkaw's post and now yours I'm thinking I MUST get the cam "degreed" with that paper wheel and the bent paperclip. My machinist could do it quicker than me and I won't need to buy that stuff for a one off cylinder head rebuild (hopefully). Cliff
-
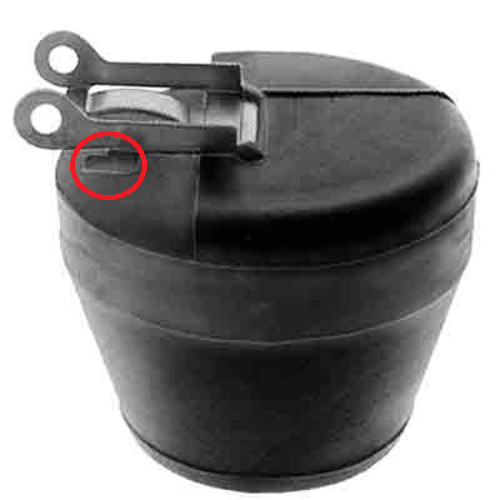
Another thing, how far down are the nozzles? The initial setting according to everything I've read and watched is 2.5 turns counter clockwise. You can add more fuel that way too, go 4.5 if you think it's lean and try that. Did you set your floats with the lids upside down? At .550"? I did and had a problem for a year. The newer needle valves aren't strong enough to set them that way, they won't hold the weight of the float like the Grose jets would. You have to hold them right side up and blow through the fuel inlet, pushing the float up until your breath stops. An easy way to get close is to get the float's tang looking like this one. Mine was raised up like Evel Knievel's Snake River Canyon ramp. ignore that red circle
-
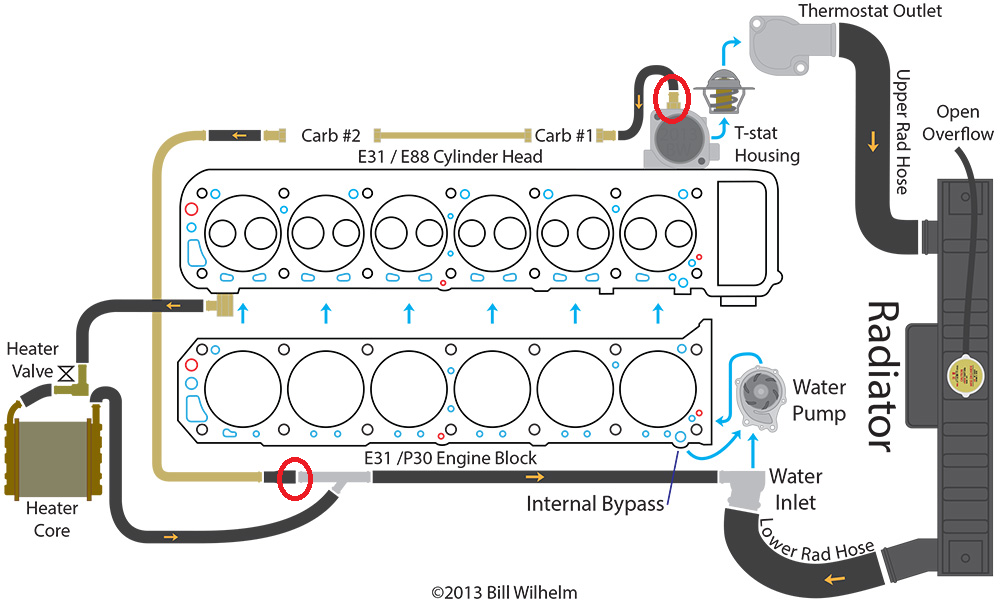
Yeah, you can cap it at the thermostat housing and then the passenger's side "y" fitting between cylinder 5 & 6. I have original SUs and chose to block that line to prevent any future leaking. Doesn't get very cold down here. Car runs fine, nice and cool without it. About 175 degrees. I read a story on here where a guy romped on his before the thermostat was open and blew out a rear freeze plug. So just to be safe I always wait until it gets up to temp before running it up. My thinking is/was that coolant line is always open and deleting it severely cuts my coolant flow before the thermostat opens up. Maybe wrong, most likely is, but that's me.
-
-
I found the post that shows the difference between the Felpro and the Nissan. Click "siteunseen replied to a topic" Crappy phone pics from me but you'll be able to see the difference. Oh yeah, get some of this and lube the threads on everything. It makes future projects a lot easier.
-
"Should I buy a reliable Honda?" If you don't have a car yet then yes. Old Zs aren't what you'd leave in long term parking at the airport. They're toys you might not be able to play with everyday. I can't lock the doors on mine without climbing through the hatch. Imagine explaining that when you're opening the door for your girl or see a cop when you're leaving the bar.
-
If you loosely put those on the studs you can hang everything and come back to tighten it all up. Cupped side to the head.
-
Felpro has a universal for around $15 from chain parts houses. I want to say there's 3 different ones but I could be wrururu wrong. '70 thru '74 with square exhaust and round intake. then '75 thru '76 square exhaust round intake with the injector notch, '77 thru '78 round exhaust and intake with the injector notch. Good luck getting the special order felpro from chain stores that's not damaged. I got 2 that were bent up all to hell and back.
-
The n42 head is from early 280s. It has the fuel injector cut out on the manifold gasket. You need square exhaust ports and round intake holes. I prefer Nissan as it has some aluminum backing around the exhaust ports. They're about $25 from your local dealership, they'll have to order it but two days maybe? Google this part number and look at the images. It's what you need for carbs and square exhaust. 14035-E4610
-
-
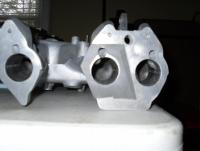
If you lay a gasket over the intake you'll probably see the intake's holes are smaller. I scribed around mine and used a grinder to match the ports, intake holes are now the same as the cylinder head's holes. While you're there, the slide begins but it's winter and fun if you have the right tools. Here's a shot of my 280's intake, same way on the 240.
-
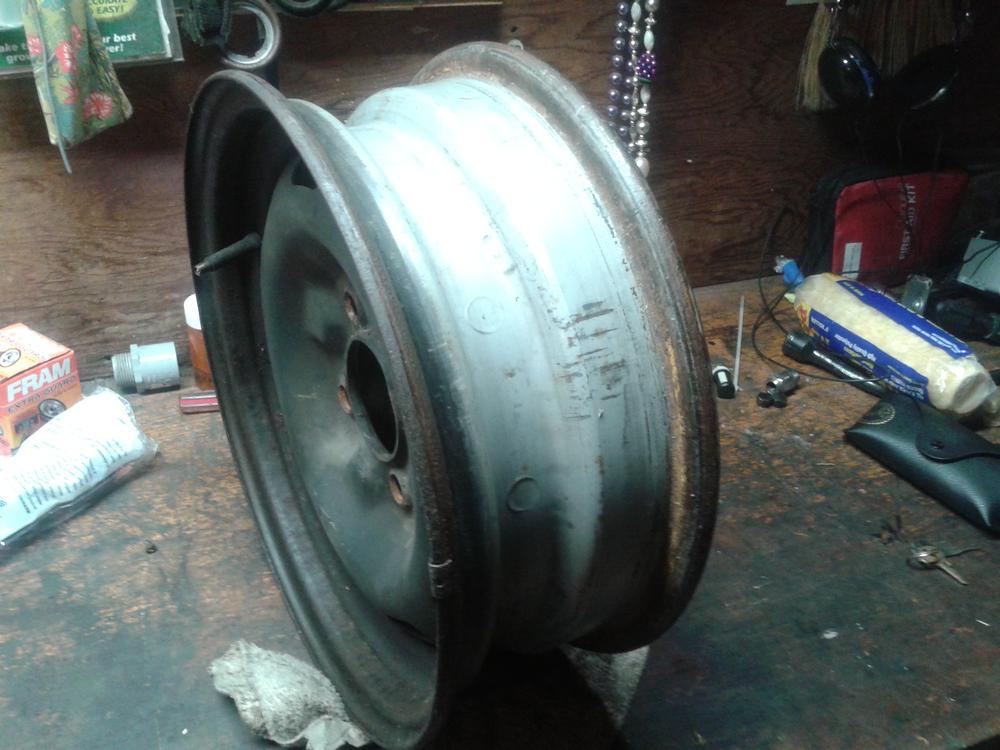
And there they were! Right across from the stem, TOPY 2-72, same build date as my car so I'll say it's the OE. Thanks Chuck.
-
I blasted the valve cover then went back over the lettering with fine sandpaper. That's the first one I ever tried and I was using play sand, it's pretty aggressive and leaves a rougher finish but I like it. Coated with Eastwood Diamond Clear satin, also used that on the other aluminum I bead blasted. Oh yeah, I did that outside as you can tell from the pics, use an old gasket and screw it down to a piece of wood. That keeps all the blast media out. I found out the hard way, once you blast it don't go and try and clean the inside. It turned mine a funny looking color so I went back and did it over then blew it off and sprayed the clear satin on.
-
Where, I can't find a thing? I have the rim on my work bench with no/know tire right now. Good time to look. Thanks!
-
On page 191 of the "how to restore your Z" it says the early Zs were silver on the inside then oversprayed matte black on the outside. Then they did gloss black on the inside, then "lower gloss" on the outside. My early '72 is silver everywhere then matte black on the outside. FYI I think for my spare I'll do matte black all over the wheel. Easier for me.
-
More of a grey color. Original off my '72.