jfa.series1
 Subscriber
-
Joined
-
Last visited
Everything posted by jfa.series1
-
 Here's a pic that explains offset. I think all S30's had zero offset with stock steel wheels. You can see that positive offset begins to move the wheel centerline inboard and that gets the inside of the tire closer to the strut assembly. Negative offset moves the centerline outboard which increases the potential for the tires to hit the fenders.
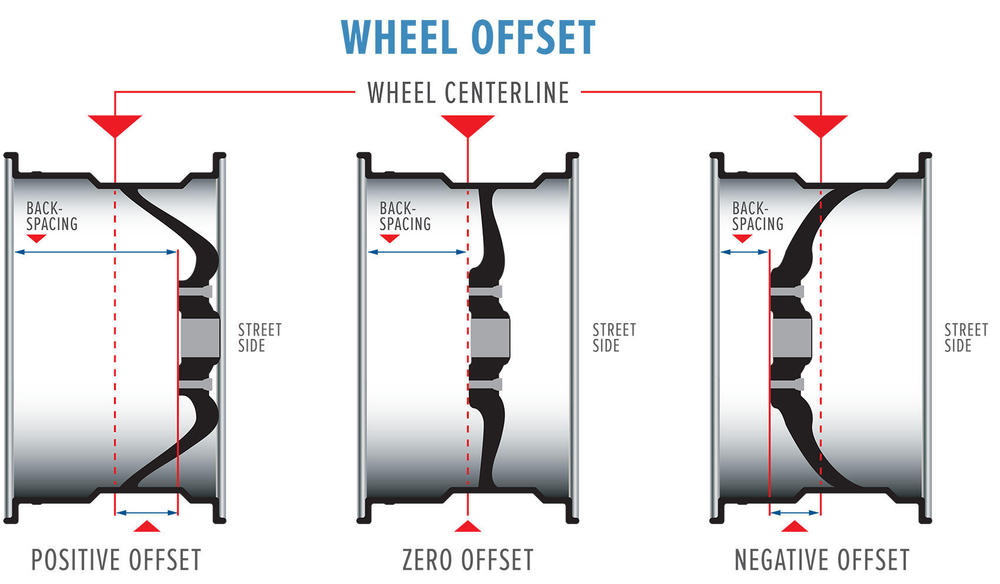
-
Hopefully you're only working with the center section without the ends attached - much easier that way. Something must have changed the arc of this section if it did not touch prior to rechroming. Did the chroming shop have to do any repairs to the section? What about the mounting brackets - any work done on them? You should expect about 1/8" gap (or more) between the middle of the center section and the rear valance panel. If you start adding shims or washers you may end up moving the end pieces back to the point their mounting bolts thru the fender won't line up.
-
@Diseazd Guy - Time for you to post another great pic.
-
Sounds like you are talking about a 240Z but we need some details on the year model car as there are differences across the years.
-
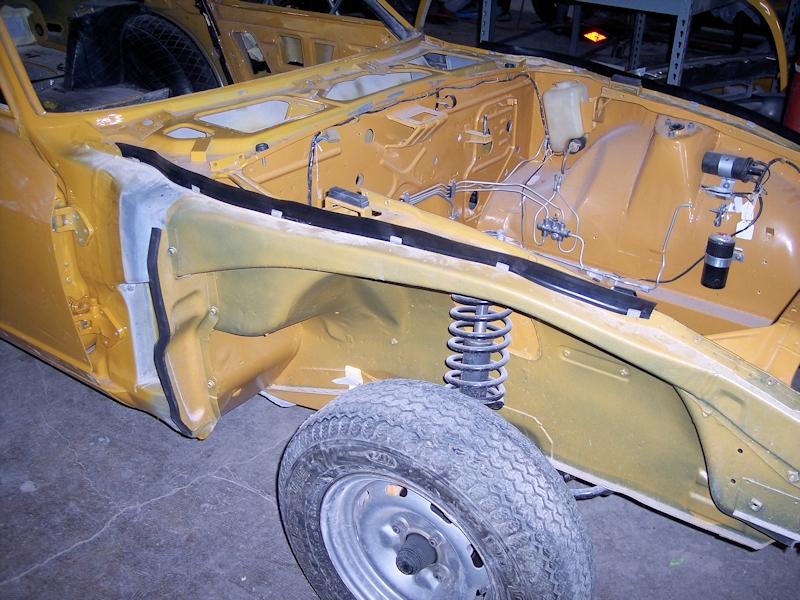
Absolutely - been there, done that. Check your local auto parts store for self-sticking closed cell foam weatherstrip. It usually comes in a variety of widths and thicknesses, I think I used a 5/8" thick product. In addition to the splash shield (shown), use the same product on the baffle on the inside of the fender where it seals against the A-pillar. Closed cell is important as it will not hold moisture. Be sure to remove all the old stuff before applying. Also - you can see the same material used for the pads.
-
Cliff - I just saw the pic of your car that you posted in the "Tail Light Issue" thread. It looks like you have the aftermarket bumper sold by MSA and others. If so, that is the model of bumper I had problems with because the arc of the center bar was too shallow for the curve of the valance on my car. That probably explains why yours is so close. At least you had more success than me in that you were able to get it installed. Yaayyyy!!!
-
Cliff - my OE bumper was about 1/8" off the valance at the center, the new SS bumper is the same. The "washers" comment was from Colin. We PM'd a bit before and after his purchase, he told me his brackets might have been a bit bent resulting in the new SS bumper contacting his valance. Hope this helps. Jim
-
The bumpers are my OE units that I had shaved and painted body color during my resto some years ago, swapped out recently as @Patcon says. The front dam is a 1st generation BRE Spook used by BRE only in 1970 before being replaced by the design now commonly seen. This one was installed by my selling dealer before I bought the car and I've been told it may be the last in existence. I've heard the color being described in several different ways but 918 Orange is a first. Tweak your monitor settings to get the car to look more like a butterscotch candy and you'll be close. Good luck with your project.
-
-
-
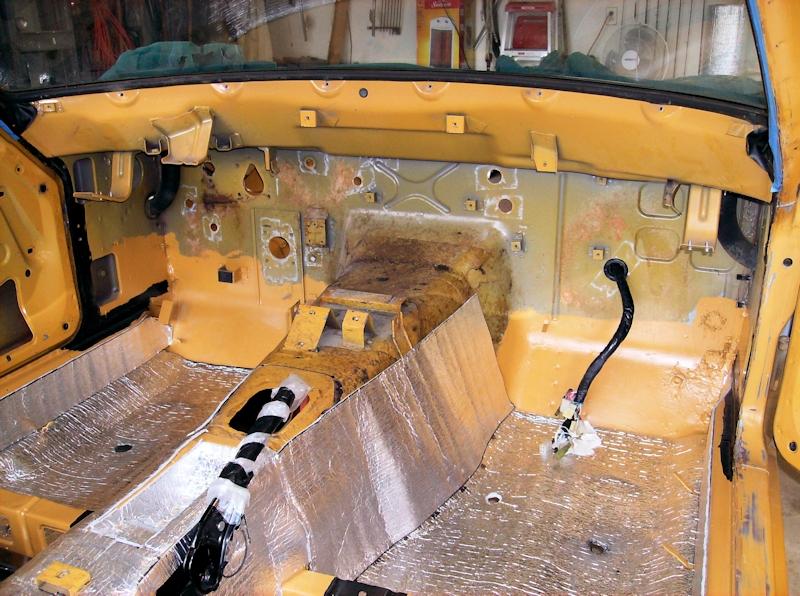
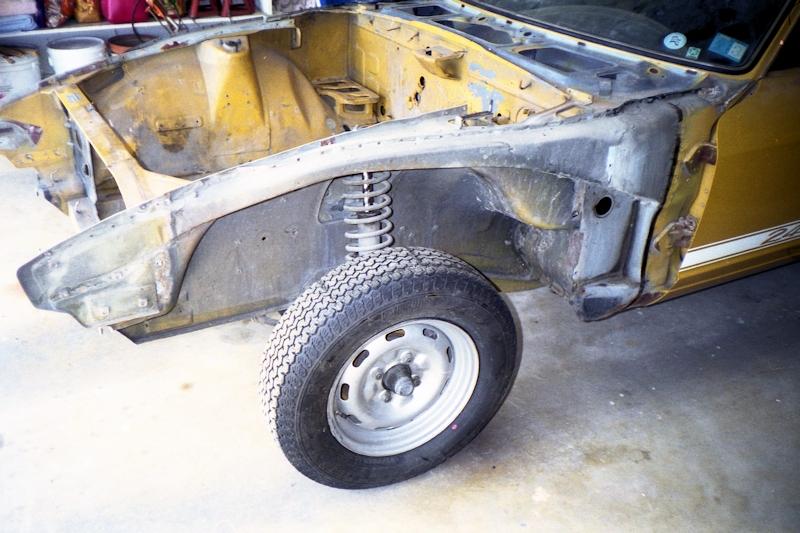
The plenum below the cowl has a large drain hose at each end the empties into the inner fender area behind the splash shield and ahead of the door pillar. Without the fender off you cannot see this outlet.. If the car has spent a lot of time outdoors there is always some chance that debris has collected at these drains and might be partially/completely blocking them. Consider going in with something less powerful than a power wash to make sure the drains are open - an ordinary hose will do. FYI - these L-shaped drains are routed thru the cabin. Look up under the dash at the base of the windshield to spot them. Here's a pic of my car during tear-down, the large hole in front of the door is where the drain pops out.
-
Not just "well done" but truly "VERY WELL DONE!". Congratulations on a fantastic rescue and rebirth.
-
Welcome to the best forum for classic Z's. Great looking car, innovative and slick paint job! We'll be looking forward to your contributions.
-
Congrats on your find and purchase - looks like some pretty good bones to work with.
-
What shocks are you running with these new springs?
-
Well... with one vote for a US spec car, this looks to be a 280Z thing and not a Canadian rule thing. Shows to go my lack of exposure to the intimate details on 280Z's.
-
A Canadian cure for fuel tank flatulence??? Seriously (yeah, sure), I vote for the safety aspect. I've never seen this in US spec cars, possibly a Canadian rule.
-
Joe, Here's a recent thread with discussion and pics. Jim
-
Here you go: https://zcarsource.com/door-upper-molding-rubber-seal-240z-260z-280z-70-78-new I see you found my 5-year old post on my fuzzy strips install method. I installed the squeegees the same way. Jim
-
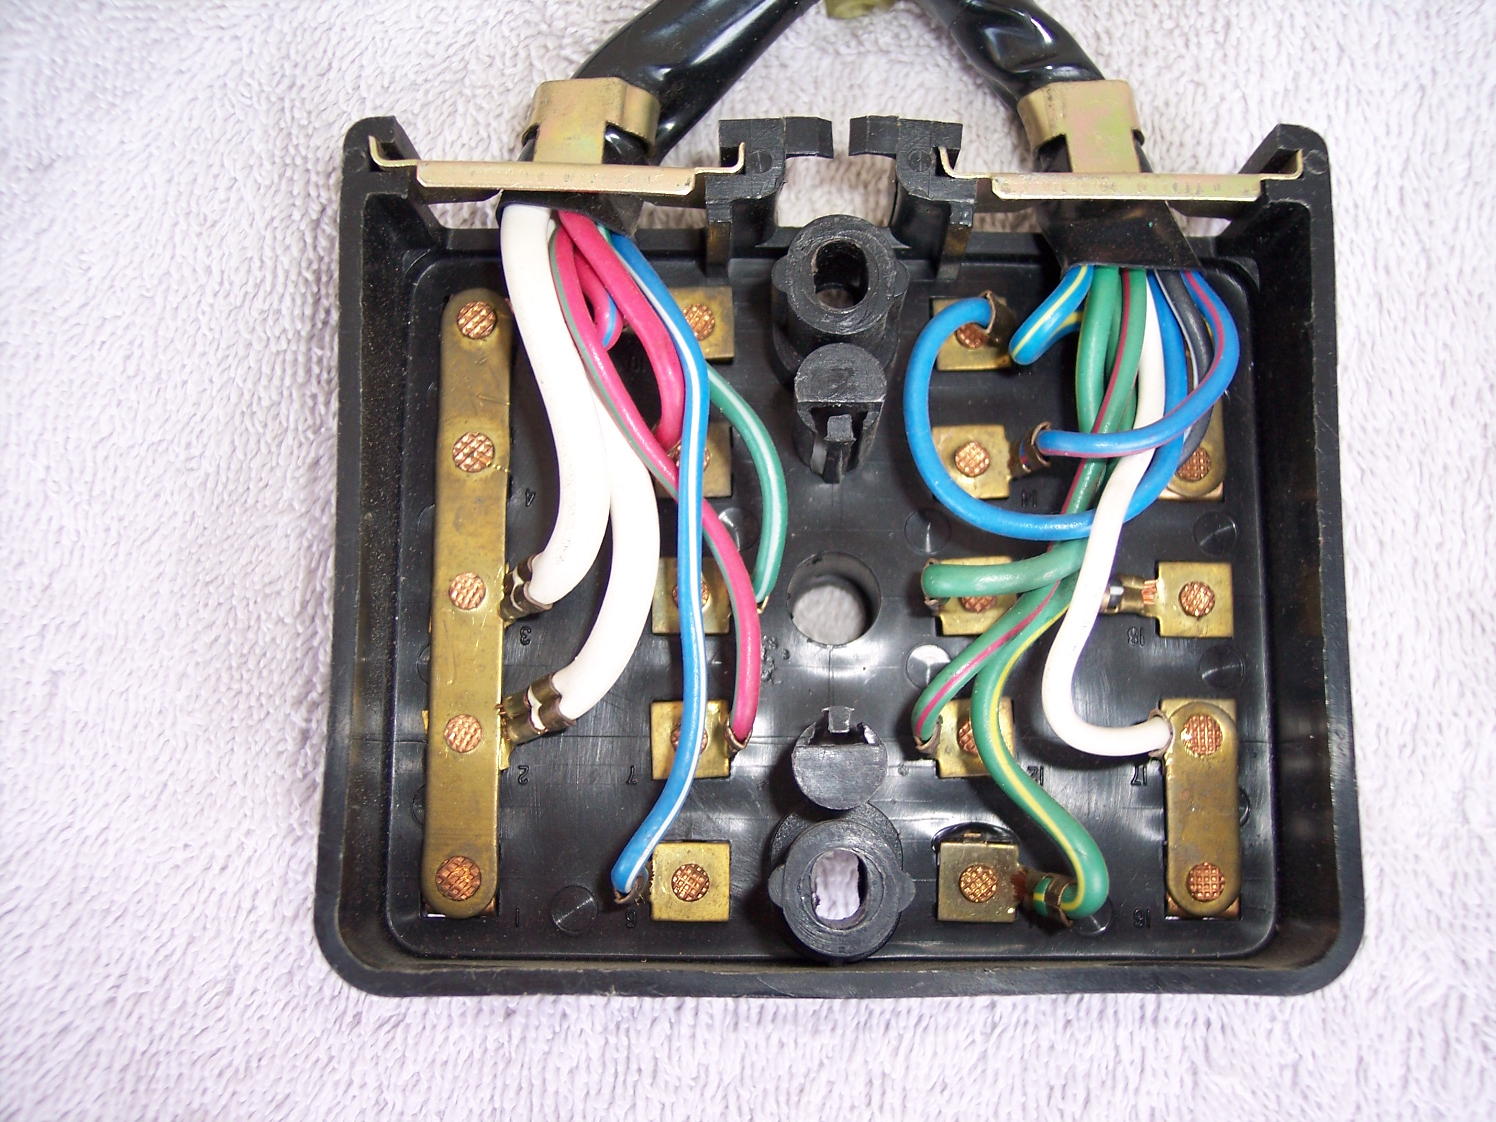
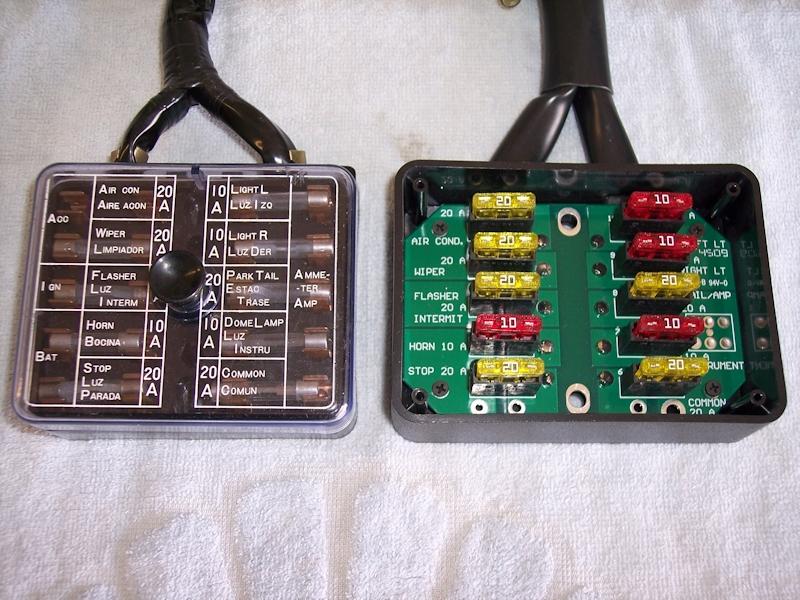
Phil - The pic you referenced was mine, not Tim's. The female spade connectors were not burnt, merely had aged covers and as best I recall I had them labeled as Main A and Main B as were the male sides of the harness before I disconnected them. The MSA unit has butt connectors in place of spades, probably for the simple reason of the difficulty of getting the correct size female connector. With the MSA unit, you have the choice of cutting off the large male spade connectors and hard wiring the matching dash harness into the fuse block wiring or moving the old female connectors to the new fuse block - the option I took after this pic was made. Here's a pic of the backside of my OE fuse block (actually in excellent condition). You can see that both large gauge white wires go to the same place, how they are connected to the dash harness becomes irrelevant.

-
We just went over the small white wire a couple of weeks ago - it goes to the horn and you posted that you found the matching female connector. I just pulled my old fuse block - the wire coming off the fuse you indicated that is blowing is a small gauge green with white stripe. Trace that wire to your likely short. BTW - the stop light wire on the left side of the fuse block is a medium gauge green with yellow stripe but that's not the fuse problem you identified.
-
That would be a 20 amp fuse, same as OE. Blowing a fuse repeatedly says you have a dead short somewhere.
-
Those and many other NLA rubber bits are available here: http://www.240zrubberparts.com/ Great products from a fellow enthusiast.
-
Some fine, aged Canadian patina you have there.
-
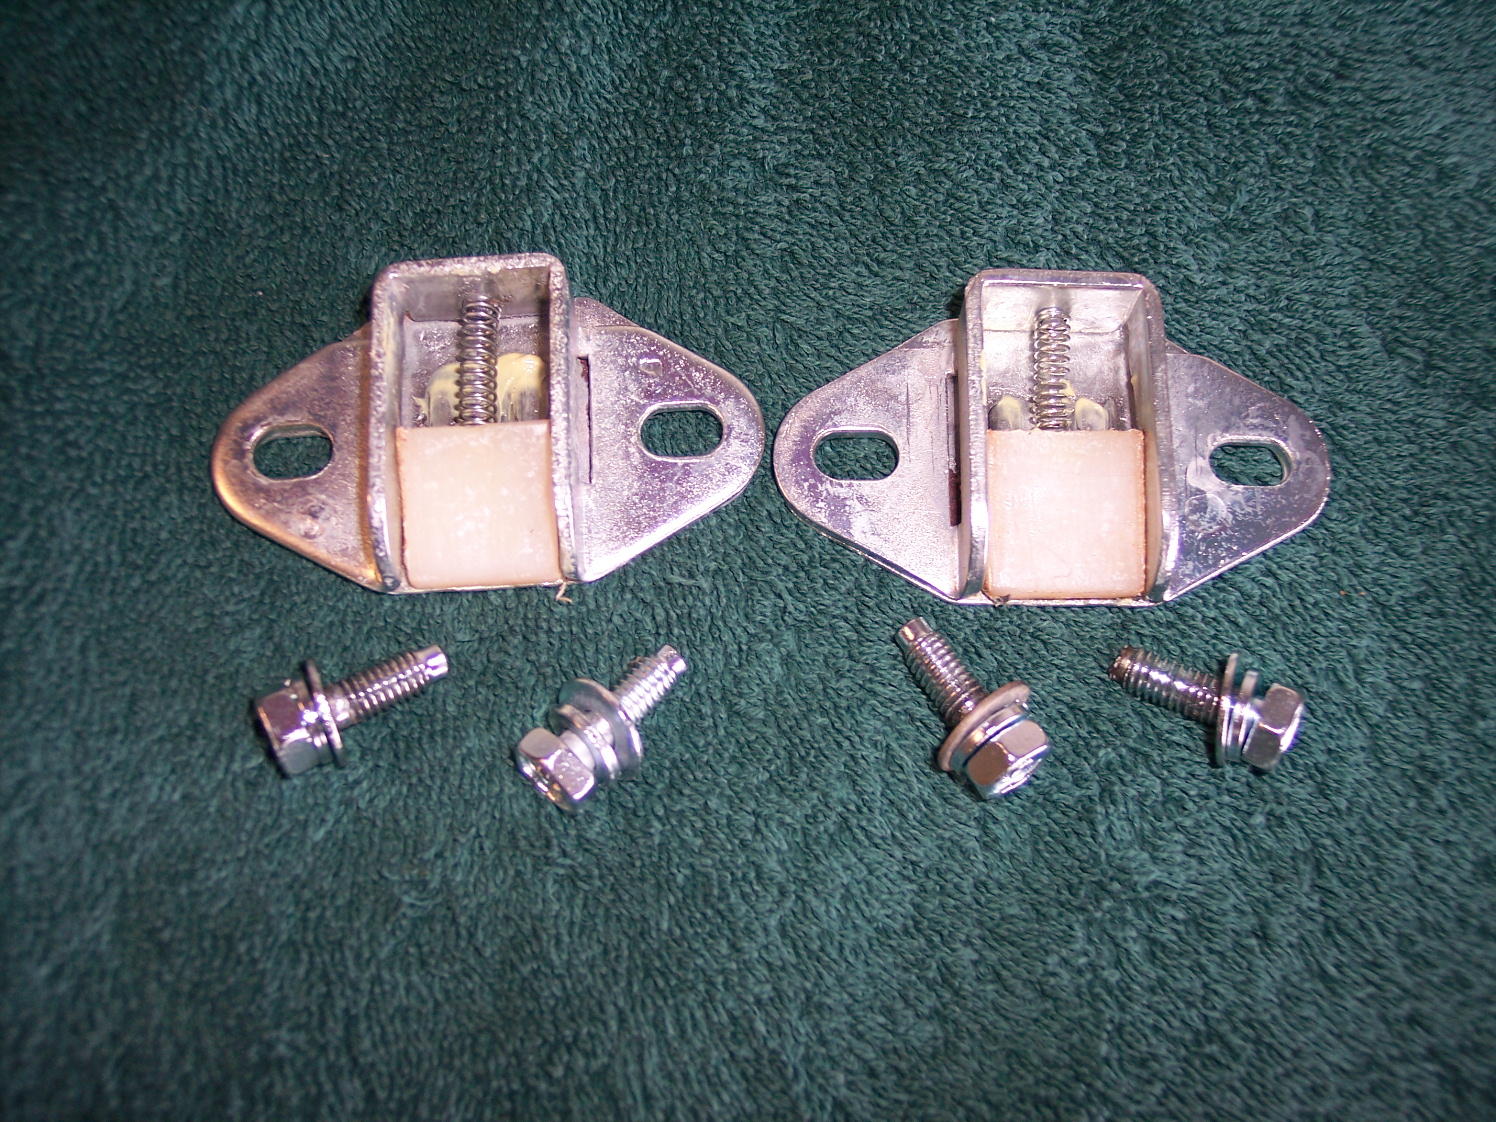
They fit into the hatch stopper where the spring butts into the metal. They are a bumper for the nylon wedge. Sorry not to have a pic of one installed.