jfa.series1
 Subscriber
-
Joined
-
Last visited
Everything posted by jfa.series1
-
 You might find some things here: https://junkyardjenny.com/
 -
I am well pleased with the MSA Ceramic Coated Header and Premium Exhaust System I installed some 14 years ago. The fitment was spot on, the OE heat shield fit without bending or mods, no interference with the steering rod or frame rails. The supplied Turbo muffler was a bit loud and had some drone at 3k RPM, a 12" resonator I later installed cured that and softened the sound a bit. A local shop I use was very impressed with the overall design and exceptional quality of the entire system.
-
Fresh air intakes for the vents controlled by pull/push knobs under the dash near the driver and passenger kick panels.
-
They may have sprayed clear over it.
-
I do not have the harness you are looking for. You would be better served by creating a item-specific Want to Buy advert in the Electrical forum, you will get far better exposure to your specific need. Also, it is strongly recommended that you NOT include contact info in your posts. There are bots that will sweep up this info and use it for malicious purposes. I suggest you edit your post to remove the phone number. Good luck with your search and your project.
-
The lower one in the pic is correct for your car.
-
You don't say where you are located but try and find one or two classic vehicle clubs in your area - any make car or truck. With enough trying, you'll get to owners who can get you local referrals.
-
Many thanks for all the constructive comments and suggestions. I've been running the AC Delco Friction Modified transmission lube for some time, great product and it has provided a significant improvement in shifting. I suspect I have a bearing problem, primarily occuring on cold start situations. Anyway, I'll move forward on tracking down components. With the recent change to the de minimus rule, it looks like most offshore shipments are now on hold pending guidance from the feds. ☹️
-
There is a possibility my original 4-speed may need a rebuild. It is my understanding that rebuild kits for the type "A" transmission are NLA, at least in the US. Some questions for our talented membership: Are any of the components of the "B" kit usable in the "A" transmission? Has anyone identified susbstitute components - bearings, bushings, synchros, ...etc.? Roadster parts? Any thoughts on where else to search for a type "A" rebuild kit? I really want to keep my driveline orignal. Swappng to a type "B" transmission is undesireable due to the potential for damage to the console and underlying body to accomodate the change in the shift rod location. I'm open and welcoming to any comments, suggestions and recommendations. Thanks, Jim
-
Sorry, I no longer have these antennas.
-
This is in regards to a hazard switch body, not a relay.
-
Be EXTREMELY cautious in bending any of the tabs, go slowly with very little pressure. The body is pot metal and breaks very easily. Ask me how I know. 😉
-
Ditto.
-
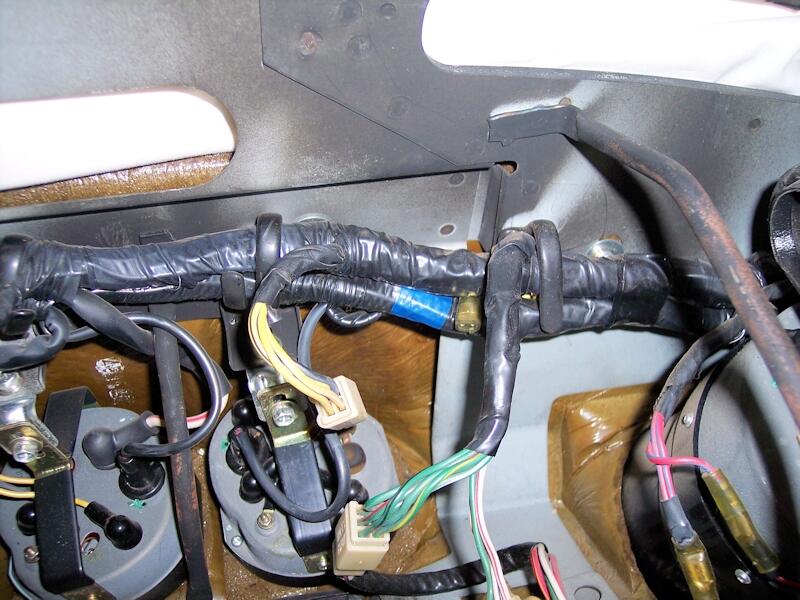
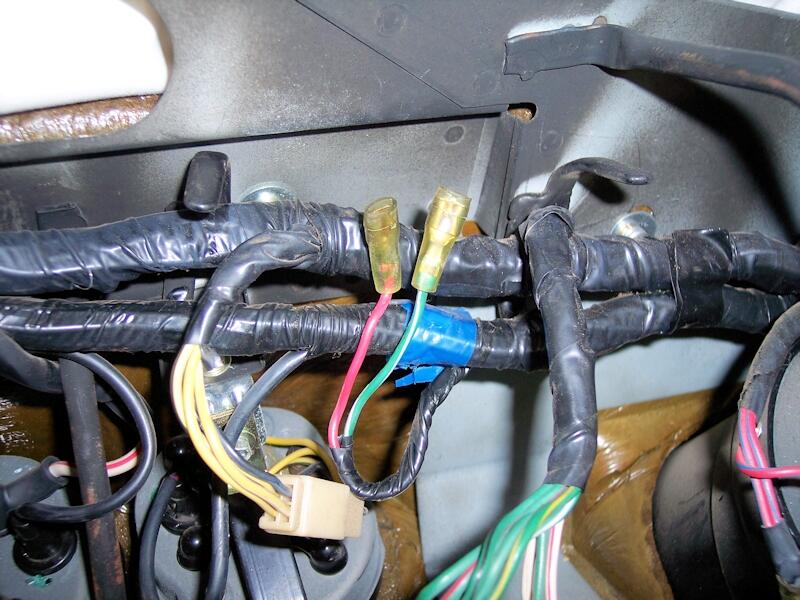
And if you decide to pursue auxillary lighting, here is the factory wiring Easter Egg just waiting for that switch in the dash. Remember, if you go this route you will want to install relays and larger gauge wiring to actually power the lights.
-
Both of those links are variations of the Registry PDF I posted back in June. To the best of my recall, the version I posted is the original format that was active at the time I added my car. This version includes the original engine # where known and a column for replacement engine info. Because it was an active online spreadsheet a user could modify the report format to suit their taste. https://www.classiczcars.com/forums/topic/69433-2015-2020-online-registry-spreadsheet/#comment-676812
-
Yup, I now recall the hood was pranged and repaired many years ago.
-
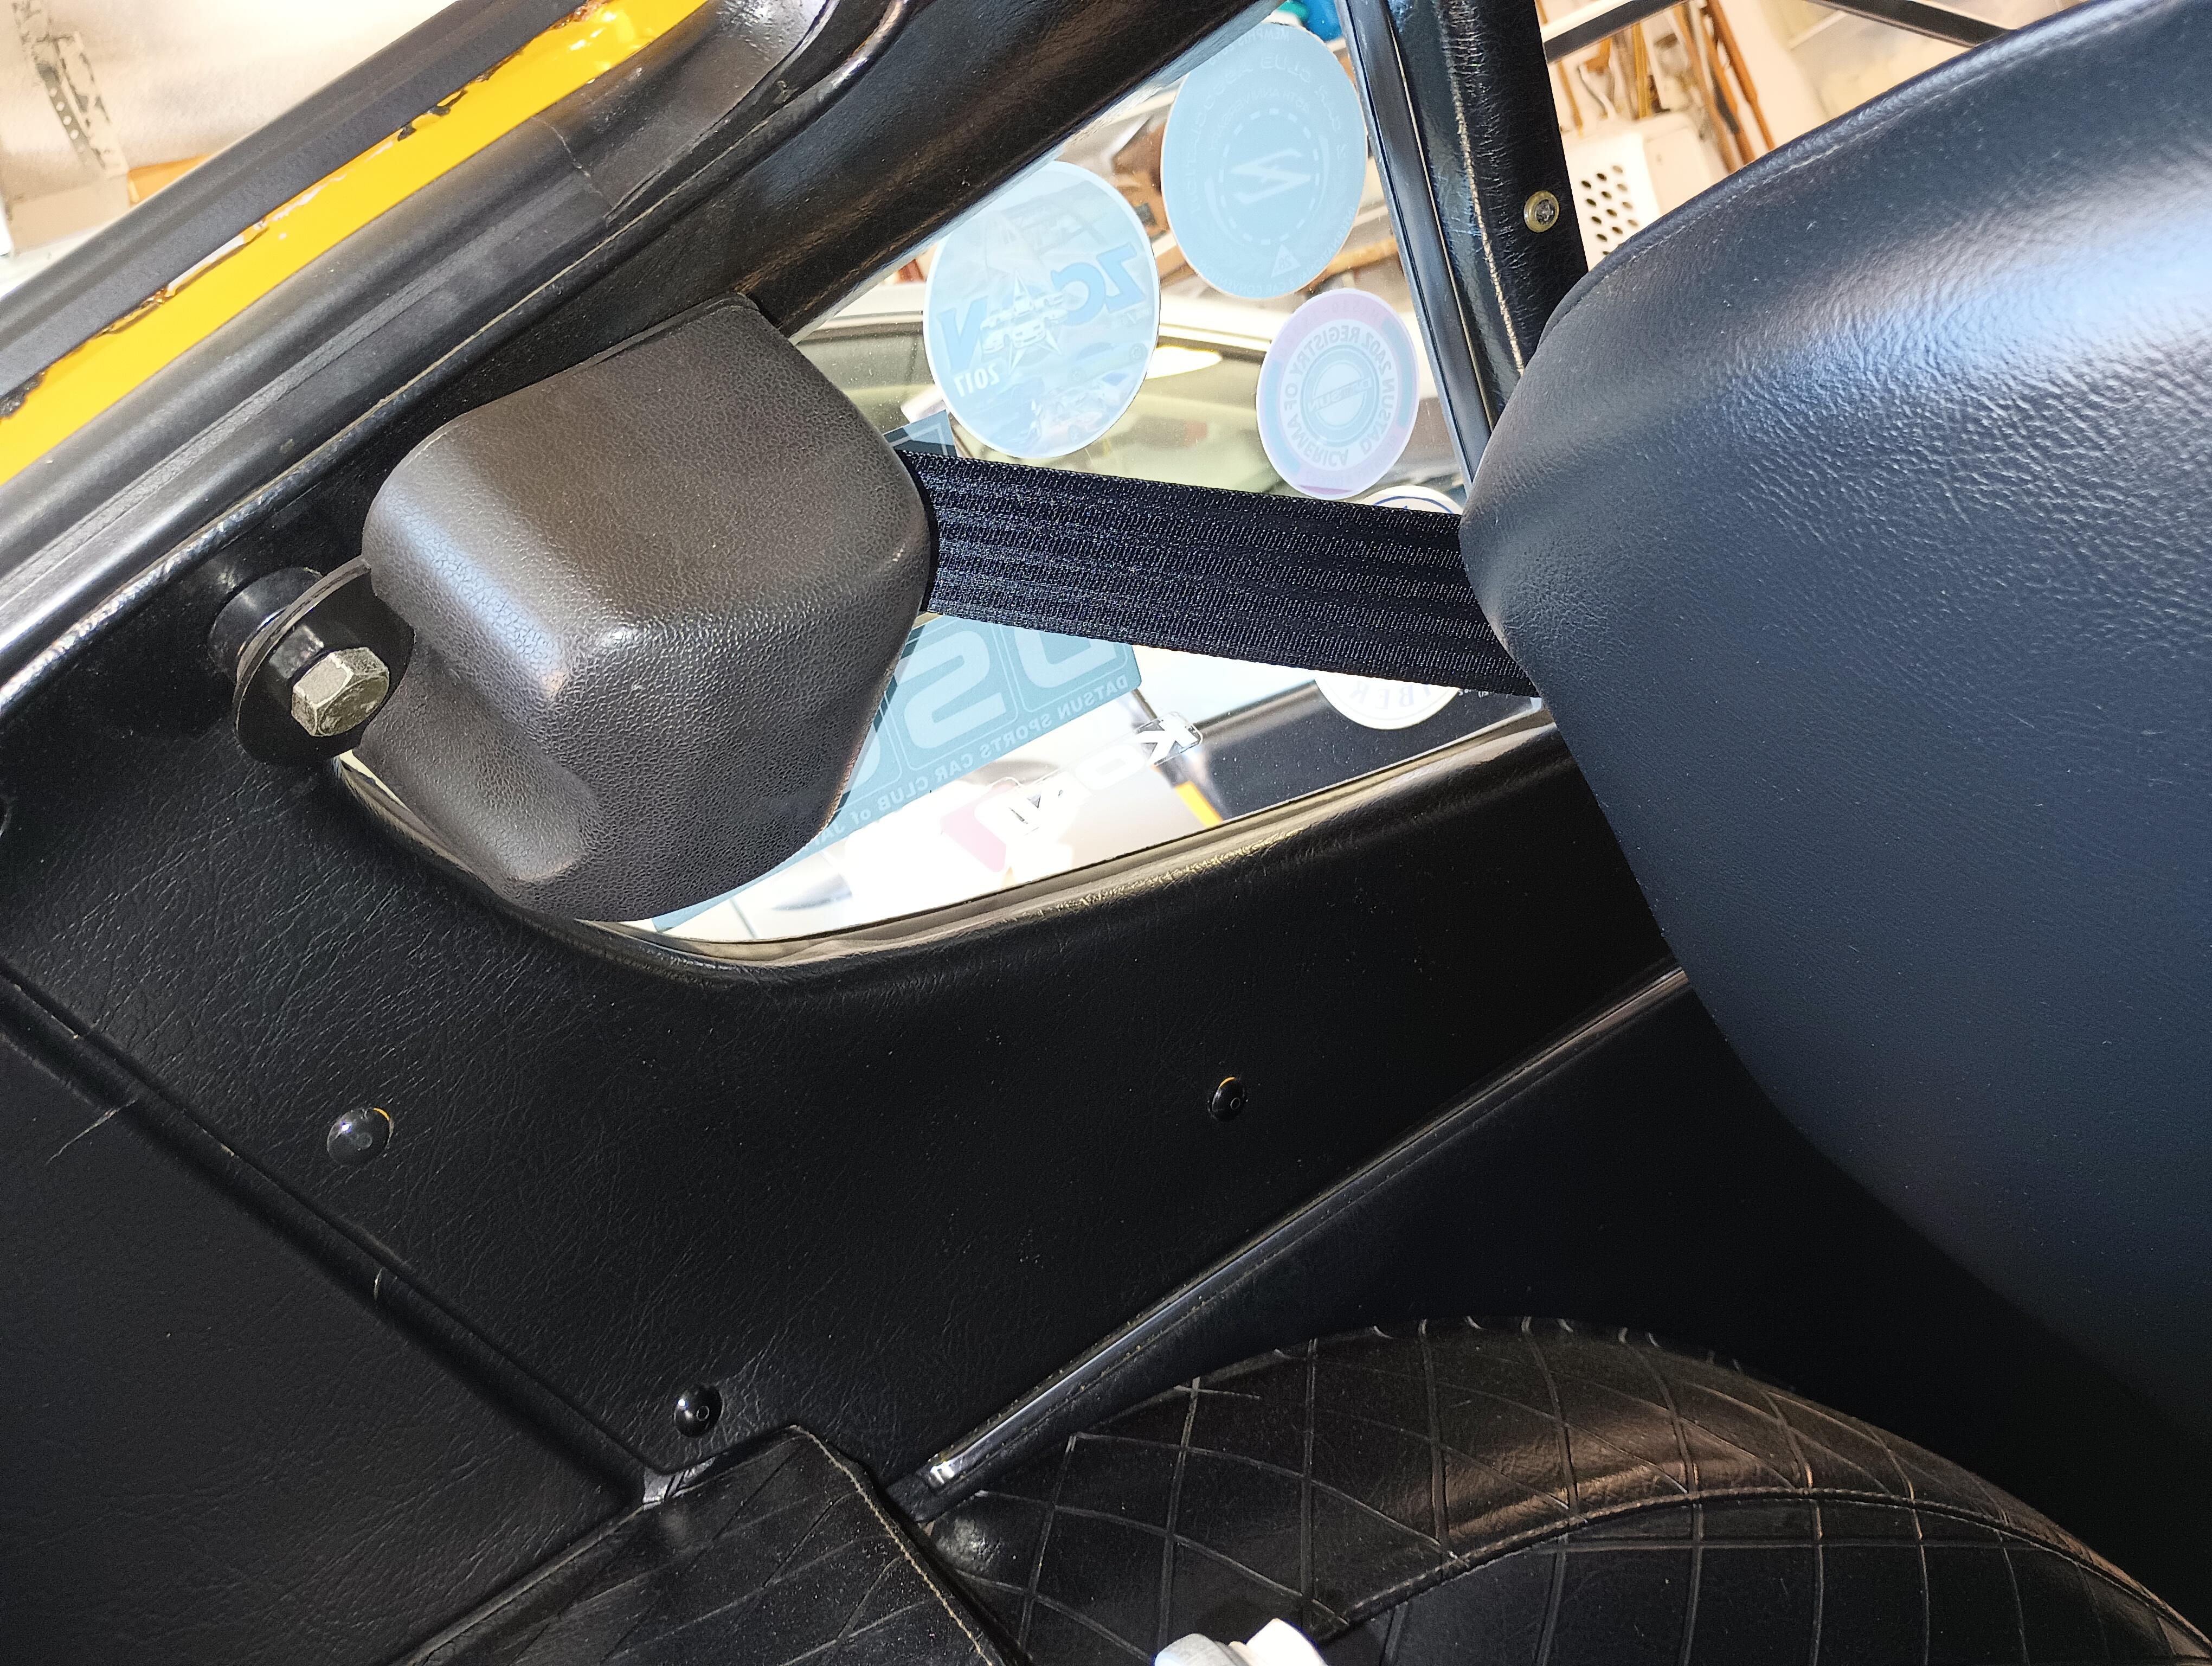
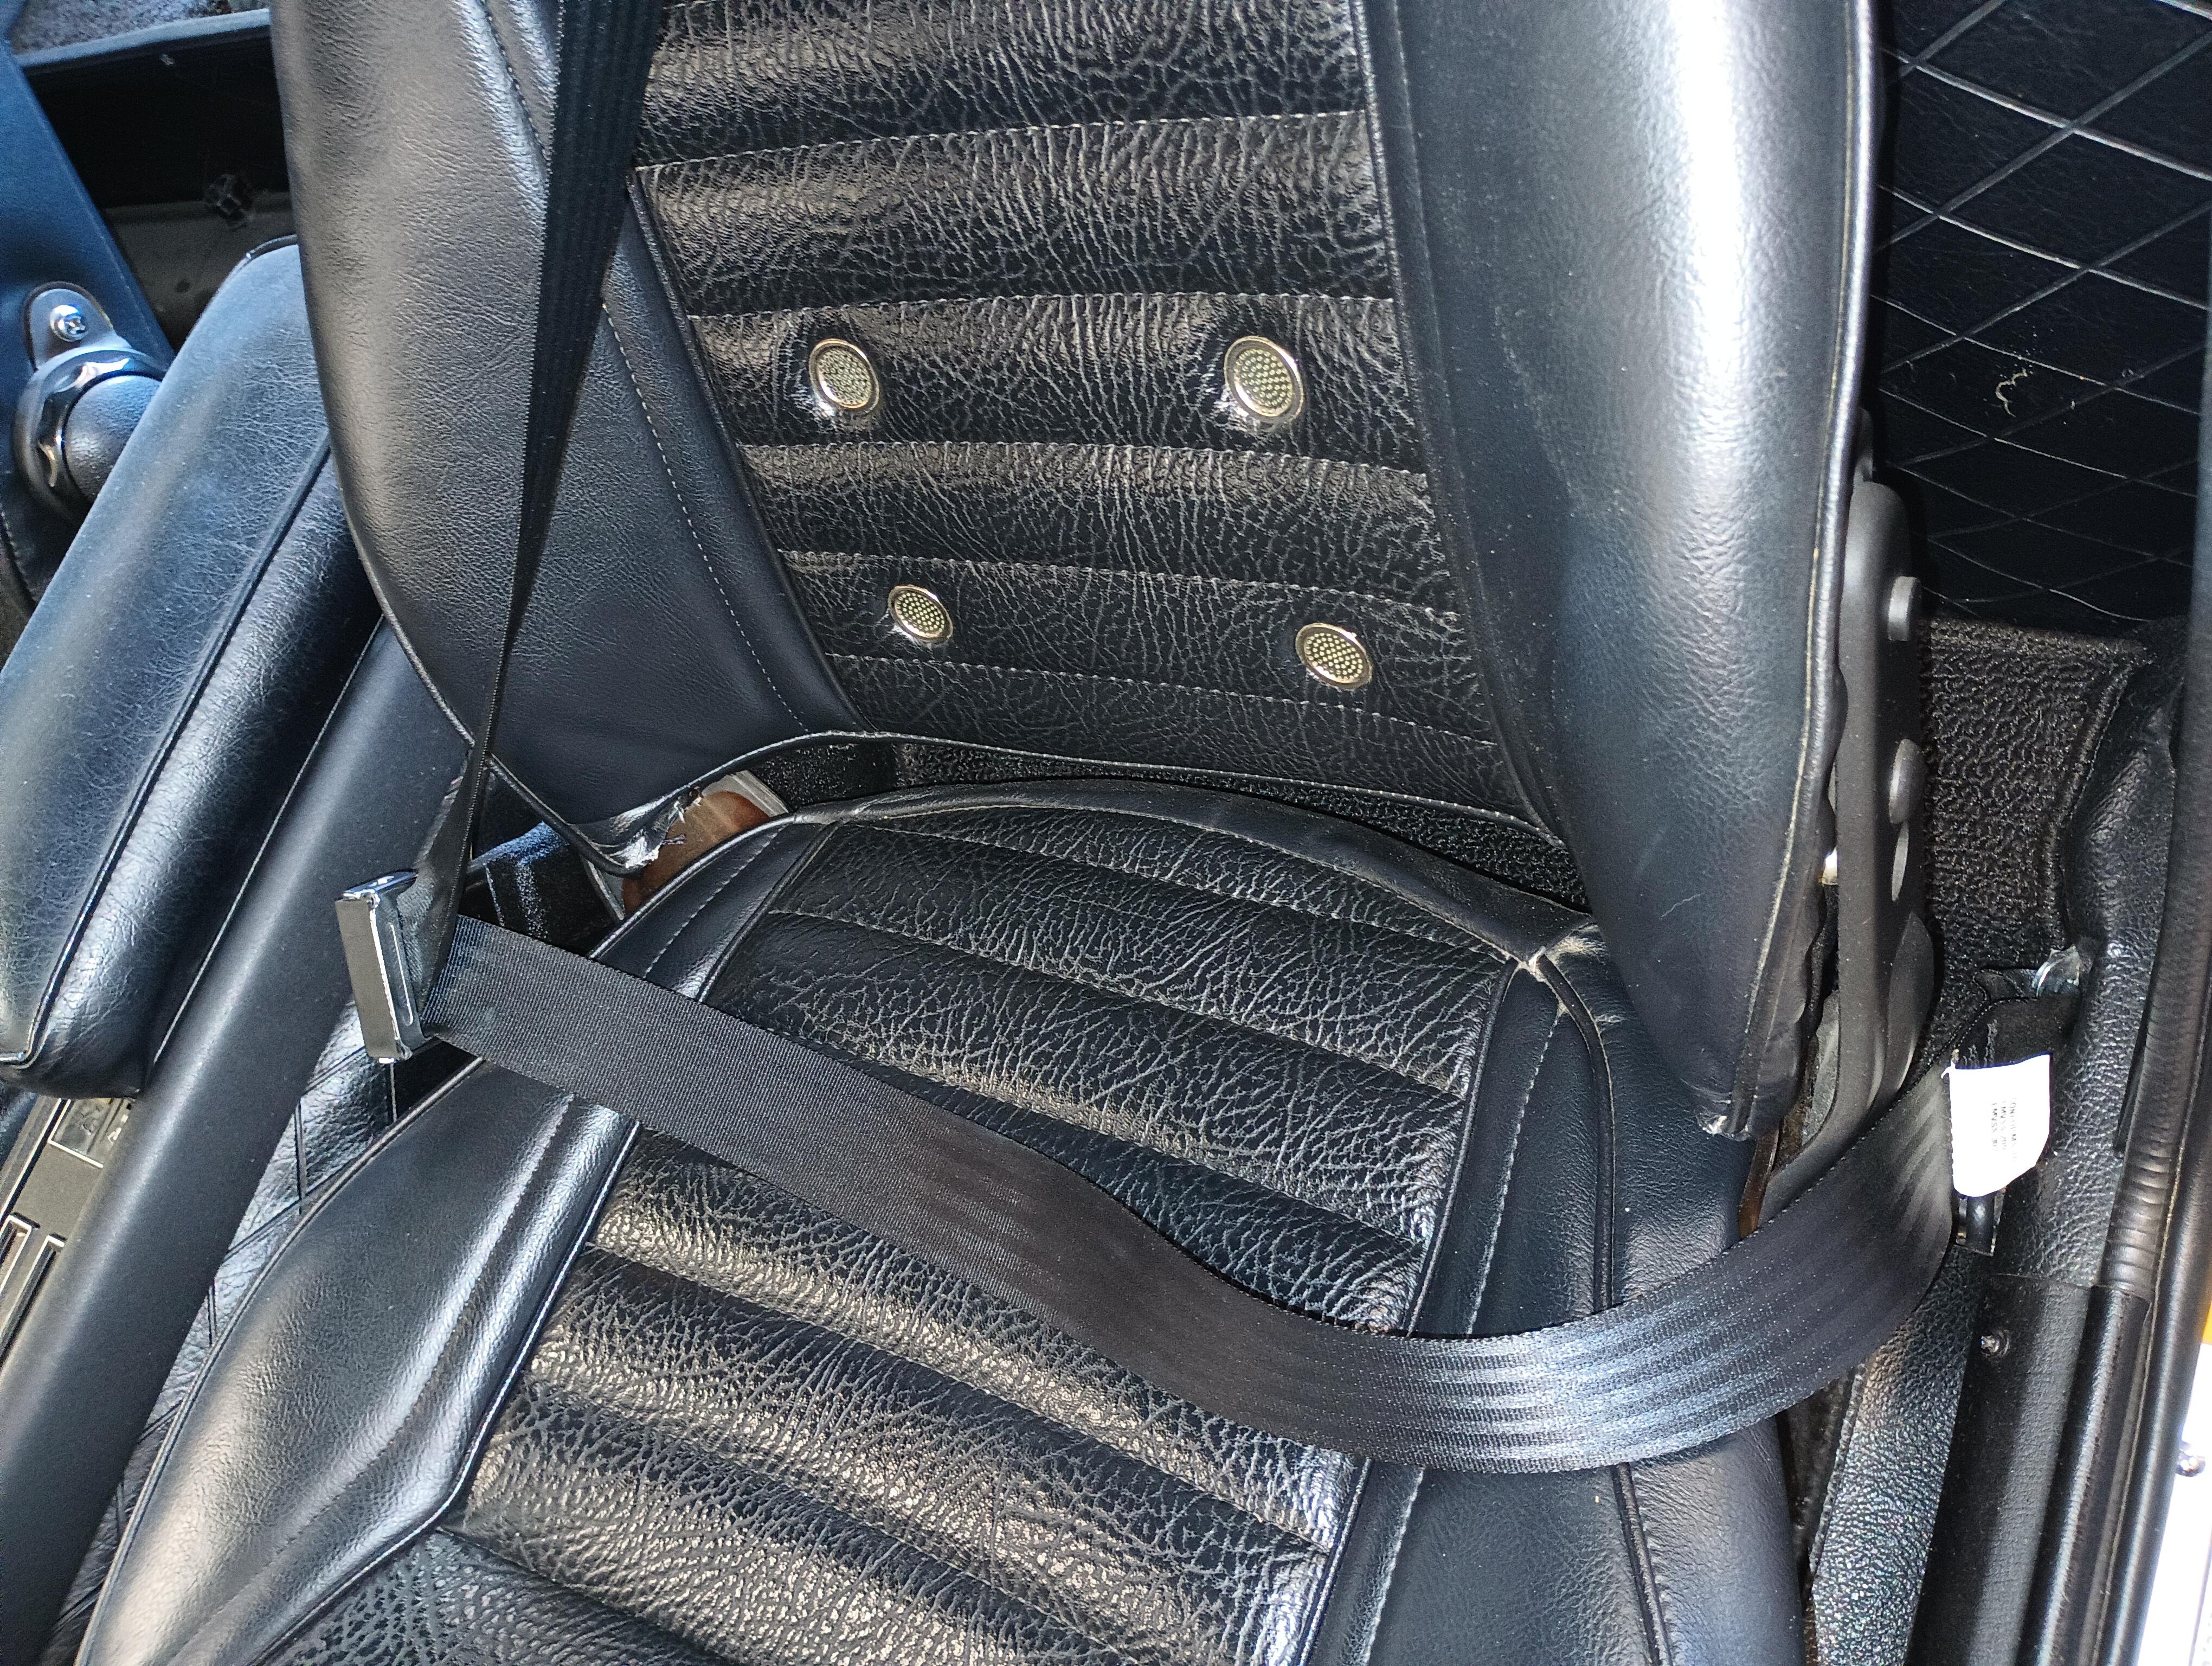
One more vote for the Wesco Roadster Retractable belts. You definitely want the 11" extention. I used only the OE bolts all araound, did not requre the hardware kit.

-
Apologies will never be necessary when one is caring for family and self. I am so very glad to see you back with us, your humor and knowledge have been sorely missed. For those of you who know them, here is a pic from ZCON 2015 when my wife and I were fortunate to make the in-person acquaintance of Philip and Janet. What a grand time we had hanging out with this couple and others from the classiczcars group.

-
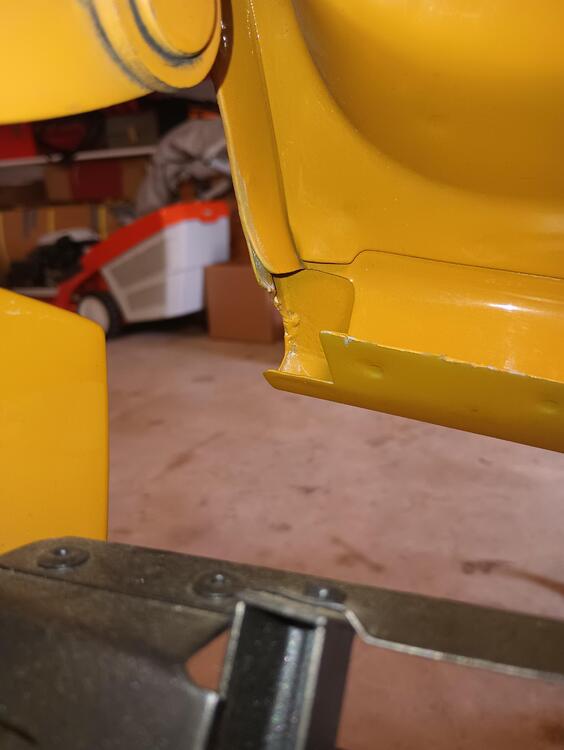
With the hood and bumper installed this is the best I can get for pics, hope this helps.
-
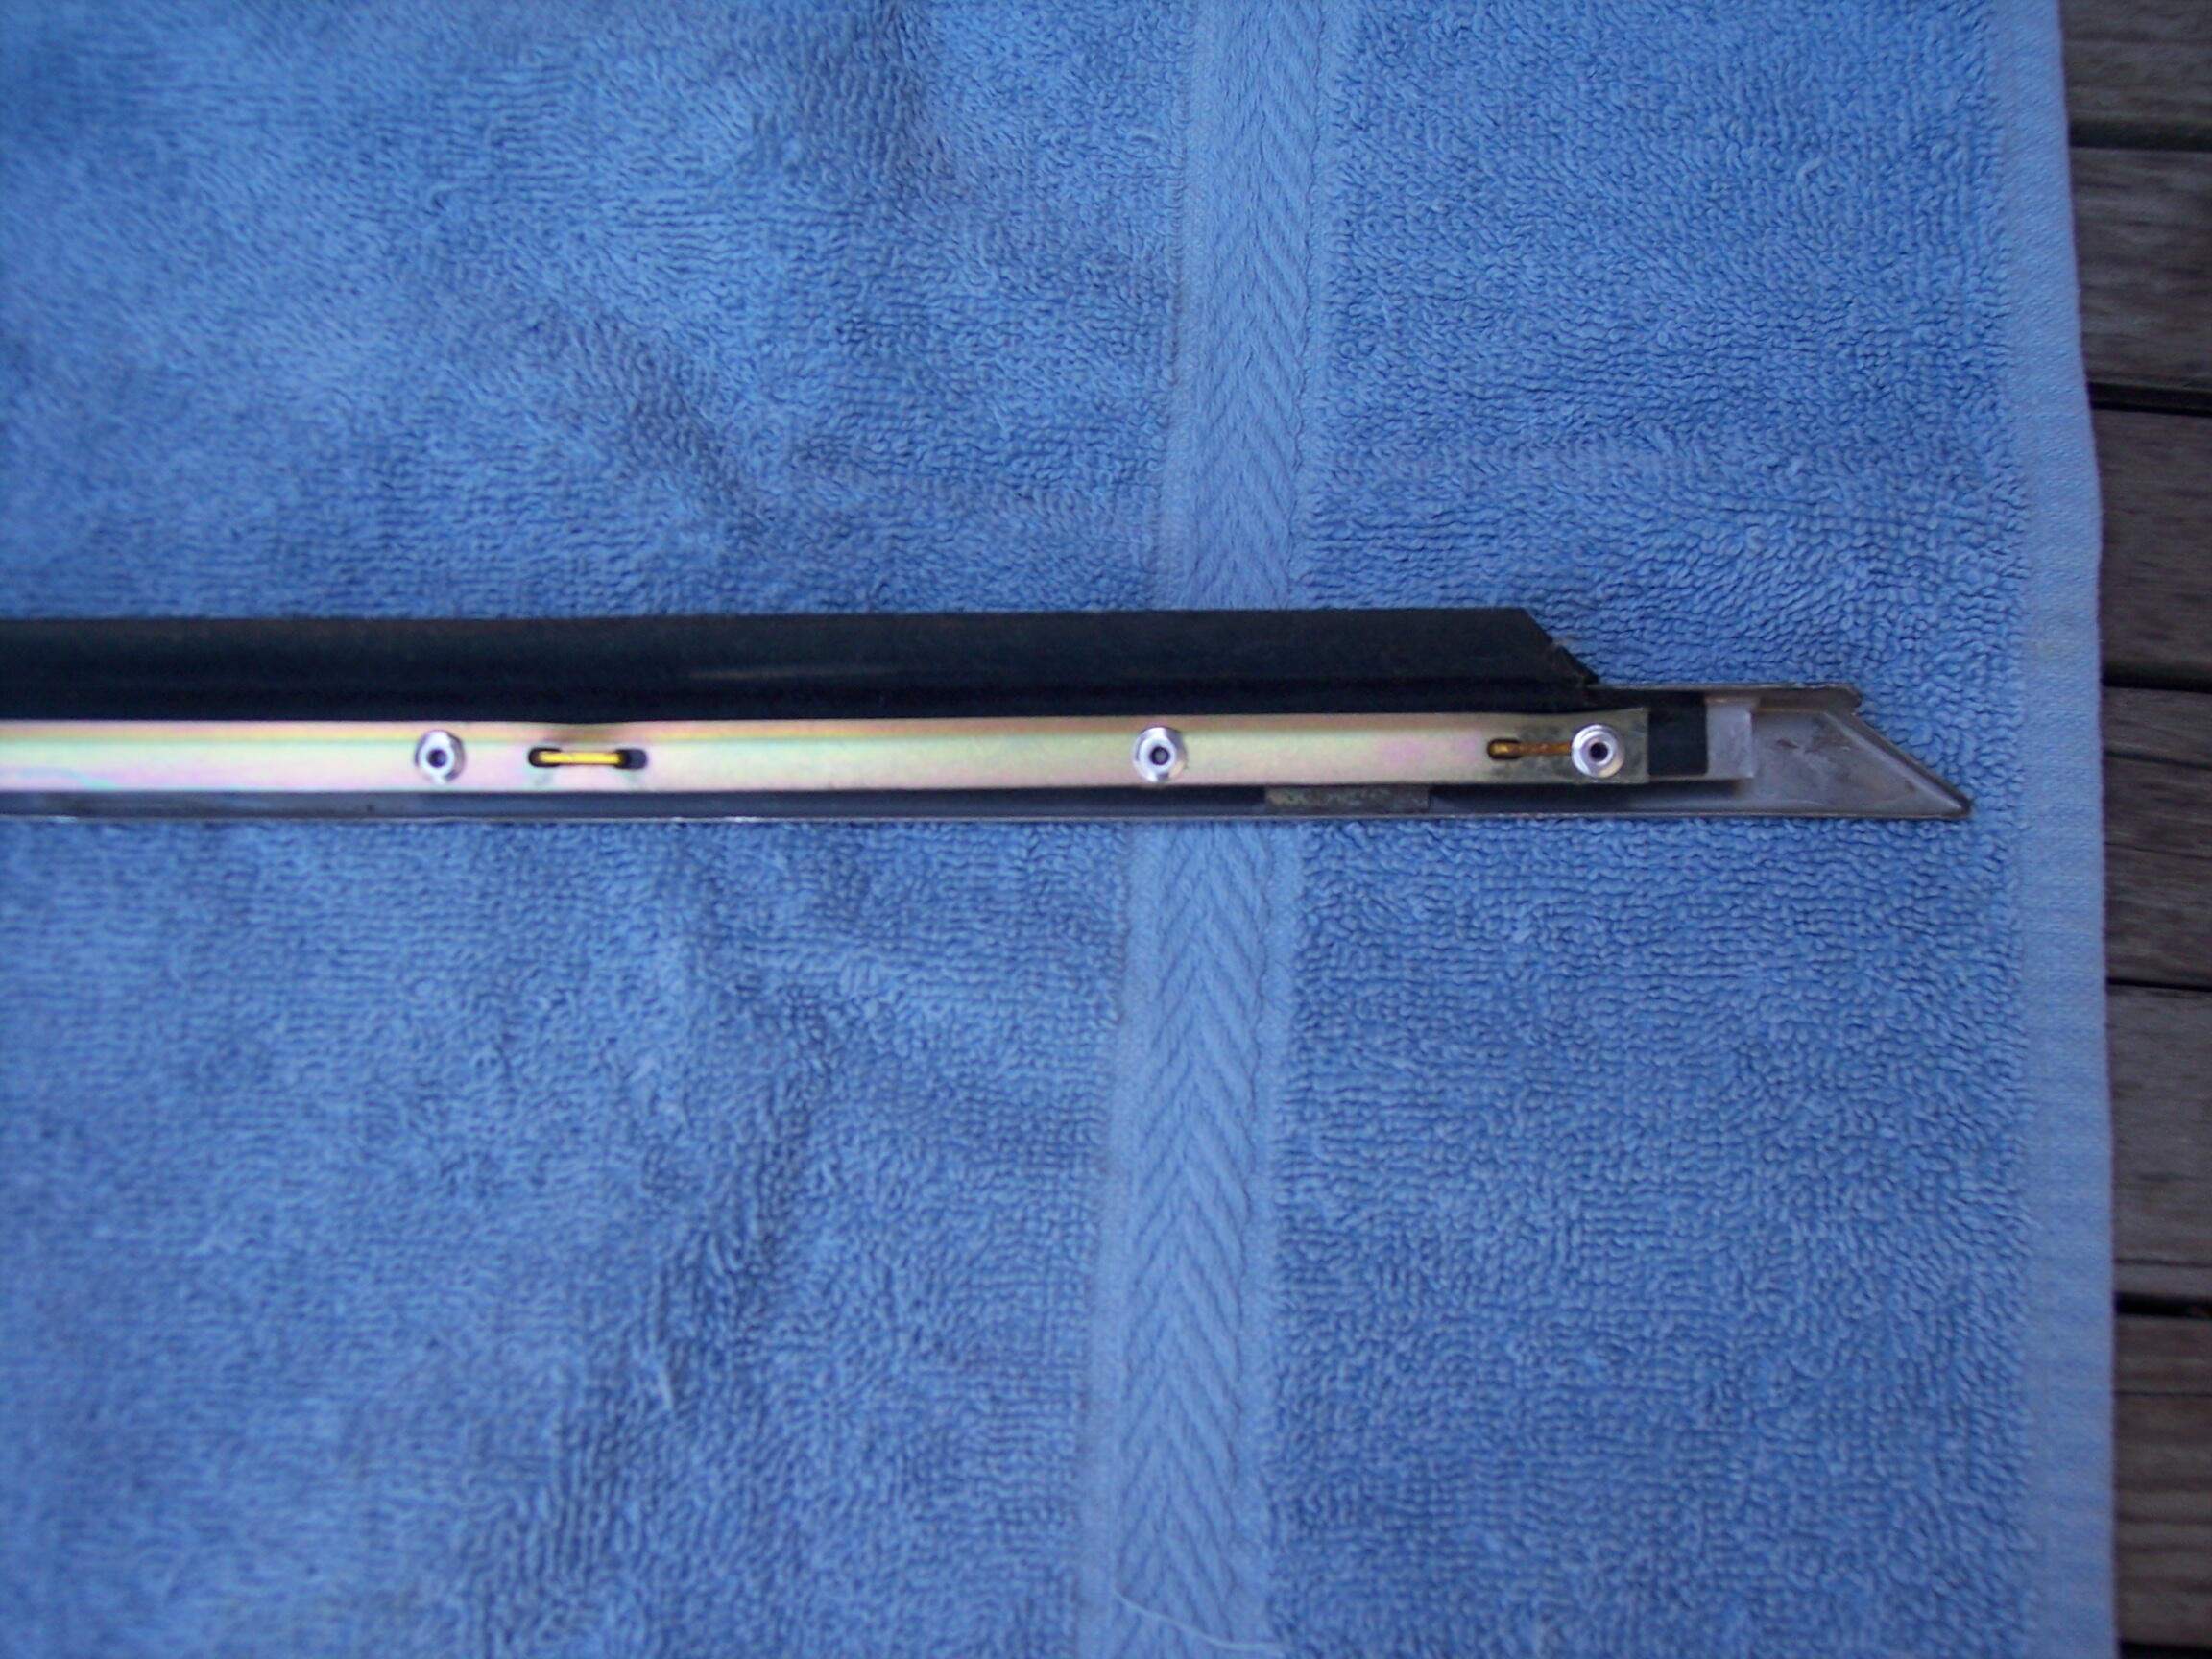
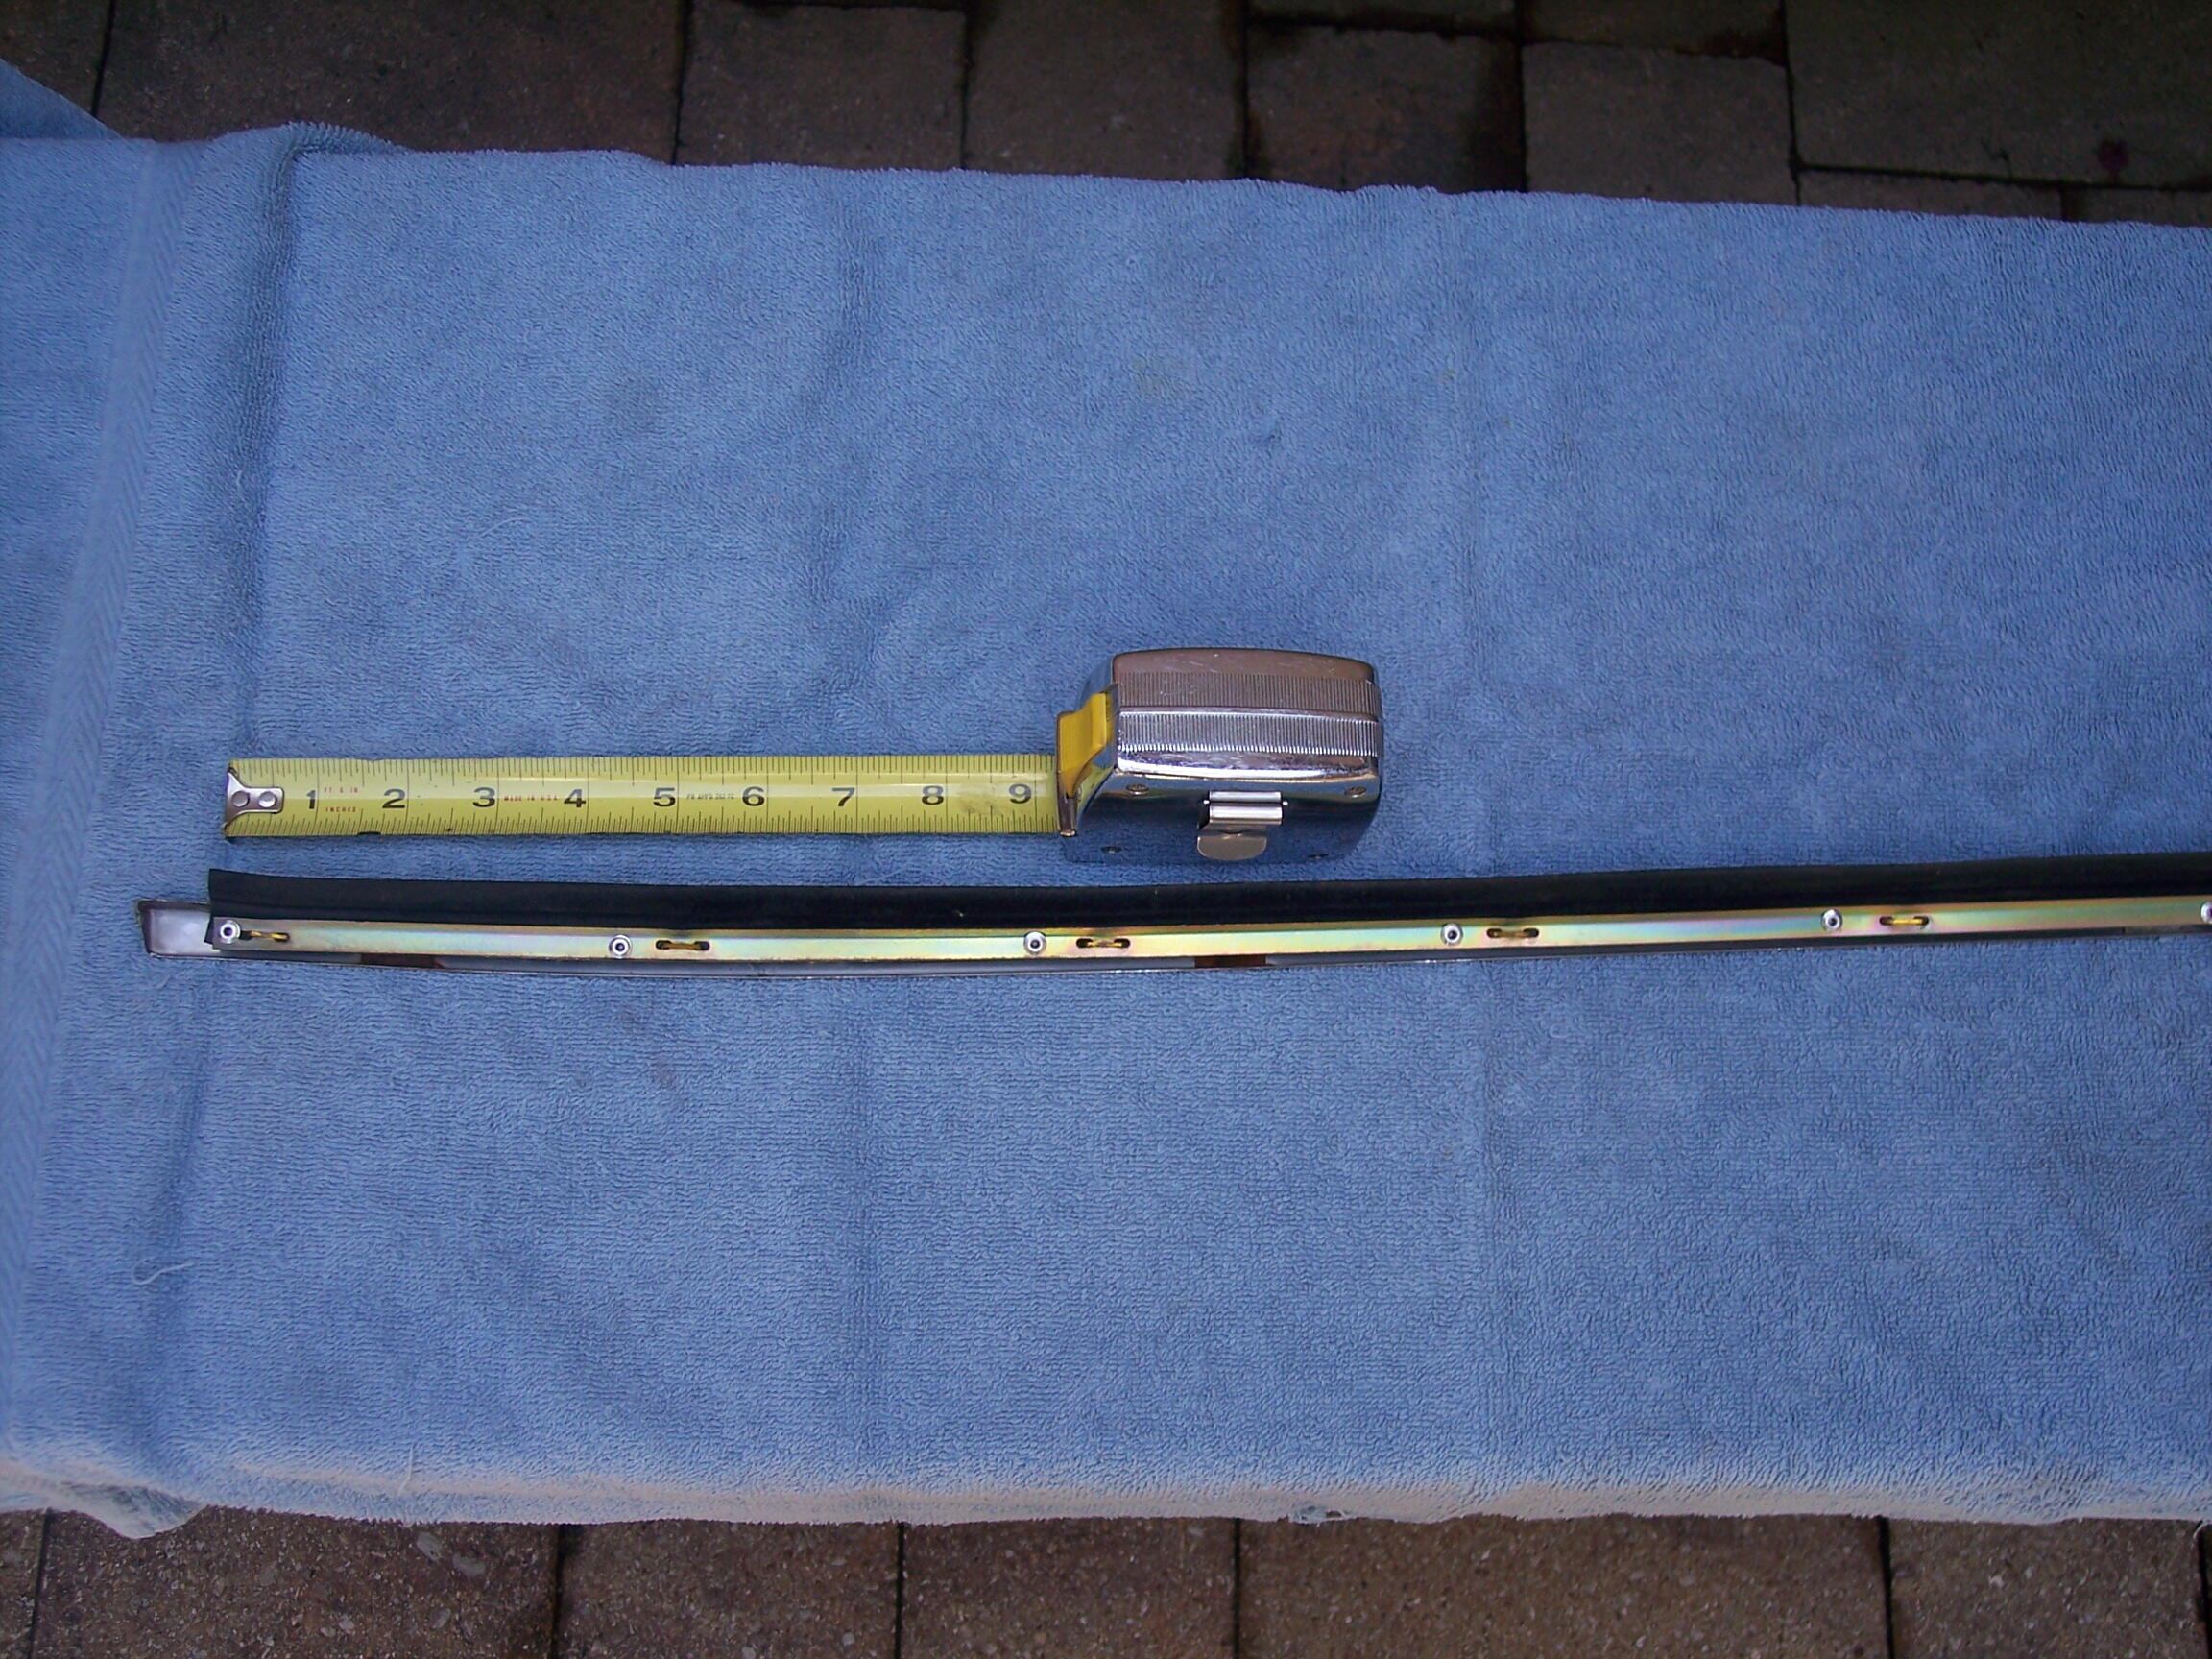
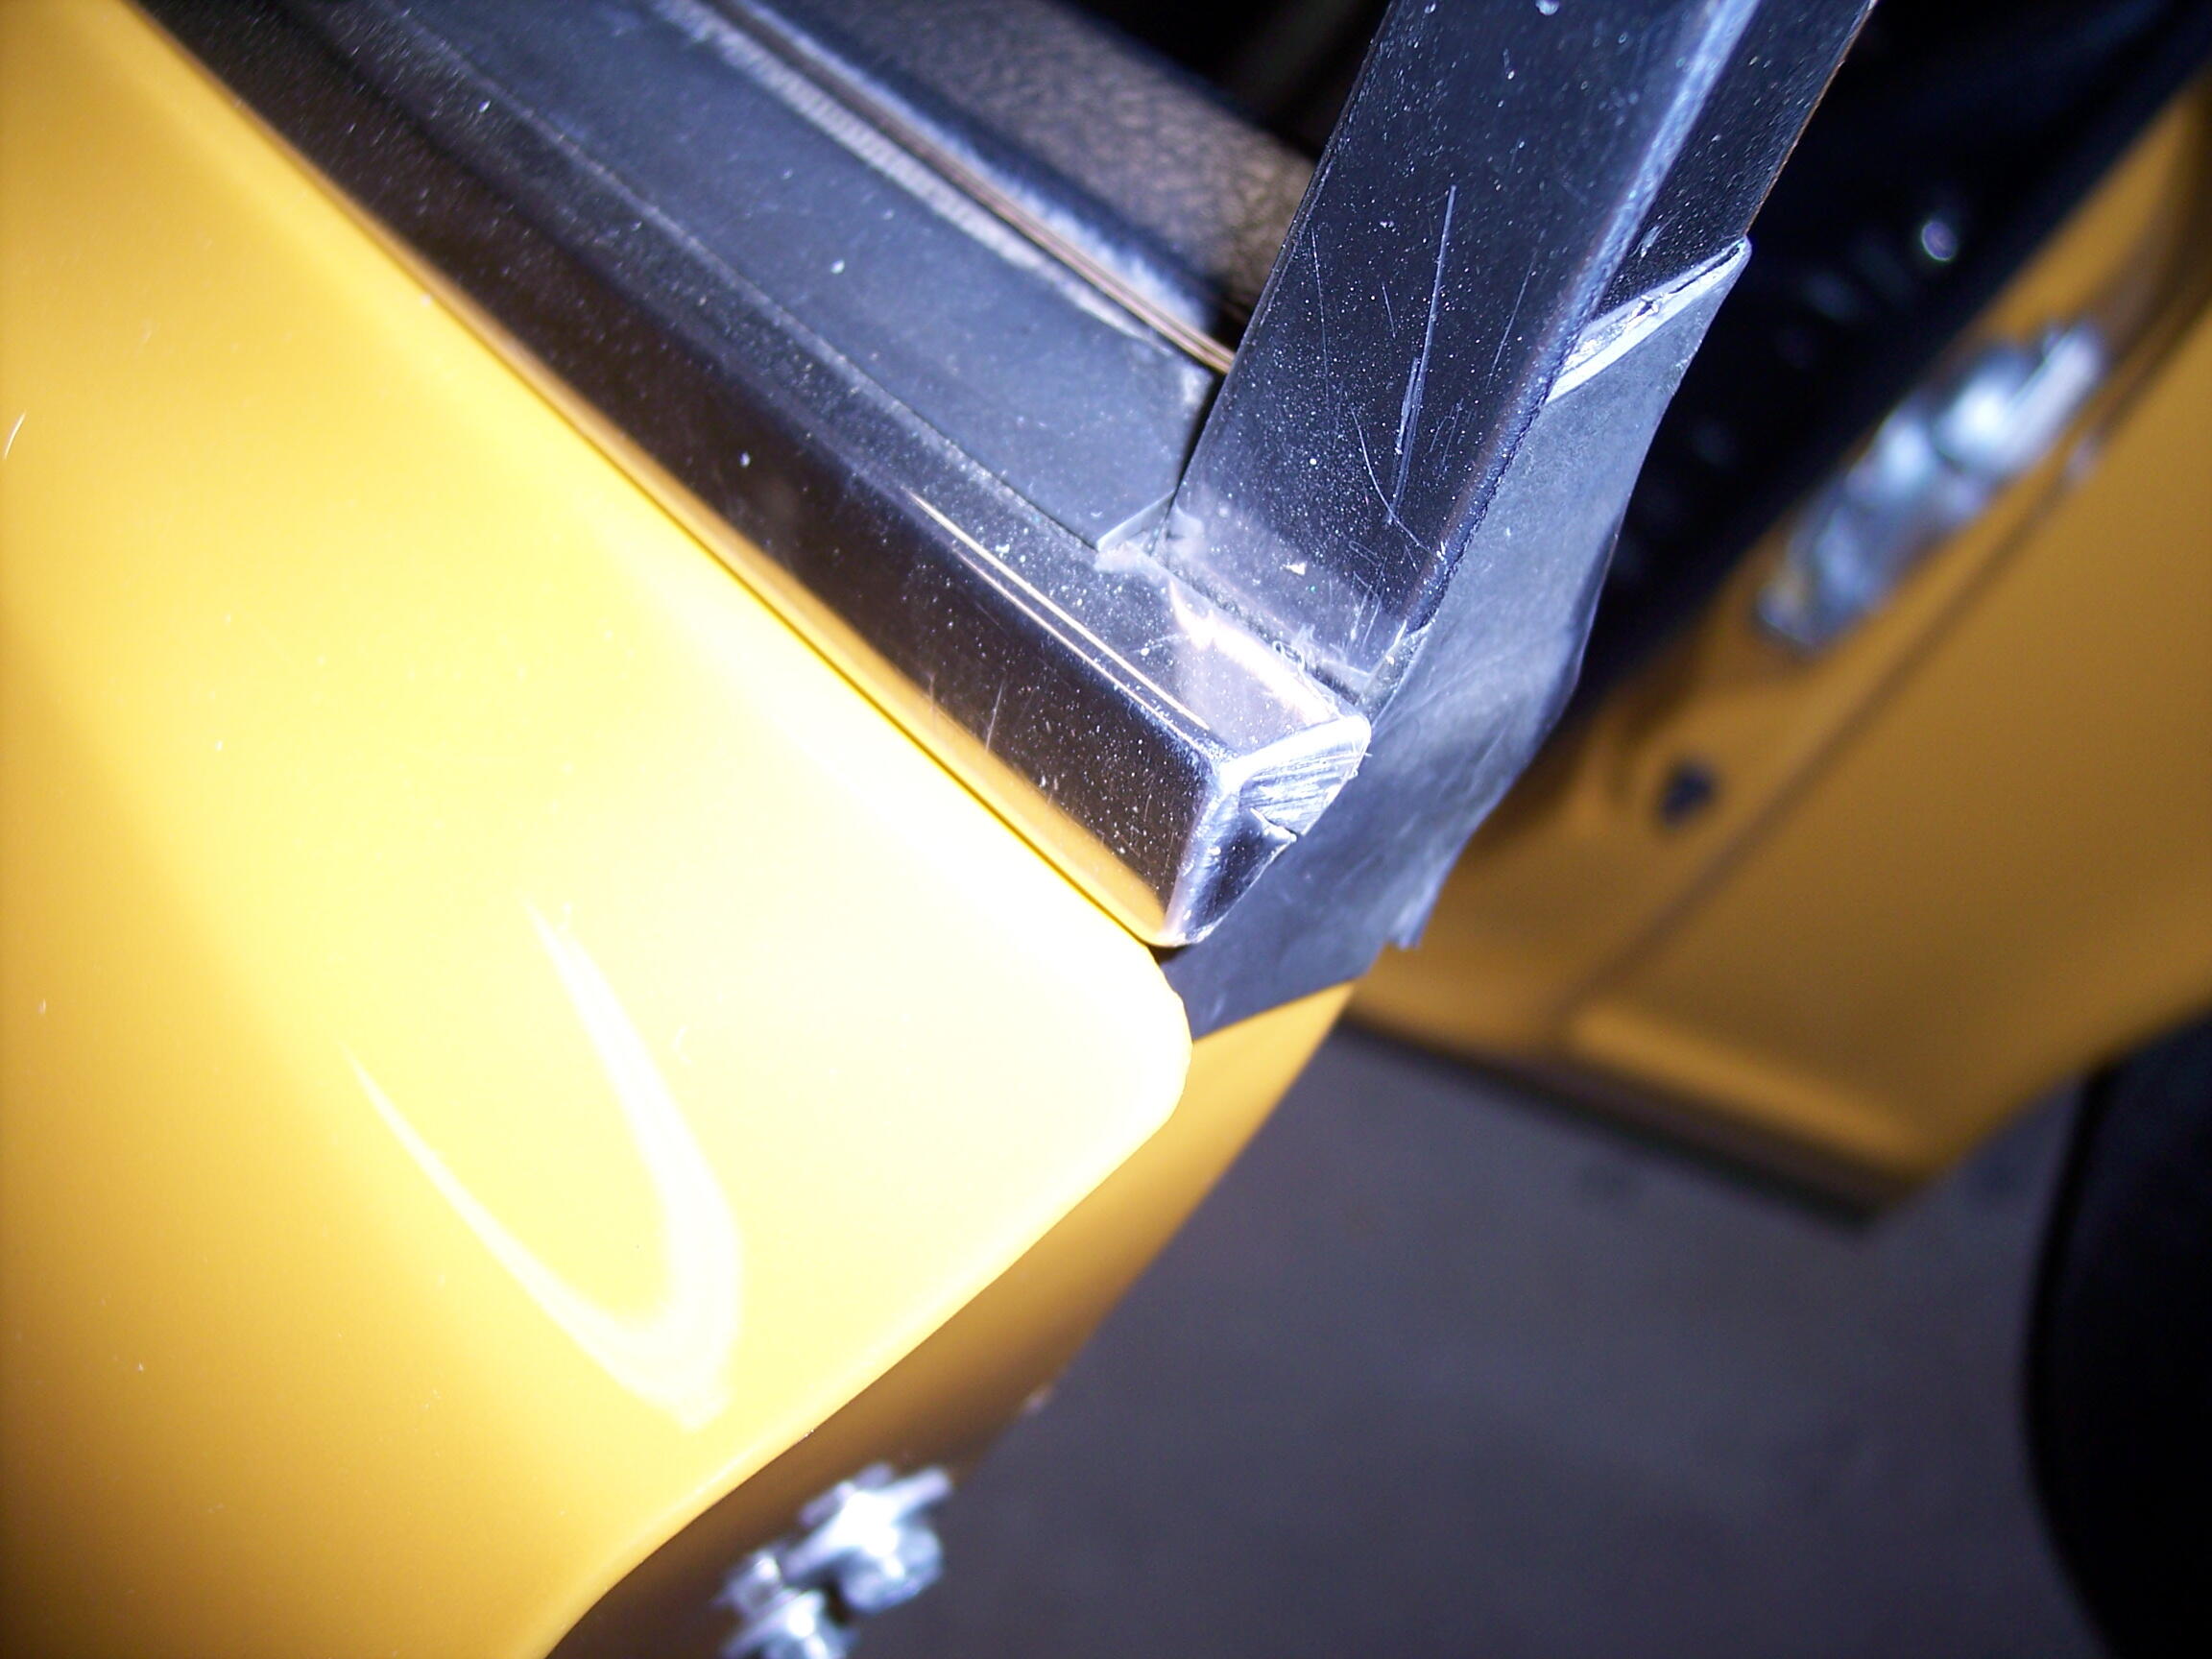
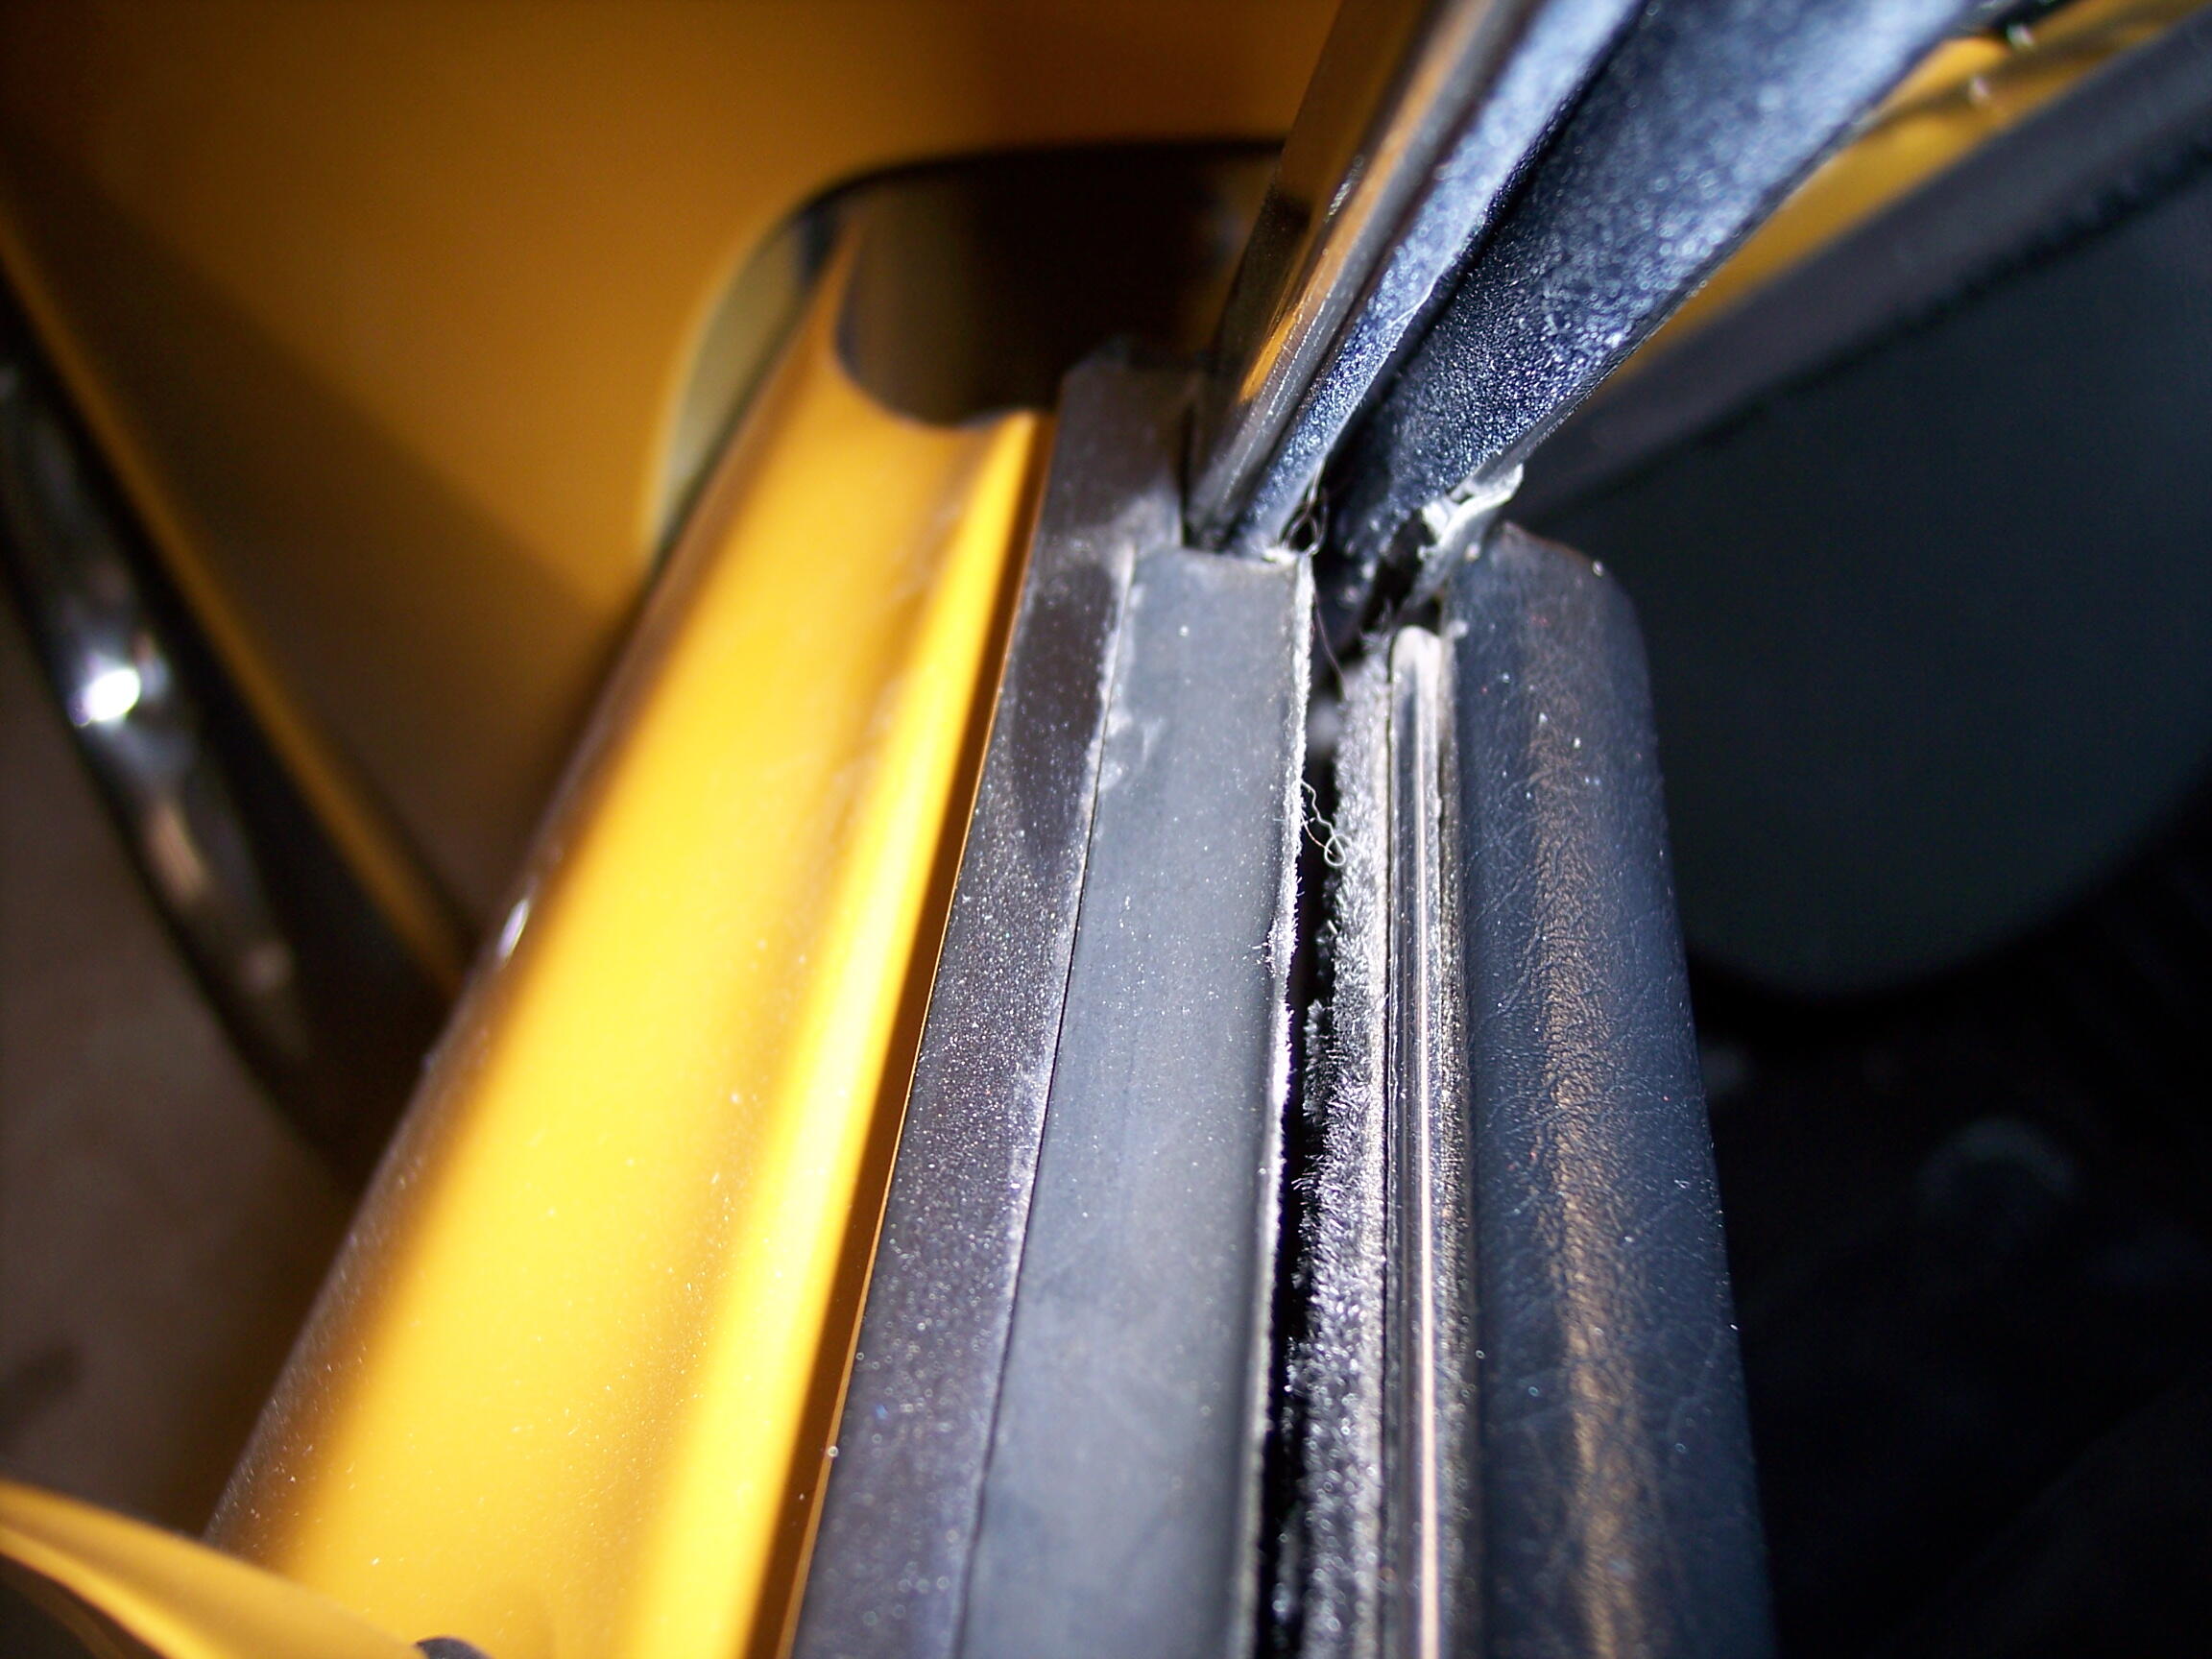
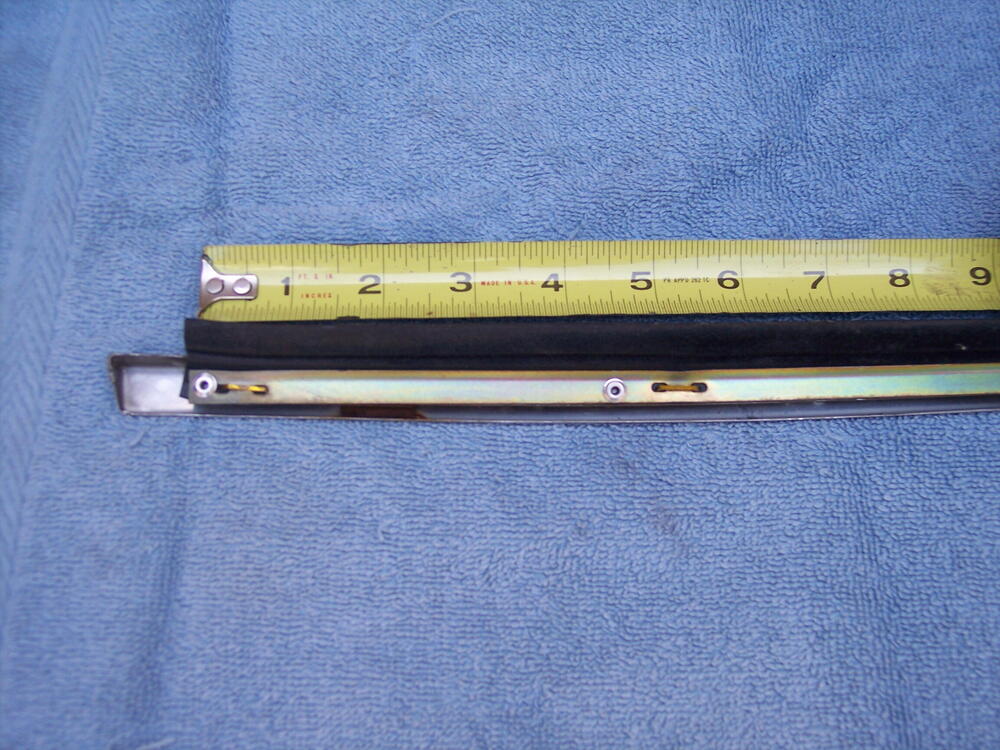
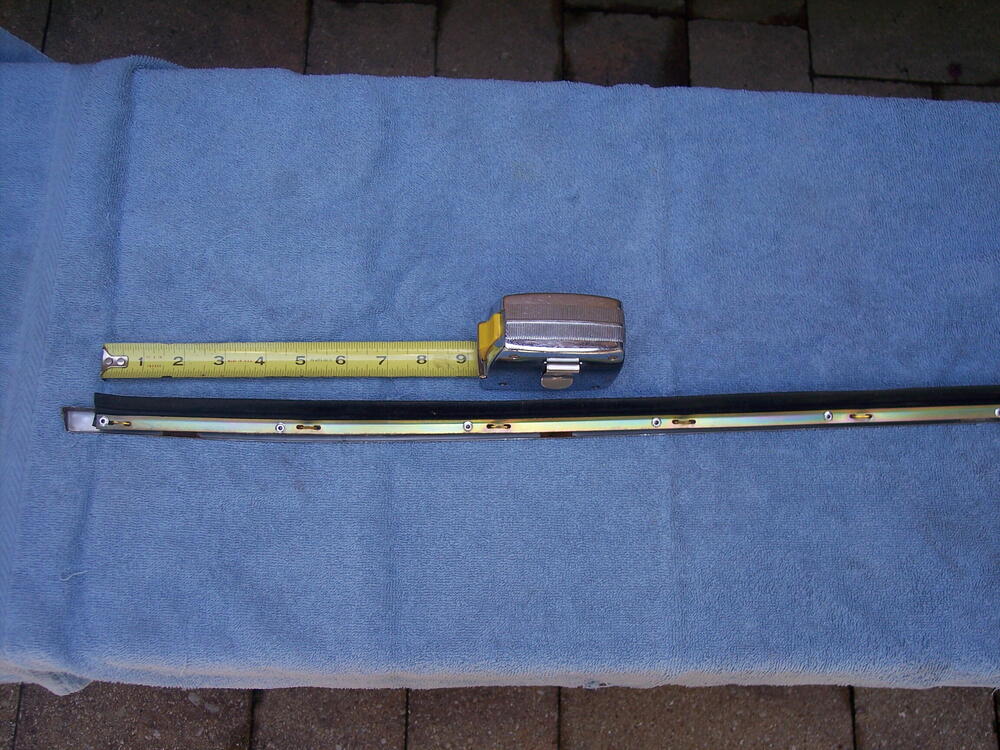
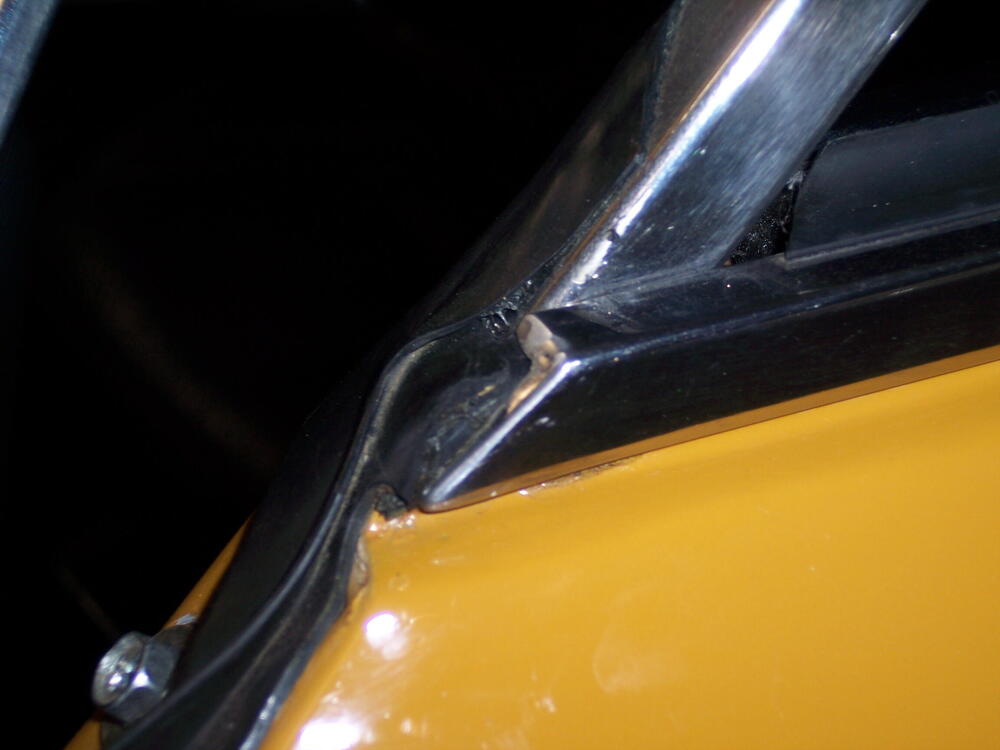
At the request of @Yarb here are some details on my pop rivet install of the squeegee rubber on the belt molding. Background: When I was doing my car 14 years ago, replacement squeegee rubber was not available but Black Dragon had complete belt molding assemblies available at a great price. The molding was excellent but it was straight and not curved to fit the pinchweld on the top of the door. After several tries it was obvious the new molding would not easily curve into the required shape and I was not going to risk damage to a fresh paint job. So... I removed the squeegee strip with its thin metal backplate still stapled in place and installed it on my OE molding with 1/8" pop rivets spaced about every 4 1/2" at the staples. The backside of the pop rivets does not interfere with the fit onto the pinchweld.

-
If the worst should happen and you damage the filler tube I have a used one in excellent condition that I will let go at a very resonable price.
-
Ha! That links back to a post I did almost 7 years ago about using pop rivets to secure the sqeegee rubber to the belt molding, similar to how I did the replacment fuzzy strips to the door panel. @Patcon Charles, If you need some info I can pull off a molding and get some pics of the pop rivets.
-
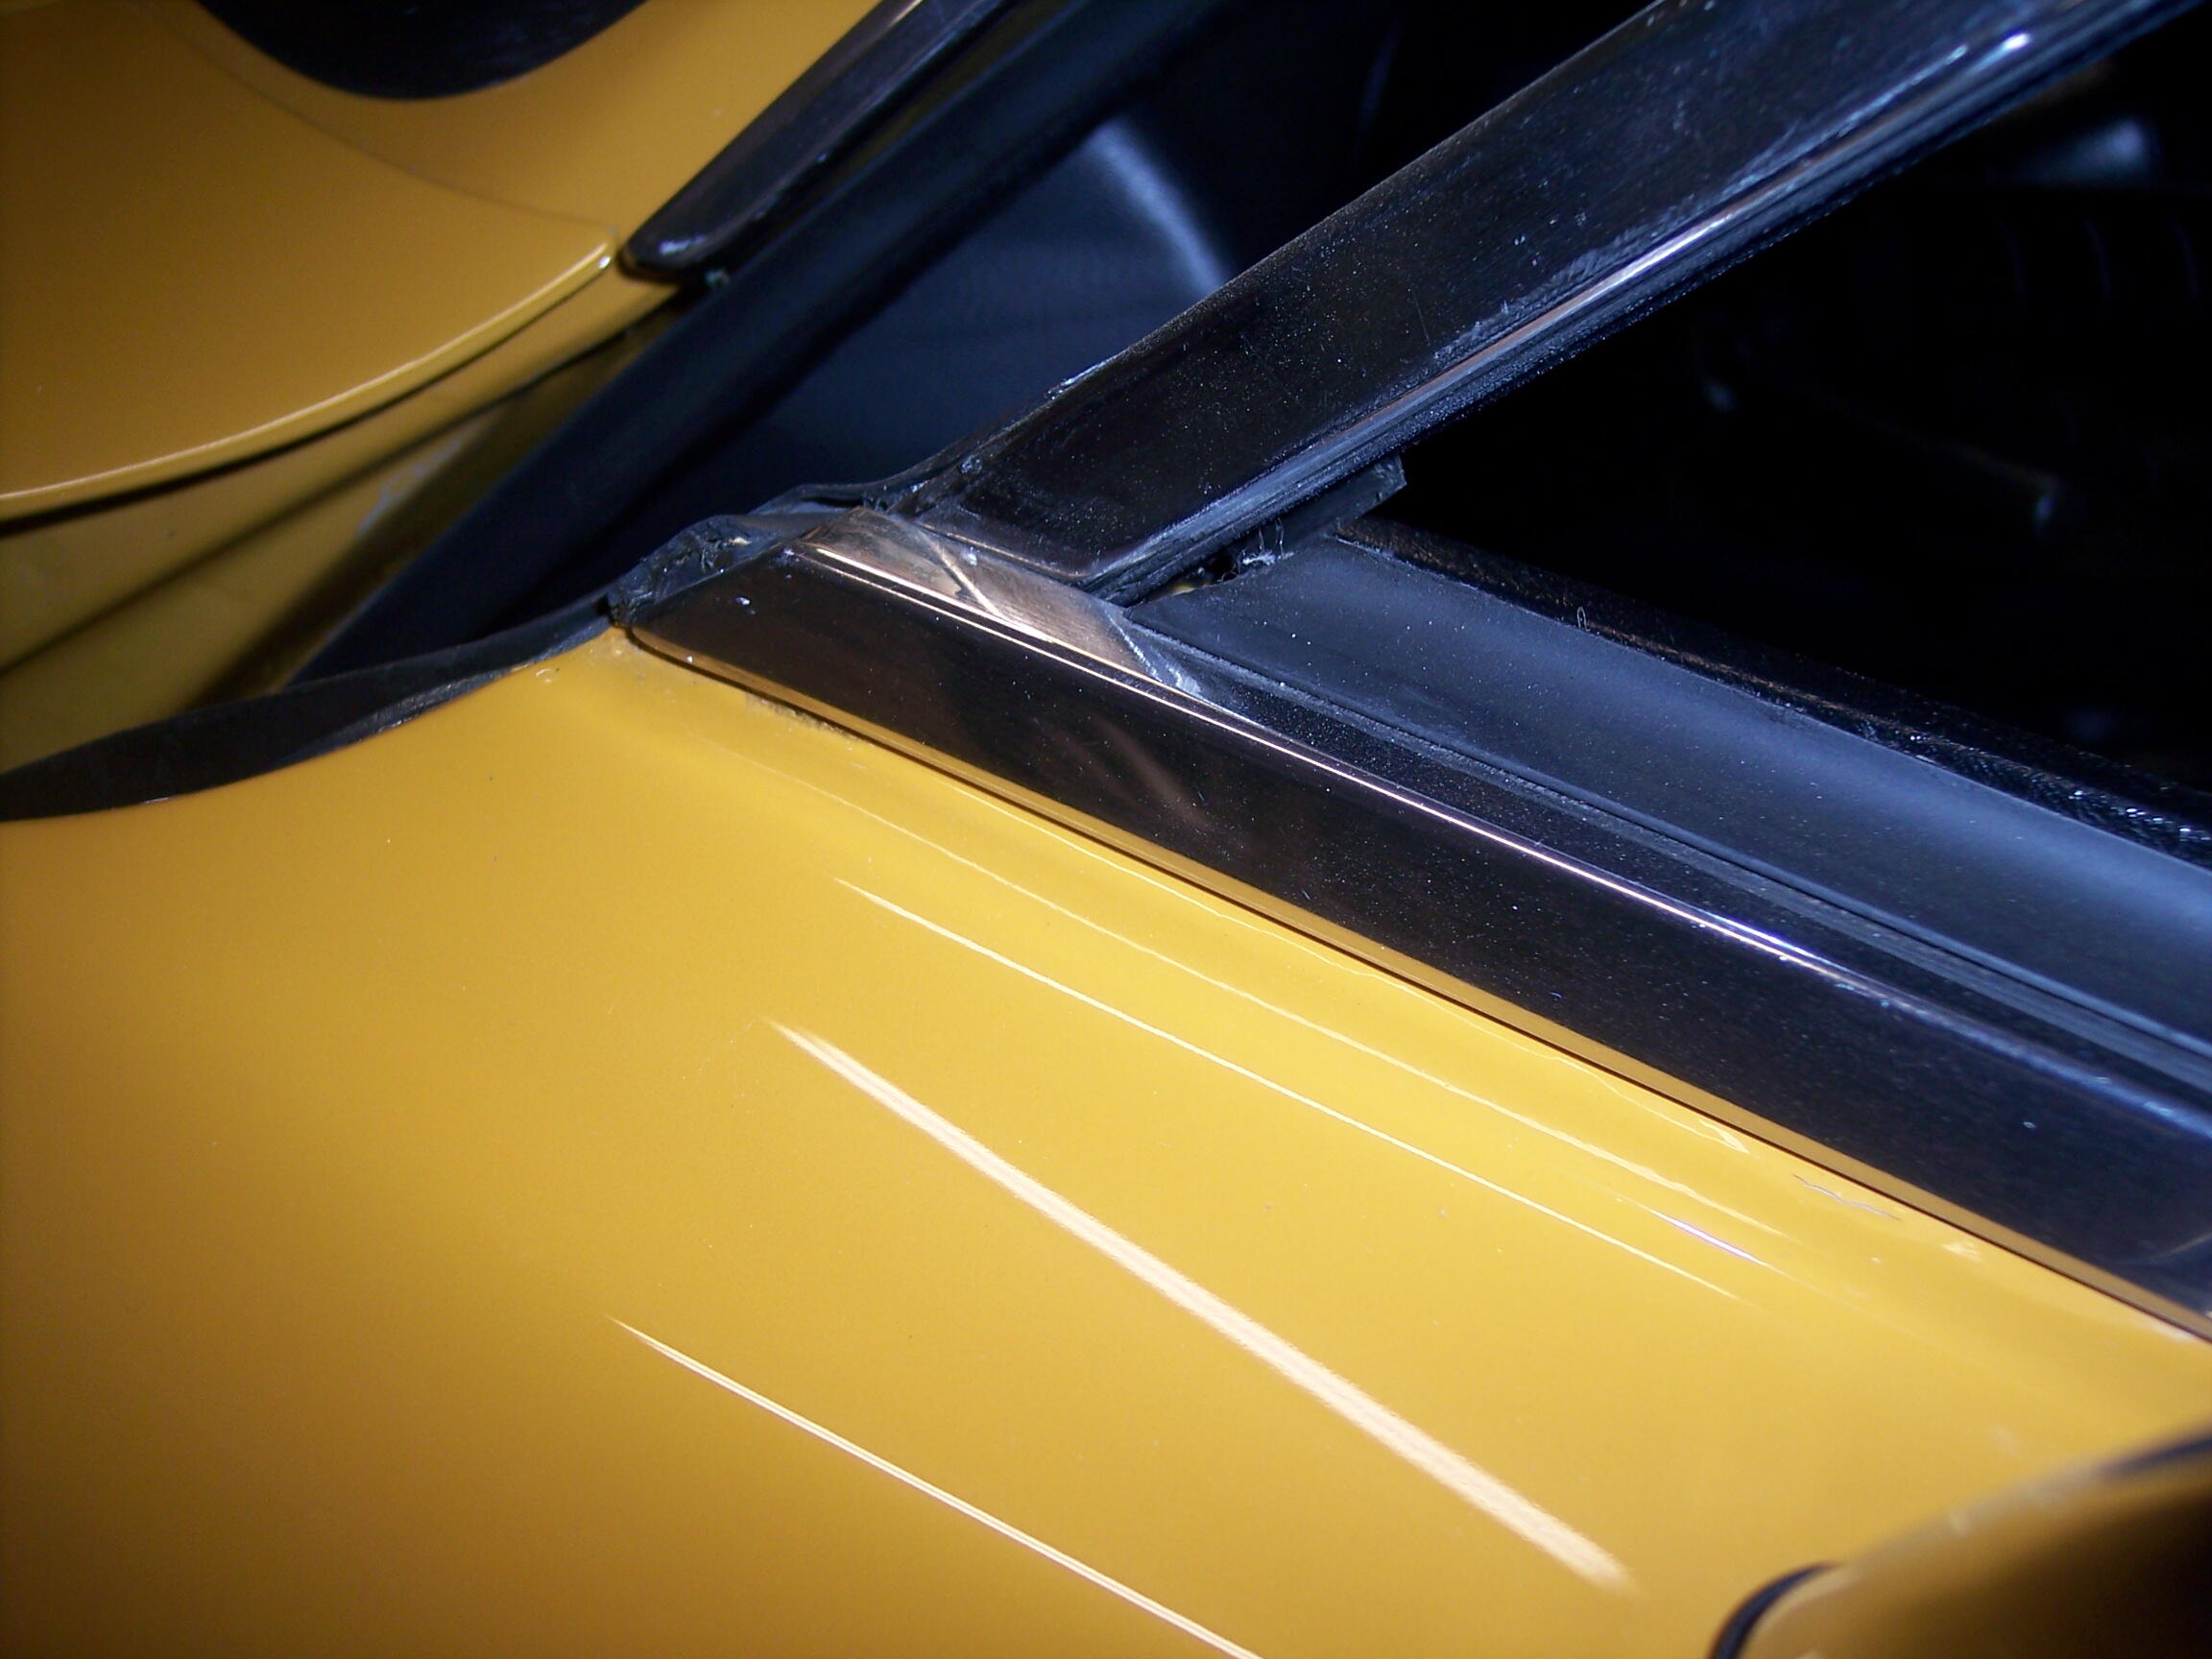
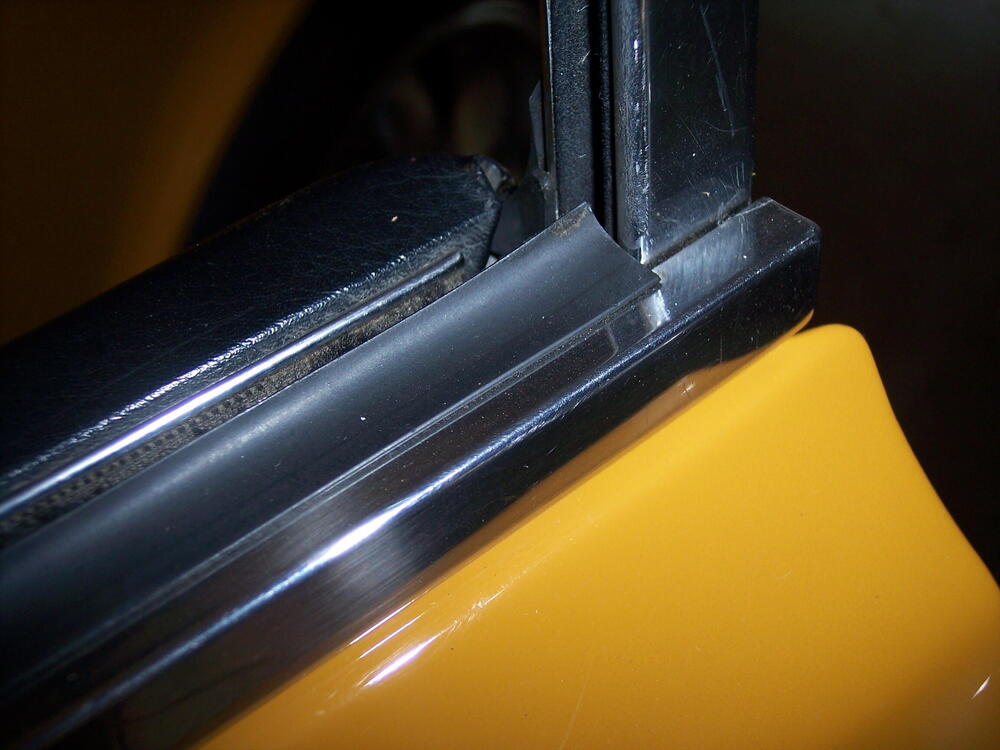
Charles, here are some pics of the belt molding and squeegee rubber on my car. Hope this helps with your question and yes, the rubber does trim out inside the window frame.


-
A true beast, so very well thought out. Awesome work! Safari Gold rules!!!
-
Thanks Guy, but I am disinclined to follow someone else's work in this case. In his ebay post I noted that he "modified" plastic connectors and the metal base. With all of the switches I have refurbed I have not yet found a need to modify the OE components - sometimes replaced with new or from the parts bin but never modified.