
Zed Head
Community Member
-
Joined
-
Last visited
Everything posted by Zed Head
-
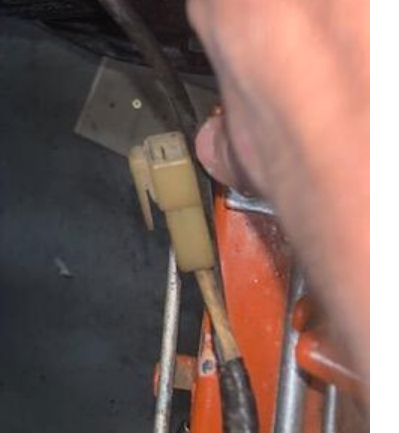
The thickness and color of the wire makes me think it's alternator/fusible link related.
-
The old fashioned original impact tools work well. Three pound sledge and a hefty wrench. Pipe wrench or a solid open end wrench. More slow motion high mass inertia than high speed low mass.
-
You will get a low number if one of those tube adapters is used in the spark plug hole. It increases the effective combustion chamber size. Five 110's and a 100 looks pretty even overall. Four is the dirty one though and he shows three as the low pressure. So, bad oil ring seems to fit best. Bummer. I'd run a hot plug in #4 to keep it clean. I think it's been suggested before.
-
Heat makes a big difference. Expands the aluminum and softens the sealer. Even one of those blow dryer heat guns, doesn't have to be a flame.
-
Just noticed the back plate. 2002.

-
The car is down there in harmony01's neighborhood, and, "Location is approximate". I missed the "See more" on the description. Lost title. Needs driveway space. Not clear if he ever had the title in his name. Still has Washington plates. PLEASE READ (If posted in the wrong area please delete) I AM TAKING SERIOUS OFFERS ON THE CAR Hello, I am selling this 1971 datsun 240z It has a manual transmission that shifts great Not really in a rush to get rid of it but the extra driveway space would be nice. The car ran perfectly but the carb was acting up so it was removed and it hasn’t been put back on since. Floor pans and battery tray need to be replaced, lost the title (but it is clean) a while ago, carburetor not included, tiny spots of rust here and there but overall good condition. If you have any questions don’t hesitate to ask, thanks
-
Not much description. Probably wrong. I think I see a 91. That's 40k in 20 years.

-
Don't forget the scissor jack on the rocker sill point for lifting. Might as well try it to see if you'll be able to change a flat tire because that's all you'll have and that's how it's done. You'll still want jack stands before you crawl under.
-
People are placing a lot of value on the 400Z and the marketing hype. I would have taken the money. Doubtful that the work done was worth the difference. https://bringatrailer.com/listing/1971-datsun-240z-183/ https://bringatrailer.com/listing/1971-datsun-240z-155/ 57,500 - 24,240 = 33,260
-
https://www.oreillyauto.com/shop/b/shocks-struts/shock-strut/75de62e0ee1b/v/a/6638/automotive-car-1979-nissan-280zx?q=shock%2Fstrut
-
It could be. Or it could be a bad bushing. Or a bad shock bushing. Lift, grab, wiggle, listen, look. The cars are old and the rubber degrades. You'll probably find something.
-
Found some good communications to lower the hesitancy for the younger crowd. https://www.yahoo.com/lifestyle/drake-losing-hair-covid-19-160106536.html
-
It would be interesting to see when the part number changed for the switch if it did. 1976 is definitely a different diagram, I think.
-
It might just be that the parts changed but the diagrams did not. There are other diagrams that don't keep up with the actual parts. Or, the switch has been replaced along the way with a newer part. Trust but verify, I guess.
-
Thanks for the comments cgsheen1. I'm just trying to figure out things using the wiring diagram.
-
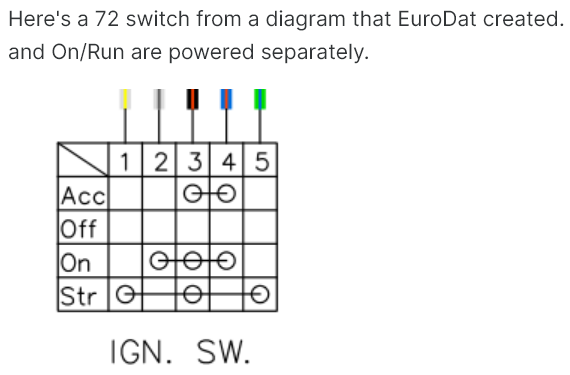
Nice video. Now I'm left wondering if a 72 will Start with the wires switched. The switch diagram shows just one power source for the coil for either Start or On, there should be no power there at Start if the wires are switched. The 71 diagram shows all 5 pins powered at Start though. If we only had the 71 diagram there wouldn't really be a discussion. Anyway, looks like a stuck or bad tachometer.
-
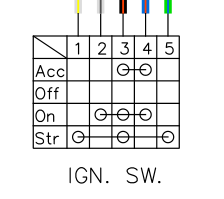
The question isn't "will it run" it's "will it start". The later switch diagrams, like the 72 diagram from EuroDat above, show separate power circuits to the coil. A Start circuit and a Run/On circuit.
-
You can just use your meter and disconnect the starter solenoid wire so the engine doesn't turn (for the quiet). See which wires have power at each key position.
-
It might start as soon as the key is let back from Start to On, wired that way. I recall some old posts about early ignition switches being different. There was discussion about losing power during starting, to radios or AFR gauges or or Megasquirt controllers or something.
-
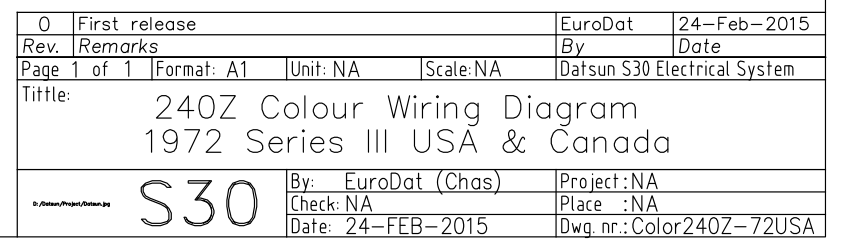
Here's a 72 switch from a diagram that EuroDat created. Doesn't show B but it can be assumed, I guess. Start and On/Run are powered separately.
-
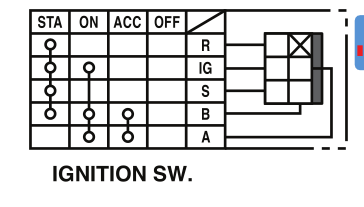
Here's the 1976 scheme just for comparison. Accessories off for Start. R must be the resistor bypass. Never really looked at it when I had mine. It's EFI though so IG has to maintain power.
-
That's interesting. It implies that 2 and 5 are both powered at Start, otherwise there would be no power to the coil at Start if the wires were switched. I thought that 2 switched off at Start. The diagram seems to show that every pin is powered on the bottom position which should be Start, which doesn't seem right. Usually accessories are disconnected for Start. 5 is shown as bypassing the resistor which should be the Start circuit. Kind of confusing. Switching the wires would bypass the tach and the resistor at Run. Makes sense that the engine would run but the tach would not work. Edit - looking more closely at the grainy drawing I think I see small circles at 1, 3, and 5. Matching AnvilZ's post below. Doesn't answer the question though. ,
-
I did not watch SteveJ's video (no offense SteveJ) but if you have tested everything and confirmed that the wiring through the loop on the back of the tach is correct then you end up with "tach is bad". They do crap out after 40+ years. I had a bad one in my 76. I think that there is a place or two that can rebuild them. Have you confirmed that the needle is not stuck? If you take it out you can take it apart and do some cleaning. People have had success doing that. It's a common problem. Just watched your three videos. The tach is probably not destroyed. It's just not working. It's fixable. You might post another thread titled "Who can rebuild/fix my tach?". I can't remember who knows but they are out there.
-
If you saw continuity, then never mind.
-
You might take those measurements again, following SteveJ's instruction. Make sure that the current is actually passing through the loop. You could also take a measurement at the tach plug to make sure the voltage is getting to the tach. Then you'll know for sure.