zKars
Supporting Member
-
Joined
-
Last visited
Everything posted by zKars
-
Welcome to the forum, sorry your first post has to be of the desparate kind. Well, the most likely thing you did to prevent starting is the spark plug wire remove/replace has them now in the wrong positions. You have the order right, but did you count CCW or CW? its CCW on the dizzy. Second thing, at TDC, #1 points forward toward the rad, kinda between the vacumm advance pot the cap clip. Is your #1 TDC rotor pointing backward toward the firewall? Maybe you were on the wrong piston stroke when you first found TDC. Pop the oil cap and find lobes for #1 pointing up (both are in front of the fill hole, get a flashlight) when the damper timing mark is at TDC compression stroke. So confirm #1 TDC compression stroke with the plug out, both #1 cam lobes pointing up, damper timing mark near to zero as you can get it, and then when you see where #1 is on the cap, (doesn't matter where that turns out to be) install them CCW from there. Who knows who might have previously assembled the dizzy and its drive spindle/oil pump in some crazy out of "normal" place position, and just fixed it by putting the plug wires as needed. Been done many times. Do you remember where #1 was on the cap when you removed the old wires? Not likely, but would have given you the reference you need now. Let us know how you make out.
-
Wade, Alrighty. then! Didn't realize I gave the impression they were "free", so might have to charge you a $1 each, just to keep it legit and all official like. Mind you this isn't the classifieds, so they better be free or Milke will be all over me for illegal posting.... I'll package them up and send you a postal shipping cost tonight. Things must weight about 3 lbs each... And YOU get the pleasure of freeing up the lock nuts and threads on the other one.... One was enough for me. hahahahahah
-
Never suggested adjustable T/C rods are new. I've had the original style AZC set on my Z for years. Allows me to never have the exact camber I want, ensures I always worry if the rod end lock nuts are staying tight, and produces a suspension compilance at a perfect bone jarring level that I love. Just wondering if anyone else had seen this particular brand or type of them or new who made them. Pure interests sake.
-
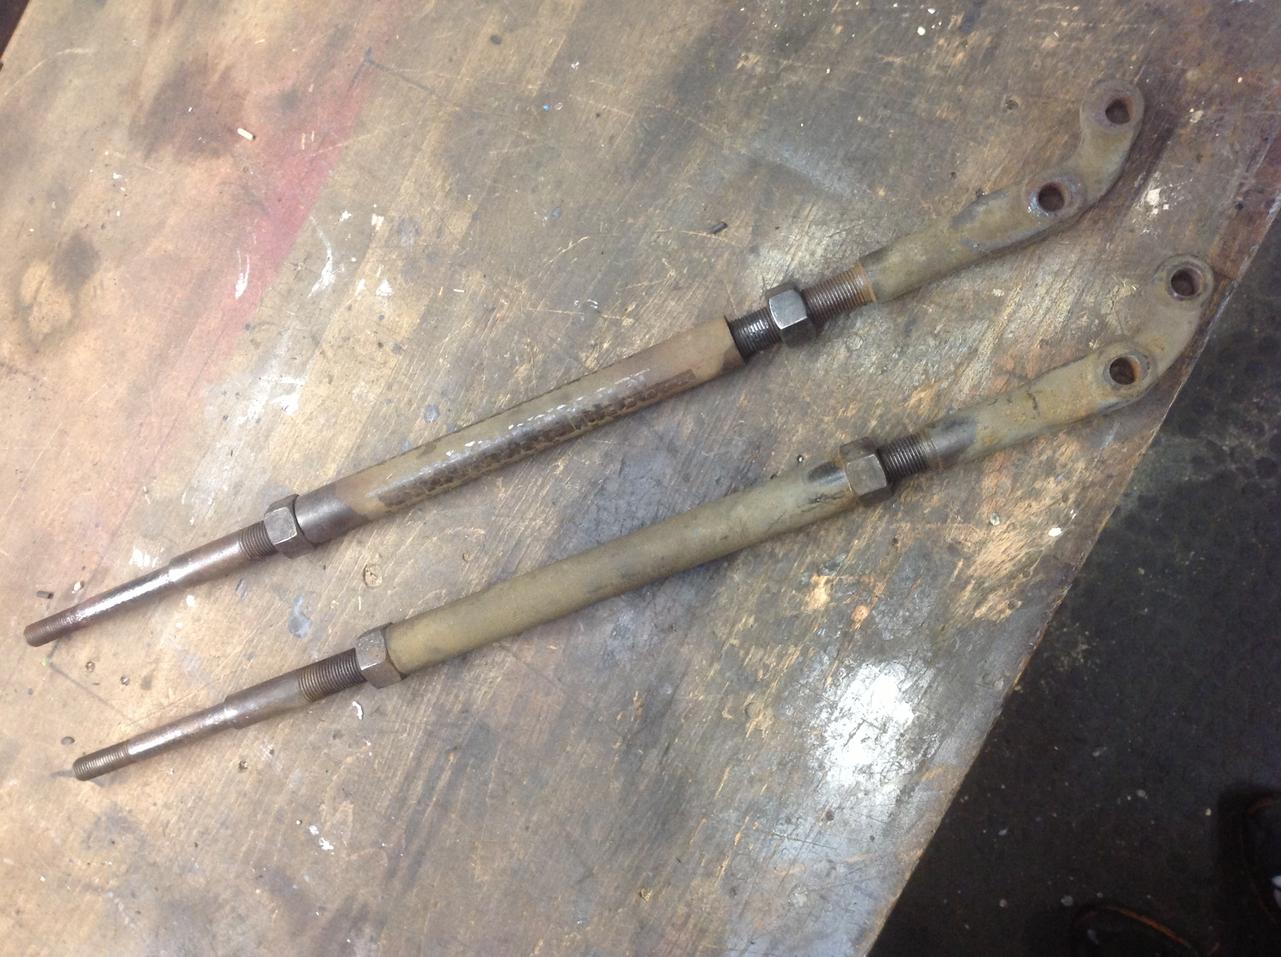
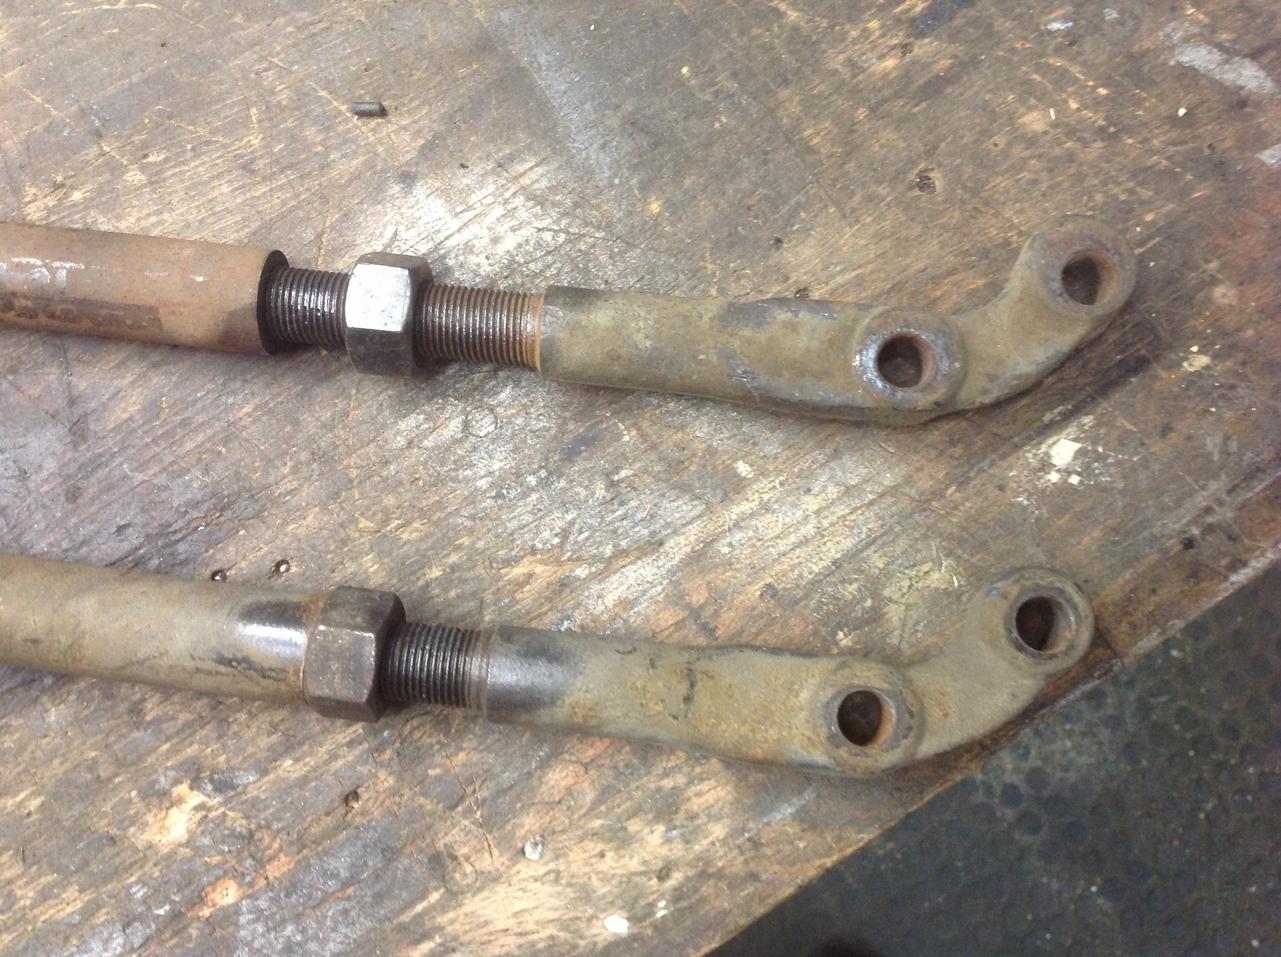
No history from the PO. Its new to him as well. I'll check the thread Dia and pitch tonight and see how close Jon's eyeball guesstimate is. Anyone else want to guess? Little wager on the side, nudge nudge wink wink?? Looking this morning at the closeup picture of the control arm end, I'd swear the holes are drilled WAY off center relative to the casting shape on the top one. Bottom one looks alright. Makes me want to think these are reproductions. Might just remain wall ornaments.
-
While working on yet another Z, I discovered these "gems". Any one seen these before? They appear to made from machined originals, the casting of the front end is too close. There is a fair bit of corrosion and pitting on the end where the bushings go, not sure if I want to risk using them. Interesting concept at least. Stock mounting and bushings, but adjustable caster. Anybody wants these (reads brave enough to try them) let me know...


-
The stock battery is a 24F. Now let google be your friend. such as http://www.rtpnet.org/~teaa/bcigroup.html
-
The pitch of those nuts on the car are 10 x 1.25 without doubt, at least as it came from the factory. Go buy a Harbour freight tap set and clean them up. Nothing you can put on the bolts you have will clean out those threads without harming its threads.
-
Removing the distributor base at the 2 bolt location will require a new gasket for that connection unless this has been apart recently. The old one will separate. More trouble than its worth. Mark the plates (Sharpy!) where the 10mm headed timing adjustment bolt locks them together to note their alignment and take that one bolt out. Pull dizzy straight out, it can only go back in one way (tang at the end is offset, no 180 out is possible). Easy peasy.
-
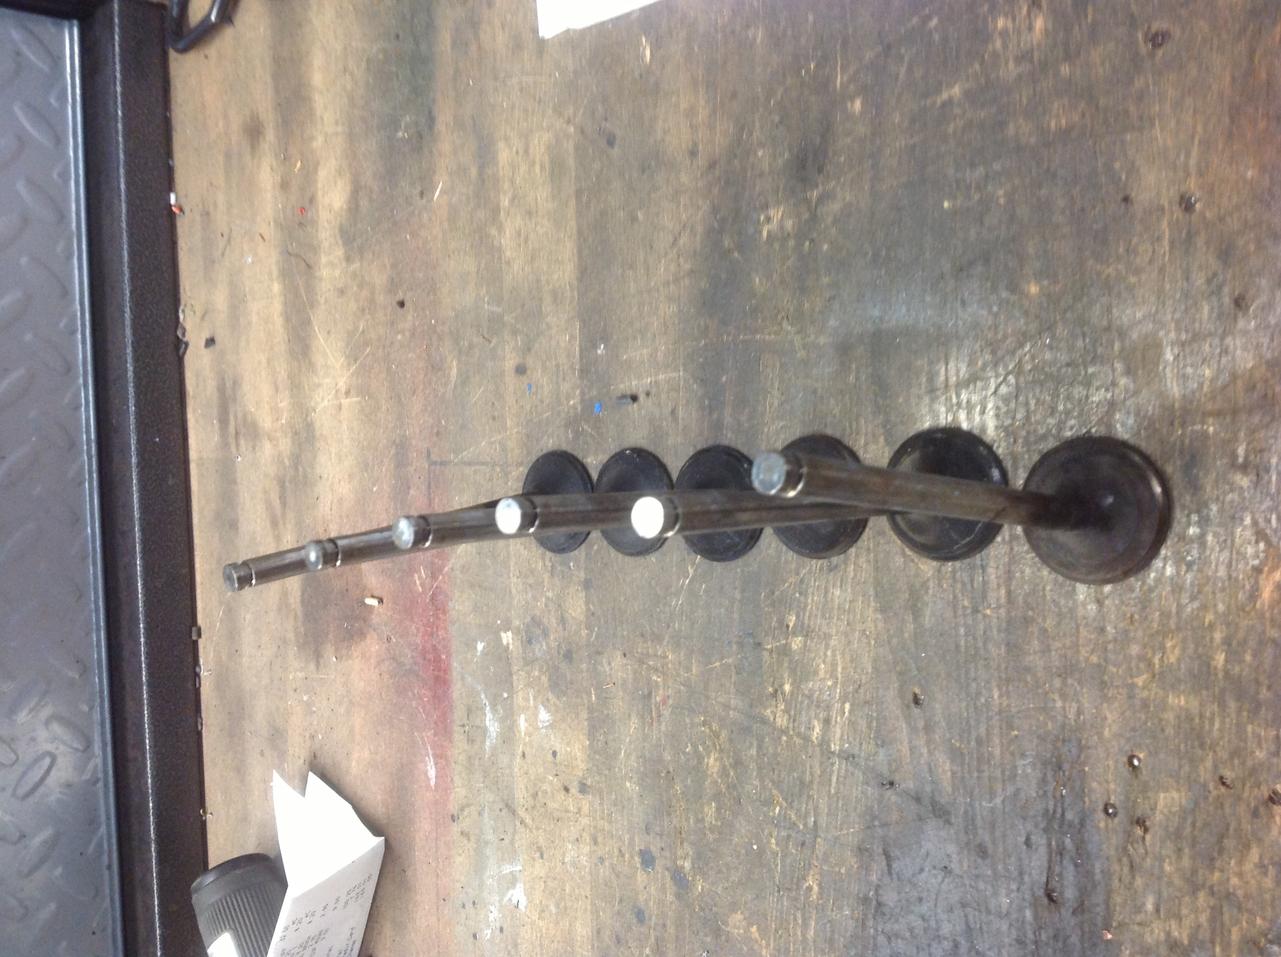
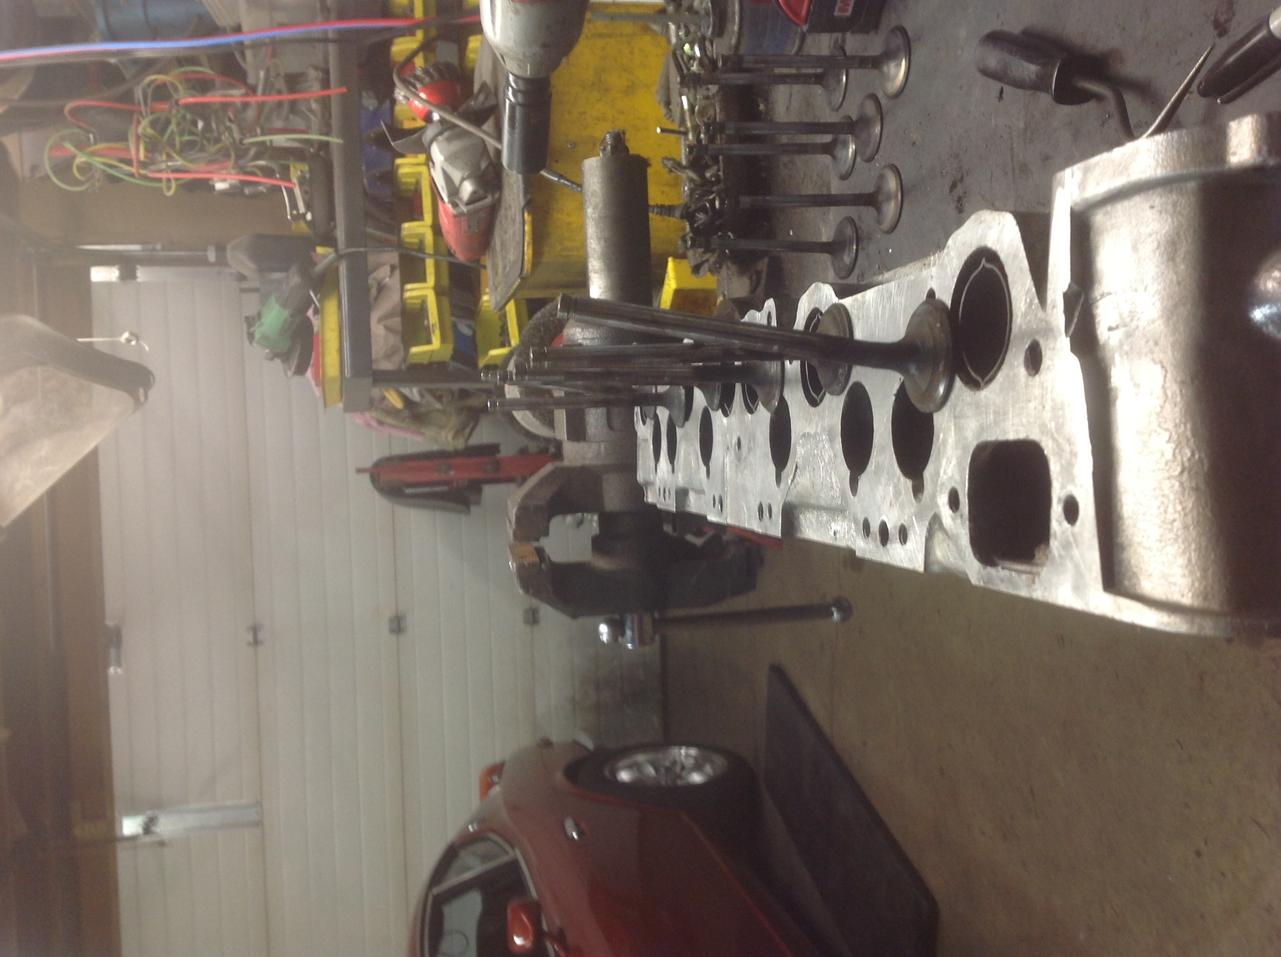
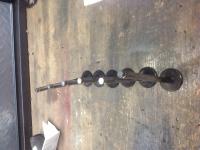
Finally had a chance to remove the valves from the head. Enjoy the painfull art!


-
The only other challenge is the difference in how the two gauge housings mount to the dash. It's best to put the guts of the 280 gauge into your 240 housing then adapt the wiring to match the wiring in your car. Both have the same wires, just not the same plugs. Just a bit of cutting and adding new connectors, or splice the 280 gauge wires to the connectors on your 240 gauge. It certainly can be done. Good luck!
-
My understanding of oil pressure is that is caused by the balance of two controlling factors. One is the internal relief valve in the oil pump, and the other is main and rod bearing clearance. The pump relief is a spring pressure controlled device that just allows internal bypass at a certain max pressure, but the bearing clearance and pump volume determine the overall pressure over the range of normal operating conditions. I can't see one bad bearing causing high pressure. When the pump relief valve sticks, the pressure gauge becomes a tach, ie rpm determines pressure and it can quickly get WAY above 60 at as little as 3k. Doesn't sound like your case. Time to take it apart and diagnose. If its one bearing seized and the other have correct clearance and no sign of scoring and starvation, likely just a blocked passage to that bearing and bad luck...
-
Gordon Welcome to classiczcars.com. This site has a classified section, feel free to post it here. Look at the other similiar z cars for sale and decide what yours might be worth. There are many Z owners here that are in your area. As Wade says post a couple of pictures in this thread, and I'll bet you'll get some quick response. A well cared for one owner car is much sought after. Good luck with the sale. And as Wade says, cash or nothing.
-
i think Supertramp had it right when they wrote "Dreamer, you know you are a dreamer..."
-
you got it now. Start button is perfect.
-
Black yellow coming from the harness. No idea why you would have three wires there. There is a single 1/4" male spade terminal on the starter. The black /yellow wire from the harness should be the only thing attached to it. If there's more, then some one has added something... Pictures might help.
-
Do one test first. When you have the "click" no start condition, remove the small spade wire connector (BY wire) at the starter that is your key "start" +12 signal, and connect the spade terminal on the starter to the battery + terminal with a different wire. (make sure you are in neutral!!!). If the starter cranks strongly again, you have narrowed the problem to one of two common places that affect the ability of this connection to supply sufficient current to the solenoid to engage it. (And you know the starter solenoid is fine) 1. The key switch in the Start position is not able to supply enough current to the starter terminal due to a bad key switch. 2. The spade terminal on the end of the BY wire at the starter is not well connected to its wire. Cut it off and replace it after thoroughly cleaning the bare wire you will strip, to add the new 1/4 spade terminal to it. Solder this terminal to the wire if at all possible or make a very good crimp and insulate with heat shrink either way. Let us know what happens. PS. I f you haven't already done, thoroughly clean the heavy battery wires and their connections at either end, att the battery, at the starter and where the negative line is grounded (starter mounting bolt?). If the battery cable terminal ends are poorly connected to their wires, replace the cables.
-
zcarsource.com and arizonzcar.com are different businesses run by different individuals. I could be totally wrong here, but I suspect zcarsource offers the dash restoration service, but sends them out to one of the real dash restoration businesses, hence the $300 additional charge. Just my opinion.
-
As far as I know the only difference in AFM's from 75-78 is that the 78 AFM no longer has the fuel pmup switch contacts and corresponding pins. Other than that all are identical. Even the 79-83 NA afm's can be used, they just mount differently to the car. This can be overcome with a bit of creative bracketry.
-
I was working on a guys car and it had several extra wires running around the engine bay from various PO's attempts to run stereo's, fog lights, you know, the usual crap. My mission? To remove all traces of this stuff. I was literally pulling wires out left and right cleaning this mess up when I found about a long 14 gauge light blue wire on the drivers side coiled up nice and neat underneath the brake booster area. Followed it back to the firewall where it lead into the hood release bracket. Assuming it went through the firewall in there, I was tugging at it trying to pull it out. Not budging. Finally I noticed it was operating the hood latch! Some PO had looped it around the latch arm, then more or less horizontally over to the master cylinder body, then over and down behind it, leaving a nice rolled up couple of feet hanging just above the frame rail. Tug that from underneath and it opens the hood simple as anything. Not exactly a nice tucked job, but fully functional.
-
and here are some pics


-
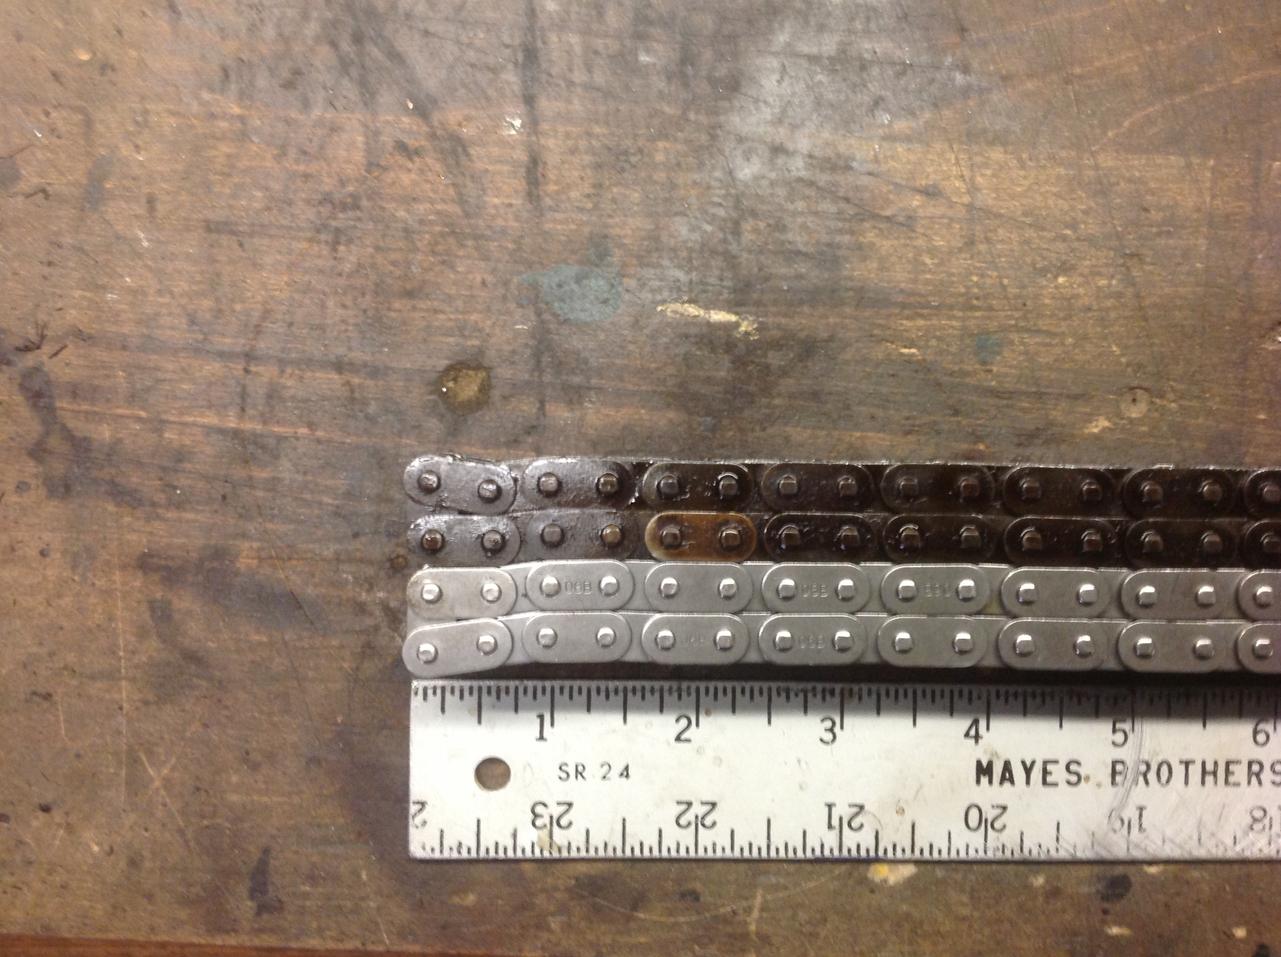
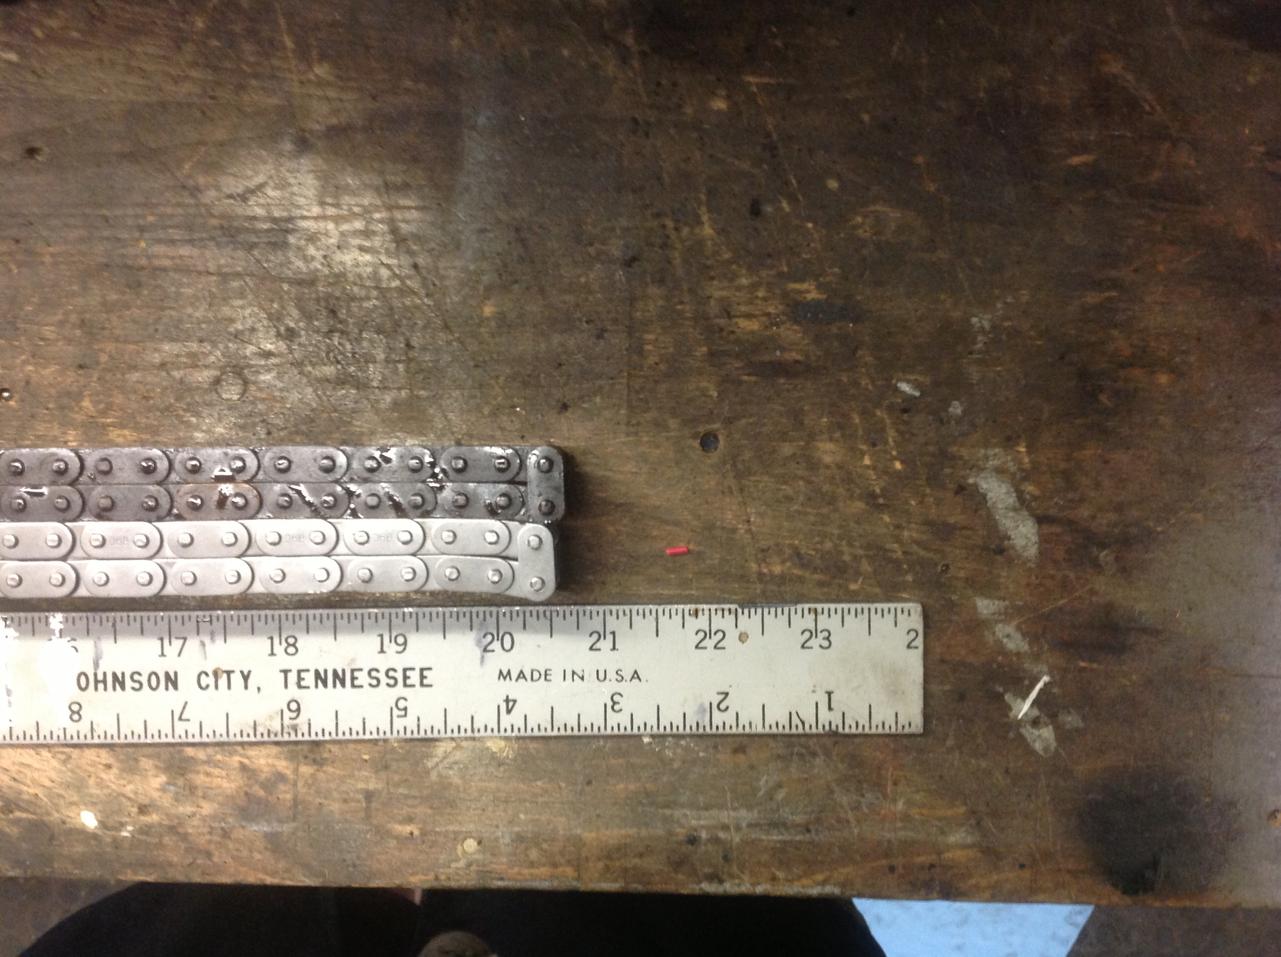
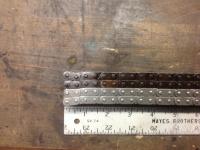
More details now that I'm made some positive progress. The car is running and left for its new home last night. The original power-on ticking/clicking noise that caused the iniitial investigation is gone. Replace with much more satisfying and familiar cold clearance set valve train clatter. Blue/Jan, you guys are spot on about new chain being tight ie no slack. I installed the "new" (to him) head and a new chain and guide,s and as usual, the chain is a VERY tight fit. I got the chain on its correct clocking, then when re-installing the (curved) tensioner, I had to use a c clamp across the chainand guide in the center to lightly compress it to get the top bolt (slotted hole) in the tensioner. Same when re-installing the tensioner. Tight fit indeed. I took a picture of the old and new chain on the bench to show the length difference (sorry will post it later). The old is clearly stretched, but not quite to the extent I expected. The old head had shims under the towers as well which I removed for the near-stock thickness N42 that took its place (used his towers/cam/rockers/lashies). Would have been impossible to get that chain on with those shims in there. I looked at the valve cover and it looks exactly like the two shown above. Not a mark/gouge in the cover that I can feel with my nail or finger, just the cleaned paths made by fresh modern oil clearing away varnish. And in general, with more thought about what caused the tooth skip to start with, I'm more and more skeptical about the rag having anything to do with it. I just can't believe the texture and material strength (or lack of it) of it would be able to create a wad that would have had sufficient compressive strength to cause this. The rag was well distributed around the gear when I stopped dug it out. No concentration in one spot. I'm now inclined to believe its a combination of the herky/jerky motion of using the remote crank switch and the very loose chain with no tensioner pressure that ate my lunch. Beware! Another learning point to add to the conversation. When using the starter to rotate things, it's now very clear that it had no problem bending the valves as it rotated the engine without so much as a hiccup that might give you clue something bad was happening. At one point late in the process, (actually just before the realization of doom occured) I'de put a socket on the crank nut to move the engine to exact TDC to get things lined up for another timing check. The engine rotated smoothly then BANG, it stopped dead. When back the other way, smooth until, BANG, same thing. Dead stop. I put quite a bit of pull on the handle and couldn't budge it. So its clear that HAND rotation or maybe pushing the car in gear is the right technique, if you have ANY reason to suspect an old loose chain or you're working on a new motor and testing if you turns over. Sounds obvious now, doesn't it?
-
Looks good to me! One question or concern perhaps. Is that glass filter at the front of the rail rated for FI pressures? Might we worth a check.
-
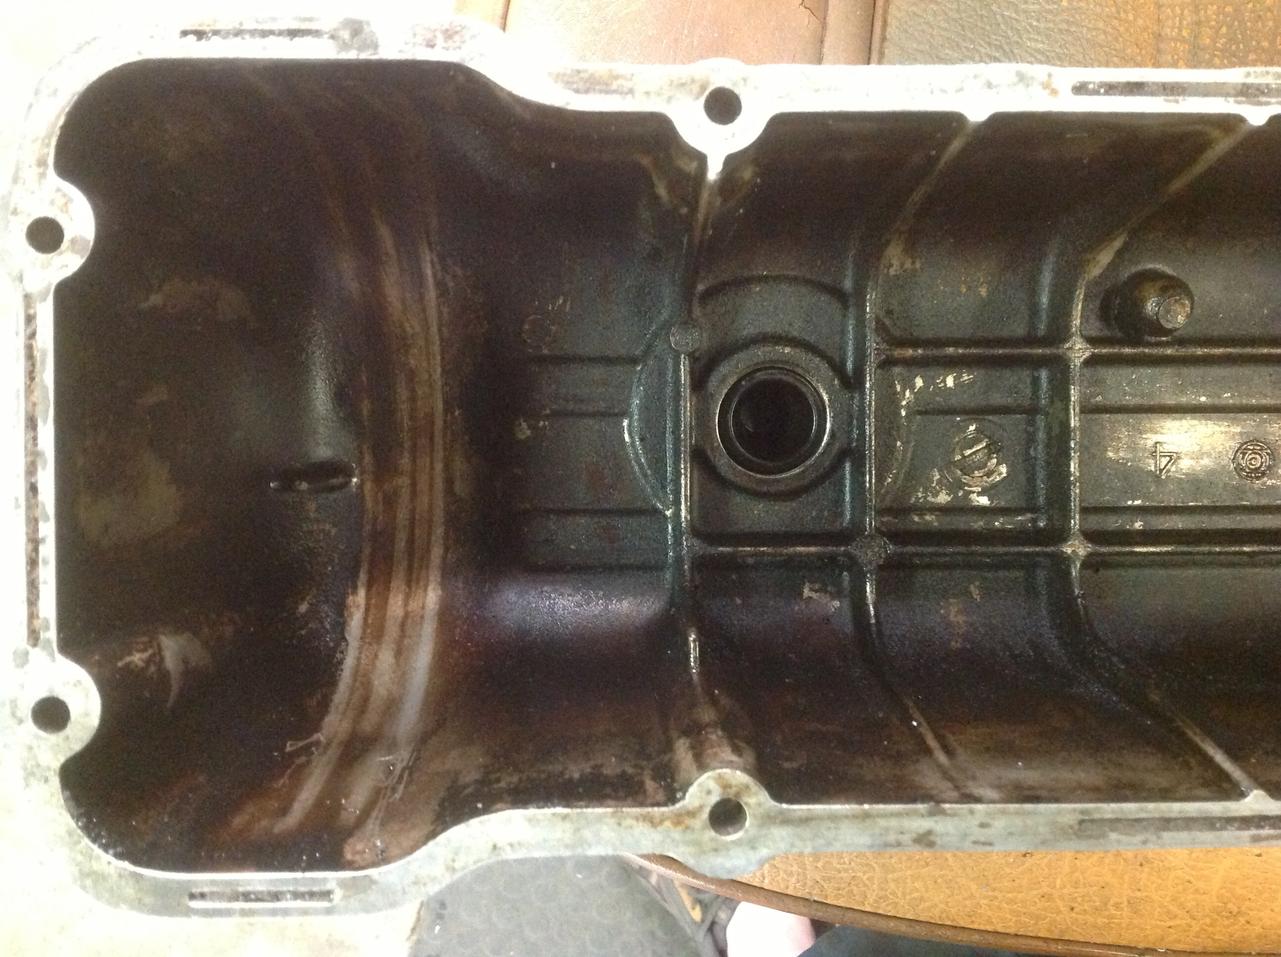
Hardway, so from what your saying, it seems then that there was no actual touching of the chain to the valve cover. You can confirm that there is no marks in the aluminum? If thats the case, then the patterns we see are likely just "cleaning" of the previous dark varnish coating by oil spraying from the chain. Did you recently change to so some of that modern "detergent" oil?
-
The A11-600 000 ECM works from all 75-78 North American 280's. If that maximum ecu is working for you, relax. Drive it and forget it. It's tune is for a smaller engine, so your mixtures might not be "correct" but if your plugs look okay (brown, not white or black), your mileage is reasonable, and you've had it working fine for a couple of years, be happy. If you really want a A11-600 000, let me know. Some say I'm cheap, I call it affordable.
-
Wow that's hard to believe! Its scored all the way around! Its not clear just how close the chain must be to the cover until you see something like this. Does this mean it was loose enough to be "floating" off the teeth enough to be rubbing the cover over that much of its circumference? Hard to imagine how this looks running, but there's the proof. I haven't really looked under the cover of mine, other than to note how black and grundgy is looks.... I'll report back.