zKars
 Subscriber
-
Joined
-
Last visited
Everything posted by zKars
-
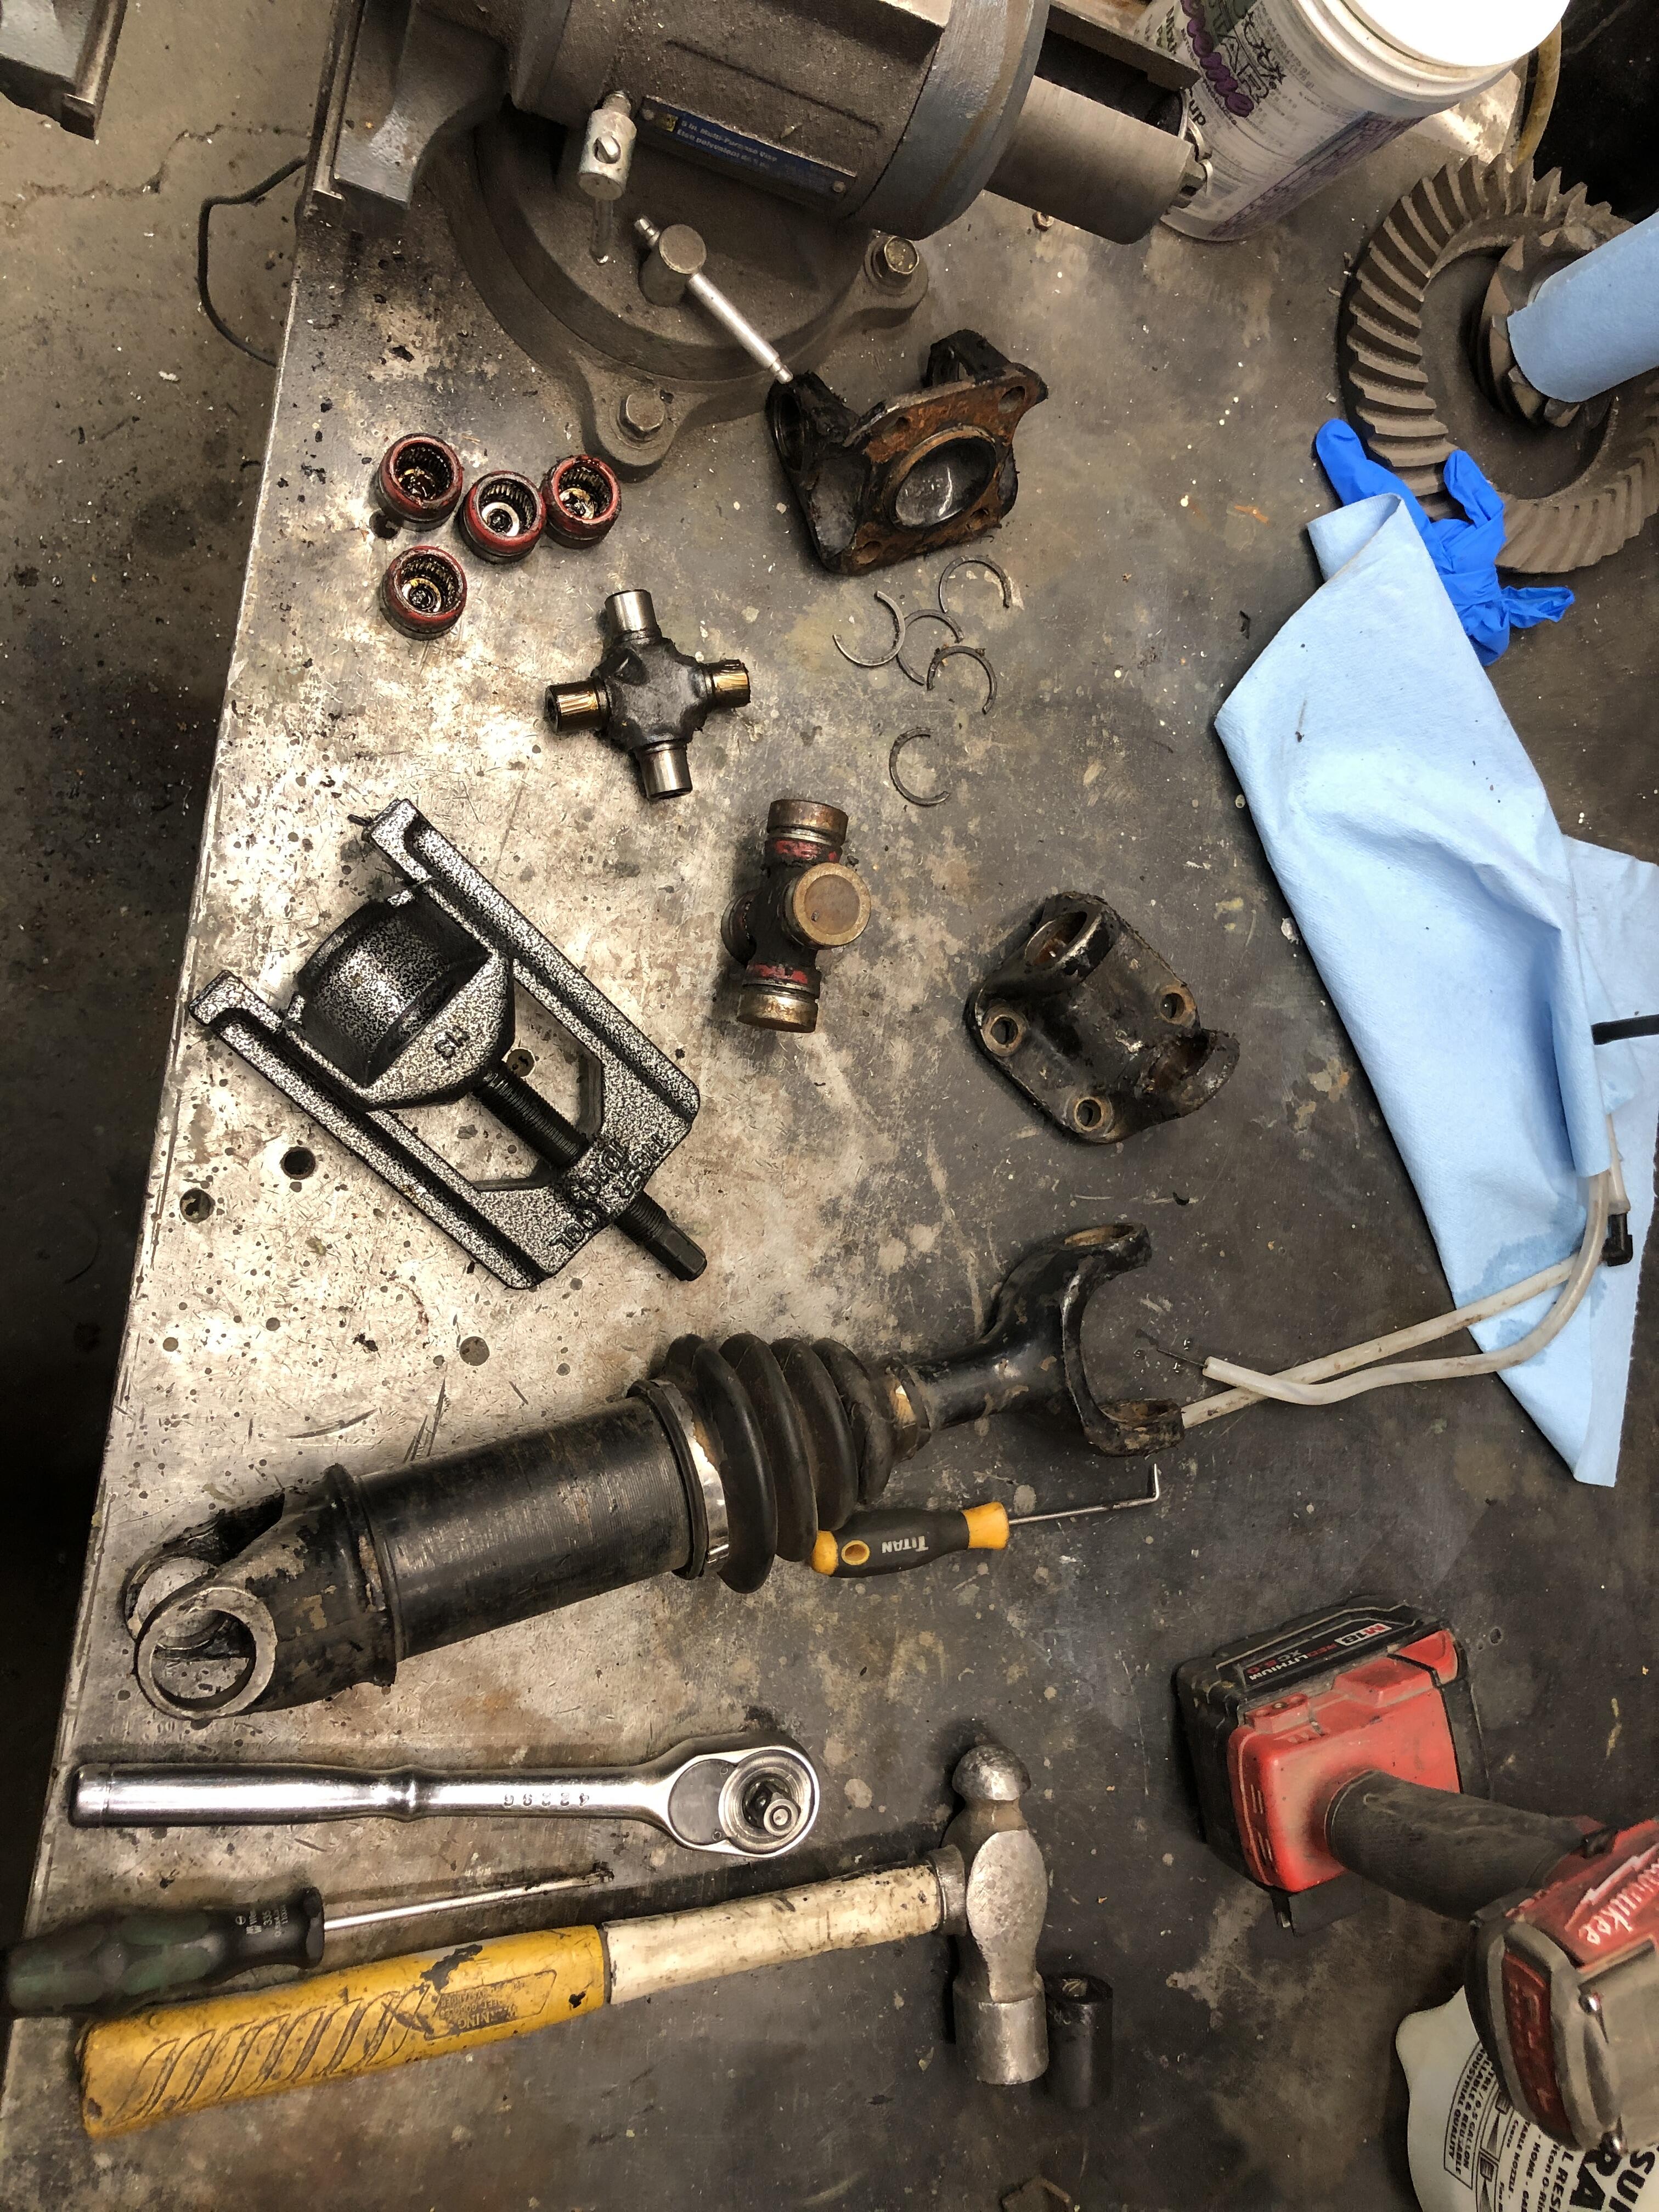
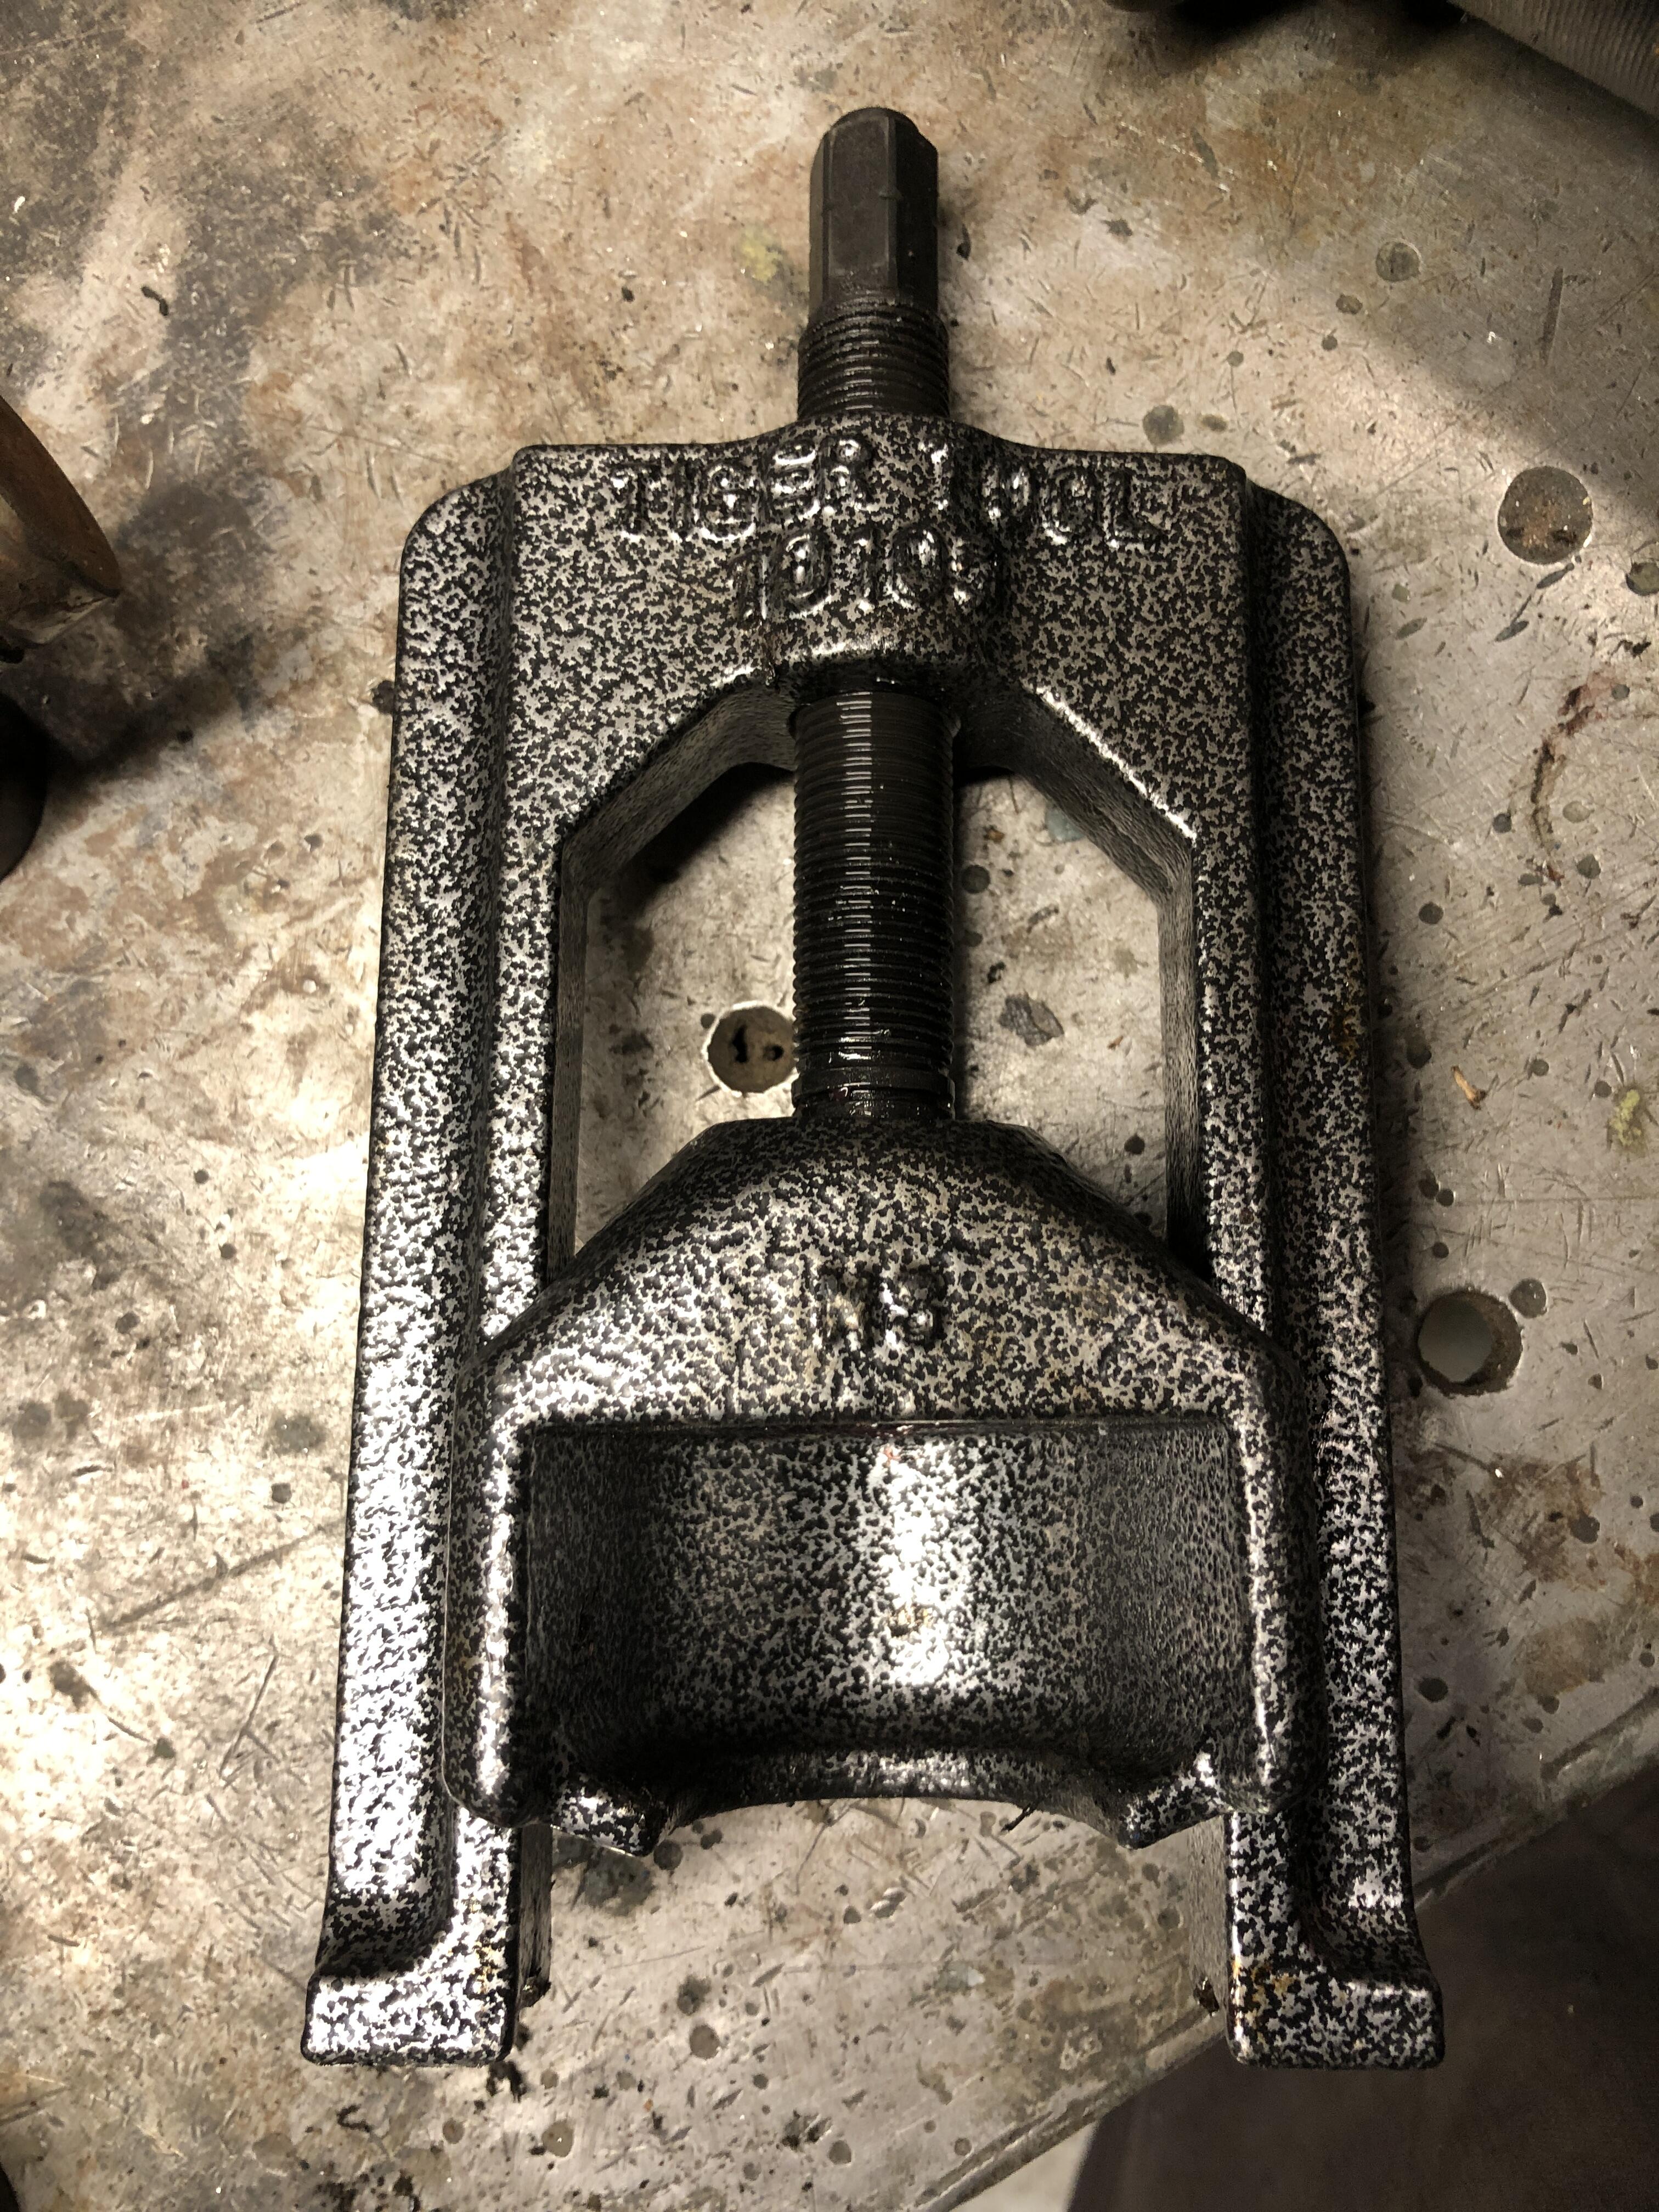
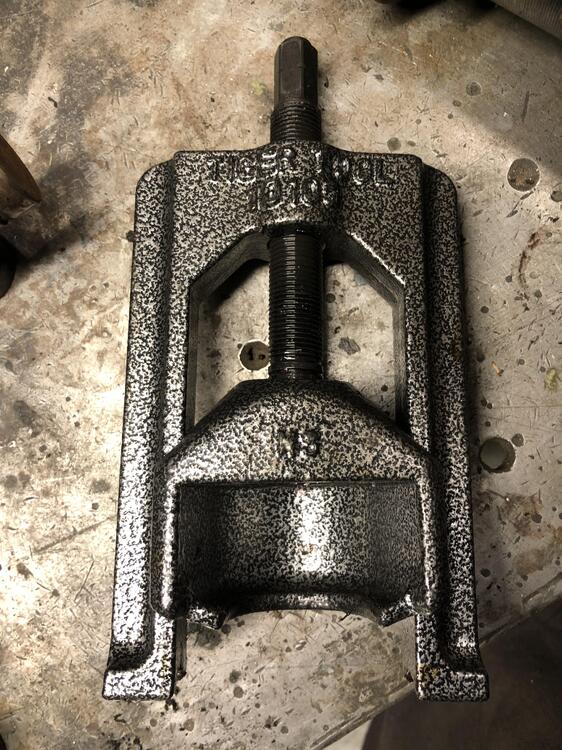
 I took this half shaft apart in 15 minutes. That's using it for the first time. No hammer. No sockets, didn't even need the vice. It was nice to hold it, but not necessary. This particular one was 'easy", the u-joints where replaced in it sometime in the near past, the C-clips weren't rusty etc. popped right out. I guarantee you will spend more time picking and beating on the c-clips to get them out than removing the u-joints. Fits our yokes perfectly. Not too big, not too small. Goldilocks just right. https://tigertool.ca/products/ujoint-puller?variant=35217197400214 It comes in three sizes. This is the baby one. The two bigger ones will do any u-joint you encounter. And maybe the best part? Price! Amazon.ca has it for $129 CAD (delivered if you're a prime member). They are made in Canada, in British Columbia. Designed to be used with an impact gun, built to last, no BS. This. thing. works. And will for a long long time. I think I shall turn my pile of filthy worn out half shafts into a pile of lovely fresh and ready to go ones. No more "Now which one is decent to use....."
-
I rarely endorse tools, but in this case, I feel I have to share one I recently found and used that I am very glad to have found. U-joint replacement, especially the half shafts have always been a test of wills for me. Yes I can do them, no it's never pleasant. Find the right sockets to beat on, fight with supporting them while you beat on them, discovering the sockets you used are now bent and don't snap on the ratchet handle anymore. Dirty ugly fight. Hate it. No more. Behold the "Tiger Tool 10105" U-Joint service tool.
-
Never seen a non-aluminum bell housing on an L series transmission.
-
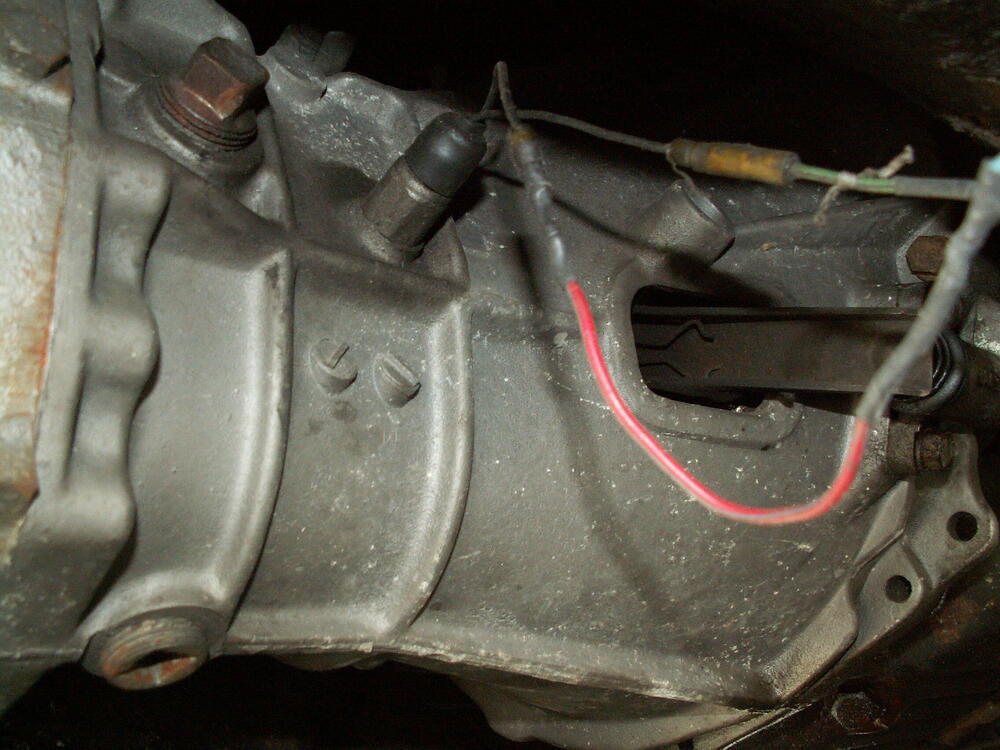
Aha! I think I have it! The location of that switch hole tells me that’s a 4 speed bell housing, assuming the right of the picture is toward the engine (front). I see the ramp and flat spot on the rod in the first video, and they are forward of the hole. If the hole were ahead 1.25 I think, it would be in the right spot. Now as to why that trans has a four speed bell housing, this is normally done when the five speed came from a later Datsun truck/car with the engine vertical, so the bell housing clocking is wrong, so you have to get a Z bell housing and what do you have on hand but a 4 speed…. Didn’t I just do a thread on how I modify that shift rod to move the ramp in line with the 4 speed hole? Just grind down the rod and make a new ramp further back in line with the rev switch. Simple, right….
-
Trying to think of things that would allow the 5/R shift rod to be out of its normal position but still have both gears working correctly. Nothing comes to mind other than the rob being bent
-
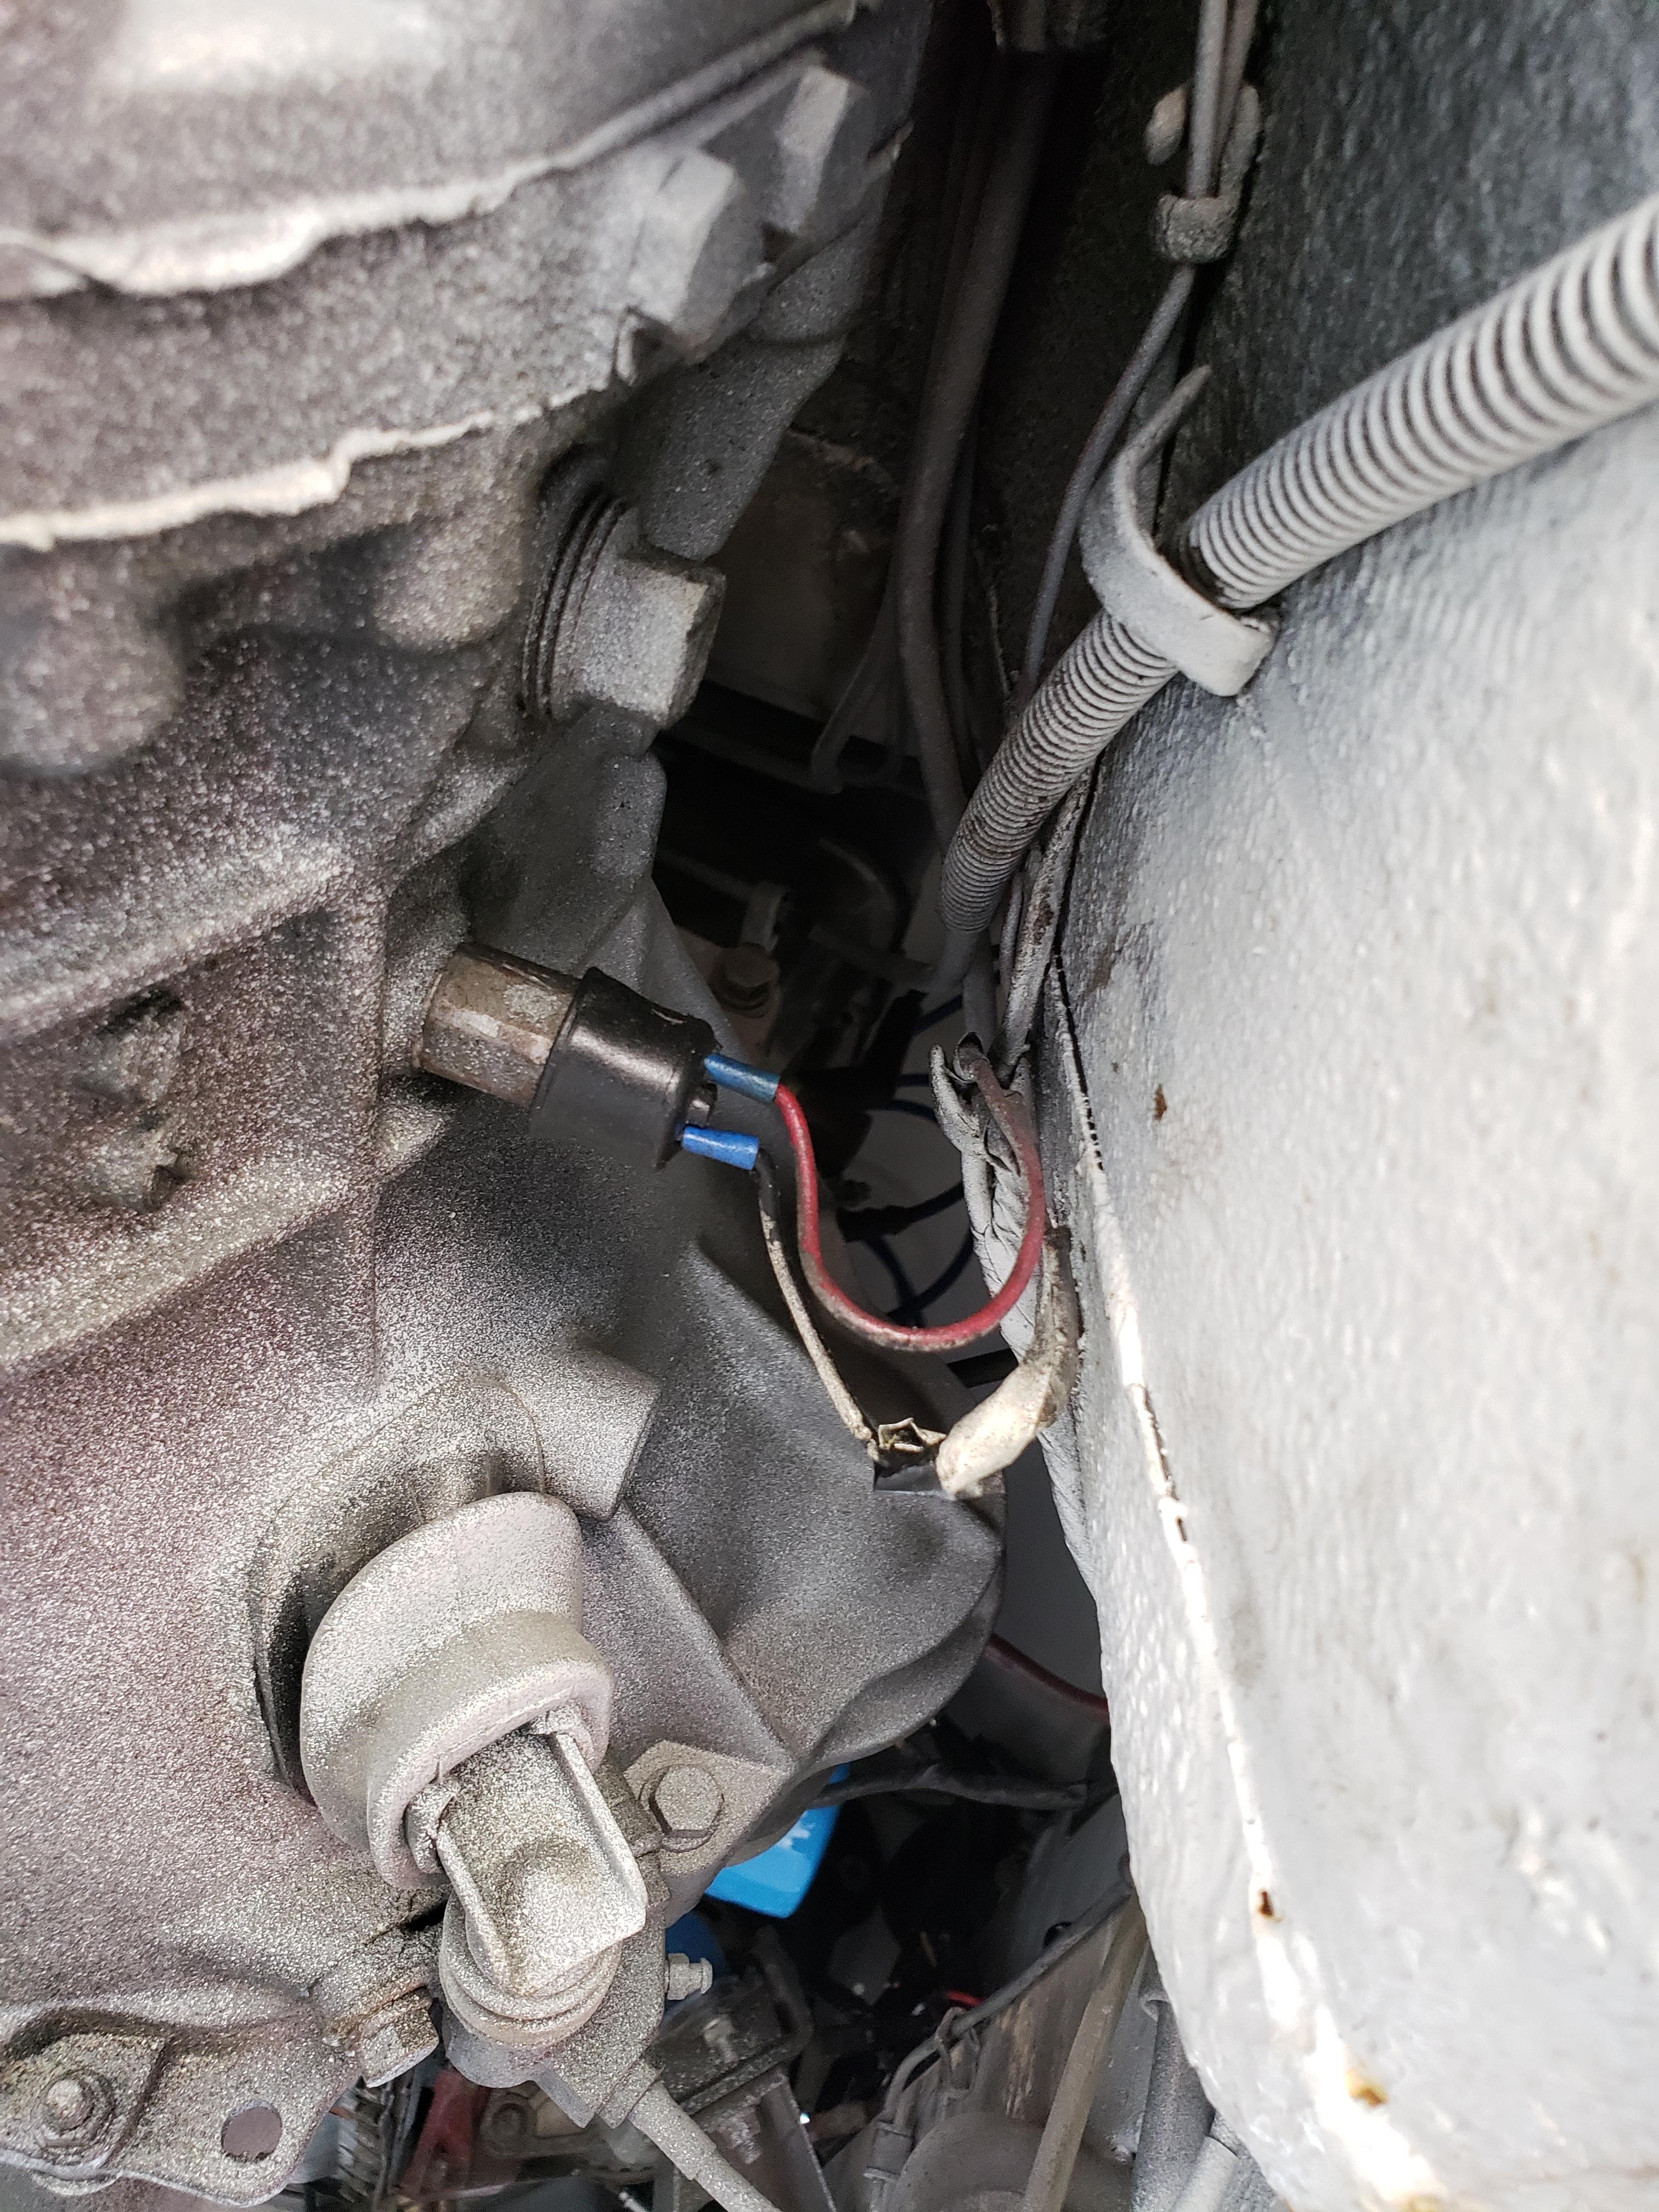
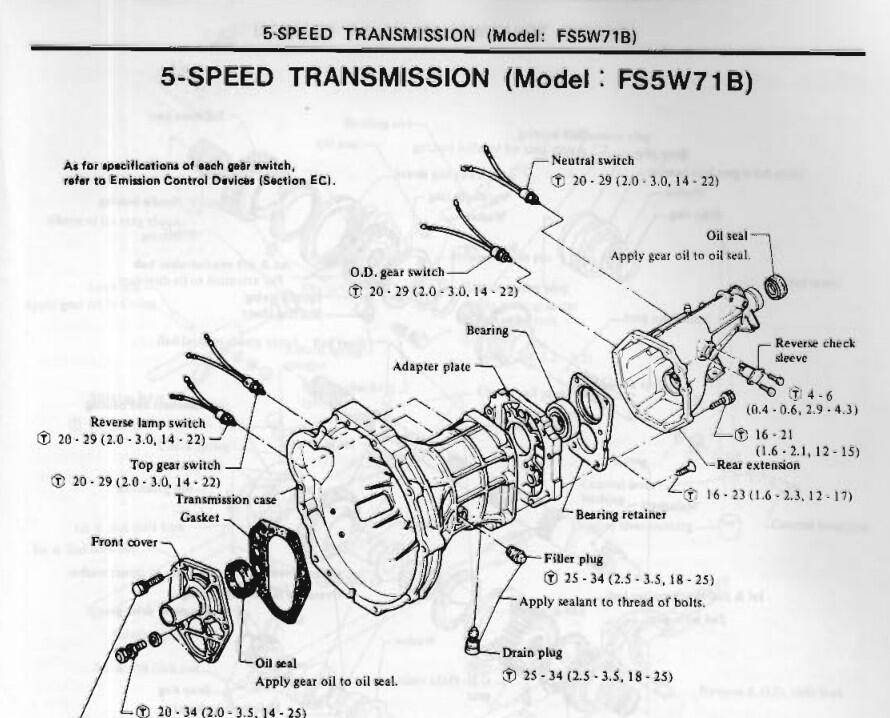
If you two locations for switches on the right side, in front of the fill plug and behind the slave, then the front one is the reverse switch. This picture shows the “usual” location” of reverse switch on a zx 5 speed. A Z 4 speed would be the same except further back in the space between the fill plug and the spot where the switch is in this picture. The FSM picture shows where the rev and 5th gear (top gear) switches would be
-
Actually you might have a point. Let me find a better picture
-
Now it all comes clear. The reverse switch is just behind the clutch slave cylinder. Right side. Various trannies have 5th gear and neutral switches as well. All reverse switches are in the same place

-
Might be down to a switch with the “right” plunger length and the point at which switch turns “on” as you depress the switch. Take one of your functioning switches and start filing off a bit of the tip so it’s shorter. Keep removing a bit at a time until it works?
-
The square headed plug is the fill plug. Should only be one place to put the rev switch forward of that in the bell housing. I’d be tempted to buy a new switch and try that
-
IT’s just the ramp machined into shift rod. It would have to be bent pretty badly to keep the switch “on” all the time. I would expect shifting performance to be “different”. If the roll pins were loose/out, you could not shift. If shifting into reverse and 5th works fine, then it’s unlikely that its in the transmission. So you can take the switch out and move the tip by hand and the lights work correctly? If so, then I guess the shift rod must be bent. I’m baffled. Now all this said, I have a customer with a similar problem…. Hmm…. No his won’t come on. Crazy And did you know they make special pin punches for roll pins? Just got some last week. And those roll pins above are in no danger of going anywhere…
-
-
A good contact in Vancouver area is Byron Meston. I know him personally. Although a dedicated 510 guy, he is well connected to the various Datsun communities in the area and is renown for his willingness to help those in need (as needy as all Datsun people seem to be!) 😉
-
I’ve found pretty much the same issue with about a dozen non-working horns now, and it relates to corrosion in the power connection terminal where it passes through the body of the horn. You can clean both sides of it thoroughly inside and out, even by sand blasting, and it will look like a million bucks but will not pass current. The corrosion between the touching mating surfaces of the metal bits that make up this insulated pass through connection are severe enough to insulate. I have had to grind the head off the rivet and separate and clean ALL the metal contact surfaces to get it to work again. The rest of the horn internal parts are rarely the issue.
-
Interesting solution. Can’t quite make out the pattern. I might suggest going to a big vehicle upholstery shop in your area and having them look through their sample books and suppliers for various vinyl patterns. I couldn’t believe the number of options they showed me when I did this years ago.
-
AGC fuses are 0.25" diameter. ATO fuse blades are 0.025" thick. Buy 0.25" OD brass tubing at hobby shop, slit it the long way with a 0.020 slit, cut into AGC fuse minus 0.1" lengths Press the fuse blades into the slit of the little itty bitty tubie thingy. Should be tight press fit. Make slit smaller if 0.020 is too loose. Repeat for other blade. Ensure space between tubes and total width = AGC fuse width. Put in AGC fuse holder. Capn Obvious will make us little plastic rods with spacers on his little itty bit lathe to go between the two tubie slitty thingys. Done. $1.00 each. Now where to by 0.020 slitting dremel cutting wheel or equiv..... Also thought of just a generic 0.25 roll pin that already has a slit by its very nature and kinda springy in the same way. Probability of the slot being the right width is small, but if it's too small, we can fix that. Or if too big squish it in a vise until its the right size. Looking at some roll pin spec tables, NOBODY seems to list the slit width. Just because when you use them for roll pins nobody cares how wide the slot is, jeezzzz...... Come on.... Don't make me go buy the Princess Auto/Harbor Freight variety pack, please....
-
I was thinking they are spring Stainless steel formed in a press of some sort. Would need some tension to retain the fuse blades. Just dreaming mostly. Waiting for Captain Obvious to chime in…..
-
Thanks for doing that! I fully understand the cost of developing new products on small scale and related costs, I am not surprised at the current asking price. Being is Canada and the related added costs is something I just have to factor in. Hmmm wonder what kinda little jig I could make to bend those little clips myself….
-
Been searching for this solution for a long time. Too bad the price is crazy. Buying 12 (comes in packs of 3, so for 10 you need to buy 4 packs of 3, or 12) are $50 USD. With exchange and shipping getting near $100 CAD.
-
Perhaps investigate how much of that weight is the compressor vs the underdash components. The Sanden compressor for the mini isn’t more than 15 lbs and the underdash unit and hose aren’t anything north of 20. I too find the mini to be “ok” for S30’s and 510’s in our northern climate, but likely not really enough for true hot southern climates.
-
I’ve been involved in the purchase and installation of 1.5 of Hung’s dashes. They are faithful reproductions and good quality. Hung is always great to work with.
-
First, I am very impressed at your ambition trying to renew the harness. I have re-furbished many harnesses, but tend to just replace pins and sometimes connector shells, never all the wire as well. Rarely is the wire compromised unless I find corrosion in the strands as I replace terminals. High current wires, (ie the fat white ones) I commonly replace entirely including all ring and connector terminals. These fancy colored 10 pin 73 specific connectors have the same 6.3mm spade terminals as the other 2/4/6 pin connectors, so just remove each terminal, inspect clean or replace it, and snap it back in the housing. No need to replace the housings, which you can’t do any way, they are not available new. You can use Weatherpack or Deutsch connectors (DTM for 14gage and higher, DT for 10-12). Steve’s suggestion for 10 pin connectors are fine, but I’d just do terminal service and retain the stock housings.
-
Extensive roll bar additions throughout do all the strengthening needed in a race car. I would add strut tower/firewall bracing to an auto-cross or weekend racer first before these chassis bars. None of the above are necessary or will provide any noticeable difference to a street driven car. Spend your money on stickier tires.
-
There has been a couple of times I almost purchased an induction heater for stubborn things but never found one that was both economical and had lots of options. This one looks reasonable. Having an Oxyacetylene setup is handy, but expensive and bulky and storage is an issue. Let us know how it works on control arm casting heating.
-
It would seem I can’t upload video’s or images, as others have noted. I will try again when the issue is resolved. As they say, it ain’t real without pictures.