Leaderboard
-
conedodger
Free Member17Points12,513Posts -

Zed Head
Free Member2Points19,236Posts -
HS30-H
Free Member1Points5,509Posts -
inline6
 Subscriber
 1Points1,282Posts


Popular Content
Showing content with the highest reputation on 09/10/2024 in all areas
-
Move the lathe to the car. On-car-rotor turning is a thing. And who checks their new rotors for runout? That's not obvious either! What's going on here!1 point
-
1 pointI have performed this procedure on a few carbs, but I think only one set has seen the road. Reports are that set worked well. So I made a custom threaded piece of brass. Maybe you could find something generic instead of making something special. I put it in a position where it did not interfere with the hinge molded into the float, and I did not want to put it upwards into the bottom of the float because of gravity. Beyond that, I tried to put it into a "fail-safe" position on the float such that if it starts to work itself out of the float, it would hold the float closed instead of holding it open. Figuring that a float level too low would cause the engine to not run, while a float level stuck open could cause a fuel spill.1 point
-
It’s a little early for the body shop estimate, but rear window and left rear fender flare, plus a few vertebrae and a skull maybe?
 1 point
 -
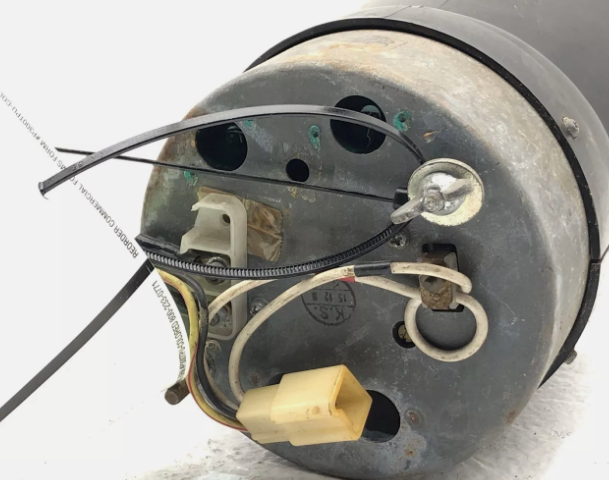
1 pointI can't remember the exact details but I know that people have fiffled with the loop of wire on the back of the tach and had good rresults. I think that they might have removed a loop or made it bigger. It generates an electromagnetic feild and the electronic igntion boxes apparently overload the current sensing system. They pass more amps. As I understood what I had read and barely remember. I think that you can reach it from underneath without removing the tach. https://www.ebay.com/itm/235464345938?mkcid=16&mkevt=1&mkrid=711-127632-2357-0&ssspo=sQc_o1-rRnS&sssrc=2047675&ssuid=&widget_ver=artemis&media=COPY
 1 point
 -
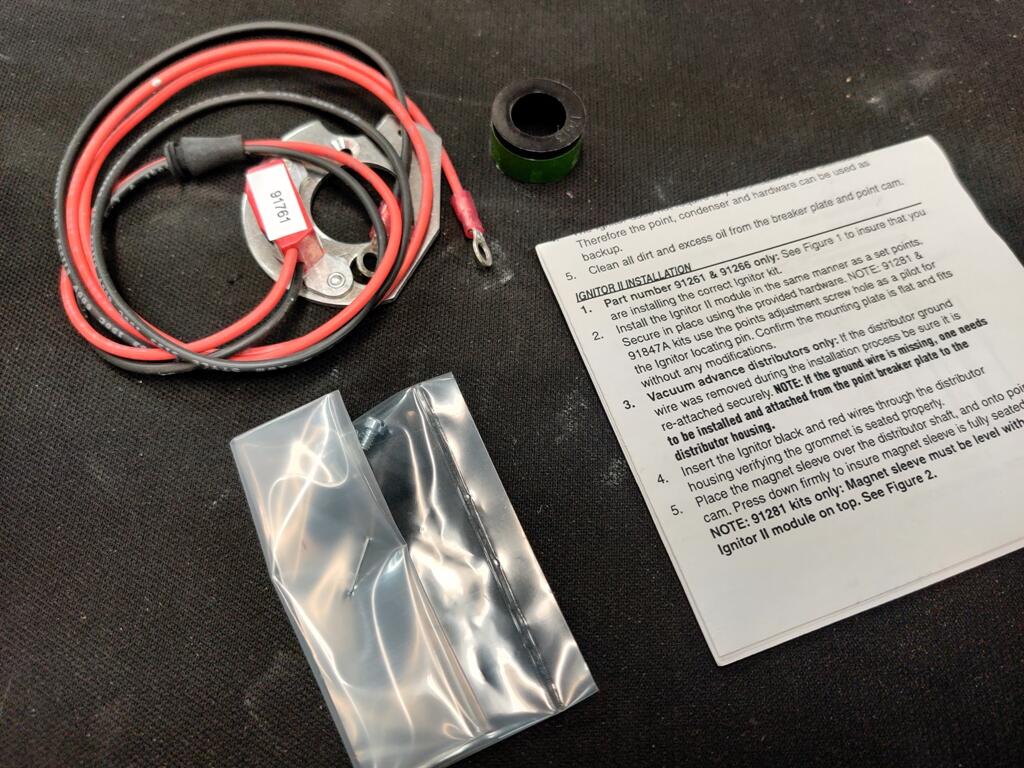
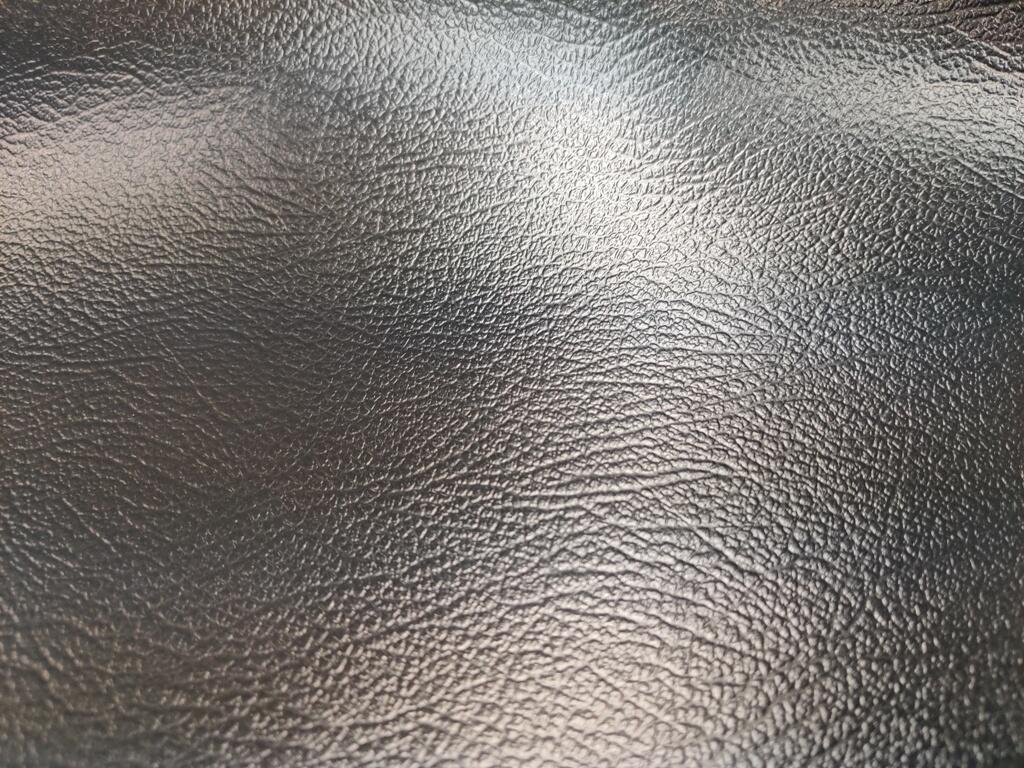
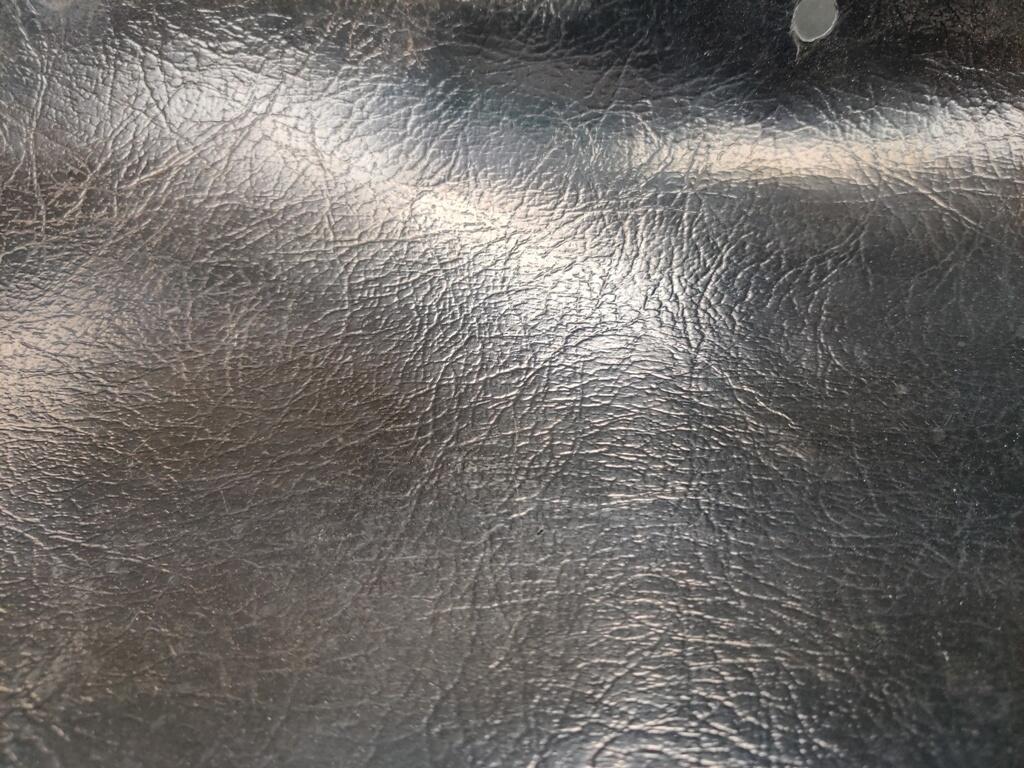
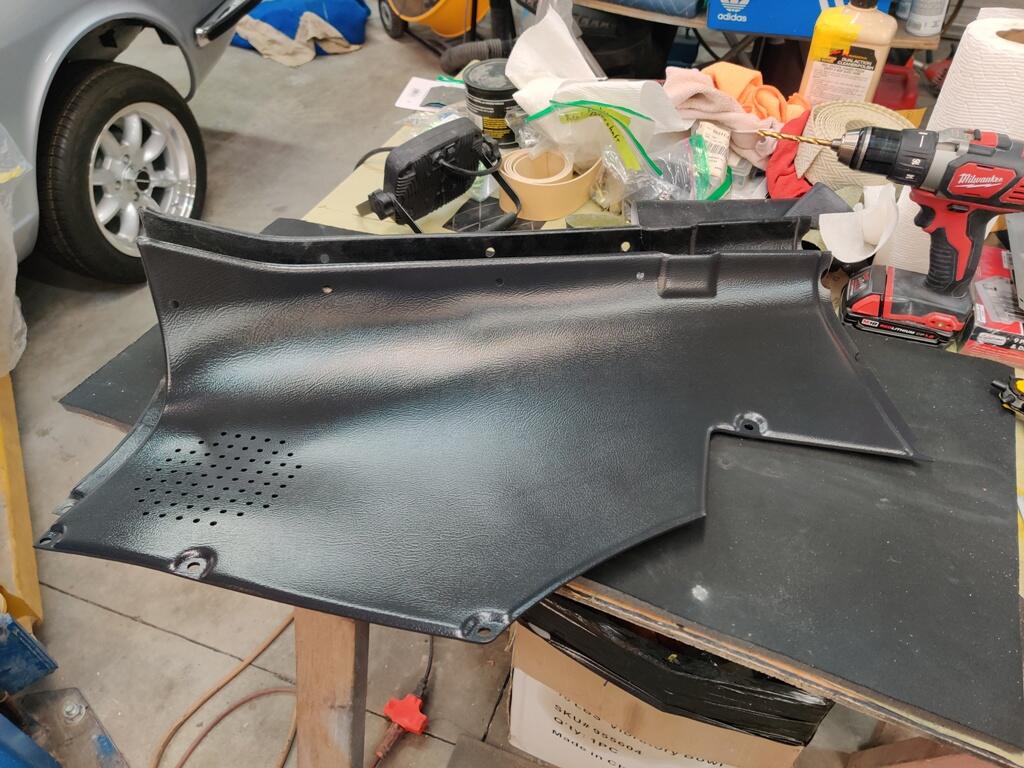
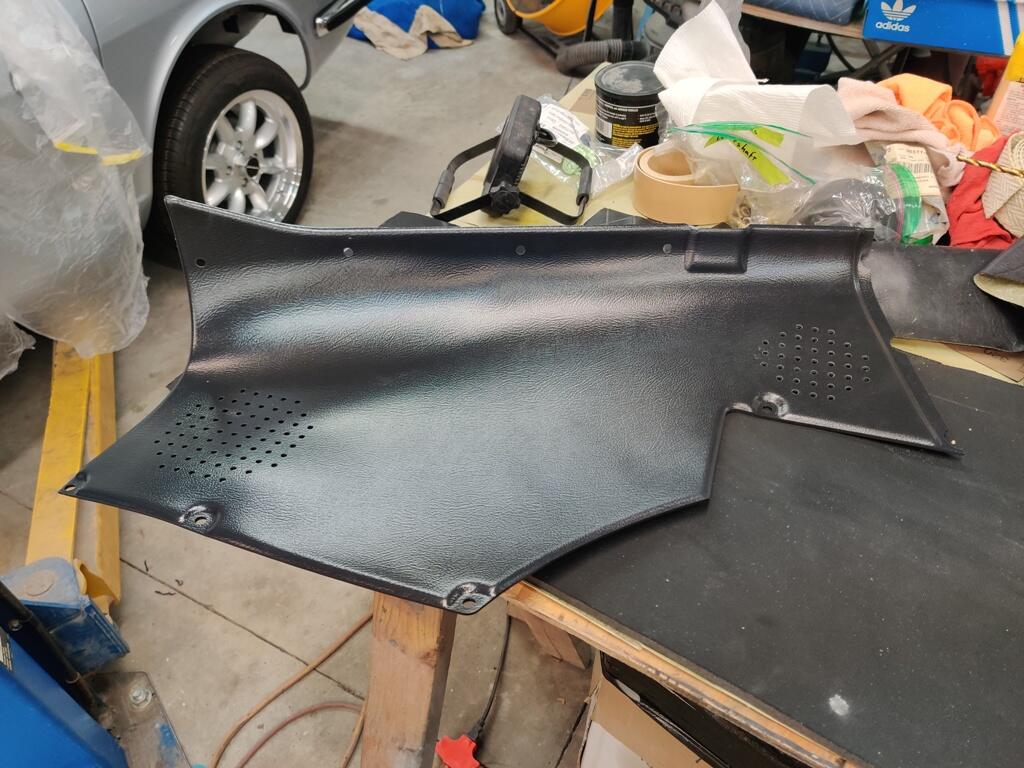
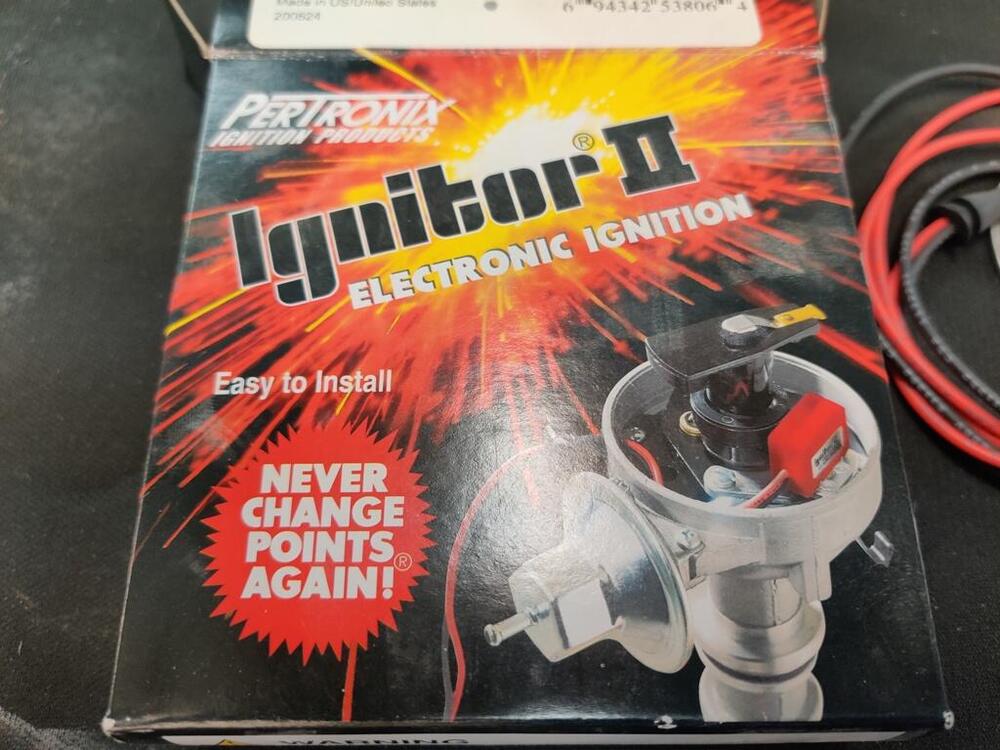
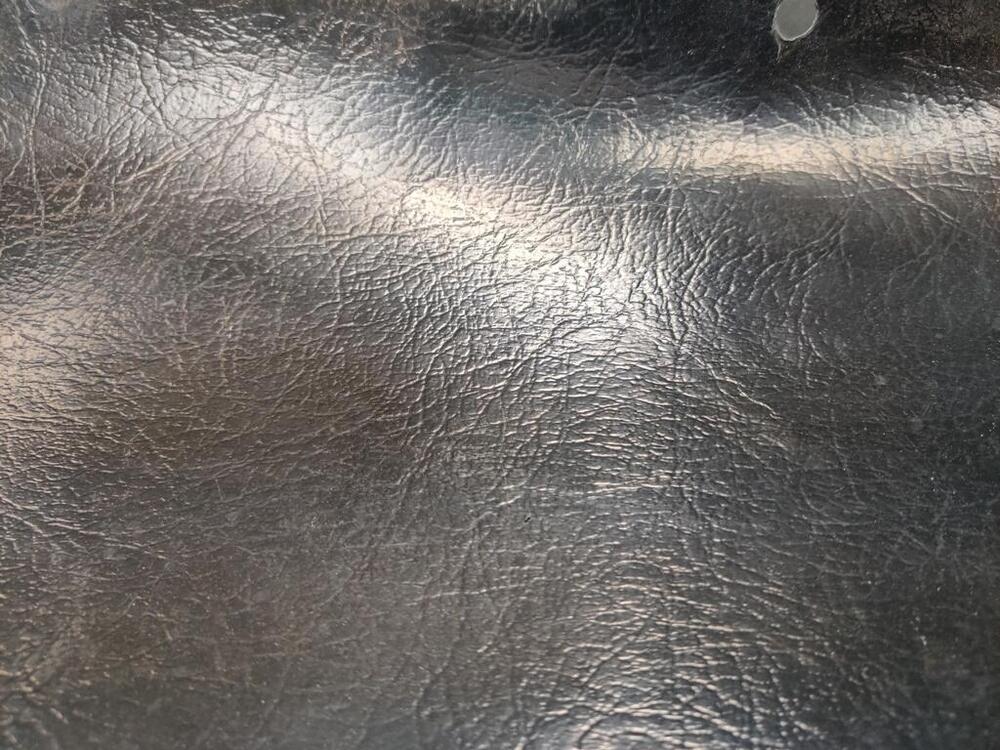
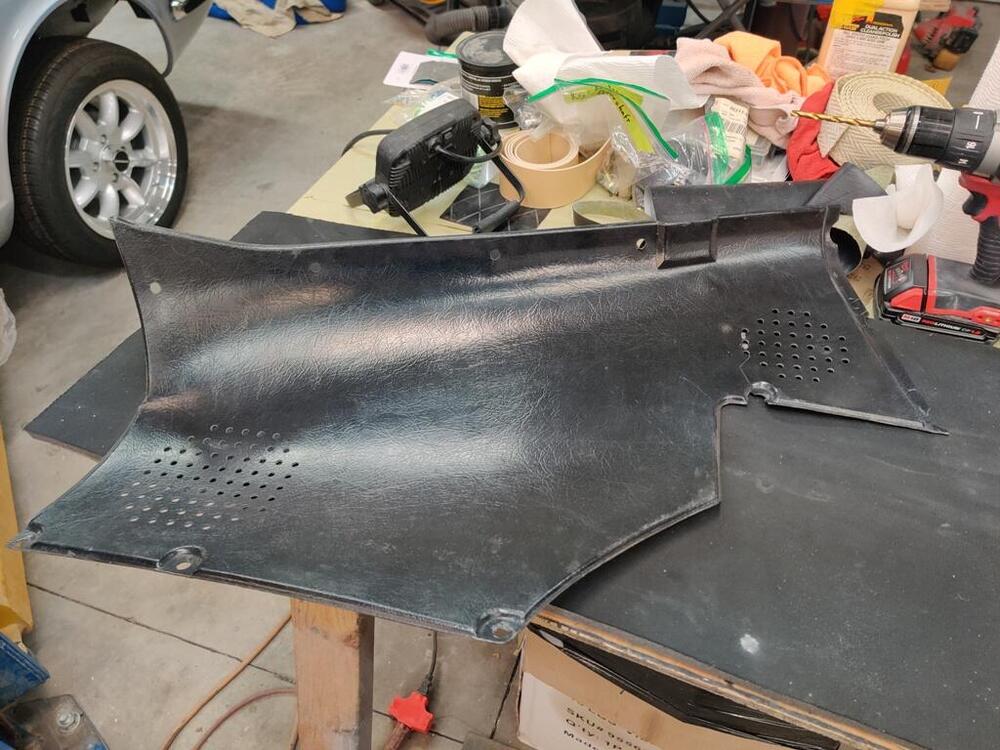
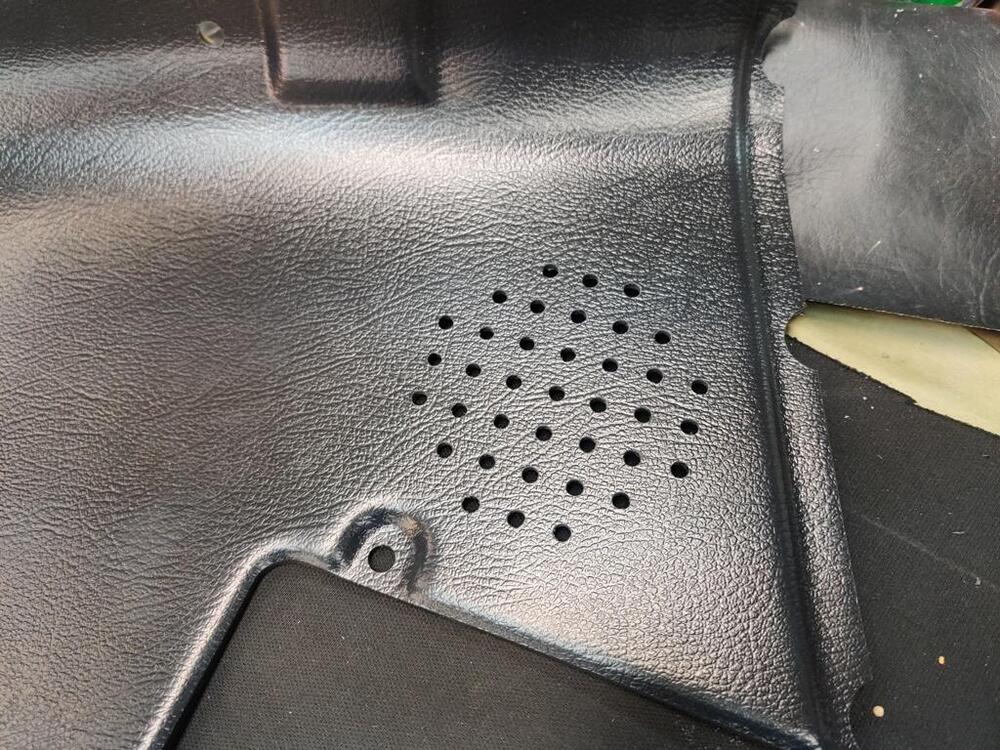
Today, I took a 1/2 day off from work and worked on the car. I was able to get the driveshaft measured properly. I will be sending it off tomorrow for shortening and balancing. I installed the Pertronix electronic ignition. I didn't take pictures, but I ended up modifying the distributor cap a bit to allow the wires to exit the distributor. I just drilled a hole and used a dremel a bit to get the boot that came with the kit to fit snugly. Next, I did a modification to the new interior panels I bought. I purchased the whole set of new, black panels (roof bar, quarter window, rear hatch, and tail light) from Z Car Depot. I also was able to source new SU nozzles from them. First, a comparison of the grain finish: Original and reproduction, in that order: The reproduction panels are nice. They are thicker and heavier than the originals. Instead of the hard plastic they seem to be made out of a slightly softer material. They only come in the early 1970/71 configuration. So, I drilled holes for the side pillar vent. New reproduction panel as received -- factory original panel -- and reproduction panel with holes drilled. I was able to clamp the original on top of the reproduction panel and use the original holes as a template. It came out nicely: Lastly today, I swapped out the new SU nozzles. While I was there I checked proper throttle plate opening when using the starter lever. When you pull the starter lever all the way open, the throttle plate to carb body clearance should be about .023" to .027". I also made sure to secure the cables at precise locations so that the nozzles both activate and move the same distance when the starter lever is pulled. I am getting closer to being able to start it up.


 1 point
 -
1 point
-
1 point
-
Diplomatic and pragmatic. However I've got a hunch that a stickler like yourself would have a nice set of JIS screwdrivers in a secret compartment in his toolbox. Your secret's safe with me... I've known Len for something over 25 years at least. You'll be pleased to hear he's in fine form but still getting used to the peculiarities in character of his recently restored HLS30U, which he says were something of a shock to the senses after 40+ years of S30-series Zs with their steering wheel on the right side... 🙂1 point