Leaderboard
-
conedodger
Free Member11Points12,513Posts -
JDMjunkies.ch
Free Member5Points637Posts -
Captain Obvious
Free Member3Points10,081Posts -
inline6
 Subscriber
 2Points1,282Posts


Popular Content
Showing content with the highest reputation on 09/05/2024 in all areas
-
I've heard people say that about you. Oh wait... That's not true at all.3 points
-
Yeah. i got a bunch of books again, from vairous sources. The top left (lower one in the next photo) is a french book generally about "heroic" japanese cars from 1960 to 1975 and has it's own chapter about the Z-variants. Nothing new, but nicely written with plenty of photos. My french is quite limited so i don't understand everything, but anyway. i found it for two bucks online, so i had to have it. Same for the upper one in the following picture. A german book about japanese cars from 1912 to 1992, it is less a book about certain cars, but more about Automotive Companies, and the industrial history in general in Japan. and also has a broad section of facts and figures about many, many cars. I still have to read it, but it makes a pretty good impression on the first glimpse. The bottom right is the October 1974 Service bulletin issue 216 "hints in servicing the Nissan Air conditionier. which i will use to update some details in the big S30 Aircon Knowledge post soon, which i released recently. And then i got the Japanese Z-4 Service Bulletin from October 1971, which introduces the HS30 Models and mentions changes of the S30 and PS30 models. Obviously it has some details about the HS30 cars including the G-Nose HS30-H models, but also some other details which are useful for upcoming knowledge posts which i'm working on.2 points
-
Ok, I am back at this thing! I sent the left side flange off to have .5 mm removed by lathe operation from the area indicated in the picture in the prior post. Tonight I found the time to mock things back up again and check backlash. With .5 mm removed, I put a .3 mm shim on the left side. Thus, I added a .2 mm shim to the existing set of shims on the right side flange (.3 mm .4 mm and .5 mm). In theory, the distance between the bearing races of the left and right side flanges is what it was before the lathe turning, though I suppose it could be a few "tenths" of thousands different. I don't think I can know for sure. Assembling and then measuring backlash as I have done before, I got .005" of backlash. Hallelujah! I did a quick and dirty version of checking the wipe pattern and it looks good to me. I will post pictures of that a bit later. One thing I did check and find out though is that while the Quaife unit has no measurable runout (checking with a dial gauge (units in .001") on the part of the carrier unit the crown gear bolts to, the same cannot be said for the crown gear. I ran the dial gauge against the gear and measured a bit more than .004" of run out. I am going to loosen the crown gear bolts and try to adjust that so it is within specification (.0031"). Stay tuned!2 points
-
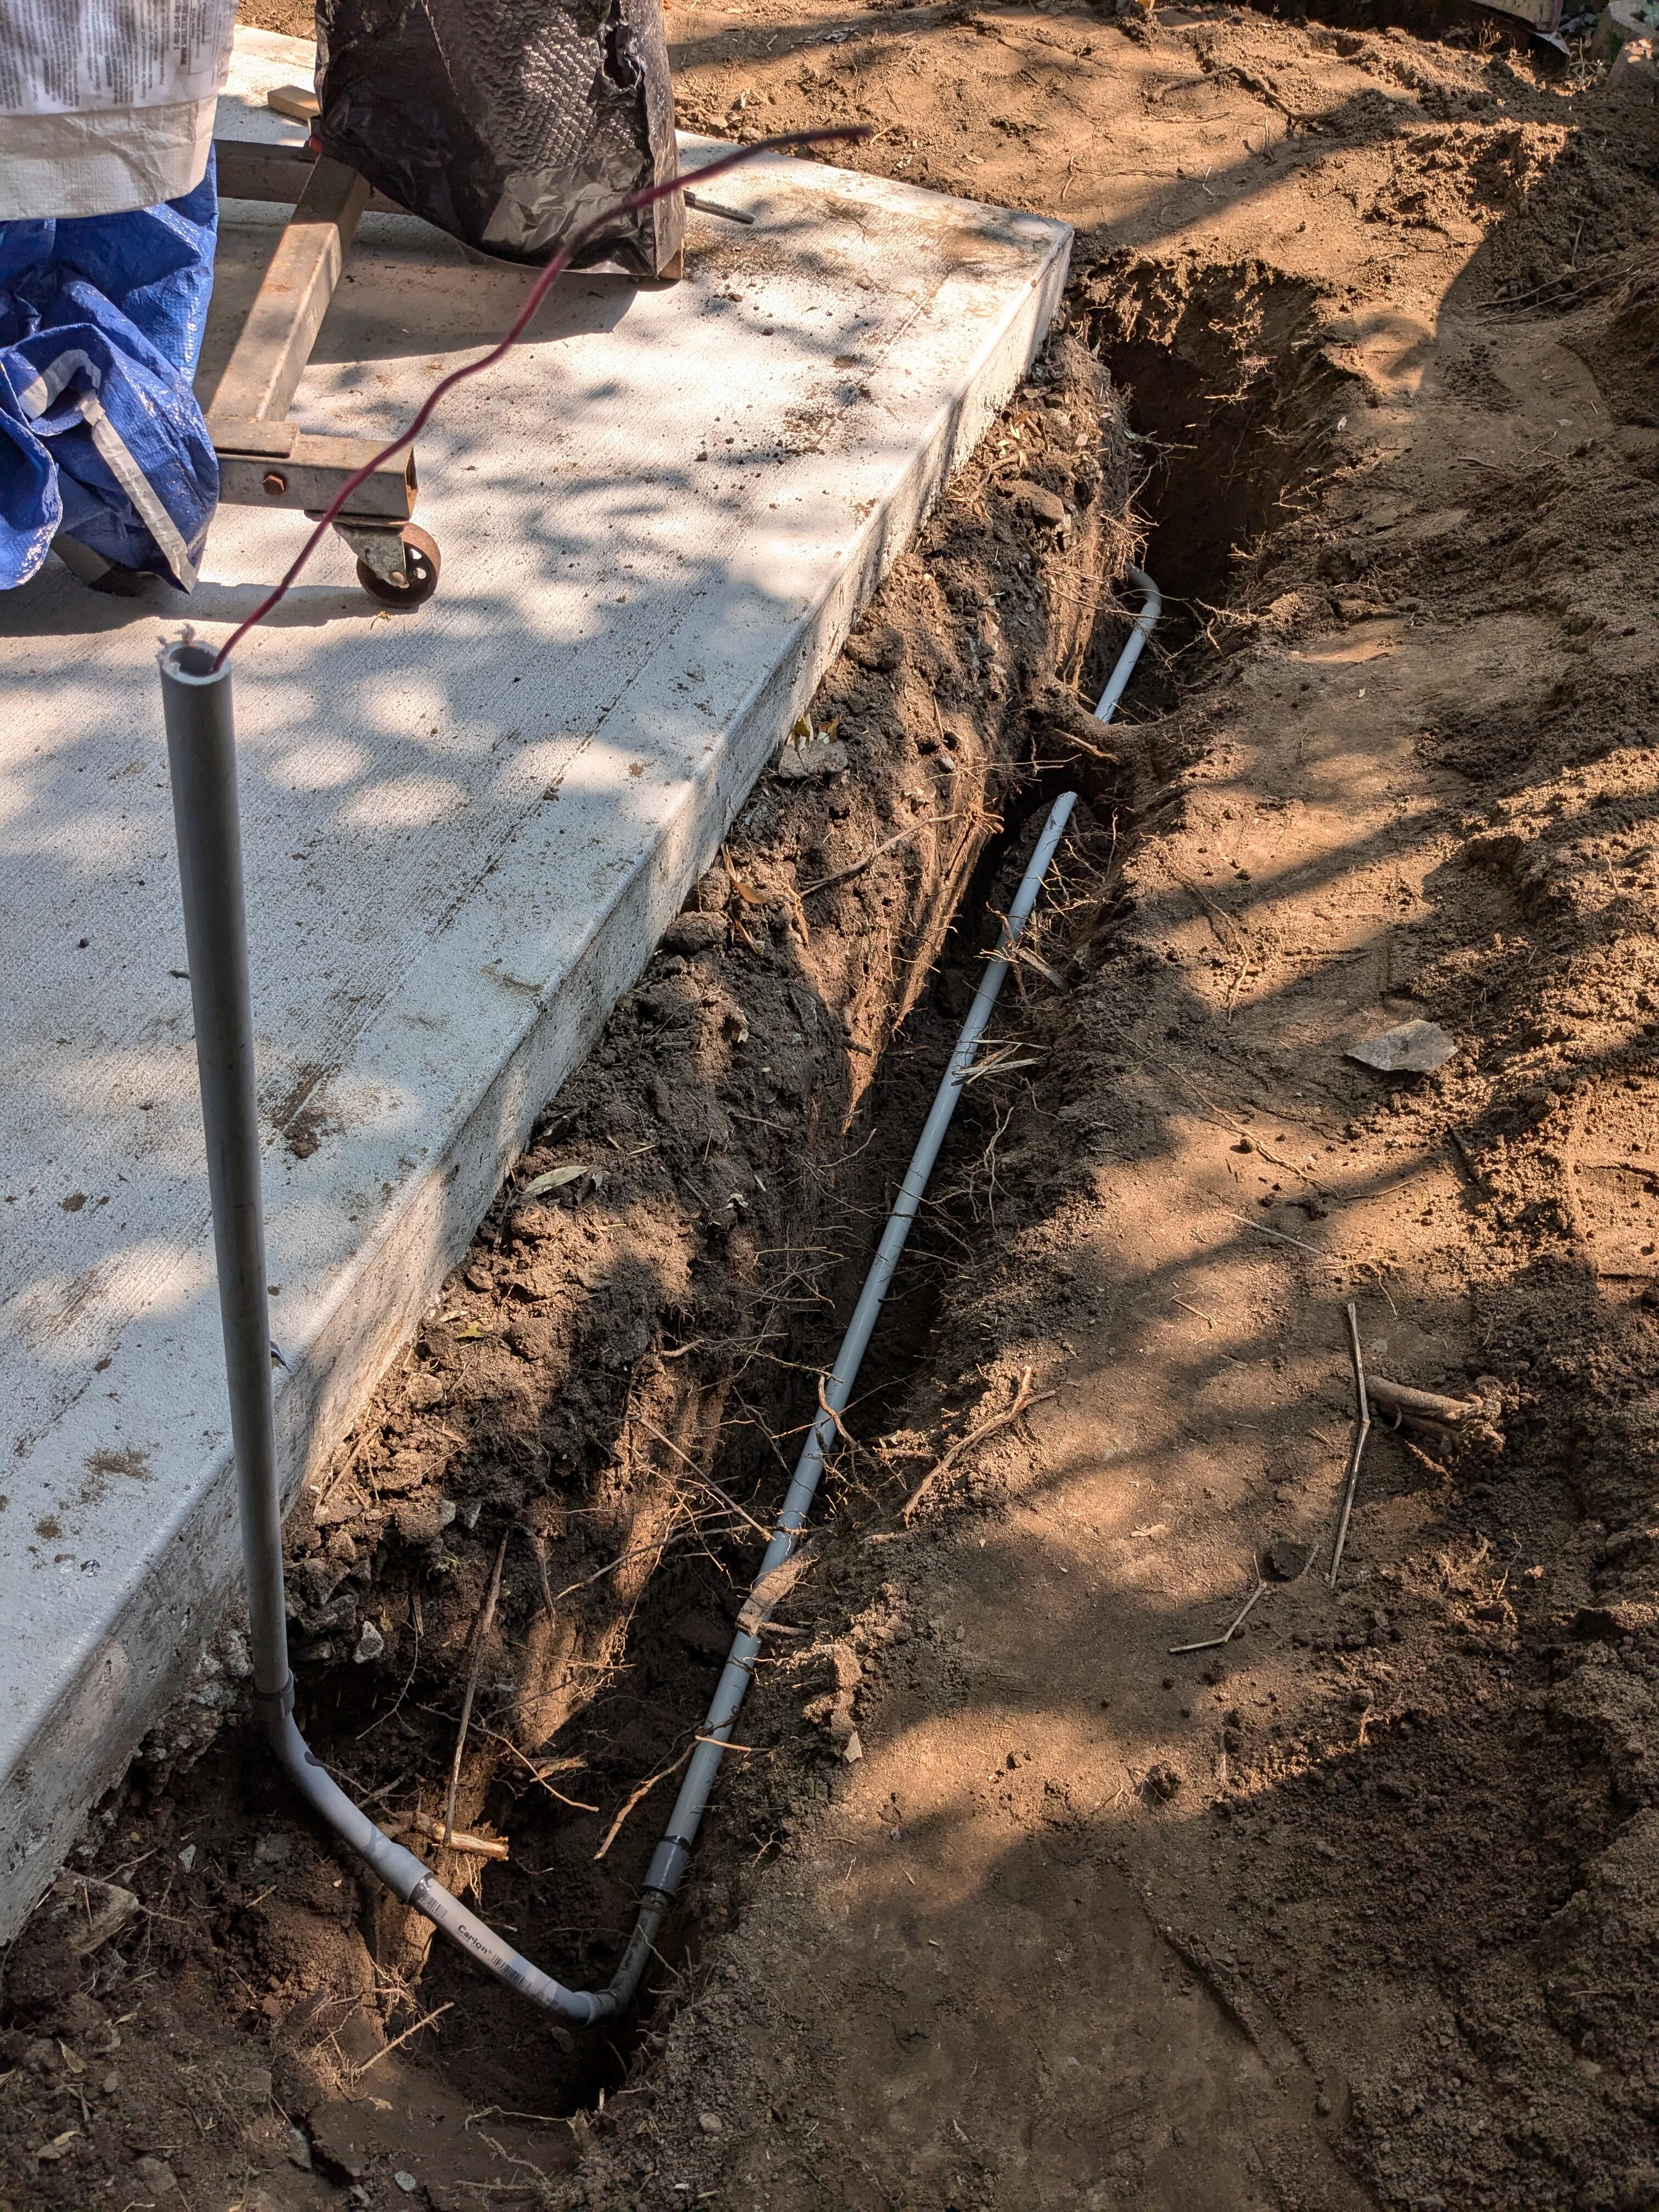
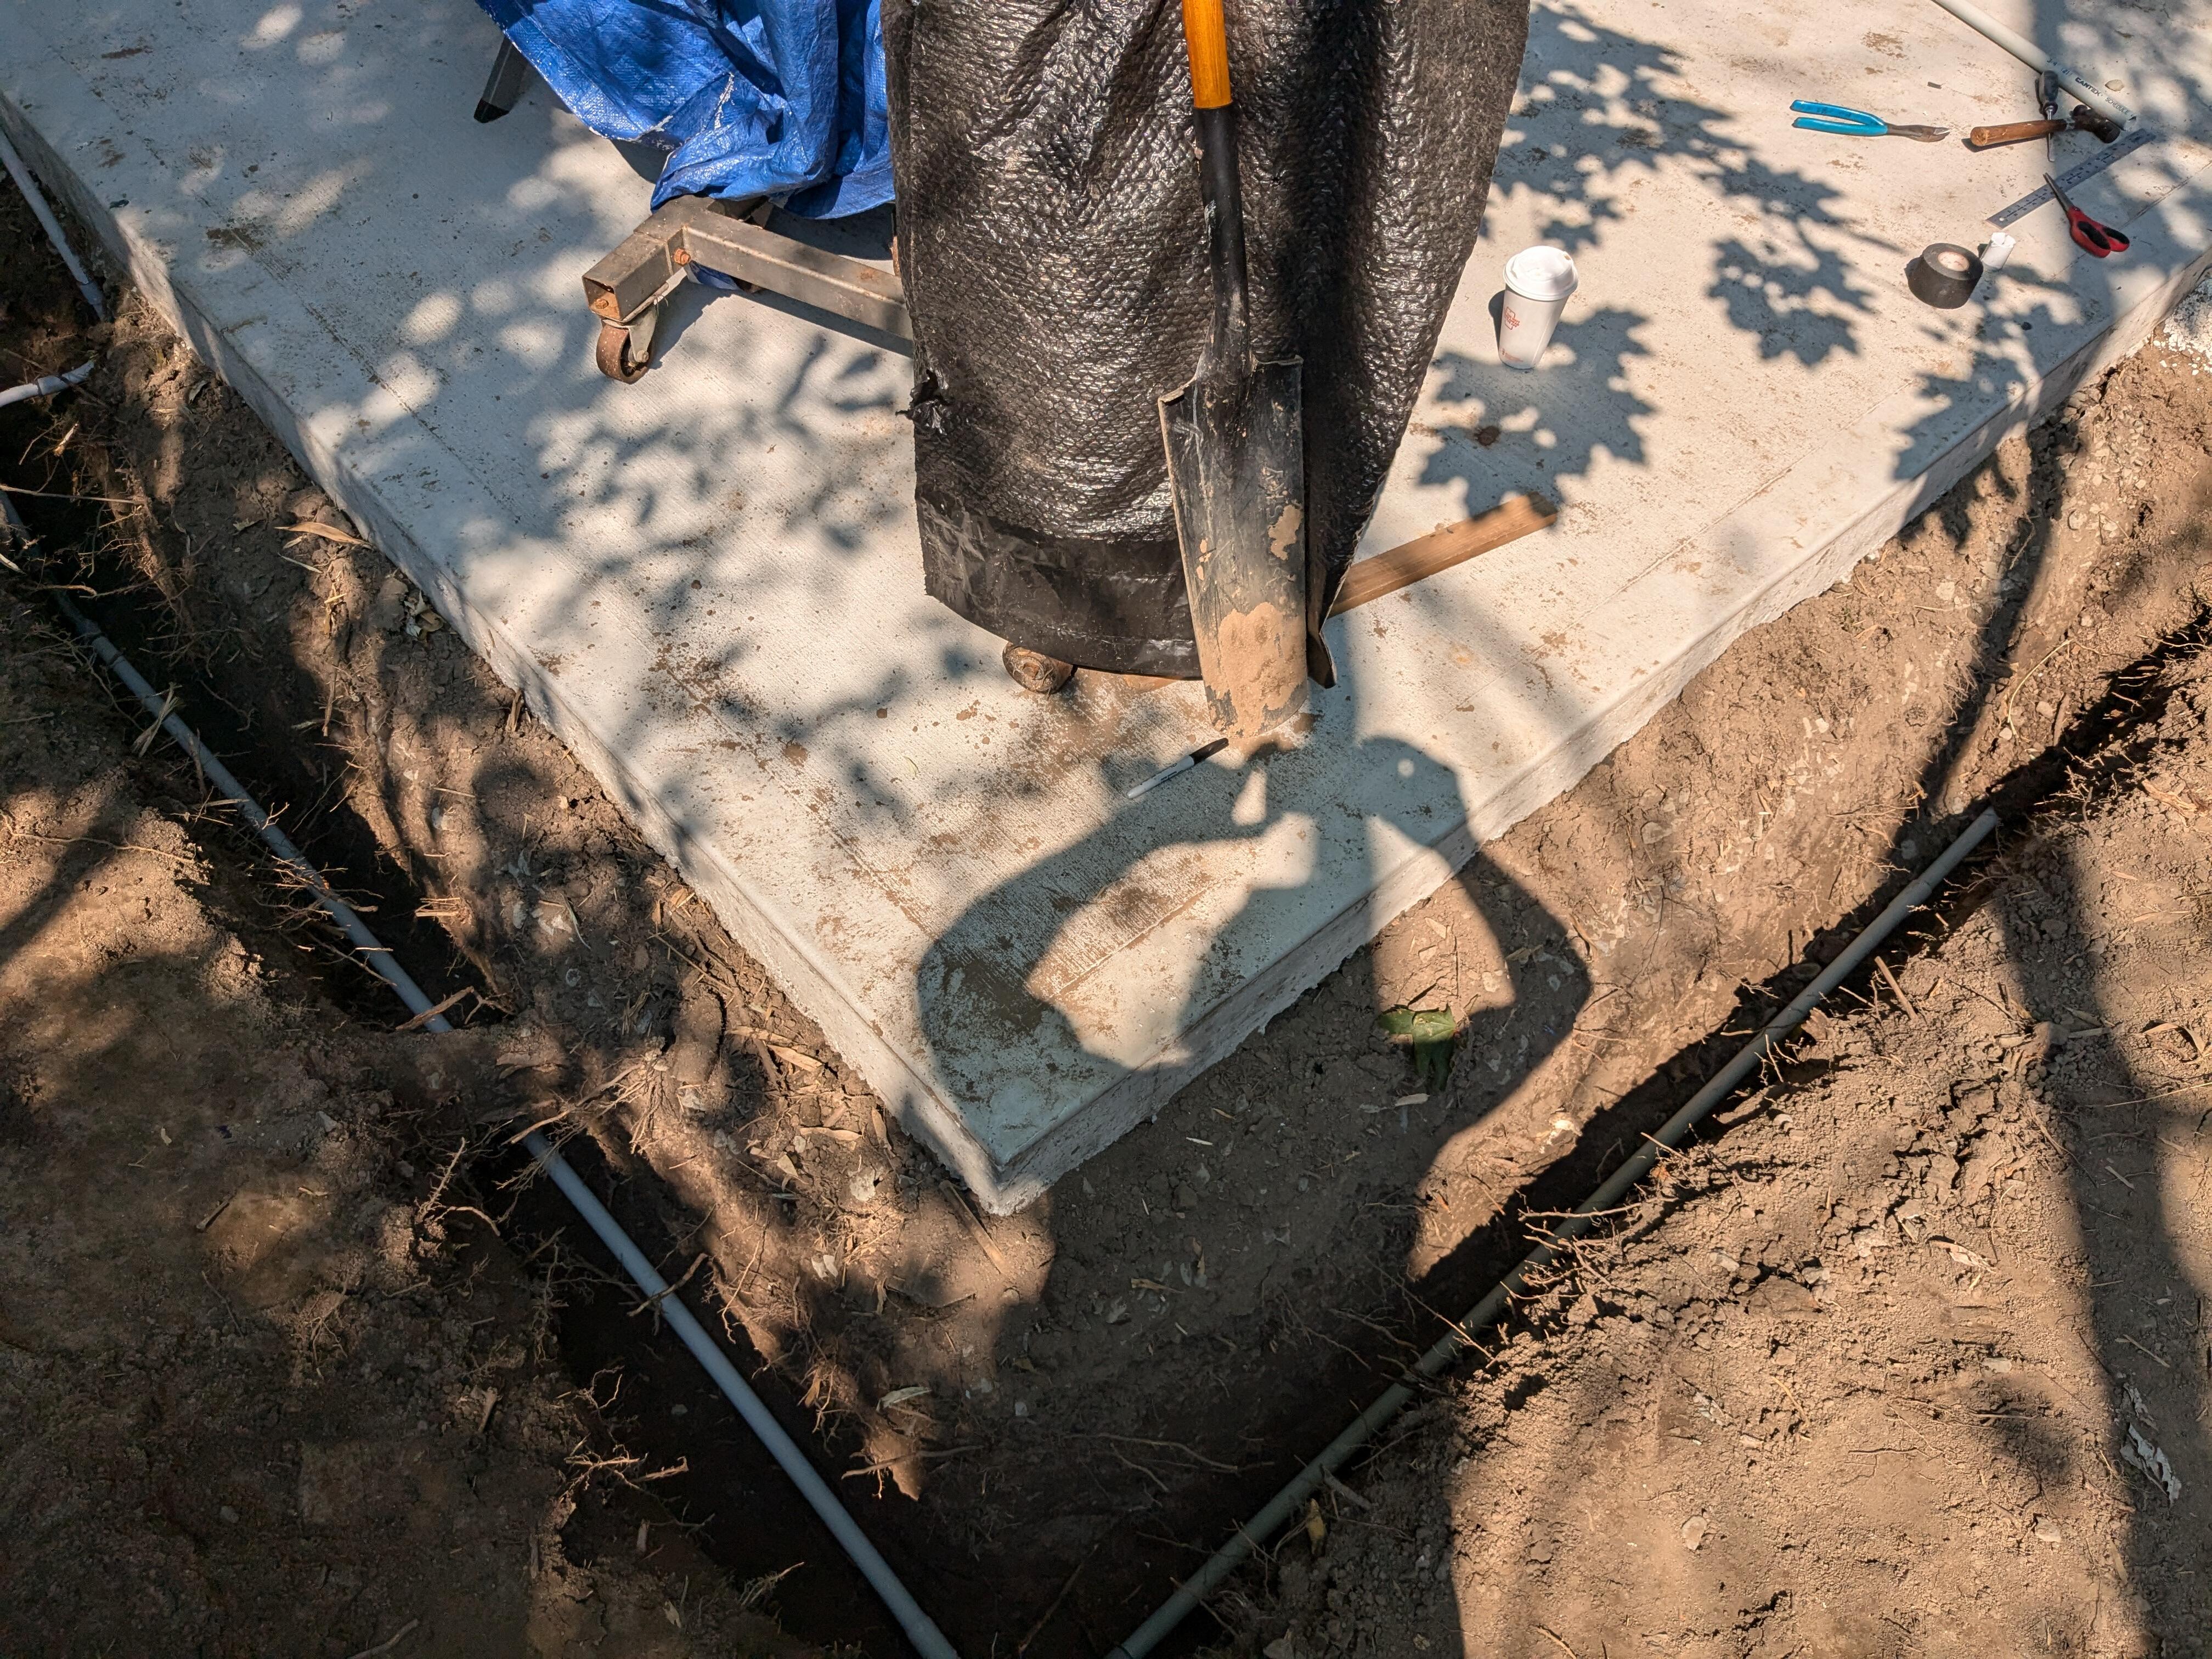
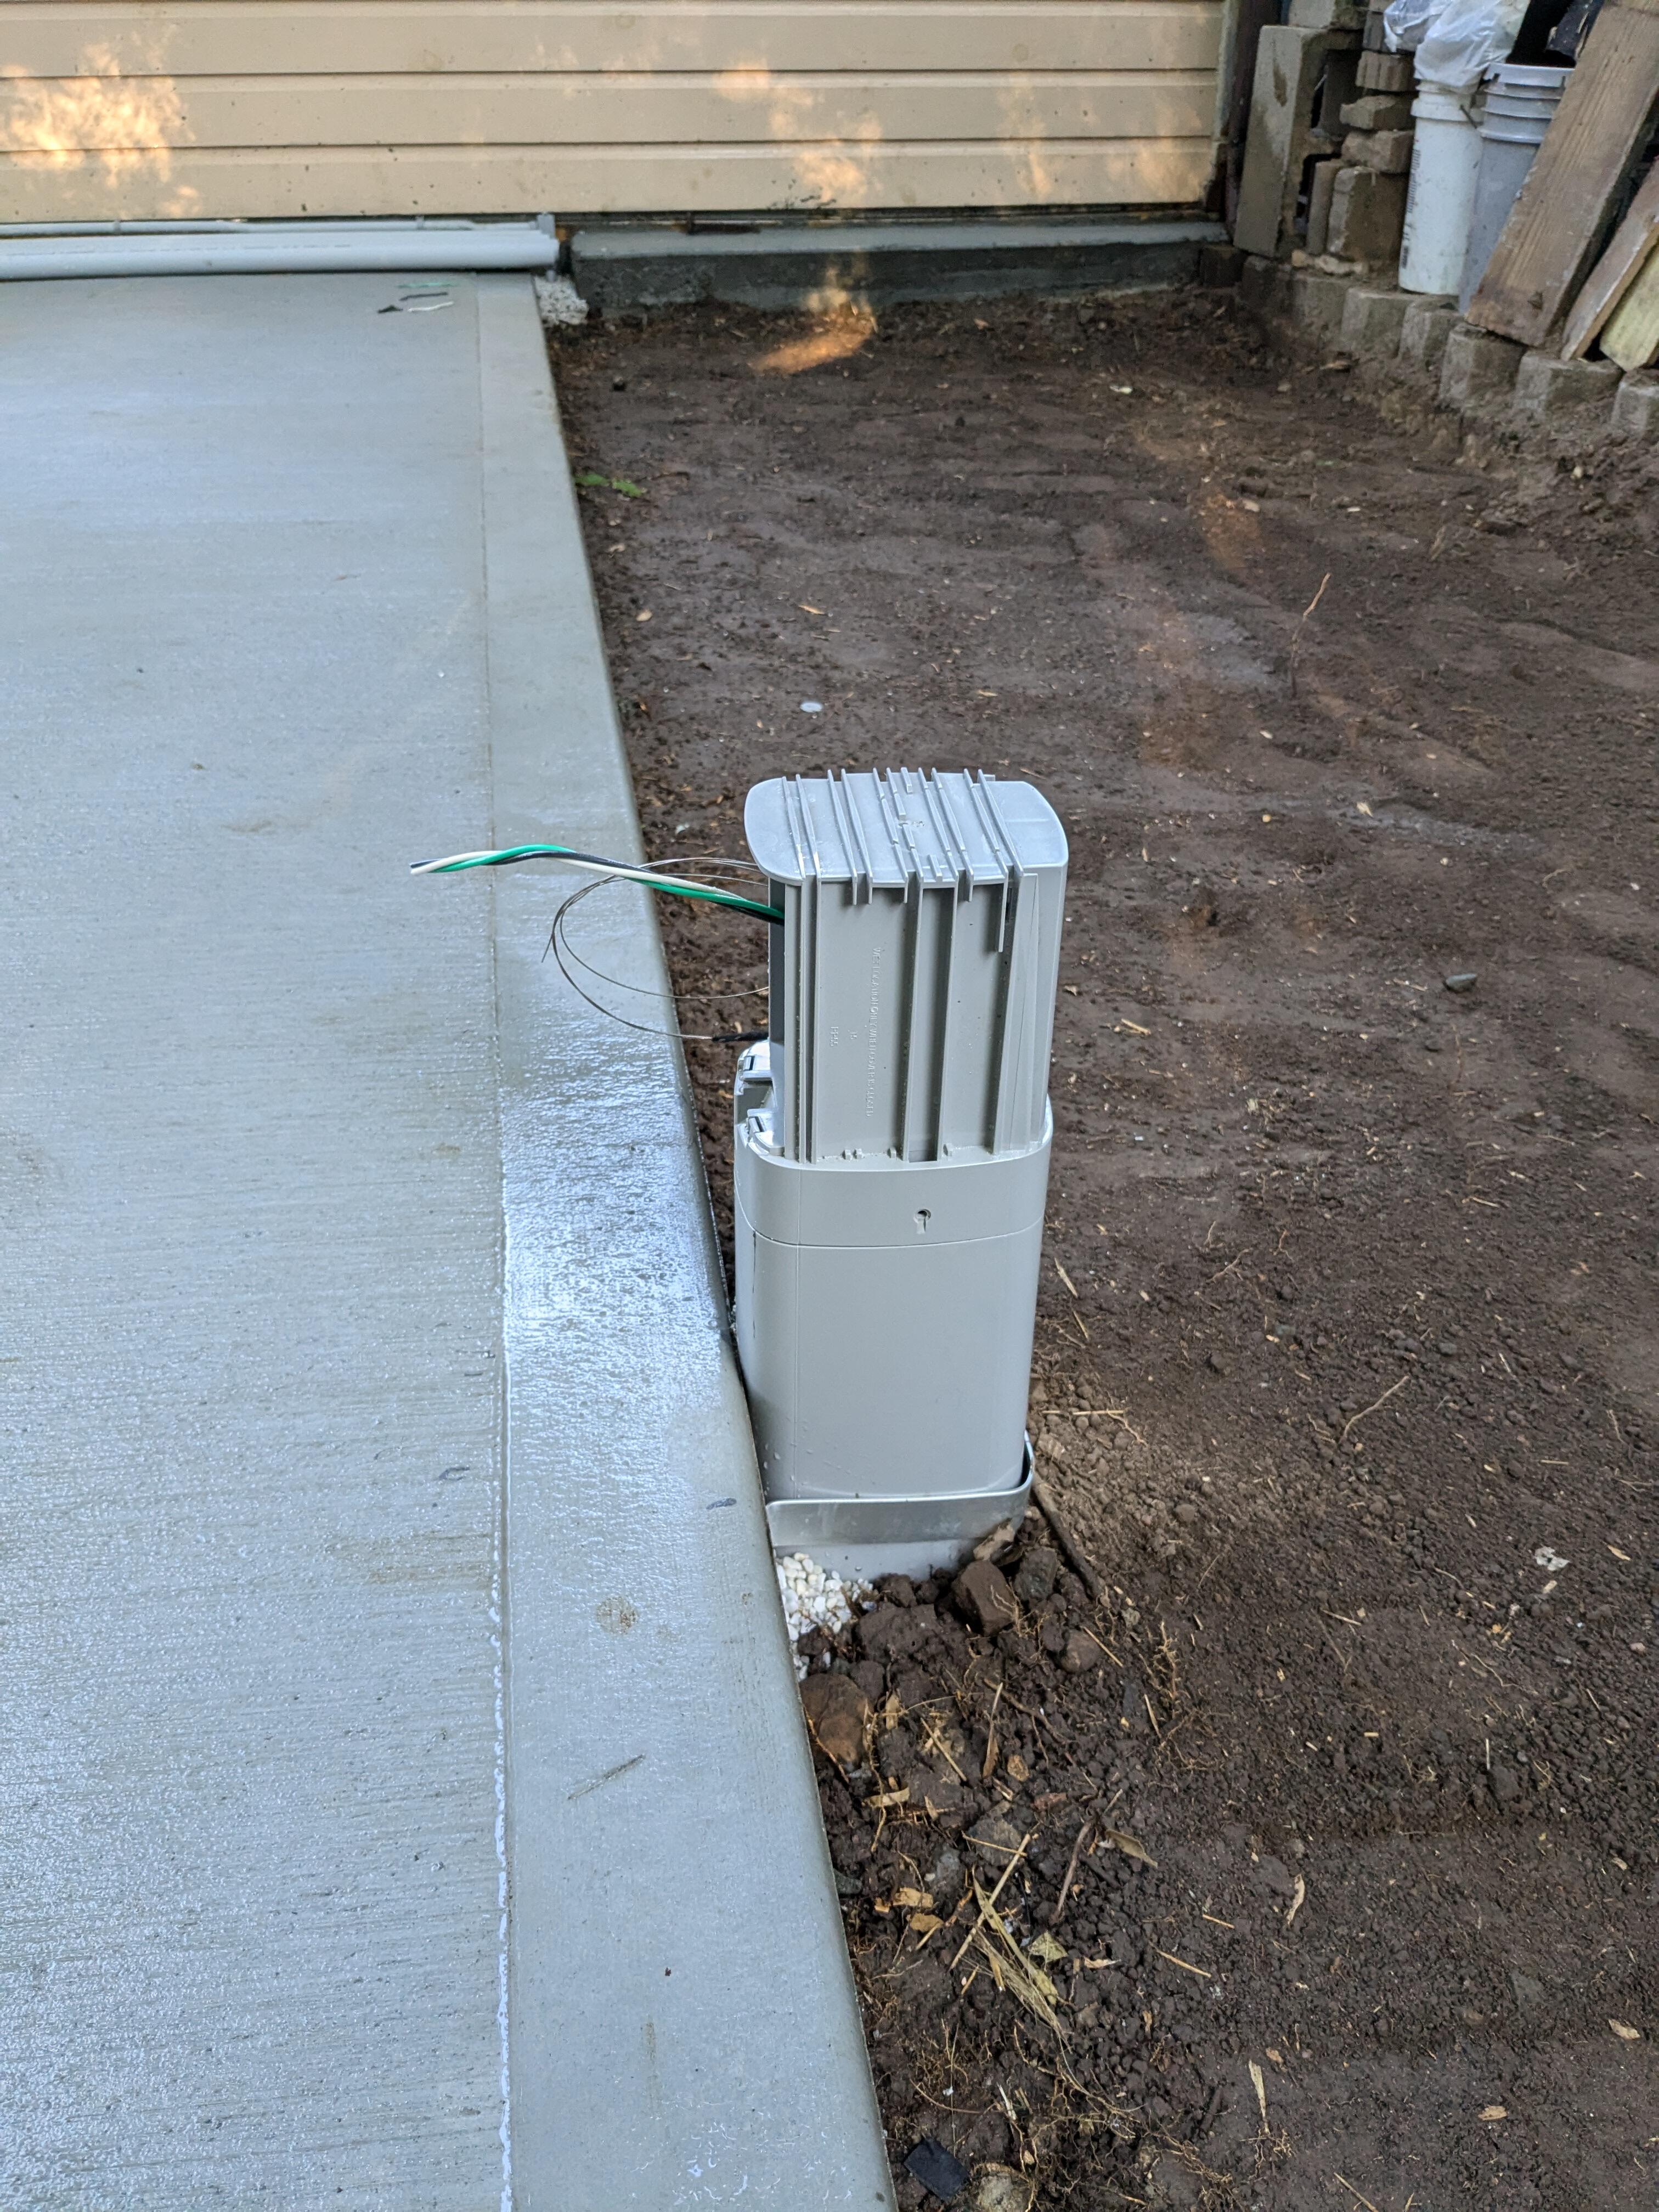
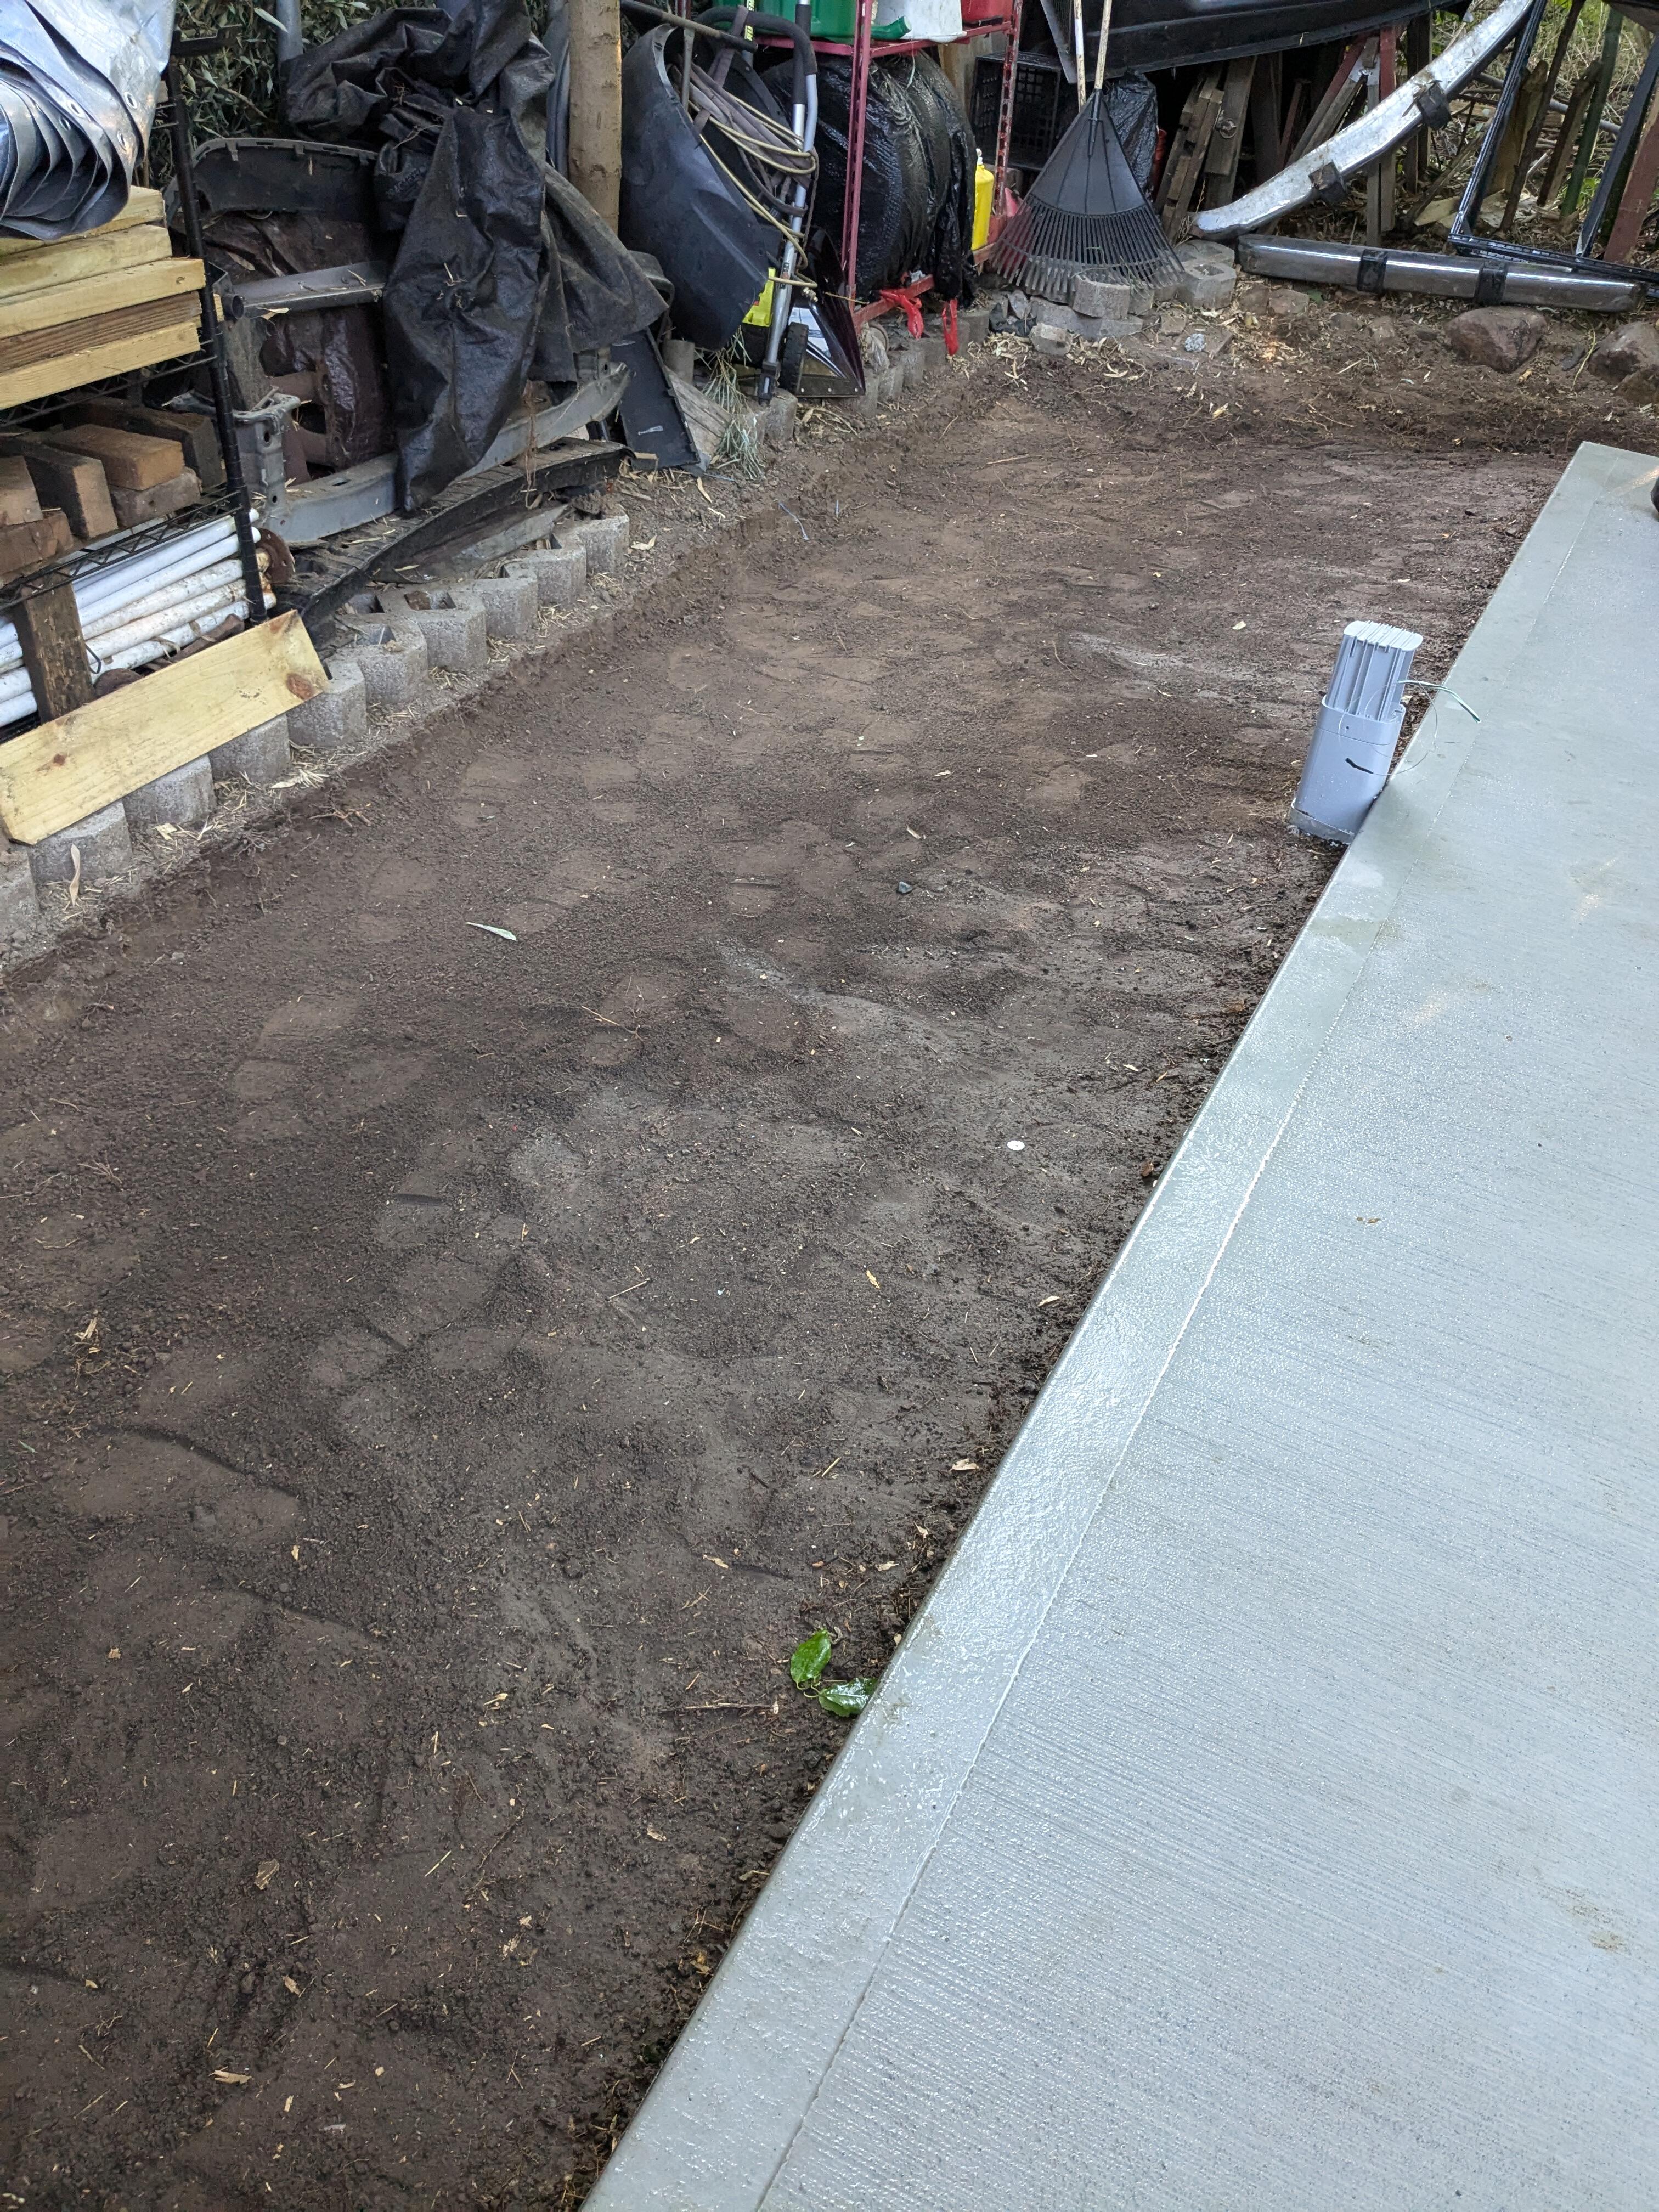
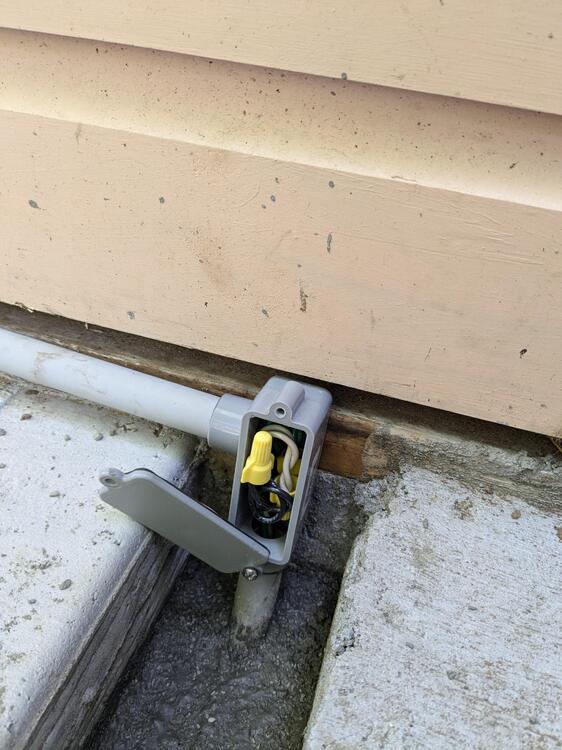
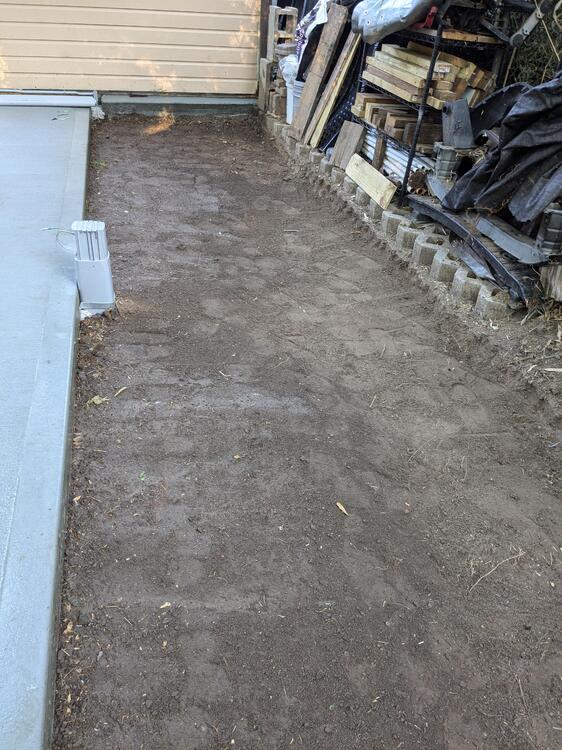
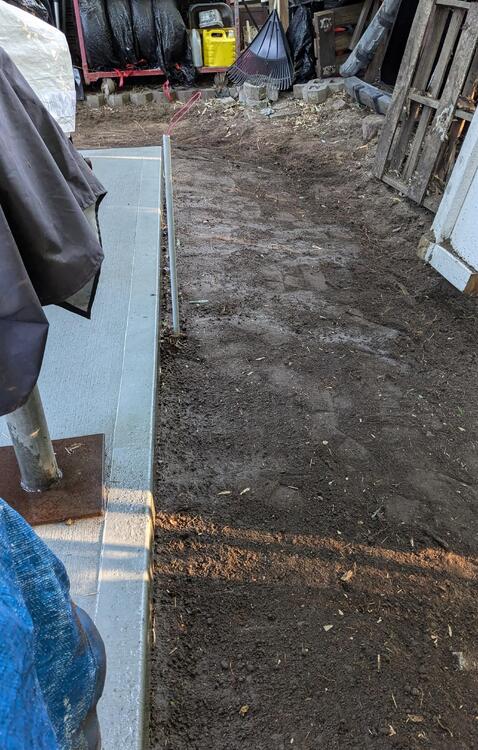
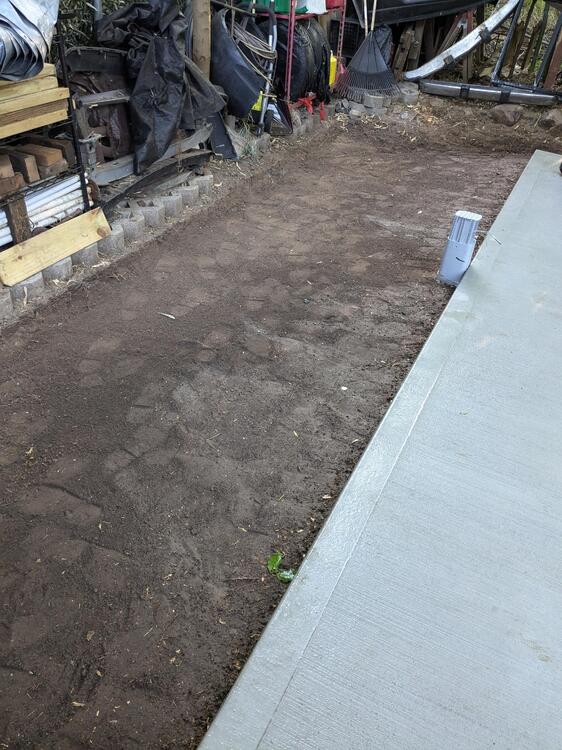
Dug the rest of the trench around the West side, and run the conduit. I had forgotten to order more 12/3 solid THHN, so I ran a snake so I can pull through the wire through tomorrow. connected the first leg to the feed off the receptacle 1st post in place, I'll remove the cap to feed the second run through Started packing the trench & grading the ground away from the patio - this area has always held water.


 1 point
 -
1 point
-
I've been shopping again recently and today a lot of packages arrived. First, i found some original "Datsun Genuine Spare parts" stickers in switzerland. I always wanted those, but i never came across them. These seem to be original vintage stickers. as they have some wear marks and the material feels old. also the color is slightly faded on one sticker. Recently i also came across a set of original Datsun color sample charts. Even though not 240Z related, i like to collect those, because they're rare and don't pop up often. I already own some (see here), but these will add to my collection. So new in are charts for the 100A / 120A, 160J / 140J, 260C / 200C, 180B / 160B. Recently i also found a nice set of Nissan "Sports option catalogues" in Japan. I already own a few of those, but the whole lot was a nice find, so i made sure i get them. The Z432-R is specially rare and some of the others were missing. I think my collection is pretty complete now... For those who don't know. These are basically the pre-NISMO era Option / Competition parts offerings from the Factory, back in the day. Some deals take a bit longer, and i've been working to get this lot for quite a few months, but thanks to my man Rob, i finally got the parts today. It's a NOS parts lot, including many rare rubber and plastic parts in good shape. All the small things you don't find very often and are good to have! The lot included: A set of front and rear bumper rubbers: A upper and lower hood lock set, and a set of rear quarter window rubbers Various dust boots, O-rings, a Fuel tank rubber insulator and a Handbrake rod: A set of rear bumper mounts (which i need right now) and the rear strut top covers: And a slightly used but very good condition OEM water pump, which i got for my friend, since he was looking for one: Overall not the largest lot of NOS parts i ever bought, but definitely a quality one! The seller also showed me some photos of a magazine which he recenty acquired. Road Rat no 17. Issue. It's a beautiful coffe table book with stories road trips etc around japanese (car) culture. Nothing Z-related really, but genererally about some japanese collectors cars, great photos and definitely worth a look for those who like high quality images and something to read on a rainy day! It was sold out on the publishers website, but luckily a swiss company still sells them (worldwide) I also got a bunch of excess Datsun 240Z Steering wheel mounts (see here for details😞 And this TechnoVersions diff mount. I don't think i will use it, but a friend ordered some and i made sure i get one just-in-case 🙂 I still have two deliveries pending and one sea-freight pallette in Japan in preparation, so there will be more to show soon. Overall im pretty happy and excited that the parts allow me to work on a few things that were on hold.1 point
-
The repeating theme of this build is definitely "two steps forward, one step back". Whenever i start to work on something, i realize there is much more work required than expected. Remember that nasty weld on the LH Door upper front in the previous post? I thought it just needs a bit of an attack with an angle grinder and some rust protectino primer. Well - once i started grinding, i realized it was a pretty cheap repair from the past, and once some of the covering layers were ground down completely, rust appeared underneath. So it seems like it was just a simple "patch-up" work rather then a proper repair. It's just a small area and i expect it to be no big deal for the bodyshop to fix, but yeah, another small little area with an hour or two of paid labour required. Even if it's only a small area, which most people wouldn't be able to see, it would hurt my heart to just leave it like that. Also it would be just a matter of years before rust bubbles appear in that area. so better fix it now! I kept up my motivation and decided to install the hood tension rods instead (yeah, i thought i'll sand them only before they go to the paintshop). Before: And after: It honestly took me a minute to figure out how this al goes in, but then it was a fairly easy install, even with the hood and hinges already installed: Now i can work with the hood open safely again and do not need any supporting bars or anything and don't have to fear it falling on my head. Obviously, the hood allignment from the bodyshop is completely off now with the tension rods installed. thats why i do this - so it can be aligned and corrected PRIOR to painting. Next i hope to be able to work on the front fender area. some smal tasks are pending there 🙂1 point
-
So now that the car is back at my shop. I thought i'd do a little inspection of all the details, to check if i see any need for rework in some areas. Overall i'm super happy. they did the best, especially since they have never seen a 240Z in their shop before my project. Some areas need a bit of work, and the first task of me will be to cover all the bare-metal spaces in rust-protection primer. They wanted to do it but when the trailer was available they weren't able to finish it, so instead they left me two cans of primer to do it myself. I'm happy if i don't have to pay them for something i can easily do myself. And considering it will be a few months in my workshop before going back for the final adjustment, it's a must to protect it against new corrosion. I don't want to describe every photo in detail, so here's just a gallery with random details. On this side the body line has been hammered back in already by the previous bodyshop: Optional footrest reinforcement, as on the japanese cars (that weld needs a bit of a cleanup, to satisfy my OCD). Luckily something i can easily correct) Floorpan reinforcement brackets on the rear, as on the original cars: That's it. I'm now in the mock-up phase of the car, where i have to prepare and test-fit everything and i'll show you some updates soon.1 point
-
I wholeheartedly concur. It was another stinker. Unfortunately my stack of poor, bad or total garbage books on the subject of 'our' cars is so tall that it I had to apply for planning permission from my local council.1 point
-
Great info, thx. Also of note, the original examples shown have a trunkbed plate with welded nuts in place of the provided plate, with welded studs- likely also for ease of installation. The original nut-plate solution is also how the roll bar was installed on my Works car. i can certainly understand why Mizukami went with the latter stud system, as the original welded-nut-plate solution requires 4 large holes to be drilled into the floorboard. A very subtle difference that 99.5% of enthusiasts would probably not recognize. (thatsa lotta nuts & studs talk)1 point