Leaderboard
-
.JPG.cfcada9cf1c1b502df3f5f2f2ca3ff36.JPG)
SteveJ
Free Member6Points9,646Posts -
Captain Obvious
Free Member2Points10,081Posts -
lonetreesteve
Free Member1Points1,700Posts -
EuroDat
Free Member1Points3,309Posts


Popular Content
Showing content with the highest reputation on 12/15/2020 in Posts
-
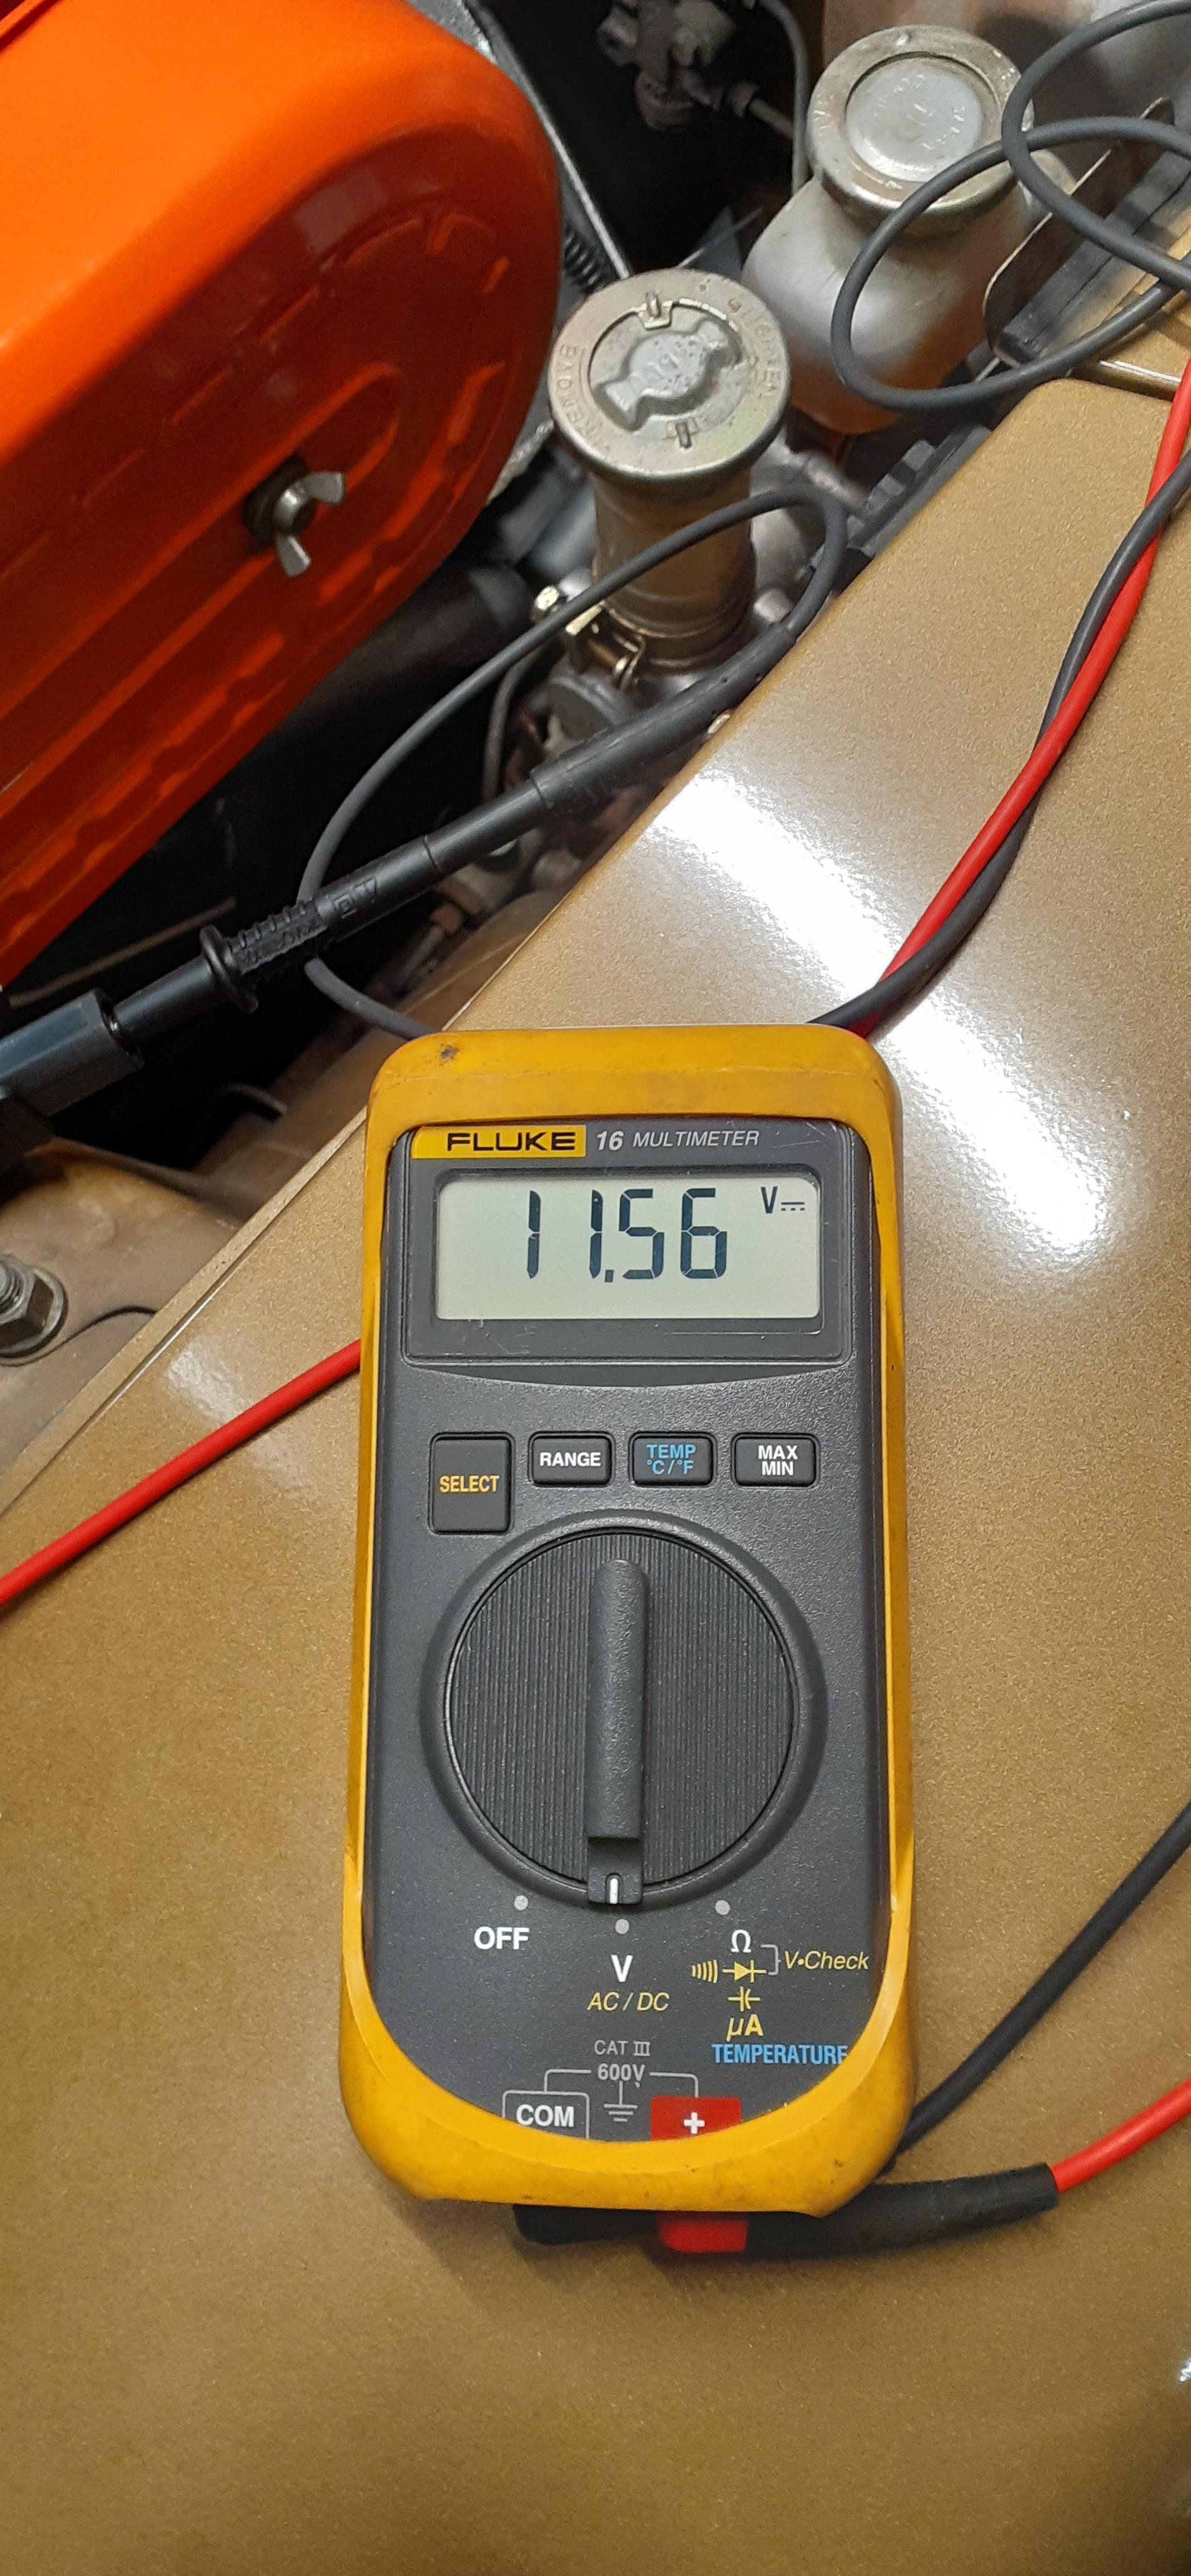
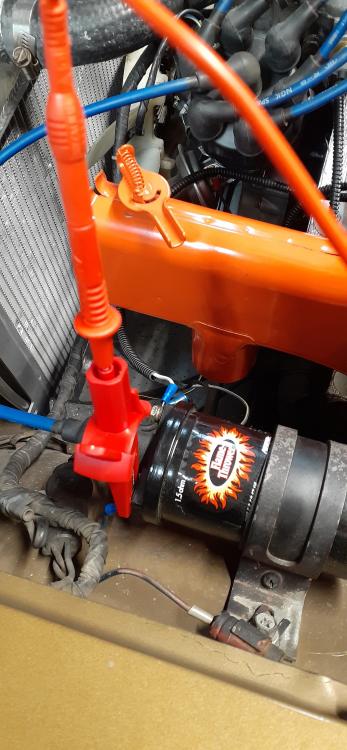
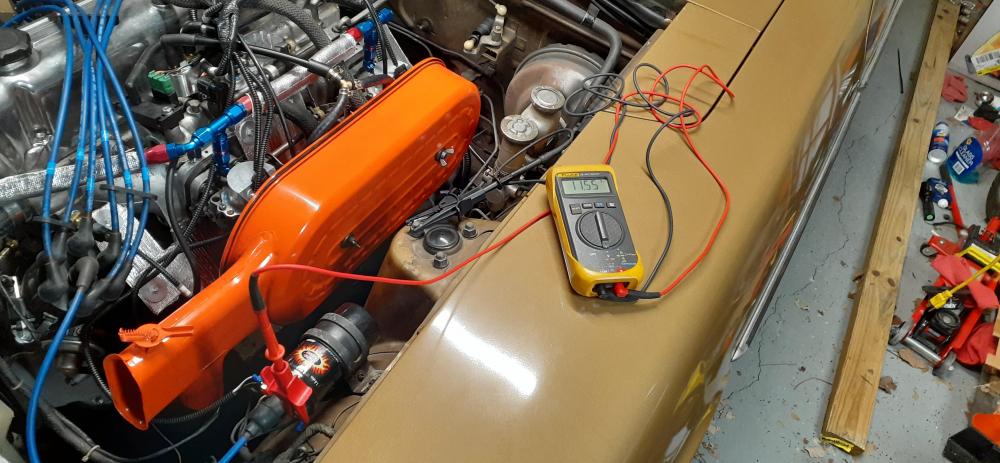
Um, you still aren't reporting good data. I asked for voltage, and you gave a resistance reading. This is how things should be configured: 1. Connect one lead to coil positive. 2. Connect the other lead to ground (strut tower is good for this). It should look like this all together. 3. Have the meter on voltage. 4. Turn the key on. You should see around 9 volts. I have my ballast resistor jumpered out, so my reading is higher.


 2 points
 -
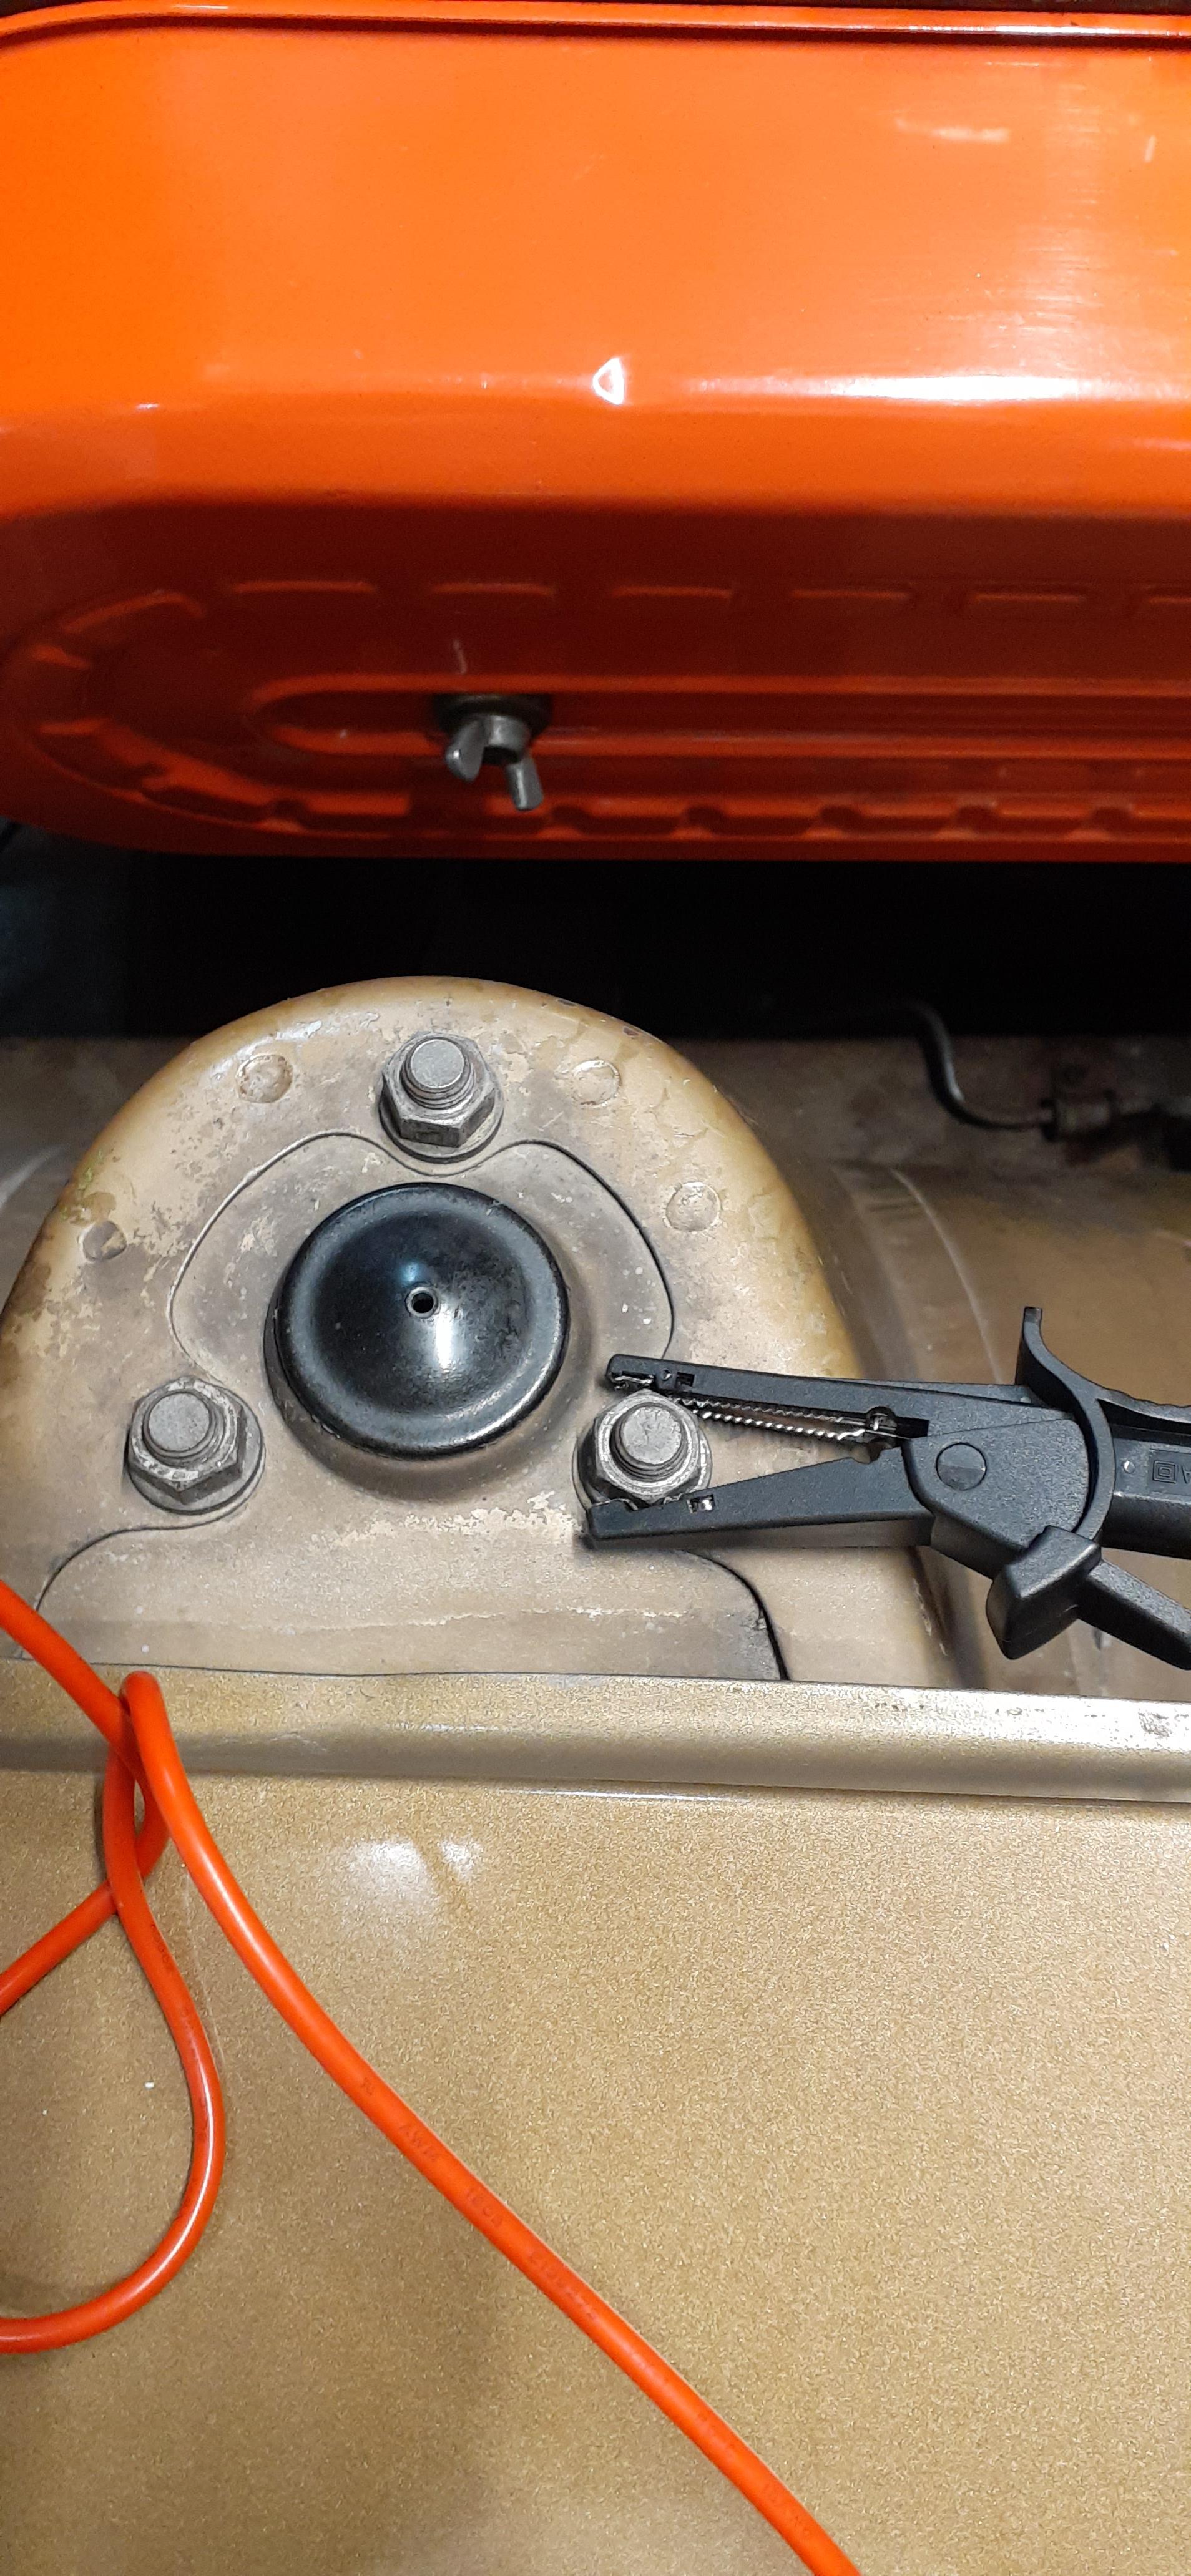
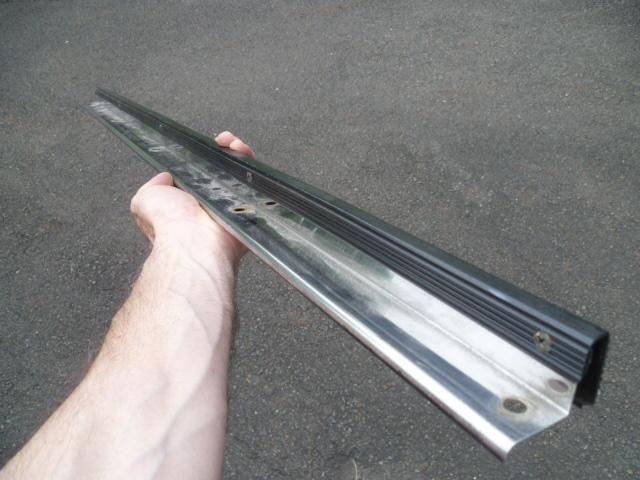
2 pointsI did pretty much exactly what you are planning. But first... some background. The 70-76 cars had a full sized spare and a full depth spare recess in the back deck. But in 77, they changed all that. They went to the space saver collapsible spare and reduced the depth of the spare tire well such that the spare now sits proud of the rear deck surface. And they also changed all the sheet metal and uni-body pretty much everywhere, including the rear decking. Those metal supports used to be located underneath the deck lid on earlier years, but moved to above the decking for 77. I wasn't there when they did all the modifications, but the rumor on the street is they did all that in order to allow a larger fuel tank for 77. In short... They traded less storage space in the rear for a larger gas tank. So with all that said... I drilled out the spot welds in the original piece spanning the two rear wheels. And no, I'm not worried at all about it changing the rigidity of the vehicle. 1) It never went all the way to the sides (there's about a 25mm gap at each end), and 2) The piece that it was spot welded to is identical to the previous years. They just spot welded an extension to the vertical piece they used from 70 to 76. Here's the piece in question. You can see about half the spot welds drilled out on the near side: And here's what it looks like once you get all the welds drilled and the piece loose from the car: Unfortunately, taking that piece out leaves a rough edge that does not look "finished": So to finish the now rough edge that exposed... I used the same piece they used in the previous years and screwed into place (just like the previous years): And as for the rest of it... I used foam to build up around those rear metal frame members to give me a flatter surface to build a new deck. I don't have any good pics of that process, but I'll see if I can get some of the finished product.


 2 points
 -
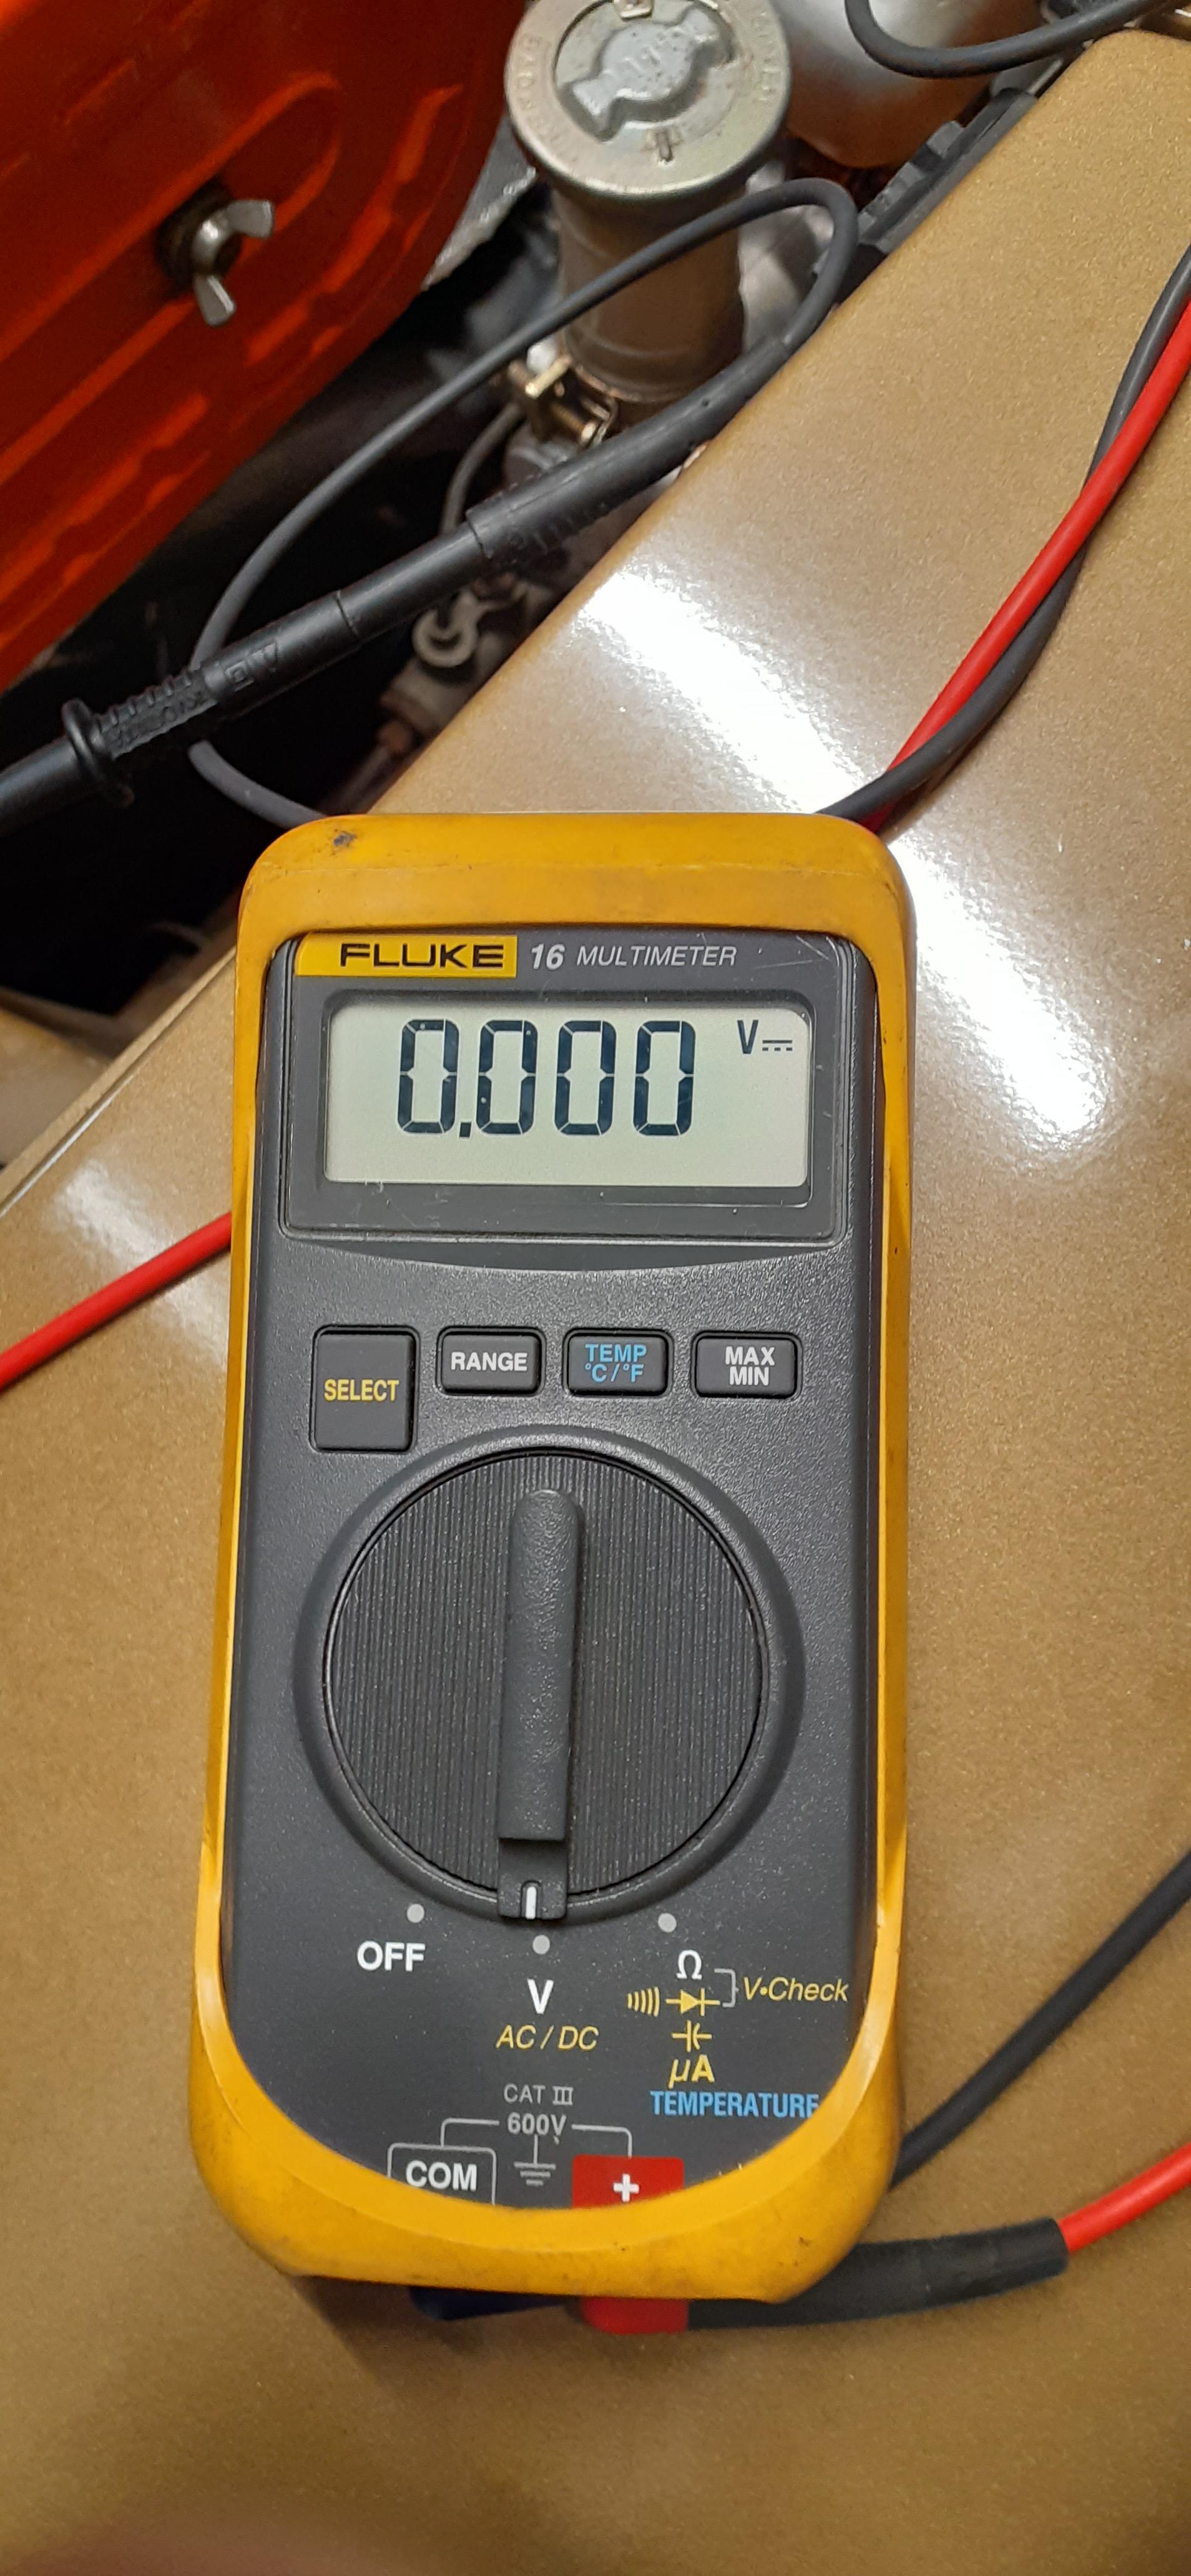
If the meter was reading 0 Ohms when touched across the ballast resister, that means the ballast resister is just a small piece of wire. A bad resister would register as an open line or very high resistance. Just to be clear, you should be measuring from the black/white wire to the wire going to the positive on the coil. Let me be clear on what I asked before. What is the voltage to ground at the positive terminal of the coil when the key is in the ON position? To go back to one of @Zed Head's posts, did you flush out the old gas and put in new gas? Trying to run the car on 12 year old gas is not a formula for success.
 2 points
 -
I've had that meter for over 20 years now. It was a Christmas gift from my late mother based on a suggestion from my brother. I tend to use a clamp on ammeter on the car similar to this one: https://www.amazon.com/dp/B00SQ4UETO. It's not precise at all, but it also won't blow up if you have too much current or if you don't have the polarity right. It's great to find a battery drain. Just look on Amazon for test lead kits. The Fluke kits are not cheap, but they are good.1 point
-
So, you have voltage at the coil, though if you are measuring it where I asked, the wiring is not going through the ballast resistor. You need to see if the distributor is triggering the transistor ignition unit (TIU) and if the TIU is working. Download the factory service manual (link in my signature) for the 76, and look at the EE section, starting with page EE-32. That has the diagnostics you need.1 point
-
1 pointWe counted twice but I will count them again. I will also take some time to pin down the ratios and the year1 point
-
1 pointIts not. The porsche type synchros are steel and this one is a fibre type clutch synchro. I think they changed somewhere in the 79-80 model 280ZX. About the same time they dropped the 4 speed. Of course all close ratios have the 5th warner synchro, but the 2+2 variant still used the wide ratio FS5W71B. Btw. Very bad idea for a manufacturer to mix servo type (porsche) and warner type synchros in the same transmission. The brass rings require GL-4 and the steel servo type requires a GL-5 lubricant like the diff.1 point
-
1 pointAlso in NEW bikes sayd my German dealer (I live next to the border with Germany) I was there last week to show my 280zx.. He sayd everybody wants a bike now with this covid-19 bustle.1 point
-
Ya I flushed all of the fluids. And with the key on the on position I had 0 ohms. I was Looking at some of the wiring and I think the previous owner might have messed up some of the connections so tomorrow I’m going to make sure everything is correct.1 point
-
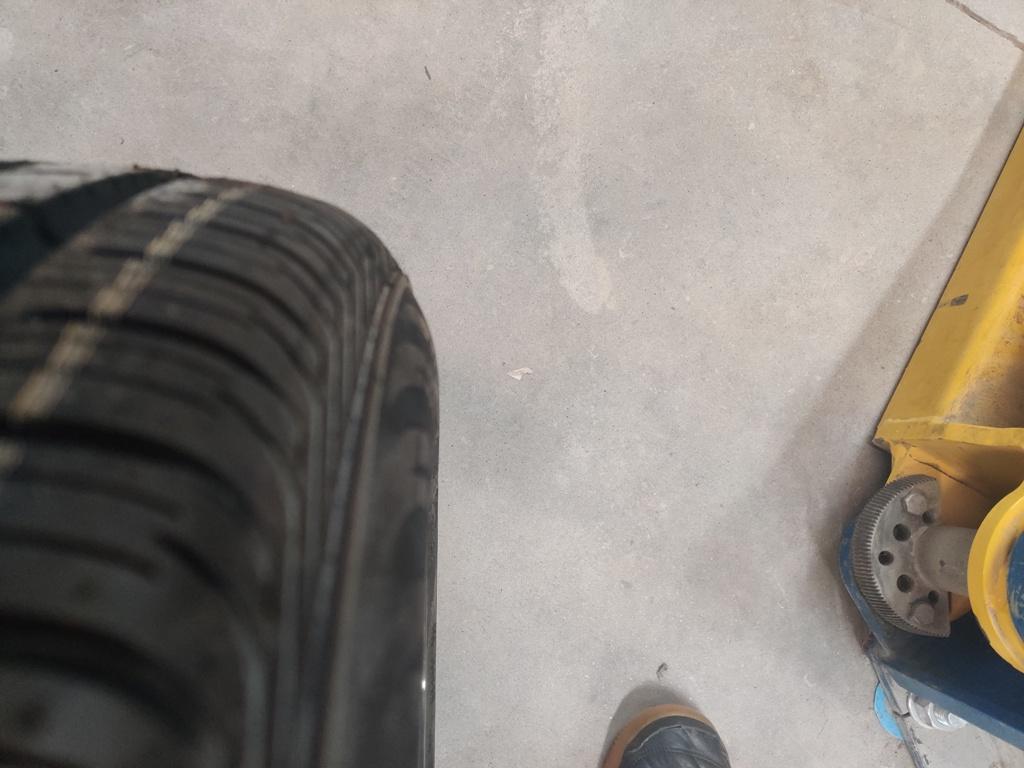
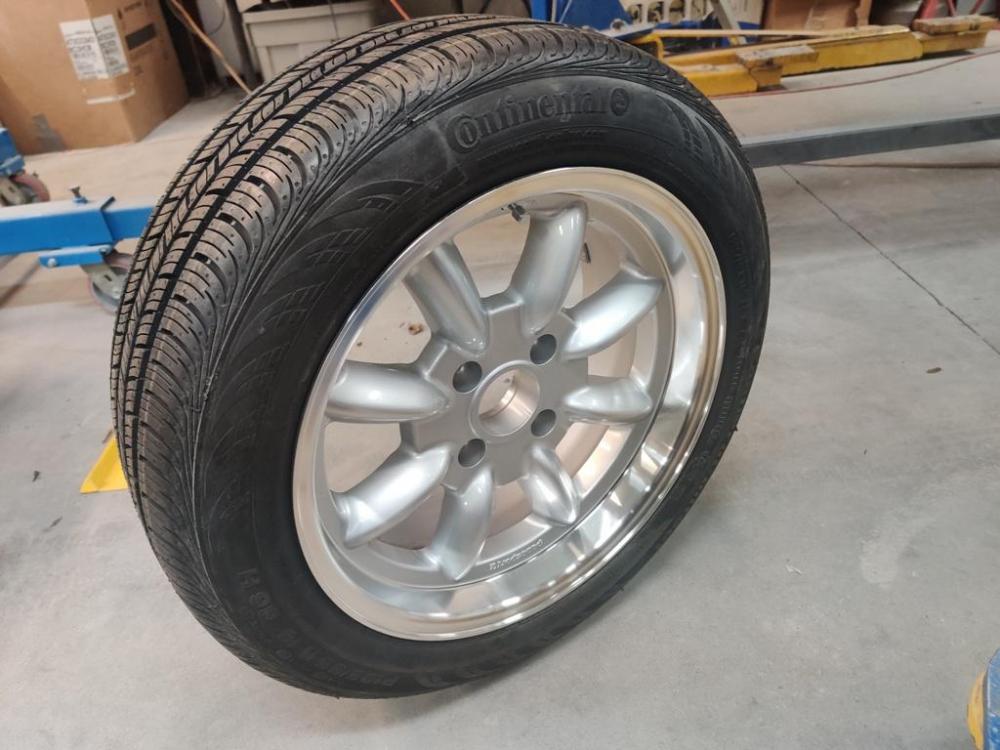
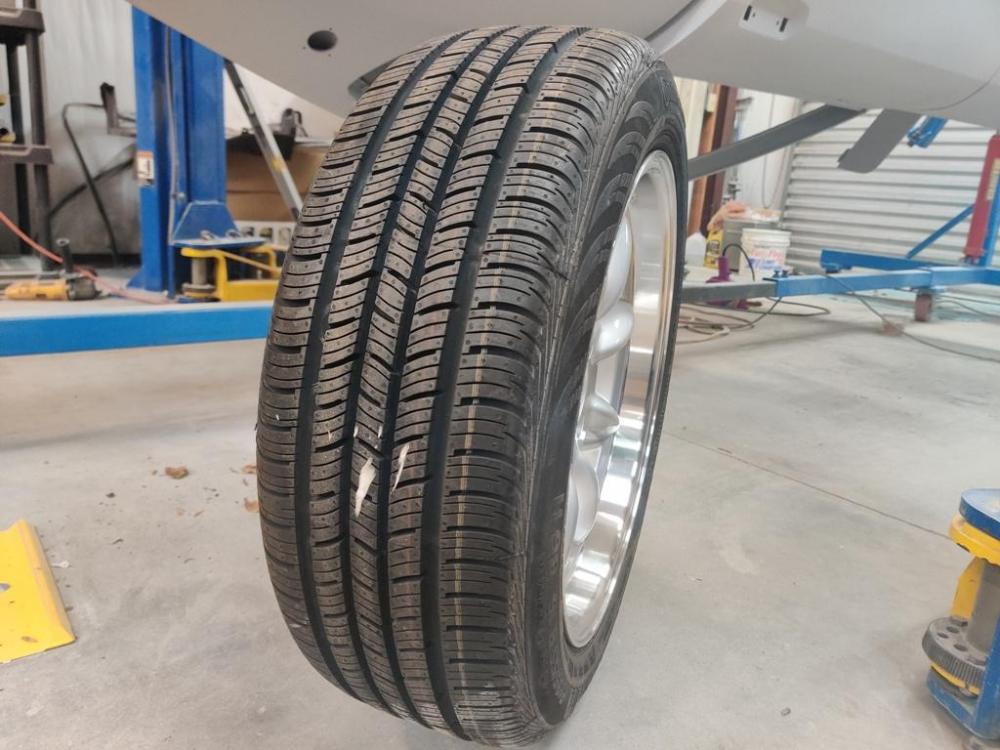
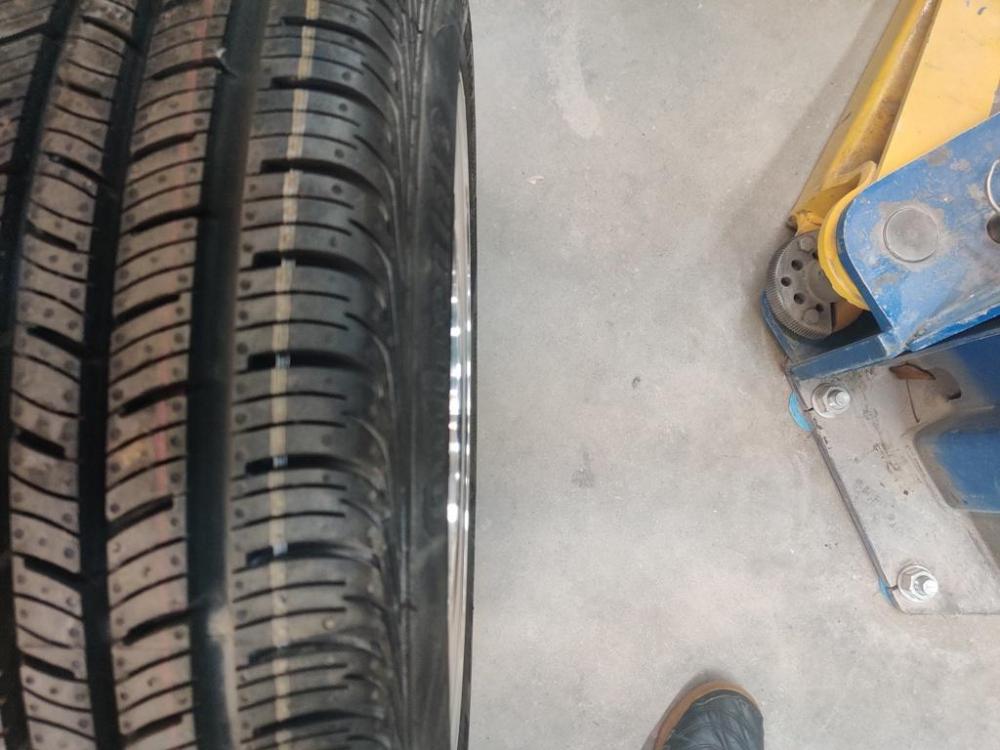
Got some tires mounted on the new wheels today! YAY! I have had such a hard time finding a place that can mount and balance wheels without f*$@&^$ing up the wheels! I did not want to take a chance on the brand new Panasports. This place (in Marietta, GA) has the right equipment: https://www.weaverbrakeandtire.com/ The technician who did the work, Shawn, was nice and very careful. I forgot that the wheels came with stems, and went with one they offered. Even after mounting one tire, (when I found the stems taped to the bottom of the box in which two wheels were packed), he broke the bead and replaced that stem with the Panasport supplied one. The tires I went with are CONTI-PROCONTACT - SIZE: P195/55R16 (rim width range 5.5-7"). I chose this size as it is the closest to stock diameter as I could possibly get with a 16" diameter wheel. Additionally, it was of critical importance to me not to modify the stock sheet metal in any way. I have read various posts from others about tire sizes. Sometimes people would say that the tires would rub on the stock lips and sometimes not. I decided to go as conservatively as possible on tire width because of those posts. The tire here is maxed out on a 7" width rim, and I am ok with the final look. The tread width is approximately 6.5" wide. It is what it is. I wanted to err on the side of not rubbing, as the car will utilize ST (Suspension Techniques) springs which will lower it a tad. A few pics from different angles which show the profile: I didn't quite get as much video as I wanted here, but it was hilarious to watch Shawn mount the tires. He had to use a special "tool" to get the bead to seat: The tool is a "Bead Bazooka". It's use was necessary to get my P195/55R16 (rim width range 5.5-7 inches) to inflate properly on the 7 inch wide rims. This tool shoots a quick blast of air at the tire/bead area which assists with pressurizing the tire enough to get it to seat fully on the rim. I'm a long way from mounting the tires on the finished car to check the final look. I am curious how much clearance I will have between the outside face of the tire and the lip around the circumference of the rear wheel well. My suspension plans include Koni inserts inside unmodified struts with Suspension Techniques (ST) springs and ST front and rear anti-roll bars (a set up recommended by the late John Coffey). Everything will be reversible. That is, if I, or someone after me wants to return this car to pristine stock condition, it is something that will be possible with 1 afternoon of work. 😎
 1 point
 -
1 pointAs I recall, the beams in orange were added in the later cars to deal with the added weight of the larger fuel tank, and probably the general increase in weight the cars had by then. Earlier cars didn't have them, and it's possible you could remove them without consequence. I wouldn't necessarily recommend it, but I'm not convinced the structure would be any worse off than a 70-76 car.1 point
-
1 pointMost of the green stuff you can remove without consequence but I would be careful with the lip at the front of that area. You can cut it down in height but you should replace the horizontal lip as that is part of the structure. The orange areas you can not cut off without compromising the structure of the car, those are part of the subframe of the uni-body. If you like you could pick up a pair of drug bin lids and bolt them right on, the holes are already there.1 point
-
What did you do to the engine and car, gas tank, fuel lines, fuel pump, injector system, etc., before you tried to start it? I had an engine once that only sat for a year and it wouldn't start until we put oil in the cylinders. The rings get dry and there's poor compression. Plus your injectors might be full of bad fuel, even water. 12 years is a long time.1 point
-
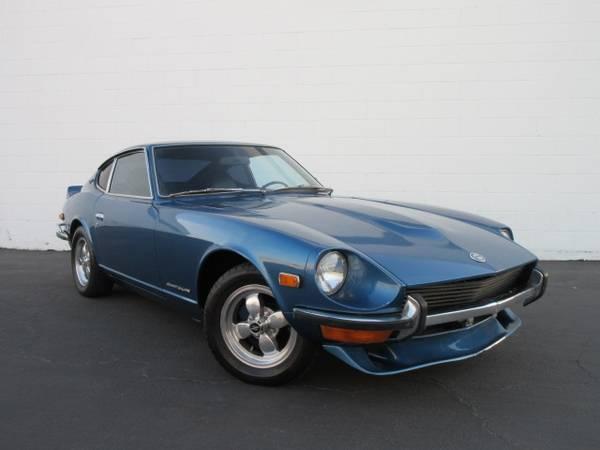
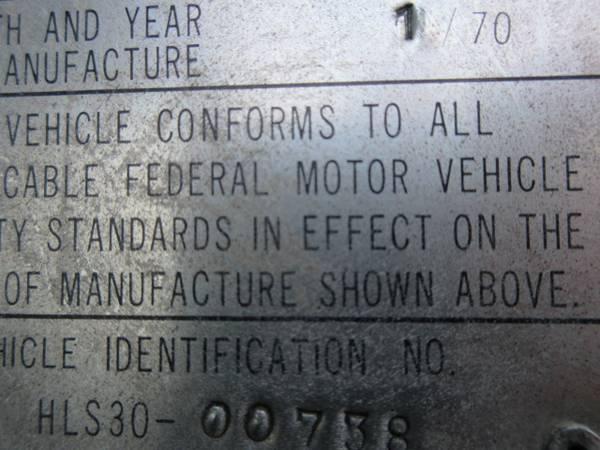
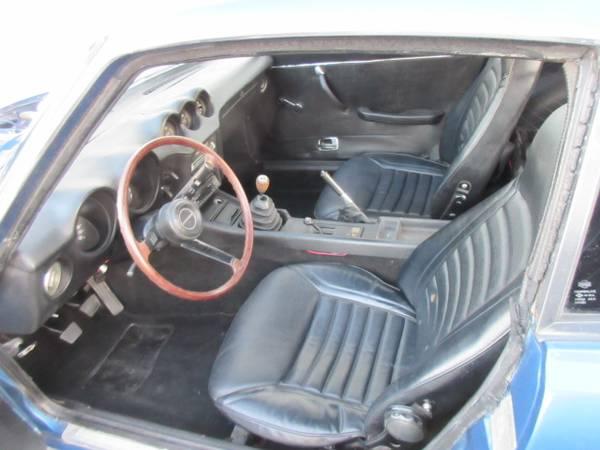
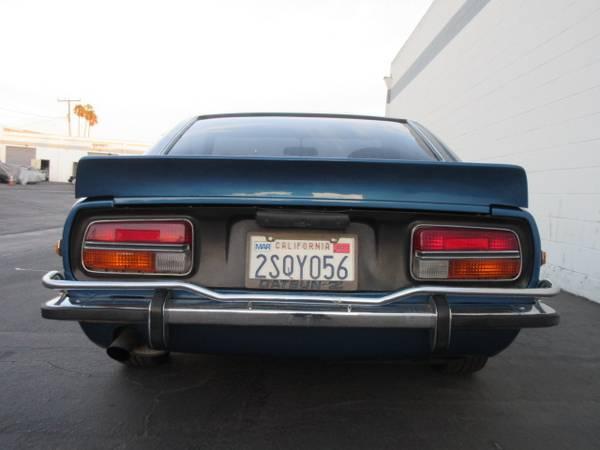
1970 Datsun 240Z LOW VIN #738 - $26,850 (Torrance, CA) The seller is located in Los Angeles. Here's the link: https://losangeles.craigslist.org/wst/cto/d/torrance-1970-datsun-240z-low-vin-738/7244637837.html 1970 Datsun 240Z Stock L24 with correct E31 Head 5 Speed trans off 280ZX 82-83 5SP Vintage front and rear spoiler Vintage wheels No major rust Dash has crack Tachometer sometimes do not work Speedo needle is broken Genuine Nissan Euro Tail lamps 2 Owner California car Runs excellent $26850 310-308-89right six
 1 point