


Leaderboard
-
HS30-H
Free Member4Points5,509Posts -
inline6
 Subscriber
 4Points1,282Posts
 -
Captain Obvious
Free Member2Points10,081Posts -

siteunseen
Free Member2Points15,115Posts


Popular Content
Showing content with the highest reputation on 02/10/2020 in all areas
-
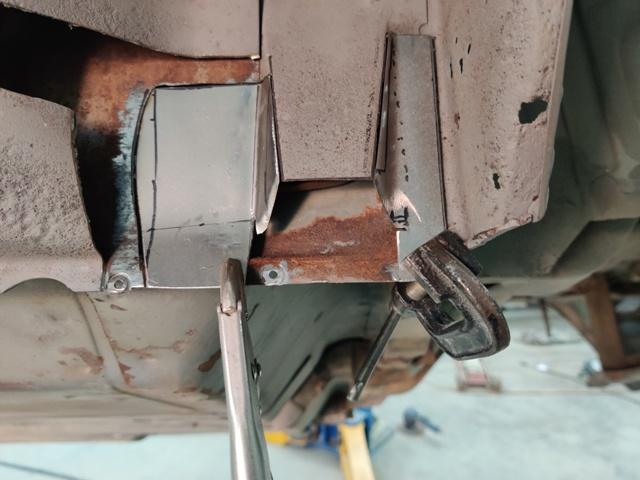
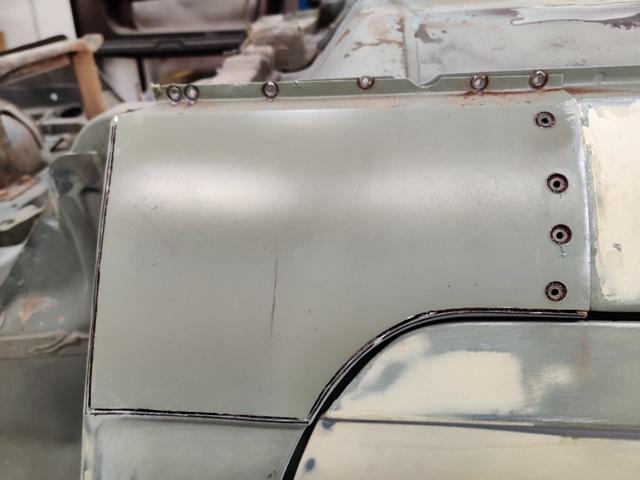
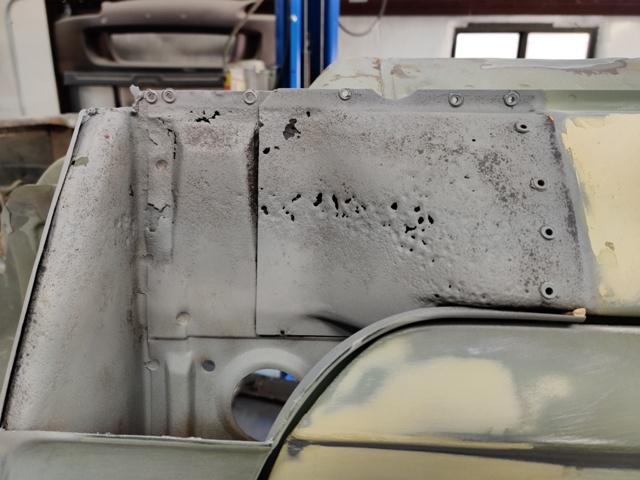
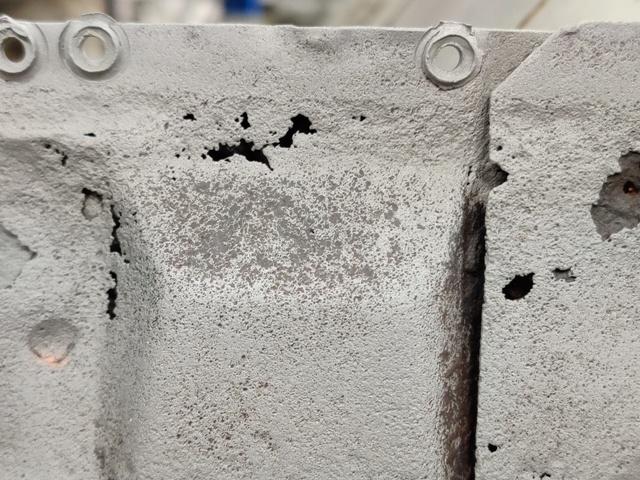
Spent a good part of the day today working on the inner part of the driver rocker area. Started cutting to see how far the cancer went. The "middle" panel (there is an inner, middle and outer) needed replacement sections. I spent some time making sections to piece together: I put a few tacks to hold the new panels to each other, but didn't start welding it to the car yet. I clamped it in place and moved on to making a rocker end cap: Fit of the rocker end cap is "getting there": This piece has some compound curves, but I will section it a bit to try for the best fit possible. Before I start welding these pieces in place, I will use the sand blaster to remove the surface rust.
 3 points
 -
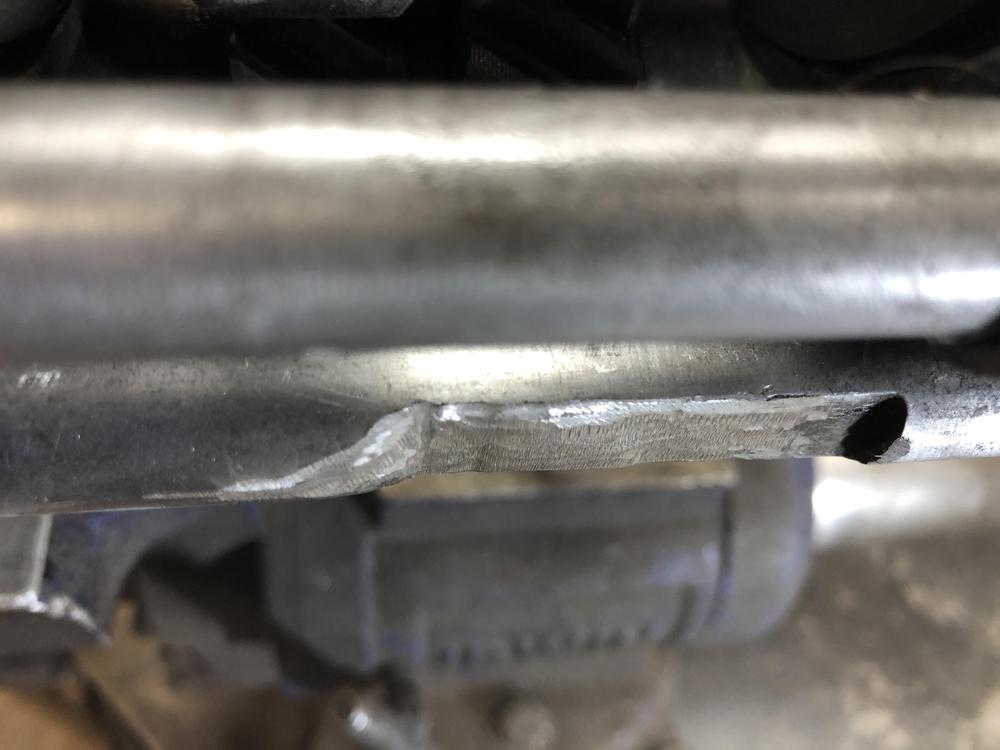
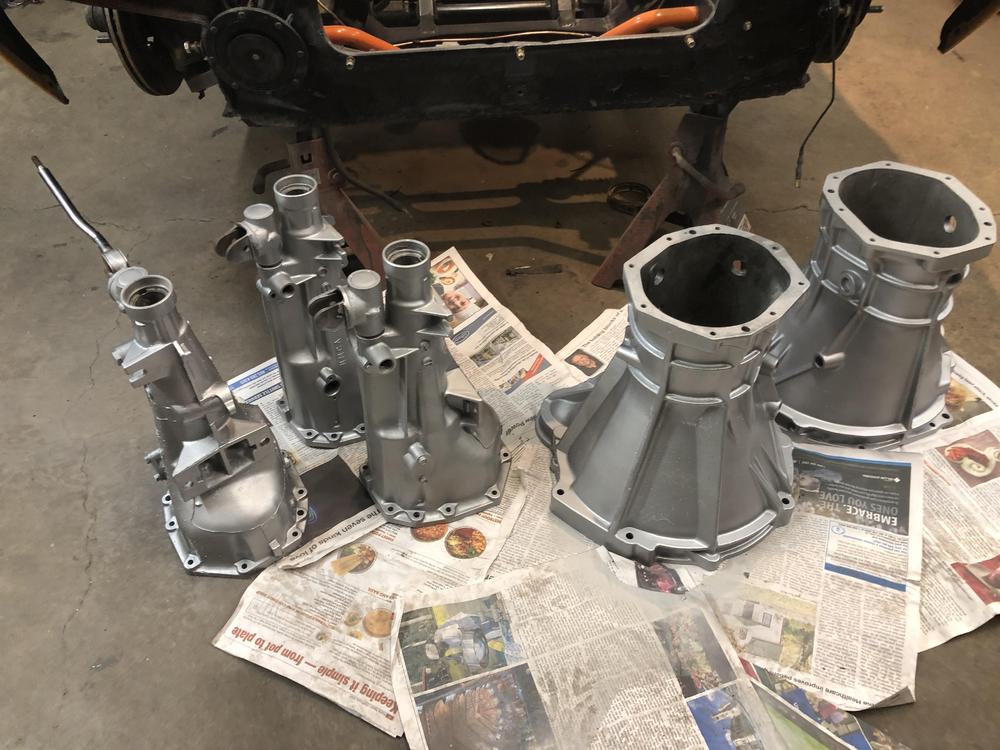
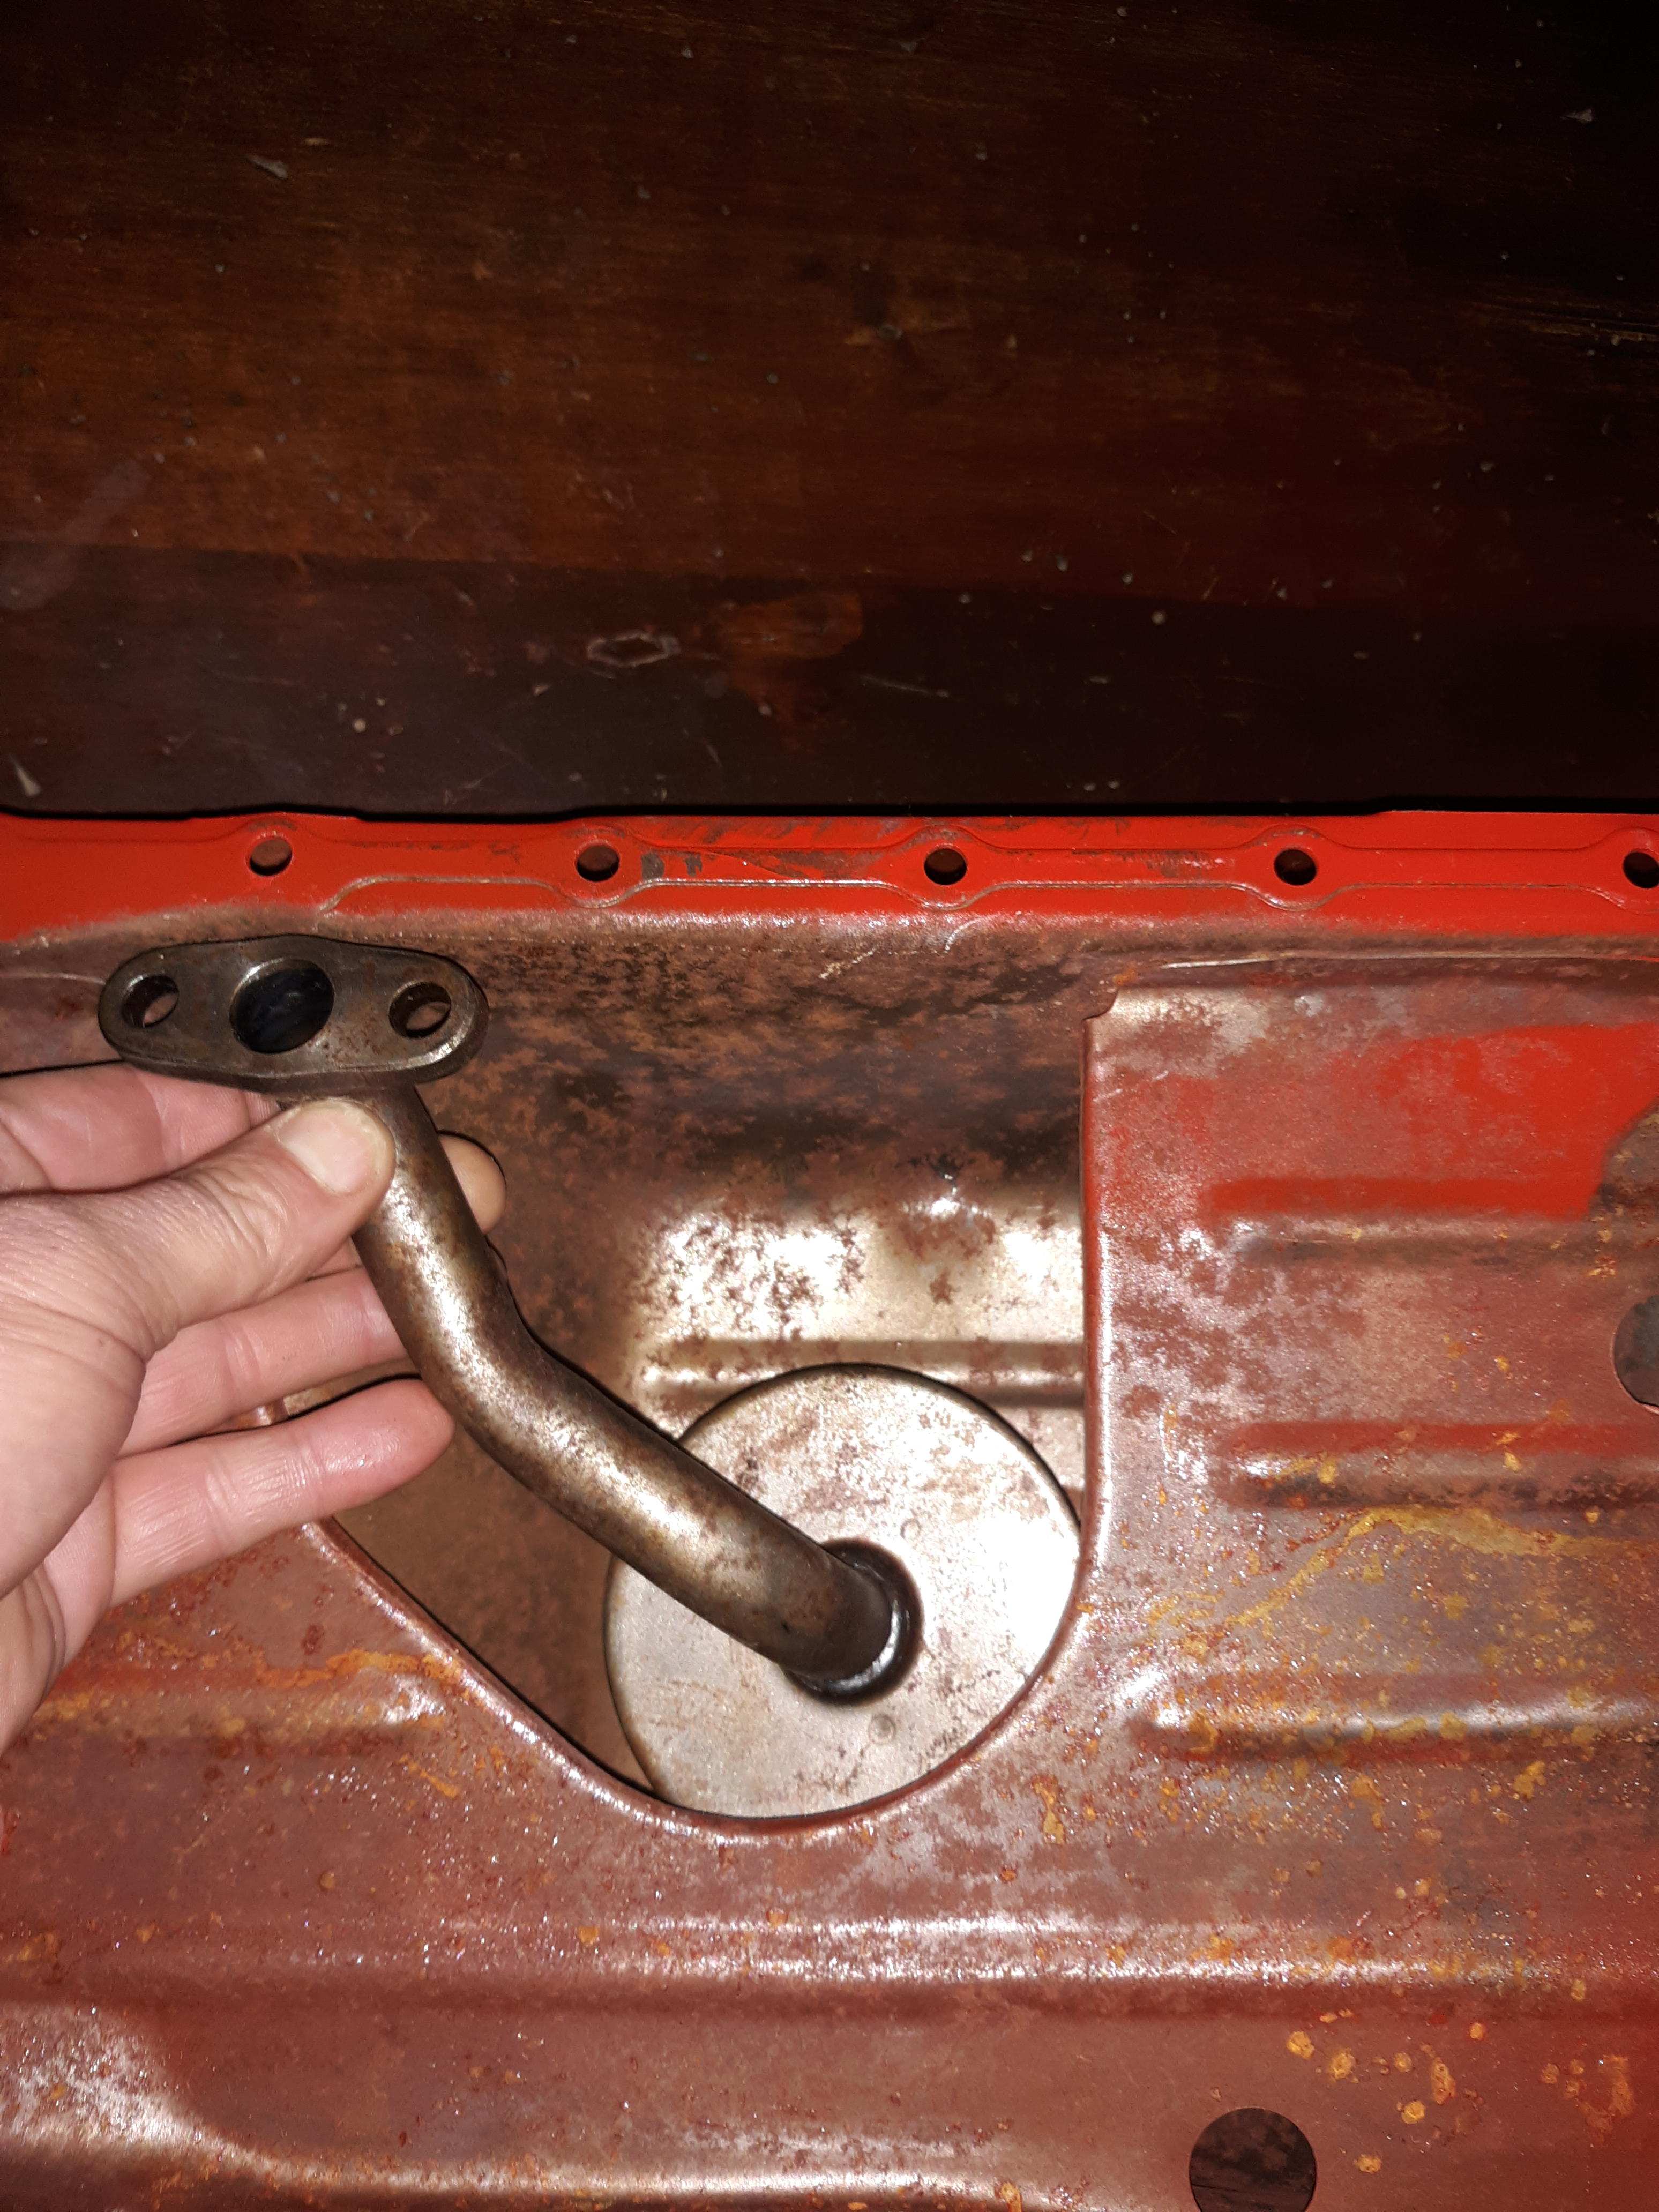
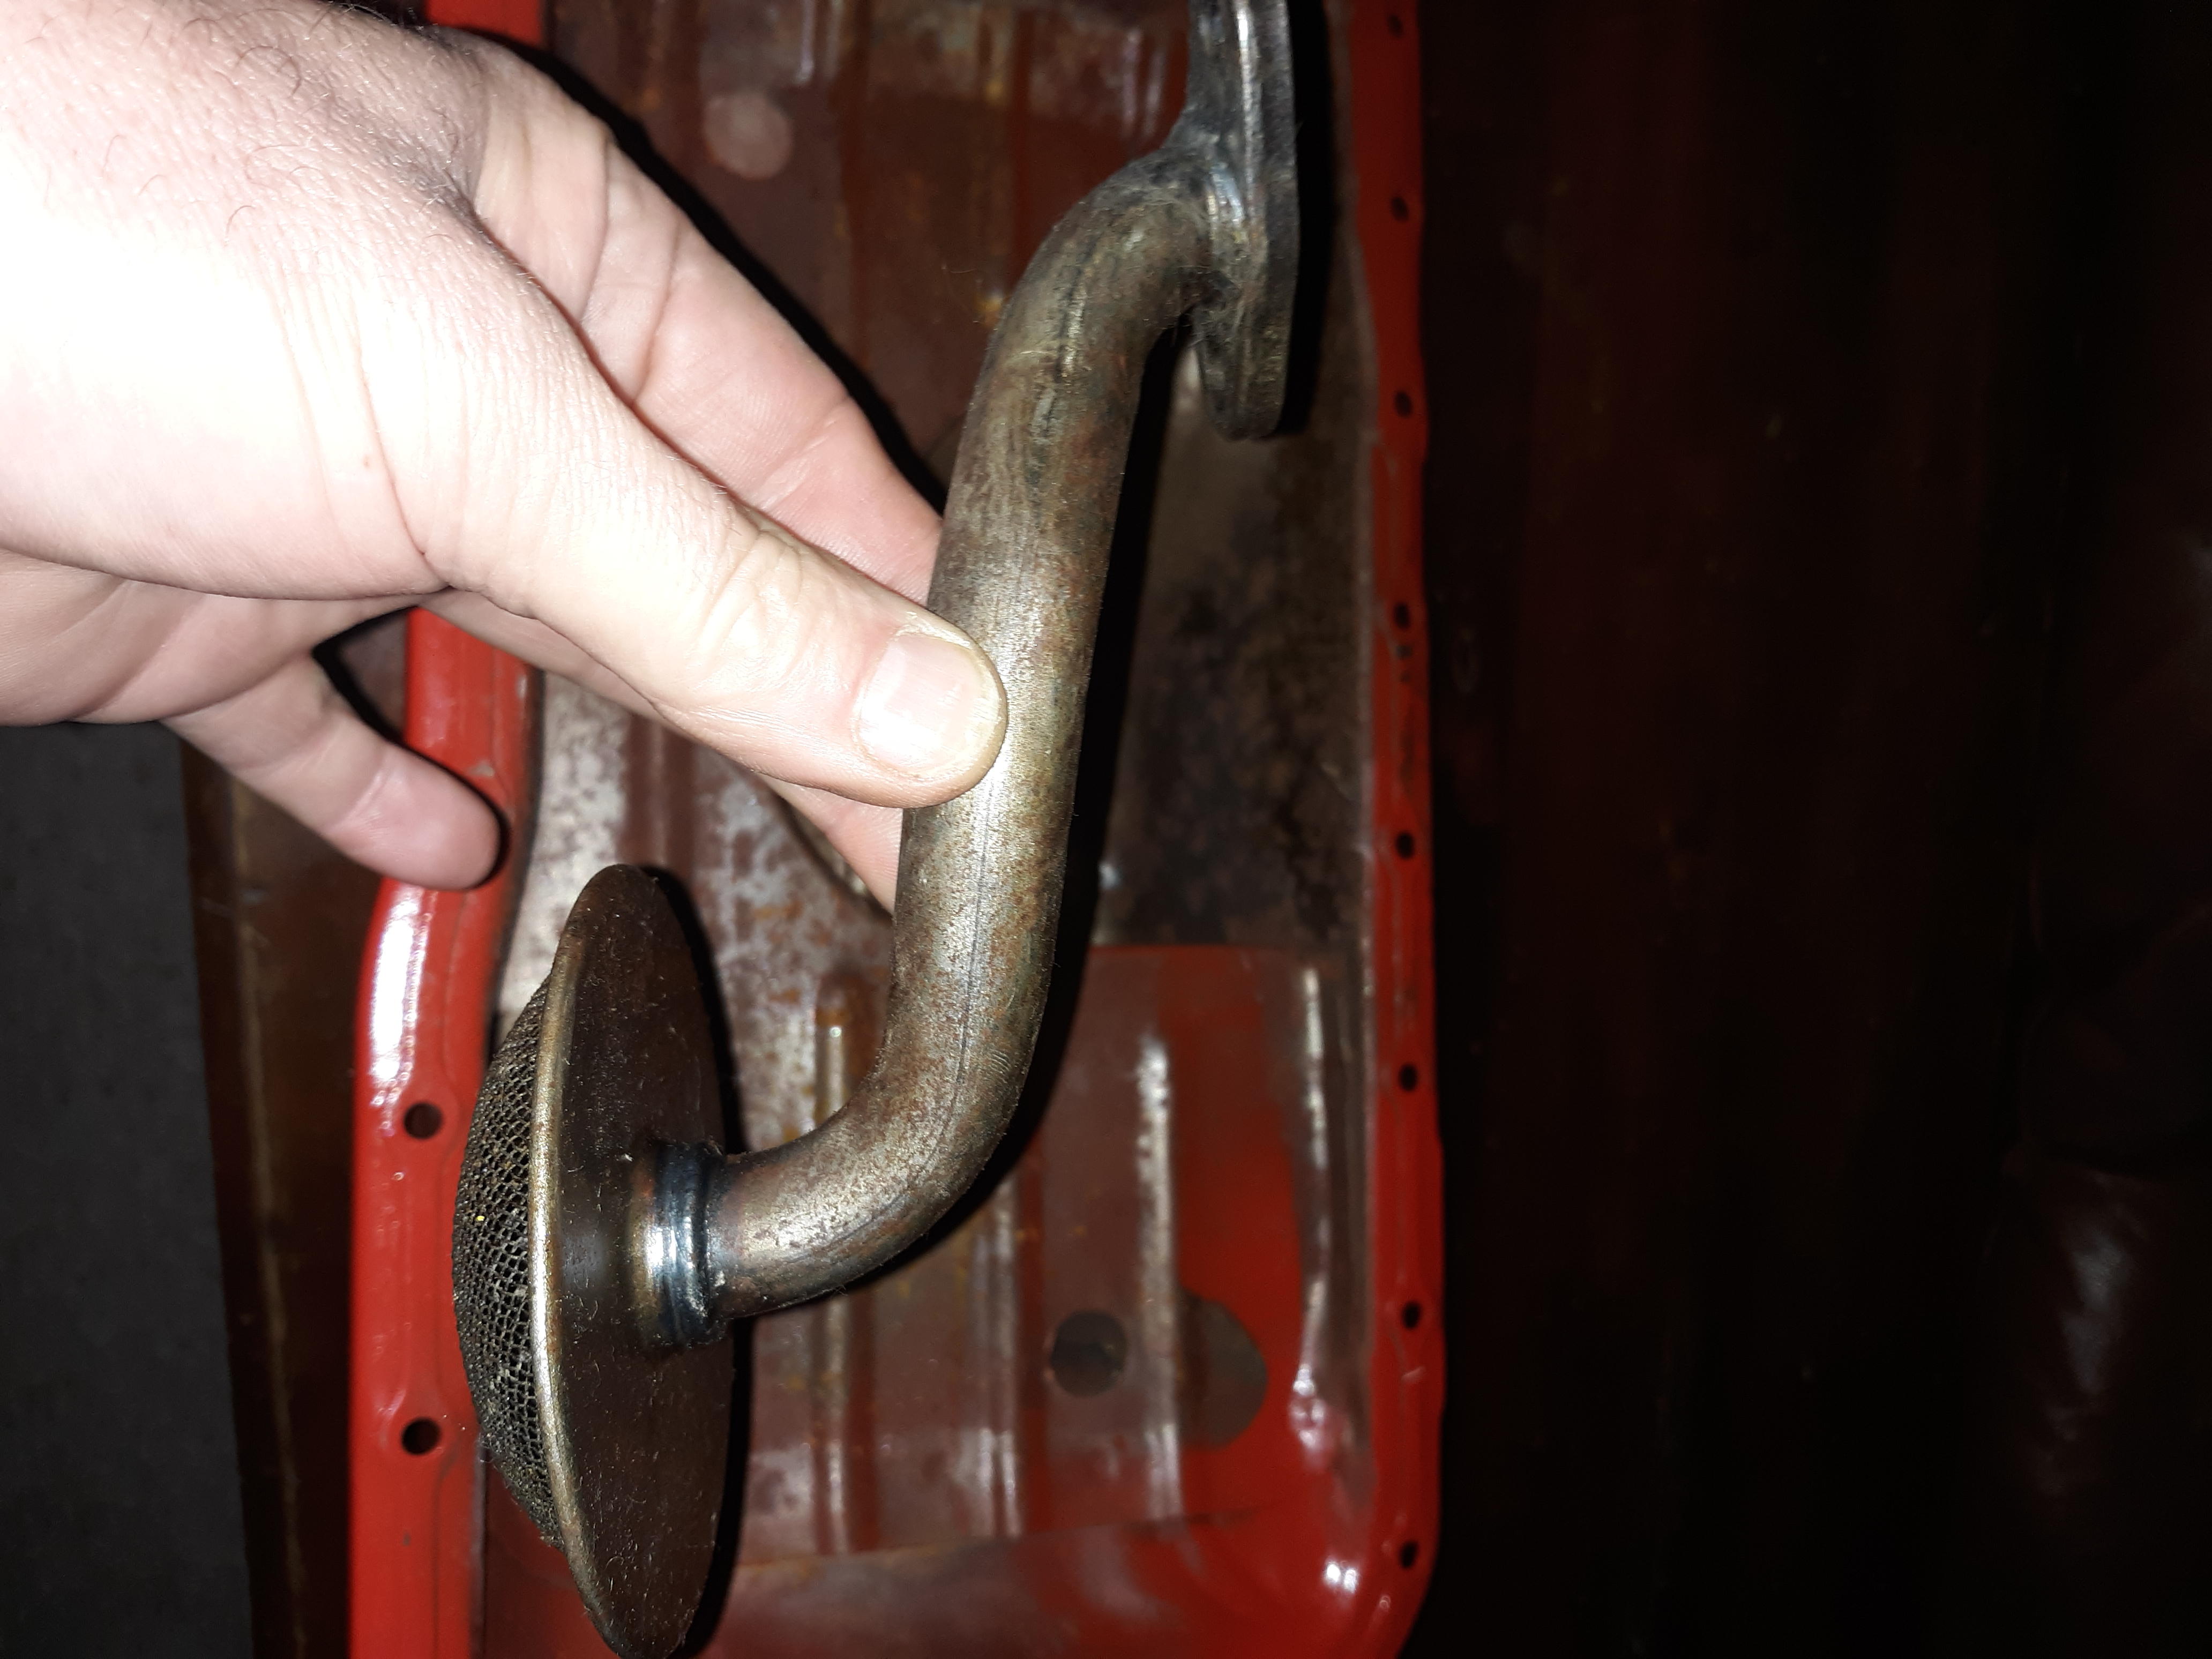
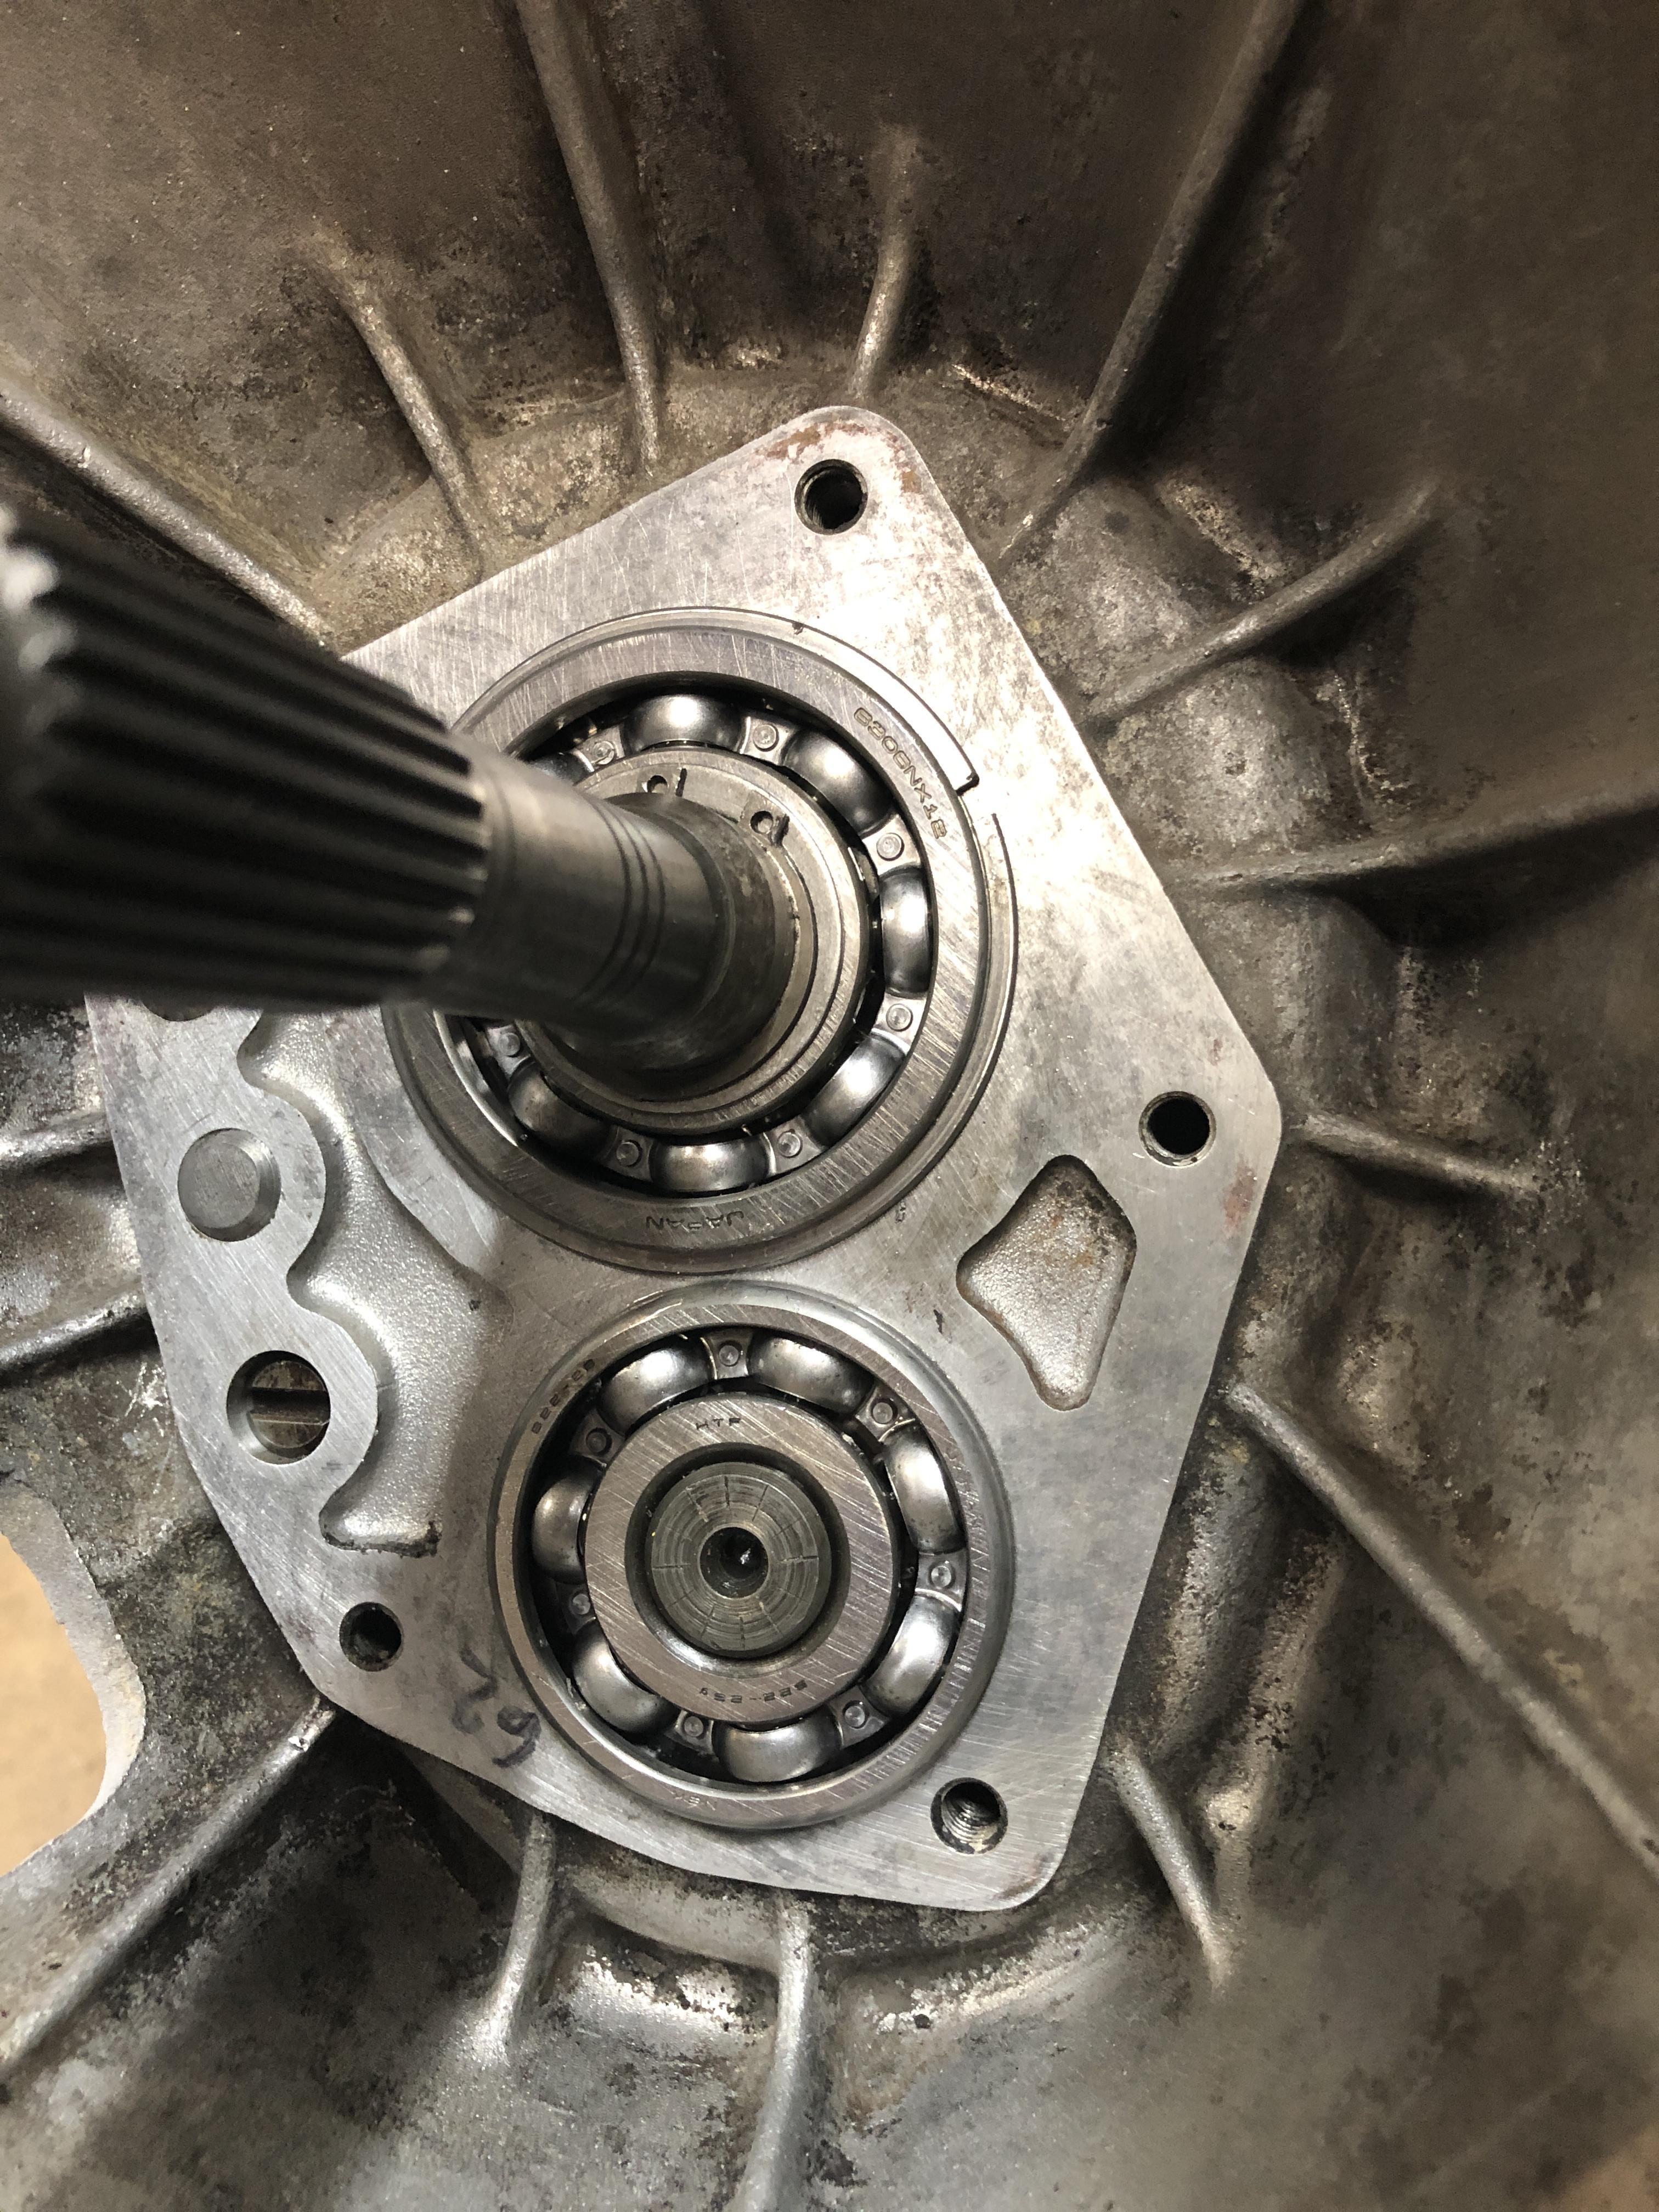
1 point1 point1 pointWell I know from holding the two of them in my hands that the stock ones for the ZX are different than the ones from the Z. The one for the ZX is a little longer and comes off at more of an angle towards the back of the engine (which makes sense since the sump is in the rear). There are pics on ebay of both styles, but without them side by side, it's really hard to see the differences. Looking at the oil pans though, the holes down into the sump look like they're pretty much in the same spots, so I don't know if you can actually get one style to fit into the pan that it wasn't designed for. That link to zcardepot seems to indicate that it's (at least possible) to share the same pickup tube on all years 70-83, but that may be an aftermarket difference from stock? In any event, if you've got the ZX pickup there, should be easy enough to bolt it on and see if the oil pan will fit into place.1 point1 point1 pointI've done a little digging on the subject (because I'm in a similar situation), and my understanding is that any pan will bolt up to any block just fine. There are some issues however... First issue is fitment into the car. Either the original (middle sump) Z pan OR the rear sump ZX pan will work in the Z. But the converse is not true... The middle sump pan will not work in the ZX. But since you're putting the motor in a Z (and not a ZX), either pan would fit fine. Other issue is that I (believe) you need to use the correct sump pickup tube for the pan. In other words, if you're using a middle sump Z pan, you need the middle sump pickup. (And conversely, if you're using a rear sump ZX pan, you need to use the ZX pickup.1 point1 pointYou might get your problem resolved if you can get to talk to the owner of the shop. You've probably been talking to somebody low in the organization. But, if you make fun of the people you talk to, ridicule them, call them stupid, and/or tell them how angry you are, they'll just tell you to get lost. I don't see the Item number on the paperwork you posted (I didn't look very hard). You didn't say if it was the correct number for the 2+2. 4 seater. It's probably on the box. If you find that the Item number is incorrect, it will make things easier. That's a miscommunication. If the item number is correct then they have to figure out who put the wrong parts in the box. I would go through all of your communications with them from the beginning and see if you can find a place where a mistake was made. I've always found that if you can show the path to a problem people will accept their mistake more easily. But, you might find that you made the mistake, so be ready.1 point'Superleggera'. ? In fact there were many details 'wrong' - especially interior-wise - on this car. It's a little risky to try to pin down a single factory spec for the roadgoing 432-Rs, but they certainly didn't have exposed 918 Grand Prix Orange paint visible in their interiors - apart from the rear deck area - as they were all satin black. It was a little jarring to see freshly painted body colour in the forward section of the interior in this car, and where the missing diamond-pattern vinyl would have been. Many other examples of late 'personalisation' evident on the car too: Brake booster, KS 'Rally Mag' replica wheels, trumpet mesh covers, half-painted rear spoiler, Schroth harnesses etc. I wouldn't kick it out of bed, but some of these things are itches I'd want to scratch...1 pointMike, Whilst I appreciate your effort to create your new 'JDM' section, I reckon you're about 20 years too late. classiczcars.com had been discussing these cars as part of the S30-Series pretty much since you founded the forum, and the content is (I think pretty much inextricably) woven into the tapestry of our historical forum thread content. I can't see how that Japanese market-specific content can be isolated, extracted and given a new home without losing its original context? And what will happen to the conversations from which is has been extracted? Will they too lose their context? I'm not sure I understand. For example, Kats' thread: ...has been running since 2007, is ever-popular, always interesting and - I think I'm correct - one of the most popular threads on this forum in terms of hits, comments and member participation. This thread alone has brought much to the conversation here and has informed and educated in the process. That education works both ways, as I believe much has been learned about both the 'Datsun 240Z' and the 'Fairlady Z432' models and other variants. But how do you distill the 'JDM' content from that?1 pointYes. As per the title you gave the thread: "Meanwhile, a Z432R sells for $805k in Japan" There's a big, big difference in content, rarity and value between a 432 and a 432-R, so I think it worth making it clear all the way through when writing about them, lest people get the wrong end of the stick. I've already seen it happening. Edited to add: There was no model variant-specific 432-R badging. It was badged the same as the 432 model.1 pointSpecifically, a PS30-SB Nissan Fairlady Z432-R I've seen some people being confused between the 432 and 432-R. It's worth being vigilant about the distinction.1 pointDid the final assembly this morning, went pretty smooth. Have to work on my technique to get the tail housing on and the shift forks aligned at the same time. Good trick here is to take the reverse lock out assembly out and look in there with a flashlight. It’s in line with the shift forks and the tip of the shifter rod, so you don’t have to guess much. The other part of this is to make sure you have the through/retaining pin that is just ahead of the shifter in place, and the detent/spring thingy with the 19mm hex cap by the shifter in place as well. This keeps the shifter “kept” within the correct confines of its movement while you get the shift fork finger in “just” the right spot. My fancy 62mm front counter bearing “schnicked” perfectly into the front cover. The C type front cover went over it without issue, needed 4mm of shim. I can happily select all 6 gears. There are no extra parts laying around. AND I tried the reverse switch function with my slimmed down shift rod. It works! Only comes on in reverse. Bought it a new switch as well. I stripped the cases and repainted with 2k epoxy primer (Eastwood stuff in a can) then VHT aluminum color caliper paint.

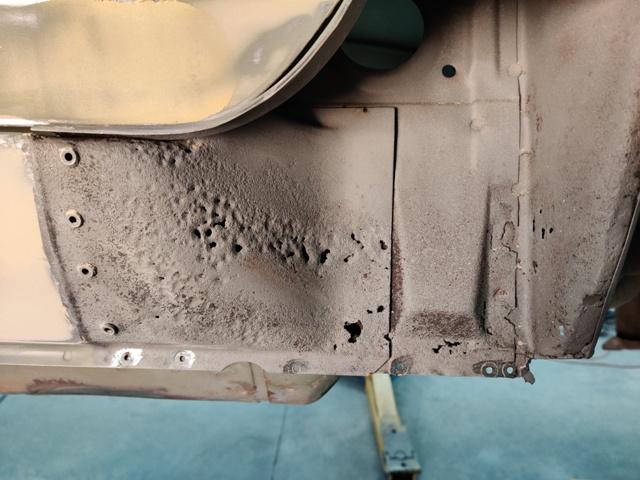
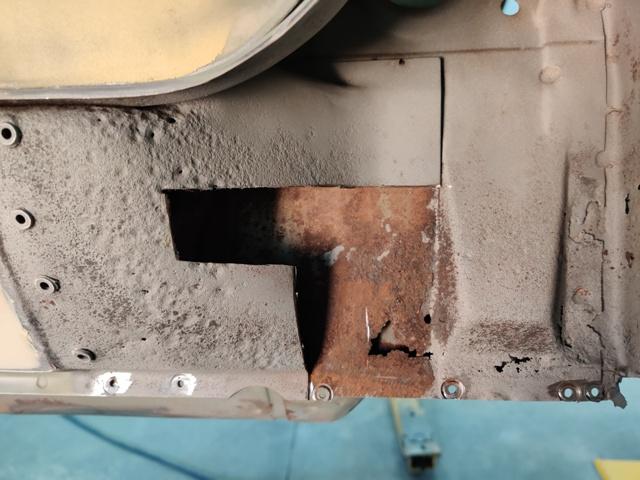
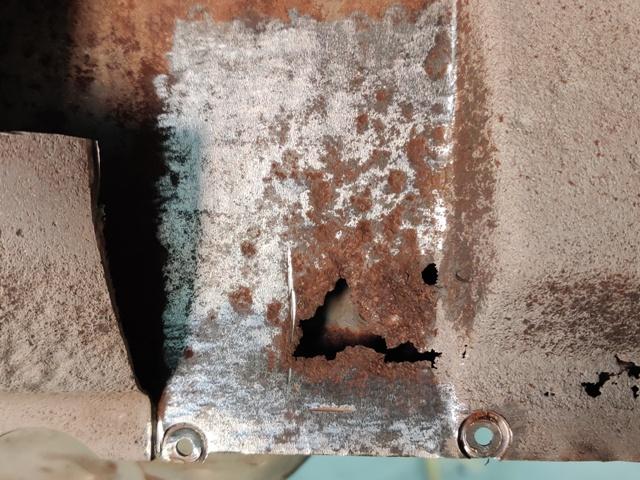
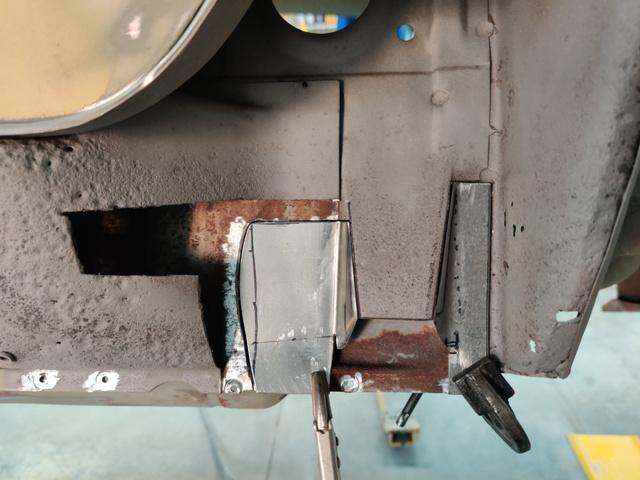
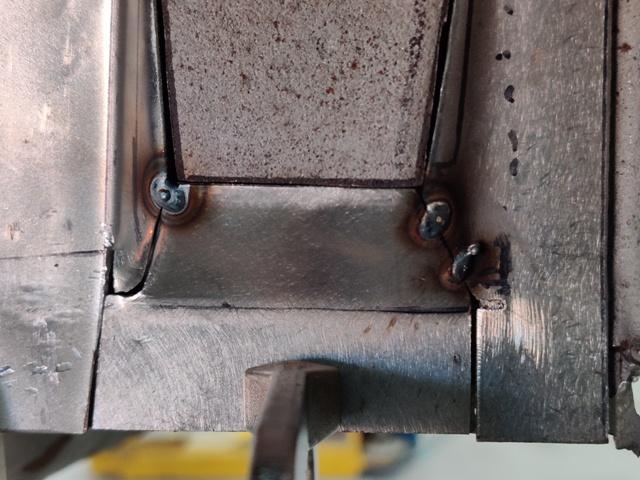
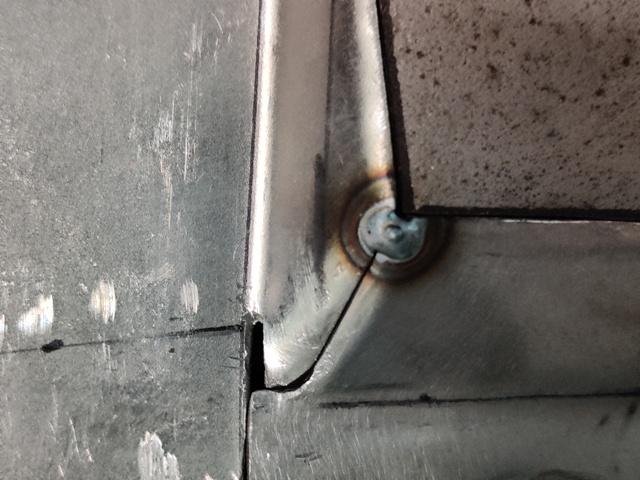
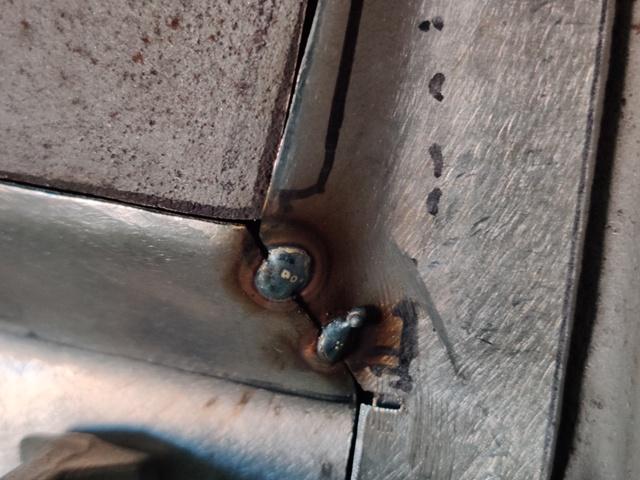
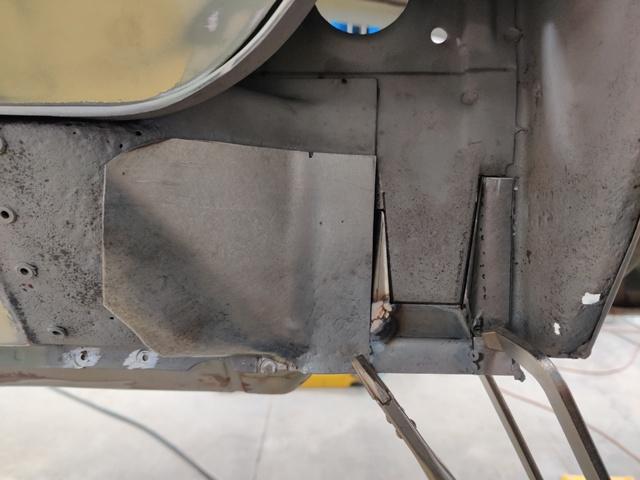
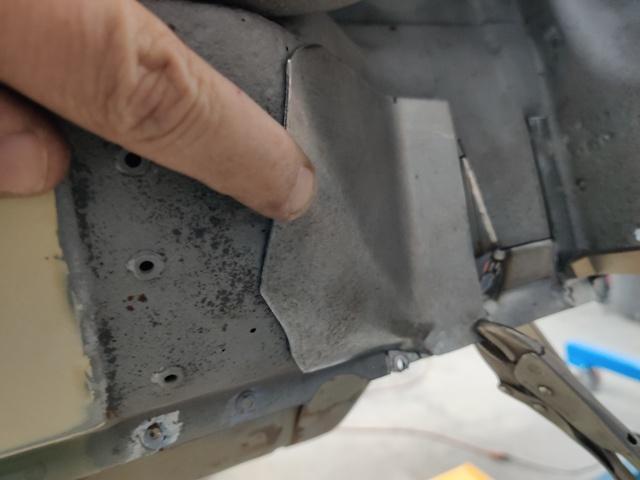
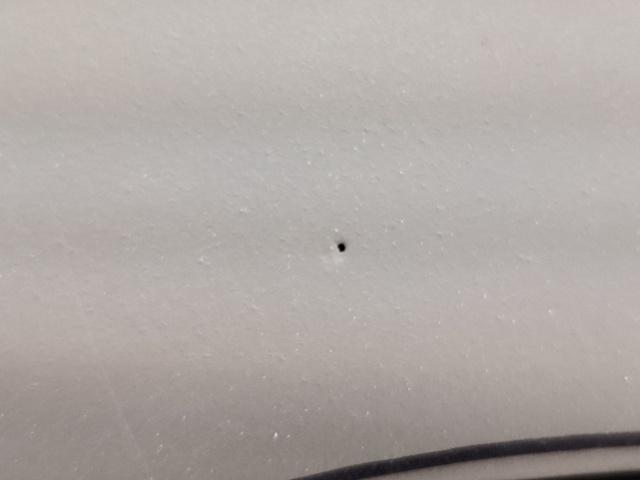
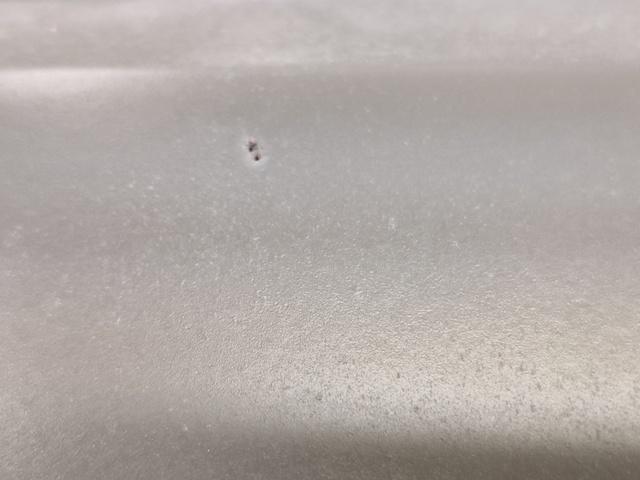
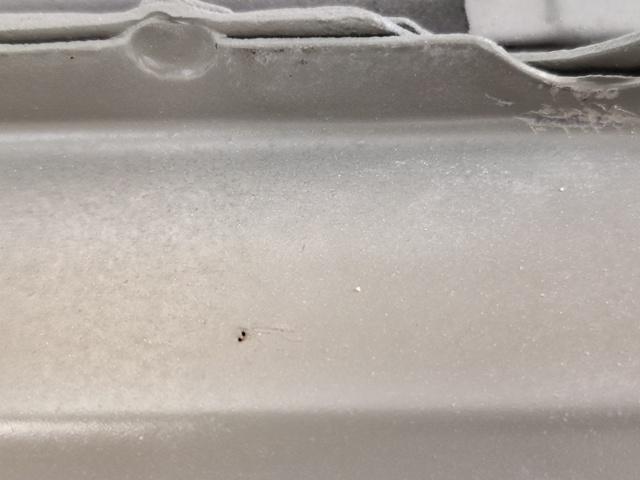
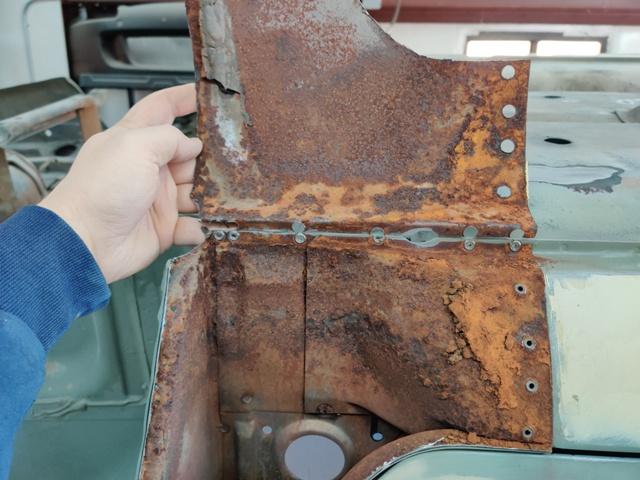
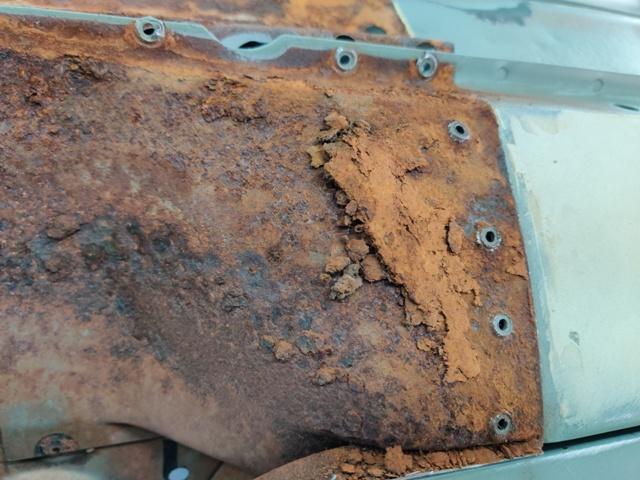
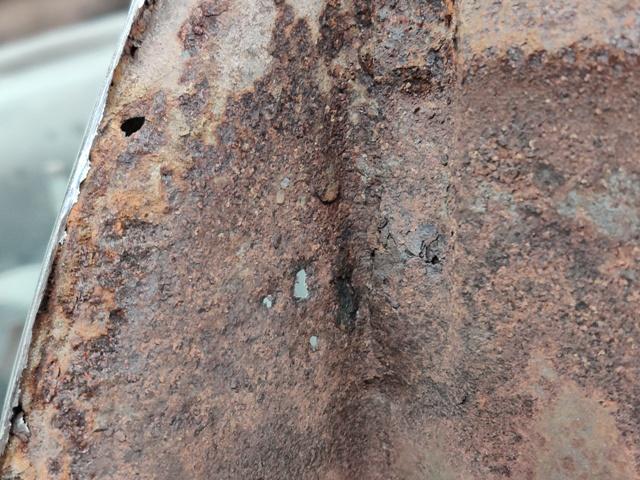
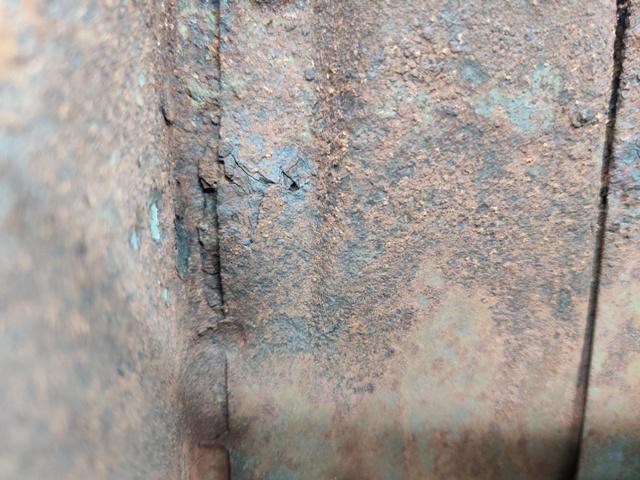
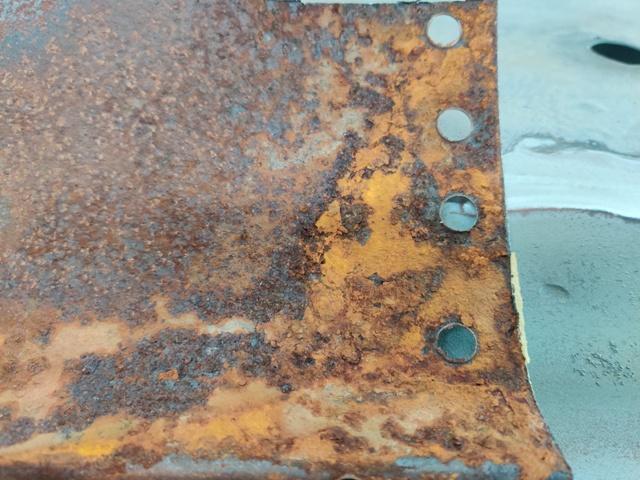
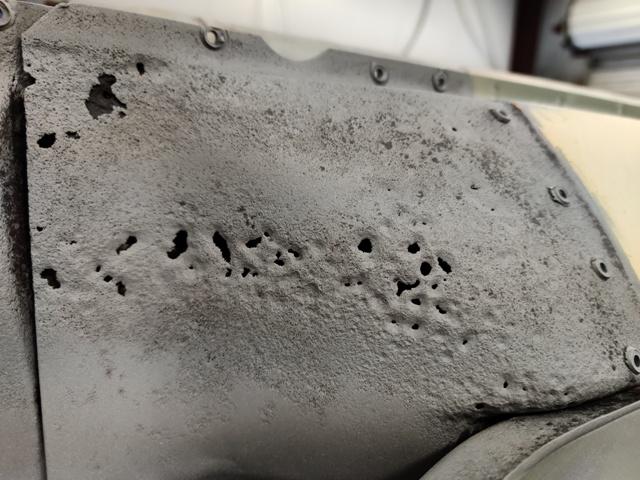
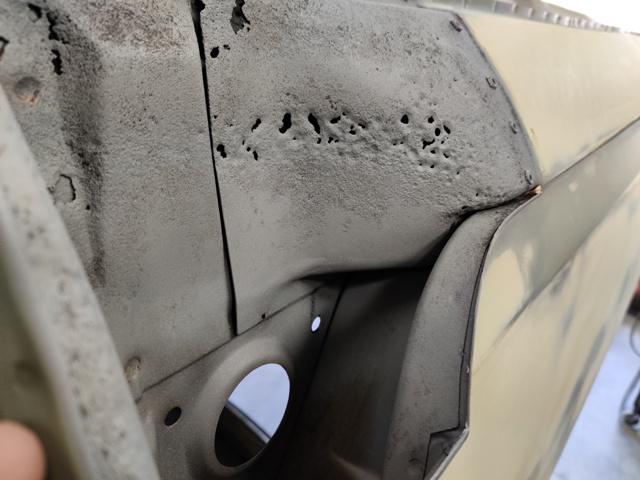
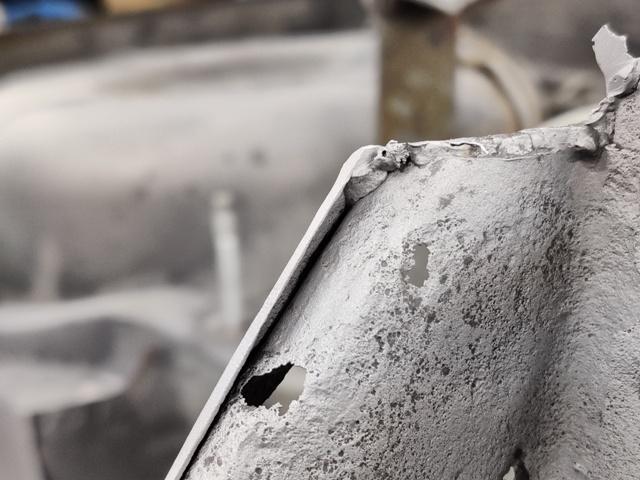
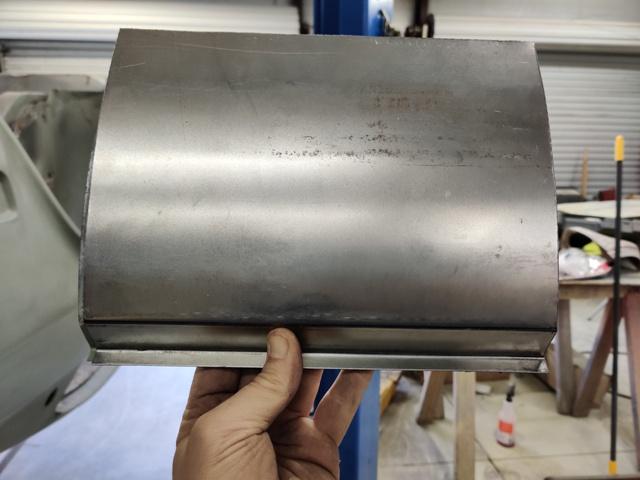
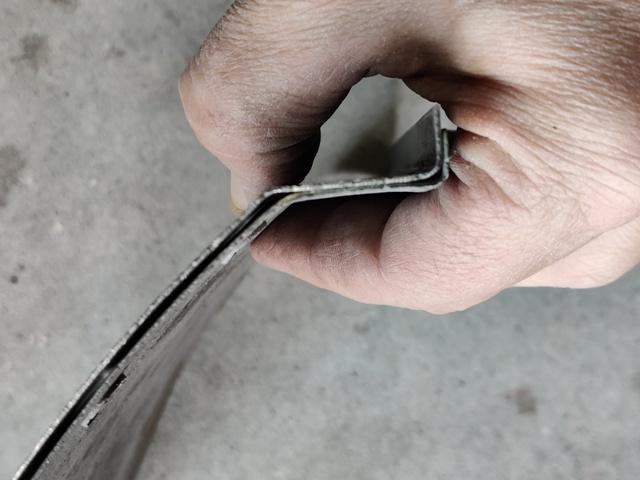
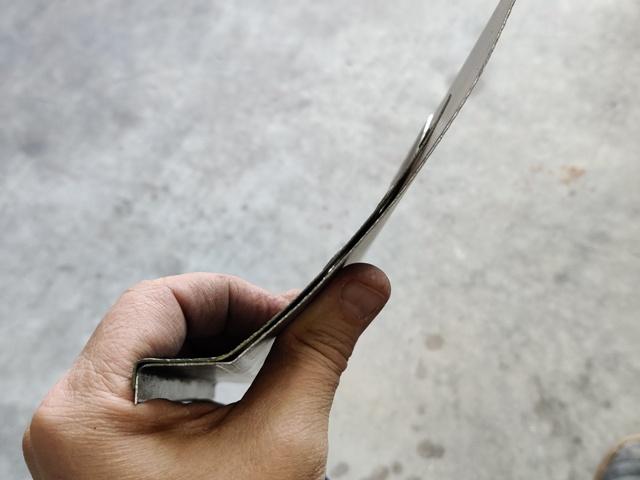
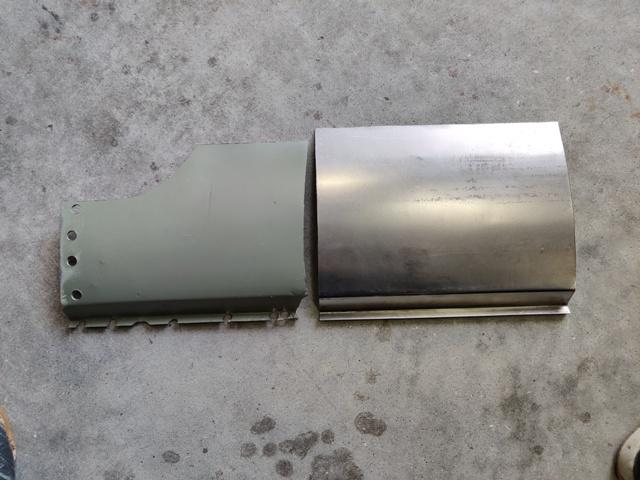
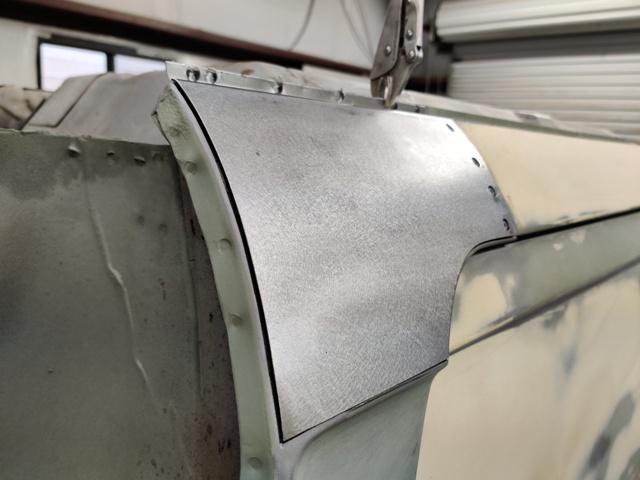
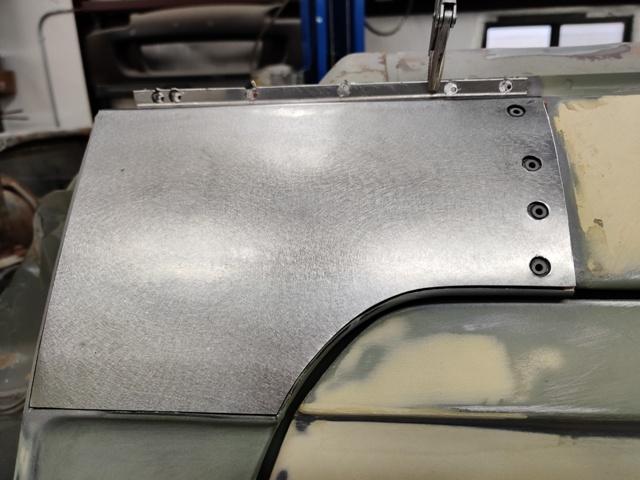
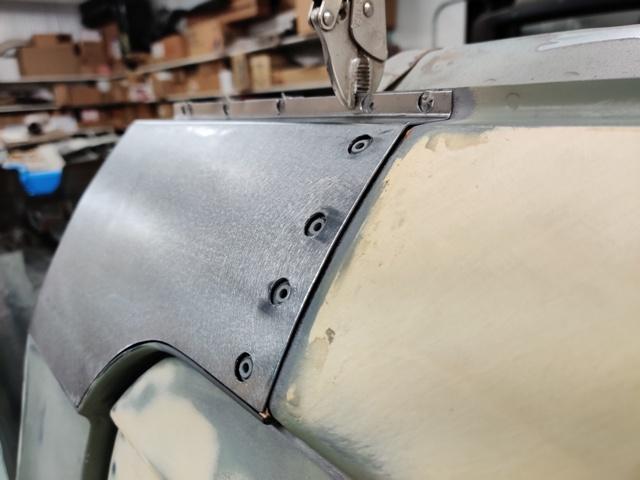
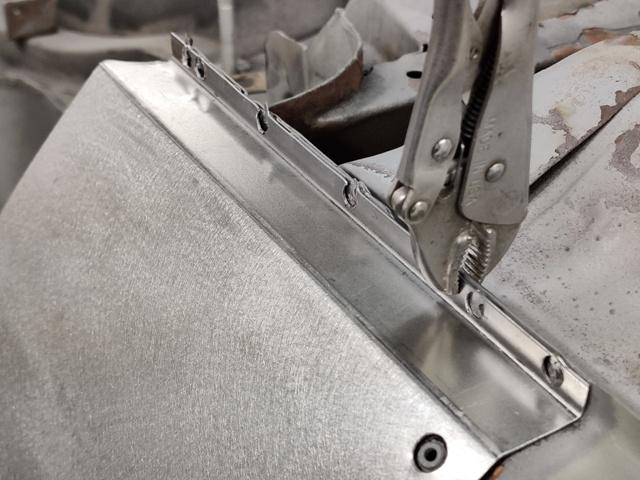
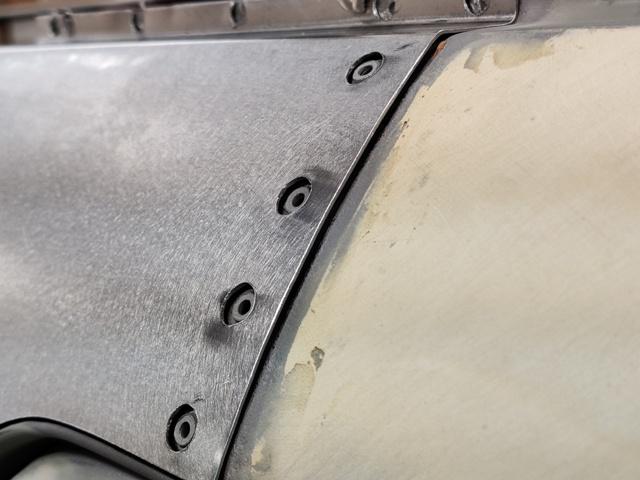
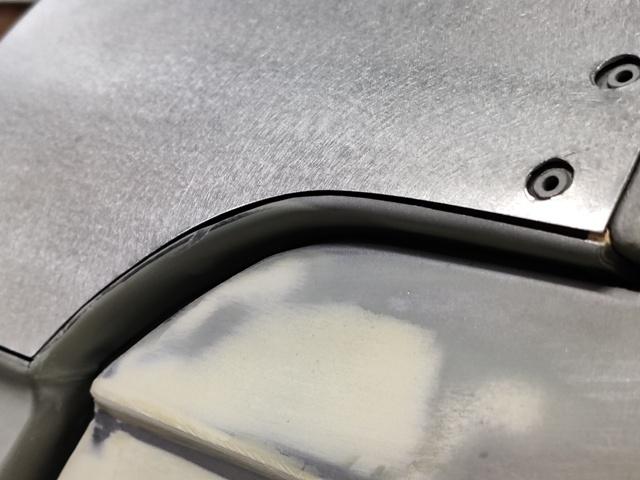
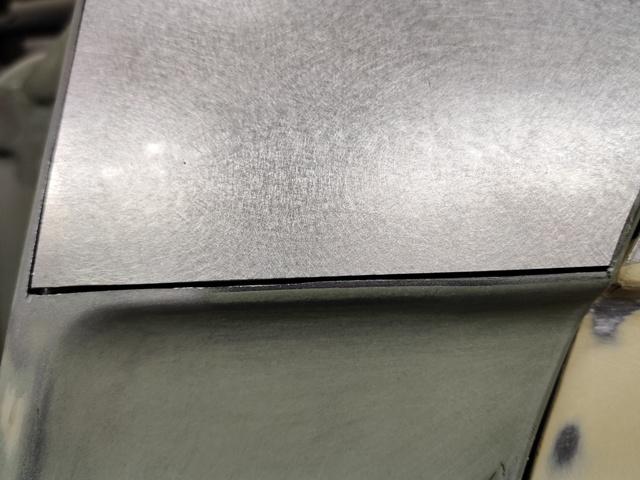
 1 pointThanks! I will work on the dog leg areas first and then see where I land with door gaps. I don't think it would be much work to stitch some metal on the few inches of the bottom, front edge of the door, but it will likely cause at least a little distortion. May leave it alone. I didn't want to take off the lower corner of the driver quarter panel - I just kept looking at it and trying to convince myself it wasn't worth the extra effort. I examined it closely and contemplated... Car is upside down in these pics. In the first pic, I am looking at distortion in the area where the quarter panel spot welds to the rocker. These outward points or "dents" are areas where the metal is super thin and being pushed outward by the expansion caused by corrosion. Seeing these little pin holes all the way through the metal, I know that the corrosion on the other side is substantial enough to be breaking through. Especially, on the bottom flat area, any surface repair here would be short lived if water gets in again. Because I want to cut and modify the dog leg curve to improve the fit with the bottom corner of the door, I went ahead marked out where to cut and started cutting and drilling out spot welds. Opening up the panel revealed quite the mess: Unlike the passenger side, the corrosion on this side damaged some of the other, inner panels. Once again, I employed the sandblaster to remove the rust. For this side, the panels are more damaged, lots of holes in the back of the rocker panel and a few holes in the inner wheel well panel: Using the old panel as a guide, I cut a new panel from a flat sheet, and used some 1" X 1" square tubes and my vise to make the 90 degree bend for the weld flange. Then I marked off a line locating the ~ 45 degree bend and used a piece of aluminum channel (it has a really sharp corner) to replicate the factory bend radius. Some hand bending of the rest of the panel (clamping the panel in between a 2 X 4 and my bench surface) to make several slight bends... to replicate the shallow curve...) Getting the distance correct between the 90 degree and 45 degree bends is the hard part. I am happy with this: Once in the correct shape, I used the old one again as a template to locate holes to match the spot weld cut outs. Then I used a 4 1/2" grinder with a flap wheel to sand the edges of the panel to fit the opening on the car. Even with just one vise grip holding it on, the fit is very close. I am very happy with how this turned out. However, I can't close it up yet, as I have more sheet metal work to do to fix the inner panels.
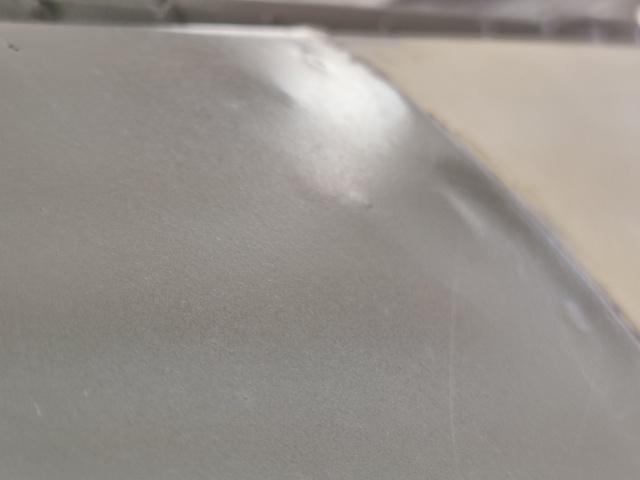


 1 point


Important Information
By using this site, you agree to our Privacy Policy and Guidelines. We have placed cookies on your device to help make this website better. You can adjust your cookie settings, otherwise we'll assume you're okay to continue.