Leaderboard


Popular Content
Showing content with the highest reputation on 01/12/2018 in all areas
-
A few years ago, I was in the middle of restoring the heater/blower system for my 70. All of the foam gaskets were shot, so I made tracings and used them to fabricate replacements from foam sheet. My approach involved making paper cut-outs that I could glue to the foam sheet and then use as a guide for cutting out the shapes and punching the holes. I didn't want to risk malking a mistake with my original tracings, so I scanned them into .pdf files and then used those to print out the pieces that I eventually glued to the foam. I ended up with a library of .pdf files for all of the system's gaskets. I posted these as part of a how-to article, but another member recently contacted me to say that they won't download any more. For that reason, I'm re-posting them here. Hope they can help someone else with their restoration. They should come out of your printer in 1:1 scale. For most of these gaskets, I recommend that you use the 1mm-thick closed-cell neoprene foam sheets that you can buy at crafts stores like Michaels. These sheets already have adhesive on one side, so they're very easy to use. You'll probably need at least a dozen sheets (maybe more). You'll need something thicker and softer to make the pads for the big airflow control flaps. I recommend 1/4"-thick open-cell foam. They need to be covered with thin, soft vinyl sheet. The foam that lines the plenum box for the centre air outlet grill is intended to reduce airflow noise. It needs to be made from open-cell foam (1/8"-thick). 240Z 1970-71 Series 1 - HVAC Foam Gasket Templates.zip2 points
-
2 pointsWhere can we get that magic dust? I'm going out to the garage now with my leaf blower.2 points
-
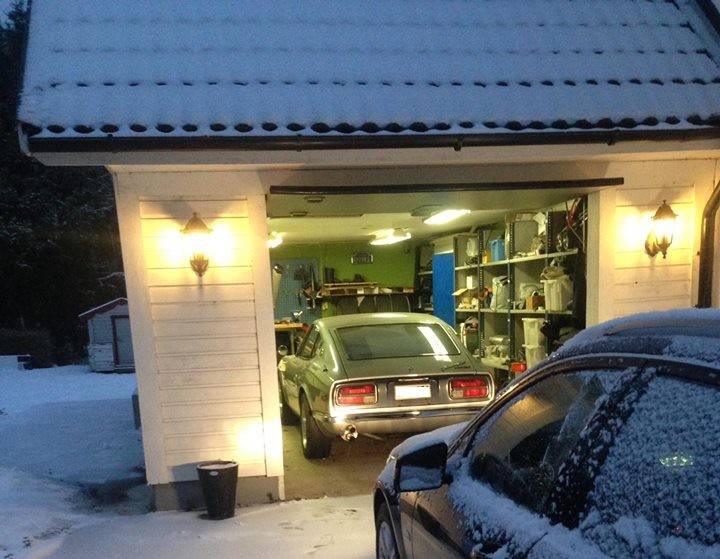
2 pointsWell, i can only look at your garages with envy. Mine is small cold and painted in some kind of "vomit green". But at least there's a Datsun and some parts in there : )
 2 points
 -
This thread has been a wealth of great knowledge and great research. I hate to say developemment because the only developement being done is developing a smoother and more responsive engine. I find this thread interesting because before school lets out for the summer the plan is to install the SK 47mm triples on mine. This is actually the first thread where someone even remotely mentioned barometric pressure and density altitude in the testing, which are two very important calculations that should not be overloooked during testing of this type. Maybe this could be a factor with inconsistent readings. BLODI if your software will allow you to insert the current local altimeter setting before your next pull. Having done a road trip across the Rock Mtns with the SU's, the effect high elevation and thin air was drastic, almost to the point of causing starting difficulties and then the effect was reversed and performance returned the closer I got to Los Angeles, (sea level). Perhaps without the correct local barometer you are tuning IN & OUT of the window. JUST A THOUGHT. I had no idea what my baseline would be and your testing has narrowed the window for me. THANX, keep up the good work. In1 point
-
1 pointOkay, i just got back from my trip and had about 2 hrs with the car before worked called me back. I tested the extra OEM fuel pump that was in one of the 3 boxes of car parts from a 1978 280z (paid $300 for all those parts). I didn't know if the lump was good, but after reading that when someone converts to carbs they need to get a different pump, i hoping the one he took out was good. So I plugged it into my battery with some extra speaker wires I had and she ran like a top. Good news as that saved me some $$. I will install that pump when I get back from work on Tuesday, Thanks for the info on checking the gaps on the stator. I will do that also. I think I will also pull off the fuel rail and clean that as it seems to be the easiest way to get those injectors swapped out. So I have 4 tasks on my plate. 1. Intall the new OEM fuel pump 2. Pull fuel rail and injectors. Clean the rail and change the injectors as well as inspect the wires. 3. Intall the new Champion dual core radiator and hoses. Fill with coolant. 4. Check the stator gaps and rotor alignment. From there its a hope and a prayer that it starts. I’ll report back what happens. It will be the middle of next week before I can finish ll that work, becasue of my job and family commitments. BTW, it freezing in my garage. Uggg!!1 point
-
What a career, always worth reading about. If you're a Datsun owner who doesn't recognize the name, it's time you caught up! https://petrolicious.com/articles/a-conversation-with-one-of-americas-greatest-race-car-designers-peter-brock1 point
-
1 pointi believe we may be about to witness the effects of the main core (think bell curve) of the 'baby boomer' retirement phenomenon. This will unleash into the classic car market thousands of aging-but-wealthy people with time and a lot of money on their hands and a deep pool of nostalgia that they want to have serviced. There aren't enough Ferraris, Cobras, Maseratis and E-Types to go around, and too many of the other obvious choices are too uncomfortable or unreliable to suit a seventy-year-old trying to relive his or her youth in style, safety and comfort. The days of the $25K 240Z may be coming to and end soon. Only the Porsche 911 and the Alfa GTV tick the same boxes.1 point
-
1 pointThe motor is pretty much ready to start. I am waiting for the exhaust to show so it can be bolted on. It is coming from California Datsun. I started this motor project with good friend at Miner Automotive. I still have my 240 block that came out of the car. I felt that some day I may have fun building it. Unfortunately it is not matching numbers. My grandma had mentioned that they had the motor replaced and no longer had the original when I got it from her. So with that said we decided to build up a F54 block with bored flat tops and original e88 head. I ordered some z therapy carbs and here it is ready to fire. Not sure my grandpa would understand the polished parts . But I got carried away making it mine. My mission has been to keep everything stock except the motor and obviously color. My grandpa always wanted to paint it silver so keeping it green wasn’t the best option. So I chose a tint of silver “charcoal “ it is a Nissan color though. Going to finish getting her running then off to paint.. Sent from my iPhone using Classic Zcar Club mobile1 point
-
1 point
-
I will chime in for Daves relay work and I have had my combo switches done by him for both my Z and my roadster. His work is unparalleled! Quality, value, and better than OEM. Dave has saved more Datsuns than anybody.1 point
-
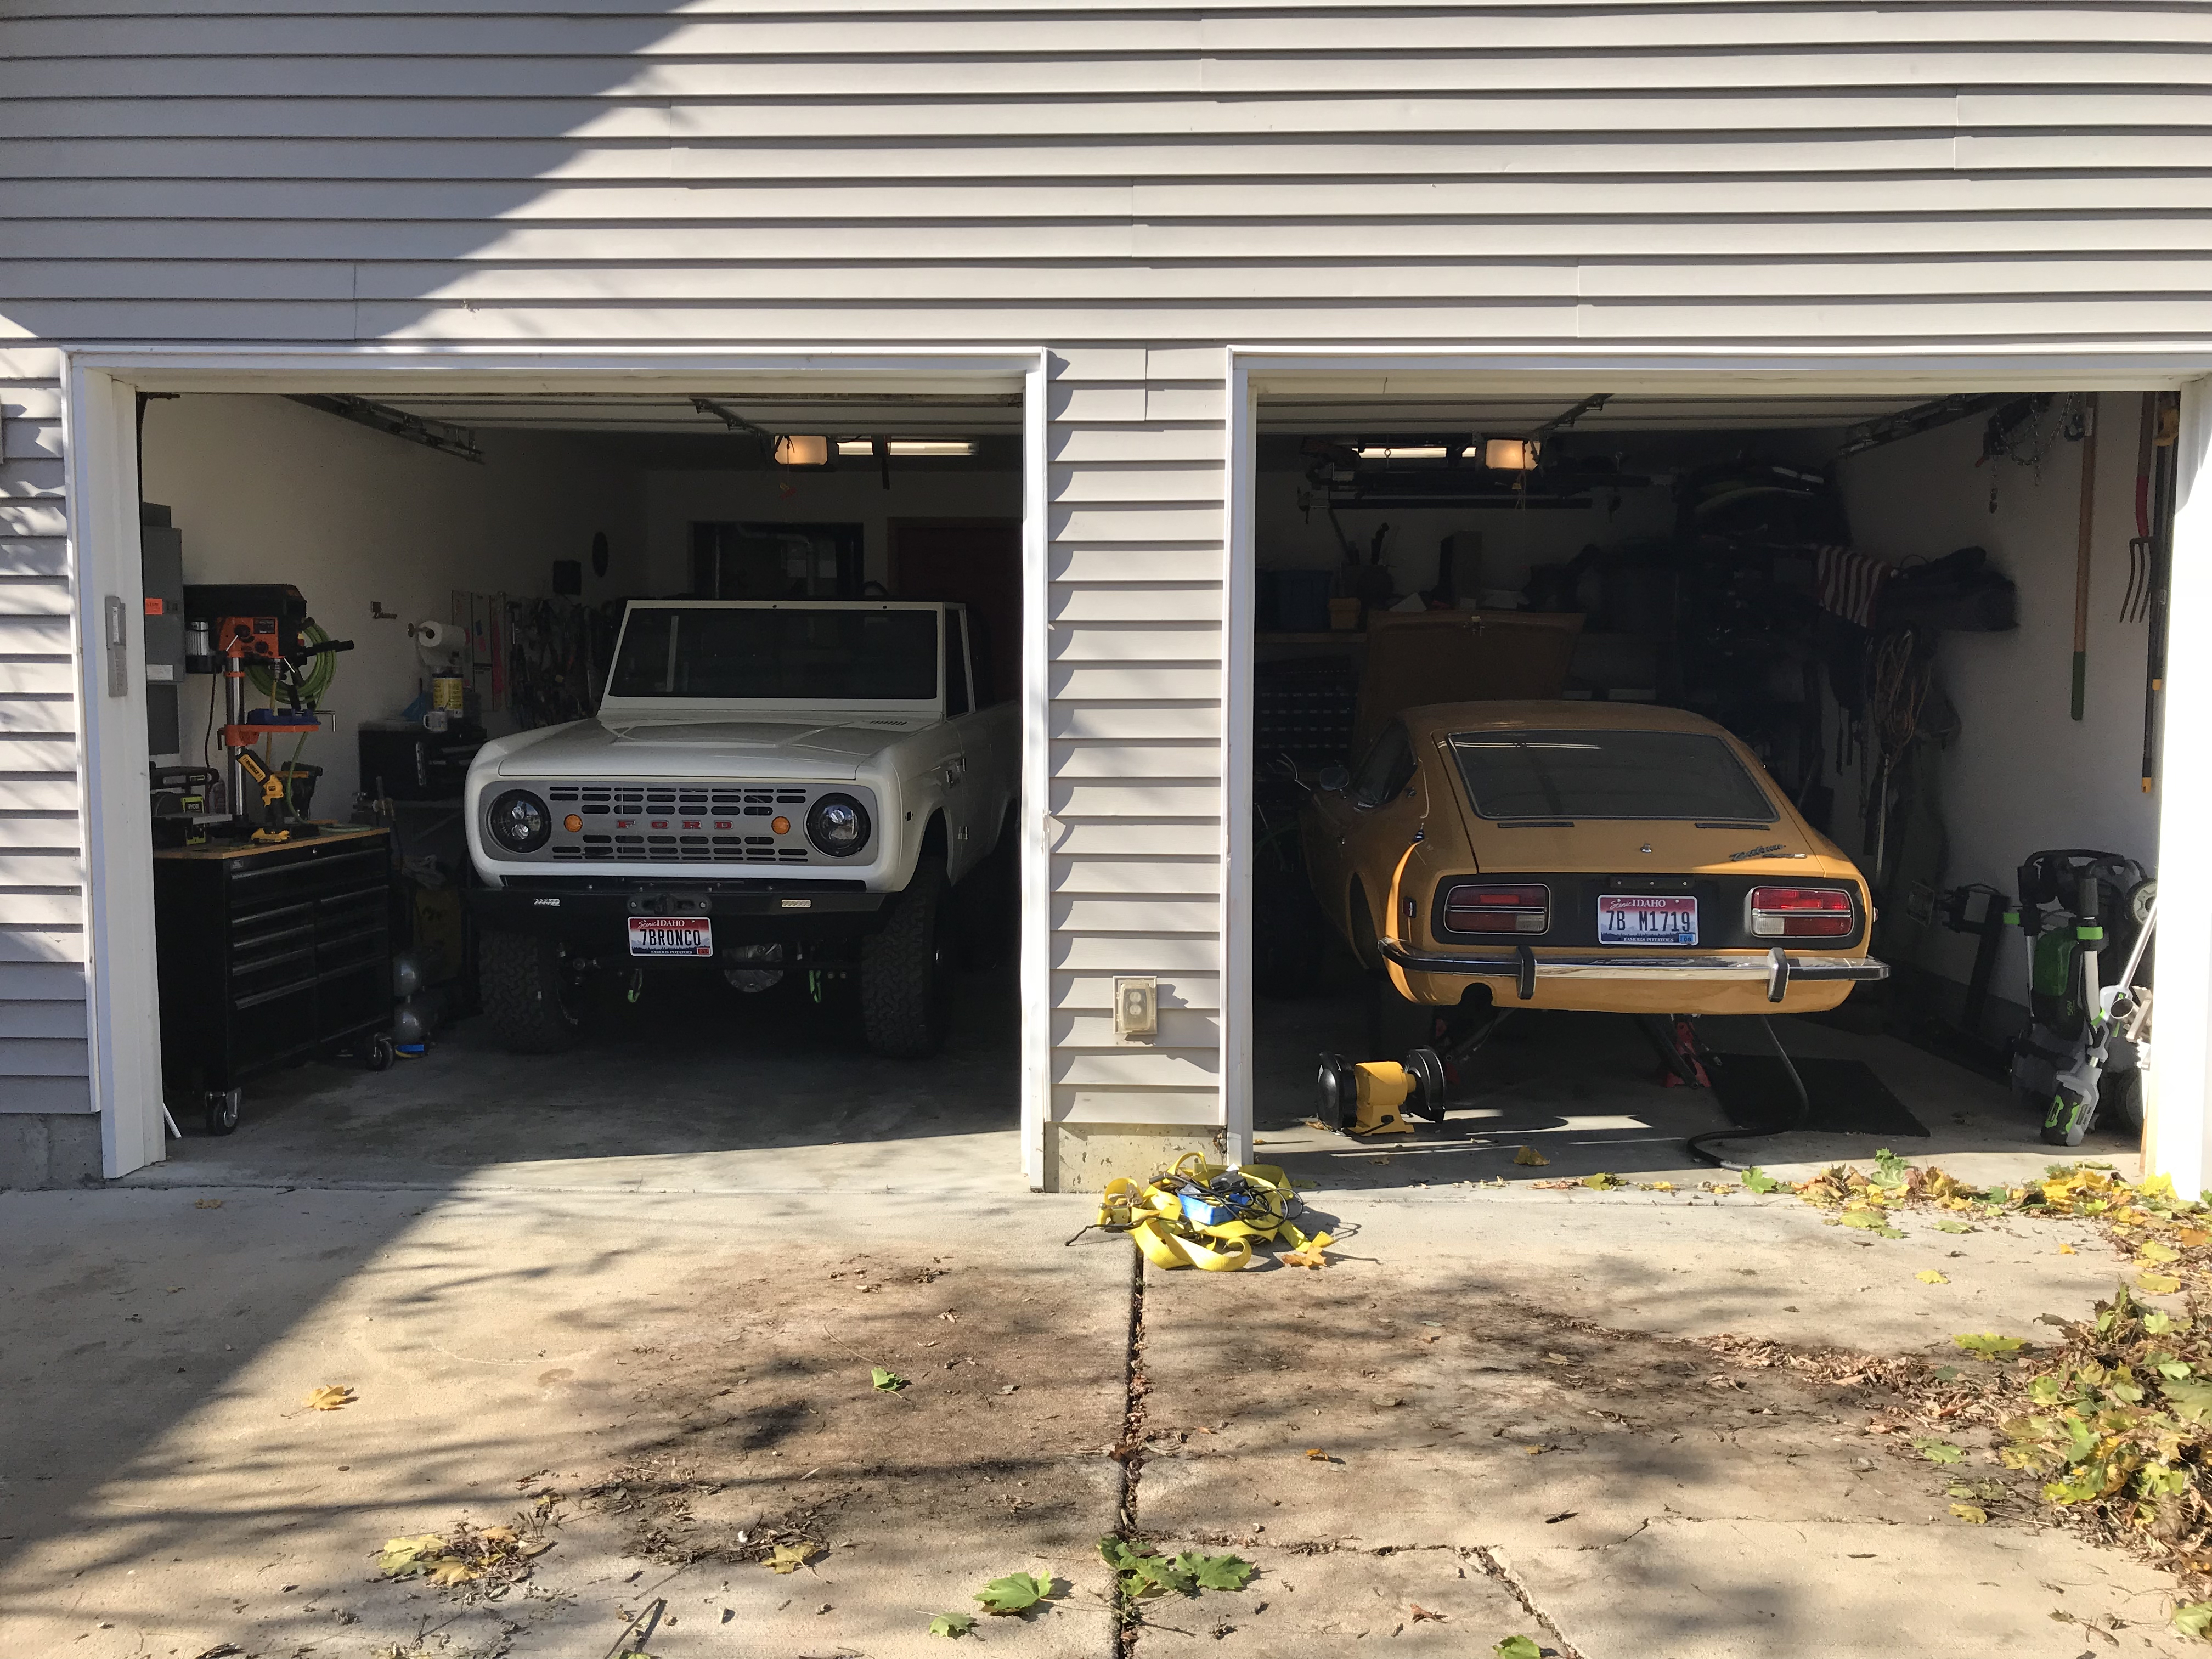
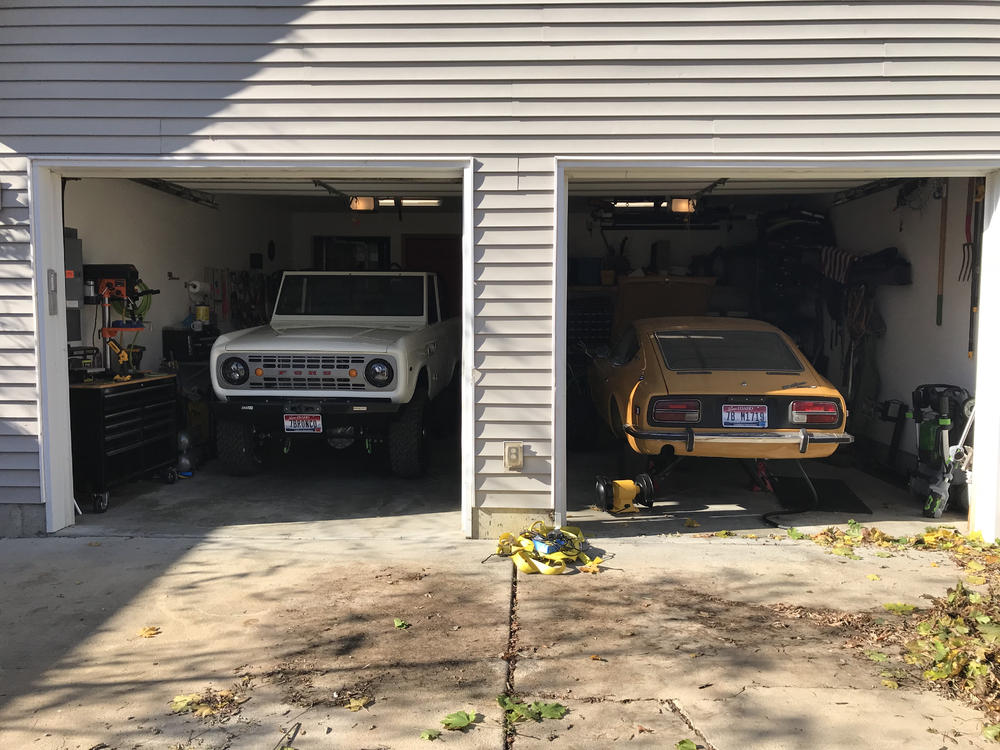
1 pointI need to move, get a shop and a car lift. 2 project cars is a lot:)
 1 point
 -
1 pointThis is a dream garage for me. I've done a lot of the work myself. Since that last picture was taken I've insulated the entire garage and added a mini split heat pump for the paint and work bays. I still have to pull lines for TV cable and internet and also run air lines. Probably add more LED lights, build more shelving... It never ends! It's been a great learning experience. I built 2 2'x8' workbenches with 9 sliding drawers each. I'd never done any of that before. This woodworking stuff is new to me. I'm in the garage almost every day. Today is my birthday so I'm leaving work early to go home and celebrate by working on the AAR! :-) Chuck1 point
-
1 pointyup, all the information I need, thanks guess I will spend some time hunting a OEM replacement. I promise to characterize it when i get one , have all equipment here (stabilized thermal bath, heaters and propper measuring devices). Thanks guys! to summarize for those who do not like to read1 point